Transcripts
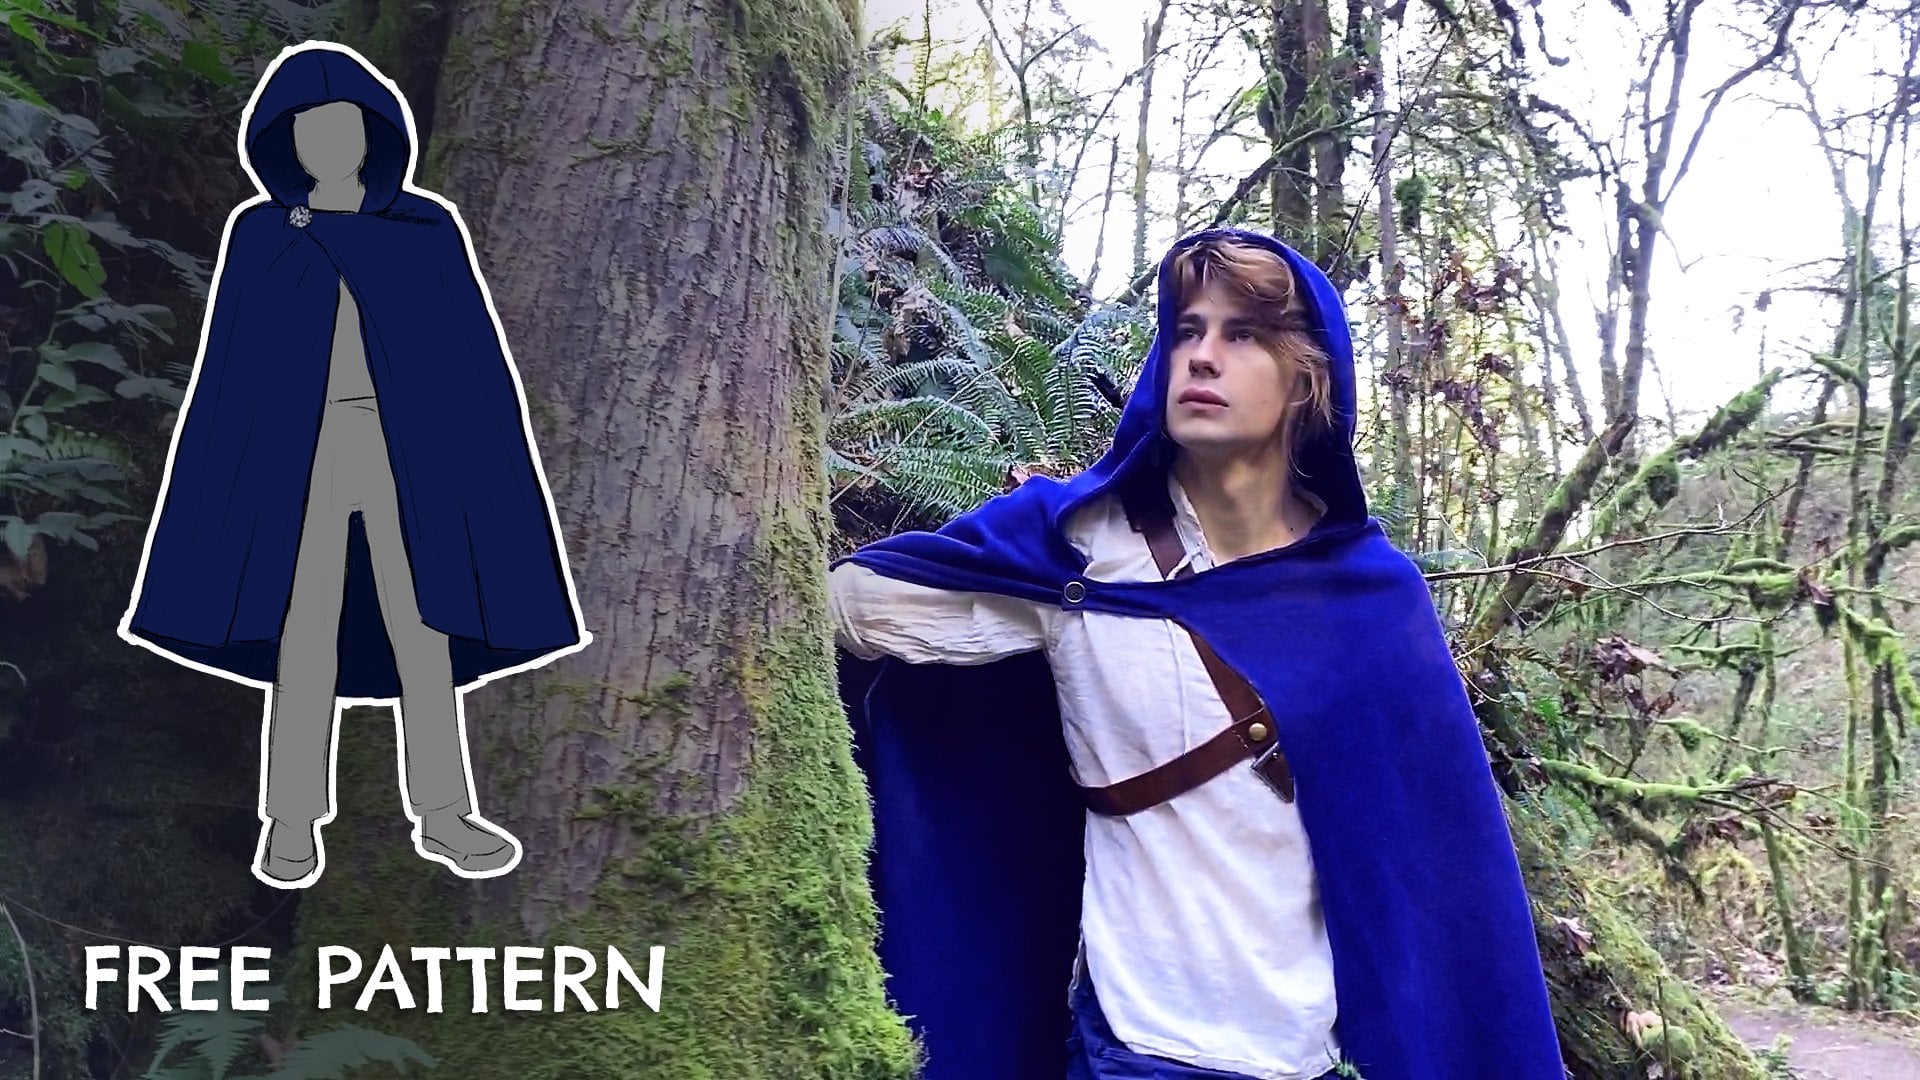
1. Introduction: Hi, welcome to my Skillshare class about applications in cause plane fashion. My name is Mary. I am an illustrator and graphic designer, but I have a secret. I love sewing. I've been sewing for about 10 years now since I was in high school. I learned this so because I really got in the cost play and I thought it would be cheaper and easier than just buying the clothing. I was a little wrong, but it was so much fun to learn how to sew. It has now really consumed my whole I phi. So clothing for my friends and family and myself and I just find new and fun ways to so all the time. So no regrets. When I was first learning how the cost play, one of the trickiest things I had to learn was applicative. So that's why I want this to be one of my first classes because I feel like it can be used really early on and it's really helpful. And not just caused play, but in regular life to like sewing on patches and just embellishing your clothing you already own. I think applicant is amazing for that. Now, you don't need a great sewing ability for this class. I just recommend having a sewing machine with basic stitches. You don't need anything fancy. And just having a basic understanding of sewing, knowing terminology and the tools that's typically used, that would be a great place to start in this class, I'm going to show you how to create custom application on any type of fabric like stretch or just regular quilting Khan. As a special bonus, I'll even walk you through the step-by-step process of creating a reverse apple K, which I've used in some costly projects. I can show you. For your project. I just want you to create any type of applicant from scratch. It can be huge and elaborate or really tiny, as long as you show that you've understood the principles and feel confident making apple okay? Be sure to ask me any questions you might have along the way because I wanted to see all your amazing work, right? It gets started before you go shopping. Be sure to check out my next lessons where I talked about the tools and the type of feasible she'll need for this class. All right, I can't wait to get started. See you there.
2. Class Project: For this class project, you're going to be creating your own application entirely from scratch, using the step-by-step instructions that you're going to be learning in the following lessons. I'm going to teach you three different types of applications. Regular stretch in reverse. So you can choose what works for your project best. You can create anything for caused play fashion, updating old clothing, or even quilting. I'd like to see anything applicant in fashion. It can be difficult to replicate certain logos are the patterns are just cool designs. This is why applicant is so important and fun to learn. You can revive old clothing or create an exact replica of your favorite characters costume. It's like gaining the ability to paint with fabric without actually having to paint on fabric, which can be messy and permanent. Trust me, I've regretted painting on fabric before. So you know what to expect in the following lessons. Here's the main steps for the project. First step is choosing your design. You can either complete this from scratch or just look up something for your project. You're going to copy that design on feasible web and adherent to your applicant fabric. And then you're going to cut up that applicant out and iron that on to your main fabric. Once it's ironed on, you can finish off the edges with any stitching things that I will go over in the class. As we go through the lessons, be sure to start thinking about your project so you can get some inspiration and ideas. And before you go shopping, do watch the following lessons so you know what you need. Hope to see you there.
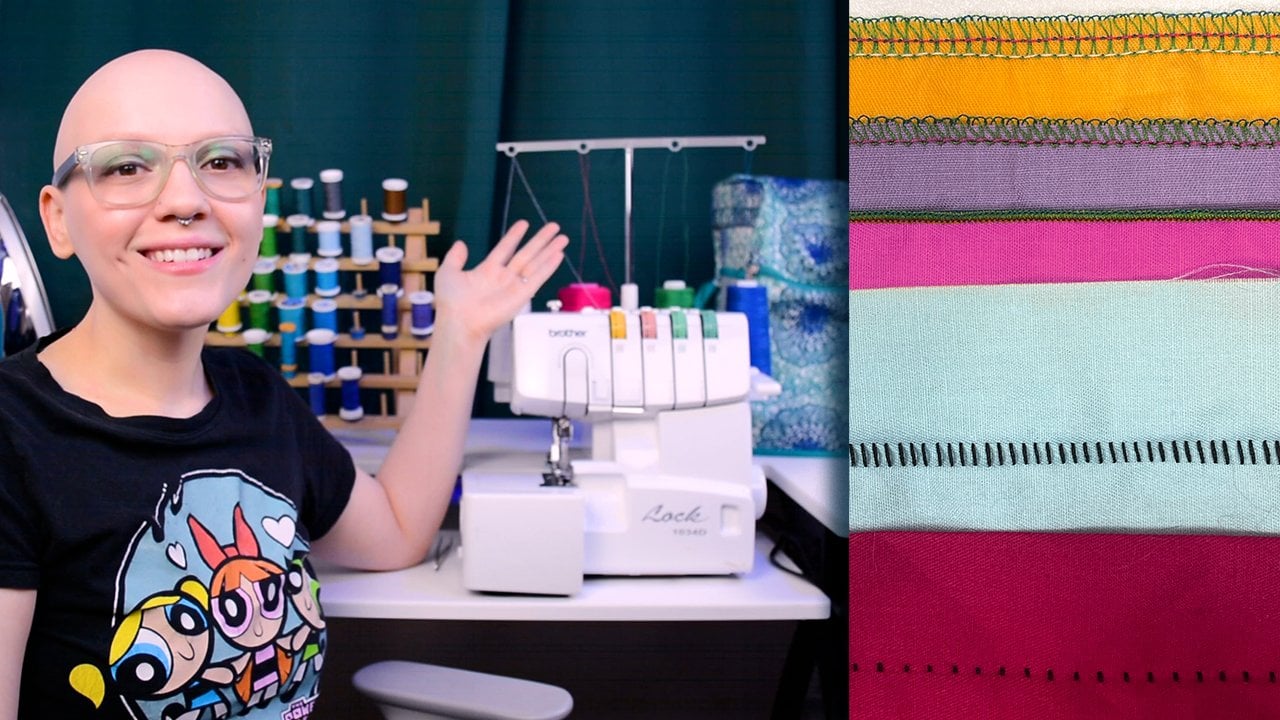
3. What Tools You Need: Hi there, Welcome to my sewing space. In this first lesson, we're going to go over what tools you need. Now. There are hundreds of sewing supplies you can buy. Most of them just help add to the convenience of sewing and making your job easier. But I'm just going to talk about the basics you need to complete this class. First off, let's get to my sewing machine. Now, this is a gin know me. It's a computerized machine with an LED display. As you can see, this is obviously a more advanced sewing machine then you need for this class I have, you can see that the machine has OEM, I think around 70 different types of stitches. The basic ones being here on the main panel. And then these are all decorative. For the most part, I even have the full alphabet, but I'll be honest, I don't really get use of that. On my machine. You can just the width and length here. On other machines you might have dials or buttons or something like that. You'll have to look in your manual, so know how you change the variables on your machine. But something you should definitely learn early on makes sure your machine has either a matching or contrasting thread depending on your design for both the bobbin and the upper thread. And also make sure you have the right type of needle for the fabric you are working on. I have a universal needle in my machine right now so I can work with the various types of fabric. But if you're using something heavy, you'll need a heavy weighted needle or if you're using a knit fabric, which I'm going to go over later. You'll want a ballpoint or jersey needle. One other very important thing, the iron. This is my good trustee iron I've had for a few years now and you can obviously have something with less features. I think for most interfacing and diffusible, you only need just the heat setting, not the steam setting, but do read the instructions to make sure you have the right tool for the job. Obviously, you'll also need an ironing board or you can just put a quill on a table and be very careful because you will need to press the Apple case in this class. All right, some other notions, and you might need our scissors or rotary cutter or whatever you're most comfortable with. So you can cut accurately. Pins are clips to keep everything together. Again, just use whatever you have on hand. And don't forget scraps of fabric to practice on. I have a bunch of these by my sewing table that I use constantly and you can buy packs of them online. And of course, the imagistic seam Ripper. I have a bunch of the clover, it's my favorite one. It feels good in my hand. And trust me, you need this always. And lastly, of course, is interfacing and adhesives, which I will explain more in the next lesson. Keep watching to find out more.
4. Adhesives, Interfacing, and More!: Welcome back. Here's the part that can be confusing. Let's start talking about the different types of adhesives and interfacing. First up, let's go with interfacing. What I have here is a big pile, a couple yards of stretch interfacing for jersey knit fabric, as you can see, it's pretty transparent. This is a soft side and there's a bumpy side right here. That is where the glue is. Interfacing is something you iron onto fabric to make it stiffer so it doesn't rip or lose its shape. Or like for instance, you have buttonhole, so those don't worry about interfacing is very useful for wide varieties of fabrics and wide varieties of projects. All right, next step is feasible web. Here's the kind we're going to be using in the tutorials for these classes. You can see it. Okay. Feasible web looks a lot like interfacing. It comes with instructions on the back for you to know how to use it for your type of iron and fabric. And there are a bunch of different brands and styles and you just have to know what works for you. I look for syllable because we are obviously are sewing on top of it and iron on adhesive. We will be using this in the next lesson. Next up is stabilizer. It's something you iron on fabric to give it stability either for permanent wear or to, let's say Do application. We will put this on top of flimsy fabric that cannot be handled being sewn on and for like a satin stitch in the sewing machine. And this will give it stability and make it so much easier to get our stitching done and make it look beautiful. Then you have adhesives. You can buy fabric glue or glue sticks or washable fabric tape. One of my favorites to adhere applications or any other part of your projects you want to adhere together, either temporarily for a base things kind of situation or just DO hold it up while you so final stitches. So for this class, I will be using double-sided feasible when a lightweight interfacing and feasible stabilizer. In the next lesson, I'm going to show you my step-by-step process for making a custom application on non stretch fabric. See you there.
5. How to Custom Appliqué: Hi, welcome back. This is the start of the lesson how to make a custom applications. So in this lesson, I'm going to teach you how to make an applicant on non stretch fabric completely from scratch. Now, personally, for cost play is why I learn how to Apple, okay? This is actually one of the first projects that I mean, it's a win weaker shirt replication for my fiance. I need this about five years ago, It's Mach 2. I made a first one with different stretch and non stretch fabric then the ripping and not being so pretty, which is why I'm separating the stretch in non stretch lessons so you don't make the same mistakes I did. As you can see, it's held up really well. I've washed in, worn it dozens if not hundreds of times. And so as long as you are machines that to is pretty much good forever, I can show you some of those photos are a little blurry of my very first attempted applicant. My machine was not as high-quality as this one and no matter what I did, It didn't seem to give me a consistent sentence ditch, but I tried my best in from far away. It look pretty good. So if you're a machine isn't the best, you can definitely achieve a pretty good result. You just have to take your time and have patience, which is a quality really need them sewing and everything learned in this lesson, we'll be continued and expanded upon in the stretch lesson. So definitely watch this lesson and don't skip around. All right, let's start with our very first applicant from scratch. By this point, you should have a design chosen and print it out or ready to draw something from scratch. I'm going to be taking double-sided usable web and applying it to one of my fabric scraps. For this demonstration, I'm going to be applying it to the wrong side of the fabric. Although this fabric doesn't really have a wrong side, you'll want to take the usable web and using your paper scissors, cut out a size within your fabric. All right, here is the piece of feasible web. I'm ironing it paper side up so the glue is on the bottom. And if you can see that texture, but I'm just going to start in the middle and just press. I have steam settings turn off and I am just pressing and holding mine says for like six seconds and then I'm moving on. So now you have it, it's completely glued on. And now once it's cool, It's pretend I wait and I am going to start tracing out some parts. Using a pre-made Central. You can use anything that will mark on paper. I'm just using erasable pencil. And this part doesn't have to be perfect. You can draw, you can erase on the paper. It doesn't matter. Okay. So my sensors have been drawn. I don't know if you can see and I'm just going to take my papers. You can cut them by hand. Or if you're really careful and you have a similar shape, you can use a rotary cutter and map that is one and done. And I'm going to keep going. Do remember to iron your fabric before you do this process because you might accidentally iron in a wrinkle into diffusible, making it not so pretty when you're trying to apply it to the final product. All right, so now you have four little application. You can follow this process if you want with me the practice of different various types of stitching. This is really easy and fun. As you can see, you want to keep the design as clean as you can, because these will be the final edges. And they are still paperbacks and they can be used as stickers now. So I'm going to lay down what I consider the final the mean fabric if you will. So do have right sides up. With that. It's a little hard getting it started. Try not to pool or stretch the fabric. As you turn it into a sticker. There you go. As you can see, it's shiny because that's the adhesive. And that's why you want to let it cool because otherwise it can be wet and you can just start placing your stickers. And yes, if you want, this can be the final step. But they will not last through wear and tear in my own experience. So if you're doing a one-off project or it's for a wall hanging or something along those lines. Go ahead and feel free to stop after we iron these long. This could be a front of a t-shirt or quilting square, or really any piece of clothing. Then just as before, I'm just going to take my iron and press them firm. You know, five to ten seconds. You don't need a fully heated iron for this type I'm using I think it's a medium heat is best and no steam. See, it's not coming off. I'm sure if I scraped data, I could probably get it to come off a little bit. Obviously I do not want that. All right, To recap in this lesson, I teach you how to make your own advocate using diffusible web on non stretch fabric. And then in the next lesson I'm going to show you how we can finish it off with stitching. I can't wait to see you there.
6. Types of Finishing Stitches: Hi there. In this lesson we are going to finish off this example by stitching around each heart with a different type of stitching. This is how you finish off applicants and make them permanent by sitting around the edges. All right, let's get started. The first stitch is the most basic stitch, the straight stitch. This is a good option if you have very limited stitches on your machine. So I like to start probably on the point here. It's like an entryway and since it's just a straight stitch, I don't really have to worry about where my needle is starting, but we'll talk about that later. I'm going to manually set my needle down right at the very tip. I'm giving myself maybe about an eighth of an inch border, but it's really up to you. I do like to make sure my needle is in the down position before I start. And something that might help you, it does me is slowing down my machine significantly because I tend to be a bit of a speed starve. Honestly, I hate that about myself. I tried to rush through everything. I'm sure you'll notice. I'm starting to hit a curve, so I'm slowing down. And I just have my machine on my basic straight stitch if you want, you can shorten or narrow the stitch, but I don't think it matters for this example, I'm starting to get into the curve. So I'm picking up my presser foot and maneuvering it. So I keep that saved about an eighth of an inch all the way around and around this really curvy apart, you might just have to move it every few stitches if you want a really clean resolved. I'm also using a clear presser fit. I believe it's four applicant and k and try to get right below the point of the heart and then turn maybe one stitch past it. Keep going. And I'm going to meet my stitches backwards. Started in for this streets ditch. My machine has a locking stitch function or you could just make sure you go over your other stitches. And I could have spent a little bit more time around here. But normally if there's an area of I accidentally went to straight on, I would just pick this and redo it again. So remember that these edges after you wash and dry it and you can even see here are starting to come up. This is the type of fabric that will fray over time. You can even start pulling at it now and getting a little bit threads. So if you like that rough and tumble a look or hand-on look, then keep going with it. Or you could finish it out with a zigzag stitch. So up next is the regular zigzag. I'm machines standard one is quite a wide, it's a five, so I'm going to narrow it down to a four millimeter, I suppose with I'm gonna do it on this next one. And just like the first one, I'm going to start at the peak, the point of the heart, the bottom part of the heart, and so forth, zigzag fit. You really want to think about where the needle is going. So on their machine, I, I know I can see from our machine it's starting on the left side, so it's then going to move to the right. And so since I know it's going to move to the right, I'm going to start inside of my shape. And when you want to adjust, you wanted to make sure your needle is inside of the heart. So I pick it up and I just and then it goes back outside the heart. So always make sure you're inside of the shape when you are adjusting the direction, because otherwise it's going to look crazy and it just gonna, it's gonna jump. So forgive your mistakes and you can always use the same rubber. If you're noticing that your stitches are looking a little pottery ever so slightly because especially if you're using very thin fabric like this, you can do what I did in this other example, which is put freezer paper on the back and it tears away. Can you see from a stitching and you can just clean up the back of your work and then the front ends up looking pristine and flat. Here we are with what we were just working on on the machine. I realized that these bottom two I wanted to do sentence Ich and blanket stitch. And they should probably be using this freezer paper on the back to help them keep their stability so I can stitch them really flat and really pristine. I probably could've used that on this one, but luckily it came out pretty well. So I'm just going to take this and cut a piece. That works. I'm just eyeballing it right. Just enough to cover the back. It doesn't have to be perfect by any means. But you see it covers them. Find probably heard a little bit, a little bit more generous with a decimal. That is, you can use this on any sort of fabric. In my experience, I wouldn't use anything furry or anything like that with a crazy texture. But it has, I don't know if you can see a paper side and then a shiny side and the shiny side, you want it to face down on the wrong side of fabric like this. And you want to take a lambda hot iron about the same as you would use for the interfacing or anything like that. And just press it. And that's shiny side is actually going to stick to the fabric like diffusible would, but not in a permanent kind of way. It's very temporary. I could definitely peel it off. Okay. So now we have exactly what we had before and we're going to do exactly what we did before. But now there's just a piece of freezer paper on the back that we will rip off when we're done. Let me get the example. Here's one of my earlier tests for this class. And I was going really hard and really fast on these top two examples. And you see how extremely pottery that I even had to go over it like once or twice because I wasn't getting the desired effect and it was just so ugly obviously, I can't show you guys that. So I took freezer paper and I've already partially ripped it off. And I did just what I showed you. And now these are flat. They are clean. They are a lot more professional-looking. So I approve. So freezer paper is your friend ice bascially like it for things like Lycra swimsuit fabric material. I just use it when I'm sewing it, regular stitches because it keeps it in place if you don't have fancy things like a walking foot or other special ways to make your fabric be more stable. See, yeah, that is my advice. Freezer paper. All right, next step is the classic sentence, ditch. This is what I think of when I think of applica, a really thick layer of stitching around the shapes that creates their own outline. The secret to the sentence it is just that it's a zigzag stitch with the length shorter and so on my machine, my regular big zigzag stitches number 4 and it's regular length is two. I like to test this out on each and every fabric before I'm completely certain that the satin stitch is the right type. Because as you can see from my previous examples, that if you make it too long, you can start to see the zigzag Venus, the space between the stitches. But if you make it too short, like if I make it anything really smarter than 0.4.3, like it only goes down to 0.2.2.3 is a really dangerous area. It can look really good and really tightened, really uniform, but can also make my machine gets stuck really easily and start to stitching in one place because the feet can't really pool it when the stitches is that bundled up. Experimentation is key. I definitely went you use scrap fabric and really practice your satin stitches, make them different widths and different links and really play with it and get the best result for your machine, which can vary quite a lot depending on the type of pressure foot you're using, the material, the needle quality. All of these are variables that you will have to change and tweak to get the best type of stitch. So take a gander as to which side of the needle you're starting on and put your needle down. And let's go. So I wanted to take his really slow. Yeah, I like making my machine speed the variable that I changed and not my foot pressure. So I don't have to worry about where my foot is right now and how hard I'm pressing on it because that's a variable that I'd rather leave up to technology. If you take the turns a little bit too fast, so you will see a gap. So do really incremental changes when you are shifting your direction. Just try to keep data. The fabric as like a middle line. The edge of the fabric is like the middle of your stitch. I think that yields the best result. You see you want to go slightly past where you think you want to go. Because when you turn, it's going to go in a completely different direction and cover up your previous stitches. Do you see what I mean? I still want to go like another few stitches down and silt stop on the left side. And now it's going to cover up those stitches. We adjusted a little bit and then follow through on to the next part of the heart. So you get a more. Let's clean looking at edge points. And I'll show you that at the end. Right there she is. You see we encase the previous stitches in order to make a new path. And I think that's the cleanest way to do it. You can see there's a few gaps here and there where I had to really turn for the corners, just going more slowly or maybe changing my substituent help with that. But I think that's a really clean satin stitch. I think it would look even cleaner if I made it even more narrow because there's less room to get wrong. I really do enjoy this result and I think it looks really good. All right, if you have a fancy machine like mine, you might want to start playing with some of the use of other kinds of stitches to get a more unique and personalized result. I personally really like the blanket stitch because I really do have a lot like five or six different ones and I can really hone in on what style I like to use, but I tend to have a favorite for blankets stitch, a lot of other decorative stitches. You can always vary the length and width as well for mixed results, some of the computerized digits might not like you messing with them, but you can definitely find some interesting techniques that way. I'm starting inside of the fabric. And you can readjust. And I'm very, I'm currently drawing, drawing. So in on the very edge of the fabric letting the incase my shape. And where you stop on this one is you want to stop when it is coming in for your stitches. So you don't mess up their perimeter. And always remember, you can just pivot as you so if it's a slightly curving line, you don't need to stop and start and stop and start and stop and start. This don't make dramatic curve changes Azure. So that's dangerous mostly for your line quality, but you know, and I'm making sure I'm going all the way to the end meeting my previous stitching. And now as you can see, I think it looks pretty good. I really do enjoy this type of sandwich. It looks really like a patch now. It looks really like it belongs there. Now, once you've added the stitching, it looks home. It looks happy. All right. Next up is some stretch stitches. I need a cover, but I will be going all over that in the next lesson where I cover how to make applicants with stretch fabric.
7. How to Appliqué on Stretch Fabric: Hi, Welcome to the stretch lesson. Let's start talking about what is a stretch applicant? For me, a stretch applicant is something that goes on stretch fabric like this t-shirt for instance. A lot of my everyday clothing tends to be stretchy because it's just more comfortable. So when I want to add applicants to these types of clothing, I want them no stretch and move with the fabric. Because if you use like that, say quilting cotton, it tends to rip or get puckered with just everyday wear and tear. And so I'm going to teach you all the techniques and materials you need to make applications for stretch fabric that will last you. But why so the garment. All right, Let's go. All right. Welcome back to my machine. I'm going to test some stitches, some stretch stitches to show you whether or not you might like them or use them and how well they work with the stabilizer kneel down. I'm just going to do it takes for ever because it's going back in for back and forth, back and forth, back and forth. And so you really have to be patient. I don't know if you can see, but it's been really easy to so without stretching out the fabric and getting caught under the arrow because I put the stabilizer on the back. And so there is the stretch straight stitch. It won't be stretching until you actually remove the paper. So denied trying to stretch it while you're still selling. Next up, I'm going to do the basic zigzag. And then lightning bolt zigzag that I call it. It's just a little bit narrower. And it's really meant for stretch fabric. Let's do this one. This would also be done for a stretch blanket stitch. Yeah. That is kind of like a faux overlap because it It's segments, all of the parts of the stitching, it makes it easier to be stretched. This is the blankets stitch I like to use the most because it is dense and small. But as you can see, they're all really clean, looking in solid choices for stretch to j. And welcome back to my ironing board. I wanted to show you those samples stretch stitches that I did earlier. This is the triple straighter stents, which is my favorite because it it looks most like a regular stretch ditch and it has more versatile applications. This is a zigzag stitch which can be narrowed and thickened and really is also versatile in itself. But I think it's more of a eye-catching stitch and I tend not to use it. This is the, what I call a lightning bolt stitch, which is just my machines stretch stitch, which is the structure of stitch in the most secure and fastest stitch my machine can make. So definitely keep your eye out for this like lightning bolts style zigzag stitch. This is just like a faux over lock stitch that MIMD machine can make. That is also a stretchy and then this is a blanket stitch that can also be used in such applications. So I'm going to remove as best as I can. I'm gonna it's easier to see the straight stitch just comes right off, makes it easier. You don't want to just go in crazy and drip and drip because you will start ripping out your stitches. Trust me, I've done it. You might need scissors or tweezers or something. If you can't quite easily remove it, just remove the bulk of it. And then once you start pulling and manipulating the fabric, it should start coming out on its own. All right. I've gotten the bulk the paper off. It's still really in green and some of the more complex stitches because it's just harder to get the mount. The easiest to remove is the straight stitch and the zigzag lightening stitch. So keep that in mind. The regular zigzag tends to get pulled out easily. So I don't really recommend that if you can help it. But now, like the fabric That's super stretchy, the stitches will go with the fabric and not rip. As I was showing you the stretch stitches, I realize I should add a line of stitching right here. This is just a regular straight stitch. See it's kinda puckering already because it doesn't really like this fabric. But do you see when I pull, it just stays put. Now, if I were to really pull it still isn't stretch. And eventually there it popped. You see? So imagine that some garment you're wearing and now you're stitching just popped. And there's like, it's all peccary. There's like a whole inch now without stitching. So yeah, don't use straight stitches. Regular straight stitches seem I can show you again. I'm stretching. Oh, I'm trying to pull my shirt and it pops. And there you go. These will not pop. Here. Straight edge. No popping. Easy goes right back to how it was. So take that as a lesson. We do not we do not want straight stitches. We want to stretch the edges. This I wanted to show the class is an example I just tried to do by putting the stabilizer on top of the stretch applicants. And I did a zigzag stitch as you can see, which got really kinda bubbly and pulled out once I tried to do the tear-off situation and as you can see, it's kinda messy in the stitches are getting pulled out a little bit. And so that tells me about this method is not great. With a zigzag stitch like you see, the applicant stretches really well. It's a good application, but I do not love the tears away on the top. That might work for us sentence ditch or straight stitch because then it just rips on the lines of the stitching and you don't get this kinda nasty little peccary situation which I guess I can use tweezers to remove. But if I had put it on the bag and I'd have this stuff on the back, I probably won't care. So this was just an example, kind of a failed attempt, but that is good. We're learning. I'm learning every single day. So zig zag stitch stabilizer on the front? No-go. I would have put it on the back. I previously made two of these applicant hearts. And let me show you why E, The feasible stabilizer. So it's on. But the reason that I add the stabilizer is because when you take this to a machine, you see how thin and easily pulled it is even with the apple, okay. You could easily get a distorted obligation me just even pulling on it. Mean It kinda puffery. Just going to press it again. And you don't really want that. You don't want puffery bubbly applicants from being pulled on your machine because it's stretchy fabric. So I'm on the reverse side this time. This is the wrong side. I'm going to add some stabilizer. I'm only using a small amount and I can feel where my applicant is. It's right here. And if you want the smooth side down, That's Elise for correct for my stabilizer. And you don't want to press this too much or it will make it almost like a permanent bond and you don't want that. So this will be removed, uh, when we are done stitching this. All right, In the previous example, I had put in the stabilizer on the front. And it was really hard to get off with the zigzag stitch. This time I put on the back and I did a triple straight stitch. Where on my machine. I don't know if you can see actually does three stitches for every stitch, it goes back and forth, back and forth. It's a little hard to maneuver because it does repeat itself so many times. So it's a little hard to know when you should turn your fabric, but it's just something you have to get used to. I use this type of stitch on my all my Zelda stuff, the cape, the wind weaker shirt. I just really like the way this looks on your fabric. It's very secure. And here is the stabilizer. As you can see. It just peels off. It leaves no residue that I can feel behind. It's very much the same amount of adhesive as the freezer paper. In my opinion, they have a similar quality. Now I like to tear, make a start and then you can just rip all the way around. See the straight stitch is so much easier than a zigzag stitch. So it gives you like a current, a dotted line to rip on. And for the most part that's easy is the perimeter. Now you don't have to remove really the stabilizer at all. If it's for like something that you want to keep really secure. But even with this little mass stabilizer is not stretching. You see just has the stabilizer right there but is not it sustains Dale. And that's not going to rip the fabric, but it's not going to look nice if you have like a big thick patch of stabilizer on top or something. So I do recommend removing this and even just pulling it. C starts the removal process all by itself. See, you just came right out on its own and you can also use your scissors to start as well. But on this one it didn't really pull the stitches at all that I can see you leave a little bit stuck leftover that I could get with tweezers, but it's super clean now. And now it can stretch as much as it needs to see. It can move with me and it's not going to get weird. And this formed and peccary because it's completely secure on this fabric. And so this would be great for T-Shirts. Really anything stretch in it, especially costumes. Let's make our costumes Comfortable, guys, I love using really soft, comfortable fabrics for my costumes because you, where it's, you know, it's clothing. It shouldn't feel like a paper bag or something. So yeah. I love doing stretch applicative. It's just the one extra step of the stabilizer. And as you can see, these does have already come up just from pooling and stretching, but they will not fray since it's just t-shirt material. It can be washed and washed and it will be perfectly fine. Alright, and that wraps up the SEC applicative both stretch in non stretch fabric of next is reverse applicant, which is where we create an open window in our project instead of a piece of fabric that can have a lot of different uses. And it can be really interesting and just kinda have to learn a few different processes and we've gone over, but don't worry, I'm going to walk you through every step of the way. Let's get started.
8. How to Reverse Appliqué Part 1: Alright, let's get started talking about reverse applique K, reverse apple. The case simply means an application that is in a window of the main fabric and can be behind it. So you see the application through a hole or a finish edge of the main fabric. This can also just mean an opening in the main fabric where the edges are finished as well, which I will show you both options. I like using reverse applicants in cosplay because I've had to replicate that effect from costumes before. But they're also really fun for light covering up holes in jeans or just adding kind of a textural element to things. It really does create more of an intrigue in uniqueness to your pieces with reverse application and also looks good and traditional work like quilts and other things like that. So I think you should definitely give it a try. All right, this is my first example. This is going to be in the main fabric. And this fabric is going to be the applicant. Now, you want to make sure your applications Fabric is a few inches bigger. Then you want the final product to be. You can cut it even the same size as your main fabric if it's small like this, but if you're doing like a clothing item, definitely make it like two inches bigger on all sides just to be sure. You'll see what I mean in a little bit. Now we're actually going to use, you can use stabilizer or freezer paper here I'm going to use freezer paper since it's cheaper. Since I have more of it. Here's my freezer paper. I just needed to be bigger than the size I want my application to be. You're going to need a pencil or marker nouns. And be careful not to rip the paper or the stabilizer. And on the non waxy non-nucleoside, you're going to want to draw or trace your applicant. And we already know that I'm going with a Harvard and try to center it on your piece of paper because you do want there to be extra paper on all sides. And so this is without any fabric, we are just tracing onto the paper. And now without cutting the perimeter, I'm going to cut out a little bit into my shape and actually cut out the shape like a sensible. So we want an outline of the shape within the paper is going to be a little difficult. It might be easier to use some smaller sharper scissors, whatever you have. This is easier with simpler shapes, circles, squares, things that don't have complicated parts like I wouldn't want to make a lowercase. I or I have to have the circle and the eye because those aren't connected. So you want to make applications that are connected, that are basically like a stencil. And now what we're gonna do with the shiny waxy side down on the main fabric on the wrong side, you're going to where you want the final application. So put this where you want the final application. I'm just centering it. And then press on the freezer paper or stabilizer. Neither is a permanent, this will be removed. Now what you're gonna wanna do is cut inside this template you may leaving like a fourth of an inch all the way around. You might want to hold on. If you don't trust yourself. To cut properly, you can always using chalk, give yourself a guide, I'm just roughly sketching and a guide. The quality of this cut line isn't as important as the quality of this on the outside because we're going to cut this and then fold this over. So just as before, I'm folding this, snipping it. And then going to come around the edges. I'm using these small scissors because they're cute and it helps me to make those small turns. All right, and now we have. A hole here and what you're gonna wanna do. And if you've been sewing, you know that when you have rounded corners that you typically need to clip them so that they can press easily and be folded over easily. So I'm going to go right up into the edge and not cutting past it for right up into it, getting close. I'm just gonna start snipping. Just where there's curves. Doesn't need to be perfect. And right here where there's this point, I'm actually going to cut into the point like that. And the same down here, I'm gonna do the same. I'm going to cut into the point you see. And now you have to be really careful because you're going to need to get really close to your iron. I like to use a pencil to help me get the edges. Dean might help in this scenario to really keep everything flat. So I'm just taking these little edges and pressing them. Make sure you cut your SNPS close enough so you can get the full effect. If you're having trouble keeping the flaps back. I have used starch in the past with good results to help this process go by faster. But if your patient, it shouldn't be that bad. I meant this is one of the more difficult steps once you've pressed it back enough that you feel confident that you're going to be able to keep them back, you can remove the freezer paper gently and given another press. And if you're really are having trouble, you can use washable tape to really stick down those edges. I'll show you an example. I just rip little pieces like that and then tape them down. You can do that all the way around if you want it to have a really easy time, we'll sewing. I definitely recommend doing it like this. But pressing also just works. It really depends on what you have and how comfortable you are using these tools. So with that adhesive and place optional step, we can now take what was the applicant fabric? And if you flip this over to the right side, you can see how it looks. Finished. Pressure applicant forever. And please impress. You want this to be as flat and crisp as possible. All right, so now you can pin this or use any other sort of adhesins you like and stitch around finishing out the heart. I'll be back in a second to show you how that looks. All right. Here we are. Back after sowing. I will admit to you that since I did the satin stitching, it's a little less obvious that it's a reverse applicant, but if I had used thicker fabric, it would have been a little bit more obvious that the mean fabric is on top of the under fabric, but you do get a nice lip here with the applicant. So there is a bit of a step-down look, but it would be more dramatic with heavier fabric for sure, or a different stitch. Here's the reverse. And so let's say this was a piece of clothing. I would then want to use this as like a lining fabric. So you would say this was the piece you're sewing to stitch all the edges and then this keep finishing your project and this is like a lining. But if this is just a small part on a shirt or a skirt, I would cut it close and then finish it off with my surgery or binding or descending sort of stitching so it won't fray or you could use fabric that will not frame. So there is the first example.
9. How to Reverse Appliqué Part 2: Alright, now let's talk about the second one. Let's pretend of this fabric. Maybe can't be ironed on at all, like it's mine all in. It's really shiny. Let's pretend that this is vinyl and you can't iron on it and it'll be wrong. So you have no idea how to make a reverse applicant on this fabric. This is exactly the problem I ran into when I was making a stretch final body suit. I can insert those photos. And so what I did is what I'm about to show you first things first you need some interfacing for this do match the type of interfacing to the type of fabric you're using. So if it's stretchy fabric, stretch interfacing, regular and match the weight to the fabric, please. I'm going to cut off like last time a piece larger by a few inches. Then we need for the applicant. Alright. So here's the bumpy side, here is the smooth side. Let's get started. So this time you're going to do something that feels a little unconventional. You want the glue side up. And that's what you're going to first draw your application. Drawl trace, however, you can do it. I'm going to do the same thing I did before. For consistency, a nice heart right in the center. I realize my pencil doesn't show up on the blue side, the interfacing. So I'm going to go find something that will, Let's see if this pen well, so yeah, it's a little hard to draw my glue side, I will warn you. Here is the main fabric. This is right sides up. Now, what you're gonna wanna do is pin this to the main fabric without ironing. Do not touch that iron until the next step. I'm going to use my tape here because I don't want to go grab mcons, place it where you want it to go for the final placement, I'm going right there in the center. Okay. And what you're gonna do is stitch on the line you just drew. So for me I'm going to stitch along this pink heart line and then I'll meet you right back here. All right, We're back. I have now stitch on that line I drew. I don't know if you can see it, but there is a line of white stitching all around that heart. There's the back. And what I'm going to do now, just like before I'm going to cut this inside portion out, not disturbing any of the surrounding fabric, just the inside portion. And you want to cut it right up to the stitching very close. Do not cut the stitching though whenever you do, do not put the stitching, that would be bad. We don't like that. And you're cutting through both the interfacing and the main fabric. So I've trimmed it out. I left a scant edge, I try to get close to the stitching line. Now, you're going to do something that's going to feel confusing. But I believe in you, you're going to take you're gonna unpin and unstick the interfacing to from the front. So I hope you didn't permanently intelligent. And you're going to pull it into the whole bringing it to the wrong side of the fabric. Now here you have a couple options. You can either press the interfacing as it is on the outside. But if you do have a non precedential fabric, you can hand stitch it. So for difficult things like the peak of the horror, you're just gonna have to freely gingerly press it out. Four hands stitch it. I'm going to use my iron because obviously this is not vinyl. And this is the method you would use if you just wanted to create a whole regardless of the type of fabric. So I just got the, the top of the heart Finish and now I'm pointing to. Work on finalizing the youth. Any peaks are points are going to be hard. Okay. It's gotta be hard to get to lie completely flat and perfect. You're just going to have to finesse it as best as you can. Pressing and sections not all at once until the end. So I'm just letting my iron work with me as I smooth out the fabric. Okay. So now that most of it is down, you can then know actually press the whole thing flat. Now the more difficult shape you do, the harder and harder and harder it's going to be to have a flat, clean result. Even this peak down here I'm having difficulties with. You can see the interfacing is still pulling in. Hand stitching would probably make that a little bit easier. Now what you can do here is one of two things. You can just simply pop a fabric behind it and stitch it just as I did before. There you go. There's your window or you could simply leave it as it is in Situ around the edge, which is exactly what I'm about to do. And I will be right back. Welcome back. I have done the stitching. I will be honest with you. I challenge myself to do a satin stitch and it isn't beautiful. I put freezer paper on the back and then did the stitching. It. It's okay. I think it looks kinda cool. It definitely looks like a bound when know which honestly I hadn't made before. So it was a nice fun test for me too. So obviously, this is just a window. You can add an applicant if you want or not. I like the window. I'm I had to learn how to do this because a costly I was making needed open holes on the shoulders and I didn't know how to do that cleanly with vinyl and this is what I came up with. So let me know what you think. And yeah, so there's just going to be interfacing either sewn or adhere to the back at all times. Depending on the air facing, it shouldn't fray, but this is woven so it will. Yeah, if this is something you weren't aware all the time, the interfacing will start coming up with wash and wear. So you might want to trim it close to the shape, but now that it's stitched, it's good to go. That's kind of fun. You can make a bunch of different shapes. I recommend simple shapes because obviously points and edges and just like our hard with this method, but save those for the regular, traditional application. Make fun simple shapes. All right, that was a little complicated but super fun. Am I right? Next up? We're talking about pre-made applicants and patches. Just so I'm covering all my bases. We're, we're wrapping up our applicant lessons. And by now you should have a good grasp and understanding on applicants and feel confident making pretty much anything from scratch.
10. Sewing on Patches & Premade Appliqué: Hi there. Welcome to the patches and premade applicants section. I just wanted to talk about for those of us who are a little lazy and don't always like to make everything from scratch, pre-made application and patches are really nice. I buy mine on Etsy and I add them to my t-shirts and hoodies, my backpacks, really anything to add a little extra pizzazz to your clothing and other garments. So I'm going to walk you through anything you didn't know about patches and premade application. Let's get to it. Patches. Here's one on my favorite hoodie. As you can see, patches are non stretch. Typically, they are embroidered and it's coming up. Most of them these days come with iron on adhesive on the back, which is simple. You just iron on like interfacing the hoodie after so many washes, the patch has not last in. So I'm going to just stitch around the perimeter like I've shown you, probably with a blanket stitch because that's my preferred look. Now, I wanted to bring this up because it can be hard to stitch patches on premade clothing. Like let's say I wanted to stitch it here on the sleeve. That would mean nearly impossible just due to the construction of the sweater and getting it under my machine. So when you're doing stuff like this and you want to stitch them around, if it's not maneuverable in your machine, then you're just going to have to hand stitch it. And be really cautious about maneuverings so you don't sit the wrong place on your garment. I'm going through the neck and I'm going to maneuver around as I slow. So really being careful not to catch anything. It can be challenging because you can't always see what you're doing. So you kinda have to maneuver the best you can. Again, like before with a blanket stitch, which is one I'm using now. I'm just stitching along the perimeter, just catching a patch and a little bit. I really like this method. You can also hand stitched things down if you can't get to them or there is a lining like this jacket. I wanted I add in everything on this jacket except the word somewhere. So I added this large patch, this front patch, and the side patch, and I had to stitch it all by hand. You can kind of see those hands stitches. If you look along the perimeter there. I stitch about one stitch every half inch and I used a slip stitch which you can look up how to do online. And I don't love hand stitching and vaccine might say I hate hand stitching. I will do it in situations like this because you can see there's a lining fabric and like specially on the back, I didn't want the lining to be caught up in this. I wanted them to still be separate, so I had to hand stitch this too. And I did the same thing. Just a slip stitch with stitches every like half of an inch. Just grab a snack, watch a TV show. It's not that bad. But I love patches. I think they really can transform clothing before this was just a jacket that literally said somewhere, that's really open for interpretation. So I put a space theme on this somewhere. We're more thinking out there, out of space, out in space. To me, it just made more sense and made it whimsical, made it more interesting. Maybe it a talking piece. You see, you know, someone who's going to stop me in the middle of the street and want to know where I got this from and I can tell them then I mostly just bought these on Etsy. Now, let's talk about pre-made embroidered applicants. Any elaborate applicant will be attached to a backing. Typically it's a mash see-through backing that isn't really there that you can easily hand stitch down. But sometimes it might be felt or a heavier fabric that you want to treat as a patch. But if it's mesh, then you can treat it more as an application that you can cut around and do what you want with, as you can see here. Now, there's sections and different parts. And like let's say I just wanted this amount to go on the hem of address. Then I would take my embroidery scissors and gently through the mesh, cut out just this, not cutting the beaded section, but just cutting into these meshy parts that will not fray and beats will not fall off. And then I would just hand stitch or machine stitch with similar color thread matching. My custom cut applicant out of these pre-made applicant. It's really important that you watch though where you cut it because these beads and other embellishments will just fall off really easily. But it's so beautiful. And you can use it on and sewed one project You don't have to use as fabric, you can use it as a little pieces. I can just cut this shape out, put on one project, cut this shape out Po1 and their project. It's entirely up to you. I'm getting beads everywhere. All right. I think I've taught you everything I know about applicant. I cannot wait to see your projects.
11. Final Thoughts: Congratulations, you've finished the class. In this class, we've covered regular applicative, stretch applicant, a reverse applicant, pre-made applicative, covering all the bases of advocate that you should feel confident. And now I look forward to seeing all of your projects. Be it caused play fashion, or even a quilt. I want you guys to think outside the box and put applicant on everything. I hope you guys had fun and enjoyed the class. And if you did, please leave a review or a comment to ask me any questions. I plan on making future illustration and sewing videos. So I love any feedback from you guys. Also make sure you post your projects in the project gallery so I can see it and everyone else. I loved the lead, some feedback and just really enjoy your projects. If there's one thing you take away from this class is just a growing confidence in your sewing ability. Every minute and every mistake you spend selling is getting you to a further place. In a more advanced plays. I've been sewing for years now. And I think you really do learn from the mistakes more than the successes. Because even as I was making this class, I was finding new ways to do things in different ways to do things because once you have a problem, you can find solution. As always, it's been a pleasure to teach this class. I had a great time. I hope you had a great time. I'll see you in the next one.
 Mary Rose, Illustrator & Designer