Transcripts
1. Intro: Are you ready to
start a new hobby that is relaxing and rewarding? In this quick beginner
crochet class, you'll learn everything
you need to get started, even if you've never picked
up a crochet hook before. Hi. My name is Isabella Zubk. I'm a maker, knitwak
designer, and teacher. I focus on designing
easy accessories and home decor pieces that
are great for gifting. Apart from publishing my
patterns independently, I've also worked with
yarn companies and publishers like Making Stories
Lane and sorella Yarn. In this class, you
will learn how to choose the tools and
yarn to get started, the basics of crochet, like how to hold
the yarn and hood, how to start your
crochet project, and how to create
basic stitches. Step by step
instructions to make a stylish headband with a twist
detail using the stitches you've learned in the
class and tips to customize your project and
make it truly your own. The project in this class is to crochet your own headband, either following along with
me exactly or crafting a customized piece by experimenting with various
basic crochet stitches. Crochet is a unique
and versatile skill, one that machines
can't replicate. It's trend, perfect for
creating handmade accessories, clothes, home decor,
or even toys. This class is designed
for total beginners. You don't need any
prior experience, and I will guide you
every step of the way. To make things even easier, you will also get
a class guidebook with alternative tools, yarn suggestions, and additional resources to get you started. By the end of this class, you will not only have
a finished headband, but also the confidence to start your own crochet journey, whether that's making
more accessories, cozy blankets or
home decor items. This class is perfect for anyone curious about
trying crochet. People passionate
about slow fashion or anyone looking for a
creative way to unwind. Let's get started. I can't wait to see what
you will create.
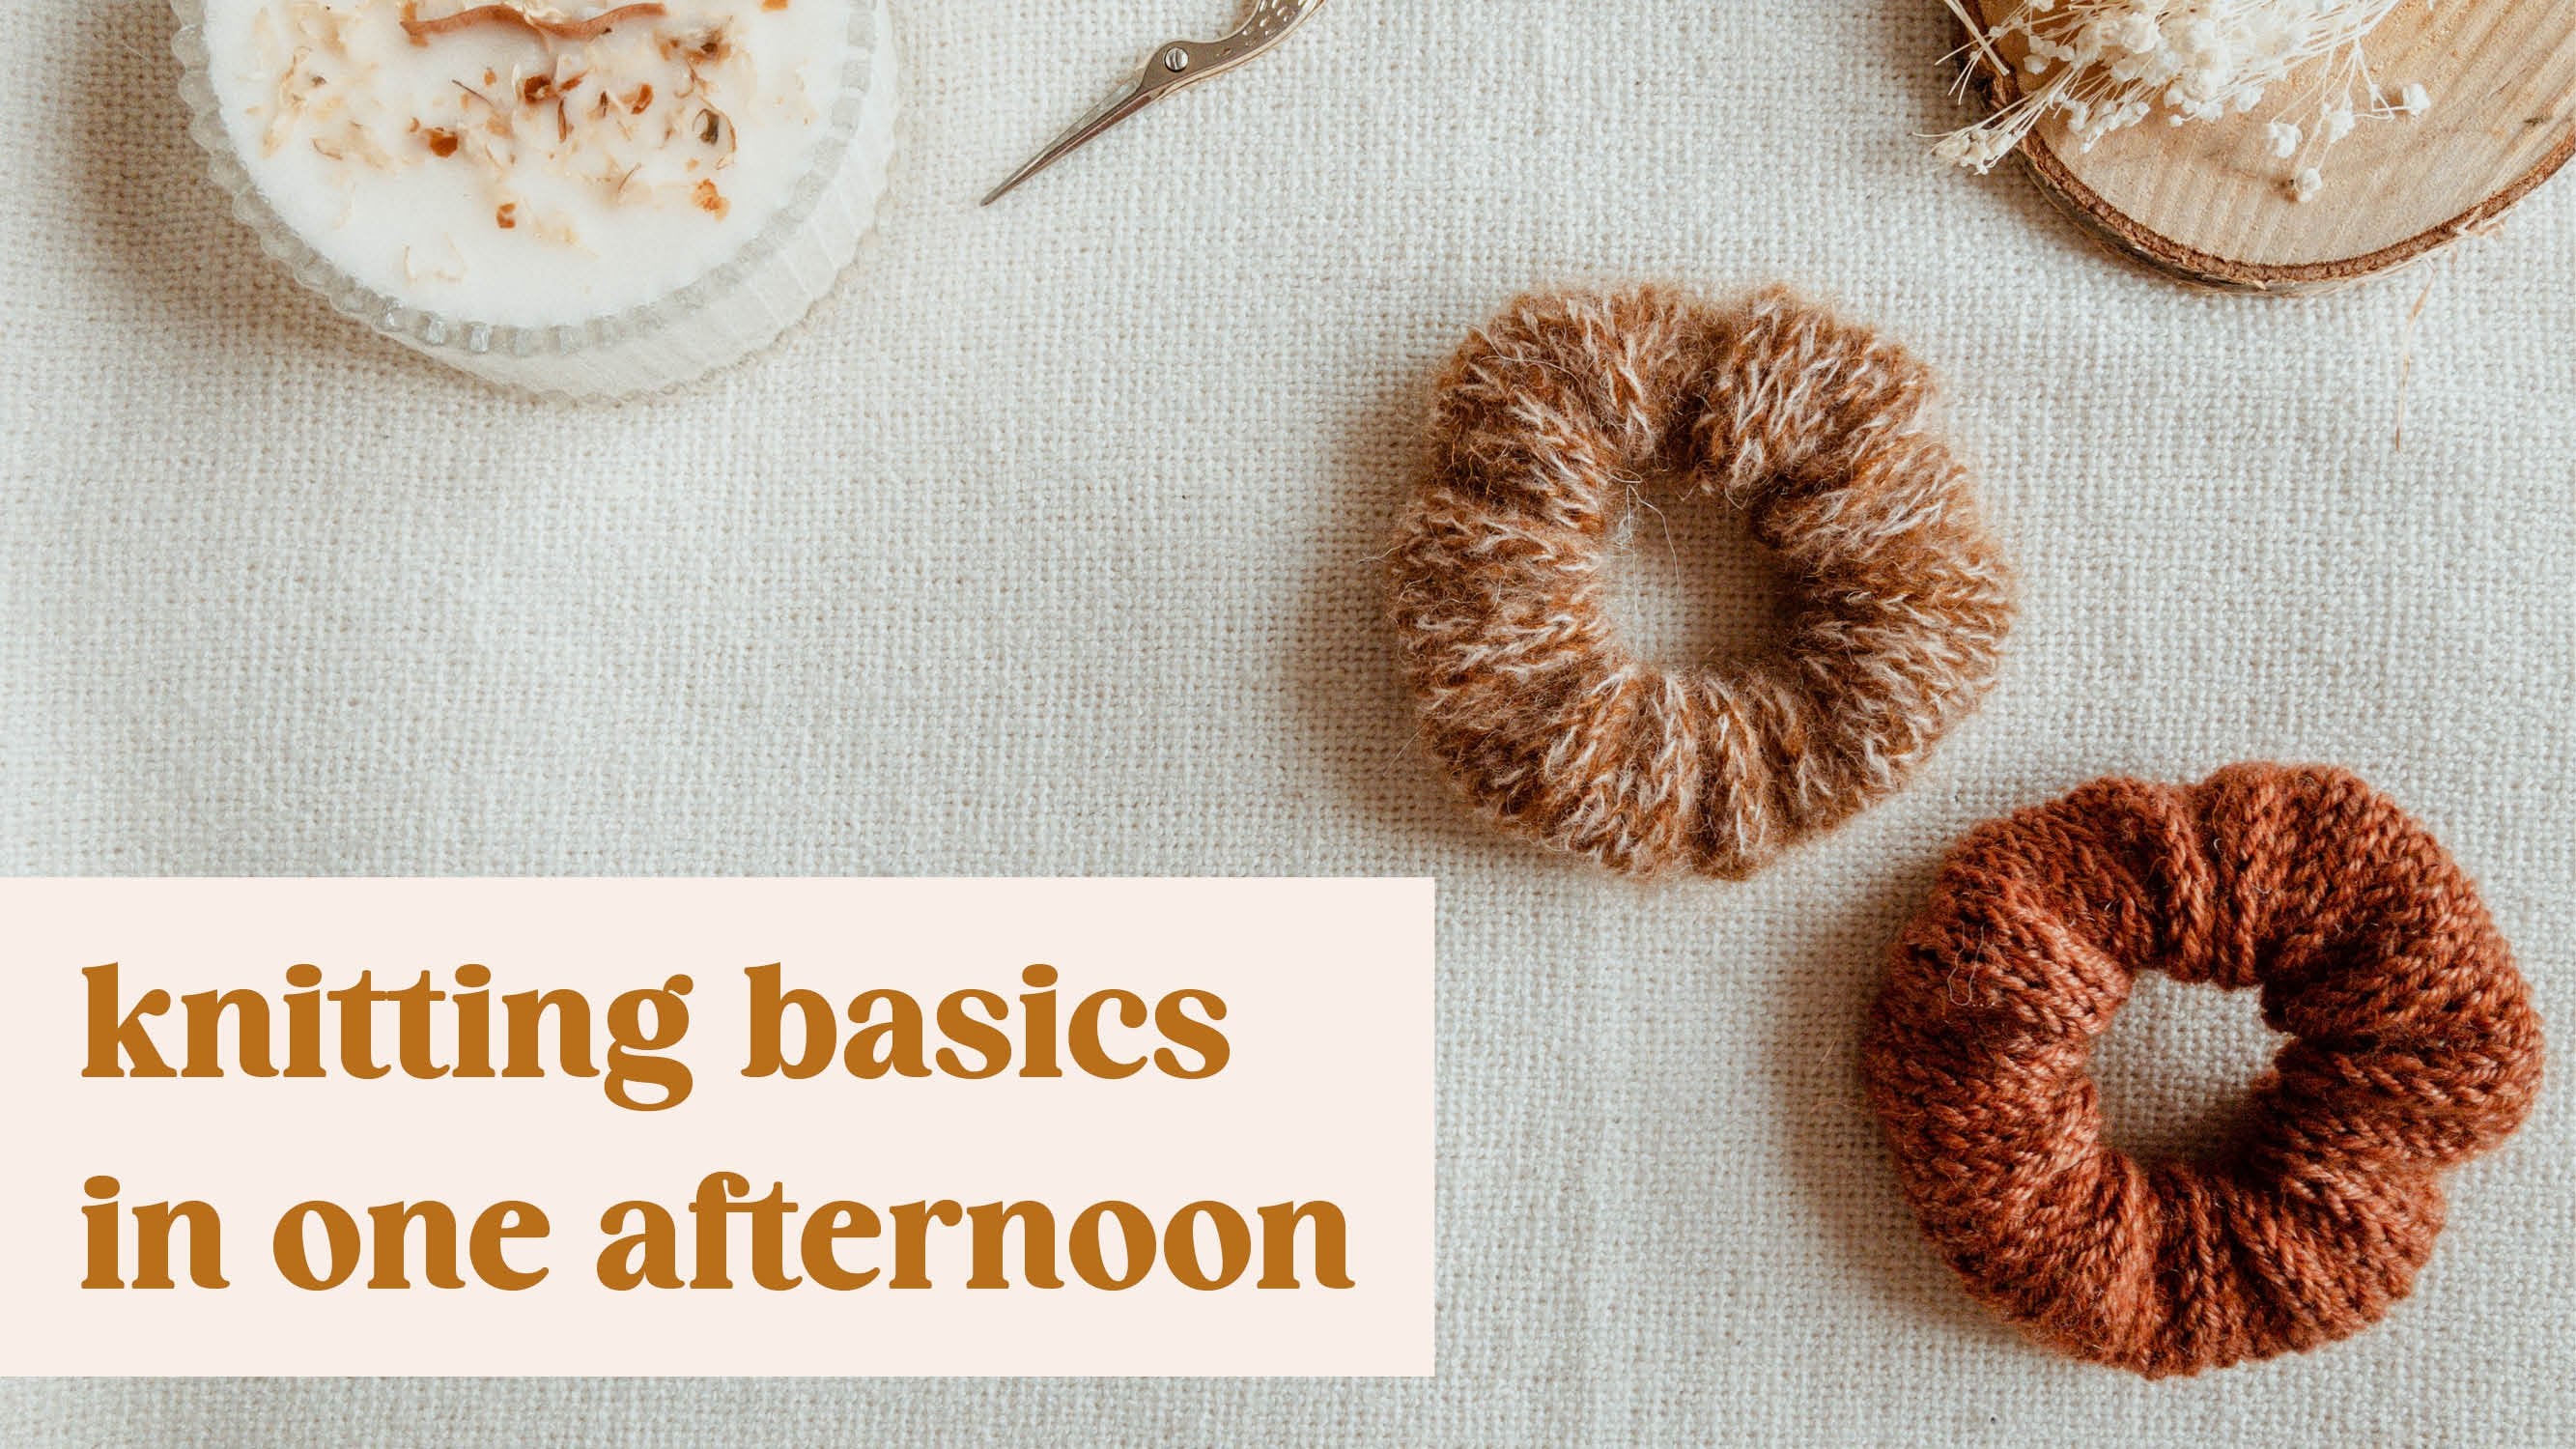
2. Class Project and Resources: The project in the
class will be to crochet your own
headband with a twist. Follow along with me to create a headband identical to mine, or let your creativity
shine and use some of other basic stitches
you will learn in the class to create your
own headband concept. Share a photo of your
finished headband or your work in
progress as a project. To do that, go to the Projects
and Resources section, click the Create
Project button and upload your headband
photo as a cover image. Remember to download
the class guide, which contains some tools
and supplies recommendations and other tips to help you
get started with crochet. Just as a heads up,
some crochet terms are different for US and UK. Please keep in mind
that this class will refer to US crochet terms only. Now it's time to go through
the necessary tools and supplies you will need
for creating the headband.
3. Tools and Supplies: We will need just a few
tools and supplies to practice basic
crochet techniques and to create a headband. First up, yarn. You will only need 150 gram ball to crochet an adult
size headband. I will be using the Peruvian
yarn from Plcolana, which is 100% peruvian highland
wool in worsted weight. But there are lots of great alternatives that
you can use too. You can refer to
the class gate for a few popular yarn options. If you can't find any of the yards recommended
in the guides, choose yarn that is
worsted with yarn. So category four medium, yarn that is smooth, so well twisted, not
fuzzy or with a big halo. So avoid more hair or
novelty yarns as a beginner. And also yarn that
is light in color. It doesn't have to
be cream color, but avoid dark navy, black or deep gray, so you can see the
stitches more clearly. Next, you will need a crochet
hook in size 5 millimeters. So that's US age eight. There are lots of shapes, brands, and types available. You can get simple metal
hooks or wooden or a type of ergonomic hooks with a softer handle,
which is what I use. I find such hooks are really
comfortable to work with, and I really recommend to
start with one like this. Last, we will need some notions. You will need some scissors, tapestring needle
that is bland and has this big ear or eye that
you can thread wool with. You will also find tape measure handy and optionally a
couple of stitch markers that are either in this
spiral form that you can insert into a stitch or removable or
opening stitch markers. If you don't have such markers, you can substitute them
easily with safety pins. Now that we have the
materials ready, let's jump into learning
some crochet basics.
4. Crochet Basics: It's time to learn
some basics of crochet before we jump
into our project. So first, how to
hold a crochet hook. So there are two popular
types of holding a hook. It's knife grip, so how
you would hold a knife. This is how I hold my hook because it's comfortable to me, and the other one is called a pencil grip because it's
how you would hold a pencil. So try out both ways and
see whichever is more comfortable to you and then use it both are
absolutely fine. So you would hold your hook
in your dominant hand, and then in the other hand, you will hold the yarn. Similar as in knitting, we want to have some tension, so it's easier to work. So you would tension
between your fingers. So let's start with
making a slip node, which is the start to
lots of crochet projects. To make a slip note, you take the yarn end and you cross it. Over itself and then reach with your fingers through the loop
and take the yarn strand, pull up, and you
have a slip node. So place it on the hook. Okay. This is the start of
a crochet project. You place the slip
too on the hook, which is the beginning
of your project, and in the left hand, you will hold your yarn. How I like to do it is
just to wrap it around my index finger and let
it flow down my hand. However, you can wrap it around. Some of your fingers just
see what works best for you. Now we will learn how
to make a yarn over, which is important part of
many of crochet stitches. So to make a yarn over, move your hook so that the
yarn is moving over the hook. So that motion. Make sure not to wrap the yarn
in the opposite direction. So it's yarn over yarn
going over the hook. So once you make a yarn over, grab it with the hook and pull
it through the slip node. And we just made one chain. So again, to make another chain, yarn over, and put the yarn through the loop
to make another chain. Again, yarn over and pull the yarn through
the loop on the hook. What we are doing is
called a starting chain, so the base of the new project, how we will start a new project. And to make the starting chain, you make the slip node and
then you make as many chains as the pattern calls for
or your project calls for. Let's start with making ten
chains. Let's make it 11. Okay. When making
your starting chain, do not count the loop that
you have on the hook. So this would be the first loop, second, third, and so on. Okay. So when you make
the starting chain, you can see that this
chain has two sides to it. The first one is this front vs. Side, as you can
see the stitches, the loops are shaped
as kind of vs. And if you turn it around, you can see back bumps, so these horizontal
bars in the back. To start working the
first row of our crochet. Swatch, we will be working
into this starting chain. And then depending on the type of stitches that
we will be working in it, we will make the first stitch
of the rod into the second, third or fourth
chain from the hook. If you are working
with a pattern, the pattern instructions will tell you where to make
your first stitch. Otherwise, it depends on the
type of stitch and we will cover it a little bit
later in the work.
5. Basic Stitches: Single Crochet: The first stitch that we will be practicing is called
a single crochet. To start working the first
row with single crochet, we will have to work into the
second loop from the hook. So we do not count the loop
that is actually on the hook. We count here the first
chain and here the second. So to make the single crochet insert your hook
into the stitch. So between the two Vs Okay. Make a yarn over and pull
yarn through the chain. Now you have two
loops on your hook. Make another yarn over and pull yarn through
both of the loops. And we have the first
single crochet done. At the beginning, it's
really helpful to use opening markers or this
kind of spiral markers to mark the first
and last stitch of the row so that
you can keep track of where to work your
stitches so that you don't work too few or too
many stitches during the row, so that your work is an actual square or rectangle or whatever
you intend it to be. So just use a marker to
mark the first stitch. You can also use this type of opening marker
or if you don't have it, a safety pin will work as well. Now we will make single crochets in the rest of the chains. So we just work into this chain. Now we will work
into the next one. Again, we insert the
hook into the chain, make a yarn over, pull the
yarn through the stitch. We have two loops on the hook. We make yarn over again and pull yarn through
both of the loops, and we just made
a second stitch. So again, stitch, next chain. Insert the hook. Make yarn over and pull the yarn
through the chain. Two loops on the hook, yarn over and pull yarn
through both of them. And again, into the next stitch. Okay. I finish my first row of single crochets and I will use a marker again
to mark the first stitch. Sorry, the last
stitch of the row. So after working the whole row, we need to turn our
work so we can work in the opposite direction. So to turn the work, you simply flip it. So your hook is on
the right side edge, and you can work in the
opposite direction. After turning our work, we need to make so
called turning chain, and that's because crochet
stitches are quite tall. So we need to make this turning chain to bring the yarn up to the level
of the stitches to make. And that matters especially
with taller stitches, but we make it for
any kind of stitch. So to make a turning chain, we have one loop on the hook. We make yarn over, and we
pull through the loop. One chain has been made. The number of the chains
in the turning chain depends on the
height of the stitch you'll be making
in the next row. So we will see in detail when
we practice more stitches, and you will also
find a reference in the class guide for the
basic types of stitches. For a single crochet is
just one turning chain. So let's practice
single crochet again. Let's keep track of the
stitches and see how to work signal crochets into the stitches and not
only into the chains. We will be working
from the first stitch. If you turn your work a
little bit, at the top, you will see the Vs, one leg and the other leg. Each of those is a stitch. So if you want to count how
many stitches you have, you can count from from the first stitch that you
marked with a marker, all up to the last stitch. So to work single crochet, we will insert hook
into our first stitch, which we marked with the marker. So we will insert the
hook into below both of the legs of the V. Make a
yarn over, pull up a loop. So we have two loops
and then the yarn over and pull through
both of the loops. And the first stitch is made. So we can remove the marker. Okay. And you can move it to the
stitch that you just made. Try that way. Okay. So the first single crochet
of the row is done. To make the next one, insert the hook under both legs
of the next stitch. So the V, make a yarn over, pull up a loop, yarn over and pull yarn through
both of the loops. Okay. And again, insert
hook into the next stitch. Yarn over, pull up a loop, yarn over and pull
through both loops. So another row in
single crochet is done. If you want to put away your project for a bit
as you don't work on it, and you are afraid
that it will unravel. Actually, with crochet is not
as easy as with knitting. But still, you can secure
it with a stitch marker. So you pull up a little
bit of the loop and then use a marker on it. You can even pull on the
arm to see if it is secure, so you can see that the marker prevents the stitch
from being unraveled. And then you can
remove it and just insert your hook to
work further on it. Okay, now that you know how to start a new project and how
to work a single crochet, let's have a look at other
basic stitches, how to work.
6. Basic Stitches: Half Double Crochet: Okay, so the next stitch, let's learn a stitch that is called a
half double crochet. So I will be working
further on my swatch, practicing a couple
rows of each stitch. So I'm at the end of the row, so I have to tune my work. Okay. And now I have to
make a turning chain. So for half double crochet, I'm using also one chain
as the turning chain. So I yarn over and
make one chain. Okay. To make a half
double crochet, we will start with Yarno. And then we will insert
the hook into the stitch. So keep this yarn over safe so it doesn't
get off the hook before we insert it. Okay. Now we make yarn over
and pull up a loop. So we have three
loops on the hook. You make another yarn
over and pull yarn through all three loops. So again, we start
with yarn over, insert hook into the stitch. Make another yarn over. And we pull yarn through all three loops
and get yarn over, insert in the next stitch, yarn over, pull up a loop. The loops on the hook, yarn over and pull yarn through all of the
loops on the hook. Okay. Practice, H double crochet
until end of the row. Okay. So we finished the row. Now, I will turn
my work and I will work one more row of
half double crochet. So you can see it
looks different than the single crochets that
we made previously. You can keep on working more
rows if you want to practice the stitch or you can move
to practice the next stitch.
7. Basic Stitches: Double Crochet: The next ditch, we will
learn double crochet. So again, I turn my work, and now I have to
make a turning chain. For double crochet, I
will use two chains. So one chain, second chain. To start double crochet, I will make a yarn over and insert my hook
into the next stitch, yarn over and pull up a loop. I have three loops on my hook. I will make a yarn over and pull the yarn through two loops. So I have two loops
left on my hook. I will make another yarn over, and again, pull
through two stitches. And this completes
the double crochet. It's a taller stitch than the
previous ones we learned. So again, make a yarn over. Insert hook into
the next stitch, yarn over, pull up a loop. The loops on the hook. Yarn over, pull the yarn
through two of the loops. Tulops are left. Yarn over, and again, pull the
yarn through Tulops. So I finished a row of
my double crochets, and you can see it's a taller stitch than the
previous that we worked, and it definitely
looks distinctive, so it's quite easy to see
that it's a different stitch. So practice more the double
crochet if you'd like. Or let's look at another stitch
which is treble crochet.
8. Basic Stitches: Treble Crochet: Let's look at another stitch, which is treble crochet. So for treble crochet, we turn our work and make a turning chain of
three stitches. One, two, three. Now, to make a treble
crochet stitch, we will yarn over twice.
That's how it should look. Then insert the hook
into the next stitch, yarn over and pull up a loop. You have four loops on the hook. So we will yarn over and pull the through
two of the loops. So we are left with
three loops on the hook. Again, yarn over and pull
the through two loops. And now we have two
loops remaining. And again, yarn over
and pull the yarn through two loops to
complete the travel crochet. So again, yarn over twice. Insert the hook into the
stitch and pull up a loop. Four loops on the hoop, hook, yarn over and pull
yarn through two loops. Three are left, yarn over and pull yarn
through two loops. So two are left, and yarn over and pull
through both of them. Okay, again, yarn over twice. Insert and pull up
a loop, yarn over, pull through tulops, yarn over, pull through tulops and again. You can see that
the treble crochets are taller and awesome. Like the space between
them is more visible. So this is the characteristics. Okay, let's work
the treble crochets until end of the
row to practice. So our trouble crochets
are finished. Is
9. Basic Stitches: Slip Stitch: Let's practice one more
stitch, which is very simple. It's called a slip stitch. It's very nice for edges, but if you want to work into
the slip stitches later, if it's not an edge, but you want to use it within a project, then make sure that you
don't work them too tight. So for the slip stitch,
turn your work, and we'll make one
turning chain. And to work a slip stitch, insert the hook into
the next stitch, yarn over and pull the yarn through the stitch and also through the
loop on your hook. And that completes
a slip stitch. So again, insert the hook, pull up the loop through both the stitch and
the loop on your hook. For the second row
of the slip stitch, if you want to work into them, remember to make the
turning chain of one chain and then make sure not to work into
the Vs that are in front, but rather the the ones that are slightly in
the back because this is the stitch from let's say two rows ago and this is the previous one,
the one in the back. I work a slip stitch, pull the arm through
both the stitch and the loop on the hook. Here again, I insert the hook into the stip that
is slightly in the back, not through the V in the front. Okay, now that you have
practiced different stitches, you can unravel the
swatch, not lose yarn. Wind the yarn back to the ball, and let's crochet the
headband in the next lesson.
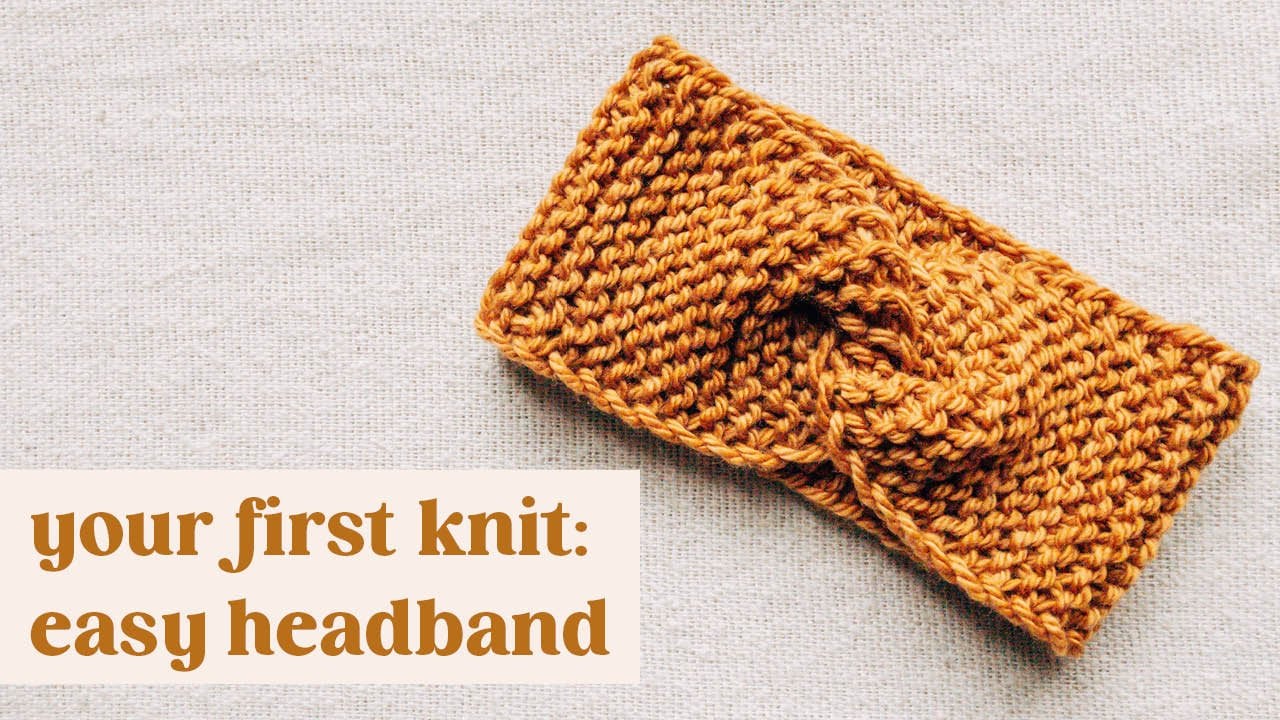
10. Crochet the Headband: It's time to crochet
our headband. It's a super easy project. We will crochet a
long rectangle, and our starting chain
will be the narrow edge, which will be around
10 centimeters, so 4 " wide. And then we will work
lengthwise until the rectangle is around 2.5
to 5 centimeters shorter, so one to 2 " shorter than
your head circumference. After finishing the rectangle, we will fasten off yarn and
seem to create the twist. It's really super easy
and a quick project. I will crochet my headband
in single crochet stitch, so it's easy to make
and quite dense, so it keeps my ears warm. Feel free to use any
of the stitches you learned in the previous lesson
to crochet your headband. You can also mix it up and work alternating
rows, for example, a row of single crochet, followed by a row
of double crochet. You can really get lots of
combinations and customize your headband to your
liking. Let's start. So ideally you would make a gate swat before
making your headband. However, headband is such a
quick project that really, you don't have to
bother with it. You can just try to crochet with some amount of stitches
and give it a few rows, see how it looks, if
it is wide enough. If it's not too narrow, in case you want to change it, you can just unravel your
work and start again. I propose you start with a similar amount
of stitches to me, or you can also refer
to the yarn label. If they give a gauge on the yarn label for
the crochet stitches, you can use it as a reference how many stitches to work for
the 10 centimeters width. So for myself, to
keep the width of my headband at around
10 centimeters or 4 ", I will need it to be
14 stitches wide. So I will chain 15 stitches. That would be 14 for the starting chain and one more for this kind of
starting turning chain. If you start with
double crochet, you would chain 16, so
14 plus two and so on. Use reference from
the class guide about the starting
chain to figure out your custom
starting chain number. So I'm starting by
making a slip note. And now I will
chain 15 stitches. Okay. Now that I have 15 chains, I will work into
the second stitch from the hook with the
first single crochet. So first second here. Okay. Remember that you can mark the first stitch if you'd
like to keep track. So I will mark the stitch
as well in the first row. Now I will work
single crochets into the remaining chains
to form the first row. So I finished the first row, so now I will turn my work
and make the turning chain so that's one chain and work single crochets
into the stitches. So starting from
the first stitch and single crochet
into every stitch. So I have two rows of
single crochets worked. And I will work
basically this way until my headband rectangle
is long enough. I like my headband
to be one to 2 ", so 2.5 to 5 centimeters shorter than
my head circumference, so it's sitting snag on my head, but feel free to try it on to see how it fits you
best before you sim. Okay, so crochet your headband
rectangle and then let's jump into finishing
in the next lesson.
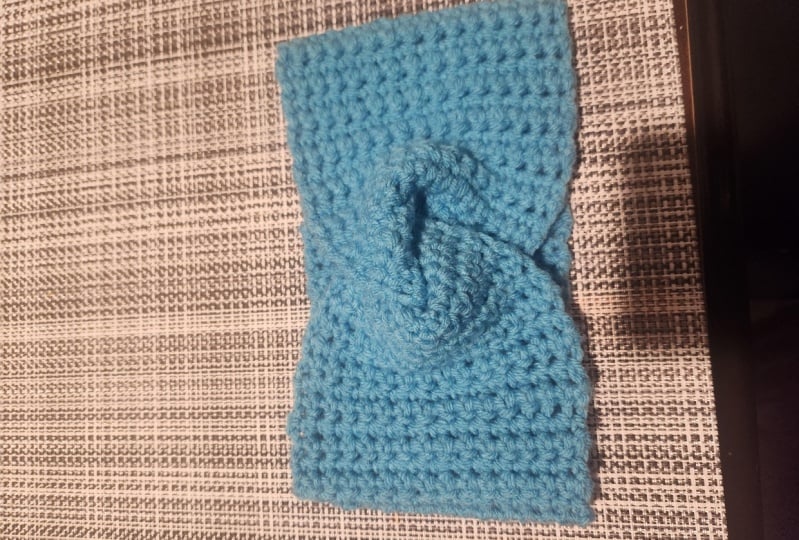
11. Headband Finishing: It's time to finish
up the headband. When your strip is long enough, you can cut the urn and leave a longer tail
around 30 centimeters, so 12 " long, more or less. Then to fast enough, simply pull up your hook and
the yarn is fastened tough. That's quick and easy. Now we have to do a little bit of finishing before
we sing the headband. So let's weave in hide the
end from the starting chain. To do that, we will take the tapestry needle and we will thread it with the
starting tail. And depending how your
head van looks like, mine is looking the
same on both sides, so the right and wrong
sides are exactly the same. So for me, it doesn't matter
where I weave in the end. But if you chose some specific pattern that has distinctive right
and wrong side, hide your end on the wrong side, so the side that will not be
visible when you wear it. And the easiest way
to weave in ends is just to take the
needle and weave it through some of the
stitches fourth and back. That should be rather secure. And it shouldn't unravel. Now I will cut off
the remaining tail. Next, before seaming, place your headband with
the right side up. So whatever you
want to be wearing, what you want to be
visible when you wear it, it should be facing up. Then we'll take both
ends of the strip. And let's tread the needle
with this long tail. So you are prepared. Okay. So let's take both edges
and fold them in halves. Okay. Then we need to insert
one part into another. If it's curling, no worries, we will be able to
move it around. Okay, so put one half into the other so kind of a
sandwich is created. Make sure that the part with
the tail is facing outwards. So it's easier to sim. Okay. Now that you have
the parts aligned, take the needle and
insert it just below the last row of stitches
through every layer. Make sure that you are catching every single layer and
pull and backwards. Again, through every layer. I'm catching it just
below the stitch. Okay, so we need to seam it until we reach
the other edge. To make sure it's secure, you can go one more time backwards just
reinforce the seam So this seam is made on the
wrong side of the headband, so it will not be
visible when wearing. Okay. Now let's weave in a little
bit this longer end. Just moving the needle through the stitches here and there. And the remaining tail we
can cut off after seaming. And now everything
that we need to do is to turn the
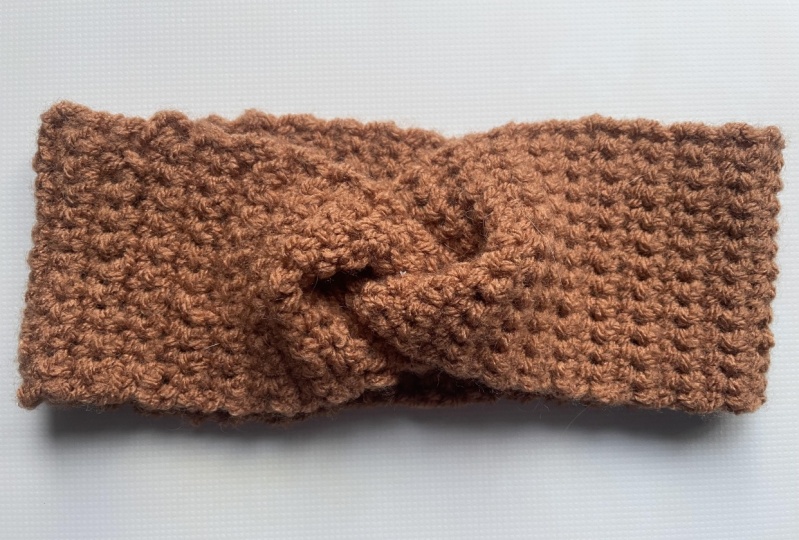
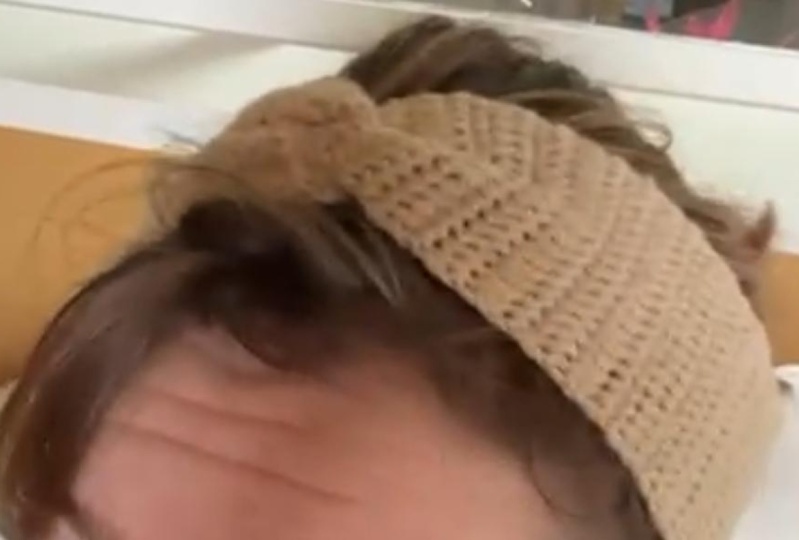
headband inside out. And it's complete, so
you can see the seam is on the wrong side
and we're having this fun twist detail on the outside in the
front of the headband. So remember to care for
your handmade hand band, and refer to the yarn label always for the
care instructions. But whenever in doubt, always handwash in delicate
woolwh and lay flat to dry. Let's wrap up the class.
12. Wrap Up: We have reached the
end of the class, and I want to thank
you for taking it. I hope you enjoyed watching it as much as I enjoyed
creating this class. Let's recap what you've learned. You know how to choose
the right tools and yarn. You know, some tips to make
starting crochet easier, basic stitches like single
and double crochet, and how to create
a headband with a twist and even customize
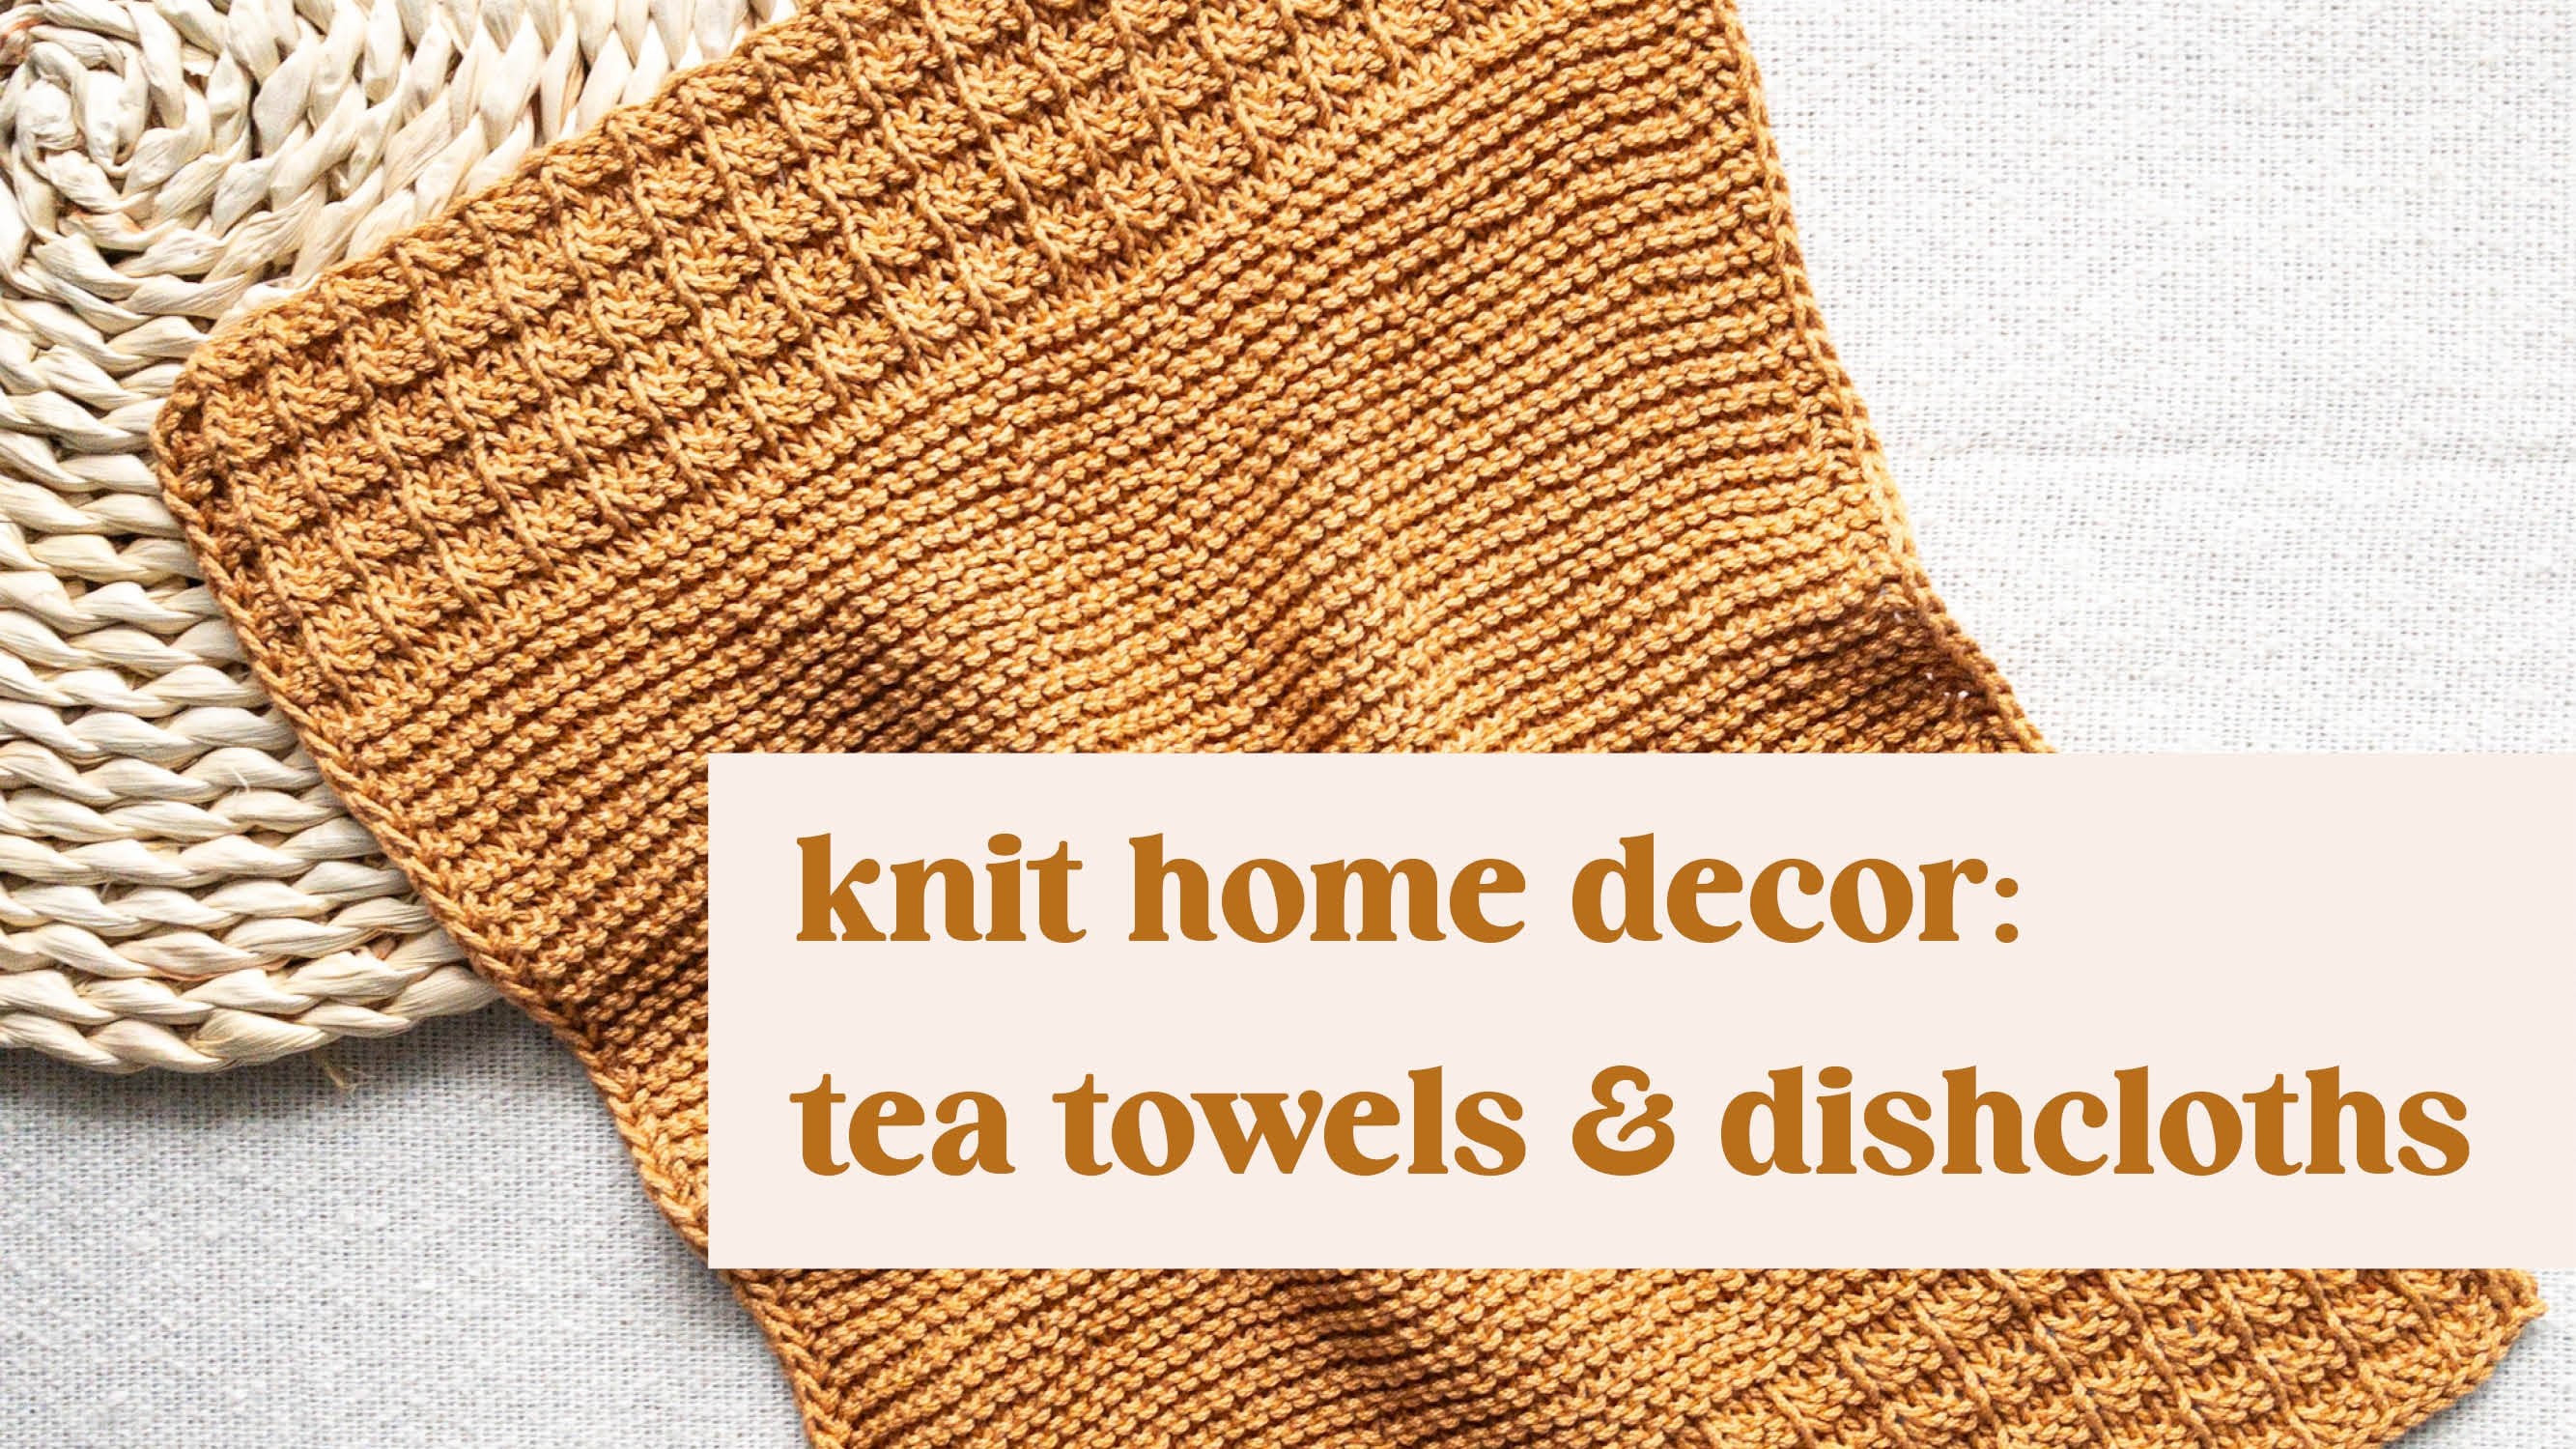
it to make it your own. So what's next? Try combining those basic stitches to make simple projects like blankets, scarves, or kitchen towels. These are great for practicing and building your
crafty confidence. Before you go, I'd love
to hear your feedback. Please leave a review to let me know how you like the class. And if you'd like
to stay in touch, sign up for my newsletter. Thank you again for
joining this class. Keep practicing and
happy crocheting.
 Izabela Grzybek, Knit & Crochet Designer