Transcripts
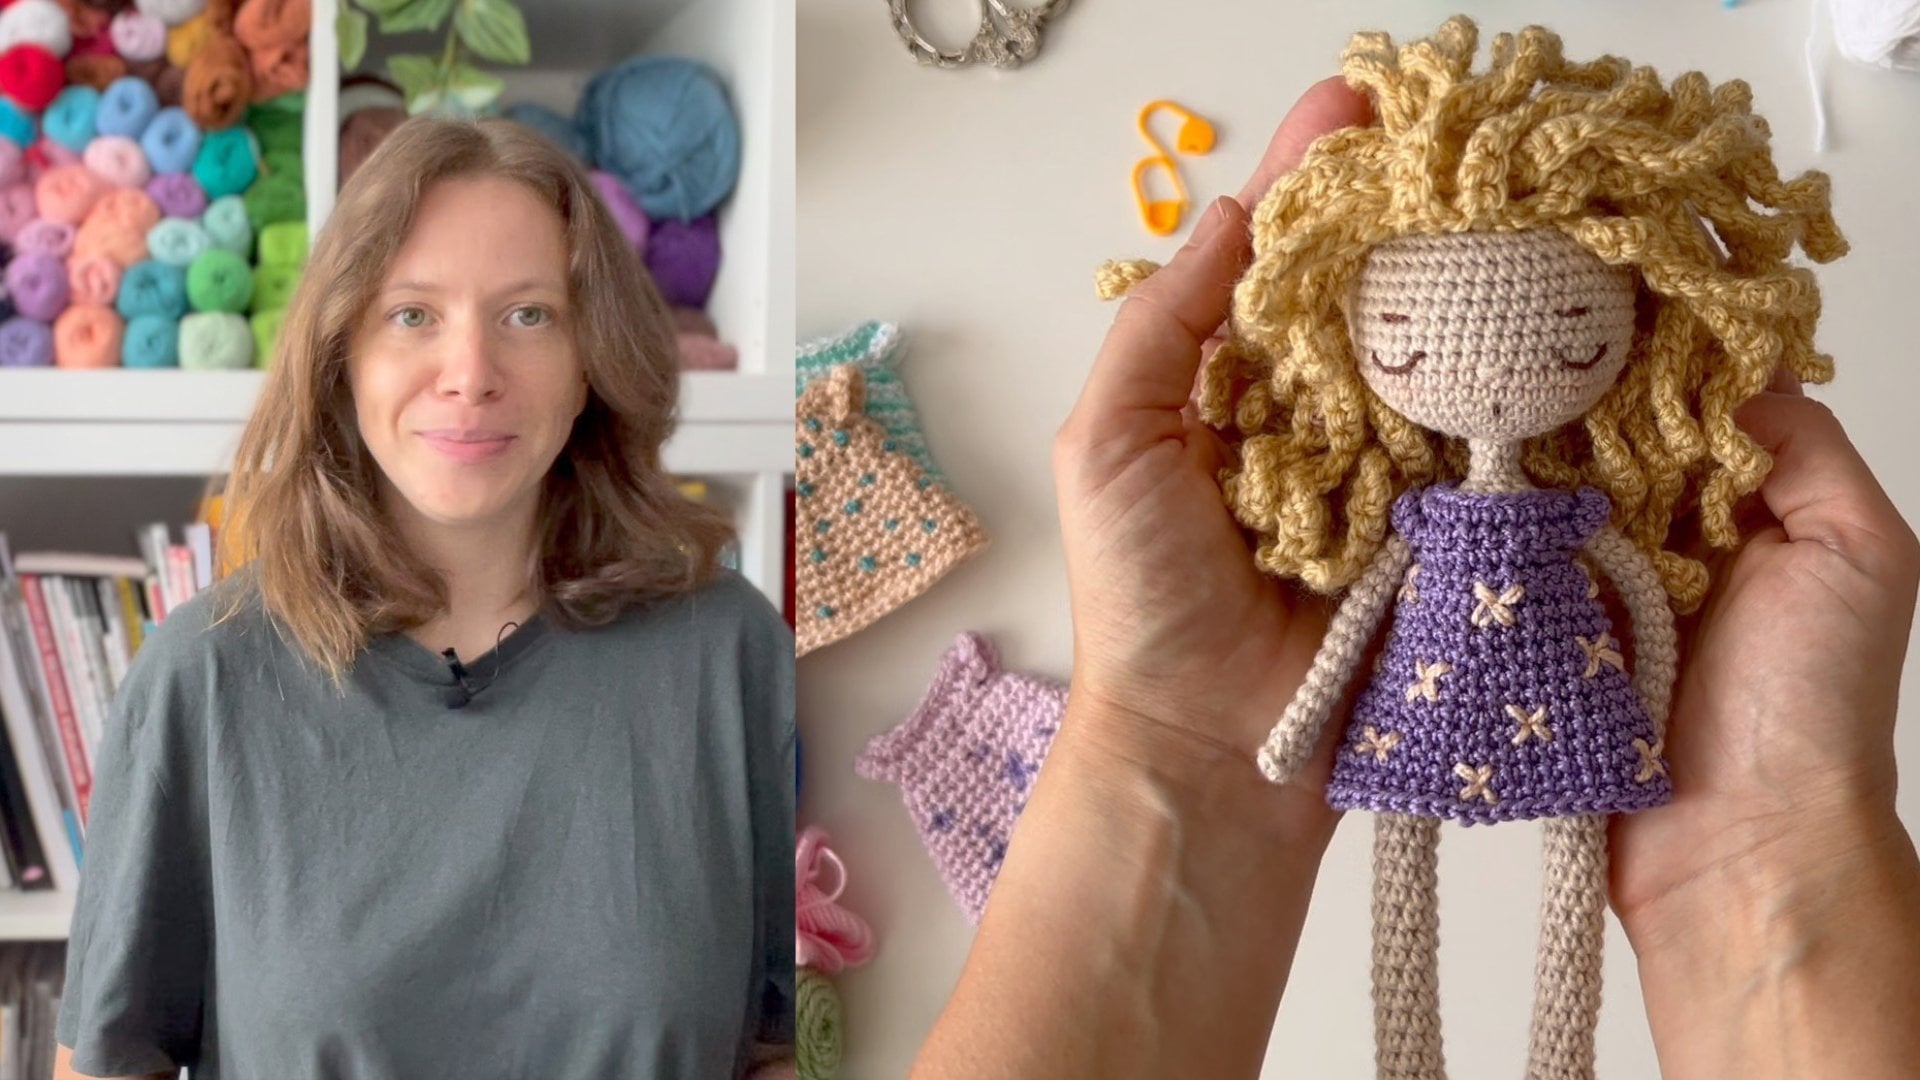
1. Introduction: Hi and welcome. I'm Olga
from Olga Mi groomi. I'm a crochet designer and a big lover of Emi groomi dolls, miniature clothes and
cozy handmade details. I've been creating Emi
groomi characters for years, and I've also taught several
classes here on Skillshare, like how to crochet the doll's
body, embroider the face, make the hair, and even
design her dress and boots. In this class,
we're going to add a new piece to the
wardrobe of our dolls, a tiny hooded cod. This isn't a step by step class. It's more like a
guide where I'll show you the key points,
shaping the body, adding the sleeves and hood, finishing neat edges, and
adding small decorations. You'll learn how to adjust
the cod to fit any doll, make the hood and
sleeves fit perfectly. Add fun details like
tassels or pom-poms. I'll use my own doll as example, but you can easily adapt everything to your own doll
or Emi groomy character. Along the way, I'll
encourage you to try test and adjust each part. By the end you have a beautiful hooded coat and the confidence to create
your own toll clothes. Let's get started and
have fun crocheting.
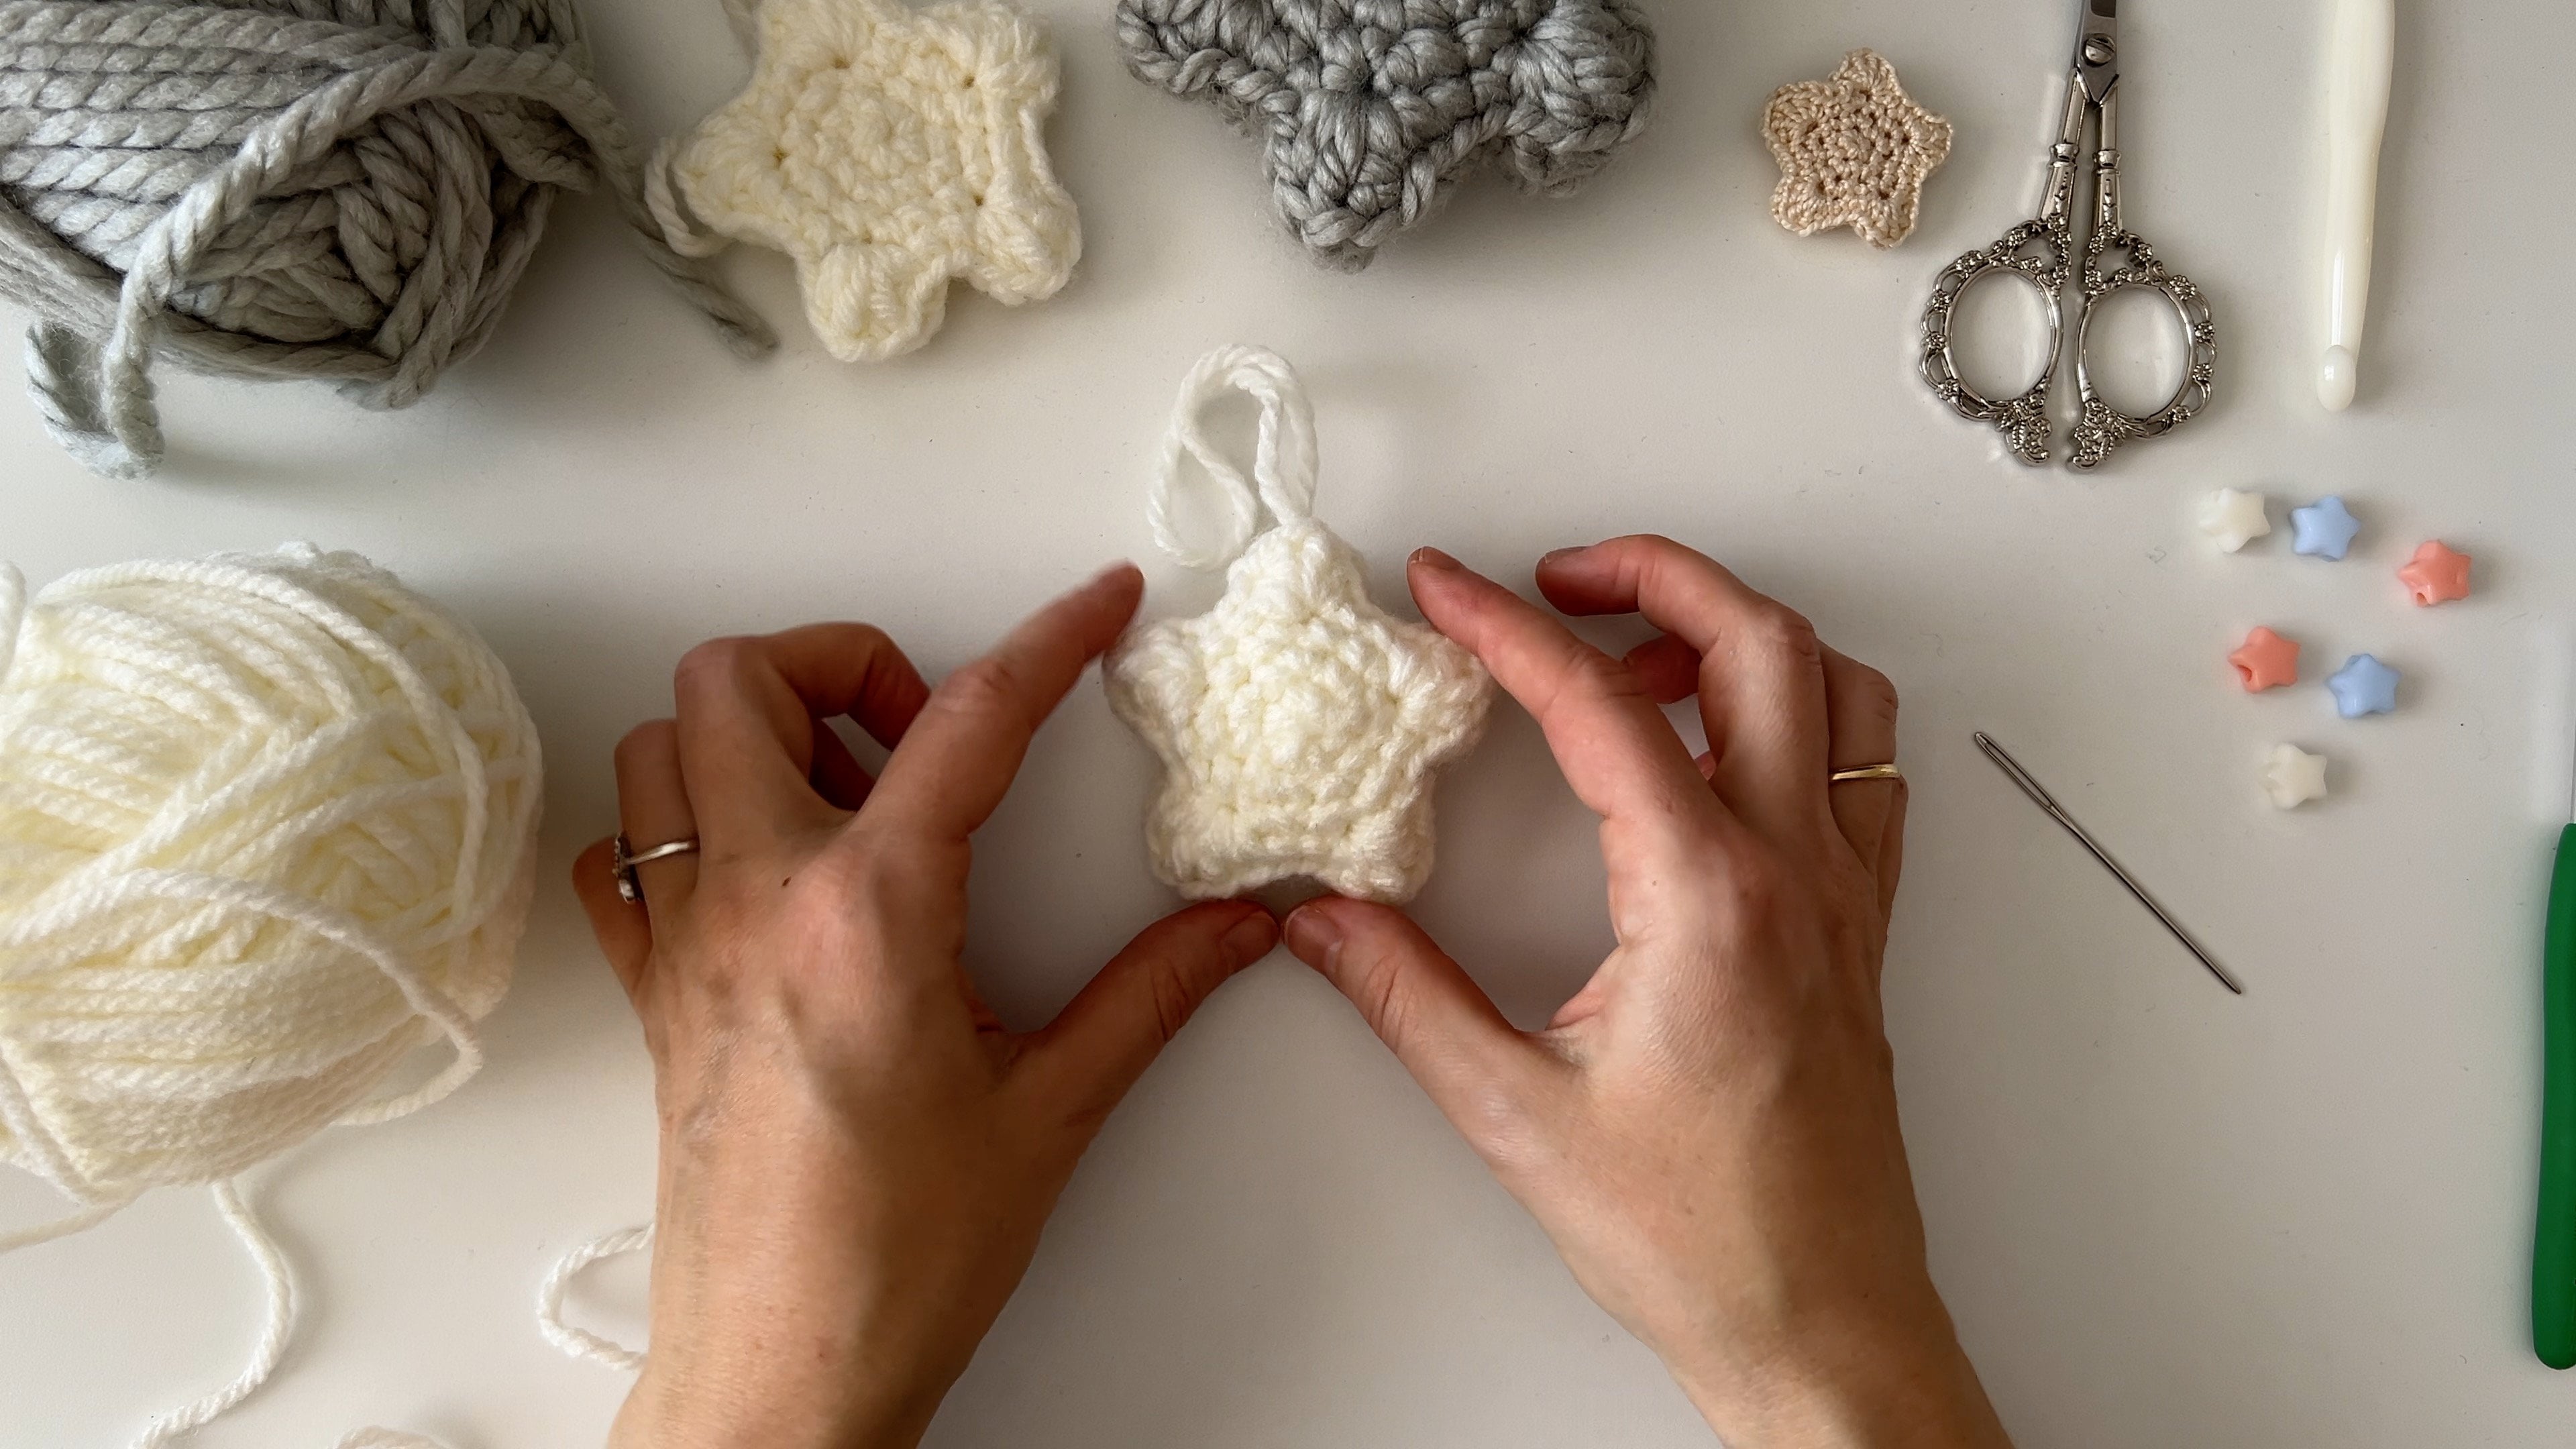
2. About the Project: Hi, everyone. Welcome back. In this class, we'll make a tiny hooded code for
your E groomi doll. This isn't a step
by step tutorial. I'll show you the K point
so you can understand how the code works and
adapt it to your own doll. I'll be using one of my
own dolls as an example, the same one from my
previous classes. But you can make this code for any doll or Emi groom animal. In the project
resources section, you'll find a
printable PDF pattern or the code designed for my dog. Remember, if your doll
is a different size, you might need to adjust
the number of stitches, the code lens, the sleeve
lens, or the hood size. To open the file,
you'll need a password, which you can see right now on the screen, what you learn. How to adjust your
work to fit your doll, how to attach parts
without sewing, how to add small details
that make your coat special. Materials you'll need
cotton or acrylic yarn, hooks that match your yarn, yarn needle and scissors, and your emigrmy doll to try the cod or you can
practice on its own. Project is to crochet a tiny
hooded cod for your doll. You can follow the written
pattern for your first d. Then make a second one
using your own measurement. Add decorations if you
like, or keep it simple. It's your code. When you finish, try it on your doll,
take a nice photo, and share it in the
project gallery. I'd love to see your creations. Sharing them inspires
other students and helps our creative
community grow.
3. How the Coat Body Is Constructed: Before we start crocheting, I want to quickly explain
how this cod is constructed. We crochet from the top down, working flat because the cod
stays open in the front, and the whole piece
is made by always working into the outer
loop of each stitch. This means when we are
on the right side, we take the loop that
is closer to us, the front loop, and when
we are on the wrong side, we take the loop that is
farther from us, the back loop. This makes the fabric softer more flexible and gives
it a beautiful drape. The structure is a
ragland shape with four increased points that form invisible lines separating
the front panels, the sleeves, and the back. Every time we reach
one of these points, we always do an increase. In my partner, I make
one single crochet, one chain, and one single
crochet in the same stitch. Little group creates the regular increase
and the chain in the center is the point to make an increase
in the next row. Between those increases, we have five sections right front, right sleeve, Beck,
left sleep, left front. Row by row, each section grows naturally thanks
to these increases. And the best part is that this construction lets you adjust the width of
the coat and also the slips from the
very first row just by changing how
many stitches you give to each section. We
4. How to Calculate the Starting Chain: Now we are going to
see how to calculate the starting chain so you can adjust the code to any doll. The idea is very simple. The starting chain must include the stitches
for each section plus the four stitches where the regular increases
will be made. Visually, it looks
like this front, increase point, sleep,
increase point, B, increase point, sleeve,
increase point, front. To create your chain,
you only need to decide how many stitches you want
for each front panel, each sleeve the back. The increased points are
part of the starting chain. And when we work
the first row and make one single
crochet, one chain, one single crochet,
each increase point, that little chain in
the center becomes the stitch where the
increase happens. For my coat, I used 14 chains
plus one turning chain. This chain has two
stitches for the front, one increase point, one
stitch for the sleeve, one increase point, four
stitches for the back. One increased point, one
stitch for the other sleeve, one increased point, and two stitches for
the second front. If you want a wider chest, just add most stitches to the
front panels or the back. If your doll has wider arms, add most stitches to the sleeps. My recommendation is
to test it directly on the doll after the
first or second row. If you see it needs
a little more space, you can undo it and add one
or two stitches where needed. It's a very quick
and easy adjustment. In the next video, we will work on the
top part of the coat.
5. Crocheting the Top Part: Et's crochet the first rows. The rows will grow
automatically because all the increases we make
at each increase point. I won't show how to crochet row. You can follow the
written PDF pattern in the project and
resources section or use your own numbers. Crouchet and try the
piece on your doll until the sleeve sections
and the body sections back on front reach
the right with I prefer to work into the outer
loops all the stitches, odd rows in the front loops, and even rows in the back loops. The sleeves must
be white enough to fit the doll while she
is dressed. For example, if she is wearing a sweater, her arm should go through the coat sleep
without any problem. If the width of the sleeps and the body back and
fronts is perfect, but you want the top
part to be a bit longer, you can add one or more straight
rows without increases. In the next video, I will
show you how to separate the slip sections and crochet
the lower part of the coat.
6. Separating Sleeves and Body: When all five
sections already have some height and the yolk
starts to take shape, it's time to separate
the sleeves. We do this when the chest width fits your dog comfortably. The separation is very simple. We leave the slip stitches unworked and continue
only with the body. In my code, for example, I skip 13 stitches
for each slip, but this number may
change depending on how you distributed your
stitches at the beginning. That's why it's important to
try it on before separating. Here's how it works. Crochet the first front section. In the last stitch of the
front, make an increase. Skip all the sleep stitches. Make an increase in the first
stitch of the back section, Crochet the back section. In the last stitch of the
back, make an increase. Repeat the same steps
for the second sleeve. Finish the second front section. By skipping those ditches, the sleeps stay on hold and the body becomes
one single piece. From here, we keep croching downwards until we reach
the length we want. One of the best things
about this type of coat is that you can adjust
it at any moment. I recommend tritone as you work. These are the three key
moments to check the feet. After the first rows, when the yolk starts to curve, check if the chest
is wide enough, or if you need to add one or two stitches to
the front or the back right before separating
the sleeves to make sure the arm area
has enough space. After separating the sleeves to confirm that the body
keeps the width you want. If something feels too tight, like the chest, the sleeves, or the lower body, don't worry. Just unravel a little and add one or two
stitches where needed. You can add a small
number of chains to make the sleeves
or the coat wider. The idea is to make the coat
fit your door perfectly, and these small adjustments are very quick with this
kind of construction.
7. Crocheting the Body: Now it's time to decide how long you want
your coat to be. You can stop early for
a short jacket or keep crocheting more rows
for a longer coat. If you want extra length, simply continue
working the body. This is helpful because
dolls usually wear the coat over other
clothing like dresses. So the lower part needs a bit of extra room to fit everything
comfortably inside. I recommend trying Atonia
doll after a few rows, ideally with her clothes on. This will help you
decide whether you need more length or if the
width is already enough. When you reach your ideal
length, simply fasten off. The body will be ready, and in the next part will
work on the sleeves.
8. Adding the Sleeves: Now we are going to
crochet the slips, which are worked from
the stitches we left on hold when we
separated the body. In my code, there
are 13 stitches, but this number
may vary depending on how you distributed your
stitches at the beginning. Join the yarn in the first
crestig of the arm hole. This is where the slip begins. Make one turning chain. Crochet one single crochet stitch in the first
increased ditch. Then continue across
all the sleep stitches. Make one single crochet stitch in the second increased
stitch of the arm hole. At the end of the row, slip stitch to the
chain to join. Make one turning chain. For the following rows, turn your work so the stitches stay aligned with the body. Skip the chain and the
slip stitch and continue working into the outer
loop of each stitch. Crouches straight across
all the slip stitches without increases until you
reach the desired length. If you want a bit of shaping, you can make a decrease at each end of the last
odd numbered row, one decrease at the beginning, and one at the end. This makes the sleep slightly narrower at the wrist so
it doesn't look too white. You can also experiment with different sleep styles by adding increases using other stitch
buttons or changing colors. When the sleep reached
the desired length, fast enough and with in the end, repeat the same steps for the
second slip, and that's it. Now our cord has both the
body and the sleeves ready. In the next part, we will crochet the hood to
complete the coat.
9. Shaping the Hood: Now we are going to
crochet the hood. The idea is to leave a
few straight stitches on each side and work the increases evenly
in the center section. In my case, I use eight stitches in the
center for the increases, and I leave the
remaining stitches straight, three on each side. The number of increased
rows will depend on the size of your doll's head
and the volume of her hair. My dolls have fairly large
heads and a lot of hair, so the hood needs to be
white and comfortable. Join the yarn on the right
side of the first row. Make three single crochet into
the first row of the quad, then increase evenly across, leaving the last three
stitches straight. This creates the hoods
initial curved shape for the following rows alternate
between straight rows, without increases, and rows
with gradual increases. This helps the hood gain enough width to fit
your doll's head. Always work in the outer
loop of each stitch just like the rest of the cod to keep the
texture consistent. Place the hood on your
doll and check the feet. It shouldn't be too
tight or too loose. If needed, you can add or remove rose to
adjust it perfectly. Once the hood has
the desired width, crochet several
straight rows until it reaches the height needed
to cover your doll's head. To close the hood, alternate the crease rows
with straight rows, just as we alternated
increase rows earlier. When you reach the final row, fold the hood
inside out and slip stitch through both
sides to close it. Cut the yarn end
within the ends. In the next video, I'll show you how to crochet border around
the front and the hood for a neat polished finish. M
10. Edging and Finishing Touches: To give the cod a neat finish, we are going to crochet edging around the front
panels and the hood. This sets structure and keeps the edges
straight and tidy. Attach the yarn to the left row of the cod on the
right front side. Make one chain. Work. H double crochet stitches along each
row on the right front. Continue the edge around the hood using half
double crochet stitches. Work all the way down to
the left front panel. Crochet the edging
on the left front, the same way as on the right. Have do crochet stitches until you reach the last
row of the front. If you want a wider edging, add one row of slip
stitches along the left row of the cod
and repeat the edging. Cut the yarn, weave in
all ends carefully. In the next video, I'll show you how to add some
decorative details.
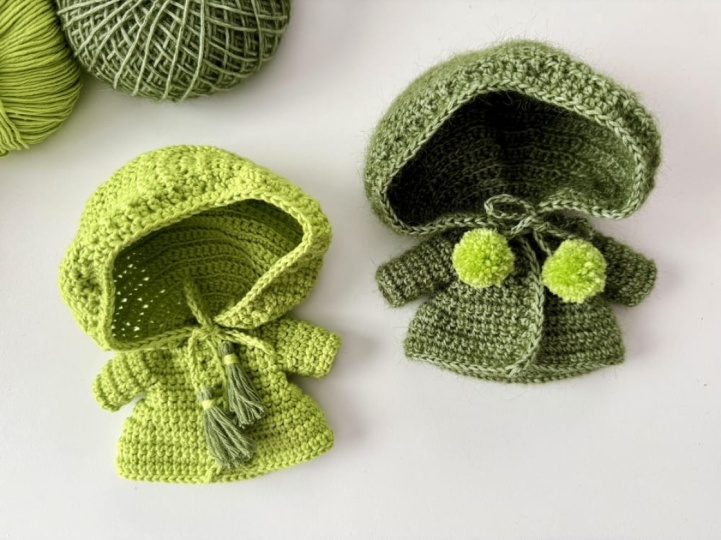
11. Cord and Optional Details: To close the cord at
the neck like a cape, you can crochet chain cord and thread it between
the neck and the hood, insert it with your
hook in several spots, keeping the spaces between
them roughly even. You can decorate the ends of the coat with
pom-poms or tassels. Use different colors to make the coat more
visually interesting. I personally love
edding pom-poms. They're so cute. These
details are optional. The coat already
looks lovely with just the edging and the
simple cord, and that's it. With the edging and
the court finished, our doll's coat is complete. Body, sleeves, hood, kat edges, and a soft little
cord to close it. Now your doll can wear a
coat in style and comfort.
12. Wrapping Up: Hi, everyone. Congratulations on finishing your tiny hooded cod. I hope you had fun making it and learned some new
techniques along the way. Let's quickly review what
we've covered in this class. How to crochet the
cod from the top down and adjust the
width for you to, how to separate the sleeves
and work the body and slips, how to shape a hood
that fits perfectly, and how to crochet kat
edges and at a cord. And some fun details like
pom-poms or tassels. Remember, you can always
adjust the size, the length, and the decorations
to make the coat unique for each doll or
any groomy character. Experiment with
different yards and colors to create new outfits
using the same idea. I'd love to see your
finished coats. Share a photo in
the project gallery and inspire other students. Seeing your creations
helps our community grow and it's a great way to
show off your creativity. If you love this class, please leave a review. It helps others
find the class and join in the fun of
crocheting this mini coot. Thank you for taking
this class with me. I hope this tiny hooded cod brings more charming personality
to your em groomy dog. Keep crocheting, enjoy
experimenting and see you in the next Skillshare class. He
 Olga Bortniak, Crochet designer, dollmaker Olgamigurumi