Transcripts
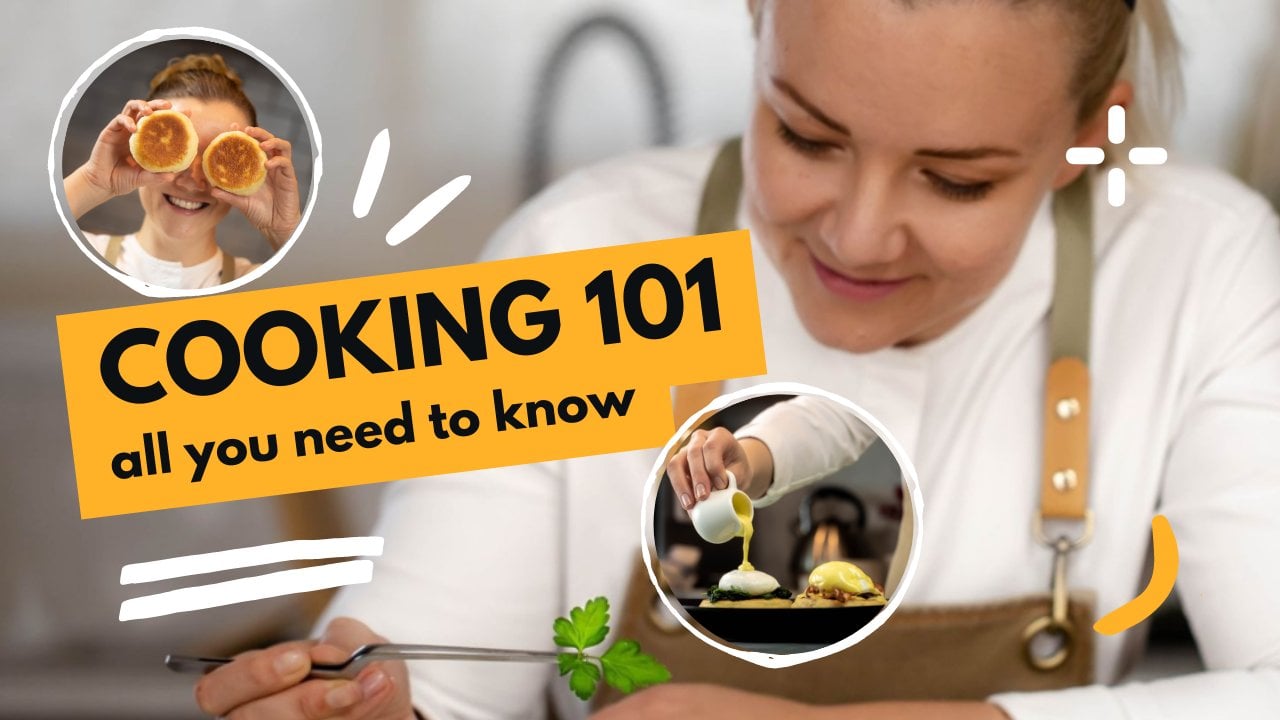
1. Welcome | Introduction: Knowing 1,000 recipes is not going to make
you a great chef. But mustering calendar
techniques and understanding the thinking process behind
those recipes development. Well, my name is Natalia, also known as
Schaeffer the cola. I'm a professionally
trained chef, catenary artists, a YouTuber. And as you might have
already noticed at calendar instructor
in today's class, I'm going to share with
you the step-by-step, easy-to-follow guide to
creative recipe development. Instead of making canola, we actually go into
make a little darker. You might find yourself
sometimes looking at those amazing fine dining dishes that Michelin star chefs
post on their social media. And you tell yourself, Wow, how did she come up with this? Like it looks incredible, but also, I'm achievable. I wish I could create
such dishes as well. Well, if that's you,
you're in luck. Because this is exactly what this recipe development
class is about. After taking this class, you'll get yourself from
the point of someone to silently admires the
works of payments shifts to position
of a person who can develop your own unique, beautiful, and most
importantly, delicious dishes. Dishes that tell your stories.
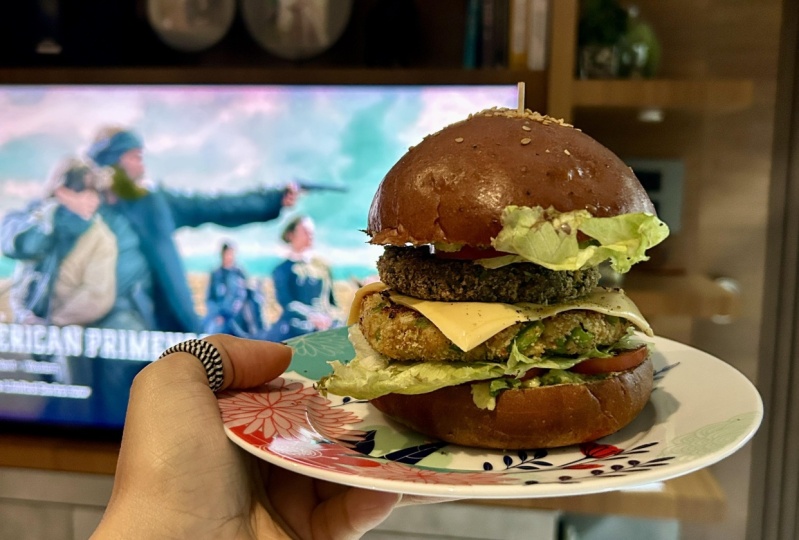
2. Case Study & Class Challenge Overview: I'll share with you today One of the most common approaches
to recipe development and explain it to you in details by taking you behind
the scenes of the recipe development
from one of my most recent dishes that you might have already seen
on my YouTube channel. But what you haven't
seen there is how did they come up with
this dish and therefore, how to replicate this process to create dishes of your own. In this class, we'll go over together each step that I follow in my process of developing
new and modernistic dishes. Thinking behind the
ingredients selection, the theme restriction, the footplate in and testing
of those recipes and you, my friend, will
have an opportunity to also create a
dish of your own. Finally, I'll also share
some extra tips and tricks that will hopefully
inspire and help you out. You continue your
journey and create your first standalone
chef worth the dish. In the next chapter,
I'm going to brief you on the initial dish steam. We will start the thinking
and planning process. Then we will continue development across all
the following chapters. With recipe development,
you can take it as far as you wish to reel it. Most of the shares, they
continue tweaking and improving their dishes
with each season. Sometimes it's done
to improve the taste and flavor to the
chefs likeness. Sometimes it's based on the
guest feedback and sometimes it's done for the sake of seasonality and to
improve the workflow. All of this we will touch
on in today's class. What's important here
and what would be adviced from you to
do in order to get the most benefit out
of this class is not just to listen to me and
follow along with me, but also start making
notes on your first dish. As I explain each step
and ask questions, the chefs usually ask themselves when they
develop a dish, apply the same to yourself
and start developing a dish. So by the end of this class, you will have a first draft of the dish that will
be unique to you. This is actually your
challenge for this class. Create the first draft, the description
droplets in and test. Share your notes and findings with us by submitting them to the project and resources
section here on Skillshare. If you have any questions on
how to improve your dish, you also drop them down alone with your
projects submission. I'll make sure to give my
feedback to all of my students.
3. Where to start?: There are many ways how you can approach
recipe development. As a professional chef,
you'd be usually restricted or narrow down to a theme
of your restaurant, e.g. if you work in an
Italian restaurant, you'll be required
to create dishes that are true to
Italian cuisine. But if you're just starting out, you have no restaurant run
or you're a home cook. Where should you start? Well, that's easy. You should also start by
narrowing down your focus, just as professional restaurant
chefs do when it comes to recipe development or actually
any major task completion. First thing you should
do is to break down this huge and seemingly
unachievable goal or task into smaller
size puzzles. So step number one
would be to choose a theme or a restriction
for yourself. In our specific case, I, as a professional chef, specialize on fine dining
and modernistic dishes. And there'll be also
creating a dish to share with my
YouTube audience who loves learning more than coloring techniques and
molecular gastronomy. So my restrictions for this dish would be
for this dish to be modernistic and must incorporate molecular gastronomy
elements or elements. These are two main
restrictions that they have right now, still pretty broad. One fun thing that
I'd like to do with my dishes is to
create an illusion. So why not do the same
for today's dish? So the third restrictions
that we're going to have is to create an
illusion with my dish. Finally, let's pick a dish. One comfort ease that
had been wanting to modernize for years already is punished payer erase uses native to Valencia
region and Spain. To sum up, today, I've chosen a common dish to base my recipe on by earlier. And I've also chosen three restrictions for
my recipe development. Create some sort of an
illusion with a dish. Incorporate molecular
gastronomy culinary techniques and give the final dish
presentation and more than look. In other words, I'm trying to
create a remixed version of the classical period
that will represent my unique approach to
cooking and food philosophy. Now, it's your turn to sit down, take your notepad
out and write down restrictions for
your first dish. For the sake of this exercise, I'm going to advise you to stick to the
same restrictions. Just pick another
comfort casual dish. So it will be easier
for you to follow along each step with me
through the whole class. But if you feel adventurous,
you can of course, choose your own
restrictions for your dish. I'd love to see all your projects at the
end of the class.
4. What do I know about the theme?: Next step would be
to ask yourself, what do I know about this dish? What do I know about biophilia? Do a preliminary research, make sure that you know
the traditional recipe. It may be the most
common variations. Google the recipes, watch a YouTube video on
how to make one. Search for the traditional, the OG recipes to really understand what makes
this dish truly unique. If you don't have any experience
with this dish at all, then definitely
without any excuse, first, cook the
traditional recipe. Makes sure you accelerated. Also, many chefs, when they tried to modernize
classical recipes, they serve a portion of the classical dish on the side of their
modernized version. So remember this, it might be a cool place, an
idea at the end. So step two is do your research. And while you're
doing this research, create two columns in your recipe development
node bird or notes app, as I do in the first column, include all the most
important the integral parts in descriptions of the recipe that trying
to modernize things that are non-negotiable in
a good dish preparation, like in our paella case, I'm going to write in first
column things like soccer. So Frito bomba
rise and arguably, but still I'm going
to include this in my version of paleo seafood. In the second column. Slowly start noting down things that are allowable to play with, things that you can
change and modernize. So in the second
column I'm going to write the seafood texture, portioning and
thinking to make it. Moreover, biter
will allow em use bush style dish and so
corrupt presentation. Now you can take a moment, pause and write down the
notes on your first dish. What are the things
you know about it? Which things are non-negotiable, and which things you can
allow yourself to play with.
5. Inspirational Board: Once we got our initial
nodes on the dish done, it's time to loosen up and
create the inspiration board. You can do it in an
old fashioned way. Print and cut out images
from the magazines. But let's face it, you probably won't
have time to do it. So I'm going to
show you what I do and you might be
already doing it as well for your other projects. Open up Pinterest. Yes, the pin app and
create a new board. I'm going to call
mine Skillshare, recipe development class,
paleo in brackets. Start opinion. They're images that inspire you when you think of this dish. Things that I advise
to include here are photos of a traditional
paleo, blatant ideas. Photos of how those must
have elements of paleo from the first column look like and maybe some
variations of them. And very importantly, color
themes and combinations. You can also include some aesthetical
images on your board. If you want to translate
a certain emotion or mood to your guests
through your dish, images that represents
this mood or emotion. At first, everything that you like and would like
to show in a dish. When the moodboard is done, go through each image and revise the ideas that you
had when you paint them. Here is the mood board that
I have for this class. I've been there a little bit, a couple of more
pictures here as well. Like this. Color schemes with actual
picture representation of it. I really like how it looks, such golden colors
and then play it on something simple and
maybe dark colors. And I also like the idea
of using this technique of making this a quadratic here and then molding it
into shape, overcome Nolli. So there'll be a great illusion, something that looks sweet, but then it's savory. And for the edges, I'm going to use the fish or fish career like
instead of the cream here. And maybe incorporate some molecular gastronomy
and maybe pearls. Like here we have
pistachios and instead I'm going to make e.g. fresh P pearls. These are very common in YLLs. I think it's a great idea. And we will play
it on something, maybe like a gray dish
or something like that. So I think this is a
preliminary idea for our dish. Now I'm going to draw it down. As a result of this exercise, you will definitely have some concise ideas
about your dish. So write them down. Make sure that you understand the flavor profile
that you're going for, the cooking methods,
the way you would like this used to be presented and would like to look like. And most importantly,
the colors. It's time to make
your own mood board.
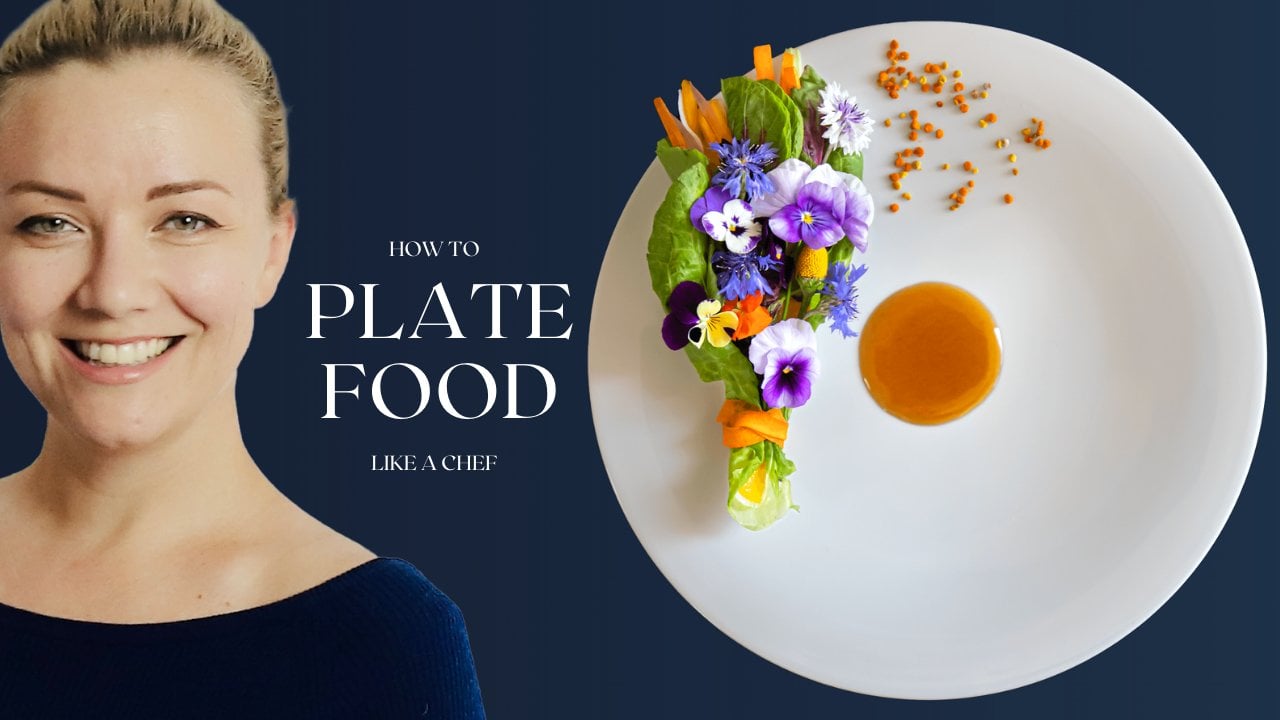
6. Creative Plating: I have a whole class here on Skillshare dedicated
to footplate. And so today I'm not
going to go into much details about different
plating techniques and put presentation. But if you want to
learn more about it, take a class, it's worth it. However, what I'd
like to discuss here is that no matter what
other people will tell you, the way you present your
dish is extremely important. Full stop. Footplate in is the
first impression your guests have on your food. If they don't like
how your food looks, they automatically fallen the
impression that it doesn't taste good either,
and vice versa. If you absolutely killed
it with food presentation, you're already on a good start. Therefore, I'd recommend
you to brainstorm your foot plate and
ideas right after you've restricted yourself
to a theme and before you start any
cooking at all, why? Because footplate, not always, but often enough, significantly influences the whole
dish development. To illustrate this, let's
think about our paella dish. If you remember, the
restrictions were to create a modernistic illusion dish with molecular
gastronomy elements. From my mood board assignment
from the previous chapter, I got an idea of presenting
the Saqqara to start with, with by alien inside and cover
the ends with a seafood, but there are bred and decorate
with some fresh P pearls. So at first glance, this dish would look
like a sweet canola, but in reality it's going
to be epithelia bite. This whole idea is based
on the plating aspect. It changes up the
whole dish preparation and cooking completely. If I haven't thought about
the plating upfront, I would never ever be
able to come up with the same dish on the spot. So this blatant idea changes up the whole
cooking process. Now that you have some food
place in ideas for your dish, draw them all in your
recipe development Notepad and I highly
recommend to use colors. Color palette is very important when it comes
to food presentation. It often makes or
breaks the whole dish. So plan your color
choices before cooking.
7. Socarrat Tuile - Test, feedback & development: Here comes the part of the recipe development that
you've all been waiting for. Now we are actually
going to cook. I heads up, this is the
most tricky and probably would be the most
time-consuming part of these Paleo
recipe development. Luckily, I've personally already worked with this rise
to the king before, so I don't need to test the execution of this
technique in general, I already know the
work in recipe, the bacon settings, the times. If you've however
chosen a technique for your dish that you've
never, ever tried before. Then step one for your
testing would be to test the technique of execution itself on a small batch of food. Makes sure that you really understand how this
technique works, that you can replicate it and what are the tricky parts, e.g. in this Socratically,
I already know that in order to
create a crunchy real, first, I need to cook the
rise to the food doneness and then pureed food
processor, not too much. So they can still see some of the whole race granules and the rest is
pre-read to create starchy texture so that the
whole race granules can actually stick to each other when they're being
drained out in the oven. From my previous test, I also know that the
most tricky part is to move this rise to
illustrate specific shapes. So this is the
major part that I'm going to test out today. I'm going to test
different shapes, sizes, rolling
methods, and assembly. Maybe something
else comes along. We will see how the
desk and goals. So first, I'm just going to flatten out the rice
bread with my hands, dried halfway through
in the oven and then molded directly onto the
cannula mode and drive further. This is the method
that I've used before. Let's see how it performs today. This is the end product
of this method. First and foremost problem with this method is that the shape is irregular and I want the M shape for my
dish to be very neat. So maybe what am I going
to do in the second test is tried to roll
out the raspberry and then cut it with
a cookie cutter to create some identical
and uniform shapes. Second problem is the same. I don't like how it looks like, especially considering
that this would be the side that will
face my guests. So in order to
solve this problem, the solution that they
can think of right now is to try and move the
right spirit directly onto the canola molt while it's still wet and flyable without draining out halfway
through and then just try to flatten out the
seam completely. So this is the second
thing to test out. Finally, there was a huge
problem with stickiness. The rice can only get
completely stuck onto the mode. One thing that I can test
out is to try and cover the mold itself with a
parchment paper or foil. I have my doubts about this
method, but let's try. After the second test, we got these results. The idea of using
the rolling pin to rollout the right spirit
was a great idea. It worked very well and to
use also the cookie cutter, I'm going to stick with that. What was not great or actually a complete failure was
the idea of using foil. I could easily get out the
rights to use the mold, but I couldn't get the
foil of the rice fields. So what I'm going to
do in the next test, I'm going to try and use
rice flour and spread it, or just on one surface
of the rights to use, the one that touches the mold so they don't stick onto them. In order to preserve a
beautiful golden saffron color. On the other side,
rice flour might also solve another big issue
that we have right now. When the rice bread dries
out on top of the moles, it shrinks in size and
creates this all full cracks. This is a no-go and it
doesn't match the needs. Look that I'm going for. Also some of the tweets, they just fall off the
walls and just got completely destroyed like
that because of those cracks. So let's see how the
rice flour helps us. The rice flour was yet
another great idea. It definitely solves
at least one of the previously discussed
problems with stickiness. The cracks, you see less
off but they still appear. This is a no-go for me. Also, there is another problem
that still remains for us. The problem with seems
they appear irregular on each canola and also they stick little bit to
the mold itself. We've done at least
three tests by now. We found some success,
but not complete. And as a chef, I need to look at the
time now and evaluate if it's worth for me to keep on testing or it's time
for flexibility. I personally think
it's the second. I can probably work on this recipe for a
couple of more days. Test out and come up with the perfect tool shape
and the cooking methods. I'd say I'd rather adjust
my initial idea and adapt. Remember that arts or arts, where you're the chef
and you are the artist. Normally, you know how your dishes supposed to
look like at the end, many great artists created their best works of
art by accident. They didn't mean
for the results to look like how it did at the end. And yet, this is the
creative process. Go with the flow and do what
feels right in the moment. As Bob Ross used to
say happy accidents. In my paella example, I'm thinking of the two
problems that I have right now, seems and cracks. And it simply
decide to change up my initial canola shape
to a smaller taco shape. I believe that it will
solve both of my problems. There won't be any seams at all. And potentially there won't
be any cracks either as there will be a space for the
right tools to shrink. But I will need to rethink and draw another version
for the plate in. Here it is. And I think it
looks even better. Okay, Finally, as expected, this is a perfect and easy to
replicate cooking methods. Just look at all of
those media taco shells. They look perfectly identical. There is no stickiness
or cracks, just perfect. Also, the size of the portion size is much smaller
than initially intended, which makes it even
more suitable for the amuse Bush one
byte dish style that was going for
happy accidents.
8. Seafood Pâté - TF&D: When it comes to the seafood in our modern Bailey and use bush, we already know that we
will need to pipe it out. And the shape of piping became even more important
to take into account the new version of the plate in that we came
up in the previous chapter. So taking this into account, I've decided to
go for a seafood. Instead of just the
prereq, erase my God, keep a shape as well as
water featuring buttons. So let's go for the Petain step. It will also give a
more sophisticated wipe to the whole dish pairwise. For this effect selection, I'm going to go for
just protons and add a little bit of fish sauce to accentuate the
seafood flavor a bit. One of the reasons
that I've chosen specifically prompts for this button is to hit two
targets with one bullet. I will use the pronoun
meet to puree in the potato itself and the prom shelves to make protein fused
button to give my part. So far we've considered
mostly only the looks of our Bailey
and use bush. But this one is for the taste. Once the party is done, I'm going to test out
different piping shapes. I actually didn't know the shape and look
that I'm going for, but I need to test out different piping tip sizes basically. So I'll test it out on
the side of the scraper. Smaller size would look much better since our
dishes so small. And that's basically it prompt, but there was the easy one. We'll have to see how it
looks in the final assembly. But so far, so good. It's approved for
the next stage.
9. Fresh Pea Pearls - TF&D: Last element of our modern
paleo is the fresh P pearls. We're going to make them from their fresh pea juice
mixed with agar, agar using the direct
verification technique from the molecular
gastronomy, agar. Agar is the natural
derived hydrocolloid that will help us to create this small spheres are
pearls from the pea juice. In terms of the techniques, It's one of the simplest
molecular cuisine techniques. All you need is a liquid
mixed with anger, anger, and then IS called oil. However, what I need to test for this recipe, the pearl shape. Ideally, you'll need to
use a special dropper for this method to create perfectly shaped and identical pearls. But I'm going to show you
two alternative methods. First one is to use
a squeeze bottle. This is the easiest way, but then it's hard to control the size of shape of pearls. You'll end up with very silicon pearls wireless for the recipe, we need all of them
perfect and neat. Second method is
to use a pipette, which is much more precise way, although more time-consuming. Looking at comparing
the results, I'd say with definitely need to go for the
pipette methods. Now it's your turn you guys
to test, get feedback, adjust if necessary, and test again elements
of your dish. This might take some time, maybe even a couple of days. So don't forget to have fun. Don't stress out. If one way doesn't work, research for the
solution online, maybe drop a comment, maybe I will be
able to assist you. But in worst-case scenario, just take a deep
breath and adapt your dish to the new reality like I did with the right tools. Remember, it's your dish. You are the artist. And only you know
how it's supposed to look and taste
like. You got this.
10. Plating, Taste, Eating Experience: The last part of testing is to test out the actual plating, taste and flavor and
the eating experience. And that's also the part
when you might want to get some external feedback from your friends and
family or colleagues. In our case, disassembly
came out just a splint drawn in my notes that there was nothing
to adjust here. It came out to be just perfect. One teaspoon of paleo rise
with the Frito fitted perfectly inside the
so-called at-will brown. But they're piped out and stayed in place
just perfectly as well despite my initial doubts due to the temperature control, the fall in place as well. So there was nothing
to correct here. As for the plating,
I've initially was planning to go for a
dark medium size plate like this one and
play the dish on top of some black rice
for some texture. However, since we've changed the dish shape and size
in the course of testing, they appear to be no way to play the pale attacks without
touching the rice. And when it touches the rice, rice sticks to it in place. There is one rule of not including any node edible
items on the plate, especially not sticking
them to the edible parts. Therefore, I had to get rid of this idea of seven
Paley on Blake rice. I could have went for
a special construction or special plate, but instead, I decided to go for a more simple and
classic way of plating. I've just picked out a
thin line of Patel on the plate and attach
the taco shells on top. This serves two purposes to keep tacos in place and prevent
them from rolling. And you avoid the non-edible
elements from the plate. It's also a much easier
and less expensive way in comparison to create some special constructions are purchased or purchasing
special shape plate. Finally, let's taste it. The flavor is perfect. Despite quite pronounced
buttery flavor in there, I can still taste all the must have elements
of a tuple alien, disaccharide, the
rice with so Frito, the seafood and of course
the fresh peoples. Flavor wise, I think
we've nailed it. Also the eating experience turned out to be
much better than the initial canola version that goes a much
smaller in size. And therefore they could
truly be eaten in one bite. Like to amuse Bush should be when it comes to
testing your recipes, it's important to note here that this stage of recipe development is very important and should not be overlooked or underestimated. Even if you are a
professional chef with years of experience, you should always test
out your recipes. When you're just starting out. There are many factors that are known to you and unexpected
in your cooking. Test out your recipes as
many times as you need to. But also don't
overcomplicate it. The best, the most delicious and the most enjoyable
recipes and dishes, often the most simple ones. So follow your heart and instincts and it will show
through your cooking. Now, it's your turn to test your first recipe version
and get the feedback.
11. Bonus Tips!: Apart from everything that we have already
discussed before, there are a few more things to consider for your
recipe development. Two very important things
at time and workflow. Think how much time
realistically do you have for your dish to be
fully cooked and served? No one wants to wait for
their food for hours. And some foods takes hours and sometimes even
days to be cooked. Is this the case for your dish? It is for mine. So make
sure that you plan your workflow ahead and
prep as much as possible. Let's have a look at our
paella dish in this recipe, I'll definitely prep
the Kodak cartwheels in advance and store them in air-tight container
until needed. I'll make people a day
before and refrigerate them. And they'll also prep
the proton potassium in advance while it's the
traditional paleo for staffing would be cooked just before servant and kept
warm so guests can enjoy a warm dish like a paleo should be
engineering service. All I'll have to do is to
assemble the paella tacos. Now think what you can plan and prepped in
advance for your dish.
12. Final Thoughts: Alright, so we're almost at the end of this recipe
development class. It was packed and I didn't blend to include so
much in this class. I hope it wasn't
overwhelming for you guys. Here is the step-by-step guide to recipe development that you can follow to create your first unique and
truly yours dish. Step one, narrow
down your focus. Pick a dish and restrict
yourself to 23 characteristics. Having to create an
illusion with a dish, incorporate some molecular
gastronomy culinary techniques and create a more than look for the final dish step to
do the preliminary research. Learn how the
traditional dishes made. Maybe research some
variations and make sure that you
can actually cook it. Step three, create two columns. The first column with the most important and
integral parts and descriptions of the recipe of the dish that you found
through your research. And fill the second column
with things that you think you can play with in your
dish interpretation. Step four, make a mood board
that will inspire you. Make sure to include there
some place and ideas. Photos of how the must have elements of
the dish look like. Some color themes
and combinations, and also includes some
aesthetical images as well. Then go through the Moodboard
images and come up with a dish idea, flavor,
and fleeting. But you think that
would work best based on your moodboard. Joy down, using colors and write down each element of the dish with its
cooking techniques. Step five, test, get feedback and develop each
element of the dish. This process can take as long as you want it to
over-complicate it. Huge though, simplicity is kink, but also don't
underestimate this tab. Or God forbid, omitted at all, destined is crucial to
any recipe development. Sometimes things that seem
obvious to note, not a splint. Step six, danced and get feedback from
your dish assembly, plating, taste, and
eating experience. Step seven, no down your
time constraints and plan your workflow accordingly and prep as much as possible. Hungry people, they don't
like to wait and they turn into hangry pretty fast. And then said, here are seven steps to successful
recipe development. I'm not saying seven easy steps. But now that you have this big recipe
creation undertaken, broken down into smaller tasks, it's much easier to
take the first step. So now you have no excuse. If you've been following me
through the whole class, you should already
have some nodes and ideas written down. Now it's time to
take action on them. Do the class challenged project and share with me
your results by submitting them
here on Skillshare to the project and
resources section, you can also share your
creations on social media. Write down what you've cooked
and tag me in description. I can't wait to see what
dishes you come up with.
13. Before you go: Here are a few more things
to mention before you go. First of all, thank you
for taking this class. It's a pleasure for me to
have so many people taking my online classes
and helping you guys to advance yourself in
your career journey. If you've enjoyed this class and you've learned
something new today, please take a moment and
write a quick review. Also follow me here
as an instructor on skill share and subscribe
to my newsletter. There should be a link
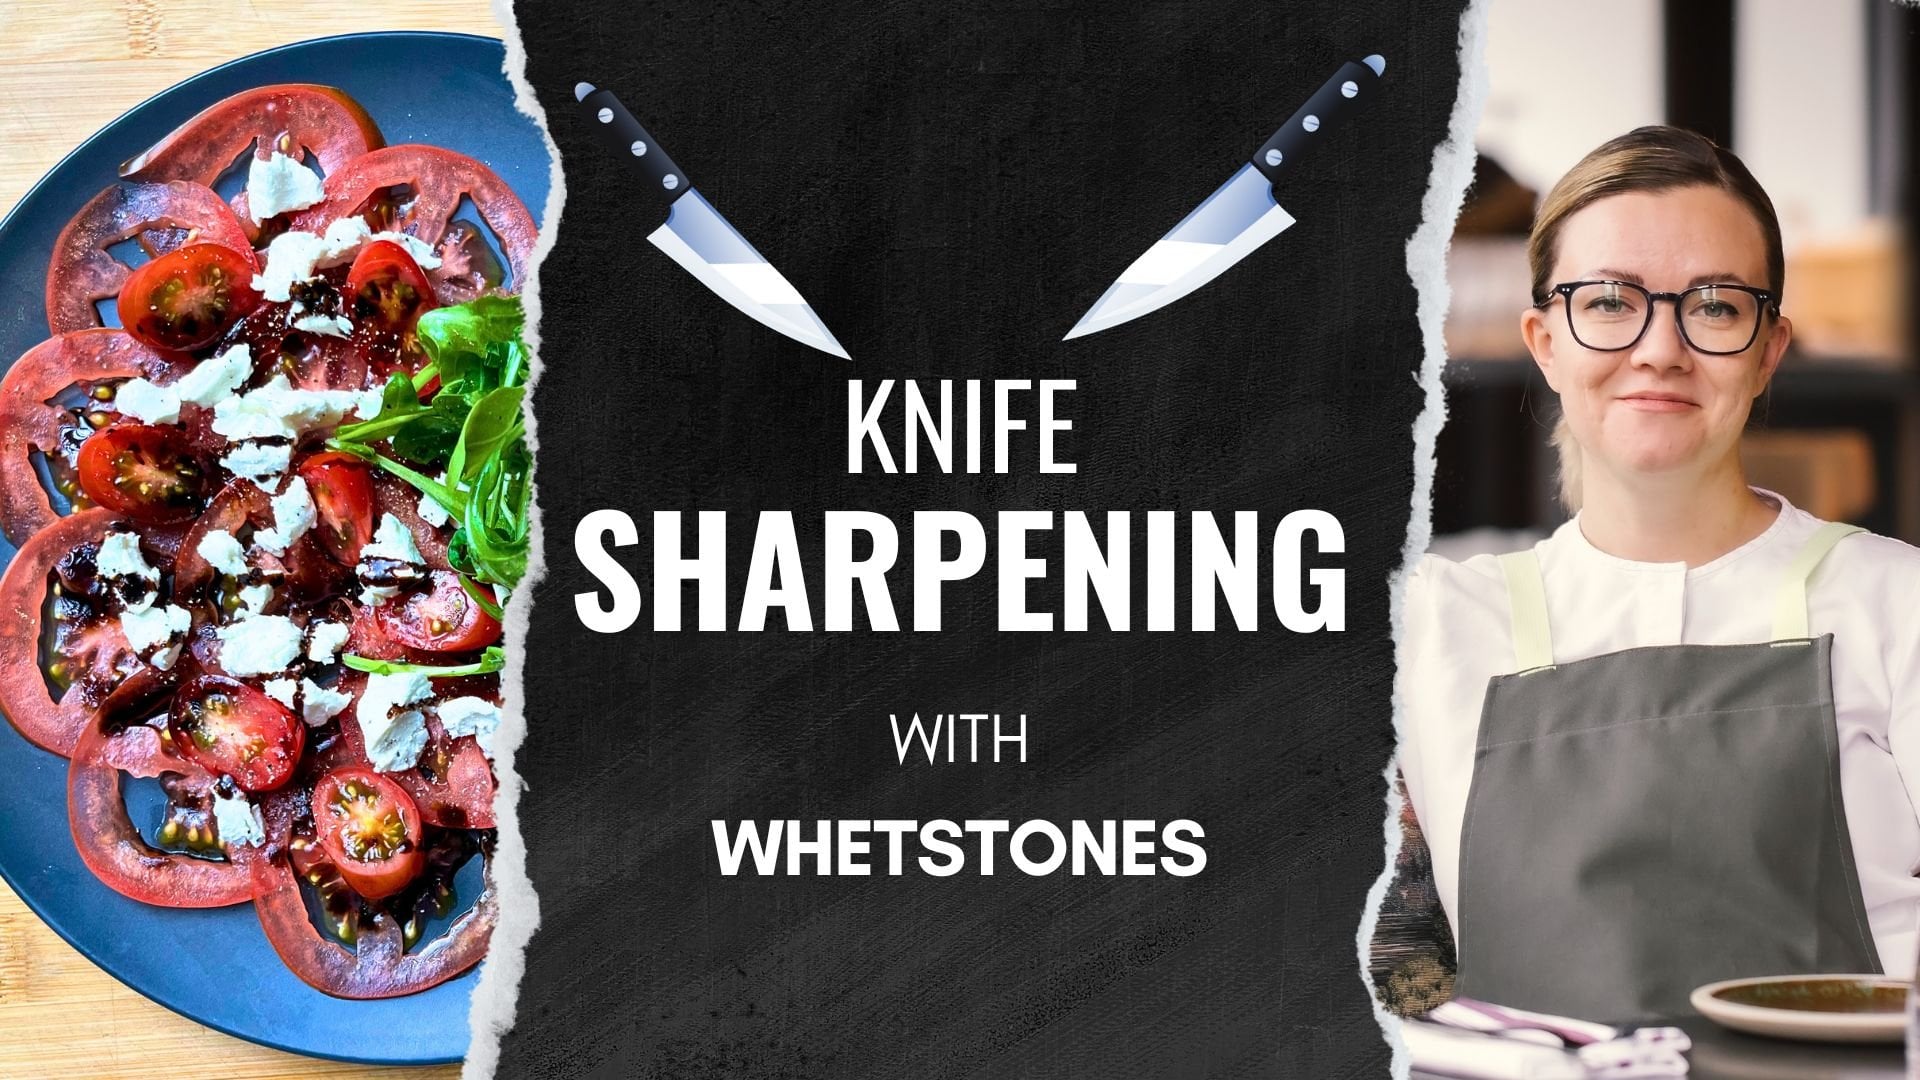
in the description. Don't forget to check out my other classes on
my profile here, like cardiac education,
footplate in and French sauces. And they said, congrats
on completing this class. You're one step further in your career journey
and where most of the home cooks who
had never thought of recipe development seriously
and never took this class. You're the best
Yeoman calorie hero. Now go and create some
beautiful and delicious dishes. Now it's time to paste it. Oh my God, this is
so good. Periods.
 Chef Rudakova, Chef & Culinary Artist