Transcripts
1. Introduction: Hello everyone. My name is still in Turkey and RVU instructed throughout this course, painting exercises or painting for me is something that gives me a lot of freedom of expression and provides me with an opportunity to test out my artistic capability and also Fink, feeling free enough to actually understand whether I leg sat in mediums or would you prefer to move into different ones? In this class, we'll be going through doing four different PT, which we can do for any person or any person. We suddenly a bit of an experience or even with none, can set off on some of these painting. Because they move on from an element of somebody who's stacking on with painting. A portion of the WACC which needs a little bit of experience, but I'll guide you through each step. I want you to join this class if you feel like you are interested in learning how to paint different forms of variety, including abstract in landscape art pieces. Or if you're just interested in having a little bit of creative freedom, are going to be going through for creative exercises for you to do, which will provide you with a lot of opportunity for you to develop your artistic capabilities. And even if you're not an artist yet, it made provide you with an opportunity to just relax because painting is a very massive process in a very involving process. And I'm starting that you'll be fully engaged.
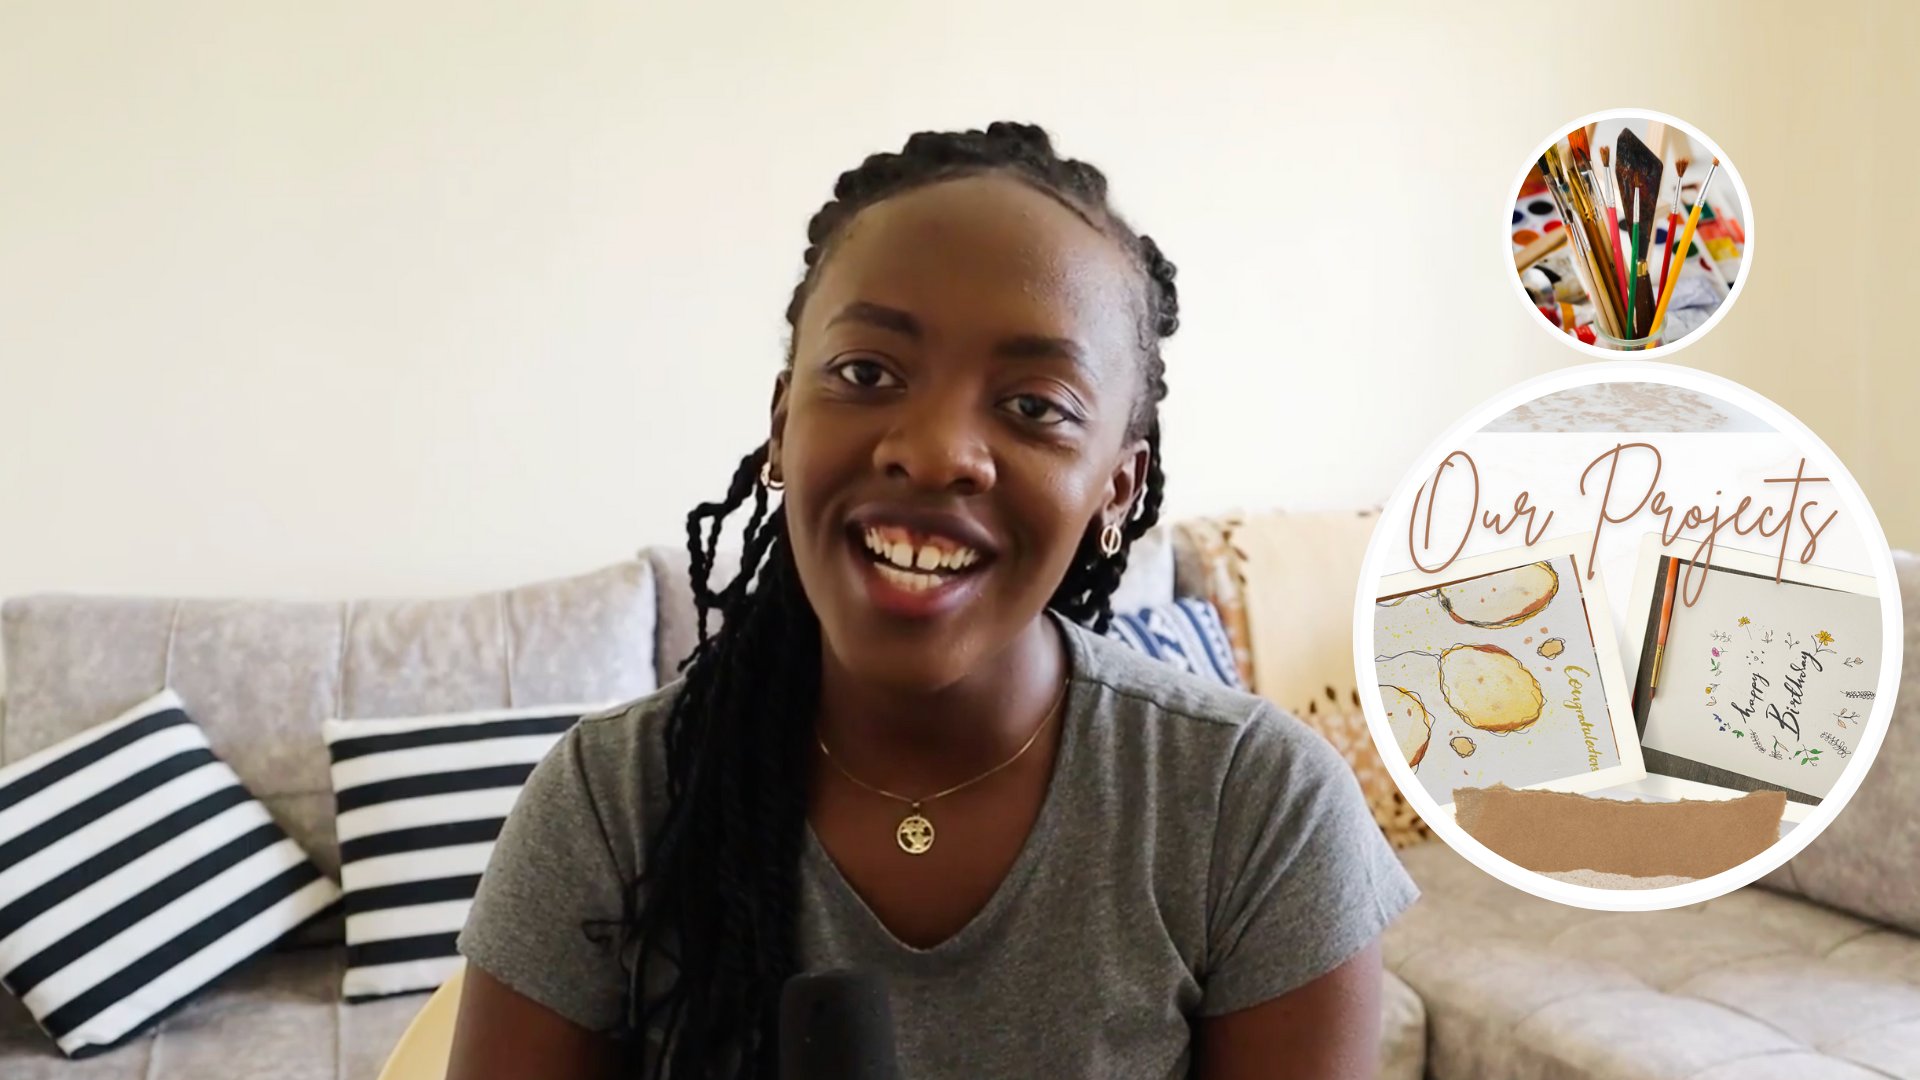
2. Your Class project: Okay, now onto this part, we're going to be going
through your class project. In this class project,
I want you to try at least one of the four
paintings that I'll share here. These art paintings are
created from different scapes. Say, for instance, there
are different ones in the abstract field and there's one on the landscape field, and a little bit of
combination of doing color blending and different
colors and mixing of colors, which is important
for anyone who's looking into developing
their artistic capabilities. Because these art pieces
are very easy to do, I don't want you
to feel that you are not really able
to work on them. You can just choose on one piece that you
want to work with. Ideally how the class has been created is that we
start off with the most easy one and go on into
a little bit of complexity, and we use a variety of medium, so it might work
with what you have. If you have water color,
you're free to try this out. If you have cash paints, I welcome you to try
this out as well. If you have acrylic
or oil paint, you're also welcome
to try this out. For these pieces, I've
done them on paper. However, you're
free to do them on Canvas boards or on canvas. I just preferred
paper because it was the most accessible
medium which I had in hand and is accessible
to each and every person.
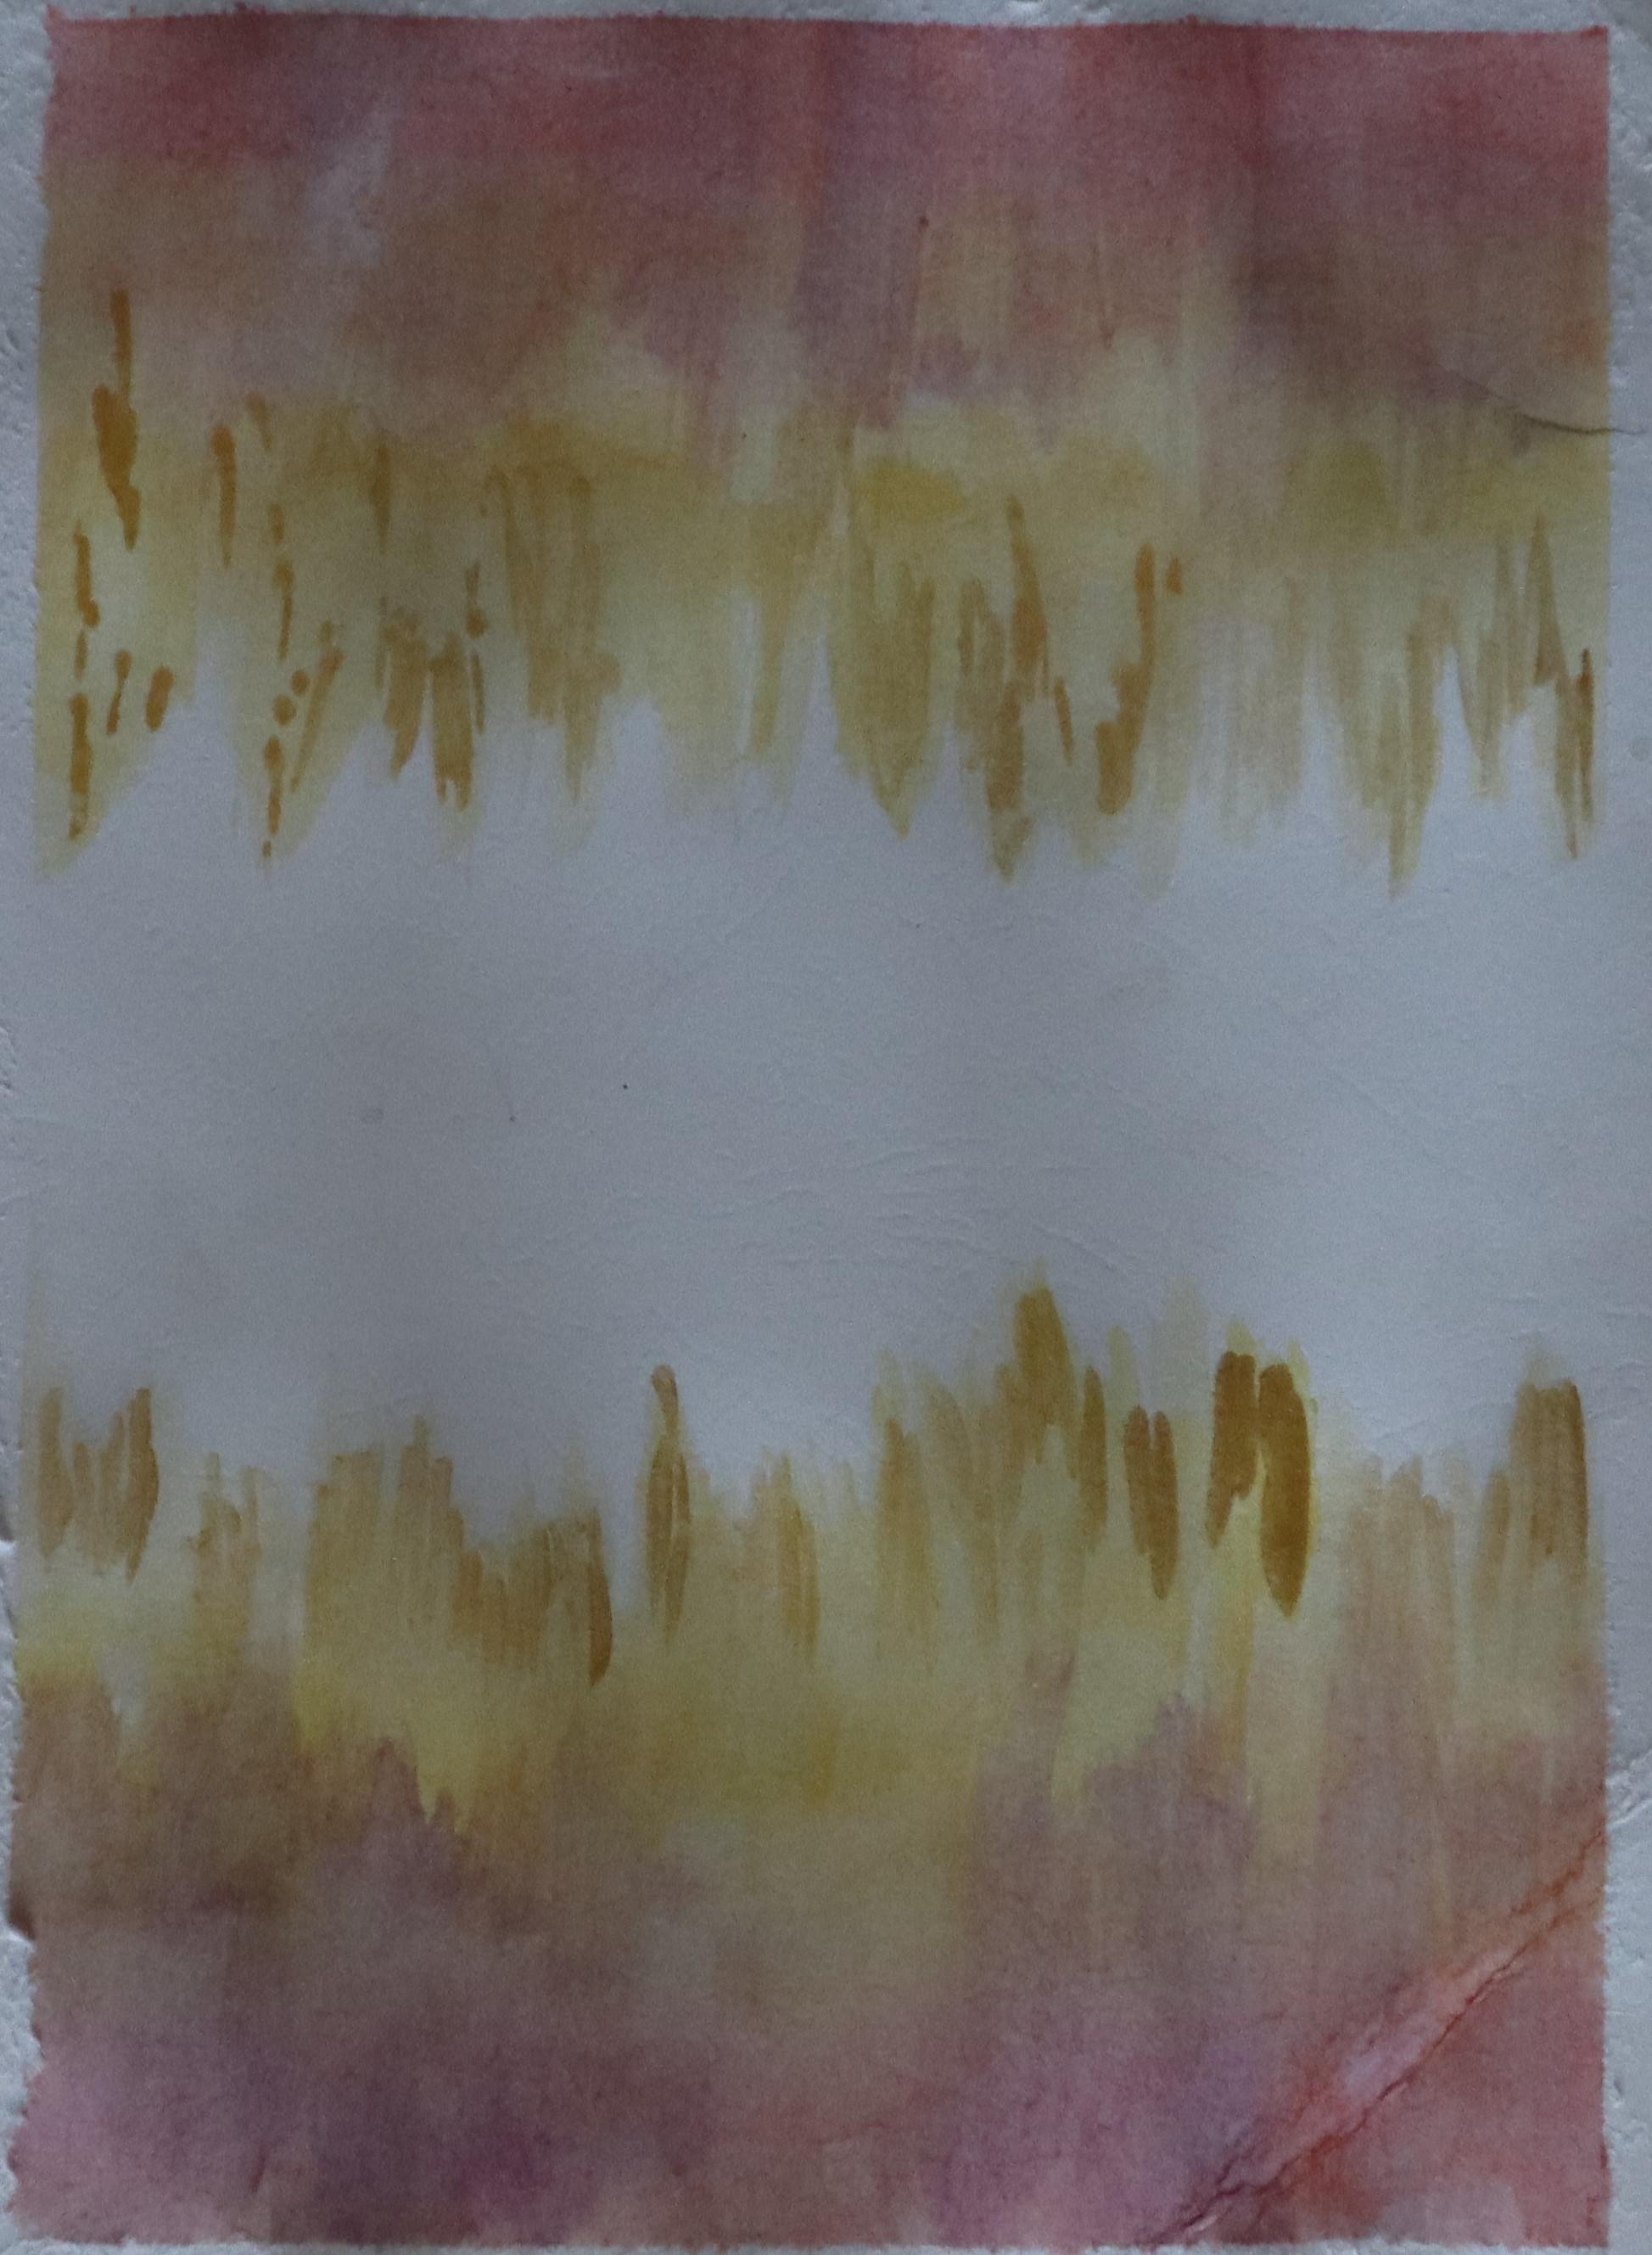
3. Lively Abstract painting : So for this fast, but we're going to go into a little bit of light painting. This is ideal for anyone who's just starting off on the painting exercises. So we're going to be needing white and I'll also need some red. So for this I'm going to be using some cadmium red because I went to make some pink color. And we'll have a little bit of yellow just in case we need that. And I have a thing. I'll use the golden pots of the metallic set of the paintings. If you don't have this golden color, it could also choose to use a golden pen. Walk the same. So let's just go ahead and start column mixing for that case.
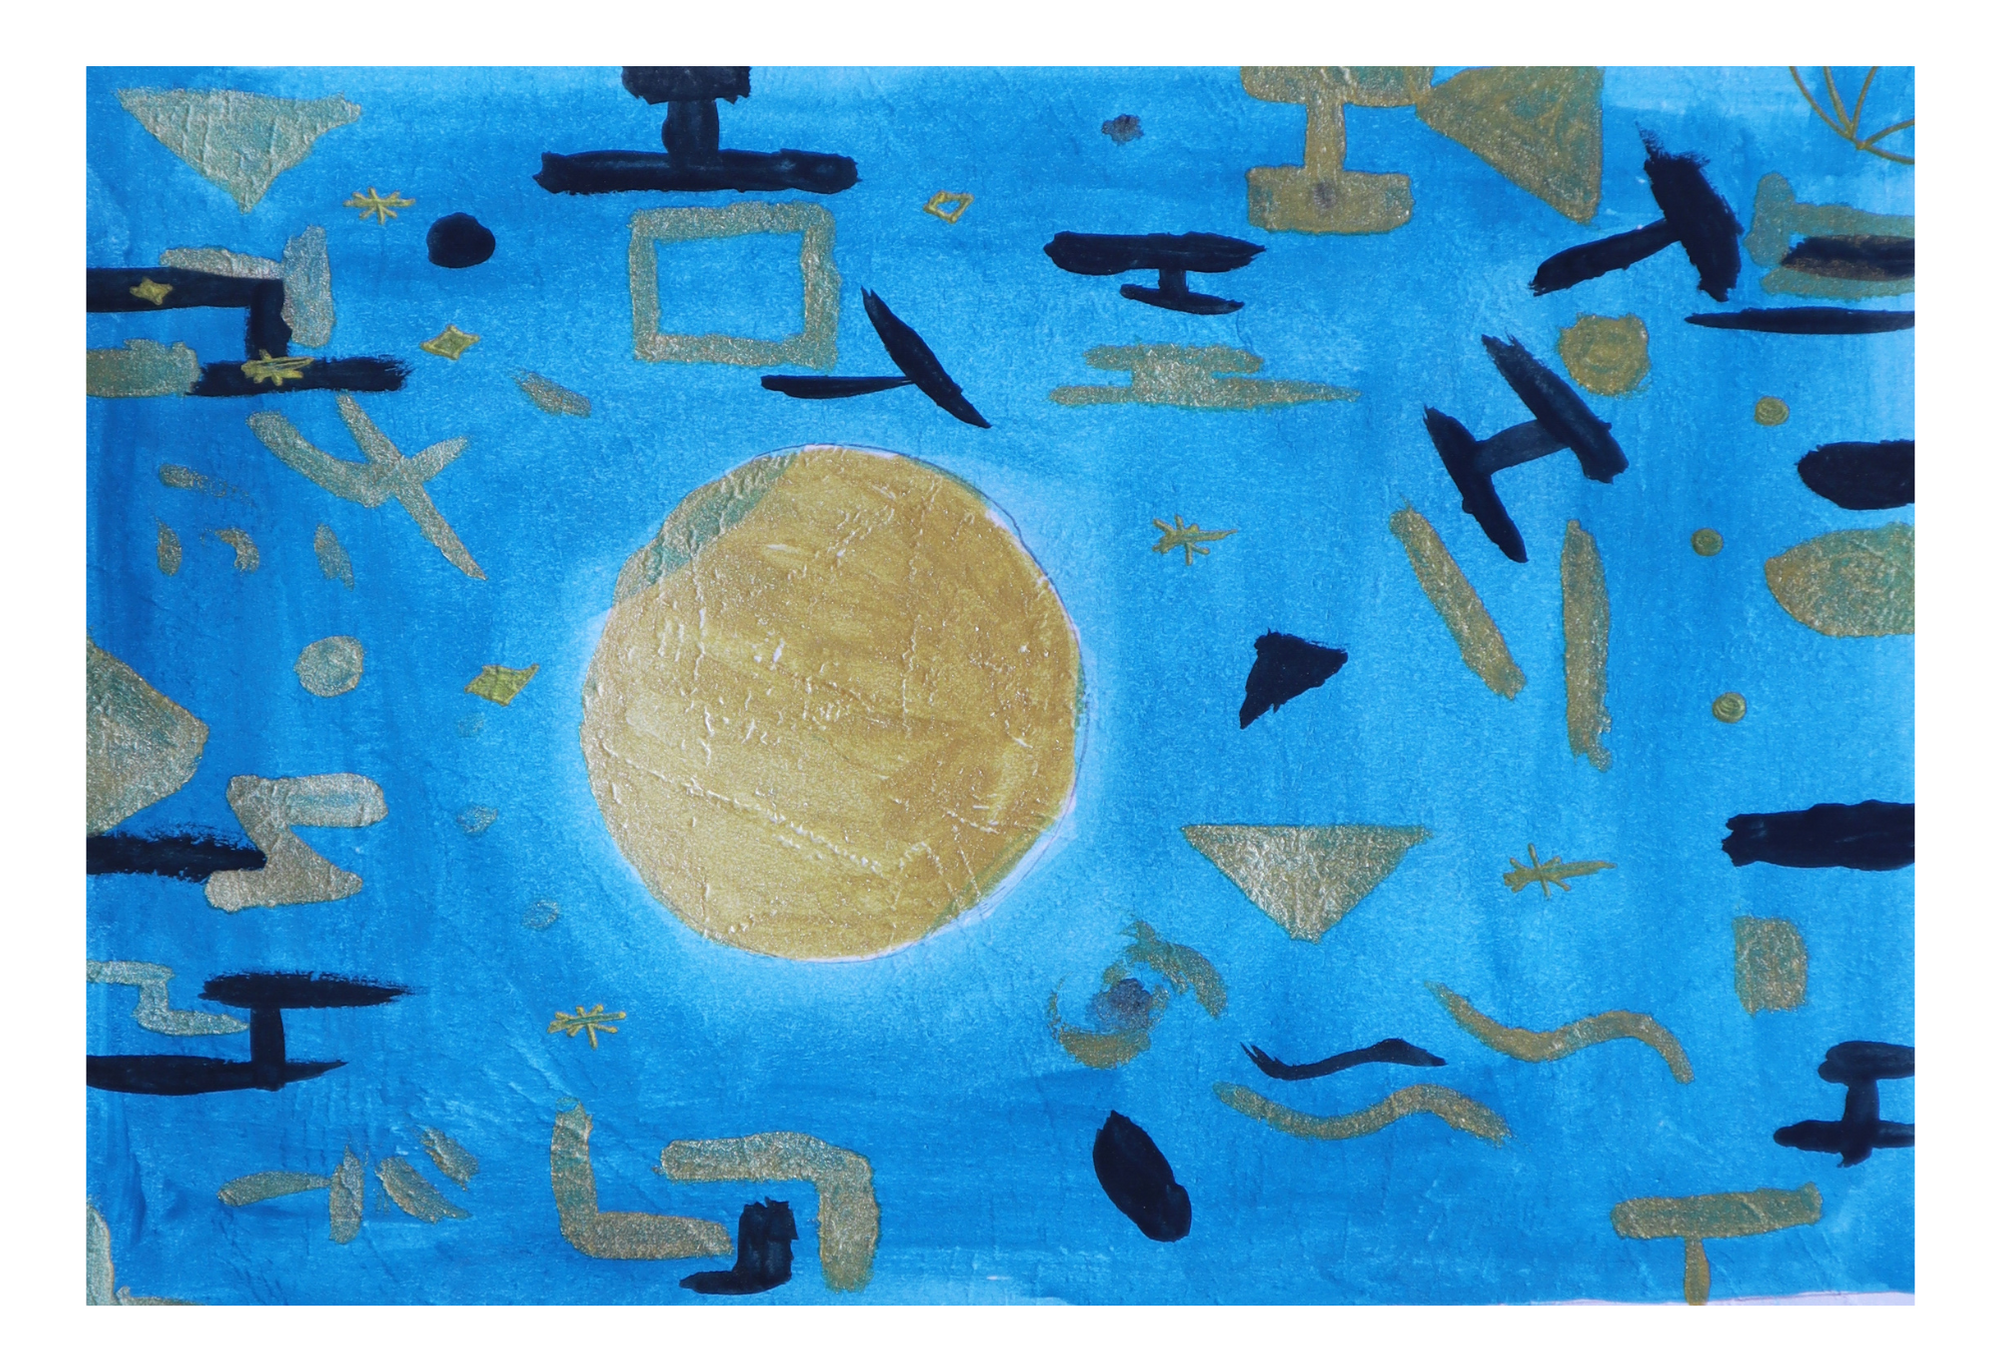
4. Mystic Abstract Painting | Materials : Okay, so now we're going to be going on into ice. Second piece of painting. For this one, we're still going to be using some white and blue. We're going to also need the gold pilot, a little bit of controller. And we're going to also just use the cup for this. You can use whatever you have. Just draw out a cell called in the middle and then we'll be ready to go. Yeah. So just make sure you get your supplies. I'm still using the same rash, the same water, and there's not really much of a difference. The only thing is that the lacking with ultramarine blue and white and a little bit of cold gas so we can get, so for the first part, as I mentioned to you, is that I'm going to be drawing out a circle in the middle. For this, I need just a small circle. And I'm going to be using some some saccular things I have here to just draw the circle in the middle. I'm using a normal pencil. To just draw it out. It should generally be because this is still on a little bit of loose painting. The main focus for you is just to have a point where you'll add a lot of gold color, we'll just see it as it progresses. Yeah. So I'm going to start off with some ultramarine blue on my kind of this paper starting off from the edge. Remember to always mix it up with some water on your brush. Just add some water into your brush and then go ahead and add on the paint into the paper. If you feel some points are a little bit darker than the others, you can always just add in more water into those areas because you're working with acrylic paint, it should be easy for you to blend in and make sure the whole painting is accurately to retail with the color. Submit, just make sure also to, to leave out the Sappho painted in the middle. I'm going to just continue on if this loose movement across the whole painting. Now I've moved on to a better brush. I felt that I could change the pressure that if it remember to always just deep a little bit of the brush into the water. So for this part of the painting, because I'm mainly using acrylic paint, using a bit of a thicker paper, so it's a bit more textured and is ideal for painting situations. We choose the competency, for instance, oil pins or acrylic paint. But you could also just use watercolor paper. If you're working with gouache spins or other pins, I would ideally suggest something about maybe 160 GSM would be worked best. Remember to add in a bit more pins day for me, on this left side, each was a bit lighter than the other side. What you're listening for is too much even in that, but some good flow, some good, some medium 0 concentration. I've repeated the same thing on the right side of the painting. Because I could do that. Just depends on what you feel like doing or if you feel that they're white or the white of the paper is really a peering through. You can always add a little bit more color. So now what we're going to do is just let it sit back and wait until it.
5. Mystic Abstract Painting | Accents : Okay, so now that the painting is dry, we are going to be adding on a little bit of colors. I'm going to be using a combination of a light pencil. I like pets even choose to use this. However, I prefer to use a very small black and some white king. Aside from that, I'm going to be using my metallic palette. I'm just going to be the ones really standing out. So for the center circle, I'm going to be using the gold color for this. So just as I had shown you before, just wet the brush a little bit, some water. And because I wet my paints before it's going to already just me light enough to spread evenly. And the main focus here is to just create a cyclic form. It's okay. Iv fluids into the blue area intrude, as I mentioned before, we're not searching for perfection here. We're just searching for progress and just having fun with the painting, which just comes through enjoying each part of VTE. So for areas which won't come off very clearly. And also Okay, we've just going over that. We are 10, which I have here. This is just my gold pen and I'm going to just color in a little bit more on the, on some of these areas to create better outline for the golden color. In areas which look a bit more white than I wanted them to be a color in with some gold gold accents. So now that we have that gold color, I'm going to act as a moon, but not necessarily a moment. I'm going to now go into creating shapes. So for the first shape, I'll go with, actually I think I'll do some outlines with my pencil. So the integral with sum square shapes, some lines and some circles just across the whole painting for, for, for, just for us to have an end result which looks very abstract deemed. So that's going to also do some styles that you can use this with a balance of black paint or black pencils, as well as some gold. I'll just even it out in some areas. I'm going to just draw in some geometric shapes or and line work because they don't necessarily any targets appearance that I'm going for. I just want to create some form of progress. Yeah. So once you feel that you have a lot of colored done in, you can go ahead and reach up. We're going to go on and use some black. I'm still going to go back to my tumble, tumble brush pen. So because it's a bit thicker, it will appear better. Remember you can use these or use a paint brush. So I'm going to show you an example of both results. A few. However, for people starting out, this might offer a better management of the hand because you're able to manage your linework with append better than you probably would with a pencil. I'm also going to add on some white accents as we move along. Remember, as I mentioned before, we're not necessarily going info any end target shape. So I'm going show you how to do that with a brush now. So we're going to go a darker color of gold. Yes, that's a plus for this goal because my light cycle is a little bit too great. I'll go over it and just make it darker. Remember, you can always make, this is actually real time OF MY paintings. So remember you can always improve on their parents based on how you feel a painting is going to, you can change things up. There's no necessarily any requirement of how the end result should appear. You could also choose to have a white circle rather than Cool. Then why? If you don't have metallic pins with you? So the good thing about this metallic paints is they're really sick or they tend to appear more clearly on the paper and leave a good lasting impression. I'm going to try to use a balance of mushing, going to try something new and use this darker color, which I haven't ever used before. This painting. So we'll see how the bronze effect just looks like, actually looks really good. So you can try that as well. And I'm going on we some box shapes and number 5 or something that appears like a five or an S. H comma seven letter H from it. Which are threatened necessarily perfect, which is just a combination of result of things. And now we're going on with our white jelly roll the pencil. And I'm going to add some white dots across the painting to just create a little bit of effect, nighttime effect for my abstract piece. And I'm still going to show you how to do this with a brush, because now the good thing about a brush is unlike a pencil, is that it's thick enough. So the Pinterest be thick enough that it won't appear transparent. So I tend to prefer actually using that as compared to using a pencil. So just make sure that the painter tape coin now is big more think. So don't mix it up with a lot of people. A lot of what SRE well, going on flood story, Timmy heard just a bit random pattern in walkway into also follow the same format with the other colors that you've used. You're going to just do something similar for the whole painting. Remember to go on even into the edges of the painting as well. So that the whole piece looks cohesive. And we're going to go now into some style sheets. After we want to try also some, a little bit different approach which is sprinkling some, some pain to that brush. So for such light, for such luck, you need such a rush which is more rough. So I'm going to go in with some white color. Front of your finger just splatter some of the paint on the paper. Thought creates more laughs staff or a smaller white points. I'm going to try that output. So with the old upset, with your brush and try out on the gold, I'm going to go with some lighter gold. And I'm still going to just do the same effect. This is going to appear lighter than the previous effect, which is white because of the closeness of the two colors. And once you're done with that, you can just wash your brush out. I think I want to add accents around when white. Remember to just hold your pen lightly so that you don't attach along the star effect. You're going for a very abstract piece here, Just some random line work. This can generally be done by everyone. So I think we're almost done with a piece. It has a good balance of it has a good balance of that golden accents as well as the white and the blue and the black. So we're going to just strip off the tape. We try to stick on the paper to the edges. And that's the end of the painting, That's the end of the second exercise. So this is how it appears in the end. It's a random piece, but everyone can do it.
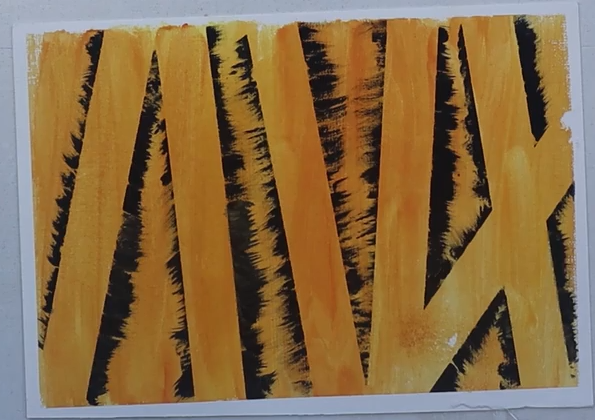
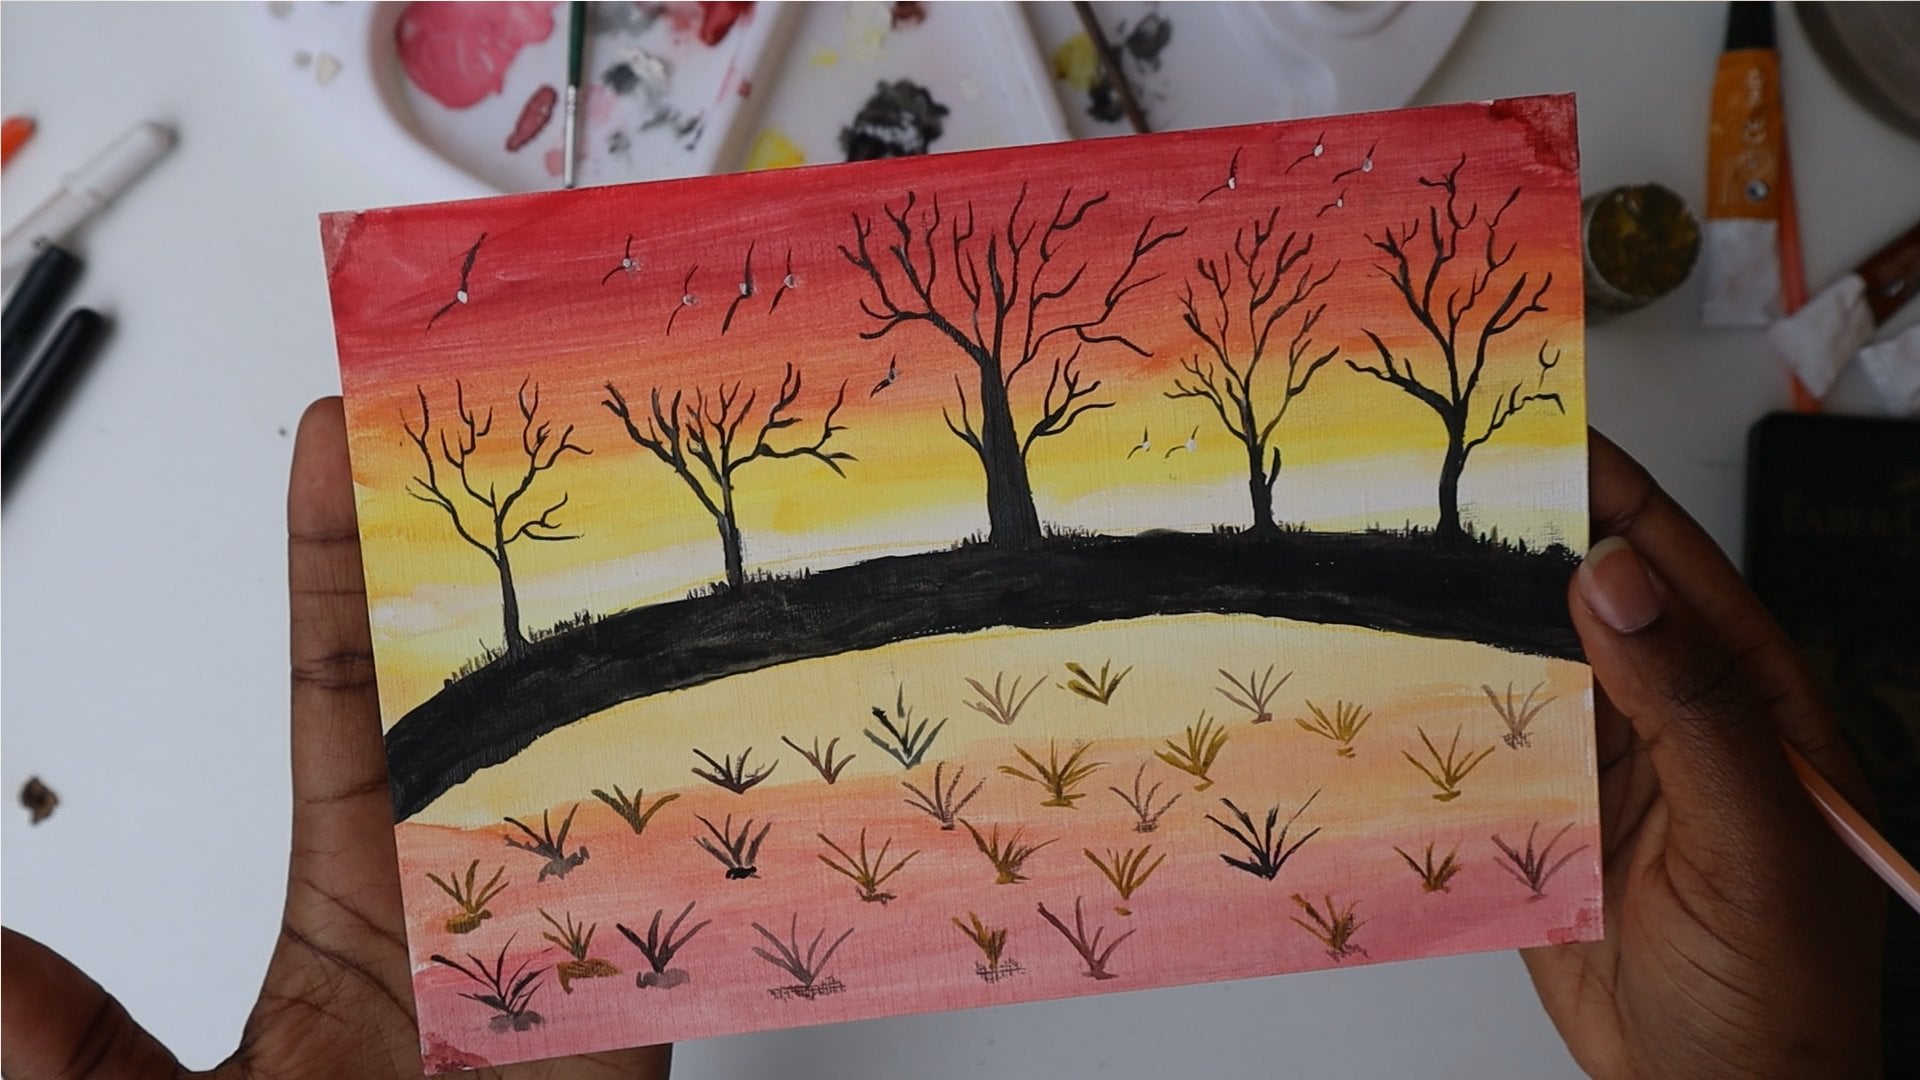
6. Painting Using Tape | Materials : For that painting project. We're going to need some tape. You can either use
some washy tape. For this exercise,
I'm going to be just using some
normal clear tape. Aside from that, you're going to need to make some orange. So for me, I'm going to
be using a mixture of the previous red that we
used before and some yellow. I'm just going to color
mix that as we go along. Aside from that is that
you're going to a brush. So aside from the two colors, you're going to need some white, which is included here. And aside from that,
I'm going to be adding on some beautiful black
paint into the painting. I'm going to still use my
palette knife for color mixing, and for that, I'll just
to do some mixture. Because red is a bit stronger, do a little bit more of
yellow and less of red color, and now we have a good orange. So I'm just going to start
off using my big round brush. And for that is the
first thing I want to do is just wet on
the whole painting. So for me when once I wet the
paper, there'll be easier. It will be easier for the paint to flow across the
whole painting. And because I want
to work with tape, I need a lot of even colors, and now I'm going to go in
with the light orange color. Remember to use upward strokes, which is painting downwards
and upwards for the whole well spreading
the painting because I've already
wet the paper. It's easier for the
painting to flow. So there's ease of
blending the colors, they're flowing really easily, and I need not go over so much. So make sure all parts
of the painting have the colors and once the
painting is fully covered, we'll be ready to go
in into the next step, and for that, you'll
need the tape. Yeah. So I'm just
going to leave this out for a minute to get dry. While I go over some
areas which I think need a little bit more color. So once that is done, I'm going to come
back once it's fully dry and continue on
to the next part.
7. Painting Using Tape | Highlights: Okay, so now we're going
to go on with some tape. I'll just cut a little bit, and we're going to
put it in random way. So for this one, I'll
just do a little bit of article or diagonal work. Put in some more in
a diagonal form. Oh, now, I want you to take
on some pure black paint. I'm going to go
in with my brush. The main thing is
you want to just lightly create some gradient
of sort from the painting. For this, you don't necessarily
have to mix with water. You just want the
paint as it is. The main reason we have tape
on is to make sure that the parts don't touch on any areas where we just don't want the
gradient to appeal. I'm going to repeat
this motion everywhere. Starting off with
painting where there is tape and then going on
into areas where there is. And it's okay if you
make some errors. I'm also noticing that I am making some along
the way in that I'm starting off with the area of the painting
which has no tape. Just remember to start off with the paint on the places where
there is actual tape and then go on into areas
without the tape so that it a tapering off effect. Just make sure you've
covered all the areas which had some of the tape area. So I'm just going to add
a little bit more paint for this portion, which had some tape,
but I didn't cover. So now that it's in this shape, I think I'm and now we're
to off the painting. To remember to do this slightly. And this is our final painting for this part of the exercise. So we're going to move on into the next painting
in the next class.
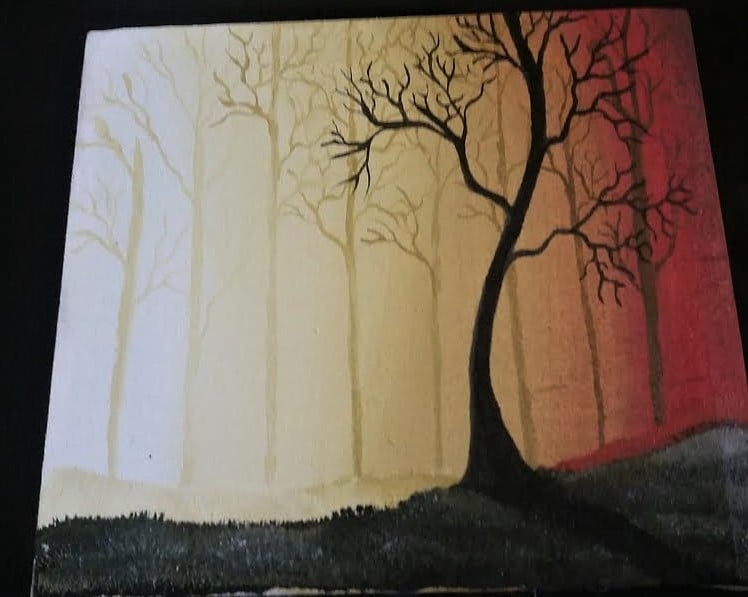
8. Landscape Painting | Materials: In this fight of this painting projects, we're going to go into a little bit more complex work. This will require a little bit of color blending ingredients, and I'm going to show you exactly how you need to do that. As I mentioned before, the main thing that we need, first of all, is water in that good brush, which we'll use to blend the colors. Yeah, I have with me, cocky. I'm red. Aside from that, I'm going to be using a lot of white, will also need some black paint for the assets at a little bit of some more detail brushes for you to have a good option to select from. I prefer the ones which are easy to flow, or we will take one paint quite lightly and we'll be ready to start. To start off, you're going to just wet the whole paint paper. Remember as we did in the previous painting, or if you're just watching this class, we do this to increase the ease of blending the whole paint in the flow of the PNG. You can do this using spray bottle or for me in this scenario or anyone else, a sweat, eat enough, and then we're ready to start and the fast color. So for this painting E, We're going to start off with white. It's more of a forest at dawn or at duck. And we're going to start off with such invited see motion. So as you can see, I'm painting from here going downwards and then we're going on to add some cocky, lightly. So the main point is it should go a long while increasing. We just want this color to appear. And because it's more of a painting in the forest, they're going to be areas where I will repeat see the good thing about using acrylic paint is that it's thick enough to cover image as well. You made a mistake. You can always count on just improving how things are when you're adding on their khaki paint or the Caracalla, just make sure you add in some water to just help blend things or things that they're moving more smoothly. As we go along, I'm going to make the khaki color a bit darker. So just take on some more color. We can start off with this layout of light color or light blending and then add on mainly the color itself, which is the khaki color. That's a bit too dark. I started off with the edge and then go in blending into the white color. Still using the C motion. You don't have to take this off to the end of the painting because that's where we want to add on some red color. And then we're going to just continue this slightly by adding in some water as well as some weight to just help blend everything smoothly. If you feel that the Cauchy has gone on too much, you can add in white. When you add in white colleges through or to wash off your brush before you take on the weights column to your brush. We're doing this so that the main reason we have more of a gradient here, or we're doing a lot of blending is because we want our transition of light coming in from the sun or just light coming into the painting. I deli cheese from the signing of forest. And we want that to just come in very smoothly or lightly into the painting. And you can do that through the balance of adding some water in and adding on some of the white paint. So once we have enough green, we're going on to adding a darker red color. So for this, I'm using carmine red, cadmium red, just a bit of red, just a little bit a touch of red. So we're going to go in with some cadmium red and just blend that into the green color. Just add a little bit more as you go along. Remember to add in some water. So I'm going to do that and lend it out in the areas which I feel it's too much like, for instance here. So just taking on some water to just help blend things or make things smoother. And then once we're done, we've blending things. I'm going to go back into the tree. And she it updated transition. It's okay if that red elements go into the green or vice versa. Remember what you're going for is a good transition has this is also a good time to switch brushes into one which is dry by two of the same texture as the brush you're using that to help blend things smoothly. So once we have that done, I'm going to go on and add a little bit of black and when to use the previous block that I use because I just need a little bit that'll from the edge. So for them lab, we just need a little bit of heat and still continue with the same motion. So you can see there's a good gradient going on here. So I'm going to go back to the brush I used previously for blending purposes. And so far with that, we're done with the first five. The next part is we're going to be drawing some of the times or the trees in the background. And then once we do that, once the painting is fully dry.
9. Landscape Painting | Background: So now we're going on to the next portion of the painting. And that's to just paint the trees. So for this part, I'm going to just search for the smaller brushes that I have on hand. Select this one is a smaller brush. Hopefully this will block 2. You need something that's a bit more stable or which one to move around a lot and very small. So I have a few options. I'm going to walk around until I establish which I'm going to mainly use. You're still going to use the green color, which have quite a bit here, then I have some adrenal of water here. So I'm just going to mix that in and lightly draw a stem or a stem for the plant. While I'm drawing these have noticed I prefer to have a little bit of a bigger brush rather than the very tiny ones. So still on the smaller brushes, but one which we have better, better flu. So I'm going to switch on to that. So it's okay to just return based on what you're working with. And also just switch back. Also. Just work with what you feel is Visa. And so for here we are going on for a stem, for a tree. I'm doing it very lightly because in this portion of the painting, It's the, it's the trees which are at the back of the, of the painting. So now I'm going onto draw some loose stems that you haven't no leaves on this paintings because what I'm going for is just an impression of a tree rather than a big tree or a very detailed piece of BMD. Remember, I also want this to be a project that anyone can take forward. So because of that, I wouldn't go into a lot of detail luck. However, the brush that you have should provide some good detail of the stem so that brush branches. And if you want to go on end, paint the leaves as well, you can use, you're free to use Alpha. However, islands at the picture here for you to see. The example of why it's better to use one myth is that beat had a Bristol locked because they provide better management or flow for the painting. So I'm gonna introduce these repetitive motion. I want a couple of them in the background or just slightly appearing. Some of them are going to be very light appearance and as they go on, that going to just fade off, then you can also just go over areas where you feel need a beach mole. Ok. Also because these are at the back of the painting, you don't need to outline the back, the stem, or the back of the tree much by adding some gradients into E. So that's, I'm doing a week or longer free or a longer branch, branch right here. As we continue, you can see that it's fading off easily into the background. I'm just going to make the stem speaker because it appears a bit too thin for my liking. And when you creating branches and you want for them to appear as if they're going into the buck. Just continue on with flu, like with the flow of the painting and paint in the end of the brush branch on the other side, like behind the tree. So I'm going to do this time for a few more trees. Remember to just have the blue smoke man clues. Clues, brush, walk. So that it's easy for you to, to make the painting flow. Also, there is no requirement of how the trees should look. It should just be appealing for you. You can take on the branches up to the edge of the painting, which is at the top. Missed or you own liking or your own preference. And also just extend them to the bottom parts. If you feel that that is what you want to do. If you feel like the painting is not really doing much, just dip your brush in some little bit of water because it's a detailed brush. I don't believe you'll need to dry it too much, but if you feel you need to, go ahead and really do that, there is no right or wrong approach for this is just based on how you feel the the brushwork is going for you. So while I'm going to still do another tree at the front, That's going to be a bit darker. Limit this with green in that light color or just the light haze because you want them to appear as if that though the trees up their BAC of the, of the forest, while the ones at the front, we're going to do them with a little bit of black as we go along. Because you want them to appear as if they're on the foreground. So just one last tree at the edge of this piece, right there. And we will be done with the fast Porsche, which is of the trees. And then we can go on into our dean, the front tree, which will be just a little bit bigger. So that's what we have so far. Don't worry about the end. Going to add some new bit of grass.
10. Landscape Painting | Foreground: Now onto the next portion, we're going to be creating a
little bit of a gradient so that we show that these
pictures or this tree I mean, are in the background, where
there is the foreground. For that, I'm still
going to be using the Khaki color, which
we have right here. And I'll start off with this lighter version of
it and move on to a bit darker for the whole piece the whole portion
of the painting. So just a little bit
of a drop of it, and I'm going to start
off at the edge. I'm going to go on
very lightly in form of as if this
is a mountain area. And for this portion, you can have light movement. The painting is moving in
a different direction. So because we want to
create a gradient for it, we want a bit of a movement towards the way the
mountain or the terrain. And now we're going to go on and add red for this
portion right here. I'm on that lightly. That will be for the first part. Take your blending brush
or just the lighter brush which has better fill for me, which is this brush. It has better bristols and try and blend that out
into the rest of the area. We're going to be adding a new layer of color
into this front portion. We just want this to
appear because we are adding on some la into the end, and we're also making
sure that it flows in with the colors which
are in the painting. So just blend that out lightly add in some water
if you feel you need to. Take on a drop of khaki, mix that all out and add in more water at the back of
this front portion here. Just creates form of dimension or just
some shadowy effect. Make it appear as if it's
blending into the terrain. Once that's done,
we're now going to add in some black fuse. So for this part, it would be best to
use a fan brush. However, I don't
have that at hand. So I'm going to just
use different brush, which has had a Bristol
going to go in into that. And with that dabbing motion, I'm going to dub on
on the painting. This will create a
idea that there is some grass and just
do it lightly. Don't worry if it has some areas which are
not colored, actually, that provides you with
a good aspect which would be similar to
that of a fan brush. So we want it to
appear as if we have some tickets on the paintings, if we have some tickets on
the foreground of the piece. And continue on into this
further part at the back. What we're going to also
do is we're going to go in with a little bit
of the khaki color as well to just do the same
thing across the painting. Until it down with
the black to wash out your brush or clean it out. And then once it's
clean and dry, you can go in and deep into the khaki color and just
do the same thing lightly. But now we're going to
go in with some white. So the white color is ideal for just showing
in some dimension, going in with some tissue
to dry out the paints. You can choose to do this
or leave this portion out. But I just need to do that
because I had a lot of paint going on on
the different areas. So at this point in time, I'll just use some pure
white color for that. I'm just going to take
it with the edge, the edge of the brush. You can see right here. Yes. Now it's clear. And dab it up at
different points. To just create an illusion
that there is some dimension, as I mentioned before, And as you can see within the picture or what
is appearing on the screen is that there is some form of mountainous
regions and, like, less hilly areas. However, remember, you
should do this probably with some more color of if you have a fan brush
that would work the best. Remember to do this with
a fan brush if you can. If you don't don't
use a sable brush, more of a cycle brush or just a hard brush
for you to have better effect of the variation
in the foreground area. The good thing about
the white color is it creates an impression
that there are roses. So it's ideal for this
portion while also providing a good accent. So now we're going to add on
some black into my palette, keep your brush into some
water and take on the bruh. The bigger brush, should use a bigger brush
at this point. And at such a point where you feel you want it to
end, you can end it. The good thing about this
one is it's a bit bigger, so you can edit it to some extent or increase
the width of the back. I'm just using some
plain plain black color for the main portion. Of it. I'm also increasing the thickness of the
tree as we go along. I will add in some
branches to the stem. Because the light
is coming in from the left side or the sun is
coming in from the left side. This left side will bitter. So but we'll add
that as we go along. At this point in time, I
just want you to switch your brushes into more
of a detailed brush and add in branches Where you feel is best fit for you. So I like how it's
going on so far. I'm just going to thicken
this a little bit. I'm going to do the same
thing for this left side. Remember to dip your detailing
brush into somewhat. This is, as I mentioned, the star of the show, you
want it to be in plain. Plain Black is the best
option to have here. And then I'm going to also
create a branch right here. Just a bit smaller And a lot about art is that it's more of the
impressionism of it. And I feel like I tend to
take a lot of that when I'm working on landscape art pieces, just sharing the message of here is a tree or
here is a piece. And as you've seen here, I've made a little bit of a mistake in that the paint
has moved more. So tend to start
off on this side if you are painting with
your right hand, and if you are with your left
hand start on this side, so that no paint
smdges as it has here. However, for me, I'm going
to correct that by adding a branch on that area. So Everything is good in as much as there was
a slight error there. So I want to add
some tinier branches on this side before we continue on to making the tree appear more in line with
what the painting has. So, as you see now Spa, we have our style of the show. But what I'm going to do
here is you're going to need a little bit of
some brown paint. So this is some burnt umber because all I have at
hand is some burnt umber. Fever, you can use a
little bit of CNA. And we're going to need
that and some white. So for the band here,
I just add it on the on the side of the back so that it creates an
impression that the light is landing on the
left side of the painting, and you can do that
by adding it and then blending it out
with a drop of white so that it just shows off
lightly that the light or this part is a
bit lighter and do that as well on the branches
as I am doing right here. Remember to also use a little
bit of white, a little bit. Not necessarily at the edge
slightly after the edge. So use the band
sienna at the edge of the painting and then put some white hue or blend that in with some white a
little bit after the edge. So the other side of
the painting is darker, so we won't add any
accents to that side. If you feel like you've
added too much white color, you can add some
more brown as I am adding here to just
blend that out. So just add on start on some little bit more as you go based on where you feel it's needed. And I'll still go back and
add some white highlights at the base of the tree
so that we create an impression that there are
some roses or some life. I'm going to add on mixture
of some white and gray. You can also use
gray for this part actually to just blend out the white and for the base of the tree should be
a bit darker because And so now the final
portion of this is because I want to bring
in some life into the piece, is I'll draw in some birds. And for that, this
will literally be the lightest or the lightest
bit of the exercise, you just need to dip
it in some black for the detailed part
and draw two lines, one facing up and
the other downwards. Here is where it is, one. The other facing
the same direction. And at the point
where the two lines meet put in some white color. And with that, you have a bird. Remember to add some
water for this so that the painting or the
birds feel more free flowing. So now that I'm done
with the black parts, I'm going to add the white
accents to the birds, step your brush in
some white color and add in the points of some
white where the pieces meet. And you literally now
have your painting. I really hope you enjoyed
this part of the project. So this is what we have. You can see the birds
have some white accents. There there's a little bit of grass action going on
in the green area. There's some gradient. And that's the end
of this painting. I hope you create one in a similar way to this one and share it with me in
the project gallery.
11. Final Thoughts: Okay, and now we've come
to the end of the class. I really hope you
enjoyed each part of this process of creating the
four different paintings. At the end of this class,
I feel very engaged. I actually appreciate taking
on this time to train you over the different
approaches that I use in creating my art pieces. I've learned a lot
about also just feeling free with the artistic colors that I choose for
different paintings. Today, I went on for a
lighter orange for one of the pieces while I normally
go in for a darker one, and I loved the results of it. I really hope you share
it with me as well. And that we'll be able to learn more as we go
along this process. I really look forward to
seeing what you share with me, and I hope you join on for
other classes if you feel like you want to engage
me or on social media. My social media handles
are also included. Can you also leave a
comment below on which art piece worked best for you or which you'd want
to try out in future. Thank you for this class. Bye.
 Silvia Njoki, Creative, Artist & Marketer