Transcripts
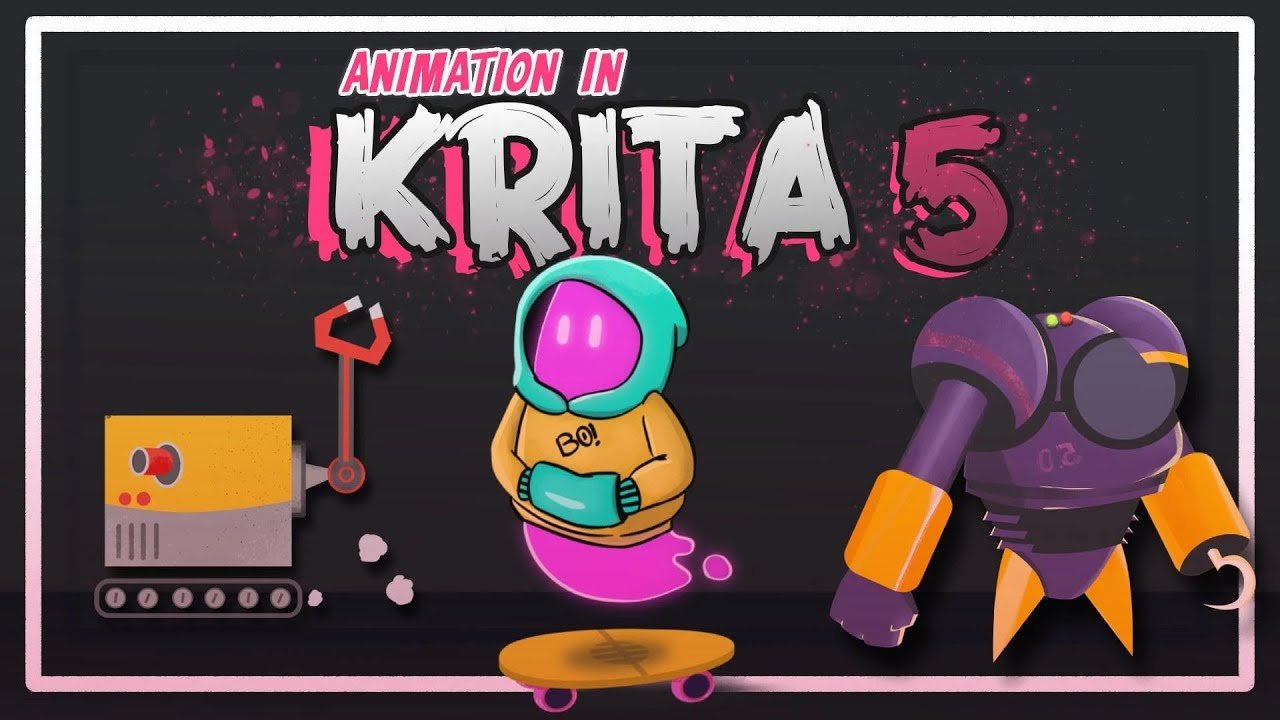
1. Class introduction: Getting started with
making your own talking two D animation character is
actually pretty complicated. You have to know how to
design your character, how to animate it, how to add the talking mouth while
matching your voice. And also how to edit everything together to get the
final animation. But to be honest, I
am going to teach you all of that in
the next few classes. I hope you are excited
as much as I am. Hey, my name is to and I'm a
content creator on Youtube. In this course, I'm excited to share my knowledge
with you as someone who wants to get started with making
two D animation. At the beginning of
my Youtube journey, I didn't have a good
camera to show my face, which is why I had
to come up with different solutions for
making content online. The best solution I found
as an artist was making my own two D character
and make him talk for me in the videos just like
you're seeing right now. I started this
journey on Youtube a year ago with zero experience. After a lot of
trials and errors. I now have my own two
D animation character that I use in every
single video, which I will teach you exactly
how to make step by step. In this course, we are going
to cover a lot of things, including brainstorming
your character, and sketching and designing it. Then coloring well,
recording your voice, adding the mouth of the
character, and making it talk. And finally adding everything together to make your
final animation product. This course is for all beginners out there who want
to make their own to animation characters
and want to start their journey in the
animation field. But it's also for the
people who are doing this just for fun and want
to try new things out. Which is why this course
is not really that long. And you can finish it in
one day with no problem. After the course,
you can start making the cool character animations that you always
dreamed of doing. For this course, we're
going to be using Adobe character animator specifically to
animate the mouth. But you can use any
program you like to draw your character like Photoshop
or Clip Studio Paint. Skillshare is awesome
because it's centered around active learning through your
participation in projects. This course is no different. When you're done watching
all the classes, you will be able to upload your own to the animation character. Take this class as a little
animation class in school, and see the project as the
homework that you need to do. By the end of the class, I will personally make
sure to give you a complete feedback on all of your projects so you
can improve faster. Because feedback from
the right people could really change
a lot for you. Don't forget, have fun
with it and good luck.
2. Brainstorming your Character: The first question you
need to ask yourself before brainstorming
your character is, do you want to make
yourself as a character? Or do you want to make
a fictional character? Either ways, here are the
things that you need to identify before starting
to sketch your character, your clothes, your hair, your accessories, your
expressions while talking. You can have multiple of those and also any special features. Now, in case you are making a two D a character of yourself, look up references on
Pinterest of people who wear similar clothes to you or just take a
picture of yourself. In case you are making
a fictional character, then try to find as many
references as you want. Because this will help you a
lot in the sketching phase. It will save you a lot of time, but it will make your character automatically look
better as well. Just because you're
taking inspiration and learning from other people
to show you what I mean, I'm learning to make a new
outfit for my own character. First, I went on to
Pinterest and search for some images of some clothing
style that I really like. I would really suggest same and make sure to save
the images somewhere because you're going
to be using them a lot during the designing
and sketching phase.
3. Sketching your Character: When sketching your character, the first thing that you
want to do is to put all the references
that you gathered in front of you so you
can actually use them. You can either paste them into the drawing software
that you are using, or you can use a
software called Pureref, which is basically for putting all the references at one place and then looking at
them while drawing. And don't worry, the software
is completely for free. Make sure to set the
canvas of your drawing to 1,920.1080 which is basically the compas size for
Youtube videos. But don't worry about the
size too much right now because you can edit this in
the editing section as well. Once you have done
that, you need to figure out one thing
before drawing, which is what is the body type that you want your
character to have? Here are some examples that
I have already made for you. You can pick any of those
or even make your own. It doesn't really
matter, but what's important is that you
will never change that, choose the body type you
like and stick with it, and then you'll be good to go. Now I went for a
cartoony body type that is not really realistic, which is what works for me. So feel free to draw your
character the way you like. Once you have that, you
can start sketching your character and figure out how it'll look
with the clothes on. Don't worry about anything
yet like coloring or line. All will come later in the
inking and coloring section. For now, just focus on making the character as
cool as possible. One tip here. Start sketching your character in the
standing normal pose, just like I am doing right here. Because this is the first pose
we are going to be making. And it's the pose that we will adjust all the rest
of the poses to it. Now you don't have to just draw the half of the character
like I am doing. You can add the
lower body as well, but since I'm
making my character for Youtube, and in Youtube, you don't usually show your
whole body while talking, but rather just the upper part. I'm just going to
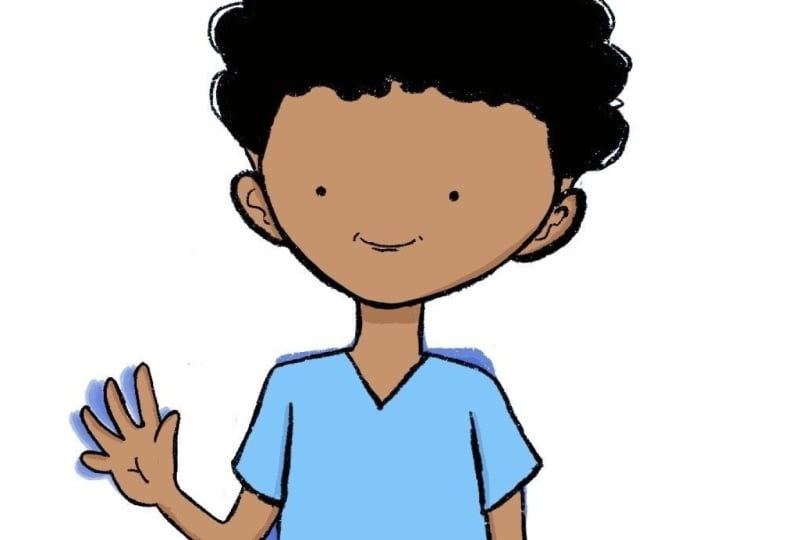
draw the upper part. This is how my
character turned off. It's been a while since I
made the last character, so I actually have a new
hairstyle and I also like a lot, I use one for this character. Now, once you are finished and satisfied with
your character, we can move on to the next step, which is adding the
line art and colors.
4. Inking and coloring: Now when it comes to inking
and coloring your character, we need to make different layers for every part of the character. The first layer is
for the upper body, and the second layer
is for the head. The reason why we
are doing this is because the head will
not change at all. We will only be changing the upper body and
mostly just the hands. Instead of having to draw
the head multiple times, we draw it one time on a
separated layer so we can paste it into the new poses
that we will be making later. As you can see, the ink and colors of the upper
body are in one folder, and the inking and coloring for the head are in another folder. Now, congratulations, you have your first pose that we
are going to animate. But first, I want you
to copy the head and body exactly like this
into a new project. This project needs to have
the same canvas size, so we can make another pose
to animate the character, both folders, paste it
into another project. Make sure to save the
original one though, because we are going to
work with a new project to change the pose and
to make a new pose.
5. Making new poses: Now there are a lot of poses
that you can choose from. Here are the poses that I already had for
my old character, but for the new character
I'm making right now, I'm going to make a high pose. And then another talking pose. You can choose any of the poses I made from
my old character. Or you can make these two
new poses as well with me. Or you can just come up
with your own poses. Now to make the
animation look smooth, we need to draw over the standing pose to make sure that the character
doesn't move at all. And the only moving part
is the right hand here. Try to replicate what I'm
doing, and you are good to go. At the end, I made
these two poses. As you can see, when I
switch between the pictures, it looks like the
character is moving his hand while standing and
staying at the same place. Which is exactly
what we want now, to save everything, you need to export every puse separately. And make sure that
while exporting, there is no background
color so we can use it as a PNG in the video
that we want to make. Now that we have our character
and our new poses ready, we can start animating. The first step for that
is recording your voice. Don't worry about the month yet, We will be adding it later.
6. Recording your Voice: All right, for
recording your voice, we're going to be using a
software called Audacity. It's the software that I
personally use for everything. The best thing about
it is that you can edit the voice that makes
it sound more professional. And that's what we will
be doing right now. But to do that, we first
need to record something. You can click this button
to start your record, but first you need to change the input to the device
that you are using. I'm currently using this one. Yeah. Just click here and
the record will start. Hi, I am Muto and this is
my new animation character. Let's listen to it. Hi, I am Muto and this is my
new animation character. All right, first thing
we need to do is to select somewhere where
you didn't talk at all. Once you've done that,
go to effect and then go to noise
removal and repair. And then go to noise reduction. And then click Get
noise profile this way. Now we know what the
background noise is. The next step will be
removing this voice, select everything and
then go to effect again, noise removal and
repair noise reduction. And then now just click okay. This way the background
noise will disappear. Now what we need
to do is to make the voice sound
more professional, select everything and
then go to effect, go to Q and filters
filter curve Q. Then here, you don't have
to understand any of that, just do what I'm doing. Go to Presets and
setting factory presets, and then click on Base
Boost. Then go to Apply. Again, select everything. Go to Effect and Filters, Filter curve, and then
Precess and settings. This time we're going
to choose a lulo for speech. Then click Apply. Now select everything again, and then go to Effect to
the same place again, but this time we're
going to be using a Treble boost Apply. Now the last thing that
we will be doing is basically select everything
again and then go to effect. But now we're going to go
to volume and compression. Go to limiter. If
it's not hard limit, choose hard limit
and then apply. You're good to go. We can
listen to it again now and see how much the
voice actually improved. Hi I am to. This is my new
animation character. Hi I am to. This is my new
animation character. If you did some mistakes
while recording or said anything wrong,
don't worry about it. We are going to be cutting
that in the edit section. You can also cut it here, but it's way easier. In the edit section, we can just export now. Go to file export and
then export as a B three. Just like that, we completed
recording the audio.
7. Adding the Mouth: All right, now we're finally going to be adding
the mouth to do that. We're going to be using
Adobe Character Animator. When you open that, it will
look something like that. The first thing we
need to do is to create something called puppet. We do that by going to file and going to open Puppet Maker. When you open it, you will
see a lot of puppets here. But we don't really
care about them because we're just going
to be using the mouth. As you can see,
the mouth here is like moving while
I'm talking to you. Yeah. There are
different puppets and stuff like this one, but personally I
just use this one. So once you choose your puppet, just click here on Generate. All right, once you
have the puppet here, next thing we need to do is to hide everything
except the mouth. Go to window and then
click on puppet. It will open this
window right here, and then just hide
everything except the mouth. All right. Open the puppet here and then just
hide everything. Now the only thing left
is this head right here. Click on head, and then hide
everything except the mouth. Perfect. Now, go to
this scene right here. Again, as you can see, okay, there's some
background stuff, foreground. All right. All right. Now we've
got the mouth here. The reason why we
recorded our voice before this step is to
do this right here. Adobeacor animator has a very cool feature
where you can import your voice and the software will sink your mouth movement
to the recording. To do that you need
to go to file and then import audio that
we recorded earlier. And put it in the
scene right here. It will look
something like that. Click here and then left click. Set scene duration to playhead. All right, the last thing we need to do is to sing the mouth. Click on the puppet and
then go to Timeline. And choose this
option right here. It will take some time,
but then as you can see, we have all the mouth
movement right here. Hi I'm to. This is my new
animation character. This is actually
not going to lie, it saves you so much time
and it's very efficient. Hi, I am to, and this is my new
animation character. By. All right, so now that
we have done that, we can go to this
little icon right here, and then click video with
Alpha via Adobe Media encoder. This way it will export
the video as a PNG, which is exactly what we need. Click here, it will open
Adobe Media Encoder for you. Once you see that, just
click here and click Enter. Boom. Just like that, you
have your mouth ready.
8. Editing your Character together: To animate our character, we're going to be using Cap Cut. It's another free software
that I personally use, and it's more than enough
for this animation. First, you need to import
everything that we need. What we need is the three
drawings that we drew earlier and also the mouth and any kind of background
that you would like to use. I personally will go
with a white background. First thing you want to
do is to add the mouth. We want to edit this before starting anything because
this will not change. Just cut the areas
that you don't like or where you
made some mistakes. You are ready to go add
the background and make it as big as the audio
and the mouth. Let's kill it right here. Now we're going to
listen to the audio. Hi, I am Muto and this is
my new animation character. Hi. Now I place the background on top of the
mouth, which is not good. We need to get it
underneath the mouth. Here you can see the mouth. Don't worry about it too much. We're going to be placing it
in the right place later. First, we need to add our poses. The first pose we're going to be adding is the first pose. At the beginning, I am
saying high to the viewer, which is why I made this pose. Once I say high in the audio, I'm going to be
changing the pose. Cut it right here.
You can cut things in cup cut with control
B, just like that. Make it a bit bigger
so you can see more. All right, exactly
where I say hi. We're going to be putting this the place where I say auto. I'm going to go back to
the normal standing pose. Let me cut it here
again with control B. And then add the
standing pose again. Hi, I am to Just
right here here. I'm going to say this is my
new animation character. Yeah, this is my new
animation character. All right, we're
going to be using this pose for this text. Boom, this is my new
animation character. Let's cut it here, actually,
make it a bit longer. Then add the wave again, because I am saying to
the end of the video, maybe add the standing
animation at the end as well. Boom. Now as you can see, we have our little
animation first. Hi, I am to. And this is my new
animation character by the bike can
come a bit earlier. It's like that actually, no, just make it that Hi. All right, now that we
have our animation ready, you need to click on the
mouth and then go to the end. And then click on three to
make it on top of everything. It's like that. Scale it and position it
the way you want. I'm going to rotate it by 15. Boom. Don't worry
about the quality. This is just because of
cup cut to work a bit faster. Just like that. Hi, I am mu. This is my new
animation character. By. All right, we can move
the mouth right here. Let's see the final product. Hi, I am T. This is my new
animation character by Hi, I am Muto and this is my
new animation character. By Perfect, you can obviously make a lot of poses and add more backgrounds, but I think for the tutorial
this is more than enough.
9. Your Turn: So now that you have
watched all the classes and saw how to make your
toy animation character, it's your turn to do
this stuff yourself. And so here's exactly
what I want you to do.
 Gakusei Muto, Mangaka - Youtuber