Transcripts
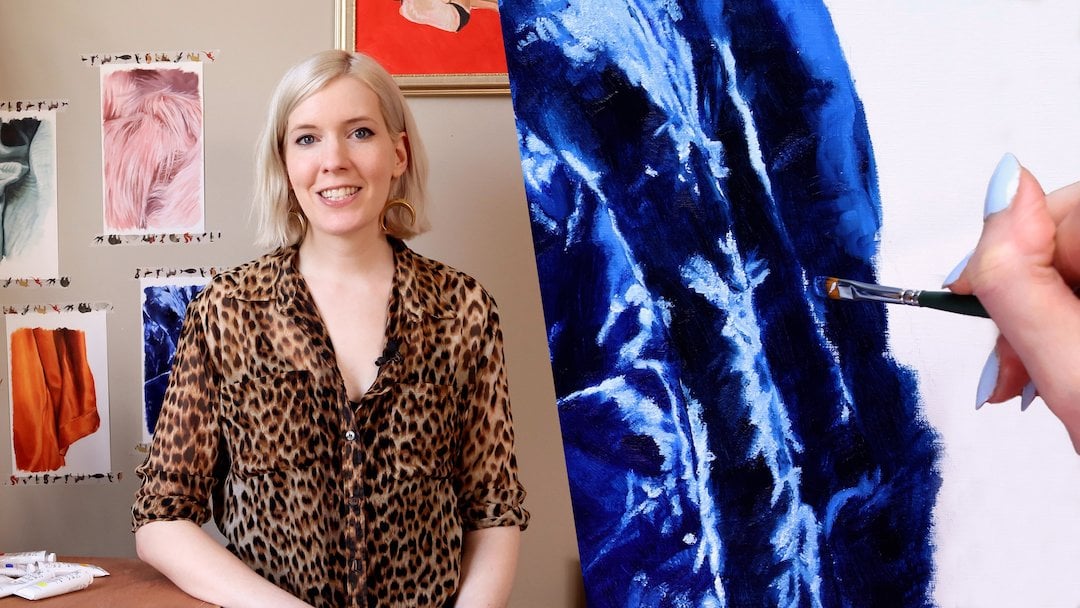
1. Welcome to my class: Hi, I'm Kate, and welcome to my oil portrait
painting class. In this class, I'm going
to guide you through my full process for grading a realistic portrait
with oil paint. Whether you want to
understand structure better, paint more confidently or simply enjoy the feeling
of painting a portrait, you're in the right place. Throughout this course,
I'll take you step by step from the very
beginning to the end. We start with preparing
materials, the paint, crushes, medium and surface I personally use and recommend. I also walk you through some essential fundamentals
in color mixing, sketching, some tips
that help you grow further so you could create portraits on your own
after this course. After that, I will show you how to build your underpainting, how to blocking in the
big shape and values, and how to slowly develop
the portrait layer by layer. I walk you through
every stage in real time sharing my tips and listen in
painting portraits. By the end of this class, you have your very own
realistic portraits. My goal is for you to
understand how you can apply it to any portrait you
want to paint in the future. This class is for everyone, but I highly recommend
it if you already have some basic foundation like understanding simple
facial proportion, basic color mixing, or you can paint basic
three D objects. You don't have to be
perfect at any of these. Even a little experience
will make it much easier to follow and
enjoy the process more. But if you're brand new, you're still welcome to join. Just take it slow and have fun. That's the most important part.
2. Brushes & Surfaces: Tools and Materials: So before we start painting, I will walk you
through the brushes and surface I use most often. Understand your tools
make a huge difference, not only in how your
painting looks, but how it feels when
you're painting. So first of all, brush sizes, here I will show you
from large to detail. It's important to have
a range of brush sizes. So large brushes for
blocking in and big shape, medium brushes for
building forms, and small detail
brushes for the eyes, leaves, edges, and
finishing Dutch. Now we show you two main
brass type that I'm currently using Bristo
brass and sabras. Bristobas which is
stiff for more texture. I hold paint and
release it very well. It's very excellent for building structure
and it's also very great when building off on the painting and
some first layers. But the cars aa is not ideal for blending and can leave visible mark if you
want a smooth finish. Here are soft brushes. They sable soft synthetic
or soft fiber shape. I mostly use it for
blending, refining edges, creating smoother transition, developing realistic
skin texture. It's very perfect
for sob gradient, I helped create a
polished finish and great control
in tighter area. But the cons is that it doesn't hold heavy
pain as well and it's not ideal if you want to create sexual visible
stroke on your painting. So in my experience, I often use Bristobs using them to blocking shape and lay
down the foundation. Also when I want intentional
texture in the final look, I return to Bistbs again because they leave
beautiful brush dock. F sub brr, I often
switch to sob brushes intuitively when I want gentle blending or smoother
transition in portrait, especially around the cheek, the eyelid, create
subtle shadows. They help me give the painting that realistic
and luminous finish. So here I will show you some of the brush I use
very, very often. Most of my brushes are
from hobne from Japan, a brand that I trust because their brush quality is very
consistent and long lasting. This is very important for oil painting. If you use the same bros for
both light and dark area, you will mix them
unintentionally and your painting will
become muddy very quickly. That's why I personally
buy two of the same bros. If I use that size, that type of bros very often, I will buy two of the same bros, so I can use one for light
and one for dark area. So the tip help me keep the color clean
and fresh and vibrant. I also recommend using bras
from reputable brands. In my experience,
high quality bras, I mean, not too
expensive, of course, depending on how
you can afford it, but I recommend using bras from reputable brand because
they hold pain better. They release pain more
evenly and good tools don't make you become a
better artist overnight, but of course, they
will make the process far smoother and more
joyful, easier for you. Are some type of surface that
you can use to paint oil. First of all, is
oil painting paper. They are very great
for practice. They are very affordable. They are very perfect
for quick study, values practice or
trying new technique. Empty aboard. This is also
a very affordable choice, but it needs to be prepared. First, you need to seal the surface with
one or two coat of glue and then apply about
four to five coat of gil. After sending is
mood you will have a clean even surface
that ready for painting. And lastly, is canvas. You can buy bruise stretched
canvas at most art shop. Cotton canvas like this is very affordable and
great for beginners. I still recommend adding
a few extra layers of just so before painting to
get a bit of final result. And this is the surface
I love the most, and this is also the
one I'll be using for this portrait
demonstration in this class. This is linen canvas. This is my personal
favorite because I find that it holds
paint beautifully, and that's why it keeps
color vibrant and fresh. It's a bit more expensive
compared to cotton canvas. Of course, depending on
type of linen that you buy. But in general, I find that it's more expensive
than the cotton one, but it's very worth it. I find that Lenin is very ideal for portrait
painting because it has a special texture that
groups the paint very well and adds subtle
character to the portrait.
3. Oil Paints & Mediums: What I Use and Why: So here I will introduce you the oil paint
and medium I use. You don't need a huge
collection to start, a solid set of core colors
and one or two simple medium. The goal is to understand
your materials so they could support you
process, not overwhelm you. For most of my painting, I regularly use this oil paint. This give you everything
you need to mi skin tones. Beside all the basic oil paint, I also have some other
colors that I use sometimes to make my painting
more colorful and vibrant. These aren't necessary
for beginners, but they are nice
addition when you want a specific
temperature or intensify. You don't need expensive
paint to start. Let me share some brands
that I use and what I recommend from student
grade to artist grade. For student grade, I use
Van Gogh and Winton. I started oil
painting with this, and I still recommend them. The quality is solid and
the colours are quite reliable and also the
price is very accessible. They're perfect if
you're just beginning or practicing portrait basic. And also good quality and affordable pigment
that I find later, I use master class
and gambling color. They have good pigment load, but remain very affordable. For professional grade, they contain high pigment
and very vibrant. I use Michael
Harding and combine. These are my favorite. The
colors are extremely vibrant, rich and full of pigment because the pigment
load is very high, so you often need less pain to achieve
beautiful saturation compared to student
grade when you need more pain to achieve the
final load that you want, for professional
grade, sometimes you just need very little pain. Medium can be very
confusing at the beginning. But in this video, I will just simplify some very
few medium I use. And to be honest, I do not use medium much
in my painting, but I will show you what is wonder so you can choose
what fits your style. First of all, this
still top and tie, use the thin paint, clean brushes, but it has strong smell and
can be irritating. I actually don't use top and tie anymore because I
cannot stand the smell, and my painting
space is very small. So if you use it to sing
your paint, clean brushes, please work in a well
ventilated area. Spike lavender oil. This is natural, less
harsh than turpentine, less toxic than turpentine, but it's still a solvent,
use it with care. It's good for thinning pain
and also to clean brush, it's great for
toning the canvas. I often use it to
tone the canvas and use it in the beginning
stage of my painting. So thicken linseed oil. This oil painting medium
is perfect for glazing. As gloss and flow, it helps paint
level out smoothly. I use a tiny amount in my final layers when I want
smooth luminous transition. Venetian turpentine, this is a traditional
glazing medium. It's thick, resin like. When mixed with linseed oil, it creates beautiful
glossy glazes, but I use it very
rarely only when I want a very specific
glazing effect. Here I'm showing you
all the medium I have. But in my actual
painting process, I don't use this very often. Especially in this lesson, I only use spite lavender oil to thin the paint and to tone the canvas I'm currently using baby oil to
clean my brush. It helps to remove the
paint from bras very well because my painting
space is very small. I try to avoid
using solvent and I cannot access to non toxic
solvent in my country. So baby oil is a
good alternative. But an important
warning when using baby oil is that don't
let baby oil get on your canvas during the
painting process because it can ruin the painting or make the surface stay wet and sticky. So always clean your br thoroughly and make sure
it's dry before continuing. I also use the soap to remove the baby oil and also
leftover pigment, but I use it sometime
not every day. If you paint in a well
ventilated spaces area and also have access to non toxic
solvents in your country, I honestly recommend using
non toxic solvent because they are easier and safer to use during the
painting process. But baby oil is also a workable alternative
if you're careful. During the painting process, I mostly use a clean tissue to wipe excess paint
from my brushes. This keep the color clean and prevent my painting
from getting muddy.
4. Preparing the Canvas: Stretching and Priming: For this class, I'll
be working with linen, a frame, a stable gun, and a pair of stretcher pliers. Step one, massle and cut, lay your linen on the surface, and then put the frame on top. Cut the fabric so that you
have a generous margin around all four sides enough to fold
over the frame comfortably. This extra space
allows you to stretch the linen evenly without
running short on any edge. Start by placing
one initial staple in the center of one
side of the frame. Wh anchors the fabrit and
prevent it from shifting. Then using stretcher pliers, pull the linen firmly
on the opposite side and place a staple directly
across from the first one. The frapri should feel tight
but not overly strained. Repeat this process on
the remaining two side, pull then stable,
pol then staple. Always work from the center outward to keep
the tension even. When finished, your
linen should feel tight and smooth with no
sacking or wrinkles. If the canvas feels
loose or slightly baggy, simply remove the
sales in that area, pull the favorite tighter, and then staple again. It's completely normal
to adjust once or twice. For this class, I'm using
liquitex acrylic gesso. Instead of a brush, I prefer using a flat
bunge applicator. It helps spread the gesso evenly without leaving visible
brush mark on the linen. This creates a cleaner, smoother surface for
portrait painting. Applying the gesso, typically, I apply four to five layers, apply the first coat evenly
across the entire surface, and let it dry completely. And then you apply
the second coat at a slightly different
direction and then repeat until you have
four to five thin layers. After the fourth
layer is fully dry, I gently sand the surface
with a fine grit sandpaper, sending health, even
out the texture, and create a smooth
painting ground.
5. Color Mixing Basics for Portrait Painting: I will not go too deeply into color mixing principle
in this class. I encourage you to
explore some lesson, focus on color mixing, working with limited
color palette, and experimenting to create as many color
variations as possible. Understanding the
color wheel and basic color theory will make the painting
process much easier. To keep this lesson simple
and not too overwhelming, I only introduce few key points that are especially important
for portrait painting. So every color leans
either warm or cool, warm colors like red, orange, one yellow, one brown, and cool colors like blue, cool yellow, cool green, violet. When painting skin tones, we constantly ship temperature. Warmer area like cheek nose, leaves around the eyes, and cooler areas often in
the jaw line, the neck, of the cheek shadows, if something looks off often because the temperature
is wrong, not the hue. Remember to pay attention
to value when painting. Value means how light and dark a color is in portrait painting. Value controls the foam. A correct value with a
slightly wrong color still look believable, but a wrong value with even the perfect color
still looks strain. When missing color, remember
to first check the value, then adjust the temperature, and then adjust saturation. This will keep your mixture
clean and intentional. Complimentary colors is a color that sit opposite each
other on the color wheel, such as red, green, blue, orange, yellow, purple. Adding a tiny amount of complimentary color will
help to reduce saturation, help you to create
natural neutrals and make skin tone
look more realistic. For example, too much
warm in your mixture, add a touch of green
or ultramarine blue, or if your mixture is too cool, add a tiny bit of
orange or warm red. Now I will walk you through my initial color mixture to prepare before
start painting. I will not remix every
single color in detail. Instead, I prepare a few
key mixture that cover the range from darkest value to mid tone and to
light the tone. This mixture will give
me a variation of colors I can easily adjust
during the painting process. For the darkest mixture, I use buntmw and
ultramarine blue. I also add a small amount of bun sienna to create
the flow and loosen the texture because
the buntew from star glass tend to be a bit
dry and slightly greedy. This creates a deep
natural shadow color. For a warmer dog, I miss bun Siena, ultramarine blue, and a
little Azaren crimson. If I want to push it darker, I sometimes add a
touch of bun temper. This mixture is useful for the warmer part of
the shadow areas, especially around the face where the temperature
shifts subtly. For the middle dark tone, I mis three primary colors, a lasering crimson,
yellow ochre, ultramarine blue, and a
bit of titanium white. When these blend together, you get a beautiful
naturalmdtne. Depending on the portrait, you can adjust this
mixture along the way. For example, add more red
or orange to warm it up or add more ultramarine blue or cerulean blue
to cool it down. This mixture forms the base for most natural skin shadows. This mixture leans warm and will be used for the lighter
mid tone of the face. I start with a good
amount of titanium white, then mis in a laserin crimson, cadmium orange, and a
bit of yellow ochre. I don't clean my palette
knife at this stage, so to keep a little of
the notrmture blends in, this help the color remain
natural, not overly saturated. To balance the warmth, I add a tiny amount of ultramarine blue to
neutralize it slightly. If you only add warm colors, the mixture become
too red or unnatural, this small amount of
blue will keep bring it back to a natural skin tone. For the light tone, I mix
titanium white with coral rose and then add a bit of cadmium yellow to make
the mixture brighter. Then I add a touch of
ultramarine blue to neutralize the warm so it feels more like natural skin rather than
pure pink or orange. Lastly, the lightest mixture, I take a small amount of
the previous light tone and add much more titanium white
to create a light variation. I also add a tiny
amount of cadmum yellow to keep the highlight
vibrant and lively.
6. Sketching the Portrait: Proportion: Before we start painting, let's spend some time talking
about the sketch because a portrait becomes so much easier when the
foundation is strong. Good drawing is what holds
the entire painting together. The color, the breast work, and the details all depend on whether the structure
underneath is accurate. That's why I believe
that developing strong sketching
skill is essential. It will support your
painting process in any medium, not only oil, everyone has their own way of practicing and their
own sketching method, but I'll share two approaches
that I personally found very useful so you could try them to practice
at home as well. The Lumis head is
a great method to practice because it teaches you the underlying
structure of the head, the sphere, symmetry, the plan, proportion, the placement
of the feature. When I first started,
this approach made drawing pass
feel much simpler. With consistent
practice, I believe that it can significantly improve
your sketching skill. I also spent a lot of time copying drawings
from the old master. It helps me understand how to simplify shape and
design the shadows. By studying and
copying their work, I can see why they make
certain decision and it has greatly improved
both my eyes for detail and my line work. Now let's talk about how
I sket for painting. You can sket on paper
first and then transfer your drawing using bracing paper or graphi transfer paper. This method is great. If you're not very confident
to sket directly on Canvas, you want to focus
on the painting instead of worrying
about drawing accuracy. The portrait has
complex proportion. This is the easiest
method for beginners and ensure the basic structure is correct before
you start painting. First, I start by toning the canvas. As I mentioned earlier, I use white lavender oil to thin the oil paint and I create a
very thin wash of burn sana. I use a large broth to spread this wash evenly across
the entire canvas. At this stage, I
use more solvent, so the paint stay
very thin and fluid. This allows the color
to flow easily, cover the surface
quickly, dry faster, and create a perfect base
for sketching on top. Then I gently wipe the portrait
area with a paper towel. This creates a warm
tone I feel more comfortable to paint on
instead of a white canvas, which easily distract my eyes. A pure canvas is quite
hard to judge value on, so toning helps a lot. First, I compare the height
of the face to the frame. In this reference, the distance from the top of the head to the chin is approximately the same as the distance
from the chin to the chest. I start by marking
the top of the head, then mezle downward so
that the distance from the head to the chin matches the distance from the
chin to the chest. The midpoint between
these two mark becomes the chin that helps me anchor the face correctly
within the composition. Once I have the top and bottom
of the face established, I begin marking the
main facial division, from the forehead
to the eyebrows, from the eyebrows to
the base of the nose, and from the nose to the chin. In this portrait, the
distance from the forehead to the eyebrows is roughly equal to the distance from the
eyebrow to the nose, while the distance
from the nose to the chin is slightly shorter. After marking this point, I measle again to double
check the proportion. After marking the main points, I connect them lightly
drawing the eyeline, the nose line, and the chin line following the tooth of the head. Because of perspective, these
lines are not parallel. They subtly converse toward
a single vanishing point. Next, I draw the center line
of the face to indicate the direction of the nose and divide the face
into two halves. I mark the width
of the left eye, noting it starting
and ending point. Then I compare the relationship
between the two eyes on the reference image to understand their
proportional difference. Because of the head tilt
and perspective principle, the right eye appears slightly
narrower than the left. Based on this comparison, I estimate the spacing and mark the position of the
right eye on the canvas. I then reject this
measurement against the photo to make sure
everything feels accurate. Once the main facial
visual point are marked, I begin sketching the
face by connecting this landmark and refining
the overall drawing. I use in Bonsiena which make the line easier to adjust
and correct along the way. At this stage, I also
start indicating the main shadow areas
such as the cheek bones, the eye socket, the
side of the nose. This helped me
visualize the face as a three dimensional
form and create a solid foundation for applying
color in the next step. I also mark the mouth, the left corner of the mouth aligned roughly with
the left eye socket, and the right
corner of the mouth aligned with the outer edge
of the right eye wrist. I mark this point on
the canvas and check them against the reference
to confirm accuracy. This measuring state
is quite flexible. You can compare
any relationships that feel comfortable to you, such as the width of the eye compared to the
length of the nose, the distance between
the eyebrows, compared to the eye width or any other proportional
relationships you notice on the face. The goal is to understand how different facial fissure relate to each other
in size and position. The more carefully you measure, the more accurate
your skirt will be. At this stage, everything is still very light
and adjustable. This sketch is simply a guide, a solid foundation
that will make the painting process much
easier and more confident. Throughout the sketching
and painting process, everything can be adjusted. I'm constantly
measuring proportion and making small
correction along the way. Even if you start by
transferring the key point or outline from the reference
image onto the canvas, you still need to
revisit and remeasure as you paint because
as pain is applied, les naturally shipped
and edges move. Checking your
proportion again and again is an important
part of the process. I highly recommend you to learn about
comparative measuring, which mean comparing
one distance to another rather than relying
on fixed measurement. This method helps you a lot
when painting portraits. For example, you might ask is the width of the head bigger
or smaller than the height? Is the distance from the eyes to the nose the same as a distance from
the nose to the chin? Where does the corner of the eyes align vertically
with the mouth? You use your brass or
pencil as a measuring tool, holding it at arm length, comparing angles and lengths, and marking those
relationship on the canvas. This approach build accuracy without making the
drawing feel stiff. Because bunsena is diluted, it's very easy to adjust
at the sketching stage. If something falls off, I can simply use a towel to
wipe it away and redraw. Since it is a free hand sketch, there is no need
to feel stressed or aim for perfection
right away. I work primarily by
observation, sketching, adjusting, and remeasuring proportion
over and over again. I continue refining
until the skirt feels balanced and the facial features are in the right proportion. This back and forth process is a normal and important part of building an
accurate portrait. As I go, I also
begin to reinforce the shadow areas and also the darkest value zone
by applying a bit more paint. This helped me establish an early sense of
value and volume, allowing the face to
read more clearly as a three dimensional form
before moving on to the color. At this stage, I
focus primarily on the face and only lightly
indicate the neck. I devote most of my time to refining the overall
facial shape and the angle of the head
rather than focusing on detailed rendering
of individual features, avoiding excessive
detail at this point, help me prevent visual overload and allows me to establish
accurate structure, proportion, and gesture before progressing to more refined
stages of the painting.
7. Foundation Stage: Blocking In Part 1: For the first layer, I always work from the darkest value toward
the lighter ones. This helped me establish
structure depth in a clear value hierarchy
early in the painting. I start with the eyes by using my darkest mixture to define
the main eye structure, the upper and lower
lash line, the eyelid, and the grease of the eyelid, the tear duct, and the
outer corner of the eye. The color around the eyes naturally leans
warmer and redder. This is because the skin in this area is thin and
rich in blood vessel, so I add a small amount of laserin crimson to
my dark mixture. This helps the shadow feels more lifelike rather than
neutral or flat. I am slightly defining
the outer contours of the eyes rather than focusing
on detail immediately, I prioritize establishing the overall
shape and placement. Now I will work gradually
building the form with sound control lines since this
is still the initial skit, so I keep the mark light and flexible so that I can easily adjust
proportion if needed. For the area
surrounding the irish, I still use the darks mixture, but I add a touch
of cerulean blue, since her eyes color is blue, so this subtle
adjustment helps suggest the coolness of the irish while keeping the value
dark and controlled. The base mixture already contain umber bottob
ultramarine blue, so adding cerulean shaped the ht without breaking
the value structure. Now I move on the OSI, following the same approach. I begin by defining
the out controls to establish its overall shape
and placement as I work, I'm constantly comparing it to the first eye rather than treating it as a
separate element. This helps maintain
the consistency in shape, size, and proportion. One important thing to
keep in mind is that both eyes should sit along
the same horizontal line, often referred to
as the eye line. As I draw, I frequently
step back and check whether this second eye aligns correctly
with the first one. It's very easy for
the second eye to drift slightly higher or lower, this stage requires careful
observation and adjustment. I often go back and
forth refining both eye together instead of finishing one completely before the other. I'm also paying attention to the spacing between
the eyes as well as the angle and the
tilt making sure they follow the same
directional flow of the head. Once the main eye
lines are established, I move on to the
eye socket shadows. I use a middle dacton modified with a small
amount of yellow ochre, yellow ochre slightly warm
the mixture and lower the Croma which is especially useful for
natural skin shadows. I then adjust the
temperature as needed with bun Ciena to warm or
ultramarine blue to cool. In this portrait,
the left eye socket and the outer corner of the left eye are the
darkest because they are partially in shadow
cast by the hair. I emphasize these
areas slightly more to reinforce depth and
lighting direction. Anatomically, the eye socket
is the deepest recess area, so it naturally contain
the darkest shadow. The area that produ
slightly in the middle, such as the upper cheek or brow bone catches more
light or reflected light. In this case, I observe
that her skin has a warm, reddish undertone,
especially around the eyes. For the lighter areas
surrounding the eye, I introduce subtle violet, create grey by missing middle tone with red and
blue ultramarine blue. Violet is very effective
in portrait painting because it helps
transition between warm skin tone and
color shadow area. For the lighter glends I use a mixture dominated by red ton, balanced with
ultramarine blue and soften with my
light ton mixture. This creates a natural
luminous skin color without becoming
overly saturated. I then move on to other areas of the face that contain
the darkest value, the cheek hollows, and the
area beneath the chin. The cheek hollows on both side, especially on the left
appear significantly darker due to cast shadow
created by the hair. From this recess area, the value gradually transition lighter as they
move outward toward the cheek in the
reference image, the cheek display a notable
warm color temperature leaning strongly
towards red and orange. To reflect this, I begin by painting the deepest part
of the cheek hollows and extending these
shadows toward the side of the chin using
a warm dark mixture. As I work, I gradually introduce
more isarin crimson to enhance the warm and better describe the underlying
blood rich skin tone. For the middle tone
transition on the cheek, the area between
the cheek holour and the fuller cheek blends, I observe a strong red orange
quality to achieve this, I missed a colour
dominated by red combined with cadmium orange and a small amount
of yellow ochre. I also use the darkest value to define the upper
edge of the forehead, helping to frame the face, and then apply the
same dark mixture to establish the nostril. Using the middle tone, I paint the shadows along
both sides of the nose, adjusting the mixture with additional red and orange and kded or sometime yellow ochre. While working with
this middle tone, I continue to develop the
mid values of the cheek. In this portrait, the
skin appears overall quite warm with a strong
red, orange bias. This one may be influenced
by reflected light from her red hair because my initial mixture are
relatively neutral, so I constantly introduce
more red and orange during application to
accurately capture the temperature and
liveliness of her skin.
8. Foundation Stage: Blocking In Part 2: Next, I move on to painting the shadow
beneath the nose. This area sit in a
dark middle value, and as the shadow transition
downward toward the mouth, the colour gradually becomes warmer with more orange nodes. After blocking the dark areas, I continue establishing
the middle light values. I walk from the eyes
downward to the cheek, moving from the cheek hollow outward toward the
center of the face. From there, I gradually
transition through the middle light tone
toward the lightest area, grading a smooth
value progression across the facial plane. When working on the
lighter tones of the face, I prepare several variations
of my light tone mixture. I introduce more
amount of erlein blue, which is a cool blue to supply
cool certain light area. This is important because
not all highlights are warm in areas such as around the
mouth and beneath the nose, I observe cooler light, so I adjust the mixture accordingly with a
touch of erlein blue. In the first working stage, it's very important
to not overdetail. The main goal at
this stage is to establish the major value
and color relationships, not to define small features, Odetailing too early
can easily become overwhelming and often weakens the overall structure
of the painting. At the same time, is
equally important not to block in shaves that
are too large and uniform. If a single value or color is applied over an
overly large area, it becomes very difficult
to read the underlying form instead of blocking in only the darkest and the lightest value, pay close attention to the transitional
tone between them. For example, avoid painting
the entire cheek with one flat pin tone or using only the lightest value on
the front plane of the face. While we don't need to
stop to refinement yet, we must still describe enough radiation to
suggest the form. By the end of the
blocking stage, the portrait should already
read as three dimensional. The value and color
transition should clearly indicate lens turning in
space even without detail. To support this, brew
direction is very important. I recommend imagining the
head as a collection of simple three
dimensional forms such as sphere, cylinder, and plane. The face, especially
the cheek and forehead, can be visualized as
part of a sphere. I follow this image form with my brush stroke
allowing the direction of stroke to wrap around the form rather than
moving randomly. This approach reinforce volume and help the
painting feel solid. As you can see, the
bridge of the nose, which is a nasal bone catch
the most direct light, but it should not be painted
as a single flat highlight. The bridge subtly turn
as it moves downward, so the value and color ship gradually rather than
stay in uniform. I block in the lightest area and observe where
the light actually hit instead of covering the entire bridge
with one bright ton. Along both sides of the bridge are the side planes of the nose, which receive
slightly less light than the center of the bridge. The color and value should transition from the
lightest point at the center and gradually become darker as
it moves outward. It's important to
avoid outlining the nose with a
single uniform color. This will make the form
appear flat or like cartoon. I pay close attention
to the area where the forehead transition
into the beginning of the nasal bridge. This connecting zone typically
appear slightly darker than both the
protruding forehead and the bridge of the nose. The reason is that
the forehead and the nasal bridge are more
forward facing planes that catch direct light while
the area between them turns subtly away from the light and fall into soft shadow
cast by the forehead. Next, I move on to the forehead. Although the forehead generally
receive the most light, it's important not to block in the entire area with
the lightest value. Doing so would flatten the form. Instead, I observe the
value changes and build the area gradually working from darker values
toward lighter one. On the right side
of the forehead, there is a subtle cast
shadow from the hair, which introduce a slightly warmer reddish orange influence. I reflect this by warming the mixture
gently in that area. I use a light ton mixture
adjusted with red and a small amount of cerulen blue to paint
the nasal wins. The nasal winds receive
less direct light. So it's important to avoid using the same light value for these
areas as for the bridge of the nose because it receive less direct light and therefore must remain slightly
darker than the bridge. Maintaining this value
difference is very essential for reserving the three
dimensional structure and form of the nose. I leave the leaves
to blocking lots after establishing the
surrounding skin tone. Her leaves are not deep red, but rather lean toward
a warm red orange. I miss red with cadmium orange as the base colour
for the lower lip, I add a small amount
of white to reflect its fuller form and
greater light exposure. For the upper lip
and shadow areas, I incorporate more alizarin
crimson and also sometime add a touch of ultramarine blue along the darker edges
to deepen the value. When painting the leaves, I follow the natural
direction of the leap planes rather than outlining them
with a single line. This approach help create a more convincing three
dimensional effect. I'm also paying attention to
the structure of the leaves. The leaves are not flat. They have volume with subtle blanes that
catch differently. The central area often
appears fuller while the edges soften and blend more into the
surrounding skin. Instead of outlining the
leaves with a hard line, I allow the edges to
soften gradually, especially along
the outer contours. This helps the lips
feel integrated into the face rather than appearing
cut out and graphed. I varied the color slightly introducing warmer tones
toward the center and slightly cooler and more
neutral tones as I move upward to reflect the
natural variation in the skin and leaf surface.
9. Foundation Stage: Blocking In Part 3: After establishing
the facial tones, I move on to blocking the neck, again working from
the darkest value toward the lighter ones. I begin with the deepest
shadow beneath the chin. This area received very
little direct light and is often the darkest part of the neck due to the cast
shadow from the head. I use a warm dark misure adjusting with bone
tumble and bone sienna and also introduce a
small amount of red to reflect the natural warm
and blood flow in this area. As the form moves downward
and away from the chin, the values gradually
become lighter. I transition into
mito ducton softening the edges to avoid a harsh separation between
the face and the neck. The side of the neck remain
darker than the center helping to describe the
cylindrical form of the neck. The I avoid pushing the neck into the lightest
value at this stage, keeping the neck slightly
darker than the face, help maintain focus
on the portrait and reinforces a natural hierarchy of the light and attention. At this blocking stage, my goal is not detail, but clear value relationships, temperature variation,
and a solid sense of form which will support
refinement in later layers. After blocking in
the face and neck, I move on to the hair. At this stage, I
use a large bros, which is extremely important when beginning to paint hair. When painting hair,
always start with a large bros and focus on locking in the major light
and dark masses first. Avoid the common mistake of becoming overwhelmed
by the complexity of the hair and trying to define individual strength too
early with a small bros, beginning with a
small bros often lead to stiffness and
loss of structure. The priority at this stage is
value and mass not detail. While painting the hair, I continue to evaluate the
surrounding space using it as an opportunity to correct and refine the overall
shape of the face. In this blocking phase, I concentrate solely on establishing the light and
shadow pattern of the hair. I do not describe whether the
hair is straight or c yet, that level of detail
will be addressed in later stages once the
overall structure is solid. For the doctor's hair muscles, I use my dog mixture
and introduce more burn sienna to keep
the shadow warm and rich. For the middle tones, I rely primarily on burn sienna and for
the lighter areas, I introduce more red
and cadmium orange reflecting the red
hue of her hair. In some highlight area, I also add a small
amount of yellow ochre to increase brightness while
keeping the color crowded. I'm focusing primarily on value, how light or dark each section is rather than small details
or texture as you see, I keep the broo broad and simple allowing me to
adjust easily as I go. If something feels off, I can always refine it
later in the next stages. The goal here is to create
a solid base that describe the overall shape and flow of the hair so that in
the later stages, adding detail become much
easier and more control, don't worry about
making it perfect, focusing on blocking the main light and
dark relationships.
10. Foundation Stage: Blocking In Part 4: Finally, I block in the
chest area and also continue refining the connection between the neck and the chest. Adjusting the neck is also a part that
takes a lot of time, as it help clearly suggest the tilt and the
orientation of her head. I also enhance the darker values and refine the
transitional colors. Insuring the transition
between the neck and the chest feels
natural and cohesive. I reassess the value structure and reinforce some of
the darkest shadow. During the painting process, certain shadow areas may
not yet be dark enough, so we can always
check and go back and forth adjusting
and deepening shadow as needed to strengthen contrast and restore a clear
sense of depth and form. While painting, I also switch brushes to maintain
the clean colour. I even have three
separate brushes for the side that I
used most frequently, one dedicated to Doc mixture and one for the middle tones
and one for the light tone. For other brushes,
as a very list, it's important to use separate brushes for
dark and for light area. If you use the same brush
without properly cleaning it, dark pigment can contaminate lighter mixture causing the
colors to become muddy. Likewise, light
paint carried into dark area can weaken
the shadow value, reducing the contrast and flattening the overall
depth of the painting. If you only have one
brush for one side, make sure to wipe it thoroughly with a
clean clot or tissue or rinse it briefly with solvent before picking
up a new value range, keeping your brushes clean and organized help a lot
in resolving clarity, color purity, and
strong value separation throughout the painting process. To complete the blocking stage, I returned to the ice and
filling the remaining areas, including the eyelid
and the Irish when painting the iris, it's important not to fill it with a single flat dark color. The value and color of the iris vary depending
on the light. In this portrait, the iris
appears lighter around the outer edge and darker toward the center where the
pupil is located. I use more ultramarine blue in the darker central
area of the iris to create depth while keeping the surrounding areas slightly lighter and more transparent. This variation help the eye feel alive and three
dimensional rather than flat. I'm moving on to the second eye and follow the same process. I apply the same approach in terms of value,
color, and structure. In this stage, I'm also constantly comparing
the two eyes as I work, making sure they
feel consistent in size, alignment, and intensity. It's important that
both eyes belong to the same phase and share the
same lightning condition. I may go back and forth between the two adjusting as needed. In this stage, I'm
still focusing on the overall structure and value not overly refining
small details yet. For the white of the eyes, I avoid using pure white. In reality, the sclera is a
sub gray rather than white. I miss a subtle neutral
using blue red, bun sienna and white adjusting the balance
to keep it understated.
11. Developing the Portrait: Building Form and Color Part 1: The second layer focuses on
building up and enhancing the facial feature and refining the overall
structure of the face. At this stage, I deepen the shadows and introduce
more transitional value and color variation to create a smoother skin tone and more
clearly defined feature. While the goal is not
extreme detail yet, this layer bring
greater clarity, contrast, and cohesion
to the portrait. I begin this layer by
returning to the eyes. I deepen the shadows and
further define the eyelid, under eye area and the surrounding skin as it connects to the
nose and upper cheek. Observing the reference,
I notice that the skin around the eyes lean toward
cooler red violet ton, whereas the cheek leaned toward
warmer red, orange hues. To reflect this, I also introduce more
blue to the mixture around the eyes and adjusting the amount based on the
value of each area. I also refine details within
the Irish and People. I also pay attention to the asymmetry between
the two eyes. The left eye received less
light in the reference, so it's shadow or deeper
and more pronounced. When painting the lower eyelid, it's important to
remember that it's not just a line but a
sub rounded form. The lower eyelid sits
slightly forward from the eyeball and catches light differently
along its surface. The edge of the lower lid is usually lighter than
the eye socket beneath it, but darker than the
highlight on the upper lid. I avoid outlining it sharply and instead
suggest it formed through subtle value and
color ship the lower eyelid often reflect light
from the cheek below, which can introduce slightly warmer or lighter
tone along its edge. At this stage, I begin using smaller finer brushes to define eye controls and
anatomical details more precisely while still
maintaining subtransition. Skin a static. I constantly shifts in value, color, temperature, and
saturation across the surface. The more subtle and control
these transitional, the more realistic and
lively the portrait become. This is the primary purpose
of the later layers. In contrast, relying
only on dark, middle, and light value
and then blending them excessively often
lead to muddy color, flattened form and
a lfeless result. A common mistake when
painting is that painting the shadow as one solid block which make the form look flat. Even within the shadow, there's always variation
of light and dark. Shadows are not uniform. They contain structure, reflected light and
subtle transition that describe the form. So when building layers
in shadow areas such as around the eye socket or
along the side of the nose, I carefully observe
the reference to identify value shaped
within the shadow family. For example, the deepest
shadow often appear new plane changes or
waveform overlap, while areas closer to the
light may contain softer, slightly lighter shadow tone
due to reflected light. By introducing this variation, the shadow remain dimensional rather than heavy or clumped. I also avoid blending
everything together too much, which can flatten the form. Instead, I use
control transition to suggest how the
form turn in space, allowing the shadow to support the overall three dimensional
structure of the face. At this stage, I began using softer brushes to build
up layers which help create smoother
transition across the skin surface when mixing colors during
the painting process, I avoid mixing large amount
of paint all at once. Instead, I miss small
variation at a time, then test the color
directly on the canvas. If it doesn't feel right, I
adjust the mixture gradually. This approach, keep the process flexible, reduces wasted pain, and also help prevent color from becoming muddy
because overworking a single mixture with
too many pigment often does the color and
reduces pregrancy for me, color mixing is a process
of testing and adjusting. Of course, this is
guided by color theory and fundamental principle,
not random mixing, but it's important to
understand that a color on the palette really look the same once applied on the canvas, the palette in neutral
isolated context, while the canvas
present color in relationship to surrounding
values and hues. Because of this, a
color that appears correct on the palette
may shift in value, hue or chroma once it
plays within the painting. This is especially important when working with
light and shadow, a color may appear very dark
in the reference image, but once painted, it can
turn out to be too dark. Often this happened because the area is surrounded
by light to values, making it appear
darker by contrast. Also, the same applied to reflected light
within a shadow. It may look bright
in the reference, but if painted too light, it can break the
logic of the form. The lightest value within
the shadow family is always darker than
the darkest value within the light family. At this stage, I begin refining and defining
the eyes in more detail. I switch between smaller, fine detail broaches to gain better control over the
lines and subtle transition. This is a stage where it's helpful to slow
down and work more carefully as the eyes
are the local point of the face and small adjustment
can make a big difference. As I paint, I'm constantly observing the reference and making adjustments
along the way. Rather than relying
on a single measure, I continuously tweak the color, adjusting the value,
the temperature, and the intensity as needed. I don't expect to get the
perfect color immediately. Instead, I apply a small amount, observe how it within the
context of the painting, and then refine it
further if necessary. I also go back and forth
between both eyes, comparing them to maintain consistency in shape,
direction, and value. So at this stage, the goal is to gradually
build up clarity and definition while still keeping the transition
solved and natural. As you can see, I'm constantly redefining
the contours as I go. So feel free to make
adjustments along the way. This stage is very flexible. So don't hesitate to correct and improve
the shaft as you work. Sometimes when I apply a color, it may appear too
light or slightly off compared to what I
observe in the reference. In those cases, I simply adjust it directly
on the canvas. This is actually
one of the aspect I really enjoy about
working with oil paint. Oil painting gives you
the advantage of time. You're not forced to get
everything right immediately. You can continue to modify layer and refine the paint
while it's still workable. Rather than trying to achieve the perfect mixture
from the beginning, I treat the process as
a series of adjustment. I apply small amount of paint, observe how it interacts
with the surrounding colors, and then refine it if needed. This allows for a more intuitive
and responsive workflow where I can gradually move closer to the correct
value and color. So don't feel pressured to get everything
perfect in one step. Take advantage of the
flexibility of the medium and allow yourself time to adjust and refine
directly on the canvas.
12. Developing the Portrait: Building Form and Color Part 2: Now I'm reinforcing
the eyebrows by adding darker values and softening the transition in the
area between the brows, so it blends more naturally
into the surrounding skin. I begin refining the
transition between the eye socket and the
bridge of the nose. In the earlier blocking, I focused mainly on
separating light and shadow. The transition as a point
was still quite simplified. Now I start to soften those shadow edges and introduce most of the
variation in color. Remember not to blend directly
between light and dark, but build the transition by
adding intermediate colors. This helps maintain
clarity while still achieving a smooth and
natural shift in value. I'm defining the globula the
area between the eyebrows, where the bridge
of the nose start. This area is important
because it connects the forehead to
the nose and helps describe the overall
structure of the face. By carefully
adjusting both value and color in this region, I can better describe the three dimensional
form you will notice that the planes
here are quite subtle. They gently shift from light to shadow rather than
forming any hard edges. Overall, this stage is about refining and connecting forms, moving from a simple
light and shadow blocking toward a more nuanced
and dimensional surface. When refining the
nasal catalyse, I pay close attention to both value and color
temperature shape. The upper portion
of the catalyse closer to the eyes tend
to appear cooler and darker as it sit deeper within the eye socket shadow and
receive less direct light. In this area, the color
often lean slightly toward cool violet tone As the
form moves downward, the catallag become more
exposed to reflected light from the surrounding skin causing the color
to shift warmer, often leaning toward
orange and warm red node. I reflect this gradual
temperature change in my mixture
transitioning from cooler, darker tone above to
warmer tone below. I'm mainly focusing on
softening the edges along the bridge of the nose so the transition feels more
natural and less harsh. At the same time,
I start to view the form of the skin
around the nose, especially the area just
under the nose and around the side of the nostrils where
the flesh slightly reduce. To avoid this area look flat, I use curve brush stroke that
wrapped around the form. I move my bras in a sub rounded motion to follow the natural
structure of the face. This helps the nose
feel more lifted and three dimensional where
the surrounding skin feels like it's
wrapping around and connecting smoothly into the
cheek and toward the mouth. I continue to ask more
shift in value and color to support this form rather than
relying on strong lines. Overall, I'm thinking of
these areas as a series of soft routed forms that connect together rather
than separate flat shape. Now I'm returning to
the ice to further refine the details and
enhance their clarity. Layering is not only about
refining value transition, but also about gradually
enhancing color saturation. As the painting progress, I pay closer attention to saturation and chroma
in the later layers. I intentionally build
up the surface with more saturated and vibrant color while still remaining
control over value. This gradual increase
in saturation as depth richness and a sense
of vitality to the skin, making the portrait
feel more lifelike. When we talk about
the form and light, there are a few simple
things to keep in mind. The light areas are part
that receive direct light and the core shadow shows where the form start turning
away from the light. This is usually the darkest part of the shadow on
the form itself, and the cache shadow happen
when one part of the form locks the light and create a
shadow on another surface, and reflected light
is a light that bows it back to the shadow area
from nearby surfaces. Even though it's lighter
than the rest of the shadow, it should always stay
darker than the light side. Because of this relationship, when I'm unsure about a color, I apply a small test stroke to a limited area and compare it carefully
with the reference. If it's not correct, I adjust the miture before
committing further. Avoid applying too
much paint too quickly and then correcting
directly on the canvas because it's often lead to muddy color and
your painting will lost vibrancy and it will also lead to
unnecessary effort later. From my personal experience, impatient during color mixing is one of the most
common mistakes. Applying color too
quickly without careful observation
and compare with the image can result in multiple value errors
across the portrait, and it will require
heavy correction later. Take your time, be patient
with the mixing process, and don't hesitate to test and adjust multiple time just
small area on your painting. Color accuracy developed
through observation, comparison and restraint not by trusting your
first instant alone. Now I'm going through the
remaining areas of the face, softening edges and refining
transition around the cheek, the nose bridge, the chin to
create a more cohesive look.
13. Refinement Stage: Enhancing Details and Transitions Part 1: In this stage, the focus shifted toward refining the painting
through age control, subtle detailing
and strengthening the overall light
shadow relationship as multiple layers of paint
are applied contours and structural lines
can naturally soften, shaped or become
partially obscured. For this reason, I
continuously return to the feature to re
clarify the form, reinforce structure, and enhance value
contrast where needed. This stage built directly on the foundation established
in the first layer. So in this stage,
I focus mostly on adjusting layering and enriching it at more vibrant color, smoother transition,
and increased clarity. The surface gradually
become more refined as I focus on
subtle variation in value, color temperature,
and saturation, rather than dramatic changes. As I'm working wet
on wet it allow my fresh paint to interact with the
existing layers beneath. This approach allow me to create soft edges and
natural transition, but it also require control. Rather than planing
light and dark area directly which can
doll the surface, I continue to mix
transitional color as I go and place them
deliberately between values. I will not speak as
much during this stage because much of the work
involves constant observation, comparison and adjustment in
response to the reference. I continue using
the same approach as I discussed earlier, missing small amount,
testing on the canvas, and adjusting as needed. You are absolutely
free to work more intuitively or adapt
this process to your own style as long
as you remain mindful of value structure and avoid excessive blending
on the canvas. When adjusting color, it's important to consider
not only value, but also Cromer and hue. For example, if an area needs to feel brighter
and more vibrant, I may add a small amount
of cadmium yellow. Please be careful
when adding white because too much white
will reduce saturation. I use it primarily to increase value rather
than brightens. To correct and balance color, I often think in terms of complimentary pairs
on the color wheel. For example, when a
mixture become too violet, I add a small amount of
yellow to neutralize it. Or if a color appears
over the red, I balance it with subtle
addition of blue and yellow. I also adjust color based
on looking at the hue. For example, if an area I
see that need more orange, I may add a bit cadmium
orange to the mixture or bun sienna if I want to create
a warm but darker tone. If an area needs to feel
cooler while remaining light, I introduce cerulean blue, which is a cool blue
into the light mixture. Much of this process is guided by experience
and intuition. Developed through
repeated practice, you are free to
explore and adjust hes creatively as long as the value relationships
remain correct, the form will still
read convincingly. You can gently exaggerate color temperature to
suit your preference, whether you want a warmer
pink violet mood or a cooler of aton while still maintaining
realism and structure. One approach I find
especially helpful for describing the
wings of the nose and the nose tip is to imagine the lower
portion of the nose as being constructed from three
simple spherical forms, two smaller spheres
representing the nasal wings of each side and one central sphere representing the
tip of the nose. Thinking in this way offer
two important advantages. First, it naturally guides brush direction
encouraging stop to follow the curvature of the routed form rather
than moving randomly. Second, it allows you to
approach the shading of the nose as you would a simple sphere
with a clear highlight, core shadow and cast shadow, which is the shadow
beneath the nose. By simplifying the
nodes into basic forms, it becomes much easier to understand how light
moves across its surface. This method is far
more effective than attempting to copy
the nodes directly from the reference without an underlying structure which can feel complicated
and overwhelming. Reducing complex anatomy into symbol shape provide
a clear foundation, making the painting process more manageable and helping the form read convincingly
in three dimension. For the nostril and
the base of the nose, I'm careful not
to use pure dark. I vary the dark tones
slightly to keep them rich and avoid making the area
look too harsh or flat. I'm constantly
refining the contours, but rather than
outlining the nose, I define it through
value shifts and sub edges that keeps the nose looking natural
rather than graphic. Throughout this process, I continue step back
observe and make more adjustment to both color and value to maintain
balance within the face. Now I'm continually refining
the shape of the nose, enhancing the filtrm and deepening the core shadow
beneath the nostrils. As you see that I'm just
constantly adjusting both value and color in small amount rather than
making big changes, this helps maintain
a natural look and keeps the form cohesive. Sometimes I might apply a color that turns
out a bit too dark or the hue doesn't
quite match what I'm aiming for and that
completely no more. When that happens,
I simply go back, adjust the mixture
on my palette, and then apply the color on top. This is also why I prefer to apply color in small
amount at a time. Instead of putting down a large area of
paint all at once, I build it gradually testing each mitre to see if it fixed
before committing more. It's almost like a process
of constant checking and refining rather than trying to get everything
perfect in one go. It's important to remember that mixing the wrong color
is part of the process. You can always adjust it either by modifying your mixture
or by layering over it, don't be afraid to experiment. Working slowly and making
small corrections along the way will give you much more control and
a more natural result.
14. Refinement Stage: Enhancing Details and Transitions Part 2: After establishing the nose to a point where
it feels stable, I begin to move on to
the surrounding areas, focusing on the more
subtle transition around the lower cheek and
the area around the mouth. At this stage, I'm not
making any dramatic changes, but rather refining
the transition to make them softer
and more natural. Around this area, I noticed that the color slightly
shifts toward a cooler, more violet tone
to achieve this. I introduce a small amount of red combined with
blue into my mixture, creating a subtle
purplish variation. This color transition helps
balance the warmer tones in the cheek and leaves and also reflect the natural
variation of skin, which is never a single uniform
color at the same time, I'm using these value
and color ships to better define three
dimensional form of the face. The area around the mouth and the lower cheek has gentle blanes that turn
away from the light, these subtle changes help describe that structure
more clearly. I also pay attention to the direction of my
blood stroke following the natural curvature of the form to reinforce
the sense of volume. Overall, this stage is about refining and
connecting forms, making sure that areas
transition smoothly into one another while still maintaining a clear sense
of light and structure. Now I'm enhancing the shadow
around the cheek bone areas. This area naturally
sits slightly recessed, deepening the value here
helps define the structure of the face and makes the cheek bone feel
more pronounced. I'm also taking into account
the influence of the hair. The hair creates
a sub cast shadow onto the side of the face, especially along the
outer cheek areas. Instead of treating this shadow as just part of the skin tone, I slightly deepen and cool the value to reflect that
shadow coming from the hair. I apply the paint
gradually building up the shadow in thin layers
rather than adding a heavy dog, all at once, this helps keep the transition
soft and natural. At the same time, I
soften the edges as the shadow moves inward toward
the center of the face, so it blends smoothly into the lighter
areas of the cheek. Now I'm focusing on the shadow area under the
left side of the chin. In this area, it's very important to
think carefully about the value relationships so
our eyes don't get misled. Even though they are
variant within the shadow, some parts slightly lighter, some darker, the entire
shadow family should remain darker than anything in the light side of the face. A helpful way to
think about this is even the lightest part within the shadow should still be darker than the darkest
part in the light area. Sometimes when we look at the
painting for a long time, our eyes can get tricked and we might accidentally paint
the shadow to light, especially in the middle tones. To avoid this, I
constantly compare this shadow area to
nearby light area like the cheek or jaw
that's catching light and make sure there is a
clear separation in value. In terms of color, I don't
just add black to darken it. Instead, I adjust the
mixture by slightly muting the color and shifting it cooler while still
keeping it rich. I begin to enhance
the chin and neck, focusing mainly on
the shadow areas. I gradually build up
darker values on top of the initial blocking to
increase the overall contrast. This helps strengthen the form and makes the structure
feel more defined. Rather than applying
one heavy dot layer, I bull it progressively
adjusting the value step by step so it integrates naturally with the
existing foundation. I also pay close attention
to my bras direction. Following the control
of the in and jaw line. This is important
because the gen plays a key role in defining the
overall shape of the face. Instead of drawing a sharp
outline to define the jaw, I avoid using a single
hot contour line. A strong line can make the face look flat or even cartoon like. Instead, I define
the edge through gradual transition
introducing subtle shapes in value and color, so the jaw line
feels like a curve, three dimensional form
rather than a straight line. Around the jaw and chin, I soften the edges carefully, allowing the form to turn
naturally into the neck. This creates a more realistic
and organic appearance. Overall, I'm thinking less in terms of lines and
more in terms of lens and transition using value and color to describe the
structure of the face. Now I begin to define
the leaf more clearly. I start from the inner part of the leaves where the
color is usually the most saturated and gradually work my way outward
toward the edges. The center of the leap tend to have richer, more intense color, so I use a more
saturated mixture here, then soften and reduce the intensity as I move
toward the outer contour. I pay attention
to the difference between the upper and lower lip. The upper lip is
typically darker and less saturated because it face it downward and receive
less direct light. As a result, it appears slightly more muted
and deeper in value. In contrast, the lower
lip catches more light, so it often appears lighter, more saturated, and
slightly warmer in color. Keeping this contrast between
the upper and lower leafs helps create more realistic
sense of volume and lighting. I then deepen the shadow
between the two leaves, the line with a met, this area is
important because it defines the separation and
adds depth to the form. Rather than drawing a hot line, I build the shadow carefully
using darker values, allowing it to feel soft
but still clearly defined.
15. Refinement Stage: Enhancing Details and Transitions Part 3: Now I just continue to
adjust the lifts carefully checking the shape
and form to make sure everything looks
balanced and azuro. Now I move on to refining the remaining light mid
tone areas across the face. They are the areas that are not in the
brightest highlight, but also not in the shadow, so they play a key role in connecting
everything together. I focus on subtly adjusting
both value and color in these regions to create a smoother transition
between light and shadow. I introduce gentle variations, slide shifts in warmth, coolness and saturation to make the skin feel more
natural and alive. You can observe from the reference and you can
also play a bit with color. You can ship the hue
slightly and be creative as long as your values stay correct and still
describe the form. I apply the paint in
thin layers using sub plus work to gradually build up the surface
without overblnding. At the same time, I keep
comparing these mid tones to the surrounding light
and shadow areas to maintain the correct
value relationships. This step is less about strong contrast and more
about subtle refinement, softening precision, and unifying the
overall skin texture. Now, I use a fine
detailed brows to carefully adjust and
enhance the mouth area, refining the edges and small details to bring it
to a more finished state. Throughout the painting process, there is no need to rush, take your time and allow the
work to develop gradually. One very important
habit is to step back and view your
painting from a distance. When we work too
close to the canvas, it becomes harder to notice
areas that fell off, especially in terms of
proportion, shape, or alignment. A tip that I personally find
very helpful is to leave the painting in a
place where you can easily see it during
your daily activities. Since I don't usually finish
a painting in one sitting, I often let it stay
visible in my space. This fresh perspective
makes it much easier to identify issues that
are difficult to see when working up
close for a long time. Sometimes even small
shift in lines or proportion can happen without
us noticing while painting, regularly stepping
back helps you catch and correct those
subtle inaccuracies. As I move around and see it from a distance or
different angles, I can naturally spot areas
that don't feel quite right. It's completely normal to go back and forth during
the painting process, not only to enhance
color and form, but also to constantly check
and correct the contours, alignment, proportion,
and overall shape. Now I'm back to the eyes again. I will enhance the eyes by
adding subtle highlight along the eyelid which help define the form and catch
the light more clearly. I also brighten the white
of the eyes slightly, but I'm careful not to use pure white except I adjust
the value just enough to make the
eyes feel more alive and luminous while
keeping them natural. I also add a small highlight to the inner corner of the eyes. This help bring a
sense of realism. These details are quite subtle, but they make a
significant difference in enhancing the clarity and
the liveliness of the eyes.
16. Final Adjustments & Highlights Part 1: In the final stage,
I focus on refining the remaining
details and bringing the painting together
as a cohesive hone. This includes defining
the hair more clearly, adjusting the neck, and
applying the background. As I work, I also continually
reassess the overall face, making small adjustment to the facial feature where
I needed more detail, adjust the proportion if needed. At this stage, I
enhance contrast and saturation to strengthen depth and visual impact while being careful not
to overwork the surface. I also add final highlights selectively to introduce a
scene of glow and vitality, hoping the portrait feel
finished and alive. I'm adjusting the neck as it appeared misaligned with
the till of the head. In the reference, her neck
angles more noticeably. I refine the value
structure and add more detailed color
transition to clearly define the neck as
a cylindrical form. At the same time, I smooth the transition between
the neck and the chest, ensuring the connection feels natural and anatomically
consistent. It's helpful to have a basic understanding of the
neck structure when painting the neck so the neck can be simplified as
a cylindrical form. So when we paint,
we want to think about how light wraps
around that shape. In terms of anatomy, there are a few key
elements to notice. The central area is formed by the throat and on both side, we have the sterno
cldomastoid muscle. This run from behind the ear down towards
the collar bone. This muscle creates subtle lanes and influence how light and
shadow appear on the neck. You often see a
slightly lighter area in the front where
the light hit more directly and darker areas along the side where the form
turns away from the light. But when painting,
I don't focus too much on drawing the
anatomy in detail, but I keep this structure in mind to guide my value
and color decisions. Thinking in terms of simple form and underlying structure
will help you to paint the neck easier and help the neck feel more
solid and three dimensional. When refining the hair, I work on top of the blocking established in the first stage. Although this is considered
the detailing phase, I continue to use a large bros rather than switching to a fine
detailed bros. I use the tip of the bros to suggest smaller
strand when needed. I find this approach
easier to control as using a small bros can
make the hair appear thin, fragmented, or messy instead
of full and cohesive. I always think of hair
as mask and form, not as individual strands. I imagine the hair flowing
in large wave like shape defined by alternating
light and dark areas. Especially when painting
curly or wavy hair, I avoid drawing
each co separately. Instead, I paint
interlocking areas of dark, middle and light value, allowing this value shape to suggest curl
movement and volume. This approach helps
the hair feel thick and three dimensional
rather than flat or sparse. I place my first stroke, I follow the natural way
direction of the hair, reinforcing its overall
shape and rhythm. This keep the hair
unified and structure. In this layer, I primarily
use a lazarin crimson and cadmium orange for the mid tones to maintain high
saturation and vibrancy. I increase brightness
in the highlight mainly by adding cadmium yellow
rather than white. I use white very sparingly, reserving it only for the
brightest highlight at the top of the head where
the light in most intense. Over using white can
quickly reduce saturation. And make the overall hair
look dolled or was out. In the reference image, some of the hair
highlight appear overexposed and
therefore read as white. However, to maintain saturation and vibrancy in the portrait, I avoid using too much white
to my highlight mitre. For this part, I will speed
up the process a little. When painting the hair, I'm constantly going back
and forth between the shadow and light areas to build the
overall form of the hair. Remember to always keep in mind that instead of focusing
on individual strength, always think in terms of
larger shape and volume, hair is best understood as a series of form
not separate lines. Throughout this process, I
keep it loose and flexible, just going back and forth, adjusting and refining
until it feels right. Try not to overwhelm yourself
by attempting to paint every single strain
exactly as you see in the reference unless
that's your intentions. Personally, I prefer to capture the main character and flow
of the hair rather than copying every detail. H
17. Final Adjustments & Highlights Part 2: Now I'm making a few
final adjustment to refine the portrait. This includes subtly correcting the facial shape and selectively deepening certain shadow areas to strengthen the ness
and reinforce the form. I'm using a small bros to inhale the shadow
on the right cheek, the shadow, and even
the reflect light in this area is influenced
by the color of the hair. I use a warmer mixture
leaning more toward orange. Y. Throughout this stage, you can always go
back and forth, adjusting the features until everything feels right to you. There isn't a strict rule
of right around here. Personally, I tend to
keep refining with small detail adjustment until the overall result
feels balanced. This part really depends on your own artistic
preference and aesthetic. You don't have to
define every contour sharply if you prefer softer, more blood looks completely fine to focus on the overall
shape and form instead. I think what's most
important is capturing the main characteristic of the subject and
making sure the form, proportion, and value
are working correctly. So try not to fall into the trap of over detailing
or over blending. Too much detail can
make the painting feel stiff and too much blending
can make it look flat. So keep it balanced, refine where needed, but
also know when to stop. For the highlight,
I separate them into warm and cool
color at this stage. I introduce Nico
titanium yellow, a bright yellow to emphasize certain highlight
area instead of relying solely on pure white. For cooler highlight, I
miss erleen blue with white to as in areas
where light appear cool. I also add a bit of
nick titanium yellow to apply on some highlight areas
that are a bit greenish. In my warm highlight mixture, I add a small amount of my latest flesh tone that
I'm already missed earlier. This helps soften and
warm the highlight since Nis cote tandum
yellow naturally lean slightly cool with a
subtle greenish undertone. This approach to
highlighting is quite personal as I enjoy slightly exaggerating color
temperature contrast to bring more vibrancy
and life to the painting, you are absolutely free
to approach highlight creatively and adapt
them to your own style. To ensure the highlight integrate naturally
into the skin, I use a clean rail brush to
gently soften the edges, allowing them to sit smoothly on the face without
appearing harsh. After adding the
highlight and suply blending them into the
surrounding areas, I take a step back and reassess the nearby
light mid tones. Sometimes it's easy to
overdo the highlight, which can make the
face appear too flat or slightly over exposed. To correct this, I go back into the surrounding mid tone areas and gently adjust the values and colors either softening
the highlight or rebuilding the transition
around it as you can see, skin is not made
of just light and shadow is a
continuous transition of many subtle color shape. Instead of relying on
strong highlight alone, I focus on restoring those
delicate variation in tone and color to keep the surface feeling
natural and dimensional. This step helps maintain
balance and prevent the painting from looking
too harsh or artificial. When applying highlight, I often use slightly
thicker paint, especially in the
brightest areas. Ticker paint helps the highlight catch more light physically, which makes them appear more luminous and dimensional
on the surface. It also allows the
highlight to sit on top of the underlying layers rather than blending too
much into them. After placing the highlight, I also subtly plane the edges so it will integrate naturally
into the surrounding skin. However, during this process, the brightness can
sometimes get reduced. Because of that, I usually go back in and reapply
a small amount of highlight with thicker paint to reinforce the intensity
in the brightest spot. This layering approach
helps maintain both softness in the transition and strain in the
highlight itself. The key is to keep the
highlight controlled, plays only in selective areas, so it enhances the form
without overwhelming. Now I'm moving into the
final adjustment using a fine detail brush refining
the smallest areas, enhancing highlights where
they are not bright enough or also deepening shadows where they still
need more depth. I also go back to redefine
certain contours that may have softened or shifted
during the color adjustment, bringing back clarity
where needed.
18. Final Thoughts & Class Project: Now that the painting
is complete, you're absolutely free
to refine it further or keep it looser depending
on your personal style. You don't need to push every
detail unless you want to. What matters more is that you enjoy the process and create a portrait that reflects the essential character and
spirit of your subject. Painting portraits is the
balance between observation. And also intuition.
The more you practice, the more natural your
decision will become. Allow yourself to experiment, make adjustment, and even
make mistakes along the way. That's all part of
the learning process. For your class project, create a realistic Oil portrait. You can paint along
with me using the same reference or choose your own reference
that inspire you. When you're finished, please upload your work in
the project gallery. I can't wait to see
what you create.
 Kate Nguyen