Transcripts
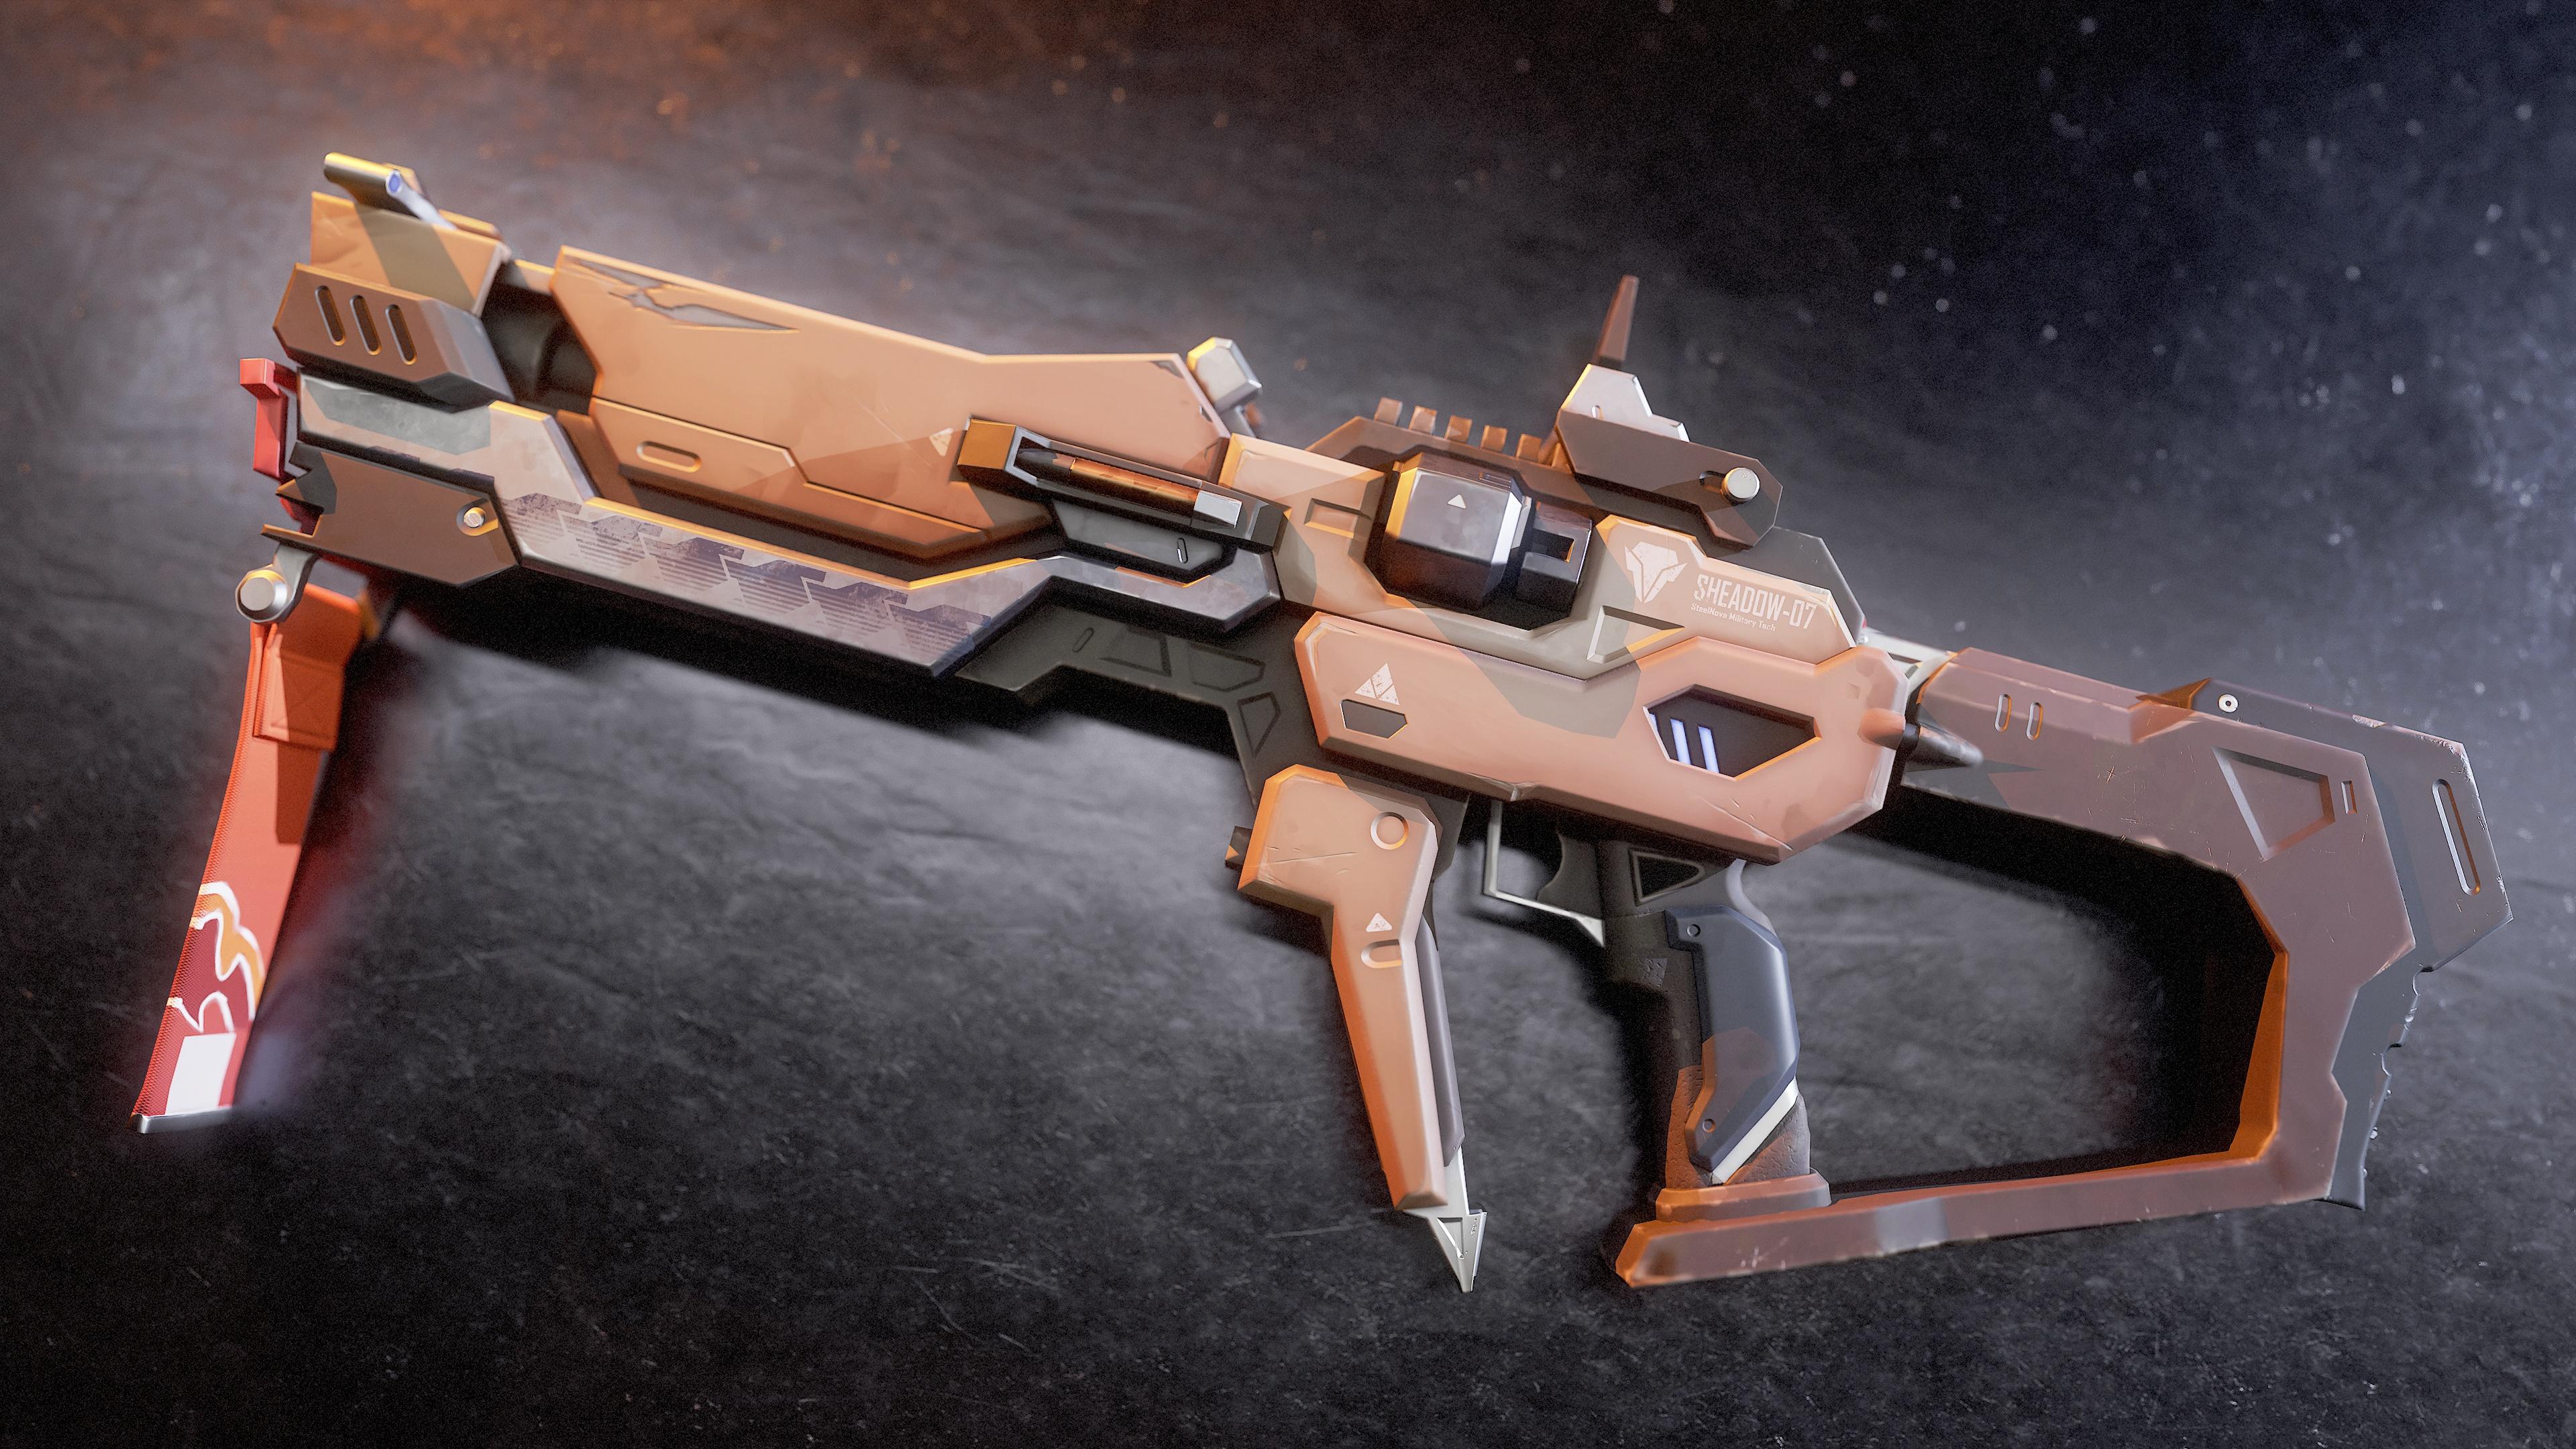
1. Course Trailer: My name is Marco Abel. I'm a freelance character artist working in the game industry, and I will be your
instructor in this course. In this course, you will
learn how to create a styles weapon completely
from start to finish. We will cover the
entire workflow on creating this weapon. The key chapters are as follows. Using sever for blocking out and creating the
final high poly acid. Using blender for di topology to ensure we have a low poly
and game ready weapon. So using blender for
the Ube wrapping, making our models from high to low poly using
substance painter, creating our final stylist textures using
substance painter, and creating some final
portfolio renders using Marmoset two back five. The way that you
should think about it is at the end of this course, you will be able to create exactly what you see
in this trailer. And you can apply these
techniques for any type of stylize and even
relistic treaty acids. The majority of the modeling and sculting will be
done using zero. Starting with creating
the initial blockout mesh directly in zeros and refining it to a
final high poly model while following our comset art. After that, we will focus on doing a low polyhpology using blender and also doing our UV unwrapping
also inside blender. Next, we'll be focused
on preparing and baking our texture maps
using substance painter. Then we will move on to creating unique slc textures also
using substance painter. We will finish the
course off by making some final render
for our portfolio using MarmosetTolbak five. With a total of 29 plus
hours of beta content, this course is considered
a large course. But I feel confident that
at the end of this course, you will have the
knowledge on how to create many different high
quality low polygam acids. Course has been also
done completely in real time with not a
single time lapse, so you can follow along
with every single step. We also added a
keyword registration so that you can see which
bottoms we are pressing. This course is intended
for intermediate artists. It is essential to have a basic understanding
of the so words listed.
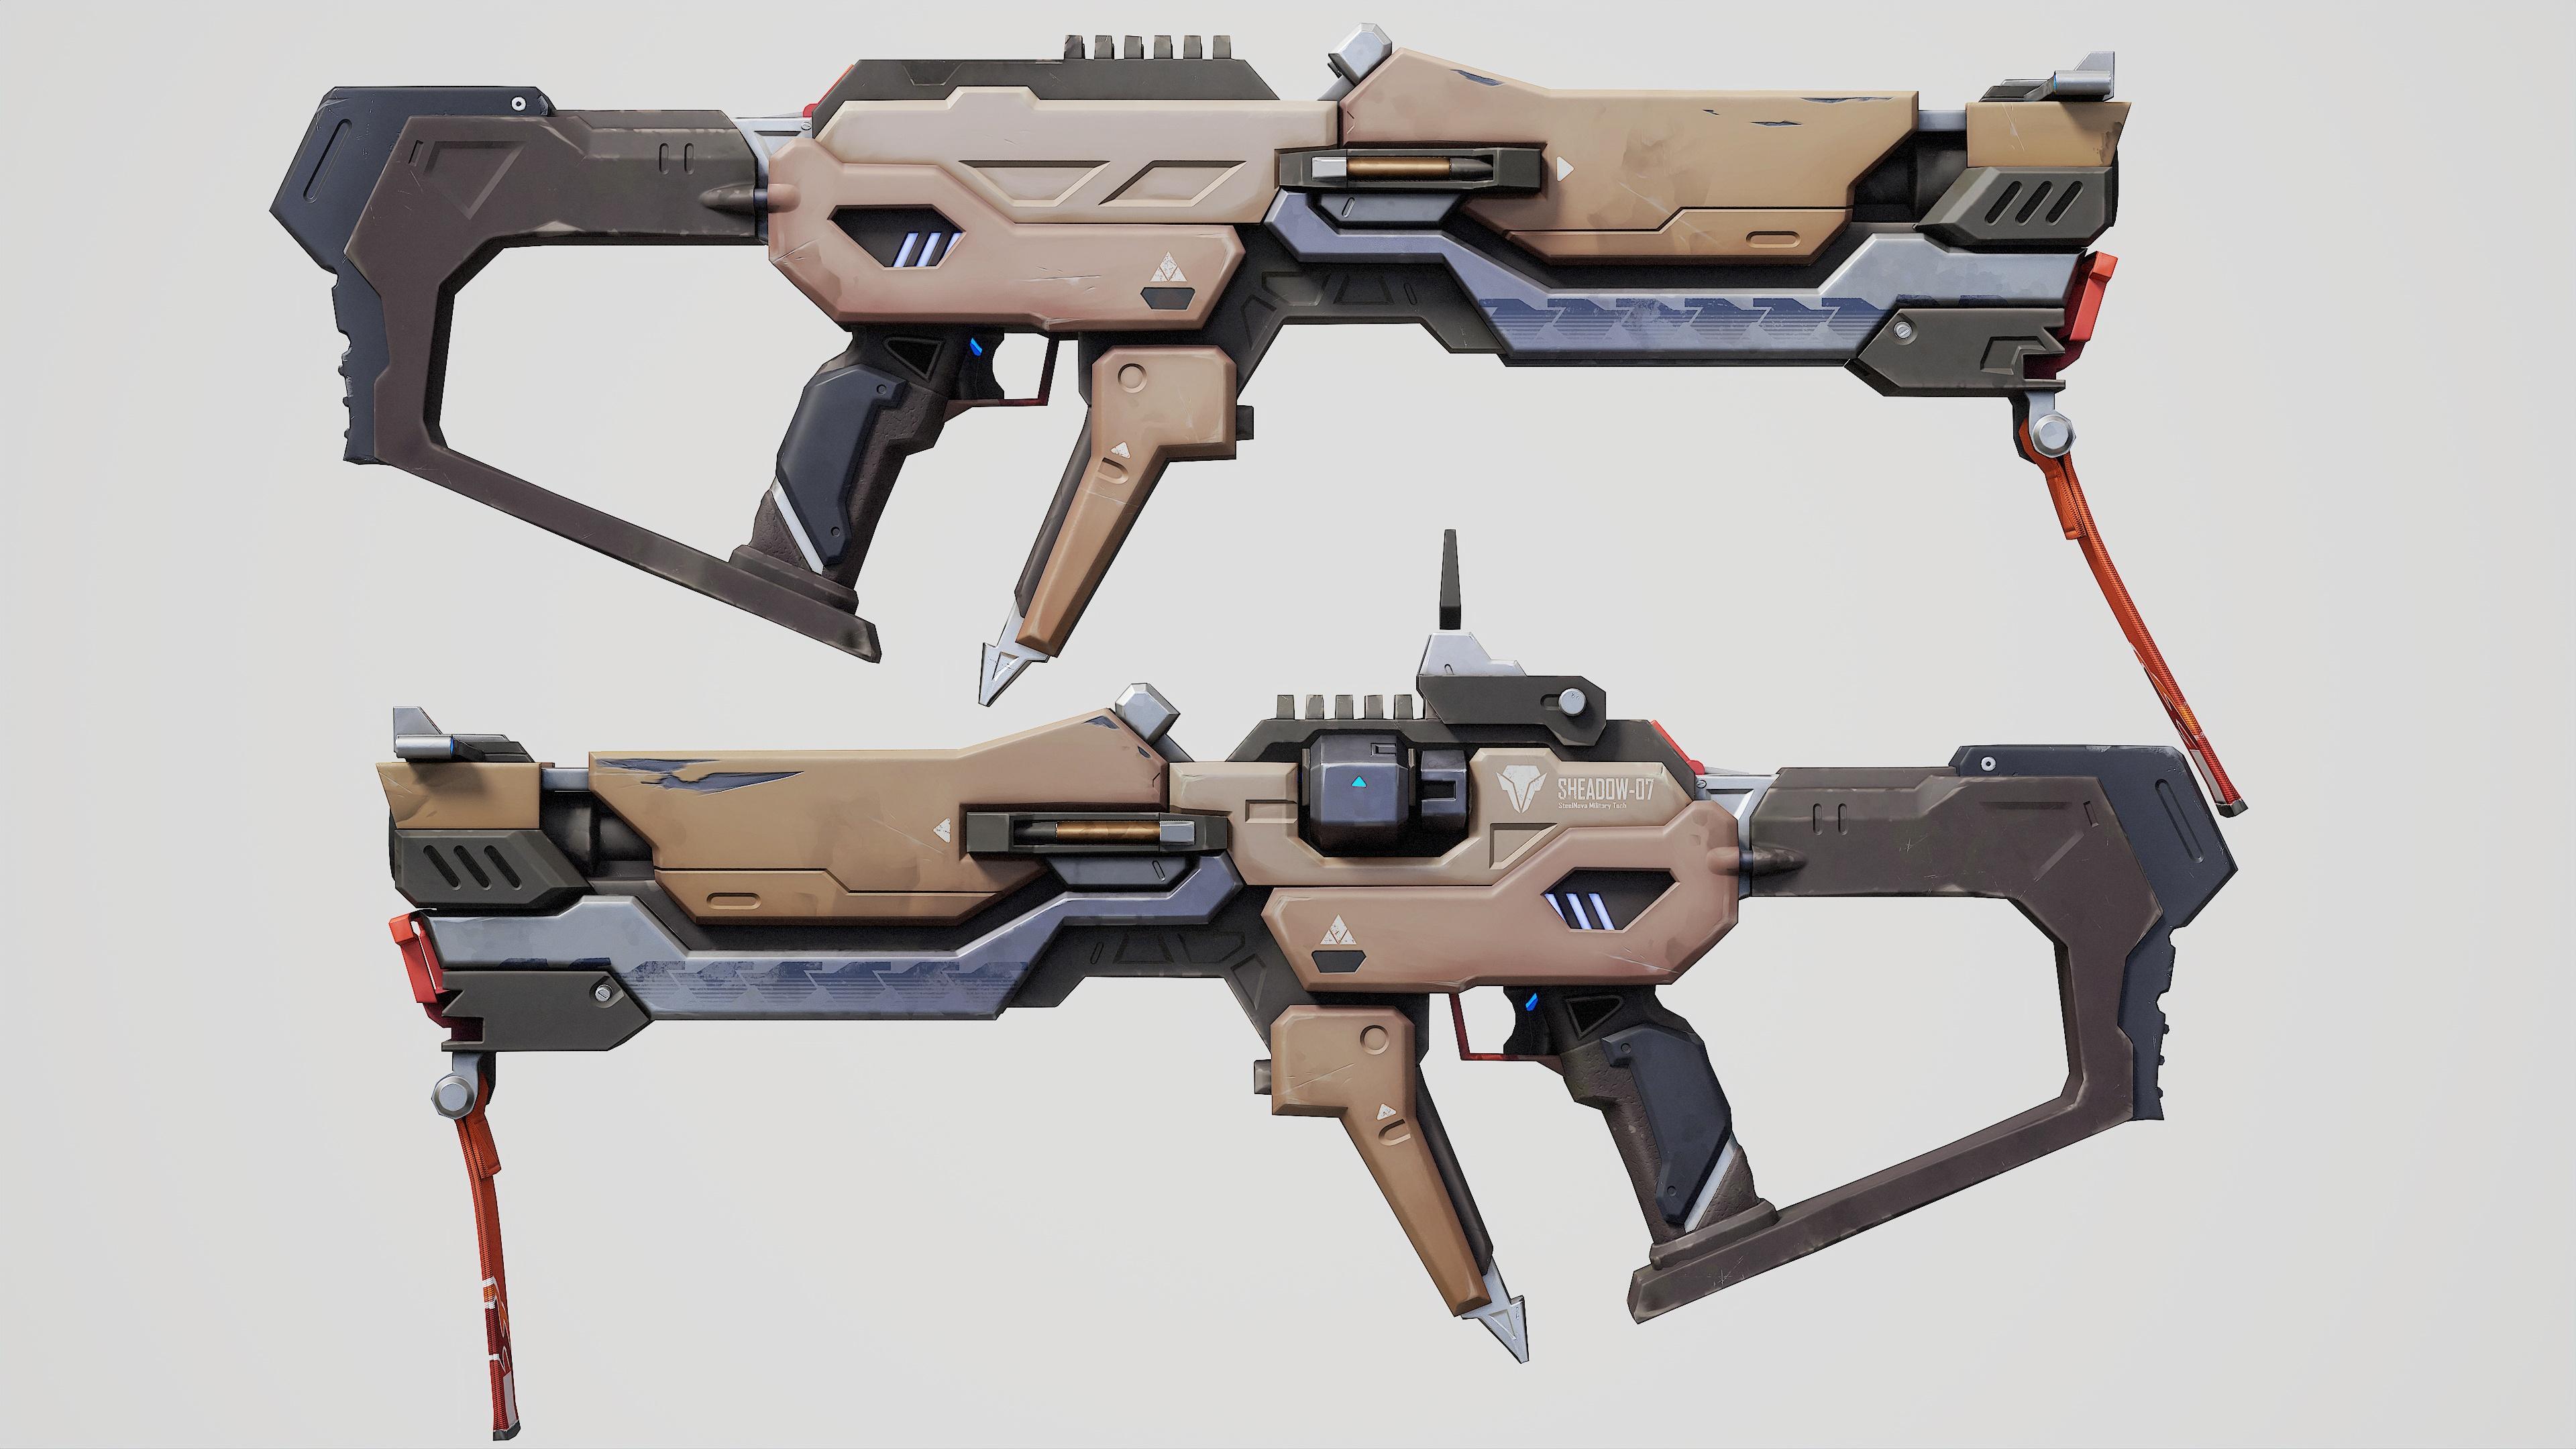
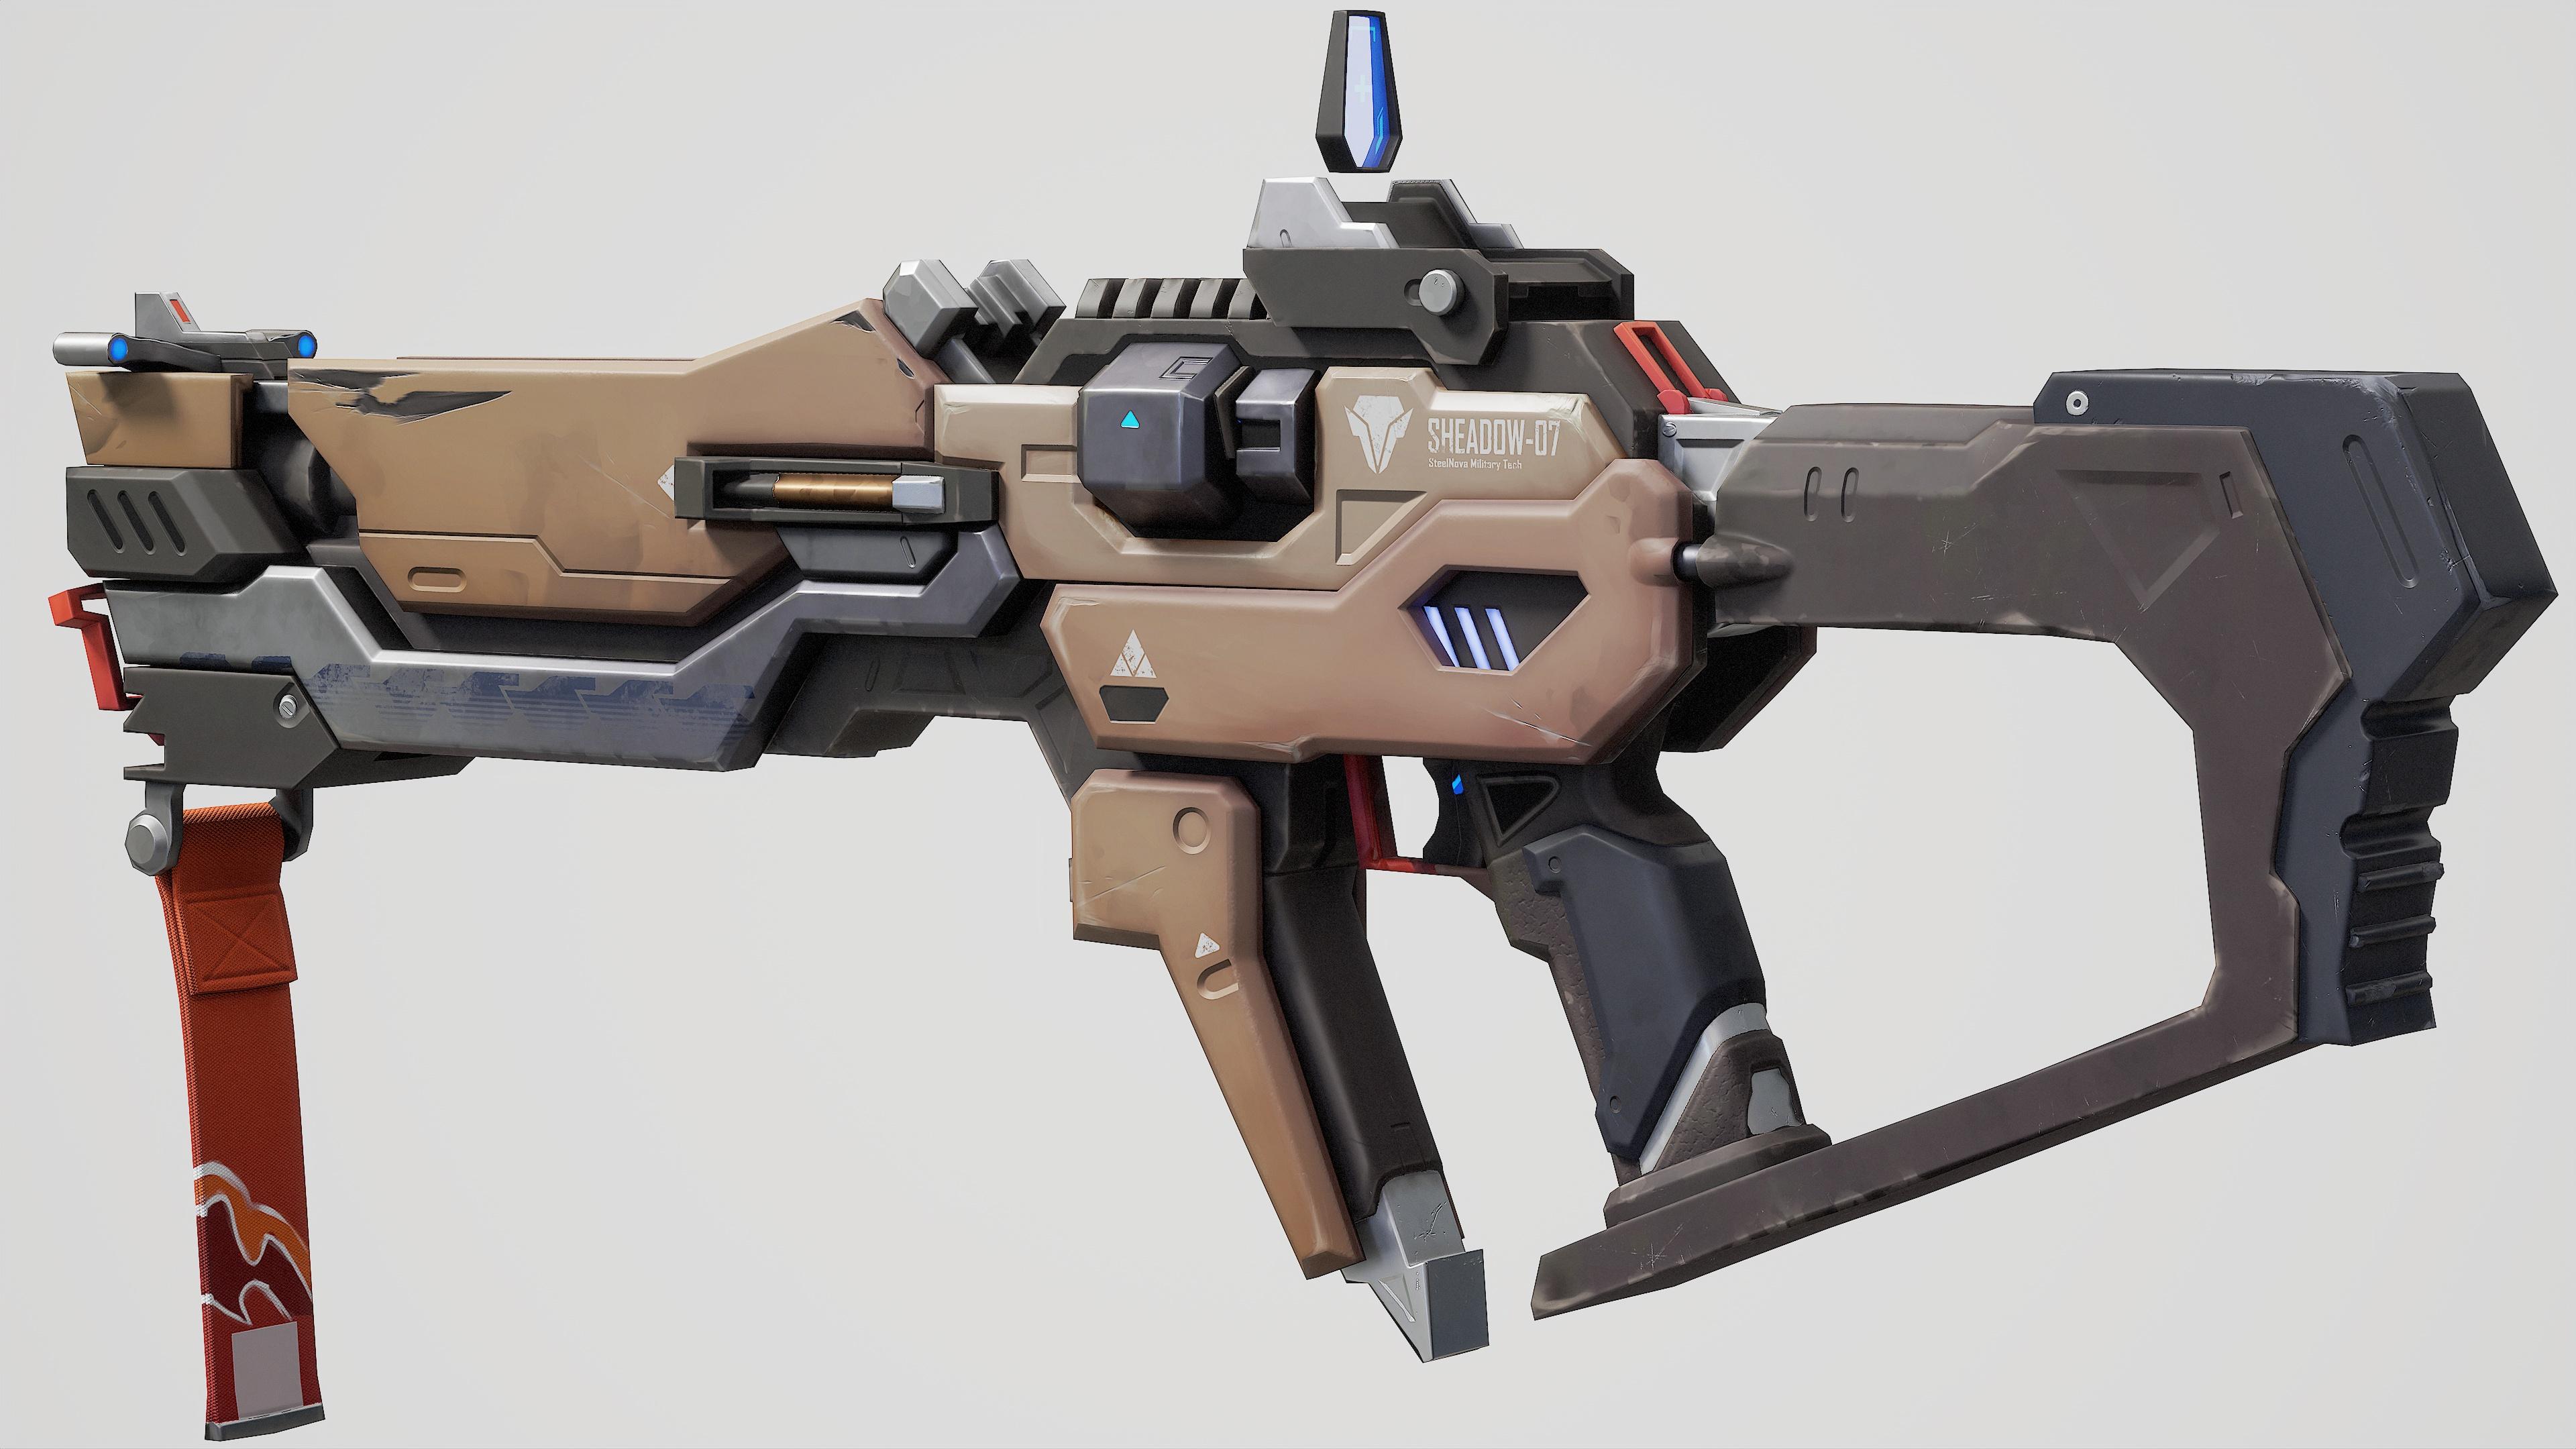
2. 1 Starting Blockout: Hello, guys, so welcome
to this course. In this course, we're
going to be making this weapon here.
So let's start. The first thing that we're
going to do to start this weapon is to make
the primitive shapes, which will be by using
some some cubes like this. I just press W and
select my gizmo here, select a cube, all right. Let's press again W and
reduce the amount of polygons in this axis
and these other axis. Well, in every axis. So now, let's see. We'll make some primitive
shapes like for this part here. Like for this part,
and for this one, from the middle, I
made everything. So let's make it. Let's just, like, put
the cup like that. Let's make it longer. Alright, let me just
lit the drawing that I made my pure ref so all right. Let's add two around here, maybe one and two edge
loops, another two. All right. Now, let's
mask these ones. And with the Gizmo, we're going to pull this up like this. All right. Maybe we can bring this
down here of like that. All right. Because here I'm making
this base part here. You know, that this has, like, a shape that's what I'm making. Maybe this part will be a
bit longer, maybe like this. And this part also
should be a bit longer. Perfect. Right? Give me
a second. All right. Let me make this
part a little bit like longer to make this
diagonal line more long. Sorry for the separative words
that I have. Use it now. Right. I make the
same here also. Perfect. All right. Let me make this a bit thinner. Like this, maybe not too much. I like this is good. All right. I will make another cube
the same way I did before. Just make this thinner. All right. And this cube will be
will make three cubes, maybe or maybe two like this. This cube here will be
the back part here, and this middle cube will
be this middle part here. So let's do it. I will separate this cube with
split mass points here. We'll make this a little bit thinner on the
vertical axis. All right. All right. Let's do here. Let me make a bit this thicker. Let me add some egg rope here. Perfect. All right. Like this something
like Like that. All right. I will maybe
make a little bit. Up. All right. Let me add another
edge loop here. Oh. What? All right, perfect. Another edge loop here. This should be a
little bit longer. Or maybe shorter,
maybe 30. All right. Around here. I'm just
moving this around. Maybe like that should
be good. Alright. Should be a bit longer,
maybe like that. Now I will just extrude
a single poly like this. Maybe not that much. And we'll mask it out. With mask it. Make it charter, make
this diagonal stuff, and make parallel this
line to this line here. All right. Perfect. Now we can make maybe. We could make Let me add another edge
loop here just in case. All right. Now, I will
make this extrusion here. You know, that is a little like a little extrusion
here. So let's make it. All right. Let me pull
this up. All right. Let me make this a
little bit thinner. Oh, sorry. All right. Let's extrude this. I
mean, not like that. Here, I will add just
an edge loop here. I will just remove
that edge loop. And let me just extrude this maybe just a
little bit like that. All right. Oh, I just forgot
something little easier. All right. Now we are
talking we are talking. Little bit, maybe another one. And now I will just
make this flat here by just masking and then using our chismo to
flatten that part. All right. Perfect. Let's do the
same with this part here. Let me just mask this
entire portion here. All right. Mask it. Perfect. Now, we could lower this part to make this
ramp that is in the coset. Just making this ramp here. That's like a ramp. We put this with a red color. Oh. Give me a sec. All right. So we're back. So what I was explaining was I'm making here like the shrump. You know, that here's
like some planes, and I'm trying to achieve
those planes in my model. All right. Let me just add
a little bit of slope here. But before that, I will achieve the C symmetry here and here, also the C. All right. Let's do mirror and weld let's add just a
little bit of those. Those slope here. All right, perfect. So let's continue. Let's try to make
the back part here. So I think I will
need another cube. I will just duplicate
that with control. With Control, you can duplicate
things using the Gizmo. All right. So I just duplicate it, and now we'll just
rotate it to make the handle of our weapon. Maybe something like this. Maybe we'll just put it
just vertical for now, and then we can just
continue tweaking it to get it in shape. All right, perfect. Let me see. Maybe this can be a
little bit longer. A little bit like that. Perfect. Let me add maybe just up here. All right. So let's continue
with our back part. Now we are going to
make this part here. It's relatively easy to do. Let's mask this phase. And now a cold function that has the gizmo in zebrus is we can extrude phases just
using our gizmo like this. You just need to press control and then drag your
gizmo and you can duplicate phases many times
as you like. So let's do it. All right. Let me bring my
gizmo to the phase. And we're going to be
making this ramp here, and then these
indentations here. That's what I want
to achieve for now. All right. So let's
do it like this, maybe we could
extrude and rotate this right, rotate again. My make this a bit
thinner from this side. Keep rotating to get in shape. All right, kind of like that. All right. Just
keep rotating it. Let me I'm just looking
at my reference. All right. Let's see. We have let's see. Let me add just another top here so I can rotate a thinner. I mean, I can extrude
a thinner pot here. Do it with the gizmo. Perfect. Oh, I have just extruded another
part that I didn't like. Didn't want it to extrude, so I will do it just
with my Team modeler. Now we can continue
extruding with our gizmo. All right. So let's just
keep extruding this. Kind of like this, maybe. I'm just trying to do this part. This is just a blockout. Then we can do another pass
and refine everything, get everything in shape. So I'm just doing some
approximated stuff here. Let's extrude again. All right, I will extrude this. Now we can use the function here in the demdelar cold slide. Perfect. All right. We can keep pruding. Let's see where our stuff goes. All right. Let me see the
size of my handle. I think this should
be a little bit bigger. Maybe like this. Alright, let's keep
working on the back part. Maybe this should be a
little bit shorter. Perfect. The let me use my
lazo mask pool here. This should be flat, completely flat this area. All right. For a sec, es put this in place. All right. Let me bring
this down. All right. Perfect. All right. So let me just slide. It's a little bit more. This should be here. All right. Perfect.
This should be thinner. Act up like that. Perfect.
It should be thinner. And now we can do another
extrusion here, right here. Here. Do another extrusion. We can just make it thinner, just to make now. The rotations that we want
here. Let me make it. So everything match and is
completely flat and straight. I'm using the clip hoof brush just to make things straight. I try to make things straight. This is not helping
me for some reason. All right. Now we can extrude these two polygons of like that. All right. Move it around here. This part here should be a little bit thinner, and shorter. This part here, maybe it
can be a little bit longer. Let's see. All right. Sliding this. All right here, I will do the same thing that we did here. I will activ my imetry in
the C axis. All right. Let's wait for Cerberus to save. Now I will deactivate the X axis and do some
mirror and weld here. Perfect. All right. We make this thinner, it should be more
thinner like that. I will just delete this agro
that it's not needed there. All right. Perfect. I will just keep dragging
this part to make it longer. Perfect. Let's see here. Make this like that. This should be a
little bit thicker. I would say maybe something
like this maybe can work. All right. L et me slide
a little bit here. Or maybe we can just
delete that polygon. All right. Perfect. Mm hmm. Perfect. Let's
just keep doing our stuff. Watching by reference and
guessing how would be the next step for us to do because everything
is real time. All right, let me just
slide this so you can see, like my guessing process, my thought process
and all that stuff. All right. This part
here is not that big. I mean, it's a bit bigger. That's what I'm trying to say. All right. You're
asking some stuff. I All right, this polygon here is not
needed. Let me just delete it. All right. Not that long. Maybe something like this
should be nice enough. Let me bring a little bit up. Maybe try to make this a little bit bigger
from that part. All right. All right. Let's something here. Maybe we can just rotate this a little bit
more like that. Make it a little bit longer.
I mean, not that much. All right. Let's mask
this other part also. All right. Perfect. Let's use a slide just to
align better that edge there. Right, we're making
this part here. Now, you can see that here is another plane
change that goes. Like this. Here is one plane, one plane, and then
another ramp goes here and then turns again like that. Let's try to make it also here. This will be around this area. Let's just add one edge
loop and another one maybe. Now I will just try to
make this straight. Let's use a slide. Try to make it as
straight as possible. All right. Perfect. I will just delete this one. Pressing sheaf, we can make
this up that we have here, press shift, and this will get the shape that
the near grope has. In this guy, if you
press shift here, then this will get the shape
of this diagonal edge loop. And if we press
shift in this area, this edge loop
will get the shape from the other
straight edge loop. Right. Let's just make
this thicker here. Perfect. All right. Now, I will just slide again, a strop complete here to make this ramp a
little bit longer. Perfect. Right edge
again. All right. Let me see my reference. All right, let me make
this straight, also. Right? Something like
this should be enough. Let me just delete
this again, Sodium. I will just redo
same stuff here. Let me just put the
gizmo in this area. I'm trying to match the
scale that we had before. Something like that
would be nice enough. Let me use the clip brush
just to make it nicely. Fine die. That's perfect. We'll
just do some control C before we make this thicker. Now we'll mask this tip part. I will just rotate it, make
it a little bit shorter. Let's make this
straight Alright. Perfect. Now, I will just
delete this one again. All right. Let's make this straight, kind of, something like this. Should be nice
enough. All right. Let's put our edge
loops, press in shift. Right now we can just
make this thinner again. Something like this
should be good enough. Alright. Let's do some
slide edge op complete here to make this ramp in
this area a little bit. And longer. Maybe
let's do it the gizmo. Let me do something here. Cause this gizmo is not a line completely direction
of our part here. Right. Let me do something
here again. Maybe. We can align this nicely. You put your gizmo out and then drag your cursor
to a near vertex. Your gizmo will align
with that vertex. That's what I did here. Nothing good to know. Let me
just put this in like that. Alright. To do something here. Body. Perfect. L is
alged to the center. Let me do something. Alright.
Let's do it in the middle. Then Now, this should be
in the middle. All right. Now it's perfect. Okay,
perfectly. All right. So let's keep looking
what we can do here. All right. Alright, let's just move. This a little bit more a a little bit
more that pose there. All right. Let's see. We can add another group here. Another edge drop here. Perfect. Kind of like this. And now
we can make some ramp. Just edge here and make a ramp. Because you can see here
there is a little ramp, and that's what I'm making there maybe a
little bit shorter. Let me just bring
again my p here. You can make it
something like this or let's slide this
like that or right. Work Perfect. Let's see. Let me just sprink this and
make it thinner again, maybe. Perfect. Maybe this should
not be that long. I All right. Let me just do something here. I want to make this thinner. Something like this. Maybe not a thin, a
little bit just thicker. Let's just take this. Put a little bit
more of angle there. All right. Let's see. Perfect. All right. Let me just let this polygon, maybe add it again and do
again do again the ramp. Maybe make this a
little bit thinner. Maybe just let this
another pom there. Make it thinner kind of. Maybe something like this
should be good enough. Align this again,
something like that. Let me take this line this
one to the other part. Alright. Let me just keep looking
at my reference. This should be a little
should be straight. All right. Just do this and
make it straight. All right. Maybe something like this,
maybe more like that. All right. Like this. Be nice. Let's see. Let's see. I look at this, and this has some curve here going
outwards like that. Maybe. All right. I think that this back part is a little bit too
big for a weapon. So let's make this part
here a little bit bigger. See, All right. I have measured it,
and the weapon should be like round three
back pieces long. Maybe something like this. Let's see here. Maybe I make it too long. Maybe something like something like this should be good enough? All right. All right, let's
do some handles. Yeah, or maybe not. Let's actually, let's do this
part here. Let's do that. Alright, I will just duplicate the handle piece. Separate it. Alright. Let's make it thinner. And now I will make
it shorter. Perfect. I'll add some edge loop here. Now I will extrude this
a little bit like that. Maybe now we can make
it a bit shorter. And we can now make this the agona Maybe not that much. I just think This should be a little
bit upper here. It should be a little bit
more towards this part here. Let me just slide that piece. I do the same thing here with the symmetry, we weld perfect. It's half our
symmetry. All right. Let's just wait for
this to finish. Let's use the Gizmo. Instead of this slide
as he's bugging me out. Alright. Pn this down. All right. Maybe this should
be a little bit thicker with
something like this. With a little bit of taper here. Should be nice. All right. Let's make here the handle. All right. Perfect. All right. Let's use our the modeler. Let's add one extra pier. Maybe two more, maybe
three more just to get like this part here. I'm doing this part now. All right. We can even add a little bit more to make it a little
bit more circular. All right. Perfect. Let me see something we can maybe rotate our handle. Just a little bit. Let's make it kind of
parallel, not that much. Yeah, let's do it.
Something like this should be
good enough maybe. Maybe not that much. Maybe
something like that. Maybe not. That should
be good enough. All right. Let's
do something here. Let's add another edge hop here. Around here, maybe another one. And let's mask this and
just pull this backwards. And now we can Extrude another edge lobe here, I mean, another oligonEdge make it with that
circular pattern there. All right right too much. All right. Let me make align
these two ones here. All right. Perfect.
Something like this should be good
enough, maybe. Move this. Let's have the C
symmetry activated. Tweak a little bit stuff here. Alright. I wish to pick that part
there. Really to pick. Let's break this up a little bit more. Something like that. I All right. Let me just slide this
with a slide brush. Something like this. All right. Perfect. Let's do the C modeler. I mean, the grab brush
siding or move brush here. Let me just delete some polyculs here that are not
needed that much. Maybe we can slide
this. Alright. All right, the handle should be about the same size
of this stuff here, and the weapon should
be around the side of around the side of two handles hand off.
Let's measure this. Yeah. So Let's make this a little bit longer there. All right. We need a little bit more space
for this piece here. Let me just move these two. I mean, I can have
my cell leg brushes, move a little bit more
like this. Maybe. All right. All right. So let's see what else
we can do something. All right. Perfect. Let me make this part here
a little bit thinner. I mean, shorter, maybe
a little bit shorter. Oh, give me a second. All right. Let's
continue with this. Let's bring this up a
little bit. I like that. Let's make this part
here a little bit longer by bringing down
these polygons here. I'm like, this should
be good enough. All right. This is a little bit
too long. All right. Less mask is So be about here. I think, yeah. Maybe
that can work. Perfect. Let me make this
shrimp here a little less long, a little bit shorter. Something like that should
be good enough, maybe. Yeah, I think so. Let's make this a little
bit thicker also. All right. Maybe we can
make this even shorter. Something like this can be. All right. Let's make the little
ramp that we had before here with a slide,
little slide here. Or maybe let me slide these vertet us to
align them better. Perfect. All right. Let's slide dl and
off like that. You have the shape there. Perfect, or right et's do now this big piece here. Let's paint another cube. Cube. Here, let's just make it. This type of cube with a gizmo. Alright. Perfect. This should be a
little bit thicker also. And this would be thicker, too. Alright. Let's bring this around here. All right. Let's see, maybe a little
bit more like that. Maybe something around here. I'll be in this here. Good. Enough. Let me make this a
little bit shorter. Maybe something like this
should be nice enough. We just comparing
my blockout with the concept to see if
we have something off. And surely there is some
stuff that are off. But we can fix them later. Let's see. All right. Let's see here. Light, maybe not light. Let me align my Gizmo with these two chices.
Something like that. Maybe try to make this a little bit in like that. Alright. Perfect. Now, I can put this around here. Now, what I'm going to do is Let me just make this a little bit
more like that. Perfect. I will bring this around here. Perfect. Now let me
add another edge loop. Around here. All right. Just extrude that and make it
thinner like this. Perfect. Something like that
should be good enough. Let's add more edges. Because this is like some ramp that has
some plane changes. Let me it has one plane change, another one, another one here. That's what I'm
trying to do here. Let me slide this sloop
complete down here. All right. Let me mask this one. Move it to make the first rump, or now we can mask the
other one and move it, make the second ramp
that I said here. One, two, and three. Let me like that should
be good enough for now. Alright. Let me add another gebe here. Let me see something. All right, I'm just looking
at my references. All right. Maybe we can make the
upper part less tall. All right. Perfect. Let me make this a
little bit thinner like this. This piece here
should be or can be a little bit thicker. Like that. This part also. And this stuff can be a little bit thicker. All right. Perfect. All right. Let me make this handle sof a little
bit thicker like that, maybe, maybe a little less
thick or less mask here. Now, let me just
extrude it a little bit so the handle reach
the back part. All right. Now we can make
maybe the trigger. Let me make this a
little bit shorter from this part around here
should be good enough. Maybe we can also make them think here let's must
this and make it shorter. And here, I'm seeing that this has a little
bit of a ramp here. Let's try to add that
same stuff there. Maybe let's just add
another edge loop. Let me do something.
Let's use this time. Let's use the slice curve, make some edge loop. And now what we're going to do is to use the symmetry here. All right, the symmetry here. And now let's use the
sym modeler and here, put your cursor on
top of a vertex. Now, press space and
select this option here and just stitch
this to the other one. And now let's do
the same sin here. But in this case, let's put our cursor on top
of the on top of the edge. And now let's use this
delete to have it. Now we can make that little bit that little
ramp there easily. Perfect. Maybe we can make a little
bit longer the handle, maybe thicker. I like that. Let's make this just a tiny bit longer around here
should be good enough. Let me break this also like that to make another ramp
because you can see here is a ramp there. Let me just bring this
a little bit like that. All right. Perfect. Maybe we can make
this part less big. Maybe something like
that would be good. For now? Alright. Let me save again. And now let's make the trigger. That will be really easy to do. Let's add another cube
small here polycube. Let's make it
thinner. All right. Let's make it smaller, a little bit more thinner.
Let's put it here. All right. Now, let's add more a
few more edge loops. Let me use this time. Here insert, let's use
the multiple edge loops. Prime kind of like
that will be good. Maybe. Alright. Let's
move this to the left, make like this circle shape where the finger will be
placed to pull the trigger. All right. Maybe a little bit. Dollar All right. Now, let's make this
metal piece here. I will be also easy. Same thing. A paint cube, here, Emo all the cube. Let's move this around here, make it a little bit
thinner and smaller. Let's put it here. Maybe just a tiny bit
more thinner round here. All right. Let's make it longer. Now, let's go here. Let me slide this a little bit. W just edge here a
little bit like this. Alright, let me just
do it with my gizmo. Now I will just extrude
this like that. All right. Let's make this a
little bit thinner. I mean, smaller, a little
bit shorter, right? Something like that
should be good enough. Perfect. All right. Something like this. All right. Smooth this mask that. All right. Perfect. Let me worries my
stuff insert, insert. Hearing edge actions, insert. Let's add another. Let me just go back to
the single edge loop. Add another edge loop here. Around here should be
good enough to do it. Maybe not round here, maybe. Maybe around here. I think that should be
a good place to do it. And now let's make
like this shramp here. Let's make it. All right. Let me see like this,
should be good enough. Alright. Perfect. Let me make part here, flat, just in case it doesn't. It's completely flat here also. All right. Perfect. Alright, I think
that's a good place to leave this part here. So in the next video,
we're going to keep working on the blockout. So see you in the next video.
3. 2 Continuing Blockout: Alright, guys, so let's
continue with this weapon. So now, what we are going
to do we will try to make, like, these parts here. Let me just draw maybe these parts we will try to
do now that are on the side. So let's try also before
that, let's do something. I will use my Gizmo
to move these two, just a little bit to the right. Perfect. Use you
can see here that there is kind of a space between this point
and this point. All right. So let's move it just a tiny bit, maybe
something like that. I think that should be enough. Also, I will maybe
make this thicker, something like this, maybe. Yeah. All right. So let me also make
this part here. This part here around
the level of this, you can see here that the plane changed from around the level of the stock part of the weapon. So let's do it.
Let me grab this. Alright. Let me mask. And now let's bring it down. Perfect. Around here. All right. All right, or right. See? Maybe we can
make the scope. Let's make this thing
quickly, maybe. Yeah. It can be done a thing
that can be done quickly. Let's see. Let's try it. All right. Let's add
a cube. Perfect. Let's make it. Hold the cube. Nice. Let's just remove all the polygons that
it has. All right. Let's see. Let me see the size. Let me see the proportion of that weapon inflation
to the other part. Seq is measuring
around half the length of this middle part. Let's just make it like that. Maybe let's put the
Gizmo around here. And let's just shrink
it. All right. Around there. Pin good enough. Let's make it bitless
shorter from this angle. All right. Maybe a
little bit less. Let me just give it. Just
a tiny bit. All right. Let me see. We can
add one polygon here. Around here, maybe,
another polygon here, another one here. And now we can let me
use my lasso mask. Perfect. Let's bring this
up around this point maybe. A bit tiny bit more. Let me also grab this other part and bring
this up around here. Would be good enough,
maybe. All right. We have other plane here. Y. We could change let
me put this around here. You can make this flat
or straight by pressing chaf and putting the edge loop
near a straight edge loop. So if you put this near this
corner and press chiaf, your new edge loop
will be straight. But if you put it here, the edge loop will get the
form of that corner edge loop. I will do some straight edge
loop here around this point. Yeah, it's around here. Kind of. All right. Let's move it. Be something. Maybe not. Let's see what we
can do. All right. Let me just bring this down and move this to this side. I will be around
in the middle of this lower Lower edge corner. Round here should be
nice enough, maybe. Alright. Let me just bring
this a little bit down. Alright. Maybe not that much. I think
that's too much, maybe. Right. Round here. Perfect. All right. This part should be something
like this around here. And this part should be like some ramp shape here,
something like this. Should be nice
enough. All right. So we have this. But now you can see
that this goes up. This goes up. So we
are going to make this part also. Right? That will be super easy to do. See Alright. Let's add a polygon here. Let's try to make it
straight as possible. Maybe around here, kind of. Maybe could be around
here. Around here. Alright, let's do
extrude single poly. Let's just extrude it.
Just a little bit. Let's go to the si bull
and make it a little bit, taper it, a little bit of taper. Around here, maybe this can be a little bit longer, kind of. Yeah. Alright, now we have this because this part
will be a little bit more with more angle. Let me bring make the entire piece a
little bit longer, also. All right. Now, we can, I mean, we can do some stuff. Let's active the symmetry, remove the X symmetry
and add the C symmetry. Let's do also here
with mirror and weld, mirror and weld in
the C symmetry. Now, let's add two edge
loops here near the corner. Around here, kind of. Yeah. And now with extrude, let's use extrude He loop. And now we're going to extrude inwards this edge loop here. Yeah, around here,
should be nice enough. So you can see, we have made now this dinner
part super easy and super nice done. Let me see. We can see that we
have some stuff here. Let's try to do it maybe. Right. Let's see
how we can do it. See how this piece is. Maybe we can add
another stuff here. And with Q mesh, we can extrude this to the
point there around there. Let's mask these two points. I think that is
good enough, maybe. I think so. It should be that should be
great. Let's see. Let's slide these two. I not that much mas this also. Bring this up a little bit. Let's in a bit. Alright, I
should work, I think. Alright. No. No, what we can do is here. We can do an inset
here with standard. Let's inset this and now
we need some polygons. We can do something here. Let me delete these two
polygons. All right. Let's see, this will
not work for us now. Maybe we can delete
these two also. Let's add the
polygons around here. Teach these two. And now here, let's
see what we can do. We can extrude these two
our rounds like this, Bridge these two and
bridge the two also. Let me just Oh, ****. Oh, oh, oh, oh, sorry. Oh, let's grab this
hooligans here. Oh, my my keyboard
is a bit crazy now. I don't know. What's happening? Let's Let's do another maybe another polygroup
Polygroup here. All right. Let me
just polygroupT all the same polygroupr
another color. It can be more contrasting
with the other stuff. Now here, let me just
put another loop. I mean, another polygroup there. Now we can use our
extrude extrude, with single poly
here, single poly. Now we can extrude this inwards. I mean, not that much. Something like this
inwards unless a slide this kind of like
that match this level, maybe also this part. And here we have that
light part, maybe. Yeah. We could make
it a little bit. Shorter, maybe I
think it's too long. We made it too long. Yeah, that can be
made. Let's see. Maybe we can see, maybe we can add next loop here. And now let's use the
square polygroup. I mean, the square mask here to bring the backwards
and make it shorter. Maybe. I think something like
that should be nice enough. Alright. Perfect. Oh,
what's happening? Oh, yeah. Alright.
Something's happening here? Oh, right, I see. I see. I see. Let me mask this also. Now this should move
without problems. Yeah, it's working. Something like this should
be nice enough. I think so. All right. Perfect. Let's just try to
match this again. Round here, maybe.
Maybe around here. Let's compose this straight. Let's do a trick here or right. Let's use our gizmo to
make it flat or right. Let's bring it a little bit to the right around here.
Bring good enough. All right. Maybe this should be a little bit up a tiny bit. Maybe I should be a
little bit, a little bit. Right. Something like this should be nice
enough around here. Let's also mask this part and pull them away.
Something like this. Perfect. All right. Let's see. Now, we need to make this hole here that we
have. We have a hole. Let's see what we can make, what we can do and how we
can make it. All right. All right. All right. All right. Per fet, maybe make
it a little bit or not not be that that up. Maybe we can make it a little
bit thicker like that. It should be good enough. My mask is bring this down
or maybe not as mask, a little bit up more up. Maybe it should be nice enough. Perfect. Et's at metro here, maybe. All right. Let's see. All right. Let's see. Perfect. Let's see
what we can too here. Maybe add another
one here, maybe. Not that much. Alright. Let's select these polygons and extrude them in
words like that. That should be nice enough. Maybe we can also do
some creases here, z here, or maybe in two which
division of four or right. And here we can
crease these edges. Let me do something here,
right here. Perfect. Present. Nice and clean. This edge also. So these ones. Nice and clean. Alright. Perfect. Although this part here
should be straight, I think. Let's see. Mask. Move this to the right
around here, maybe. Yeah. This is awesome. Maybe not. Maybe we
can just leave it. It doesn't matter too
much. Alright, let's save. Al right now, let's make this little pod
here would be super easy to do. So let's do it. Paint here, ply the cube. It is up. Let's make sure that
doesn't have any polygons. Just Alright. Let's
make it flat. Perfect. Let's see. Let's
delete or duplicate this and delete the middle here, the middle edge loop. What? Of poly. Oh, I know this. Alright. Now it's working. Let's make it double sided. Now we have deleted
those polygons. Let's put. Let's make
first the C symmetry. With ron well here. Perfect. We have
this middle arop and now we can add another aop here. Let's mask this Ar perfect. Let's make it
something like this. And also this part. Let's make it molar, something like that. Perfect. All right. That should
be good enough, maybe. All right, maybe some a
little bit trinket. Right? I don't think I
will use this cube. We can reuse this one All right. So let's duplicate this one. Me hide the other
one. Make it thinner. Now with bridge. We can bridge some stuff here. Or maybe not with bridge or
maybe let's bridge these two. Let me do it again. Bridge. Perfect. Bridge here. Let me just remove
the lit option here and make it and do nothing. All right, make a
straight polygon here. All right. Stitch with this one. Do the same thing
here. Stitch with the other one. All right. Now here, you can see that
this piece is tapering. Let me just break my draw here. This thing has a little bit of an angle here and see
the change planes and this part is inclinated
and this part awesome and also has a tiny
bit of thickness here. So let's try to do
that. All right. Let's just mask
this lower portion and just make it
something like that. It should be good enough. Alright, let's inflate
it just a tiny bit. Maybe we can inflate it. I how this looking
from the far right, make it a little
bit Inner maybe. Safe. All right. Now, let's extrude all polygons to make some thickness here. Around here should good enough. Let's remove the double sided, you can see that our
polygons are flipped. So let's just click
here and flip normals. Alright, I think that option. Well, I don't remember where is that option in the day
in the default Cebush. All right. Let's
continue with this. Maybe we can add
another polygon here. All right. Now we have our scope. Let me just grab this. Let me just remove
the other one. All right, crack this. Make it maybe smaller. It's a bit more upper up right. Now we have our scope. Perfect. So now, let's try to
do these pieces here. So let think how we can do them in an easy and nicely way. Maybe what we can do is to get another cube
here, another cube. Yeah, we love cubes here. All right. Let's bring
this to the side. I will let the other polygons
because I just want piece. Let Now, I will just move it and also we'll activ
my dsymetryRmove the X one here, here, mi weld. Now you can see that
we have our polygon in the two sides. All right. So let's work. Let's do first this
lower portion here. All right. See this
lower portion. Maybe we can extend
this around here, maybe around here,
I think. All right. Let's see if we draw a line
from this point up and see that is around there right to do it. Around here. All right, we can extrude another polygon. All right. Let's make
put this a little bit. S, maybe lower here. Something like this
would be nice. Mask this one from there. Every knots like
this. Let's see. Let me mask this other
piece, other piece. All right around here
to be nice enough. Alright, let's see. All right, let me grab this one. Make the taagon line a
little bit more parallel. Maybe this one would
not be that inner. Let's just make this kind of
parallel here would be good. I think this should be longer. That how it was before was
better, in my opinion. But it's not parallel
with the other piece. I want that to be parallel. I will just make it
para. I don't care. Same as bird, para. Perfect. Now we can extrude
another piece here. All right right here. Maybe Let's just leave
it something like that. Let me mask this just
to make it Glad. Glad. All right. We can make a rump here,
something like this. A rums here maybe.
Something like that. Let me just bring go a little
bit like this, all right. Something like this
should be good enough. Let me just make this part flat. Awesome. All right. Maybe not as much. Maybe, yeah. Let me
just bring this up. A bit. Around here
should be good enough. Now we need we can make this piece a little
bit longer like this. And see an gonna lie increase
in length. All right. Let's extrude another Ep. And this piece would
be around here, maybe. I think so. Yeah. It
would be around there. But the space should
be more upper. And this stuff would be
a more like this, maybe. Ib not that much. Alright. I think that
this part here should be a little bit down
something like that. All right. Let's try. Make this piece here. Parallel. All right. Let me bring this
more forward to the right. Is awful zone around here. That's completely
straight. I know. Around here should be, maybe. Let me see if the clip brush works this time to
make it straight. I think so. Yeah.
Alright. Should be kind of straight now. And now, what we can do
can add another edge loop. Oh, Edge here. And we can bring this
piece down a little bit. But what we are doing here, we are plucking
the trigger part. We pick this up a little bit. Just to not not plug the trigger part where our
finger of character will be. This piece would be
around here. That's why. I'm thin. Let like that. Let's move this around here. And that would be a little bit That rum should be a little bit
longer. All right. From here, maybe. Let's bring this
up a little bit. Alright. And this part
should be also longer. Around here, maybe. But this bit here wouldn't be that long. Alright. Hmm. Maybe we can make this
a little bit flatter. Like this. Right? Maybe this something like this. Maybe not. A little bit hard to guess
where all the stuff will be. All right. Alright, let's see. How we are doing maybe
as not the best. I think we can improve it. Also here, this goes up. Then maybe less extrude here. Less extrude a
tiny portion here. Oh, here. Tiny portion. Let me bring this around here. And also I will mask these other pieces
here around here. All right. Right, perfect. Now we can mask
this other piece in this down add another edge loop. Maybe it will not be the
cleanest way to do it. But since this is a clock outut, maybe we don't care that much. Also this part maybe a
little bit to the left. And here is a loop should be
a little bit around here. Perfect. Maybe should
be good enough. For now, I at least right. Let me safe because
ears tend to crash anytime without I without
any alarm or any. All right. I will pause just to think
what we can do next. Alright, I have noticed
something that our handle here a little bit too
long for our weapon. So what we can do here is maybe try to make these parts here a little bit
more tall, kind of. Yeah. Let's see what
we can do here. Alright, let me just hide this
piece that we are making. We mask here. Also, let's go to here
and mask this also, and here masks this. And here we mask
this other part. Now, I will press here and
select every part here. And now I think we can let
me just invert the mask. All right. Right, let me do
the same thing in this part. Now we can invert. Now we can make this taller
a little bit. Maybe. Alright. Let's let me measure this baby. Something like this
should be good enough. I think so. It should be good enough. All right. Let's bring back
the other piece. Now here, this
entire or maybe not. Maybe, yeah, entire piece. And here, maybe they can be a little bit upper
thing like this around here, maybe. All right. Let me just mask this piece. I'm being this back left little
bit to the left. Alright. But this doesn't have
completely the shape that that piece has. The concept, more
like a rectangle, but the other way, a little bit we maybe
could be some consistences with with the two
drawing, maybe will be. Or. Let's see. Maybe just leave
it like for now. I think this would
be the best way, a little bit of a little bit off from the proportions that
have have in the concept. But let's try to
address that later. Let's don't think on
that for now. All right. We are just making this Maybe we can also make this
piece here a little bit. Around here will be a
little bit more like this. It's still the same here. Let me mask these pieces and I will bring this
down on this level. All right. Let's see. Let me just make
this flat again. All right. Perfect. And here, maybe we can just bring this to the left, make a ramp here. As I don't want that
honor to be poking out from our piece around
here would be good enough. All right, let me do something. I will slide this edge. Where is edge. I will just move it around here. Also, I will slide this
vertex around here. Slide this a little
bit more down. Make this edge. Oh, flat here. Now we can slide this
vertex to the left. I like that. Maybe now we can
make this thing. It's a bit longer. You see, but now this
piece is not good enough. Maybe we can here, we can just move it right
the right around here. Also here, I will just move
it to the right in a bit. I bring some perspective
to see what we are doing. I should be lower. A All right. This should be lower
here around here, maybe. All right. Now we can move this side and try to make
it parallel around there. Also this piece will be
this part a bit longer. All right. I think this piece is in
a good place for now. Let's just extrude it. Through all polygons,
make some thickness. Lip. Alright. Perfect. We need to make
the other pieces. Let's try to make this one also. All right. But you can see that this
image slipped because you can't read these letters here. I have another piece
here flipped S? Now, the nice orientation. And this is you can see here is from around here
where it should be. So it will be one piece
of this should be here, and the other one
should be flat. That's what I'm
guessing from what I'm seeing. Let's try to do. All right, let me see. We can duplicate this. Let me just remove my symmetry. By making my symmetry nod, my perspective, make
my orthographic view. And now let's delete the thickness by just
selecting one edge loop, this frontal edge loop, and then with Chief
click you can select the edge loop and then just
press the lead lead hidden. So I will try remove
almost every polygon. And we can leave with this single one and
from here, start working. You can see that this piece is less thick that
than this piece here. Let's try to replicate that. We'll just move
this a little bit. The side, also,
we'll add edge loop. Here in the middle. Now to make this
Bble we can do it. Use our Bble tool here, or we can just select here
in the face where you it? I think it was here. But it was right
not move that move. Well let me just think a
little bit. All right. The other method that I was
talking about was scale, pull grupo, polygon center. But for this, it doesn't
work white nicely. So let's mask here
and press out. And then with this
axis selected, press out and then drag it, make kind of the
pebble that we want. Maybe just twig and stuff. Right to make it good. Maybe not not working
the way we want. So maybe inflating it. Now just bringing
this, make it flat. This is a really
nasty way to do it. It's really nasty, what we
have to we have done here. But for some reason, the method is not
working quite nicely. At center, is not working. Mesh center? No. We pobly go center but let's say that this
doesn't work quite nicely. Alright. Maybe let's try to
use the pebble tool here. Let's see. All right. Maybe it's working enough. All right. Let me
mask this point. All right, let me move. And now let's just tweak. What? Let's just tweak
this stuff by hand. We'll mask this also. Move it. These two. What? Why is not symmetrical. Oh. Let's just mirror it. Maybe just right. All right. Let's see. Mask this. Perfect. Maybe we can mask these two. Make it flat around here. To fix that nasty babel that we've had there Alright. I think this can't
work for now for us, or right now, let's just
continue with this piece. Alright, you can see the chip. Let's try to replicate
this chip inside Zerus. Let me say first.
Alright. Let's see. Let's see, let's see, let's see. We have this polygon. And we can extrude
another polygon. Oh. Extrude me
Extrude my polygon, bro is just closing. Let's do something
here. I will just deactivate this MAR attraction. No attraction, and now
should be good enough. Should be good again. Alright, let me just
mask this one here. And now let's break this down. Also, this piece should
be a little bit lower. Kind of like here. Most likely. All right. Let's extrude a little
bit more. All right. Let me mask this, make it flat, all right. We'll just extrude
more polygons here. Extrude this one. Make everything
flat and straight here. So let's see straight. And straight. Perfect. Now here we need another polygon
here around here, maybe around this part. Now we are going to
extrude another piece. Another piece here. Yeah, let
me make this flat bright. I mean, again, All right. Now here, I will just
make some paper, maybe something
like this and try to make this line
parallel to this one. All right. I think that
should be good enough. And this piece should
be a little bit longer than the other piece around this long from here and there will be another extrusion here be Let me just through this. I wish we could make this remove when we move Let's see. Maybe what we can do, let me add a little bit of
thickness. All right. And now I will just use
the Gizmo extrude to make my life easier to be able
to do straight extrusions, like this perfectly
without too much problems. Around here, right and weld. All right perfect. Let me see if we don't
have anything bad. All right. We need
to make this part. I mean, we need to make this like a ramp
in a diagonal way. All right. Right to do it. This is something
in my computer. Let me give me a little
bit. Right. We are back. Let's see. Let me make this align with
the other agonal stuff. I think this would be good
enough for now for us. Maybe or maybe not. Maybe not. Let me just do the
same thing here. To make this line like that. All right. Perfect. Let me just quick save. All right. Now we need make this stuff, but in the other side in the correct side in the
correct orientation. Try to make this big piece. Maybe this also little
big piece here. That should be just a cube with a little bit of
modifications. Try to do it. A penta sphere,
Gizmo, poly cube, move it, move it even more, make it bigger, right, move it in place. Something around here, a little bit more forward a little bit
forward around here. Round around this point, let's make it around
here. All right. This should be that bulge Alright. Let's mask this. Make it like that. All right. Let's make
this more like this. I've seen something here that is a little bit of this
should be smaller. And this piece should be longer. Yeah, this piece actually
should be longer. Around here would
be good enough. Oh. Around here would
be good enough. Let me mask these other
parts and bring them backwards here because I don't want that to be showing
up in this area. All right. I think now working
maybe make it a bit smaller a little bit more upper All right. Maybe this one should
not be that big. Let me just push this
in just a tiny bit, mask the lower portion, move it around here. I will do some stuff here. Let me mask this entire piece. Strewed tiny portion there. Maybe do something here. Alright. I think this
should be good enough. Maybe it is a little
bit more like that. Alright. This is the shape. This has. We have a plane, another plane, another plane, and
another plane. I think this should be
good enough for us. For now, Alright. Let's try. It's safe. Let's try to make the hole. Let's try to make
this hole here. Right. Let's see what we can do here. We can add We can add
an egg loop here. I want this to be straight home. Let me just put
this into nothing. I just add straight glop here
around here, another slope. I'm just looking at something. Uh I see. Maybe this could be a little bit more
longer, just like that. Something like this
should be good enough. I think that should be
good for us for now. And now we can let me just make this
longer, a tiny bit. Around here should be
good enough, I think. Around here. Perfect. Let me just
remove that piece, that atrope, add
another one here. Let me remove the thickness because it will be easier
for me to delete polygons. Let's remove the
thickness. Leave heading. Alright. Let's add
another polygon here. And now we need to
make some stuff here. See? Will be the
best way to do this. What would be the
best way maybe set. Make an inset,
maybe or maybe not. Let me see we could delete it. Let me just delete this for now and we could make this agono around here. I would be nice.
Enough. Let's make these two parts
Tayono around here. I would be nice. Enough. We just move this Okay. Good. All right. I not that much anymore. Of course, All right. This here is not completely
aligned with the rest. And this ramp is a
little bit too long. All right. It's quite
a bit too long. See what we can do there. Maybe we could make it
like this and not that a tiny bit more like this would be good enough
for us for now. Maybe let's just mask this, try to align this again. All right. Let me just save. My go back here. Maybe now we can
make it parallel. All right. Now it's parallel. It's do the same thing here. I will just it. All right. Or making that piece. Right? If we could make
it a little bit smaller. All right. Maybe this piece here
would be more like that. All right. Maybe this should be a
little bit more like this. All right. If I can, we could make
this other piece here. Here, you can see,
it's kind of the same. Basically, the same shape, but a little bit more flat. We'll just duplicate
this, split, all right, make it a little bit more
flat and more and smaller. And thinner and
ladder would say, we can make a little bit more
dye with this piece also. Alright. Perfectly. Taking now that we can just extrude
again our stuff. But what happened? Make sure all polygons all right all polygons around
here. I be good enough. Maybe a little bit or
like that or right. Perfect. Now, maybe we could write
to make some pb for this. Let's see if our scale
center work nightly. Now it doesn't work nicely. I don't know why this is weird. Right, let's just
add the pebble with the pebble tool here. You see? Perfect. We need to do a lot
of cleaning in this pebble. Let's do it quickly, and then we are going
to end the video here because it's a bit too long. This video's mask. All right. Oh. Let's do the bebo here. Around here would
be nice enough. Mask and move it around here. Mask here. Let's move it also around here maybe. Mask these two. The nothing or write
this two right my God perfect right here
to be good enough mask these one this one mask. Around here. But now I will mask these two here.
Let's bring this up. Something like that
should be nice enough here also around here. Here here and here would
be nice enough. All right. Think what we have
here. All right. Maybe we can just hide these piece here
because that there should be don't need
to be seen theres. All right. All right, perfect. So let's see what we have here. I will also mask
this piece here. We just do it. A Alright. I think that would be
good enough for us or now cause this pebble
maybe go not be there. Let me just delete
this pebble here. Maybe delete it. I Maybe not. We'll see what we can do there. Maybe we can mask these edges. Let's see what
would be the result in that All right. Maybe. Move this more like that. Mask this, move this
more like this. Should be good. Enough.
Mask this. Move it. Move it. Mask point. Something like that
should be good. Let me use the clip curve. Just to clip it
and make it flat. All right, let me just
mask these two polygons. It's the engagement. All right. Alright. I know, I think would be nice. Enough. Now, do something here. We'll just mask these
pieces, and bring them up. Here masks Right, I see. Around here. And this one around here. A Alright. I think we can leave
this video around here. We have done quite
a bit of progress. Oh, we need to fix
this other piece also. I just forgot it. Oh, my my. Let's do it let's
do it quickly here. Maybe here, right. We can do it quickly.
Here. Perfect. All right. Here posing Perfect. It's not. At least flat. Mask,
but mask mask here. Mask here also. Bird flat. Perfect. Mask. Mask mask. All right. I think
that maybe I will need to do Imrund wells later. But I will just leave
it like that or now. Alright. So I will continue with more blockout and with more shapes in the next
video. I'll see you there.
4. 3 More Blockout: All right, guys, so let's
continue with the blockout. Now we're going to make
these pieces here. Let's see if we can do them. Alright. So let's start. Let's maybe start first
with the lower piece. And then we're going
to make this piece. Alright. Let's do it. So let's do the same thing
that we have been doing. And let's just
bring a plane here. Let me also add maybe a
few more polygons here. This in this part
here, maybe two more. Maybe that should be
nice enough, maybe. Alright. I will just
duplicate this. We move it. I will delete everything
but a polygon. Let me say poly group or now maybe let's do
something here. All right. Let's Alright, give me a sec. Let's select this. Now, this lid hidden. Alright. Then immediately or maybe not. We can leave it like
that. Alright, let's see, around weld in the C axis. Oh, C axis here. Perfect. All right. Put this in double maybe or not. Alright, let's start win. This lower piece. Maybe we can do the upper one. We'll see. Let's see. Let's do the lower piece first. Alright, let's grab the polygon. I will make will
delete this polygon and let me just align everything to make it straight as possible. All right. Sick Alright. Perfect. We'll just
do some thickness. Thank. All right. Let's do
some thickness here. That part is around let's see. It's kind of thicker
than the previous one, maybe around the level of
this one of this piece here. Maybe it could be.
Yeah. Also, we can make this also thicker. Thing like this should
be good enough, maybe. Maybe something like that. Alright. Let's see. Something like this should
be good enough, maybe. Yeah. Let's do the
same here. Extrude. Feel this touch. Maybe just the sickness of
that other one. Perfect. Alright, let's keep
just extruding stuff. Alright. Smooth this. Let me just put this
in square as square. Make things easier
for me to select. We'll make this kind of Daya. Yeah, this should be Dija. There should be aligned with
this rump. So let's do it. Around this. All right, I see. It's also not fully aligned. It's fully straight. Let's see if we can make it
straight kind of like that. Yeah. Let's go back here and
see what we can do. I think that around that
would be good enough. I did a mirror and
weld. All right. I did a mirror and weld.
So let's continue. Let's see. Let's now
strewed a piece here. My mouse. Let's
extrude a piece there. Make this a bit charter.
Maybe something like that. Move it. This should be Alright. Move it like this, maybe. This piece should
be a bit upper. All right. Let's add
another polygon here. A another one. Right? Is real time. It maybe will take me
a while to figure out. It's relatively uneasy shape. So there should not
be much problem. Alright, let me see. Now we can maybe
mask this polygon. Move it like this to
make the shrum here. All right. Let me mask this one. Bird, move it more like that. Because this part is short. It's like this. It's short. You can see here.
It's not that white. This part here is
not that white. Alright, so let's
continue. All right. Let's see. Now let's
make this part here, then try to make
this entire piece. All right, this mask
this polygon, Strud it. Let's see where
this should stop. Alright. I should stop
around here, maybe. Yeah. And now we can extrude
again and rotate it. And move it downwards. We can maybe expand this part, something like this. All right. Let's try to make it
parallel to this line here. This so called can
be a bit longer. My something like this
should be good enough. I think so. All right. More like this. All right. Let's see.
Let's extrude again. More like this. Let me just
put this in a good shape. Let me just mask these
ones and then align them. Also, we'll do the same with the lower edges just to
have them proper alignment. All right. Let's see. Maybe we can move these downwards so we can get a little bit
more steel with there. Right. Perfect. Let me safe. All right. This should be
go more like this, maybe. A little bit more like this. Round here, maybe. Yeah. And now we are going to
extrude again like this. Maybe around here, and then
extrude again around here. But let's try to
make this part here. The same thickness
that we have in this area by moving this
around here, maybe. Something like that
should be good enough. Right? Now here, we can maybe move it a little
bit more to the right. Maybe something like this. Make some diagonal, little diagonal stuff, maybe
something like that. Alright, let's align the
upper and lower edges. Perfect. We have
that piece there. Alright, I will make
the babel later. Let's try to make
this piece now, this upper piece. Let's do it. Let's just duplicate this one and just select one polygon. Let's just select
one polygon here. Alright. Baby you
could use this one. All right. Move it
upwards or right. Is is properly align. You say so. I think that also should be
a lot more thick, maybe. You can also make this even thicker this middle
piece, even thicker, maybe I can get a
barrel there easily. Be a little bit more narrower. All right. All right. So, let's see. Let's see. Let me just
align again these polygons. Perfect here also. Let me bet the mask and then
align this again. All right. Maybe we can shrink a
little bit that piece. Extrude it with the
same sickness that we had before all polygons. Yeah. Let me do some mirror
and weld in the C axis. Perfect. Oh, I forgot
to add the C axis here. Also the mirror and
weld in that part. All right. So let's continue
making some stuff here. Should be around the length. That piece, this maybe should be a little
bit more inwards. A little bit more inwards. Maybe something like that
should be good enough. All right. Let's see. All right. We can make this
a little bit more. Ha. Maybe this should go
around here and even go further than this
copper part around here, maybe a line with that p here. Right to do it. It's my around here. Right to do it. All right. Now we have that there. We can just make some
quick extrusions. All right. I have just
deleted on polygon. Let me just break my
ism again and just remove that tab right. Let's extrude this and make this line parallel to that other one around here will be good. And let me see
that piece you go. Yeah, kind of like that. All right, through again. And this one now will
go upwards around here. Yeah. Perfect. Let me add another
edge loop here. All right. This is something.
Let's maybe add this one and then
another one here. Another one around here, yeah. And now we can move. Let's move first these
phases to the right. Make this line also
parallel to this other one. All right. And from here let me add
another polygon here. We'll add another one. Maybe around here. From here, I will just move
this to the right around. Alright, let me
just do something. I will just remove that one
and put it a little bit upward around here and do
the same thing mask it, and move it to the right. Around here should
be good enough. Let me safe look quick. Alright. Perfect. So now, I need to make some stuff. I will select this Q mesh option and then just move it like that, just to have a little
bit of a gap here. Because in this
middle piece will be another piece and this
other piece also. We're going to make now because we need to
fill that part, and we're also going to
make this piece here. But let's just do the
simple stuff first. Let's do those pieces. All right. We can just duplicate this maybe insert a polygon,
another polygon here. All right, the lid. We'll just keep these
polygons around there, miro and weld, all right. Just move the upwards. Perfect. All right. It should not be
that hole in there. All right around here, maybe it should be
a better place. Also, it should be maybe
a little bit shorter. Let me see. It's completely
parallel to that one. I don't know. Yeah, it's more pattern. Yeah, maybe. So we need to
align this other piece alles. Try to align it. All right. It's not fully align. Maybe Let's just leave
it like that for now. Or maybe not. I will just
try to align it better. All right. Let's just
use the clip brush. It's my clip brush. Around here. Maybe yes. Perfect.
That should be line. All right. Et's just add
thickness there also. Sick invert mols. My stuff doesn't want to go. Alright. Now it's working. Let's move it a little
bit more inwards. Make it longer. Now what we're going
to do is to move this polygon and align
it to that other piece. Let me mask this and
use this to make it straight now should
be good enough. And here we need to do some stuff because this
should be a little bit more than Jago Maybe something. Well, let me just make. Alright. What we can do here. Let me just move this to
the right a little bit. Make this lower ozone. Move this and make
it like that, maybe. Just to get some diagonal suff. But now we need a cap here because there will
be this piece. So we need to make a hole there. Right. For that, let's try to make
these two pieces straight. And these ones also, let's move it around
here. Make it straight. Let me just remove
the thickness. Let's see. Let's maybe
add another one. Right, move it upwards. Make those pieces also
bright as possible here and the lower ones here will
be also. All right. But now, this is a
bit too too small, but let's make it a little
bit more bigger like that. Alright. I Get. Let me just slide these vertex. Maybe we can also
make this piece. Day won. Something like that, let's try to align it. All right. Let me use the clip brush. Et me mask that piece. Let's see, we're going to delete those
pieces here anyways. Take the little piece. Me downwards. Let me mask these
ones and also make it around here. All right. We will need to
line pieces again. Perfect. Now I will
just delete these two and then do some
thickness again. Perfect. Now we have the gap. All right. I let's try make this
little bis here. It will be something easy to do. Let's add a cube here poly cube. Move it, make it bigger. Let's just remove
all the polygons. Right. Hand well in
the C axis here, and then activ the C imetry. All right. Let's move it front here. Perfect. Let's just move it.
Oh, where's my pollen? All right here. This should be maybe around I
should be around here, and this should be a
little bit longer. This should reach this part. Yeah. Perfect. All right. Now, let's mask this move it that part. Let's move it more inwards. They make it more flat. Let's use the dynamic, the local symmetry here. But just deactivate the dynamic
if you have T brush 2025. All right. Let's put a polygon here
another around here. Maybe let's just move this a
little bit more like that. And other piece here a
little bit more like that. Now, let's mask this edge
and move it outwards. Something like this
will be good enough. Something like that should be
good enough, safe, perfect. Now we can use the
insert multi edge loop. Let's just click once
and you can see that we have a middle edge loop in the exact middle
of our object. Now from here, I
will change to bebo. Or maybe what we can do is
just select this let me see. We could select it. Maybe do an inset. Yeah. We could inset it around
maybe around here. I'd be good. And this here, maybe we could
add another polygon there. Let me just add a polygon
here a little bit lower. Right. And now I will just
mesh these two ones here. Perfect. Now we have
that is there made. Let me just make it a
little bit more thick. These pieces, right? We need to make the other piece. But first, let me add some
babble before I forgot it. Bebo, Edge p complete. Let's see. Babble
here. Edge complete. What is insepted? Oh, do nothing. All right. So babble here. If we have another method, Alright, let's just do the bebo. Perfect. We need to clean some pieces here.
Let's just mask it. Mask. Oh, it's not masking. Or spicy mask,
right mask Invert. And now let's align that piece. Let's just come here
and do some alignment. And also here, I
will just align it. What? Perfect. Here I will just mask Mask. Move it upwards. Around there. Less also take this, move it to the side. This piece also can be
moved to the side around. There we not Mm. For the other pieces, I think
that for the other parts, I think that they are great. Let's do the same thing here. Let's add pebble. And this is almost perfect. They said almost because
it's not mask it. Move it and make
the pebble nicely. And now it's good. Let me slide this. You don't have that
overextended polygon. And have a bit of
a cleaner bology. All right. Now that we have
made our pebbles, let's do the other
piece, this piece here. And also, this stuff should
be a little bit more thicker. We bring back my mask
red around here. All right, let me
smooth this one. Make it a little bit
more thicker, maybe. Something like that. But now it's trespassing this piece, and I
don't want that. Maybe we can do or maybe not. I don't think that
would be a good idea. Let's just leave it
like that for now. We will see what we
can do there later. And also, I will just make
this thicker to fill the gaps. All right. Let's safe. Perfect. I see. Let's make this piece here. Let's just add another
cube. Hold the cube. Oh, my cube, where's my
cube? Here's my cube. Perfect. Let's
just move it here. The hard weld, C symmetry. Perfect. Where's my miro weld. Oh, here, and now it's working. Let's just delete this
middle edge. All right. Let's put it in place. Make it taller, let's
put it in place. Make it taller, little
bit wider here. Round here good enough. It may make this a
little bit more small move these polygons downwards. Perfect. Here this should
also go downwards. I This also should go downwards around here. Perfect. Let's just
mask that and align it again with this awesome. Perfect. Maybe this can be
a little bit or upwards. We mask this one. All right. Around here. Let's make it. Emer this part. Let me slide. A troop complete here. Maybe not. Let's just mask it. Love it down. Let's just bring this one here, and the other piece also here. All right. Here, also, we'll just move it. And we'll just move it. Perfect. Now we have
some space to work with. All right. This should be it'll
bit more like that. And here will go. Maybe this part here
can go straight. Oh. Something like this. Perfect. Let me move it. Perfect. All right. Let me also move
this polygon and put it in place around here. All right. Let's put
it this up here. All right. Perfect. Let's just mask this one. Move it. All right. Let me add a edge somewhere
here, maybe around. Oh. Here's my edge here, single edge loop around
here, maybe the edge. All right. Now let's mask this edge
here and move it right. Something like that. We can also make this one maybe
with a little bit of taper. Let's first make the taper. Let's first make the taper. Around here. All right. Maybe this is a bit too long. Let's make it shorter
with shorter, something like that
should be good enough maybe even shorter. Let's move this. All right. And all of these pieces
here should also move. This piece, let's
move it to the left. This piece here, I will
also move it to the left. All right. Round here. Perfect. And all of these pieces will
also remove it. We left around here. Let's see if we have
let me compare we have our barrel here a bit too
long, maybe, maybe not. I think that's a good place. Right, we can keep
working on this. Perfect. I make the taper. Now, let's mask
here, mask, invert. Move it. All right. Maybe bit more. Let's just slide this light. What light it. It doesn't want to be slides. All right. Let's make that taper. All right. Now here, I need
make some stuff. Let's do some insect first. Let's do some inset. Maybe something like that. But now I will let's see I should continue
around here. Let me just go back. May add troupe here. I something like this, we'll
add an inset here and here, and I will use my
les tool lice mesh. Make some edges. This is kind of like
the knife brush. The knife tool inside
the lender or magia, to be able to make edges
and cuts inside our mesh. But this doesn't work
that well here in Cerush. That's a bit of a
disappointment, but it works. And well, right, let's
stitch these two polygons. Also, the slide mesh
doesn't work with symmetry. So if we use that tool, we will need to do
another mir and well to regain our symmetry. All right. Perfect. Let's
just delete this polygon, and then we are going to stitch these two points together
and here and here, and they are perfect. All right. Now what we can do is to extrude single
polygon here and here. Now, let's just oh, Single poly. Single poly. Alright. Maybe move it. Just
a tiny bit, maybe. Alright. Maybe not. I think we didn't need it to do that stuff
that we'd have done there. I'm so dump. Sorry.
I'm a bit dump, yeah. I will just consult
C. Sorry for that, but you have learned
a new technique. It's always good to learn stuff. Even me, I'm learning
all the time. Never stop learning. Learn is always a good thing. Yeah, right. Let's also move. This one around here. Perfect. All right. I move the entire the entire
stuff. All right, perfect. What I'm going to do now will be just to duplicate
this stuff, Bleed. I will make another
polygon, another cube. And now I will just put
it here around the side. From this side, maybe. But it here with
mask around here, and then then I will just slide
this light edge. Perfect. Light this stuff. Perfect. Make it a little
bit more flat, maybe. Maybe even more like this. I Alright. Perfect. Let's also
make this inner piece. Let's do the same thing. I will just duplicate this stuff. Here, I will go again to a cube. I will make this
longer. All right. Maybe also from this
part, make it longer. Maybe a little bit more inwards. All right, put it here. Do something like this. Now what I will do is to
add a middle edge loop, and then I will mask that edge and move it to
make some shape like that. Maybe we can also do a pebbor. Let me just add
few polygons here. Something like that
should be good enough. Alright, perfect. Let me go back to single poly. Tingo poly here. Alright. Let me just duplicate this. Awesome. Plead mask point. Maybe we can do something here. We can mask this
and then make it. Maybe something like that. I say that's good. I think that's good, yeah. We mask here, and mask here
and do the same thing. Is there a mask? Let me just
put this and do nothing. I mask bird. Perfect. All right,
let's go here. Maybe I will delete this one and just duplicate
this other one, make it a little bit smaller. And I think that we are
good to go for that piece. All right. Perfect. Now there is less stuff to do. Maybe here, we can add a polygon here, here, here. And that polon or maybe
instead of adding a polygon, we could move this stuff around here like this. And now we can just
bring this up like this. Perfect. As you can see, there is some stuff going
up in this area. All right. So I think that I will
leave the video here. In the next video, we will just continue adding the forms and
shapes and all that stuff. We will try to make a tip here, this stuff, and also this
piece and also that part. And then we're going to keep refining and
refining everything. I like making this shape here, adding those details
and all the stuff. So see you in the next video.
5. 4 Doing More Blockout: Alright, guys, in this video, we're going to continue
more with our weapons. So let's start. So let's see what we're
going to do in this video. I was thinking on doing these pieces and
all these pieces, maybe this one also of the
stuff that we have here. So let's start start first with this E. Let's try to do
an analysis of that. Alright, you can see
that here is a plane, another plane, another plane,
more planes like that. Here's one and two,
three, four, five. But you can see here in the other side that it
has one plane and then goes diagonal here like a
beb and this goes down. You can see here that also have some sort of a
beble around here. Something like that
this half in this area. So let's try to do that. All right. Let me just erase
stuff from my reference. Alright. Let's do it. Let's a paint cube as always. And from this cube, we're
going to make everything. All right. Let's see. Let's just remove until there's one in the
middle. All right. Let's remove it. All right. Now, we can use our C symmetry. All right. Let's see. Let's around here. That stuff. See how this stuff goes. I think there is an
empty space this area. I think we have filled that filled that with
some stuff here. Maybe we could do a mirroring weld in the
seed D drn here mirrn weld. We can add another
two edges here. And now maybe we can do a mesh
with one poly around here. Something like this. All right. Let's try to stitch these ones. And there we go. We have
an empty space there. Maybe this would
work or maybe not. Alright. Maybe we can do this. Here. Maybe we can use this. All right. Let me see. I mean, that looks like
an empty space there. That's what it looks like. I have sense if maybe a character doesn't
have the scope here and doesn't
have it attach it, maybe it can be used. This stuff has some
sort of scope. I think that's what it is there. So let's continue
with this piece. Make it a little bit narrower. A bit smaller. All right. Let's move it. Perfect. Make it a bit bigger. Maybe we could also
make it thicker. And then from here, we can
start bringing it out. Let's see. Can make
the first one here. All right. Can make
the first one. Then we have another one
plane down and another one. Let's see. Alright. Let me add
a polygon here. I will me this around here, maybe that's below around here, maybe a little bit down. I think here will be a
nice place, all right. And then we need to extrude the stuff. Maybe we can make it. Molar. Something like
this should be nice. See through a loop. Okay, something like
this should be nice. We can strut a single boy here. Oh, you can see that there is some space
between this and this. Let's try do it also
that it'll taste there. Stru this. Maybe not that
much around here, maybe. I'll be good. All right. And now, I think that this plane here is
aligned with this. You can see here, that plane is kind of aligned with
the other piece. And we just need to
mesh this part here. Mesh it, we can make this a
little bit. Higher maybe. Alright, let me bring this down. Just a little bit, a tiny bit. And now here we can make the
beblin that we got before. Make a babble if this
babble stuff works. Alright. But before that,
you can see that we got some diagonal stuff
here, right to do it also. And this seems to be curves. Stuff seems to be
curve like this. Like that. All right. Maybe we can make it. Longer. Let me just mass one area
and then make it longer. Maybe here mask, make it a bit more not
wearing that part. If I look at this angle, this looks ssa. It bit short. All right. Maybe now we can mask here, Matago line hang that or we could just extrude here and then we can mask mask this one, go here and just make a
diagonal parts in that area. Right You can see here that there's
another diagonal space. Right to do it also,
maybe if it works nicely. Diagonal stuff. Alright. Maybe this should be a little
bit more from the axes. Alright, here, maybe now
we can make the bebo. This don't working. Alright. See, why won't
work in this area. All right. Oh, I just saw
something that here, you can see this plane goes in. Maybe what we can do
is another mg rings in or we could just go on so C and y. Mesh this part.
Let's ski mesh it. Around here, maybe. Around here be good enough. Let's see. Let me this time
mask this do the pebble, something like this instead of using the the modular method. Alright. A All right. Now we need to extrude
some stuff here. Insert. We put this in
extrude single poly. All right. Let me
say feel quick. It should be around here, maybe. And we can extrude
a polygon here. Make it longer, and
these will go down. All right. All right. Now I think that this part to be aligned with
the outer part. Yeah, it should be. Let's do it. Right, let's just
move this left, so this is aligned
better the outer part. And here should be good enough. And this part here will
be a little bit longer. Something like that
would be good enough. But this part will
be around here. Maybe. Or we can make it a
little bit. Maybe not. Something like this should
be good enough around here. All right. Just to make a little bit better better
layering there. All right. Here, let's see, we can maybe put this is not going the way I want this to go. Let's see, maybe we can make some life cup here
around here, maybe. Yeah. Now we can do a
Q mesh here, maybe. Yeah, we need a Q mesh. Let me just late this polygon. Now there's something
weird inside our mesh. You can see there. We have some inner polygons
that are not great. We have I see what
we can do here. Let me delete. Polygons. No, I can add my stuff. I can bridge these two. Alright. Let me slide slide
the edge loop complete. All right, give me a second. I will just bridge
these two again. And now I will slide
the edge loop complete. Around here. I think that
there should be nice enough. We'll delete this
the bridge this one, this one, and these 20 and
these two to be bridge. Maybe it can be a solution there so we don't have a
hole around that area. We have this piece here. All right. So now let's try to do let me think
what else we can do now. Maybe we can do this piece. Or maybe before that, we can do this piece here. Maybe these two can be a nice
thing to do before doing that piece or maybe these three can be better to do
it before doing that. Let's do these three pieces
before this complex piece. Right, I have saved around
two times in a row. That's just a tug that I
have because I have lose too many words from Stivers
crashing without warning. So let's do this piece first. That's the easiest one. Alright, we just need a cube. We just need a cube, here, here, polygon, right, bring it. Move it to the side. Let's
run well in the C axis, Activ your symmetry
in the C axis. And let's go and remove
these polygons here, this middle one here. Perfect. Et's make it longer around the size of the
length of this part here. All right, maybe it can be
even further around here. There's nothing bad with that. Maybe something here
should be all right. Let's now extrude this
extrude all polygons. Around here maybe flipped. Let's align these two. All right. Perfect. All right. Let's see. You're thinking a little bit? A little bit. Let's
do this piece now. Another easy piece. Let's do the same
thing. Maybe this one, let's just duplicate this, move it and just transform this into a cube. Make it longer. From here. From here should be good enough. Make it a little bit smaller. Perfect. Let me activ
my dynamic symmetry. I mean, my local symmetry. Let me just remove this middle
edge loop. Around here. Something that I forgot
to add is that we have a little bit of
inclination here. Have some sort of a heels up and down maybe we will try to add that piece there can add two ones. Here, maybe a
little bit shorter. Round here, maybe
should be nice enough. We can now use our gizmo, bring this down around
here, maybe good enough. Alright. A little bit more. Let's see. Suggesting this stuff
more like this. Is a little bit longer. And this let me do
some ran wild first. In the sea Imam. Right, let me just mask this and bring this up
around here, maybe. Let me try to make
this parallel. Maybe something like this
should be good enough. All right. Maybe no. I'm just suggesting some stuff. To see the best way
to do this part. We can try to make this a
little bit more parallel. Bringing this up here. Every here and the parallel. I see it parallel, right? Now, I bring this down and then we can mask and make this
a little bit longer. Maybe something like this
will be good enough. And also longer from this part. Maybe maybe or maybe
not something. Around there should be
maybe not that long. Now, from here, we'll add an edge loop right? Let me move this to the
side right around here. I Perfect. And now we can move
this one like this. Something like this
would be good. Maybe make this a little
bit thicker like that. We can add some stuff here. Maybe not. S mask these two and bring this up and make this longer. All right. Make that piece longer. Maybe something like this. Right? Around here
would be good. Maybe we could make a little
bit longer than usual. Maybe in this piece, we could bring this like that. Maybe not. I don't think so. All right. Let's see. Let's see
what we can do here. Let me try to put this
in the a nice way. Alright. Here from here. I see it from this go. This should be
lower. Make a mask. Make a mask and bring this
that maybe make it parallel. And we can move this to the side and move the
forward like that. Now, I will add something here, and I will mask
these two polygons. We had we could do it before
doing all the stuff I did, but I didn't. But now I did. Alright, let's
think a little bit. What we can do here All right. Now I see that maybe we
could make this shorter, maybe a little bit longer, like this. Or maybe not. Maybe something like this. W would make this like here. People do it
something like this. Let me use my clip
brush to see if I can make this feather. For some reason. This is
just coin. We're like that. All right. Now here, maybe I can move
it. Around here. Move the backwards
around here, perfect. Perfect. Let me make this a little bit more a little bit
thicker around here. Maybe something like that. And now I will try to insert a polygon here. Make this piece comes like this. Or that's straight. I think that's straight
in the concept. Let me see the shuett. I don't know, maybe we will
just leave it like that. Now, let's try to do some
beblin here with pebble. Something like this. We
have a nice bebbo there. Alright. All right. We can also try. We can try to add
this reddish piece, like some sort of another layer of stuff on top of this piece. All right. But first, let's
just do this others. It's a little bit more
complex than the other one. At let's just do the
main form for now. We we will be kind of
similar to this one. We'll just duplicate
it with control shift. All right with control shift. And now I will just convert
it to a cube again. We'll just remove the
middle edge loop. And I will make it longer something like that. Make it thinner. All right. Make it thinner. Let's make it a little
bit thicker, like this. Perfect. All right, perfect. Let's make it a little
bit more thick. Like this should be
good enough, maybe. Let's add an edge loop in
the middle right here. We must move it and align it
with this other ramp there. All right. Now, we can go here, it goes in finpry to do it here around here, maybe. We can select this then do some extrusion with
single poly activated. Now in this area, I will just mask
without symmetry, move it to the left, then do Vhar weld. Or maybe not actually that big. Just extrude it
just a little bit. The or maybe Alright. Let me do something. I will make it
thinner around here. Will be good. I will now with
my they diselect this one. Trude it. And then I will
extrude again these two. Now I will mask and
mirror and weld. All right, perfect.
It is good work. I'm just trying to
figure out something, make it this shorter. Like this. But now, this is
not line anymore. We'll just leave it like before. But this doesn't have. This is a bit thicker
than the reference one. Maybe we could just
bring this up. Something like this. All right from here, I will try to align
it a little bit. Around here, maybe. We could do it. We'll make this a
little bit longer. I mean, a little bit more
white this cap there. Let me here. Just
bring this down. Tiny bit. Now it's in a better shape. Alright, maybe now we can make this piece
a little bit bigger. So it touched the center piece. Tach the center piece here. Perf. Although this doesn't
look that big. Let me just go back
and try to figure out something what we
can do in this case. Maybe, yeah, we can
we can just make it thicker around here. Let's leave it
like that for now. In this piece, also, we can make it thicker. Maybe. All right. All right now, let's try to
make this piece here on top. Let's first make
the middle piece. All right. Let's
paint a cube again. All right here, perfect. Bring our cube to the correct place
around here. All right. I will just active
my C symmetry and then do a middle edge
loop around here. Now let's make it thinner. First, let's try to do another layer of
stuff on top of this. Maybe maybe not. It looks like have
some stuff up there. Well, let's just focus
on making this piece. All right. Just make it longer. From the same length
of the other piece. Maybe a little bit
shorter, actually, maybe. Alright, we can make some
edge loop in this area. Another edge loop
in this other area. Now we can make a ramp. Maybe this could even
be a little bit lower. All right. Maybe
something like this. We could make for that, set the ramp. Bring this like that this part. All right, let me do
something here real quick. I will duplicate this polygon. I mean, this stuff. I will select this and
then we'll add another p, the this vertex, little
rest now extrude this up. And now that we have
this piece in this area, maybe it will not be
a good idea to do. Me do some little cushion. Maybe something good. We could bring this
little bit up maybe. But this is here. I'm not sure. I mean, you can see this piece here. But I don't sure how this
is attached to here. All right. I will just
figure out later. Let's just focus
again on this piece. Perfect. Now, we can add another edge loop here
and another one on top. Do it again around
here, another one. Let's just do it one here
and another one here. Let's mask these pieces and bring the
backwards around here. All right. Let's see. We could add another loop here. We can make this a
little bit longer, and it's a little bit lower. Ithing like this
should be good enough. Maybe, what we can
do in this area. We could make, where's
my stuff? All right. We could make this a little bit lower so we can have haze
for this piece to exist. All right. Let's try to do it. Perfect. All right. We can put this here. Nicely done. Now, this part, let's see. Let me just hide
this real quick. But quick. Perfect. Now, I can break this forward a
little bit higher. So it keeps its thickness. Maybe not just make this part here a little bit
thinner just to compensate. Alright. All right, perfect. Let me put again be that I hide Maybe. Maybe not. Maybe, yeah. Maybe we can make this
piece a little bit shorter. This piece here. Also,
a little bit shorter. Bring this around here. E here. And this around here, maybe. Or maybe not. Can leave that area maybe. We can leave it
like that, maybe. Yeah. I think that's good
to leave it there. All right. Now I can duplicate this. I will just select this, remove the other pieces. I will delete these two. And now I will let me
just make it flat. And here I will just light Perfect. I will just Alright, it's not working quite well. All right, that
working quite well. That's extrusion there.
Let's just do this. Let's do the same here. I will delete these
two and make it smlar Let me just delete
that polygon there. Make this smaller like this. I'll use my clip brush
to clip this part. And now I will just align this. Perfect. I like this, should be good enough. All right. Let's try to do
these pieces here. It's a penta cube but then. I Q. And all right. Bring this forward. Make it motor, move
it to the side. Oh, make it polycub, remove the middle edge. Move it to the side,
something like this. Maybe Mirror Mirror and weld in the C axis Mirror and weld
without the local symmetry. I will just move it something
somewhat like that. And now I will just active
my symmetry in the C axis. Alright. Put this around here and make
it thinner, align a bit. All right. Now, I will just
try to align these pieces. Maybe something like this. A All right. Maybe
something like this. Let me just put a little
bit of portion there. We'll make it a little bit. Molar in that area. All right. I will just shrink it a little bit more like this. Maybe we can mask
the upper portion, Mask, invert, move it upwards. This piece, we can
also do the same. Break this tiny bit
up around here. Now I will just try to align
these two pieces there. Right. Alright, let's see. We can make these
pieces. Let me see. I have an idea
maybe that we could try make something like this. And now I will just make
middle eup in this area. Insert and insert. I will insert with
multiple edge loop to make an exact middle edge loop. Be safe. And now let's try this
time use where is it? Clip cle. And let's see how this goes. We'll put it in the middle. All right, invert and
do it. All right. But you can see that
our regin is mess. I mean, the middle polygon. We could just move it in place. All right. Now I will just do some inset. Just to name set. Perfect. And I will just extrude this Extrude this nicely. Poly wards. And there we go. We have our circle piece
in a nicely good way. Alright. I thought that it would
be more difficult. But it was kind of icy. Let me make some
beble in that area. Alright. So, let me save. Maybe we could add these
tubes that are going on here. Let's just import cylinder. Let me make it a little
bit lower polygns by just converting it into a cylinder using our gismoRotate it 90 degrees. Put it in place. All right. Maybe something around
here should be good. Maybe not. Maybe a
little bit smaller. I'm thinking that could
be maybe the barrel. Let's just move it around here. Maybe we could make this part a tiny bit smaller. This part here. Let me mask. Is a tube complete? Move it upwards
around this area. All right. Now, maybe we could try and do a cms. Maybe some mesh. All right. Let me try to put
this in a good place. If this let me do it
because this doesn't want. Let me put it in a good place. Let me just mask
this polygon and use my gizmo to make it plain
with local symmetry. Alright. All right. I will
just make it smaller. Maybe a little bit sller. Something like that
should be good. Maybe we c still make
it even smaller. All right. Duplicate this stuff. Make it even or not. Not that small. Let me just
measure something. All right. Missing mine. Missing mine is also correct. That's all right. I
think it is good. I All right. Perfect. Let me make this
smaller or let me make this part smaller so I can have two of these
tubes near each one. Alright. Maybe this first tube can
be a little bit longer. Something like this. This polygon, I mean, this tube will be
longer, but but worse. All right. And here I will just try
make like this pebblin here. Press out, make like this pebblin and just
extrude it again. Alright. But we have this
piece in the middle. I just want it there
because we can feel those gaps Wout too
much of a problem. Baby, now we have
a big cap there. I it's looking really bad. I haven't thought on that. How we can fill that gap
to make it look good. We will just guess how we do it. Although this piece
doesn't look like a tube. This more looks maybe it does. It does a tube. It is a tube or maybe not. It doesn't a Maybe we
could make this flat. We will have to
think on that first. But this tube is not
working for me at all. I will just mask it. Let me see all right masket and
then split mask points. I will just hide it and
make this tube bigger. For now. Let's make this two bigger little bit bigger
kind of like this. Right now here, I
will just go again, how it was or something like
this should be good enough. Or maybe not
something like this. Perfect. What I'm thinking it's maybe we will have to do this bit here a little bit
thicker in length. Yeah, I think so. Maybe thicker and high. I mean, but here we have
basically our blockout. We still need to refine our
blockout and just keep fixing stuff that we have not notice and all that stuff. So say Unitx video.
6. 5 Refining Initial Blockout: Alright, guys, so let's
continue with this weapon. So we are in this
stage right now. And let's see what
else we can do. All right. Let's try in this video to make
this piece here, which will be easy to do. Maybe this part also here and maybe we can make also these
pieces and all this stuff. And this stuff around here, it should be and easy to do. Let's start. All right. Let's start first with
this lower piece here. All right. Let me just duplicate
plead. All right. I just duplicated my model with pressing control and
then drag your gizmo. I will duplicate your stuff. And if you press
split on mask points, it will split in a new SubTool. So now I will click here and
transform it into a cube. Because that's what I
want right now on a cube, let me apply or achieve
my local symmetry. I will reduce the amount of polygons and
tropes that we have. Let's place it here. All right. Place it
from here, maybe. Around here, I think
should be nice enough. We can make this a bit. Maybe something like this
around here should be nice. We could also make this
longer, tiny bit longer. Let me make this a
little bit thinner. Perfect. We can also make this stuff thicker
maybe around here. All right. Let me make this a little bit. Thin or maybe not a thin
right around here, maybe. Perfect. We need to
make some bebble here. Alright. Let's try to do that. Let's insert an edge loop here. And now I will just mask the top part and then
just drag it like this. All right. And now I will just add another edge loop around here with my C
modeler and insert. Here insert in edge actions, you just press space and
then insert. All right. Let's mask this pace
with the Gizmo, we're going to extrude
it press in control, and then just extrude. Align it like this would
be nice enough maybe. Then just put it around
this area. All right. Maybe we could make it a tiny
bit longer than the other one around here and try to make this also parallel this
line with this other line. This line with the other
lines would be kind of parallel. All right. Let me mask this part to
make that piece thicker. Something like this, maybe. Sicker. It will also
make this piece here thicker mask this part and this other part,
then just drag it. I will mask mask again,
the upper portion. Now here we mask this point and track
align them again. Here. Find that. Let me not see. I
will just do this. We should make this
also longer like this or should be uh like that. Right, maybe we could make this piece a
little bit shorter. Maybe a little bit bigger. All right. Put it in place. This piece here can be
a little bit Backwards. Something like this maybe. We could also mask that
part here and pull these backwards around here. All right. All right. Let's see. I think that there will be good
enough for that piece. Let me make this part
here a little bit. Thicker, maybe. And this piece a little bit
longer, kind of like that. Alright. Let's see. Here, I will
use my clip brush. Make those lines straight flat. Perfect. Now, let's just put
it in place again. But here, let's do
something. We can do. We could remember to have your C symmetry
active in modeler. Let's use our our
stitch to here. Let's put our cursor on top
of a vertex stitch here, space, and then stitch. Then we're going to
stitch these hooligans. And now we have
our stuff actually placed there with a
perfect ag align. All right. Let's just continue. I will just align the Gizmo. Then I'm going to make
this straight like that. Maybe this could be a
little bit longer longer? Maybe not. Maybe not a long. Maybe we could make this part here
a little bit shorter. Maybe something like this
should be good enough. All right. So. Let's see what we have here. All right. This area. We've got some stuff going on. Let's make now this piece here. I will just duplicate, plead, and then transform
it into a cube. Cube in the middle. I just want a cube
in the middle. Let's press here out and then this in the middle.
I don't think so. Let's just press the house icon, and this should be
in the middle now. Let's make it longer like that. Something like this
should be good enough. Alright, let's make
it kind of longer. Like this. But now this
is rotated. Alright. Around here should be good. All right. Let's add two Edups there. Now let me add
another Egop here. We could this something around here should be good. I Perfect. Now here, this area. Let's extrude our
stuff. I need bit more. I will make this longer. I mean, bigger around this area. Kind of like this. Alright. Around here
should be good. Maybe we could
align this better. All right. Perfect.
So let's continue. Maybe let's add an egg rope here with C modular around here. And now we can
extrude this part. Modular, put this in extrude, and then extrude it. Like this. All right. All right, perfect. This is a line. I
can bring this up. Now we can extrude again a piece here and make it longer
and thinner like this. All right. Let me make this
piece a little bit thicker. Align your gizmo, just
press out and then drag your gizmo to a vertex
that you want to align. It's not align properly. Try to do it again right now, it's line to make this
thicker, a tiny bit. And here I will move
it also around here. I can find Nice
vertex to align with. All right, let me put this here. All right. All right. Let me
just align this. Perfect. Align it. All right. I will just
delete some pollens. Alright. Maybe now
it's better. Alright. We have those pieces
placed there. Or is it safe? Try to do some belling with
our pebble tool. All right. But we need to fix this area. Mask this vertex and then put it in place
where it should be. Around here, maybe. Yeah. And here we could also
bubble our stuff. Let me bubble. Perfect. See, we could. Just move it and
put it in place. Perfect. Now, Now, let's try. You do? Let's see. Let's try to do
this from pieces. These two. This can be just be made
easily with a curve brush. So let's focus in
these two pieces. All right, we are here. Let's see. All right. I make this. I see the best way. Let's just duplicate
this. Move it. Remove the local
symmetry. Make it a cube. Mirror and wealth in the C axis. We have this moving it. Put it around here. All right. Around here. We a
little bit long. Alright. So I will separate these two. Yes, I just forgot to split
those into different parts. All right. Let's activ
our local symmetry again. And now we will just put it in place around
here should be. Good. Now. Make it. Like this. We can extrude again
with our Gizmo. Mask it here, move it,
something like that. Mask invert your mask
and move it. All right. So here I will mask again
around here, maybe. All right. I will match this corner
and move it like this. I will match this
face and then just do an extrusion around here. Perfect. Now, let's add oh, let's add one vertex
here in the middle. Let's add it with
multiple troops. Then another one here. Perfect. Let me go back to
my single troop. And now I will use my clipped
circle to make the stuff a circle If this just let me put it in a circle shape. Kind of like move it. It's in the middle.
This is still not complete careful babe. Maybe we have to put it by hand, which will not be that good. I like this around here, maybe. I think this will work maybe. I also think that
we can go to Plan and do more assignments
there once we finished with our lockout
here inside Zbrush. We could also make our
lockout inside Blender. But for me, it's kind of more comfortable to work
here in Zebras. Although Blender has
better tools for only modeling Zebruss just kind of a
personal preferences. All right. I will here we select this and I
will do an inset with the standard
option here in set. Then I will go here. But first, let me
mask this piece. Make it at least a at this end erk. Let's see. Mask this area, all right, and move it like
this. All right. Now we have this this. We could refine that
in blender with just a clique to make
it completely circle. All right. Now, here. I will do this. Wait
for it in place. Here, select your modeler. Here in the pertex actions, I will just click
here and split. Before, I will do set, and now I will click
here and split. Now we are getting perfect. Now this time it's
a perfect circle. We can extrude it. Alright. Let's not extrude it. Let's do this instead.
Still lead this. And here in the edge actions, let's press and bridge
your bridge edges. At this time, let's press
bridge two holes all right. Let's deactiv our symmetry and press on a corner in the hole. Click, and then let's
press the other hole here. And this will make
our edge loops. I will just delete the
excess of edge loops that we got here excess
minus the middle one, all right, just a tiny bit. All right now, we got
this piece there. Maybe we could make it
a little bit shorter. I like that would be
good around here. Alright let's quick
saved. Alright. Let's see. Now, let's try
to make this shape here, which we will be
kinda easy to do. All right, same All right. Will paint another
cube as always. Click here. Click here and cube. Make it bigger. Make it flat flat, kind of. All right. Do it like this. Now I will do some inset. I will add another
edge loop here. But first, I will
take polyroupolyru, polyup all right stride to
make it another polyloop. Then I will add another
edge loop just to isolate this polyub All right. Now we've got these
to work with. All right, I will
delete this loop then. All right. We can do some stuff here. Let me do a mirror and
weld in the C axis. Right now, I will
use my C symmetry. Let's click here. All right, Let's put two actually. Now I will just move
this to the side. Let me mask this area. Et me mask here. All right. And now let's
try to read it again. Yeah, kind of, we will have mask or slide this
edge loop here. And also this one. All right. Here, I will just
make it straight. All right. Just activity double side. All right, this should
be a little bit thinner. Now, I will just All right. Let me just wrap this
strip, make it straight. I will just put it
around here and maybe also unmask
the middle one, move it like this. Maybe. Yeah. And here I will
do some beveling. All right. We can slide and slide here. And maybe here, we could
also make it straight. I like this. All right. Let's make this
piece all straight. All right. Let's see.
We just move it. Post this around here, maybe. We got this other piece
and that we can put it. Around here. This piece
here should be upper. This other piece of more lower
here, kind of like this. Alright. We mask this area and make it. It wider. Is like that would
be good enough. All right. Let's see. Maybe we can do now an extrusion and make some
thickness for this piece. Extrude make some thickness
kind of like that. Now I think it's
a bit too thick. Maybe we could make it sinner than that and then just putting an group and then
deleting the elder one. And now let's just click in the face to at the same
sickness that we got before. Although I don't know
how this piece is supposed to be attached
with a weapon. I really don't know how
that piece is working. What is the logic behind that? But we will have to
figure it out, maybe. Maybe it's not the best. Oh well. Who will see. We will see. We will see
maybe is a touch around here, something like this, around maybe Cold be Cold beer, really? Aa, yeah. Alright. So now, let's try to make
these tea here. Let's append a cube. Move it. Make it poly
cube, make it bigger. I will just measure and
well in the C axis. Here C axis will
delete. Maybe not. We can leave it like that maybe. Yeah. I will. Use my leg brush here. Delete. This one. Make it thinner, make it. Now. Put it in place. Make it double here. I think double is
here in visibility. It's not here, where is it? Sorry about that. I just
forgot where it was. Aton. I see where it was. Double. I thought it was in visibility. Preview, no. Formation. We'll just spread
double here. All right. Now that we have this
here a little bit longer. We could make maybe
a little bit wider. Thickness around
here and also we could move We can
move this piece down. We'll just delete
this middle stuff, that middle geop and make
it, something like this. This piece here, I will just
align it with this corner. All right. Something like this eggs right now we can do is here, primitive, a paint, a
cylinder, like that. I will just mask. I mean, split that into two separated edge loops and then do a mi
wealth in the C axis. All right, in the C axis here. Now we can just put it in
place in local symmetry. Something like this
would be good. I think, this would be a little bit more like this in this area. All right. Perfect. Maybe this can be a bit
thicker from the inside. Around here, I will just
mask and inflate it or not. Maybe inflate is not the best. We just align my gizmo
here and then just press out and then
drag. But maybe not. We just do this. Or let's just leg this edge loop
and make it thicker. Should make a little bit thicker like that should
be good enough, I think. All right. So what is left? Is just to do this
piece, I think. Let's try to do it. Let's see. We could use a Here IMM curve white strap. Make it a line. Like this. Let's do some smooth. Little bit. Something
like that should be good. All right. I will
just apply my curve, just click in a random spot in the model and it
will delete the curve. But just leave our geo right. I will split this from
the other object. Now here, I will do some
miran wealth in the C axis. You can see that there is
something we let's do it again. What? We got something weird. Again, let's do it. All right, I will delete
these middle oops. Let's active C symmetry, let's delete this right perfect. Now, I will just mask the side and let's make it great with
our loveful symmetry active. Make it straight. All right here, we could
make it something like that. We could make it shorter
kind of like this. All right, let's delete
some unwanted tropes. I'll just delete a few of them. I like this. All right, I will just
move it down a bit. And now, what I'm going to do will be to mask
here that polygon, and then I will just
extrude kind of like this to make this wrap
around that piece. Alright. Let me make
it wrap around there. All right, perfect. Almost done. All right. Around here should
be good enough. Maybe a little bit longer. I like that. I All right. I will just make it longer. I have musket and use my gizmo to make it
a little bit longer. All right. So we have this. We could use our gizmo, put it in a better place. All right. Fred. Using my topological
wrap brush is to be able to let a little
bit better or stuff. Alright, so I think
we basically have almost everything
laced and done here. Let me make maybe some
hole in this area. Third is the leg, the middle polylops polygons with old and just click and then extrude
here and go poly. We'll just extrude these
inwards, kind of like this. Perfect. Basically, we have our out. And now the next steps will
be just to refine this even more and maybe adding
some details later. Do some prtpology,
all that stuff. But since we have made our our blockout using something
similar to polymodlling, we could reuse a lot of this so we can save time
during the topology. So I think that would
be for this video. In the next video,
we're going to continue working in this model. Maybe we will start
finding more and more our blockout to look it, make it look similar
to our concept, even more because this is
looking a lot like it. But that, let's just do it in the next
video. So see you there.
7. 6 More Refinement On Blockout: Alright, guys, so we're going to continue
with this model. We are going to start
refining our mesh, and maybe we can also export it to blender to keep
refining more and more. But we will see if we
export this to blender. In this stage. So, let's see. We need to make some stuff here, and I notice that I
haven't made like this, we need to make this stuff. You see these pieces,
I haven't made them. Also, we need to make
this piece here. And then we can maybe start refining few things
here here and there, adding stuff. All right. Let's start. So
let's start first with this piece here that
will be the easiest. Alright, so let's do it. Let's append a cube. Here, cube. All right. I forgot just to open
something here. All right. So I just forgot to open the program that you can see
here, the keys I'm pressing. So let's just press
W to get our Pivot. Let's go to this icon. Now let's convert
it to a polycube. Let's move it upper, let's make it
smaller, bit longer. Maybe we could just erase
almost all the polygons here. Right let's make it. Let me say like Let me
activ my C symmetry here. Alright let's move it. Let's make it maybe, kind of like this
should be should be enough st Like this. A right. Now, let's go to our
C modeler. Let's add. Let's make this a
tiny bit. Molar here. Another tiny bit. We
usually this middle stuff. All right, a tiny
bit, maybe Alright. So let's add two. Let's add two eggeops
and a middle one here. And now I will mask these ones. Let's go to polygon
action space. We mask. Let's mask these two. Move it Up, move it up, right. I will mask also this part here. Mask. Let's bring it
up also. Alright. Basically, we have ease, but we need to adjust
it a little bit more. Let me mask this
with a like this, we put a square mass. All right. I just span it, make it a little bit
longer from that part. I will mask all these pieces except the middle
age loop. All right. And now let's click here to bring our Gizmo to the
place it should be. Now let's click on here on
local symmetry. All right. Oh, because I mean Zebr 2025, we've got this other option
here that's called dynamic. This will make a
dynamic symmetry. We will not use it for now, so let's deactivate it. And now we can make it smaller like this in
an easy nicely way. All right. Perfect. I think
that should be enough, maybe. Let's see, maybe a
tiny bit smaller. I mean, not that
much. Let's see. We got one, two,
three, four, five. Five. But I don't think
here there is space for five of these ones and
three. Let's do something. Let's press control
to create a new one. Let's press Control and then click in the Gizmo
to create a new one. And then we are going to
release the control bottom so we could make a
few meshes in a row. You will see let's
release the control. You can see what we have here. All right, so we have
made these ones. Although I think it
should be a little bit thinner or narrower, maybe something like this
should be good enough. Make it also smaller,
something like this. I think that's nice for now. Let's just extrude it again. I mean, duplicate it
again with control. Now let's release control. 35, six. I think six would be
good enough. All right. Let me do something.
Maybe we need this part a little bit upper. Let me mask the middle
portion. All right. Spring this stuff center by just deactivating our symmetry and then clicking this
icon with out. All right, what? All right, let's go back to our stuff. Let me make this kind
of that. All right. Maybe it should work or
maybe we should move, let's active or symmetry again. We should mask this portion and bring it more to the middle. And now we're getting some
troubles here because CRs, sometimes it is kind
of funny and don't want to work in the
way I want it to work. Gonna try it again. Now it's working nicely. Alright. Maybe like this
should be good enough. I think so, yeah. All right. Let's a quick save. Alright. I think this piece
could be a tiny bit wider. So let's make it wide. Alright. Where's my gizmo. Right here. Let's make it white. Just a tiny bit, not that much. Let me actuate my perspective. All right. Tiny bit. I don't want it
to be that white. Maybe something
like this should be good enough. I think so, yeah. Let's grab these two cylinders
here and move it also to the side around here
should be good. All right. I will save again. Alright, so let's try to
make this back piece, also, we need to make some stuff here in order to
match our concept. But this part is a
little bit weird because this area I
mean kind of weird. But let's see how we
can address that. So let's start first,
making this piece. So let's go here
to the back area. I will wrap this edge loop here with my mask and
then move it backwards. Something like this
will be good enough. Maybe we could also
move this piece. But around here, maybe Yeah. Now, what I'm going to do
is to paint a YouTube. Now, let's use Argisma
to transform it into a polycube Move it. Make it wider and longer. All right, perfect. Let's move it up. Let me mask this
other part and make it more like this. All right. Perfect. I will make
it even longer, just a tiny bit more. Alright, let's see, I will
make it kind of thinner. Alright, I think that this level of thinner
should be good. Enough. All right. Let's put it around
the level or maybe not. Maybe a little. All right. Something
that I will do here. We'll just make this part. It's a tiny bit more taller. A bit more. This part, let me just move it
side here. All right. So in this part, it's a little bit weird. Let's see what we can do. Alright. But it's a little bit weird. We have, another piece on top. And then this bit this piece
that goes up and then bend. And this bend here is
a little bit weird. Let's see how we are
going to address that. Alright. So let's see. Let me just undo
what I did here. I will make this a
little bit smaller. Looking like this, maybe. Tiny bit smaller veins. Like that should be
good enough we make it. This part a little bit longer, just to try to make it
parallel to this other line. And now I will just
duplicate this one. Control D, I mean, Control Shift D. Then
I will move it here. Make it longer, a little bit shorter. All right. Now, here I will add all loop with my simulor
and then insert. Let's center the chismo without our symmetry and just pressing out and
clicking this icon. And I will make like
some taper around here. Because this is kind of tapered. I mean, this part is a little bit a little bit weird, I know. We see we could get this nicely. All right, let me go back here, bring this to the
side around here. Maybe this part will
be brought here. And here we could
move this part to the side and then bring
this other part forward. Maybe something like this. All right, I will make
this a little bit thinner. Something like this. All right. That's how we make this
stuff, little bit thinner. And now here instead
of making the thinner, wait, this one can be thinner. This part could be
leaf like that. But this one would
be even wider. I will mask this
lower portion here. I just deactivate
my perspective, so I can have an orthographic
view of what I'm doing. Let's activate my C symmetry. Now with my gift centered, I will just make this wider, something like this maybe
should be good enough. Maybe a little bit less, maybe something around here. Around here should be good. Enough, I think. Maybe,
Maybe not that much. All right. I see
some stuff here? My reference. All right. I see something here. Perfect. Just mask. This part and move it. Let me mask that mask this one. Move it backwards here maybe. These other parts will be also mask the upper
part. I like this. A lot of twiging Let's do something that's safe. And then we'll do a transpose
master so we can adjust the proportion of
our weapon without needing to jump between
it's in sub tools, and then we can transfer the changes that we have done
to our separated Subtools. For head here, see plugging, transpose Maser, and Tiposemsh. Right. I think that we need
to do some stuff here. Maybe do some modifications in the proportions of our weapon. So first thing that we can do it's maybe right. Make here this piece. Let me see. Would make it a little bit
longer like this. Maybe not. If we could
just select everything and move it size a tiny bit. Maybe not that much, that's too much for
what we want to do. Let me just hide that piece, and then I will just
move it to the side. Entire stuff. Let me wrap this one and also do the
same thing here. Well it to the side, it
something like this. All right. Perfect. Let's see
what else we can do here. In this part, we could make
this part here a little bit. Per. Maybe, let's see. Let me
mask all these pieces. You mask the handle? Let me go here. Alright. Now we can
make it longer. Let me mask this part here. Try to make it longer. Let's go here. Mask this one. And let's just try to
make it longer again. Maybe something like this
would be good. Or maybe not. Not that much. Maybe what we want is to make this piece. This piece a little bit shorter. I just press Control click one mesh to mask that part only. We do this, bring
it back a tiny bit. Or maybe we can just move these parts
back a tiny bit. Let's go here. Let me put a gizmo in this area and
bake it. Let me like that. Let me mask this part and
move it up. All right. Now we can just make
this part here. Maybe a tiny bit longer. Also here, I want this area to be I'll be longer also. Mask. We just move it.
With something like this. Yeah, maybe something like
that, should be good. We do the same here
and we just mask this. Alright. Let's try to
match the stuff here. Match these two. Let me
select go here, mask this. Move it down, but line
ramp with the other one. Alright. Now, I will go here, mask that key and do
the same stuff here. Maybe something
like this, maybe. Let me select this
piece and move it around here. All right. Perfect. I will also do
the same thing here. Mask this piece and
make it a bit longer. And these pieces we could
mask it and move it. Make it something like this. It's too much better reference. Alright. Now, we could also try and make this thing, at least here in
this in this part. Tiny bit. Bigger. We
need to make it bigger. We definitely need
to make it bigger. P that I don't want to make
it bigger are the ones. I want this, I also
don't want this part. I don't want any of these
pieces to be bigger. Any of them. Alright. Let me
just hide this stuff here. All right. Maybe also
this stuff. Maybe, yeah. Maybe not. I would just
move it afterwards. Now I will mask this. But let me select
these two again. I will mask this. Alright, let's bring back
everything again and move this stuff around here. We mask. I mean, he that around here. Let's bring back everything. Now let's just do this. A tiny bit. Maybe that would be good. Enough. Something like this see a difference? George something like this
is better for us right now. I All right. I think this is good. The difference. All right. I think this is good. We could make it even bigger like this. Maybe not that big. That's a little bit too much. I think here, good. Alright. Now, let's
adjust this piece here. We'll just move it up. Maybe make this
piece even bigger, something like this should be good. It backwards. All right. Let's see. Go with you. Right. I think this is good enough. Now, our barrels not a complete not a complete far. We'll fix that later. We could when we
apply our stuff, we could go back in the
barrel and just put it where it was before So let's see. All right. Let's
do something here. I will just mask this piece. With my gizmo and
pressing control, I will just move it this one. Now I will rotate this
one to be a little tiny bit more like this, maybe. Now I will mask all of these pieces here
and move it to the side. Maybe a side around here. We'll go here. Makes this a little bit smaller
again. Let's go here. Make it. Longer. And here a little bit shorter. A here. Perfect. All right. Let's go here this area
and then bring this down. In a bit. Let me say
around here, maybe. Be careful to not add any E flops in this stage where we add
with transpose master. If you add Egloop when we try to apply what we have
done, it won't work. Please don't add new
topology in this stage. All right, here,
maybe. All right. I will move these pieces. I will move this
to the side around here will be good enough here. Then bring this mask these two. Bring the Oh. What? Mask the two bert it. And let's bring these
two up around here. One other piece, we go
around here and there we go. Right, move it and
align it. All right. Perfect. Now here,
I will just move this piece to the
side around here. Maybe. Maybe we
could also make it. Larger tiny bits. We could do that. Let's
do something here. These parts here should be big. Let me go here. Ouch. All right. Let me go here. Invert.
Let me put this in the middle and then press
out and then pick on here, just inflate it
like this, maybe. A All right. Who would make this
a tiny bit white. Looks like this. All right. This piece here should be tiny bit thinner,
something like this. Be good. Enough. I All right. This part here should
be a little bit taller. You go here. Let's
put the stuff. Let's put it here,
and then just make it a tiny bit bigger here. All right. Let me save. Some quick save. All right. Perfect. Safe again just
watching if we need to do watching if we need
to do more stuff here. My thinking that for the details
to make our life easier, is in these details we will make them with a warflow
called floaters. That's the workflow
that overwatch is using to make these
pieces, the stuff. All these pieces are
made with floaters. And what solder is, they are just like
floating geometry that simulate to be a detail where there is a detail but it's like a separate geometry
and floating on top. We will see that later,
but not for now. Let's just focus on
refine our weapon. All right. I was watching old angles
to see if we could change something All right. I think that there
would be good enough. Also, I think that I will put some edge loop here to
make some cap this area. All right. Let's be safe
again. We do something here. We have some stuff that are not working that
well in this area. Mask here, mask, everything except this edge
loop will be down. And now I will just
hide that part, mask this portion, and then
invert the mask will be down. Round here. I will
buy that again. Mask this portion in
bird, bring it down. I don't want that mass. Oh, mask this piece. Alright. Let's bring it, you know, down, oh, down. Looks like this should
be good enough. Alright. Perfect. I think we are almost there. We need make here this
piece a little bit. Longer mask here, make it
longer, something like this. Now, here and here we just mask all that part and move
it forward around here. Let me see something. All right. Let's just make this
bigger like this. All right. Maybe a bit and make the wins here. Not that wide. You put this maybe. Still keep cerca shape. Oh, I just get something
that I don't want to change exist like that. Is just pressing out, and then these red axis, we could like some sort
inflate that piece, we put it around here. I just press O and then click to a Pertexlge my vertex to that. I mean, my Gizmo to a Pertex. I think it should be
good enough. All right. We could make this piece
here a tiny bit longer. Let me just mask, then get all the deep part. Make it a tiny bit longer. Something like that should
be good enough, maybe. Yeah. Let's get this one again, mask and move it forward. Something like that
would be good. This piece looking
kind of wonky. Mask this move it backwards. A bit maybe. All right. Let's go here. Mask invert and
move it backwards. Right. We got this. I think that we could
leave it as it is now. Maybe we could do it. All right. I think that now is time to apply our stuff. We will do it. I'm just looking at this
try to figure out is if there is another stuff that I need to address
before doing that, we could always do the same
thing and then go back here doing another
transpose measure. Then just keep refining
the things or Again, I will just save it again. And now let's go here to see plugging and make
sure that please, you don't have added more
geometry in this part. I transpose master, we didn't
want any extra geometry, and we don't want
any extra upto. If you have let it maybe
this into a new upto, please merge that
again. All right. But you want to
merge that without losing this name
here. All right. So here, see plugin, and then go here
to Tipos subtea. And now the plugin
will go through all of our subtols and
just put it in place, adding the changes
that we have done. I see it here. All right. We go save. All right. Maybe we could have done another
thing I'm looking at it. Maybe later. That
could be done later. Yeah. Here, let's
see what we can do. Oh, God. We were working in this piece. Or in my path to forgot
that important thing. All right let's go here, be it. B wider. All right. Wonderful. Add a piece here, maybe another piece,
maybe here also. This part is kind of weird. I don't fully
understand this piece. Try to make some
ramp in this area. Something like this.
Maybe we can do. I go down like this. I wear this piece here. Let me sing just a tiny bit. Alright, what I have done here, I think I could not find a better solution
for that piece here. I mean, that piece is a
little bit weird because it goes like here
and this goes up, but a little messy this area. So what I did here, let me go back so you can
see what I have done. It's just safe. Then go back. You can see here that I added two ropes and then
I bring them down. Something like this.
You can see it there. And now I have moved that backwards and do
some selection here with my seamlar I'm pressing out and then extrude
it and edge I mean, some polygons from
that selection. And I mask that portion here
and then I made some taper. There. Then I just
keep working on that. You could see here that
I have this part plain. Also make this part lower
to make the ramp a bit thicker, all right, continuum. S that I have masked, make it this part longer. I just align that part there. Trying refining a
little bit more. You can see here
that I just mask this area with my kismo
make it straight plain. Now I'm just trying to match
the angle of this part here, see that I have it taller. And now from here,
I just mask it this piece and then taper it a bit a little bit more used to have just to follow the
angle of that piece. You see here that this
piece is not not added. Well, let's do something here
mid wealth in the symmetry. Now we got some stuff we're trying to fix it with
stitch, these two. And these two. Alright.
We have fixed it. Alright. I have made
some changes here. Can see that it was like this. Make it moder a bit shorter from height
and a little bit thinner. This part, I also do some stuff. I just make it thinner. I could even make it a little bit more. Also, these pieces will
be a little bit thinner, something like that.
Alright. This awesome. Now, I think that we can
just leave this video here. I will see if we need
keep refining more. Obviously. We have to add more stuff that we
don't have now, like this piece here. We need to add it
this, this stuff. We need to make this
hole that is there. And from that, I think we
need to make this stuff here. And when we have done that, I think we could start, like, making the acohiby with
adding the floaters and make the surf
the surface smooth. Maybe something like
this, you can see, I've just added some
creases to see. And we was just
experimenting a little bit. But maybe we could do
that inside Blender since there will be a
bit easier to add supporting edge loops
instead of creases. Sometimes supporting
edge loops are better to hold the
shape, but we will see. So see you in the next video.
8. 7 Adding Some Creases And Dynamic Subdivisions: Alright, guys, so let's
continue with our model. What I'm going to do
now will be to add some rises to all the
pieces and see if we can just leave it with
crises or if we need to do some supporting edge loops. In that case, will
be easier to go to blender to do the
supporting edge loops. It's easier to do them
here than I mean, doing the in blender
than here in Cebush. Let me do something here. I'm just telling my canvas. All right, so I can have
more workspace to work with. Give me a second. All
right, so let's continue. As you can see here, I
have added some creases. So I will try to do it
in all the other pieces. Right here, we can also
can do it. All right. I just press here in geometry, freeze and just press
this bottom Cris. But we will need to add
manually the creases. So let's see here Chris
polygroup this bottom. All right, so let's add
some manual creases. All right, here, here,
here, here, here. R just checks. I will decrease decrease level. Here, maybe in two will
be something good. And also in dynamic subdivision, I will just increase my smooth
subdivisions. All right. But I want this to be res. I want also this part to be res. Well, let me just delete
this group just for now. All right. Also these parts here, I want them to be cree. Yeah. I want that crease. Here. Oh, here in space. Actions res here. All right. Reese. Let's see. Alright. So we have this freeze kind of. I forgot something here. Yeah. Now I notice we got Oh, I forgot about this part. That's what I was noticed. I have noticed. All right. I think that in this part, we can add a little
bit of supporting their troops in the simple
way, maybe here also. Alright. Delete this one, maybe something here. All right. We can
add also one here, make that even sharper. Because I'm not using
something here. Maybe we should adjust some parts here
completely correct. Right. Something like this. Trying to do it by eye trying to not mess
with the overall look. I think that would be nice. Let's do it in here also. Here, I will just
press crease and almost all the pieces
are creased nicely. But this piece, I will
crease it manually. It's actions, pase,
it's actions, Cris. All right, perfect. Let's decrease the
subdivision levels. I mean, increase the smooth
subdivision level, sorry. Decrease decrease levels. Alright. Maybe we could add
a little bit more polygons. All right. Maybe something
here, here, something here. And a middle one will be
good enough to be nice. I will be doing a mi and well in the sea
at this. All right. Perfect. We can add edge loop here to help this part to hold
better the shape. I will add something more here, so it supports in better shape. All right. Let's see here. What I
will do something here. I will let wear a mask. I will just bring
this down a tiny bit, something like this.
I could enough. I will make this braid. Maybe we could also
do it here like this. All right. And in this part, maybe we could I will just
select my math las of math. We could get this. And with the Gizmo, I just
press out, bring this up. And maybe we put move the side. Then we can move this
a little bit mobile. Yeah, so it's closed.
Both the gaps. All right. And we
could make this. What I did was I just press my gizmo and then click
in here so you can move multiple subtols
at the same time. And with the select process, we can select subtols
or diselect them. I will just diselect all of these pieces that
I don't want move. I will just push it tiny
bit to the side, maybe. Tiny bit more. I think
that's good enough. Yeah. Safe. All right. All right. Let's do it now. Yeah, the creases here. We do the creases all over the place. I mean, in all the pieces, so I can have, like, the visualization of how on how this will look when
subdivided and polish. All right. I will just increase
my smooth subdivisions. Maybe we could add a little bit more polygons here and there,
maybe a little bit. Or here, maybe
here and one here. One near this corner. I think that should
be good enough. Right let's do the
same thing here. I will increase this edge. All right. Maybe we could add this stuff. Let's decrease and increase the increase level and increase division
mood subdivisions. All right. Let's see. All right, perfect. Let's do it here.
That could leave it. We could leave these
parts like that. This one, I will just crease it, increase the crease level, and increase the
smooth subdivisions. I can add one edge up here, another here, and another here.
I will just do something. I will just press my space here and then put the
polygon actions into nothing because they
R in the middle, I don't want to do any
polygon actions for now. All right. Let's
just subdivide it. Here, I also have
made some creases, so this will be good for now. I think I will just add. I will just add. So Let me before
that, align this. Alright, let me do it again. We'll just add some
supporting hopes for better the shape. Alright. We want here. Here. All right. But now we will need
I'm saying here, I will just increase
the crease here. This crease I will just put
one more in this polygon so we don't have this weird
stuff here. You will see. I put it here. Now we don't have that we're
pinching there. We'll do the same thing here. I forgot. Oh, it's
there. All right. I think I forgot to put some
supporting troops there. But it seems that I did it. Let me just mask this polygon. Always remember to deactivate
this stuff, right? And we move these down.
Now we have that. All right. Et's do
the same thing here. Freeze, increase the
slider, increase the stuff. And we are postny with space. Let's add some metal
crisis in these edges. Res, crease, grease. More creasing. All right. All right. Let's do
the same thing here. All right ping ping. All right. There we go. There
we go. There we go. Maybe I could add one
polygon here in the middle. Maybe one here, maybe not. I think that should be
good enough. Alright. Let's do the same thing here. I will just crease, decrease
this, increase this. I often tend to leave my rise label into because
that gave me, like, this nice kind of sharp, but round corner that is
not completely round, like I mean, it's not
completely sharp like this. This will this not look
good. Don't look believable. What you want your edges
is to have a tiny bit of maybe some hoof that
can catch a light. So that's what I'm aiming for. I will crease these
edges, all of them. All right. All right. So let
me add a little bit more of supporting troops. We'll add maybe one more here. Perfect. Here. All right, Chris. Right, let me do something
here real quick. I will just use my
crease in here, I rip complete so we can
do this part really easy. You can see here right
and here also. Perfect. Yeah. There we go. I forgot this corner. Perfect. Let's increase the
subdivision. Stuff here. I will add a little bit more polygons support
better shape, maybe. All right. Perfect. Let's see. Now, this piece here
will do the same. I actually did it. I
forgot that I did it. I think I did that
out of camera, but it's the same process
that I have shown in this entire video. All right. Let me just add more
crises here and there. Perfect. Let's see where
else we can add more crises. Alright. I maybe we could increase
the subdivision. I mean, the crease level
here or maybe not. Is a little bit more, maybe not. I think that should
be good enough. I will just add
another polygon here. Yeah. Perfect. All right. All right. I will add another trees in this area because I want
this part to be carp. Like that or right perf. All right, we'll just do that. I will add maybe some
portant sroup here. Perfect. All right. A one here. Let's see. Maybe
another one here. And here be not that much. If we could just put some
creating in this area. We not. All right. Perfect. One something here. Here, we need to put one res more. Perfect. But there is a lot
of necessary polygon here. Maybe it is necessary. I move that what happens? It's the same I believe. Yeah, it's the same. Nothing really changed
without that volume. Maybe yeah, I have notices. Um All right. It seems I will just be. All right. Let me
freeze this part. All right. Freezing
more. All right. Perfect. All right. We're
swimming like that. We'll just keep creasing stuff. Breeze here, more creases. Right here, even more creases, more and more All
right. Perfect. What else here and here
we could do. Let's see. All right, we need some
supporting troops, maybe here, one in the middle, maybe two more in the sides
is supporting the shapes. We'll add another supporting
troop here and here. So if we can hold the shape. Let me increase my criss level. Right here, I will
add more crises. All right. Maybe we could
add middle one here. Perfect. All right. But maybe we could put this
in three in the division. In the res level, I mean, let me put this. I'm seeing around here. Maybe I think that's too much around here should be good. In tune. All right. Let me add push these traps. A bit more to the side. I was like this. Alright. Save it like that for now. Right, let's see what
else we can do here. We need more stuff. More supporting troops. We just add a few
more here and there. It bit more of creasing here. All right. Creasing
in this area. Let me save just in case. Alright more safe. All right, here and here. Maybe this one not. This part. Also, I forgot that we still
need to make this piece. But we will add it
just a tiny bit later. Maybe in the next episode, we can add these maybe, like, tiny shapes like these
ones and all this stuff. It will be kind
of easy to do so. Let's continue. But here, I want to make
this little bit longer, maybe something like that. See here? All right, something like this. All right. Oh, let's see, we
have some mess, some weird mess here. Let's do some creasing. Do this for. Now we got more mess stuff. All right. Let's add. Let's do a
mihran weld in C at C. Here, perfect. Oh,
here. Alright. Let's add now add two groups in this
area so we can hold. Bake find a better. Now I will just add
maybe here, maybe here. Here, I need another
crease. All right. But now I need to a neat rope that goes like this barrier. But how we can do
it will be easy. Take I move this even more down. I will use my slice mesh. Let me do some Wood save. And here, pace on top of an edge and space
with your si modeler. Space and then select your
slice mesh option here. And we can just click let me right click in
one edge to another one. And just follow the
curve that we got. You can see that it will generate some more
edges than necessary. But your main one is the one
that is creased like this. All right. All right, let me just
connect this one. We can do the same stuff
with the point actions. Just select slide
mesh, select this one. If this, just let me do it
for some reason. It doesn't. Alright. Now, we'll need to
we need to clean this mess. That's what I was telling that Blender is easier to
do this because we can do this type of stuff with just the the knife brush
that we have here, sadly. The thing that is almost
the same these slice mesh, but you can see that
make this mess. So let's try to clean that. We'll just delete
these won polygons. Here in the point actions, I will just let stitch. We'll just stitch
these two polygons and these two ones here also. And now, uh you can see that we can just
delete more of these polygons. If we got maybe maybe not if we got a face that
have four vertex, we can just delete that edge. Maybe in here, you can see that there is more
than four edges. If I delete this stuff, it will delete this
entire phrase. You can see here, you can see here that it
just delete some stuff, and I don't want that. So what I'm going to
do is just stitch these two these ones I
Crush once, I will do it. I think I had a
mask there that was not letting me at my
stuff. All right. Perfect. We'll just
do some slice mesh. All right. I think I would
just need this stuff. Alright let's breach these two, and these two right. Perfect. Let me just
teach these ones. The other to here. All right. This other to here on
top right like this. You need to be aware because the slide mesh
don't work with symmetry. So we have to symmetrize the mesh afterwards,
the stuff we did. So after we clean the stuff, we can symmetrize you see here, that one part of
the mesh have it, and the other part, it
doesn't it just cause a mess. So let's do our Mheran weld
in the sbt try. You see here. And now we got our
troop around here. Let's delete these
unwanted creases here. I just select my edge rope complete and I will
apply them here. Perfect. Maybe we could
decrease this to one. We'll add another
edge here. All right. Perfect. All right. All right. I think that's nice. Let me add a crease here. All right. I think we
can just leave it. Probably not. I will
add portont shrup here. Another one here. All right. Let's see. Sing is with our nous groups, I think. All right, let's do the same
thing here in the stock. I will do some cases polygroups and see where we
need to add manual creases. Maybe here we need. All right, I will
do another one. Another one here. Let me
decrease the crease level. All right. Perfect. And perfect. I will add some poten
top here just to support better its shape. Then we can have
that plane there. I will add a little bit more
of polygons in these areas. All right. I All right. Perfect. Let's add
pees here also. Let's increase the stuff here. All right. Let's add a
little bit of stuff. I will maybe just decreases. One, two, one. Here, here. Also here. Let me see. I think one more around this
area will be good enough. Perfect. Alright. Let's do the same thing here. Crease and increase again here with a slope
complete. All right. That's it. Decrease this
one and increase this one, maybe add a few more
polygons here and there. What's happening? Right now, it works. Remember your symmetry
in the C axis? Right here. Perfect. This little piece.
We will also add the stuff here with similar
grease soup complete. Let's do it. Put it here. Decrease this one,
increase this other one. Put some supporting egg ropes. All right, it's working. Here, we'll just press crease and decrease
these two sliders, decrease level and the
smooth subdivisions. All right, let me see here. We could add a little bit more of supporting
the troops there. So it's a better corner Right. This little piece
here will also get the same treatment
here and here. And there we go, and maybe more supporting edge
loops support better shape. All right. We need to do the
same stuff here. Ese, I will just my crease
with grip complete. All right, just to
do this quickly. All right, perfect. Perfect. Here, I will just put
it again to edge. Here. All right.
For some reason, I just forgot to add
freezes here and here. And this other part also. Let's decrease decrease level and increase this other stuff. I will add a
supporting gero here, and here around the corners. I forgot to put this in nothing, do nothing the polygon
actions. All right. Let's see. Perfect.
Perfect. All right. Or edge loops here and there.
All right, there we go. I'll add a cree
here, it's complete. Perfect. There we go. We could add a middle one here
with something like this. The goods. All right. Let's keep doing the same
stuff all and over the place. All right. Me crises
or more crises. That's what we have to do? Alright. Et's do the
same stuff here. Freeze, actual complete. Perfect, decrease,
increase this other stuff. Rise, put some
supporting at loops. Just to hold better to shape. Alright, perfect. I will put the middle
one there. There we go. Here also there
here, so complete. Here I'm here, perfect. And this one also will
add a manual edge. I mean, a manual creed
here and the other stuff. We also have some
treses. All right. I don't know if I told you, I say, it's my bad. You can activ the dynamic
subdivision with D key here, this key, the D,
and you can leave the dynamic subdivision by
pressing chifD all right. Here. I will just decrease
decrease level. Perfect. All right. Then there. Maybe one. All right. One here. On here, maybe. All right. Do the same stuff here, Chris. All right, perfect. More creases. More and more creases. All right, Crees here. All right. Let's add a little
bit of subtena chips. All right. Maybe one
in the middle here. I think that's
enough in that part. We still need to do more modifications
and all this stuff. But we will do it later. Here, let's see increase
the other stuff. Remember to see symmetry. Fortune troops here and here. And these places near the corner near the places that
you want to keep Carp. All right. All right, let's do it
on top here. Same stuff. Icrease increase the
expose subdivisions. All right. Perfect. Adding more
creases here and there. All right. But I think that
we don't need all that stuff. Maybe, let's decrease a tiny bit decrease
level in this one. I think it was to much there. Maybe we don't need
these heterops here. Maybe I will add just
another head sup here. I think that's enough for this. And in this part, I will
add another crease. All right. Strap here. Sports better The shapes. Perfect. A little bit more
of polygons here. All right. That's good. Here I will
also add my crises. Oh. What I have done, where's my stuff here,
rises Alright Cris. Decreasi stuff. Increase this one. I want this to be circle. So I will just increase the other stuff here
just by doing that. Alright. Oh, one. Let's do it manually. A troop, a key, here, Edge. All right. Perfect. Just remove those real quick. These two also. And
here, remove them. I need this to be more circular. Let's move it, maybe. Something like this.
Kind of more Circular. The All right. I think that maybe
will be good enough. For now, let's add a little bit of supporting
edge loops here. Perfect. I these parts also. Freezes grease greases Alright. Perfect. All right, Let's do here in the barrel or creases,
increase this stuff. Increase this other. All
right. Let's go here. Put more atrops All right. I think this is
too sharp for us. This part here is
also too sharp. That would be good enough. Here I will do the same stuff. But in this one, I will
just leave it in one. And maybe here I will remove this one and push
it them more to the sides. And here I will
remove these creases. I forgot this part.
Freeze. I will just remove the
creases from here. Where else we put
another crease here. I will just reduce this one
and increase the other stuff. Let me do something here. I'll inset these two
inset with standard here. All right. Let's
see what we can do. Here remove these
freezes. All right. We'll just remove
this other stuff. These places. We need
to put some stuff to be completely circular because some of them are not
completely circular. We'll just insert this stuff. Alright. I don't like how this turns. But Let's see. We make
this look better. I I will have to redo
this piece at some point. Love me out. Let's just leave it
like that for now. Maybe we will go back to
this piece and do it better. Cause for now, I will
just leave it like that. Alright. Let's do some
final stuff here. Please save. I will do this last one, and then the few
ones that are left, I will just do it out of camera. So let's do this final one. Write prize, true
complete or right here with edge or some creases. I will here edge complete.
I will just add it. Now, here with my edge, we'll just add few
more here also. All right. We'll add more creases here and
here. All right here. Perfect. Increase
the subdivisions. All right, here and here. All right. So I will just
leave the video here. And I will do the rest of creases that are left that
are just a few ones. And in the next video, we can maybe start adding
more shapes to our stuff. Maybe like adding
these shapes here. Maybe this whole maybe
these other holes here. And after that, I
think that we'll be able and also make
this piece here. We need to make that really
to make all of this. Forgot to do it. And after that, I think we can start detailing
with some floaters. I will teach you how to make your own floaters and
group them into a brush that you can use just to place them real quick inside
here, see brush. We could do it inside a
software like Blender easily. But there, we don't have
the ability to make a brush IMM brush with
all those floaters. Go to the next video.
9. 8 More Refinements And Adding New Shapes: Alright, guys, so
let's continue. Let's see what we can
do in this video. In this video, what I'm
thinking that we can do is to do this hole
here and maybe do some more refinements in the overall shape
before sporting these to slender to do a
little refinement. Alright. Let's start. I have seen that I don't have kind of two straight edges here. For example, this is
kind of inclinated. Let's see if we can
put it in right. But this is still
inclinated All right. I think here would be nice. Also, this part is
not completely flat. We need to address that.
Let me you use my Gizmo. That set. All right. Let's use our gizmo here. Now, let's press. I mean, contro and then click
with the Gizmo activated. Now, I'm just going
to scale this down. But with the dynamic, I mean, local subdivisions, I mean, symmetry, sorry, with the
local symmetry activated. Now let's try to scale
down to make it flat. Kind of like this should
be good enough maybe. Is this flat. It's pretty flat. You can see this
is kind of weird. Let's mask mask. The lower part. Let's do the same thing to shape it in a nice flat angle. All right. Let me see how
thick this should be. All right, I will do the
same again here. All right. Let's press this to reset
the gizmo rotation without, remember, press this with. If you don't press that
without, this will happen. Let's say you have
this like that, and you press this and
your thing we messed up. So please press out
here. All right. Now let's try to make this flat. Now is flat, all right. That's what I was looking for. Now I will use my team modeler with insert here in
the edge action, and I will delete this Oh. Why is what? Let me do something.
I will do a mirror and well with the C symmetry. Or right now, they should
let me do my stuff. Let me put the polygon action
into do nothing. All right. Now we can delete that part because if you can see here is some steps that I
don't really like, I will delete that polygon and then place it again, a aerop. Yeah. Alright, perfect. And now, how we are going to make
that hole? You will say. Alright. Let's see. We need to make this. But
before I have noticed that this is more inclinated than
what we have in our weapon. So let's try to do it too before making the
hole. All right. And before that, I
will do something. I would just mask this part here and just move it forward. I mean, up right. I will select this
and move it right. Perfect. All right, here I will mask. Let me delete this polygon
here and delete it. All right. And now I will we can
delete these two. We can grab mask this
polygon and move it forward around maybe here. Will be good enough. Maybe around here, yeah. Let's do the same
thing with this base. Let's just delete these two. Mask this and move it
the side around here, ring to match the same
angle intonation here. Let's place it again
those edges. All right. Now I will have to
adjust the bebo. I will delete again this
polygon. That edge. Now let's try to adjust that part. I just mask this polygroup so I can move it without
affecting the back part. I can adjust it in a nice way. All right. It's not straight. Maybe something like
this. All right. Now I can add. Again, these two edge loops. Alright, perfect. Now, to make this whole. Let's see how we can do it. Let's see I think we can add another edge loop
here around here. Now, I will just mask
these edge loops here. I will move it. I will
make them bigger. Around here maybe. Alright, I will
mask these parts. Let me just use my lasso brush. Where's my my lasso mask
brush or right here. Let me just select these pollicles here
and then move it up. Alright. Perfect. I see. Now I can take this polygon and move
it around here maybe. Let's mask this other
one and move it to the side to make this line
parallel to this line. Let's see. Around here, maybe. Let's get this poly going
to move it to the side. The topology is a bit mess, but we are going to fix
that in just a moment. Let's just focus
and make the whole. All right. I think it's
kind of in the shape. Let me mask this again. Move it a little bit up. Maybe something like like this. Let me just here, I will use my demdor and
in the polygon actions, let's select the lead. All right. All right,
I will delete this. And in the back view, I
will also do the same. Now let's active the
double vision so we can see the two sides
of the polygons. And now here in the edge
actions with our smdeler, let's press this bridge and then two holes and then
click on one edge, one hole, and then in the
other one, just like that. Alright, we have the hole, but we need to fix
our topology in order for this to work well. So first, let's use
our slice mesh. This will not work
with symmetry. So let's deactivate
the symmetry. And in the edge action, select slice mesh and also do the same thing in
the point actions. So let's start placing
the edges around here. We're going to place
it around the hole. This will be like some
supporting edge All right. Perfect. Now we need
to clean this mess. What we are going to do here, we're going to in the point
action select stitch. And now we can stitch
these polygons together. All right. And that's like this. There is one, and here
we can stitch these two. There is two. Stitch is
other ones. Perfect. And these other ones. Perfect. Now let's select the delete options
in the edge actions. Oh, we have something
we here we have. Let's see what we
can do in that part. Let's just delete
these edges for now. All right. If your polygon is
quad, is a quad mesh. If you delete one If you delete the edge that slice mesh made and your polygon
doesn't disappear. That means that your
polygon has four phases. But if you delete this edge and then it deletes that means that an angon that
we need to fix. Alright. Let's see why this is an anon. Let me see a week. I think that we don't much in that area. All right. Let me do something here. I will stitch these polygon. All right. In the
back parts too. We will need to do the same
stuff in the back part. Let's do something. I will
just delete the other part. All right. And now let's do the same stuff here
with our slice mesh. Let's do the same
thing, here, here, here, here, then slide
mesh out here. Perfect. All right now, let's
stitch our polygons. All right. Wes my
sea modular here. All right. Stages. And now let's just
delete the extra edges. Perfect. All right. Why do I have? Well, I think I did
something wrong. All right. Let's see. What I have down
here. This should be stitched with this bar. But right now, it's better. Alright, let's use this stitch. Now let's delete.
Delete the edges. All right, delete, delete. It should be deleted nicely. And now I will just each these
two and delete this one. Won't delete this other one? This one, I think that's nice. That's inconvenient of the
slice brush that made a lot of a lot of extra edges
that we need to clean. All right. Let's use
our slice mesh again. Bring an edge that goes
from these polygons all the way to this part here. Let me do something right here
all the way to this point. And now we can delete this
edge and those extra edges. And this one I will just
stitch with the lower one. And now we have a supporting edge roop that goes around the hole and can
support better the shape. All right. Perfect. Let me put this better also
the same in the back part. All right. Now, what we can do. I will do something. I will just mask these ones
just to make a bit cleaner, the topology around here. We'll mask these two, a little bit of maybe. Let's leave it like that. All right. I will just delete all these extra creases that
we don't shop complete here. All right. Perfect. I don't
want these edges. All right now, I will do
just a little beble here with a strop complete here, a little bebo Perfect. Let's just press click here, applying the same level of bebo. And now we can
place some rises by hand around here with just edges around
here, right here, too. Perfect here in this part also. We need to extend the creases, a little bit out in
order to this to hold better the shape. Perfect. Now we could add
supporting troops. That's in edge actions. Let's add let me in
the polygon action, just put it again
and do nothing. Let's add some
supporting troops. Oh, my God. Yeah, around here. Perfect. Also here. Let's try to put some
there everyone here. As I have forgot to put some creases in the bebo
part with a troop complete. Then we can get that
nice bebble there. Perfect. We got the whole. Yeah. I think that we will need
to do some refinements. Let me just delete
that edge loop. And then I will just mask
this corner and bring it to the side
around here, maybe. I will just delete again
this other edge loop. Perfect. Let's see. Alright, I think that's
nice. I think that's enough. All right, let's see, I think
we could delete this one, then mask these two
corners and bring it to the side around here. Let me just delete all the supporton loop that
I have placed. We're going to play them again, but in just a moment. And now I will just mask the
entire hole and then make it a little bit flat or smaller. All right. Let's place again our
supporting edge loops. All right. All right, perfect. Let me apply a supporting
edge loop here. Let me put some more edge
loops in these areas. All right. Now we got a
little corner ping out. Let's try to hide it. Oh I see. We got a lot of stuff here. We Let's try to mask this
and then make it just flat. And here, let's add another edge loop and
try to match these two. And also here, we'll
do the same thing. All right. Let's mask
these two again. All right. Now they
are they are ching. You know, something here. We got weird stuff here. That is not too nice to have. Let me use my slice
brush and slice it. What? Here a slice mesh. Let's do it again, slice to this point. All right. Let's do the
same sink. All right. Let's do the same sin
in the other part because we cannot do Mar
and well because we have this past this hole
here because we got these parts that are like some charger,
something like that. All right. So magazines, I mean, I don't know how to say that in English. All right, let's just delete. Oh, we got something weird here. We need to stitch these two. Let's steach them. Do
the same thing here. Let me stitch these two. Now we can delete those
unwanted polygons around there. I will just increase these edges that we don't
want them to be increased. Let me delete those extra edges. And now there we go. Let me increase this other one. Yeah. Here, and I think
that we are good to go. Now in this part, I will just move it because
it's poking out. I will just move it
to the side, right? And here, I will just do a
mirror and well in the C axis. I forgot that I have my
local symmetry activated, deactivate your local symmetry and then do another
mirror and weld. And there we go.
We have the hole. Let's do another thing I
notice that this piece is a little bit shorter or smaller
than the bits we got here. Let's try just to
make it a tiny bit. A tiny bit shorter or smaller. Let me delete fortenap there. And now I will just
mass these ones. And move it up just a tiny bit, tiny bit around here, maybe. And this part, I will mask this polygon and
move it around here maybe. I think, right. We are a little bit down. Alright. It's more to the side. Maybe. Maybe something like
that should be good. Alright. Now, let's try to
do these pieces. I mean, these holes here, that will be really
straightforward. I I have experimented before, and I got a method. I think that will be good. Right. Let's select our
symmetry in the C axis. And I forgot to place again
these supporting crops here. All right, there we go. Let me place some supporting
loop around here. All right. And now
let's do the holes. We are here. Here in
your point actions. Let's let split here. All right. But before that, in
the edge actions, let's insert So edges like this. Let's have maybe one, two, and three, and here
one, two, and three. All right, perfect.
Let's go here, split. What is overlapping? Overlapping. I should detect it. All right. Now working. Let me do something real quick. I will do a mirror and
weld in the C axis. Perfect. Now, this will let me use my stuff
with the symmetry. All right. I will just get these two and then delete them. It's the same in the other one. Around here, it could be a tiny bit bigger.
Maybe around here. The other one select
this and delete hidden. Now I will use my e mesh
to make an straightp. All right. All
right, there we go. But we are getting
some stuff right. All right, we don't
care about that. Let's just delete these
two and then I will stitch here stitch
the ones to here. Break deleit and then
what? Delete? No. Let's just stitch here. Stitch not stitching. H here, and this
one to this part. Now I will just select I
mean mask that part and I will just make it flat maybe. That's completely flat. Around here should be good. Let me move this a
little bit better. We'll move it this down also. But this is not completely. Let's see. You can adjust it. Now, with the double
vision activated, let's do the same stuff
here. Let's delete this one. Let me delete the middle
edge loop right now just to make the things easier,
deactivate the symmetry, and let's select bridge and bridge bridge and bridge these edges. Why do you just want to bridge this is in
two holes here. Let's select edges or
right bridge edges. And now it's working. Let's bridge these
ones, perfect. Here, it's the same
thing here, perfect. All right. And now we
got those holes there. Now, let's add
unfortunate troops there. All right. Perfect. I will do
a mid round well to get this middle age rope. All right. Now I will place two porting edge ropes on the
side to hold per the shape. All right. Let me ask this one. That's flat out straight. I think so. All right. We got the holes there. Now, let's do this
tiny stuff here. That could be just, like, a cute little bit elongated. But before that, let me
just select these ones. And then just move
it to the side. A little bit up, maybe. I say I bit. Maybe. We could do that. Getting weird. Trying to make it a little bit. I think that we
got enough maybe. Alright. I'm just king
a little bit in shape. Alright. I think
that's good, maybe? Alright. Let's do. Stop there. I will just oh something here. It's append a cube.
Here with the Gizmo. Transform it into a cube. Move it down. Where's my stuff? Where's my cube? It is more. I had a cube there. Where did it go? It's so small. Alright, let's just make
it bigger. All right. Now, let's just remove
all the polygons Egops. Let's put it like this. Let's make it a little bit
elongated and narrower. All right. Let me add a middle a troop. With multi loop
here and now here, let's put it in the
same polygroup. All right. Let's take this. Well it up a bit. All right. Let's make it
a little bit smaller. Perfect. All right. All right, there we go. All right. Let's see. Let's do a miran well in the
symmetry. I mean, axis. Now let's active our symmetry in the c axis or the SD whatever. All right. We got one of those
pieces there. Now, let's just move it and
duplicate it three times. I know. Right, I mean, so
do here, right. And then three here. And now we got
those pieces there. But I think they should
be a little bit bigger. Because one would
be up around here. Another one around here. Maybe a last one. Around here. All
right. There we go. Let's make it a little
bit smaller on the side. Perfect. We got
those stuff placed. And now let's see what's left. I'm thinking that
maybe this part should be a tiny bit longer. This part here, this piece. Let me select this and select all these
subtols here and make it. Put the Gizmo around
here and make it a little bit longer around maybe to the corner in this point
here around here, maybe. All right. And now we need to move all of these
pieces to that part. Let me just mask all of these. Move it to the side. This will mess the topoly
a little bit much. But we don't care. Right now, we can fix it later. Let's try to fix it now. All right. Let me
do some stuff here. Perfect. Perfect. I
will delete here. Perfect. Page. All
right, all right. But I I think I got lost. Let's move it here to this born. Stitch. Nothing. These two, here, here, here. All of these ones opus Titch This one, maybe two Ts, and
this one to Ts part. Perfect. And now we
have cleaned the mesh. We can add our
supporting edge loops. Quick. Get the
legs hidden right. And now let's do a
mir round weld with the Xs without our
local symmetry. All right, perfect. Let me add one more group here and maybe another one here. All right. Safe. All right. I have seen that we got these
pieces a little bit weird. They got elongated too. Let's go back here. But this time, I
will diselect them. Now let's go back to here and elongate again,
these pieces. It bit. All right. There we go. All right. Let's see. Let's make real quick this tiny piece
on top of this other. You know the Let's see we got. Maybe we can duplicate this one. Isolate it. But with
our C symmetry, polygons here, let's
select another one here. Let's press polygroup here
and then polygroup these two. Selecting. I mean, height this polygroup inverted,
delete hidden. Now we can extrude all polygons. All right, extrude all polygons. Perfect. All right. Let's deactivatee the multi ect. All right, let's make it. Blood. I mean, thinner,
all right. Perfect. I will delete this middle top. Move it this down.
Let's move. Let's put. All right. Let me go here. Let me grab this one. Move it to the side. Around here. We'll put
an edge loop here. All right. And here I
will just mask those, and then just leave
it like that. Now, here in geometry, freezes. Let's do some friezes. Here we can add also a
little bit of friezes, and also we can add some
supporting edge loops. I Perfect. We got that piece there. Right? Try to do the handle. It would be kind of difficult, but that can be done nightly. All right now, let's
work on the handle. Let me slice, I mean, slide this entire edge loop. If we can do it, I will just delete these extra edge loops
because they are in the way. I will just slice I mean, slide entire edge loop. All right around
here around what? Let me delay this to
other extra edge wipes. All right. I'll slide make that part there
a little bit bigger. And now we slide this edge
with the edge selected. And now these other
pieces to I mean, I think that this edge
will not be there. Is not one thing. Each. There we go. Now, let's staach this t. Let's see or not et's just leave it like
that there. All right. Now, I will just let's
slide this because I think that I have control
S that All right. So. Now I want to do some
bebing here to complete. All right. I want to do
a little bit of pebble. All right. I will just mask move. I want to just mass
these polygons, so I can move the better. I would delete the
middle at All right. I will press again, increase. We can increase
the inner up here. Perfect. Es mirror and Welch. All right. More creases here. Y All right, perfect. No, I will do something. I mean, this pebble
should be bigger. A lot bigger, I would say. Let me just align
my gizmo it down. And now I will just
mass this edge loop. I will do some slide. Edge loop complete. Edge edge. I will do some slide
completing the bibble. All right around here should be put No. I will just add some to
Portinap around here. I just replacement. All right. Perfect. All right. Mask this one. Mask here. Make
it flat. Perfect. All right. Now, we
need to do some stuff. This piece should be shorter. Et me mask this entire
piece and align my gizmo. I just scale it down. It be shorter and a little bit upper around here, maybe. We match these
two. Move it down. All right. This trigger, I
think that should be also bigger around here. All right. We will need to do here. So stuff here. Maybe around this area. We want to mask
this one in bird. Let's get our gizmo here
and bring this to the side. Maybe not. I will do something will
be easier to make it. Or maybe. That's why not. I don't think so. Yeah. I'm just thinking. Let me just duplicate
this handle. I will get the poly groups. All right. Insert, I just want that is All right. We can do it maybe like this. Let's make it molar, maybe
something like that. All right. Now, I will do some
extrusion that is safe. P group O, will just
strut it a tiny bit, just like this lip. All right. Now that we are here, I will just remove all my
creases, increase all. Perfect. And now here I I will add an edge. All right. Maybe around here. I will do two more
extrusions around here. All right, single poly, we'll do some extrusion. Just align my gizmo. Alright. Make this what. And now let's do something here. We'll move my gizmo to
this corner and just scale it a tiny bit. Let me remove this stuff. Alright. Let me do
some mirror and weld. H. Alright, perfect. And here also, we'll
do some extrusion. I will get. This stuff. Let me do something here first. We'll move it up. We'll mask this. And now. Around here maybe. Let me mask this. Move it here. This also I will just
move it around here. Not at work. Ah. Okay. Tiny bit down. Mixed truth. Here mask
this corner, move it to. All right. We mask this other corner entire piece. All right around here. Now here, we'll add
another headhup. We'll mask this too. Move it. Something like this. All right. Move it.
More like this. Now, what I will do
is just to delete this middle stuff here. I mean, I just want
to delete these two. I yeah. This awesome. Perfect lit. Now I will do
some shoot all polygons in. Perfect. Let's flip our normals. Now I will do some Bbling. Let's see if the
bebble wants to work. Let me save. I will do this. Now I
will do some in fit. Maybe. All right. I will just inflate
it, make some bubble. I do something here.
I will just delete the middle a troop h. All right. Move it a little bit to the
side, maybe around here. And now let's place some
supporting groups around here. All right. So creases. Let me just remove again this
potenti here. All right. I will add some
creases here also. This is not the best. I'm in trouble here. All right. Let's do some stuff. I will use maybe my slice mesh. I create some All right. We create some supo genes here. All right. Will be stage be stitch. Will be stitch here. Oh, my God. L mesh. Les here, here, here, here, and here or right itch itch perft. No, I will just delete
all of these polygons. Maybe this will be around here. Now I can delete this edge. Alright. Let's get back. Our slice mesh. Let's go here, awesome. Perfect. I will just
delete these two. Let. All right. Perfect. Now let's do assume
this wrong Welch. Chris, Oh, Chris, that should
work a little bit better. We'll add more protein edge
loops around these areas. All right. Maybe around here. We'll do some creasing here. All right. Perfect. I This is something similar, but not. This is too sharp. This will
not be very nice to hold. And here is a mist of polygons. That piece shouldn't
be that thick. I think that we can leave
this video here now. And in the next video, we are going to continue
with this piece and the handle. I'll see you there.
10. 9 Making Refining The Handle Part: Alright, guys. So in this video, we're going to continue
to do our handle parts. So in the last video, we have left the shape
on here unfinished, and now we're going to try
to finish to finish it. So let's see. First, I have noticed
that this is really big. I mean, in the thickness, it's really thick.
That's what I mean. We need to address that. So I will delete all the interior pass.
Let me do something here. I will do some group by
normals that will be here. Let me see polygroups and
then here groups by normals. All right. Let me select by hand
these polygons and then I will do some
polygroup All right. Now, I will just
select my stuff. All right, and delete the
other stuff. All right. I will remove all of these
extra polygons that we have. And now I will just de inflate make this thing
a little bit thinner. Let's see. Let's use
the gizmo for this. All right, let's
align our gizmo. And now let's use let's press out and out with pressed, let's scale in this axis. All right. And you can see
it's making stuff molar. All right, S I think that's
a little bit better. I will make it double. Maybe something like this
will be good. Alright. Maybe a little bit less
sick from this side. Is a tiny bit. All right. I will use my
mask so will mask this and move it a little
bit more All right. Maybe a tiny bit more like that. Let's mask those a tiny bit, just more like this. All right. Let's extrude again
all polygons inwards. All right, let me do a mir
run well in the C. Perfect. Extrude it in words. Perfect. All right. Let's see if the bebo
wants to work now. Yeah, it's working kind of. Let's adjust the bebo by hand
here right in this area. Remember your symmetry in
the C symmetry, all right? As a justice. Let me do a mirror on
weld again. Alright. A little bit more like
this. I think that's good. Let me mask the inner part. Just to push this a tiny bit up. Maybe something like this
should be good enough. I All right. I think that's actually better. All right. Let's see. Let's apply, I mean, active our local symmetry here. The active dynamic? All right. All right. What's happening? Oh, I see. All right. Why this is going on like that. All right. Now, this
should work. Perfect. All right. What I did
was my gizmo was, like, it wasn't aligned
with the axis of the scene. So I just press and this bottom, and that aligned my gizmo. And I can just make this. What in a nicely way. All right. So now we can do I will
do something here. I will make this
the same polygroup. And now here in geometry, we can do some Chris or maybe
Chris polygroup border. And now we get this
maybe All right. Maybe we can add few more
important edge loops. Here and maybe here. All right. This is one. Let's see
how this work in too. All right, let me
add more crises. Let me do press Cris here. Now, let's add friezes where
we want we charp our stuff. All right. Perfect. There is something I want
this to not be that harp. Maybe something like this. Something like that
should be good. I'm wondering why is
this W that I saw it. This edge doesn't have. Doesn't have Cris. Let's add it. All right. Perfect. This is still not working
nicely in the way. The way I want this to work
and what and why is that? I think this costetpoly
that we have is looking. Out. All right. All right. Let's see. We left that for now. Let me focus on another
piece. All right. So here, I don't
want this to be that sharp, at least in the back. I will try to make it round. Let me remove the
creas from this art. All right. Let me
remove rises here. And that piece would
remove the middle Cris. I don't know why that
is pres and now here, I will mask this
edge loop complete. And now I will
move it backwards. Maybe we can move it like that. Make it a little bit rounder. All right, you can see here, it's a little bit better. Let me put this back.
Make this sharp. Let me add the creases. Alright. Let me mass just these parts and do some polish by features. Alright. It doesn't working.
All right, forget that. Let see. Perfect. This is all real time. So I'm basically figuring out the stuff while
I'm doing them. So let's continue. All right. I see. It's not working nicely there. I polished by features,
not working nicely. All right. This piece here,
it's really to hide. I mean, this part will
be a little bit lower. Let me select my edge
loop complete. All right. What's happening? Slight edge. Alright now, let me just distribute that edge loop
there in a better way. Here also. All right. Perfect. Let me add some
freezes in this area. Let me do some Mirre
weld real quick. Let's see, this is not completely symmetrical
for some reason. All right, et something. Let me use my square
mask with here mask pen. Let's just click in
outside the model to make this square mask. I will move it a little
bit to the left and I will do a miror and weld in the
C axis or right perfect. Now it's working better. But here, I still have to figure out a way to make
that part better. Because Wait. What's happening here? Let me just delete
this sup, right. All right. I think
that box that we are getting there is because
we have a pole here, and zebras the subdivision
is not working nicely there. So we need to get rid of that pole in order for
this to work nicely. All right. Let me
think a little bit. I just need to get
rid of this edge. But we need that stuff there. Alright, let me
think real quick. Alright, so I managed to
get that part work nicely. You can see here the
changes that I have done. Let me say through quick and go back to show you what
I have done here. You can see here as we
got our stuff well mesi, I just get rid of those edges. Alright. And now with the
slice mesh slice mesh, yeah, with our simular
in the point actions, I just made a cut around here from this point to the other side
here on that point. And then I just clean those
extra edges that we got. And I did another cut from
this point to this point to make like this nice edge loop going down from both from the outside and from the inside, I
did the same thing. After that, I'm just
stitching. You can see here. After that, I'm just stitching these vertex together.
You see here. I'm just stitching
them in a nicely way. Perfect. So in that way, we can get that part to work
nicely in the way I want. Alright, let's continue. Let's put more creases here. All right. Not forget to
activ again your symmetry. All right. Perfect. Now you're
going to see here, it's working quite well now. I want to do something. I will add two more loops
in the middle. I will mask with my mask
lasso, this loop here. And now I will just move
it in this direction. Because I want that nice
curve to be happening there. All right, you can see here. It's working. Pretty nice. All right. Let me slice
this edge here, slide. We can slide it nicely. Perfect. All right. Let me see what happened
if I do pools by features. Not doing good. I will add more
creases here on top. Crease Alright. Perfect. All right. We have done that part. I will save All right. I think we can also make
less sharp this part here. I will just remove the
rising here and also. Let me just remove
the creasing here. All right, let me
bring back again the crest in these lower edges. And now I will just
mask mask here with a shop partial in
this edge in the corner. And now we can just move it, move them, align our quarter. Now we can just move them back. And now we can get
this nice curve edge. All right, I'm just
removing these brises here. Maybe that's good. Yeah. Because if we are
holding something, we don't want them to
have some sharp edges. All right. Let me bring
back again those creases. Let's see what's
happened if I put again this stuff. All right. I'll do something. Let me see if this can work, slice mesh. That working nicely. Ditch. I'm just
experimenting a little bit. All right. I can stitch this once
to here. Perfect. I can continue by
slice mesh to here, then do some mir and weld. And now I can delete these two edges from there and now they
should work better. I know, better. Let's see. A right now, you can see
it's working better here. All right, perfect. Let me save real quick. Alright. So. We'll save again. Alright,
let's make this piece, this lower piece here. Alright, let's do it. All
right. How we can make that? I think the first thing
that I will do is to duplicate this lower portion. And now I will just take these lower pass those
lower pass, delete hidden. All right. I will
make them bigger. I have just active
the double view. All right. Perfect. I will
make them or like that. Maybe we can remove. Oh, maybe not. All right. Let me remove those. Rink it a little bit. On this side also. All right. Try to match here with
slide, light here. These corners will
do some run weld. But it's not working or
right now it's working. Let me remove those
middle extra stuff there. All right. I want this to be
aligned nicely. With that lower part. All right. Now, what I will do is to
extrude all polygons down. Maybe we can make it
a tiny bit bigger. Yeah. A little bit
more Ib not that long. Maybe something like this
should be good enough. I will now extrude all the group all I will add a
middle edge loop here. Mask. Let's do something first. Let's go back and then press
get Let's extrude it again. Alright, let's extrude
it again and then press out just to get a
different edge loop there. Right, let's add a middle goop. I will mask this upper
edge rope and then do some beble there, right. I will make this part
a tiny bit longer. Align my gizmo and make it a little bit
longer, just like that. Perfect. And now I want something here. Let's see. I want here you have a piece going up like
we got here in the coset. I want to make this piece. Let me think how we can make it. Alright. That would be the
best way to make that piece. See let's try to add, maybe not that way. All right. Maybe
an edge loop here. We can extrude it. Maybe not. Or we can make them separated. I think that will be the
best option here, Billy. All right, let's just mask, increase our stuff. Mask here. Mask here. Perfect. All right. Add few orden ge loops. All right. Maybe not these crises. Let's see. Maybe a, not. Let's not add them. Should complete? All right. Was polyprop
here? Perfect. Now let's try to add that I will just copy
what I got here. Let's duplicate this. Now I will just get this lower
part delete all right. Let me remove these edges. Let's bring this down. All right. Now let's move one
of these tects around here. The other one, I will
slide it around here. Perfect. And here,
this lower stuff, I will just move it down all right. Let's see what we got here. Select this middle part
and make it smaller maybe. Here I will add
another edge mask. At working. Lease select this. All right. I see. I like that. Maybe not. Maybe something more
like this would be good. I think that's what
we are aiming for. But I want this to
be around here, we have to make this part lower to have this
straight edge there. Let me extrude all polygons. Let's extrude them
all. All right. If you extrude
something like this, the normals will be flipped. So let's just press flip here. Just do half your
normals, correct. The flip they believe
where it was visibility, I think, maybe not. I don't remember. These play properties
you can see here. In these play properties, you can find the flit bottom
and the double bottom. All right. Try make our
beble Bebble all right. Nice. Alright. Let's bring this down. Now, let's do some crises. Freeze. I don't want
this part to be creased. Kriz poly group border. All right. This part I want decrease or not all
these lower elops. Maybe we will have to leave
this like that, maybe. Maybe not. I don't like
that middle stuff. We got some pinch in there
that is not really nice. I will just try to make
this pebble part better. All right. Let's see. Perfect. All right here down. I freezing. That crease
just got deleted. All right. Right to add one Edge hub here. Perfect. All right. May add a middle sup. To try to overcome the inching there If we can do that, All right. I will slide. These two. Light are
here should be good. Maybe some up here not. Impulse future, but no,
we don't want that. I don't like that
harpening there. I think I would just
leave it like that maybe. Let's see if we add
one troop there. Maybe there, no. W be
the same result anyways. All right. Let's see
how this is looking. I safe. Maybe we
do some inflate. All right. Perfect. That was not the
best way to do it, but we did it. That's
important thing. All right. We have
made that little bars. And now I can see that here Maybe no. Maybe here we got
some stuff. I will. In this we'll just
duplicate the handle base. Now I will just add
another edge loop here. And now with my last leg brush, I will just hide these
ones, remove those. Maybe also the lower ones. Let's do some delete hearing. Let me delete those
lower ones also. All right. Let me. It's all right. I will save. And maybe we can just increase a tiny bit thickness of the, and then do some
extrude polygons. Clipped. And now let's do
some crease polygraup border, and let's add by hand
decreases in the corners. Now here, select them and
move it backwards there. All right. Because you can see
here that there is another in this area. So we have made that that All right. Perfect. I'm just doing
some refinements here. Just try and get a better
view from the three quarters. I don't like like the
set. It's kind of weird. So I was just trying
to just shape there. Alright. All right. I need a better to
follow you here. Really, I need a better
to follow you there. Maybe something like
this. You're not. Let's just slip this for now. All right here. I will just mask the upper
portion and move it up. Alright. We mask those right around here. Make them. Maybe not that much. Make them straight. All right, let me try
to align a gizmo here. Let's use the click brush
to make this straight. Alright. Now, it's safe. This piece should
be on top of this. And the other piece will be
a little bit in the side, a tiny bit it's awesome just a tiny bit
and here as a tiny bit. Perfect. All right. Okay. I think this should work. Maybe we can make this
stuff a little bit lower. Around here, maybe. Yeah. Let me add a little bit of
supporting edge here. Y. Here. Yeah. Another
two here and there. Perfect. And here,
I will just make this bigger like perfect. All right. Maybe not bigger,
maybe just move it down a bit, something like that. Let's crease the I want these corners to be crease also freeze edge here
and here, perfect. Now here in the crease level, we'll be down level of two, Dynamic subdivision of four. Perfect. Less add more polygons here. Alright. Perfect. There we go. And we got the
handle made nicely. All right. Let's see
what is left before making some floaters and
tending the to blender, do some more refinements. Alright. Alright, I think I will
leave the video here. In the next video, we will see
with what we can continue. But for now, see you
in the next video.
11. 10 Adding More Secundary Shapes And Adding Some Color: Right, guys. So in this video, we're going to make some
pieces here that are left. Like, we're going to
make this stuff here. Maybe bring some color to this. So let's start
making these pieces. Alright, how are we going
to make them? Let's see. I was experimenting a little
bit before recording. I have kind of an idea of
what we can do here. Alright. Let's see. I think we could take these three ones
here and take the three. All right, make it small
lead est. Alright. What's happening? All right. Let me just
mask it better. Let's see. Let's mask this part, just to make it
straight and flat. Perfect. Let's do the
same thing on this part. Let me mask the back part also. Perfect. What I want. All right. Let's do now this other part. Make it flat. I all right around
here. Perfect. I think that should be enough. Now I will mask this
corner and make it flat, also. Give me a sec. All right. Now, what we can do
here will be this. We'll mask this portion around
in the middle around here, maybe e now let me do some
mirror and weld in the C axis. In the C axis, all right. Now what I will do is
just to select all of these polygons and I will do some inset with
the standard method. Perfect. Now I will just
remove the middle part. Yeah. Let's remove it. Elite. And now we can start doing some stuff here. Let me see. We can maybe
extrude some stuff. Let me make this
part a little bit flat and also All right. What's happening? I want to make this flat. So I will use my mask
option in the edge actions. Let's bring our Gizmo there. Let's try to make this flat. Let's do the same thing here. All right. Perfect. All right. So let's see what we can do. Maybe we could extrude
one around here. Another one. Perfect. We could do the
same thing again, try to extrude it and
extrude another one. Less you stitch these
two here. Perfect. All right. Let me just remove the crease because I didn't
want the crease. But for some reason, it's removing the res
from everything here. Weird. All right. Let me add some
crises from here and here. Also here in this
board. All right. Now, I need to do some stuff. I need to make some
better topology here. Alright. I will do something. I want I will use my slice mesh. I want something to
go down like this. Alright. So, I will delete Oh. Let me do something here. I will use, again, my sliced mesh and
go back to here. Let me do some Control C. Here. All right. By a slice mesh. You here. All right. Now this will go to
the vertex. Perfect. Now I want to do something. I will delete all
of these polygons. All right. I will
delete this edge. Let me bring down this vertex. All right, bring it down. And now what I going to do? What I'm going to do here
will be bridge here, bridge. Let's insert one polygon there. Let's bridge these other two. All right. And now from here, let me do the same
thing in the back also. Lest delete all of these lions. Let me bring down a
slice mesh around here. I will see Alright. Let's see. Let delete those. All right, I will just stitch
this one here, perfect. Mask that vertex with my mask option in the C
modular ploid action selected. Now, I will just
remove this edge. Perfect. I will do
the same thing that I did in the other part. Let's bridge here to here, here, let me add
another edge loop. All right. Now let's bridge. This one to this one,
this one to this one. All right, let me
use my poly group, real quick. Poly group. What I did here to pick a polygroup that
already existing, press your polygroup like out and then your polygroupn press
shift or maybe Yes, shift. You can shift to pick a polygroup that
are already existing. So here, what we want to do? Let's add an edge around here. See. Perfect. Now let's bridge these
two right, perfect. Perfect. I will just select
again my polygroups here and remove the crease from these edges because I don't
want the crease there. Remove first the crease, and then I will remove
the the edge ropes. Perfect. And now we got some nicely
and better topo in this area. Now what I can do here since I got better topo
there, I can do this. Ontpoy trick because I need two more edges
coming around here. Let me just make this flat also. Alright. Let me move it around here. I will just mask this
one. I move it here. This one, awesome. All right. All
right. Let me see. Let's mask this corner, bring our courser there. Alright. All right. So what I'm going to do here will be I will use
my slice brush or slice mesh here slice mesh in both edge
and point actions. And now I will start
making some stuff here. All right. So let me put my oligon
actions in do nothing. All right. If this once let me do my stuff. All right. He doesn't want to let
me do stuff. All right. All right, let's see, to here what I want an edge
to be around there. Perfect. I will stitch
this polygon to here. I will remove these edges
because they are not necessary. I will remove the crease
from these edges here. Here, we need it. All right. Now we need to
adjust this stuff. Let's mask this area. Alright. Let's move
it just a little bit. Let's mask it again
with a little bit more. All right. We can bring this
a little bit down. Maybe this can be a
little bit more straight. And here we can
just mask this or maybe it would be better to mask these two edges
and bring them up. There's a tiny bit,
bring them up. And now let's do the same. We'll mask this vertex, mask point point and
then bring them up. Maybe we can bring this
a little bit down. Let's try to make it flat. Let me mask these two. Maybe something around
here should be nice. I All right. Right, perfect. I will add some support in the troop here. Perfect. All right. I want this
to be more circular. I will just push this back. Maybe that could be better. I will save quick. All right. Now, what I'm going to do will be to extrude a troop complete
extrude here. All right. Extrude, you'll pick. It's not in atrope complete. At rope here. All right. Let's try to make
this blood All right. To around here and this stuff. I will just stitch these
two projects. And here. Alright. Nice. I will just extrude again here. An edge, an edge and
another one here. Perfect. Lets just
adjust this little bit. Let's go back to our s modeler. And now I will breach here, these two. Let's add some edges here. I just want more bridge. Then we can bridge this to
here, and this to here. And then this to
here, this to here. This to here. Perfect.
Now we got this. Let's quit safe. All right. We can crease the corner. Perfect. All right. And then we got this I will crease
this corner also. Now we got this
stuff here. Perfect. I think if we can crease
this part a little bit more, maybe I will remove this
supporting edge loop. That's better. All
right. Quick, save. All right. I will do something here. I will make this stuff this entire piece a little bit thinner with our local
simetactivate it. And then I will just push
it in like this, maybe. All right. Now, let
me see my reference. We have made kind
of this piece here. Now let's try to make this one. I think this piece should
be a little bit bigger. We'll just mask that. We'll mask this entire portion. Let's use our gizmo,
move it in place. Maybe something around here. We move this one around here and then just make
it a little bit longer. All right. Let me mask this entire portion, and let's make this
just a tiny bit longer. All right. I will do another thing here. We mask this part, make it flat. Perfect. Now, let's
do some meter and weld in the C axis without
local geometry. Perfect. There we go. Let me
remove these rises here. All right. I need to add a little bit more
thickness in these parts. All right. I will just mask these two edges and
move them like this. All right. Let's go here. One
thing that I have noticed is that here, this corner is too sharp. And this needs a
crease around here to hold that is better. I will need more creases here. All right. Perfect. I
will do something here. I want to slice slide. This up here, but I don't want them to be to slide
the upper part. I will just mask the
upper portion and then use my slide
with up complete. And now I will just slide
this down and this other os. Maybe something
like this should be good. Alright, let's save. All right, let's try
to do the other part. Here. What we can do here. All right. So let me see. We can add polygon
here. Add a polygon. And now, I will do something
with the slice mesh. Let's put our slice mesh
in both point actions and edge actions
or we o or right. Perfect. This is not
symmetrical or right. Let's try ring this all the
way to this part. Perfect. And now this down. All right. Let me do something. I will just press here and do
not crease because I don't want the new stuff to
be creased because we need to increase them
manually so we can save time. Alright, let's
increase this stuff. All right, let's delete this. Let's delete this edge. Perfect. This edge also. These edges here will be deleted once we mirror and
weld our mesh. Let me do something. Let me mask this and make that straight and
flat around here. We'll just put it
around this area. Try to match. The position is part also. Let's try to make it bright. Let's completely straight. Yeah, I think so. Alright,
let's put it here. Now, I will do the
same thing I did here. I will do it in this part because what I'm doing
here is just adding more polygons to this part without messing the lower part. So we can use this
nice and quickly topology tricks to save time. Right, you can see
here. We don't need to do we don't need to increase those edges
because we have selected the option
here to not crease. All right, I will
delete these edges. All right. We'll make this flat. Perfect. All right. Alright, now what we can do? I will add another edge here. Perfect. Et's try to make
this a little bit longer around here
should be good enough. Maybe not. Let's see. I will select these polygons. Actually, let's do
a mid round welding the axis now. All
right, perfect. And now I will do some inset with the standard option here. All right. Perfect. Let me try to put this edge in the middle
around here, maybe. Around here. I think so. Now we need more
hooligans there. Let's try to do it. I mesh. Do this. And now let's bring more
stuff to this part. Oh, let me put this
in do nothing. Let's put this down if this
just let me do my stuff. Well, let's do this instead. Now we will clean that later. I mean, later, I mean, now, let's clean it. Let's remove these edges
and move these ones. All right here, I will just stitch this point to this point. Perfect. Here, I will do the same here. Stitch this one to that one. I remove this edge. Let's go it wrong
well. All right. Let's fry, make these
edges here flat. All right, flat. And the other one
also will be flat. Around here. Perfect.
All right. Let's see. Let's move it a little bit down. Just a tiny bit. All right. Now we can mask we can mask this part and making it a little
bit more round. Maybe something like this. And you can see here that this part here is a
little bit pointy. So what I will do will be just to take this
and squash it down. Maybe something like
this would be good. I have some references
that I have made for myself before
recording the video. Maybe we can just squash
this down this part. All right. Now, I will just mask these two edges and move them right let me
do some stuff here. With weld, and I
will mask these two. Here, I will just
move these two. Here. We're a little bit up. All right, let's mask
this polygon here, this edge, little bit like that. Now, let's try to mask
this entire portion here, make it a little bit sicker,
maybe something like this. I be good. Let's also try to
make it bigger. Let's see which local
symmetry activated. Maybe something like that. Or maybe I think that's
a little bit too much. Yeah, that's quite too much. Or maybe not. Maybe, try to make it to
not make it that big. And also, I will just
move this a little bit to the side around
here. This part also. Perfect. All right. Let me do
some quick mask here. I mean, quick
creases around here. Perfect. All right. Let me remove the creases here. Let me do some round weld
and save just in case. Always save your stuff. Let me remove the
crease around here. All right. I think that this will
work quite nicely. All right. If we
put one stuff here. Let me do some experiment. We can just do one edge, and now here we can put
another row of edges. Let me delete this and
then put one stuff here. And now I will bridge these two. Perfect. Rich, let me select the
polygroup in the polygon atoms. Let's pick this polygroup with pressing click and then
pressing chief here, all right? Perfect. All right. I will mask the two here. I'm trying to make this
a little bit rounder. Perfect. And now maybe let's do
some mirror and wealth. We can take this
entire piece and do some inset like this. All right, yeah. We'll
remove these creases. Remove those freezes. I don't know why
sometimes this is getting all decreases when it when it should not
take the creases. I don't know why
that's happening. But yeah, things happen. Alright. Perfect. We got those pieces
there nicely and clean. All right. Let me seeing. Let's try to make this
stuff also right now. I think we have time for that. I will save a sue quick. All right. What we can do here. Let's see. Let's see what we can
do here. All right. I need some stuff. I want stuff here. Then just go down like that. Let's try to do it. Let's
add a edge around here. Perfect. All right. Let's see. All right, let me think
yourself real quick. It's at this and maybe
we could extrude one stuff here and bring
this back like this. Maybe a little bit more. And I will just move it here
and make this straight. Perfect. I will remove the
creases here this area, and I will add new
ones around here. Perfect. Having some crest here. All right. Alright. Let's see.
Let's continue. Right now we need the
hole here, this area. But this is too thick. So I think we can bring
this down a little bit. Before that, let me add a
niche around here. A edge. Right. We can bring that
part down All right. Let me add another edge here. Run these bars and
we bring it down. All right, perfect. Now let's try to make this
part a bit more like this. We could remove, I mean, delete all of these hooligans. Let's make the mesh double. And now let's try to bridge
this stuff here and here. All right. Let's
do the same. Here. Oh, I forgot that I had
a middle group there. Let's bridge two here. Now I will add a middle group. Let's put this in keep polygrup. Let's add a middle one. I just put my inset brush in multi edge loops and
here in keep polygroups. Let's select the bridge. All right. Now in this area, let me delete this
one and this one. All right. Now let's reach. Real quick, feel
nice. All right. And there we go.
Let's mask again, rein geometry, freeze
to some creases. Now, for some reason, I'm getting some pinging. Let's see. Let's try to
apply here singular troop. Is supporting a troop here
to hold that weird stuff. Let me mask this part here
and make it straight. All right. Perfect. We got
those stuff there. I think that that piece, although that we have that here, that a thin piece, I think that's looking
kind of weird there. I don't liking it too much. Maybe we could
make it less thin, maybe something more like that, which should be good. I think so. Let's try to add also a cylinder
that you can see here. Just a pinned cylinder. Around here. Just make it thin and put it in
place around here. Let's just put this maybe rotate it a little
bit, something like that. Maybe not. All right. Let me see. We could make that piece tiny bit bigger. A tiny bit. All right. We got those pieces there. Let me emmetrz this
in the other part. Let's remove the local symmetry. Then do some on weld in the
s at this around here, perf. These have a lot of polygons. So I will try to clean
those extra polygons. Just trying to keep some
important edge loops on the corners to hold
the shape. Perfect. All right. So what is left here to do let me see, we have made almost everything. Maybe we can add
some poly paint just to differentiate each stuff. Maybe we can start doing now that stuff.
Let me say first. And here, in the C plugin, you can find your S coolor
here. You can see S color. What that plugging does
is you can have this will open another window
that you will get some color wheel and
some color peak. And you can select colors
that are not from brush. I mean, if you have your reference maybe
here in this Pure rev, you can just select your
color here and then drag your cursor to the color that you want to select
around here, maybe. And you can see in
the other window that the color is selecting. This is selecting
the color there. All right. So in that way, I will be going to color pick all the colors around the
model and start placing it. Wace you pick your color, press here in set color, and that will transfer
your color to your Rush. All right. Let's try to add that color
where it is needed. All right around here. Let me see. Perfect
around here, maybe. Let's see if I have
another material. Let me just modify this
material a little bit. I will just crank
up a little bit, the ambient just to make
it a little bit brighter. Now, here in RGB, let's press your fill object. You can find those options here. In color, you can
find fill object and the RGB is in draw. Around here, Indra, you
can find where is it? You can find the GB around here. Perfect. All right. I will add that
color to these pieces. Let's Let's select
another color. This brighter one
with these pieces. That piece only. Let's select piece other
color with this one. Here, here and here, this other part also. This piece. All right. These other pieces. Alright, let's quick save this. All right, let me let like this gray color
here for the metal. All right. Let's put that reddish color in the places where it need
be like some metal. Round here also. Little Oh, here, I noticed this is too elongated for this part. Make it a bit thinner. And try to match better the position of
this spring our cursor, try to make it flat, all right, a bit thinner per ft. I'm just trying to
get better that part. Let me move this stuff to here. All right, I will just
select this corner and move it to the left and
maybe it's up. A bit, all right, perfect. Alright, let's keep
placing some colors. Right here also. Hell, here on top. We'll also place that
color here and here, let me sell it again this gray and put that in these places. Here, let's select this
grayish color. Put that here. We select the gray and put it there and also here, all right. All right, let's see this
grayish in this part will be. This other gray will be here. Now let's select
this darker color and put it here and
all these pieces. Around here, let's
select this color here. We can take this gray
and try to paint by hand with your draw or standard brush with
just the RGB selected. You can paint, find that part. All right. Perfect. Let's see what is left
to apply the color. This is just for
better visualization. All right. Perfect. I will select the orange color
that maybe reddish orange color that this
piece has. All right. Let's put it here
also, and here. Let's this gray and put
it around these places. And now, everything
it's with color. Let me put some bluish color. All right. Sec.
Just quick, save. Alright. Around here, let me select this leish color there. That for some reason, my splugin don't want to work. Let me save quick. I will just select it
by hand because one time the sea color
crashed my PC, and I don't want this
recording to crash. So I will just try
to match it by hand. Right around here. Perfect. This bluish color. We'll select this gray, maybe make it a little bit
more like this around here. Perfect. This will be a
little bit darker, I think. Yeah, a little bit darker. And this should be a little
bit yellow around here. Maybe. I And here we are. I think this red or orange
is a little bit too much. Let's try to reduce
that ration there. Alright, I think
that's good enough. Alright. All right. Let me see. Y this piece here. I will maybe select this color. Maybe not that color. Maybe this one, but
a little bit darker. A little bit darker
around there. Let me select this bluish color
and try to paint it here. It was real quick. All right. I will select this gray color? All right. Here we are. This color should be darker. All right, here we are. So I think I will
leave the video here. So the next video.
12. 11 More Refinements: Alright, guys, so we're going to continue
with this model. Let's do some few things that we need before in order
to put the floaters, let's see, let's see
what we can prefine. All right. We need to do
some work in this area. So you can see here
where is more stuff. This can be added with a
floater and this also. And I will do some
general shape. All right, let's do
this. Right here, I think will be nice if
I mask this. All right. Let's active the local symmetry. Set. All right. So let's activate
the local symmetry. Let's mask this evert. Oh. Let's do it in another way. Let's use our the modeler
with extrude or right here. Let's extrude this
part or right. Now, I will use this
and I will just scale it down a tiny bit,
something like that. Right. I think here
should be good. Maybe we can move
it a little bit. Can shrink it a
little bit and move it a little bit like that. All right. So let's
do this stuff also. This can be a little
bit more like this. I will make it
smaller around here, maybe. Or bright. All right, perfect. I think here cause that part or not. I think that this
can work right. Perfect. Let's see here. If we need to do
something, right, let me add some creases
maybe creases here. Rezescress will come here geometry and decrease the
dynamic division level. I mean, increase it and
decrease the trees level here. And I will do some more
rising in these edges. Maybe here or two. Let me put this in
edge, do some creasing. As I will do a
Masur round weld in the X axis with local
symmetry active. All right. Let me remove this crease in the
middle. Perfect. Maybe we need some more edges just stain a bit
more I think so. Maybe that can work there. All right. We need some, like, side panel that this has there. All right. I do something. Let me go here maybe. I will duplicate this object. I will just get these ones. Alright. I will
mask the top part, make it flat with my gizmo, mask the lower part,
make it flat also. And this middle headroop I will just make it
flat by masking. All right, let me say
quick. All right. Perfect. I will inflate this maybe make it a
little bit smaller. Maybe not. Let's see. Let me hide this part for now. And also these parts. All right. Right, we are here. Let me put this on top here. And now I will mask this Let
me remove this middle one. All right. Let me
remove that one and put it maybe here. Yeah. Mask this maybe move it down maybe something like this would be nice. All right. Perfect.
It's not flat Brison. Let me mask this and
just make it flat. Like this. Correct. All right. And now I will do some extrude O polygons
and put it around here. Let's squeeze. All right, let me grease this edge
around here and around here. Alright, I will put it a
little bit of darker color. Also, I will scale this a
little bit. I, not like that. Um, I like this.
This is too much. Maybe I just scale it like this. And now I will add some
group around here. And I will do QH with polygrupO. Let me do something.
All right. Oh, my God. Select this. Oh.
Do something here. Let's press group normal
and select all of this. Make it a single normal. Now let's use our
Qs with polygroupO. There we go. All right. Re Now I will add maybe some Etrops to
hold better the shape. With Dimetr Let's do this stuff. All right. Hey. Hey.
Sorry. Around here. I not that much.
Stating a bit more. And also, this is inverted. You can see here, it's inverted. Let's flip. Maybe this can work. But I don't fully
like these parts to be Like that. Let me do something.
Let me bring back, stuff that I have hide. Alright, I think
that's oh maybe. Where is this piece? Or not. Alright? What is that? Right it is also known. All right, so let's
go back here. Also, I think that we need a little bit of a hole here. Also, I would make
this spot a tiny bit a tiny bit bigger, to the side that we
would move it like this. Alright Perfect. Let's go back here and
see what we can do. Because you can see here
that here is, like, some hole where this can join. Well, let's try to do that. I will make all of this stuff. Let me use my lasso, my mask lasso here, and I will make this
create one by one. All right. All right, perfect. All right. Maybe we can increase a
little bit this part. I will just move all of these polygons to
the side around here. This one also will
move it. Or maybe not. Maybe it'll be around there. It'll be around here. Perfect. This one I will just
move it to the center. All right to the
center around here. Let me just keep moving. It's around here. Maybe not. Maybe, yeah. Whatever it Alright. Maybe this stuff
here should be big. I mean higher. I should be
a little bit higher, maybe. O here. Also, let's adjust
this ramp here. Let's see. Maybe not. Let's just
leave it like this. I'm just trying to guess. So stuff. All right. Now around here, this stuff will be
maybe in this place. Let me mask that is around here. All right. I will
add another f here. Perfect. And this, I
will just move it to the side around here to be
aligned with this ramp. We'll mask the top
part and move it down. Why that putting there. Why is that? I
shouldn't be there. I mean, I just want this.
This should be Oh, my God. Let's just try to
work with this. We'll be around here. Let me move the other one. Around here. Yeah. Now, we are going to mask these vertex and move
them down around here. Perfect. Alright, let's see what
else we need here. Alright. Let me remove the Q mesh from my
polygonal with my s moltor. I put this into nothing. Just for that to
not be in the way. Alright. Let me mask this part. We may also want to
bring this forward. I mean, because I don't know why that like that in this place. There's no function
really function there. We'll just do something here. I will just select my Q mesh. Mask. I mean, select all of
these and move it like that. And now this let me
remove the lower edge, select this mask it. I mean, invert the mask
and just make it red. Just the angle. Now, this I will just
move it forward. All right. Let's just move this forward and try to align it with
the other piece. And why we have these polygons, I don't understand why I
put those polygons there. I don't fully remember why. All right. Let's put
this around here. Adjust around here this angle. And I will move up this
stuff here. Perfect. Now I will do some
creasing Trees. Perfect. All right now
that is aligned there. All right. Let's continue here. We'll just select all of this
and move it around here. We'll select this one,
move it around here, and I will make this right. Perfect. All right. We'll make this
entire atop, right? Perfect. Now this stuff here
will be awesome. Perfect. I post this to the side
just a little bit. Right now, I will add a niche around there. Alright. Mask this part and just
move it to the side. Now I will just the active. Mass. I mean, the
active the symmetry. I'm sorry. All right. And now from here, let's do
some extrude single poly. And select all of these
polygons by pressing out with your modeler. I will just now and don't
forget the active these ones because I just want this selection from this
corner to around here with a little bit of maybe like this. All right. Let me do something first. I will just move
this to the side. All right. Maybe these parts
also can be move it. Right, perfect. And now I will do some little russionPerfect. All right. Let me do it again, maybe
a little bit deeper. Maybe something like
this should be good. I will put a black color
there in this stuff. Let me just do some auto groups. Let me just correct the
color here. Perfect. I would add. Let me
do something here. Because let me do some creasing. Add some manual creasing here. Crease these corners. All of these corners here, here will be creased. And now I will do some
inset with polygroup o. Remember to put
this in standard. All right here, also
need to be crested. Perfect. Let me put an an edge
loop around here, and now I will select this, put it in solid flask there. Alright. Maybe that can work. I will just make
this this piece. I bit wider. Maybe
something like this. Also, let me make this
a little bit taller. In or let's go here. And now we're going to
select these pieces here. I will just move it a little
bit down to the left. Yeah. Perfect. This maybe should be shorter. Alright, let me align my gizmo. Maybe it should be shorter. And it should be lower also. We select this mask this one. And I will do some slide. Sliderop complete. I don't want that to slide there leave it down. Also, I will just slide
this single vertex. Leave it down. Let's do some extrusion
again with all polygons. From here, flip. All right. I will move it up in a bit. I say that so good. All right. Perfect. Let's
bring back the breezes. All right. There we go. Alright, let's see
what else we can do. Oh, I just forgot
hearing this piece. We need to do maybe some stuff. We'll just adjust this piece and also add some
beblin around here Bb. Let's see right here. Just want some pebble. Let me make these
pebbles straight. All right. Let's mask that. All right. This
will be straight. And also this part here
will also be straight. I just adjusting a
little bit stuff. Increases maybe rises
around here around here. Perfect. Rise poly group, decrease decrease level and increase
the smooth divisions. Add a few more edge loops. Alright. Perfect. I need to add some stuff here also. And this maybe should. It's a bit wider. This stuff can be a
little bit molar. We move that to the side. I will also move all of
this piece to the side. Around here, I make it. Now this piece here, I will just make it
a little bit bigger. And here I will add some
crises around here, also Cris But level in four, level in two maybe. So mihrain welt in the X axis with our local
symmetry activated. Few more edge loops
supporting edge loops. Around here also. And I think this can
work for what we need, I will make put this
a little bit more deeper around here, maybe. And now what else we need maybe we can just remove one here,
if it's like that. All right. Let's see. We got this let's just a tiny piece here because we got
some orange part here, and this part is also aligned with the other stuff like this line is
aligned with this. I mean, this is
straight parallel. That's the word I
was looking for. This is parallel to this. So let's try to do that here. In our case, the one that we have is not parallel
the lower part. So let's reset the dis rotation, and now I will just
remove these two. And here I will just move this to the side. All right. There's
something around here. We like that now. Let's see here. We around here. All right. Now we
can adjust now. Let me remove the middle one. Be well in the C axis. Quick. All right. Remove that. I will slide this edge right. Maybe. Let me try to adjust this stuff I don't like it. I think we got the wrong
interpretation for this piece. All right. Let me make this
entire piece here like this. I will just remove
these ones around weld. Let me mask this
also around here. Now I will just move
this stuff like this. Maybe All right. Let me do, again, the same thing. All right. Do it. Sorry, but this is
entirely in real time. So we may need to
reduce some stuff. Alright. Let's put it
around here, maybe. Now, let's mask the lower
part and move this like this. Maybe. And now let's try to slide this corner. Around here. I think that's
better for what we need. I will use a clip brush to
make this straight or right. Now I will do some loop
complete around here, and I will add some supporting edge loops
to these points or right. Maybe not that close, maybe a little bit separated. We are around here. I will
do another mirror and weld. Perfect. All right, I will just move
that around here. Make it a little bit smaller. What's the purpose
of that piece? I don't know, but it's in
the design so we do it. Maybe around here. And maybe this orange part is maybe some piece that is
holding these other ones. So we can try and make
something to hold this piece. Maybe let's add a
cube and select this orange color. Put it here. All right. Let me just select the
polycube in my gizmo. I will maybe reduce the
polygons from there. Here, I will just leave
the middle one and I will remove the polygons from these
other vertical axis also. Now let's squash it. Make it something
maybe like this. All right. Let's see. Perfect. I know. All right, this needs to
be adjust around here. Perfect. And now let me do some stuff here. I will merge these two together. I will just make a
new polygroup there. I will merge those
ones. Merge down. You should put your soup to below the one that
you want to merge, and then you select the one
that you want to merge. Like I want to merge this
piece to that piece. You put that piece
below this one, then you click Merge
Down and press C right. All right. Let's do
some crises, maybe. I will add some
stuff here. Alright. Now I will add maybe just let
me put this and do nothing. I will add two more
edge ops around here. We select this and this, I will just let them. And from here in bridge, let's select two holes, and this should merge. I mean, bridge these two nicely. For some reason,
this is not working. I will save in
case zebras crash. Because brush and
crash for some reason. Um, it's not working
in the way I want, so I will just bridge this
stuff by hand. Alright. This is flip. That's the reason that we
our stuff is not working. So I will mask this one. And go here, display
properties and do some flip and your
stuff should be or not. Let me just hide this
one and do some flip. And now our stuff is
working perfectly. Now, if I breach two holes, this should work nicely. Let's see. You can see it here. It's working perfectly. Here, maybe we can select
this right, let's say, bridge bridge here to calls, move it to the we decide to make this
nice curve stuff. But you can see here
that we're getting some stuff weird
here. All right. Let's try, mix it. Let me move. Mask this entire portion here, move it to the side. I will also move
that to the side. Let me put this and then
scale to this point. All right. Make this
flat and straight. All right. Screeze real quick. I will just make all of
these here straight. Perfect. Maybe that
could work in that area. Maybe, um Let me add
two potenps to this. All right, put this and
do nothing. All right. But it's here, another one here, maybe another one here
another one around there. And I think that
that would work. Alright. Maybe we could make this
a little bit higher. I just move it a little tiny bit to there
something like that. Alright. Let Oh, maybe we can live like that. We don't care too much. Alright. So I think that we are almost good to
go with the floaters. So a so I will see what else is needed before going
to the floaters. Let me do some finan here. All right, let me make
this part a little bit thicker around here. Perfect. Let me see if I can
remove that one, how this will look. No. Let me just remove that criss I will just wry what just stuff. All right, I think
that would work. So I will see what else we need to adjust if
everything is good to go, I think that in the next video, we can maybe start with
the floaters, maybe. So see you there.
13. 12 Making Floaters: Alright, guys. So in this video, we're going to start
making the floaters and the details around our model. So first, we are going
to see which details can be made into an IMM,
an insert multibrush. So we can start placing
them in an easier way. So let's see. Like, we
have these details. We can make a
floater and just put it in insert multibush
insert multimer sorry. Like these ones, these
little ones here. This one, the stuff
here can also be in an insert multi mesh. This other one here, these shapes can be put on them. This stuff. This one can
also be maybe this can be just like one of these
but just a little bit bend. Alright. Now, these other ones, I think we are going to
make them by its own. I will make it by hand with
not an IMM, that's it starts. Alright. Let's go to
another tool here. Maybe a sphere or
something like this. Let's just press here,
polymesT. All right. Now here I will I will
make this first one. This tiny hole is just a
super easy stuff to do. So let's make a three
d cylinder right. Now I will just remove
the other side. We put this. I will
click in the home icon. Now with my C modeler, I will just extrude loop
complete loop here. I will just extrude
it like this. Maybe we can make
it a little bit inclinated maybe something
like this could be. And now we have
our first detail. Let's add some supporting
loops to this. All right. Now, let's see. We can make these is
like capsule shapes. Let's try to make them. All right. Let's see. I paint and other stuff here. And now here we can maybe we can try and use let me
see what we got here. This one. All right. Oh. All I did. All right. Let's go to the tool that
we have just created. And now I have selected this IMM primitive with
our Gizmo active. If we click here in this
bar on top of here. If we click in one
of these forms, we can transform the tool into the mesh that
we have created. Alright, I will just
delete the other one. Now I will center my Gizmo into my model
then create the home icon. Perfect. And now I will do the same stuff as we did before. Oh, st it, extrude. Look. All right. I've created one of the details. Maybe this can be a little
bit more like that. All right. We'll just add
another extrat around there. All right, perfect.
Maybe we can also duplicate this and
make it maybe longer. Maybe something like
this can also be good. And maybe we could also
duplicate this again and make it like this
Naware version. I will just select here
in the Y symmetry. Let's press here
in local symmetry. And now I will just try to make the top part a little
bit more round. Let's also select
our X symmetry. And I will just reset the subs. Oh here. Perfect. All right.
We have that. We got some stuff. I will duplicate this and
make it narware also. Maybe some se like this. Select the X and Y symmetry and try to do the
same thing here. Make that a little
bit more rounder. Perfect. Now we can just remove those edge loops and
place them again. All right. Let's see if we got more of those that we can use. All right. Alright, let's just use these
ones for now. All right. Now, let's press B and click here in create
Islled ultimsh. We have our floaters here. Now, we can start
placing our floaters. Like, let's start
placing these ones. All right. Let's see. Here. Let me put my cursor
with dynamic here. Select this Cerco stuff and just place them where they
should be maybe with control. Maybe a little bit molar. Maybe something like that
should be good enough. All right. Around here
also with control. Perfect. We can also do something. We could delete the inner
part of this stuff. Just to avoid some
weird stuff here. Let me try to select all
of this without that. And I will just
press the lead here. I think it should should
not change anything. You can see here
it looks the same. So let's try to do that, so
we can avoid some stuff. Alright, let this here, I will just delete the inner up. Maybe with these ones, I will not do that. But let's see. Let me do again, the create Insert Multimsh. Let's go here and just place them again where they should be. All right. Perfect. Et's place our detail here also. Is maybe should be a
little bit smaller. And then once we bake this
stuff in our normal map, they will look like if
they were sculpted there. All right. Perfect. We got
those stuff there. Place. Let's use our capsule shapes. Maybe this one around
here. Like this. Perfect. Here, also. Let's try to place it. All right. Around here. Let's see where else
can place those stuff. Here in the stock. You can place maybe this
bigger one like this. Alright. Et's place the ones
that are here. There are three of them. Let's place them
with the Nara one. Then we try to make
this stuff parallel to this line, right? Now, I will just
duplicate this three times around like this. All right. Let me move it. I think they are a
little bit too thick. Let me go back again
and try to make them a tiny bit narrower. Let me select my
dynamic symmetry. And now with all our stuff
without the symmetry, strike, make it a little
bit more rounder the tips. Now I will do some mirror
and weld in the C axis. Now here mirror and weld. Without the local symmetry. Perfect. Oh, right,
here, Mr and weld. And now it's perfect. Alright. Now, what I will do
will be select stuff, our detail and just
move it to the side. Let me use here autogroups. That stuff is here in
polygroups Autogroups. So let's press
again around weld. And now let's just move our
detail and duplicate it three times like it is maybe, perfect. A right. We got those there. Let's try to make these
little ones here. Maybe here I will just select. Alright, let's see. Let me save the brush. Save as. So here, Roses. All right here insert weapon loaders. I am Perfect. Alright, now, I will maybe
I've noticed something here. Completely. Its not
This is not straight. Let's try to make it straight. For some reason. That stuff
there is not straight. Why is that? Let's try to fix. Now, this should be straight. All right, let me delete this edge loop and
place it again. Now this is working nicely. Now I will go back to
my loader brush and try to play them around here
maybe and place them there. I will split mask
point here because I want this floater to
be in its own tool. And now here I will just add an edge loop around the
corner this corner here. I will mask this past the
Gizmo on there and just bend it get the shape of
that detail there. All right around here. Perfect. Now here, we can just put some supporting group
to hold in place that corner right like this. All right. Maybe a little
bit separate them. Predated. All right. Maybe something like this
would be good. All right. And now let me move this
just a tiny bit around here. A little bit smaller. Let's see, a little bit smaller with our local
symmetry activated. Little bit smaller, like this. And now I will just duplicate
it again we round here. Alright. Perfect. Let's see what else
we can place here. Let me save again. Alright. Which
else we can place? I think that's all
the details with those stuff right now. Let's start making
these bigger loaders that we will have to
make them one by one, maybe all this stuff. Let's try with this first. All right. I see here, we don't have space
for that stuff. We can maybe collect this
and try to make it smother. Shorter, or not, maybe not. That would not be a nice idea. But we can do. We can get this stuff here, make it a little bit like this. We'll just move that
to around here. Maybe we can also move this
entire piece around here, maybe. I Or not. Maybe a bit. All right. These details should
be around here. With half the space to put it. Didn't touch on that. All right, how we
can solve this? Maybe we can move
this to the side. Maybe something I'm saying this. Now it's to chars. All right, Let's
see what we can do. Around here. All right. Let's try to make it. So we need one polygon to tweak. Right let's steal one
polygon from this mesh. We just duplicate it.
Select ply group, I will just click here. Then I will just select.
Let me just place it. A new polygroup and just delete
all the other polygroups. Now I will just make
this polygon straight. All right, make these stuff. Perfect. Trying to
make this stuff. Right. Perfect. All right. Let's just move it to the side. It's also mask this one. Maybe I can just let me just copy here this
polyloop I mean, this polygon. I will just place it
somewhere else like here. I can use this polygon to
create the other floaters. All right. So let's mask
this stuff here. We mask. Something around here. Also, let's try
to make it motor. There is something
like this here. Try to move this to the side. Make it motor
something like that. Maybe not, maybe it's
looking too bad. It should be around here. We'll just place it around here. And now this stuff, I will do some extra edge
loop or mesh border. And we can create that detail. It's not looking good. I'll be more like this. I should be around here. But we have to make some stuff in order
to make that piece. Make it right. Right? I'm just moving
around some stuff. Just to make it fit because
we got that detail there. Don't try to do it nicely. Alright. We'll also sell this stuff with
something like this. And this stuff should
be around here. But now I think this stuff
is a little bit too short. All right. Let me make
it a little bit bigger, maybe something more like this. And we can maybe try to push
this stuff, just a tiny bit. Around there, let's put
some porton the troops. All right, around here. Around. All right. Safe just in case hero crashed. It is behaving like that. I don't know. All right. We got that detail in
place in of roughly. Alright. Let's do some
mirror in the C axis. And then mirror and weld
in also the C axis. All right. We will have to fill this
part with something also. Now here we got this other
detail. Let's try to make it. Just real quick. Here, I will just select we
have this polygon. What is it? We just isolated here all right. L it's hidden. But
it around here. Make it bigger. And also here in
create insert mesh, I will just select
my weapon floater, create insert mesh and click
here in a pen Alright. And now I have that stuff there. I will save it. All right. Let's now use this polygon as a base to make
the other ones. Here. Let's go here
and just place it. Just try to make it. Right, that's possible. Play to Musket point. All right. Let's say it is
straight, I think. Yeah, it is straight. All right. Is stuff deleted. Try to make. Again, the miran well
here and the sea exist. But they are here. Mirror in the axis here mirror. Why just don't let
me do my stuff. Now, it's working. It was because I had the
local symmetry made reason. I mean, active. No. Sorry, my misspelling stuff. Alright, let's place
this stuff around here. I will shrink it a tiny
bit around here, maybe. Let me just delete the
other part. All right. I will place an edge loop
around here and just move this part down it down,
something like that. All right. And now I
will just extrude. Then the place it a nice way. This is not straight. But right now it is around here. Perfect. Now let's use our C modeler fruit mesh
border to make this part here. And now I will just
delete this one. Delete, I mean, here, delete, and I will just
mask those ones and make them straight like this. I let's not make it like that. Let's use the slide brush here, the slide action and move
it around here in place. Let's just slide it around here. Now, I will just try make
them straight. Please. Let me drink this like that. Alright. Play some stuff here. All right. I'm seeing like that. Like
that should be good enough. Let me put some creases. Comprising. Let me
do some increase O. Let me put one look there just to see if
that can hold shape. All right. Let me put a crease
here with H look complete. All right. Perfect. Now
we got that detail there. Let me do something. I will just delete all of
these polygons because I want this part to be a
little bit bigger. Where is it extrude mesh
border around here, maybe. Maybe
something like that. I Let's see, there is
something like this. Yeah, I think that's nice. Perfect. It slide around here
and around here, perpras. And we can add our stuff here. Our supporting edge loops. Perfect. Around here and around
here and here, perfect. Now they are working nice. We need a little crease here.
Better the shape there. All right. All right, I see. Here, maybe we have some
stuff going on here. If we can add a floater
just to represent kind of the hole that this is
making here and do that. Let me just leg my
closer brush here. We'll just place some polygon. Where's my stuff? All right here. All right. Let me just move it 180 degrees. Perfect. I will just make it smaller. Make it longer. I like this. Put it around here and just start moving it place. Let me extrude this Extrude edge around here. We move this down. Perfect. We'll just
shoot again here. All right. Now, we'll just put
it a here and just start putting feather stuff
around here, maybe. All right. Let me do one
last extrusion around here. Around here, maybe. Seem like this should be good. Perfect. Let's just make
these parts straight. From here. All right. So now I will mask H L partial. And I will just move. Let me just quick save. Maybe we can inflate this.
We can inflate that. Let me invert my mask,
something like this. And we have created this
illusion of bod there. Alright, let me just insert
some supporting edge loops. Alright. Perfect. Round here. Now I will just
increase all and there we go. We got that stuff placed. And now, what I would do
will be a mirror and weld. The C axis, all right, without the local symmetry. I have just clicked first in
mirror because this side is the mirror plane for the mirror or the mirror
and weld work nicely. We just press mirror, then mirror and weld. Alright. Before adding these ones, let me just ask this part and move it.
I leave it like that. I think that's better.
All right, perfect. Me uncles. Alright. We got this. Let's see what else
we can put in place. See here in the back, we can select our floater brush. Plate some stuff. A, split mask points. Perfect. A tiny bit. Now we can
start working on this. Let's mask this part, make it kind of parallel
to this line around here. Let me just make
it flat. So this. Now, this part should
be a little bit around here it can also be a little bit longer this more like this. I'm making this one here. Something more like that. Let me try to make this one. This line here,
parallel to this one. Maybe something around here. I'll be good. All right. Let's extrude this in
I mean, where is it? Meshaction extrude. Mesh border. Here, mesh border. Let me do something.
I will deactiv the normal here, normal attraction. I will put this in
no attraction here. All right. Maybe not that I like
that, not that much. All right. I think this
should work nicely. Put some porton ropes. All right. Maybe we
can make that floater. A bit smaller with our
local shipment reactivated. Around there. Also, I will make this floater and a bit
more rounder and less sharp by just placing supporting edge loops a little bit far away from the corner
increase all right. Something like that. All right. Let me mask this. And here's a slide
slope complete. I'll try just to slide
it a bit or like that. Increase all. Perfect. I think that's kind of nice. Maybe. I don't know. It doesn't like I
doesn't like it. It's not deleting the
stuff right here. I just want to delete
those polygons. Now I will do another
shrewd border to make this maybe
something more like this. I think this will be good now. Alright. Oh, before doing that, I will just slide
this like that maybe. Something more like this. All right. What is this. Let me just delete that. Alright. Perfect. Now I
can place some stuff here. That's it better. Dave? Alright. Maybe a little bit smaller. All right. And now I need a
little one there. I can just let again
brush and just put it in place with something like this. All right. Is something
like this here. I will do another another
root mesh border here. But I don't want that
to be trot there. All right. I will just pled it
into its own tout. Just make it a tiny piece there. But it's really
small. Let's make it. And if it's small and
also I will remove. That increase all
extrude mesh border. Is something like
this should be good. Right to play some
supporting troops. All right. Something
like this would be good. Something like that. All right. Let's see which
loaders we can place. All right. Let's try to make these ones. And also, we have
this floater there. Let's make it real quick. Here, floater. Let's select this one. Just let's go to this
subdue and just place it. Nicely there. All right. Perfect. When change, these
flows are in the side. Make it a little
bit more complex. Now, let's try to
make this stuff here. What I will do here will be Oh. What I will do here,
I will just place. What is happening here. M mask just in case my ro crashed is working
here really weird now. I think the brush is bugged. Not working properly. But let me restart Crush. I have just restarted Rush, and now the brush
is working nicely. Alright, let's
read Musket point. We'll just color
pick that color. Alright. And now let's try
to make this detail here. That will be a nice one. Let's move it around here. All right. Let's select
our lasso mask brush. Mask. Make it. Bigger like this with here a little bit
smaller around here. And now I will just
extrude mesh border. Make it something like this. I think this is maybe too big. Move it to the sides but bit. Let me remove the creases. Increase all right. And now I will just
add some edge loops, protean edge loops
here and here. All right. Here. All right. We got one there. A tiny bit molar. Put it just right on top. I'm seeing this maybe. All right. This one, it's the
same stuff, but it. It's a bid All right. It's something like that there. Let's make it a tiny bit longer, maybe something more like this. Maybe not. Let me
move this one here. All right. This other loader.
Let me mask it. Move it around here. And this stuff here. We just move it around here. Perfect. Alright. Let me do some and wells in
the axis. Perfect. I need another floater here. Let me use my floater brush. All right. To mask points. I will just put it, merge them. Again, later. Something more like these rums. Now here, I will just remove
these supporting loops. I will add them later, but I will just remove them
for now because I want this to move like this. I see something.
Remove all of these. Maybe add one here, move it. Let me remove that. Move it around here maybe. Alright, move it around here. Maybe that I want to make this
line parallel to this one. So I'm just doing this. Alright. So let's see. Extrude mesh border, Dave. Alright, I will just mask here. Plead mask point. Just try to make let me put the shoot mesh
border in no attraction. All right here around
here. Perfect. Let's add, again, the
supporting edge loops. Perfect. All right. We got that there. This one should be a
little bit more like this. Let me move. This
one a tiny bit. All right. A little
bit more like that. Something like this. Now let's do some extrude
mesh border around here. All right, insert. Perfect. All right, there we go. Let me do something here. I'll just mask this
here, slide so complete. Move it here in
place. Increase all. All right. Perfect. Alright. We got that there.
Let me make it. Bigger. Something
more like that. Would be nice. All right. Let's see what so
More we can add. There are a lot more
videos that we can add. So let's see where our thus Alright let me try. Oh. Let's see try to add this one. This is like a capsule
shape but cut in half. Let's try to add it. Scrum here. Maybe this take capsule. This one, and place it. Select this color. Alright. Let me just select this stuff. Put it hidden. All right. Now, I will just add We just add a cut here and
delete the other hold. Yeah, we just
delete this delete. Maybe we can make this
a little bit like that, maybe more like this, and this can be move like that. Maybe not. Around here, maybe. All right. Let me add supporting atup here in the corner Perfet. I let me add some
crease in that part. All right. Put it around here. Trying to align those. Perfect. We got that there. Let me move this
floater around here. All right. Let's see. I also have noticed that we have this white
part here on top, and we don't have made that. We haven't made that. Maybe I will do it in the next video. So I think we can leave this
video here just for now. In the next video, we
are going to continue put more floter and
more stuff here. Make the finish high body, the one that we can bake. So see you in the next one.
14. 13 Adding More Floaters: All right, guys, so let's
continue with this model. Let's see what else we can add
in the details. All right. Let's see. Alright, I will add this tiny
capsul detail there. All right, let me take my floater brush that we
created in the previous video. So I will place this
floater maybe around here. Can be All right. I have just reset the rotation. Let's see. All right,
give me a second. But I don't think that
that detail will be there. Let me see maybe a little bit. Upper. Let me just reset again
my rotation in this piece. We'll just push it a
tiny bit into the model. Like this. All right. Let's just place it maybe around here. All right. But this is not with symmetry. Let me do some mirror and
wealth in the C axis here. Perfect. Now, it should
be good. Perfect. Let's continue placing
some more details. Alright, you can see
you can see here. We got this little stuff here. Let's try to add to add it. All right. Let's go here. Perfect. Let's select
this polygon shape. Selected, yeah, or not. Not selected, I think. Yeah, it's selected. Perfect. I will just use this, make it. Let me split must get coins. And now I will just put this
in place around here maybe. Let me go here to geometry
crease and increase all. All right. I have to fix
that stuff in my brush. The polygon had crest has
crises in the beginning here, it has some increases, and when we made the rush. I just took the creases, the model with the creases
and it's a bit annoying. But let's continue. Alright let's make this
a tiny bit smaller, maybe something like this. And now here I will just
extrude mesh border. Maybe something like this
should be good enough. I think so. Yeah. Let's
select this color, applied it or let's add
some supporting edge. All right. Perfect. One here
and one here. All right. There we go. So meter and wealth in the C axis,
without local symmetry. Perfect. All right. Let's active our symmetry
in the C axis. All right. Let's go. Perfect.
Everything good here. Maybe a tiny bit smaller. Now I will active
my local symmetry. Maybe not a little bit
more to this part. Be down here in this place should be in the best
position for that piece. But here we got the stuff in the middle All right. I will do something here. All right. Let's see. Let's select this one. We just select this stuff. I added another polygon there. You will see what I will do. Al right, now with Q mesh, single poly, with this selected, let's just do this select everything again
and again this stuff. Q mesh is a really awesome tool. It's really awesome to do
stuff like this. All right. Let me select again this stuff. All right. I think one
more time will be enough. All right, one more time here. And there we go. Let me just slide this
edge here, a tiny bit. Here we go. We add some creases here and
all this edge right. I will add more creases
in these places. All right, here, here, here, here and here. Now we can delete this
extra stuff there. Those extra E ops. All right, I will add more
creases in this area. All right. Perfect. All right. So let's save. Let's see what else. All right. I'm just trying to add
the simplest els first, and then I will start adding
the most complicated ones. Let's try to add these
ones that we have here. Let's start with
this little one. That would be straightforward. Let's go here. Alright,
let's get safe. Now I will get my
my loader brush is like that. Let
me do something. I will just slide this. This is weird. That
should not be there. That is like that. All right. Let me just slide
this oligon Alright. Now, let's go to
our loader brush. We'll just add 11 oligon with musket points, all right. Now, that piece is something
like them triangle. Maybe we can just mask this and move it with
something like that. All right. And now here Let me move this a
little bit more like that. Let's make. Not that big,
something like this. I will try to make this
line parallel to this one. And now, let me just select
my last rush. Alright. I will make this to
straight like this. Alright. This little
one also right. I have these flips, I think. All right. It should be like this. We have some incination in this part. That in our model
we don't have it. Let's try to add it. We just erase these troops and just add that
incination there. Or something like this. Just a little bit. Now this part will be
more like this maybe. All right. And this should
be lower. All right. Something like that
would be good. All right. I think that's nice. I will add again, my
supporting troops. All right around
here, these places. Perfect. A here also. Perfect. All right. A all right, I will make this triangle
here a little bit bigger. Something like or maybe
not that big actually. Lo something more like this. I will just try match this angle with this angle. All right at me. Mask the top part. Alright. A around here, I think that should be
good enough, maybe. Now I will just do some
extrude mesh porder All right. Food mesh border. And let's just place
that detail here. Nice and quickly. Let's add some sportina
chips. Here, quick. Right. Perfect.
Here, here and here, right. There we go. Alright. We got a tiny stuff
here. Let's try to add it. Right. Something's
I will just here. I should complete. Let me
do something All right. Maybe I can delete this
one because I have noticed that we have a
smooth transition here, and we got that a little bit too harp if something
like this should go. I will just come here to add again those creases
in these parts. All right here, I will just add another extra Edge around here. Perfect. Now I think that's kind of nice. Maybe we should get better
the depo in this area. It's kind of messy. And also, we have a
hole in this place. Let's just select this. Let's do some inset. Here, let's select
this option standard. All right. Let's inset
this a tiny bit. All right, I will just remove the creases from
those areas here, maybe here also. These places. And now I will just extraute the inwards like
this should be good. Let me try to make
this flat more bright. I will light these ones. Alright, perfect. Let me do some Cris
extrap complete. All right here also. Alright, let me do it
by hand in this part. Perfect. Alright. Alright, there we go. I think that's nice. Let's see that we still don't have I still need something. That means something here.
We'll just remove this crease. All right. Let me say like this, maybe. All right. Let's see. All right let me
add now the detail, the tiny details here.
All right, let's do it. I will select my stuff, place it, relate to
musket point or right. I will just reset this rotation, rotate at 90 degrees here. Now I will do a mind weld in the C axis, something like this. Now let's remove the
creases increase all there. Let me rotate it a tiny bit
more, something like this. All right. Round here. All right. Let's mask this and try to make it a little bit narrower
mask everything. Let's try to make it a
little bit more like this. Here, I will make that a
little bit more narrower. All right. Let me select
this one, move it backwards. Or right now, I
will just extrude I extrude edge here in
this angle right. We got this. Now,
what I'm going to do will be an inset angle boy. Because I want this
edge root here. Less make All right, let me delete this lower one. I will add my gizmo. And now we safe just in
case my zebras crashed. I had a few crushes today. I is annoying sometimes. I will just make
that spart flat. Now I will delete this flylop we'll move this
a little bit more like that. All right. Now here, I will extrude mesh border safe again. Stred mesh border. Something like this, maybe. All right, let me delete
this polygon here. I make this one like this. Or right now, I will add few more to poten erops
in these places. All right. Here, I would add maybe
one supporting group here. That's too much around here. Perfect. All right. Let me add a few more
supporting loops around here. All right, perfect. I will
move this more inwards. More like this. All right. This way we can create the
details fast and easy. All right. Now, let's do this one here. Let's go here. I
think that I will just duplicate this mesh. Perfect. I will select the two and delete everything but this. All right. I will active my C imtryr. Let's use the Gizmo. Move this a little
bit more like this. Alright. Let me place
this stuff here. Around there should be good. Now, I will just select
these middle ones and delete everything
but this Alright. Now I will just mask this
lower one, align my gizmo. Something like this
should be good. And now I will root mesh border. Something like this
should be good. I know. All right. Let me move
it in place around here. Maybe this should be
a little bit lower. All right. Maybe
that's too much. Something like this, I
will delete the ones. Delete me align again my dismo. Mask this lower one
here, just make it flat. All right. Let's add some supporting edge
loops around these areas. Perfect. All right. Let me delete all my creases. All right. Around here, maybe. I should be let me add
crease in this area. Perfect. Or maybe not. Thing like that should
be good enough. Alright, we have added
that detail there. But I think this is too wide. Let's mask this portion here. And now let's make it ar. Maybe something more like this. Or maybe something
like that. All right. There we go. We got
a detail there. All right, what else
we can add. Save. We can try to add
this detail here. This one, try to do it. Let's go here. Our stuff here, our brush between musket points. Let's select our polygon. All right. Let me make
this one here pointing. Something like this,
maybe not that much more like this. Ithing around here
maybe should be good. Takes a bit longer. A bit longer like
that. All right. Let me increase all perfect. Now, here in this place, we can inset you see, we can insert like this. I will add here
insert multi group, and polygrupT more like this. Now here in mask,
I will just mask polyup invert the mask, move it like this. Maybe we could make this insect a tiny bit
more thick like this. Let's add the etopes mask here, invert and make it
more like this. All right. Safe again. Alright, I will mask
this stuff a complete. Alright, inflate.
We'll do something. All right. I will inflate here. It's a tiny bit. Maybe something like this should be good. I will add a middle edge
look here like this, right, something like this. I will mask this middle one move to create some sort
of roundness there. And maybe we could delete
these ones. All right. Now, let me use dynamic
my dynamic symmetry, and I will add here. I will add single up here. I have activated my dynamic
symmetry. You can see heat. You can see it here. But this option is only
available in the 2025 version, or in my pronunciation. It's a little bit
late in the night, my brain is not working very
well. Very sorry for that. Right. We have make our stuff here. Strike to mask the inner part, inflate it a tiny bit save again if
I'm saving too much. All right. Here mask, gmpleteE
look complete here. Perfect. Anything around
here maybe should be good. Right now, I will
insert my edge loop. Around these places. And now we got that piece here. Nicely done. Could make this
part a little bit thicker. Let me mask this. Maybe here, we can do this. What I did here was just
press out and then dig here a drag and make it scale
like that in just one axis. I think this should
be good enough. We'll add two more loops
on here and there we go. We have that detail there.
Nicely done. Perfect. Fats. Let's try to make
it bigger. All right. A bit smaller. Thing like this. I still feel that
this stuff here. Let me add two more
pen loops here. The one here and another
one in this place. Alright, I think that should
be good enough for us here. Right. I think that's
nice. Let's save. Alright. What else we need to do? We need to add these bolls here. We got those bolls we need
to add those bolts right. And now we need to
make this piece here that I forgot to make this white piece and also add this little
stuff around here. And also make this stuff and add some floater represent
this itail here. A some stuff here and this one. Right here, I will do
some mirror and weld without our local symmetry
here in the C axis, all right? Mirror and weld.
Perfect. All right. Let's do some dynamic
subdivisions here. Here also right. All right. I need to improve
maybe the detail in this side of the weapon
because here, it's nice, but here we need to improve
it because we have this, like, big pace here that
we can add some stuff. Alright, let's see. Want
stuff we could add first? Think that I will make or we have I zeros by default, a brush that has
some similar shape. Let me find it. Let me try to find it. Maybe is IM IM Where is it? I can't find it here. No. Not that shape. I not that. Let's see. Here. No. Here is it. Not this one. Let me just pause, and then I will try
to find that brush. All right, the
brush is this one. IMM model kit here. You can find like this
exact shape around here. You can see it circular one. You can see it here in action. Basically the same
shape we have here. So let's start placing
our stuff. All right. Let's let my loader brush
with this thick absuul shape. Let's go here. Let me drag a
white big absu shape here. Maybe not that big,
something like this. Al right now, I
will just place it around here. All right. I will now add a middle
edge look there. Let me align this shape better. Alright. Something more like
something more like this. Now with my select lasso, I will just remove
the other part. And now, let me add supporting
edge loop here. All right. Now here with our IMM model kit, I will add this tiny bolt
here and there we go. It should be a
little bit reddish. Maybe something like this. Here, I bit reddish.
Little bit lighter. So maybe with this gray Alright. We got that bolt there. Let me just rotate it. More like this or right. Let's do some miter
well in the C axis. All right. We got
that stuff there. Now, let's try to add more
of those tiny details. Those tiny bolds, here, here we got another one. This is a tiny one. Why more like this around
here here at the corner. I mean just move this a
tiny bit more like this. All right. Let me go here. Right. Now we got a quite
different bold, I think. Yeah, this has some
hole in the middle. But we got something
similar here. We can use this buzzer
one. Let's see it. It has like some
hole in the middle. Let's just place it. All right. Let me active
my local subtry here. Just make it small around here. All right. All right. I have
noticed something. Is that Let me just split those. Let me remove this middle one. All right, let's
see. We need to make some bevlin in this part. Something like this. All right. I will add few more supporting
troops around there. All right. Let's see. Something like this. All right. I should work maybe. Let me add a trees around here. Maybe not like that. Let's just add
crises around here. Perfect. And here we got
something like this. Let me add another
supporting edge loop here. All right. Maybe
something like that. And now let's add that
fortunate chip in that place. All right. Safe. Real quick. All right. We got those stuff placed. We still need to make
this piece here. All right, let me
think a little bit, how we're going to make it? Let's just replace
this loader here. Something like that.
Let me reset rotations. All right. But just happened. All right. All right. Do something, we
must get points. G here. We'll just
select this one. They're hidden. All right, ftated 90 degrees
like this, place it. All right. Let's just place it. Around here should be
good. Get a little bit. Big, mask this one. Mask and shrink it a
little bit more like this. All right. I with the middle
one also. A bit. All right. Now I will
do some round wells in the C axis without the
local symmetry around here. Perfect. Nice. And now we can add this shape here, this cylinder shape
around there. With this grayish color, let's make it a little bit smaller and just
put it in place. Right. Let me make a bone. Something like this insert
some supporting gg ropes. All right. So supporting
edge up around here, here and here. Perfect. Now I will just took me and well
dish to the other side, and there we go our stuff there. Perfect. We are getting the details right We This stuff here should be a little bit more inclinated. Let me just let those
supporting edge loops. Try to make this line
parallel to this one. Around here maybe. I maybe a little
bit more like that. I think so. That's a tiny
bit more like this. Right. Perspect There we go. We saved. I forgot to add this shape around
here, try to do it. I around here. Let's select our loader brush. Let's select the
polygon, lid, like this. Set the stuff, increase
all, all right. Perfect. Now let's
try to do this shape. All right. Let's see what we can do here. All right. Let's see. Let's just put this here. Make it. It's a bit more
like this, maybe. Mask this, move it
more like that. I will add another edge, and now I will extrude
this one through the edge. All right, let me
just mask this one. Now I will align and make
it flat these edges. I will at this one,
move it backwards. All right, we just move
it in place around here. Just mask this one. Maybe more like this. Let me slide this edge.
Seem more like that. Put this down maybe. Now, I will try make
this one right. Now, let's stroud mesh border.
I think that's too big. Let's just squash it and make
it a little bit smaller. Extrude mesh border. Something like this
should be good enough. Alright. Alright, let's add
some supporting troops. All right around here. Perfect. All right there we go. All right. Perfect. This piece here also neat. Let me just separate
this one plt. Here we need to
make some beveling if this one want to work. All right, but not so good. We just leave it
like this for now. Let me see what
details are missing. All right. With safe it quick. All right, let's try to add
this line real quick here. All right. You need that line
there, we can make it. Let's see. What is that? What is this? A let me just fix
that real quick. Teach this to here, and I will slide
this one to here. Let me use my loader brush. Put it here, lead. All right. Let's select this. Alright perfect. Move it here around here,
all right, nice. Now, I will just make it bigger. All right. Or right around here. Maybe something more like this. We match this little
one it, move it. I will just extrude
an edge here, edge. Something like this. And now we just move it like that. And now I will just try
to make this thing Right. Let's just make it
straight. Or right. Right here. I'm like this. Perfect. I will just move it here. I will mask this with my lazo. Is all right. Perfect. Let's just move
it. Something like this. Now I will just extrude
it down like this. All right. Let me just aligning the ism. All right. We Diselect this. Diselected right now. Let's do. Something like this All right. Less Me this Well it down. Something like this. Perfect.
Do the same stuff here. Let's just put it in place. And this also will
go around here. Let's just mask this. But it's here. Let me try
to make this flat again. All right. I would select this move
it more like that. This will be easier to
do if we use blender. But let's just stay with this since we don't really need blender just for
now. Increase O. Insert. And now I will mask
this inner polygon, and now I will invert that mask. And now I will do
some inflation here. Let me quick save this stuff. Alright, let's do
some inflate here. Let me invert the mask. All right. Something like this. There we go. Let me
apply the color. And now I will just add
some support in a troop. Let me put this and do nothing. All right. Around here. Perfect. Let me add a few
edge loops here. All right. Let's add
another edge loop. Around these places. We'll do the same here. I There we go. We got that line there.
Nicely done. All right. I think we can leave
the video here. In the next period,
we're going to continue finding more details
and adding more stuff. Maybe we will make
this white part. Maybe the details from this
part here. So are you there?
15. 14 Finishing Floaters Details: Alright, guys, so let's
continue with this model. So what we need to do is just to keep adding the rest of
the details. Let's see. We need to maybe start working on these
ditils in this part, making this white stuff, and also try to fill the side of the
model with some details. I have kind of an idea here
just draw some basic shapes. I think that could work maybe. So let's do this stuff. We'll start first with this
part here. So let's do it. All right. Alright. So I will just select
this floater here. I will now separate this
one from the other one, split hidden, all right. Now, here, I will
just let's see. Let me move the supporting loop. Let me make this piece
a little bit longer. We'll just mask
this around here. Make it a little bit
longer. All right. Let's try to see if we can do some round wealth
in the C. I mean, in the X axis design
with local symmetry. No. Maybe let's try to do
it with dynamic symmetry. All right. There we go. I just activated my
dynamic symmetry and did the mihran weld. This will do the Mheran
weld in the position where you have your gismo, you can see, all right. Now I will just remove
this rise in the middle. All right. Perfect. Let's see, maybe we can add a little bit some poten
loops around this area. It has some creases. Let me remove those creases. Here, creases, increase O. Perfect. It's also crest crest
here increase O. Maybe with the creases, let me put this into maybe maybe one let's leave it in two here. Perfect. We'll do
the same thing here. We'll put this in two. And now I will just
add the freeze that was there around here. Perfect. Now we got that each there. Now, let's try to
add another one. Let me duplicate this one. All right. Right, I have this. And now I will select, I mean, I will add
another edge loop. Around. Let's just bebble
this. I will just bubble it. Let's pebble this stuff. And also, I will split
the sket points. Be Alright let's add a middle edge loop with multi edge loop and
polygroup just add one. Now I will mask this
split or maybe not split. Let's just delete
the middle one. All right. Deleteren. I will just mask
the other side. All right. And now here with this, let's do some mirror
in the Y axis. All right. Here
we got our stuff. Now we can just bring
it up around here. All right. Put it in place. Maybe with control.
Or maybe not. What I did? Oh,
let's just put it in place here. I'll
be good enough. Alright, you can see it here. And now I will just start
bridging these atoms. All right. Go here. Where is my bridge. All right, breach. Bridge, bridge, more bridge. Let's me save real quick. I really save this here
and here and here. And now I will
remove those edges. All right. And now, there we go. We got some design there. All right. We got some design
there. Perfect. Now it's not too empty.
We got some stuff. Maybe I will merge
this one down. So these both loader are
in the same soup too. We just move it to
the is a little bit. All right. And
that's kind of good. Yeah. Right. So let's try
to make now this wide part. All right. So that part. That part will be
like um Let's see. Maybe we can get let me
just duplicate this out. And now I will just
select these polygons. Let me remove the
local symmetry. Now I will just try
select those edge loops. Polygroup here. All right. These faces, also these ones, I will just make them a
different polygrup All right. Now we've got this.
We'll just select this. Let's do some mirror
wells in the C axis. So we got these two. Off here, delete hidden. Now I will's quick
safe real quick. Alright. We can inflate. Maybe I will just remove oh. I will just remove the
edges mirror and weld. Now I will just inflate
this a tiny bit. Now I will just move this down
maybe and try to make this straight with a
clip brush around here and here, perfect. Alright. Let me active my local symmetry. I will add a single
edge up around here. And this maybe I can
mask it and control. With the Gizmo, pressing
control moving the Gizmo. We can shoot it like this. Really nice and quick. All right. Is pretty nice. All right. Let me
put this in double. Let me extrude an edge here. Extrude here, edge. Let me just put this into
nothing. Extrude an edge. All right. I We need some thickness
in this area. Let me just slide. This. Maybe we could do this type of filling. All right. Maybe not. Alright. Let me see something
here. Maybe I cannot. So edge loop here. Maybe a few more Maybe not. I don't see that would be nice. Let's see. I'm just
experimenting right now. Alright. Let me just
select my Q mesh. I just Q mesh this down. Now it's not working. Alright. Let's go back to this. I will just put this in some white Now I will just extrude a troop. Something like this. Right? Let's make all of
these parts lot. Perfect. All right. I All right. Now what I will do. I will
just reach these two. Sometimes zeros is very annoying for
polymodlling, I know. Right? Let's extrude this one. Let me mask this and make it at I All right. Let's say maybe we'll
delete this one. Let me extrude again in words. Something like Oh,
let me select this. Let me do it with the tablet. Or write something
like this, maybe. Oh. Nothing. All right. If something like that,
should be good. Perfect. We are getting
something. I will just bridge this pace this
edge with that edge. Now, let me extrude
at one more time. All right. I will bridge these two also. Bridge this one with that one. Bridge these ones, and
this one this one. And there we go. I will just add some breezes. All right. Perfect. Let me just let me do some casings
o, and there we go. Here, I will just put some
supposing loop around here, maybe, maybe here also. But there is something That piece here for some
reason, is not flat. Let's just select this
and make it flat. Like this. All
right. There we go. I will add more supporting
edge loops around here and here on top here and
maybe one here, perfect. Maybe that's too much. Also, we need some babbling. Let me remove the
supporting syrup. I add it and let's
bubble like this. I just want to bubble this area. Maybe let's do it by
hand of the group. We select all of these
mask right food. Scale down like
this or maybe not. Let's do it in this
way with inflate here. Let's just inflate this inwards. And now let's scale and make
this art flat like this. I will just slide these
points. All right. Around here, maybe. Perfect. There we go. We have a bebo. Let me remove this edge
loop. All right. I will add a crease here. And All right. Let me see why that part
is behaving like that. All right, we got something. Let me add some supporting tops. We're not that near the corner. Something more like this.
Alright We got something here. If we remove the creasing
here, maybe. Maybe not. I will just make these
points here a tiny bit longer around here. And also the stuff, I will just put it around here. Let me take all of these
and move it in place. Let's do the same thing for these two ones and move those in place and
make them straight. All right. Or maybe not. All right, we can leave
that part like this. All right. Hey, what we can do here
instead of doing that, we can just extrude
a tiny piece here. Mask, inverted mask. Now let's use our Gizmo to
extrude a tiny edge there. Let me remove this
grease. All right. Let me add more creases here. Without that crease, all right, removing unwanted crises.
All right, there we go. I will do some ron weld in the C axis without
local symmetry. All right. Perfect. There we go. Now let me go back to
my to this white part, I will move the emo here
and with local symmetry, I will just scale it to
try to match this angle. This line with this lower one, something like this
would be good. Now I think that's good. But these part maybe would be flat also. Maybe. All right. Let me do something. Maybe we could select all of these pass and extrude
one piece more, something like this, a tiny bit. Let me do increase or not. Um. Let me increase this edge All right. Just creasing those
edges. Perfect. All right. There we go. More creasing around here and
maybe in this place, too. All right. And now here, there is one capsule shape that we can add with our loader. But let me do something quick. Real real quick. There should be this pebble, I mean, this floater
detail around here. Let me do it quick
with our symmetry. I'm just pushing away
tiny bit this detail. Seem like that should
be good enough. And now I will just add
that capsule shape there. Let me open my brush. All right, let me
do it real quick. All right brushes,
my floater brush. Let me save And now we just add that
capsule shape there. Maybe with this Nar wear one, maybe something like
this should be good. Here and now what I'm going to do is to do some split
sket points or right here. Now, let's select our floater. Now, with the slice curve brush, let's just slice it around here. This slice brush will create netge loop where the curve is you can see it
here in action. So I have just slice my curve. I mean, my floater just
to have this line here matching the low one and to be able to delete
this lower piece. Now, what I'm going
to do will be to add a supporting edge
loop around here. All right, there
we go. All right. Maybe, let's just push
this down a tiny bit. All right, perfect. And
there we go with a Dido. Perfect. All right. Maybe let's start working here with these parts from here. All right, let's try
to make this one. This looks like this is coming here and then doing
something like this. That's why I'm in here. I will just try to do this sacked shape this
sacked shape here. That's what I will try to do. So let's do it. All right. Let me go to my flip here. Since we are making the
weapon in this angle because this is the core the correct view for this weapon because
you can see it here, we can read what is here
and in the other one in the original
version is flipped. So here is in this side. So let's see what
we can do here. Maybe that could be Yeah, that could be a floater, too. Yeah, let's do it. For this one, I will just maybe like this. Move it, it musket point, go here. Poly cube. Make this bigger. I just
want one single polygon. No more nor less. All right. All right,
let's go here. Put it in place.
Perfect around here. And now, what I'm
going to do will be some inset,
something like this. I will delete this part. I will just mask that, move the gizmo here, and make this flat. Now I will delete
the middle one and extrude all polygons in here. Now I will just add some supporting at troops
around this area. Let me do some crises. Maybe something like
this should be good. I think so. Maybe. Maybe we could make this screen art. Any bit bigger. Let me
mask this piece here. Maybe we could do this. All right around here. Now I will do the same
thing inside part. All right. But I just
want this piece, this part to be let down. Empty like this. All right. So it will bake better. All right. Let's make it a
little bit less pronounced. There we go. Maybe now Let's see. Let me add the whole
that this half here. I will just do it with geometry. That will not be
a bit of a deal. All right, let me just
select these pieces. All right. Let me do
something real quick. Perfect. I'll just
make this la here. Also here. Invert the mask. We'll do the same thing
in the middle here. All right. Now, I will just
extrude this inwards. Extrude. Let's just change
the poly to single poly. Let's extrude this
inwards around here, and I will do some beveling
in the inner part maybe. I Or let me do some inset with
standard here. All right. And now I will delete this edge because I
want some bubble here. Let's do some creases,
rip complete. All right, remove
the middle one. Crease perfect. Now we have that stuff there. Alright. We're
getting some details. Add the floaters. Let me just move this
a little bit side. Little bit like this. Now, here, we'll just maybe add let me see
what I have here. We can add some floater,
like this, maybe. You think so. But that would
not be too noticeable. I think we could
create another loader. Like some that looks
like a capsule shape. All right. I will just
use a capsule shape. Let me try this one. All right. Make something like
the around here. Perfect. And that
should be good. All right. We got
that piece there. Now, I think the only
thing that's left to do will be this tiny stuff. Also, I just forgot about
this little hole here. Is shiny stuff here. Let's do those. Let's
start first with this one. I will just duplicate soup too. Now with the C symmetry here, let's do on mihran weld in
the C axis around here. Perfect. I will just put
two edge loops around here. Let me save. Real quick. I will just put another
edge loop around there, which selects this masket
select the other pieces. And we invert the selection
and delete hidden. Now what I'm going to do will be extrude mesh border and do
some extrusions like this. That will be good enough, maybe. Now we'll insert some porting
gobes to hold the shape. All right. Perfect. There we go. Maybe a tiny bit smaller. All right. I'm like this. All right. Let me
just align my gizmo. All right, and try to
make this a little bit. A little bit longer, right? Maybe not. Let's push it in. I like this, maybe. All right. Maybe not that much. Something like that
should be good enough. And now, what I'm going to do will be to make
this shiny stuff here. All right. Let's do it. I will use my floater brush. Let me say real quick. Let's use our
floater brush here. We just track a polygon
split musket point, select this polygon here. All right, let's make all the edges flat as
possible here also. Et's make it flat here on top. Also flat. Is part here, flat and straight. And this part here also. Flat and straight. I don't think it is too flat. A right now, there we go. Now, let's put our
gizmo in the middle. Squash it like this. Drink it. Perfect. And now here
and here, maybe. I will just mask the upper
part and move it like this. Alright. Now I will just
extrude mesh border. Shrewd mesh border. All right. There we go. I will delete all
the creases and add supporting troops around here to these places, here and here. Also, I will just add
a bit of a shiny color there for better visualization. In this part, we just mask this and select this kind
of brighter blue. All right. There we go. Let me go back all
right and apply this right effect, there we go. Let me push it a little bit
in or maybe not that much. Well it down. Here, we
need three of those, and we make it a
little bit smaller. Right, and three. Let me just do this. Alright, let's do
something here. This is just a technique.
I will show you. If we press Control, then drag our Gizmo, and then we release
the control bottom, we can create a
series like we will duplicate this object in
the same space in a row. You will see it here. If I just extrude this and then
release my control bottom, you will see that it will
make it with even spacing. So I'm going to do here. We just. All right, let me just delete
this other stuff. All right. And there we go. We've got our bright
bright stuff there. Let me see if there
is something more to do here in this piece. That is one. Maybe we could remove those supporting edge
loops or maybe not. All right. But here, sly, I need a supporting edge. All right. Here also. All right. Let me do something real quick. I will use my dam standard
brush to make some creasing. Alright perfect. And now let me do something real quick.
I'm just saving this. I will add one I slop there. I will duplicate this. I mean, duplicate no, I will just subdivide
this, sorry, divide this a
little bit and make this X kind shape,
duplicate it again. Let's see if this goes nice. One more time All right. And here. There we go. Let's try to do it again. Out here. Oh, around. Here around here, maybe. Around here also.
Now there we go. We got that stuff there. And I think that there
is nothing left to do. Maybe we could make
this part here. Tiny bit bigger. Let me just this just in case. Inflate this tip part, a tiny bit, something like this. Maybe we could also
with hot standard carve a little bit in Alright. Let me put some of these. Maybe a little bit
brighter. Color. Pair with just the
polypintRal quick. All right. Perfect. Let me just do a mask. Here, fill with this. All right. There we go. So I think there is not
more stuff to do here. We got all the pieces. I think so. Yeah. So I will leave the video here. In the next video, let's
see what we can do. Maybe I will just
import these to Blinder and do some
twigs there, maybe. I'll see you in the next video.
16. 15 Doing Tweaks Inside Blender And Preparing The Model For Retopology: Alright, guys, in this video, we're going to continue
with this model. What I'm going to do
now will be to import the model to blender to do some twigs that
I want to do there. And then I will get
this back here to Xerox to apply the
subdivisions and then export the final high poly and then do the low
poly inside blender. Alright, so let's start. So first, before
exporting this model, let's put here in the two panel. You can find it here also, here. Let's go down in export. Let's put some ten that will be the real world scale, right? Ten. Perfect. Now let's go here to see
plugin and then we're going to export here in
visible here, visible. Then we're going to
click here Export. And then that FBX, we are going to import
it back in Blender. So I will export it and I
will import it in Blender, so I will pause and I will do that and I will
get back to you. Right now that we
are here in blender, there are some stuff that I
want to do in this model. Like, for example, this piece, this is not a perfect circle. So what I going to do here will be with this atom loop tools, you can activate it here
in preferences, atoms. Let's write loop tools. You can find it here. You just press this
checker box here. And now, with this atom
that comes with lender, we're going to make these
circles to perfect circles that at that is not right
now in ebrush. I wish it was, but it's not. So let's do it. Let's select the circle loops, all the circle loops here. Perfect. All right. Now, let's select these ones. All right. Let me see. We have everything selected. Let's go to the other side. Let's do the same thing here, select everything,
everything here. All right. Now, let's just
press this circle here, and you will see that
if we press that, our model now is
a perfect circle. If we subdivide this, you will see that this
now is a perfect circle. Alright. But I will not subdivide
this inside blender for now because the rises
here in blender works a tiny bit
different from irs. I like better the result I get with subdivision
with crises inside Crush than in blender
because here we get some, like, the super super harp edges that I
don't really like. So I will do the
subdivisions inside Rush. So we did this here. Now let's go here. This is other place
that we don't have in a perfect circle. I will delete this side. Now I will add a mirror. Let's add a mirror right in the C axis, all
right perfect. Now let's go here. I will select this circle
tube right here too, all the circle ub. Perfect. And now I will
press here circle. You can see it here. I just forgot this edge. Now it's working, let me
delete these two edge loops. All right. I just press X
and then dissolve edges. All right. Now let me
do some inset here. Let's just select those
pass and press Y. You can have these insets. Let me just do some
real quick here. Something real quick.
All right. Perfect. Now I will just bring back
those supporting loops. With Control R, you
can face those loops. All right. Now, if we
subdivide this can surface, you can see that we have
now a perfect circle there. All right. Let me see what
else I need to do. Maybe we can have a
floater here this area. You can see that there
is a line in this piece. I will just do it real quick. We are inside blender, that will be super straightforward. All right. Let me
just duplicate this. Maybe maybe, yeah. Alright. Let me go here. All right. Oh, let me. Oh, yes. Perfect. We'll add. I just press this slash button to
isolate the model. Alright. Now let's add an Edgube I
would bel this Edge tube. Perfect. Let me delete
this part here, X phases. Now, let's select this with
L and then delete those. I will delete these two phases. And now these ones, and here I will just press out to scale it
along the normals. And in this way, we can have Oh, let's see. Maybe maybe not like
that. Let's see. Let's just press
S, normal S here. Perfect. I will move this little bit in the X axis,
something like this. Let me add maybe two
more drops here. So supporting drops
or write perfect. We got that stuff. And now here in this part, we have kind of
indentation here that we can maybe do All right. Let me see division modifier. I want to see how this behaves. You can see the subdivision
modifier modifier here with the creases makes
the corners too sharp. I don't really like that look. I like more these kind of tough transition that we
got here in brus All right. So we can add that
stuff with a floater. We'll just select
this E selection. We got this tiny piece here. Now I will do some scale
here in the Y axis. And then let's just
select in the border and then do an extrusion
by pressing E here. Let's see. All right. Let's now press and
then S and Y here. All right. And now
let's bring this up, something like this, maybe. Maybe, do this. You have it in the middle. I will make this molar, something like this,
maybe. All right. Now I will add some
supporting troops. All right, perfect. One here and one here. Let me make this a
little bit smaller. Perfect. All right. I think that was the
only thing that I needed to do some twigs here. Maybe we can get
these ones to do. Let me see how this behave. No, it's not behaving right. So right. Let's just leave that
part like this for now. And I don't find anything more that maybe we can do here
inside Blender for these parts. Alright, now that we did some
twigs here inside Blender, I will import this
back to Cbrush. Let's select everything,
go here, file, export FBX, and then let's just exported, like maybe weapon import. Let's see. Now here, let's press here
selected objects, apply transform, the
select animation, atlas phones also,
and apply modifiers. Now let's just export the FBX. Now, let's go back
here to Cebush. Let's go to Zip login and
then click here in Import. Now, you can see that we have
the weapon re import here. So I will just select
this and press open. It will import the
model in another tool, but we can copy the
objects and place it in the other tool because
for some reason, Cyrus doesn't import the crises, so I will just copy the models that I
have made some twigs just to save time
because I don't want to do the crises in
the entire model again. So we did some changes
here in this piece. I will select that object. Now I will go here
in the tool panel, click here in copy.
Let's go here. And now I will just press paste. And you can see that our model here is in the exact same
spot as the other one. All right. Let's
do the same thing with the other piece here. I forgot to apply the modifier, the mirror modifier
for this piece. So let's do it real quick. Let's do some mirror and
weld in the C axis here. All right. Perfect. Now,
I will just copy this, go here, and paste this. Let me do some folder. New pieces maybe. Is a random name
because I just want to identify these
models. All right. Now, let's copy the floaters that we have made
taste all right. Perfect. Let's go back. Here, let's select this one, go back here, and then paste. All right. Now, I will just
delete the old models. But before that, I will do some quick save just
in case we messed up the but we won't
mess up the things. So let's select the
previous models, the old ones, and then
press here in the lead. Okay, and here. Okay. Now I will bring
back the new models. And now what I will do will
be to add the rises back. Let's go here creases. Let's do some creasing
with the tolerance in 45, maybe 45 here, perfect. The crease label will be in two. The dynamics of division
will be in four. Now let's click here, click. All right. And now we got
these perfect circles there. All right. Perfect. Maybe we
can add a edge loop here, maybe, let's see. Yeah. All right. Let's do the
same thing here with this lower one. I will press. I will put the C tolerance
in 45, this into, and the smooth
subdivision in four, let's press crease and here we have our stuff perfectly crest. All right. Let me just remove these unwanted creases
real quick. All right. All right, so we have our stuff in a perfect
circle this stuff also. And now I think
that we are ready to apply the dynamic
subdivisions and make the final high poly. So let's do it. Let me save first. All right. Now that we have saved, let's put the dynamic subdivision
in all the tools here. I think this should be a
tiny bit less sharp, maybe. This is too sharp. But this is already in one. Is this too sharp. Maybe it's for this to
port in edge loop here. Let me just put it around here. I don't want that piece
to be that sharp. Remove these ones. All right. Perfect. Something like this, I think
that's maybe kind of nice. All right. Now, let's put the dynamic subdivision
in all the pieces. I think everything has
dynamic subdivisions. Let me see here
this also perfect. Everything has the
dynamic subdivisions applied, all right. So to convert the
dynamic subdivision in real subdivisions,
let's go here. Turn up, I will
save just in case. Sorry, but I have to save
for my brain safety. Alright, let's go
here to see plugin. Let's go here to
clean Tool utility. And then here, you will find this option dine
SD to subdivisions. This means dynamic subdivision
to real subdivision. So instead of
pressing this bottom, let's press this one DSO. This will make all the
dynamic sub division in the visible subtols that will convert them into
real subdivision. So let's do it.
Let's click here. This maybe will take a tiny bit, not too much, but I will
pause what is to finish. All right now, everything
have its real subdivisions. You can see it here. We can even do some
sculpture, do some sculpt. I don't think that
we need to do sculpt because they are not any
detail like that here. Oh, I find it that we
got a tiny floater here. I didn't notice that. Alright. Let's add it. Lo quick. All right. Let's
add it real quick. Maybe I can duplicate this one. Let me duplicate this subto. I will delete the
higher subdivisions. I will delete this
one, all right. We'll move it perfect. We'll rotate at 90 degrees. Make it smaller, move it here. Maybe. Maybe something like
this should be good enough. Maybe something
like this, perfect. Let me remove all
the extra agrobes. Here and here, now I will
delete these two tubes. I mean, faces. Let's
mask all of these. And let's just make
this plot like this. And there we go. I will mask the inner part here. Just try to align
back this stuff here, and there we go we got
that tiny detail there. All right. Let me make
it something more like this. All right. Let's see. Do something quick. I will add some potenahps. All right, person. Less B color. There we go. I will do some viral
wealth in the C axis. Here. Perfect. We have
it in the other side. Now I will just add the
real subdivision by hand. Alright, now we got
this. We got this. Now we can export our
high poly to blender. And after that, we can export the lowest subdivision version of this model and from there, start working on the low poly. So let's export this high
version this high poly version. Let's press here to
ensure that we have the highest subdivision for
all the subtols all right. Now, what I'm going to
do will be to export this back here, export, import. Let's export this right. So here, it will be weapon
high, hoy, all right. Um, let me put some stuff
up in my set maybe. Alright, I will
just export that. This will take a tiny
bit because this is 4 million polygons.
So let's wait. All right, our high
poly has been exported. So let's press here in all lo to get the lowest
subdivision of our model. And then we will do
the same process. Export here. Let's change the
name to low colon. Low poly here. Perfect, and then
press here in export. So this will export
the stuff real quick. So I will pause Anyways. Oh, this is already exported. So let's go back to blender. I will maybe just pave the in
and has another copy here. We go here. All
right. Let me see. Weapon Wi maybe. I think I wrote it
wrong, but I don't care. Now I will just do another file. We'll delete all
of these, go here. Let me first create
two collections here. I will click I will put the
name of one has i poly. Now I will we click here
and select this red one, or you can select any of these. This is just for
better visualization. Let's go here and press
and ride maybe low body. And now, this one, I will select this
greenish color there. Now I will import all my stuff. Let's import the
high body All right. This will take a tiny bit. Import. Since it's around 4
million ***** let me pause. Oh, I didn't pause. Alright, we got our stuff here. Perfect. Let me just see
if there is everything. If everything is fine, we will have to do some twigs. This is too too close
to the mesh. All right. Everything else is good. All right. Perfect. We did a dynamic
subdivision for this one. Let's see what the
subdivision surface give us. I kind don't like this. Let me here do some
quick stuff. All right. Let me see if we had
weighted normals. It's shading a bit better. I still don't like the way
this is subdivided here. So I just deleted it. And here in ebrush I will
apply the subdivisions here. Right? Four times
maybe or right. Before doing that, let me add some weak edge loops here to have more
stuff to work with. Although this is really
mess and messed up. This edge flow is a bit wonky. That won't affect too much. I will just leave it like that. Alright, let's just subdivide this a little bit,
maybe another one. Alright. I think this
will be good enough. Let's go here, plugin. This time, we click here
and selected sport. Weapon In inner middle poly. Hi poly here. All right. Let's press here. And now let's go
back to blender. Let's wait for this to
save and export our stuff. Meanwhile. Meanwhile, let's
go back here to blender. Oh, we got some
stuff we're here. We have to export
again this model. We got some weird
distortions here. Maybe that's because
we didn't we didn't apply decreases
there or for some reason, decreases go away. I will fix that in a
minute. All right. Let me see if we got any
of that in another place. I forgot here to apply
also subdivisions. Alright. What I will do will be to fix all of these problems, and then I will export again the entire hi ply to blender. Because I don't want to export
a lot of things separated. So, let's do this stuff here. All right. We are here. If we do some
dynamic subdivision, I have just control
C all the way to the beginning. All right. These places doesn't
have creases. Let's at the symmetry in
the C axis, all right. Let's add those creases there. For some reason, these
creases go away. I don't know why, but it did. Alright. Let's see here. We got
some weird stuff there. So for this to fix that, I will just press meter
and well in the C axis. All right. Now we got that fix. Let's go here also and add a
few more rises in this area. Here, also. All right, let me find if there
is any other spot that has that Oh, here we need to add
some creases also. Perfect the scene. I think that's fix. All right. Apply the subdivisions in round, something like that. Alright. I think that's perfect. Here we need to apply the
subdivisions to apply perfect. And now I will just
export everything and import it back to blender. So this will take a
while I will pause, and then I will get
back to you there. Alright, I have exported
again my high poly. I will import it
back to blender. Let's click here in
high poly before importing the stuff
here, import Px. And now let's
import our hi Body. Let me pause real quick. And now we got our high
poly here inside blender. You can see here that we have these pieces in our
high polyfolder. So now, let me just
look around if there any other spot that we miss
for some reason. All right. I think that would
be all Alright, so let's import our
low poly unquote because we need to do some more work on that low poly to be a real usable low poly. So I will just import the lowest subdivision
version of the model for now, right here, and there we go. We got the lowest
subdivision version. So I will leave the video here. In the next video,
we are going to start optimizing this low poly, this low poly to make it
a final low poly that we can do bakes and stuff
inside substance vendor. So see you in the next one.
17. 16 Starting The Retopology: Alright, guys. So in this video, we're going to start doing
the rpology for our weapon. You can see here that we have our lowest subdivision of
the weapon and the highest. So let's start to some work. All right. So I
will do one thing. I will make the inner
part of the weapon. May I say the skeleton of the weapon has one
single solid piece. Meanwhile, the outer parts will be separated pieces
like these ones. All of these outer parts will be separated pieces like this, for example, all
of this part here. Will be separated pieces. I eat here, all of these
will be separated pieces. All right. So let me make a new collection, and I will throw all
these pieces there. Also, I will delete
the floaters from my low poly because they are not necessary
in the low poly, so I will just delete them. Delete all of these stuff
because we don't need them. Let's delete all the stuff here. All of these floaters
that are not necessary in the low poly
version of a weapon. All right. Phases, write this also. These piece here will
be also deleted. All right this stuff, all of these loaders
will be deleted. Just select them. All right, perfect. This piece here. I think I will
leave maybe or not. I will just hide it or write
this here, these floaters. This one and this
one will be deleted. Also, these parts will
be separated piece. So I will throw it here to the separated pieces collection. Let me throw this here. Pieces All right. Pieces, right, perfect. And now all of these will
be one single solid mesh. I think this cylinder will
be also a separated piece. Let me delete all the floaters. Alright. This floater here, this one will be also separated pieces. Perfect. Trigger weapon, I mean, trigger part of the weapon
would be a separated piece. Also, this part here
will delete those extra. Loaded this one also. And now I think that we can war. All right. Let me
activ my statistics. So we have this here. Let me save incremental. And now we're going to
make D topology by hand. We could do divertepology, maybe by just
removing some vertex, but I'm going to make
vertebog by hand now. So let's see. We can take one
single poly from somewhere, maybe just a random place. Maybe this polygon. Let's just duplicate it
with hit D like this. All. Let's duplicate it. Shift D. Now let's press
P and then selection. So we have our polygon here. Let me just put this straight. I have just pressed S and X and then yo to
make it straight. Alright. All right. I'm just sliding the
vertex pressing double G, like pressing two
times G. All right, I will just make it bigger. Here, let me make
another recollections. All right. Let's go here. Let me throw this here. This polygon will be
in the other one. Is because I will not use the topology that
we made from rush. I will do a new one. Maybe this part would
also be a separated. Maybe, maybe not. I think will be better just to make things easier
for us while baking. All right. So I will just hide this and turn
on the high poly. Let's now start working on this. Or maybe we also can do I mean, we have the floaters
in the middle. Let's work with the
lower subdivision here. All right. Now I will just
active this magnet icon. Then I will press here
in phase project. Now here in Admdifier
I will search for mirror or right mirror. I will put this in the
C axis right perfect. I will just select this
in this picker here, I will just select any of
the objects from a weapon. I will maybe select
the middle one. And now I'm using an
addon that it's paid don, but you can do it by yourself. I mean, you can do the same
stuff without that addon. Maybe the add what it does. I just use one
option from there. That's called hetpology shading. Here that will make like this anslusened
view of my polygon. You can do something
similar by going here and pressing in front
and then changing the color, you will get something similar. Once you pick your color, you will go here and
you select objects. As you can see, you
select object here, and you will get
that stuff here. And now, maybe if you
don't want this B view, you can go here. I think it was.
Maybe it was here, and then press Baface calling. And you basically get the same stuff that I
did here with the paid. It has a ton of options, but I don't really use them. I just use this.
And so let's start. Alright. Let's make. Since this
is non deformable piece, this entire piece will not end. This most likely a
mechanical piece. This will not bend, so we don't need right? We don't need to be so
rigorous in doing the pology. So let's keep going
with this. All right. I will just make this
entire polygon bigger. Let me make this a
little bit lower. I would make this also straight. I have just pressed S
and C and then zero. What I'm doing here is, like, constraining the transform, the move transform from
this vertex to the C axis. So if I press S C and zero, I'm just basically
making straight. All right. So let's see. Let me
add one egg rip here. All right. Let's
see, maybe one here. I will just add one here also. It will be around here. Let me add few Edge ropes here. I will just fill this. Also, I forgot to say that I will take here
in this icon and then active the clipping here to make the middle part nicely, and this will not go
through or write. We'll add another polygon here. It will be. This will
be around there. Make this around here, and I will just move it. Maybe this also can be moved. Another one here. We can do maybe some triangle
here to save. Maybe not. Let me just for now, do one Edge top there. All right. Let's move
this around here, and this stuff around here. All right. Perfect. We need one op going around
here, maybe. All right. Maybe we can cut this like
like this with a knife. Then here I will just add one vertex and move
this like this. Alright. Now, I will just get this down
maybe something like this. All right. Let me active maybe here. Maybe not. This too confusing. Let's just stick with
this because I cannot see the exact order All right, so let's keep working. Perfect. Let's add more polygons
around the model. And try to keep it clean. This past will cause some
trouble while baking. That will cause some troubles. But since that it's
not visible this part, I think maybe we could
leave it like that. But that definitely will cause some troubles that
we will need to fix. All those substance painter
has a new option for baking that the cage will be will
be put automatically. I mean, it's like, for the cage of the baking for
this area will be smaller, so it will not cause the
baking issues in those areas. So we will have to test, but I will just make this
entire piece one single. One single mesh. We could also fix those
inside Photoshop. All right. Keep adding more polygons. Let me right. We have some something here that require our attention. Alright. Let me just keep
shooting my polygons. I will I will not pause there. I will need another group. Let me deactiv my magnet just add the rope and
then active again the magnet because if we
have our magnet active, what will happen if we add loop, like for example, this view, in the other side
will get messed up. For some reason, it was not the case. You can see it here. The back part just
got messed up. So let's just the active, the magnet, put your edge loop and then active
again, your magnet. All right. Since this will
be a real time model, a real time topology, we can have triangles, even more that this is not
it doesn't have bendy parts. So we could use even
more triangle there. But let's try to keep this
maybe square as possible. For now, and then we can see
if there are any needs to put some little triangles
in some areas to get the shape without
putting a lot of apology. I'm just extruding
this. All right. Right to catch the silhouet
of that is in a nice way. Now here, I don't want to
add another edge loop there. So maybe what I will do will
be we cannot a triangle here yet to get this
edge loop here. It will not be a problem because this topology will
not be subdivided. If your topology will
not be subdivided, then there's not
a problem if you have maybe some triangles
in some arrays, but if your topology is
meant to be subdivided, you will not have you
will not be able to put triangles because those
triangles will have some troubles when you
subdivide your model. Let's see. I will just
move this around here. All right. Let me just
keep moving this. All right. This more. Perfect. Let's see. Maybe another edge loop. I will add an edge loop here. This can go like
this in this area. All right. Perfect. Now I will just feel you'll
hear these gaps. All right, let me safe
incremental. All right. Perfect. Let's keep
adding our stuff here. Our polygons all the way I will just
extrude one more here. Keep adding. Also, you can
see here that I'm just selecting one vertex and then pressing F
and extruding it. But this is not by
default in blender. You will have to come here to preferences tons
and write F two, and you will get this aton and the the checker box will be deactive so you have to activate it in order for you to be able to press F and make a
new face like this. Be sure that you have three vertex and you
select the middle one. Like for example, this one, you can see we
have three vertex. And with this one active, that will be the
only one active. We'll just press F, and you can get
those vertex there. I'm just extruding
this to this point. I will extrude this
also around here. Perfect. I will add one more polygon. I mean, one more
edge troop there. So let's keep working
on this. All right. Perfect. All right around here will be nice. All right. We will need some hooligans
there to be able to get that that concave shape. We will need some holigans. So let's see. I will maybe delete this
triangle just for now. I will add one drop. Let me put the camera from
this angle, one detrop here, maybe another one would be
three ones around here. We could like maybe collapse these two
vertex. All right. Let me add two more
edge loops here and just stitch these two
together, these other together. And I will just put
the triangle here. So in this way, we can make two edge
loops into one. If your topology will
only have watts, then you will have to
do it in another way. But since we don't
have limited by that, and we can't have triangles, we can do it in this way. All right. Sec Alright. Let's keep adding more
polygons to get this made maybe we could
bring this around here. I could end this with
a triangle there. Now I will just keep
adding more polygons. We could do something here. I will add just another up here, just do not have that super
elongated polygon there. All right. We could do this. Let's do it. We could make like one edge
loop around here, but I didn't add the
corner edge loops. So I will just add it quick. All right. Let's add
those pack here. Perfect. All right. A Alright, so let's keep adding
more stuff here. Perfect. Here, I will just
add that polygon. I will just keep
pruing I have just shoot this all the
way to the middle. Now I will just add maybe
one edge loop here. I will just bridge these
two with selecting the two edges and then pressing F. Let's add another edge loop. Let's press here, F just
to make another edge loop. And now I will add
another group. I'm just finishing this. Let me see. We've got here six vertex. Maybe we could this if we don't have to
have if we don't want to have that
unnecessary triangular. This could be an option. Yeah, that could be an
option there. All right. So let's keep adding
more polygons. Be around here, all
the way through here. Let me see which way will
be the best way to do it. Here we got this super
elongated polygons elongated polygon that I don't
really like in this area. We'll just delete those. I will make this like
this other one like this, and then I will just
add a triangle there. I don't care. All
right. Perfect. Let's keep adding more polygons. I will extrude this one and then merge these two
to make a triangle. All right, let's bring
this down around here. This one here. Let's add another
edge loop there, another one here also. I will just shoot this
down something like this. I will add another edge loop. Then I will just
bridge these two, bridge, and then select this
edge and close that hole. And now here I will just fill that space with more polygons. All right. We are
getting something. All right. Let me say
incremental real quick. This one would be on top here. Perfect. Maybe we could add another
another at troop there. We get better the shape. Let me see how this is looking. I will add a modifier here. The that was called let me
see wait, wait at normal. That will make the shading
a bit better, all right. Now here, I will just close this gap,
something like this. Maybe we could extrude this
edge loop around here. And now I will just oh, that not, let's select
just this edge. Then I will just
close this like this. Perfect. All right. Maybe this is too much
too dense that area. Maybe it could be. But we can leave it
like that, maybe. Alright, let's keep extruding more hooligans around here just to get those
shape nicely made. Alright. Perfect. Oh,
where is my polygon? All right, here. Perfect.
This is perfect? Alright? Let's just keep adding more polygons like
this in these areas. Alright. Perfect. Et's just move
these around here, make these polygon
there more squarish. We got a handle
safe incremental. I will go to this part
now to all these part. So let's just do it. We'll just extrude
a tiny bit here. All right. We're
getting some trouble. We could do this. Let me make
this straight around here. We'll just put it here, maybe one polygon here. We could do this, maybe not. Maybe, yeah, something
like this in this area. All right. Now here we will need maybe triangle or maybe not. Maybe we can add a natural pair. Will fill aps here because we have these upper
parts that we also need to add in the topology because they are a
bit quite dense. But what's happened if I just
delete the necessary parts, maybe we could use
them as they are. Now, this is kind of too dense either we will see we will
see what we do in that part. Alright, let's just
keep with this part. We can add another one here. We could also do
some biangle here, but I feel like this part
was a bit empty of polygons. That could be better to have that part empty,
but I don't know. That's what's looking
a bit too empty. All right, because
I'm planning to add those stuff here in the poly. So let's just leave
it like that. Alright. Let's see here. We have the corner. I can't
see too well the corner here. I will just here. Clearly, I put some sprit
normals in this past. Alright. Now I will
just shade blood this. Now we can see it better. The corner this will
be around here. Perfect. Let's just keep adding our stuff. Let me put this corner Olgans. All right. Perfect.
Let's see here. I'll be around here. All right. Right, let's just extrude
this or we could also add a triangle here to
have this vertex and to be able to close
this around this place. All right. Here, I will just
continue this edge, this polyp, all right. Let's just keep
moving this maybe to this place around here. All right. This
will be here also. This part will be
here. All right. Maybe we could also add one
more edge loop around here. And we could. All
right. Let me see. We can add another
edge loop here, maybe, and put a triangle here and just take this
polyloop around here. Perfect. Another edge loop. All right, let's just keep filling these places
with more pollon. I will, all right. But I will just shoot
this down like this. This awesome. Perfect. Let me see where is the
corner around here. Perfect or odds. Let me just go back around
there should be nice enough. All right. I will just keep adding more polygons without
the magnet because I don't want these to stitch with
that lower part or maybe. We will see. We will see.
We will do it later. Do the beveling there. All right, let me add
this these edges, all right, making
that spot straight. All right. Let's do
the same thing here. Perfect. We could close this around
here in a nightly way. This will be around
here for the corner. Perfect. Let's keep adding more polygons. All right. I will now maybe
press this icon, the magnet icon and just root this polygon
all the way down. All right. Let me add
more polygons here. Perfect. Maybe this would be around here in the middle. Let's just keep
adding more polygons. If something like
this should be good. We just extrude these down
Go, let's keep going. Perfect. Something like
this would be good. I will just extrude this and put it like
this in this area. All right. Let's just
keep adding more Edge lobes Something like
this in that area, I need a polygon. I would just add a triangle
and then I will just put this this edge Allright. Let's add this polygon around here. All right. All right, so let's keep going. I'm trying to close these
parts. In a nicely way. Adding a few more polygons. This will be maybe around here. Let's add another one. All right, something like this. Perfect. All right. I
would be around here. This part could be as triangle. I will just extrude one vertex, select this H, and this
one and just press F. Perfect. And now let's
close that part here. More closing. All right. We can add maybe two more or
maybe three year edge loops. We don't have that
part to elongate it. All right, let's just
keep going with this, adding more more
stuff, more polygons. We just screw this up
as one and two etopes us now I just forgot to
acti the magnet again. We just have to see here if we update those polygons
place it correctly. So what I will do here is just keep putting more polygons
and filling the gaps. I will just merge
these two vertex at the merging filling
that hole there. Let's keep shooting more stuff. Around here, maybe
we can add maybe one hooligan around here. All right. Let's just keep
adding more polygons. We'll just extrude
this all the way to here just to make
the things faster. We'll just extrude this
just like this. All right. This will be around here. Perfect. All right. We'll add another polygon another edge loop
around here. Perfect. We'll just keep filling this
art with more polygons. We'll add another
edge up this area. Maybe this edge ope
will be straight. Like this edge loop here
also could be straight. Perfect. Now I will just keep adding more polygons training to get those shapes in a nicely way. Let me add another
polygon there. All right, we could put
this like that. All right. We need to add we need to add one edge loop here to
get this kind of hole. All right let's just
keep filling those gaps. All right here, we will probably need I will just
add one edge up here. This part can be filled. All right. I will need another one
another one here. Ob we could just close
these gaps perfectly. All right. Now I will just extrude
or maybe we'll just select these edges here and then just press in
F to fill those gaps. Here, I will or maybe
not around here, yeah. Around here, we at an egop and now I will fill
those holes with F. Alright. Let me just
close this hole here. Say, feel quick. And now we can do some
stuff in the barrel. All right. As we make the barrel smooth. All right. We'll add net loop. Alright give me a
second perfect. We can add an edge loop there. All right. So let's
see now maybe we put shoot one edge,
something like this. Here down, we don't need an edge going all the way through
here just for this piece. We'll just add a tri angle here, and then add another
edge, all right. Now, these two could
be closed nicely. All right, let me keep
adding more polygons. All right around here. I will just extrude one here. I will put this around here, keep adding more gens. That part will not be visible. So we could do something here. I will just move this
Arora. Just like that. I will do the same
thing in the hi poly. Alright. Without the
magnets, be careful. Perfect. L save real quick. I will go to the high poly and select the polygons
from this area. And now I will just move them
to the left just like that. Perfect. So we don't
need this polygon here. This other one either All right. Now, let's just try
to fill these gaps. All right, how we can do that. First, I will add maybe
three troops there. And now in this part, I would add maybe one triangle here just to get this part here. Another one here to get
this other part. All right. Now here we could fill this cap with one
polygon and just keep adding more polygons here, fill that gap. All right. Let's just extrude
this one more time. Feel this. Maybe not. Let's just extrude another
polygon here and another one because I want the
most polygons here to get the corbature on the barrel. I will add two angles here. Now I will just extrude
one more time like this. All right. I will close here. Close these parts. Now I will deselect
the active my magnet, and then I will extrude this loop with E and then pressing G and then X
just to move it around here. And to make this straight, I will just press X and zero. Perfect. All right.
Let's move it here. I will just extrude
it again down. Put it in place. Alright around here
should be good enough. All right, perfect. Around here should
be good enough. Let me go here to
edit Loop tools, and then let's make it a circle. All right. Let's put this down. Perfect. This other
piece will be also. All right. I will take this
and then extote it again, put it is this going there. All right, this is
behaving weird. Let me see if my Oh, I this in front. I will actiivey. And now, this can be placed nicely here. All right, I will
just move this. Well, around here, maybe
let this press circle. All right. Where's my
stuff here. All right. Let's put those vertex
and here I will just end. Let me if incremental, I will just close
this edge by just doing an extusion then pressing pressing and
then collapse here. Now I will just move this
around here to end this in this star there Alright. That part will not be too
visible, so we don't care. Alright. So we got all of these already
free to pull the guys. So we can maybe leave
the video here. And in the next
video where we are going to continue
with the topology, maybe I think maybe we could finish the entire topology
in the next video would be, we need to do this part
and also the stock. And for the outer pieces, the only retepology that
we are going to do will be just reduce the amount of vertex that this has
maybe we will have to do some pry topology for
this piece because this piece here
should be I mean, these two pieces should be one, one entire solid piece. These pieces here should
be one entire solid piece. Maybe just for those two, we will need to do
some propology. Also, for this, this piece should be one
entire solid piece. But for the rest, I think it will be just
super straightforward, reducing reducing the
polycunt like this. So let's do that in the
next video. See you there.
18. 17 Continuing The Retopology: All right, guys. So let's
continue with this topology. So in the last video, we left our topology
in this stage. So we're going to continue
with the back part. So let's start. I will start by rooting
these ones here. Alright, I cannot
find the corner, so I will just come here, clear custom split normals
and then shades flat. For now. Alright, let's put
this in place around here. Perfect. Alright. Let's just keep
extruding these ones. Perfect. I will do a
big extrusion here, and then I will just extrude
this part again. All right. We can do one polygon
here, maybe not. I think that's located there. All right, I will add
another edge loop. All right. It will come like
this in a circle. I will add these polygons. All right. Let me
keep extruding. These polygons here make this part here. Perfect. All right. So Let's keep
shooting here, maybe. Yeah. From here, we'll have to add
maybe two more shops here. Perfect. Let's see, maybe
one around here. I will just extrude
one here. Perfect. All right. All right, we have this. I will extrude this way and just
keep adding more polygons. A right now, we need at
some edge around here. I will extrude this
part again like this. Maybe we can add one edge there. Perfect. So let's keep adding more
polygons. All right. Complete Oh, let me complete
this part here on top. All right, perfect. Let's just keep doing this. All right, I will add another polygon here
and another atrope. We add another one. This will be a
triangle in this area. All right. Now, I will
just extrude inwards. Let me say like this. Perfect. This will be like this. Let me add one
more polygon here, and now I will just
extrude in this way. All right. Let's keep
adding more polygons here. Yeah. Perfect. All right. So I think because I don't
want to add another edge here, maybe what I will do will be
add another edge loop here, and then I will just make this triangle hill to get
another edge loop around here. All right. Let's do this. Maybe All right, I will just extrude this way. Let me shrug it again. Maybe this could
work or maybe not. We will need one in the middle. All right. Now here we
need to close this. Maybe we could do this. Yeah. Perfect. And there we go. Let me save incremental here. Let me add one more a troop
and close this in this way. All right, good we get that. All right. Let's go here. I will add angle here to
get this vertex there. So I can close this hole here. All right. Let me put these
polygons around here. All right. Let's keep extruding. Perfect. B can come like this. Now, I will bridge those
to make a oligon there. All right. We'll make more
polygons in that area. All right. Let's keep shooting. Maybe we will need to
reduce the amount of polygons that are
coming from here. Because here we have one, two, three, four, five. And here below one, two. Yeah, we will need to reduce the amount of polygons there. So what I'm going to do will be to collapse few of them into a triangle so we can have
the same amount of vertex. So now, what I'm going
to do will be to add to add one edge
rop here, maybe. Now I will just
bridge those edges. I deleted the middle one. Alright. Let's see. We need another one. Let me try to
bridge this middle. Alright. I need one here so I can
bridge those there. And even those are a lot here. I think I will need to
reduce even more that area. We can bridge here
and bridge here. All right. I think that what I'm going
to do will be collapse all this all of these edges here to reduce the amount of polygons that are flowing there because
they are not needed. Now, I have slide the edge on top the other
one that are in the side, and now what I'm going
to do is press A, M, and select this
option by distance. And you will see that all the vertex that were
double are now fixed. All right. Let me just
double check that we don't have any remaining
double vertex. Right, perfect. Let me see real quick. All right, there we
go. There we go. Now what I can do is just
to bring these pieces here. I need one polygon from here to be able to close
that or maybe not. I think we don't need
a new polyon there. I will just press F because
we got four vertex. All right. Let me keep adding
more polygons there. That would be a part that will cause some
trouble while taking. We will see later. All right. Perfect. All right. I will just keep All right. This part where it was perf, let me see around here. We need one more edge there, but I will not add a
new edge loop there. So I will just make a
triangle in this area. At last here will
be at last also. All right. What's happened if I took this? Perfect. Let me just slide
this down a little bit here. Alright. Let's just reach these
ones or maybe not. All right faces here. I will just add a new triangle here to get these projects here. A fat around here
would be good enough. All right. Here. Maybe. We will just do this because I don't want to have this super
elongated quad here. I will just cut that
to for triangulation, and we don't have any her
after this in the future. So I will just keep adding more polygons maybe here we can instead of getting
that little piece, we could just move it
all the way to here and just let this part be
baked in the texture. But we can save a little
bit more of hooligans. So what I will do here is just to clear custom split
normals, shade flat. Alright. We just add this here. All right, perfect. All right. Let's reach these ones. All right, perfect. I will save incremental. Keep adding more polyon there. Let's add Let me bridge
those here also. All right. Perfect. Here. Let's just bridge
those uh, perfect. Let's keep adding more stuff. I think that we could
just lapse these two and then just delete this
little one just to get to save more polygons because that is not necessary to have that
many polygons around there. All right. Now, let me see we need
to get these pieces. So I have to think how we can
get those in a nightly way. Maybe I would have
a triangle here just to get this part here. And now I can extrude
like this. All right. Let me make or
polygons around here. I will just make I need a triangle make
maybe a triangle here, get this here, and then I will just
make a triangle in this part or maybe not. Maybe we could use this here. And in this part, we
will just do this all right Perfect around here. Let me extrude again
a move like this. All right, perfect. Let's add more polygons
in those areas. Me stuff here around here also. Perfect. The
incremental. All right. Let's keep adding more polygons. Perfect. But, we haven't had these shapes
here. All right. I think now we are good. Let me just do this
eight d. Let me just clear strict normality
in all of these places. Because I kind of
see the volumes. Well, I would just leave
it like this for now. We could use also the high poly to do
the utropology I mean, as the base to attach the sytpolog but I
have started with this. Oh, I will just stitch, stick with this because
I'm a bit lazy and I don't want to separate
again the floaters. So that was my bad. I had to start with the hypo, but I started with the
lowest subdivision one, but it's not a big deal. It's basically the same thing. I'm just sticking with this. It should be here. All right. Let me see
what we can do here, one polygon in this area. Maybe we can extrude a
tiny bit more, maybe here, another polygon, one more here, and another one in this place. All right. Let me put this nicely here. That's maybe too low. All right. Let me think. Maybe I can add some stuff here. All right. We can do this around here just to get
that is nicely made. Oh, here, we can maybe to this to have a tiny bit more extra
polygons there so we can get a little bit more
better shape in this area. Et me redistribute
this. All right. I will add one Edge look here. Let me cut with a knife brush here maybe and here around here. Perfect. All right. I will just slide I will just slide this to this
point and then do this. We need right. Let me just slide this
also to around this point. All right. Perfect. Around here. Around
here in this area. Perfect. All right. Here. Any bit here. All right. Let's just close
this nicely weigh. All right here. Oh, yeah. Let's put this place. I will just add angle this area. Put this in the middle
point around here. Perfect. We just close this. All right. And we can do the same thing that we
did the other piece. All right. Perfect. I will just keep
adding more polygons. Now I have closed that. I will say incremental again. All right. Alright,
let's do this part. Adding any bit more
polygons, all right, I will extrude with this part. All right. Perfect. Let me put this around here, and then I will just
bring this down. I will extrude Perfect
few more extrusions. Alright. Let me add
one polygon here, maybe another egop here. We can just merge here. We can add another edge there. All right. Let me do
some So bridge here? Oh. Why the Maybe we have Oh, what is happening here. Oh, that's weird. Oh, my goodness. Alright, let's just keep
adding more polygons. Yeah, perfect. I will say again. Alright, let's see. Let's
see. Let's see what we have. Maybe All right. I don't want to add an
unnecessary body on there. Maybe here we can add another one and just close
that part like this. Let me just bring all these
pieces around here together. And now before
closing that hole, I will just keep going
with this piece here. Alright let me do a
tiny extrusion here. Maybe that's necessary,
but I don't care. All right. And we'll just keep adding more
polygons in this area. All right. Perfect. Keep adding more and
more and more here. Perfect. Let's see what
we got here. All right. Let me see what is
this. All right. Let me see here. Maybe if I make a triangle
here that comes here, we can close this.
I will do that. Can here? Perfect. And now I can
just close and close here. In a better way. Maybe this
part is too elongated. I don't quite like that part. We do this. Alright. Let's keep adding more stuff. Here, I will just extrude
this up around here, maybe. Maybe we could add
another edge up there. I will just keep extruding
this round here, also. Perfect. Let's just keep
adding more stuff. Perfect. Here, also, we'll
add three more. Perfect. So here, we'll just extrude we'll just
extrude a tiny bit more. All right. So we need
more ligansF these. I have just made that's my
angle here to get this edge. Now I will just bridge here. Now, what else we can do? Maybe I can bring this here. All right. Let me maybe we could add polygon here get this. And from here to here, we can just add another
triangle around there. Yeah. I will extrude this part, and then I will
just extrude again. I will move this up. This one will be
around here. Perfect. Let's just just keep adding
more polymers there. All right. All right. Just one more time. Perfect. Just do the
same thing here. All right. I'm basically doing
the same thing that this below, right here. That's the only thing
I need around here. Perfect. Now I will just bring
this down in a nicely way. All right. I will add another a troop this area and maybe we need a
triangle here to get this shape. Perfect. Let's do this here. All right. One more triangle here. Perfect. Maybe we will get just here, clear Gus be dromo had side because I cannot
see anything there. Maybe peace in this area. Basically the same stuff. All right. We'll add another
triangle around here. Another one perfect is
to close that part. This will be here
one around here. All right. All right. I just forgot
to active the magnet. I all right. Safe incremental.
Perfect. Bring this down, one up, another one, a little bit more, and then
down, do the same thing. One more. I'm one up, another, another and one down. Alright. And then I will just
screw it again like this. I will just get
these parts here. All right. I will
just fill this. I will add another
triangle here. I will fill these ones. Perfect. One more time here. Perfect. All right. Another one perfect and
then just close this. If incremental right we can get one ion around here
and then we can close all of these
in a nicely way. Let me save incremental. I will just reach
the middle one. And now from here, I will just merge these ones
and then dissolve another one and just close the hole
and distribute the polygons. Perfect. Let's close this
hole here on top. Let me just extrude
all these piece. All right. One more here,
another one. Perfect. Perfect. I just make
a triangle there. When we'll be here, I will add Alright. It closes. I will add just
any triangle here. We'll do that. Perfect. And now let's just close this. Alright. Alright, there we go. There is just this
part left to do. Try to see how we can
solve these places. Alright. Maybe we can extrude
here, merge. Then another one here, perfect. All right. Let's do the same thing few
more times in these places. All right around here, we need this gap. Here also, let's just keep doing the stuff until we finish
all these tiny pieces. Let me just do it that
part in this way. Ripe I perfect around here. Here, also, here,
and more time here, here, here and up
here, down and bridge. All right. I do the
same thing here. Perfect in these areas. All right. All right, perfect. A few more times. All right. I will
leave that part there. I will just shroud here. One more time. We are
almost done. Allright. Keep adding more polygons. Perfect. A tiny bit more. Allright. Now, I will just
do the same stuff, but in these areas, right, All right, perfect. Let's keep adding more
stuff around here. Perfect. More stuff here
around here and here. Now we need to
close these pieces. I will add a triangle here. No one here. All right. We can
close this at center. All right. Perfect.
At first here, at first and close. We can add a triangle
in this area. At first and at
first, will be here, we can bring another group this area or merge at first. Perfect. Let me add another one here. At last this time. All right. This at last and at first is in the order you
select your polygons. It means if you select this first and then this
other one, at last, if you click here at first, the last polygon you
selected will be merged to the first one that you have selected and vice versa. So let's keep adding
more stuff here. At last, maybe here at first. At first, bridge. Now here I need one more. It will be at last. And now I will add another
one here would be at first. Now I will just close this
and here I will just do this. That will be it for this topi
Ipogi of the inner pieces. Let me just a incremental
and there we go. So we have topologize in pieces. What's left is just to reduce the amount
of polygons here. But I think right, I think we need a tiny bit, maybe a tiny bit
more resolution. We'll just add one edge here, a troop and then I
will just do this. I maybe here we can get a tiny bit more
resolution. All right. I think that's nice. Let's test. All right. That's
that. All right. I think that's nice here. Oh, I forgot to
breach this part. Yeah, that is my bad. I've just forgot to
bridge bridge here. Let's merge at center. Let's see. I will just
bring one maybe, yeah, one here, and then do just this so I can reach and
close all these pieces here. Oh, right now, I think we
are good to go with this. We have now to reduce
the amount of polygons, maybe optimize these
low poly measures to be able to work nicely, maybe do some phytopology
in this area, a tiny more tipology here, another tropology in that area. And then I think we are good go. This part could be
left like this or All right, so in the next video, we're going to start reducing or optimizing more these
low poly measures. And after that, I think
that our low poly will be good to go and we can start doing the UVs,
so see you there.
19. 18 More Retopology: All right, guys, so let's
continue with this model. So now we will have to optimize this low subdivision that we got from Sbrush.
So, let's do it. First, what I'm going to do will be to delete all these floaters. We don't need them. So I will just delete them because they are not
necessary right now. So let's do it real quick. Here, it will be
deleted. Let me see. Here. Also, this
will be deleted. All right bass. I think that's or we
got some stuff here. I will leave maybe I will lift this part,
this cylindrical piece. I will delete the floater. Perfect. All right. I think we are good to go. All right, let's start
reducing some pollon. I think this part is
already good enough. Yeah, it's perfectly fine. Let me see this one. Maybe this is these
ones are not necessary. Maybe one here in the middle. Maybe it could be. This
one we could slide, slide it with DG. You can slide it. And here, what I will do, I will just do some mirror modifier in
the axis, and there we go. It should be in the exact
same position as before. Let me see if we didn't
mess up the things. Alright, everything
is perfectly fine. All right, let me go here. Let me see. All right. I think this piece is also fine. Let's search for more. We will delete this middle
piece maybe or not. I think almost all the pieces
are perfectly fine because we made them from
scratch in brush. See here. All right, here, we've got some stuff. Let me delete this middle piece. We delete this other
one and do some for modifier in the C
axis. All right. We could delete
this middle piece, and these supporting troops, we could delete them and
just add a middle one. Let me add a middle one here, we'll delete these ones. Also these ones and here also. I think that's good
enough for now. Alright? Will we
have a floater here. Let's delete it. Perfect. All right. Let me see here what we have. Alright, this piece, this piece. It's also good to go. There's not much to reduce here. We'll just leave it like it is. Let's see here, this part. Maybe we could
delete I don't know, some of these ones. Maybe not this. I
will just slide it. That's edge loop. And this
one, I will just delete it. I'm just pressing dissolve edges by pressing X and
then dissolve edges. This one is too close. All right. Let me select
this one pass here. All right, let's do some
mirror modifier in the C axis. Make it visible,
press the con here. And here I will just at
a middle edge loop in the middle around there.
We'll delete this. Maybe maybe we could
leave it like that. I would just leave it
like that. All right. Let's see here now. We got some extra edges
that we don't need. We just do this. I think it's fine. Alright, let's let this one to a mirror modifier X right
I mean, C, right, perfect. Let's see here. All right. We got leave it like that. This piece also maybe just
add a few more to not have those those
elongated polygons, I will add one in the middle and I will just
delete the other half. And now I will add
a mirror modifier in the axis with
clipping activated. Let me select the
middle edge loop. And now with G, select G, and then select Y to make
sure that our middle loops, this girl is nice
is nicely placed. Right here, I have I will do some cryptopology in
this piece because I want all the piece to be
one single solid piece. Al I will leave that floater. Here, let's see. I maybe
will do here or maybe none. We can leave it like that also. Maybe I will just
leave it like that. I would be nice enough. Yeah Let's see here here. We can delete these polygons. All right. Those are not necessary. We let also these 14
edge loops in this area. All right. With this one also. Perfect. I think
that's good enough. Let's see here what
we got All right, we cannot delete anything
from there with this one. I will delete the middle, the leg, this one. And now let's do some
mirror in the C axis. All right, perfect,
select this one. Press G. I forgot to
active the clipping. Now, let's press G on Y. Make sure that the
middle edge loop is stick together
with the other half. Alright. We could delete
an edge loop there. More ups here. This one, or not, we will have some floaters if we delete those
right, All right. All right. We could
delete this one, maybe. Yeah. This middle piece. All right. We could
leave it like that. All right. Perfect. Maybe here
we could do this. Let's press X, and then zero
to make it great and nice. All right, let me see. Maybe we could leave
that edge look there. All right. Let's see here. I don't think we have too
much of stuff to do here. This is perfectly fine. Maybe just delete
this one. I think so. I think that's perfectly
fine for us right now. Let me add the other
edge look what's there. This would be like
that. All right. What we have here. Here, we have a lot of stuff
that we have to reduce. Like, for example, this
edge look not necessary. This middle one is
also not necessary. Let's see, that's fine. Search for more edge
loops that are like that. All right. This middle one also
is not necessary. This one is necessary for
the structure of the shape. Let's see, this one is
not all right perfect. Let's see. We can do something. We could leave it
like this, indeed, but if we want to
reduce it more, we could make a
triangle and start stitch all these
pieces together. Maybe in this part, let's
just leave it like that. We could stitch it
and we can save you pollons that will be like
it was before because, yeah, not completely
necessary to delete dose. All right, let's see here.
It's completely fine. If you see here, as
we call, Alright. This is completely fine. I don't see anything
bad under Alright. Let's reduce the polygons
of this cylinder. I will just delete
the middle, I mean, the inner pass. Maybe not. We could leave it.
Let's just leave it. I will delete the other
half. We'll do some mire. The axis, all right let's
get out of the X ray mode, and then I will just
select these globes start reducing the amount of polygons that are in the
cylindrical shape or right. Let's keep selecting
these globs. Right now, let's do
some dissolved edges. We could delete the
supporting edge loops here. Perfect. I think that
we are ready to go. I could reduce it, reduce
it even more. Let me see. If this worded, not too too circular or right here down, also we
can do the same thing. Or let's do it. Perfect. Let me delete the other half
all right mirror. Perfect. Se something fell off from
my desktop. All right. S the axis is active. Thats upf. Now let's select the EIs. All right. Now that we have selected, let's just do some d soap edges. And then here, I will just leap the other
these edge ribs there. I will add even
one in the middle. Alright, perfect. We have
to do something here. Because I'm getting
some trouble here. I would just hit it, maybe with this
proportional editing, we could just push it a tiny bit and I will not be anymore like some cylindrical
perfect cylindrical shape, but I just wanted to shed it or to be able to stock this inside
without any weird stuff. Alright, let's do some
phthropology of all these pieces. Let me select all of them. All right. Alright, right. Let me this time
select my high poly. I will select this and now here, I will just make this
visible hi that floater. Now, let me hide the
hi poly for now. Now, we delete all of these
pieces except from this one. Let's bring back our stuff. Now I will just delete these middle edges
here pass Alright. Let me keep deleting those. All right. Let's see. Activity magnet. Now, let's
shoot this down around here. Let's just keep doing that until this is
completely filled in. All right. Perfect. All right. Perfect. All right. There we go. All right, perfect. That's nice. All right, here. Also here, maybe I
will add or maybe not. I will close we take
care of that hole later. I just want to continue simple but not too much
polygons to worry about. All right. Let me extrude or not. We need to delete all
these phases here. Delete, right. Now,
let's extrude this part. Let push it to here, maybe. All right. Perfect. I will add
another edge loop here. Extrude this up. Alright, let's add
another edge loop here. And now let's just press F. Select the other
edge loop and press F. All right here. Let
me extrude this. Perfect. This other one. Perfect. All right.
And there we go. This one, let's put it here. All right. Let's keep adding more polygons. Let's merge this
at first or maybe not at last, or what? First? Oh right at last,
right, perfect. Here, I will just move this
a little bit more to decide. Alright. Let's see what
else we have here. We a tiny extrusion. Is a tiny one. All right. And now add these polygons here. We need to close this,
let's just do that. Then just put some few edges. All right. Here, I will need two more edge loops
around here and here. And now I think I can
close this cap nicely. Perfect. All right. Let's go here. Let's do some of this. Let me move this around here. Here should be nice.
Enough. Move this down in bit round
here should be good. This one will be around here. I'm just doing some
distribution of these polygons. Make them nice. Alright, here we are. Let's put this there. The other piece
around here. Perfect. I think there we go. Yeah, let
me add a middle edge loop. Let me move this around here. Now I will just press
F to fill the gaps. Alright, let me do
some safe incremental. There we go. All right here. Let me Oh, what happened? All right. Oh, no. Here. Alright. Let me just
put another edge up here. Per ft another one. Alright. Let's just fill these gaps
around here and here. Perfect. Let's add more polygons there and here a few more right. I will delete the autoharp, and now let me add a mirror a mirror here with
the mirror modifier with the C axis Alright. Now here, I think
that we are good to go with this piece. All right. Now let's come here. Here some split normals. And now I will add some
weighted normal modifier. Maybe that's a modifier that I should put in all
of these pieces. I should apply not apply. I mean, yeah. Add that modifier. Let's do some control L. Now let's press
here. Copy modifiers. Now I will just delete them the custom split normals
that are in these models. All right. You just delete them. Perfect. Just to have a tiny bit of
tiny bit of better shading. Let me add some
weighted normal here. Perfect. All right, let me
save incremental. And now let's see
what else we can do. We need to make
this piece a hole. All right. Let me select all
of these pieces. Now let's bring back this. Let me select that. And now let's isolate it with the slash bottom in the
numeric keyboard. All right. Let's see what we could use as a starting point.
All right. Let's see. Delete maybe some of these. Maybe we could delete
this middle piece as a starting point. Was it a rest? All right, we could delete all
of these polygons. And here I will just
merge this one. Last, last, last, last. Last here, perfect. Maybe even they not merge. I will just delete
this entire edge loop. There we go. Or maybe we
could leave it like it was. To have an edge loop here that are not elongated,
let me delete. Half part? All right. I would delete the other half. I would just add a mirror here
with the C axis as active. This all right. Let me go here. I will add just a middle edge loop and then do this all right perfect. If incremental or right, I would delete the other
the other objects. And now we can do our
stuff by our own here. Let me delete this middle stuff, this other stuff here. All right, we are
almost ready to go. And now let's start extruding our meshes and
putting them in place. Let me activate
the clipping here. All right. Now we could
delete all of these polygons. Perfect. From here, let
me add a middle H loop. Now let's do some X, X, and then zero to make that straight line them
to the X axis. All right now here, let's just keep adding
more polygons around here. Alright. Perfect. Let's just extrude
this more like this. Don't forget to act
if you're magnet. Alright, nice, perfect.
This will be around here. Perfect. Alright. Let's add an edge up here. And
now let's do this. Perfect. Maybe this piece, I will
just add a triangle there to be able to close this
hole. We'll add a net. All right, There we go. Let's skip looking. I will just put the corner here. Now I will just extrude
just like this. Perfect. Let's extrude
this like that. And now let's add more elegance. All right. There we go. Let me
just keep string. We'll just move that. Let me add another edge loop,
another one here. I will bridge those.
We'll just keep bringing these on here and then bridge
these edge loops there. All right. Keep adding
few more pollons. All right. I will just extrude like this, and then I will add
an net loop here, maybe do some control
B to bevel it. All right. On B. And with the
wheel of your mouse, let's just increase the amount of edge loops that this has. All right. Let's place this around here. Let's just keep adding
more and more edge loops. We'll add this one here and that maybe here, do some mirror. I mean, merge by distance
just in case, right. That's to eliminate the
double vertex, right. Now, let's keep shooting this. Another polygon here,
another one here. I think that we are ready to go. Alright. Let's just keep
routing more like that. Let's do some merge at last
around here, merge at last. Let's come here, right bridge. We'll have to add
another up there. Let me activate the magnet around here for now. All right. Let's just keep adding
more lons like this. Now, let's just extrude
this one around here. Let's just keep
adding more stuff. All right. All right, there we go. All right, let's add. Oh, we got this. Let me just
put that triangle there, and not worry about that. Let's just fill this. All right. We got some stuff in this area. Alright no problem. Let's just keep adding
more geops in this part. All right, let's do this. For some reason, this
is not well, place. Oh, let me dissolve that triangle that
I had I have place, then just bring a net loop here, be able to connect
these polygons nicely. Now we can continue placing
more of these polygons. Alright. Perfect. Let me see how this look
without the hy poly. And that's good enough. But right now here, I will just delete clear to
some split normals. Now I will add a
weighted normal here. I think we are good
to go in this part. Maybe since this will be
too close to the camera, maybe if this is a first person, we could add a few
more edges there. Let me do this here here here and here. In this part, I will just this do some
scaling in the Taxis. And now I will just add few
more tubes in that area. I will just
redistribute my stuff. All right. Perfect. Oh All right. Let's keep adding
more polygons here. I will just move this down. Alright around here. It will be also around here. Perfect. I will just do this to close that gap and here also. Perfect. There we go. We have
a little bit more of a solution in that
rogatory there. Now here we also
have to make it. One single solid mesh. Oh, wow. Oh. I thought that I have deleted this half that half of the mesh. But I have added a
mirror modifier. So let's delete the mirror
modifier for this piece, and now we'll select this part. Incremental. And now I will do
some phytopology of this. Do it real quick. I don't know if we can do it. I'll select my high poly. All right. I got this. I will delete that one and I will just start
from this piece. Here. All right. Let's just extrude a tiny bit around here, more around here. Here, we would have make some iango something like this, maybe or not, we pull
just solve that edge. We don't need that and
then do some riango here. All right. Let's just keep placing more polygons
around here. Perfect. Here, also, let's
place more polygons. Alright, perfect. Let's just keep adding More polygons. All right. Let's just continue this
through a new polygon here. All right. I have
just breached that. Now from here, I will just extrude down
something like this. Perfect. Now here. All
right, there we go. Skip adding more stuff here. Keep adding more
stuff around here. Perfect. All right. And here, let's
bridge those gaps. Right here, I will just
keep adding more polygons here also around
here in these parts. More polygons. We're
able to do this nicely. All right, let me
add one look here. Perfect. All right, I would add another
edge up there. We could add another
edge loop around here. Or right there we go. Maybe we could add two
more Edge up there. Is one more to be able
to clothe the nicely. Let's do the same stuff here. Perfect. Now we can close that gap. All right. I think that a finishing piece, I mean, delete the
boom split normals, and now let's add a
weighted normals. Let's see here. This will cause
trouble while baking. I will just remove
that hole there. This other hole I
will just remove it. Maybe just the salt bid to make this phase lead do
and there we go. Let's just move this
axis around here. Now I will use stitch those
because they are guns. Those were pass with
more of four edges. All right. I think
this nice enough. Perferd Let me select
all of these phases. And now let's do some X zero. All right. So we make
that part there straight. Now I think that we have completed the tropology Yeah. I think we have completed
the topology for the weapon. So just last check. I think so, let me go here. Perfect. Let me just right. Maybe we could move this one at Mihn Weld and move a
few of those edges. We could delete interim phases, but let's not do that now. All right. Here we could delete those
supporting edge loops. Here ozone. Perfect. And here we can do some merge
at center in these ones a just to remove those unhesar oligons
and that perfect. We'll do that. Now, we don't have that
super dense part there. Alright. Now we have Oh, here, let me just remove a few of
those important net loops. My dad is like this. Maybe we do something here. We'll just X and then zero X here, X and then zero. My bring my e poly here. And now we just move it up. Something like this
would be good. Enough. Right now here I will just delete those
unwanted edge loops. My let's just add one
the middle, all right. Now here, let's see. Here we just delete the
put some speed normals. All right. Now here modifiers. All right, it has to modifier. Perfect. It's at a middle one. Okay, yes. Just lift the trigger like that. We don't do too
much changes there. Alright, so we have the weapon. In the next video, what
we can do is we'll be start doing the UVs. So we got some a hole there. Oh, yeah. We didn't have clipping activated
for some reason. Let's select the
middle edge loop. And now let's do clipping
Stitch, the middle edge loop. I just pressing G and
then constraining the movement in the
Y axis and then just trying to move it to make
that stitch well All right. So, there we go. Now, in the next video,
we're going to start doing the UIs. So, see you there.
20. 19 Finishing Retopology: All right, guys, in this video, we're going to keep
optimizing more of this stuff because
I have noticed that we can still do more
optimization on this. So let's do it. All right, here we have a
lot of unnecessary edges. So let's see what we can do. Like, for example,
these ones here, we could just collapse them
because they are unnecessary. They are not doing
anything to the shape. They are just unnecessary. I will just collapse a
bit of those. Let me see. We can even still
collapsing here, these ones make this even more optimized to have less
polygon density there. All right. Maybe can move it a little bit. Maybe not. I can collapse
this. All right. All right, let's see. We have a lot of stuff going on here. This edge what happen
if I just delete this? Oh, this is holding there. But we can just
collapse that edge like this and save a lot polygons. All right. Let's just call laps. This is a tiny bit. We need that shape there,
so I will just do this. All right. Let's see
what we have here. I think I will lift that
part just like that. We need that polygon. Edge there. Now here, I think I will
just leave it like this just to get
better shape there. Like for these plain parts, we don't need a lot of these. We maybe can just collapse those into one and just leave
it like that, maybe. We could also you could also collapse
this one to optimize more the shape maybe something like that at last. Move it this up. And now let's try to
align this for you. All right. Let me go back. These two can case, I will just add that edge there. Let's see. Is is
necessari All right. Let's see what else
we can remove. All right. For example, this
is needed there. Let me see. We can maybe
collapse these ones. Maybe not. Oh, you say we like that. Here. Let's see this one,
what he's doing. We can collapse those
just like this here to get less density there. All right here, what
we can do here, we can add an here, and from here we just
start collapsing this one or maybe not. You start collapsing from here. These edges because they are not completely necessary
or something like this, should be good
enough, all right. Let's just keep collapsing this. If it's something like
that, should be good. This is necessary
because I want to keep that curve transition there. And here, this stuff
can be collapsed. Something like this. All right. We have more stuff here. Let's just collapse those. We are just optimizing
more the topology. We get less and less polyco. We make the model as
efficient as possible. All right, we got
this stuff here. What is this? Why we have
that there?'s collapse that and see if we got
something we are there. All right? Not much. Let me just put that back in place
around here. Perfect. Let's just keep working on this. All right. Let's see if we can keep
removing more polygons. Maybe we can
collapse that there, here I will just do
some merge at last. This one at last or
maybe not. We need that. All right. Let's see here. We could labs or not. I don't see that would
be a good idea there. Here, we can just leave
maybe one or maybe no, at just one there. This one is Oh, yeah, it's holding the shape. We could collapse this into some of the maybe around
here, we can collapse. All right. Let me select
all of these polygons. Move it there and
merge by distance. Now I will just move this
one and align it better. All right, let's see what else we can do and
collapse those here. All right. See if we can keep
optimizing this model. Maybe, yeah, we
can collapse this here at last and collapse
those around here. That would be good enough for
us right now in that place. Maybe even here, we can do this. Last, maybe or maybe not
we just leave like that. I don't want to cut
the polyg floater. Alright. These is what is
these grips doing? Or I just go around here. Just go here. Then holding that we could produce more the polyconter just by doing laps
in these edges, maybe in this part. All right. Perfect. Let me see if we can
do something here. Maybe merge at last there. Merge or not. Let's
not do that there. All right. I that's
quite enough. Maybe, now let's see here, we have you stuff, we can delete these
ribs or maybe here, we can take one, align it to the X axis, and here we can
start collapsing. You need a shape there. See what we can do here, we can collapse these two
that will justify invest. Here, we can just do
this in this part. Collapse all of these pieces. All right. Perfect. Et's do this now by
this here by this and again. You can have this and just delete these once.
And there we go. Let's polycunt here we can delete all of these
edges right here. Also delete, also, this
one, two, perfect. Here, we have a lot of stuff and delete those and
just leave it like that. All right. Let's see
here what we have. We can, we can
optimize this more at Sender Asener
Let's see this one we could just move that part like this merge
by distance, perfect. Here we can also do the same. Maybe this just do this. This one here, here, here, and here, perfect. Merge by distance. All right. We can merge at last
or right there we go. Perfect. And here also, we can do the same thing to
optimize even more H loops, polygons here, right, merge
by distance, perfect. There we go. We have
less polygons there. Here we can also
do the same thing. Let's see. What happened if I did this. All right. I don't really like that. I
will just leave it like that. And this one is not necessary. That's holy nothing
holly nothing. Now we can do this. We can collapse that part there. All right. Even more. Something like
this should be good. I see. All right. Let's see here. Just want this. I will delete these ones. The middle one also. Let me select these
phases, leave the mirror. Where's my mirror in this piece. Here is my mirror. What? Here
is my mirror, all right? Perfect. We could leave
more polygons there. I would just leave it maybe this let's see here
what we can do. We can lapse this one, maybe, something like this. All right. Perfect. All right, let me get this here and try to
optimize it even more. Perfect. Maybe I will
just left a piece like that this triangle there because I don't like the
shape this take if I do that. All right, let's just
merge that. Maybe not. Maybe, yeah, yeah, I know. Yeah, let's do it. All right. Let's see. Let's see. This one is necessary. This one is not. Not necessary. All right, we can move this group here and
put it like this. This sage loop here
is not necessary. As we can just do this
and then select all of these and do stuff edges and just ***** those
there and this one here. And there we go let's
see if we can do more. We can just collapse
those there. And I think that's good enough. All right. Yeah, let's see if we
got necessary podgons. Just leave these two. We
can leave it like that. This one? All right,
let's see here. All right. We can do this here. All right. At last at last at last or more Let's do it more. I like this should
be good enough. We can remove this edge. All right here, we got this edge loops
doing nothing there. We can delete this edge and this other edge doing nothing. Here we can collapse that maybe because of it. Maybe not. I will
just it as it was. I think we'll be good. We'll be good enough there. All right. Let's see here. This is the most, one
of the most dense ones. We don't need. Let me
collapse this first. Maybe we don't
need any of those. We can just collapse.
These polygons. This one is completely
unnecessary. We just delete it. This one also. Do
something that part. Let me see if that is doing something is my lowest subsite. The lowest one? Oh, I think that I need
it. I don't remember. Ah, here. Ah. Yeah. Well, let's
just do it here with the hipoti to see if we
didn't mess up shapes. Tiny bit. Let's select this one. And reposition the edges here to the corner where
they belong around here. Perfect. Reposition
them around here. That's nice enough here also. We'll just put it back in place. All right. A here. Perfect. All right. This is good enough.
Perfect. I think I will delete one is one that we need that to
get this ramp there. But here we could
just collapse those. It's completely
unnecessary here. I solve what do? Soft edges right And here we can. This one is not necessary
also and just deleted. Here. We can collapse
those around here. Perfect. Let's see this piece. Let's see what we can
do with this piece. And these maybe. Just keep collapsing. These hooligans Let me go back. All right. This one here. Let's do this. All right. Let's try
to do that here. Collapse. Maybe not. If we could leave
it like that here. We can just collapse
the ones around here. Yeah, we can do that. And also here. Perfect. All right. I think that's good enough? Maybe. Here, we can
optimize this even more. A. Let's just delete
these polygons here. Now, let's try to
collapse more of these. Let me delete these phases. All right, I will add my mir. All right. Perfect. We could leave this like that. All right, here I will just delete the supporting net loops because they are not necessary. Oh, what do we have here. All right, let me delete
this part. Maybe like that. Maybe we could delete these two and also the one. Here, I will just leave
that middle piece there. Yeah, I will do that. Maybe we could something here, remove a few of those maybe nodes if we have
physics in this strap, it can swing with
better quality. Let's just lap it
like that for now. And here I forgot to include
these two in the topology. All right. And we didn't delete the
other half. So let's do it. Sick with we wrote one. Perfect. You see here, we also did it Clipping. All right. We don't want that piece there. So I will just remove that one. And then I will select this
and do some protoplo here. Let's see what we can do here. Let's delete all
of these polygons. All right. Let's do it here. Perfect. All right. Round here. All right. Here here. Let me delete this one. Oh, I didn't activate my magnet. Oh. I did, and I forgot
it. Don't remember. I haven't activated. All right. This Edge Loop is not necessary there. Alright, let's just do this. Let's merge this
one to this corner. This one to this corner. Also, and just move
this like that and just keep adding more
polygons in this area. I know we have a babel there, but that will be
baked in the texture. I don't care much. Get that pb at least
in this piece. All right. Perfect. All right, let's see. Here now that we have
that piece there, we can keep optimizing
this because this scope part is really
dense for no reason. All right let's just
do this by distance. I don't see this part. I'd be like, Dad we
take that again. All right, this part
shouldn't be like that. Perfect. Need that dahlop
there. All right. I will just do
this. Just do this. I will collapse those there, move this one down. We get better. Shape. All right. Perfect. Thank you. Collapsing these edge loops. Is is necessary? Yeah, it is. But we
can do this here. Get rid of those unwanted geops. Keep this optimized as possible. Let's see. All right. We don't
need these ones. We can just leave it here. Maybe we can just collapse. Oh, all of these pieces here
are not really necessary. This one completely can be gone. Also we have to do
something here, I would get also the
upper part here. Without the magnet, I
will just move it in the Yaxis align it better. Perfect. Alright. Let's see if we can
optimize this more. Yeah, we can do it
definitely. We can do this. Maybe this, here, here, here, here, more more more more. All right. We could also collapse this one
like that. Perfect. To be down here, we can collapse all of these pieces because
they are not necessary. We don't need those edge loops. Here, I will just
collapse all of them. Let me move the part here. All right. Let's see, at last, at last, at last, perfect. There we go. Keep collapsing. Give more edges. I think
this is far for you to go. I will collapse here. Me edges. All right.
Here, perfect. We could do it given
one more time. Et's just leave it like
this in that part. Right? I think
that's good enough. Yeah. All right. Let me see
what we have here. Yeah, we can delete these words. Perfect. Let me delete the middle
part of this piece. I mean, the left
part. All right. Now let's add mirror
in the C axis. Just try to stitch the
middle trips together here. And collapse dose. These ones are not necessary. All right. Perfect. Here. Last, at last. Nice. We could even
collapse dose here. I All right. Perfect. There we go. Is middle piece is necessary? No, it's not. We
can't remove it. Yeah. We can also collapse. Those. Maybe not. Let's just leave it like that. Alright. Oh maybe we can collapse these pieces here. All right. We need it? No. We can just collapse it. Also here. We could
collapse that. I would just leave it like this. Is for now. Go
back to this view. Let me see. Maybe we could
also do more stuff here. Maybe not. Yeah, we
can do more stuff. Let's just delete that part and we can collapse at last, last more, more
and more lapsing. Perfect. And here we need All right. If I use this, how it will be. All right, merge by distance. Merge by distance. All right. Also here. Merge by distance. All right. Perfect. I think so. Yeah. I want to add one more
extra there so you don't have that two ET one here. All right. Here we can collapse. This one's even more here. All right. Let me see. The part works. All right. So we don't really
need those polons. We just need to place
them in a nice position. And now we can just
collapse them like this. We don't really need them. All right. And here down, there are a lot of polygons
going on there. All right. Let's just a leptos They
are completely unnecessary. I What happens here? Oh. Well, don't worry. We can do this here. Let me just delete. This phase and add it again, just as a percussion. We don't have a hole there. Now, let's just keep
collapsing more hooligans. All right. Perfect. I do this here here maybe we really need that there. I don't think so.
We can collapse. We need this part because
I want that curvature. We'll add soup around here
to get better that pebble. I want to get that pebble there. B in the silver. These pieces should be up here. Perfect. Around here. There we go. I think this can be good enough. We called more out here. I will just keep
collapsing those. Go. All right. We can keep lapsing
more polygons. Perfect. No. I think we're good to go here. This area. Something like that me. All right. Let's see. This one and just be
clothes like that. Perfect. Let me do some sad incremental. All right. Now, we have come from
around 7,000 to 4,000. That's quite a bit
deduction on polygon. Also we have a lot of
unnecessary stuff here, maybe like those ops. These maybe that went no, but this one, here's
completely unnecessary. We could also maybe collapse collapse this. Just like that. Here. Let's see. You can collapse it. Let me just select all these and now we'll just move it down. Around here. Move it down. By distance. Let's do the same thing here. Right, by distance out here. All right. Well it up
by distance. All right. We delete that one. We could merge this at center Leave that one. Leave it like this. All right, let's see what we have here. All right, those two. Last something more like that. I'll be good. All right. Let's see here. We can delete this
middle piece a few of these logons. I think that's good enough. All right. We do this one there. I think it would be too pesib. Yeah, we just leave
it like this. All right. Fit. We have our little weapon. Here, we can just
delete this edge. It's like that. This
edge here also. Perfect. We can slide this one
down by distance. And this one up by
distance. Yeah. Here, we don't need that middle. Edge up here. Here. We
can maybe collapse. These ones. Alright.
Incremental. All right. Let's see. Let me delete those pages. They are not necessary. All right. Now we are in 4,000 quite a big
of a reduction. A something maybe there's right distance. All right, we don't have any weird floating double vertex. All right. So maybe I think I say here, maybe we could delete
this edge there. And also merge these polygons. All right, by distance. All right. By distance. There we go. There we are Let me keep emerging. These ones right with. I just something there. Here, at last, at last, we could do this not write
that we just like dead here. All right. Let me keep merging those by resins. All right. This there. All right. Perfect. Let me just Alright.
Let's keep in the shape. Perfect. All right. Alright, I think we
are ready to go. I'll just leave the video here and see you
in the next one.
21. 20 Starting Uvs: Alright, guys, in this video, we're going to start
making the UBS. So let's begin. All right. Let's begin first with the inner part of our
weapon. All right. So we're going to cut in some parts our weapon
in order to make the UBS. All right. Let's see how
we can do this. All right. Let's try to place the seams, the UB seams in areas
that are kind of hg. So let me see what will
be the best place. Maybe we can separate All right. We can separate this lower part. To place a UBSM, you need to be here in the
edge mode in edit mode. Come here. Now, let's
press Edit mode and then select this option or
just press two in edit mode. Two. Now we can select these edges in order to make
a UBSM here in blender. So we can separate that. So the way I think about making UVs and
placing Sims is to, like, thinking on them
a primitive shapes. Like, for example, this
resembles more a cylinder. So in order for
this to t and grab, we just need one
straight ropes going up like that and separate
these 21 from here, maybe we could take this
something like this, maybe. Is the UBSm there. And since or not, Yeah, I will leave
that edge there. Once we apply the mirror, we are going to grab that part. If let's do the
the demonstration, this is more like a cylinder, so it should be enough, just one single edge loop. You'll be seen there. Let me apply the modifier and you will see that we can get
this UB nicely done. Now, let's select here in
Sims When you press L, you can select all
the linked geometry. And you can constrain the
selection to these absent sees, like for example, the normal, the material, the seam, the sharpness of your
stuff and from UBS. So let's select this time
seem so we can just select all the geometry
that are contained in this seam area
we are created. Now we press your U
and then grab here. And you can see that our our
stuff is nicely made here. But I will control C because
I want my mirror still. We are going to
place all the seams with the mirror and then we're
going to apply the mirror, and then we are going
to do the grab. So let's see. Also, it's good idea to
have a checker material. But it is a checkup material. It's just a material
that you can apply to your model and see if your
UBS are distorted or not. So let's begin right. Let's go here this lower panel. You can spawn a panel by just clicking here in
the corner and then just dragging it up,
something like that. You can eliminate that
panel by just clicking in the corner and then just
dragging it down right. So in the new panel
that we have created, let's go here to Shader
Editor. All right here. Now let's go here. I will delete that material. I will add a new one. I
will call this hacker. Now let's press Chief A
and then checker texture. Now, we need to put an add on here that comes with rush with rush
no with blender. Sorry. Let's go here
to edit preferences. Let's go to add on, and
then let's write node, Wrangler. Yes, this one. Just activate this
checker box and then we go back here
to our shader editor. In this hacker texture, let's just press Console T. And we'll spawn
these two nodes here. In this texture coordinate, let's just select the UB one
and drag it to the vector. And now we can drag the color to the base color and then just
scale, rank up the scale. And now you can see what's happening because
we don't have any UBS. So we are going to first
add the UBS in order for the checker textures
to work nicely. Right. Let's continue
placing some Ubis. We can apply one UB here, when SMO this area, this is more like a cube. So for the cubes,
we need to add add UBSMs around the corners in order for this
to wrap nicely. Let me add the SIM right here. Maybe I can continue
or maybe not. Um, I will separate this part from the other part of the mesh because this is more like deparated material,
something like that. We can have it
separated all right. So here we have whether we have here or we Yeah, I will make a scene in
this area or maybe none. We'll just make it. All right. Let me see what we can do here. I will separate these
scenes here also. We'll make this part separated. Around here maybe we could leave that part in
the same or not. Let me just separate. Maybe not. Separate this piece. Around here, let's put a SM
right click and then add SM. Let's see what we can do here. We need to separate this
part from the other. In order for this
to wrap nicely, let's select these
polygons and then add them and here on top. Is wondering what
we can do there. All right. Maybe we
can use our hi poly as a guide to understand better the shapes that
we are dealing with. All right. Let's see here. I mean, we could leave
that, maybe not. Let's use this. I will just separate this
part from the other. I will add a seam in
this corner here. All right. This is with
the sim, all right. Now, here I will take the seams down with
something like that. Copy. Move that there. That's in place. All right. If we can do the UB
there like that. Now, here down. Let me hear sim here and just continue that sm down here. Yeah. Mark SIM Perfect. Now we can add a sim in the middle to grab be able
to grab that piece nicely. Alright, let's see. Let's see. Maybe we can remove
the seam here. Override. Just thinking and
how we can deal with this is in the seam area. Maybe we can just put
the themes like that. Here we can add another seam. All right. Here in the middle,
you can have a seam. Perfect. I will maybe separate all of these upper pieces around here into its own
separated seams. All right. What we have here, we got something weird. All right. Let me just add im
All we got something weird. What is this vertex? All right. I know what's happening. All right. Let me go
back to my model. Let's just hide this for now, select our stuff and just
put this back in place. All right. Let's put
that back in place. Around here, let me place
this nicely in the model. I had to begin topology with the high poly one
instead of the low poly. All right. So we could add better visualization
of the corners where we have done
the topology nightly, and now I'm just ing the position of these
parts a little bit. All right. Perfect.
Let's continue with the same place in here. And now All right, we have that. Now let's see what we
can do. Let's see. We can add themes No, it seems like this in
these pieces, maybe. Alright, Mark im. Now, let's see. Let's
see what else we can do. Let's add a sim here. All right. Fine grab this. This will grab. All right. Let's add
another one here. Another one here. All right. I think that's good? Now I will separate the barrel from my base model. Perfect. Now. Maybe I will take
this middle piece at a seam and then just
place a seam there. Perfect. Let's continue
these scenes around here. Let's place a little bit more
of scenes there. All right. I will continue this
them around here. Perfect. And here
we could add this maybe them that cause
something like this. All right. Let's add the sems around there maxim Alright, we need to put some seams in that stock parts at one there. Let's add another one here. All right. Let's see where
else we can add more sins. Maybe that should
be good enough. All right. Let's continue work in this stock part. All right. Let's see what we can do here. We'll plug it or this will
be separated from this one. I don't really want that. Sing the best way possible for these have dT seams here
with white click here sms. All. Maybe we both at a middle one
here and some around here. All right. We could add more
sins around here. Let me just. We could also
start to grab the stuff in order to have a better
understanding of what's happening with
our IM or with our UVs. All right. Let me go here. I will deactivate here in my vitrotopoon we can deactivate the stuff. All right. You can see that
everything is squared. If everything is squared, that means that Ubis are nicely. But we have some stretch here. That's because we didn't have enough seams in the
correct places there. Also we have some
distortion here. We need to try to fix that. Alright, let's try to
fix these distortions. Let's go here. Alright, we can synchronize our UB UB layout with the model by just
placing clicking here. So the imagery that we
slate in our eper will be selected also in the UB view. Alright, let's see.
You can see here. We need to add maybe
one them in the area. A Let's see. All right. Let me see
something around there. We could do it. Let me
see how this looks. Is looks worse. All right. Thinking the best way to
add some seams there. All right. All right. Let me think
just a little bit. All right, what I
have done here, maybe, is not the best way, but that's the way
that works for me. The way I read this, I just added one seam
in the middle edge op. And I added one
seam around here, another one like this, another one like this. And now our Ubiqter
are straight. We have here some
stuff happening. We're getting weird
stuff there. All right. Maybe the best way. Maybe we delete those. Let me see how
this looks better. We have also these
problems there. Kind of better. Yeah. I think that could work, but not too much problem. Just one here in the middle without the
two ones on the side. All right. Most of the time, when we have that distortion in
areas like that, it's just because we need to
add maybe like one seam in the corner and most of the
time that we'll fix the issue. All right. We can add another seam there. Another one here. Here, we will need to place a seam here in the barrel and
another one in this part. Perfect. Now here, I think that we let's continue the same
with that part, maybe. All right, I will
say incremental. And now, maybe we can we
can apply the mirror here. Let's apply the mirror. And now we can do
the final UBS here. You can grab. Now, you
can see that we have all our pieces nicely made. Let me see what is that piece, we got something
really weird here. That's maybe we did at What's that? We have something weird here. It's just collapse those. Maybe select these
ones, and then last. Let's go to the other side. Let's take this one then last. Maybe that should fix the issue. Let's do the grab again. We still have more
troubles here, strives to fix those, but we have here. Let's see let's add maybe sum seems around
this area, maybe. Let's see what this
give us. All right. This didn't do anything. Right, we need to add a
middle in that place. All right, now it's better. Now it's working. But the sims is on the outside. I don't want that seem
to be on the outside. So I will replace the seams
that is on the outside part. We'll just replace it to a seam that will be
in the inner side. All right around here. All right. I will hear the seams there
at this one around here. All right. Perfect. I think that
we are good to go. Let's see on grab. Perfect. Oh, I forgot to add
this middle them. Let me see. Grab again. Let me see what is this piece. All right. Yeah. I will need to do something Maybe something like that. Mm, let's see, uh All right. For some reason, this part is not working. Mark on wrap. And now we have these
wars for some reason. Why do we have that
part like that? You're right. Our seem
are not working well. That's weird. Remove those seams in the side. Or right now they
are working nicely. But now in this part, let's see try to
add a seam there. Another seam here, maybe
another one in this area. And another one here. Let's just see. Here, I forgot to that we have applied
the mirror modifier. All right. Mark him
All right on grab. But for some reason, we have this ear bend. For some strange reason, we have that part bend. I don't know why bender
tend to bend the UB let me remove those seams because I don't want the UB
to be bent for some reason, these seams are making the blender algorithm.
You go crazy. All right. And for some reason, we're getting a lot of
distortion in that area. Let's see why is that happening. Maybe we could just
split these in two and will be good enough. Here. Let's split
this. Let me go here. My mouse wheel is a bit buggy. Alright let's see. Now
it's kind of better. But now this taking
a lot of UV space. Yeah, kind of better. Let me add middle sm there. Another one here markim
another one here, here Also and let's finish here. All right, grab. Let's see. Let's see what we have here. This piece. Why is that? Maybe what I will do will be just separate this piece here. Let's try to do that. All right. Maybe here, we could delete these themes. Let's see what it gives us. All write this gives
us a better All right, let's see what we have here. Better you've been grabbing. But now we have this, like, tiny little piece here. I will just separate
that don't have it. All right to another being grab. Perfect. We have that here, and these pieces around here. Let me go here. Let's
see what we can do. No, I don't want to separate
this mesh in that place. All right. What happened if I hear the same just experimenting
a little bit. All right. Trying to make the UB in
the most nice way possible. Maybe we could separate
the inner part from the outside or make this better. If we could make the inner
part one single piece. So it can be too long, that the outside part, maybe we could make
it one piece also. All right, let's see. Oh, and now we are getting more agent or distortion.
Let's go back. Let's just leave those seems
where they were. All right. It seems in this area, let me see how that
middle inner part works. Perfect. This part here. Let me see the other
part. All right, they are working well. All right, maybe we'll leave
those, just like that. Are working, so they are nice. They will work when baking
here, we need to do something. We need to do something here. Let's go to the UV. Let's see what we are getting. Maybe we pull
separate these two. We are im let's select
this one, press and grab. Let's see what things
are not working nightly. At Mark SIM right.
Press and grab. All right. No, they are not
distortion there. Perfect. Let's see this part. We're getting them nightly. All right. Let's see here
what we are getting. We have a lot of buggy
parts here. Why is that? Because this piece is not completely separated
from the other one. Let's do, again, grab. Now we're getting something. We are getting something. Let me make this bigger. We need to this is getting buggy. These pieces, what
are these pieces? All right. All right. Let's see. What is this hard we're getting
something weird here. Maybe we could do this to separate
those UB islands. Alright, let's see
what we are getting. This is getting buggy. We could separate them. Mark Zim, do the
same thing here. All right. Let's grab. Let's see where they are. All right. They are here. I maybe we could make this better by
separating these two. All right. Let's see.
Kind better. Yeah. All right. We have this piece separated from the other one. We're getting some weird stuff happening for some
reason in this place. All right. And this part is this, what is this do some right. What is happening here? Window need to do
that grab All right. We are still getting
this weird problem. All right. Alright. Alright, let me do something. Let's see if this
works in that area. Mark, clear on grab, it kind of works,
but not completely. Yeah, not completely working. There Alright, let's
see how we can solve that part. Alright. Some recent blender is not
giving me a nicely grab it. You eat stuff here. It's even worse. This is not doing
anything good there. All right. I think we will just cut these because I don't want them to be
intersecting together. Now, that's better. We had to do some UV
stems in some places. Alright. Let me see. Keep searching for weird stuff. If we could add them this area. Mark Zim. All right here, also, Mark Zim, better there. Let me make this molar
or bigger, whatever. All right. Let's see. Bing nice stop there. Alright. I think we are good
to go with this. Let me see by distance, we don't have any buggy
any buggy vertex. I think this should
be good enough. We don't have any
intersecting graph here. Perfect. So let's go to the other pieces. The other pieces should be
really super straightforward. Safe incremental here. All right. All right, perfect. We are here. Let me see maybe these
low subdivisions are not nicely made. All right now. Stick with this. I will just move that
to the low poly. Do not confound myself. All right. S here. This will be super
straightforward. Like, let's just
add a seam here. Here also, let's add
one in this corner. Let's keep adding more seams around these other
corners. All right. A here, let's mark M. Let's select these ones or sims
around around those edges. That should be good
enough in that place. Maybe we could add
another one here. Let's see here right. We could add something this Area All right, maybe one here, another
one in that place. Here, also, mark Sm Perfect. Alright, let's keep
adding more stuff. All right, Mark stem. Alright. Perfect. Let's see
what this does. Let's ungrab it. And we almost have
perfect seams, but in these places, yeah, we don't need those seams
because they will get bugged. Alright, let me apply my
shaker material there. And here I will Alright. Let me go to the shader preview. Why is it so slow? All right. All right
now, it's better. Incremental just
in case. Alright. But getting some stuff. Let's do, again, I don't grab. We are not getting
any intersection. Um All right. Let's just keep
searching for more. We're hooligans. I just adding one
egg loop there. We make that part better. We use a tiny bit of edge loops. Alright. I think that's because the
triangulation, those problems. Yeah, that's because
the triangulation. Let me expand those seams
here to see what they do. Write it to grab. Kind of feather don't
really like it. All right. We're
getting some stuff. Let me put a seems
in that corner. All right. Let's see, we could mark a SIM there, but that will cause that part to be like
intercepting each other. Things that I don't really
like that happened. I Maybe, let's just leave it like that. Some reason we're getting R UBS, maybe here with relax, we could make this a bit more straight here by tweaking the UBland here. Oh, here, maybe. I try to do the same. Not doing almost
anything. All right. Let's just lift type that piece. Now, let's see this one. Let's mark a sim in
this hole. All right. And now we are going to separate
this internal piece from the external just like this. Now let's try to add some themes
in these corners. We just remove
those seems there. All right. Perfect. Here seem here. Clear seam and add a few more
seams in those places. Well cut some bugs. All right. Maybe we
can do some grab. Let's add our sugar
material. Almost perfect. But the blenders and grab
seism really sucks at this. I'm tempted to use the Maya system instead
of the blender one. Oh, we have this in
conformal, in gold base. Still kind of sucks. Maybe we could add some Sims in the areas. Alright. Mark, Sim, let's try again. Find a better. Not
too much, really. It's not too big
of a difference. All right. Maybe if we do some. Now, it's not working. Maybe or not. No, this will not
be good for the Let me separate this
edge loop here. I will do add that part here, and I will just clear
in the other hole. What this does. Now it's better. Yeah, definitely better. We could leave that
part like that, maybe. But this piece will
be visible. No, sir. That little part there. Alright. Maybe we could leave
leave that just like that. These piece here should not
suppose any big of a deal. We just add some seems
the correct places, there shouldn't be any problem. Wrap checker. Yeah. Exactly perfect. Should not be any problem. This piece also, let me select this entire is there Alright. All right. Let's see
what this gave us. Checker. My My stuff. My mouse wheel is a bit bad. Alright. See what we have. If I do this, this would
be better. Let's try. Yeah. It's better there. Maybe two more. Edges, in the arium maybe
feel this part or write. Another edge here, maybe Markm
Nope. Let's delete those. Here, also, let's try to Hoge this seems
there in a better. It's almost try an error. Let's mark some seems there. You see, Alright let's
just leave that piece, just like that,
without any problem. Alright. Now, let's do this piece. I think I will just do
this piece this video, and in the next video, we can do the rest of the pieces and try to fix some
of the ones that are made. Maybe. Let me add more edge loops in these areas. All right. Let's see
what this give us. Checker. Kind of better, kind of good. Kind of good. All right. Let's see if we add some seems there. Find a better. That
another one there. They are getting
something. Right to add some those areas. Maybe if we select
all of these piece, let me deactivate that. Maybe we could select this piece and put it
or not. It's not there. Let us some relax. All right. Dive some relax. All right, try to
make this straight. Perfect. Move this
more like that. To try to make this piece
a little bit better. The best as possible to make them wear these little squares. Alright. I think that
will work for us. Maybe let me see here. Let me see if this relaxed
stuff is really doing something is not Alright. I will sleep that
piece. Just like that. And in the next video, we can keep doing our UBS. So, see you there.
22. 21 Continuing Uvs Part 1: Alright, guys, so let's
continue with UBs A right. From the previous video, I have done just a
little bit of stuff. I have removed the
seam that we got here, and I just put it back here. So now the seams
upside are nice. But also to get better to not get that sort of distortion, maybe we could
take this and make it parated maybe in
one strip. Let's see. This one strap, we could
get that stuff nicely. And to make this
straight, we can do this. Let's see here where it is. Align vertical. We need to align this
vertex, the other two. And now let's align
these two here. These two, aligned horizontally. Oh, no, here, aligned
vertically here also. Now that we have a
perfect rectangular cube, let's select that rectangle. Let's select that for tangle, and then let's go here
and follow active squabs. See, select everything. This should be the active
and now follow active quads. Now our strip will be straight. All right. There we
go. Let's see here. We could also try to
make kind of Same here, although I have tons
and twigs here. In this part, what I
did was just to I mean, this part was like this. Alright, you can
see it was maybe like this with these
overlapping each other. So what I basically did was
just to merge those vertex. I modified it just
like this and to get a little bit of better
better shape there. All right. Let's continue. Let's see how UBS
here are working. Which one is from where, maybe we could wig
this and try get a better a better
alzation there. Less distortion maybe. I will be easier if we
would make this Maya, but we are making it blender. Alright. Maya has
some better tools than bender for doing B. But this is the software that we decide and also blender is free. Yeah, let's see here. I should do this. This should be better. All right. I know. Yeah. All right, trying
to get these cubes, I mean, these squares
straight as possible. So let's see here we got
something in this part. Alright, let's see
this polygon here. Maybe we could make it better. A bit better. Let's see. Maybe. Let's just twig this until we get that straight
as possible. Alright. All right. All right. Let me see what we have here. By as possible. All right. P here we could drink
it a little bit. Let's see with the relax. We could get some
better stuff here. Just select this tool here with T. You can
on this top here, and then just select
this and with Chef, you can do some relax here. And if you're not press Chef, this would be like the
move brush inside brush. It's helpful to move vertex
around and make things nice. All right, we will use this. Try to tweak our Ubis and try, make them better. Maybe something like
this should be good. Alright, let's go
to the UB island. I think it's almost
perfect there. Yeah, it's perfect. All right. Let's
see. Let's go here. Let's do the UBC.
Hopefully, this will not be a pickup for them. Hopefully, let's cross
our fingers right. We could maybe do this. All right here, we'll do some of these All right. Let's wrap this and
see the result. All right. Maybe here, we can separate that
marxim. Let's do it again. No working nice there. But it's most good. Let's see if we could relax those audience there,
just a tiny bit. All right. If I add a sim here, what will be the resold,
yeah, that's better. Alright. That's perfect. So let's just book food
that somewhere else. All right. Let's see here in these corners, there should not be a
big problem, hopefully. Let's just select these ones. Let's go here, these other ones. All right. Now, let's
try to do on grab. Let's add our checker
material, and that's perfect. Alright let's see here. What we can do in this
piece. All right. Let's see how we can grab this. All right. Let's see, let's see. Maybe we could separate
this big piece. All right. Something like that. Perfect. Now here. Let's see, maybe. Let's just remove
again the seams. I will make this big
piece, one UV island. All right. Maybe
something like that, we could take this
all the way to here. And just separate that
from the other piece. Now that we have this here, we could start
adding some thems. All right. Add one here maybe. Let's see how this would work. All right. B one here. It's better with cold troubles. Let's see how I still
need more seams, but let's see how the grab
is working here curve. We need to do stuff here. Let's see. Let's
see it this part. Yeah, you need a
lot more of seams. I remove the shaker because
that's just book in my mind. Let's see. All right. Let me add maybe one here. No. All right, this would
be a little bit of ab. We could separate these
ones right perfect. Here we need a seam All right. Let me do wrap again. It's not working well there. It's working really well. Let me add another seam there. Now it should we
are getting here, this part is booking us What happened if I just do
this and I had a sin there. But now I'm getting
these troubles there. We could move this here merge at center. Or, let me go here. All right. I have just
deactivate in the sink puse. All right. Now, that would cause a lot of distortion there.
I don't want to do that. That would cause a
lot of distortion. All right. Let's see
what we can do here. All right, let me say
incremental. Perfect. Let me think just
23. 21 Continuing Uvs Part2: Alright, guys, sorry, but I just forgot to pause the video. So I keep doing stuff
without noticing that my recording
program was paused. But what I basically did was just take this as
a separated piece. I mean, I just separate that
piece from the other place. So it's completely
separate UB Island. Also, I have applied
my mirror. All right. And here, I just have
added the seams. Let me do something here. Let me just remove the creases because we
don't need creases. Let me go here for
better visualization. And I just added the seams
in this way around here. You see it there. And also, I make this piece Sephadge one. Let me separate this completely. Alright. Let me clear the Smets do the same
thing on the other side. All right clear, Mark. All right. Let's
do another grab. Now, that's perfect. All right. Let's see it here. On creases in the corners here. One increase in this
other corner. All right. And decreases in this piece
in the middle will be maybe something like
that, and there we go. At the scenes for
this other piece, it should be straightforward. I always say that and I end up breaking my mind.
But don't worry. Everything will be fine. Hopefully, maybe
one around here. And let's see. We have that same there. All right, maybe another
one around here. This will maybe cause some
troubles in this area. Let's see. And yeah, I did. It did cause some troubles. Let's remove that. Now this is been Yeah All right. Clear SIM, let's
see if I add SIM there in this part. It's not. Not any better. All right. Let me remove that those seams. Let me add one here. These pieces are bugging me out. Alright. Alright. Maybe we could add a seam just like this. Alright, that's
either not really. I try to move. This just in place. This piece. What is
that piece? Right. Make this straight as possible. What is this place? Now, I like how this part, it's working because that's not how it's supposed
to work working. Really ugly. All right. Maybe. Let's do it in another way. Maybe, let's see.
Let's just see. All right. Clear shins. Perfect. Let's
try to do this instead. Alright. Giving us some sort
of a better tation here. Let's remove that one. Yeah, that's better.
That's a lot better. Alright, there we go. Now, let's do just
these tiny pieces here. I won't say that will
be straightforward because you saw it. We got stuck in a few ones. But this is basically a simple piece.
Alright, let me see. We could add one
them around here. Maybe a middle one could be. Around here and another
two around here. This should wrap nicely just like this that
you can see it here. Let me remove this B
modifier, and there we go. Maybe we could make
this straight. Let's see. Okay, let's align it. Align vertically vertically. We could select these
the active quads. And kind of kind of better
put these pieces here. A not that are not that good. Et me see if I
did. If I do that. No, I will just leave
this how it was here. All right, that should be
nice enough. Let's go here. Let's add some rises
in the areas maybe. Um, here, I will just add a middle one and then just few loops
in the corner. And that should be, do it. Emir. This is a
perfect UB island. Without any complications.
Let's go here. Alright. Let's see. Here, here, here,
here, here, here, all right, Mark, grab checker
and boom, there we go. Maybe even one here. Let's see. Grab and
boom, there we go. Maybe another one in
this boom, there we go. All right deviation.
A right perfect. Or here, I maybe will separate the inner
piece in this part. Oh, I didn't select it. Mark. And now I will just
select these corners. That would be nice. Enough. Cheer. Perfect. For some reason, we're getting some weird stuff in the middle. If I just dissolve those vertex, I do another not just leave that there I don't know why that
is just giving me that. Maybe it's because the
way this triangulate. You see, maybe if it's
just we need to add few of seams in those corners. Now, you can see
that that's better. That was the problem.
Just few few edges there. Alright. Let's continue with this piece. This should be good
straightforward. Let's go here. Let's add just a
few recess here. And now let's do an wrap. You can see it
here, it's perfect. I will make this
straight align vertical. Yeah. I mean, this was
align horizontal here. Now align vertical. Although a deep quad.
You can see that we got that wrap, be perfect. Alright, let's go here,
maybe with this piece. All right. Let's see. How we can do it. All right. Maybe we can
separate this piece. Alright, I will add
few few sims there. Let me remove these ones. All right. One here
in the middle. This piece there. A few of them in these
areas in these corners. All right. Mark him
and Mark Zim there. From here. Perfect. All right. Now, let me just see how this will grab right
this piece here. We need to do
something about that. Alright, what's happening
if I just do that? Let's see. Basically
doing nothing here. Really sorry? At? Maybe not. Not there. I think we. You'll need to something there. Let me add my checker. You will need to separate
the entire piece. And now let's just add one. I'm not should be good
enough for us to deal with. Perfect. Alright. Some stuff here. Again, these concave pieces. Let's see how we can solve that. All right. Alright, guys. I just did it. Separate the upper piece
from the lower one. And it just works. I will just leave it like that. Alright. Take this. That will be it for that piece. Alright. Let's continue. Let's try to do this one here. I will separate these wings from the main body of
the UB, right to do it. All right. Maybe something like
this. Mark shim. Perfect. Now, here I will just add 1:00 A.M. All the
way to this part. Heal this edge here, stew it. Maybe here also. We
can do the same thing. Heal this little edge
around this area. Mark shim now let's see
what we can do here. Maybe we could add a seam in
that place and keep adding more seam to this part and
also here to this other part. Maybe I can separate this piece here and add
another seam there. See how this works. All right, checker.
Basically perfect. Now we can apply the
mirror and do the grab. And you can see there
that we got something. All right maybe here, what is this piece? Let me see where is that
sim there because we could split this upper part
and the lower part in two. And now we have this perfect. All right. Let's sing. Let's try to do this piece. This piece is a
really complex one. Alright, let's just try
to seeing if I can do it without having any troubles. That would be a
really tough one. Alright. I here we could add a SM there. Um, do some graphs for now. I think that's
really bad or not. Alright, let's see here. What happened if we add
SIMs in those places? What this give us? Nah here, what is that polygon. We need that there. We need a seam. What is this car sims. We could add a seam
in that place. Right through it again. We could add more here. Now, we got weird p here. Let's try to remove
the same here, grab. Alright. Yeah, we are
getting something. Let's see grab better. That's almost better there. It is to be straight. Alright. Et's see if
I apply the mirror. Alright. What is this? What is that there? What is that, please? Why we have a hole in there. Why do we have a hole
here. Why's that? That hole should not be there. I mean, we have these piece, these 21 should be dissenter,
something like that. All right. What is this? We get in some troubles, we could just leave
these 21 grab. Perfect. Avery here, remove
those wrap. All right. The question is why I have
those This is plea top. Why do I have that? I don't really know. Let's see if something weird is happening, maybe I have some non
mayful geometry there. Let's select here, select
all by trade, no manfold. I don't have any no
mainful geometry there for some reason. Let me see here, let's go select all by trade
places by side. Let's see greater than, and we don't have any end gun. I will just stitch those
together, but right. Now, let's try to
put this in place, and I will just
leave this piece. Just like that maybe two
edges, two seams there. I you're not doing good. I don't know why I
have that piece there. With a hole, I don't really
know why it's happening. But for some reason, this stuff is just doing it. It's making a hole where
it should not be a hole. There should not
be a hole there. Let's try to add
again those edges, maybe something related to that. Let's see. Let's add back some tos deleted. I don't know what's
happening there really. Maybe a blunder bag
or for some reason. This is just happening. Let's just try to get
better this UB stuff here. Just move those around here, right to make this in
Metrico just like this. And I will just leave
that piece there. Let's go here. I will
separate these two. We'll add a seam in the middle. And here let's see, I will add maybe more like here, like here in these pieces. And now let's see what
this give us. All right. Check our material. All right. Nice, nice, nice. Let's select this brush. Let's try to relax
the the stuff there, and that will be nice
for us right now. Right, we are almost
done with those pieces. This piece straight to
do some Ubits for that. Maybe we will start here with them go all the
way to this part. Or we could separate
the inner piece. Separate the inner piece
from the outer piece and add a few Just a few creases in those places. Maybe. I All right. Something around there. Let's see what you
give us. Give us. All right, check our material. All right. I need
a one piece here. One edge loop. No, that's really bug out. You sm there and grab
What is this vertex? All right, let's remove that
and grab. What are those? All right. We remove
those. Perfect. We remove that
other stuff there. All right. Almost perfect. We call that. This here. In doesn't really matter. All right. This
could be maybe we need one more edge loop there. All right. Maybe one more here
in this corner. Kind of better or
maybe not. Not really. We're getting some weird
stuff here. Your shame. See? Oh, that part. Works. Works. Alright,
let's see. Here. Grab. No. Maybe we could add one
seam in that place. Mom. Not willing. Alright. This is a
bit of a complex one. Maybe we will do
this in this pot. The potatoes. Oh, so maybe not. Let's just not do it. Try to keep this entire piece. Alright, here we maybe we
will need a seam there on grab preferred All right. Let me see here. What is that? All right on grab I beats
basically doing nothing. All right. Let's see.
Let's go here, maybe. No, that's just
destroying our base. All right, let's do it by hand. Try get this in a
better position. Alright. Not giving us. The enough results there. Let's just at maybe. W seem there. Alright, we're we are
getting something. Alright. Let's see what else. I'm tempted to just split this piece here
into one single piece. All right. Maybe Let's see with
conformal, you can see here, it's basically giving us
a better result this time the conformal grab
than the angled pase. This could work for
us in this part. Sometimes the the angled pase doesn't give us
the best results. Let's see again. Perfect. All right. Let me remove that SIM there. All right on grab. Her face Mark m No. I will just leave it like that. That doesn't matter too much. Alright. Almost done. Almost done with the SIMs. Maybe we can do
just 21 seam there, and just put the
shaker material. Let's do this time
with ungold base. You know, basically, well, let me read that piece there. That should be good enough. I will make this
strap of polygons there straight right a line. Let me remove the fine on here. Let's to align horizontally,
align vertically. All right. Follow
active qua. Perfect. All right, there we
go. There's just one. Oh, my God and I have. We have two more pieces. Well, three more. Yeah, I'm just thinking
that this piece, we could just leave it into, like, one piece, maybe. May I mean, one plane maybe not. Let's just do this. I will
just apply a middle edge loop. And now I will just mark the SIMs these edges has SMS and that should give
us the best results there. Basically, the best result. You can see that we have
some overlapping geometry. That's because I have the
mirror modifier applied. I mean, here, I will just delete that biror modifier and
everything should be good enough. And here I will just add a SM in this place
another in this place. Maybe this should
be good enough. Remove that stuff there. Let's add the car material. And maybe we could align
these horizontally, vertically, and we could
get this straight. All right. All right. Let's see. Let's just scale these
two in the Y axis. Let's see here. With
some symbol like that. And there we go. We all basically have Oh,
I just forget it again. Sorry it's too
late in the night, so my brain is not
raining too well. Let's see here. Maybe
we could add few edges. I mean, some thems
in those places. Or maybe we could separate
these into maybe single piece. Yeah, I think we can do it. Mm. Let's add some
seams in these corners. All right. Perfect. And now we just
add one seam here. Just till this edge vertex. And now I will just add another
seam in those edges wrap. See this Shaker. Perfect. Why this is split up. Alright, let's remove
that seam there. Alright. I should be better now. Let me just try to make this
polygon shrub here. Right. Let's see. We could do it. Basically. Right to make
that. Ray as possible. All right, something like
this should be good. And this here also, we could try to tweak
it, make it straight. All right, there we go. Now let's go with
this piece here. Alright, let's go here. Let's go here. Here,
here, here and here. Every not in those corners just select those s
to marking and grab. And then we have
this B's checker and everything
basically perfect. So now we have almost basically
all the pieces with UEs in the next video, we are going to organize all of these UBS because
they are all over the place. We need to organize them.
They'll see you there.
24. 22 Finalizing The Uvs: Alright, guys. So in this video, we are going to organize
our UBS and maybe prepare our mesh to to baking. I mean, for baking,
yeah. So let's start. So, there are two atons that I strongly recommend you to get. And one of them is this
one will be here located. Is this what is it? I am in the UB Editor. Yeah. Let's select an object, and you will see
this ton texltnsity. I don't know if I don't fully remember if that addon is
already here. I think so. Excel. NCD? I think, if you are in the
version 4.2 0.1, you can't find that addon here in get extension
in the blender preferences. Yeah. And the other on that I strongly
recommend you to get, but this is a paid one, but it wars version because it saves you a lot of
time of organizing UBS. You basically just
need to click here, pack this in this bottom, and that will organize the UBS for you in
nearly perfect way. You even can maybe if you want like you be to have
an orientation here. You can maybe, like, in this and then you
click Impack and this will retain the orientation
and all that stuff. Here you go to say
hit rotation enable. Alright. So let's start
with this. All right here. I think that we will
do two texture sets. I mean, will be
like two materials, one for the inner part. Like the basis, this
skeleton one, maybe. And the other part, the
other material will be for the for the external parts. Yeah. So let's begin with this. I think that we maybe we get we're going to get a lot of space remaining
here. So let's see. Alright. So we have made we have made the Ubis and we
have applied our mirror. So here are our Ubis so we
try to organize by hand, maybe if you have this nice ton, the UB pack muster, you just press here, and this will pack everything
for you like there. You can also select
this budistic search, and this will do a lot
of calculations of new ways to place your UBS. All right. Also,
Blender has Blender has a packer inside for default. But that UBI packer is not
too good. You can find it. I think it's here, pack islands, and you can select
this orientation any Alright Cs to
dams. All right. You can click here,
and this will pack your stuff but it's not that good as the heuristic search, I mean, the UVPAC Masters. Let's try to pack this by hand, for the demonstration.
All right. We could increase the size, maybe to get a little
bit better better. Better solution. Also,
for the textil density, the tex density is the amount of pixels
that one UB Iceland has. So with this density checker, we could make all the UB Island to have the same texel density. So let's just select
one of those. Let's click here,
calculate TD here. Now, calculate set
value. All right. Now we select
everything and then just press this
bottom, set my TD. And this will apply the textil dentity and
all the pieces will have the same textil dentity so let's try to organize this. All right. We have these pieces. This is like a puzzle, maybe like playing
tetris, some sort. We could put this
just like that. We could put this around here. Alright, I like to see
what I'm selecting. So I just signed my UB
view with my viewport. So let's see what
else we have here. All right. Where is this piece?
Right, we could maybe put it in a horizontal
way or maybe not. S All right. I'll put this here. This is just try and error. Try to see the best way to
place our UBS in a nicely way. All right. Well, let's see. I mean, with the
UVPACmser you can save a lot of time and you
don't need to do this. Maybe just a few tweaks you will have to do,
but not that much. All right. This one,
this is a big piece. You need to place it
somewhere, maybe like here. These pieces here.
This is the barrel. We could place it
somewhere here. This is the handle. All right, maybe we
will place it rotated 90 degrees -90 degrees here. We could place it here, but we don't have
space for these. Let's try to see
if we could make a little bit more of space than where maybe we could make this stuff a
little bit smaller. A tiny bit, just to see if
everything can be inside. What is this piece?
Alright and this one Ar. Let's select these two. This piece is that middle one. We could place it
maybe somewhere here. What is the other
piece of this Alles select that All right. Select this and just put it
maybe around here. This one. What is this all right. Let's try to put it
around here, maybe. Maybe something like this. I think that should be nice. Let's select this piece. All right. Let's see
where we can put it. All right. We could create a little
bit more of space. Maybe also try to move
this something like this, maybe it could be, but we need place this
inside in some way. Sometimes these
organizing Digbs could be a little bit tough because
it's a lot of trial and error. A lot of tri and error, to put everything inside
this tiny square. We could try to put these little
pieces inside here. Alright. Let me see. We let me move
this away. All right. I will move this to the side. I'm saying around here. Maybe we could put
this around here. Maybe not. This should be inside. Or, right, we have a
little bit of space. Also, be sure that your
UV islands are not like, bucking out like this. Keep everything
inside the square because that will
cause some troubles later once we export this
to a program at program. The only thing we could put this around here,
maybe this handle. A, we could move this. All right. Maybe this could be around here. Let me move this. Just try to put everything inside, right? This could be move
here, maybe. All right. We need a little bit
more of space here. All right, let's see. I maybe we could change positions here and here. See if we could make this
in this video, all right. We have these two
pieces inside our UB. Stry to put this inside also
All right. That's perfect. But now we need space
for these other pieces. Alright Let's see. Pulstats All right. Let's just see how we
can place this better. All right, perfect. Let me bring this a little
bit closer to the other UV. And this one I will just move it a little bit to the side. Perfect. I move this
do Just a tiny bit. Let's now, maybe we will put
this around here or maybe. Let's see. Let me get this The other piece, maybe this will be a little let's
make this stuff a little bit smaller just to have a little bit more of space
that we can work with The UIPAC master maybe
will do better work than me on getting the most
space as possible on this. But let's see. I just want to demonstrate how
you can organize your UBS. Alright. Perfect. It is because I'm trying
to maintain, like, not having my Ubis
like this, like, incarnated in diagonal position or will be like
vertical or horizontal. I don't like to
put myubis like in these angles because
that maybe will cause a little bit of issues, not that much, really,
but a tiny it's always better to have your UBS aligned how they are in
your Trey billboard. All right. Let's see. Maybe we could move. This one here around
here in this corner. Now let's get this. And we could put
this back around here and take all of this piece
and put it in the corner. Right now, let's
see if we could put this back here inside. Let's move this
maybe to the side. All right, we have this and
it's not overlapping, right. We need to put now
this piece somewhere. We need to try to stick this. Maybe in this way, make a little bit
more of space here. Maybe something like this. All right, a tiny bit. And now, maybe we could
move this up around here. All right. Now we
both stick this around. All right, let's see. All right. Let's move this
to the side around here. And now we should be able to to have our UB
placed here, our UB. Let's see, maybe we could
put this down here. We could take this
and put it on top, and that will be good. Perfect. Let's put this
down a little bit. Maybe I can replace this here. All right, maybe a little
bit up around here, maybe. Yeah, I want this to be
horizontal like this. So these two matches, let me do some safe incremental. All right. Now let's
try to fit this barrel. This barrel UV. We could rotate it 90 degrees. I just put it here
and it's just to place these little
Us don't wear. We could rotate this 90 degrees and place it maybe here on top. This one will be rotated. Min 90 degrees, right or
right and put this just here. These two, I would like to place them maybe here or
maybe here inside. All right. So these ones, maybe we
could just place it here. And now oh, I forgot about this. Oh, Oh, my God. I forgot Oh, my bal is split. So let's select the two
halves and do some grab. And now you will see how
useful are the texal density. So let's select one UB Iland. Let's go here with
N to open the tab. Now let's go to tex density. And now let's click here. Calculate TD. Now we will get the textil
density of this UB Iland. Now let's click here,
calculate set value. And now let's select our UB
Island that we want to scale. And let's just click here. And this we automatically
scale your object. And now let's just
place it here. Perfect. All right,
safe incremental. Let's put this part inside. And now let's just try to fit these pieces,
these little pieces. They should be easy to put there because we have
a lot of tiny spaces. Maybe around here
should be good. We can move this down and just try to put them closer
close as possible together. All right, perfect. Let's
try to do this also. All right. This one, also, and this one
maybe here. And there we go. We have all of our UBS. Oh, we got this UB *******
out of our square. Let me see if we could find another piece that are doing that same stuff or
if it's overlapping. We don't have any. Alright, let's try just to move maybe this piece a little bit to the side
without making this overlap. Maybe these two, if we could
make enough space for us to be able to bring back
inside this UBS line. And there we go.
We have made it. Perfect, safe, incremental. This is not touching
the other UB islands. All right, perfect. So you can basically fit
all of your Ubis by hand, just like I did here. Or if you want to save time, just use a packer, a UI packer like U UBPaCmer. I will use this for the rest
of the pieces. Alright? Perfect. So let's save. All right. We are here. Let me bring all of
my other pieces back. And now I just want to get the textil density from one
of these inside pieces. So let's calculate set value. Here. Now, I will just
hide the inner pieces. But I would like to have the
trigger in the same poly, I mean, in the same texture
set of the inner part. So I will just make
a new material. We just copy the material here, copy and then do a
control L link materials. So all of these polygons of these objects has
the same material. So I will just remove now the
color the checker texture. I will put maybe
some different color just to be able to differentiate
between texture set. All right. This will be inside pieces. So now I will just
select these pieces. And now here I will just
press set value because I have hacked my Excel
decity before. And now we could fit this
inside maybe like here. We have a little space
here and this one here also. All right. All right. All right. So let's hide this. I will move this here. We call this inside, and the pieces will
be out pieces. Perfect. I will save
again just in case right So now let's select
all of the outer pieces. All right. Let me select one by one. Also, we have to apply the
mirror for all the pieces. Maybe we could just
leave the mirror and then we can just, like, leave the upper lap. But I don't think that will
be too good to do that. Because if we don't
apply the mirror, then this part will be the
exact same copy of this, even with the UVs. But everything we paint here
will be also painted here. That could be useful for, like, mobile games that we do that. Like, we just mirror the geometry with O and
UBS and we'll be here, like with overlapping
overlapping UB island in the same spot. That should be
good there, but we want a little bit
more of quality. So I will just apply all the mirror
modifiers on my model. All right. Here. Perfect. I already have the stuff there. Here also. We don't
need that there. All right around here. Perfect. We basically
have everything maybe. Oh, this one is one's down here. Everything now is applied. And these pieces here
doesn't have Bs. Let's just do it fast and
easy for the entire family. All right. Let's
just remove those. I will remove the other piece. Then add a mirror modifier
in the C axis. All right. Now we just need to apply Come Ubi UBI seems just
like that, and then unwrap. And there we go. Let's apply the shaker texture
there, and there we go. Alright, let's let that
g in the outer pieces. We have this. Let me select all these pieces
and just move them away. Let me do something here. I will just unwrap
everything again. So we have everything
here inside. But now I will buy my
text entity out here. All right. And since I say that I will use UBI
Backmaster for this, I will just use it with Juristic search and
maybe rotation enable. Maybe not. Let's see.
Let's click Apply. You can see that our UVs are perfectly placed inside this. All right. What is this trap? All right, yeah. Place it there. Let's see if we don't do
this rotation enable, what will give us
the best result. This is also good. I think this so do it. But these piece, I want
that to be straight. I want this piece
to be straight. So I will just put it
in a straight position. Alright. These ones, I will just make them we'll just
make these pieces. Horizontal, maybe just
like this. And this here. All right, perfect.
And these ones that are in the back side,
we could make them. We could make them
molar, just like this. A little bit molar because they are they will not be seen. Allr, let's select all
the inside pieces. All right. All the inside.
Write this one no. These ones here,
right that's no. I think this is everything, the inside pieces there. All right. Let's
select these ones, the leg and theele
the middle pieces. We'll just get this,
make it smaller. We'll just put it in
whatever position. All right. All right. Perfect. Let's see this piece. Maybe that could be like that. Maybe we could put it in a
horizontal position here. Where is the other
one other piece. This one. Let's see. This piece or horizontal
position there. All right, let's try to
find this. All right. Here and here, this will be also in our
horizontal position. Perfect. Those could be, just like that. I will not bother
too much about them. We just leave the
rest like that. A right, let's try to
pack our UBS again. And you can see that
everything is perfectly placed inside with the
same textil dentity. You can see that everything
is not overlapping. All right. Oh, here we
got weird stuff there. We got this again back there. All right. I think this
should be good enough. Just looking at my Ubis and we've got what
the **** is this. All right. Let's try
to fix these ones. All right. Let's see. What is this edge. Alright, let's try
to bear those seams. Clear those. Et's try to do
another open wrap there, and everything is
nice and good there. All right. I will just apply again my text identity
to these pieces. Apply text identity. Alright. Now here that we got
again that book, I mean, those
overlapping UBS there. Let's try to find
the other place. I mean, the other one here. Now what I will do here is the fact that I show you before. So we got these overlapping
UBS around here. Let me select the other one. Let me see if we got more
overlapping Ubis there. We don't have anymore. Alright, let's try to fix
those really quickly. This one, where are
those right here. Perfect. I will just merge
at center, merge at center. Let's click here, this synchronize our UB viewport
with the TD viewport, so we can just work
with the US better. Let's do the same thing in the other UV island or white perfect around
here should be good enough. Now here I will just do
the same thing here. At center here also
at center Orr, let's do the same thing here at center and at
center. Here, perfect. We got those. Alright. Let me see how is
behaving. Will be good enough. Alright, let me see
if we don't have any overlapping UVs, any errors. All right. Why, what is this? Here? What is this here? We got internal faces. Yeah. We got double geometry there. It looks like some
internal faces there. No. Yeah, they are. Yeah, we have some double vertex here that for some
reason are not merging. All right. You have
anything there. I Alright, let me see. Maybe Merchant center. Merge by dissens All right. And these ones, what ****
are these? What are those? Why this UB is like that? We don't have
enough stuff there. Enough scenes. Why is it behaving like that? Let's see. Let's find it out. Here seems. All right. Let me do wrap. This is basically perfect. Now, All right. Let me select everything again. I will just apply it again, my text identity to every piece. All right. Now, well, before that, let me continue
looking at my UBS to try to spot some errors
that maybe will be there. Here, you'll see that we
got another another there. What is this piece? Yeah, here. So let's just select
those and try to fix the issue here by
since maybe at center, but this is not merging. I think this because we have we got an a seam there. Maybe here right
now that is merge, and this one will be to merge. Or for some reason, this is just making this hole. I really don't know
why making that hole. Maybe it will be something
in the topology, maybe. I don't understand why is
that making me a hole there. Just try to see something. Since this is just
bugging me out, maybe we could delete the other half and then
add a mirror modifier. The axis. Clipping here. Now let's try to
stick these ones. Let me see if this don't
make me a hole there. Alright. Let's try to apply
the mirror and then do This Oh, my God. I really don't understand why
this is making that there. Let's just leave it as it is. I don't care anymore. I fix it. Anyways. So let's continue with this. All right. Let's apply again
our Excel LD here. All right. I don't think that
we have any more errors. Oh, I don't think
we have anymore. I think everything is good
enough now. All right. I think everything
is ready to go. What are these,
these little pieces. Let me see what are those. What we have these two
tiny pieces there. That shouldn't be like that. Let me remove my
X ray view mode. These ones will be in a same happening here. All right. This one should
be in a same UV Iceland. Perfect. All right, let's
continue looking at this. We don't have any
other error like this, for example, merge at center
here in these places. All right. I think that person is nice. Let's do the same thing
on the other side, here, here, here, and here also. All right. This one. We could make this straight. I will just make it straight. All right. Let's just
make this straight here. Just like this. And then now follow
a five quads. And this is completely
straight now. All right. I think now that we've got
some weird pieces here. What are those? All right. Then if we can make this
any bit more separated. All right. Maybe we
could make this merge at center in this way. That should not be a
big of a problem there. Lets remove my stuff here and then right to
do the same thing. Perfect. Let's try to find
the other part that piece. Let's try to do the same
thing here, merge at center. Center here, center. Perfect. And now let's
move this just a tiny bit, so that is not overlapping. Select everything and continue
looking at our stuff. We wouldn't have any more errors like this tiny stuff here. Maybe those are just
unnecessary UBSMs at a half place, maybe with that. Alright, let me merge this All right, so let's apply our
stex identity. And now we're going to click in the UBPACmuser for this to apply and make everything
inside the square. Let's do it. And now this is perfectly done. What I will do now, I will
just keep looking at my UIs, like I did and just
try to see if I spot any any other error, I will do it off of camera because that is just
really repetitive process. Like just look at
your stuff and see if you find any mistakes,
and you can fix it. So in the next video, we are going to prepare
our mesh for baking. That means that we are going
to name all of our pieces. We're going to do the ID the bit pading for later inside
substance painter to be able to mask
in a better way. And that's stuff. So, see
you in the next video.
25. 23 Preparing The Mesh And Doing The Bakes: All right guys? In this video, we're going to start preparing
our model for baking. So the first thing that
we're going to do here will be to name our low
poly and our high poly. But there will be a difference. I mean, the high poly and the low poly need to
be with the same name. The only difference that will be between them
will be the suffix. Like for example, the low poly will have a
suffix like point low. And the high polly
will have a suffix. It will be something
like point high. So that's basically the thing that we are going to do now. So I will just start naming our model like this weapon
base underscores low, underscore not point, write underscore low
for the low poly and underscore high
for the high pools. But remember, your
name needs to be the same between
the low poly and the high poly version
of the objects. For example, let's see. Like here. All right. This is called weapon base low. So the equivalent part of
this piece in the high poly. Let's see. Let's go here, active
our low poly will be this Let me high all of the
unnecessary stuff here. Also, we will need to merge things that are in the same
like mess in the low poly. All right. This is
not. All right. Let me keep just
hiding some parts. It's really quick here. I think this is all the things, the pieces that we
need right now. Let me keep hiding
all these pieces. All right. I think this is all. This is everything that we need. Yeah, let me bring back
my low poly. All right. It's everything that
we need, right? See if we don't have
anything extra. All right. So we are going to merge
the things that are in the same that are in the
same mesh in the low poly. All right. These ones, I will just
hide it just for now. All right, let me
hide the low poly. And all these pieces
will be one single mesh. A so let's select one, and let's just press Console J, and this will put in one
object, all these pieces. And now I will call the weapon
base underscored height. Remember, same name and same name between the high poly and the low poly versions, but the difference
will be the suffix for the high poly
will be height, and then for the low
poly will be low. So let's keep doing the same
thing for all the pieces. All right. Just let me
find each one Perfect. Let me find the other one here. Oh, where is it? Let me try to find it. Alright. I think
this Where is it? All right. This one. Perfect. Now, I will just
name these objects like this will be trigger over, maybe something like this, a random name L. Now let's find the
hipolyversion of this. Let me copy the name. Now I will find the
high polyersion here I will just call it trigger
cover high, all right. Now I will just call this
trigger Sothing like this, trigger a low Console A, Control C, to copy this stuff, I will just hide this for now. Let me hide the low poly
version. All right. So I will go to the high poly version
and put the same name, but the suffec will be high. And now I'm looking at this, and this is basically
a low poly. So I will do some quick
subdivision subdivision surface here just to make it like this, some sort high poly. Let me apply it real quick. Perfect. We have
our stuff there. So now let's do the same thing with the
other pieces that we have. So let's start. Let's do it. Alright, I will just hide
the trigger stuff there. All right, let me bring
back all these pieces. For some reason,
this is not smooth. Why is this doing that or no? What something weird here. All right. Now, it's working. All right. So here I will just hide this just
for now and these two, and I will go let me do it with this liner. I think I brought it wrong
in the connection low. We just call
something like that, just a random name for that will be cylinder fold connection
height, all right. It's just height
is just for now. Let's keep going with
the other pieces. All right, what we got here. Let me just select that. All right, we have.
All right, this piece. We've been like either
one, all right? I will just copy that name. I will go now to the
high poly version here. Hi. We call these
outer panels like something like outer panel
and just the number. All right. I see that I have
this floater here that I haven't placed together
with the tiger cover. All right. Perfect. I will just hide that.
Let's go here now. This floater should be
in the same object. So let me go first with this. Oder outer, lower. Let's see, maybe lower and panel, maybe something just random. All right, low,
Console C. Right now, let's go with these objects. All right. Let's go here. Let's call this the same
name, but with height, and also don't forget to merge your floaters and
your panels here. All right, let's keep
going with this. These floaters should be in the same in the same mesh as these. We have some floaters
here that are gone. Some floaters are gone. Yeah. Yeah. Oh, yeah, yeah, yeah. I have merged. Some floaters that I should not have I should not have
merge with these piece, for example, this one
would not be there. All right. Let's
just select those with L in the edit mode, and now let's press P
and then selection here. That will just separate the
geometry into another object. All right. Perfect. We are here. Let's see what else we
can do here. All right. This is perfect. Al
right now we have the floater that
we need right now. Let's go back to our objects. Now here, we'll just merge all the loader
stuff with the panels. Al right, let me just merge it. Now, let's name our stuff let some safe
incremental, all right. All right, powder panel
to low. All right. And be sure that the suffix and all your
pieces is the same. Like, if you put your suffix, with a capital letter
at the beginning, it should be with a capital
letter in all your suffix. If not, that will
cause some errors once you import it back to
Substance Painter. All right now, let's go here. Let's call this high. Perfect. Now, this isn't the
same stuff. Alright. Let's try to name this also. Let's try to find it. Alright, this will
be like the scope. Scope, as maybe. Low. Let's select everything, hide it. Let's go here. And now let's merge or write this here
should be separated. This cylindrical p
should be separated. All right. Now we'll
just hide that. Maybe not. Let's just
select all these pieces. We have all of these, or right now let's merge this. And let's put the same
name, but with high. Perfect. Let's go here. Scope Scope cylinder. Oh, I really forgot how to
write cylinder. Oh, my God. Cylinder. Right. Scope
Cylinder, perfect. Now, let's call this low. All right, right is here
with the same name, but with high here, all right. Let's do the same
stuff here on top. For example, this rich, this part here, this frame, let's call that here. All right. Scope Frame. Low, Control C, Control
B, let's just hide it. Let's go to the hi poly
version of that piece. Let's call this scope frame
on the scored height. Now let's go here. Let's see. We can
find it. All right. Let's see here, we
can put something like I have made
the UV for that. Oh, yeah, we have. Perfect. I just forgot that if I have a male the UB
for that piece, let's just call this cope
Let's see, maybe class, maybe just to put something there or let me do
some subdivision surface in the hi poly version because
right now it doesn't have any type of of hypotens maybe. Alright, let's see. Maybe
we could just select everything and then
do just this sort of pre I will just apply that
right where we are right. I will be all right. Let's just keep going with this. All right here. Let me put the name
first in this piece. It will be some magazine Amonton low. All right. See? We have this here where my stuff here right. Let's now merge all pieces
into one single piece. This is all right, perfect. Let's just select this
Alright Control Y, here, munition, it will be high. Perfect. There we go. Let's
just i that right, let's go to the
low poly version. This will call munition
two maybe low, right. Let's go here now, and let's just put the
same name with high. Alright, perfect. Let's do, now the same stuff here. Let's select all these pieces. But first, let me
just name my stuff. A right here will be something
like outer panel of four, maybe, I think, or
three, low, perfect. Now, let's select
all the floaters that this piece
will have Alright. This is everything that
this piece should have. I think so. Yeah. Perfect. Now let's
merge those into one. All right. Let's call
these hight. Perfect. Let's go here. This will be
something like, for example, maybe frontal top is maybe let's call this one and just low orbit. Let's go here. Let's call this with the
same name, height, perfect. Now in this piece here, I will call it like maybe middle is low, all
right. Perfect. Now, let's select all
these high poly stuff here and now I will just merge
them into one piece here. I will call this
with the same name, but with high the suffix. Now let's go here. I should have all right. Here, I will call
this the same name, but I will just put
lower middle piece. Let's select this name. All right. Call this hide
all right. Let's go. All right here.
Then we have this. Let's call this out
panel or low perfect. Now let's go to the high
body version of this. Let's call this hight. All right. Let's go
here what we have. Let's call this
something like, Hope. That's not on the scope. Middle top is low, perfect. Let's just put that name
or right, let's hide it. Now let's go to
here and let's just put the high in the name. All right. We have this. Now, let's see. Let's
see the naming. All right. Frontal meal is maybe low will
be the same stuff. All right. And here, let's go to the low
poly Brontal let's see. Piece, two. All right. Let's just select. Now the hypolyiversion of
this will be high here. Right here, I will just name
this has maybe ntals cope, part, low, or right
let's hide it. All these pieces should
be in the same object. Perfect. Let's put
the same name here, and that will be height or
right. Now, let's go here. All right. Here, we are here. All right. Let's call this something
like maybe tal, lower is low perfnt.
Of this here. Now, let's merge all these
floaters into one piece. Alright. Let's call this something like the same name and
with high perfect. You know how this goes. Now, this piece
this part will be like let's see how
we can name this. Let me do something here first. I will just bring this
part a little bit down. All right. All right. Let's see, this name
will be tal lower piece to Don't forget to put the suffix low or right
Perfet. Let's go here. All right. We are here. Let's go with the same
name and hide in the name. Now let's go here. This will be the same stuff. Oh. Oh, where is my
Let's go let this. Frontal, lower piece
three, low, perfect. Let's select the hi polyversion
name but with height, and this will be the strap. Why is this? It's polygon. I mean, this is a bit, it doesn't have anything,
you can see here. He vertex is so we
can just delete it. I don't know what that piece is. All right, let's go here. Weapon wrap, low.
All right, perfect. Let's select that. And
now let's go here. Weapon strap, height. All right. Now we have named it everything. And now let's just bring
everything back again. Let me delete this stuff here
because it is not needed. Delete hake, delete the folder with all the stuff
that are inside. Alright. If you press Chief and
then click in this I icon, you can just show all the
pieces at once, like here. Now what we need to do is to
make some some vertex color. I mean, the vertex
color that we have put in substance painter
will help us too. But let's see, because maybe if the color
are too similar, we can have a bit of problems while making some mask
inside substance painter. So I will just change the colors that are
too similar together. All right, we have this perfect. Now, now let's see. I will just select
with L this middle piece and these
other pieces here. A Alec dose, this could work
nicely. That could work. But let's just make this with a different color
right in the object mode. Now let's go to the
Vertex paint All right. Let's go here to this icon. Now, the selection
that we have made in the Edit mode will be
also selected here, let's click press now. Let's go to tool, color palette, here, click in New, and let's
just select a random color. Maybe it's like this pink one is clicking in this plus icon, and let's go here to paint
and then set vertex color. Alright, we have set
the color there. Let's see where else we
can add the same stuff. Maybe here, I will just change the color of the of
this piece. All right. Let me select all these piece. Let's go here. We'll just make it with another color here. We can bring this back
again into some fainter. I will just peel this entire piece with one
color, maybe some green. Let's click in
plus. Now let's go here that vertex colors. All right or maybe
what we could do. In this case, we could just
select one edge loop here. Hide this, select this piece. Now, select this H or maybe not. He Control E. Now we
have this selected. We can go to with the
vertex paint mode, let's click it
here and now let's just click here in
set Vertex colors. Everything is with
that green color. All right, let's
see, see, let's see. I mean, they are
a bit too close. Let me see with the flat view here so I can visualize it this better I think maybe this
would be good enough, maybe. Yeah. All right. You can also put the different color
in all the pieces, but I think this de color
that we have created will help us for the ID map
inside Tipton's painter. Yeah, I think so. All right. I think that's good
enough for us right now. I mean, this piece would
be like that. All right. Now that we have
basically prepare our model for exporting to Substance painter
and then baking. Now we can export it actually. Let's select our
low poly version. Don't forget to apply
your modifiers. Like here, I have
just applied it. Like the weighted normals here. Let me see if I have
applied it in everything. This one is just one angle UB. All right. So let's not
apply the mirror here. We'll just delete the mirror. We can put the mirror
again back later. All right. We have basically
everything in this part. All right. I think
this will help us. I think this is working
right now. All right. Let me see if we have more
mirrors inside the model. Let's see. I should have applied everything,
all the mirrors. All right. This modifier
will help us to get a little bit of a better bake. Alright, let's just save again. Now select everything. There. Actually, I will just
maybe remove that modifier. Not. Let's just leave it
just for now. All right. So here, export FBX. Now, let's make a new folder. I will call this folder, baking. And this will be
weapon low poly. Let's click here in
selected objects. Let's remove this one, this stuff here, apply modifier and I mean
apply transform. And now we just left
apply modifiers and I think we are
good here. Yeah. We just left that piece there. I mean, that option there. Export modifiers, remember,
we have a weight of normals with a weight of
50 perfect forget that. All right let's go here. Now let's export
our high polyly. It will take a little
bit because this is a mesh that has
a lot of polygons. Let's go here, FBX. Now let's call this
high poly here. With the same options, export. It will take maybe a while. Now, once this is exported, we're going to import all of these pieces into
substance painter. Now, it's exported. Let's go to our
substance painter or right now let's go here in new I will put this in four
K for this project right. This will be in PVR metallic
roughness of a plant, maybe. Yeah. Now here in seleg here, let's go to our model. Let's go here. Baking
here, low pody. Let's import our low body. Now here, the direct X will be like if we are going to make the textures for game engine, and the Open yll is for a
program like Blender or Maya that is not game engine, but is a tweeted software. The tweeted software works with Open jl and the games work with ideatX only difference
between these two is that the green channel will be
flipped between those. I mean, like the green
channel in the normal map from direct X is flipped from
the up and Yale version. So I will just select the up and Yale version
just for now, maybe. And all these pieces, let's just leave them
as they are right now. Now, let's click here in Okay. And this should import
nicely and smoothly. All right. We have our
low poly piece here. Now, let's go here to this icon. Oh, let's go here. And now let's click
here in Bake mesh maps. For I recommend you to leave like the opo
size here in maybe some low low resolution because we need to
do some test bakes just to bake faster to see if we have anything maybe like some
errors in our bakes. I would be the fastest
way to spot them. Let's import our high
poly version here. All right, we are
here. Let's see. Alright, we have our low poly, I mean, our high poly here. So, let's see. All right. Now here in match, let's select here
like by mesh names. Right. Perfect. If you have
done everything correctly, we will have no
errors in this place. I maybe you will have a
difference between names here, sometimes substpaor will tell you that there is an error
and you need to fix it. If you find that, just go back to your blender, put the same name in the low
poly and high poly and then import them back here
into 210 spatter. All right. Now here. Now in the new version of substance painter
in the 2025 version, we have a new
baking option here. We can select this automatic. And this will put
automatically the cage. But it's a little
bit messy right now. I don't think this will
work too well here. So let's just left this
by here by mesh names. Alright, let's tweak
the frontal distance. Be sure that you don't
have any red spots here. I mean, this red spot is
because we don't have mirar this piece because this piece has it's
too tiny, maybe. We can just be afterwards. We don't need to take UV
space for that piece, right? That piece will be
nice there. All right. Let's see if we don't have any other red spots in our model. And now let's just click
in Bay selected textures. Here, let's go here to ID. Let's select here in Vertex, select this option
Partex color. All right. And now let's export everything, and hopefully everything
will be fine. All right. Let's do it. I will just pause because this will
take maybe a little bit. All right, the
baking is finished. Let's see how this works. All right, you can see
that all the floaters are baking and they look nice. All right. Perfect. I see it here. All the floaters
are looking nice. Something. Maybe we can disable the looking for something here. A I have just disabled the ambito clson you can see
now here that everything looks like it was
sculpted or write. Now, I think everything
is baked nicely. We don't have any errors. I think, everything
is baked nicely. Perfect. Everything's nice,
everything is perfect. We don't have any errors here. You can see it here. We don't have any troubles. And that is a relief. Really a big relief
we don't have to do basically any baking
fix, I think. No, I think we can do the
high resolution bake. Now, let's click here in Bake. Let's go here in
the oppose side. Let's click in four k here. And now in Angelasing I will put this in
supersampling, 16 here. Perfect. Let's see here, maybe
crank up a little bit. The secondary rays, the cubator rays also crank
up them a little bit. Right, this will be in vertex
or right normal thickness. Alright. I think everything
is good right now. So let's click
IbseEelecte extuR. So this will take a
white. I will pause. All right, our bake
have finished. And you can see that basically everything looks nice and fine. We have this spot, but that spot correspond to the hi poly
version of that piece here. All right, everything's
looking good. Everything's looking fine. All right. Let's see. Our nomompvnice, maybe a bit of flucon
we have this stuff. Maybe we could mix them later. Or maybe actually we can just
maybe leave it like that. And then when we use
the high I mean, the amid pltion, we can
just fix it with masking. Maybe not a big bit of deal. I can see that if we turn
off the ambito clution, everything looks like it was basically exculted in the mesh. Alright. Alright, so in the next video, we're going to start
texturing our weapon. So, see you there.
26. 24 Starting Texturing And Doing Blockout Of The Colors: Alright, guys, so let's
start with the text ring. So what we are
going to do first, is to do some blockout
for our colors. Like, for example,
the thing that we did in the modeling sage by doing the blockout
at the beginning, we're going to do
something similar now. So let's do it. Let me
go here to texture this. Let me hide the outer part. I will just hide them by just
clicking this icon here. And now I can start
working with this. You can see that here, there are some colors
in the inside part. So let's try to do it. Like, for example,
this is a color, this one is another. So let's see Alright. All right. Let's see. Let's create a folder. Like, for example,
that material. I mean, this material here looks like sort of a
plastic one, maybe. It's not like a metal. It's more like, I don't know, some plastic or a material
similar like that. Let me call this Let's just
call this plastic, maybe. Like a rough plastic
rough plastic maybe. I will add a field layer, and then I will just hoot. Here are the roughness channel. We just increase it, and
now here in the color, I will just color peak the
color here in my reference, maybe this one, all right. There we go. Let me put some color in the
folder just to be able to visualize the folders better or let's add another one here. I will I forgot to add the mask the mask
with color selection. So that's why we
did this map here. We added those
those vertex color to be able to select better. Do mask in a nicely way. So let's click here in this
icon, and let's press here. Add mask with color selection. Now here in pick color, let's just click there and select the color that
we want right now. Perfect. Now that I look at this, maybe this is not a plastic. I will just call
this maybe something like inner material, maybe. I mean, it's not a metal, but also it's kind of rougher. I like to experiment a lot in this stage in the
texturing stage. So this will be some, like, back and forth. All right. Let's continue this back here, this back part will be
another material stock. I think the handle and
that stock part is kind of the same material
and handle. All right. Let's just click here, comas with color selection
and select the color here. And now let's add
another field layer. Let's add some roughness. It would be a
little bit rougher. I mean, a little bit less
rougher if something like this. All right now, let's color
pick our colors. All right. Let's maybe just bring the
more to the maybe dark side. Dark darker color here. All right let me bring
my stuff back here. All right. Maybe, let me just play
with the hue here. Just to see if we could get a better contrast there because
it is like a warm color. And I'm just trying to get some contrast between those two. We a blue hue would
be nice and good. You can see that we are
getting these pixels, these white pixels that
can be fixed by just going here to the color selection and increasing the
tolerance here. You can see that's basically
in fixing that problem. Let's go also to this one
and try to do it there. You see that basically we have get rid of those
stringed pixels. All right. Now, let's add
the middle metal here. All right. Let me set order
for that folder. All right. Let me call this sec
let me say real quick. Alright, let's call this. Let's call it like
base. And here. Let me call this like
some middle metal. Perfect. Alright, let's add
color this, a few layer. Let's add these
two channels here, the roughness and the metal one. And now we could maybe
leave the roughness like that and just increase
all the way up the metal. Now let's go here and here, let's add the color selection
and select this middle one. Perfect. Perfect and
nice, all right. Maybe in the color, that would be reddish, a little bit of a gray color. Alright, let me see. Perfect. We are getting that metal in all
the metal pieces. That's what I want, basically. All right. Now. Let's just give me a right. Now, let's just add
the blue stuff here. The blue glowing
stuff. All right. Just let me put a color there. And now let's call
this miss emissive. Let's add a color. Now, here, let's add some color selection. Let's select this blue stuff. A right let's go here. Color and here, emissive. Now, let's set the color part
to black and the missive part with the color of the color that we
want to be there, like some sort of this
bluish color maybe be nice. Alright. Now let's go here. Fry to do it. Put it in a nicely placed there, right, maybe a
little bit brighter. Crank up the volume here, maybe a little bit more
saturated, not that much, a little bit maybe more
purple, not that much also. All right. We need some black color
to fill these holes there in the cannon so I will
just put some blue here. And now I will create
another folder and call this misq maybe. And let's just create Black. Let's just create
another folder there. I will put this field
layer inside that folder. And now I will make this
color completely black and here completely rough because I don't want any
reflections to be there. This also will be
completely metallic. I mean metallic no, this
would be in zero. All right. So now, let's add a color
selection that folder here, color selection to this one. That part is completely black. Maybe we could make it a
little bit less black, maybe, something like that. Would be good. All right, a little bit less black. Maybe something like that
should be good enough. Now, let's add a paint
layer in the mask, right click and add
paint. All right. And I want the cannon here to be also
blocking the inside. So here, and now let's just
draw that black color there. Something like this
would be good. Would be nice. Let me just
draw maybe this color here. Alright. PerfetGive
me, changing the flow, adding some tablet pressure. All right. We could
make this part a little bit better. Perfect. So now, basically we have also let's add the black color inside this part because this is
basically black in the concept. So let's just add
that stuff also there with a flow of 100. Let's just put it there. All right. Now, let's just
clean this make it better. Or write something like
this here would also be Perfect. We are good. Oh, but I forgot to
active the symmetry. Sorry for that. Let's go here. This is the symmetry stuff. And now you can see that
this is in the X symmetry. Let's change this to
the C symmetry here. And now we are good
to go again and try to draw for second time. This piece here, do it here. Perfect. Let's just
try to plan this. Perfect. All right.
Something like that. Here, a little bit. All
right, there we go. Maybe just could be
a little bit darker. Something like this. All right. Let's
continue with this. There are some other
places that need that some dark color. Like in this part, for example, just add it quick in this
part here like that. All right. A fake. All right. Now, let's add the colors, the base colors for the, but I forgot the orange part
there. Let's just do it. Let me add another color here. I will add another folder. I will just put it below that. The misk folder. Let's add a color selection. Now let's color pick this
reddish orange part there. And now let's let me put the orange here piece. And now let's add a
color with right click. Let's add some orange. And now let's add a field
layer there with a roughness, maybe something like that. Let's select that orange
color in our reference. I mean, this is too orange. Here, it looks like more
more going to the red. Something like
that would be good enough for that piece
there. All right. Let's bring the other pieces. Now let's try to put the colors. Alright Alright, so let's try to add this
maybe, like, reddish orange. It's not a orange. It's more like
cream color there. And this one's more like some desaturated yellow,
some cream stuff. Okay, let's try to add those. Let's go here in this sor set. Let's delete that that layer, and let's just add another
folder and call this maybe reddish cream color. I will put the red
color for that folder, and now I will add another folder with roughness.
A little bit rougher. Ya Babs rougher, and I'll
just select this color here. Don't forget, or don't forget
to add your colors here. But to make your
color selection. Alright. Let's duplicate this folder. I will put some yellow there. It will be lighter cream color. I will select this one here. I will also took the color code from our ID map. Also, you can just color
pick your stuff from here. Let's create or let's
go to the field ALF that we have duplicated and let's just add the color
that we have copied. Alright. There we go. This piece here is more
like some metallic one. Yeah, it looks like
some metallic piece. It's something like
some metallic. Let's try to add
that stuff there. Call this metal panel there. All right. Let's put some. Let's add a field layer, some rough roughness
and a metal one. Let's add a color selection. Let's pick this one. I will take the
color from there. I would put it here. Kind of, Yeah, I will increase the metalness and also will increase
the roughness. I mean, not that much. This is too much, but maybe a little bit of
roughness will be good. Yeah, let me try to
color pick here. Basically the same color. It's darker. Alright. Maybe a
little bit lighter. It could be. But I don't want this panel to be also also
affect the other one. And we are getting
some weird stuff here. All right. So let's try to deal with that. I will click here
at paint layer. I will click this icon here. This will be like
the geometry field. If we press here in the paint
layer, if we press four, we can go to the field
tool to the field brush. So we can float the one
piece with one volume. So I will just select the polygon field and now
I will select this one. Now if we go to our mask, you can see that the only thing that
is with that color, I mean, in white, is this metal stuff. All right. I'm just removing. I will also add the
same metal here. I will also add it on top here. Perfect. All right
that. All right. Let's continue. Perfect. Here. All right. Let's add another piece. Let's call this metal to maybe. Make some green color. Let's add a field layer. And that will be the
metal for the rest of the pieces. So, let's go. As a black mass,
color selection here. Let's select this one. But I want Let me also
add an anchor point here. All right. In that way, we could code in the mask that we
have created to here. You will see in a moment. So we have selected the color. Alright. Now, let's add
a field layer here. Let's right click here, and then add field layer. Alright. Let's go here to anchor point and then select the anchor point
that we have created. And now from here, I will just call
this we subtract, and you can see that that is has been that we are not
affecting that stuff there. Alright, it's completely
black, it's not selected. So now we can start
working with these pieces. Basically, it will be
basically the same material, but I don't want it to
be in the same stuff, maybe a little bit a
little bit brighter. Let me see the baseball. I like that and a
little bit less rough. I mean, more shiny would be. Something like that. Let me change some stuff. I would make this a bit darker, just to have a little bit more
of contrast between those. All right. Let's continue adding
some stuff here. And now here we
need this material. And that material looks like the same material as
these here, this piece. So let's try to do it. I will just go here
to the inside pieces. I will select the
inner main material. And now I will just copy
Control C here, Control C, and then let's go to
the other text set and let's just do
some Control B. Here, I will just
select this color here. Let me decrease the
tolerance or right perfect. There we go. We have this selected. Let me go let me just
bring this down. Just a tiny bit on what's
happening. All right. Let me go here to
this color selection. I will just increase
the tolerance because I can see some white
pixels around. All right. Let's see
if we can solve those. All right. Let's go with the inner
main material here. Maybe we could fix.
Fix this there. But for some reason, this
is taking all this stuff. We could also fix that by hand. But I don't really
want to do that, but we will eventually do it. So there's no problem with that. I really want this piece to
be darker in this part here. So All right, let me
Let's do something first. I will just copy this
Misk folder copy. All right. Let's
just paste it here. And in this black, anyway, I have right. I have not. Let me delete those effects. Now let's add a paint layer
here, a paint effect, and let's just paint this with that black dark color here. Let's just paint that
with this color. Perfect. Around here. All right. Let's just continue
painting this. This is completed real time. So excuse me if I don't
speak too much, sometimes. I'm just painting this that's basically the only
thing that I'm doing now. There's no magic. Just trying to get this clean enough. All right. We have that piece there. Where else we need
that black color. In these holes here,
we need that also. Let's just paint them. Perfect. Let me see like this. Maybe it should be good. All right. Let's add one stuff here. Let's continue painting
the other ones. All right, something like that. Maybe a little bit too dirty. Let's actiive the
stabilized stroke so we can paint with better control over the line,
everything like that. Would be good. Let's continue. Trying to get this clean. All right. G here. And that be good enough. Let me move that here to get a little bit better
paint in these corners. All right. So here also
that light stroke. Now let's just write to
paint there in a nice way. All right. Perfect. Just paint
these nicely. We can also do this, let me see what
bottom it was. Yeah. If you press Shift
click and then shift, you can make this a
straight line that we can make some straight
lines like that. We could do it like that maybe. I mean, from the fire,
it doesn't do it. I just want to get this
clean as possible. We still have some blob liness. Alright, I will just
leave it like that. Perfect. Now let's prime, let's see what else we can do. We need to add. We need to add some E missive. So let's go here. Let's
copy the missive folder. Let's just paste it here. All right. This should be
around here on the outside. We have the missive stuff
there in this area. This also should be missive. We can achieve some blow. Maybe here, active post effects, the glare, see not doing anything. All right. All right, let's just keep
working with this. That's just for a bit
more visual interest. But here in the viewport,
it's in the texture. All right. Let's go
here. Let's see. Let's add a paint
layer here in the mask and also this piece there
should be with color. This part here should
be with color. So added. All right. Around here. Perfect. Let me add T here, then press shift, release the click and then
just do it nicely. Here, perfect. And there we go. We have the missive stuff there. All right. Perfect. Here, we also need to clean that stuff because this
is completely messed up. I will just erase what the mask did here and add it by myself. I will maybe, you know, let's keep this brush. Just for now, All right. Perfect. So here, also, add it. Here. Boom. All right. All right. We are good. Also this piece, this orange piece is the
same material as this, so I will just copy the inside, here, the orange pieces. And now I will go here to the outer pieces and
just paste it there. And there we go. Maybe here in the misk we could it's kind of
some making issues. Maybe let's just paint that
with this blackish color in this piece in this part. All right. All right. I think
that should be good. Something like that. Let's see. Oh, we have
this big hole there. I mean, this big big stuff here. Let me just delete it. I don't know why
this was caused, but let's just delete
it real quick. By hand because I don't
want to delete those. That's why I'm not
using the four bottom the polygon field I don't
want to lose the word there. All right. Let's see. What else we
need to put some stuff. All right. All right, let's see, let's sing. We need to add color
here and wrap. Let's do it. Another folder. Let's call this yellow here. Let's call it. Wrap. Let's add
some stuff there. So fill layer with a roughness, it will be rougher. And now I will here at the color selection
match like that color. And now I will go to maybe
this time orange is there. I mean, orange color. I orange, but not that aturated maybe a little
bit and not that brighter. Not a bright, all right. A little bit bright, but not that much. All right, we need and
these pieces to be with color so we can
start doing things. All right. Let me save And now, let's just try to add
those colors there. Now I'm looking
this these pieces should be a little bit darker. A little bit darker,
something like this, maybe a little bit rougher, maybe. I like that. Let's add the stuff here. That could be maybe some metal three here with this color, let me select that one or right that color. Let's go here. Add the color. Perfect. This should
be rougher, maybe. It's not that graded. It should be a little more
like maybe in the bluish part. Like some grayish color, something like that, a
little bit less saturated. Let me go to the
base color here. Something like this should
be good to know. All right. Maybe could be Right let's also add some stuff
on top here in this piece. I'm thinking of doing something. Maybe maybe we can
do something here. I will add another folder. Let's add this color
for the folder. Let's add some field layer,
another folder inside. This will be called scope. This piece will be p white hard. Here, I will just
mask with color mass. This piece. All right. Let me add maybe some metalness with that there a
little bit white. Maybe we could now
add a metal there. This is completely white. It like it. Thing like that. Like
some ceramic some stuff. So clear a little bit
down a little bit lewish. Maybe, yeah, we
could put it with some metalness, I think. Yeah, I think that's
it with some metal. I like that should be
good enough base folder. Let's see if we have
enough contrast. It's a little bit
too cold metal. This is too bright still
to decrease it. All right. It should be white brighter
than that piece there. All right. Let's just try to make
that piece a little bit. Brighter. All right. Let's see what else
we need to also add or this is
already with a metal. I think that metal is, it's already with a metal. We also need to add the
black color inside here. And there is some interesting
metal piece metal color. Let's just try to add that. It will be some
golden metal piece, although this doesn't
look like golden, maybe more like a copper
or something like that. Bronze, maybe.
Let's add a folder. Let's call this maybe
copper or golden metal. But some color just
to differentiate. Let's add some mask with
color selection there. Try to select this stuff.
Select this color. Alright, let's add
some color stuff here. Let's add this color there. This would be metallic. Completely metal and
shiny, just like that. That should be shiny. I not that shiny. Find that shiny.
Yes. Perfect. We are almost good with this. It also some colors
there. All right. Let's just try paint
a black color there. Let's go back to here. At. Now, let's just
try to add that color. All right. Et's go here. Right to paint. The
piece nicely and clean. All right. I like that. Perfect. All right. Let me make the bros a bit
modern. All right, perfect. There we go. Alright, I think that I
will leave the video here. Maybe. Yeah, I will
leave the video here. What I will do maybe
off of camera, I will just add
Maybe just discolor. I think that's the only
stuff that is left to add with the basic colors. And in the next video,
we're going to export the texture and then
bring it marmoset, and then start
texturing our stuff. So are you there?
27. 25 Fixing Baking Issues: Alright, guys, in this video, we're going to address some of our baking issues that I have spot when I was
looking our model. So one of those, I think there are only maybe three issues that I have spot. And one of those is is here and also here.
This is one of those. It's basically kind of nice, but you can see
that the geometry is not supporting
like this corner. And that's because
in the topology, the topology wasn't
correctly placed. I should have started the topology straight
up with I poly, but for some reason, I didn't so we will
have to address some stuff inside blender and report the model
and do some rebaks. Like here, you can see that we have this baking issue here. And also inside here. This looking kind of weird. And also, we it's the outside. Also, we have the omissis we will see what we can
do with those, and so. So let's begin with addressing the main
issues that we have. Alright, issue number one. This edge here wasn't correctly
placed in the beginning. You can see the row here. It's not correctly placed. So let's select those
edges and then just slide. If you slide with G, you will not get UB distortion because blender is smart enough, and also we will
be repositioning our UBS and matching the
deformation that we have done. So let's see if we let me bring my checker texture
here real quick. You can say that
basically there's no distortion, as you can see. So let's just do that. We'll remove my stuff here, and we go back to
my viewporshading. All right. Rep my
topology shading right. Now here, I will just
hood nicely with the magnet the vertex on top of that corner in that way that
can hold better tissue. Also, for some reason, we have this issue here. Um, so we will have to delete some phases in
order to fix this. We will have to do some stuff. So let's delete
these phases here, and also this one. Let's just delete those. Let's bring this up around here. Let's do the same thing in
the other part. All right. This also will be around here. This one will be around there. Let's just fill those
gaps here with a face. You can see that
is kind of smart, but we will need
to redo, I mean, to re ungrab these UB islands. So let's keep going with this. All right. Now, what I will need, I will just extrude
one edge here. Like that, strike to put this straight as
possible around here. Let's do the same
thing here. Perfect. Now I will create a
triangle here just to hold that shape
better here also. Perfect. Now I will just bridge this and then bridge and
close the holes here. Now, what I will do, I will add another triangle because
I don't want to have that super elongated polygon
because that will cause some troubles in the UVs
txrine and all that stuff. So now we have made a topology
that can hold that stuff. And now in the
baking will be nice. But what we have here, we have some issues because we need to re en grab
what we have done here. So, let's re add the add again the seams here. Perfect. You got around
here also. Perfect. And now let's click
here to desynchronize the U UV B with the
T and now let's select let's put
our cursor on top of maybe this part
and let's press L. And now let's select scenes. All right. Now we have
this part isolated. So what we need to do now. We're going to press A, but we're going to deselect
this with control. Let's press P to
pin those vertex. So if we grab again, those vertex will not move, and this vertex will go
all the way to here. You will see a sex,
let's press grab. And you can see that
this is rebked. I mean, deposition. Alright, let me just remove
the pin from the polygon, I mean, from the vertex, let's select this again. All right, you can see that
now is correctly unwrap it. Alright let's see in
the Heather prebme. Let's see if we don't have
any we're issue there. Alright, let me remove
the topolo shading. Alright. Well,
good in that part. So let's go to here also. All right. Let's see. Let's press here. Let me synchronize
this. All right. Now let's go to the
Vertex mode here in the viewboard in
the UB viewboard. And now, what I will do
is press P. L everything. Now press on Grab. And now that part is
correctly placed. Maybe without these sems
here because that seems to be causing some issues
there, you working better. Let's do the same thing
in the other part. But I can see that
where is this? Oh, those stuff are a bit weird. Let's select the only Ps here. Let's press P. And now you can see that these phases are
in the tiny vertex there. So let's select
again this phase, I mean, this part. And now let's press grab. This is for some reason, that part doesn't
want to unwrap it. Or right now, it's working. You can see there. Now
we have this part. I mean, fixed. Let's
go to the other issue that I have spot
here. It's this part. This is baking a
little bit weird. And that's because the
topology that we have there when it's inflating to make
the cage for the baking. Let me show you here you can see this part
here is the cage, and that is where substance fainter will get the raise to bake your
model into the low body. But here, in the topology, here, this topology doesn't
very well and cause that weird distortion here that I don't really like. So let's go here. If this again, maybe
what we could do, let's select also
the other part. All right, maybe we could move slide this up around there. And hopefully, when
this inflates, it will inflate nicely and
will bake in a nice way. All right. I think that was, I mean, one, two, three, and also this
part this little part here. Maybe we could put some
stuff that goes in. Let's go here. All right, we have this. Maybe in this part, we could
maybe move all these piece. I will have to do
it in both dies. Maybe just with the X. We just like this could be. I have, let me remove this. I mean the magnet,
so we can move that in the X axis,
just like that. So this has a bit of
deepness there maybe. Let's add one triangle there. I mean, just forcing the
triangulation in this phase. So in the engine, that phase we only
triangulate in just one way and to
avoid some weird issues. Because in some engines, the triangulation
work differently, model will not triangulate the same way in one
engine and in other. So in some places like this, that the need to have a
specific triangulation. We just put we force
the triangulation, by splitting the quad in two
tries so that in that way, the engine will not triangulate that phase because it's
already triangulated. Also, let's see. I think that's nice, maybe. Maybe this will be
a little bit just like this. The corner. I should start doing the
pool with the high poly, but I just dump sorry. Sorry sorry, but this
is really fixed. Let's try to not move it
too much to not distort. I too much our bis. And I think that all the
issues that I have spot here. I don't find any other issue. Alright, let's see. And one good thing
about Susan Spender is that the stuff that we have
here will not be affected. Also because we were careful to not mess the
Ubiquit we have created. So now that we have this
let's just export it. Again, let's export
it here, FBX. Let's go here, baking. I will call this low body X, and here selected objects, apply transform, animation,
and apply modifier. I think I have applied
previously in the export. I think so. So I will
just leave it like that. Sport XBX. All right. Now, let's go here. Perfect. And from here, I will go here to edit. All right, edit there here, edit, and now let's press
project configuration. And here in file, let's select the mesh
that we have px here. Perfect. Now, this should keep
everything basically the same. You can see preserve
strokes position of mesh, leaf that active. These do not active that. And now let's press
in here. Okay. And this will bring back we'll get we'll bring the
mesh that we have bag, and now we need to
do another baking. So now, let me see if the inflation here is
working nicely. I think so. I will just maybe
decrease a tiny bit, the frontal distance,
maybe something like. That should be good enough. I think this is good. You can see here that
now that's good to go. Uh let's see how
this bakes there. And I think that
everything is good, maybe. Alright, so let's press
bake selected textures. This will take me a while, so I will pause, and then I will get back to
you once this is finished. Alright, the baking
has finished. So now you can see that
this is baked nicely there. Oh, what? Oh, shoot Trudel. I have Oh, well, I think I have just
messed up this part here. Yeah. I have just messed up that part. The I dump. Let's
try to put it where it needs to be around here. All right, let me bring here my rtecture I can
align this again. I nearly perfect. All right. I don't know when I have messed up this piece here. Maybe something like that. I think so. Bring back this. All right. I think that's kind
of nice there. Let's do something. Let's select the border vertex. And now let's press P, and we'll select all these Pie, and now I will just press grab. Everything is aligned, Ken. All right. So now, this should be perfect. But you can see that
everything minus that piece that I have
messed up is perfect. Basically, you can see here
that this is baked well now. And this piece here,
this piece here. And so, so what I
will do will be just to re export these. Let's re export it. Let's just select this. Port FBX. Let's export it on top of this. And here, the same settings
as before, export. Now let's go to our
systems painter. Let's go here project
configuration. No. Since we have free exported
on top of the other file, instead of doing that, we can go here and
click here Import mesh. Let's just click that, and this will automatically
import the mesh. So now I will repake my maps, and that will be
basically for this video. Let me just bake it. Alright, so that piece there
is basically perfect now. I don't think that we have
any other baking issue. You can see that the
baking issue that we have there is fixed. The other baking
issue that we have in that part is also fixed. We don't have any baking
issues in these parts. I thought that we will have maybe some baking
issue, but we have not. That's nice, indeed. So, we have maybe some
little little stuff there, but we can't stop that later. Maybe the other piece. Maybe what we can
do in the hypoly is just to take this and move it to the to the left,
just a tiny bit. And also, I haven't I haven't mirror that
piece to the other side. Alright, let me seeing. We have another maybe
because we have maybe to trinket a little
bit too much the cage. Right, but that's it
basically for this video, I will fix those
pieces out of camera. Basically, what's
happening here is that this piece is a little
bit too close to that one, and I haven't mirror
that to the other side. And here is just that the cage. I just shrink it a little
bit too much there. And that's basically
what's happening there. So see you in the next video.
28. 26 Working On Textures: Alright, guys, so let's
start texturing our stuff. You know that in
the previous video, we have fixed some baking issues in the video previous
to that one, we made some blockout
of the colors. So now, before I start
doing like the textures, we are going to export
the texture and the model to the engine that
we are going to render. In this case, I will export
these to Marmose 25. Alright. Now, since our model
is a pretty low poly one, and the round triangulation of the quads can
cause some trouble, we will need to export
the mesh also from here from Soups and Spinter we can duplicate this
stuff later and fix it in blender and then
export that back to Marmoset. But for now, I will just
import it just like, as it is. Let's click here in Export mesh. All right, applied
triangulation. All right. Now, let's export that our mesh. Give me a sec. Let me let
me export this real quick. Marbo said on Marmo. Perfect. Now our mesh is exported. So now let's export
also the textures. So in the games
industry, you know, like for the game stuff, we use what's
called packet maps. We can use, for
example, the real one. Let me see if I can find
it in real What is it? Like orange packet
map you can see here, that here will be mbtoclusion, metallic and roughness
in this area, base color here, and the
normal map emissive one. Let's use this one just for now. And now let's see, select the real
one. Real perfect. Let's see here. We need missive. Yeah. So let's select
folder for this to export. So let me create another folder, what we called textures. I will select that folder. All right. We have our stuff. So now let's click in Export. So now here in sustancePainter. Let's import our model here. Let's select there and import. Let's search for our
model. All right. Here, there is Alright. Let me now I will import the textures surface
will be the normal map. Search for that inside pieces. So normal map here. All right. So there we are. But the normal map seems to
be like flipped. All right. So in order to fix this, you can see the normal map looks a little bit weird, maybe. It's looking weird, yeah. Kind of, let's just click here. And now it's looking
nice and perfect. Let's select our base color. Alright. Let's go now for the roughness map
will be like this one. You can see that this
has some weird colors, but that is because
all the roughness, metal, and went occlusion are all packaged
into one single map. Like, for example,
the roughness map will be into one
channel of the RGB one. So that's why this has
those weird colors. So let's select this,
and you can see here. All right. We have selected. And now here in the channel, we can choose which channels
we want to use for this. Like, for example, the roughness
is in the green channel. So let's just put it there. The green channel. At the metalness, select also this map will be
in the blue channel. There we go. Perfect. Now we need to import
missive. Let's click there. Let's import demssive All right. We can crank up the
intensity of that. All right, maybe
adding some glow. No. Let's just cancel that. Yeah. So now let's
do the same thing. But here, in the other pieces, let's select here
the normal map. All right, invert the green channel by
just clicking here, flip Y, and I'll
select the base color. Let's select our roughness. Uh Wait a second. I should not happen. Also, be sure that for
your roughness and your metal ness and also
for your normal map, this stuff here is not active because that will cause
some weird stuff. Just be sure of
that. Let's go here. Then now let's select
the metal ness. This is in the blue.
Yeah, that's in the blue. All right, this should
be completely All right. Now, let me just change the HDR or the one that
we are going to use here. Let's see, display settings, we have this panorama
environment map or DR. I like to use the
one that's called Studio Tomoko.
This one, I think. Yeah, that's the
one that I like to use for my models or write. Um also I have exported at HDR. I think that you can find it by going here. I think, yeah. You can find it by
clicking in this icon. Now let's go down. Let's right click
Export Resource. By doing that, you
can export the DRR. But I have already exported, so I will just import it. So let's click here in sky. Let's select here in image. And now let's search for
our DR. Give me a sec. A single minutes. All right. Where is it? All right. There we go with our
studio. All right. Also, I will just put this
bab in freight raising. Alright, so we can
have better lighting. Let me change this to CPU. All right, there we go. Maybe also in the main camera, I will change the AGx
bit linear or ACS, maybe that's the color space. I would like to have it
in linear just to have the same visual response like I have here in
the Susan spender. Basically the same Alright. We have our stuff here. I forgot maybe to put the
emissive stuff there. But let's see, let's see. But is there? Oh, I just
forgot to import the emissive. All right. Let's just
search for that. All right. Textures, import. There we go. We have
our stuff there. Maybe we could also go here intimate camera and
add some maybe bloom. Just for a little bit
better render, maybe. Alright. Let's save the scene, save us. Be Marble's right. Now, let's go here. So now let's start
with the texts. So, the first thing that
we are going to do right, I have some references
from overwatch. I think that the
overwatch style is kind of the style that can
match better this weapon. So you can see, we will try
just to replicate this. You can see that there's
some gradients in the colors and this quarter
stuff and all that stuff. Let's just try to do it
ourselves with this weapon. Like, bringing these color
variations there and here, this stuff, all that. All right. Let's start by doing some gradients in
our base color. Alright, let's go first
with the inside pieces. Let's select here base
color right here. One thing that I like
to do is just to add in the top of all our
layers, a field layer. Now in this field layer, I
will just add a filter here, bake lighting. All
right, we have this. Let's change the output
from diffuse plus specular, just to diffuse only. Now, let's see,
maybe we can change a little bit of this stuff here. All right. Let's not change
that. Let's go here. Let me just remove the sun
intensity and the sky color, I will just put it in white. This was in some middle gray, we could increase a tiny bit, the sun, but the sun
will be white also. Alright. There we go. And now, I maybe, reducing the sun intensity. Maybe it a tiny bit. All right now, this
material, I mean, yeah, that layer, I will
just put it in maybe overlay, working good. Let's see what screen looks. No, it's not good. Multiply. Let's click here and with
the arrows in our keyboard, let's just click
down just to see which one will be
the best for this. I think that screen, overlay and multiply and
work for us right here. Overlay ring is
not working nice. Olay, multiply. Maybe we could stick with we could stick
with the overlay one. Yeah, we'll stick
with the overlay. Now, let's call
this bake lighting. I think I got it
wrong. Let's see. Ight. Alright, I
will just call that. Like that. Alright,
let's go here. Sorry, but sometimes my
English just messed up and I forgot to even to write some stuff. Really
sorry for that. So let's copy this layer. Let's go here to other pieces. Now here, All right. Let's paste Console B, the layer that we have created. But now this is a
bit too strong, so let's reduce the
intensity here. So here, something like
this should be good enough. 51, let's go to
the inside pieces. Let's do the same, 51 or right. Now, let's stick now
here in base color. Let's go to inner material. That will be like this one. So from here, let's start doing some maybe some gradients. Maybe let's try to
bring the more to a grayish color a
little bit saturated, maybe a little bit darker, could also be nice. If something like this should be good enough,
let me copy that. I will go to all the pieces. And here scope here. Alright. Let me see where
the scope stuff is. I just forgot that
green color here here. All right. So here, let's change the color here. This one thrown out
now, it's much better. Kind of, maybe we could make it a little
bit more saturated. Be something like that. Let's keep the darkness. Let me copy the color code. Let's go here in our
material, write. I think that wasn't copied. C, let's go back here. Now, let's select this one. B, all right there we go. Right now, let's start
doing the gradients. Let me change the name and
we'll call this a space. Now let's click here in fill
layer here in this icon. Let's add a black mask here. Let's right click
and add a generator. And from here, let's click
in this really linear one. I would like to have the
gradient going in this, let's see, in this direction. So let's try to do it. Right. Let's play a little
bit with this, maybe also will be nice
to maybe will be nice to have the gradient go like
this from the top to bottom, maybe like this, for example. Let's see. All right. Let's go here
and let's change the color. Let me paste the color
that we have selected. Let me bring the hue more to a reddish one and maybe a little bit darker right now from here. Let's see in the base color
what's happening here. Maybe we could push
a little bit further the hue maybe like that. Let's see. Let's see here
what I was going to do. I was going to
change the contrast. All right. Something like this, maybe should be good. We go to material. Also, you can see that we
have these weird colors, but that's the direction
of the gradient. In order to change the
direction of our gradient, we need to use the
position maps. That's the use for that map. This is a positive.
Let's go here position. All right. You can see
that in the position map, we have these weird colors. So in order to change
the direction, we need to select the color where the gradient wheels
will going to start. For example, this one. So like maybe the
middle one here, the middle and now
here in the tip, this will be the color
where the gradient will go. So that will be the
end position color. So let's like this
and just click here. And now, if we go to
the material stuff, you can see that
now our gradient is going from the stock
to the barrel. But I really like better how
it looks like this, indeed. So I will just
leave it like that. Maybe just for now. Yeah. Now, what we can do, let me call this
gradient maybe is to bring some color in
the embed occlusion, AO. Let's make a black
mass a generator here Ambed occlusion or let's
invert the embed eclusion. Now let's just
play it with this. Let me change the
roughness and the color. I will put the roughness
a little bit high. And here the color will
be something dark. Here, it will be then maybe that would be nice. All right. Now, I add a paint
layer because I don't want this abetocltion
in that part. I think that we need to fix
the ambtocltion in Photoshop. Maybe we will see if
that will be necessary. All right. Let's
just erase that. Let's go here. All the libraries. Let's go to this brush icon and select this off
or the hard brush. Doesn't matter. All right. Now, let's just press X
to have this black color or just let it select
it here in this slider. And now let's just erase that unwanted ambient
occlusion in that part. All right, we can raise it. But I forgot to
activate the symmetry. So let's go here.
Let's click here and change the symmetry
to see symmetry. All right. There we go. So let's try to raise it
again. All right. Maybe here also, a tiny bit, try to not erase it from the inner part of the
floater, it also here. I think that will be
better for us just to fix the map, the tach map on Photoshop. Maybe, would be nice
to do it because in that way we will not need to do this all over and over again. You can see that there
there are some weird stuff. All right. Let's
see how that looks. It looks a little bit weird. Let me bring the stroke. Maybe the stroke of positive no, here, see, maybe just
reduce it just a tiny bit. Yeah, something like this
will be good. All right. Perfect. All right. There we go. All right. Perfect. Now we can add maybe
some color variation. Let's go here at
a a field layer. You can search in Google images, like some grunge texture. I have like this one that
I have searched by myself. I think that I just scrollGog search bar grunge texture,
something like that. You can just try to
search for this. Let's try to see we could get
something good from here. Let me put this a
little bit big. Let's change the color. I mean, the layer type
to multiply, maybe. A little bit low quality, but we can address
that by going here. Black mask or maybe
here just as filter. I will just add a blue slope to get this kind of nice effect. So now I will add a black mask. Some other fill. Let's type here, grunge also. Let's try to find a grunge texture that
would be nice for this. This one, no. Let's see if we can find some maybe this I will also add the
same stuff that we did at filter, blue slope. I will also decrease the opacity for that
layer, just a tiny bit. All right, let's
go to base polar. Let me change maybe the
rotation of this stuff. All right. I will
add another pill. Maybe this one will be
maybe something like that, and I will change the type to subtract or multiply
it see how this works. Maybe to subtract. Let me just leave
it in multiply. We can have some aviation
in the corridor. All right. Now. Lets let me see what we can do now. Let me bring the other
pieces. All right. People will try to add more
more stuff. Let's just do it. Keep adding more gradients
to the rest of the pieces. All right. Let's go to
the stock and handle. But the stock and
handle will be like two different gradients
in different directions. I want the gradient for
this stock part to be going in this direction
for the handle will be going in that
other direction. So we will need to separate it to separate
separated gradients. Let's add one first. All right. Let's add a black
mask iator let's go here, fly gradient, invert, perfect. Then we go, and we'll
add a paint layer, and I will put here, multiply. Let's press four and
in the polygon field, let's select. Let's press X. And now let's just fill that
part with the black color. Alright, we have that. That's right here. Gradient, one. Let's do some console D. Let's
call this gradient two. Let's go here this time. Will remove that paint layer. I will add another one. I will go here for
and just select. I mean, just erase that there. All right, let's go here. Let's go to the position
map position and now select the start position from something
around here, maybe. And the end position will be
something around here also. In that way, we can
have maybe this Hmm. Maybe Let's go to
position again. Let's just leg. Here and then here, maybe. Something like that. We also we can change how that stuff is behaving by just painted some paint by hand. Let's just try to change. To add a little bit
of a gradient there. I'm just trying to find a color
that would be nice there. Let's see. Et me select this one. And from there, let's just
try to find something good. With that, it will be good
enough maybe. Let's go here. Let's add another pane let
me put that paint below. And now I will just
let my soft brush. Let's select that active this that will be
the pain brush. I mean, pen pressure. And now's breaking
down the slow. Let's go to the base color. And now we can start, like, maybe again with this. We could also try to go
here and look some brush, maybe the cement will
be something good. For us right now, let's
go here in the flow. Maybe we could remove
a tiny bit here. All right. Try to have gradien like that. Maybe. Let's see if we could reduce the
opacity of the layer. Or let's go to the handle one. I will copy the color. Go to the handle one here,
paste the color. All right here. Now, let's just tick the
balance and the contrast. All right. Let's see if we
could get something good. I think that's a little bit
too much. Maybe that's ch. Good. And now here in the middle metal stuff that's at Abitoclusion stuff there. All right, AO. Maybe something a
little bit dark. Go here, black mass, here dor, some AO there. Go here, invert. All right, we have this. Alright. Perfect. We could also try to reduce crank up a little
bit the roughness. All right. Maybe here we can start painting some stuff away. Maybe like this one here, we could add those tiny bit. Here. Let me just
add my stuff there. I mean, the base color mode. Let's maybe remove a
tiny bit from here. Maybe just a tiny bit. All right. Let's see. Let's export these textures
to Marmoset All right. Let's go here and let's
click here in Export. All right. Also, I will save. Always remember to save. Now here, the texture should be updated if we done
everything correctly. All right. Let me see here. Here how they are looking. We need also to add some
variation in the roughness. Maybe. Let's try to do it now. Let's go here to
the inner material. I will call another folder here. I will just call this roughness. Go here, add another stuff. Let's add roughness
stuff. All right. And here, this color
variation, color variation. We can also have some
roughness variation there. So let's add the same
map that we have applied to the base
color in the roughness. Let's see that. It as this one. Alright. I say so. Let me see roughness. Working as well. That should be this roughness
variation. All right. Maybe that's not the best there. For some reason,
the roughness is not working quite nicely here. So here to the AO
I sink is because we have a layer on top
of the that are over griding roughness
in our material. Oh, there we go. I'm just a little
bit dump. All right. That was the new
layer that we have. But we have ad. So let's go here to
the color variation. Let's add the same here. Right now, from here, I will change the base voler
here to roughness and decrease the opacity for
the roughness channel. All right. On that
P there, All right. Now, let's go. Here
this rough stuff. From here, let's
add a black mask. Maybe some fill that's labels. Let's add a fill layer. So here and select. Maybe some spots. Maybe it will be this one. I will add a filter
big blue slope, maybe. I will just maybe
do this All right. I think that's a
little bit too much. Let's add another fill. This time will be
maybe like this. I will put this in multiply. All right. We also maybe change the color, maybe let's select
maybe some yellowness. Maybe some greenish color there. I still have a tiny little
variation in there. Alright. Let's try to export
that again to see how that looks in the marmoset. We like this to have a
little bit more roughness. I mean, to have a little bit less roughness, what I meant. I think it's because that's
a little bit too high. Let me see in the
roughness channel. Maybe something
like that. Here I will just crunk up maybe. You know, that here
in the roughness, let's crunk up a tiny bit this Are we export
that piece there. I'll just deactivate
that because I haven't done any changes
to the other pieces. So let's just export the
inside pieces right now. All right. Let's see. With that looking
tiny bit better. Yeah. All right. Also maybe the
roughness can also be affect by the gradient. We could also do that. You have a tiny bit more
of variation there. We could also do that. Right. I think do the same. We just copy this, go here, as the roughness stuff
and put it there. All right. So right now, I will just
jump to the other pieces, and I will start
adding some gradients. Let's start first with
this reddish cream color. All right, that
one, let's go here. Base, let me add
another field layer. This will be let's
add a black mask. Let's add a gradient here. Let's invert that gradient. All right. Now let's start playing with
this gradient stuff there. Alright. Let's change the color, maybe to some reddish. Dark color. I cannot see too very well
change that this is doing, maybe tiny bit like that. Maybe this a little bit
more like this. W be good. Alright. A little bit more balance and more not that much
of a contrast. I don't like it too much,
something like that. All right. Yeah, I'm just
playing a little bit with this all right. Let's just call this gradient. Let's add a paint layer so we can do some manual work here. Let's see with soft, the cement brush here
cement, all right. Now let's try to paint a
tiny bit of that gradient. There is something
around here maybe. All right. Produce a
little bit from here. If painting, I will change the brush maybe to
this knife brush here. Let me decrease this. Let's see what we can do now. All right. I really like this
brush because it gives some anpainted effects. I really like that effect. So we can have a
little bit of this. Some variation there
here and there. Let's see. All right. All right. Maybe around here. That's a tiny bit. All right. Let's go here also
to add tiny bit of radiant. Maybe here in the lower part. Tiny bit. And Let me select a soft brush.
A little bit too much. All right, let's
go to Base Color and see what we are doing. All right let me go
back to my knife brush. I'm breaking this bit better. All right. Perfect. That seem not that much. I think that's a little
bit too strong there. All right. A little
bit messy right now. Give me some stuff like
that will be good. Let's see. Tiny bit
messy, right now. Let's just keep refining this. Make it less messy. All right. There we go, let's, let's add a tiny bit
more at lower part. I is here, we also add a
little bit of this radiant. All right. Perfect. It a
little stuff there. Or maybe not. Alright. Now maybe we could
add some curvature. Let's add a new field
layer, Black mask. Let's add a generator. So here curvature. And now here in curvature here, let's decrease a tiny
bit these layers. So we have that
sharp edges there. Yeah. All right, I will
select for the color, maybe a little bit of yellowish, bright yellow. Color there. Let's see if we
change theretype, how this will affect there. It doesn't affect him too much, so I will just leave it
in normal. All right. A little bit reddish.
I like that, good. A little bit, maybe
less desaturated. Little bit more reddish or
to base right now here. I will add a fill layer
because I want to have some breakups in that
corbature because if we leave the
curvature like that, this will be like
too procedural. It will have urbatu
all over the place, and that will look like a mess. So we need to put some breakups. And an easy way to do that is
just adding a field layer. Now, let's select a
grunge maybe this one and change here to multiply. Or now you can see that
we have a tiny bit of breakups on those edges. So now I will add a paint layer. And I will just start
maybe adding, like, some manual work with
this curvature color. Maybe around here,
let me decrease here the flow I also here the size. Maybe the size no. I don't want the size to be
changed by the pressure. One. Little bit high. All right. I'm just adding this maybe
corbatu color in place that maybe the weapon can fall to the ground
and scratch a little bit. I might just trying to
add a little bit of that there here also, we could add some stuff. My decrease this
right by scholar. All right. Let's see. Tiny bit of detail there. Maybe around here. In this edge. We could add bit of color there. Maybe we could reduce a
tiny bit the curvature. The curvature based color here. All right? Perfect.
Let's just keep adding a tiny bit of those colors here. Perfect. Maybe here also. We can
also remove some of those edges in places that there will not have sense for
that to have a worn edge. Let me just keep adding a tiny bit of this color
in the edge f here. All right. Let me add
just a tiny bit of here. Now this is just for a little
bit as a arts purpose, maybe you have a
cool little here. All right. Let's
see how this looks. Let me reduce even more
intensity of the base color. Yeah, that's cool. B. Let me
just play with the height. Maybe this will do something. I don't like it too much, so I will just
remove the height. All right, maybe the roughness, we could rank up a little tiny bit
roughness in those areas. All right. Also here, we have
this detail here. Let's try to add it. Put this curva to All
right, let's click here. Now, let's code is maybe gray color,
detail, all right. It's at a black mass
paint layer I will use for this basic hard here, select like that reddish color. And now let's start
paint around here. Let's remove this. And if we preach chief, if we click and press Shift, we can make some straight lines. Let's make kind of the shape that that piece
has an approximation. Now, let's try to shape it to match the shape that
piece has in the coset. They try to make
this a little bit parallel here maybe around here. Fate, this should
be more like this. And this part will be a little
bit more like this here. All right. That's a
little bit too much. All right. Let's just try
to get this straight. All right, we will get it. Maybe something like that. All right. Let's go here also. It's not I know the shape that this has maybe this
would be a tiny bit. More things like
that should be good. Or right now here, let's select the high channel, and let's just move
the slider to left. Make some depression there. And here, it's at a filter, and now I will call
this I will put this blur here and reduce
the blur intensity. We have like this pbin there, we have a little bit of
pebble in that edge. We could also add a filter. Let's add this time harpen All right, something like that. Let's see how this
looks. All right, yeah. No, we have a cool detail
a cool detail there. All right. Let me bring Let me add little bit of
roughness, variation. Sce here. It's cute
roughness. By. Let's click here. Just like this, like mask, fill. It's a random stuff there. Roughness, let's add a filter. Let's go here. Maybe again, blue slope. I just really love Blue slope. I like to add that filter
whenever I can or write. Maybe something like that. All right. We could change. Tiny bit roughness. All right. Maybe
the gradient will also have a tiny bit of
roughness variation. All right. Any bit. All right. Let's go here. Let's add another fill. Maybe this one and
put this multiply. All right. Let me save. Let me export the texture. So here, this time will
be the two stuff there. The two materials,
the inside pieces and the outer pieces
or let's go here, arb set and see how the
texture are working there. They seem nice. All right. We could I mean, we could add tiny bit of I mean, the normal. Let's just try to do it again. So here to the curvature one. And here we just a
tiny bit in thermal. There. Let's try to see how this
looks word Allright. Let's go back here. Yeah, that looks cool. Yeah, indeed I forgot to add some little here
with the rubato. Or we are looking, guys. So I think that I will leave this video right
here in the next video, we're going to continue with the texturing.
So see you there.
29. 27 Fixing Ambient Occlusion: Alright, guys. So in this video will be
maybe a short one. And this will be just to
fix the ambient occlusion because we have in the floaters some unwanted occlusion there. You can see these
unwanted shadows here, and I don't really like that. So so in order for us to
fix that, let's do this. This is a method that
I found recently, and we can fix those
inside substance painter. And there's no need to export the texture to photoshop and then
do some stuff there. So we are going to do
everything inside here. Alright, let's add
a new field layer. But before that, let's go here. And in this plus icon, let's select Abt occlusion. That's what we need right here. Now, here, let's just select the ambit
occlusion one there. Let's add a paint layer. All right. Let's select just the ambito clusion
layer here without. Alright, let's go to
texture set settings. Now, let's change this ambient occlusion
mixing to replace. And now we can start painting. But you can see if we
start painting right now, you can see that maybe there is not there's nothing
happening there. And that's because here, let's go here to
this vet clusion. Let's go here to vet occlusion. Let's change this multiply to normal in both the paint
layer and the field layer. Let me call it AO pix. All right. Now let's
go to project here. Unless put the embitocltion that has baked in this
sample will be this one. All right. Now,
what we can do will be just to paint out this stuff, you can see here that
we can paint it out. So we're going to
use the Remember, here the vet detonh
should be this one, not the mesh maps here. Not that one. It's
this one. All right. And now we're going to color pick using this
color picker here. So near color. So we can paint out
some of these colors. All right let's try to raise those colors You
can see it here. We are doing some stuff. This will be basically
the workflow. Let me just show you maybe
this piece and a few more, and then I will just cut pause, and I will fix the rest. All right. I just want to
erase the unwanted shadows. You can see here that's also fixing the ebtoltion in here. All right. So let's
go back here. Let's keep trying to erase
those stuff there. Here too. I don't want those shadows. All right. Let's try color
pick a little bit lighter one. Let me go back here.
Maybe. That's good. Let me go to material or
write go again to base color. I mean Abt cushion. Let's keep trying to to
erase those wanted stuff. I like better this
method because I can see in real time in three and not into the will be if we use
Photoshop for this. For me, it's better doing
this way. All right. Continue fixing. I don't want
to raise the inner shadow, inner occlusion,
just the outer part. This one now because this is like some piece that
is on top of that. In this floater, I want to
fix it. Let me color pick. All right. Let's continue
doing this. Perfect. Also remember to have your
you symmetry activate it, so you don't need
to do it twice. But in this part in
here, this piece, we will need to deactivmet clusion the symmetry because this part is not
symmetrical to this part. So we will need to do it in both sides in this piece here. But it's just only there. All right, let's keep
fixing this. You quick. Just like this. Easy a nice. All right. Let's keep going. What else we have? All right. Let's go here. Let's try to fix this. All right around
here, maybe. Perfect. Let's go here also. And
now let's try to fix it. Let's get here this
color picker. All right. We take this one. Perfect. Let me stay here. We need to do some work also. Let's color pick this
reddish color here, and then try to fix that nguanta shadow in here. All right. Something like this. Maybe here some Perfect. It means eight for a picker. It's a bit more All right, let me select this
dark Color here, try to paint that stuff there. All right, very good. Let me try to paint also here, this inner inner parts. We clean it a tiny bit more. All right. Let's go here. We have more stuff to clean. All right. Let's just erase those unwanted
Shadows there. All right. I'm just like this. Perfect. All right. Let's keep Wing Let me
decrease the flow there. All right. Let's just keep doing some mixing here. Nice. Let's do it here also. Pick this color here. Let's continue working there. All right, select
this. All right. Perfect. Now here also, let me select this color picker, dark one, and just
paint that out. All right. Let me
select my brush here. Try to plant these two. This is a much. All right. I don't want it. So like that, not doing
anything, really. They just keep maybe
working a little bit. All right. Let's fix this area. What this, I should put a shortcut that
color picker, really. Will be the best in
this case to have a shortcut there? All right. Let's try to add
some stuff here. Perfect. Let's see
what else we can fix. Maybe these ones here also, select these and just
try fix those here. All right. Here,
select this one, maybe make it brighter. Something like that, we do. All right, try just to
erase those stuff there. Yeah. Keep going. So in the material, we are cleaning the
ambit occlusion on those unguanted areas. All right. Let's keep going. Let me select this
grayish color paint this part. All right. Right to add a tiny bit of this gray color here. All right. Alright. Perfect.
Let's keep going. Not doing anything.
Why. All right now, it's doing something. Perfect. Keep working on this. Let me select this grayish
and just try to fix. Those colors let's select this ray. Maybe this ray here, try to blend this stuff here. All right like this, try to raise that shadow there. All right Let's keep trying to fix this stuff here. All right. Okay. Perfect something like
this. Will be good. All right. Let me
fix some stuff here. All right, I need to plant
this better with the rest. Maybe select this one. She like that should
be good enough. That place. All right. I will just leave
that piece there. Just like that. I select
this grain and keep working to erase these
shadows on the floaters. Alright. Perfect. Here we shadow. Perfect. All right. So here. Perfect. Let's see
how this looks. Looking nice. All right. Let's keep going. Let's see. All right. I It's just like this. All right. Here. That's
better. All right. What else we need to do? I think it's easier
here and here. In those places for the rest, I think they are here also. Let's just try to fix this. All right. Let me increase
a little bit in the flow. Right here, let's
keep fixing this. All right. Let's just
praise. These ones. Praise those colors. Like this. Alright. Real escape painting. A bit more. Remove those. Let me select this reddish
color. Try to paint it back. Caria All right. Paint. All right. Like that. A little messy, but that's
too much of a problem. All right. Let's
continue with this. All right, I see. I think this should be kind
of good right now. Yeah, we don't bother much
with that piece here. Alright. Something like that. Let me try to make
this better here. Let me reduce the
flow here real quick. Let's just leave that just
like that. All right. Here I will just paint black, color, and nice. All right. We still
have or maybe not. Let me see the
material. All right. So I will pause right now, and I will just continue fixing the rest of the floaters on the inside on
the outer pieces. So I will get back to
you once I have those. Fix. Alright, let me pause. All right, basically I have basically fixed the
ambient occlusion. So now, once we have fixed that, we're going to do something. We're going to explore just this ambient occlusion
that we have paint. How can we are going to do that? Let's click here in file. Now let's go to export textures. Now here in output
templates let's create a new one let's
create a new one. Let's call this maybe
like ambient occlusion. Let's click here and create
a new gray scale map here. Now I will select
one of these names. I will paste it. I will
change this maybe to something like
ambient occlusion. All right, something like that. Or right now that we have changed the name
of our map here. Let's now drag this mix
AO to the gray part here. Let's click it in
here, gray channel. And now this will be the
mixed embitoclusion, like, this will mix the stuff that we have made with
the base ambitoclusion, and that will export that. So now let's select that
embitoclusion template. We have this here. All right. Now, let's
search for for a folder. Let's create a new one like a fixed because I have tried like this method
before before recording, so I will just delete
the previous one. And now here I will just
export my textures. Alright, we have the. Let's export them. Now let's search for the
textures that we have exported. And now we're going to import them back to System spinter. Let's click here, x texture. Let's put this in
project. All right. Now let's go to
texture settings, and let's replace the base and met occlusion for the new
one that we have exported. Like this is for the
inside pieces. All right. And for the other pieces
will be this one. All right. Now we can deactivate these AOfxes and everything
should be good and nice now. You can see that now our
AO it's working well, and we did that. We export the maps
and bring them back because we can
use the gradient. It's because to use the gradient without needing to
raise anything, you can see here the
avient occlusion layer. If we put another field
layer with a black mask and here with a generator,
grupatornN occlusion. Now, that emit occlusion is
working better and nice. You can see here that
it's no longer making the weird occlusion
around the floaters. Maybe this has a
little bit of that, but that's not a
bit of a problem. Right now, you can
see here that we can basically can do
our stuff nicely. And in that way, we save
time and we don't have to raise over and over again the Emet occlusion when we want to put a color
in the met occlusion. So basically, that will
be for this video. In the next, we're going to continue with the textures.
So see you there.
30. 28 More Work On Textures: Hello, guys, so let's continue with this model. All right. Let's see, we have fixed the ambient occlusion
in the previous video. So now let's continue
with the textures. So since we fix the metocltion, this paint layer here will
not be needed anymore, so I will just delete it. All right. And now let's keep adding maybe more
gradients and more stuff. Let's see. Let's try to add a gradient here in this
lighter cream color. Let's go. Let's see where is it? It's here in the other pieces. Let's go here maybe
layer cream color. Alright. Let's call this base. Let's add a new fill layer. And now let's taste. Let's see which other which other color will
be useful for this? Let's see, let's
invert this inverted. Edge increase a
little bit more the contrast, a tiny bit more. Something like that. All
right. Let's go here. Maybe let's color pink. Maybe a darker color from here. Let's see darker color. Let's put this a little bit to the red, something like that. Let's see the base color here. Alright, how this is looking
a little bit more saturated, maybe not that much. Yeah, a little bit saturated. But now this is taking a
little bit of a similar hue to that All right. Maybe this is good work. Let's see. Color. All right. I think I will stick
with this or maybe not. All right, trying to get maybe the perfect
color for that. Stich the gradient
gradient here. Let's see. Maybe
something like that. A little bit less contrast or maybe a little bit more
let's reduce intensity. All right. I Yeah, something like that should
be good. All right. I think I haven't placed
a metocltion In this. Yeah, I haven't let's add
abtocltion layer here. AO, let's put a black mass, add generator, a metocltion. So now let's see global invert. Let's play with this. Let's see what we can get. Let's change this color to
maybe darker, dark color. Let's see, maybe not that much. All right. Let's see if we do a global blur, this is looking. Yeah, kind of good. In that place, I don't
want to have aminoclusion. Let me place a paint layer. Around now here, I will just raise that Amdoclusion
from there. Et's just erase it, right. Also from here, a little bit. Perfect. A little
bit in this part. It's a tiny bit. All right. Let's do it also in this thing here. Bit also here. All right. Let's
go back. Perfect. Let's do the same thing here. Let's add an AO. Also, let me put a little bit of roughness in this ambitoclusion, a little bit of white
roughness or right let's see, it will call AO black mask, ata generator,
ambitocltion, in bird. And now let's see
what we can get here. A little bit of
roughness, let's see. All right. Base color, something
like this should be good. This is too much in that area. Let me see how this looks
with the global blue lighted. It's a little bit too much. Yeah, let me add a
paint layer here. I will remove that
extra ambient occlusion that we have in this area. All right. Let's see. Let me export all
of these four detextors. Also remember to go back to your real rectal engine pack. Let me see something
here in real pack. I A abntoclton should be
the bent, that's the Alpha. All right. In this red. Oh, no, that's that's the base color. Let me concel this. Let me
open it again for textures. So here, at.This
with the mixed AO. So let's export this as it is. Let me select this. This would be real act here. Now let me change my
direction to here. Now let's export this for. All right. So let's go
to our marmoset toolba. All right. Perfect. Let me just remove
this billboard, right? So we have one view
only. All right. Perfect. Maybe we could add some it's all
normal in these areas, maybe to make this looks like more rubber or
something like that. I will seeing Alright. Let's add a curvature in
this lighter cream panel. Let's add here. Black mask a generator, curvator all right. Let's reduce the balance, maybe. Let's twig in these sliders. Get the sharp ones, may be fine. This one maybe could be, all right, something like that, maybe let's add a field layer. Let's put this in multiply. Let's search for a grange map. Let's see if we can find some just to have
a little bit of a breakup on those places. All right, let me add some
roughness maybe and a hide. All, but this is a little
bit too much here. All right, it's
not looking good. Maybe something like
this would be maybe not. Let see this. Also could be let me change
this for a lighter. Maybe yellow color. Let me add a filter
this compro mask. Add a filter here
with the blue slope, maybe let's put this in ten. All right, let me just
tweak a little bit. The intensity. All right. Let me continue
tweaking this stuff there. Let me add a paint layer, a fill or let's
add a paint layer. And now I will paint
out some curvature that is that have
no sense to be. Like, for example, these
lower ones put this in 100. Maybe these ones also. All right. Maybe we
could reduce this. See, I think this is too
light, bright, all right. Saturated. I think this is a little bit too
much removed from here. Maybe let's add a
little bit here in this area. All right. Let's just remove it. Maybe not. Maybe that's coping. A tiny bit. Or let me use my knife
brush here and let me paint just a little bit in the AO layer to have a
little bit of paint video. Maybe something
like this here will be or let me decrease the flow of
the brush a tiny bit. You have a little
bit more of control. Or let's sing, let's paint
a little bit here, maybe. Alright. Inside here, we could
add a little bit of this color
inside the floater. All right. Let's just add a little
bit of color here. All right. Let me see in
the material channel. All right. Perfect. But I
have forgot that I had this part is
not symmetrical, so let's remove the symmetry. And now let's paint here the stuff that
this should have here. Go to the base color. Let's see what we can
paint here maybe. Little bit here
would be All right. Let me remove this
corbatur from the parts. All right around here also
from most of these parts. All right. Maybe we could
remove a little bit from here. We could leave it. It's a tiny bit,
maybe not that much. It's a tiny bit. Alright, maybe here
just a little scratch. All right. Let me keep
moving from these places. All right. This is saving. Let's wait for this to
save right now. All right. Let me save myself. All right, perfect. Let's keep removing this
unwanted patre here. All right. If we
could at Hina bit in this area would be Yeah. I got a tiny bit there.
All right. Let's see. All right. Maybe now,
let's see what we can do. This could be maybe
with this piece. Let's try maybe with a carbon
carbon fiber or just let's leave it like it is some
plastic chine material. Maybe could be awesome. Anyways, we need to do some roughness work
in those pieces. This has some roughness. Let me see rough. Right this gradient should
be a little bit bright. And this one tiny bit also. All right. Now, let's add a roughness
here right black mask, add a fill layer. Let's search this one will be. Let me add filter bluer slope. Maybe let's put this in ten. All right. Let me keep
tweaking this roughness. Maybe rotate it. All right. Let's see. Change the
name of this roughness. All right. Maybe let's select
another another runchm would be I think now
this is too much. Let's add another filter. I mean, filter no
another field layer. Let's put it below the filter. Now let's say like maybe
this one and let's put that field layer
into multiply. All right. So now this has a tiny bit more of roughness
variation to the surface. So now, maybe we
could try to find some some rubber or
plastic stuff here. Let's see. Let's type rubber. This is plastic morlosy. This is made simple. Let's see, maybe the
grip one could be good. Is plastic rubber and
this plastic stuff. All right. This
is fry re I mean, I don't want to use
this plastic trip. Maybe the one that we could
use would be this maybe. Let's add it here. Let's see. Let me make a
new folder inside this. Let's make a black mask, paint, and select all of these. All of these
polygons. All right. All of these. I just wanted
all of those polygons here. Perfect. I like that. In these pieces. Alright. I need it right here. These ones. Perfect. But I don't want the stuff
to affect in that area. Maybe what we can do is go
here at a color selection, Let's pick this grayish color. Let's put this in subtract. Let's see the mask. All right. Now, this should
be working nicely. Now let's take that a
plastic rubber into here. You can see it's looking nice, but maybe not in that piece. I don't really like that
piece there. Let's change. This would be plastic rubber. All right. Let's move this
maybe to the inner material. All right, let's
see, inner material. We're getting something. Let
me remove the base color. Maybe from here also,
we'll just remove it and I will just leave it maybe
in this middle piece. I bet go here in
this paint layer. Let me use the basic stuff. And now let's paint out
that material from here. Let me just set my stuff nicely. Alright. Let me remove it also. From here, want that plastic
stuff to be in the top part. All right. Maybe we could also have a little bit of
color variation there. Maybe let's put this multiply. No, this won't affect because this layer mose affects all the layers that
are inside the folder. Maybe if we put this
in pass through. No, it's not doing any. Yeah. So let's just
change the color by hand. All right. Let me sell
legs. Just the color. I mean, yeah, you
have the color. And now let me search
for a simular on here. If we go here. This is
a little bit too much. Now, let me see how this looks with the material
view or right base color, maybe a little bit. Just like that. All right. Let me move this below the gradients and below the
AO around here should be. All right. If we put the entire layer into multiply,
let's see how this looks. Overlay, maybe screen All
right, no soft light. Let's see base color. Maybe that would be good. Let me keep removing that part from the
mask. All right. Now, we have a little
bit of detail here. Let's skip version for this. All right. This is the surface detail, and this is the surface damage. All right. Perfect.
This is spots. Let's tweak a little bit
these these sliders. Maybe that All right. Could be. Now, let's try to add
dirt layer, maybe. Let's type here, dirt.
Let's just place this. Now, let's add black mask. Yeah, let's add a
black mask here. Black mask. Let's add a
generator. Let's type there. Or maybe we could
select here and try to find a smart mask here, maybe maybe dust plastic. Let's see how this looks. Looking kind of nice a tiny bit. Alright. Let's see edge, strong
Edge strong scratch. Edge cracks. No. Let's try to find
something that I like. Let's try this one.
Let me remove that. Maybe this is too
much. Dust occlusion. Let's see. Yeah, this
dust can work maybe. Let's put this with
a grayish color. Let me add a roughness to this. Now, maybe let's tweak
a little bit the color. Let's add a field
layer. All right. With this, let's type
here, with this multiply. All right. Let's see here. All right there at
level contrast. Planer runch amount. Maybe we could add a
filter with blue slope. All right. S Maybe remove this a tiny bit or just
put the slope in. Let's just keep looking at this. All right. Maybe change the color
a little bit dark. All right. Let's see base color here, dark. Some dirt or some dust. Let me at a pain now. And now I will just
remove some of that. Some of that feels at a paint. We just try to remove
some of those So here. Maybe we could use a Alpha that I have
downloaded. Let me see. This one, these Alphas
are from Max Dirksen. I have downloaded, and I really like how
this Alpha looks. So I will just write
it. Let's go here. Import at resources. Let's find our alpha. You can be si, give me a sec. All right. All right, let's put this into Alpha Alpha. It's going to be Alpha, right, Alpha Alpha
Alpha and Alpha. I will be in the project
weapon curse, right. It's important. And now let's try to
sing maybe this third. Alpha could be useful
right here. All. Let's try to remove. Any bit. Now let's keep removing some of those dust. Maybe we could add a
splash here around there. I All right. I really forgot how we
can flotate Let me see. All right. With the mouse. All right. Perfect. Try to remove a
tiny bit from here. Let me remove that. All right. Alright with control
and a left click, we can rotate the alpha. Made something like this.
Right to remove. Any bit. Of that. This is too similar
to the color. All right. Let me export the
textures just to see how they are
looking real quick. All right, let's
export textures. Export All right, let's go to Marmoset and
see how they are behaving. We have this. I don't know. I don't know about
that. Maybe we should need to change the
material for that piece. All right. Alright, let's keep working. Maybe I will change
the material there. Let me put Rubber again. I will change this
crip material. Let's try to find it. Maybe the plastic
rib would be good. There are no here. Alright. Or maybe not. This is looking
a little bit too strong. Alright. Let's go to the normal up here and let's reduce the
intensity of that normal mab. Maybe this is too much. I think so. Rain density, right to change. That try to change the intensity of the grain. Just a tiny bit. Maybe we should need
another plastic. All right. Maybe this one would be a nice but this is not doing anything
with the roughness. That's not doing anything there. All right. I think I
will just leave that. All right. Maybe what we can do also is to add a little bit of scratches to have a little bit more detail. Let's do it. All right. Let me see. I will put a scratch Layer here. Let's add a fill layer. Now let's put the height, reduce it a little bit. Let's click here,
black mask. At fill. Let's search for a
scratch right here maybe. Now let's select for
this one, I think this. You, now let's tie
all these stick here, the hide those scratches. All right. Maybe let's just leave leave it like
that. All right. Let's change the balance here, maybe the contrast,
increase it that tiny bit, scratch quality. I want this quality, tiling, no blur, no things. All right. A tiny bit too much. All right, intensity. All right, dust. Right now, I will add
another field layer. I will put a crunch. This one, I will just
put this in multiply. I will tie this, and now I
will just do a paint layer, and now I will start
removing these stuff here. Right here with the dirt brush, let me find my alphas
with this one. Now we can remove some of those stuff from unwanted areas. Like, for example,
the scratches doesn't have any sense to be
like here inside. It doesn't have any sense
because that part is not like, open, so it can be I
cannot have scratch. Maybe let's leave the scratches. Maybe, for example, these
areas in this part, not in the cavities. I mean, the outside
parts. All right. Let's see here. Keep removing the scratches. All right. Tiny bit. Maybe I can leave
this one there. Let me keep removing. Let me remove the symmetry. All right. Let me remove
the scratches from here. Also, inside the floaters, it doesn't have too much
sense to have scratch and near in this
type of corners. Also, it doesn't have
sense to have scratch. All right. We go here. Keep removing a little bit of those crutches. All right. Inside here, it doesn't have sense to have crutches there. I mean, active
again my symmetry. Just a tiny bit of
scratches would be good. All right. Is something there. Inside here doesn't have sense. Either et's see how this looks. All right. We we leave a tiny bit
of scratches here, a tiny bit, not that much. All right. Let me put this in multiply so we can bring back a
tiny bit of scratches. All right. Let's see, I think I haven't put some curvature inside
the main stuff here. Let me delete this
plastic rubber and these are more glossy. All right, let me add
maybe some curvature here, right let's add a black mask, a generator, stip
here, curvature. All right. E's change
the stuff here. All right. All right, let's see.
Let's add a layer. Let's search for a brunch map. Let's put this and multiply. Maybe a tiny bit height. All right. Let's add
a filter to slope. Maybe in ten And
here. All right. Perfect. Let me
add another layer. Now, let's see search
for another ranch. Let's put this in multiply. Reproduce a tiny bit. The influence or
maybe we can put this in substract All right. Let me decrease this here. Maybe without a bluer
slope would be good. All right. Let's see, let's change the color
and the roughness. Let me change the color. Maybe to a brighter one. Just a little bit bright. A little bit saturated. I All right, something
like that, maybe. At it bi righter. Let's change Alright
with the balance. I like this. Maybe not. Contrast, tweaking those
lighters just to see. We could get something
nice from here. All right these flushes here. I don't think they
look that nice. Let's see where those. Yeah, let me go here
and I will just remove a little bit
of the stuff here. Perfect. Maybe. We could add
one here, another one here. At bit here. All right. Perfect. Now, I will remove by hand this new Berbatu
that we have added. Let me changed the
name Burbatur. All right. Let's go here. We're in the paint mode. Let me remove by
hand a tiny bit. Alright. I Right, perfect. A little bit. Just want the edges to
pop out a little bit. All right. Let's go to the base color. Let's see. I like this maybe could
be here in the scratches, where are the scratches? This one. Let me
change the name, hess let's remove the color. Let's add actually
a color there. Let's just put this multiply. Maybe overlay, dof
light Earth light. In your touch or normal. Doesn't have too much
of a difference. Let's just put that have
some reddish color. Let me export that to see how this is looking
in the engine. All right. Export textures. Here. All right. We have
some stuff there. And looking at my reference, the overwatch
reference that I have shown you, I have shown you. All right. Maybe the corners can be a
little bit brighter. Screw at. Maybe maybe increase
a tiny bit value. A little bit All right. And also in the roughness, we could here, I
think it is this one. I don't really like
the amount of noise that this is bringing
to my roughness. So let's go to roughness
and maybe I will just reduce it a tiny bit more. Maybe just like this. Let's explore that
again. Sport textures. Alright. And a better Alright. Let's try to paint
by hand some stuff. Maybe let's try to paint
by hand the curvature. Let me go to my knife brush. Maybe just paint by
hand some details. Alright, maybe here. Let me reduce the flow here. Perfect. Maybe this stuff. Fate. Let's try to add
some shape here. Just remove it from
here and just try to add tiny bit of a
shape in this area. Maybe remove the symmetry and half and have this a little
bit different from each side. All right. Let's active the symmetry again. Remove it a bit more
from some places. All right. Let me
reduce more scratches. I think they are a
little bit too much pill St.. Let's move. A little bit more
those scratches. Let's just leave it. Dave
a tiny bit of those. Alright. Perfect. Now, maybe we could
add also scratches. If the outer plates, let me save first. But this time, I will use this scratch Alpha that we have downloaded from the
page I have show you. This one, Max Dikinson Dirksen. I mean, right, let's
go to the pieces. Now here, maybe we
could add crutches. Right in the misk maybe here, we add a new folder. Crutches, the layer
with a black mask. I would be in a negative
height. Let's at a paint. Let's select the hard one. Let's go to the
project all right. Now let's try to add
some of these crutches. Maybe around there,
I will remove also metry Maybe here would
be something like this. And here maybe like
temple this maybe. Yeah. Also here will
be another one. Something like that
or right here, maybe around here will be another one maybe like
that in this area. Perfect. All right,
let me keep looking. All right in the
barrel, maybe one here. In this place, maybe one here. All right. Let me add one here. Maybe one here, yes. Around here, perfect. All right. Or not. Let's see. Perfect. Maybe the color, we can
reduce it a little bit. At the roughness. We
go to the base color. Reduce it a little bit. Alright. All right, let's see. Maybe here one in this area. All right. Something
around here. But this is not working. Oh, the flow right
now it's working. All right, something like that. Alright, perfect. Let's save. Let's export this to see how this is
looking in the engine. All right. Let's go here. Maybe this one is too
similar to that one here. In this looking better
here, all right. All right. Perfect. All right. Maybe we could increase the
roughness also of the plates. Let's go here. Maybe we could
increase the roughness. Of the entire plate tiny bit. I et me copy this roughen variation and
put it in the lighter one. All right. Let me
remove this piece here. Not doing anything. Let
me select this alpha. Oh, this is not doing
anything right? Where is the scratch.
Alright. Where is the scratch love here. Let's just paint this out. This doesn't want to remove. Maybe we could shape
it a tiny bit. Maybe something like that.
Would be nice to have there. Alright. Et's try to add maybe
this type of gray color. Let's add it here. Let's add here. Maybe
just feel layer. Grains put it around here. Glass mask a mask, paint layer. It's change. Let me color
pick that reddish color. Alright. Now, I will just
paint that maybe with this Something like something like this, be. Let me put symmetry. But first, I will change the value of
this. All right. Let me erase that
stuff from here. Although that stuff
looks like it is some scratch or
something like that there. We will try to play with that we just right, get some similar shape there. I All right. Let's see. Let's try
to play with that. Metallic. This would
be something metallic, something like this,
this should be brighter. I think that looks kind of cool. A little bit more detail there. Let's add a roughness. Alright. Now let's
add an encore point. Let's change the name to
Gray Expose Met hall. All right. And we can do we can add
a little bit of color. You will see. Let's
add a black mask. Let's add a feel. Let's
select this anchor point. Now I will add a filter. Select mask outline. All right. Let's see in the mask. Let's put this in
inside from black. Like with this, maybe the
threshold, reduce it. All right. Now we have that. And now we can change this color maybe to
something around here. Maybe. Let's go here again. Just try to blur this. Let me add another fill layer. At a field layer at the anchor point and select
multiply. All right. Just to find this
color inside that. And here, this will be maybe secundari color metal, maybe something like that. From here, I will change
the pattern here or maybe we can just delete it
completely in this area. Maybe just leave it a
tiny bit like that. All right now here, let's try. Or maybe this should
be here, that pattern. Indeed, that pattern
should be there. Let me do a Control C. And now I will just remove some of
that pattern from here. Looks like that,
maybe. Would be nice. Let's add any bit of
this in this corner. Another tiny bit around
here as it is in the coset. Alright. Perfect. Maybe we could add an
exposed edge around here. All right. Let me export this to see
how this is looking, save, and now export detexors All right. Perfect. Trying to see a tiny bit. All right. A maybe we can have gradient coming from the
barrel to that part here. Let's try to see. Let's just do an experiment. Let's copy this gradient. Now I will change the direction. Let me remove that paint. I will change the direction now. Let's click here in position. Let this as a starting
point and maybe something here has endpoint. Would be be, you have a tiny bit
more of extra detail. Maybe tripsin with another color how this looks with that
yellowish color there. No. Maybe with that will
be interesting. Reduce intensity. Trying to find some
good color but that gradient All right. Maybe something around here will be let me change
the balance of this. I have a tiny bit
more of detail there. I like that maybe. A tiny bit more
saturated would be. Let's see how this
looking in the engine. Let's export detetors. All right. Ported. Let me say real quick. Now this is important. I would like to
have more contrast between the gradient
color and the base one. So maybe we will increase the duration
and moving the hue, maybe to a bluish purple one. All right. Not that much. Yellow one could be. All right. Let's try this. Did
you see it a tiny bit? That grating is not in
the concept, but anyways, I think this just a
pool a cool detail. A little bit of a
cool detail there. Something like that. Let
me try this blue colour. Let's export that here. And now we have that
blue color there. Maybe that's too much. Maybe this yellowish
color is exported. Let me say real quick. Let's go to the marmoset. Let's see. I think that's
working better there, indeed. Alright. Perfect. All right. I think that we leave
the video here. It's a little bit too long now. So in the next video,
we're going to continue working on
the textures. So say
31. 29 More Texture Work: All right, guys, so let's
continue with the textures. So let's see what
else we can do. All right. Let's see what else. Maybe we can start working
with this metal piece, maybe adding more color in
general in all the pieces. So let's start. Let's start first with
the metal pieces here. Let's go to the other pieces. Right now, here, let's
go to the metal. I think it is this one. Let me see. This one here. I will make
it a little bit rougher. All right. This one is not the one that I was looking for. It's this one, yeah. I think or not. That one is not the metal. All right. This is the one that I'm looking for. All right. This one, so let me
add phase, maybe. Maybe I should not
add a gradient here. Maybe, yeah, let's try to see how a gradient will
look like here. Let's add a linear
gradient in bird. All right. Missing the base color, maybe a little bit
more of contrast. So I can see better
what's happening. Let's wait for this to
chair load correctly. All right. Let me see with a darker color. Not that good. Let me see maybe without
that amount of contrast, maybe let's change the position. I mean, a direction of
the gradient. Let's see. I think it's looking cool. Looking cool, maybe with
a tiny bit of hue of tint some bluish bluish hue. Will be good but
any bit brighter. Let's see. It's a bit more dark. This panel, I think
this panel should be it's a little bit darker. Maybe a little bit more desaturated or
something like that, should be good. Let's see here. Let's keep looking at this
a little bit lighter, maybe a little bit
more desaturated. I think that could be good. Something like
this, let me tweak a little bit more the balance. Maybe we can also
tweak the roughness. Make this with a little bit of roughness variation
there. It's a tiny bit. Let's see roughness.
We could make this. A bit less rougher. All right. Let me put this
gradient gradient here. Perfect. So I want to make some variation in
roughness in that piece. Let's do it. Add a field
layer, black mask. Let's put this in rough. Let's click here. Fill or
let's search for something. Let's see crunch maybe with
this one. I like this one. Good. Yeah, I like it. Looking good. Let's see
the balance. All right. Let's try to see
with the tailing. All right, let's see. See what we can get with some contrast in the
roughness channel here. All right, what is
the warp intensity? Which detail, let
me not touch those. All right. I really like
that one. Let's go here. Let's select maybe another one, maybe this one and put
this in substract. We have a little bit
more of variation in the In here, let me reduce a tiny bit
more layer weight there. Maybe we could add
this multiply. Now, let's just
leave this abstract. Let me export this. I want to see how this looks
in the engine. I export this. Alright, let's wait
for this to export. Alright, let me save this. And let's go to Marmoselle
to see how this looks. Here inside remove this pupil right that scene Yeah, kind of good. Maybe a little bit less, a little bit more
rougher should be good. Let's export this
again here, export. Let's see how this looks. All right. There's
some stuff there. Maybe let's tweak
it a little bit, just to make it a little bit more noticeable the
roughness variation. All right, let's export
this Export, all right. Let's wait for this to
export these exxurs. Let's go back. Marmoset
Let's see how this looks. Alright I think this
looking kind of cool. Yeah. So we need something here. We need this Alpha in this area. We need to make that Alpha. But how are we
going to make that? I was thinking of making
it maybe with Photoshop. Let's sing, let me
open my photoshop. Alright, I decided to make the Alpha here in zebrus
instead of Photoshop. So let's do it. Let's
add a cube here. Let's add the sphere. Go here. Alright
now with our gizmos pressU and click here into you. Alright, I forgot to make here. Make polymerse pretty. Now, DU. Transform this into a cube. All right. Let me do something. In this con here, let's just track it out. And here in document, let's put this let's
disable the pro, let's put this in maybe
two K 2048 and 2048. Let's click here in free sides. Let's click in Control N.
Let's click there in edit. All right. Let's zoom out. Let me remove this ugly gradient that I don't really
want. All right. Now here, we can start working. Let me do the shape here. So we have like this shape here that we will
try to achieve. Let me say we have this
Is a shape like this. And here maybe
it's this co down, something like this,
and then here. And here, there is a tiny shape that is
some sort of a triangle. We will try to do
this. All right. So here, let's make
the general shape. See, let me just remove a little bit of
those etubes with that in. All right. Let's see. Maybe we could delete
even the other side. And here let me click
here in Act 12. I can have better view of
what I'm doing. All right. Let me remove a tiny
bit of this stuff here. Maybe these ones. Let me click here in mask Lasso. Let me mask this. Maybe we will need, here. All right. Let's add one drop
there. One edge rope here. Just around here, maybe. Yeah. Now, what I'm going to
do will be to bring this in just a tiny bit and push
this to the other way. A little bit like that, trying to make these two
lines parallel. Maybe this one
push a tiny bit to the left or this one will be pushed a tiny
bit to the left also. Now here, maybe we could push this piece a
little bit more like that. Just like this. All right. We need to extrude one edge
rut. Let's extrude it. Something like this,
let's make all of these straight just like this. All right. Let's make also
this part trade. All right. Let me mask this hip and move it more like
this around here. You could do the
alpha in photoshop, but for me, at least for me, it's easier to make these type of shapes
with geometry here in Zerros and then use the two here in zeros
to make the alpha. So I will just do
that. All right. Now let's try to make
a triangle here. Let me click in slice mesh and make some opening in this area. All right. Maybe we could let me see how
this looks. All right. Oh, no, oh, my
Console C. I mean, my keyboard is a
little bit bugged. So that it did a lot of
console C, all right. Let me do some
slide here, maybe. And here also, I will also make this bit more like
this in this area. Let me say real quick and
see how this looks here. All right. It's looking kind of nice. Maybe we could do like make it that
part just like that, maybe or maybe not. We could make this part
a tiny bit longer. All right. Let it mask again. Tiny bits a little bit bug. I don't want to do that. Let me see what's
happening. All right. This is supposed to
be the cord part. This doesn't want to
work now. All right. Now, it's working. I mean, my keyboard is a
little bit bogged. So some weird stuff
are happening. Maybe something like this
should be good enough. Maybe, let's try to
mask this and move it a little bit more to the
left. Something like that. Let's try again, our Alpha Yeah, kind of good. All right. Maybe this could be a tiny
bit taller, like that. Let me bring this part also tiny bit tally quite a bit, less long. My control bottom is not
working real well right now. All right. All right, let me change a
tiny bit the angle here at me. Just try again. Let me do something here. I will just make this less egg and this part it
bit more like that. Let's try again. All right, I think now it's working nice. All right. Let me save. Now I will make this
little triangle here. That would be IM a Zim. Let's append a cube. Let's make it small. Let's make it this
maybe polyplane. Let's just stick with one
with one polygon there. All right. Let me
click here in home. So this is in the same plane. All right, clicking home this should be in the
same plane or it's not. Let me click here and home. Now, this should be good. All
right. You can see there. Let's just move it. Now
what I will do is I will collapse these two. Let me see stitch stitch here and one
in the point actions, stitch these two together. Alright. Let's try
to stitch this. Alright. Now, let's
move this point. Something like this. Oh, it's not working.
My keyboard. It's crazy. Right now, this should work nicely, maybe something more like that. Let's make this triangle bigger. It should be more around here. This should be align with that with this
angle with that line. All right. Let's see, like that. Now here, this part
should be aligned with the other line with
this other line. All right, let's save. And let's see what we have here. Let me merge these two. All right. Let me save. And now if we do this,
now it's working. All right. Perfect. Yeah, I think this
would work very nice. Maybe let's try to make the
triangule tiny bit bigger. A bit bigger, something
like that should be good. I even more, something like
this should be good enough. Try. All right. I think this could
be good enough. So now, in order to make APhA, let's click here and
drag this to zoom out. Let's click in F. Put it
kind of in the center. Now, let's go here to
brush brush now, Alpha. Let's click here into transfer, and now we will slave
here in grab da. You can see here
that we have an Opa, but we have a tiny
bit of a fall off. Let's see why it's da. Th should be
completely flat plane. This should be completely flat. All right, let's try to
make the Alpha again. Alpha wrap dock. Now, the Alpha is
completely white. So let's go here. Let's select the new Alpha
that we have created. Go here. And now let's click
here in Export. Now we're going to export the Alpha a directory
that you want. Let's see. Give me a sec. Let's click here at AlphaS All right, AlfaS. Perfect. Now, let's type maybe. Alpha Alpha turn maybe will be. Yeah. Now, let me save this. Again, now let's go back
to Substance Painter here. Let's search the
Alpha that we have created here. Let's see. Now, let's drag this
Alpha into the project. Let's call this Alpha, right project here in board. Now we have our Alpha here. Now with that piece,
with that Alpha, we can create the pattern
that we have in this part. So how we're going
to create that? I'm thinking in a notch option. Let me see if that
will be good enough. Right, let's create
a paint layer. Let's click here,
paint a long path. Let me like this. Let's click here. Let's see how this
works right now. You can see that it's
working a tiny bit weird. Let's crank up this pacing and put it somewhere like this. Maybe. Let's just keep moving this Just try to make this raid, that's possible. This would be an option. Yeah. This doesn't want to work really
well. All right. Maybe we can do it
in another way. Let's see fill layer. Let's add a black mask here. Let's add a paint layer. Now I will put this
maybe paint layer. Let's add a fill layer
inside the mask. Let's add the Alpha here. Let's make this mall All right. Let's move it into
position. All right. Let me change this too. See planar projection here. All right. Just move this And here we could change maybe tiling or no. All right. Let's see. Physical size, and tiling. All right, this is a
bunch of stuff here. Let's see what would
be the best for us. I just want to shrink the
space here, but I don't sing. With this method,
there is a way. Alright. It horizontally or vertebally. Just repeat. All right. I think with the other way with the paint
along path would be the best way maybe because I want to get
this close together. Let's see if we could do it. Here that's not the case. So seems that we cannot get the pattern close together
in this part here. I think that I'm going to stick with this and
try to make this work. Although let me change
from a paint layer, I will change a field layer here and paint do a paint layer. Let's click here and
paint along path. Click here and then maybe
here, increase spacing. All right. There were a way to remove Make this load will be awesome. But I don't think so. Let's try to control a
little bit more de spacing. All right. Let's see the size. That working that
well. Let's put in object increase the size. All right, working a
tiny bit better here. All right, let's keep trying to make this good as possible. Around here. All right. But I forgot to have
this with symmetry, click here, go here in the C symmetry.
All right, perfect. Alright. I think I would
just leave it like that. It's good enough. Now, let's
change the color to maybe. This has some gradient. This start with a dark or and end up with
a desaturated one. Like this is, like,
disappearing. Let's try to do
that. Let's go here, maybe some dark blue color. Let's let this save
the substance painter. Or let's try to
get some reddish, dark blue color here. Something like that
should be good. Also maybe some rough will
make this Any bit rougher. Tiny bit, maybe, maybe not
that much. Just a tiny bit. Alright. Let's keep looking for the best color option here. Maybe something like
this should be good. All right. So we need to make
this disappear. Let's see how we can make it. Maybe let's add a generator. Let's add a gradient.
Reading here. This is a little bit bugged. Let me save just in case this
doesn't crash. All right. Let's do an invert, s crank up the stuff there, and make this maybe in subtract. Let's just see how we can
make this to disappear. Let's increase a little
bit more stuff there. All right. Something like this,
should be good. All right. Let's click here. Let's add another field. Let's search for lines. Line. All right, I'm not
getting anything there. Let me see. Here, line. I should want to get some
line like this shape line. Let's try to add that line here. The length. All right. Let's make this a bit smaller. Let's see the length. All right, that's not the case. All right, is basically what I want change
from UV projection to maybe something
like fry planar. Bring this down. And let's put this in subtract also so we can get
these lines here. Let's try reduce all my stuff is bring out. Let me save. All right. Let's see. Let's see. Open this
to be hundred there. All right. Let's increase this maybe depending with the thickness? Maybe not. I don't want
this happened. All right. This doesn't change
the thickness. If we increase maybe 64 puff sets a tiny bit more we
could get something. That's rotation. Maybe
something more like this. All right, I'm not getting
the stuff that I want here. Maybe it'll be this number and we can rotate this rotation. Something like this, maybe 45 degrees, make this straight. I all right. Maybe we will keep this. Let me see. If we
get this multiply. No, Eposon substract
again, Epotion multiply. Maybe N C subtract Maybe I will have to pay
it manually this part. In ripe number. Perfect. Let's add
a paint layer here. Now we're going to paint out
a tiny bit of those lines. All right. Let's select let me select my knife brush.
Maybe could be. And now let's paint
out a tiny bit of those oh, let me see. Maybe this would be substract. No, I don't want that
to be substracted. All right. We're
getting something. A little bit weird. Try to
see the best way for this. Work nice. Alright. Let me think just a
little bit. All right. What I have done
here was just to, I have created
another field layer, but this layer will not
affect the model itself. I mean, the textures.
It's just for the mask here. I did was. What I did was I just copy the basic setup
that we have before. Paint layer with the paint
on path, the gradient, we subtract mold here
and the line strap, as we left them. I just copy that entire
mask and put it here. And then I just added
an anchor point, I just name it something like
line pattern anchor point. And now, what I did
here was I just disable the paint layer that we have added on top and the line strap because
we don't need them. Maybe we could even delete them. I just added a field layer, and here in this field layer, I just select the
line anchor point, and then I added I mean, this paint layer is
not needed even. All right. This is
basically not needed. And then I just added a three linear gradient with default settings kind
of with inverting folds, the balance, maybe in that one. And I just put it
this in overlay. So now we can control
how much we can get of that pattern,
just like that. All right. Now we
have pattern here. Now maybe could get even
we could add field layer. We type here crunch search or something that could
be good for us here. Maybe just to have some
breakups on the surface. Maybe this don't,
maybe this could be reduce the amount I don't think so. It'll be too strong for me. Maybe substract or my
substract is working better. All right. Something like this should be. All right. Let's see. Let me try to add the roughness stuff on top
of this, see how this looks. Yeah, kind seeing the roughness. Working kind of
cool. Et's explore this and see what
this gave us in the engine for textures. All right, let's wait for this. Now let's go here to Marmoset and see how this is
working inside here. Not too busy, maybe we need a little bit more
of contrast there. Let's see, maybe this should
be a tiny bit darker. Something like this
would be. All right. Let's save and export
the texture again. All right. Let's go to Marmoset. Now it's more visible. Let's try to get this close, a bit more close to
the corner there. Let's go to the pattern
mask that we have created. Let's go here and
paint a long path. Here should be the path
that we have created. Let's select that one. What what's happening? S were happening here. Why is not, yeah, here. All right. Let's just move this a bit more to the right at that. All right. Perfect.
Maybe a tiny bit less. Looks like this. All right, this should be good
enough. All right. Let's keep seeing what
else we could do here. Let we save. Maybe we will add any bit of splashes of color or maybe maybe there,
something like that. Let's go the reddish panel here. Let's add maybe on top of these. Let's add a fill layer, black mass with a paint layer
there with basic heart. Let's search for the stuff
that we have created. Maybe a tiny bit here. Let me disable Imre. If it here, let's see
another bit in that area, maybe with a little less flow. Maybe not. We could even erase
some of these All right, let's go here. With something there. Around the corners. Here. Let me change my
alpha with something. Here. Let's reduce the flow. All right, let me
change the color. Maybe dirt lashes will be look something like this. Color maybe. Let's add some roughness. Make a tiny bit
rougher. All right. Et's keep adding more stuff,
maybe something here. Let me see. Maybe we could add some stuff around here. Remove a tiny bit of those. Alright. Let me remove it. It's a tiny bit. Maybe around here in the barrel. Just one splash. Maybe
let's change the Alpha. Yeah, just to have a
tiny bit more variation in the color and all that stuff. All right. Maybe here in the scratches where
it's my scratch. Is what is this doing? I don't think this doing
anything. What is this doing? Well this is the outline
in the exposed metal. All right. Inside Outline
pose metal, maybe. I just forgot to name it. Alright. Maybe where
is my scratches. The scratches should
be around here. Where are the
scratches. All right. Let me find it. All right. Scratches should be somewhere. These scratches. All right. I just
forgot where I at it. The scratches. Here in misq and just dump. All right. Maybe we could add
one scratch here and increase the color to have
more variation in the color. All right. Maybe even a little bit
rougher with metal. You see the roughness? Let's see the metalness. All right. Let me change here
the base layer. I will put this in I will
active the metal and put that in ero also here, I will activate the metal
and put this in zero. Let's see the metallic. All right, perfect. Let me export this and
see how this is looking. Let's export export this. Let's go to Marmoset see
how this is working. Looking better.
Yeah. Working good. Right Perfect. We need to do some
work in the scope in this part on also in this
metal and in this piece here. And all of these
pieces need more work. But everything is
coming together. Maybe we could add
this stuff here. We could add it now, really. But I think this symbol, we should need to make it
maybe Photoshop this time. Since we have this icon here, maybe we could bring the co
set into Photoshop and trace it there and then just
make it an Alpha. But let's make this text first. Let's go to substance.
That's safe. All right. Let me see the
lighter cream color. Let me add around here, maybe. It's at a fill layer. This would be X, all right, black mask at a Fill
No, it's not a fill. It's at a paint layer. Let's type here, fond and let's try to find
something similar to that. But this doesn't want to work. Let me change the basic heard. Let's write to get
the font. Maybe text. All right. Or this
doesn't want to work. That's not what I want. Um I think I just forgot
the brush, really. Maybe it could be I just
forgot the name of the brush. Give me a sex just to
remember it. All right. To add the text, what we need to do is
to add a fill layer. Let's write fond here, and then track this into the gray scale of
the field layer. Let's increase tiny bit, tiling. And now let's see maybe we
could change the projection to planar projection
and scale this down, and let's remove the repeat, move it nicely in place. All right. Let's mirror this here, it's in just one place. Let me move it here. I'll be around here. Perfect. And now let's just place
it where it should be. And now let's type
this stuff here. See here, you will
find this stuff. Now let's type the words. Shadow 07, something
like that, will be good. All right. We will make it even
smaller around here. Maybe we could
elongate it a bit, something like that. Alright. This has some tiny
letters that they are really tricky to read. I mean, I don't know what that says is too
pxulated to read it. Maybe we can just put anything like the name
of an enterprise, something like that would be a fictional enterprise that would be maybe the
manufacturer of this weapon. So let's see, I will
not be that creative. I will just duplicate this. And Alright. Let's see. We could change
what it says there. Let's just put a random
stuff here. Let's see. We could maybe ask GPT
for names of enterprises. I will do that and
I came back here. I just a minute. All right, I just find a name. I will just call this maybe
Cal Nova Military Tech. All right. Make it a
little bit bigger. Put this below. Squash this leave it
down around here. All right, we have
the text there. We could even add maybe some
roughness to that text. A little bit rougher. All right. Let's copy the value from
that roughness also here. Perfect. And now what I will do maybe it is to add some
deterioration of that. Just a tiny bit of breakup. Let's add a field layer. Let's add grunge add
some grunge here. Crunch. That's fine for
some good crunch, maybe. Let's see. This one could be multiply
or maybe subtract. Yeah. A good. Let's rotate this. Is a tiny bit. All right. This is good. All right,
contrast. All right. Perfect. Let me copy
this field layer. Let's click here, right
click and copy effect. I will just paste it
here also, paste effect. But you said paste effect. All right. Let me
change a little bit. Is rotation, so
it's more readable. What's happening
there. All right. I think that's good. Let me save first, and then I will export this. All right. Let's export it. And now let's see how
this looks in the engine. Perfect. The text looks nice. All right. Everything is basically
looking nice, good. All right, let me see. What else we can do for this video. I think that we could leave the video here or in the next, we will keep working on the
textures. I'll see you there.
32. 30 More Work On Textures: Alright, guys, so let's
continue with this model. I was experimenting
just a little bit before stats recording
with the pattern here. I was just like, trying to see with the
metalness of the pattern, maybe a little bit less
metal than the piece itself, so it has a little
bit more of contrast. All right, so let's continue. Let's see what else we can do. Maybe we can add a little bit of ambit
occlusion to that metal panel. Let's add a field layer. With roughness, maybe a
little bit high roughness. Let's add a black mask, a generator, ambient
occlusion here, lower invert. Now let's twist the balance. Let's see what gives
us the best result. Maybe with a little bit of
global blur. All right. Now let's go here and
change the color, maybe some dark dark
one would be good. Yeah, it's looking good. All right, let's see
maybe dark blue. Something like this could be
let's go to the generator, let me change the
name here. All right. Let's keep tweaking. All right, let's see how this
looks in the material view. All right. Looking good. A, Perfect. Also, maybe we will
add a little bit of maybe variation to the
metal, a tiny bit. Let's see. Let's add a
new fill layer. So here. Let's maybe add some
let's see here. Maybe some grunge stuff here. And also I will
add a filter with bluer slope this floor
directional I want blur slope. All right. Let's increase the size of the. We use a tiny bit. Maybe something like that. Alright. Let's add a blacks. Black mask. Let's add a fill. Now let's go and add a crunch to the
texture, maybe this one. All right. Let's see. We could put this
multiply maybe. Yeah, looking a nice. All right. Maybe another one. Let's fry this. It's the
same. Right this one, maybe. Let's tweak the tiling
and the balance, see what gives us
the best result. Maybe this one,
let's had a filter. Let's see what the
little slope give us. Kind of, right, let me reduce
the opacity of that layer. All right. Something like this
should be nice. Perfect. Maybe we could add let me change the name
for variation. All right. Let's go to the layer and let's add some roughness
to that variation. Let's see roughness, maybe it
could be a little bit high. Alright. I think
that's too much. Let me reduce it. Is a tiny bit. So it's not too noticeable. Just increase it. Just a little bit. All right. Maybe could be. We could increase a little bit
more opacity of the layer. All right. And maybe now we could paint
a little bit on the corners. Maybe some stuff there. Let's see, maybe light corner or maybe let's
add a curvature. Curvature? All right. Let me add a black mask
iatorKurvatur, go here. All right. Let me
play with this. Let me decrease all of these and see what give
us the best result. Something, kind of. Let's add a field a
filter no, a field layer. Let's add a grunge map. Let's put this multiply. Maybe not this one. Maybe this one could be. Allright. Be. Let's add a filter. Let's add some bluer slope with ten maybe or maybe not.
Let's remove that. Let's see. All right. Let me put this color into
maybe some lighter blue. All right. I'm thinking like maybe
something like that. No. It's too saturated. I mean, yeah, too saturated. All right. I don't
want any hue in that. Maybe it could be
like that white. All right see. All right. Maybe another one. Let me change the
balance, maybe. Let's change let's see here. The curvature a little bit. So here and maybe change the type of map
that we're using. Let's add a paint layer. Now I will use my
knife brush and I will try to paint some stuff in here. Maybe something like this. Being tiny bit painting, we could remove by hand some of these repature All right. Let's add some color here. All right, let's keep
going with this. Here could be a good place
to add some of this color. Right here on top, maybe something like this would be All right. Let me erase some of
the corner color. Maybe just add it
tiny bit there. L here be. Let's see how this looks here. Yeah, looking cool. Maybe we could add a little
bit of roughness there. Make that a little bit rougher. I mean, less rough. Yeah. Alright. See. Yeah.
Looking good. Yeah, let's export this to the engine to see how
this looks there. Alright, let's export this. Let's wait for this to finish. Let me also save
that. All right. Let's see. This is
this is all right. This is the paint that we did. All right. Maybe looking kind of nice. Maybe this blue could
be a tiny bit darker. Let's try to make
that blue color a little bit darker
here in the pattern. Alright, let's
decrease the volume. Maybe increase saturation
or maybe not that much. Alright, let's export the back. Let me save. Let's
wait that to save. Alright, let's export
the texture again. Alright, let's export it. Alright, let's go back here. I think that's a better has more contrast between this
pattern and the color below. Alright. Alright,
let's keep going. Maybe now We could start working on these
pieces. What I will do. Since this material is
basically the same as this, I will just copy the same
layers that I have here. And maybe I will tweak
them just a little bit. But basically, it will
be the same stuff there. Maybe all of these gradients, all of these curvature, variation there, I
will just copy them. And I will go here. All right, let me close all of these folders here and
just paste them there. Alright, let's seeing. Alright. It has some
color, some stuff there. We could do some changes. It has some bits. I don't
know why it's that. Alright. Alright, now we can
paint some stuff here. That we deleted this paint, and I will add
another paint here. Maybe we could start
painting just a tiny bit in these corners to give more visual interest
on that pieces. Maybe something like this. Yeah, could be right something spiked or write
now. Oh, perfect. Let me keep painting. But it doesn't want to work
or right now, it's working. All right. So colors
here and there. Maybe tiny bit of these tiny
bit here, maybe. All right. Let me remove a little bit
of that corner color there. Also from here, maybe. Let's add some color here. Perfect. We can move a little bit from
this art. All right. Maybe here would
be a good place to add some of these
painted detail. All right. Remove most of that stuff here. Maybe we put that by
hunter, maybe not. Let's maybe just keep
a tiny bit of that. We could keep it a
little bit. All right. But not that much. Really, I don't want
that much to be visible. All right. Perfect. All right. I haven't
noticed that this up here is
the same material, so I will just do some
twigs in that panel. Let me see metal
panel. All right. Let's draw in the
curvature here, paint some stuff here. A right paint tiny bit be here will be Perfect. All right. Let's keep adding a little bit
more paint in this corner. Yeah. Let's say by color. All right, we need to
make the symbol here, but I will do it a
little bit later. Also, maybe we could
that a little bit more of wearing here. All right. Let me keep
doing more stuff here. All right. Perfect. I have this without
Without symmetry, I just have I just
activate it now. All right. Pit. All right. Let me out a little bit
of this stuff here. Then maybe. Let's see, maybe I will need to do some work in
this piece here. I mean, in this metal piece. All right, let's see
what we can do in those metal panels to give
them more visual interest. All right, let's see. Let's see, middle metal. We have some ambient
occlusion, all right. Let's add a field layer. I will add maybe some
color variation to that. Is there, maybe here your
asset. Select this one. All right. Let me
put some blue slope. All right. I need to maybe
remove a little bit of those corbature
stuff. All right. Let's go here, maybe reduce the amount of color
that Bing out. Maybe maybe we could add the same stuff into
the roughness. All right. Let's wait for this. Let me save. Alright, let's
wait for this to save. And now I will go
here roughness, and maybe we could remove the opacity of that
roughness as a tiny bit. Let me keep decreasing opacity the layer in
the roughness channel. It's a tiny bit. I just want to have a tiny
bit of variation. Not too much, just a tiny bit. And also, I will
change the color here. We'll just make it darker. Perfect. All right. All right. Let's see. Watching my reference,
see what else. What stuff we can do. All right, I will start
maybe removing a tiny bit of those perture here in inner
in this material here. Let's remove a
tiny bit of those. Let me remove the symmetry. I will just remove just a
tiny bit because I think it's a little bit too
much all over the place. Maybe we could paint a
tiny bit here. All right. Let me move here in these areas in these
areas also. Here on top. This is all over the place here. We could delete it off these corners maybe
let's paint a tiny bit. Remove a bit more. Here also maybe here. All right. Let's
keep removing some. All right. Perfect. I Skip doing some more work here. All right. Let me maybe remove a tiny
bit in here and maybe we could add some dark color, if the weapon has fire and
maybe burn some of the barrel. Let me add in the misk here. Let me make a new folder. I would call this Burns maybe. Let's add a black mask. All right, Black masterno. Let's add a field layer
with a black mask. All right, black mask. Let's add a paint. Alright, let's put
this a tiny bit dark with a little bit
of high roughness. Let's go and select
our our alphas, maybe with the hard brush. It's a paint, all right,
we have the paint layer. We select the hard brush. We select this one
or maybe that one. Let me isolate this and we could put a tiny bit of
this color there. Alright, spry put
some stuff there. All right. Maybe I will change
the alignment to camera. All right. Or maybe this
is a little bit too much. Let's isolate again this. All right. Let me
change the direction. All right, I need to remove some of this corbatre in here. It's from this corbatu? No, it's not from
there. Where is this getting maybe here. Where that color comes from? Maybe the AO, I think. No one rubber. Maybe it's not from the ao. Maybe we, we need to
put some stuff there. I will add a little
bit of this here. All right. Let me go here and maybe increase the roughness and the
metal ness and zero. It's too dark. It's
basically basically black. I don't want that to be black. All right, I will
copy this layer. I will go to the outer pieces. Maybe here, I will add
the same layer there. I will remove this paint
layer and add another one. Select the basic heart, select the alpha that
we have unloaded. Maybe we could add a tiny bit of this in this area. Right, we could tweak.
This a tiny bit. All right. Let me change this. Maybe to board. No. All right. Change this to billboard,
maybe. All right. Maybe even here, we could add
a little bit of that stuff. All right, let me
change the alpha. Alright. Perfect. All right. Now I will copy the
strings that I have here, and I will just put them
in these pieces here. Stew it. Oh, right is the middle metal piece. I will just copy all of that. And now I go to
the outer pieces. Let me save real quick. Let's go here. Let's see where is it. I think it's this metal 21. I think so, yeah.
Yeah, it's that one. Let me console B there. All right base color. C, let me see the AO. I will maybe increase
ambient occlusion. Maybe a little bit
of global blur here. I will increase
also the roughness. All right. I did some stuff there.
Color. All right. Maybe this should be the
same material as this. So let's do some
color selection here. All right. Maybe something
like this should be good. All right. Perfect.
All right. We're good. And let me paint out a tiny bit of curvature. Let me select the
basic brush here. I will just remove most of the curbatu there. Perfect. A right. Let's see. Let's save our stuff. All right, perfect. All right. I will add maybe
some gradient to this piece here. Let's see. Strap. Let's duplicate
this at a black mess. Let's add a generator. Let's a linear gradient. Let me make this a tiny bit more reddish and a
little bit darker. Let me go here, inverse
that base color. I would maybe increase
the contrast. It's a tiny bit more. I like this should be nice
and good for that part, maybe we could add a piece
is completely straight. We could add a little bit of
a little normal here, maybe, let's say, Nylon will be
Nylon strap Nylon webbing. Let's drag drop that stuff here. I will just remove the color. Let's make this a
little bit less. All right. Let me see. Let me
go to the height. I stop here. Let me see if this is doing something
in the highness. Yeah, I will reduce the
opacity of the height, a tiny bit because I
think it's a little bit too strong and
also in the normal. Let's reduce it just a tiny bit. Something like this
should be nice. The ightness something like
that should be good to go. All right, perfect. Let me see. The roughness
we have something known. All right, remove the
roughness, the metalness. Color, let me see if the color
has some information too. For us, it's not. All right. Let me maybe increase a tiny bit more the roughness
in this strap. Alright, let me safe. Alright, let's see. Let's see what else
we can do here. All right. All right, seems we could add a little bit
of roughness variation. Let's add a black mask here. Let's add a fill layer
roughness variation. We put this in roughness, a little bit. Less rough. All right here, I will add
some random grunge. All right. Maybe something like this would be we can have a tiny bit
more of variation there. Maybe with a tiny bit of color, with some dark, let's go
here, maybe multiply. Here, it could be a tiny bit. Darker, just a tiny
bit, not much. E. All right. Now we could add these details that this
has in this piece. Let's see. It's like
some painted details. So let's try to do
it by ourselves. So let me add maybe this
darker olor Alright, let me color pick
that red color there. Let's add a paint layer in
the black mass. Let me paint. I will have to do some
twigs to the value. Alright. But I bi. Something like this
should be. Could be, yeah. Let's go here. Let's try to draw or paint a similar shape. There. I like this? Something like that. All right. It should be a
little bit higher. Let me remove. It should be a tiny
bit higher, right. Maybe this could be like this. This goes a little
bit more like that. Goes up and goes
something like this here. Maybe this could be
a bit more centered. All right, this should
have some curve to it. All right. Or fat. Let's add a white layer. All right, a white layer here. I will maybe just
duplicate this one. White. Let's put this
not completely white, but just a tiny bit white. Let me remove that paint and
add another paint layer. I'm trying to paint
some outline for this for this paint there. Some outline here all right. Something like that. Yeah. We'll have to mask out here. Move. A bit of this stuff there. All right, let me
add an orange to. All right, I will
just change this to an orange around here. A bit more saturated, more reddish, with a
little bit more yellowish. Orange, all right. So here, remove this paint layer. Let's add another one
and just paint it here. Something like this could be. This should be a bit
brighter, things like that. Maybe a tiny bit more reddish. Let's go to the paint
and add more stuff here. All right. Maybe this could be tiny
bit moder All right. All right. Let me see
what we can do here. Perfect. Let's keep going. All right. I don't move any
bit of this excess. All right and here. Perfect. Let me go to
the white. All right. And now let's add like this
Df here, that white Df. That could be maybe
some another fabric maybe that is on top. We could do some add a fiel
layer add a black mass. All right. Let me put the
hide a little bit like this. Let me add a paint
layer could be. And this time, I will
use the hard brush here and symmetry or let's
rock a tiny bit of these. We're getting a little bit
of emission material there where should not have
any of that all right. All right. I need some stuff. So this is completely straight. All right. Little bit freight, like this. But not that much, maybe. Alright. Let's go here to hide and let's change
this to replace. Stop doing anything. Not doing anything. All right. Let's see. All right. I think it's because the
Nylon frap is on top of that, or right now it's working. Why not? Let's go here to the normal and also put
this in replace. Let's see normal. Let me see. I shouldn't have anything there. This water is not
affecting metallic. Stuff is affecting that. Oh, the ambient depletion. Let me do something
in this lon stuff. Roof the ambient
depletion there. Yeah, we just remove
that stuff out. Not needed. All right. Let's go here to Oh, I can name this stuff. Wrap dip maybe. It's at a filter. It's at some normal blur and just reduce the amount of lure that we have to All right. Maybe not that much. Maybe we could leave that just like that. Now I will just maybe add a white folder here. Let's put all of these
inside this folder. I will add a white
mask to that folder. All right. Let's add a paint. Now I will just mask out
this pattern in this UVland. Let me put this or not. Here in polygon field. Let me take out of here give me out this
mistake. All right. Put this on top and now
put this around here. Now it's working nice. Let's faint out T of some of these here. I it's not longer
visible in the pot. Let's see here. Perfect. We have that there. Maybe this will be a tiny bit, going to the reddish, something like that. Perfect. Let's save this. All right. Maybe this metal
could be a little bit darker. She would be reddish colors. Cost metal. Let
me change this to maybe some Any bit
darker color there. All right, let me change this
to an even darker polar. I like that should be good. Yeah. Let me see map right. This could work, maybe. Let's export this to the engine Marmoset and
see how this is working. Alright, let's
export everything. All right, let's
go here. Perfect. Maybe this metal could
be not that tart, there. We also need to remove
the emission from there. Let's do it now.
Where is my emission? Where is it emissive? Let's paint and remove. Let's press four and remove
that stuff from here. All right. We need to do
some work in this part here. But before that, let's do some work in the
emission itself base. Let me copy this.
At a black mask. Let me maybe add a
color selection. Let's take this one. A filter. A mask outline. Let me make the stuff
a tiny bit darker. All right. Let's
tweak this a tiny bit start from inside
threshold. All right. A little bit of blure All right. Let's see. Is like this around here. Let me keep tweaking this. Not doing what I want it to do. Maybe we will need to paint
by hand this gradient. All right. Let's go. And now, this is what
Cymetrns paint out. With a soft brush
here. All right. Let's see. All right. Perfect. Let me see like that. Let's go also here, remove off that color here. I Perfect. And maybe we could
add a field layer. The shouldn't be
there. I should be in the scope with opacity
only, the material. Let's add a black
mask, a paint layer. All right, let's take this part, this should be a tiny bit. Let me safe. White is not
responding Let me see. All right. Alright
now, it's working. So, this part is a
little bit transparent. Maybe it could be even
more transparent there. Something like that
should be nice. Tiny bit, maybe a little
bit of roughness. Roughness. Maybe nuts or right. Let me add a little bit
more of paint inside these tiny lights,
something like that. W let me export that. Let me save and
export these too. To MarmosetTolb. All radiopacity should be exported into the
Alpha channel here. Let's export that. All right, let's go to MarmosetPerfect. And now here in
the other pieces, I will select transparency. Let's put this in
dither All right. Let's click here and
use Albedo Alpha, and this will
automatically apply opacity from the Alpha from the Alpha channel in the do
texture to the opacity here. All right. Let's add maybe a tiny bit of amtoclusion
to this piece. Alright. L et's do it. Let me save. All right. Let's go here, maybe. Let's search for that orange. All right. We could add tiny
bit of gradient. But let's paint that
gradient by hand. All right, let's add some base. Let's duplicate this gradient
without the roughness. Put a tiny bit darker and
reddish at a paint layer. And now let's paint. This piece that piece is
not on this extortion. This is the one. All right, a tiny bit
of a gradient there. All right, let me reduce
the Anyb just the hue. All right. Maybe we
could add the roughness. All right, something like that. Let me copy this layer. Let me go to the inside pieces. All right. Let's see here. We could also add
that stuff there. Right base. Let me remove let me
add a black mask and remove the other paint and add another paint layer and
just let's lay down. Some of that color there. With a little bit
of lar variation, let me add some black mask, Inator, a metocltion invert. Put the rough a little
bit high and let's fine some dark color for the
ambient occlusion there. All right. Let me
copy this layer. We go to the orange
piece in the outer part. Alright, let's go here. Let's put that here. All right. Let see like that. Would be good. Safe?Prefd we could even add maybe
some emission in this here. All right. Let's see. All right. I will add another folder here. A massive marks, maybe. I will add a field layer with a I will just leave
this in white. The missive also
will be in white. I will put this in black mass. And here I will add a height with a little
bit of negative value. I will go to paint
and I will select an arrow because I want to
make this any piece there. Let's see row. Maybe we could use this
one or maybe this one, let's see how this looks. That's completely the same, but maybe could add a
tiny bit better detail. I don't think so.
Let's say this one. Let's take this 90
degrees, this could be. Perfect. We have a tiny bit molar here. Perfect. This could be
with a little bit of hue. Let me copy this not that much. Yeah. Let's see, maybe we could
add a fill layer with a blur bluer here. And now let's add
another fill layer. I mean, filter with some sharp being Maybe the blue layer now. We'll just save that piece
without filters there. All right. Let me save. Let me export this
to MarmosetEport. Let's see how this looks
inside Marmoset All right, let's go to Marmoset and let's have a look of the inside there. Oh, we have also placed that
stuff in the other part. Let's go here, let's
remove the symmetry. Let me go and select the brush and just remove
that from the mask. All right. We are almost close
to the end, kind of. I will let me do some stuff real quick in the orange pieces. I will add some paint layer. I will paint the inside of
this floater with that orange because you can see here is
with the orange color there. All right. Let's see. Paint the interior
of that piece here. Something like this will be All right. Let me
do some stuff here. Let me copy the corbaor from here and I will
just put it here. Color, this will be
a tiny bit brighter. So it has a tiny
bit of variation. Any bit of pain
there. All right. Et me add some painting
real quick in these areas. All right. We're here in the corner in this
other corner maybe. All right? Let's go
to the material. All right. Go here and do some stuff here also. All right. Let's see. Perfect. All right. Save this. All right, scholar. Let's export the
textures. Uh huh. All right. Kind of good, yeah. I think we can leave
this video here. In the next video where we
are going to keep working more on the textures.
So see you there.
33. 31 Making Alpha On Photoshop And More Texture Work: Alright, guys, let's continue
with this motto. All right. The next thing that I will
do here for the texture is finally to make this symbol, but I will do it in Photoshop. Let's go to Photoshop. I have created a square
two K by two K image. Alright now I will
select my paintbrush. I will add some symmetry with this like butterfly
butterfly icon. I will just add it. That will be added
in the center. And now pressing Shiv and
Alright, let's do this. Let's Let's click. And then with Shiv, let's just click in
another place to get these straight lines so we can start making the
shape that this has. So let's begin. Let me
start with the middle here. Maybe around here. Let's see. Something something
around this. All right. Let's see here. All right, maybe here, not that much no. Maybe here. Yeah. That could be
somewhere around here, maybe like this,
a tiny bit more. All right. All right, we can keep
tweaking the shape here. All right, we are
here. Let's see. Maybe this will be a tiny bit more like this in that place. I think so yeah.
Alright, maybe we could feel now this place. Let's click in the
G leather to get this packet brush here and
now we can fill those spots. Now, press X to switch
to the black color. Let me keep tweaking this
with the black color here. And now I can fix a tiny
bit better the shape. Let's keep refining this. All right, something
like this, maybe here. Something like that.
Maybe we could maybe keep doing more stuff
here, something like that. Let's, maybe that's
low school actually, but that's not kind
of in the context, I will just delete that
remove this stuff here. I really like how
that spikes looks. Maybe I will just
keep them, maybe. Who knows? I will
just keep them. I really like how those
stuff works there. Maybe some sort of a
happy accident, yeah. Alright, let's keep adding a
little bit more stuff here. Maybe this could be a
little bit thicker. All right from here to here, we could make it a
little bit longer. Let's press G to get
the bucket fill. Perfect. Now, let's correct this painting because
you can see there is a little black line that
we need to paint out. All right. Let me go back. Let me paint those
stuff here. All right. There we go. Perfect. Perfect. All right. Let me make this a
little bit smaller. All right, a tiny bit
more smaller to get these tiny places. All right. I think that this could work. Let me maybe fix a little
bit of this stuff here, maybe a tiny bit smaller
from here to here. And now I think
this symbol called work is tiny bit different
from the concept, but I really like, like, these shapes around here. I really like them.
So I will skip it. Alright. Now, what we need to do is just to export these
maybe we could export here, like a fast PNG export. We could do it. Let's export it. And now let's export this, maybe here to the
files that we have. Let's call this Alphas already
have an Alpha stuff here. Let me call this symbopany symbo Alright. Now, let's go back to
Substance Painter around here. Alright, let's go to
the outdoor pieces. All right. Let's go where we put the previous letters here
in the lighter cream stuff. This is the one. Let me
maybe duplicate this. All right, I will
delete this and that, I will add a paint layer. Now, let's search for
the Alpha that we have exported from Photoshop. Let's go and import
that Alpha here. Or where is it? All right. Let's import it. Has
an Alpha, right. And now maybe we could use
this and paint the Alpha. All right. That's good work, but
maybe from the f, this tiny stuff looks a little
bit too much too noisy. I didn't think I
don't think that really works well from the fire. So I will just subtly, I will delete them. Sorry. But that's life. Sometimes things that you
think are working or not. So I will just delete them
and re export my stuff here. Export fat PNG export maybe
let's export this right. Now let's go back to substance painter and
re import the Alpha. All right has an Alpha,
the project here. Now let's import it. Perfect. So I will
do some console C. And take this and
just put it perfect. Let me align this stuff better. Maybe around here. Maybe this could be
a little bit wider. Let's see here I can
change maybe I cannot. Let's just make that
here on Photoshop. I will make that a little bit
wider because you can see, it's a little bit more
white in the concept. Let's select this.
Now, let's click here and just make this a tiny bit wider and
just center this. Alright I will just
fill these gaps. It is now in the center. Nos not in the center. Let me select this
magic wand here. And now I will
just cut those and put it in another order
in another layer. I will now feel don't let me. All right. I will now
just fill these gaps. All right. Let's try to delete all
of these stuff here. Right now, we could put
that in the center maybe. Let me see. Where is the center here. I just put that there. In the center, I think so maybe. I will just export
it here or right, I will call this symbol two or let's go back
to Substance painter. Let's import that symbol
or write Alpha or import. Let's select this wider
symbol and put it there. Get a little bit more smaller. Maybe it could be a little
bit just a tiny bit bigger and more close
to the letters. Maybe Something like that could be maybe more centered
like this. I think so. Maybe not. I think that
place could be good. All right, I will just copy
the effect here, copy effect, and now I will just
paste the effect into the mask so we can have a little bit of tough of
that weathering there. Let me change maybe
the rotation. All right. Maybe I can increase the
contrast, decrease the balance. All right, there we go. We could add also maybe
some more details like this and more
places on the weapon. Let's see where else we can add a tiny bit more
of those details. All right. Let's see. Maybe with this one. Yeah. Let me select
this. But what is that? Um, it's not doing anything. That's the company text. Company text. This will be the symbol, any symbo all right. Let me copy one of those layers. And now I will go here to
the grayish cream color. And now I will just maybe put that around here under the AO. I will delete the fill layer
and add a paint layer. I will just put that paint layer under the crunch that we had. And now I will just start
putting these decals, maybe around here could be yeah, could be there, maybe a
little tiny bit smaller. Let's align this better. Yeah, maybe not. It's not very well
aligned around here could be a little bit up around here, maybe that could add a tiny
bit better detail there. Let me save this Alright. Let's see where else we can
add more of those details. Alright. Let's see. Maybe here no. Maybe there, no. Et me see here. If that makes sense. Maybe could be or maybe not. We could just add. We could leave it,
maybe. All right. There we decrease the balance. I forgot to add
also some gradient in this emission stuff. All right. Let me
see something here. Maybe we could add
another stuff here. Let's see what we can add there. Maybe just a line
maybe maybe it is. I Alright. Right to put this line be that doesn't mean anything. Could be a tiny, tiny, good looking detail
there. Let's see. Maybe not. Maybe this one. Oh, yeah, I kind of
like that stuff there. Let's align this better,
and a bit bigger. Alright, we will leave that
there. I think that looks. Yeah. Let's try to rotate the grunge. Alright, let me
save this a little. A bit. Alright. Maybe we could add more stuff, more work in this area also. But now let's focus on adding the gradient on that
emission shader. All right. Let me select this
emission radiant. I will just copy this. We'll
go to the inside pieces. All right, let's
go to the missive. I will just paste this. Let me isolate that texture set. Let's wait for this to charge. Or right now here, I will just as some of these. Let me select my brush. The brush will be
the basic stuff. All right. Let me paint that maybe here
in the color selection, we go to increase the tolerance, not doing anything there. Maybe let's increase
the tolerance of this material a bit. And see if that fix it. Is that fixed? Let me see. Is there any Oh, if there is any
other change there. Alright. I think this is cool. There is not any other change
in the material, I think. Oh. All right.
Everything's good. All right. Let's keep
going with this here. Now, let's try to make
a bit of gradient. Here, let's remove depression from the size and
add it in the flow. And with a gentle brush stroke, let's try to remove a
little bit of that. And All right. Let's try to remove this. Let's keep adding more stuff. All right. Now, here All right. Our fads. I All right. Well, let's see. Yeah,
kind of cool. Perfect. Let's see what else? What else we can do? What else? Maybe, let's do a
little bit of work in this. Yeah, let's do some
work on there. I will just copy maybe the layers that I have
here in that stuff. Alright, let me go
to the outer pieces. All right, let's
go to this metal too and I will just add
that stuff into here. I think it is this one. As this metal, this metal is a piece maybe there we
will also add that stuff. There's a tiny bit
of stuff there. I all right, let me change ment cution here. And this Alright
a tiny bit less. Let me change the roughness
that I have there. All right. Here I will just add it maybe
another ungrng stuff here. Maybe have a tiny bit
different roughness there, maybe we could put this in ten. All right. Let me just delay this AO stuff. All right. I will do the same thing here. That metal piece. Where is it in the scope, right? I will just paste the same
values that I have there. All right. And also
in this golden there. Alright. This is
not doing anything, I think. It's not. Ah, that's the orange pieces.
That's not the golden. The golden metal is this one. All right now, it's working. Alright, let me change. Maybe this color. I will just put
that in multiply. Maybe not multiply. Overlay, kind of not liking. Maybe multiply could be good. I think it's better overlay. Let's increase this
increase also the opacity. The cubator I will just select maybe this dark stuff there. All right. Let's see here,
change this stuff. All right. And the AO will be a little
bit darker and rougher. Let me save this. Now, I will increase the
balance or maybe decrease it. Let me see like
this, maybe increase the blur maybe something like that could be All right. Let's maybe paint. Some stuff here. Let me select my knife brush. Maybe so let's just
paint a tiny bit. A stuff on here, maybe also here would be Yeah. All right. Give me a sec. Perfect. And now I need to add maybe
some emissive stuff on here. But what I will do here, since this is a little bit
too hard to reach out. I will maybe try and
see how we can do that. Maybe we could use the
ometropt would be Yeah, let's try to do this. Let's click here. And
now once we click here, we will have the objects here, and this will be the objects
that layer can affect. So I just want all of
these, I don't want that. Let me remove maybe
basically everything, and I will select
the stuff that are emissive or write this stuff. And this stuff here is also
missive. I think that's it. The only things that are
missive All right. I think so. Maybe. No, that one, no. All right. Let's press Escape. You know, maybe
press another layer. And now to hide everything but the stuff that we have
selected is this icon here. And you can see now that we
can paint in those places. So I will just add my
emissive stuff around here. All right. Maybe the hard one. All right. Let's just keep tweaking this. All right, let me see
here. A in this place. Here from here to here. It'll be perfect there. All right, there we go. Perfect. Let's go here and
add some of the paint there. I will select now
the basic soft, remove the pressure from there, or right now we could
make some gradient here. All right. Perfect. Let's see here. All right. Let's now click again in this icon
to leave that om. All right. Now, what is
happening here, something here. Let me remove this. And for some reason, if it's a what fix. I think that was a bug. Yeah. Yeah, I think that's what a bug. Alright, let's expo this to Marmoset and see how
this is looking there. Export exturs all right, expose this. Back to Marmoset. All right. Let's go to Marmoset here. Let's see the magic right. We have our missive there. All right. Alright, let's see. Maybe I have maybe
now. Let's see. Maybe we could make
a tiny bit more of color splashes around here. And you can see maybe
something like this could be something like that. Let's maybe add a big
one there or maybe not. Maybe that there
will be too much. I don't know. We need to try. I also off of camera, I have added a little bit
of lights here you can see, and also I added another camera a tiny
bit more of contrast. Let's reduce the brightness of the DRI so we can better
what we have here. It's looking really good,
in my opinion, I think. Alright. Perfect. Let me remove that? Let me go to the normal camera. Let's go here and increase
a tiny bit the brightness. Let me just leave this
in one. All right. The camera in here
in this camera, I just have added the
ACS color mapping here, and I have increased a
tiny bit of contrast, the clarity in the shadows. And also, I added
a little bit of harping brightness here in the bloom and a little
bit of vignette. And that's basically it what
I have done in this camera. But I will keep
using the main one, the principal one
here just to see better exactly how this
looks in substance painter. So let's keep using that. Maybe now we want to
make these lines here, these guidelines in the scope. Let's go back to
substance painter. Let's go here in the scope. In the scope part here, let's add a field layer. Now, let's add maybe note here. Maybe on top of
here, the missive. Yeah, I will add a black mask. I will change the name,
scope, ring, guides. I will make this maybe
completely white. And also I will
add an admissive. Maybe in the missive, this
should be completely white. All right. Let's add some paint with the
symmetry activated. All right now, let's make
with the hard brush, without pen pressure,
let's add the guides. All right. Maybe I can
add color All right. Maybe this could be black. All right. Let's remove maybe here. All right. Let's see here, maybe
the cross that this has in the middle or write
something like this. Perfect. Let's try make this bit
better or maybe if we have a cross cross alpha here that we can use
to make that perfect. Maybe this could be. All right. All right.
I don't want to borer. All right. This could
be remove that stuff. Maybe this shape. All right. Let's just add this cross
here in the middle. All right, there we go a little bit below around here, Cbinlr. Now, let's add the other
stuff that this has. Let's go back to the basic
heart with no pen pressure. And now let's try to
draw those stuff. All right. Let's go a
little bit too thick around here and
then here. Perfect. It would be something
like that with this one, something All right. Let's make this a
tiny bit smaller. And now let's paint
the tiny lines that this has around here. Let's just add those All right. I wish I want this to be the
same length in this part. Maybe something
like this or right. That could be reduce a tiny
bit the line thickness. Yeah, that would work here. Right, we have the
guides in the scope. Maybe we could even
reduce it even more. Maybe something like that. Perfect. All right. Perfect. Let's see. Let me save this then saving and then export
these sport textures. All right. Let's go to marmoset
and see how this looks. Right now, we have stuff here, perfect. Nicely on there. All right. Perfect. Let's see what else we could do. Let's do what I said, maybe do some more big splashes
of dirt color, whatever, just to give maybe a little bit
more visual interest. Maybe more story to the weapon. Alright, let's go with
the reddish stones here. May and here the splashes. We will add some stuff there. It's like one of those. Ors. Maybe something like that. I think that looks nice there. Yeah. Hey, let me remove the symmetry. Maybe we could do a little
bit of variation there. All right. That's something like
that. Every here. As we will do some stuff. Perfect. Just try to make a
tiny bit better shape. Looks like that
could be good. Yeah. And now here maybe we
need a little bit more of wearing in the stock
part. Let's go here. Let's now select the
stock and handle. Let me add maybe another layer. Let's see fill layer. Where's my field layer. At the field layer here. Edge where I just
type there edgeware. I let me save. Perfect. And now I will just
add a black mess. At Generator, maybe we could use some we could add some
edge EdgewareGenerator. Here. And now we have this. Let's tweak a tiny
bit these sliders, add the best result. All right. Let me
do something here. Now, I will add a fill layer
with a crunch map, crunch. Select the random one. I will
put this in maybe multiply. Something like that. Now here, I will add a height channel and will
make this tiny bit older. All right. Perfect. So now I will add a paint layer, and now I will just
start painting. And also, we need maybe we could lead or maybe not
add some color. Maybe let's select the
same color as in the vase, but I will just make
it a tiny bit lighter. Little bit lighter, maybe more saturated
and going more to the right loe right in this edgeware I
will start removing stuff where they don't
have too much sense. Being There is something there. Maybe here. Let me add maybe a little bit of
painting in this area. This corner. Perfect. We could add a bit of this. Perfect. Let's go here. We add a tiny bit
more of this detail. We could fit a tiny
bit more this corner. Maybe here also just a tiny bit. I think that's a little
bit too too bright. I like this should be better. Let me make this a little
bit rougher. All right. I will remove this edgework
from these places. Here also that place doesn't need to have
too much edgewk. The most edgeware that this
should have is maybe here. So maybe this got tiny
bit of stuff here. All right. Let me see something here
real quick. All right. Maybe I will need to paint
a tiny bit of stuff there, middle metal, lot of paint, and I will just paint
this maybe with a hard brush, and let's paint. This is a All right. Perfect. All right. All right. Out a tiny bit. Just keep adding a little
bit more stuff here. Let's try to remove the excess. All write something here. I think that's working nice. We have more stuff here. This should not
have that edgeware. Indeed, let me delete
the edgeware from here. And these scratches
doesn't have much sense. Where is my scratches. Let me find as it
burns rushes here, or maybe just remove
those crashes from here. Maybe I will add some
flashes of color there. We could sing. Let me go
to the stock and handle. Maybe I will add a field layer, a black mask, and a
paint stuff there. Let's add a big one
or right maybe here. Let's change the
color. All right. Maybe here also. All
right, maybe with this. All right. Let's see,
change the flow. Let's see this. We'll use that. E's try to make a tiny
bit darker there. That's a little bit
less roughness. So there is more
variation there. All right. Maybe this one here. A all right. Let's expose it to
the engine for texts. Let's see. All right
here MarmosetPerfect. We have crutches here in
the stock. All right. The variation here. Maybe we need to duplicate this.
Maybe we could do it. Let's try to see if we could
do it here inside Memoist. We could do Console D and
then here in transform. Let's put in here minus X or not, maybe minus a C there. I don't find it. C is not
the one we do control. All right, I think. Good.
Let's go back here. This is all right.
Let me remove that. Even the Y should be good. Now, this is there, but now the normal R flip, maybe we could here
and who back faces. The best way to do it is
just using a mirror modifier inside blender and
then we export it. I will do it. But for now, I will just
leave it like that. And so All right. Let's see. I think I will leave the
video here in the next video. Let's see what we can
do. I'll see you there.
34. 32 Final Touches To De Textures: Alright, guys. So let's do some little twigs
to the texture. Just a final touch. Alright. I will do the same
pattern that we have here. I will do it also on the
other side because I feel like that feels
too empty on here. So let's try to do it. Let's go to the outdoor pieces. All right, let's
go to the strap. Where is my strap rabia here. And now I will try to
paint the same pattern. I'll be kind of hard, indeed. But let me select
my knife Brush. Alright, maybe I
could put what it is. There's not a project option, I think. Um Yeah. We'll have to do it by hand. Let's try to do
something similar here. Let me see the com set and
let's just try and do it. Alright a afraid to do this. All right, perfect. This is affecting. I don't want that to
affect also the back part. Let's see how this works. Well, what I can do is to add
another paint layer here. Yeah, I will add another paint. And here I can start
working for some reason. This is not letting me work. Supposed to have
some stuff there. But this thing, I think
this is what's happening. Let's select all these pieces. All right. We have some guide here that we could
use All right, strike and use. This guide. Perfect. All right. It's kind of
something like this. Some reason. I think it's for the
whiteness that I have here. All right. Let me see. Perfect. It should be a little bit
lower, something like that. And this should be around here. All right, let me delete erase. This part. Perfect. Let's see. All right. Alright, let me go
to the orange now. I will add another
paint layer there. I will just try paint this part. All right. Now I will select
the white part and draw the contour that this
has something like this. Perfect. Let me do it also here. If you tweak it a
little bit more Now, I will do the same stuff here. I will go again to the red layer and paint a
tiny bit of this spike. I forgot to add. All right, let's go
back to the white. All right, something
around here will be good and also here on top. Let's try to make
this less visible. Maybe some see like this. Perfect. Let me try to
delete more of this orange. Now this stuff here,
I think it's this. Yeah. Yeah, I will do the
same stuff in the other side. Let's do another paint layer. Let's select the basic hard. With the symmetry, let's try to draw the pattern or write something
around here, maybe. Perfect. Now, let's erase
these parts with chief and just clicking around here. All right. So now that part
doesn't feel that empty. All right, let's go here. If we just continue
without the symmetry. This conform here. All right. Perfect. All right. Let me
say real quick. Let me see. Maybe I can add
a little tiny bit more of prime here in these corners to make it a little bit
more interesting there. All right. Let's
see, middle metal. I want some middle metal. Let me seleg maybe let's say
half a dirt with this one. I will just copy
and paste it here. And now I will Maybe even change the color, maybe something more brownish. All right. This should
not be a metal. The color right let's
paint some stuff. We add tiny bit of
this with symmetry. Let me go back. Let's add a
tiny bit of this around here. Maybe something
around here could be in areas where maybe
the dust can accumulate. Something there. Yeah. Is a tiny bit more of work. A little bit let me
see my base color. This could be a tiny bit darker. All right. Just trying to make that a
tiny bit more interesting. All right. Maybe here also, we can add some stuff there. Maybe here we could add tiny bit of that A, let me go to the scratches. And now I will
delete some of them. Let me go in the inside
pieces. Give me a sec. Where is that scratches? I will delete some of those
scratches around here. Those places doesn't have
tents to have crutches. All right. If I can add the same
layer in these parts. A give me a sec. Let's copy that dirt layer
and I will just paste it in here maybe. Let's wait for this. All right. We have
something here. Maybe we can paint some
stuff in these areas. Tie. Perfect. All right. Let's see. Maybe here, a tiny
bit of that there. All right. Here, also. And just a tiny bit of that Let me see how this is looking. Maybe we could delete
a tiny bit more. Of that there. Let's see. In this is here. We could add some stuff there. Let's see. Let me copy this layer. I will put it in the
scope white part also. Maybe around here. Let's paint a little bit. Thing around here,
maybe. Would be. To have a tiny bit of color variation there
and roughness, everything. Yeah, maybe here,
we put that or no. W it seem in the metal
to, I think it's there. There I think is here or
right. Let's right to do it. Maybe a tiny bit of this. Trying just to make everything a tiny bit more interesting. Like adding a bit of
these variations. Alright, I will explore
this to see how this looks. Let's be safe first. Alright, and now I will
export this to substance. I mean, I will export these
to Marmoset. Go back. Alright, let's wait
for this to export. Alright, let's sing here, let's wait for this to charge. Alright, let me go
to my normal camera. I think it looks fine. Maybe I will need to
wash out some of these. But overall, I think maybe maybe paint a
little bit around here. I think it's looking good. Yeah. Let's go back
to substance painter. Let's go to the inside pieces. Now to the dirt here, where it, middle metal or I will
just erase tiny bit. Of this also here here also. For some reason, this is
not getting the color. Well, I think that's what we do. I don't see much to
do in this weapon. Maybe we could add a tiny
bit more of stuff here. Perfect. Let me do some little see some little recap here to see how every
map looks like. All right. All right, let's see. I don't see too much else. Really, I think we
could leave the weapon, the texts here maybe. All right. Just looking at this, Let
me export again my texts. All right. Perfect. Let's go
back to Marmoset but And now I think
it's better here. Yeah, kind of better. Yeah, we go keep this. Did you say has this was
in first person, maybe? Like, here we have
our character with a weapon holding
holding the weapon in first person like
Boom Boom, yeah. We go to the other
camera you have made. It's looking I can
really my opinion. So I think I can leave
this video here. This video was just
tiny little touches. And if I notice anything
else that we could do, maybe just a picture, maybe that I don't see now, I will do another video. But I think that in this
stage is the weapon is ready. So you see you in
the next video.
35. 33 Render Scene And Final Words: Alright, guys. So I have made
a little rendering scene. So let me show you
how this scene is made. You can see here. I have downloaded asset, a table asset I
think it was from Sketchfab or trader. I
don't fully remember. But you can see also that I have done a little
bit of material work. I just use the materials that
comes with Marmoset toolbg. You can see. If you have
the Marmoset toolbg, you should have these materials. I track and drop
these materials. So I added a little bit of admissive stuff,
admissive material here. You can see here. And also, these materials
are in triplinar. You see here in texture, this part here, you
will see that it in triplinar and not in UV. So we can use those materials
without need of a UV map. And also for the lights, I added two rim light. One of those are a
little bit yellowish, another one is a
little bit bluish. And also, I have added
two key lights here. You can see that the
shape is rectangle, a little bit elongated. You can see here. And
for the for the camera, there's not much
that I have changed. I basically didn't
change anything. I just added the color
mapping here in Aces. I also writed a little
bit of exposure, the shadows and graty and the
contract just a little bit. Added a little bit of harpening,
a little bit of bloom, gnette and also I
added a little bit of grain intensity and a little bit of depth of fiel,
you can see here. I have my focus
and freras it and sticky focus to
maintain the weapon in in focus with this slider
here in this part here, 0.9, I think, basically, that's it for this course. So congratulations to get to this point and see
you in the next one.
 FastTrackTutorials, Premium 3D Art Education