Transcripts
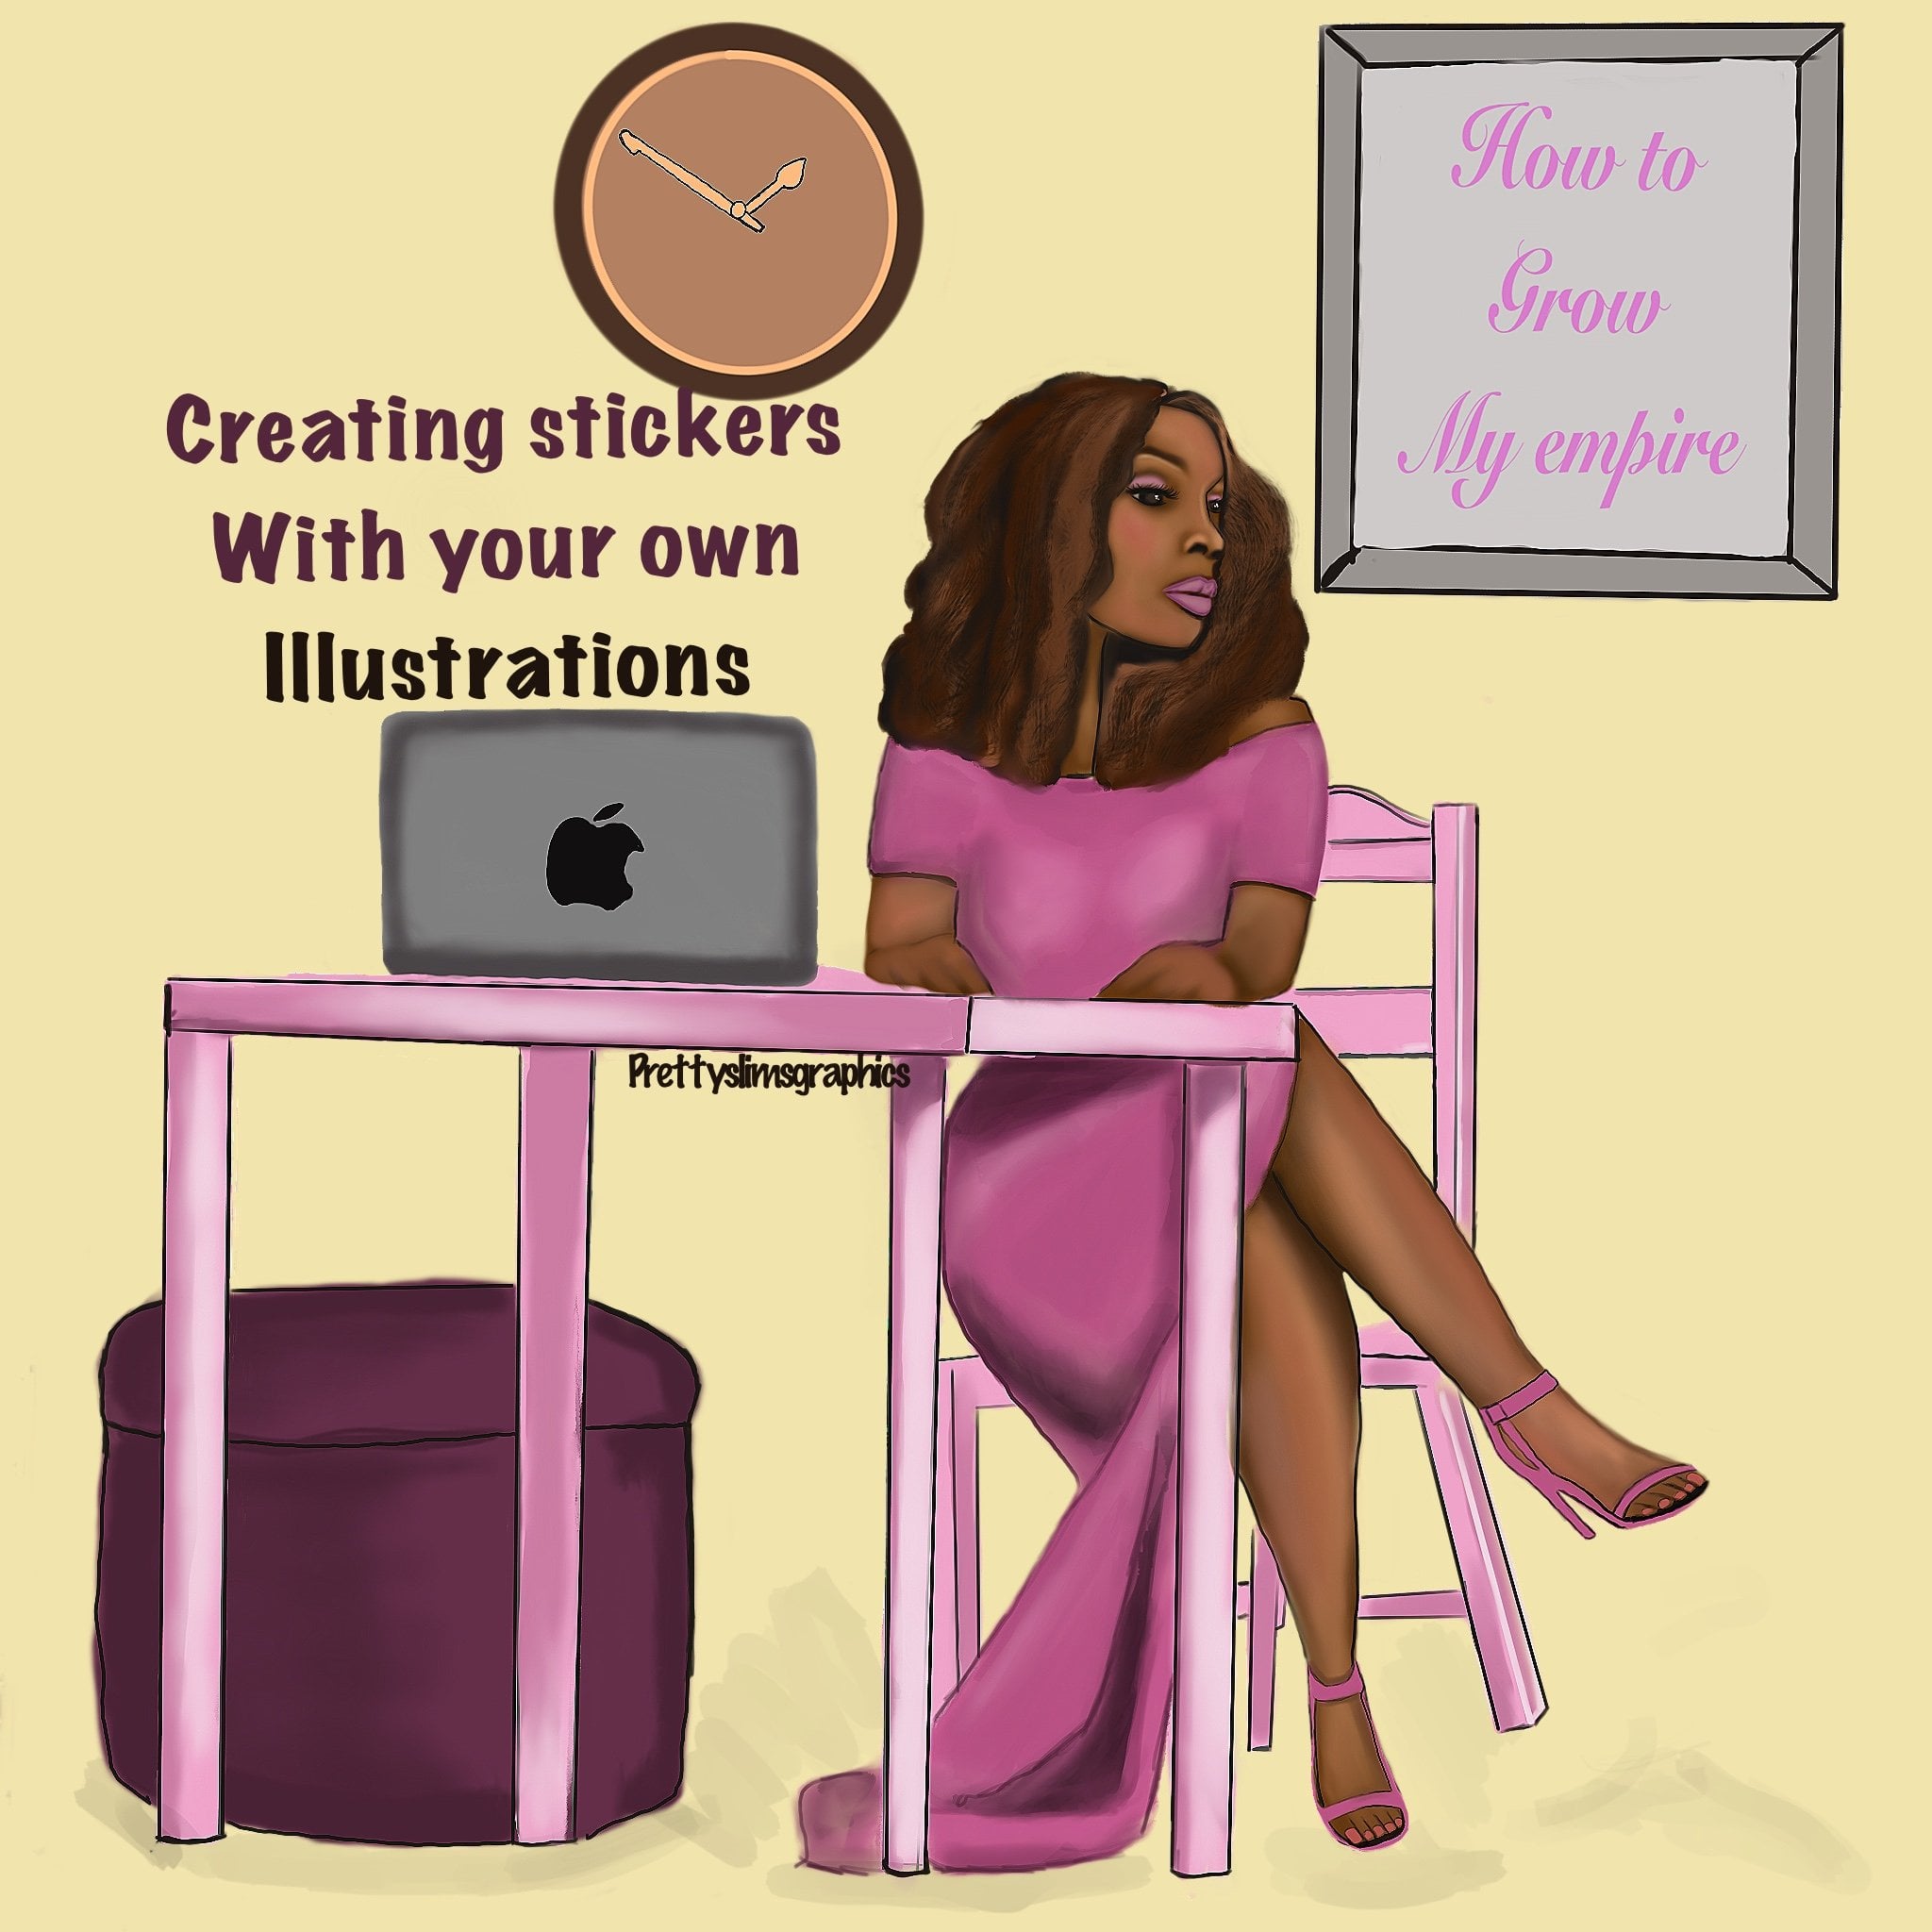
1. Intro : Class. This is my second
class on skill share. In my first class, I
showed you how to create digital stickers with your
illustrations and procreate. This time I'll be
teaching you how to create the same illustrations but use them for digital apps. If you converted over
to digital planning, this will be perfect for you.
2. Class Description: In this class, we're
going to cover how to plan out
our sicker themes. Some tricks with layering, how to minimize white space. And much more, stay
tune to the end because there will be a project that you have to complete at
the end of the class. Don't worry, it's
nothing difficult. I just want to see what
you've learned in the class. Stay tuned and see you
in the next video.
3. Materials: Computers for this class is just the Apple
pencil and an ipad, you in the next video.
4. Finding Inspiration: But inspiration for my stickers. I normally use Pinterest. I will go on here and find different images that I
want to use as inspiration. I will make them my own. For instance, we're going
to be doing this one. I'm going to add my own
sayings on top of the cup. Lately, I have been feeling more into
reading books and stuff, so let's see what kind of
images you can find for books. I'm going to say coffee and I just want like
a stack of books. Nothing too fancy. But something like
this looks good. I might just free
style because books are pretty simple to do. But Pentrius has a
wide range of things. Sometimes I struggle
with colors, I will actually do that too. So I'll go to color
palette on here. You can pretty much p
anything into procreate. If you want to bring colors
in from a particular palette, you can do that. And procreate. All you have to do
is just save it and then upload it onto it so they have
different things. I love pink. I'm thinking of something with a mixture
of pinks and greens. This purples really big. Okay, let me not get
that chart. All right. So basically to find inspiration
or to have references, you can use Pen,
you can use Google, you can use whatever you like. Since you're not using this
for commercial purposes, it's just for your own
personal thing, That's okay. This is basically how I come up with my inspiration
from my stickers. So we're going to go ahead and
move on to the next video.
5. Planning Part 1: All right guys. This
is what I came up with for my clip
art with the books. I added some flowers and I brought in this color
palette for the books. That is going to be
the first image. I have already started to
set up my second image. I've learned to put these on different layers really quick. I just want to take this off
and show my second image. This is the cup, the
mug that we saw, and these are the words that
I want to add for the cup. All right. I did want to
incorporate some flowers. I'm not sure how I want to
set the flowers up right now, but they're there to
minimize white space. When you get ready to export
this over to procreate. I'm sorry, not
procreate. Good notes. You're going to come up
to this section up here, and this monkey wrench sign here is what you're
going to be using. So you click here. Then
we're going to select Canvas, Crop and Resize. That's located right here. And look at the setting. I have this set up 3 " by 3 ". That is pretty much
perfect for me to bring. It is slightly
bigger enough for me to keep my resolution good. As far as my colors, it also has just enough so I don't have a whole big
old sheet of white space. So to change the settings, you just basically tap there. You put in your numbers
and then you hit done. And it actually
says and crops all. Just make this down. All right. Another thing
that you can do as far as tips and tricks to something. I have these flowers and I'm not sure where I want to place them. So I am going to play with that now and see where I can put it. I think I want to
separate the flower from the leaves that's put here. Now if you're like me, I don't get many chances
to draw flowers very well. Anytime I can use my little
heat to save time, I do that, I go here and I will copy this and come down to the
bottom of the screen, and it has like a
copy paste feature. And then I will come back up. I will come here and
I will duplicate. And I'm going to
duplicate more time. Okay? Then I will take
one layer and then I will fit the flowers up
according to how I want it. Three. And then on
my original layer, because I still have the
flower on my original layer, I'm going to take the leaves and I'm going to
add them somewhere. You know what, I may
not even need them. Oh, yeah, I may not
even any of them. I want to erase that part. Okay. So my other
selections of my original I'm going to select. All you have to do is
hold down and drag it. Select them all, because I
want to make them smaller.
6. Planning Part 2: Okay. How about I
just had a thought. How about I put them on top
of the clip, Excuse me. Now I have to drag and
select all of these so I could pull it all down. Okay, I think that looks okay. Yeah, so I am going to Okay, so here is my
placement for my cup. I'm going to be showing
you a few things you can do to save you time when
it comes to coloring. The first one I'm
going to show you is the color field
technique with Proc. So if you hit at the top of the page is usually
where your buttons are. Take this. All right, up here is what you're going to hit and it will bring
down that bottom. Anything highlighted in
blue is basically selected. So it's already selected. And of course, you want to
have your color up there that you're going to be
using With the cursor, you can change how
you want to do it, but I normally just use
freehand and use it that way. So I'm going to start selecting it Doesn't
have to be perfect. Again, you are going
to be putting in and you just tap it to get that one. If you want to stop it, you just unclick there
and it will stop. Okay. I'll show
it one more time. I select my color, I'm going to hit
the cursor there. It's already still populated and I'm going to do
a couple of flowers. Let's go in and show you
how you can do that. That's basically what you would do and then you
would stop it there. That's a cool tips
that you can use to speed up some more time. I'm going to go ahead and finish coloring this one
and I'll be back.
7. Coloring tips: Okay, now we're going
to play with texting. I have my thing that
I want to have there, so I'm just going to
go ahead and start. I'm just basically
freehand writing. I do. Once everything is done, I will go back and finalize
the details of it, but for now I'm just
freehanding in. Okay, So I have this here and I basically want to
make this thicker. I think it's too thin, so I'm
going to make it thicker. And to do that I will duplicate my same layer and then
I'm going to slightly drag it over and that gives it an
extra thickness. Let me hide this layer. You see it? Is it made
it pretty much thicker. If I wanted to do anything
else I could before that. You merge those two down
and that becomes a layer. Another thing, you can make
this layer a clipping mask. So you can only be able to draw on the text that you have here. If I wanted to go in
and say, for example, I wanted to add poca dot, let's just say, let me
use a different color. I would go in there, let me change my
pen to the brush. And then I could, I could add separate
poca dots to my words. It will only add to the words. It won't go anywhere
else on the paper. You see how that
going? Only on there. It's a bit light. So
I can duplicate and darken it and I
could merge it down. I could also come up here and let's say
that's not a good color. I don't like that, and I
can drag this into there and it changes the dynamics
of the whole image. Here is my second image, the colors and everything that I basically
want to use for it. I am going to add the
remaining details off camera. Then I'll be back to show you all how to export
this into good notes.
8. Exporting to Good Notes: All right. This ended up being my finished look for
my first sticker. Then I'm going to go
down here and hide this one and show
you my second one. I did not stick with
the polka dots, I just did that to
show you guys how to add things to text
and stuff like that, but I just did something
very simple and did like a double outline
for the wording part. I think they both came
out pretty much good. I'm going to unhide my image here because now
I'm getting ready to show you how to transport the files over from this view. You're going to come
up here to the menu that's over here by the gallery. And you're going
to hit this sign that's going to
bring your job down. Menu, and you're
going to hit Share. We are going to be doing
the P and G files, because I want both of
them to go together. And I'm going to save two files. Go on my ipad. I'm just going to do that. Then I I'm going to hit I'm going to All right. Sorry everyone. My
screen share was not pulling up everything
that I needed you to see inside of good notes. This is the Good notes
app, how it looks. I had to go back into my images
and take the background, the white background
off and I'll show you why to make it. You're going to press the image and it's going to
ask you where to insert from. And then you just
click Insert From. I saved it to my ipad, so I will press that. Then I am going to select, it, comes up just like that. Now, previously before what I had was the white
background still attached. So I'm going to show you
what that looks like. That's what it
looks like. If you want that white border around, that's totally fine.
It's totally up to you. But you can always
use it without it. If you save it, you can make it bigger and it doesn't do anything
to the quality, you could make it smaller. Let's see how the other one looks and there is the coffee milk. That is how you bring
the images into. Good. Ok, I hope you learned something today
and I look forward to seeing your
projects. Thank you.
9. Class Project: You've made it to the ends. Thank you for taking
the time out to watch the video today in the
class section project. Just submit an image of what you've created
along with me in class. It can be finished or it can be still in progress.
It doesn't matter. I just want to see
what you created. Thank you so much for
taking this course and I'll see you in
the next video. Bye.
 Christina Williams, Illustrator/ Watercolorist