Transcripts
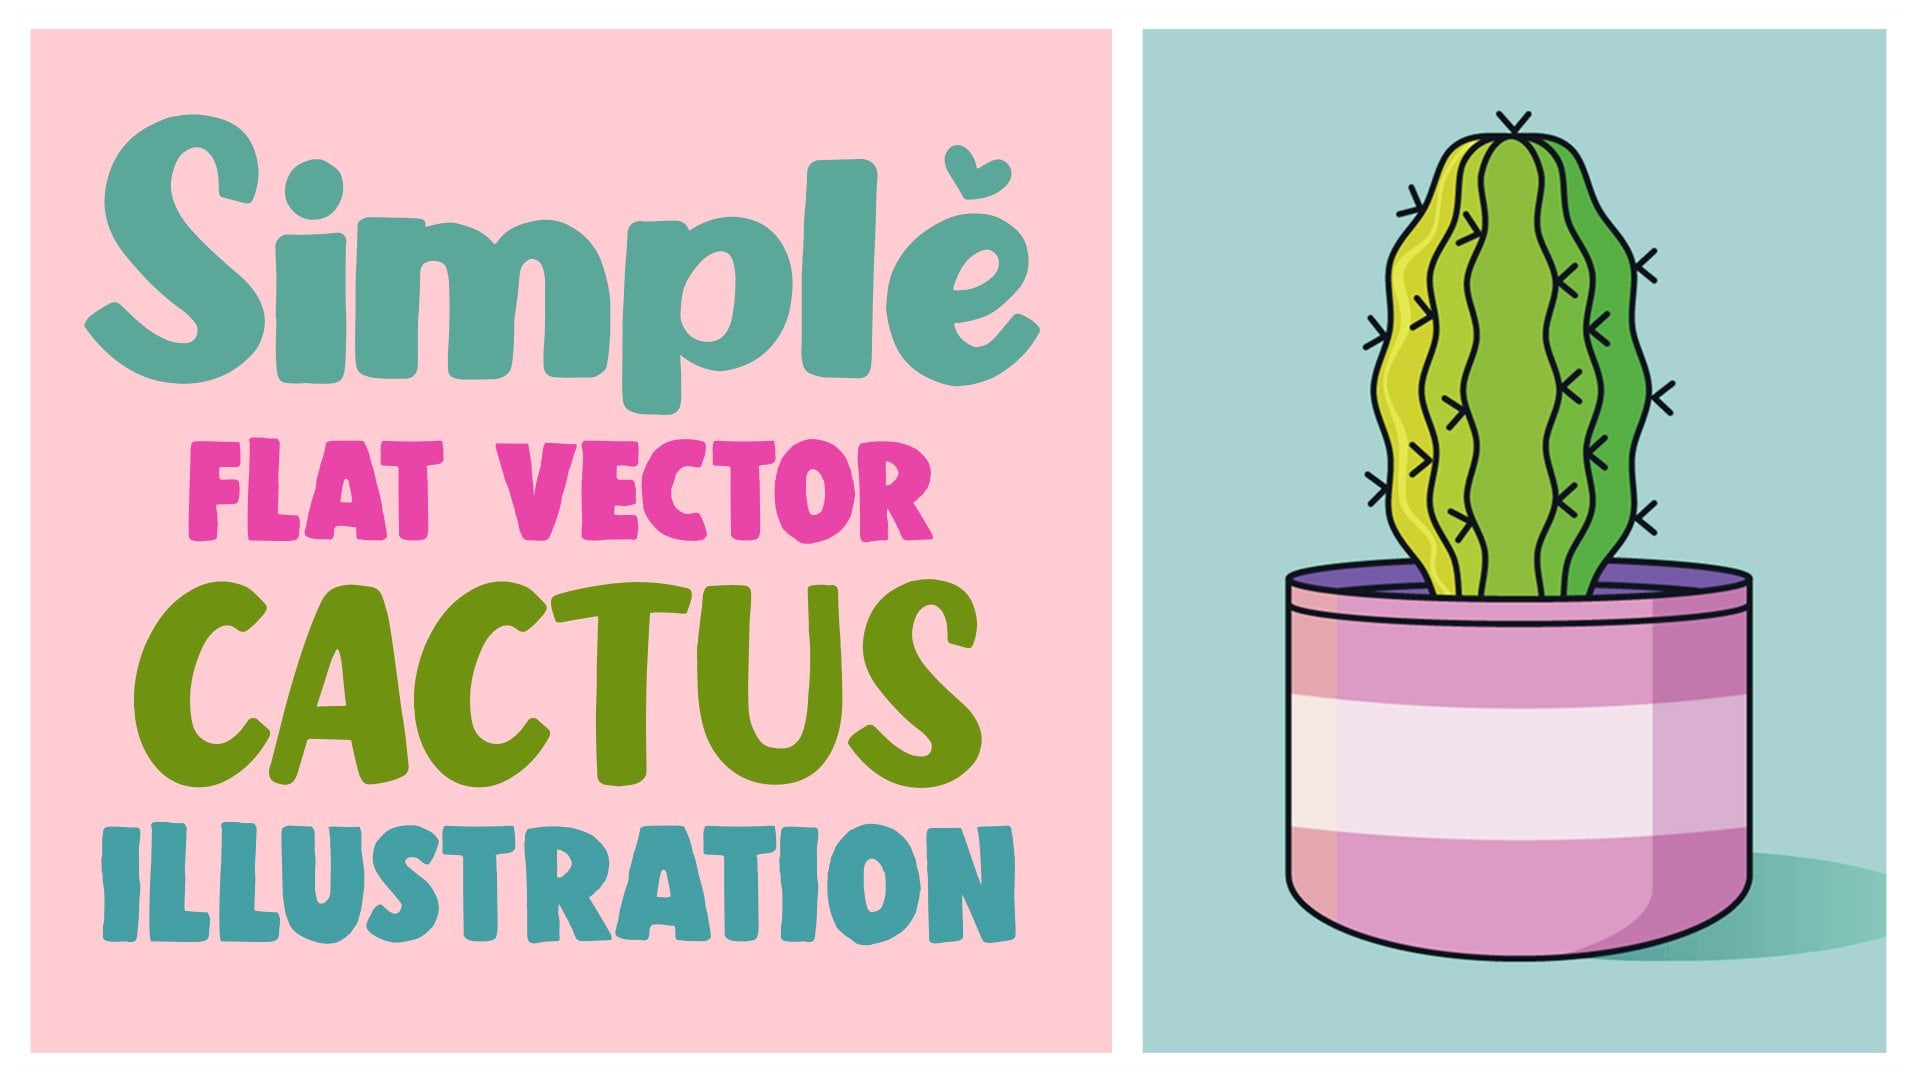
1. Introduction: Hello, everyone. My name is Ksenia in them in illustrator and graphic designer. In this kill share clothes, we're gonna learn how to easily make cute and colorful wrecked illustrations. Using Adobe Illustrator will start from the very beginning and step by step will explode the basic tools. After completing this class, you'll be able to create provide administrations, which you can use the stickers prince for close boss skirts. And, of course, there's all kind of graphics pull over the Internet. This glass is open for anyone who may not have any prior knowledge or experience in vector graphics, but wants to know how to incorporate that a bill a straight it into the creative process.
2. Constructor: the first bloke of our class is about stop. It's very recognizable, cute, And what matters most is easy to create. The men characteristics of the style around shapes, move Kherson lines and visible Contra strokes. All those characteristics together give us a strong but cute character. Strokes help us to highlight the borders of shapes and smooth curves, makes the shape and the whole upcoming character look nice and aesthetically pleasing. Also, you might have not just all the examples have a very simple but unique way of colorant. It's bright, has highlights and Greece shadows and always sunk you details that make it character look like a complete and really complex illustration. At first sight. It might seem difficult to create such kind of illustrations, but in this class will dispel. The Smith step by step will go over all aspects of creating a good looking character so far away the fear and let's begin. So I hope you left all your Dawson fierce in the last part of the class, and now you're fully prepared to start creating your first characters just to know how everything works. Let's begin with the pre made templates off elements such as eyes, mouse, some features and basic sealers that can help us to create a cute character in the project and rest of stop. You can find a downloadable template with the pre made features that's open it and see what we have here. He would have. Five are birds a war spaces aren't boards, represents regions. It can contain principle. Oh, exportable artwork and the first upper left Tarbert. You confined free Collins with the pre made sets off elements. I smiles and features the other free arbors contain a bunch of bring my food serious that we're gonna use to start out breath of creating cute creatures. And the center had a blank space where we're going to try to combine all the new features all together to make a cute character. So take a quick look at everything you have here. You can quicken elements and selecting ice moss or other items, and you can drag them to the white space on the blank arbor to start having fun. Use a selection to for that, for simplicity. Eyes and feature elements are grouped by two. So don't be afraid of ruin anything. And now let's try to make a character using this elements, shall we? First of all, we need to create a new layer above all the other layers and learned the basics of how to work with lays in general. So it's gonna own fears. But layers I needed to least organized and ended the objects in a document. You can finally spend a here on the bottom, right? If you don't have it here, go on the window on the application bar and choose layers during the new lake leads to create new layer but nonetheless panel. Let's click twice in it and given the name character one. When you're down with stop in the name jazz quick enter when the new layer is made were finally begin to create a character. Just a quick note. Before we begin, I'm using PC, so I'm gonna be saying out and control. If you use, make its option for else and common for control. So choose a food. See that you like. Let's say it's ice cream scented with the selection to hold Elke and drag it with your mouse to the white arberg. Now I have a copy of our ice cream suitt, Then you need some ice on it. Click on the first ice, press it, hold the l Key and drag it to the white space from the ice. Somewhere on the ice cream wave in the eyes will be appropriate. Don't try so hard to put it in the center. We'll fix it later, so it's starting to look like something cute. You might need to zoom on. Zoom the arbor to see the features properly, so uses shortcuts. Control plus control minus. In that case. Okay, let's repeat the dragon Cope in step with the mouth element. Click on the first mouth, hold else key and drag it to the white space. Let's put them out somewhere between arise just to make it even cuter. Let's squeak on cheeks element and put it under the ice. Now we got a character, but we should fix some details. Firstly, we need to make our document look organized, and secondly, we need to make our ice cream look not so Derby. Let's begin this organizing our document which created and you lay, but there's nothing in this last folder that's because of our premium elements, which leave in other folders. Take a look at the last battle, you can see the tiny arrow new every layer you can click on it and jail show up the subways that belonged to their country clear. For example, in the late fall, the ice leave all the pre made ice elements, and when we're coping the element, it appears in the folder it belongs to, and it's not a problem at all. Let's see how we can fix it. Quickens ice cream Seward with Capital Blank. Harbert. Now take a look on the last panel you can see the selected art indicator appeared on the right of the layer in the layers panel. You can drag the subway to the layer folder. You want that strike, put him out there, hold left button and drag it to the new live you've created that's repeated with the other elements off the ice cream. Quicken the ice, go to the last panel, finds the indicator, boot the mouse and drag it to the newly with created Repeat with cheeks and mouth elements . Also, you can select all the elements at once, and they over remarked with a selection in daycare. So it's Indonesia to select them all now we've done, and our document looks very nice. Of course, you're allowed not to do that, but keeping your document need an organ. It becomes very helpful and saves a lot of time while you're working with a huge amount of separated elements. Now let's take care about recent ice cream face. First of all, we need to find the Align panel. It's summer on the right, but if you don't have it here, go on the window, align. We use the land pale to align or distribute selected objects along two axis with Specify. Okay, holding your left mouse button. Select all the ice cream elements. Just a reminder. Check your lace panel. You should have all four items ice mouth, cheeks and seal it in that last folder we've made not so long ago. If you mean something, get back to the previous organizing step. Find them all and put them all to the right folder. When they're all selected. Opens the Align Panel and Click Horizontal Alliance Center. As Alan objects. Part of the spinal now faces perfectly centered American group. All the characters elements, so the object since now are treated as a single unit, which means that you can move or transform a number of objects without affecting their attributes. A relative positions you shortcut control. Geeta Group objects. You also can ungroomed them and use them as a single elements to under abuse. A shortcut control shifty When you're grouping objects, the new subway photo appears since the main less fold. Let's check it out, given the name ice cream, and now our document looks even neater than before. Okay, now we know how to combine the elements together. So let's repeat everything and make two more characters. Start within Yulia. Choose a food Seward. Drag it to the blank are both holdings alky, juicy ice and repeat drag the same with the mouse and cheeks. Then make a document need. Find all this ablaze you've created and dragged into the correct layer folder, aligns the objects correctly using the Align panel and carries on to a Lanson to button and groups of objects to make them a single union and that not we're finishing the second part of the class in the next part, we're going to focus on creating your own emotions, so stay tuned and get ready
3. Creating Emotions: in a previous part of a class, we will learn the basics of working in Adobe Illustrator. We used Bremer eight elements, and now it's time to move on and how to make everything by yourself without a constructor. First things first. We need to create a new document. If your adobe illustrator is already lunch with another document, you can click on file you. The Dalek window will help you to choose the right format of your document. For now, let's just up on a four. Press it, Go to the prince step and choose a four If you're launching Adobe Illustrator from the home screen there, if you brought in some of the left created button speaks for itself and will help us to create the document by selecting available templates and presses. Oh, make a custom document and the open button will open the already existing document. So let's begin this creating in your document by clicking on suppressive a four on the top of the home screen. The new document is ready, and now we need to save it. Go under file Save s or using control s key combination. Give the document the name. Let's go with emotions, make sure the file form. It is a E and Greek. Okay, Now the document is safe. It will be saying automatically from time to time. But just to be sure that you won't lose anything. User control s key combination when he does something beak and don't want to lose it accidentally. And now I can start exploring how to make our own emotions. We will rely on the emotions we've used in the previous part of a class, So let's take a quick look of them and divide them into few groups by type of those will need to use to create the elements. So the 1st 2 we're gonna use is a lobster. There's a tumor in the left. Let's find the rectangle to here. Quicken it and hold down the mouse button. Or you can click the right mouse button instead and you will see the hidden toes Senate the Arabs toe. So let's create a circle. Put your mouth on the blank space, click and hold the mouse button and drug dragon until the elves is the desired size This cruise and said, l show that your wheat and high village are equal and your ellipse is a circle. Also, if you need to draw a circle, you can hold the shift key Wild Dragon. Now look here on the tool, but we have two boxes which called Feel and Stroke, I feel is color Parton or great and inside the object a stroke and be visible. Outline off the object. You can control the vihd and color off the stroke. Let's select our circle and quickens a few bucks twice. The dialect window is the color picker is here for you to see red, the color that speaks the solid black and click OK, now we need to pick a stroke are you can do the same way We do it with a few collar, but as we're speaking, the same solid black. You can click once on a few car and drag it to the stroke. Books now have both feel, and stroke is a solid black, and we have one I don between in the 2nd 1 So now we can repeat what we did in the previous part of a class. Well coping. The objects quicken the circle you've made holding out key and drag your circle to the right. We need our object, strictly horizontal and on one line. So hold down the shift key, Wild Dragon, and he would have out first. I said, Let's do the second prayer. The second braise little bit, tiniest. So we need to make our rice from the first set. Smaller. Let's go, be one I from the previous that you've created and put the summer under the first back. Now we need to select the I used in the selection toe. Well, you're clicking on objects. Here comes little books around it with the tiny squares on the corners. This squares help us to edit an object by drug in the corners and making the object bigger or smaller and even rotated. So let's pick the bottom right corner and drag it diagonally up. Now I have a tiny I don't forget to use the shift key held down because we still need a circle. Repeating the stethoscope in the second I and the second I set is done in the first set will combine the first to place and create new ice with harlots Copy and I from the first set put it summer under the second pair of eyes Now select and I from the second set and drag it holding the Elke I. You already corporate without dis electing the tiny. I click on the few books on the toe but twice, and pigs and white collar Houston's Akala Pekar move this wide circle a little bit too left side to make it look like a highlight. Now select two circles using this election to and group them using controlled, geeky combination. Now could be the second I, and different, I said, is ready. The last set into these elves group is Amber. I said once again, corporate the rare. First I put it on the first set of eyes. Now we need to add this bro to make an evil eyes. Look for the bro. Element will need a simple life. You can find this to on the tuber. It goes the line segment to selling this to and let's edit Nias and you. I put the cursor on the top of the I a little bit more left from the I edge and drag it to the right again a little bit more right from I edge. Use a shift key to create a stray line. Now in still selected, click the right mouse button and choose transform. Rotate. The Dalek window will let you feel the get visit degrees value. Let's set it to 10 degrees. You can click on preview checkbooks to see how it will look, so let's now click OK and get back to our bro. Now got the line. But it's too themed. Lets your friends to control banal in soap and finally, the switcher with up down arrows that gold stroke weight Quick a few times to the upper arrow and you'll see that our land becomes Ficker. Continue until you think it's enough to look like a broke. One of thing to do is to make our line a little bit prettier and not so edging again. Go to control panel and near the switcher. You'll find its up stroke Greek on it, and the Dalek window will show you what you can do with a stroke of a selected object. We're here to choose around, kept in the cap section. Now on bro look nicer. Let's group all right and bro Objects with the control G keys and copy are grouped. Object to have a second I and he'll have a little problem. The bro. On the second, I should look the other way. Let's solve this problem in a few clicks. Select. I was wrong, bro. Click. The right mouse button. Just transformer. Reflect the Delic window will help you to make everything right. Just just excesses. Vertical and that's it. Quick. Okay, in our first Bayer Vice Israeli. Now let's just group of sex one by one. So they impairs. Use a selection to and controlled geeky combination to make it. Don't forget to organize your document and give names to all your groups. The second to we're going to use for a new group of us is still the Arabs to but with some tricks. Now let's create a circle. We want me to feel inside so it's done to sounds the field box off. Look under the scholar in boxes. You confined free, smaller book seconds in the road, colic, radiant and none. So with selected field box quick on non Aiken and objects feeling will disappear. We longer need the stroke thing. No one needs to make the stroke look pretty again, so we can do already known manipulations with control bear and stroke weight and gaps. Or you can select the eyedropper tool to cope. Appearance attributes from one object to another. So let's drive in YouTube. 70. I drop it soon and move it to the bro. Object. Click and look at what happens now. Have a circle with thick strokes and round Kipps. And now we need to split our circle. Stroke 22 pieces to face. This challenge will need to use in YouTube cold Caesar's Let's find it on the tuber. Now select the stroke circle you've created and was little help from the scissors to Let's Cut our circle first, let's take a look at our circle. When you're selecting an object, you can see the anchor points it's made from in this circle, therefore, points top right bottom and left to split it off. Just half and half will need to put the seasons to right on the left and right anchor points and click on them. Now I can see that there is only a partial selection off top and bottom segments, and you can move them individually. So let's move the bottom side down now have two parts of different eyes and we need to create them. Pairs, so repeat the part was coping. Now have two more sets of eyes made was just a stroke. Let's upgrade them a little bit by agents. Some cute eyelashes could be the first left eye and put a summer under the second set of ice. Zoom it a little was control plus keys for ease of reference. Now take the line segment tool that we use before and created. Sanya Vertical language shift held up. Put it above the center of a night, then copies a lot and move it to the right. Keep it on the line. Click with the right mouse button and use a transformer. A taito. Fill the gate with minus 50 degrees and click. OK, move irritated lines so it's on the line whose are going beyond now have to less is done and still needs a further one. So let's use a new to cult reflector. You can find it on the two bars, always with the reflection tool. There's a small cross points you need to put it in the center where your first vertical lashes and then was held, held down, dragged the second wish. Do the left, put it underline and here we go off religious are done. Now group this I and copy to make it a pair doesn't get the group to rise together and give the group of name. And we can easily make the second pair of this set justice selecting them and click and transform. Reflect so jay Z horizontal axis and click cope instead of a cake more a second bed down below, and we're done here. The last two pace of ours are very simple to create. Will be using the already known line segment, too. So let's create the crossed eyes. Celinda Line, Segment two and create a vertical land Holding down The shift key is that I drop a to to copy their appearance off previous line. Sweetie, get back to the selection two and click on the line. You've just drawn with the right mouse button. Choose transform. Rotate into the gap with degrees values right down 45 degrees and quick. Okay, Now have the right angle intimating the second crossland. Let's reflect the language. Just done using transform reflect The axis is vertical and click up instead of okay. Now I have the perfect cross. Let's group it and copy to make another. I group it together, give it a name and we're done with this set. Now this makes the last discover I cry and I said, and finish with the ice so that the line Segment two and create a vertical line holding down the shift key. Use the eyedropper tool to copy the appearance of previous land sweetie on top of the vertical and draws a perpendicular line a little bit shorter than the vertical one. Now select both of them and go to the Align panel because we need to make them perfectly centered. Choose a horizontal alliance center at the line objects part of the panel. Now it's centered. Group it and make another. I group them together and give it a name, and now we know how to create different types of eyes using different tools. So let's move on to the mouse part, and we should start with creating. And you are Bert for now, alleged applicator. Already existing are Bert Front Arbor to on the tour. Click to select our, but you want to do public it and click the new arberg bottom in the control panel. Here's our new arbor. So let's get back to our mouths. First of all, when you to create a simple circle using L. A pistol. Actually, let's great two circles make one and then created Corby. The one simple circle is already mouth, but the second circle will split huffing half as we did with the ice. So repeat this step. POTUS is is to right on the left and right and key points and click on them. Move the bottom side down, and that is a little have free, different mouse now, for the second mouse set will just do the same, but not with a circle but a rectangle. Choose a rectangle to draw the rectangle. Use the eyedropper tool to cope with the appearance of already existing objects. Then go to the stroke panel in the control panel and choose around. Join in the corner section. Now our rectangle has smooth corners, and we need to turn this rectangle 45 degrees. So with selected rectangle cleans the right mouse button. Choose transformed. Irritate. Into the gap was a degrees, whether right down 45 degrees and click OK, and now we need to split it half and half using the same method as earlier. So now we get to New Mouse. The first group of mouses is this ca viikii t like once, and we'll make it from the smiling mouth we've done before so quickly that mouth put it summer on the blank space and then use an al shift. Cope it once again in the line that wait. When's the writing? A point of the first mouse matches perfectly with the left anchor point off the 2nd 1 Your dragon right now. So I have to have circles in a lot, and they look like a kitty mouth. So let's group them together and give him a name. Now I can rotated 90 degrees to make a case in mouth. So, like the kiddie mouth using the right mouse button and choose transform, rotate into the gap with the degrees value right down 90 degrees and click copy. Let's move it to the blank space and given the name and one more set of mouth is ready. And then pretty sure you can make that line the like miles by yourself fusions a line segment to After that, we got to my mouse left. Let's make this super smiley open mouth. Make a circle well needed to be filled inside, so use both stroke and feel boxes on the toolbar as a solid black color. Now select the circle, then choose a direct selection soup. This tool helps us to sell a directly anchor points segments or combination off both, so let's give it a try with a direct selection to choose the left anchor points off the circle, then holding down shift case. Select the right and keep one and then holding down the shift kit and your left mouse button. Director anchor points up now have a new form, but it's a little bit too long. So we need to select the bottom anchor, point off the subject with the dark selection to again and drag it a little bit up. Don't forget the shift key because we don't want to ruin everything. So now mouth is done, and don't forget to give in the name, and we need to create the last mouth and get it over with. So these exact mouth we're gonna be making by using the panto and you need to find it on your toolbar so for the first, and keep on down, holding the shift key diagonally. Move your mouse up and put the second anchor point down, and now I have a line, but we still need to continue now. Holding down the shift key. Move your mouse, diagonal it down and put the next anchor point in the same car. Is aunts a lot with the 1st 1? The smart guys will help you with this task. So smart guys do strange lines showing up. They can help us to ally Adit and transform objects or are birds relative to other objects . So if you don't have the stool turned on, go under added preferences. Smart guys on Windows or illustrator preferences Smart guys on black and said this sentence you see right now on your screen. So getting back to all us mouth, make a few more half rectangles using the pento and then click. Enter key when you think you're ready with the mouth. Ledge issues eyedropper to one more time to quickly the appearance off Prius lines we've done to make a call on a smoother Now. Give this exact mouth and name, and nowhere down was a mouse section. So let's move to the feature section. Go up Is that our boat, as we did before. Find Arbor to on the tour Click to select our, but you want to do public it and click the new arberg bottom in the control panel. Now when you know how to make circles, let's begin with a simple round cheeks. Make a circle using the Ellipse toe and make it being. I'm using this color you can see on your screen with both feel and stroke. Make a copy to give it a fair to make this Elon gated chicks scope of the circle from the first pair off. Chicks put it summer under and with a selection to drink the right anchor point off the object to the right and the bottom one a little bit up and fill it with a little bit different, being few I'm using discolor you can see on your screen for both feel and stroke boxes. Now make a copy and give this chick a pair. Now let's rotate the Elon gated chicken Be to make a new pair of cute chicks. Cook is Elon gated cheek. Put it summer under Supriya sprayer and using the right mouse button, go to transform. Rotate into the gap with the degrees value right down minus seven degrees and quick. Okay, then using this election to and the right mouse button go under, transform reflect. Check out the vertical axis turned on and click Coping. Move it to the right and out for a pair of cheeks is ready Group and give names to both Elon Gated prayers. And now let's create the last pair of cheeks who had in the constructor Jews a line segment to on the Suber making vertical lines and go to the control panel and choose a stroke with equals four points in the stroke panel. Choose around, kept to make the edges smoother, Then, using the right mouse button, go to transform. Rotate into the get this degrees value right down minus 10 degrees and quick. Okay. Then, with a selection turned on, go to transform. Move right down free millimeters into the gap, horizontal on the position sector and click copy, now repeated once again to make the free lines in a row and group done together, and we need to pick the exact color that we use before with Iran cheeks so quickens the first round cheek and then click twice on the few books on The Toolbar Corp is a hex, a chemical Qala Valley with the Control Seiki combination Sect. Our free Group lines with a Selection two and click on the stroke books in the Catalytic a window foods ecology of corporate to the hex. Identical color value gap and Click OK. And Now Alliance has the same reddish color as a first chick set. Now Kobe. The group lives to give them a cheek bear, group them together and, um, a name. So now we're done with cheeks. But let's make one bro sit. So create a circle use eyedropper tool to cope with the appearance we use before. For example, choose the same as a landmark Fugett by yourself but said a stroke weight in the control panel to the six points. Now it's got a segment. With a Season two, we'll need the upper left segments. So put your seizes onto Topanga Point and click, then do the same with the left anchor points and the lead. The rest segments. After that, using the Selection two and the right mouse button go to transform. Reflect, check out the vertical axis. Stronger and quick. Copy. Now move. It is right. And now Ambrose already group them and give them a name. So this part of the class has continent. And now we know how to make our own emotions using different tools.
4. Creating Shapes: So now, after we have learned how to create emotions, it's time to explore how to create Klay and recognizable shapes. In this part of the class. We will review the shapes revision in to construct a chapter and a few bonus shapes. So let's begin with an easy ones and finalist with a more complex. First of all, creating new document and save it for warming up will make too easy shapes. Candian Donut. So using the lib still create a circle, sends a stroke way to four points and choose wrong. Kept after that Great one more Elon Gated A. Lives a little bit smaller than the main circle. Then, using transform, rotate. Make a copy of this elongated ellipse and said the angle close to 30 degrees. Move it a little bit on top, so it's left. Anchor Point is connected with the left tank. A point off the first helps, then using to reflect on YouTube or make a copy of Zahra tentative and put it on the main Arabs. When you have offer helps is done, we need to select them all and find the shape building to on the toolbar. The shape builder to is interactive to for creating complex shapes by emergent and raising simpler shapes. It intrusively highlights ages and regions of the selected art, which can emerge to form new shapes when it says the shape it highlights. It was a great great. So when it's emerge, all the ellipsis who have made just put your mouse's cursor inside the shape of created and with the left mouse button pressed big up all the shapes inside and draw a line to merge them all together now have a new petal shape without lines inside. So let's move to our candy body. Smart guys will show you weather center point of the circles. So think of it as an orange here and put your petal shaped right on the center line. Now move it a little bit on the right. So the bigger part of the pedals are outside the candy biting. Now we need to make it a pair. So again, using the reflect to on your tuba, make a copy of this petal shape. Don't a small cross point or right in the center of the candy body circle. Okay, Now we have this rapper shapes on both sides and we need to get rid off everything inside the candy body. So again, select everything together and use a shape builder to inside the candy body. So the predicate is ready. Don't forget to group it and given the name okay. Moving on to the donot object. Create one small circle with a selection on user control seat to cope with the subject and control shift feed. To pass it in the same place. Now uses out shift, key combination and the selection toe. Let's make it bigger, so pull the selection frame diagonally up. Use the eyedropper tool to cope with the appearance of the prayer circle, and we need one more biggest circle here, so repeat the last step and making as the biggest circle. It already looks like you don't but let's make it pretty was aiding the wavy effect on the middle circle to make it look like a glace. So select the middle circle with a selection to then go to the application bar into the effect tap, choose, distort and transform and then exact into the Dalek window, said the values to size 1.4 millimeters regis per segment five and points smooth after that , go to object. Expend appearance. Now we just need to add some Sprinkles randomly using the line segment toe, and our donut is ready. So group it and give it a name for the next. First. Shapes were going to be using circles again, but will customize them. So let's begin with an advocator. Create a circle with a selection on, take a direct selection toe and quick on the top and a point, and now, using the shift can move it up until it has a next shape. After that, change the direct selection to the selection to and make a big corporate on the shape. Using control C Control Shift V and I'll shift combinations. Use the eyedropper tool to copy the appearance of the previous shape. Now create a circle. Inside this construction, it would be out Pete and the Navigare Israeli group it and name it. Now let's create a strawberry. So to make a strawberry, we again belong in the simple circle. But now, with a selection on, take a direct selection two and click on both left and right ankle points to make it hold down the shift key. Enough does that pull it up until the circle becomes strawberry like no need some leaves, creating Arabs. Go to the tuber and find anchor point to now get back to your leaf And Glick was the anchor 0.0.2 on the top anchor point. So now it's not an ellipse anymore. For the full Strobel, relief will need free of this pedals, so repeat the part with the transform. Rotate reflect, too, and the shape builder to, as with it was a candy said the angle it goes to 45 50 degrees when you're down was all the steps. Let's have a few seats and we're done with the Strober to make seats. Repeat that part was making the battle with in Cup one, too. So make the seats tiny and use both feeling stroke colors as overs. Don't forget to group and name him. Okay, moving on. Let's created beer. Make the circles want a little bit smaller over another, a bit bigger one. Then sell that in both. Using the selection toe, use the shape builder to to merge two circles in one form. After that, change the selection tool to the direct selection to choose to anchor points on the sites where two circles have crossing points. Now I can see that the pointers ins angles change their appearance. That means that you can pull them to the sites and the angles will become smoother. So let's try to pull them horizontally, not looks like a pure body. And we need to add a stem and leave to make it look more like appear so create around elongated rectangle using rounded rectangle to go toe effect warp arc and said the settings to Vertical Ben tickles. 4% destruction horizontal because 22% distortion vertical manage, 42% quick. Okay, then go to object. Expand appearance now put it on the top off the pier body creatively, fusion and Arabs, and upon to transform, rotate and sent the angle. It goes to minus 60 degrees, but you live near the stem, then select everything with this election toe and uses shape Builder tool to get rid off everything inside. Zip your body. No, you need to select everything, said the stroke way to four points. Group it and give it the name and the beers ready. And now, when we went onto an ice cream uses around the trip tangle to create a rounded rectangle. Use that I drop it to to copy the appearance of previous lance with Creative. Now take the direct selection, too, and select two sides upper anchor points. Then move your mouse withheld on left mouse button diagonally down to the max, and now the shape looks like a Popsicle, so make a narrow wooden stick, using the same around that rectangle. To put your cursor on the bottom Cars on salon. Find a center point with help from smart guys and then holding down Elke. Create a rectangle, which would be absolutely centered, so select both bars and get rid off. Useless part of the stick was a shape builder to and now let's make this melting part using the same Iran a trick tangle toe, ruling it five melt in pieces, so to make them absolutely identical, let's result to simple math. Select the Popsicle shaped with the selection. So now take a look at the control panel. You can see the values off wheat and high on the right side of it, so take the wheat value and divided to five. Now to make a rectangle with the determined values you need to select. Rhonda Tricked angle to in just Greek consume bling space on your art board in the dialect window. Put your calculated value Inter's of wheat gap and click OK, No, there is indirect angle, so pull the corners they are getting it down to next to makes him around after that modest new rectangle into the Popsicle body and make for more copies. Used a different high levels to make it look melting. Now select Arifin and using the shape builder to merge the upper part of the Popsicle together with the melting part to make the one so that shape just around. Join in a stroke belt to make the ages smoother. Now group the Popsicle parts. Given the name and let's move on. Now we're going to be creating a paper cup. So create Iran a trick tangle. Select your bottom and get points and using direct selection toe Mexico honest. A bit rounder. Now find the free transform to on the toolbar and choose perspective. Distort on the Time and Alec Window Now pose the left bottom and component Verizon. So it is the right for a bit until the whole rectangle looks like a cup. Now put your mouse cursor on. Suppose a rectangle. Find the center point with smart guys. Help using the Alki crit and you horizon's around. The trick tangles. It would be a base for elite. Now makes the corners round. Create one more horizontal rounded rectangle a little bit smaller than the previous one, and put it the way is a big part of it is over. The previous rectangle now making as a rectangle summer in the centre off the cups body that will serve as a sticker. No select every friend and Texas shaped building to Mircea Griffin inside the body. Those elite and cut the extra pieces of sticker holdings owns Elke using the same shape Bilde to now the body of the cup is ready, and we need to make a stroke. Create and there around the trick, tangle and bent minus 15 degrees. Using transformer, take Kobe. This rectangle. Make it smaller by pulling down the selection frame and bandit minus for two degrees. Move it on top of the previous part of a stroke. Select them both and use enza shaped building to Mersch. Everything inside a stroll together if you have any extra useless bars outside the Stros body cut, it was holding downs out key, using the same shape builder to with the direct selection. So select to anchor points, which forms a sharp angles on the fault and pulled him to the right to make the angle smoother. Now that said a few details on the Stroll Festival, let's make a line almost on the end of a stroll to show it's exactly a stroke. Take a panto and draw a line right under. The place was around and in the stroke turns to the straight lines. Use a shift key to make the line. You're drunk straight When you don't tap the enter key. No one in to make this land looks like an arc. So was a pencil selected? Move your cursor to the center of the line. You've just made hold the alky and with the left mouse button held down, boot diagonally left until became arc shaped unique. Using the same method, let's make a few lines on the fault. Now let's get free. The views, this parts of a stroll using the shape build it. So now let's drop it and given the name and the paper cup is ready, and now we're moving on to hot duck. To make a hot dog will need freer examples, so things ever tangle toe, create one rectangle, cope it and move it the way it forms free almost identical rectangles That would be our bombs. Now create one fina rectangle and put it a bit upper than centerline. Let's elect Imo Group together and go toe effect warp Ark and said that bent well you to minus 35% use a horizontal style. Now click OK and then go to object. Expand appearance. After that, you can on group the object with control Shivji combination, or you can click twice on the group with the Selection two and work inside the group. Regardless of the way of choosing to do the next steps, you'll need to select the bag bomb with a selection to change it to the direct election to and magazine corners. Maximum rock. When you don Moses repeat the step with two other rectangles. Now let's make a sausage a little bit bigger, using out key and pulling this election frame. After that, select all the objects and use a shape builder tool to merch. Everything that should be merged together and our product is done now can had few says I'm seats to make it look even prettier. So creating Arabs, go to the tuber and find anchor Point to not get back to a seat and click with the ANC upon two on the top and appoint. Now make it tiny and put summer on the hot dogs bomb and make few copies. Now stands a group everything, if you on grouped it and given the name. So no ads on was reviewing the shapes we hadn't constructed. Chipped er. So let's make a few more simple shapes as a bonus festival will create a loaf of breath so create around its rectangle, Selects to bottom anchor points was a diary selection tool and make them a bit rounder. Now put your cursor on the top horizontal land. Find the center point was a help from smart guides and then holding downs. Alky Create and Elon Gated circle. Select both objects, and he's into shape builder to merge them together, not select the result of the selection two. And make a Kobe with with control C control shift Vicky combination and using out shift combination. Mexico pit shaped smaller, adjusted a bit was moving and making it match or foreign is away. You allowed not to make the second smaller form. Just increase a stroke. Wait to make the outline Ficker. As always, don't forget to group it and given the name and breaths, loaf is ready. So let's move on to the second object and it's an egg. Let's create a circle, then go to effect the starting transform Ralph in and said the settings that weight size 6% detail one pair inch point smooth. Your result may be different because every time it makes a different form after then Goto object, expand appearance. And now let's add a yoke using the Alps toe when you're done. Group Arifin and given a name and went on with the neg. Now let's make a slice of pizza, so take it polygon to and start making a figure. Press down the heirarchy to remove size from the polygon and make it a triangle. Was a dark selection to Mexico or nurse mover. Put your cursor on the soap horizontal line. Find the center point was help from smart guys and then holding down out. He create an Elon gated round trick tango, then go to effect warp arc and sends a bent value to 20%. Using horizontal style. Click OK and then goto object. Expend appearance now Mexico nous Ron to Max and moves across the little doubt. If it's needed randomly, add a few circles to the pizza body. They should represent salami. Now select all the objects and uses Shea. Build it so too much everything that should be merged together and cut extra useless parts as always, group ever friend and given the name and the pizza slices ready in the end, let's make a slice off watermelon. So make three circles Once was right, once for the white layer and one for the flesh. Create one and signing as a using control C control shift We and all she's combinations. Then pick a rectangle to and put it over the circles the way it's both and borderline lays exactly on the center line over the circles. Now select every friend and using the shape, build it to with Elke, held down. Get rid of everything that insides a rectangle and get rid over tangle either now have the perfect slice of water mountain, but let's make it a little bit freaky, so create a rectangle on top of a slice and draws a vertical. Last. In the same places are circles. Go grooms, a rectangle with the lines to give and go to the free transform to choose a perspective, distort in his Alec window, then move top left anchor point, horizontal it to the right until it looks like a perfect slice. After that, select all the shapes and said the stroke way to four points. Now, at few seats using the Alex, go to the tuber and front anchor point to now get back to your seat and click with anchor 0.0.2 on the soap and ca point, we will need both feel and stroke colors. So now there's group Arifin and given the name and the watermelon is ready. Nowhere Done was making shapes, and in the next part of a class will be learning how to color everything
5. Coloring, adding Shadows and Highlights: So now we need to figure out which goes a good for us. According to supervise styles, most common color schemes will be bright or pesto, and special attention is given to rainbow color combinations. Well, the culture should be based on your intentions. So first of all, you need to decide what do you want your character to look like? Bright colors work well with the simple lines and makes it objects, vacation and coo and pestle. Collison intended to represent something very cute and soft, and it doesn't matter that you can't use the self calls to make an attention getting character. Okay, let's begin with the coloring part. You can create a new document and drug emotions and shape you've created before to this new document by simply using the selection toe. Or you can add color here on the same document. It's up to you, Al trade in yuan and at the same time show how to cope anything from one document to another. Okay, let's start with the toast. If you've created the new document, as I did, repeat after me. Get back to the previous document where you were making objects found it'll shape and with the selection tool and the left mouse button held on, just drag. It wasn UTEP within you document. Now it has a toast here, and we'll be working with a group of objects, so you need to get into the group to change the competence. To do this, click twice on the selection, or you can on group the objects if it's easier for you. So select the outs across shape and go to the field books on the tuber and then select the color. Even choose the color by yourself. But I'll be using the simple and suitable callus. Also hex identical values I'm using you can copy from the downloadable templates was relevant titles. Plus, you can see the Vela's Here on the screen for the out across. I'm using this colorful feel and this one for the stroke and now have a backwards done. So let's call it the flesh. It should be a little bit lighter, so I'm using this color for the field, and this one was across stroke for Brother. Look will need a few Ma Giotto's shadow and highlights, and of course, we'll need to put our face on its so how to make a shadow. It's a bit complex, but we'll get going step by step festival. Take a pencil and create a closed form. Just make sure to make some kind of triangle inside the object. It doesn't matter what it's outside of form because we'll cut it on your way. Always is this tray and go, but we need to make it smoother. So was a pen to and using the out key. Drink this diagonal line somewhere in the center to the bottom left so it makes this curve , Then select every friend and use the shape build. It's due to race extras. No need to fix this shadow form. So using the eyedropper, too Corpuz appearance of Beckford bread loaf but said the stroke, our books to know because we don't need here. After that, go to control panel and find the transparency panel send their capacity to 40% 1 nothing. If you zoom, you'll see that your shadow overlays the strokes and it doesn't look neat. We need to fix it to, so the way we will be doing it might seem to be ridiculous, but it works well. Need to cope and pass a stroke lines to the front, so use control. C control shift wiki combination to do it. Don't forget, we only need stroke. So said a few books to non, and now the shadow shade doesn't overlay strokes. Okay, let's create a few highlights will need two of them, one on the right, up a corn and one going down the vertical line. So for Aunt Want rate, a circle and use indices is cut. The operate Quarter Jews ical, which is near to what? I'm using this one and make sure your stroke caps around. Now let's create one more ballot using the line segment, too. When you hands on this car, let's let's group every friend and given the name body. Now let's copy the face feature by feature. When you hands on Corbyn, group them together. Given the name face and let's make sure that everything is centered, select everything and go to a land panel in the right bottom quantity. Choose Atlanta selection and choose Horizontal Alliance center, and we're done with the face. Now I can move the face up and down, holding down the shift kit and his overs. Don't forget the group. Everything and given the name, I hope you've got the general idea of how to collar Arifin and in what order you should do it. So in this part, I won't be showing how to color every piece, but will go over the difficult one so you won't be scared by the simple object and could do by yourself. And now let's move on and color a few more objects. So takes a hard look from the previous document and copy to a new one on group sheriff in our click twice in it to get into the group. Bless tricycle. It was a Grady int. So choose a grating to on the tuber. On the right vertical panel, you can find the Eiken off gradients of settings. If you don't have it here, go on the window gradient. To get a dialect window, we will need the line a great and so quick on the cycm. Then you'll need to set up the colors. There is a great and slider with two collar stops. Now choose a black and white option over great and if it's not already chosen and let's at the colors so quickens. Left color, stop and go to feel books on the toolbar, said the first logical. I'm using this one. After that, click on the right color, stop and choose the second color. I'm using that one. Then it can modify the color, origin, capacity, location and angle over. Gray didn't just click on your hot dog and dragged the line in the direction you want. Hero needs a vertical direction also can click and drag the stops on the slider to get exactly what you want your gradient to look like for the stroke color. I'm using this one. Let's apply the same great into the second bomb just elected and using that I drop it, too. Corpuz appearance over the first bomb. You may need to make some changes, so use the great and powerful for it. No need to call us a sausage so selected red degrade into and let's go to the great and panel. So go for the same steps as you did with the bombs. Selective Collis is a light awa and the doctor one. I'm using this one for the lighter and this 1/4 doc one you can play beat with allocation off the color stops also change the sausage stroke color. I'm using this one for that. After you've done those colorants, a sausage less collars, it's seats. So select them all and pick a cow. I am using this one for feel and this one for the stroke. Or, if you have a problem with overlay and sausage stroke copy and past the stroke off the bottom bomb. Now let's at some shadows and highlights a switch it before starting with the boredom bomb . Take the panto and create a shape in the bottom left corner. After that change, it's appearance. Mexico. Visit Pento plus alky for the color. I'm using this one with settings. A prostitute of 65%. Now put the shadow. Understand your stroke we've made a while ago. He's in control plus left square bracket, then using the shape builder to cut the extras. Repeat the same steps with up a bomb. Use the eyedropper tool to cope is appearance off the shadow from the bottom. Bomb now does the same to the sausage. I'm coping the appearance off the bombshell. Oh, but setting the color to this one. So let's on group ever friend. If you haven't done it before and select all parts off the bottom bomb and group them, then do the for one using the right mouse button. Choose the arrange. Bring to front Now I can arrange your sausage shadow under the bottom bomb using control plus left square bracket. Now you need to cut the extras and let's add some highlights. Using the panto. Make a line on the right upper corner with an alky. Mexico now said the collar to sell it white. Coping this holiday on the second bomb. Fix it a bit if it's needed or create in yuan figures that arrangement off seat if news create a highlight on the sausage, I'm using this color. Also, you can add a few more details. I'm gonna add to filled circles with the same appearance The strokes are, and also I'm gonna add shadows under the seats simply by selecting them and copy Pastor. Also al copies. Appearance off the shadows on the bombs and move them a little bit to the bottom. And the next step is arranging the origin seats to the front, and he redone with the calorie. So now let's group everything given the name body and let's go to some face when you're done with scoping. Group the face together and given the name face, I change the Chiefs you to make it merger other Carlos and said Seville, you to the's. No make shoes of faces centered Use the Align Panel and Horizontal Alliance Center for this made a face bigger if you want. Given the name and we're down this color in the whole joke. Now let's continuous a paper cup. I'll create a new our board to copy the cops. See words from the previous document. And for now, let's on group Ever. Finn, we'll need to use different colors for Cub's body is a sticker and Felipe and stroke. Let's select the body of a cup and pigs a color. I'm using this one for the field and this one for the stroke. You're free to pick any color you want. Then let's like the sticker and said the color for it. I'm using this one for feel and this one for the stroke, so continuing coloring with a lit I'm using this color for field and this one for the stroke. After that, lets like the stroke and set off the colors I'm using the same color as a sticker. One if you're having a problem with a stroll. Stroke overland. Elite stroke. Arrange a strobe backward now when we're done with choosing cars, less continuous shadows and highlights. As always, take the pencil and create a close shape. I'm studying with the body and stick apart, so get rid of a stroke color and it sends at best to to 30% and pick the darker column. Moving diagonally bottom right for the color picker. Don't use blackish or greyish cars that will make your shadow look dirty. So I'm using the scholar for the cop's body shadow. No need to get back and make us move curfews in the out key. When you're done with the curve, select all the parts of the cubs by and with the shape builder. To cut all the extras. We'll meet one last shadow on the cup and will put it on this elite. Use a simple rectangle Corpuz appearance of the previous shadow with an eye. Drop it to then select the body parts and cut the extras. After that, select both off our shadows and using shaped building to merge. Stand together now against it like the corner was a direct selection. Two. And make it smoother by dragging it to the bottom right. Also, you can add one more shadow under the stick it to make it look even better. So repeat the previous step for doing this for the shadow on the lead. Let's use other Medic Now we need to use control C control Shift B and moves in yuko Pretty good to the upper right. Get rid of Stroker by setting it to none. After that makes a man color. Every doctor I picked this one for that purpose. Now make a little shadow under the up a piece off elite. I use the same color as updated Lee, but Ceta passage to 75%. Now you need to cut the extras and after that corporate, all the strokes. To make the whole illustration need, select all the strokes one by one and copy past them with the Control C control shift. We said the field color to non arrange elements to the front or back if it's needed and the shadows Adan, so let's get over the highlights. Let's create a circle segment. Hallett, as which it was a breath and put it on the lead. So create a circle. Take the scissors and cut the upper right segment. You can even copies appearance off the breast, heil it the same with the upper part of village. Just decrease a stroke. Wait, make a harlot on the body using the panto increases stroke with and said Not solid white color. I'm using this one for that at the little circle, as which it was a bread. Let's put the highlight on the stroke, using the pencil making shape and copies appearance off the cub's body. Highlights said that positive it high. I change it to the 40%. Don't forget to put the shadow on the stroke. Use a pencil as we did before copies. Appearance of the shadow on the cub's body and put the shadow under the stroke. Now got the extras, and it looks like we're done with the coloring. So group everything together. Name it as a body and let's add a face when you add zone was scoping the elements from another document. Group them together and make sure the face is centered. Use the Alan Panel and Carrizo NITEL Alliance center. Name it as a face group, Arifin together and given the name Okay, let's go. One more complicated object together and it's a donut. So as before corpus and during the shape from the previous document. And let's begin on Group a reference, so it's easier to work with the parts of the whole illustration. Let's start with color in the back. Set a k a. The body off the donut. I'm using this color for feel and this one for the stroke. If you experiencing the same problem with the arrangement of Donna's body, use the right mouse button and choose Arrange sent to back and after that, select everything and use a shape. Build to two cards, a donut hole, then call us a glace. I'm using this one for field and this color for the stroke. No need to call it the Sprinkles, and I'm using those colors for this, and he begins a heart part with shadows and highlights. So starting with the body created shape with a bench on the left side, make a small kerf with alky and mental. I'm using this collar for the few and setting their passage into 45%. Now let's got the extras. Was a shape builder to after that will need to put the shadow under the glace, so use the control plus less square bracket. Key combination for that. So now hope is a stroke. To make the counter need for the glaze Shadow will need to go up is a grey shape with the control C control shift, Vicky combination twice and most one of the corporate object diagonally to the upper right . Then using the shape, build it so cut everything except the future shadow. The future shadow is this little piece on the bottom left and when you're done with the cutting extras get rid of a stroke and sets a darker color for the few I'm using. This one also will need the shadow above the donut hole so created circle a little bit bigger than the whole and move a dead. And then it is up a right now, using the shape, build it to cut the extras and with the eyedropper tool Corpuz appearance off the glacier. Though we've already created well, some of our Sprinkles are under the shadow, so we need to arrange them to the front use the right mouse button and arrange Bring to front. Create the shadows on the Sprinkles. Just couples in with the control. C Control shift Vicky combinations. Move a little bit to the bottom left and said the same color as the other glaze Shadows. You can use the eyedropper tool and switch the few color to the stroke, then set the stroke weight and stroke caps. But it will be way easier to cope is a color value and just said the stroke well was best in it. Now let's put the shadows under the Sprinkles using control plus less square bracket. Key combination To finish with Shadows Corp is a stroke of a glaze to Mexican, Too neat, Okay, done with the shadows Moving onto highlights for the highlight on this Donald body ever flagged. The Shadow was a reflect toe. No need to set the pointer to the center off the donut hole, and I'm using this color for the highlight. Few. Nawaz group everything together and given the name, body and corporate the face when he had done coping the elements from another document, group them together and make sure the faces centered using Align Panel and horizontal a land center for that now, Name it Face group Arifin together and given the name. So now we're done this color and complex pieces. After that, you'll be able to call it the simple ones by yourself. Anyway. All the colored objects will be included in one file, which you can find in the class materials so you can get a picture than for Qala values and so on and in the next part of a class will young how to make stickers and buttons.
6. Stickers and Patterns: So let's start with making stickers create the new document within a four vertical press. It's that open, alcoholic characters with the shift key mentioned the size. You want them to be rotating positions, and until you're happy with how they look all together, leave the space between the objects up to 57 millimeters. Don't place them too close to it. Just also leave some space along the ages off the document. When years on this, combining the characters together will need to create our cat lines. If you've seen any sticker before, you know there's a white outline was a machine or you with your hands and help from the Caesars can cut the objects emit way. So we need to create those lines. Festival Making Corp it off the layer with all of your objects. To do this in a simply way regulator, I can in the last panel I can create in Yulia, and now I have a copy. Then you need to select all the objects on the carpet layer you can use. The Stargate nears a layer in the layers panel whenever finished selected union to go under the object expense. If there is a dialect window. Just click. OK, will need to expend both feel and stroke after that, Make sure everything is selects it and find the pinnacle Pathfinder. If you don't have this panel, go on the window. Pathfinder. We need to make two things in a row. Merge and then unite. And now you can see we have the outline off. All of our objects after that was ever been selected. Will need to go under object. Beth offset death, and we need to set our offset to 2.5 millimeters. Now click OK, select DeLay again and repeat apart was emerge and then unite now have a clean based shape . After that, we don't need it. Field with a car. We just need a stroke. So converter boxes and said the color for the stroke. I'm using magenta and you can find this car in the cars. Watches on the color picker window and that's it. Now have a clean counter. Only need now is to name Alice s Sprint, the one with all call it objects and cut for one with outlined concert, and we're done with the stickers. So let's move on to the patterns That button is a sinister, repeating image composed of one or few elements, and I'll show you how to create free, different Parton's using our characters, so creating you a for document and copy a few characters we've made before. I chose five of them Pizza, Hot Dog, Donald Ice Cream and Paper Cup. You need to make them smaller and combined them together. Some kind of read it with the stickers. After you're done with this, we need to select them together and go under object. Barton make. You will see the Dalek window with options, and he begins all the front. Now I can choose and change only the objects inside the selected box. You can change the size. You can rotate them, move them and so on. Festival. Let's set the tile type. I chose brick by row and says a brick offsets to 1/5. No need to place everything using harmony and focusing on the general image. So start changing objects inside the selected books. The main idea of this is to keep the space between all the objects broadly similar, So I made the object a little bit smaller, irritated them and move the way. They're at the same distance from each other when you think you're done, click done near the Parton Options window. So now we have a Parton's done, and now we can use it. So all the pardons you create it be on the swatches panel. If you don't have this panel, go on the windows watches. Now I can hide the layer with your corporate objects and create and you want on this latex rectangle and on just watch spending. Choose the Parton you've just made. Now let's create a rectangle as big as your arbiters, and we're down here. If you want to make a background color, create in Ula Wizard Rectangle as biggest your artwork pickle and Bundesliga under the one with the Parton. So for the second pattern, I chose a neg toast. Abba, Gana and Strawberry follow the steps we did for the first pardon for the title type. I used heads by the column, and the first Barton was a big candy and rot amount is made by using hex by the roads out type, and we're done was making stickers and patterns. So let's move, want on the last part of a glass and learned how to save the files in different forms correctly
7. Saving and Exporting: we saved outfalls as a default ai former before it's an adobe illustrator file, meaning it can be opened Onley in Adobe Illustrator. But this format is one right format for working and editing your artworks. So let's see what other for months for saving a double astray tick and offer us also one quick not for a I format when you have not won are, but you can save them in a different files to Mexico. You need to select at shared books on the Dalek window cold, safe each arbor to a separate file. So if you go on the file safe S you'll see there's a few more for months, you can save your document as an E. P s file. It's quite similar to a a former with only one different that it can be opened in different programs, and you can save your files as a PdF former. These foreman can be open everywhere, even in a browser. But if you put it into the adobe illustrator, there will be no data lows. So those free for months let you save your artwork as a factor with the future possibility to edit it. And if you need to print your files without losing equality, while on this for months will be requires from the print office toe. Actually print your artwork properly now moving on to the roster former such as Depict and Be Injury. The difference was a vector for months is that you can't scale your artwork as much as you want without losing quality. And also you won't be able to have all of your less and separate objects when you open it in Adobe Illustrator or other Vector graphics software. So to save into those four months, you need to go on the file. Export Say for Web Well, Jeff Beck is the most common and familiar filed. For most, it's used all over the Internet as images, photographs, banners and so on. S four B injury. It's almost the same, but you'll be able to have the option off transparency, background. So if you need the image for your computer or for uploading, it's summer in the Internet, you should save your fast as aji pick a PNG, and that's it. Our class has come to an end. You've learned how to use basic tools in Adobe Illustrator and now you can create cool and cute characters from scratch and convert into the stickers and pardons, or you can use them individually in any case you want them to use. I hope you found this cross helpful and thanks for watching.
 Xenia Sorokina, Illustrator & Graphic designer