Transcripts
1. 00 Course introduction: Hey guys, Welcome. In this tutorial, I will show you how I create this animation uses Cinema 4D. I am pulled on a
shallow go, Ali. I'm a 3D artist and
he's Cinema 4D. In this particular tutorial, I'm gonna be showing
you my process from modelling and
also an emitting this scene using keyframes on the gray-scale morula
plugin called transform. This tutorial as
well structured that any topic of interests
can easily be accessed. By the end of this tutorial. Not only will you
be able to create this particular
scene in Cinema 4D, we're also going to be learning
some important tips and tricks that is going to be helping you, your
personnel working. Excited. So let's get started together.
2. 01 Modeling simple shapes {timelapse}: Hey guys. Since this tutorial is not really focused
on modelling, I just want to show you how
I quickly block health, the, the models which are
used for the mission. The main idea of the
entities that you can get the flu, the process. And we started
getting you board, which a lot of
unnecessary information. I want to stress this, that simple shapes were used in the modelling
of this room. And it's not necessarily
have to be exactly with the same
dimension that I used. You can create your
own relative shifts. Just have to do is that
you follow the concept or the main idea is using an
increase in these models. You are able to
create these Moodle. There's no problem in that. You can skip this
chapter and just move on to the next one which
the Moody's available. And you can just
lend the animation. This is just to balance every, every aspect of the lending that even if we begin
to get started on, really want to shop in his
model is cues can really understand the general
process in doing so. And if you're already
an intermediate or a professional or an
advanced learner, that you just really want to
understand my own process. All you just have to do is just keep some
sudden chapters and just go straight to
the point of where you took last chapter that you are very
much interested in. So as you can see that to
using these simple shapes, like keep it very, very low because one
of the thing you must try to avoid when you are modelling and you want
to use it for animation, starts to keep it fast when
you aren't admitting it. And to not to bog down your render view and also not to slow
down your rendering. You have to make sure that you
keep the subdivision loom. The general idea is just, you can just if the, if the viewing distance
is not all that, two clues that you're not
too much attention in setting your camera close
proximity to the Moodle. You can just make
sure that you keep the subdivision level low. Justin getting the
smooth smooth shape. One of the main thing I
strongly believe week, instead of modelling
tools is that it doesn't really matter which
region we are using. Just like if you're
using Blender or Cinema 4D or you just have to
make sure you do is that you practice really best satisfies those who really
practice on daily basis. You can main
properties, use queues, using existing, referenced as soon as
really being worked on, I just have to do is just
make sure you reference the original artist and you can just engage yourself
in creative challenge. This really helps in
pushing your boundaries. And it really helps
you to get into uncharted territories which are important in creating this, this unchartered territory is usually given to you
and amazing experience after you solve for getting
started is not easy, I must say, but you just
have to keep practicing. So as you can see that I only use Cinema 4D tools
like funeral, like Arthur array, like Yoda 2s. Likewise, Joseph to get
these models. I mean don't. So I don't really use
any broken anymore that improved organ pancreas use
semaphores native to num. One thing I want to say lastly, if you are unable to model
all the rest of the details, you can always find
some models at high or really worked on
some that I get. I'm provide everything
in the three-judge file. Only Joseph, download
it from there. We can get started.
Photon emission. So thank you very much for watching and see you
in the next episode.
3. 02 Adding props finalizing modeling: So guys, welcome back. Let's continue to be had in the details of some of the props that
we're gonna be using. Particular file attached
to this tutorial. Make sure you download it. You're going to find the
rest of the process. So I have opened it on year. The other props dot v will
be using for this to dry. Just copy it. Just copy the props
and paste it. You up your own personal models. Also, you can do all to
just bring it all in. Likewise, post-apocalyptic
you're saying bring it alive. So I'm going to do mine, so you feel free to do so. So so the camera I think it was you did at all. And just get rid of Ready Hub. I can read to kids to create another one. Mole of something is. So as you're doing yours is
make sure you are saving it. Void and in any situation. So you felt like if
particular models and see if you can remove it
or you can scale it to go up proportion. You hope your week. Because I wanted it to be
too big for our rooms. So tragic. So not enough to look
exactly like mine. So you use what you felt. I mean, are you feeling to me doesn't necessarily has to be exactly like mine because I'm following the
reference that I'm using. So we're also going to get
similar result though. Nickie to your home, make it your home view so that you can be able
to place about Moodle. You want to place it right on. You can change the shading
mode when you're in that view. You can just shaded mode here. So think we're closer
to the reference. So let's go up to the camera
again. I think we are. We're ready to start animating, so I will leave you to make the necessary corrections
arrangement that you feel like it's
needed to be there. So make sure you just make
the right arrangement. You can. Lastly, before I
hand this episode, I think this is the right
time to group everything so that we can have
an organized sin. This will be easy to wheat. So make sure you rename it whatever you want
to name it to be. Second group, all
these together. Okay? So you can rename. So if you, if you're not interested in
doing all these modeling, an orange and I really mean it. There's also secretes
progesterone, which is going to be included. So you can do jump
into the animation. And I'll get the same result. So I'm just doing this for
those who are interested in knowing our button
is done from scratch. So I believe we are ready for the Quick IQ
tests were in dire. Yeah. I believe we're
ready for detested, so I'm going to make my
own correction leader. So feel free to do
yours likewise. So see you in the next
episode where we get started animating our scene.
4. 03 Transform plugin overview: Now, in this episode I
want to introduce you to transform an amazing
plugin by Briscoe gorilla. If you are familiar with
grayscale gorilla on YouTube, you will know that they create a lot of amazing resources. That's makes Lydian
motion graphics easy. So why don't you have
plugin is called transform, so you can find the
plug-in at their website. When you check the description
of transform because see and automatic and
easy control animation, I'll help you to make complex motion graphics
and seconds this simplify an emission that is a must
get to not only doubt, apart from making text
animation super, super easy. It's also in a
non-destructive way, which was 65 Animation Preset. So it is simple,
straightforward. Like I said earlier,
it is non-destructive. So perhaps we are working
for a client and they say, well, they are not cool with
that particular dimension. And pops using keyframe
animation for that. To make changes
easy pathologists have to do with
transform is just press a button and generate
the frame animation. So it is a must get
at least if you, if you can afford it,
Please go for it. So there's also a method in doing this similar animation
or so instead of it, I'm going to abbreviate both. I'm not gonna go into detail
since this one is really focusing on using
this particular tool. So there's different plugins
that the mid of daily Bu. So if you can subscribe
for Gorilla plus, I mean it's totally worth it. So you're going to find
Sigma does not amazing. Plug-in or soda we can
use, I can transform. I think. Yeah, I believe it's cost. I've used so scribe for
the how long will it cost? $3.25. So that's about $400
yearly in an unknown. So you have assessed to
over 2900 materials, which includes HDLs, are
high on hold-out 3D assets. Many tutorials that make
life more easy for the ys. So this is the most
gates please do. Check it out. Okay, So
in the next tutorial, I'm gonna be diving
into that plug-in and how to set it up
and get things started. See you in the next episode.
5. 04 Brief introduction to transform plugin: Hey guys, welcome back. I quickly want to introduce
these transform plug in two. You get started after
you have installed it. Just have to do is that you
will find it in extension. There isn't a alternatively,
just select it. And after you make whatever objects you
want to animate it, height of the plugin,
feel like bees. And make these the chart. So after you make a choice, make sure you click refresh. This is important.
It will always tell you to refresh all the time. So make sure you click on
your refresh for less. The plugin to the rest of soda to illustrate
what I'm saying, just click it and click Refresh. Now, Post-war, I make sure it up
tweaking it. Crunch mode. I'm cheating. Mode, I'm in lines mode so that at least you can
go straight to warn, you can understand some of
the points alveolar treating yet this post object mode, select the French mood
that we want to animate. We're going to select it. We select the chunk that is the old chunk of the animation. So leave it all as
computed as out. So pleura spleen, inmates PM coming. I think I included
this one likewise, which I don't see how
it animate it out. So I can correct the
end for him to be something that's in animated in. So we can change. These are different presets
that are really whoop. So another mode that
we can select is the poorly moved when we
select the polling mode, is going to be using
a polygon count of the model to do the animation. So press Play. You can see that it's
used the polygon. So that's the difference. So if we write with Polygon, poly subdivided, and
we'll make sure we choose the mood to be polygon. So I would choose Transform. You can fresh. So press Play can see that it animates
individual polygons. And this can be
an amazing effect if this is what
you're looking for. So another example,
use these apps. If you want indifferent, you have lots of
objects that you want to animate and select the plugin and you
drag it inside. Click Refresh. So you can do the exact
animation you did with others. Also, these Italy animate
objects together, but if you want the
existing parts, so when you click the
existing part is going to be using you can see how that
transform these individually. So instead of using the polygon, it transform the
objects that are included in the group together. So this can be amazing if
that's what you're looking for. The last example is the
one with the cloner. So I'm going to be adding the
plugin like I did earlier. So I'm going to drag it. It's going to
recognize a cloner, Eastern thinker see now that it can recognize cloner instantly. Which duct you can also do
whatever transformation oh, effect that you want to use. So this is super easy on this. You can control the
movement, the rotation, the random niche, and different even the
seed and the time reverb. So let's make meeting a
lot of objects super hazy, which use a lot of presets. So see you in the
next episode, guys.
6. 05 Animation 1: Welcome back. Let's get
started on a mixing. To get started, we're
going to be new plot the reference that we want to use. And if you do the
same breakdown, when I study Yoda, you
notice that backdrop. I think you are yet
to create that, yet we're gonna be
doing that later on, the fluid force than
these other extras. Then the law animate
in effect in our code. Then let's start with furniture. And then the wall. I think we're gonna be
getting started in line. Like what? So the first thing we
need to animate these, the, the flow, I mean the bees. On here, I'm going to be using simple keyframe
animation for hosting we have to do before we started the meeting
is to make sure that we go our scene. I'm forced to come to glossing the necessary frame per
seconds that are going to use log using unfulfilled per seconds,
you can use study. Usually have a default of toxic per second zoologist
have to do is make sure you press Control D. You press Control D is going to give
them to you the project. So when you see
the project, yeah. I'll just have to do
is just change it to fall over to the render setting. The frame rate to 243? Yes. To change. I'm just going to
fall. You will notice that instead of 90 you see 42. So I'm going to be animating
frame which is four seconds. I don't want the animation
to last just nine seconds, so I'm going to just be present
in a cell and it's nine. You can do the
mathematics. Sorry. Yeah, 249. We can do the math on
your timeline year, so you've just priced too high. And that's going to
be on a 16th three. So we just reviewed
all of the frames. I'll just have to do is
just adjust these slide. I think go so we are going to be animating this flow post, and we're only going to
be animating the piece. Sometimes the best
way is to put it, is that any set of
objects that, you know, we are going to be
unlimited to get up, group it together in a note. So first of all, this together we are
going to be pressing all going to be calling it. Since I want to be using
a reminder mission, if framing, It's super simple. Let's go back to the camera. So all I have to tell them, I animated in these axis, so I'll make sure that I don't
want it to show 0 frame. I'm going to drop
the exact frame. I want it to be a second. So I'll have to do is
just make sure that I keep frame our object. And the Hawks is supposed to
do the axis, just drag it. You can see that it
is in the y-axis. Just a select your base and just press this button here,
which is for keyframe. So Cinema 4D has
recorded our position, this position at
zero-centered at 24 frames. So now when we drag
it back to 0 frame, we can just make sure that
we drag this down a little. And then we'll press
the button again. So rapidly excreted
it is animation, just created interpolation, so series of movement
of the object. So this is just simple, just practice it and
you're gonna get it more. If we press Play now,
we can see that. Now we have already gotten, now we have had emission. So it's just a simple
linear animation. So as I was saying, you can also edit the key-frame, key-frame here and
just go to animation. I can just show the truck. So this is the timeline. And you can make necessity
correction here. So you can go straight to the, to the call just by right-clicking
animation, then show. So you can edit your
animation from here. Going to extend the keyframe. This has a lot to play with
all the animation behaves. So I think we're gonna be
adding, editing this later. I think that nest them
forced to do is to animate these panels here though, I make sure I group them together because I'm going
to be adding it transform, I'm going to be using transform. So for that. And also before that, I showed earlier and
that vision also matters in our country is going to be
responding to the model. So we use any fully perfect
choice for this year. Yet to do your splits
are simply do that. The Loop Port just
subdivided a few times. Just in 11 Hux is not necessary to create
it in order axis. So this is very important. So make sure you do
that so logical. So CD exotic vector
that I'm about to do, Let's go to our Transform. Let's add it to
create fresh earlier. So we want the transform
to start walking, want it to be in Austin. Wanted to start walking from, let's say from 24th
frame two, forty eight. Forty eight. Immediately
after the partnership fought, even can make sure
that it's overlapped the lead to make sure it. So emitted. Does this one shoe
for your rights. But I'm using a different
kind of effects. You can use different
wound is different effect. So you can see there's
different ones. So guys, like I said, I'm gonna be using the
particular preset is year. I'm going to look for it. It is the bus pain. So if you can find them exact one also,
make sure to do so. So let's see, let's see. So because see how it's, wow, this is similar to the effect
that we're looking for. So what we want it to be in a particular axis so that the rich can follow
switching these two z. And you can see, now we have this
beautiful effect. So this is just amazing. So yeah, it depends
on how you feel. You can extend the frame. So that's why I said earlier that this
is non-destructive. More you see how it feels, you can weaknesses
the correction. So I think we are, we are home. Yeah, this is great. So let's animate direction also
in the next episode. See you in the next episode.
7. 06 Animation 2 {animating the couch}: Hey guys, So let's continue emitting the
rest of the model. So we're going to be animating the chair or a couch
and also the rest of the panels we see forced
to continue doing that. Let's go back to our model. Now we have this ready. So let's animate this likewise
like we did for database. So let's just do a
quick linear animation. Make sure that I
can just go to 0. We'll make sure that when I
drag it down, press play. So this was perfect. So we can just do the
straight muscle, the rest. So think I want this
one to arrive late. So I'm going to select it. Make sure I keyframe this last position that
I want it to be. An obese, I'm going
to drag it down. So whenever I press Play, already got this
beautiful image. And sometimes if you don't
have this plug-in here to actually lead some to make the particular object
that you have an emitting visible and invisible. You can make sure that you've arranged your model in such a way that you
can see the one that you already unmetered
and the one that you are yet to so that you avoid a lot of confusion because
sometimes it can get messed up when your
blood of prompts to Moodle in your scene. So we taught no further ado. Let's make sure we
hit upon together. Just call it an empty. So we're going to be
adding a transform login. So we're going to
be selected these. So make it a child
click Refresh. We're going to be
more than a, we want the existing paths
to be involved in this. And I think I'm
gonna be using BIM. So I'll make sure that it
start from after the S1 are shown by C. These
are all will be. So I'll make sure I stopped by. Let me say I hate to six. So let's see how
symmetric it is in. So messed up. See within, Wow, Beautiful. So I noticed that this
is yet to be done when this is yet to reach by
an arrest him, please. I think we should start by saying this is okay,
policeman stopped by. I can make it like that. Beautiful. So play along with ease. Just play along with ease. And you can see we
already animating. So you can create
different folders. I mean, these different group, like I said earlier, that I wouldn't get a little
tins confused to get out, can group these and
call it be anemic. So every object
job-ready, animated, you can drag it,
drag it, drag it. So that all you just have
to do the rest together. Okay, group the rest together and you're going to want
to hide it so that you can see the exact one
that you are Modeller. So can just select the
one that you note that the z to be, to be there. So I think this is perfect. So you can just hide this
soda only up to this. So when you get it all
started and just play. So we see the base, the floor. Does this mean love in this? So the next enforced
to animate now is the couch after the, so we can just drag
the couch out. We can see to do this, I'm going to be using
the cloner, this design. I just want to animate
everything at once together. So I'm going to be
selecting the couch. When I'll be using a cloner. I can make the cloner inside. I can put it inside the
couch alone or just have to do the rest
inside the cleanup. So the next thing
you have to do, just make sure it isn't linear. And our many mixture that the total number of
children you put inside a tuna. Think mine, it is about seven, so I'm going to be
selected several counts so that all my seminar
objects can show. So I can make sure these are 0. You can notice that
changed the orientation, the axis of my object. Pulling their written mix
of change of coordinates. So I'll just have
to make sure is that I own check this reset coordinates so that we can get exact coordinate
that we had earlier. So to continue, Ali, just have to do is just to
make sure that we animate these white boxes because
C is just beautiful. We're just going
to animate this. Ok? So we can increase the offset. Just
meant the opposite. So you can see on we will look to it exactly as we want
these to be done. Yeah, I think I'm okay at 64. So then at 0, we make sure we drag it up. We don't even see
it in our cameras. So we framed out so we can see everything
is settled then. Common. I don't know what's wrong. Let me check it again. I think we're yet to
think something is wrong. Yeah. What I did wrong was that
I didn't mean to Z all these begin at 0 is 0. So bot, yeah, I think you
can all see it. So instead of me
dragging the axis, all I just have to do is
to make sure that I, I, I come over here and the y coordinates so that
I can set the keyframe to. You also can follow along. And you can see how everything
just gets set up in. I think I made a mistake here. It's supposed to be seven. So let's see. So when we sell it off,
everything goes perfect. Everything is perfect so
we can edit that later. I think we are getting closer to the reference that we're using. So we thought it would flow then the couch than an STM false
to meet the other prompts, then we're gonna be
doing the wall lift up. So I think there's nothing
much left, Duncan, just to finish up the animation, and we're gonna be doing
that in the next episode. See you in the next episode.
8. 07 Animation 3 {animating the desk}: Welcome back guys. In this episode we're
going to be unlimited. The rest of the room. We are gonna be on the midterm, the plunked on the
depths come to rest. I'm going to be doing
this admission together. If you like, you can
do your separately. Before I do that, I want to show you a quick
changes that I make. I want to be too stringent. The default lights, though we are yet to light
up our sin, but God, Cinema 4D default light
to aid us in our scene, our moodier more clearly so
you can just play with it. So, um, for us to
animate the rest, because we're going to
be bringing them on the same transform tool. It's important for us
to group them together. So we come to the other groups. There were gonna be unlimited. The plane, the deformed, the rest of your prompts. And I think I'm going
to be grouping. I'm going to make this editable. Yes, I'm going to make
everyone on these editor. I will make sure that by
group it all together. So you also can do that, can just make it burn. And just delete these on
a tertiary amine group. No, no target. Non-group. The nest and I'm gonna be
doing is that I'm going to be grouping all these together. So I'm going to press Alt. I'm going to drag it out
and I depressed so I can see that I want to
animate together. So the nest and like we did
earlier is to select the tag, drop the spoon side,
and click refresh. And this time we're going to be selecting the existing path. So when we select
the existing parts, we're going to completely
refresh again. And then when we press
Play we can see that okay, meters in or out, we can
make the transition in. So you can see that everything
just started to get about. We don't want this transform and we're going to be
choosing a different. So you can choose whichever
one that you felt. Natural fuel, that
is this okay to use? Tile. So I'm going to look
for the one that I I want I think I'm
okay with gloves on. Let's see defects. Defects. So you can see it's similar to the reference
that we are using. You can see over here
that everything just collapsed in the fall
into the app, please. We are going to be
using that same effect. We're gonna be using collapse. And I want the timing to be
right on it to be exactly how I wanted it to be
exactly after the seat. So I think by C7 is okay. So start frame by 57
then AND by circles. So plausible firewall, you can increase it
or so, maybe one. Let's play everything that
we've covered, please. Yes. Then writing texts and everything falling
into the app, please. Sadly, this is beautiful. This is what I'm looking for. What I think I'm going
to make it a little bit more. I'm gonna make it 45. So this is okay. So you can play along
with these crates full of great for Love,
mall, amazing. You can see that there
is a lot to play with. D says in lots to play. And you're going to
increase the randomness. You can see we
increased randomness. Gear will be gone even in different seed sort of consider different effects
that we are looking at. So false too, I think
I'm not okay with these separately,
but we're cool. Yeah. Cool. It is. So you can experiment
with Yoast likewise on one that you feel
that it's okay. You can make use of that. Wasted our time. I think we will continue with the rest below. Now, I think you're going
to be animating the carpet. This one. Since we are going
to be doing that, we're going to be using
the same transform given the same process, group it altogether and selected transform,
drag it inside. Can hide this again. So click Refresh,
select existed. So you can just do whatever
you feel is, okay. It's not necessarily too, because I've done this
before many times. So at least I know the one
that I really, really want. So now I think I want this to
be inset around frame one. To frame one is this entry. Okay? We have a vertex
together into place. It's certainly and we see
this one sliding exactly when these sworn on stock,
at least what we want. So perhaps if you also
want to include maybe pops the couch and you want to include the
pillow, but it just after, just drag the pillow out and make sure you reduce
these bugs to six because we have
reduced the amount of object that we grouped together to replicate
and erase soap. But it does have to do is
just bring the pillow into these particular NO and make
sure you click Refresh. It's important because if
you don't click Refresh, most of the time, you won't see the objects or to just add. So let's play this
on light in college, It's please retain
foreign in place. K. K. Now we have the pillow. Pillow is just your call, whatever you feel is okay. Just do it the way
you want it to be so I can make the changes, not one again, just
to include the pillow back to the one that is okay. So Mitch, make good use of
these amazing phone login on. I think we're hooking
this episode. In the next episode, we
are going to be crossing. The next one is to finish up
the animation on the walls. And from there, you can
rent out on the mission. So see you guys in
the next episode.
9. 08 Animation 4 {conclusion}: So welcome back guys. Let's quickly finish
up the animation so that move on to the next one. So we want small rest. All we just have to do is
just group it together. Acid, already grouped store. You select it, does what
we've been doing earlier. Click on fresh mixture. It isn't existing palettes. So you can choose whatever
you want to choose, but I'm poking these
that I'm using. So and I think I'm going
to start a free man. Juan, labeled with
emulated last seven or so. Okay. I can delete it.
Lead to I think it's okay. I think I'm going to
correct this this one. I'm in the rock, I'm in
the cabinets and erased. So I'm going to make
it a little bit later, not as fast as inter make
it like one to two. Okay. I'm going to make it
a leak on the wall. I'm going to make it. So at least I can just
change the name to. Now we have our own emission
from start to finish. I see it every day. Then the last thing see these
apps in 2D animation is, and I think the last thing to
animate also is the camera. So to animate the camera, you just have to do is just
remove the protection. Come to coordinate. All I did was that I wanted
to be at this position, this closer to the end. So I keyframe every of these. So what I did was that I move, select the camera, select the camera and I move
it to the frame. Before then, I make sure I
select the object so that at least it's we have
objective glucose. So I just make sure I
hit somebody to be. So it goes through these here. Let's select the camera again. Then I get these X sub I and I shift this keyframe here. So whenever I play
this on a mission, everything started getting
unfolding the camera. So start moving so slow, but at least started
moving, moving, moving, moving k. So that, that leaves can create
these more dramatic effect. So camera is one of the important thing that
these goods to animate or so. With this, I think
I'm going to play around with this orientation. So you also can do the same. This is just me showing you the process of I get this done. So you also count. You can skip this part
if you have done it personally and just
move to the next one. So it is almost up to you what the video in every
of the episode. But if you know that there's certain things
that you can lend, it needs dual to do.
I'm going to watch it. So that's just the duty of ineptly suits so that at least you also can
mean good everything together. So I think I'm
loving it like this, I think is the best time to
just do the test rendering. The reason is because the
tiny confused, right? One thing that is
very important is that timing has to be
asked to be right. So when the time, if you write, I think that it's
important this, so I could just do
test rendering. Can just choose something.
I think I'm okay. You can just tell it to
not to save all the frame. The frame. So I can just make it simple simple format
because I'm not saving it. So I can just rent. Yes. I believe it is Dawn now, so I took three minutes. So I think I'm going to play it. Yeah. This is this is okay. So the reason why I always try to test the rendering force this because so that
at least someone can get the timing right. It is important to get
the timing right so that necessary
production can be made. Lastly, before we
leave modelling, and I think it's time
we modelled the box. And you can just use a simple cube editable grid or you can just deliver flow. I think I'm okay here. So now let's make it. So yeah, I think I'm okay with this. Yeah.
10. 09 lighting tips: So welcome back guys. I quickly, we just
want to talk about I liked this in using
Cinema 4D standard light. And also how to render it with some necessity
rendering settings. So this thing is simple, so I'm going to
start by creating this base material that I've
already applied to read, I can just rename it. Says this is all
applied to these. The colorful backdrop is
going to be different. So I think I'll make this one to be exactly sure what I'm going
to drop it to the right. So the next thing we have
to do now is to hard light. Because right now there's
no light in our scene. In Cinema 4D standard lightened. So for us to light up the
knowledge and you just need to do is to come over here and select a
P Bihar light though, when we add it and
just drag it too. I think I'm okay over here. And I would allocate, it. Won't go to the top board. So that at least I
can see more clearly. The last light I'm going to be adding this to
the background. I'm going to be adding up later. So for now, just some
sudden settings here. You can just to current frame O via the anti leasing business as well as using the
physical render. I'm just going to be
sticking with standard warm. And I think we are gonna be hard in a global
illumination or so. Before we do that, I
think Let's test render a scene that we're
going to reduce. This one is from
use it. This one. Make this retest,
render the scene. Now we can see the scene. There's lots of too much
passion shall do here. We can correct the data. But before we do that, let's add a global illumination because this is going to really epaulets two bounds
appropriately. Using global elimination
to takes some time. So just be patient. Sometimes just keep it
as low as possible. And soda that you can
get more quality render. Because see that the
shadow is a little bit more most often compared
to the previous one. We want the Nuba illumination. And I think the next thing
I'm gonna be doing this, I said that there's
too much space here, which I don't want it in. The light now revealing. Well, I just have
to do is just put a tiny dose of the
light in a moment. Those, these are the wall. So I'm going to select this particular one
column to the polygon. Smooth, interesting drug it. Greg, I'm going up again. I believe we have hokey. So I can go back to the camera. And there's lots of settings. But I'm not going to
go deeper into that because I just want
to create a simple, The first thing sometimes
it's just to make sure you hope the shadow falls. Least. You'll be able to focus
on the light itself. I think. Let me throw
in another light. Does is it more different light. Light, light up
our buck current. Unwanted. I want this. Is that I won't be
an illumination. So what I wanted to
execute every year, so I'll just have
to do is just go to the light and go to
project exclude. So drug or just select these
and just select the Moodle. So it's going to
exclude the rest. In nature, the rest model. So I can create another camera, is I can use this
one for a remote. I think I'm okay with you. So now, if I render
it again, please, I can see I would like to
behave without a shadow. Now, since it's starting
to get more interested on, it is something that
you just keep on doing on back-and-forth to find the exact thing that
you really loved and where you can find
these multiple render. So I think the next thing I'm gonna be doing is
that I'm just going to add a soft on lipstick with
the Curia shadow for now. Just one light. Okay, I think I'm loving this. So I can make sure
that I changed the, I use a preset that there's different presets
that you can use. You can try the, the object
visualization that is I. So what if you know that your
computer's not as strong? I mean, the CPU is not all that. I mean, huge time, so not too much cost. Or maybe you don't have any
graphics processing units on. At least. You still
want to dissent when it gets to keep
it as default mode. This one, I think I can
experiment with this moment. The advantage of using a rendering like
this or this moment. He saw that I can see how we start adding
textures and materials. I can see how light
behaves at forces. So that if there's
any correction, I can make sure
that I corrected. Now, you can see that things
get a little bit messy. So I can change this
back to something, something more inferior high. Just to see, just to
see how it will look. I can see now that
the light is trunk. So I can make sure that
I reduce it some low. So I can't reduce
this also from yours. And just render
the region so that at least another thing you can do to make the random or faster is that you can
reduce the resolution. Can make the resolution
a little bit lower so that it can render fast. So I think I'm going to make it. So I'm going to make
this a little bit lower. And then when the chin, the
shadow too soft. Second one. Let's test this again. So I think I love
how these really, really looks at the moment. So the nest, and if you want to take this
a little bit further, is that you can start it
texture in your scene. I'm going to quit the
next episode also just as a brief
texture in the scene. And then you're going to see
how the lights really more obese when the textures
and materials or had it. So thank you and see you
in the next episode.
11. 10 Bonus material: So welcome guys. As we round off
these this tutorial, I just quickly want to
show you how I create the materials and
textures that I use. I applied them. So when easy bonus path. So I make sure that I
follow your color palette. Using this reference,
you're going to find the image also for download. So I make sure that I adjust create only base when
I remove the reflectance. And cinema 4D is easy to pick columns
only Joseph to use the, use the eyedropper up. And you can delete any color from any reference
that you have. This is super easy. So that's how I close the end Sanchez colors
that I want to use on. After then I started
applying them. So I just applied. If you apply, it only
dropped like this. Because you have already
grouped them together using the transform to, it may not be easy. So you just have to do
is make sure that you select the exact war. You want to add the texture
to your drug to need. So think, Okay. I think I have to select the transformed through
at the moment so that at least I can easily
apply this texture. I need one more. So I'm just going
to select these. I'm going to be applying
this to the window. So now I can just drag
and drop whatever I want. So I think I'm going to create another set of blue color here. You also can just be
experimental with these. Can choose the one
that you feel. I mean, it's okay for
your, for your model. Then you can start doing now. I just keep on
dragging to the couch. I'm going to put it on. Once. On the one hand, we're going to make a decent little bit different,
I'm going to add. So he doesn't have to be exactly like the reference
that you're using. Just get experimental
with these. College. For such, for some. Moodle. Can even search for song. Think I'm going to delete. Okay? So keep on doing what you
feel is the right one. So I will keep on doing mind. So you also can do
your slide whites. So guys, I have applied some
of the materials on you. If I press Render now, you can see that the
light come up with the materials and the
texture, everything. I mean, it's look alright. So this is just me showing you
just how to go about this. If you really want to push
this using standard red-green, if you are using a
third party rendered in generic redshifts of URI octane. I strongly believe that that is also easy
to be done there. But the advantage
of using standard sometimes is that it is, it is also quite fast. And also after you rent out whatever you want to
render out there still opportunity to correct some
subtleties like color grid. Like I increase the sharpness, so don't get too much
lost in cracking up a lot of details whenever
you're trying to render, because that's
going to determine the render time likewise. So just make sure
you keep it medium. After then you can take
it to after I've flipped, and then you can edit
too, your tastes. So lastly, I'm also going to tell you how to truly want to push this and
you want to render it, then you just have to save it. I always save it as a PNG
like a picture format. And whenever I want to import
it into After Effects, I'm going to report it
as an image sequence. This sometimes it is
very, very effective. Why? Because if there's a particular frame
dot add any issue, all I just have to do is just to render that particular frame. Again. It's really
save a lot of time. So I can stick to standard, but if you'd like, you can
also go into physical tics. It's time. If you choose
adoptive or fixed, there could choose whatever
I want that fits heat. So I strongly believe
that you have been able to learn something from
the start of this course, from the beginning to the end. You can also check on
our tutorials that I've made in my proof. I just checked it out and involve any questions
whatsoever. I'm willing to help. So do well to give it a shot. And also your class projects, you can repeat the
same thing for humic rich own sin that
is totally different. You may make it a bedroom on. You can apply to similar
emission effects to eat using transform on. I really want to see your work. Really want to see how you come up with something written. An amazing out of these. I wouldn't be
willing to share it. Awesome, My Profile. So thank you very much
for going through the course and see you later. Bye.
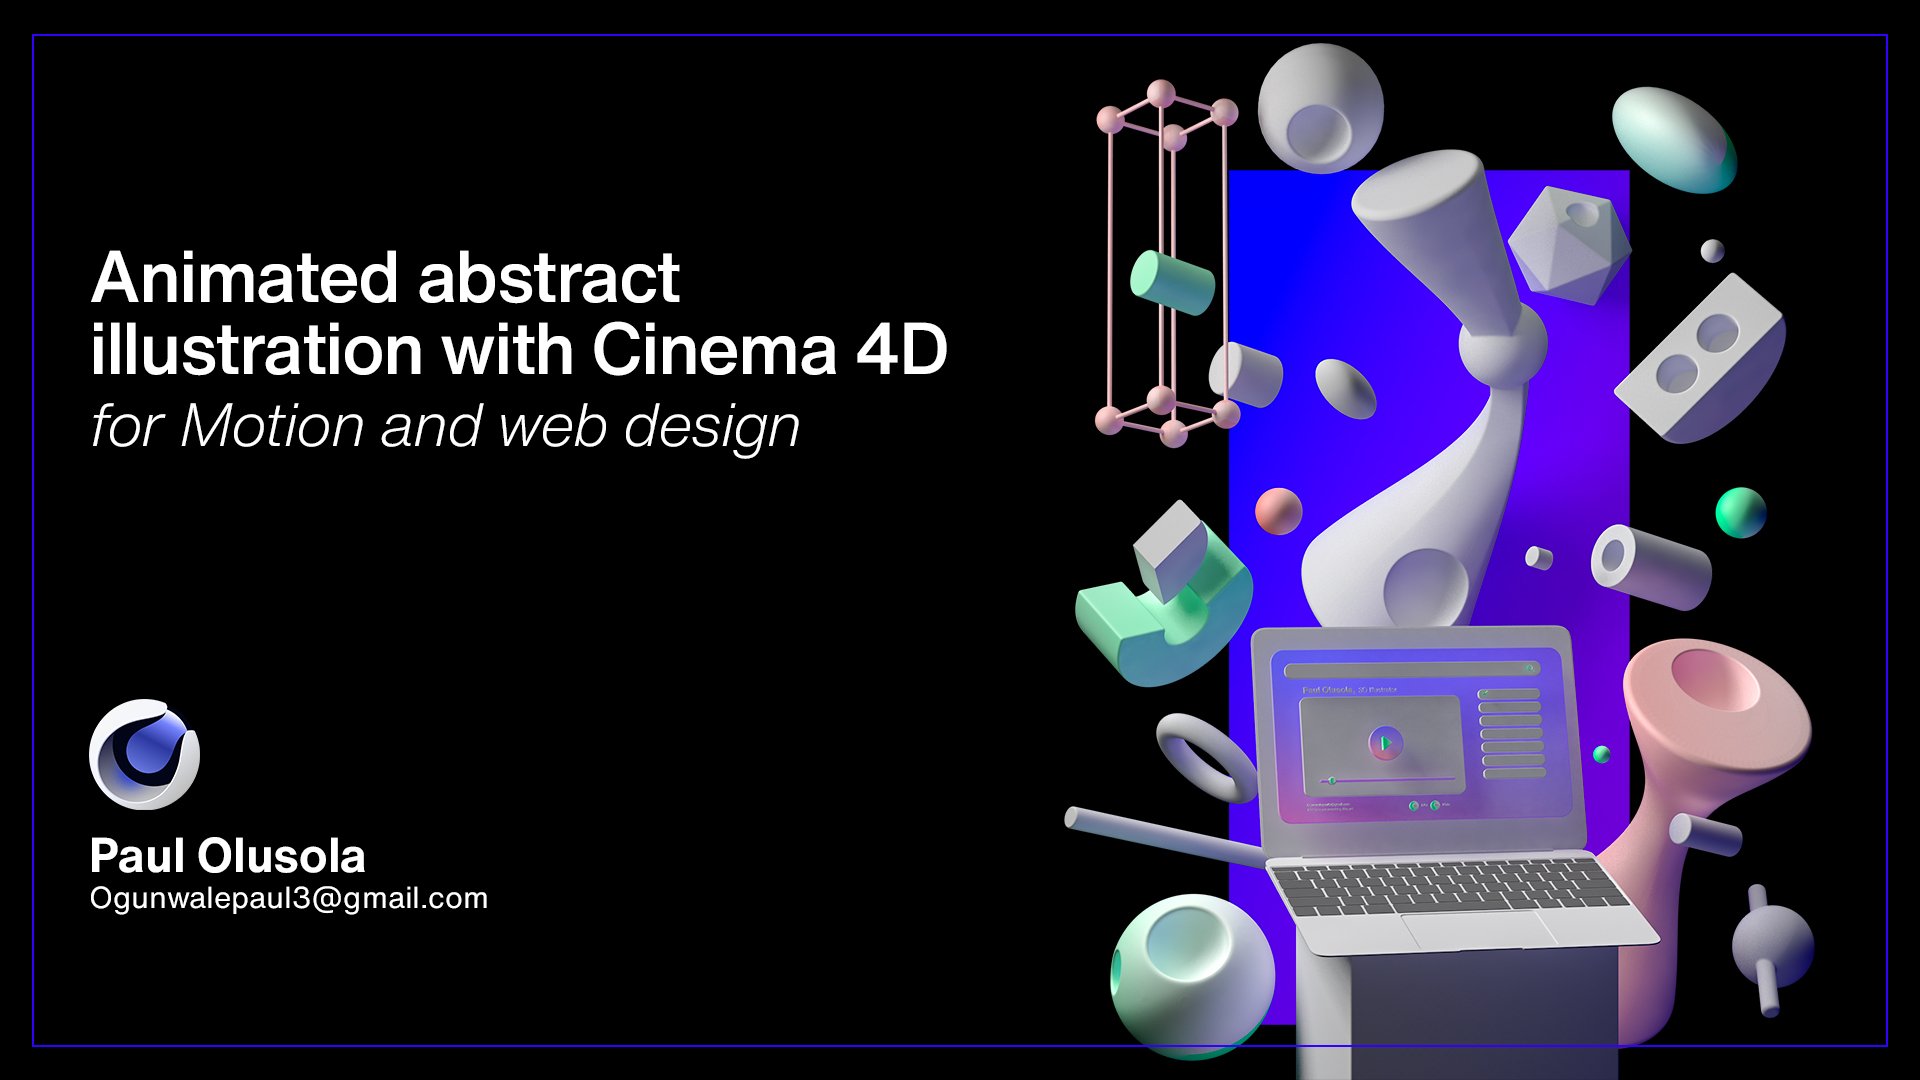
 Paul Olusola, 3D Motion & Illustrator