Transcripts
1. Introduction: Hello everyone and welcome
to this new course. In this course, we will go
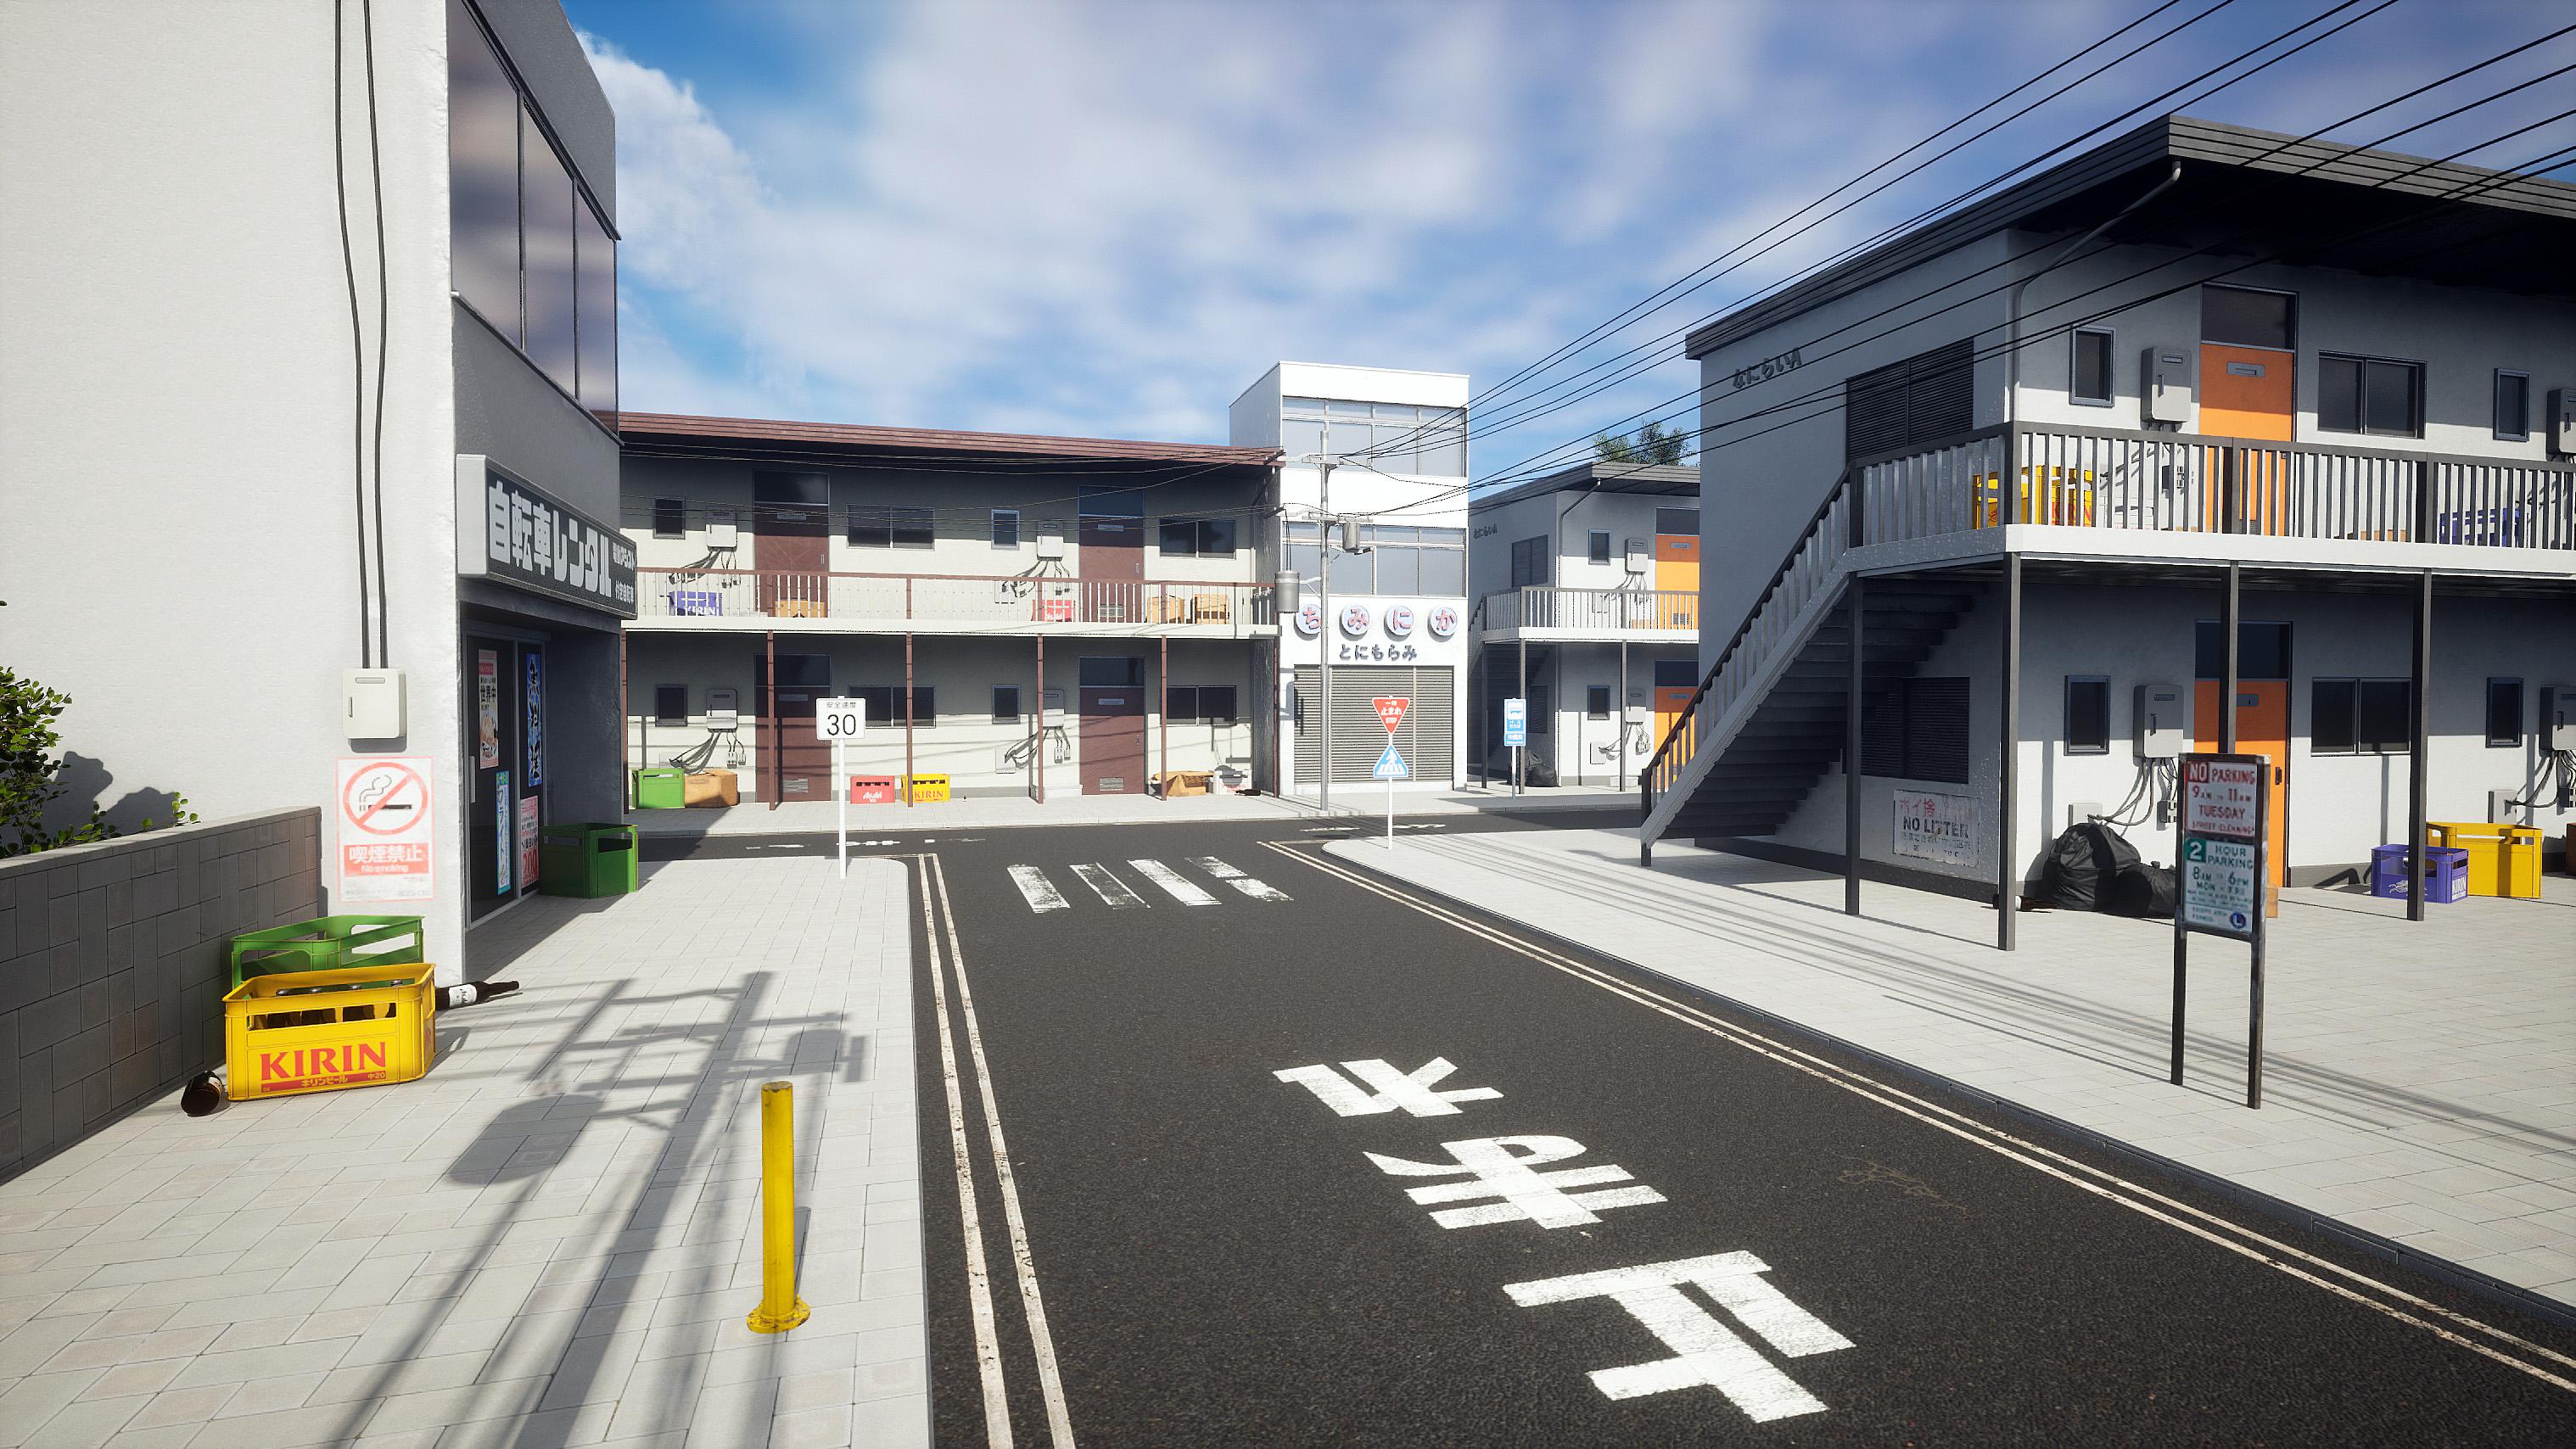
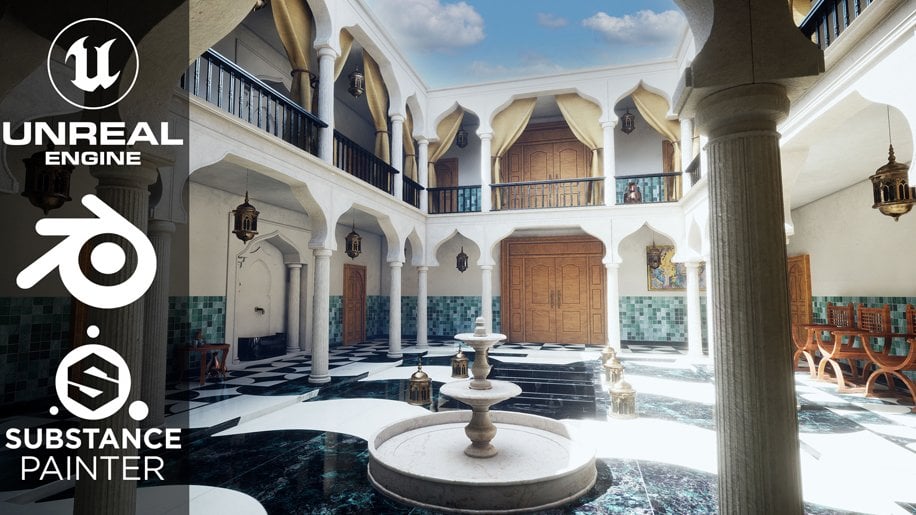
over the entire process of creating a Japanese
treat environment using Unreal Engine five, blender and Substance Painter. We will go over
modeling in Blender, texturing using
substance painter and setting up the scene, lighting and materials
in Unreal Engine five, all the modeling will
be done in blender. However, the techniques
used are universal and can be replicated in any other
3D modelling package. The materials and
textures will be created using Substance Painter, level art, lighting and composition will be done
in Unreal Engine five. And this course, you will learn everything you need
to know to create the final results that you see in the images and trailers. The same techniques
can be applied to almost any type
of environment. This course has over
9 h of content. We will go over every step in this course together and
nothing will be skipped. The course does not
have any kind of time lapses so that you can
follow every step easily. We will start by gathering
some reference images to gain some initial ideas
and mood for our scene. We will erase these
reference images in a free program called pure ref. After this, we will
move on to blender and start modeling
our main assets. We will start by modeling the main buildings in our scene. And after we're done with them, we will also create a bunch of different prompts to detail
our scene even more. In that process of modeling will be covered in vendor only. After we have modeled
all amino acids will export them to
Substance Painter. Start the texturing process. We will learn to create high-quality and
realistic materials and the key features
of Substance Painter, like smart masks, generators,
smart materials, etc. After this, we will import
all our models and textures into Unreal Engine and set
up the scene over there. The next step would be
to set up a lighting and create a mood and
atmosphere for our scene. We will make use of the new
features of Unreal Engine, such as human to get realistic
lighting for arsine. Next, we will set up a
post-processing volume, further enhance
the visuals of RC. Then we will spend some
more time creating a lot of small props to further
detail the scene. Even more like some
cardboard boxes be a great sign boards, etc. We will end this course by
adding a couple of blocks from Quicksilver mega scans to give the environment of
finishing touch, setting up different
camera angles, and taking high-resolution
screenshots for our portfolio. So I hope to see you
there in the course. Thank you.
2. Setting up the Reference Images: Hello. Hello and welcome everyone to this new course where we will be creating a Japanese
street environment from start to finish. In this first lecture,
we will start by installing a free program
that is pure ref. It will help us in organizing and viewing our
reference images easily. So to do that, just quickly
open up Google and search for a free program. You can download it
for completely free. Just click on the first link, then go over here
and hit Download. Here you can select
your platform. I am selecting windows. And over here you can donate
to them if you want to. But for now we can just select a custom amount and
put it to zero. And then just hit download. The download is done.
You can basically just click on this installer and install the program as I've already downloaded and
installed pure deaf, I will not be doing it again.
You can complete do it. And now just search
over here in search bar for VRF and open it up. Using pure ref is pretty
easy and straightforward. So first what we can
do is just open up the resource files that I've provided to you
with this course. I will just quickly over there, open up this reference
images folder and you will find all of these reference images that I've added in the course files. You can add some more to these according to your preferences. So now to bring this, now to
bring them into pure ref, just select them all and just drag and drop
them like this. I'll wait for the
loading to finish. And you will see all of the images are now
here in pure ref. So a couple of basic
functions of pure ref. You can just hold
right-click and move the window over your
screen like this. You can do is you can also right-click and go
over to mode and make sure enabled always on top for this will do is sorry, I buy extra and disabled it. Yes, enabled, always on top. Now what this will help
us to do is we can easily model on our stuff.
While we are doing it. Pure ref stays on top of the screen so that
we can easily view our reference images. Like e.g. if I'm making this air
conditioner outlet, I can just easily model it
over here in Blender while I'm doing the reference image in pure ref, it is pretty handy. Next, you can also just resize the pure reference like this according to
your screen size. Pretty helpful. You can also
double-click on any of the image and it will
automatically focus on it. Let's say I want to
work on this one. I will just
double-click over here. These are the couple of features that you need to
know about your Ref. There isn't much to it. You
can just hit right-click. And most of these features
are self-explanatory. So first, let's just quickly
say what pure ref seen. So go over to Steve
and hit Save. I will save it over here only. And let's rename it
to reference images. I will save it over here only in the reference
images folder. Now, it's safe. And wait for it to finish. Alright, so the
scene is saved now and we have all our
reference images over here. Let's just increase the size of some of these
reference images, which are appearing to be
pretty small like this one. So that the sizes of all
the reference images is pretty much comparable. Alright, like this I
think is pretty good. You can arrange them
however you may like. And I think this much is
it for our first lecture. In the next lecture, we will
start by blocking outdoorsy, and then we will start with, and then we will start
with the bottom of different types of
buildings and things. Alright, so these are
our reference images. You can add some more
to these if you want, do like insurgent Google. And so these are all our reference
images for now. I will be adding
a couple more to these as the course proceeds. And you can also add
some of your own. I think this is enough
for the first lecture. In the next video, we will start by blocking out the environment in blender and start with the modeling
phase of our course. We will be learning a lot of
new things in this course, and I hope to see you there. Thank you for watching,
see you in the next video.
3. Creating the Blockout: Hello everyone. So in this lecture we will start by blocking
out the environment so that we know already how everything will
be looking at. After blocking out,
we will slowly model everything one by one and add
more details to our scene. So first let's just
quickly open up pure ref. And I will load up the scene that we saved in the last video. So it Right-click, go
over to load and load recent and open up this
reference image is fine. Wait for the student to load. And alright, so first I
have opened a blender. We will create new blender file. So you can just click anywhere. And we are the new blender file. So first what I will do is press a to select everything
in Blender, and then just press Delete
to delete everything. For now, let's scale the
window a little bit down. So what I will be doing
is I'm trying to go for a street intersection
environment like this one you see over here, you can just double-click on it and your reference
focus on this image. You can see over here we have
a t point like thing with the roads and we
have a couple of buildings in the
front and inside. I'm trying to create a
similar environment. Obviously, we won't be creating
so many unique buildings. But yeah, I'm trying to go
for something like this. So to start off, what I will do is first let's
come back to Blender. Just quickly enable
screencast keys. Now what will happen is any of the shortcuts that I perform, you can see them over here. So it will be easier for you guys to follow
me in this course. Alright? So the first thing
that I will be doing is I will press Shift a
to add a new object, go over to mesh, and
let's add a plane. So basically this plane
will be a ground. So let's scale it
up a little bit. To scale objects in blender, you just need to press S and now you can scale
it up like this. Or a different way would be to just go over
here, press N, and open this toolbar up over in the Item tab
over here at the top, and you can see the
dimensions over here. So we'll just set
the dimensions to exactly 40 m for both x and y. So you can just drag
and select both of them at once like this,
and type in 40. And you can see it is now 40
m. So the next thing that I will do is I will select this plane and press Tab
to go into the Edit mode. We can now edit the word disease and
everything of this plane. So what I will be doing
is we'll be creating these pavements or
these roads over here. So to do that, we will be
just adding some edge loops. To add an edge loop, you just
need to press Control plus R. And you will see this
yellow line appear over here. Just use your left-click. You can move this edge loop
over your plane like this. And I will place it
somewhere around here. Alright? I will again press
Control plus R, add another edge loop. Let's place this one
over here like this. And this will be
a straight road. And let's create another road. I will press Control
plus r. Again, you can use your scroll wheel to increase or decrease the
number of edge loops. So this time I will be going for two edge loops and just use my left-click and then hit right-click to place them exactly at the center like this. Alright, so now what
I want to do is I want to measure the
length of these roads. So to do that, there is
a pretty easy method. You can quickly go over here in the overlays
menu and enable. Excellent. Now, what will happen is
if you select this edge, you will see 0.334 m or its
length is written over here. But you will notice as
this complete plane is 40 m. But the edge length of this edge is written
over here is 0.667. So this definitely seems wrong. So why is this happening? Because we haven't applied
the scale yet of a plane. So just press Tab to come
out of the edit mode, press Control a and
apply the scale. And as soon as you do that, you will see the measurements are appearing
correct now 13.3 m, and this one is
somewhere around 6.69. So let's see. I will press two to go into
the edge select mode. So one is for what it is, it will press one on your
keyboard at the top, like this, you can see we can now select
the vertices of our plane. But if you've been pressed,
now we can select the edges. And if you press three, then we can select faces. So yeah, pretty basic stuff. I will press two. And we can select edges and
see there are measurements. So hold Alt and select this
complete loop at once. Then again, hold Shift and Alt. And now I will select these
two complete loops at once. Now again, see the
lens are written over here of all the edges
that we have selected. Now press S to scale them up and raise x to lock on the x-axis. As you move your
mouse, you will see the measurement values over here are changing.
You can see that. So I will keep this road
around maybe 6.5 m, like this. Then again hold Alt and
select this complete loop. Then hold Shift again and
press Alt, select this loop. Then press Y to lock it
on the y-axis like this. And for this road, Let's give it a
length of around 7 m. As you can see if
I will press three, how to select the faces. This will be our Lord, and these can be our pavements. Alright, so to
create the payments, just simply select
all of these phases. Over here like this,
redshift plus D. To duplicate them like this. It right-click to place them exactly at
their position only. And now to separate
both of these objects, just press P and now
separate the selection. So now what has happened
is if you will stab, you can see both of these
are two different objects. We have our ground and
we have our payments. So you're pretty neat stuff. What I will do is select
the pavement whereas G and move it a
little bit upwards. Then press tab. And you can see over here, we have these three
separate phases, but we don't really need three
phases for this pavement. So to solve this,
Br2 for Ed, select, select this edge, then select this edge while holding
Shift, press X. And instead of
deleting the edges, just select dissolve edges. So if you select dissolve edges, you can see both of
them have disappeared. But if you selected, let's say, delete edges, so plus x again, and this time delete the edges. You will see the face has completely disappeared and
now we just have the edges. So let's hit Control Z. We do not really need
to do the edges, we just need to dissolve it. So press X and dissolve it is. Alright, so now we just have
a single phase over here. Alright, this a to
select everything and just press E to extrude
downwards like this. We have created our
pavements there. Select them, press Control
a and apply the scale. Make sure you keep
applying the scale. Because if we don't, it can sometimes mess up odd functions
and modifiers in Blender. Alright, one more thing
that I want to enable this go over here in the top right corner
in the shading menu and make sure to enable
shadow and cavity. This will make it a
little bit easier to view all the edges and also
enable shadows in our scene. And here it is little bit
taxing on your computer. So if your blender gets laggy, you can disabled both of them. Alright. Now I will select the pavement. Go over here in the
modifiers section, and let's quickly add a
bevel modifier to this. You can see as soon as we
added a bevel modifier, the edges have smoothened
up a little bit. You can, these are
degrees of segments, but let's keep it at one only. We just keep it fairly low poly I will decrease the
amount of the debit. Go over here in shading and makes sure that enabled
harder normals. As soon as you do
that you will see enable auto smoothing
object data properties to go over here in
Object Data Properties and enabled or disabled, you will see what this will do is if you will
disable auto smooth, you can see the hard edges,
but if you enable it, we have artists move over here and just make sure to enable both auto smooth
and harder normals over here else it won't appear. Next thing that I want
to do is I want to make these payments over here to have a little bit
of rounded edges. So that is pretty easy
to do is press tab. Go ahead and select this edge. So to select the edge first Br2, and select this edge. Make sure to select this
one also at the same time. So hold Shift, select this one. Basically just
press Control plus b to bevel it like this. You can see via bundling it. First what I will
do is I'll just go over here and goodly disabled. Excellent, because it
is kind of distracting. All right, Again,
risk control plus D to bevel it like this. But this is not that smooth. So use your scroll wheel to increase the number of
segments like this. Pretty handy stuff. Let's give it quite a number of segments to make
it, to make it smooth. And I will give it a bevel up around this much I
think is pretty nice. Stabbed them out
of the edit mode, and yeah, it looks pretty good. Next what I will do is
I will just select them both and move them to
different collection. And let's create
a new collection. And I will rename
this to block off. Alright, so basically this
is a block of collection. We can create a separate
other corrections like for building one
building to building free, just to keep everything
organized so that we can view
everything properly. And the next step would be to just quickly
save a blender. See. So press Control S.
And what I will do is, let's go back and I will
create a new folder over here. And let's rename
this to blend files. And I will just give it a
name of lawful for now. We can change it later on. Obviously. It's saved. And we have our road and we
have our pavement over here. You can see these edges. So to solve it, just right-click
and hit Shade Smooth. And yeah, they are gone. You can also select
a ground plane and just right-click
Shade Smooth. This also enabled auto smooth. It is a nice practice
to do this for each and every object so that
everything stays uniform. Alright, so the next we
will be adding a couple of cubes that will be
acting as a building. So again, press Shift plus
a and let's this time add a cube seven for the top view, you can press seven on a number
pad to view the top view. Then G to move the cube around, and let's place it around here. One more thing that
we can do is we can press Slash on a number pad to isolate the cube like this. You can select any
of the objects in your environment,
then press Slash, isolate them, like this on them properly without
any obstruction or anything from
any other objects. So slash again to
come out of it. And this time I will select the Cube press Slash for the isolation mode and I want
to move the origin point. So origin point is this orange color point
you see over here. We'll notice whenever
I scale or rotate it, it rotates from
this origin point to lease or to change this. What we can do is press
Tab, press three for Face. Select, select this face. Then press Shift plus S, and select cursor to select it. This will bring this
3D cursor over here. Then what I can do is select
this object again and go over here in the
menu and set origin, origin to 3D cursor. This will bring the 3D cursor to the bottom face like this. So you might think of
why we have done this. I will just show you now slash
again to come out of it. And now what I will do is
I will enable snapping. So go over here and set the
snapping to face, I think. Yeah. Then you can just
press G to move the queue. And as soon as you
hold Control now, you will see now the cube
is snapping to the face. So it will be easier for us to place it on the ground
perfectly like this. And one more benefit
of doing this is like moving the origin
point to the bottom phase. When you try to
scale your queue, you will see if I press S and Z, you will see it scales
perfectly how we exactly want. It won't move like
a below the ground. It will just scale
above it because we are scaling from
this origin point. To show you the difference between I will just
create another cube root. Let's place it over here. Let's give it roughly
the same size. Let say I want to
increase the scale of this cube and this
Q on the z axis. I will select this
one, press S and Z. And I'm easily scaling it
on the z axis like this. I can increase or decrease the height of the
building very easily. And it does not move
below this ground. But if I scale this
one on the z axis, you can see scaling on both direction because the origin point is
at the same time. This makes it really handy for stuff like buildings
and everything. So yeah, make sure to just
move the origin point at the bottom over here and I
will just delete this for now. We'll just quickly look
through the reference images. You will find these two images of residential
buildings in Japan. Kind of like building I'm
trying to create for this one. Let's scale it accordingly. Now, what I will do is
select the building and move on to item for us so that we can look over the
dimensions easily. Press S. And as you can see, this
building is a pretty long one on the y-axis
to press S to scale it, and press white, block
it on the y-axis. And I will scale
it to around 16 m. You can just click over
here and type in 16 so that it is pretty
much accurate. Then let's press S
then Zach to scale it on the z axis and let's
decrease it a little bit. I think around 8.5
would be pretty good. You can view it like this way. 8.5 would be fine. For the x-axis. Let's make it a
little bit thicker. Again, around 6.5
would be pretty good. We can move it back over here
and little bit to the side. Yeah, that looks fine. I guess. You can adjust the size of our ground and pavements later on also, for now, I clean this
building looks pretty good. You can press Control a and
apply the scale to this. Next, what I will do
is I will just shift plus D to create a duplicate of this layer is
this one over here. And another building that I
have selected is this one. I will try to create this one. Maybe this is like a longer
building on the z axis, a little bit thinner
on the y-axis. So let's press S to scale it and scale it
down on the y-axis. Around this much ice cream. Value of 5.5 would
be pretty good. Then we can scale it
up on the z-axis. I'm thinking around 11.5
m would be pretty good. So we can set this to 11.5. And this we can set at 5.5. Yeah, this looks pretty good, I think in my opinion, another thing that I will do is we will create a variation of this building one only
and place it over here. So again, just press
Shift plus D to duplicate this
recession for top view. Duplicate this,
and let's place it somewhere around
here, like this. One last building, I will
create another one over here. I will select this one,
a seven foot view. Let's duplicate this,
place it like this. I want to decrease the
height a little bit. So plus S and Z. I think around here is fine. Let's increases
thickness a little bit. So I would just ask them and maybe set this
to around 7 m, I think, is to create a little bit of variation,
different buildings. Next, what you can do is we
can press Shift plus a to add a camera just to see how our
scene would look together, like a rough idea of it. So to set up your camera, you just need to hold
Control Alt and zero. And you can see the
camera is now over here. You can go to view, enabling camera to view. And now you can move it
according to your mouse. Very easy. Maybe we can work with
something like this. Let's disable this to love the cameras so that
it does not move. And you can press zero on a
number by view the camera. Another thing that
we can do is we can quickly select this
press Shift plus D, scale it down a lot. Scale it up on the
y-axis like this. And just create
these small walls that we can place
around the corners. Well, them I'm just roughly
giving them a size. Fields, right? Distinctly again, change the position
of my camera. Around here. I'm just zooming in and out
a little bit like this wall. Let's duplicate this. Press Y. We've locked it on the y-axis and paste this one over here. Like this one. Duplicate our Z rotated on
the z axis by 90 degrees. Something like this. Maybe. We will be working
in this space only. So we will be creating these
four different buildings. Then we will be creating
a lot of different stuff. Like we will try to populate the areas around the pavement. We will be adding sign boards and lots of stuff like that. First, it will be tasked
to create these buildings only because we have to
add all these details, these windows, doors
and everything. And he had tried to make them unique so that
environmental looks good. But for now, I think I am pretty satisfied
with my blowhole. Hit Control Plus to
save your files. And in the next video,
we will start with the modelling of a building
one that is this one. So we will be using
the models from the blackout only and try
to retail them a lot more. Before ending, just quickly
press a to select everything. And you can just
deselect the camera. So hold control and make a selection like this
to de-select this. Now press M and move
this to block out that we have all of the stuff in the block
or collection only. So you can easily
enable or disable it. It keeps everything handy. Hit Control plus S. And
thank us for watching. I'll see you next one.
4. Modelling the Residential Building: Hello everyone. Let's
continue in this lecture, we will start with the
modelling of our building one. The first, let's quickly open up your ref loading our
reference images file. So these two are
the images that I'm trying to follow for
this building one. So let's start first. What I will do is I will select this press Shift plus
D. Duplicate it, right-click to place
it over here only. And now press M. And
let's move this to a new collection to
select New Collection. And let's name
this building one. It okay, and now what I can
do is just quickly disabled the blackout collection so that I can easily work
with this cube only. Alright, so let's start. So the first thing that
we can see over here is let's add some of the
basic stuff over here. So you can see this thing
at the top of the roof. So let's add a cube. What we can do is first
delete this, select this, press Shift plus S,
then cause it to select it to bring
the cursor over here. The reason I did this wherever this cause that is
present in Blender, if you will add a new object, let's say I added a cube, Shift a and add a cube. It will be added at
this causal link. So that way it gets added
exactly at the center of this big Q and zag. And let's move it at the top. Alright, so time to scale it up. This S and Z, scale it
down on the z axis. I think this much will be fine. I'm just roughly scaling it. I think that looks pretty good. Start to go into the Edit mode. Press three for Face,
Select, select this face. Let's move it back a little bit. Obviously we can modify
all this stuff later on. So this looks fine
for now, I guess. Select the cube
this time press Tab for a more risk control. Our lakeside edge loop
right in the center. It right-click to place
it exactly at the center. Risk and ruthless be, to bevel it and give it a bible of this
much amount I think. Now plus three for Face, Select, select this front face and
press E to extrude it. Like this. You can press one
for the front view and now press G and X and
move it back a little bit. Just fine. I think.
Again, press tab, select this face this time
recipe to extrude it, and let's extrude it till
here to create these tiers. I think here is fine. Again, press Tab,
risk control, odd, add an edge loop like this. Now select one for
the front view, risky extraordinarily here and press G and Z and moving down. You see it kind of looks
like this building only. We can move it a little
bit further in here. Next again, press Tab Control art and add another edge
loop over here, like this. Registry for Face Select, hold, Alt, select all of it. But this time instead of just
pressing E to extrude it, we're creating this
thing over here, press Alt plus a0 and then
extrude faces along normal. An extruded like this. Then you can eat. Then you can do for Edge Select, hold all select
this complete loop. Over down a little bit and
create something like this. I think this looks pretty good. Stab again, address three, Face, Select, select all of this, and move it down a little bit. Alright, in this
way it was fine. Let's just undo it. Alright, so this is the basic shape
of our building one. Next, Let's start by
adding all these details. That is these doors,
windows and everything. Let's quickly press tab, go over here and enable edge
length. Select this edge. So this is around
3.6 m and this is around 4 m. So quickly. Three for side view, you can enable X-ray
from over here. So what actually does, basically is if
you disable x-ray, there's three for
the right side view. And you try to select
all the vertices. You will see only
the vertices that are at the front are selected, but not the ones at the back. But if I enable X-ray from here, now if I select
all the vertices, you can see the ones at the
back are also selected. Now what I can do is just
move it a little bit upwards like this so that they are
roughly the same size. Both of them are 4 m. That's fine. I guess. Now selecting this top
piece and move it to here. Alright, pretty good, I guess. Next let's start creating
these doors and windows. There's three for front
view, let's add a cube. And now I will be using Booleans to create all these
cutouts over here. Let me just quickly demonstrate what is
basically a Boolean. If you don't know already, I will just delete this
cube and add a new one. Move it over here, scale it up. And let's duplicate this again. Press Shift D to duplicate. Alright, so basically
we have these two cubes and I will just show you
how we can use booleans. So to start off first, we have to enable an add-on. For now, I will just
minimize this pure ref. So click over here, you
minimize this on the taskbar. Go over to Edit Preferences. In the add-on section. I've already searched for it. But if you go to the
add-on section and in the search bar and search
for the Bowl Tool or down. And if this add-on is
disabled by default, you can just quickly enable it. And now we can use the Boolean modifiers very, very easily. Alright, so let's say I
want to use this cube. And I want to create
a cutout of this cube onto the skills.
How can I do that? I just need to
select this first, then I need to hold shift
and select this one also. Now use Control plus minus shortcut to use the
Boolean difference operation. So you will just see
what exactly it is all about hold Control and hit
Minus on your number pad. And as soon as you do that, you can see this cube was used as a cutout onto this cube. And if you select this cube, you will notice a Boolean
modifier is added over here, and the difference mode
is currently selected. So there are like
three different modes for Boolean modifiers, the difference, union
and intersection. First one, we are going
over this difference. Basically. You can see we use this
cube and we created a cutout using it onto
a different object. This is the difference
Boolean operation because we are
subtracting this cube. And you can see we are creating
this cutout like things. So it is very useful when we are creating some
complex shapes. You can even
duplicate this cube. Place it over here. Again, select this
first and select this. It controlled plus minus. And you can see we have created another cut out over here. And we can read very
interesting shapes with this. You can disable overlays
and see it properly. Alright, so now let's go
over the next modifier. That is the union modifier. So it is pretty
self-explanatory. It works exactly the opposite of the difference modified if you
select the union modifier, you will see both
of these objects are now joined together. You won't really see the
difference right now. But if I select this object, that is this, this cube that has both the Boolean modifiers and add a bevel
modifier to this. You will see that the bevel
modifier is being added to these areas also where both of these cubes
are being joined. So now both of them are
a single object only. We can enable hard, enormous, and auto smooth quickly. And if I create another cube and try to place it over here, you will see the
difference between the edges over here and
the edges over here. They look like as if they
are a single object because we are using the Boolean
union operation over here. So now if I again select this cube and the shortcut for the Boolean
union operation is, Let's demonstrate it
with this new cube. So select this cube,
like this huge one. Then risk control and the Plus key on your
number pad like this. And as soon as you do that, you will see both
of these are joint. But the bevel modifier
is not really working like it was
working with this one. So the reason for this is if
you will notice over here in the modifiers that
the bevel modifier always needs to be at the bottom of the modifier stack for the Boolean modifiers
to work correctly. So make sure you always remember this whenever
you're working with the Boolean modifiers and
you add a bevel modifier. The bevel modifier should always be at the
bottom like this. As soon as you do that, you will see the bevel modifier
I started to work. You can enable and disable it and see the difference
for yourself. Alright, so with this, all out of the way, let's just select all of this
and delete it. And the last Boolean operation
is the intersection. Again, I will create two cubes. Show you what is the
intersection operation. In the second Both
of these cubes and this time select
this one first, hold Shift, select this one. And now press Control and
the slash key on a number. But you will see
what this has done. This has created like a
intersection over here, like we still have
this tube over here, but we have this
cutout going through. You will see even more properly when I add
a bevel modifier. We have created like
a hatchling thing. So basically this is
the intersection mode of the Boolean modifier. You can see over here. If you select this piece, you can see the
intersect is selected. And you can also select this and add a bevel
modifier to this. It will work separately. You see pretty cool stuff. We can create various
interesting shapes with the Boolean modifier and it is used a lot when
we're creating like sci-fi designs to
create all this stuff. These three were the
basic three modes of the Boolean modifier, and now we will use them. We just create our
doors and windows, like cutouts for our
doors and windows. So let's again bring
back pure ref, create a cube risk-free for
the front side view in place, the first door
somewhere around here, scale it up like this, bring it out in the
front like this. First select this cube, and then select this object, then press Control plus minus. And as soon as you
do that, you can see we have created this
door cut out over here. I will just select
this and maybe select the top face and extended a little bit towards
the top like this. Here I think is fine. Let's move it a little bit onto the right side.
Again, breastfeed. Let's duplicate this. Scale it down. And this can be a window. Again. Select this, then hold Shift, select this press
Control plus minus. Create the difference. To create the window
cut out over here. Again, duplicate
this, press G then y, and move it over here. And this time let's create
the window on this side. Alright, again, select
this, then hold Shift. Select this press
Control plus minus. Now quickly just select
all three of them. Duplicate them, and
try to move them over here to see if everything
fits correctly. So it kind of does not. What we can do is
one thing we can do is we can increase the
size of the building, or we can just
decrease the size of all these windows and doors,
everything perfectly. So first I will select
this first window, and let's just scale
it down a little bit. I will scale it down on
the y axis like this. I think this one is fine. Let's place it around here. Let's kill the door
down also a little bit. I think this is fine. Next, we can just
select this window. Somewhere around here,
scale it down. I do. This must be fine. Yeah, somewhere around here. And we can just select these three and believed
them one-by-one. Again, select all three of them. Shift plus D. Then he'd wipe it off on the y-axis and
place it like this. Now it fits perfectly. You can now select the
complete building while holding Shift and hit
Control plus, minus. Alright, so now everything
fits perfectly. You can select both
the dose and just move them a bit of foods like this. Also, I will just select
the main building, rest seven for top view
on the number pad. Enable X-ray and
just select all of these vertices from over
here and move them. Just fill it with inwards
on the y-axis like this. Alright, now I think
it looks perfect. One more thing that I want
to do is I would want to just remake this thing
that we did over here. So what we can do is
let's just quickly three, hold Alt and select
all these faces. Press X and delete the vertices. And select this
bottom phase also. And we can just
delete the vertices. Press one for vertices
select hold Alt, select this complete loop. There's moving till here. And press F to fill in
the face like this. Let's create this
again over here. Press Control R, add
edge loops in here. Plus three for Face.
Select all oil. Again, press Alt plus E, extrude faces along normal. And I just wanted to
extrude this a little bit. Not too much. Salt plus E extrude. This much, is fine. Yeah, that looks much better. Now let's finally start by creating our
windows and doors. I will just scale
it up a little bit. What we can do for now
is we can just select all three of them and
delete them for now. We can just work on
these three and later on state we will just duplicate
them four times over here. That will make our
work a lot easier. Select the main building
and just remove these three are Boolean modifiers that have this red
color over them. That means they are not really working because we deleted
them from over here, so we can just
easily remove them. Alright, I'll select the doors, scale it up a little bit. Fine. Now what we can
do is save this window, redshift plus S, then closer to select it to bring the
cursor right over here. Now I can press Shift a and add a cube so that it gets added exactly over
here at the center. Alright, let's try
to match the size. Now what we can do is press
Tab to go into the Edit mode. Read three for Face,
Select, select this face. Before that, I will just press Control a and apply
the scale first. Now press Tab again. As I insert this and create
something like this. I can just extrude this
inwards like this. To create this
window like shape. Let's make it a little
bit more ticker. That's fine. Right-click, Shade, Smooth this, and also add autos mood. We can also add a bevel
modifier to this. Again, duplicate this
and scale it down. Now in Redshift day and
this time I had a plane. So this will be
our window glass. Later on while we are texturing, we will add the glass
material to this. I think I wouldn't do
it looks pretty good. We can also add
the bevel modifier to the building like this. You can see how it
affects our edges. It makes them pop out
a little bit more. Go over here in a
bit harder normals and also at auto smooth. Let's give it a label
of 0.00, 10.01, 30. Yeah, that's pretty good. Alright, next, let's work
on this door for S3. Again, select this cube, redshift plus S, then
it goes into selected. If your origin point is not
dyed the middle over here, what you can do is
go over to Object, Set Origin and origin to geometric being the
origin point, right? Extender. Alright, Now press Shift
plus a and then add a cube. Again, scaled according
to size like this. Now first what we'll do is we'll create this frame over here. As you can see. I think that would
be pretty easy. Just press Tab. First,
applied escape and press Tab. Let's see, we can add
an edge loop over here. Press three for Face, Select, select this face
and this one does. I insert this? And you can see it is
inserting this way. But we want a frame over
here also at the partition. So press I once,
then press i again. You will see now it is
inserting individually. So press I want, and if you press
one more time in other phases are being
inserted individually. So you can press I
turn that on or off. So yeah, pretty handy stuff. One more thing that
I wanted to show you is if you will press Shift while inserting or beveling or any of
the stuff like that. The movement would be
really smooth and you can place your inset or
bevels really close. But if you don't hold Shift, it will be like really fast. I didn't really like
hard to manage. So you can just
hold Shift while in settings so that you can
insert it perfectly. Alright, something like this. I think it would be pretty good. Now just press E,
extrude this inwards. And we have created
our door frame. We can also add a bevel
modifier to this if you'd like. Linus killed, enabled harder
normals and artists moot. And make sure to
degrees the baby. Alright, now we can
add another view. And now this will be ago. And again by shifting
this time add a plane. And basically again, this will
be last material in this, bring it forward like this. We will detail out later on
like adding all this stuff. For now, I think
this one is fine. Alright, let's work
on this window. Select this. First, go over to Object set origin and origin
degenerate tree. You can see the
origin point shifted. Now press Shift plus
S because it is selected. Again, add a cube. Actually go ahead and first, we can create this frame. So again, we have to
do the same thing, scaled it down, and match
with the scale of the cutout. Next, move it inwards. That's controlling apply the
scale press tab and again insert this and
extrude this inwards. We can add a bevel modifier
and apply the scale. Alright. Next what we need to do is we need to
create these window frames. Now. Again, add a cube. Three first, add a cube, grit, scale it down. Now scale it up. Let's control they apply
the scale press tab. And this controller
and add an edge loop. Hit right-click to place
it exactly at the center. Let's move it inwards. Didn't hear numbers tab
select both of these phases, press I, intersect
them individually. Now just extrude it inwards. Add a bevel modifier. Reduce the bevel amount. Basically, now we have
a Windows if you want, but we can do is just select this red slash on the number
back to isolate them. And what we can do is basically we can just separate them both. So two separate anything,
restaurant for vertices, select hold Alt, and select
this complete loop over here. Now you can press V, and
as soon as you do that, you can see the vertices that
have no separate it out. Now what you can do
is press a to select everything recipe and separate
by loose parts this time. So as soon as you do
that, you can see now both of them are
separate objects. But still what we
need to do is again, a slash come out of
the isolation mode. This time just select this
one single window rest slash. And you can see we have this
hollow or face over here. So press Tab and just select all four of these
vertices while holding Shift. And just press F to
fill in the face. Again, select this
one slash, this tab. Select all four of
these vertices. And then press F to
fill in the face. And now you can see,
we can clearly see the partition over here. But you can do is
select this window and move it a little bit from the front window looks much better. Now basically we can just select everything that
we did like this. Make sure to de-select
the main building so hold Control and deselect it is three for front
view press Shift plus D. Then why I love
it on the y-axis, they sit somewhere around here. Now firstly, like this, you need to only
select these boxes that have this outline. Select all three
of them by holding Shift and select
your main building, then press Control plus minus. Alright. Now you can say that all of it. And make sure to
de-select the building. So hold Control and deselect it. Press Shift plus d, then z, and move it up over here. Like this, I think. Now just select all these
boxes with the outlines. Now again, select
your main building, then press Control plus minus. You can see we have a little
bit of problem over here. We can just quickly
select all of it again. Make sure to de-select
the building, is move it up a little bit so that it does not really interfere with this
platform over here. I will do is now select
the main building. Enable X-ray. Let's select all of these vertices and move
them down a little bit. And select this one and
just move it up like this. Disabled overlay and just
see how everything looks. And yeah, it looks pretty good. Alright, so I think
this is it for this lecture because it
is already quite long. We will continue from
here in the next one. And you're watching.
5. Detailing the Residential Building: Hello everyone. So let's continue
modeling or building one. I will open up your left. And now let's create
the stairs over here. That would be pretty easy. I think let's just add
a cube first three, and let's place it over here. Let's scale this down
around this much. I think. Just scale it up
on the y-axis like this. Alright, now to duplicate this, we can basically just simply add an array modifier to this
to make our work easier. So go over to modify it
and add an array modifier. And you can see if you move
the factor on the x, y, or z. You will see another
stare over here and you can just create
number of copies. But what we need to do is
first let's set the X factor to increase the Z factor. Do I think minus one? And the X-Factor to
one or minus one. And yeah, we have something like a stair and now we can
just increase the count. It kind of goes off a
little bit at the bottom. So let's just decrease
the zed value. We just make them fit. Yeah, I think that
fits perfectly. Another thing that
I want to do is I will just select
the main building. Select these all phases, press three and select
this face, this one. And just press I to
insert this like this. And now just extrude this
downwards like this. To create something like this, just to give it a
little bit more detail. And I will also disabled. Excellent. Alright, so next, let's create these
railings over here. So to start off, let's just simply start by adding a queue. Raise 74 top view, and let's place it
somewhere around here. First. Scale this down, around
this much I think. Now we can scale
it up like this. I think around 6 m on the
z would be pretty nice. Yeah, that's pretty good. Select this again, press
Shift D to duplicate, rests X and place this
one over here like this. Now as you can see over here, we have a couple
of these railings. So we can just again use the add a modifier to duplicate
it over and over again. You select the I modifier. This time we don't want it on
the x, we wanted on the y. So the x value to zero and
increase the y factor. So let's see. I will duplicate it
around seven times. Now, just decrease it to fit it perfectly
over here like this. Yeah, that looks pretty good. Next, we have a rating
over here also. Just select this one, and I will duplicate this, press X and place it over here. Now let's just roughly
scale this down. So press Tab to go
into edit mode. You can go into
the vertices mode, suppress one and select
all these top vertices, and just bring them down
by pressing G then z. Like this. Make sure you are in
the X-ray mode so that all the vertices are
selected at the back. Now, I will just
press Control R, add an edge loop
over here like this. S3. Select this face. And now just press E
to extrude this here. Now press G and Z and
place it over here. So pretty easy stuff. You can see this line kind of
feels a little bit slanted. So what we can do is press Tab, enable X-ray and just select all of these vertices
and move it down a little bit that it
feels straight. Yeah, I think that is better. Now, just select this one. Press Tab, press three for Face. Select, select this
face over here. Enable X-ray first select this face and just press E to
extrude this year, I think. Maybe we can increase
the scale of this. You can see this x8 fighting, we call this because the
phases are overlapping. So what we can do is
just select this and increase the scale on the
y and just a little bit. And it will go away
over here also. This increases the scale on
the y-axis a little bit. Alright, now press
Control R again and add edge loop tool here. I'll select this face and
extrude this still here. Add another edge loop over here. And now select this
phase three first, select this face and
extrude it inwards. We might need to push
it in a little bit. So select this and just
wait till here like this. And now select this one and just push back
the array modifier. That's perfect. Alright, now let's clear
the small bars over here. That is also pretty easy to do. Again, we need to
just create a cube. And this time scale
it down a lot more. Scale it up on the z axis
and bring it out over here. Something like this, I
think is pretty good. I'd add a modifier
to this again, rest one for the side view. And let's see. Let's duplicate this. Move it down on the z axis
just to fit it perfectly. I think 0.135 or 0.136. Yeah, that's perfect. I think. Again, select all of these, duplicate this, press X, and now place it over here. You just need to change the
values on the array modifier, set the z value to zero
degrees the array. Again select this and
first duplicate it, press Y, and place
this one over here. Now again, select
this duplicate. The X factor to zero. Just make sure to
remember the value 4.17. I will set it on y for 0.17 and now set the
X factor to zero. Now place it over here. Now just keep on
increasing the account. If you want, maybe we can reduce the number
of bars over here. If it is looking
too much to you, you're going to select this and set the count to 60 maybe. And just increase the factor. Yeah, maybe I think that looks a little better than earlier. Yeah, that looks pretty good. Let's hit Save. And let's see what
else we can do. We can maybe add these
ridges over here on the top. Risk control are
at two edge loops. First, let's apply the scale
for this risk control a. Apply the scale. They stab, press Control R and
add two edge loops. Scale them up a little bit. On the z axis. Let's see. Select hold Alt, select both of these edges by
holding Shift and Alt. Now we'll just press
control plus V, bevel them like this. And now make sure to add one single segment
between them like this. Now select the segment
in the middle. So hold Alt, select this, then hold Shift and
Alt select this. And now to push it inwards, we just need to press Alt
plus S. So the old plus S. And we can just shrink
this like this one. We can also add the
bevel modifier to this. You make it look
a little better. Something like that. Maybe adding the bevel modifier
isn't doing that much, so we can just remove this. Yeah, that is fine. Alright. So our building is
starting to come along and I think it
looks pretty good. We will we are basically
adding a lot more details like the days two doors
and stuff like that. And we also creating this
electrical meter over here. Say I think this is
it for this video, we'll continue adding details to our building in
the next video. Thank you guys for watching. I'll see you in the next one.
6. Creating Doors and Windows: Hello and welcome
to chapter five. So let's continue adding
details to our building. I've opened up your
reference blenders, so I suggest you
guys to do the same. Alright, so let's start. First thing that I do
want to change it. I want to move down these
windows a little bit. So just quickly
select them all like this hold Shift and just
select all the windows. Now what you can do is just hold Control and deselect
the main building. You can just press G and C If only the windows
are selected. We have selected this also
hold control and remove this. Alright, so now only the
windows are selected. You can press G to move
anything and just hit right-click to
cancel your moment like this so that you can
place it back where it was. Alright, so Bridgette and z and let's move it around here, I think is better. Yeah, that's fine, I think. Alright, let's see. Next. Let's just add a couple
more details to the roof. And over here, select
this press tab. And let's select
this bottom face. I insert this, and let's extrude this inverse slash
to isolate this. And reshift plus S then
goes into selected. Let's add a cube over here. Scale this down, scale
it up like this. I add a modifier to this. Set the x value to zero
and increase the y value. Something like this. I think. We can do a similar
thing over here also. This press tab and
select these faces. Then press I to insert them and just extrude
them inwards like this. Now again, I will
create new cube. Let's just select
the cube and select the main building
and press Slash to go into the isolation mode. Bring it out over here. Scale this down. Xr to add a modifier
to this also. I'm just increase the x value
and let's duplicate it. Like this. Select
this press Shift plus S goes into selected to
bring the cursor over here. And let's add a cube. Again. Scale this down here. Start scale it up. Now again, I'd add a modifier, the x value of zero and
increase the y value. All right, I think
this looks pretty good for slash to
come out of it. And let's see. Yeah, I think that looks fine. Alright, Next, let's
see what we can do. We can create these
windows over here. So they are also
pretty easy to do. You have to just
do the same thing like we did with these windows. So let's just add a cube. They sit over here, scale it this much. Now just select this
first and select the main building and
press Control plus minus. Also one more thing that you
will notice is right now, if you select the main building, we have a bevel modifier
right in the middle. So just drag it
down at the bottom. You will see as soon
as you do that, the bevel modifier
is now working. Make sure it is at
the bottom like this. Alright, now just select this cube press Shift plus
S because it's selected. Let's add another
cube scale this down. One for the front view, and let's scale it
up accordingly. Now we can just press Tab, press three for facedown leg
press I and insert this. First, apply the scale. Now insert this and just
push this in words like this. Again, add a cube. Now, scale this down. This down on lot,
I think this much. Now just we will add
a modifier again. Next factor to zero and
increases the y factor. In order why I think
we need to increase the Z factor like this. Now this increase the count. Yeah, pretty much this
is what we needed to do. But we can do is
you can just add a cube at the center like this, increase the size of it, and bring it out over here. Like this. Maybe I will just select all of it and scale it up just a
little bit on the y-axis, on the x-axis, like this. Yeah, I think that
looks really nice. So just select all of
it and reshift plus D and place it over
here like this. Now select this cube and
select the main building, then press Control plus minus. Let's move this a
little bit inwards. Also select the stairs
over here, this tab. There's enable X-ray and
select the word C's over here. And move them like
this a little bit. We have something like this
only on here. That's fine. Again, I will just select this, this, and this, and move
it a little bit inwards. Yeah, that looks fine. Next, let's see. We can also create this pipeline
thing over here that goes down like this to a building. That
is also pretty easy. We can just maybe select our building and
select this roof, then press Slash, go into the isolation mode so
that we can work easily. Press one for the side view. And basically I will
just add a cylinder. Scale it down. Let's place it over here. We need to scale it
down a bit more. This much is fine. Just a bit more. Yeah,
that's fine. I guess. Let's see now, to create
these curves over here, it is pretty easy to do. Let me just quickly show you press Tab to go
into the edit mode. Make sure to enable X-ray. And if you select the
spring too low here, so just select the Spin tool. So the way it's been
two looks at it spins your geometry
around, your 3D goes up. So first we need to move our 3D cursor right
over here somewhere. So hold Shift and use
your right-click. And you can see we can move the 3D cursor by using
Shift and right-click. So just place it
somewhere around here. Now, if you will. And now if we will go
to tool over here, you will see the settings
of the spin tool like this, the x, y, and z-axis. So if you try to spin this
while holding this plus icon, so it does not give us
the desired result. That means the axis. We said that kid was wrong again plus one and let's
change the access to y. Okay, right now the full
cylinder is selected. So make sure we just
select these vertices. Announcement this and you can see we are giving it that spin. And we have easily
created that down. It's done like thing over here, but this is quite large. So again, press Control Z. This time, move this pin tool closer like this. And let's see. This is something we want. You can open up this thing over here and just set the
angle to 90 degree. Angle is exactly at 90. You can see we can increase or decrease the angle from
over here like this. And we can also add more steps. So step says these
number of segments in between make it even
smoother or like low poly. So let's just set it to 12. And also set the angle to do. Now just extruded
outwards like this. Move it down a little bit because it is kind
of slanting over here. If you want. We can also enable this that
is proportional editing. If you press G and
Z and you will see this circle around
your movement. Like whenever you
move something, you will see this circuit. So if you use your scroll wheel, you will see that the area
of the circle is increasing. So basically what it will do is whatever is inside this open, it will be affected
by your mind. If you try to move
this, you will see this is also
moving over here. But we haven't even
selected this. So this is the, this is because
of proportional editing. Even if you scale something, you will see this thing over here is also
getting affected. But if you disable
proportional editing, you can see only
this thing is being scaled or only this
thing is being moved. But if you enable
proportional editing, will see whatever is inside
the circle is being affected. So you can increase
or decrease the size. You can see as soon as you
get out of the circuit, it is not really being affected. We can just maybe add
a little bit here. Yeah, let's just turn it off. Again. We need to
create another tone. So hold Shift and
right-click place your 3D goes over here. Try to spin it again. Not really that
it's largely born. So let's again try
moving it somewhere. That expediting, excrete
something like this. And now this plus E extrude
downwards like this. Let's move it a
little bit like this. And yeah, I think that's perfect
slash to come out of it. And let's see. I
think it looks fine. We can just duplicate this and place it over the
right side also. So yeah, pretty nice stuff. Let's just hit Control
S to save our files. We can work on
these doors. Maybe. That would be a next step. So let's zoom in over
here on our first dog. Let's select this and just slash to go into the isolation
mode or the local mode. The second is select
this press Slash. Now press Shift plus
S then goes into selected cube over here, first, scaling this down over here at the top and scale it
up on the y-axis like this. Slurs press Control,
apply the scale. And this time what
we need to do is instead of using the difference
of Boolean operation, we will use the intersect
first press tab and make sure to come
out of the screen. You'll just select
this one, selection. Now press two for Edge, Select, select this edge and now hold control to select all four of these edges. So
that is a shortcut. You can just hold
Control and Alt. And select college is like this. And press Control
V to bevel them. Bevel, something like this. Because if you can
see over here, the edges are rounded. So press Control V to bevel and give it like two
segments I think is fine. Then just hit right-click
Shade Smooth. Also make sure to
enable auto smooth. Now for selling this piece, then select this one and then
press Control plus slash. Add the intersection.
And you can see we have added
the intersection. It's not looking that good. But if we add the bevel
modifier to this also, I think that looks much better. Scale it up on the
y-axis a little bit and scale it
down on the Zaid. Alright, Next what we can do
is again select this piece, redshift plus S
goes to select it. Let's create another
cube scale this down, and truly apply the scale. And this time the select this, select this and press, then press Control plus minus to use the
Boolean operation, the Boolean
difference operation, and makes sure to move it above the pivot so that
it works on it. You can see right now that all the edges are
looking kind of harsh. So go over to shading and
enabled hardened normals. So make sure to
enable auto smooth. And you can see they are
smooth now over here also, make sure to do the same. We can maybe add another
cube over here to scale this down and place it
inside like this, is to add a bit more detail. Also if you want, you can
add rounded edges to this. Also just press Tab again, raised to select
hold Control and Alt and select these edges
and press Control V. And I think this weird
kind of looks better. Slag to come out of it. And let's see. Yeah, I think it looks nice. Thanks Larry squared
this thing over here. So that is also easy to do. I will again add a cube
skin this down. Over here. Scale it up accordingly, apply the scale and again, give it a little bit of bevel. Control and Alt and select all these edges and
risk control me. And don't forget to shade, smooth and enable artists mode. And now just select
this and select this risk control plus minus. But basically select
this press Shift plus S goes into selected. And also don't forget to move
the bevel modifier down. Now just add a cube,
scale this down and add a modifier to this. Increase hazard factor like
this and increase count. Yeah, basically, this is something we wanted
to create it. Yeah, Basically this
is what we wanted to create. Let's hit Save. Let's see we can create a
basic handle like this one. We can really see
what is going on. So I will just add a cube. And let's see what we
can work with this. Obviously, the
environment would be pretty huge and things like
this won't be even visible. So I won't give
much thought to it. Just add a simple box. Let's add a bevel
modifier to it. Enamel harder normals
and also auto smooth. Decrease the amount. And maybe you can
just duplicate this, scale this down and create
something like this. Because to be honest, it won't be even
visible from faraway. That's fine, I think. Alright, so now our door is done and what we need to
do is we need to just copy all these details that we created onto the
remaining doors. So because we have like an
interstate Boolean operation, copying and pasting can
be a little bit tricky. So what we can do
is you can just select the complete
door with everything. Make sure to select everything. These two things also over here, and de-select whatever
we don't need. Basically just select
the complete DOE. And first I will just delete
all these three doors. Again, select everything. You can just use Control to
de-select everything and just to see if
everything is there. And now hit right-click, press Shift D to duplicate and y and place it
exactly over here. I think this would
be much quicker. Now this select both of these
doors while holding shift. Makes sure to de-select
whatever we don't need. Yeah, we have just selected the doors and now
press Shift plus D and place it over here. Alright, so now we are done. Let's disable overlays and
see how everything looks. Okay. One thing we
kind of messed up, I think when we were
moving the windows down, I think I forgot this one. So just select this and
move it down over here. Just quickly. Make sure
everything is right in its place. The doors are looking fine. Alright, so now we
can just hit Save. I think the only thing left
to create with this building is these couple of electric
meters and virus over here, just to add a tad
bit more detail. But I think rest of
it looks pretty nice. So I will just hit Save. And I think this is
it for this lecture. We'll continue from here in the next one. Thank
you guys for watching.
7. Creating the Electric Meters: Welcome guys. Let's continue
detailing our building. As I said earlier,
we will be creating this electrical meter as the
last detail of our building. So let's start. I will disperse quickly
shift they add a cube, three for the front view, and let's place it over here. I think about a size
of this much is fine. Let's apply the scale
press Control a. Apply the scale, add a
bevel modifier to it, decrease the amount and enable harder normals
and auto smooth. Next, we can just press Shift plus S because
they're the selected. Add another cube over here. Let's scale this down. Scale it up on the y like this. Now, this time I will be using the intersect operation
of the Boolean. So for select this,
then hold Shift, select the big cube, then
press Control plus slash, something like
that, and just move the bevel modifier below this
so that it works properly. And also select this piece over here and move the
bevel modifier below. There's decreased the
amount a little bit. That's nice, I guess. Next we can create
this handle over here that is pretty easy
to do. Just add a plane. Okay, In this, on the y-axis
by 90 degrees like this, I'm just pressing R to rotate, then pressing Y to
log on the y-axis, and then just typing
90 on the number. But now scale this down, scale it up on the z axis. Next step, enable X-ray. And one for the vertices. Select, sorry for the ED, select Br2, and just select
these two edges over here. Press one again and now press E to extrude them like this, press X and log it over here. Now basically we have a handle. Let's move it inwards like this. Now to give it thickness, we can add the
solidify modifier. So go over here, are
the solidify modifier. Apply the scheme. And you can see, you can adjust the thickness of the
hand very easily. You can see the thickness
is kind of weird over here, around the corners to just
enable even thickness. And you will see
that is now fixed. So let's decrease
this still here. And also I will add
a bevel modifier. Enable harder normals
and auto smooth. You can also press tab, select both of these edges, then press Control V. And better than like this. Make it a little bit smoother. Shapes. Move this, and
yeah, that looks better. I think. Select the menu press tab and select all these vertices. And move this a
little bit over here. Now select everything and
just bring it out till here. I think it's fine. Yeah, that looks fine. I guess. Next, there's just
simply add another hue. Scale, this down,
place it over here. Basically just died
a bevel modifier to this and also don't forget
to apply the scale. Alright, next, we can add
another cube and create a bunch of MCB
switches over here. Like this. Light escape, the best stab at a
couple of edge loops. I'm sorry, one over here. This one over here at the top, and another one over here. Now select these faces plus I plus I again to insert them. Extraordinary outwards. Now press Control plus and legs are a bunch of more edge loops. And just select all
of these faces. This, I even set them a little bit and extrude
them outwards. Something like that. Obviously it won't really even be visible from pretty far away. So we can just read
something pretty simple. We don't have to go too
overboard with the details. Let's duplicate this and
just scale this down. Alright, I think
that looks fine. Next we can create
a couple of wires. Give it a little bit
more realistic feel. Alright, so how we can do that? We can just press Shift plus a go over to curve
and I add apart. So now if you go over to curve and don't see all these
objects over here. So don't worry, what
you need to do is just go over to
Edit Preferences, Add-ons section search for extra objects and just
enabled both of these. The curve also add Cove
extra objects and add mesh extra objects
enable both of them. This will give you a bunch of different options over
here in your menu. So go over to go and add a path. So now you will see the
straight line is being added. But if you will rust
out, you can see, you can adjust it like
a code like this. You can see we have
a curve over here. So how we can use
this to create wires? Let's just press three first
and rotate it on the y-axis, I think, yeah, by 90 degrees. Rest of fun. And let's see. I'll
place it over here. Just below our meter. Like this. This, this and this slash going
to the local mode. Now select this press tab. I'll just adjust your wires
so that I go over here like this and just make them
look a little bit organic. I'll select this one and Brazil and y and place it over here. You see something like that. To view it even more properly, you can just select the Via, go over here in the object data properties
under the geometry section. If you increase the depth option over here under the bevel menu, you will see now the wire has some kind of
thickness and you can easily see an adjusted. So let's play down over here. That looks pretty good. I think. Next move this over here. Let's set the thickness
to around 0.015. Now there's duplicate
this via press Shift plus D and move it
over here like this. And let's see, Just give it a little bit of
variation so that they don't look exactly the same. Both the wires or
something like that. Slash again to come out of it. Just make sure they're
not overlapping with the Royal, like over here. So select them, bring
them out a little bit. Next, we can select
these two things also. And just select everything. Press Slash. Again. Duplicate this via,
place it over here. Let's decrease the
depth of it to 0.01. And this one will
go right over here. Inside this. We can select this and
delete this vertices to make it a little
bit easier for us. I'm not doing much, I'm just trying to move them accordingly. It's pretty simple. You just have to get a
little bit of hang of it. Again, duplicate this. Timeless move it
this way, like this. And again duplicate
this and just make one single via go over. In this thing also. Alright, that looks pretty good. I think to me, Let's hit
Control plus S first. And now what I want to
show you is if you go over here and enable statistics, you can see all the words, see that everything over here. So actually, these cars do
have a lot of vertices, so we want to reduce
them a little bit. If you select this and decrease the resolution
from over here, you will see as soon
as you decrease it, the vertices over
here also degrees. And the quality of this
wire also falls down. You can see it is
now very low poly. If you increase it,
it is very smooth. So I think it was earlier
at 12, a value of, I think four is pretty
good because it is fairly low poly and it won't be even visible
from far away. So just quickly select all of
them and set them to four. So instead of doing
it one by one, there is a pretty
neat little shortcut that you can edit
all of them at once. So just select all of them. Now while holding Alt,
just decrease this. And you can see you are
decreasing for all of them. If you don't hold Alt and you
change any of the values, you will see only this
one is being edited. But if you hold Alt
and then move it, you can see all of
the selected objects are now being edited. Just set it to four, like this. And now we have also
reduced the number of vertices because obviously we will be duplicating it quite a lot of times,
four times precisely. We'll just select all of it, everything we just created. Let's hold Shift, select
all of it and hold Control and deselect
all the extra objects. You can just press
G wants to move it and see only the things
that you want to move. Our selected. Right-click to
place them back over there. Let's shift plus d y. Over here. Again,
press Shift plus d z. Place it over here. Now again, shift plus D, Then y, and place it over here. So really simple stuff. Disabled the overlays and see
how you're building looks. I think everything has come along pretty nicely and
it looks pretty good. One thing that I want
to do is I want to select all of the venues
over here, this one, and just move them to the left side a
little bit because it is kind of getting a little
bit crowded over there. Now hold Control and just
de-select these extra objects. Only the windows are
selected for G and Y. Just move them a little
bit the left side. And yeah, that's perfect. Make sure to hit Save. I will just minimize your risk for now, we don't
really need it. And the next thing
that I want to do is if you will
see the arrangement of the wires is pretty much
the same on all four of them. So quickly, select this
and try to randomize the movement of
the wires a little bit so that they don't
look exactly the same. Thanks for this one also. And this one is the
last one, I think. So, yeah, just quickly
do a couple of changes. Overall. You can just
select them completely and move them over to the right or left algebraic or just some kind of variation so that they
don't look exactly the same. Alright, so that's better, I guess a control S
to save everything. And I think we're pretty much done with our first building. You can enable that the blackout and see how it looks over here. Obviously, we already
have a block. That's why everything
is overlapping. This thing. Let's disable back the blackout. It's saved. Right now, all of the
objects related to building one are in the
collection collection. So just selected, I'll press M and move it
to the building. One collection like this. Yeah. No, it's perfect. Hit Control S to
save everything. And I think this is
it for this video, we will continue from here in the next one. Thanks
for watching.
8. Modelling the Second Building: Hello and welcome everyone.
So let's continue. We are done with the
modeling of a building one. So what we can do is we can just hide this collection and again, enable our block out. This time, I will start by
modelling this building, and I will be following this
reference image over here. This one. The building we will be
making will be of this line. So what we can do
now is just select this building redshift
plus D to duplicate it, right-click to place it
in this position only. And now this M and move
it to a new collection. Let's create a new collection
and naming buildings. Alright, now we can just
hide our local Collection. And let's start with the
more lean on this one. So if you see in this
reference image, this building is
pretty easy to make. We have a shutter
and then two floats over here and a
couple of windows. So if you want, you can try
to create this on your own. But let's start now. I will first start to go into the Edit mode
and enable edge length. And before doing anything, make sure to apply your scale. So just press Tab, press Control a,
and apply the skin. Like now, we can start. First, let's buy roughly
creating the shapes over here. Press Control plus
and add an edge loop. And I really give this shutter
or height of around 3.5 m. So you can see over
here on this edge it is currently 4 m.
But if you hold Alt, select this loop, then press G and J and move it on
the z axis like this. You can see over here,
the values are changing. And you can see now the values are changing for the edges, whichever ones are being
affected right now. So I will give the shutter
or height of around 3.5 m. So you can see over here, 3.5 m. Maybe a little bit more. Next, let's press Control plus art and add for-each
loops like this. And these will be our
two floors were here. But let's scale them
up a little bit first. So press S and Z, scale them up on the z axis. And if you see over
here on this edge, I want the height to be around two bidders
for both of them. So you can see it
is currently 1.97, 1499, so 2 m, like this frequency, we have these two floats over here and over here
we have our setup. But as you can see, we also
need to read the sign boards, so we need a bit more
space right over here. Just select both of
your floors hold Alt, or maybe just
select one of them. Hold Alt and select this
complete face loop. And first, make sure to
come into the face mode. So press three, then hold
Alt and select this loop, G, Then Zach, and move
it around here. Like this. Also hold Alt, select this face loop and move it
just a little bit upwards. Yeah, I think that
looks pretty good. I will come back over here, select this edge loop, and just move it a
little bit more. In my opinion, I
think that's perfect. Alright, so let's
move further now. I will press three
for Face Select. Let's select both
of these phases. I insert them. First, make sure to
apply the scale. Now press I to insert them. Let's insert them till here. Now just press T to
extrude them inwards. Press E to extrude
them inwards like this I think is fine. Maybe I will give both of them a little
bit of both height. So hold Alt and select
this complete loop, then hold shift and
select them both again, press S and Z, them
up a little bit. Alright, now I will select
both of these faces, press I to insert them. And now risky to extrude them
inwards. Again, press tab. Now let's select Shut up. And if you can see over here we have a little bit of ledge. So let's try creating that. But first, I will
just press Control R, add an edge loop over
here. Like this. This ball-like
thing. Move on here. And let's add another
edge loop over here. We can just press Control R
at two edge loops like this. It right-click, then
this S, then y. And just scale them equally. Also I will just quickly
disabled. Excellent. Alright, so now if you best three and select this face and tried to extrude
this inwards. You see we have a bit
of a problem over here. As you can see, we have this phase overlapping
when you weirdly. So to fix this, we
have a different tool. If you go over here, you can
see this extrude region. Just hold on it and you will
see this extrude manifold. So this is a different
type of extrude. Selected this one
extra manifold. And you will see this
yellow color icon on whichever phase you select. Now as soon as you
extrude this inverse, you will see we don't really
have that face below us. That works much better. Again, I will press Control R at edge loop
over here at the bottom. Select this face and now extrude
this outwards like this. And yeah, I think that
looks pretty nice. Press Tab again and make sure to de-select this tool again, go back to the selection tool. And first let's
create our windows. So press three Shift plus a first press Tab to
come out of this object. This object redshift plus S
then closer to select it. And now we can basically start by adding these windows.
So it is pretty simple. Press Shift plus a cube. Let's place this
first cube over here. Alright, so scaling,
scaling down, this one over here, it up on the z
axis a little bit. That first risk control, they apply the scale press
tab, select this face, then press to insert this and extrude it
inwards like this. Now basically add a modifier. Set the x vector to zero. And these are why. I think till here is fine. Now as you can see, it
does not really fit. So what we can basically
do is select this, this DAB enable X-ray. Just select these right-side
vertices and G then y, and move them till it
fits perfectly like this. Yeah, that's perfect
in my opinion. Now what I will do is basically we select this, duplicate, this, place it over
here at the top. Again, enable X-ray. Dab. Select these bottom vertices and place them over
here like this. Press Shift plus
they add a queue. And this queue can
go in the center. Gave this down. Now bring it out over here and
scale it up on the y-axis. Alright, so that
looks pretty nice. Select all three
of these objects, press Shift plus D,
and duplicate them. And logged on the z axis. And let's paste them
right over here. Make sure everything
fits properly. You can also use DAB plus
three for Face Select, select these three
phases over here, and just press E,
extrude them outwards. We add a little bit
of land over here. For the roof. Let's select
these three phases. Risk, I, hold Alt and select this loop
and risky to extruded. Alright, so next we can
start working on the shadow. I think it is pretty easy. How we can go about creating it. First, let's add a plane. Place it over here,
rotate it by 90 degrees. Like this. Scale this down a lot. I think this might is fine. Now basically what
you need to do is scale it up on the
y-axis like this. I think we need
to scale it down. A big mismatch is fine. Now press Tab to go
into the Edit mode, add a bunch of edge
loops like this. Let's add three segments
with right-click. Select the middle one is
three for right-side view. Make sure to enable
proportional editing over here. G then y and scale down this circled by using
the scroll wheel. Something like this.
Shade smooth this. And we have some
cream of this sort. Now, basically just add
the array modifier again, the x to zero, and
set the white one. And basically just keep
on increasing the count. And we have something that looks like so
different shutter. Maybe we can make it
even more smoother. Let's select both
of these edges, x and dissolve them edges. We have something like that. First enabled auto smooth. We can see it kind of looks
very harsh if you want. If you like it this way,
you can probably keep it. I will just select
this edge over here, press Control plus b. And basically just
bevel it like this. Make it even smoother. And now just press Alt and
then rotate by 90 degrees, three and place it over here. Scale it up on the y-axis. And now bring it out over here. Select this account. I think I shared.
That looks perfect. Especially if S
goes or deselected. Let's add a cube,
scale this down. Let's place it over
here. Duplicate this. And just place them like that. Both of these youth, and
let's just join them. So press Control J to join them. And now you can see
there are two of these. So we can use the mirror
modifier to mirror it. Over here. Select this add mirror modifier. And now we need to mirror them
according to this object. So what you can do is basically just select this middle
object eyedropper, and select the shutter. And you will see me or
easily mirrored them. Control plus S. And now let's just fill
in the sign boards. So pretty simple
to create again. Add a cylinder, rotate
this by 90 degrees. On the y-axis, scale it down. They sued over here. Smoothness and also
enable auto smooth. Scale it down on the x-axis. It's controlling
applying scale, stab. There's three for Face, Select
and select this top face. Just insert this. And basically you
extrude this inverse. We have pretty much
the same thing. Maybe we can make this
thing a little bit thicker. Okay, make sure to disable
proportional editing. And now also we can
add a bevel modifier. Enabled harder normals
add auto smooth, decrease the amount of the bevel modifier.
That looks perfect. Now add a modifier, the X factor to zero
and increases the y. Let's create four copies. Move it a little bit towards
the right, like this. We can place it a little bit outwards towards the beginning, like this press Shift plus
S goes or deselected. And again, let's add
another cylinder. Scale this down way. We can just keep them
flying like this. It really isn't even visible. Or, or, or a better way would
be to just press Slash. We're first going to a
local more press tab. Select this back phase, reside inside this inverse and just create
something like this. And yeah, just so
it looks like it is connected to the building even though it really
won't be visible. But yeah, for now, we won't be adding
this Japanese text. We will be adding it later on, but for now I think this
image is pretty good. Let's hit Control plus S. And
before ending this lecture, press Control a to
select everything. And now basically press M and move this to the
building to collection. Let's enable both the
building one and bidding too. And I think they look
pretty good together. Alright, so I think this
is it for districts. You guys thanks for
watching. I'll see you the next one. Make sure
to save your file.
9. Creating the Store Building: Hello, Welcome guys. So let's continue making our buildings. One thing that I
want to do before starting is less as disabled. These first and enable
black the Blackout. We have created this
building and this building. So for this building over here, I will be just simply copying
and pasting this one only. We will be creating a
color variation for it. Like over here you can see these two buildings
are pretty much the same, but they have different colors. So similarly, we will be doing some sort of thing
for these two also. Like they will have
the same model but different textures to
create some variation. So what we can do now is
just disable the blackout, enable building one,
and select all of it. Make sure to select everything. Then just press Shift
plus D to duplicate this. And now you can just hit
right-click to place it right over here only so
that they both overlap. And now press M and move
this to a new collection. And let's name this
building three. And now turn off building
one and enabled that the blackout seven for top view. And let's just place it
somewhere around here like this. They are pretty much
disabled the blackout. And we will have
something of this sort. Yep. Now, what do we need to do is we just need to
create a last building. Disabled all three
of these collections enabled by blackout,
select this building. Okay, I think I by mistake
selected this also. Let's place this back over here. Now select this building
press Shift plus D. Duplicate this, hit right-click, and now press M and again, create a new collection and
rename this to building folk, disabled the blackout. And let's see what
we can do first, I will just press Control
a and apply the scale. And also in the edit mode. Just enable excellent for now so that we can properly
see all the edges land. And the building that
I want to recreate is we have something like this over here,
like this building. We have a sharp like thing, like a convenience store. So I will try to create something like this
building over here. It is not really that visible, but I think we will be
able to do a good job. Alright, so let's start First. We will be basically again
adding a bunch of edge loops. Press Control plus r. And other force is
loop that we're adding is for these
doors over here. So I think about 3.5 or 6
m is pretty much enough. Next, we can add two more edge loops of risk
control on your scroll wheel. And two of them. And now we will be adding
for these windows. These windows I like
a little bit wider. So press S and Z, and let's scale them up
around 2.8 m. And let's see. Yeah, somewhere around here, it's pretty good, I think. And for this thing over here, the sign board lighting, we can basically say this cube press Shift
plus S goes to select it. And simply I will just add a
new queue listed over here. Scale this down. And now scale it up on the x-axis like this thing. A size of around
this much is fine. For now. I think obviously
we can change it later on. Press Control a and apply
the scale first degree, is it to one meters around here? Alright, that's fine,
I guess for now. Let's start detailing
the building now. It is pretty easy,
in my opinion, just select this first tab. Let's move it a
little bit downwards. Rheostat, select this face. Press I to insert this. And now just extrude
this inwards in here. The windows, but
I will basically do is instead of extruding in, first press Control R and add
two edge loops like this. It right-click. Select all three
of these phases. And now press I to insert them. Press I once again to
insert them individually. Place them somewhere around here and now press E,
extrude them inwards. I think it is a little
bit kickoff as I, again, I think around
this much is fine. But it's e to extrude
this inwards. Yeah, that's pretty
good, I think. Alright, next what
I will do is I will just press Shift
a add new cube, scale it down,
place it over here, move it out over here. And now scale it up on
the x-axis like this. Just to create a ledge
for these windows. Something like that. Also I
will add a bevel modifier to this building so that all the edges are a
little bit more visible. Enabled harder normals, and
also enabled artist's book. And make sure to
decrease the amount. Let's add a bevel
modifier to this cube. Also apply the scale. Add a bevel modifier and do all the usual stuff
and just decrease the amount. Next for this sign board, I will first apply the scale. Add a bevel modifier. Enabled harder normals
and auto smooth. And let's see what we can do. First, I will press tab,
there's three for Face. Select, select this top face. First, I will just
press two for it. Select hold Alt and control, and select all four of these. Reduce risk, unfold B and Bevel them
like this a little bit. To make the edges smooth. Then press Tab, press three, select this face, press
I to insert this. Now just extrude this inwards. If you had like a bit
of shading issue, as you can see, don't worry. You can just press G then
vi and move it a little bit more inwards and it will
probably solve itself. That's pretty good.
Again, press Shift plus k and add a clean, place it over here,
rotated by 90 degrees, and just move it out
over here in the front. And we can basically use it
as our window over here. We can select this
ledge like thing, duplicate this and place it
over here at the top also. And let's see, for now
the windows are fine. Next, let's work on
these doors over here. Shift they add a
cube, scale it down. Again, place it over
here at the top. Ended up on the x-axis. Alright, now I will be just
adding a bunch of cubes. I think it's data cube
listed over here. Bring it out in front. Gail it accordingly. If you press one and you are seeing the backside
of the building, you can just press Control plus one and you will see
the front of it. Move it inwards. I think the extrude that
we did was pretty deep. So just select the
building slash tab again and select
these three phases. G then dry and move them
a little bit outwards. Select this cube and
bring it out over here. Also select the small cube over here and also bring this out. You press control a
apply the scale was dab. And let's see. Let's Control. Act
two edge loops. It right-click to place
them in the middle. Disable edge length
for now and just scale them up on the
x-axis and place them both in the corners like
this. Let them vote. Rest. I insert them. Now just extrude them inwards. Just a second, I'm scaling
the cube accordingly. Again, press Tab, add edge loop right in the
middle. It right-click. I'll select both of
these faces and I, and now it's sodium inwards. And these two basically
you're going to be our gates. Add a bevel modifier to this so that the edges are
like more visible. You can clearly
see the difference between disabled
that bevel modifier and you cannot even see the
edges properly, enable it. And it adds a lot
degrees a bevel amount. So that it is like
really subtle. Enable both harder
normals and auto smooth. And yeah, that's pretty good. Enable X-ray, I will
select just this middle. Middle vertices. Scale them
up on the x-axis like this. Just to make it a
little bit thicker. Like this was fine. We can just press Shift plus S. Those are selected and
add a cube. Like peered. The handles. Handles
can be pretty basic. You can just use
something like that. Now add a minute
modifier to this. Select the dropper tool
and select this gate. It will basically mirror this itself and add a bevel modifier. Apply the scale. You can see if you don't really
apply the scale, the bevel modifier
is pretty messed up. The bevel Israeli like long on this one
and very sharp on, over here on these edges. But if you apply the scale, it is uniform on all edges. And now you can
decrease it and you can see it is pretty
uniform on apologists. Yeah. This is what happens
when you don't really slider scale. The handles. This way are pretty good. Again, what we need to do is we need to add another plane. Move it out over here, rotated on the x
axis by 90 degrees. Now just scale it up
throughout the dose. Will basically again
add a glass material to this maybe Unreal Engine
or in Substance Painter. We can see that later on. But for now, basically
this is our building. You can just enable the rest of the things
and see how it looks. Also, let's enable blackout. Don't really want to
see all the cubes, just the ground over here. I think it fits in pretty nice. Select this thing and let's move it a little bit over here. That looks very nice. Let's hit Control S to save our files. Disable the Blackout again. One thing I will do is I'll
just select this ground. Both of the ground objects
redshift plus D to duplicate them so that they are separate from the
lockout section. Right-click, press M and create a new collection
and rename this to ground. Now we can just
disable the blackout. Okay. One thing, one more thing. So I also want to select
these walls and I will also put them in
the ground or leaf, press M and move them in
the ground collection. First press Shift D
to duplicate them. And now press M and just move them to the
ground collection. Basically. That is
what I wanted to do. The reason I did this so
that we can view everything properly without the obstruction of the blackout buildings. So yeah, that is pretty much I think I'd environment the main buildings over
our environment. Obviously we will
be creating a lot of small props and
things like that. Now I will again disabled
back all this stuff. And now again, let's
shift our focus to our building for
one thing again, building for is currently
just the signal cube. So select all of
it, press eight. Make sure to disable the
camera. And now press M. Move this to building
for over here. Alright. So I think this pretty much it
for the building for, we can obviously add
other things later on, okay, one thing that
I will do is if you see this meter like
thing over here, let's add that to the building. That's pretty easy to do because we have already created that. We can enable back
our building one. Select this meter
from over here. This thing, this thing,
this thing and distinct. Make sure to select them all. Redshift the Press x and
move it right over here. You can press the full stop
key on your number bag. We just focus on any of the
object that you select. Maybe we can scale
this down a little bit so that it is a
little bit smaller. All right, Now, let's see. You can select this
press Shift plus S goes into selected, add a path. Or we can maybe
copying this wire, or let's just create a new one. Go to curve and add apart this on the
y-axis by 90 degrees. Move it up over here. Let's give it a depth of 0.01. I think that was what
we gave over here. Maybe a little bit more. 0.02, I think. Let's just go with 0.015. I don't really remember
what we added over here. Let's just quickly
check it here, 0.015. Select this. And again, we need to basically
add a bit of organic. Notice. These buyers are
just move them like this, selected, right, to give
it a little bit of curves. And also make sure that
it does not really overlap with the wall over here. Again, maybe at two
of these wires. Duplicate this. Now again. Move it
towards the right. That looks fine, I guess. Alright, again, we need to
select them both and make sure to set the resolution
preview to fall. Maybe, maybe you can decrease
it even more savings. Because this wire does not
really have much dawns. Alright, it's saved now. Now just make sure to select this portion of the building. Press M and move this
to building for. Alright, now you can again
disable that the building one. I think this was it for our reading for and now
Control S to save it. And yeah, I think this is
it for this video, guys. Thanks for watching. I'll
see you in the next one.
10. Applying the Modifiers: Hello and welcome guys. So now that we're done with the basic modeling of
all our buildings, now what we can do is we can start with the
texturing process. But before that,
obviously we need to apply all these modifiers and also UV unwrapped bad models and then export them
to Substance Painter. And then finally we can start
with the texturing process. So now what we need to do is, as you can see right now, if you select this building, let's focus on this
building first. And if I select this
piece over here, you can easily move this box and move the position
of our cutout over here. But if we apply
all the modifiers, we won't be able to
change such things like, you can see all these
modifiers over here. If we apply all of them, we won't be able to change them. So the results
would be permanent. Now make sure you are happy
with everything as it is. And then we can
apply the modifiers. But instead of directly applying the modifiers
onto these objects, only what we can do is just hit Control Shift and S.
And we can save as, and we can create
a new blend fight and just rename this
to lockout final, maybe the Blackboard underscore
final and hit Save As. So basically now we have two different copies of
the same file and we can just apply the modifiers
for all these objects. So first let's turn everything off and just turn
on building one. Just to give you an example
of applying modifiers means, let's say I select this piece
right now as you can see, I can adjust the count, increase the number of
objects in this lake. In region number of
objects in this array. Do whatever I want to like, increase it or decrease it. But if I go over here, click on this arrow
and now apply this. Now I can't really do anything. We can press tab and we can edit these objects however we want. But we cannot really
make any changes to the array modifier that
we had earlier over here. Obviously you can add new modifiers and you can
edit them as you like, but you cannot make changes
to that old array modifier. But if you just undo
everything back and bring back that array modifier over here. One more thing that
you will notice is let's just select
this press Slash. Right now, if you press tab, you can only edit the
single object over here. Because we are really
using this object and then copying it multiple times over
using this add a modifier. So let's say you only
want to edit this, this piece over here,
this tear in the middle. So first you need to
apply the Add Modifier. Now you can edit
every single one of them individually
however you may like. But that's not my point. I just wanted to make it clear that in some of the objects we first need
to apply the modified, then only we can
make the changes. Alright? So to apply modifiers
for all these objects, we don't really need
to select it and then go over here and
apply them one by one. What we can basically do is just press a to
select everything. Then press F3, search for the command and search
for convert mesh. So you will find this
convert to Mexico, but as soon as you
click over here, you will see everything
has been collapsed. And like all the modifiers are not there and everything
has been applied. But you will notice there are some of the
issues over here. As you can see, a
couple of our objects have been completely
disappeared. So why has that happened? Just hit Control Plus date
to bring everything back. And let's try to fix this. Now. Again, the modifiers
are still there and I know that fixed for
this, it is pretty easy. As soon as you go over here on the object data properties, you can see this
thing over here. So what this thing means is that this object data is being
used by two different cubes. So we don't really want that. What we need to do is
just click over here. And now both of
them have unique. Again, if you select
this, this one, you can see both of them have same object data. We
just click over here. And now both of
them have unique. You just quickly
need to do this for all the electric meters
and all the doors, because this issue rarely happens when we use the
intersect modifier. So just make sure
to remember this. Whenever you use the
intersect modifier, makes sure to just
click over here on this object data to create
a unique copy of it. Now basically we are good to go. We can again press a
and then press F3, and now just hit
Enter. And let's see. Now I think everything
is pretty much okay. If you still don't
understand what went there, I will quickly add a cube. Scale it up. Let's
add another cube. Let's place it over
here like this. And if I use, let's
say the difference 45. So hit Control plus minus four, select this, select this
and hit Control plus minus. We don't really have any issue
of object data over here. Let's hit Control Z. If
I use the union one, then also we won't
have any issues. But if you see,
if I select this, then this, then press
Control plus slash. And that is for
the intersection. You can see we have this
intersection over here. You can even add the
bevel modifier to this. We just make it a little
bit better visible. Now if you go back to the
object data properties, you will see we have
this tool here. So that means both of them are using the same object data. And now if we
select all of them, press F3 and tried
to apply the mesh, you will see we will
have some issues. So hit Control Z
and just click on this icon to make them both have unique object
datas like this. And now if we select
all three of them, press F3 and just
convert to mesh, everything is pretty
much good to go. Just make sure to remember this. All right, now what
we need to do is, now as you can see, all of the modifiers have been applied. If you select this cube
and try to move it, you will see nothing
really happens because we have applied
all the modifiers. And we cannot really
change the position of this cutout now and
it will be permanent. So that's why what I did was I created another copy
of this blank file. So if anything goes wrong, like in a later
point in our course, we can always fall back
to that file and use the model that still have
their modifiers intact. Now, what we can
do is if you see all these objects with the bulb is like this one
that we use for the Booleans. We don't really have
any use for them now, so we just quickly need
to select them one by one and just delete them. Because there is no point
of having them now. Just make sure you don't accidentally delete
a real object. Just delete all
these all objects. Like with the wireframe visible. You can even press
G to move on and see if only the wireframe
objects have been selected. And now press Delete this one also over here. Now we have pretty much
applied all the modifiers for objects. As you can see. If you just press Slash, go into the isolation mode, you can see all the cutouts now are permanent and we
can actually edit them. We cannot do this stuff earlier when the modifiers
were still there, like the Boolean modifiers. But after applying, you can make all these changes
in the edit mode. But yeah, we don't really
need to make these. Alright, so we have successfully applied all the modifiers and deleted all the useless
objects for our building one. So we basically need to do the same thing over
and over again. So I think pretty
self-explanatory. So you can just now enable
building to select everything. And then press F3. Also make sure to
apply the scale first. And now press F3
convert to mesh. We didn't really use
Booleans for this one. I think we're safe. Now again, all the modifiers
have been applied. Disabled this quickly
enable building three. So this is pretty much
the same building, press a to select everything. And if you remember, we first need to sort this thing out of the
intersection problem. These same object
data properties. These objects that have
the same object data, we just need to make them have unique object data so that there are no issues
when we apply the modifiers. Alright? So yeah, basically
these were all of them. Press a to select everything, press F3 and hit Enter. I'll just quickly go through all these Boolean objects that we do not need
anymore and delete them. Okay, So Arlan, I think disabled reading three enable
that we're looking for. Also, it's pretty simple. Just press Control a
to select everything. Again, press F3 and you can
watch or read it again. I forgot about this
thing over here. Just click on this icon. Now, we're good to go. Just delete this
Boolean object is small one and rest.
Everything is fine. I guess. The last one is this ground. This one also, I will
just press control a F3 and convert this to mesh so that all the
modifiers are applied. And yeah, basically this was it. I don't think we really
need a wall over here, so let's delete this. And yeah, basically
this was it hit Control S. And now we have applied all the
modifiers and deleted all the Boolean objects that we do not
really need anymore. Now what we'll do is
in the next video, we will start by UV
unwrapping them one-by-one, and then export them
to Substance Painter. And then start with
the texturing process. Thanks for watching. I'll see you in the next one.
11. UV Unwrapping the Buildings: Hello and welcome everyone. In this lecture, we
will be starting with the UV unwrapping
of our buildings. So let's start with
this building one. What we can do is we can
just quickly disable the rest of the collections and just keep this building one. So as you can see,
this building is a pretty huge asset with a lot of different
small objects. So we cannot really UV unwrap
this on dosing the UV map. So for this particular building, we will be having two
different uv maps. And when we import this building
into Substance Painter, we will have two different
texture sets to work with. And then at the end we will
have two different sets of textures that we will be applying into two
different materials. So basically how this
will work is we will start by creating two different materials in Blender only, and we will assign the materials according to the objects
in this building line. We can differentiate them on the basis like we can
have one material with all the main objects
of the building like this huge part,
like this one, this one, all these
main portion of the building and the
rest of the materials we can have all the smaller
objects like the doors, windows, and
everything remaining. So after we have assigned
all the material, then we will UV unwrap them according to the
materials they have, like the ones with the same material will get
UV unwrapped together. And then after
that we can export this model to substance
painter or Unreal Engine. And yeah, so basically to start, what we can do is let's select this main part of the building. That is this huge block. Go over to the materials section and let's create a new material. And I will rename
this to building one. Underscore mean. Alright, so now I want to apply this material
to this thing. Let's select maybe this, all these pillars
over here. And this. Now we can maybe over here also these things
and the stairs. Now maybe what we can do is
just press Slash to come into the isolation mode to see everything if all the
correct things are selected. So this is a way to
recheck. We're fine. Now what we need to do is we
need to copy this material. Just select this one again, hold Shift and select
this main object. And you will see this building one underscore main material. And now we need to copy this to all the objects that
we have selected. So we do not need to
do this manually. We can just quickly
use a shortcut. So while this thing is selected, make sure your main object
is selected that has the material control plus L. And now link the materials. As soon as you do that, you will see 12 is
written over here. That means this
material is being used by 20 different objects. So now you can see all these pieces have the same material, but not these ones like
the doors and the windows. They do not have this material. All right, now, I
do not really want to see these objects that
already have this material. So to remove them
or to select them, what we can do is instead of
now pressing Control plus l, just press Shift plus L. So this is to select
the link materials. So as soon as you do that, select the link materials. All the materials
would be selected. With this material, like I have this already selected
and now I want to select all the rest of
the 11 objects that have this particular material only I will just press Shift plus l, then select all the
link materials. So that means all
the objects would be selected that have
the same material. So this is a pretty
handy shortcut Control, L and Shift plus L. So now hit material.
Now all the objects are selected with this
particular material. And now I can just
press H to hide them so that I can work with
the rest of the objects. So let's quickly just
select any door. So let's select this one, create a new material. And again, this will be building one underscore like
doors, windows. We can maybe name that. And now press a to select
everything because we want the rest of the objects to have this particular material only. And now while this
door is selected, hit Control plus l. Now link all the materials and you will see 109
written overhead. That means we have 109 different objects that are using this
material currently. Alright, Now press Alt plus
h, and as you can see, we have two different materials over and complete a big asset. So now if I want to select all the objects of
this second material, like this door windows material, I will just select
this door or maybe select this door,
redshift plus l. Then select all the
link materials. And you can see only the
pieces that have this doors, windows, or material
are selected. And we can do the similar
thing for the other material. Alright, so now with all
this out of the way, we can go to the UV Editing tab to start with a UV
editing process press Tab to come out
of the edit mode. And now first risque
to select everything. And make sure the first
step of your UV unwrapping processes to just
apply the scale. Because of the scale
is not applied, it can mess up with
your UV unwrapped. So just press Control a and
make sure to always apply the scale before starting with
the UV unwrapping process. Risk control, apply the scale. Alright, now, as I
mentioned before, we want to UV unwrap the objects that have the
same material together. So first I will select
this main object. Shift plus L and
select material. Now only the objects that have
this material is selected. Press Tab to go into the Edit mode as a to
select everything. And we won't really be UV unwrapping them like one-by-one. We will just quickly use the smart UV project that
is the shortcut to UV. Unwrap all of it quickly. Go over here and
make sure to enable display stretch is to see if any of our UV
islands are stretching. And also select this
thing over here. What this will basically do is if you select a couple
of vertices over here, those same vertices would
be selected over here also. Now press a to select
everything with you and then hit
smart UV project. And now hit Okay,
as you can see, are UV unwrap is done, but it is not really
that efficient because we have a lot of empty
spaces over here. So open this up,
this menu over here, decrease the angle limit, and let's see what
we can work with. So after setting Nanga limit to absolute zero is increase
the island margin. And yeah, I think this UV
unwrapped looks a lot better. There are not many empty spaces. Yeah, I think we can definitely
work with this step. So now we're done with the
UV unwrap of this building one underscore main press tab
and press H to hide this. Now we will be UV unwrapping
the rest of the objects. So just select them all. Press a press Tab. Again, press a to
select everything and hit you and smart UV project. Now make sure to set the
angle limit to 66 again, because sometimes it can mess things up when
it is at zero. It can take a long time to load and makes sure the
island margin is also set to zero now hit Okay. And I think this one came out really well with the
default settings only. So we can definitely
work with this step. And as you can see, we now
have two different uv maps. If you press alt plus H
to bring everything back, Let's say I want to see
this particular UV map with the main building one are
the main material one. So select this piece or select
any of the piece that has the building one underscore main material, redshift plus L. Then select the
link Materials tab and you can see one of
the UV maps is this one. And the other one is
selected door redshift plus L and select the link material. Now press tab and the
other one is this one. Alright, let's come
back to the layout tab. And we are done with the UV
unwrap of a building one. So what I want to do now is before UV unwrapping the
rest of the buildings. That is the building
234 and the ground. I want to test this building
one by exporting it into Substance Painter and
see if everything is working properly
with a UV unwrap. And I want to texture
this building one first so that everything
works out properly. And then after that, we can
UV unwrap the building 23.4. And then we will start
with the texturing process of the rest of the buildings. In the next video, I will export this building one into
Substance Painter, like do all the usual stuff
being the mismatch and then start with the extreme
precision fingers for watching. I'll see you next time.
12. Exporting to Substance Painter: Hello, Welcome guys. So in this lecture we will
be exporting our building one into
Substance Painter and starting with the
texturing process. Alright, so let's start. So to export any model from Blender into any
different program, you first need to select all the objects that
you want to export. So currently we only have this one single
collection enabled. So I will just press a
to select everything. Go over here in the file
section that in the export. And I will be exporting
it as an FBX file. So select FBX. And over here I will just quickly
create a new folder. So you can hit this icon
to create a new directory. And let's rename
this to exports. You can rename your
export file over here, but I will just keep it
to block out underscore final only in your
expert dialog box, it would appear something
like this over here. So everything would be selected and these two are unchecked. So what do you basically need to do is we just need to enable selected objects
from over here so that only the selected
objects are exported. But right now, we only have those objects present in our scene and we're
selected all of them. So it does not really matter. And the next one is
to select mesh from overhead so that only
the object types of mesh get exploited if you
have a camera that is also selected or any type of
lights that are selected, they won't get exported
in our FBX file. Only all the mesh object
type, we export it, and only those ones would be exploited which we have
selected particularly, let's say if you just
selected this part over here like this and you left all
of this, like this only. And then you exported something, then only these all objects
would be exploited. So yeah, just make sure to
press a to select everything. Then go over to File
Export, and then it FBX. Now just come back one step and select this exports
folder and make sure selected objects and meshes enabled from over here
and now just hit Export. Now the export is done. So basically these were
the steps to export any model from
Blender into f vx. And now you can quickly
open up substance painter. And we can start with
importing the model into substance painter and starting with the
texturing process. But first there is a little
issue that we need to fix. I deliberately adding that so you guys can learn
how to counter it. Okay, Let's start go
over to File New. And overhead in
this dialogue box. But basically you need
to do is just go over to this file section and
hit the Select button. And I will be selecting this blop out final FBX
file that I just exported. Say I just double-click
over here and rest. Everything pretty much
remains that default because we can always
change this later on after we are done
creating a new project like we can always see in the documentary solution
or the normal map format. For now, I will just say this export file over
here and hit Okay. Alright, so as soon as
you embody your model into Substance
Painter right away you will notice a huge issue. So as you can see, the main object of
a building over here is looking pretty weird. It appears to be
showing up inside out. It is very possible that
in your substance painter, this particular object,
it's like completely fine, but like some other object
is appearing inside out, or it is very possible that every object is completely fine. But still, we should go over
how we can fix this type of issue because you might face it in some other
project of yours. So basically this object
is having flip normals. So, so basically this object currently has flipped novels and it is very easy to fix that. First we need to go
back into Blender. And if we will go over here in the overlays menu and
enabled face orientation, you will see your objects are
now colored in red or blue. So basically the thing
to remember overhead is if your object
is colored in blue, that means it is perfectly
fine and it is good to go. But if it is in red, you need to change
its color to blue. Just find if any object in
your model is red colored and if it is not in your
model is completely fine and you can just go ahead with the
exporting process. But if any of them is
red colored like this, it is very easy to fix this. Select this main object, a Tab, to go into the Edit mode and press
a to select everything. Then press Shift plus n. And as soon as you do that, it will recalculate the normals. And now you can see
it is a blue color. Only. Makes sure if any other object of
yours is red color. Just quickly fix it. Let's say if I want to turn
this object into red color, I will just press Tab a to select everything that he
then hit Shift plus n. And you can enable inside. And you can see now
it is red color. Makes sure no object
is red colored. Just select this
press Tab plus a, then press Shift N, and it will recalculate
all the numbers. And basically every
object should be blue. And right now everything is
pretty much blue-colored. So we are good to go press
a to select everything. I'll just make this a rule of
thumb that whenever you are exporting anything from
blender to any other object. Before exporting
makes sure to enable face orientation from over
here in the overlays menu. And just quickly check if every object is
appearing to be fine. So right now everything
is pretty much okay. So select everything
again and we need to export our
file one more time. So go over to export FBX. Select the blob or
final so that it replaces this file
and hit Export. Let's come back to subsist
paint the Create New Project. Select the File and
select this new file. Hit Okay, and discard this one. Yeah, everything is appearing
pretty much fine now. You can hold your OIT and use your left mouse button to move through the
substance painter scene. And use your scroll wheel to ban like this and
right-click to zoom. You can also zoom in or zoom out by using our scroll
view directly. I think these are the basics of Substance Painter and you should be pretty familiar
with all this. Alright? First thing that I will do is go ahead in
the display settings. As you can see, all these
jagged edges over here, they don't really
look that good. So I want to fix them. Go over here in the
display settings, scroll down and enable activate
temporal anti-aliasing. And as soon as you do that, you'll see all of the
jagged edges have disappeared and our model
appears pretty smooth. Alright? So the first step, whenever we export anything into Substance Painter or sorry, I should say, whenever we import something into
Substance Painter. And before starting
the texturing process, we need to bake the mesh maps. So if you come over here in
the texture sets settings, you will find this
big mesh maps. If you don't find
this texture sets settings window over
here in the Window, toolbars in the views. And you can enable Texas at
settings from over here. You can see we have two
different texture sets. As I mentioned earlier, these two different
materials are now created into two
different texture sets. So yeah, pretty handy for us. This is what I was
talking about. That's why we needed to UV
unwrap them separately, if you will press F1. We can also see the duty view, that is our UV view. Select this door
windows or texture sec. If you select the
main texture set, you will see the UVs changed. That's why we need it to
UV unwrap them separately, press F2 to go back
in the 3D mode. Alright, so now I will just go ahead and hit big mesh maps. And now we need to set the
parameters so the size, I think I will be
just going with the highest quality for k
is I think, really good. But if your PC is not that fast, you can even go with
two k or wonky. But I will be going
with folk assembled the ID map from overhead because we won't be using the ID map. We can enable diffusion
and use low poly mesh as high poly mesh because we don't really have any high poly mesh. So yeah. The last thing
is basically we can set the anti-aliasing to
four-by-four maybe and rest. Everything remains
pretty much the same. The default settings
are really good, so we don't really need
to think or that much. These all settings after
everything is done, just hit bake selected textures. Now just quickly grab a cup of coffee or something because
it might take a little while. I will just spend the video and resume when
everything is done. Alright guys, so the baking
process is done now. I hope it did not take long. On this okay button
and quickly go through your model for any kind
of potential issues. Can have a couple of
shading issues sometimes, but I don't think we have any. Like if we will just
zoom in over here, we have a couple
of them over here, but these won't be even
visible from far away, so we don't have to worry
that much about them. And when we will apply any
particular material to them, These would like
completely disappear. Like they are somewhat
visible, but don't worry, they won't be visible
from that distance. I think everything
appears to be pretty good to me and I'd bake
came out really nice. Before proceeding. Let's just hit Control
S to save our project. And let's see, I will create
a new folder over here so that it is easier
for you guys to find the different files so that
everything remains organized. I will rename this to
Substance Painter files. Double-click on this
folder and let's rename this substance being
defined to building one. It's saved. Wait for it to save. And I think guys, this is it for this project. We will be starting
with the texturing of this building one
in the next video. So thank you guys for watching. I'll see you in the next one.
13. Texturing the Residential Building: Hello and welcome everyone. In this lecture, we
will be starting with the texturing process
of our building one. Alright, so first what I will
do is I will be selecting the building one underscore main texture set from over here. Because we will be texturing mainly focused on
walls and everything. So yeah, if you want to select
different texture sets, you can either do
it from here by clicking on the
particular texture SEC, or you can just hold Alt and control and then use your right-click and click
over here like this. And then the main text
inset would be selected. But let's say if I click
over here on the door, then this doors windows
Texas had it selected, hold, Alt and control, and then use your right-click. Very easy. We can also hide detection
sets from over here, or use the focus more to only focus on the particular texture said that we are texturing. But for now, let's
keep them all on. Alright, so after
you have selected, we already have a layer
over here. In a later step. Let's quickly go ahead
and delete this. Also one thing that
I want to mention, if you do not see any of
these tabs over here, layers Texas set,
setting the properties. You can go over
here in the Windows section, in the views, and you can bring them in, in your substance
painter and then set them accordingly
according to your setup. Even the shelf over here. So yeah. First I will be applying a wall material to
the vaults over here. So if you go over
here in your assets, so click on this, the first one, materials and search
for concrete. And you will find this
concrete clean Medina. Just drag and drop it
like this over here. Alright, so right away you can see it does
not look that good, but don't worry, we'll fix it. So first what we can do is
we can create a new folder. Let's rename this to walls and drag and drop this concrete onto the
walls folded like this. Alright. So now what we will be using is we will be
using a geometric mask because obviously we don't want the concrete material over these tears or things like that. So click on this icon over
here next to the folder. Then right-click and
hit Exclude all. So now the material is not
present on any of the objects. But click over here again. And now select this wall, like this, this main
piece over here. And now you can click
back over here again. You can see one is
written over here. So that means this folder or this material is being
used by one object only. And that is this one. If you click over here again
and maybe select this. And you can see the material is being used over here also. And two is written now. So two objects are using it. But yet for now, let's
just select this one only. And now click over the
concrete clean layer and let's set it
up a little bit. First, I will change
the projection from UV to try planar. And over here, let's increase
the tiling to maybe 20. Also, if you're feeling like the texture quality
is pretty low, you can come over here in
the texture set settings and increase the size 2-4 K.
And as soon as you do that, you can see all these scratches are visible more properly. But yeah, it will make your substance a little
bit laggy and choppy. So I will be keeping
a tequila when you will export everything we
can export it at for K. Let's see. Setting the tiling at grantee I think
is pretty good. You can increase or decrease
it according to your needs. Maybe I will even
increase it to 45. That is our basic
concrete material. Next, let's see what we can do. We can maybe decrease
the amount of scratches. You can see if you increase it, there are lots of
scratches on the building. But yeah, let's keep
it to 0.1 maybe. Next what I want to do is I
want to add a bit of dust. So click on this
vaults icon and add a fill layer so that the failure gets added on top of
the walls like this. Like if you select the concrete layer and add a fill layer, it will be added in
this folder only, but I want this layer
to affect all of it. So I will place it
outside the walls folder. Rename this group
does select this, and let's give it a darker color,
something like that. And now come over here in
the smart math section. And you will find his
dust occlusion smart mask is drag and drop it
like this over here. And as soon as you do that, you can see a lot of dust has
appeared over our building. But obviously this
is like too much. So click on here on
the mass settings. And what we can do
is there are lots of different sliders that
we can work through it. But, but first, I will just decrease the
amount of grunge. You can see grungy is basically this dirt that is
appearing all over here. So let's set the grungy
amount to 0.1 and rest. You can see dust is added along all the
corners and everything. You can maybe increase
the dirt level. However you may like to
increase the contrast. You can do a lot of things, but obviously I
think this is too much and do everything
back and yeah, I think just decreasing the
grungy amount was fine. Alright, let's proceed further. Alright, so next texture, these pillars over here. So I think I will be giving
them a metal material. So again, I will create
a new folder first, let's rename this to metal. Now I will add a new
fill layer to this. Let's rename this
to black metal. Maybe. Set the
metallic value to one. You can see already it
looks like a middle. And next we can set the base
color, something like that. Now again, click over here, right-click and exclude all. I can just select this thing, this thing. This one. Yeah, all these species. Also, I think I will
select the stairs also. Let's see how that works out. We can obviously change it
later on if you don't like it. Let's make the color
a little bit lighter. So far the top of the
building, that is this part. Let's come back in the walls of older only select
the concrete clean. And first, click over here and add the
material to this also. But now I want to change
the color to black, but I cannot really do
that because this layer, both of them have the same
concrete lean material. So if I change it to any color, both of them will change. So just duplicate
this material first. Set the color to black. Now again, hit right-click, exclude all, and just
select this one. Now both of them have a
different material like this. Pretty simple. The tiling you can see is
pretty messed up at the top. So maybe if you want, you
can decrease it to 15. Dog won't be even
visible like that. So I think that's
fine. Let's see. Maybe we can make the
concrete color olive darker. Yeah, select the
concrete clean layer. Let's rename this
to concretely in black. Copy this layer. So Control C to copy. Let's go into the
doors windows section. Delete this older layer and I will just paste it over here. The reason I did that was to use this material
on these blocks. Also click over
here and deselect them so that they both
have the same material. Alright, Next, let's come back to building one
underscore main. Let's see what we can do. Let's go back to the
metal layer and z, we can add maybe another layer. Like this is a white color. If you name these two edges. Increase the metallic
value a little bit. For this one, we
can use the edges, any of the edges smart
mask. Let's try. This edge is just
dy. As you can see. We've added a little bit
of dust along our metal. I think that looks pretty good. Alright, next what I want to do is all these white colored
pillars that you can see. I want to add the
metal material only, but not of the same color. So first, I will select this and select all of them
in this folder only. Now they all have the black
color metal material. Now what we can do is just select this black
metal material, copy it, and paste it again so that there
are two of them. Rename this to white middle. And let's set the color
back to white. Like this. Now just right-click,
hit Exclude all, and just select these pieces. This way we can easily
differentiate between the two. Alright, I think that
looks pretty good. Make sure to hit Save. Let's see what we can do next. Let's copy this metal folded up. And Let's move back to the doors, windows, extra set and
paste it over here. And let's see, we can use the metal material over here
also on different things. Click over here and let's
use it over here on the door and the door frame. And let's see how it looks. I think that looks pretty good. I will remove the white
metal from over here. Select the black middle and
just make it a little bit lighter is to create a little bit of variation
between the two. All right, now just quickly
click over here and just select a couple of items like these
frames over here. And all these parts of their doors or something like that. I think the metal material
looks fine over here. Next, we can also add
the metal material to these. Or I think not. We can maybe add
something else over here. We'll figure that out later on. But for now, let's apply
the metal material. These two also. You can also add it to
the handle over here. I think for not that much is it? Let's see. Next we can create
another folder, rename this to glass. Let's add a fill layer to this. I will give the
color really dark. Make the roughness value to zero so that it is
reflective like this. Yeah, rename this to last. This. Click over here again, right-click and exclude all. Now select this thing, this thing, this one, this one, this one,
this one, this one. All the pieces that
we wanted to have the glass material on,
something like that. I think that looks pretty good. Let's see. Next. We want to add this dust
layer over here also. So go back to the
main lecture set, copy this dust layer up, come back to the doors windows, and let's paste it on
the top like this. And you can see as soon
as you do that little bit of dust is added
all over our model. You can see over here
also it is failed. We can maybe, if you want, decrease the opacity to 50, that it is a little bit
lighter and not that harsh, but that is totally up to you. Also, I want to add
a little bit of more like dust around the
areas of the glass. So let's go into
glass folder only. Create a new fill layer. And let's just copy
this last base. Copy this up, rename
this to dust. We don't really want
the color channels, so you can disable
the color channel, increase the roughness to
somewhere around here. And now let's see, we can
maybe use the dust surface. I don't think it
works that well. Let's try something else.
Let's try this one. Yeah, it does add a
little bit of dust. You can go to the mosque editor, increase the global balance to increase the amount of dust. I think that looks pretty
nice. You can see over here. If you want, you get
increased or texture size to forget to see everything
properly, how it looks. You can see as soon
as you do that. This looks pretty good
over the glasses. Maybe we can decrease the
global balance a bit. Let's set it to 0.45. Alright. Now it's pretty nice, I guess it controlled
plus S to save our files. And let's see, for these
windows over here, let's just go into the smart materials section and we get searched for
maybe a plastic body. Let's see which one we can use. You can use any one you like. Let's use this plastic dusty. Obviously we don't want
it all over the place. Just right-click exclude all. And select these two items. And over here also, select the base. And let's set the
base color to black. And we don't really
need this dust. So what we can do
is just second, select the dirt edges and just decrease the opacity of them. Maybe we can give it
a tad bit of opacity like that. Like this. Yeah, that looks pretty good. I think one thing that we can do is let's select the
plastic dusty and remove it from this thing.
Just the center one. And we can maybe add the
metal material to this. Just to make it look a
little bit interesting. Let's see how that looks. I think that looks better. Next, we can start with the texturing of
electrical meters. First, we can texture these wires because
it's pretty simple. I will be using this latex
black smart material only to discretely drag
and drop it onto the top. But make sure that
dust ladies are the top. Place it below it. Select the latex black, right-click and exclude all, and just select the wires. You can also drag
select like this. Like making a selection. Make sure like something
else is not selective. Alright, so yeah, I think the wires look pretty
good this way. You can open it up and
maybe edit it a little bit, like baking the base color
a little bit lighter. And also let's make it a
little bit less reflect it. So 0.25 enoughness
is finite thing. Let's save our files. And I think this
much is enough for this video because it
is a pretty long with, in the next video, we can
finish with the texturing of far, like leading one. We can maybe take shut up those and all of the remaining
things that are left. We will be doing that
in the next video. Thanks for watching. I'll see you next time.
14. Adding more Details: Alright guys, so let's
continue to extreme. I will just close
up these folders. Alright, so far this
electrical meters over here, I will be just going in the smart materials section and let's search for a
plastic material. And let's see, maybe
we can use this one. Plastic glossy scoffed. Just drag and drop it
over here like this. And again, click on this
Geometric Mask icon first, bring it down the dust layer. Click on the
Geometric Mask icon, right-click and exclude all. Let's select this, this
on all the four of them. Alright? But this piece
over here, I will be, I think, again, using
the metal material only, that would work much
better, I think. Yeah. One more thing that
I'm noticing is I forgot to add the class
material over here. Just select this and
click over here. Yeah. So next, we need to obviously
change the color of this, open this folder up, go over to the base color, that is this layer.
Select the color. And I've already
decided on a color, so you can just copy me
and put it over here, 0.155, I want to choose
like a yellowish color. So 0.114 for the
saturation and for the value 0.7.
Something like that. Yeah, that looks pretty nice. Next for these pieces over here, what I want to basically do
is for all these switches, I want to add the
black color to them. And for the rest of it, I will be just keeping
it a white only. So let's see how we can do that. If I go ahead and add them, you will see the fill
layer is added to the complete layer at once. Now I just want to add the black color and material
over these switches only. If I try to click over here
on the geometry mask first, right-click and extruded
and tried to select this, you can see it selects
the complete object. And it is not really possible to like only select
the switches. So we have to find
another way to do it. So just right-click
and hit include all. And now what we
will be doing is we will be adding a black mask. So instead of using
a geometric mask, we will be using a black mask. So add this, Let's rename
this two switches. Basically a mask, if
you are not familiar, it is the same one as
we have in Photoshop. Mass is like a black and
white image that decides where the texture should show
up and where it should not. So if you select this and
select these two lower here, this one polygon field. And this tool has
four different modes. So you can see these folds
that we can see over here. So if we select this third
one, this is the mesh will. This mode is basically the
same as the geometric mask. If you click over
here, you will see the complete mesh is
selected at once. One thing that you need
to remember is that black means invisible and
white means visible. So you can see the
currently the black mask is completely filled
with black color. That's why as soon as
we added a black mask, you would have noticed that
our whole layer disappeared. Let's say I remove the mask again to go over
this once again. Let's turn off this
main collection and you can see this fill layer is completely covering our complete like all the models over here. And as soon as I added
like a black mask to this, everything completely
disappeared because black basically means invisible. So now if I select the
mask and select this tool, this tool is basically filling all these objects
with white color. So as soon as I added
a white color to this. So now what has
happened is basically the mask is now filled with white color over
this area and that's why this fill layer is
visible over this part. You can also see this in action
with using a brush tool. Say I selected a brush tool
and you can see I have currently selected
a white color. I'm painting like this. And you can see, because I'm
painting with white color, that's why this fill layer
is becoming visible. Because in terms of mask,
white means visible. And if I press X to switch to black color,
so this is a shortcut. You can press X to switch
between two colors. So x is four black,
that means invisible. So you can see now I'm
erasing this video. And you can even
select this layer and change the color
at any point of time. So you can see
pretty handy stuff. Let's set this to black again. Select the mask again, and let's remove all of this. Now I want to completely remove the fill layer
from over this area. So go back to this tool because this tool
makes it easier. While we are in the Nashville. Currently the color
is set to white. So if you click over here, you will see we are filling
the objects with white color. That's why this field
lead is becoming visible. You can now even notice that the mask has white
patches over here. This is basically the UV map
that is being filled with white color over the areas
that we have used this tool. So let's undo this and press
X to switch to black color. As you can see, now
if I select this, we will be removing the
fill layer from over here. Alright? So all of
that out of the way, I will be selecting this tool
instead of the mesh tool, I will be using
the polygon tool. And you can see, if
I click over here. First, we need to press X to
come back to the white color because we want the
layer to be visible now. So if I click over here, you can see I'm filling
it with black color. Make sure to only click
over the switches. And you can see it was
pretty easy to do. Let's do the same
thing for all of them. Alright, so I think
it is done now. We can bring back the mean. And yeah, I think that
looks pretty good. Alright, next, one more thing
that I want to mention is, as you can see over
here on our building, one underscore main texture, say on this bottom part of
our building over here, I want to add the black colored concrete material
that is over here. Over here also on this part. But if you just open
up this Walls folder, select this concrete black. Select this concrete
clean black layer. That is basically this one. If you enable and disable
it, you can see over here, I want to add it over here also on these faces
towards the bottom. But if I click on
the Geometric Mask and tried to select this, you will see the complete
object is selected. So now obviously we cannot do it using this
directory mask wage. So again, we have to use
black masks for this. So what I will be doing
is just right-click and hit included so that it
includes all of them. And add a black mask to this. As soon as I do that
everything will disappear. For this one over here, over this top
piece, I don't need to select each and
we faced one by one. I can just go in here, select Nashville and
select it all at once. But for this bottom piece, what we need to do is
we need to again select polygon field and just
drag select like this. And over here also just
drag select like this. And this back face also.
And yeah, we're done. Make sure you just
don't drag select like this and accidentally
select all these spaces. So yeah, just like
that. Pretty simple. This is another way of like
separating different layers. All right, so the last
thing that we need to do is basically add color
to our doors. So let's create another folder, rename this two doors. Now let's add a
fill layer to this. So add a fill layer,
rename this to base. We only need to set the
color for this again, I've selected on a color. If you remember, we can quickly open up
your Ref right now. Right-click load
and load our scene. We'll be creating doors or
somewhere, this color only. But you can see over here there are four
different colors, but we were just going for same color only
for all of them. So you have some
kind of orangeish color for the hue value, set it to 0.068. Saturation would be 0.6 and
the value would be 0.667. And now, again, click over
here on the geometric mask. We can easily use
the geometric mass. Now, obviously you can also use the black
mask if you want to. It's totally up to you, but using the geometric mask
is like a little bit easier. So hit right-click exclude all, and select these four. I think a building
looks pretty good. Now, if we want, we can add a little bit of
effects to this door material because maybe it is
kind of flat right now. Let's add some
roughness variation. So add a new layer. This time I will be only using the roughness channel
because if you see, if I disabled the scale, everything is pretty flat. We don't have any kind of roughness variation like
this glass layer over here. So we will be adding some
roughness variation. So two adjectives, we basically only need the roughness
challenge and not all of these. So hold Alt and click over this roughness
channel like this. And you can see all of them
are automatically disabled. So now I can control the
roughness of the complete layer. But we don't really want to control the complete roughness. We just want to add a
little bit of variation. Set this to 0.1. For now, just add a black mask again. Rename this to
roughness variation. And this time let's
use a fill layer. Instead of using a
smart mass directly. Go over here and
add a fill layer. And let's see. Into texture section and
searched for grunge. And we can use any one of these grunge maps that you like. I'm searching for a good one. Maybe this drag and drop
it over here like this. And you can see as
soon as you do that, we have a bit of
roughness variation. Over here. You can increase or decrease
the balance to control it. What you can do is you can
also increase or decrease the tiling and
control it even more. Let's say three. I think it looks fine, but maybe the roughness
value is too much. So let's set it around 30.35 v. So that
is not that harsh. Or maybe let's just go for some other layer or
another failure. Let's see. Let's try this one
drag-and-drop vertebral here. I think this one is much better. So this one feels
nice. If you want. We can also add a bit of
color variation to this. So let's add a new fill layer, or maybe let's just
duplicate the base layer. So select this press
control C control V. Rename this to
color variation. Just make the color a
little bit more darker or a little bit more lighter, or whatever you might like. Let's make it a
little bit darker. Add a black mask again
and add a failure. Again. Use about the layer. Let's use this one, grungy
map 007, drag-and-drop it. And as soon as you do that, we have a bit of
color variation, increase the balance,
something like that, but obviously this is too much. So just go over here and
decrease the opacity to 15. Maybe. This way it is like
really subtle. Maybe increase it to 25 is
a pretty subtle effect. But you can use it in your projects to add a
bit more value to it. You can even make it lighter. Or I think earlier one was fine. Alright guys, so I think we
are done with a building. Maybe let's just hit Save. Let's see what more we
can do it. Oh yeah. We can also add a little bit of damage to our main
volts over here. As you can see,
there's do dark now, I think that would
be the last step. Select the building one
underscored main texture set. And if you select
this concretely, and you can also change the
lighting of your model. Just hold Shift and
use your right-click. And like this, you can view your model in
different lightings. Alright? You can see we also have a damage
parameter over here. But if you increase
it right now, you will not see
desired results at all. You can see this looks very, very bad because we have titled the texture
too many times. So what we can do basically is we can duplicate this layer to select
the concretely layer. Duplicate this. Let's rename
this blue damaged concrete. And first set the prediction
back to UV projection. And let's set the tiling back
to one for now, insert 25. Now increase the damage to
very little amounts like 0.04. We have a little bit of damage, set the scratches to zero. Now this increase
the tiling little by little to see what
would look best. Alright, so something
like that maybe. But again, this is not the
desert, desert obviously. But I will be doing now is
I will be using a mask, a smart mask to mask this
damaged concrete layer. So add a black mask to this. Let's come over to the
smart math section. And let's search for
some kind of edges, smart mask or anything does smart mass,
Let's try this one. I just scratches, drag
and drop it over here. And as soon as you do that, I don't think I see any
changes right away. You can turn it on and off
and see for ourselves. So if you notice over
here, along the edges, we have added some damage, but it is not that visible. First, let's set this to focus so that we can
see it properly. I will minimize pure ref. And you can see we have
added a little bit of damage along the edges, but to increase it
effects even more. You can see over here
also it is added, I think it is getting added in a pretty organic
way and it looks nice over here also like this. So what we can do is basically select this Metal
Edge we're generator. And let's increase
the year level even more so that it is
even more visible. Now that I've
increased it to 0.9, you can notice the damage
is pretty prominent. I think I do not want that. I will set it to 0.85 maybe. And also another thing that
I want to do is I will just set the opacity to ten. Maybe. You will notice when I increase or decrease
the opacity from over here, these damages are not really
getting adapt much effected. The reason for this is currently we are in the base
color channel. If I reduce the opacity
of this to zero, the base color information
has completely disappeared, but the height information of this damaged layer
is still there. So let's say, I said
this to back 200. So now all the color
information is bad. But let's say you want to reduce the amount of this
height information. So you need to go
into the channel. And now if we decrease
this opacity, you will see the height
channel is being affected. I think you should know
about these things. So I want to reduce the
color channel information, go back to base color and
set this to maybe ten. So now. So yeah, now you can see the base color
information has reduced a lot and we have
damages over here. You can see they look pretty organic and I think
they look nice. Let's come back over here. And if you want, you can also increase the damage
from over here. If you do that, you will see
the damage is like really, really a lot and it does
not look that real even. Let's just undo this. Maybe we can
increase it to 0.05. And yeah, I think that looks pretty good
and pretty organic. And I think this is it for the texturing of
this building one. I'll just select
the concrete clean and make its color a
little bit darker. And that will be the
last thing to do. We can even make it a
little bit yellowish. Something like that,
in my opinion, go back to texture set
settings and set this back to two k because it has made my substance a
little bit choppy. So yeah, I think
guys, this is it for the extra mile
of building one. Let's just hit Save. And I will see you
in the next video. Thank you for watching.
15. Texturing the Variation: Hello and welcome everyone. So now we're done with the
texturing of our building one. So let's just quickly
open a blender again. We have these remaining
buildings over here. So let's enable them back. So now we all know that
these two buildings, the building one
and building three, are basically the same models, but we plan to create different texture
variations for them. So instead of texturing
this building to, first, I will be texturing
this building three, because 1.3 basically,
as I said earlier, are the same model and
we just need to change some colors to create
texture variation out of it. So it won't take much time. Now because both
of these models, building one and building
three are basically the same, we do not really need to UV unwrap this one once again,
this building three. And we do not need to
do all those steps like exporting and
banking the HashMaps. What we can do is we can open up Substance Painter
this project only. And we can basically create
a duplicate of this project and we will create a texture
variation in that duplicate. So to do that is go over
here to File, Save As. And over here, let's save it
as drilling building too. Let's save it as building three because we already have
a building to overhear. Save it as building
three and hit Save. And you can see now the
project is building three. And we can create a
different texture over here. And we've not really need to
use this model overheads. So right now, this model is
basically of no use to us. So we can just disable
this or if you want, you can even delete it because
we won't be even using it. We will be just
exporting this one only. And we will just create two different materials
in Unreal Engine and we will have two
different texture variations. So yeah, let's open
up a substance again. And what we need to do is we do not really
need to change much. We only need to change
some colors up. If it will quickly
open up pure ref. Search for pure ref, open it up. Right-click load and load
this reference image. And as you remember, we have this thing over here. So this reference image over here is kind of similar
to this picture. So now we will create
something like this. Basically, what you need to do is select a
building when mean. And you can see
that all the stairs and everything out
of a dark red color. So I will be giving that
to all of these pieces like the top piece and even
the stairs and railings. So select your concrete clean
black, the color for it. And I've already
decided on a red color, but you can experiment with it. For the hue value, I will set it to 0.023. So if you want, you
can copy me or you can choose any
color of your own. Saturation would be 0.44 and
the value would be 0.35. Something like that. Next,
open this metal folded up, select the black metal. Again, select the color and
putting the same values. So 0.02, 30.4, 4.0, 0.35. You can see our metal material is kind of looking
weird a little bit because of this Edges
layer that we add it. So what you can do
is basically just go over to the opacity and
set the opacity to 50. So that the effect is a
little bit toned down. So this way it does
not look that bad. It looks alright. Next, select the building, doors, windows texture set. And also one more
thing that I will do is you can rename the
texture sets over here. So just double-click over here and set this to building three. And this one also
set this to three. So that we do not
have same names for the textures when we are
exporting them to Unreal Engine. Select the doors
windows texture set, open this Doors folder up. And again for the base color, set this to 0.02,
30.4, 4.0, 0.35. You can turn off color
variation for this one. Yeah, I think I will just turn off color
variation for this. And the last thing
that we need to do is, or what you can do is enable color variation and set the
same color for it first. So 0.02, 30.4, 4.0, 0.35. Now just make it a
little bit more darker so that you have your
design with lesion. So first just said the same
color and then you can make it a little bit darker so that we have a little
bit of variation. But if you want, you
can even delete that. And the last thing that we
will be doing is you can see that the concrete
is kind of yellowish. Just go back to building three
main and for the vaults, open up this concrete clean. And for the yellow color also, I have already decided on it, but you can experiment
with it a little bit. So the hue value would be
0.155, saturation 0.078. And the value is 0.776. Alright, so rest everything is pretty much alright. I think. We can also change the color of these
electrical meters over here because it is kind
of looking the same as the concrete
wall in the back. So select this texture side, open the plastic glossy folder. Select the plastic,
the plastic layer, and for the color, this circuit to grayish color, I think that would work
pretty well with this. This also looks pretty good. And now I think we're
pretty much done with the extra variation of
our building three. So now these two are
the same models, but we will be using two different textures
for both of them. It will add a little
bit of variation in environment so that
these two buildings is not really look same. Alright, so just hit Save. And I think this is
it for this lecture. And in the next
video, we will start UV unwrapping this building. And we'll start with the
texturing of this one. And finally, we will
show that building. And then we will
export everything into Unreal Engine
and see how it looks. So thank you guys for watching. I'll see you the next one.
16. Texturing the Second Building: Hello and welcome everyone. In this lecture, we
will be starting with the texturing
of our building too. So let's just turn
all the collections off except the building
to collection. The first step to do is we will be adding the materials to it. So like the earlier building, this building is a
pretty small assets, so I will be just adding
a single material to it. So let's just select
any one of the objects. So select this
one, this big one, create a new material. And let's rename this
to building two. Now if we remember, if we need to copy this material
to rest of the objects. So you select the object
with the material currently, press a to select everything, and then press control plus L and then link the materials. Alright, so now you can see
the ten written overhead. That means this material is being used by ten
different objects, as I mentioned earlier. Alright, so now
the UV unwrap it. Let's head over to
the UV Editing tab. And the first step to
do is if you remember, we first need to apply the
scale of all the objects. Press a to select everything, control a and apply the scale. Alright, Now basically just hit Tab to go into the Edit mode, press a to select everything. Rescue, and then
basically just heard smart UV project it. Okay. We can maybe increase the eyelid margin a little
bit to maybe 0.030, 0.00, 40.003 is fine. They are not much empty spaces and we can definitely
work with this. Let's come back to Layout. And if you remember, I mentioned before exporting, we need to check the
face orientations. So go over here and
nibbled face orientation. And you can see we
have one red object. That means the normals of
this object are flipped. So if you remember, what we need to do is press Tab, press a to select everything
and press Shift plus n. And that will basically flip normals
and we're good to go. So now all the
normals are correct. Everything is colored
in dark blue. That means all of the
normals are fine. We can go over here and
disabled vasodilatation. There's a to select
everything and now it is time to
export this model. So go over to File
Export and select f vx, limit to selected
objects and make sure to select mesh
from over here. Let's come back. And in the exports folder, I will be saving this one as leading to and now hit Export. All right, so now we can
open up Substance Painter. Alright, so substance
painter has opened up before starting. One thing that I
want to change this, I just now noticed that
the earlier export, we did not really change the name if we just
quickly open it up in the 3D view
for this building, There's just rename
this to building one. That everything stays a
little bit more organized. Just making this change. Let's come back to this print
and now go over to file. Let's create a new project. And the steps remain the same. Go over to File,
select and select the weeks while
we just exported. So building to double-click
on it and rest, everything remains
pretty much default. It okay. And just quickly look through your model for any
kind of issues. So I don't think there are any. I will first enable them Berlin decreasing
from the display settings. Next, head over to the
texture sets settings. Select big mesh maps. Output size would be for k, and I will just do the same
things that I did earlier. Enable these two options and set the anti-aliasing
to four-by-four. Now they selected textures. Let's quickly wait
for it to finish. I will resume the
video when it is done. Alright guys, so the biggest
finished now hit Okay, and quickly look
through your model for any kind of big issues. So this BIG came out pretty clean and I don't
think there are any. So let's start with
detection process now. Before that, I will just
quickly save my project. So hit Control S. And in
Substance Painter files, Let's save this as
building to save. Now we can start with
the texturing process. Now, you will notice
some of the materials we basically have to reuse that we earlier created
for our building. One, like the glass
material over here and a metal material and
even the concrete material. So instead of like doing all those things
over and over again, but I will be doing is, I will be creating
smart materials out of those layers that we created
earlier in the building one. And then I will be using
it in this project. So before starting the
texturing of building, to quickly open up the building, one project of yours. You can hit Save it
for it to open up. Alright? So now select the building
one underscore main. We have this Walls folder. So now we can basically create a smart material out of it. So to do that, just
hit right-click. Go over to where does it go over here,
create smart material. And as soon as you do
that, you will see in your shelf it has
popped up over here. Nitrogen is right-click on this and rename this from vaults two. Let's rename it to something
like Kohl's underscore concrete so that we know that this material
is related to our course. And it couldn't be easier
for us to find it. You can just type in course. We have our course
concrete over here. Alright. Similarly
for the metal, this right-click and
create smart material. And rename this to go
to underscore metal. Alright, open up the doors
and windows and let's see, I think we needed
one more thing. The glass material,
again selected, right-click and create
smart material. Over here, right-click
and rename this to course underscore glass. Basically, this is
what we needed to do. We can again open back on building to
sustain the project. Now, it will be really easy for us. Protection
is building. Let's remove this
filter from over here. I've searched for course. We have a couple of more
materials overhead. That is this course underscore, rubber and course underscore. So these are the materials I created for some other costs. So don't get confused by them. We basically have to use
these three over here. So first, drag-and-drop the
course underscore concrete. Now we just need to edit
this material a little bit. So delete this layer first,
open up this folder. Now, first we can disable this
concretely in black layer. We do not really need it. Everything is pretty much fine. The damage one is working nicely and this
layer is also fine. We can maybe increase the
tiling I'm in-degrees that Eileen to 20. That's better. Now, just select this
thing over here. The geometric guy can
right-click and hit Exclude all. And now just select
this main piece. Alright, Next I will
drag and drop the class. Again, hit right-click
and exclude all over. So there's one issue over here because using the geometry
mask is complete, object is being selected. So all these boundaries
also getting selected. So we don't really want that. So just undo this quickly. Right-click and hit include all. Now, instead of using
the geometric mask, we will be using the black mask to add a black mass to this. Again, select this tool polygon and make sure to
select this mole. So that is the polygon fill
mode, not the Nashville mode, because Nashville
board is basically the same as divinatory
mask as you can see. Just undo this and
now select this one. Polygon fill and just
select these faces. You can see how easy it was. One thing that I
forgot to mention is these two different modes. We also have this one. So this is the triangle field. So this will divide all
your faces, introduce half. So if it's click over here, you can see it will fill in two different halves,
like two triangles. So yeah, I don't really
use this mode ever. And the last one is
the urethral mode. So basically what this will
do is it will press F1. You can see all these
small UE eyelids. So anytime you
click on any model, it will feel according
to the UV islands. So you can see over here, these all are
separate UV islands that why they're
filling up separately. But if they were together like all these pieces over here, let's say I selected. You can see this whole
side is selected all at once because they are
part of the same UV island. This does not always
work properly. So I mainly use these
two words only. Rarely ever use a
triangle field or the UE junk food to select
the polygon filled. Quickly select all these phases. Press F2 to come
back to the 3D mode and dusted also working fine. I think we can also add the desktop
version layer if you want. So now just add a fill
layer on top of all this, rename this to dust. Let's set the color
to a dark color. Add a black mask. Now come into smart
mass section and search for desktop collusion strategy and drop it over here like this. And you can see that it's added all along these
gardeners and crevices. But I think keeping
it this way is fine. We do not really need to
increase or decrease that much. Alright, so the
last thing to do is drag and drop that
iron material. Come back to the smart
materials section. Drag and drop this iron. Let's move it below
the desk layer. Right-click and hit extrude all. And just select these pieces. We can move it below
the glass layer. So again, we kind of
have a little bit issue. We cannot really
use the geometric mask because you do not want the iron material to appear over here on a glass material. So we cannot really
use geometric masks. We have to use black mass gain. So hit right-click and include all and add a black
mask to this. Now again, select
the polygon field. And now we have a little
bit of issue with us. We cannot really go ahead and deselect each and every
phase one by one like this. What we can do is
basically go to this mode. That is, the mesh
will select this all at once, like this. But then you will say
the iron material is appearing over here also
on our glass layer. So there is a very
simple way to fix this. What we can do is
we can quickly go back to the polygon fill mode, press X to set that
to the black color. And just select this face to
de-select it from over here. So you can see how
easily we work this out. We didn't really have to
select each and every face. And we can just deselect
this one huge face. And that way we can easily
add the iron material. Let's come back to the mesh, will select this piece also. Okay, first press
X to come back to the white color and
now select the, select this, this, this, select all of them quickly. Again, you will notice the iron material is
appearing over a glass layer. Select this polygon filled
press X or the black color, and now be selected from all the layers are
pretty simple. All right, let's
see what we can use for these things over here. So I will open up my pure ref just to see
how they used to look. Also one more thing.
I want to add the iron material over here also to click over here again. And on these pieces also I
will add the iron material. Select the mesh, will select
this thing, this thing. Press X first to switch
back to white color. I always forget this. And yeah, that
looks pretty nice. Alright, so hit right-click
load alone recent. I think it kind of has the same material as
the concrete only we don't really have to detail it that much because it
won't even be visible. And we will have these
lettering added later on stage. Don't worry, we'll add that. So what we can do is we can select the concrete layer only, look over here and select it. Next, what we can do is open
up the concrete folder, select the concrete green
layer and duplicate this. And we can have a little bit of bluish color for this layer. Like over here we
have select this. Let's see. We can also use a dropper tool and directly selected
from over here. So yeah, that looks pretty good. You can select a dropper from over here and select the color. Now, just again add
a black mask to this and select
the polygon fill. And just select these faces. And yeah, that worked
out perfectly. Alright, So it was that simple, we easily textured art building to using the smart materials. So it is a pretty
handy technique to reuse all the materials that
you've already created. So we don't have
to again and again create the same
materials are left. So let's just say Save now. We're basically done with
the texturing of a building to tenuous watching. I'll
see you in the next one.
17. Texturing the Store Building: Alright, so we are
back in then and now, and we are done with the
texturing of a building too. So we can again disable this. And building three is also done. So let's do for the
final building, that is the building for. So again, select this and come over here to
the materials tab. Select any of the object
and create a new material, and rename this to reading
for pretty similar stuff. If you want, you can try
doing it on your own. And now I want to apply the material to all of
the remaining objects. So just press a to select
everything and press Control L and make
sure this object is only selected that we just
applied the material to press Control L and
link the materials. And yet all of them now have the same material as
you can see over here. So let's head over to
the UV Editing tab. Now. Let's start first and
press a to select everything. And first press Control
a and apply the scale. Then we can press Tab, press a to select
everything and press U and hit smart you predict. And it Okay. For this one, the
default is pretty good. I don't even think we need
to add the island margin. Margin is finite, zero and rest. Everything is pretty
much good to go. We need to just check what's the face orientation
before proceeding. So enabled face orientation. Here we have a couple
of issues here. So let's quickly fix them. Select this thing, press Tab, press a button, press Shift. And if if it does
not correct itself, just HIT inside and it will, sometimes it won't
connect the normals automatically after
pressing shift and you just need to enable
the inside checkbox. Again, select this
press Tab English shifted for this one also, again, shift plus n,
Then hit insight. Now I can just select
all of them and now export them to
Substance Painter, disabled face orientation,
press a to select everything. Save first and go over
to File Export and Vx in the exports folder. Let's rename this to building for enable selected objects
and mesh and hit Export. Alright, so the
export is done now so we can quickly open
up Substance Painter. And now we will be creating
another new project and basically using
the same materials, but we will add a
little bit more detail to this particular building. Alright, so go over to File New and just select the
file that we just exported. So this building for it, okay. We can press F2 to
come back to 3D view. And as you all know, the first step is to always bake the mesh maps and
also enabled in DC. Come over to the
dishes at Settings, go to bake mesh maps, make the same changes and
just quickly hit bake. Let's wait for the
bank to finish. Alright, so the biggest
done now hit Okay, and just quickly go
through your model. But initiating issues, I
don't think we have any. So we can again quickly start
with the texturing process, come back to the layers. And now in the smart
materials section, search for our course materials. And I will drag and drop the
concrete material first. Select this layer one,
just delete this. Let's open up this folder. And we don't need the
black concrete materials, so we can select this
layer and delete this one. Select this right-click
and hit Exclude all, and just select this main part. You should, I think definitely decreased the tiling
a little bit. I think 15 is pretty
good for this building. Next, let's see, we can
add the class material. Instead of using
the geometry mask. Or I think we can use the
geometry bossed with this one because we added separate
planes, I think. Sake this right-click
and exclude all. And yeah. I was right. We aren't separate
lanes for this. So that's where you can
directly select them. So that's pretty handy for us. Or drag-and-drop the island. Right-click exclude all
and just select this, this not these pieces, just these. This one over here. This one is two. I think for this also, I will use the iron
material only. Next, we can just
quickly texture this electric box over here. So search for plastic. And we use this
plastic glossy scarf to drag and drop it over here. Exclude all and you
select this. Again. Select the iron one and
select these two pieces. Open up your plastic
glossy scoffed and just change the color. Something grayish, I think. Maybe even yellowish
would work fine. Yeah, something like that. I'm for the wires, we can use this latex
black material. Right-click, exclude all,
and select these two wires. We should definitely make the
color a little bit lighter. Increase the roughness and little bit. That's pretty good. Let's add a little bit of
dust as we read earlier. So add a fill layer. Rename this to dust. And let's go over to the smart math section and drag and drop this
just occlusion smart mask over here. I think it is very dirty, so we definitely need to
tone down it a little bit, so decrease the grunge amount. And yeah, that's better. I think that the grunge amount to zero. Maybe we can visit to 0.1. That's fine, I guess. Alright, so now
we will be adding a little bit more detail to
this particular building. We will be like, as you can see over here,
we have this board, so we can add like posters stickers over here to make it feel like
a convenience store. Maybe. If we will go over in
your resources folder, open them up and you will
find this Textures folder. So here I've prepared a lot of different
textures and Alphas, but we will be using further intercourse
to detail some of our props and even
details some of our buildings like
this, no smoking. I can, and like this
sticker over here, we can use it for making
it as our sign boards. We will be using them
in Substance Painter. So let's select all of them.
We can select them all. So just select all
these poster images. So all these leaves the alpha ones out and
some of these view labels, we will be using them later on. So just select all of
these posters and stickers and drag and drop them onto
Substance Painter like this. So this is how easy it is to export something into
Substance Painter. And you can now drag select
like this, all of them, because what we need to do is currently it is
set to undefined. So we need to set it to texture. So you can either
press control a, select them all and
just select Texture. All of them would be
selected as textures. Or one more thing, you can
just drag select like this. Alright? So the next thing is import your resources to
pre-select current session. So these resources are, these images would only be important to our
current session. That means if you close
your substance painter, you won't find them in
your shelf over here. If you select project, then these images will be exported into this
certain project only. And if you create some new
project in your future, you won't find these
particular images. If we weren't these images permanently in your
shelf forever, then you need to select
Import to library. That way it will
stay there forever. But right now I will just
select project and hit Import. As soon as you do that, you
will find them over here. So the way you can find
all these assets is, let's say we have
normal shelf over here. And if you don't find this menu, you can open this
up from over here. So what you basically need
to do is open this thing up from over here for you to buy part and just go
over to project. And as soon as you
select project, you come over here in
the texture section, you will find all your
important assets. And these are all our mesh maps, so yeah, don't worry about them. These are important assets. Let's see now how we
can use it first, what I will do is select
this latex black. I can add a fill layer. And what I will do is
select this tickle to drag and drop it
into the base color. You can see it as somehow
appeared over our model. But this is definitely
not the way we want it. But don't worry, we
will be fixing this. First. Let's rename this to let's rename this to
post a sign board maybe. Now, as you know, we only want distinct
to appear over here. So what I will be doing is
I will add a black mass to this and select this tool. Select the polygon fill and just select this huge base like this, so that this layer only
appears over this area. Now we just need to set it up. So to set it up
properly, just press F1, bring this up and
you can see you can move it very easily. When you are moving
it, you will see it is changing over this face. So just place it
over here like this. And now what you need to do
is you scale it down while holding shift, I think. Yeah. While holding Shift. Scale it down. Like this. Sorry. You can hold Shift
and control both at the same time to
scale it like this, the scaling here like this. And you can see we also
need to rotate it. So hold Shift to snap it and rotate it like this
in 90 degrees. Again, hold Shift and
scale it up like this. Then hold Control and you
can scale it up this way. Our sign board is
pretty much fit. I think this is
upside down or no. Don't really know. If
it should be this way. Yeah, I think it
should be this way. Basically, this really is try to fit it properly
in your face. I think this sign board
looks pretty cool. If you want, you can
use some other one also like this one over
here that we have. I don't really know what
the sign boards say. Just like pick them up from Google images are
some of the backs. So yeah, you can use them. Just hit Control plus S first. Save this as building for. Alright, Next we have some
of these posters that we can paint on the doors
to advertise something. So press F1, F2 to come
back to the 3D mode. And now I will be creating a new paint layer this time
instead of adding a failure. Because if we add a fill layer, then I can just place
one of them at a time. I cannot like paint all of
them on the same layer, so I want to paint them
all on the same layer. So instead of using
the fill layer, I will use a paint layer. Now I will show you how we can paint these
assets like this. First, we need to select
this prediction tool. And as soon as you
do that, you will see this thing up
here over here, this white colored box. And now if you
select your poster will drag and drop it
into the base color. It will see it has appeared
over your screen like this. And if you print it, you will see how it is
appearing over your model. But you don't want to paint
it this way obviously. First I will disable
all of them except the color channel
because I only want to be in the color channel
and nothing else. Next, let's see what
we can do first, I will rename this to boosters. Alright, so now to
manipulate the size, rotation and all
those things of it, press S. Remember, S is
the shortcut key for this S. And you will
see it has activated. And while holding S, you will see all the
shortcuts related to it. So if you use your right-click, you can zoom in and zoom out. It's very simple. If you use your
middle mouse button, you can pan it across
the screen like this. If you use your
left mouse button, you can rotate it this way. You can also hold Shift
while rotating to snap it into 90 degree
angles so that you don't accidentally place
it in something like that in this kind
of weird angles. So plus S, then left-click and press Shift
to rotate it properly. Let say if you are a little
bit lost in your transforms, you can just press S and
hit this reset button. And it will reset itself. So yeah, pretty handy stuff. Now press S, use your
right-click to scale it down. Let's place it
somewhere around here. Let's place it
somewhere over here. I think. I'm just placing them randomly and not giving it much thought. Also, you can come over here and change from perspective
view to orthographic view. That way it will be
easier for us to paint because there is
like no distortion. So press S, scale it up. I think this image is pretty good and you can
paint it very easily. Alright, Now this one is done. And now on the same layer only, I will just drag and drop
different one over here. And now I can paint
these different ones. So you can see how
handy obtained layer is different from a failure. So if I just come
back to my brush tool and you can see both of them
are on the same layer only. It is a little bit
easier for us. So again, select the
prediction tool. Let's select something else. Maybe I can select this
thing to paint it like this. You can do it however
you may like. You can even find some
different posters on Google and do it
according to you, is totally up to you. We can also drag and drop
this no smoking sticker. And instead of painting
it on the front building, I can paint it over
here on the right side. Also one shortcut that I
forgot to mention is while holding Alt and
Shift Y holding Alt, you can move your
model like this. But if you hold Shift together, you can snap it in
90 degree angles, so it is pretty easy for us. So yeah, let's hold
Alt and shift. Use your left-click
to snap it like this. Zoom in and just press S. Then right-click,
scale it down. And then this over here. Next, let's use this poster. We don't necessarily
have to use all of them. Use a couple. And I think this
image is pretty good. Alright guys, so I
think this one is fine. Now, I'm feeling like
these posters are a little bit too bright according to
the rest of the building. So easier way to
fix their colors is just select the posters, go over here and add a filter. Select this and search for
HSL perceptive filter. Now you will notice you can
easily manipulate the hue. You can see, you can
change the colors however you may like. So we don't really want to
play too much with the hue. We just want to increase or decrease the
saturation and lightness. So what I will be
doing is basically I will decrease the
lightness to 0.45. And you can see
instantly they went a little bit darker.
As you can see. That fits much better
with a building. I think 0.43. Yeah,
that's much better. We can even decrease a little bit of
saturation, not too much. Work for it fight. And yeah, I think
that is pretty good. Let's hit Control S to
save our buildings. And yeah, I think this
is it for a building for you can even
detail it further. Spend some more time with this and experiment a
little bit more. Yeah, thank you
guys for watching. I'll see you in the next one.
18. Setting up in Unreal Engine : Alright guys, so now
we are done with the texturing of all four
of our main buildings. So let's just disable them for now and we're left
with the ground. So what I will be doing
for the ground plane is basically I will be texturing this in
Unreal Engine Ali, and I will not be exporting
this to Substance Painter. So yeah, I will
just set all of it. And first press Control
a, apply the scale. Also, let's add a material
to this and rename this to ground risk control L
and link the materials. Alright, exquisitely
head over to the UV Editing tab a
to select everything. Okay, First, we need
to apply the scale. Superseded select everything and just smart UV project this. That's fine, I guess. Alright, let's come
back over here. And now basically, I will be exporting all our models
into Unreal Engine first. First, let's create a new
project in Unreal Engine. So click over here and open up Unreal Engine to
create a new project. Just click over
here on the games I can and select blank
from over here. Over here, you can keep
all the settings default. If you have a ray tracing guard, you can enable this
from over here. But I won't be
using ray tracing, even though I haven't read RTX enabled card, I
won't be using this. You will be using
the new features such as human and NAMI. Let's keep this disabled. And let's name this project
as Japanese street. And just hit Create. Alright, so Unreal
Engine has opened up. Can dismiss this. Okay, One thing that we
forgot to do is quickly disable all of this and select
all of the ground objects. So just press a. Let's quickly go
over to File Export and we need to export this also. Just rename this to Brown. And basically we
will be importing all these files
into Unreal Engine. So yeah, just import your
ground from a lender. So hit Export and come
back to Unreal Engine. And now what we will be doing is right-click over here and
let's create a new level. Keep this as new world. Only, double-click
to open it up. It's Save. As soon as you open it, you will see everything dark because we don't
have any lights. Let's quickly add some lights and set up our atmosphere
in this video. Over here. Wait, we need to go
over here in the window and enable display sectors so that we have this place
after window over here. Now search for force
directional light, drag and drop it over here. Next we need to bring
on Sky atmosphere. Select your directional
light and search for sun over here and make sure this atmospheric
sunlight is enabled, then only this will
work properly. So if it is not on by default, just make sure this is on. And siliceous guy atmosphere. Move this and everything
over here is fine. Next, what we need
to add is we need to add the exponential
hide fall. This is basically a little
bit of fog and mist. We can adjust it on our own. We can increase or
decrease the density of the fault, but for now, I will just keep it at default. Next, let's see. We need to add the skylight. Just drag and drop the skylight and make sure real-time
capture is enabled. Makes sure to enable this. And the last thing
that I will be adding is a volumetric Cloud. So basically that will
add clouds to our scene. So yeah, that looks pretty nice. Save our project and let's hit right-click and
create a new folder. Because now we're going
to import our models. So let's name this as models. We can easily solve models. Open it up. Let's create another new folder and
rename this to building one. So let's import our
building one in this double-click
to open it up in, add it over here. Now, head over to your
folder wherever you have created this exports folder
and select the building one. All of these settings are, I think pretty much default, just hit Import All and
wait for it to finish. In close this up and just check. You can see all of them
have been imported. You can also see our materials are also important over here. So we can just add
the texture to them. Let's come back over here next. Create a new folder. Let's rename this to building to building to first, cancel this, make sure to open up
your building to folder. Now hit right-click
and now import this. Select building two
and hit import all. Let's close this up and I will create a folder
for building three. But as you know, we're just importing the
textures for the building. But we will be importing the building three
again, but not now. So just keep this
folder empty for now. And let's add the
building for first. We will handle this
building free later on. Now again, add, import
and select building for. And the last one to
bring in is the crown. This way everything stays
organized because we will be adding later on props
and things like that. So yeah, it is good to
keep everything organized, it in bold all alright, so now we can start
bringing them in RC. Select all of them
except the material. Drag-and-drop them
over here like this. And make sure to just set the location before like
clicking anywhere else. Just make sure to
set this to zero. Comma zero, comma zero. I think it is district. Shadows are kind of
messed up right now. Don't worry, we will fix
all of those things. Next, let's bring in
our building one, select all of the
materials I'm in, select all of the models, and just drag and drop it. Like this. Wait for it to
load. Can take a little bit. Why? Alright, again,
set this to zero, comma zero, comma zero. And make sure before you
click anywhere else, just press Control plus G to
group them together nicely. Whenever you select this, you can select it all at once, so it is easier for us. And I think I messed up a little bit while
exporting the ground. Because if we come
back to Blender, go over here and check
the face orientation, we forgot to check this and
these all models are wrong. So let's quickly
select this press Tab. It'll select everything
that shift plus n naught where it can
be fixed pretty easily. So disabled face orientation and we need to
export this again. Because if you will notice
in your Unreal Engine, the ground overhead is
looking very weird. That is because of
incorrect normals. To select it all,
go to File export, FBX, select the ground
again and just hit Export. Go back to Unreal Engine. Select all four of them and
just quickly delete them. Come over here in the ground. I will delete all of them
to select them all and press Delete and
force delete them. And we will just
import them again. In bold all. Alright, select them and again dragged and
dropped them like this. Now they're imported
correctly and now the shadows are
also working fine. Set this to zero comma
zero, comma zero. Next, let's bring in
the building to again, set this to zero
comma, zero comma. We showed the best
control G, join them. And next is operating for again set the zero comma zero comma zero
is controlled with g. And for now we can just select our building one
press Control C, Control V, and just duplicate this and place one
over here like this, just so we can view it. You are seeing how
everything is looking. Place it somewhere around here. Alright, so the next step, in my opinion is the camera. So go over here and
search for camera. Drag and drop it like this. Alright, so make sure you fix your view like this properly, or however you may like it. Plays it however you like, and select your camera, right-click and select
Snap object to view. And now you can right-click
on your camera and hit pilot. And now we are viewing
to our camera. So go over to lengths
and set the length. Well women, and you
can see it is exactly how we viewed in our scene and now you
can move your camera. I forgot to mention
how we can move in substance painter is
basically holding your right-click and then
move your WASD keys, like you will move in
a video game where you right-click and move just like that. I will
just pretty simple. Something like this. Alright, so for now I
think this is fine. It is pretty
experimental anyways, so we can change it
whenever we want. It a little bit
downwards like this. Control plus S to save our Unreal Engine projects
and make sure to go over to file and hit Save, save
everything properly. Alright, Next, what
you can also do is you can change the placement
of a lighting. So click on your scene, press Control L and keep holding it. So hold control and L and you can move
your lighting using your mouse like
this very easily. You can set different
times of the day. You can set it at evening
or at right morning. Night is basically
not that useful. So that's something
according to us. We can maybe set it
like this for now. This looks quite nice. We can always change it
later on, don't worry. Again, see we can create lots
of different variations. So for now I think that
is pretty much okay. They controlled plus
S to save this. And now we need to
export our textures from Substance Painter
and bring them into Unreal Engine so that we can
add our textures over here. And then we will be texturing
our ground furthermore. So before that, just
to end this lecture, I want to do one more thing. The select your each
and every material. So like this building
for material. And make sure you enable, go over here and nibbled
two-sided from over here. So basically what this
will do is if you have a 3D plane in
your model anyway, it won't cost any shadows
in Unreal Engine, but if you enable
this two-sided, it will start to cast shadows. So that isn't a nice
to have it enabled by default for all
of your materials. So he'd saved now, wait for it to compile
and disclose it. And let's quickly do this for each and every
material that we have enabled two-sided hit Save
and Close your material. Come over to Building
three, okay, so we don't have anything in
building three right now. Commode building to
and enabled two-sided. Save. Just close this one and you scroll down a little bit and you will find
your materials. So over here, it is done for all
of the materials. Now, I don't really know if that made a
difference or not, but it is nice to have
it enabled by default. Right? So I think this is it for this lecture I will continue
from here in the next one, we will be exporting our
textures and things like that. So then you guys for watching,
I'll see you the next one.
19. Exporting Textures: Hello and welcome everyone. So let's continue. If you open your
Unreal Engine project, you will see
something like this. So make sure to just
double-click and open up your level so that you
can come back over here. Now, in this lecture, we will be exporting
textures from Substance Painter and importing
them into Unreal Engine. But first I want to
address a small issue. Like if you zoom in over here in the pavement
of our ground, you will see the edges
look kind of weird. Also, if you want to slow
down the speed of a camera, you can decrease this camera
speed from over here. Set this to, to hold
you right-click and you can use WAS
due to move slowly. Now, you will notice
that the edges of your pavement
looks pretty weird. So it is not that
huge of an issue. Because if we just zoom
out like this way, they won't be even
visible that much. But sometimes you might
face this shading issue of edges in some huge model of yours in some
different projects. So I just want to show
you how you can fix this. So if you go back in Blender
and zoom in over here, you will see the weird edges
are present over here also. If we just fix them in Blender, they will be fixed
in Unreal also. Alright, so to fix them,
it is pretty simple. Just select it, go over to modifiers and add a
weighted normal modifier. As soon as you do that,
you will see that the shading of the
edges is not perfect. You can also enable
keep sharp to make them look sharp like this. That's up to you, I
guess I will just disabled keep sharp and
keep it this way only. Alright, so now
what you basically need to do is just select this, go over here and hit Apply. And one thing we must do
is we just select it all. And we need to export
this once again. So go over to File
Export and Vx. Come back over here in
the exports folder, select ground, and do all those things and
just hit Export. I will just quickly go
through this in Unreal also, I will select the ground and quickly delete it
from over here. In the models also select
all of it. Just delete this. And let's add. Once again, it is quite of a tedious process and
it can take a while, like a little bit
of back-and-forth. But yeah, this is just to make sure that
everything is perfect. Alright, so now you can see
the edges look perfect. This is how you can
fix this issue. You set this to zero, comma zero, comma zero. Alright. Now we're good to go. Let's open up substance
painter now and start with the exporting
of our textures. Alright, so for now, we can just open up this blender and just
close this for now. So hit Save and
just close Blender. Substance painter has opened up. Go over to File and let's
start with the building one. Open your project tab and it is pretty easy
to export lectures. So what you basically need
to do is either you can go over to fight and then
hit Export textures, or we have the
shortcut over here for hitting Control Shift and E. And you will see
this dialog box pop up. You don't have to worry much
about this dialogue box. We have everything over here
only in these settings. You can see we have two
different texture set. So as I said earlier, there will be two different
sets of textures. You can also enable or
disable them from over here. Like you only want to
export one texture set. But these are the
global settings, so we will just changing the global settings
for all of it. So the first thing is
the output directory. Output directory is basically where will your
textures be going. So now what I will do
is to save some time for us that we that we don't have to again and
again import and export everything from
substance painter to Unreal Engine
again and again. But I will be doing it. I didn't go over
to Unreal Engine. Come back over here,
right-click and create a new folder and rename
these two pictures. Again, create a new folder, rename this to building one. You can right-click and hit
showing the show in Explorer. So as soon as you do that, you will see this has opened
up now in your Explorer, the parts to this folder. Just double-click over here on the top of this and copy it. And now you can
basically come back to substance painter
and directly paste this part over here and hit
Enter and then select folder. So this way, these textures will directly get exported
into our Unreal Engine. You will understand how
it will go through. So open up substance
painter again. So next is the output Template. If you open this
up, you will see different types of
output templates like we can see for Blender
also is there Corona engine? Engine cycles are
all these things. If you scroll down and you will find Unreal Engine four bad. I know we had it using
an Linden fight, but Unreal Engine four
will work perfectly. So just select this one. Unreal Engine for PAD file type. We will be going with
data and in bits plus T3. The size, I think foci would
be the perfect for us. You can go a little bit lower, but to have the best quality, I think it would be
a lot of overkill and it will make our project
very huge and very laggy. So I would just be
going with foci. I think that is the best spot. And you do not need
to do anything else. After all of this is done, just hit Export and wait for the exporting
process to finish. And as soon as this is done, you can just come back to Unreal Engine and don't
recover anything. You will see this
thing over here. So six changes to source content files have
been detected. So would you like
to import them? So yes, we will just hit Import now because we want to
import all those textures. And as soon as it is done, open up building one and you will find a texture over here. So there are six textures, so three for each material. I will show you how we can plug this into our
different materials. So first, go back
to content models. Open up building one, and open up this material. Let's open up building
one underscore main. Alright, so we have our
material over here, make this full screen,
and we can delete this thing to just
select this, hit Delete. Now press Control plus
space to bring up your content browser
like this. Building one. And make sure to just bring in the textures for building
one underscore main, these three reading one
underscore main ones. So these three just select
them all by holding Shift and drag and drop
them over here like this. These are basically
different channels, like if you noticed
in Substance Painter, we had five different channels. So color, metallic, roughness,
normal, and height. So these textures are
basically these channels only. So we have first the base color. I will plug base color
into base color. The second one is normal. To select Normal and
plug it into normal. And now you must
be wondering that we have three different
channels left, like metal roughness and height, but we only have
a single texture. What type of texture is a
different type of texture. So this is a bad texture, if you remember, when we were exporting from
Substance Painter. So press control
shift and E again, we selected the output
template as bad. So what this pad texture will
do is basically it will pad three different textures into a single texture only like
in three different channels. For in the R channel, in the channel and the channel. So what this will do is it
will help us save memory. So in the archenteron is
the ambient occlusion. In the green channel
is the roughness, and in the blue channel
is the metallic. Only a single texture can get us three
different channels, bad into three different
color channels. So this will help us
save a lot of memory. So just make sure you
always remember this. R is for ambient occlusion, green is for your roughness
and Louis for metallic. Now just quickly hit Save. Wait for it to finish. Now close this and you can see the material
has appeared over here. I know it looks very weird, but don't worry, we
will be fixing it. But first, let's open up our building when
doors and windows. Select this, delete this, and let's do the same steps. So select all three of them, drag-and-drop them over here. So the first one, base
color goes into base color, normally goes into normal. I'll goes into
ambient occlusion, g goes into roughness, and Lou goes into metallic. So make sure you
do this correctly for the base color
and the normal, we will be using
the RGB channels. So all three of them. But for this bad texture, we won't be using
the RGB channel, we will be just using RG and B. So now again, hit Save. And let's come back to see how our buildings
look right now. You can see the textures
have exploited. But if you zoom in over here, they look very shiny
for no reason at all. Over here also, all of our areas look very shiny
and look very reflective. So this door is not supposed
to look that reflective, but it is still looking
that reflective. So why is that happening? Because we did not do
one single setting. I have not mentioned it yet. So again, open up building
one underscore mean. And you can view the preview of your material
over here and you can see all of it is looking
very reflective and shiny as if it does not
have any roughness. So the reason this is happening is because of this bad texture. So don't worry, we'll
just quickly fix this. Now select this path texture. And over here, double-click
on this picture icon. You will see this window pop up and overhead just disabled sRGB. So as soon as you do that, you will see an edit over here and you can
read this error. So the editor is
sampler type is color, should be linear color. So this is a very
easy error to fix. You just need to Jane
the sampler type from color to linear velo. As soon as you do that,
the error goes away. And if you view the preview, you can see now it is not
looking shiny anymore. And the material has a accurate toughness.
And just hit Save. And let's view back
in our 3D viewer. And now it is not
looking that shiny. We can see we have some issues with the shadows right now. If I go too much in, the shadows are
popping in and if I go back, they are fine. But again, we will
be fixing that. Don't worry. Let's come
back to content again. Models building one and
select the second material. That is the doors
and windows one, and do the same
thing for this also. So again, this is looking
pretty shiny all over it. Double-click disabled SRGB and select Linear color
from over here. It's saved. Now it is not looking shiny
and new. Disclose this. And now beginnings look accurate if you just
go in over here. I know the shadow issue
is very bordering. Let's just quickly
fix that first. So to fix it, you need to
select a directional lights. So scroll through and you search for your directional
light over here. If we zoom in too much, you can see the shadows. So if you scroll down, you will find a setting, yeah, distinct,
distinct field shadows. So just degrees this and
just set this to zero. And now you will
see your shadows are not doing that weird thing. Yeah, It is pretty
much I create now. Alright, so now you can see our building is looking perfect. And we're not having those
weird shadow issues also, and not having those
reflection issues. So we can view it
through a camera, select our camera and pilot. And yeah, everything looks fine. Also to view
everything properly, you can go over here and
increase the screen percentage. So this will make your
unreal very laggy, but it will increase the
screen percentage and that will make it everything make everything pretty
sharp and high resolution. So yeah, let's change the
lighting a little bit. I don't think I like this
lighting that much. Right now. These two have the
same material, but obviously we
don't want that. So we will be changing that. Don't worry. Let's see what
kind of lighting we want. Say I think that is better. Alright. Let's set the
screen percentage back 200. And right-click on the camera
and it stopped piloting. Also one more thing, I
will select the camera, right-click and go over to transform and select
Lock actor movement. So what this will do is if
you go into your camera, like pilot your camera, you don't accidentally
move it while holding your rightly so that we add
camera position stays fixed. Alright, I click stop piloting. Let's see. Next, let's import the textures for building to building for. Go back to Substance
Painter, file, recent files and building
to save on this one. Let's come back to unveil. In the meantime, come
back to content, over to textures and
create a new folder. Reading do. Again, right-click over here and show in Explorer. Select this and Control C. Copy this path. Open up Substance Painter hit Control Shift N E to export. Double-click over here and
Control V to paste this part, hit Enter and make
sure to select folder. And let's quickly do
the same settings. So Unreal Engine four, bad dog, image plus
the string and foci. So quickly hit Export and wait
for the export to finish. After it is done, we
can come back into Unreal Engine and hit Import. Alright, next we have
a building to come back to content models select building to open up the
building to material. Let's delete this. Risk and roll plus space, and drag and drop all
three of these textures. Plug this into the base color, this one into the normal. Resting overhead goes to
the ambient occlusion, green goes into roughness, and last one into metallic. Again, hit Save. And right now we haven't fixed that
linear color color issue. But let's just see
how our model looks. So again, if you
go in over here, everything looks
really, really shiny, as I mentioned earlier. So let's just quickly fix this. Open up the material again. Select this
double-click over here, disabled SRGB and
set color to linear. So as soon as we do that, you will see things won't be shiny and reflective anymore and will have their
accurate roughness. So hit Save. Alright, so now the
building looks perfect. Also, I'm feeling like this metal material
over here is very dark, so I will just reduce it
darkness a little bit. But first let's just
explore these textures. So go over to Substance
Painter and open up by waiting for Save. Alright, again, first, we need to create a new
folder in Unreal Engine. Go over to textures, and we can create the
folder for building three. We will be voting
lectures later on. First, let's even bone
building for Now moving 30, just right-click and show
in Explorer. Copy the pot. And close this up. Open UP
Substance Painter and hit Control Shift and click over here and paste
the path over here. And just make the same changes. You can do this on your own. Notice, very simple. It export. Again,
the export is done. Come back to Unreal
Engine and who can put back the models waiting for
and open a building for this risk control blood
space, and drag-and-drop. All three of these textures
like this into base color, normal, occlusion,
roughness, and metallic. Save. Let's just quickly fix
that issue also select this. If you want to view
your model first, you can do this. You can see how shiny it looks
from all over the place, even our sign board. To properly view
the shiny effect, you can just press Control
L and move your lighting. And you will see it properly. As you can see over these
areas and this area also. I think I accidentally brought enough that externally
point like, let's just come back
to our old lighting. And first let's fix this issue. Open up. Select this texture, double-click over
here the symbol SRGB and set color
to linear villa. Save. Now close this up. And yeah, now everything
looks perfect. Let's just move it through
a camera. Alright. Let's see. First, I will also import the
textures for building three. Go back to Substance Painter and select our building three. Save the changes. Now in control shift and E. And we have already
made a folder. So just go over here, right-click and
show in Explorer. Copy this whole thing up. Now let's just paste
the path over here. Make sure you always
hit Enter after this, so that we are actually
in that folder. And now select folder. Go back over here, hit until engine for. So yeah, this is a little bit long and tedious process to do. But don't worry, after you've
done it a couple of times, you will memorize it and it
will get pretty easy to do. So just hit Export and wait
for the export to finish. After the export is done, quickly come back
to Unreal Engine and wait for the pop-up over here for six
changes. Now hit Import. Alright, so now we
have a building three. Let's worry about it later on. But first, a couple
of things that I might want to
fix. So let's see. First thing that
I'm seeing overhead is this is looking like really effective and really
shiny this door material. So come back to
Substance Painter. And you will see how we can
make changes back and forth. So now it is pretty simple. You can open up your
building for, Let's save. And let's say you want to
make any kind of change. So first let's wait for
the project to open up. And yeah, now I
just want to make this glass material a
little bit less reflective. So select your glass, select the glass vase and
just make the roughness 0.2, I guess, something like that. And now just hit
Control Shift and E. And now you do not need
to make any kind of change. Just very easily hit Export. And after the export is done, you don't even need to import it back in Unreal Engine
or anything like that. You come back in here and
wait for it to pop up, hit Import, and you will see the changes automatically
are done in your project. Is wait for it. And yeah, now the texture
has been imported and you can see it is a little
bit less reflective now. And yeah, I think that's better. Let's see next, I want to make this a little bit less black overhead this metal. Again. And also for this one, the color, I will
make it a little bit. Maybe something like that. Let's just quickly hit Export
and open up a new project. So this time I will be
opening up building one. Go over here, open up
building one. It's safe. In the meantime, in Unreal
Engine just hit Import. And yet we just need to click a couple of buttons
here and nothing else. Now you can see the color
has changed a little bit. Let's view all this
through a camera. Or I come back over here. First, let's see
the texture said, Come over to Building
one underscore main. Open up the folder, select the black metal. I think it is currently set to four K. I will switch it back to two k and select the color and make it
a little bit lighter. That's better, I guess. Also for this concrete
also in the vaults folder, open up concrete, green, black. And this one also I will make
it a little bit lighter. Alright, now let's
quickly hit Exports, hit Control Shift T and export. Wait for the export to finish. Come back to Unreal Engine. And just hit Import. You will see all
the colors update. As soon as we do this. You can see the colors
have been updated. I think this is pretty handy. We do not need to import
and export again and again. We just need to hit a couple
of buttons here and there, and everything would
be done for us. So we have set it
up in that way. Alright. So I think this
is it for this video. In the next video we will
be texturing the drown, and also we will be importing
our building three, we will be deleting
this building, and instead of this, we will be having a
different building. This video also has
gotten pretty long, so I will end it here.
Thank us watching. I'll see you in the next one.
20. Texturing the Ground: Hello and welcome everyone. So I have opened up a
new project over here. So in this video first, we will be putting in
our building three, and next we will be
testing our ground. So yeah, let's start. So these two buildings
are pretty much the same. So I will deselect this back one and press Delete and just
delete it completely hit Yes. And now what we basically
can do is go over to models and in the
buildings three folder. Press Add it important. And again, just import
your building one only because we don't
really have a building 35. So building 1.3 are same. So I will again in
both building one into the different folder
that is building three we just
imported over here. They're getting bored. All
wait for it to import. All right, so there's
this close this. I will come down over here and first I will
select this material, press F2, and rename this to
building to building three. And do the same thing
for the other material. Also, scroll up, select the other material they
serve to rename it. And this has building three. Alright, now you can just
select the model and hold, Shift and select everything. And just drag and drop
it like this over here. Wait for it to load. And then you can hit Control
G to group them together. And make sure to put in zero
comma zero, comma zero. Alright? Now what
we basically can do is this is a completely
different model now, and we have different
materials for this. Open up this
building three main. Delete this and we
have already done this a lot of times
press Control plus face. Head over to the textures
folder in building three, we have already imported these textures from substance
painter in the last video, select all three of
these main textures and just plug them into
their respective channels. So the first one goes
into base color, this one goes into normal. R is for ambient occlusion, green is for roughness. And Louis, What Metallica is double-click over
here, disabled SRGB. And there's this fig, this. And I will just fix
this together already. Said this to linear
villa and now hit Save. Basically that's all the
steps that we need to do. Close this up. And yeah, you can see, and now you can see the new material is
appearing up overhead. So similarly select
the second material, delete this press
Control Backspace. Again, select these
three drag-and-drop. And yeah, I think this should
be pretty easy by now. Alright, I'll just
quickly finish this up. Alright, so we're
basically done now. Next, we can start with the
texturing process of ground. And you can see if you
knew through our camera, one more thing that I
want to do is just select all these lights so the
volumetric loud hold Control, select the skylights
by atmosphere, then select the fog directional
light, and the camera. So these six items, because these are
different from the models, to just select them all and hit this folder icon so that
they appear at the top. And rename this to
camera and lights. So that way it
makes us easier for us because they are
all at the top. We can just select all of
the rest of the icons. I mean, rest of the
remaining things. Select them all and just create a new folder and
put them in assets. But this way we can just
easily close this up and everything stays a
little bit organized. So select your camera,
right-click in pilot. Now it looks a little
bit different over here. We can maybe what we
can do now is piloting, select this building
up over here. Let's duplicate this and just placed one over here like this. Select this ball and maybe
I will just delete it. Displays it over here like this, so that our scene is a little bit like it is not looking
empty from over here. So as you can see, we will
put in like a tree or something overhead
at the back so that there is no empty space. For now it is fine, I guess. Next I will select
this circle and move it towards the left
side a little bit. Alright, so hit Save. And next we can move
on to texturing are ground plane,
the ground assets. So for that we will be
basically using our pixel. One more quick fix that I
want to do before starting is I just want to separate
these three objects. So these are currently
a single object. So I just wanted
to separate them. So I will quickly
open up Blender. I'm sorry for that, but
I will just quickly separate them out because
I'm not liking it this way. And it will be better for us if we just separate them out, because we might have to
duplicate one of them. You just select the block, I'll select this piece for slash. And the way you can separate
the objects is press Tab, press a to select everything, then breastfeed and
select by loose parts. So p is for separating
by loose parts. Now these three are
separate objects. The slash again come out of it, disable everything except
the ground. Select it all. And let's just quickly
exported once again, select FBX and explored this in your exports
folder as the ground. Alright, I will just quickly go back and import
everything again. Just delete this for now. Open up the ground. Also do give this old ground unimportant. Now they are all separate selected all and
drag and drop it. Place it at zero comma
zero, comma zero. I will just delete
this wall for now. We can obviously add it later on from over here
if we wanted to. All done with that out of the
way, Let's start texturing. So the way we will be going
through texting or ground is we will be using
the assets from Excel. So Excel is completely free
and nowadays even easier to use it because it is
integrated in Unreal only. You can go over here to
goodly active reject. As you can see an image
select Quick cell bridge. So as soon as you selected, this pop-up will come over and you just need to login
into your epic account. So it is completely free
to use with Unreal Engine. So now we will look for
some assets for our road. I mean materials, so I will
search for asphalt material. And let's see which
one we can use. Obviously, there are
lots of different ones. You can go through them and select anyone that
you might want. So these are all like
road material, so nice. Obviously it is
completely up to you. Which one you want to use. The one that I will be using is this one, chip see payment. So the select this and you can select the
quality from over here. So I will just
select high-quality. And I have to sign in first. So I will just quickly
sign in into my epic. So now I have signed
into my account. I will set this back
to medium quality only because high-quality is
really a large file. So if you want to go for
it, you can definitely go. But I will be setting it
to medium quality only. And I've already downloaded
this asset one time. So you can again
hit download over here and wait for the
download to finish. You can view your
downloads over here. So you can see it
is downloading. As soon as the download is done. You can just select
this and hit Export. And you will see, I will
just minimize this. The material has
appeared over here. Just drag and drop it
over here like this. And you can see now your
road is off a material, but obviously, I think the
size is too much right now. So just double-click over here
on this material instance. And if you look over here, you will find this
tiling and offset. You can enable this scaling and offset and set the
tiling to maybe five. Let's see, for x and
y, both of them. I think five is a good number, or maybe we can
increase it to ten. That is really up to us. I think ten is pretty good. We don't see that much dialing. Yeah, we don't see
that much repetition and I think the
scale looks fine. Let's try it. I think it is fine. I'm not really experimenting
this much with this. So there's this close this now. And for these pavements, again, open up pixel bridge and
search for pavement over here. And you will find on
another material. That is, let's just
scroll down this one. I will be using this one. Again, already downloaded this, so I will just hit
Export this time, but you can hit on
Download and wait for the download to finish and
just click Add over here. And if you go back,
hey, in the content, you can find this in
the mega Scans folder in the surfaces than concrete waivers and just drag and drop this
material on this thing, this thing, this thing. And over here, again, the scientists do much. Double-click over here,
enable dialing and offset. Let's set this to 55 again. I think we need to set
it mode I 15, 15 maybe. Yeah, I think setting
it to 20 is perfect. So now if we look
through our camera, we have seen already looks much better with all
these materials. One thing that I do
want to change is I want to change the
location of my camera. Select the camera, and I've already decided
on a location. You can just right-click and go to transform and
disabled log at the moment. And you can just move
around your camera and see what fits you best. But I will be just setting
the location on the x21 7755 would be 5.5. And they can be two-ninths. So now what I will be
basically doing is. It's moving it towards
the right side, little bit like this. It stopped piloting for now. And select this thing
and this thing over here and just move them back. Just to create some space. Again, Let's view to our camera and see
how everything looks. Now our scene looks much
more wider and better. I think. Let's select
this and move it. I will just rename this
from assets to, I think, rightly, so that we can just
press F2 to rename this. And I will rename these
two models so that it shows up below the
folder, camera and lights. Select all four of
these and drag and drop it into the models. Alright, open up your camera
and lights Right-click, stop piloting. And let's see. So the reason I separated
these three outwards so that I can just select this
press Control C and V, and duplicate it over here. Like this. Again, select both of
these press control CV. Duplicate it towards
the back like this. Let's select this, move it towards the light a little bit. This thing over here, I think is fine. Again, Let's see
through a camera ones. Alright, so I think now it
looks much, much better. You can decrease the speed of a camera to adjust
it even better. Select this piece, press
Control C and V. And again, move it towards the right. Because we can see
a little bit of empty space over
here in the corner. Alright, I think this camera location is
much, much better. You can increase your
screen percentage. Now our scene looks much, much better with the addition of all these road materials. So let's detail our road
a little bit even more. Let's turn this down,
Right-click, stop piloting. And also make sure to set screen percentage
back to break. Open up books and bridge. Again. This time I will be just
searching for load. And we have different
categories over here. We have like 3D assets. We can also use various
different 3D assets, but I think that is a
thing for later on. Right now we want to
go into the gaps. And you will find a
lot of details over here related to street. You can just go ahead and
select the street. I can. Yeah. Let's scroll through. And
the ones that I will be using is this painted
parking lines. So just hit Export.
After downloading them. It is really easy to use them. Increase the camera speed. For what you basically
need to do is again, just drag and drop this
detail over here like this. This E R to scale it
down and scale it. I think this much. Yeah, I think this
image is fine. You can press G to do
to view the icons, the game icons like this, because if you want
to select the icons and the game icons
have turned out, you can already
selected press G, and then you will
see this selected. Now just press control C V
and duplicate it all along. This will add a nice bit
of detail to our roads. Let's select them
all and move them. Over here also,
on the left side. There already are
road looks much, much better with the
addition of these things. You can look through a cook salt bridge and find
different types of painted lines and you can create various
variations with this. I'm just doing it so
that it is a little bit quicker so that we don't have to spend too
much time on it. Because this thing is like really very fundamental
and very easy to do. You can just drag and
drop different types of decals and see what
works best for you. We have these different
manhole covers also. Like we have this thing also you can just import this also. Wait for the download to finish. In the meantime, let's
export this thing, the intake parking lines. We can export this. Okay, not this one. Let's
come back over here. So this one, being a pedestrian lights drag
and drop it over here. Even this looks really good. Now what we can do is we can
select all these decals. Risk control C, then V. And this E to rotate them by 90 degrees and also placed
them on this side of the road. Let's push them in a
little bit inwards. You can select this. First. Let's just press control C V and list them here also on this side. Then over here. This is a predictive task. But just by adding these things, we can add a lot of detail
to our environment. And yeah, Let's just
as G select these two and move them a
little bit backwards. Select this and
move it over here. Alright. So I think this way
eyeballs look much better. Next, let's come back over here. You can also use this
thing over here. Let's see if we
add this selected. Let's try using it. Over here on the
side of a street. And I don't think it looks good. You can just remove
this one for now. We will look towards
this later on. Let's bring something else. Let's see, I also saw this
one Japanese stop sign. You can definitely
use this to add some Morefield do
our environment. So this rotated by 90 degrees. I will definitely press R
and scale it down like this. Let's look through
our camera once. And yeah, this way definitely
looks much, much better. Let's press Control C V and
use one over here also. I will decrease the
scale for this one. All right? As I said earlier, you can look through all these different decals and place whichever
one you might like. You can also use maybe
this manhole cover. Let's just download
a couple of them. Let's just see another
sign that we can use, maybe this one, I use
this one in my project. Let's import this and
use this one over here. So I don't think these roles science make
that much sense. I'm just placing them randomly, is to add a little
bit of detail. We also have these different
stop taxi only by science. You can use these ones
also if you want to. Let's try that manhole
cover that we downloaded. We can look through
from overhead also. Just hit export and
stride placing it. Where can we place
such man moviegoer? I just place it
over here right at the same time and see
if it looks good. I don't know if it fits
really well within our scene. So for now I think I
will just delete this. We also have a couple of damage
options, like these ones. You can import this. Let's just see how we can use them like this asphalt grass, you can add a little bit
of damage to your road. Or maybe we can use this. I think it looks fine. Scale it down and you can place
it may be anywhere. Duplicate this rotated. I don't know. It looks really odd. Yeah. I'm just giving
you options that you can go through all
these different types of decals and use them. I wouldn't suggest adding
too much of it, but yeah, we can definitely
add some of it to add a bit more value
to our environment. But right now I think
even with this only, our environment
looks pretty good. Next, we will start by creating small different prompts
along our scene. And first we can set up a
little bit of lighting and post-process volume in our scene to make it look visually better. And then we will start
with the process of adding different prompts. So yeah, I think this is it for this lecture. Thanks
for watching. I'll see you in the next one.
21. Setting up Post-Processing: Hello, Welcome guys.
So in this lecture we will be adding up
post-process volume. Make our scene look
a little bit better. Alright, so let's start First. I will just select
all of these decals. Select them all, and just add a new folder and fill
in the details folder. Alright, so over here in
the place adverse window, if you don't find it,
you can look over here and enable place actors. Just search for
post-process volume and drag and drop it over here. Like this. You can press G and you will see this cube
like thing over here. If you scale it up a little bit. So I've scaled it up. The shortcut for
scaling anything is odd and ease for rotation
and W is for movement. Alright, so let's
say I selected blue. Bloom is a setting that you
will just see what it does. Basically, I move into
this box over here. You can enable intensity and
just increase the intensity. And you will see this
is basically blue. Wherever your light is hitting, it will make it glow. If we increase it a lot, even see the glow is a lot. By default, it is around 0.675. You can increase or decrease it. But let's say I move
out of this box, you can see that blue setting
is not working anymore. If I move into the box again, you can see the bloom
is back in action. So this is similar with any of the
properties that we use. Like let's say I use
chromatic aberration. So let's say I just set this
to full, completely at five. So nothing is happening. But as soon as they
move inside the box, you can see this is the basically the
chromatic aberration effect. It will divide up your
colors like this on the objects you can
undo using this icon. What I basically
want to show you through this is
that whenever you stay inside this post-process
volume or this box, then only these
effects will show. So to make it affect
our whole environment, we need to either completely
increase its size, but I think a better
way would be to just enable an option over here. So we don't have to increase
scale again and again. You can just go over
here and search for in finite extent and enable this. And now you can see the square is like the cube is very small. But if I remove this back to my blue and
now increase the blue, you can see the whole
environment is getting effected. Even though I'm
not inside the box because I've enabled
in finite extension. So you have basically
wanted to explain you that. Alright, so let's start. I will first move
into my camera, right-click and file it. Also, I will right-click and lock the movement of my camera. You can visit G to just disable all the game icons so that you can view
everything properly. Select post-process
volume, I will just increase the screen
percentage to 200. Alright, so the first thing
is obviously bloom over here. So we can maybe
increase bloom to 1.5. You can see it adds
a little bit of glue and I think that
looks pretty nice. Next is exposure. Exposure basically
controls the brightness and darkness in our scene. So you see this minimum ripeness
and maximum brightness. I will just enable both of
them and set them both to one so that they don't change again and again
according to i, adaptation. Now you can see this scene
is a little bit brighter. If I just undo this and
set this back to one, you can see the seam got
a little bit brighter. What you can do now
is you can enable exposure compensation and just adjust your exposure
using this slider. So whatever you set over here, it will completely stay
at that lighting only. So let's set it back
to one and we want to decrease obviously a little bit. So let's set it
around negative 0.2. You can disable your
post-process volume and see how you're seeing
used to look earlier. Yeah, not much
difference right now. Alright, let's move further. We can increase the Blumer
little bit more to 1.8. And let's set the exposure
to negative of 0.3. Justice they can set
it back to zero. So increasing it
makes it brighter. Alright, so I will
take 0.1, let's see. Yeah, I think that's better. I will say the bloom
back to 1.5 only. Alright, let's scroll down and we have chromatic
aberration. I don't really like using
this setting that much. You can increase it and see how it affects
your environment. And yeah, we'll just
keep it disabled. Next is dirt mass. We won't be using that, but if you just enable this
and set a texture over here. So let's say I
selected this texture. You will see now if I
increase the intensity, this texture starts to
appear over my screen. You can see it kind of looks
like a lens on your camera. You can add a dirt
mass for your camera. And it can include like a
real-world camera that has got a dirty or scratchy lens
is pretty useful for that. You can change and see how it looks with
different kinds of textures, but it definitely won't
be using that disabled. Both of them. Camera's settings. We won't be changing from here. We can change them from
overhead only from a camera. Next we have is image effect. Under image effects
we have vignette. So now just enable this and
notice around your corners, if you decrease this to zero, you will see your code gardeners
are much more brighter. But if you increase this, the gardeners or a lot darker. So you can set this to 0.6, will make the corners
a little bit darker so that the focus gets
shifted to the center. You can see how it
affects your environment. Next, let's see we
have embrasure. So temperature is basically
if you increase it, it will make your environment
look like as if it is a little bit hot over there and it will give it yellowish stones, making it look as if it is hot. And if we decrease it, it will, it will give a bluish tones, making it look kind of cool. So default is 6,500. I will maybe set to 6,000. You just give those
bluish color tones. I think that works much
better for our environment. You can even degrees
it to 5,500, maybe. Even that looks alright. 5,800 I think would
be best. Right now. I think that's fine. Indefinitely adjust this. Alright, Next we have tint. Tint basically if
you increase this, you will see your scene. We'll get a reddish
pinkish color tint, and if we decrease it, it
will get a greenish white. So I will just set this to zero. I don't really want
to change this. Next, we have the
global color settings, so saturation, we can enable this and maybe
increase it to 1.1. You will see if
you increase it to a huge number like 1.5, even your colors
are now a lot more saturated and everything
pops out a little bit more. You can just disable
the post-process volume and see it for yourself. But I don't think that
much Is that good? I will set it to 1.15 maybe. Yeah, That's fine.
Contrast also, we can set it to 1.1. And I think the rest of
the settings are fine, disabled only at one. We also have the
different colors settings for all the shadows, mid tones and highlights. But it is like really advanced. I don't want to spend time
thinking through them because you can always change these things through
Photoshop also, zero, Let's just do the
basic things over here. If you want to do
something advanced, we can always take
a screenshot of our environment and make
the changes in Photoshop. Alright, I think these were the changes that
I wanted to make. You can also check all these films settings like the slope. You can see how it
affects your environment. All of the settings are like pretty much
self-explanatory. You can enable and disable them and see how they work
on their environment. And obviously you
can experiment with this a little bit and see
what fits best for you. We also have global
elimination method, that is the new feature
in Unreal Engine. Lumen. As you can see, if we select
this and turn this to none, you will see your lighting
has gone completely bad and now the environment
does not even look that good. Make sure to keep
it at lumen only. You can also use screen space. And it does solve a
little bit of problems, but it still looks pretty bad. Then we have standalone retrace. We disabled retracing when
you are creating a project. So it won't really
show much difference. And I will just set this back to human and everything
looks much, much better. We also have
reflections over here. So reflection is also
controlled by humans. You can set this to
none and you can see how it affects
all your windows. Things over here, you can see the metal does not
look that good, but setting it to
you and you can get all those nice reflections. These were the
post-processed setting. You can just disable your post-process volume and see it adds a little bit of visual
Bob to our environment. And I think it looks a
little bit better now. Yeah, you can definitely
experiment with all these settings and
do whatever you want to. What fits best with your style. Alright? You can also
select a directional light. Press Control L, and try
moving it a little bit. I think this kind of lighting
is a little bit better. If we want to see the
exact setting of my lady. You can see over here I've
selected a directional light. You can see the rotation. So x is 39 degrees and you can put the y rotation
at around -30 and then rotation at around minus 148 degrees to get
the same lighting as we. Next we can set up the camera, right-click, oh, we are
already piloting it. You can also change couple of your camera's settings
from over here. Let's just select a camera
first and duplicate this so that we don't accidentally make
changes to this one. Now right-click on
your screen a camera up to two and now
pilot this one. Right now, basically both
of them are the same. I will go over to transform and disabled lock at the moment. Now contain all these
settings over here like film that you can
set this to digital. You can change and you can see immediately effects are
alike. Environment. You can zoom in a little bit. And now our environment
looks completely different just by changing this
camera settings over here, we have this very small
focal lens camera that will help you
should close up shots. Not really good for
wide-angle shots. For close up, you can
definitely use this. You can see there are definitely a lot of options over here. Right now if I just right-click
and pilot this camera, you can see how much
of a difference just using a different
camera creates. This looks really good. We can maybe just
keep this thing. And I will right-click
and duplicate this so that we don't
accidentally use this setting. Violet, this one. And let's see, we can even change the lens. We can increase the focal
lens and just zoom out a little bit to get a different kind of look
for an environment. Yeah, we will definitely
experiment with this. A little note when we are taking high-risk screenshots
for our environment. Alright, for now, let's
just delete this. Jam Rack 23. And we have got two different
angles for a camera. One of them is this one and
the other one is this one. I think this one also
looks pretty good. So one more thing that I want to discuss is this
focus settings. If you open this up, right now, Gamma is not
really focusing at anything. I think to enable this, draw the book focus plane and now decrease
the focus distance. You will see this
pink colored plane appearing over the scene. So let's say right now, disabled this and send
the focal length to zero. You can see how everything is out-of-focus and very blurry. Now keep on increasing it. And you can focus
on certain objects. So the plane is to
help us with that. If you neighbor draw
the book focus bleed, you can place your focus at
anything you want to select. Say I want to place my
focus over these buildings. This one, you can see now
it is pretty sharp and in focus and the ones at
the back at kind of blurry. But if I want to change
my focus to this, I can also do that. The setting also definitely
helps focus over here only. So that's enabled this back. And let's focus somewhere
around here for now. Alright. You can also
select the other camera. Try adjusting the focus. You will also notice how if
we keep increasing the focus, everything gets a
little bit sharper. Let's place the focus. I look back for this one. I'm just experimenting
with the cameras again. You can do this for
however long you want. You can lubricate the
camera so that you don't lose your previous settings. You can lock the actor
moment so you just don't accidentally hit
right-click and move it in. Select Camera three, pilot this. And in. Move it around. And just try something else, like dry or different tangled. Like something from
over here. Like this. We will fill something out over here so that it does
not look weird. And you're going
to increase maybe the focal length and maybe create some
different kinds of short. I don't really know
unjust. Right now. I'm just swinging my
camera and finding if I can find a good angle, maybe something like
that. I don't know. Yeah. Even something like
that looks pretty good. We can adjust the focus. You can see now these
buildings are the focus. So yeah, you can
definitely play with this degrees the
focus a little bit. And I think that one, this one is much better. Or something like that. You can even take a screenshot of this. We can have multiple different screenshots of my environment from various different
angles and focal lens, like capture it from
all different angles. Definitely experiment with all the post-process
settings, the camera setting, the directional light, have a very different
result from mine. I would put it that way. You can select the
directional light, increase or decrease the
light colors intensity. You can play with a lot of different things over here also. You can also make your directional
light use temperature. So if you enable
this increase this, it is getting bluish
tones and decrease it, you will get yellowish white. Disabled this you can see in the directional light
does not cost any shadow. So that makes the
environmental very weird, unrealistic, enabled this back. We also have light
color over here. If you want to go crazy and
do something different, I will definitely suggest, as I'm saying, to experiment with all the
different settings. Also, one more thing that
I want to enable for directional light is
disliked shaft occlusion. And like Chef blue, it is not really
visible over here, but if it is possible, I will show you
what this setting does in the coming videos. Alright, so I think this
is it for this video guys. Make sure to just
experiment with all the different settings that we went through in this video, the post-process volume,
the camera and the light and come up with something
nice thing goes for watching. I'll see you in the next one.
22. Modelling the Beer Crates: Hello and welcome everyone. So now in this lecture
we will be starting by creating some small drops to
populate around our scene. So that's why we are
back in Blender, but I won't be using
this file again. Let's just create a new fight, a completely separate for props to go over it in you
and who can generate, save on this one. Alright, so now we are in
a completely new file. I have turned on my
screen casts keys, so first press a to
select everything, and let's just hit delete. Delete all these
existing objects. Also, I will go over here
and search for pure ref. Right-click and open up
our reference images. Alright, so we'll go back
in the folder in which all the reference images are present in your course files. So select the reference
images folder. I've added a couple
more of them over here. So just select them all, the last four of them and drag and drop them
into the scene. So these are the first
set of prompts that we will be creating a
bunch of beer grades, and then we will be creating a beer bottle that we can use to populate
around our scene, around the residential homes. First, we will start by
making these grades, which is, I think
pretty simple to do. Alright, so come back in Blender and let's see
how we can do that. Simply first press
Shift plus eight. Let's add a cube, go over to
mesh and select the cube. So now we want to kind
of give it a cuboid, kinda not like a cube
like shape to press S, then x and scale it up
on the x-axis a little bit around 2.7 m. And
then select on the y, scale it around 3.5 m. Like this. Alright, so we have
this sort of grade. Then we can press Control
plus a to apply the scale. Alright, now what I will
do is I will be using a middle modifiers to make
our work a lot easier. I need to divide this tube
into four different halves. So to do that, just press Tab
to go into the Edit mode, press Control plus r. You add edge loop. Click
over here on the edge, and then hit
right-click to place it exactly at the
center like this. Just press Control
plus odd selected, move it around and then
just hit right-click and it will be placed
directly at the center. Now press seven for top view. Make sure you are in
the vertices select. So from here, you
can also click one. You go into the
vertices select mode enabled exited from over here. And just carefully select
all these vertices. And then hold shift and
select all these vertices. Just press X and
delete the vertices. So now you can see we have
just a one-fourth of acute. So let me do this once again. Just select these vertices, press X and delete them. Then select the right ones, press X and delete them. This way. We have
something of this sort. So make sure you have
something like this. And your origin point is still exactly at the center like this. Now, just go over
to Add Modifier, add a mirror modifier. And now you can see it has
automatically duplicate it over to the right
side on the x-axis. And now if we select the y-axis, you will see we have easily
duplicate it four times. And if you press tab, select
this and try to move it, you can see all four edges are being moved
at the same time. Alright, so enough of it. Now press Control
plus v to bevel this. And let's give it a
smoother edge like this at three
segments in between. So 12.3 and add this
much of a bevel stabbed, right-click and Shade Smooth. Also go over here. And in the normal section
enabled or disabled. We can also come over here and quickly enable
shadow and cavity. Alright, again, press Tab, then press Control plus r
and add two edge loops. So scroll your mouse
wheel to add to a E-loops and just
place them over here, somewhere around here like this. Next, what we can do is
add another edge loop and just place it somewhere
around here. I think. I will say this edge, G and Z and move it over
here at the top, like this. Then what you can do is basically just press
three for Face, Select, select this face, this face, and then press X and
delete the faces. Okay, wait, first,
what we need to do is select this top face, press X and delete the face, and select the bottom face
plus x and delete it. Then select this
face and this face, press X and delete it. Alright, so now we
have a desired result. Also one more thing.
Come back over here in your modifier and make
sure to enable clipping. Clipping we'll do is, let's
just keep it off for now. This tab. If I
select this word Z, you can see I can
move it around. But if I enable flipping, it will stay stuck
around this like this. So it will be a little
bit easier for us. Makes sure to enable clipping. Now we have kind of a shape. Now what do you basically
need to do is first, we need to add a little bit
of thickness to upgrade. So to do that, we can simply
add a solidify modifier. Makes sure to apply the scale
and increase the thickness. Let's try 0.05. I think
this is pretty good. Next what we will do is you can see all these edges coming out. So it can be a little tricky
to create this in our model. And it will take a
lot of effort for this small probe which won't be even visible from far away. So what we will do
is, I will show you a quick little shortcut how we can create these
edges very easily. So just press Tab, go
into the Edit mode, rest two for X select, and just make sure to select the edges
that I am selecting. Select this one, this
one, and this one. Select this one, this one, this one. Like this. Basically wherever you want these edges to come
out like this, select all those edges. I will select these four. Let's see. This one,
this one and this one. I think this is pretty much it. Redshift plus D. And you can
see you can duplicate it, then hit right-click and
separate the selection. So that way both of them
are a separate object. Now if you press tab,
you can see we have these lines and then we
have this menu over here. Select these lines and remove
the solid if I modify it, because we really don't
need it for this. Next, go over to Add Modifier and this time
add a skin modifier. Who see something very weird
happened, but don't worry, press Tab, press a to
select everything, then press Control plus a. And this is a shortcut to adjust the thickness of
the skin modifier. So you can see when you
press Control plus a, you can easily adjust
the thickness like this. So very handy stuff. If you zoom out a little bit, it exactly looks like
these edges only. This disabled the
overlays and you can see a great looks pretty
good and pretty realistic. Also in terms of modeling, I will just select these
edges again, press Tab, press a to select everything, then risk control it and make them a little
bit more thicker. Make sure you don't go too much because it can get a little
weird around the edges. Also enables smooth
shading for this. And we can also add
a bevel modifier. Reduce the bevel amount, enabled harder normals,
and enable auto smooth. You can see that
looks pretty nice. What we can do is we can
select this again, great. Press tab and select
these three edges. Then press Shift plus
D to duplicate them. Again, hit right-click recipe
and separate the selection. Select this, remove
the solidify modifier. And I want to add
this thing over here. Only. Select this
first, the single line, then select this complete thing, risk and roll plus
J to join them. And you will notice
nothing really happened because the skin modifier only works when all the
vertices are connected. And these two different vertices are not really connected, like this one and this one. So what do you basically need
to do is just select this, this thing over here
and select Mock root. As soon as you do that, you will see the thickness has a beard, but this has a lot of thickness. And these two techniques
are very different. So again, just press Tab, enable X-ray and select all
four of these vertices. Then press Control a
and just scale it down. Make sure to just select these vertices only and
not the rest of them. And yeah, I think that's
pretty much perfect. Next what we can do is
we can again press tab, select all these
vertices at the bottom. So hold Alt and select All in, all of them over here. Then press Shift D
to duplicate this. Again, right-click the tree
and separate the selection. Select the selection, and
remove the solid if I modifier. And this time I will just press Tab and risky than press F. And something really
weird happened. And the reason for
this is because the mirror modifier
is still active, we cannot really
fill in the space. So first what we need to do is go ahead and apply
the mirror modifier. So to apply a modifier, we first need to come
out of edit mode. So press Tab and now apply
the mirror modifier. Establishing a to
select everything, then rest F. And you can see if you come out of
the isolation mode. We have created a bottom face. You can see over here, we have a lot of detail
in the bottom face, but I won't be going that
far because honestly, when seen from this far away, it won't be even visible. If you want to create
a detailed Rob and showcase it as
a singular project, then definitely you need to
go for these kind of detail. But if you are working
in an environment, then we need to work quickly. So that's why I will be just. Making it something like this, I will be adding a little
bit more detail though. This tab. Let's select these bottom edges recipe to
extrude them with g then z, and move it a little bit
downwards like this. Then you can press S
to scale it outwards. Create something like that. And let's do the same
thing on the top. So hold Alt, select
these vertices, press E, G, and Z,
and bring them out. And just scale them
outwards very easily. Alright, so I think that
looks pretty good now. Now what I will
basically do is you select it for top view, right Shift D to
duplicate this, press X. And let's create four
different copies of it. Shift plus D, and move it towards the right
side on the x-axis. Again selected all press
Shift plus d, then press Y. And we have basically
duplicate it four times so that we can have like
four different colors for a little bit of variation. And what I will be
doing is again, select this redshift plus
d and x listed over here. And now select all
of them like this. Make sure to have active object. And then select all of them. Hold Shift, then press tab. You can press one for the
front view, enable X-ray. And just select all of these vertices and make it a little bit
taller, like this. Somewhere around 3
m on the z axis. So just decrease it down. Yeah. Somewhere around here. Just so we have a different
kind of grade. So we have two different
kinds of grades. One to one is a
little bit you even and one on one of them
is a little bit smaller. So I would select again all of it for the large one
and duplicate this. And we will just have
two copies of this. Now we have basically
created all our grades. And let's hit Save first
and rename this two drops. Save the blend. If
I press a to select everything with M and
create a new collection, and let's rename this to create. Let's collapse this. Alright, now we wanted to
create this beer bottle. So instead of working with
this from like pure ref only, I will be bringing
this reference image into Blender only. So to do that, it
is pretty simple. First, let's disable that rates. Rest one for the front view. Press Shift plus a Google image, and select the reference image. Come over to your Japanese
Environment folder and then go to reference images
and just select this one. Now that we have is invalid. Now I will disable your refund. Now minimize it. And we have this in
Blender and it is now really easy to
create this because we just need to basically add
a cylinder, scale it down. First enable X-ray. And now we can just press
Tab all these vertices, press E and shape it accordingly through the
bottle very, very easily. So what I'm basically
doing is I'm for selecting all the vertices. Pressing E, extrude it. Let's extrude it till here because it is
basically straight. Then press E wherever
there is curvature. So just press S
to scale it down. Something like
that. Risky again, the G Then Zach,
move it upwards. Again, scale it down. This is what I was
basically doing. I haven't been doing
it a little bit fast. Plus E, scale it down. E. This E again. Yeah, it is pretty simple and
pretty the appetitive also. Over here, what you
can do is press E, then instead of
scaling it inverts, just scale it
outwards like this. And then again,
scale it inwards. You don't really have to be completely perfect with
the reference image. We can just eyeball
it a little bit. And you can see we have
got ourselves with something like something
looking like a bottle. We can just hold Alt, select this complete Edge, move it a little bit upwards, press Control B, add a
little bit of Babel. And yeah, we can just make
it a little bit smoother. Right-click and
hit Shade Smooth. Also enable auto smooth. For the lid of the bottle, I will be again
adding a cylinder, a cylinder to scale it down. Linseed overhead the top. And I will be adding something
basic like this only. We don't need to go
too overboard with the details because it
won't be even visible. Alright, so we are
already done with a bottle selected and the shift. Just so we can have two
different variations of the bottles also, I'll select the reference
image and just delete it. Select both of the bottles, press M, and add
a new collection. And let's rename
this two bottles. It okay. It's enabled that
the crates move it over here. So we will be texturing them together
in substance painter, in the same texture set
only first-price one. And let's scale the bottle
according to the grid size. This place it over here on the great recession for top
view and just scale it down. I really feel like
it fits perfectly. Integrate, say, I think
this size is perfect. So let's bring it out over
here. This big bottle. Press delete, and select the small bottle and just
duplicate it once again. Alright, so now one
thing that I want to do is I want to place them properly so that I can texture them efficiently
in Substance Painter. So if you notice, like if I want to add
something over here, like a logo or something, I can easily add it on this
crate by pressing one. From viewing the front view, I can easily add some kind of logo over here in the front, but it would be really difficult to add a
logo in this grid. Let's see. So what I will basically doing is I will just press
seven for top view. Select this green like this, and place them diagonally. Just place all of the
grades diagonally. And this is my small little hat to show all the assets easily, displaced them
diagonally like this. So this way when you press one, you will see all of the
front phases at once only. Then if you press three, you can see all of the
right side faces at once. It would be really
easy for us to texture these things
in substance painter, Let's select the bottles
and displace them over here in the
front like this. Just make sure your grades are placed like this diagonally. Because maybe we will be adding different kinds of logos
on different grades. It makes it a little bit easier. And even if you don't, it is not really a hard thing to place them diagonally because when
we export them in unwilling, we will be placing
them individually only not like together. Now what we can do
is first hit Save. Now we need to apply
all the modifiers. So I don't think we really
need to create a copy of these grades because they're really,
really small assets. So I will just select them
all and apply the modifiers. First go over here, enabled
statistics and you can see the vertices count
and I just count is really high for
these small grades. And the reason for this is
because of the skin modifier. So skin modified is like
a really high-quality. It creates really
high-quality stuff. So what we can do is
we can go over here, add another modifier and
select the decimate modifier. And you will see as soon
as I decrease this ratio, the amount of vertices
also degrees over here. As you can see,
it is decreasing. Also the shape over these
edges will also change a little bit as soon as I decrease the ratio,
you can notice it. If I set this to zero, they are completely destroyed. We just want to keep a healthy
balance between the number of vertices and also the shape of the actual
shape of our edges. We can maybe put it at 0.1. You can see because of
the decimate modify, we have got ourselves a little bit of weird
shading over here. So I think going over to modify tab and adding a
weighted normal modifier. We'll fix this kind of enabling gift shop
and you will see it has mostly fixed all
of the shading issues. And the word count has gone
from 53,000.46 thousand. I will do the same
thing for all of them. But you don't really
have to go like select each and
every edge and then add two of these modifiers. But you basically can do
is you select them all first. Select this again. Make sure to select
this at last, risk and roll plus c. And you
will see this menu up here. But if you don't
see this appear, go over to Edit Preferences. And in the add-on
sections search for copy, copy attributes menu. So just enabled copy attributes menu if it is not
enabled by default. Now press Control plus C and select Copy
Selected modifiers. And just select decimate and weighted normal and hit Okay. As soon as you do
that it will see the vertices has
gone 46000-8800. That means all of the edges now have this Modifier applied. So yeah, that works
really good for us. Now the word count
is pretty low. So press a to select
everything and now it is time to apply
all the modifiers. I just think we should
create a duplicate of this. So what I will be doing
is just press Shift plus D to duplicate them all and hit right-click to place them exactly
over their own lives. So we have two different
copies of these things. Press M and create
a new collection. Let's rename this to
grades and bottles. In the bracket we can write
not applied so that we know we have not
applied modifiers one, so that if you want to use
them sometimes we can. So let's just disable
this collection now. And now we have only
these things left. Select them all again, and just press F3 and now
hit Convert to mesh. Now all the modifiers, some
applied and we cannot really make any changes to
our rates and bottles. So that's why I created a
separate little collection. So let's say I want
to make a change to the plate when you disable them both and enable
this back again. And this one has all
the modifiers syntax, so we can use these if
something goes wrong. Yeah, I think it is a
good practice to do this, just to disable this again
and enable them back. Press a to select everything. Make sure to have active
object like this, like an orange color in
a yellow color outline. Then press a to
select everything. Go to File. August 1st. Before exporting, I
forgot we need to add a material and
UV unwrap them. So go over to material. Let's add a new material
and rename these two rates. Bottles. This one has the material, press a to select everything. While this is selected. Then press Control L
and link the materials. You can see 22 has appeared. So that means all of them
now have the same material. So basically now press
a to select everything, control a, apply the
scale of them all. We'll do a UV Editing tab, select everything with
TAB, then press a again. We can enable stretching
from over here. And this thing also, then press U and smart UV
project and hit Okay. We have this kind of UV unwrap. It is not that great, but I
think we can work with this. So yeah, just press Tab, come out of the edit mode
and we'll go back to Layout. And before exporting, Let's quickly check for
face orientation. This thing, as you can
see, it is flipped. So just select them
all on my one. Stab press a to
select everything. Press Shift N and
just sit inside. And you will see
now the blue color is over here at the top. But in the bottom we
can see the red color. But it does not matter
because it creates won't be visible from the
bottom like this. But if you are
wondering why we have this type of thing like one phase is blue
and one face is red. The reason for this is
because this is a 3D plane. So if you disable
face orientation, select this and press Slash. We just created this
as a 3D plane and not like a cube or
any other object. So that's why our 3D
plane always has one side visible and not visible
in terms of normals. So you have one
side will always be blue and the other
one would be read. You need to make sure of this. So if you want to
have both sides of this as blue and that
basically means like, uh, you want displayed
to have a thickness, so it is not really a plane
anymore, it is a cube. So if you enable that face
orientation and let's say you want to have blue
color on both the sides. So one easy way would
be to just go over to modify it and add a
solid if I modifier. And you can see now, because it has a thickness, it is blue color
from all the sides. And another way would be to just press tab select everything
risky to extrude this, like this, that
it has thickness. Now press a to
select everything, press Shift plus n.
And you can see it has thickness from all sides
and it is also blue-colored. So because it has thickness. So as long as it
is like 3D plane, we will have a red colored side and the other side
would be blue. But in our case, it does not really matter because
the grades won't be visible from the below and they will be placed
on the ground this way. This works out perfect for us. Now. Select them all. Make sure to have
active object go to File Export and it FBX. And now in the exports folder, enabled selected objects don't
enable active collection. Then select object
types as mesh and just rename this to
creates bottles. And this will be our first
set of drops. So hit Export. Now, we're done with the modeling of a
first set of robes. In the next video, we
will be texturing them. And after that, we
will be placing them in our scene
and us watching. I'll see you in the next one.
23. Texturing the Beer Crates: Hello, Welcome guys
to. In this lecture we will start texturing
our beer grades. So I've opened up
Substance Painter. So let's create a
new project now. Now over here we can just select the file that
we just exported. So this one double-click
and just hit Okay. Alright, so we have all
our assets over here. So obviously first I will just enable temporal
anti-aliasing. I don't think there
are any issues with our export or our models, so we can just go ahead and make our mesh maps to go over to Texas at settings
celebrate mesh maps, disabled the ID map, set this to four K and do
the usual settings and just quickly hit big
selected textures and just wait for it to finish
a resume when it is done. Okay guys, so the
bakers done now, so just hit Okay. And now we can start with
a texturing process. Maybe we forgot to flip one
of the normals of this one. So that is why Or maybe
I think we deleted this. Let's just quickly open up Blender and see
what's the issue. This particular plane. So select props. And everything looks
fine over here. I don't know what
really happened, and I think we may have
forgot to select this plane. So what we can do is just
press a to select everything. And let's quickly export this. Once again. Know how ready this happened. Go back, exports,
export came out fine. Then you don't have to
like re-export this. I think I did some kind
of mistake. This quickly. Go to File, select and again export this important
this into Substance Painter. And yet this time all
the planes are fine. So this time all the
planes are fine. The reason we cannot see them from bottom is
because as you know, it was red color
from the bottom. And we only added 3D planes that are without
any kind of thickness. But that's why we cannot
see them from the bottom, but we can see
them from the top, and that's all that we need. So now let's quickly
make the mesh maps. So the bank has done again. This time, everything
came out nice. Now let's start with
the texturing process. Come back to layers, and let's just
delete this layer, create a new folder. And I will name this
plastic underscore yellow because we will be having different kinds of soft
colors for all these grids. So let's start by
adding a fill layer. And I will set the name as base. So all the settings remain
pretty much default. And I will just select the color and I will be
going for a yellowish color. And I've already decided on it, but you can experiment with it. For the U, I will be going
with 0.1 to saturation would be 0.836 and the value is 0.73. Alright, so the sort of color, I will just click over here, right-click and exclude all. And just select this
one. I'm into pieces. And only these two
pieces I'm in, these three pieces will have this yellow
color and material. And we can have different colors for all these different grades. So now let's start detailing
the material a little bit. This way it looks pretty plain, but next weekend, another layer, Let's rename this to dust. Make it a little bit
more rough, like 0.6. And go with the smart masks. And first let's use the
desktop version mask. You see now the crate
is pretty dirty. So let's just select this and reduce the
grungy amount first. Let's set this to 0.3 degrees
or Dirt Devil also 2.3. I think that's much better. We can create another layer. And I will create VB unjustly and give this orangeish
color like this. And in your smart mask, if you will search for rust, you will find a lot of
different rest masks. So let's try a couple of them. Not this one. Let's try this addressed. I think this one
looks pretty good, but what we can do is
you can just go over here and select this opacity
and set this to around 20. Maybe that we had
this kind of effect. This way it is rarely
subtle and not that much. We can adjust the mask editor if you want to increase
or decrease the effect. Yeah, I think this
word is pretty good. We can also add a bit
of roughness variation. So add another layer. And this time just select
the roughness channel. So make sure only the
roughness channel is enabled. The roughness to point to three, add a black mask. And this time I will
be using a texture. So go over to textures
and search for brunch. Let's see. Let's try this one, grungy map 003. First, select the mask
and add a fill layer. Then we can just drag
and drop it like this. And it is not really
visible. Right now. We can go over here
and select mask. So we can view our mask. So our mask kind of
looks like this. We can now adjust it. First. Let's increase the tiling contrast. Now if you press M to view your material and just
look at this way, you can see a bit of
roughness variation going on. If you select your main layer and increase the
roughness amount, you will see it is
now very prominent. But the reason we gave it
a low number like 0.20, 0.2, so that it is a
little bit more visible. Now I think our grades
look nice in maybe select a dust layer and set
the opacity to around 70, that it is not that dark. All right, now I think
it looks pretty good. Next, let's just select
this complete folder, press Control C and Control V. Duplicate this. Let's rename this to plastic. Underscore read. First, let's change the color, select the base layer,
select the color. And for the red color, set the hue value to 0.98, the saturation to 0.7, and the value to 0.65. All right, so now we don't want this color to appear over
this great obviously. So just click over here, right-click and exclude all. And now we can just drag
select these three. And now this is a second
grade similar way. Just duplicate this. Let's rename this to maybe blew. Open this up. Select
the Base Color. In select the color. The hue value goes to 0.660, 0.51, 0.5 to five. Right-click exclude all, and
just select these three. So as you can see,
the rust layer is not working really
well with this. So just select the rust
layer and let's change the color to maybe some
kind of dark blue. You see. This way you can add different colors
with the orange one. I think it works fine. Next, maybe we can create a
white colored material only. So let's just duplicate this. Right-click, exclude all. And now select this. Great. Come over to the base. You said the color,
this kind of color, like not really white,
light grayish color. I think this looks pretty nice. Then for these large grades, I think one of them can
have the yellow color only. So let's select this and
select it like this. For the other one, let's
create another color. We can have a green color. Duplicate the complete folder. Open it up, select
the base layer, and for the green color, just set the hue to 0.3, saturation to 0.447,
and the value to 0.485. Now, just right-click over
here on your Geometric Mask, exclude everything, and
select these three. Now you see upgrades are looking pretty nice with
all these different colors. So first, let's hit Control
S to save up reject. And over here we can
save it as your grades. And just hit Save. Wait for the project to save. Now, let's add a
couple of logos, as I mentioned earlier, to add a little bit of
more detail to these. Creates, if you open up your breath and right-click
and open up a file. With all the reference images
you will see these gates have like different kinds of
logos for these companies. As you can see over here. So if you go over in
your texture folders, in your course files, you will
find this Textures folder. And you will see I've
created a couple of these same logos
that we can use. So if you wanted to create them, it is not that difficult. You can read them with a little bit of
Photoshop knowledge is makes sure to create them in black and white tones
like this only, so that we can use
them as Alpha images. Just select this one, this one, this one, and this one. And now just drag and drop them like this into
Substance Painter. Drag, select all of them and make sure to select as alphas, because we will be
using them as alpha's. Don't export them as textures, import them as alphas. Select, import your resources
to the project only, and then hit Import. Alright, so now all
of them are imported. Let's start. First.
What we need to do, basically, we need
to create a layer. So we will be using white and red color
for all of these logos. So first, just create a layer. We will be just having
the color channel. So just disable everything and just keep the color channel. And now we will
add a black mask. First rename this to look
like, as I mentioned earlier, we add black mass to control the texture or control the layer where it will appear
and where it will not. If you select the black mask and let's say we select this tool. We can select like
single phase is where we want this white color
texture to appear. But this time we
won't be doing that. Instead we will
be using a brush. And with the use of brush, we can use our white color to add this layer
wherever we want. And if you press X, now it is black color and
we can remove it. You might get confused
because the layer also has white color and we're using white color to paint it. But let's say I
click over here on the fill layer and
change the color to red. And now let's come back
to the mask so you can see the color is
still white over here. And we are painting and
it is appearing red because the color of this
layer is red colored. And we are painting
with white on the mask, not on the model, but we're painting on the mask currently. And as I said earlier, white means visible
in terms of masks, and black means invisible. If we paint with white color, this red colored layer is appearing wherever
we paint with white. And if we select black, we can erase this CM, make sure it is clear to you. So first let's just select
the red color only. What we can do is we can add the same red color
that we used for this. For that. So select the base color and put in as the
new value is 0.98. Saturation would be 0.7 and
the value would be 0.65. Let's see how that works. Select the mask again. And now just double-click over here on this logo, like this. Now, right now it
is black colored, so press X to switch
back to white. And if you add it, you can see the red colored logo is
added with this layer only. You can select it and change the color of it
however you may like. This is a pretty handy trick. I will just make it
a little bit darker. And yeah, that's better I think. But what I want to
do is first I will select the Eraser
tool and erase this. Because I don't really want this logo to appear over here. One more thing. You can hold Alt and Shift and lock
your view like this. But it is not really
perfect. As you can see. The distance between
all these rates is being affected because we
are in the perspective view. But if we set this
to orthographic, you will see all of
them appear to be exactly flat in the
same line only. And distension, not
really an issue. So you can hold Alt and
Shift and you can snap them like this very easily
in different angles. Perfect 90 degrees. But if we set this
to perspective, it can be a little
bit difficult to do. You can see it is
not really perfect because of the distance
between all the grades. So yeah, make sure
whenever you are stamping of stickers
like this or logos, just make sure to set
this to orthographic so that distance is not really an issue between
all the objects. Hold Alt and shift and
snap them like this. First I will select this
dragon like Google. And on this side, I will be
using this to just snap it. Just hold Alt and shift
and snap your view. Then you can adjust the size of your brush by holding
Control and using a right-click and moving
your mouse left and right, like this, you can also
just do it from over here. Let's scale it up. Control and right-click and click once and you can see
the logo has appeared. Hold Alt and Shift again. And just move over to
the backside like this. And just use the logo over
here also at the backside. Alright, Next I
will use this logo. Now hold Alt and Shift and
just snap over here like this. And on the right side
and the left side, I will be using this loop. Make sure it is at the centre. 0 Lord, and shift again
and move over to the left, the right, like this. And you can see we
have easily added logos to all four sides. We have pretty basic. Next what we can do is we
can add another fill layer. And this time I will be
going with the white color. Add a black mask. So again, rename
this to Bluebook. Add a black mask. This time
let's select some different, but this time let's select
some different logo. So let's select this one. And we can easily stamp it
up over here like this. Begins down, put
up overhead also. That is pretty the
protective stuff now and you can do it however you may like. I'm just using the
same logo a couple of times in different areas. Now just select this one and paste it over
here like this. All Alt and shift and move back. There's user over
here. And here also. The last grade, what we can do is we can just come
back to the red color. And while selecting
the same logo, stamp it like this. And we can leave these
sides empty for this great to have a bit of variation and for
the large grades, I won't be using any logos. Just have them clean, empty, like this one. We can use this logo over here. It does not really matter. We can mix and match them. Alright, so I think I
look pretty good now. Hit Control S to
save everything. Alright, last I will
add another layer, and this will be
for a beer bottle. So let's rename
this to bottling. Right-click exclude all,
and just select these two. So let's see how we
can create a material. First, I will set the color like dark brownish,
something like this. Now the way you can create a
beer bottle material is just set the metallic to one and
set the roughness to zero. And you can see it kind
of looks like about it. Then adjust the color a little bit more to
get that exact look. I think this is perfect. And it looks pretty workable. Last, we will be just
quickly using iron material. Or maybe we can just
create one on our own. Add a fill layer, set
the metallic to one, and decrease the
roughness a little bit. We don't really have to do much. Right-click, exclude all
and just select these two. Yeah, we're basically done. Rename this to iron. Now if he will come over
here in the folder, you will find a couple
of beer labels. So just select this one
and I will use just this small one and
drag-and-drop them. This time. Export them both as textures and not as alphas because they
both are textures. So go over here and say
project hit Import. And now we have already done this in the previous lectures. How we can stamp up textures
is create a paint layer. This time, I'll
select this tool, the prediction tool, and now drag and drop
this first level. Scroll down onto over here
in the color channel. If you remember, you can
press S to scale it down like this. Place it over your bottle. Exactly. So press S then use your
right-click to adjust the size. Alright, so now just
place this accordingly and use your brush tool
to paint it this way. We have a couple of issues now. One thing is that we cannot really see the texture properly, but that is because
we are currently set in to K. If we increase
this to focus on, the texture would be
a little bit better. So yeah, as you can see, next is we have these
things appear over here. We can just select
the eraser tool. And we can quickly it is the easier way would be
to just click over here, then hold shift and control to erase in a
straight line like this. You can see it is perfect. Place it over here like this. And it is it again. Control and Shift and
paint in a straight line. Remove this area also. And yeah, basically, this way we can add a label to a bottle. Come back to the layers, select the prediction tool again and drag and
drop this label. This time. We can waive it, disabled the roughness channel. And I think it would appear a
little bit less in painted. This time, as you can see, that King did not appear. So if we want to erase that, you can just disable
the roughness channel. Select the brush tool or the eraser tool
and just erase this. And yeah, we're basically
done with the bottles. I think they look pretty good to be looked at from far away. And they look pretty convincing. We can press Control plus
S to save our files. And I think we are done
with the texturing of all our assets in this one. First, let's rename
this to label. And yeah, that's
pretty much about it. For all these textures. In the next video, we will be exporting them into Unreal
Engine and we will also explore these textures
into them and then start placing all these
assets around our scene. Let's just hit Save and tangos watching. I'll
see you in the next one.
24. Modelling the Sign Boards: Hello and welcome guys.
In the last lecture, we finished with the
texturing of all these props. And I mentioned that we
will be exporting them into Unreal Engine and
start placing them. But before that, I'm
thinking that we should create some
more prompts and then we will import them all together only and then
we'll start placing them. So in this lecture, Let's create some
more new props. I will just disable
these two collections. And first weekly, let's
open up pure ref. Right-click and load your
reference image scene. And if you zoom in over this particular reference
image over here, you can, if you don't find it, is look for it and double-click. And you can zoom in
on it very easily. So you can see a couple of different sign boards over here, like this one, the
speed limit one, or the stop sign, and various little small signs that can add a lot of detail
into our environment. So in this lecture we
will be modeling these. So yeah, it is a pretty
easy thing to model and you can definitely
try doing it on your own. But alright, let's start. So select your blender scene. And let's press Shift plus a and just add a
simple cylinder. Right-click Shade Smooth
this and enable auto smooth. S. Then Shift plus z. We just scale it down on the
x and y plane like this. Just scale it down a lot. Submitted on this. Then we can press S and Z, scale it up on the z-axis. So something like that. Then what we
basically need to do is we can just duplicate this. Press Shift plus dy plus x
and duplicate it like this. We can create like three or
four different sign boards and yeah, that would be it. Next, let's add another object. So press Shift plus
a, then add a cube. Again, scale this down 74 top view and let's just make it around the
size of the cylinder, only something like that. Then scale it up on the z axis
and match it with the old. Something like that.
The size does not have to be exactly equal. But that's fine. We can
press S then x less than y and scale it down
on the y-axis like this. Then let's just duplicate
this one also, x, and place it over here now to create the
actual sign boards. So we want the textures to properly fit the sign
board that we create. So what we can do
is if you open up your course files and look
over in the textures folder, I've added a couple of textures
that we will be creating. For the sign boards only. We will import them
into Blender so that we exactly modelled
limb or with proper. I mentioned that when we added Substance Painter
and texturing these, we do not face any kind of
issues that the texture is not properly fitting into
a particular sign board. That way it would be
perfectly accurate. So distressed one
for the front view Sinatra Shift plus a go over to image and add
a reference image. Go into a Japanese
Environment folder in the textures folder. And over here you can see all these different sign boards. So let's first select this
top one. So double-click. And your overhead it is, Let's scale it down and just make it relative to
the size of the bowl. So I think this is pretty large. Select this, scale it down. And yeah, I think a size
like this is perfect. So now what we can
do is just select this redshift plus S, then go to select it. Redshift plus a add a plane. Let's are then x
and rotate it by 90 degrees on the
x-axis, enable X-ray. For scaling down. Let's see how we can
create this shape. Press Tab less than
x and scale it up. One for the vertices, select and select these bottom vertices, press M and merge them
at center like this. Now just try to match
these two lines with our actual Blaine. Press S and scale it up. Now I think it is perfectly in line with the
reference image. So now what we basically need
to do is first press Tab, press Control a,
apply the scale. Then press Tab again. Select all three
of these vertices. If you press Control a and B, you will see nothing
really happens because this is a simple plane. And now we need to
bevel the vertices. So to bevel the vertices, instead of pressing
Control plus b, you need to press
Control Shift plus B. Now bevel it and
you can see we are easily beveling. Our vertices. Add a couple of
segments like this, and just try making it smooth. And you can see it almost no perfectly fits
the reference image. It is a little bit out of place, but I think we can
definitely manage that. This matches pretty
good. Let's select all these top vertices, S and X. Scale them up a
little bit outwards. So yeah, I think
this is perfect. Press Tab. Disable X-ray to select
the reference image. Let's move it back over here. And what I will do is select
this reference image, press M, and move it
to a new collection. Rename this to record images that we can easily disabled
this whenever we want. Alright, now select
your sign board. Will do modifiers and
let's add a solid. If I modify first, apply the scale right-click, Shade Smooth, and also
enabled auto smooth. Give it a little
bit of thickness, is pretty good, I think. Then let's add a bevel modifier. Enable harder normals. And yeah, I think
that's pretty good. I first sign board
is pretty much done. It looks a little
bit large to you. We can scale it
down a little bit. Alright, the shift, let's say, let's add a couple more
cylinder, scale it down. They stem over here. Like this. Over
towards the backside. We have something towards
the pole to hold this down. Shift plus B and
duplicate it like this. And yeah, I think the sign
boards looks pretty good. Let's move further
and create some more. The hip plus a again. First I will select this Ball, Redshift plus S that goes into
selected redshift plus a. And again go over
to image reference. And this time, let's select something else.
Let's try this one. Again. Scale this down. I think this image
is pretty good, but this one is very basic
shape and very easy to do. Redshift plus S goals
are to select it. Simply a cubed scale this down. S and Y, scale it down
on the y axis like this. I'll just simply add
the bevel modifier to this to make the corners
a little bit smoother. Live Scale enabled harder
normals and auto smooth. And yeah, that's basically it. One for the front
view and enable x-ray and see if it
fits, perfectly fits. You can see we have these a
little bit of rounded edges. So if you want to create
that, we can do that. Select the Cube
press Tab to select, select this edge,
hold Control and Alt. And again select it.
Select all four of them. One for the front view
enable X-ray and just press control V. And try
to match it with this. And yeah, that's perfect,
I think. Alright. If you can see the
edges over here, just select it again and hit Shade Smooth, and
yeah, they're gone. Now. Select these two
cylinders, redshift plus D. And then we can just
select this pole, then press Control plus C. If you remember, if you press control Z and don't
see this menu, you need to go over to
Edit Preferences and enable your copy attributes menu from the add-ons section. First part copy. And you will find this
copy attributes menu. I've already mentioned this one, but just in case
press Control plus C and press Copy location. And you will see now both of
them are placed over here. So just select one of them. They sit over here, select
another one listed over here. Alright, so to sign boards
are done. Let's see. We have this one sign would
overhead that has like two different ones in
a single one only. So select this red shift plus b. Again, select this first, select them and press Control C, Copy location listed over here
at the top. Bring it out. Then press Shift plus k. Let's add another reference image for a select
distinct. This poll. Redshift plus S
because it's selected redshift plus a and go
to image reference. And this time I
will add this one. So scale it down. You can move it up
over here and just see the size that they are, roughly the same size. So yeah, I think this
image is pretty good. Alright, redshift plus S
because we selected press Shift a plane located on the X by 90. Enable X-ray. Let's scale it down and just try to match it with this line
over here at the bottom. Then press S and X
and match it with these two lines. Like this. Then press Tab to
enable the edit mode, press Control R and add
edge loop over here. Then basically just select
these two vertices, press one for the vertices, select, move them a
little bit at the top, then press M and
merge and center. And now we just need to match
it with these two lines. So select this, move it a
little bit upwards till here. Everything is exactly
like we want. It's perfect. Press Tab, press Control, apply the scale. Again, this tab,
select this vertices. So just select the
single one only, not the rest of the ones. Press Shift plus B, also
in Control Shift and B. And just bevel it like this. That's pretty good. Then select these two ones because the two of them have different
amounts of bandwidth. So it is better for us to
bevel them separately. Then just these two. You can decrease the number of segments because the Bible is not that much.
That's pretty good. Yeah, I think this
looks pretty good. Now, you can just dab, center these left side vertices and push them in a little bit. That's finding is we can select these two
vertices at last, then press Control Shift and me. I don't think we really
need to balance these two. So hit right-click to
cancel your bevel. And I think these are fine, just like that Only. Disabled X-ray. Let's select
the two reference images. Press M and move them into the reference
image collection. Now select this first,
select this first, then select this and press Control C and copy
selected modifiers. Select, solidify and
Bevel and it Okay. And you can see all the
settings are now copied. Right-click, Shade,
Smooth, enable, auto smooth, apply the scale. I just move it
inwards like this. These two press Control plus one to view it
from the backside. And for this, I think
we don't need to add the cylindrical
ones who like new ones. So select this, press
Shift a and add a cube, scale it down, and we can
just use something like that. It's not that hard to create. Something like that is fine. Let's Plays one over here. Ship plus D, This one over here. Select them both
press Shift plus D and place both
of them like this. Alright, so hit Save. Now, once again, what I will do is let's
create one other sign board. Select this and select this. Select these two also, redshift plus d x and
log it on the x-axis. Let's place it over here. Select this, this, and this, and move it up over
here like this. Just to have a little
bit of movie deviation. Alright, so for the last one, just select this S goes into selected one for the front view, redshift plus a and
add a reference image. And this time I will
be using this one. Let's just use this one only. Shift plus D. Select this first, then select this, it's
Control C and copy Location. Enable X-ray. First risk dab their
scale it down like this, and scale it up like this. Instead of scaling it down, Let's just select
this, G then z. So instead of scaling it, we're just moving in
because scaling can sometimes mess up the bevel. So just select them all and
just move them one at a time. So now select this orangey
than x and place it like this. A little bit off. But I think we can manage that. Stab, disable your X-ray. And yeah, I think that's pretty
good. Let's bring it out. Select the reference
image, press M, and move it to different
images collection. Select these two shift
plus D listed over here. Alright, so we're basically
done with the sign boards. It was pretty easy to do. It's saved and press a
to select everything. Press M and move them
to a new collection. Let's rename this to sign boards in bracket not applied because we will be eating a
duplicate of them. Now just select this
complete collection. So right-click and
duplicate collection. And we can disable
the first collection, renamed the second
collection to apply because we are now going to
apply all the modifiers. Alright, so first select this. And let's add a
material to this. Rename this to sign boards. A to select everything and press Control L and link materials. F3 and convert to mesh. It's controlling, apply
the scale for all of them, then go over to UV Editing. While everything is selected press Tab to go
into the Edit mode, we can minimize
your risk for now. Press a to select everything, then press U and hit
smart UV project. Yeah, I think the default
UV unwrap is fine. We have a little bit of
empty space over here, but I think we can
definitely work with that. Let's press tab, go to layout, and let's hit Export. Now let's export them
out of Blender so that we can start with the texturing and
Substance Painter. First, let's check
for face orientation. And all of them are good to go. Now just select everything. Would file export, FBX. And in your exports folder, Let's export this
as sign boards, selected objects and select
mesh, then hit Export. All right, so the export is
done now save a blender file. And in the next video,
we'll start with the texturing of all
these. So tangos watching. I'll see you in the next one.
25. Texturing the Sign Boards: Hello and welcome guys. So in this lecture, as
I mentioned earlier, we will be texturing
our sign boards. So let's start by creating a new project in
Substance Painter. Alright, so click
over select and just select your FBX
file of sign boards. Within remains the same. It okay. You check for
any kind of issues. You can rotate the light by holding Shift and
using a right-click. Alright, so everything
seems pretty good. None of them are
exported in correctly. So I will go over to
texture set settings, hit big mesh maps, and quickly do the
usual settings. And then I will click on bake. Just wait for it to finish. Alright guys, so the biggest
finished now it okay. And quickly check. I think everything
came out pretty good. I will quickly go over here and in a very temporal
anti-aliasing. Alright, so let's start. First. We need to add the textures
to add on these sign boards. To go over in your course files. Open up these
textures and you can find all the sign
board texture images. So four of them are like normal textures and one
of them is an alpha. So I will show you how we can
use them both differently. Select them all
and drag and drop them onto your substance
painter asset library. So make sure to select
the first four. Select sine one, sine
23.4 while holding Shift, click over here and make sure
to import them as textures. And just import the
last one as an Alpha. Makes sure to
double-check sine five is an alpha because it is a
black and white image. So that's why we will be
importing it as an Alpha. Now, look over here, select project and hit Import. All right, so now there are multiple ways through
which you can add these textures over here onto
your model. So let's start. I will go over to
layers, select this, and just delete the pre-existing
layer. Before starting. Let's just say what's
often Spain the project, it controls less S and
save it as sign boards. Save. Alright, so let's start. I will start by
adding a fill layer. This time add a fill layer. And I will just quickly
show you a method. So let's select this sign to drag and drop this onto
the base color like this. You will see now it has
appeared over all the models. We can adjust the things like tiling and the rotation
and the offset, all those things like
that from over here. But what we will do is first press F1 to bring up your UV map so you can easily place it over here. And then I will add
a black mass to this so that I can isolate this texture
only over this phase, only. Select this tool, and
just select this face. And let's select all
these edges also. Do that. I have selected all
the required phrases that I want to add
this texture on. Again, select bank the field. You will see when you move it. The texture is only
appearing over these areas. So you can hold Shift and
Control, scale it down. You can see the phases
not placed correctly, so we need to
rotate the texture. So hover over the corner, hold shift so that you
can snap the rotation in 45-degree angles and
rotate it like this. Also the back face
is also selected. You can again select
the Mask and press X to switch back to the
black color so that we can de-select
this face like this. Alright, again, select this and hold Shift and
Control, scale it down. And you can see how
easily we can place our texture to
place it correctly. You can just scale it
differently like this. From all the sides. You can see how easy it was to add the texture over
here like that. But there is another
pretty easy way to do, like to add a texture onto your model that we
have already done. So instead of deleting this
one, I will just keep this. Let's rename this to stop sign. And now I will add
a paint layer. This time using a paint layer
we have already done this. We will use the prediction
tool to add the stop sign over here very easily
with F1 or F2. To bring back your
complete 3D view, let's rename the
layer to stop sign. And select this tool,
the prediction. And now scroll down and drag and drop this onto the
base color like this. So this method, it is a little bit difficult
because you have to place your texture correctly. We can set the camera to orthographic so that
everything is flat. In easy place our texture, I think this is almost perfect. So you can just paint your
texture very easily this way. There is like one little
disadvantage of doing, of using this method. So one of them is,
you can see it is appearing over here
at the back also. So we need to select the
Eraser tool and erase it. There is EDS method
to remove this, but we will go over
that later on. But the disadvantage is that it is appearing
over here at the back. The second disadvantage is, let's say you want to change
things like the roughness or the metallic values of
this particular layer. We cannot really do that, but we can do that thing
for the fill layer. So let's select the fill layer. And if I tried to increase
or decrease of metallic, you can see it is
being affected. Or if I increase or
decrease the roughness. It is not that
visible, but you can see it is being
affected on this layer. Also the metallic values that is happening because
this is a film live. If you tried to do the same
thing on the paint layer, nothing would really happen. Let's come back to the brush. You can increase or decrease the metallic and nothing
will really happen. What is basically happening is if you set the
metallic to one. So now if you make
a paint stroke, you can see this page stroke
is completely metallic. If you set this back to zero, you can see it is
again non-metallic, but it won't make the changes to your already
existing strokes. You need to manage
it beforehand. In the case of a paint layer, because you cannot really make changes later on at the end. That is the basic disadvantage
of a paint layer. So now onto how we can remove these areas.
So it is pretty simple. This time again, I
will add a black mask. We can also add a black
mass to a paint layer. And now I will only select these faces where I want
this texture to appear. I will leave the
rest of them out. That way it is pretty easy to manage where we want
the texture to appear. X to switch back to black color and just
de-select these faces. Now you can see we
are good to go. It is only appearing
over here only. Now I have shown you both
the methods through which we can add these textures
onto our models. So I think using the
paint layer method is a little bit easier because it is a little
bit easier to do. So I think I will
be using that only. So in the case of paint layers, you do not need to create
multiple different layers. You can work on the
same one or leaf and add all the textures
on the same layer. But for now, to do that, we have to remove this mask because it will
interfere with us a lot. So just right-click
and remove the mask. And you will see all
these things up. We're back again,
but don't worry, we will fix that later on. So for now, let's just quickly select your
prediction tool. And now the sign over here also. Make sure it is accurate from
all angles and just paint. Next. Let's let this sign. Alright, so I think
this is perfect. Painted next to this one. So drag and drop it over here. So you can see we have added all the different
signs over here. You can see the paint is appearing over here
at the back also. So now we will quickly fix that. What we will do now
is basically we will add again a
black mass to this. And it has disappeared
from all the phases. Just quickly select
all the faces where you want the
texture to appear. And yeah, it was that simple, but we just need to select
all these edges also. Just quickly do that. And we will be good to go. Make sure you don't
select any extra faces. Switch back to black
color and just de-select these faces that have
appeared by mistake. So similarly do this. Same thing for this one also. You can also make a
selection this way. It will be a little bit bigger. You can see it will
select these extra faces, will describe to do
it with caution. So just move towards
the backside now press X and remove it
from this face and this one. X again to switch back to white color and you
select all these edges. Yeah, it is a little
bit tedious task to do, but it definitely can be done. Alright, so again, press X
switch back to black color. And let's see if there are any faces that are
selected at the back. So normally I would do.
Again, let's press X. All right, so for the last one, sitting back your brush. For the last one, we won't be
really using this texture. Again. We will be using this one. This is alpha image, and we
will be using it differently. So let's look at it
at a later point. For now, what I want to do
is select this top sign. And let's say I want to
make this a red color, a little bit less brighter. So to do that, I will go
over here and add a filter, select the HSL
perceptive filter. If you change the hue, you see, you can adjust the hue
saturation and all those things. So first let's set
the lightness to 0.48 and decreases
saturation to 0.45. That's better, I think. All right, Now let's add the material for
all these parts. This pole over here. So basically it will be
using a white material only. So let's find a simple material. You can close this
out, this filter, select the smart materials, and search for plastic. And let's drag and drop
this plastic dusty. Don't have this one in
your smart materials. You can probably use
any one of these. You can even use this one,
plastic dirty scratch. Let's drag and drop any I even this one
looks pretty good. Let's see this one. This one also is fine.
It's totally up to you. Which one you want to use. I will be going
with this one only. Drag-and-drop it at the bottom. And you can see all this dust appearing over here at the back. So I think this is too much. Select this and
first set Select. And now I want to just
decrease the opacity of this. So set the dust opacity to 50. Or maybe even a little
bit more or less 25. And the dust also I
will set this to 50. And yeah, I think
it is more subtle. Here you can see the
paint is still appearing. So again, select your mask, press X to switch
to white color, so I can switch to black
color and now select this face and remove it. Make sure you are
placing this plastic, this D or any of the
plastic materials that you are using
at the bottom. Because if you use
it towards the top, it can mess up with are like all these textures as you can see if
you place it at all, these textures that we like
added won't even appear. So make sure it is at
the bottom like this. Alright, so for the last one, what we are basically
going to do is first, if you want to look at all
your imported resources, you can click over here. As soon as you click over here, this window will appear. So you can just
select project from here and now come
over to textures. You can see all these textures. If you select the Alpha, you can see the Alpha. So first, there are
multiple ways to use it. Again, you can add a
fill layer, let's say. And let's make this red color or any kind of color
that you want. Let say these two blue color. Add a black mask. And now you can select
the Paint tool. And you can see we
can easily paint with white color and this blue color will start appearing over here. And now if you press X and switch back to black
color, we can erase it. But if you double-click over
here and select this alpha, increases size, press X
to switch to white color. You can add something
like that also. This is the way we
can use alpha images. But I think this
looks pretty weird. So what we can do is post, Let's delete this layer. And I will just select this
plastic dusty material. Duplicate this. So press control C control V. Change the color to blue. To change the color to
blue. Something like that. You can use the Eyedropper
tool and select this color only.
Something like that. Now select the geometry mask, right-click over here
and exclude all. And now just select this. And now we can basically
add a new fill layer. Keep the color it white and double-click over here to select this Alpha and just stamp it
like this with white color. We can see we have a basic sine. And I think it
looks pretty good. This is another way that you
can use this Alpha images. This is basically, these are different ways that you
can use these textures are the alpha images to create
various different prompts. So let's just hit Save first and let's see if there's
something else that we can do. We can add a fill layer and we can add a bit
of color variation. So just to give it a little bit of like
damage, like feeling. So add a black mask first. Come over to all libraries. And in the texture section, search for grunge again. And let's just use
a basic texture. Let's use this grunge band 001. So first add a fill layer. Now add this grunge maps 001. And you can see how
this white color is appearing over our textures. First, let's
increase the tiling. So that is something like that. You can also
increase or decrease the balance from over here. Now, let's rename
this group dust. And I'll set the opacity to ten. This way you can see we have a little bit
of discoloration. Let's just select the orange map again, decrease the tiling. Also degrees of
balance a little bit. And yeah, I think it
looks pretty good. Select the fill layer and remove all the things except color, so that you don't leave the
color channel too much. We can also set it to five. So that is not that
visible, but still there. Yeah, I think
that's pretty good. It adds a little bit of small
details to our textures. Alright, so yeah, I
think our sign boards look pretty good now
we can hit Save. And yeah, I think this is it for this video. Thank
you. As watching. I'll see you in the next one.
26. Modelling the Cardboard Boxes: Hello, Welcome guys. So in this lecture we will be
creating some more crops. For now. This will
be the final prop said that we will be creating. After this, we will be exporting all our process
that we just created, like these bottles and
creates and the sign boards. And now we will be creating
some cardboard boxes. Just fill out our
scene so that we can place them around the
homes and outside them. So yeah, this will be our
last prop set for now. So to create a cardboard
boxes, it is pretty simple. You can just add some cubes. So press Shift plus
a, add a queue. And let's get it on
the x-axis like this. Alright, so one cardboard
box we can have like completely basic like a
loose from all sides, then G, Then virus, move it over here on the right. I will also turn on
my screen cast keys. Let's just duplicate this one. Press Shift plus d y
and place it over here. Changed the dimensions
a little bit. Let's just scale it
up a little bit. And now I will press Tab,
press three for Face, Select, select this
face and this x, and delete the phases. Now I will create an open cardboard box to
create some variations. So doing that is
also pretty simple. We can first select these two, raise e to extrude
them like this. To lock on the z-axis. Place them till
here, then press S, then y, sorry, S then
x, given them down. Let's place them somewhere
around here like this. I'm just scaling
them inwards and moving them here and there. Now select these two
edges over here. This e again. Then press G and Z,
move them upwards. Then Y, scale them
inwards like this. As you can see now a little bit overlapping is
going on over here. So just select these two
edges and move them down a little bit better. Let's controller
apply the scale. And now let's add a
solidify modifier. Because if you don't add
a solidify modifier, and let's turn on the
face orientation. You can see inside
will be hollow and the inside of the cardboard
box would look empty. And you can see from
over here also, we can see the red color. So to solve this,
we just need to add a solidify modifier so that we have a little bit
of thickness in our box. We don't need to add a
solidify modifier to this one because it is
closed from all sides. So select this, press Control a, apply the scale
and now let's give it a thickness of 0.03 m, which is pretty
good in my opinion. Let's add a bevel modifier. Enabled harder normals and
also enabled auto smooth. Alright, so this looks
pretty good in my opinion. Again, let's select this. We get this plus y,
raise it over here. And now we can create
something like this. Just select these
two edges, press S, then x, then y, and scale them
outwards. This time. Make the box completely open. Now select these two
rest S The next, again, scaled them
outwards like this. Let's just scale it up
a little bit so that we have some kind of variation
in our boxes. And the sizes. I think this one is two views, so I will just scale
it down a little bit. All right, Next, again,
duplicate this one. Stops and this face stab to go into the Edit
mode, select this edge. Let's move it upwards like this. One for vertices select, select these vertices,
move this down. Incident this age, this down. Stab again, let's
let this word sea enable X-ray and
select this vertex. And we have something like that, like a folded proper
cardboard box. Next week GAN Just select this box, redshift plus D and just
create some smaller ones. 74 top view. Let's scale it up or
something like that. Stem over here. Let's
duplicate this one. We can have a couple
of small boxes. Let's select them all and
create a new collection. Rename this as cardboard boxes. Out of line. I think. Let's just select this one. Press Shift plus d y. We can rotate this
one by 90 degrees. We can a little bit smaller
in scale it on the y-axis. Stab, you go into the Edit
mode, select the edges, and just move them down a little bit there just to
randomize the moment. Alright, so I think these many cardboard boxes,
there's enough. We can definitely populate
our scene a lot with these. So now what I will do is
just select this collection, right-click and duplicate
this duplicate collection. You can turn off the first one. Select the second one and rename the collection
to apply it. Because we're going to
apply all the modifiers, a to select them all, press
F3 and convert to mesh. Now all the modifiers that
are applied, as you can see, the select this cardboard box, create a new material and rename this material
to cardboard box. Now while this box is selected, press a to select everything, then press Control L and
link all the materials. And yet now we can go over to UV Editing risk. First step. And while all of
them are selected, press Control a,
apply the scale. Now press Tab, press a, then press U and
smart UV project. Yeah. I think this union
rep is pretty good. We can definitely move
forward with this. Now, let's come back to Layout. Enable face orientation once and everything is fine, I guess. So, yeah, let's just export
them and to the texture them. Select them all. Will be fine. Export FBX. The exports folder, name
it as cardboard boxes, selected objects
and mesh export. Alright, so the
export is done now, we can open up Substance Painter to start with the
texturing process. So texturing them would be
fairly straightforward. I will provide you with
the smart materials that we can download for free and we will be using that material. That is a basically
a cardboard material that we can use to
picture these boxes. So now create a new project. You don't select and deselect. Let's come back over
here and exports folder. Select your cardboard
boxes and hit Okay. Alright, so first let's start
by making our mesh maps. So go over to display settings. And I will first enable
temporal anti-aliasing. Gold texture search settings. You'd make mesh maps and quickly do the same
settings that I do. Alright, so now we'll just
wait for the big to finish. Alright, so the vagus
finished now, so okay. I think everything
is pretty good. Alright, so now we
are going to use a cardboard material to
texture these cardboard boxes. For that material.
Just quickly go over into your course files. Open up this download
links Notepad file, and you will find
this link over here. We just select this link, copy it, and you can paste
it in your Google Group. This is basically a set of
different cardboard materials, which is completely
free to download. And these are really
good materials. We can create pretty nice-looking
cardboard with this, so we will be using this. So if you have never
used to come through it, basically what you need to do is just type in amount over here, what you want to pay for this, you can also type zero and
just sit, I want this. And then you can put in your email address and he'd get and you will get
the files for this. So as I've already
downloaded this, I won't be downloading it again. Go over to File
and you will find this cardboard materials back. Now to get the files, I will just basically hit right-click and extract two cardboard
materials back over here. Alright, so open it up. And overhead, you will
find different types of materials and also
smart materials. We will be using a one
single Smart more detail only and this duct
tape material, what we can do is
we can select them all and drag and drop them
into our Substance Painter. It's like that. So you can select them all. Now, click over here and make sure to select
as base material. After selecting it as waste
materials select project and he can put them over here. So let's do the same thing
for the smart materials. Also. Select them
both drag-and-drop. And already it is selected as smart materials so we
don't need to do anything. Let's select project
and hit Import. These are overhead
now in a shelf. So to use them, I will be using this one cardboard
standard for this. Drag and drop this onto your models like that.
And it will load. And you can see right away, it works pretty well and gives us a fairly nice looking
cardboard material. But it is kind of
like very plain, so we can definitely give
it a little bit of details. Let's go over to layer, select this and delete
this, open it up. And you can see we have a lot of different settings that
we can choose from. First, let's enabled rounded. To give it a little
bit of dirty look. Next, I will, just
on top of this, I will add a desktop
illusion layer. Give it a darker color, add a black mask. Now just remove this
important resources for it. And in the smart math section, just drag-and-drop
best occlusion. Obviously we don't
want it this much. So make sure to
turn it down a bit. Select your generator and set
the grunge amount to 0.25. Instead the dirt level to 0.3. I think even lower 0.25. After that, we can just decrease the opacity from overhead to 50. That it is very subtle. Not that much. Rename this to dust. Alright, so now to add details
into our cardboard boxes, we will be using a
bunch of Alphas. So if you come over here again, back in your course files, in the textures folder, you will find these
packaging Alphas. So you can see we
will be using these, we have these kinds of
icons on different boxes, so we can definitely use them to increase the
details even more. So just select them all and drag and drop them
into Substance Painter. Make sure to select them
all and select Alpha. Select your project,
click Import. All right, so before starting, let's save our projects. So hit Control S to save. And we need to
provide both boxes. Alright, so it is saved. Now, using this
is pretty simple. We do not need to
create another layer. If you open up this folder
and in the surface section, you will find this ink layer. So just select this black
colored mask, this one. And if you print
it, you can see you can paint this dark colored ink. So what you basically need to do now is you can select any of these Alphas and very easily
stamp them over here. So you can see instantly
it adds a bit of detail to our boxes and makes them look a
little bit more realistic. We have a little bit
of issue over here. Like, let's say I want
to add alpha over here. I can definitely
add it like this, but it is a little bit
difficult to work this way. Because if I hold Control and Alt and snap
my view like this. First let's change too. Orthographic. You can see
everything is overlapping. We can see them
properly in the front like this and in the back. But if you try to see
them from the sides, we will get these
overlapping boxes. So I mentioned this
issue earlier and I fix this issue
beforehand only when you are texturing the beer
crates because we place them diagonally so that we can see
them from all four sides. I kind of forgot to do this
for the cardboard boxes. Don't worry. Our progress won't
be like nullified. What we can do is
quickly go back to Blender for top view, and let's just quickly place
these boxes diagonally. So if I just quickly come
back to Substance Painter. And you will notice
that if you use these single alpha's just like that, the brush will stick to
the surface like this. You can see if I come over here, it is sticking to this surface, but if I come over here,
it is sticking to this. So it will be easy to like a stamp the stickers
on the sides. If there are single stickers and we're just using the brush, it can be pretty simple and
we can do it very easily. We don't really have to place
all the boxes diagonally. The reason for this
is the alignment is set to tangent wrap. If we change this to camera, you will see the brush
won't snap to the surface. But if I change this
to the tangent wrap, it will snap to the
surface like this. You might ask why we are
placing them died Lenny, and exporting them again. The reason for this, it is fine when we are using
a brush like this. But let's say we are
using this tool, that is the prediction tool. If you press X, we will
paint with that color. If you press X, then we will be painting this ink
with the white color. And we can just drag and drop our alpha over here like this. Then it can be very
difficult to stamped all these Alphas because for
this tool to work properly, we need to have proper
orthographic view. So yeah, that's why
I'm doing that. But if you want to
just use the brushes, you can definitely
do it by placing them over here like
this also fairly easy. So let's just undo everything. And yeah, what I was
saying is now I will show you how we can export these boxes again without spoiling a project or
anything like that. So press a to select them all. It saved on your blender
file over to export FBX. Select the cardboard boxes
again and hit Export. Come back to Substance Painter. And now, instead of
creating a new project, Let's go over to Edit
Project configuration. Select the file again, and select the cardboard
boxes and hit okay. You don't need to do anything. You will see it will
load a little bit. Now everything is back. What you might need to do once. You might need to bake
them HashMaps again, because you can see we have
these things over here, that is because of
the old models. So if you just quickly go
over to texture set settings, hit big mesh maps, and just baked goods again, and everything
would be resolved. One thing that might
be lost is that the packaging textures that
we use on the first few, they might have
disappeared but a rest, everything is the same. So yeah, that's
pretty good for us. Alright, so the baking
is done now hit Okay. Let's quickly check.
Everything is pretty good in my opinion. Alright, so go back to layer
and I will select the ink, right-click and just clear mask. This black color one
just hit right-click and clear mask so that
everything is fresh. And now make sure your
view set to orthographic. And now let's start
stamping of some stickers. So a stamp one over here. Move this over here like that, x times one over here. You can basically place them anywhere over here
in the corners. This one over here,
one over here. This is pretty easy to do. You can definitely select
any of your stickers, convert them into alphas, and do this on your own. Let's select this one. Scale it up a bit.
Over here, like that. You can place it over
here at the back also, the back is pretty empty. Alright, now let's
select this one. So for this one to work properly because it is like a collection
of different stickers. We cannot just basically
Stanford this way. It looks pretty weird. So, yeah, for this
particular sticker only, we will be using the prediction
to select the projection. And it is already dropped
in, into this grayscale. Just if it is not, just makes sure to drag
and drop it like that. Removed the Alpha
from over here. And now press S, scale it down. First. We can maybe use this arrow is a little bit
out of place it over here. If you put in like
anything extra like that, just use your eraser tool. I'm currently it is. Again, come back to
the prediction tool. Let's come over here. You can press S then hold
right-click to scale it up. There's just two of these boxes, just two. Over here. We can add these two. You can see how easy it
is. Let's start three. Barcode overhead in the corner. Select your eraser tool and just erase all the extra stuff. To erase in a straight line. Just hold Shift. Click over here like this, then hold shift and control. And you can see the kidney
days in a straight line. Let's move over to
the other side. So hold Alt and Shift, snap it like this. Let's make sure this one also first. Select your position. Incident rays into the series and you can also
set it to four K. Come over here and texture
sets settings set this to four k so that you can do everything very crisp and clean. You can see all edges are sharp. Now, let's put some
overhead also. It is looking kind of empty. Yeah, that's pretty good. Again, maybe put all
of these over here. Over here, Let's again
add this atom down. It is definitely a little
bit of replicated stuff. But you can definitely do that. Just to fill out your view. Just to fill out your
cardboard boxes. In, select the
prediction. Elite up. Again, Let's select
the Razor Tool. Is all of this. Let's come back to the Brush. Select this one. Alright, so let's see
if this much is enough. This side is pretty
empty, but yeah, we definitely don't need to
add it on all four sides. But if you want to, you
can definitely go for it. But even having a completely
filled on three sides is fine because they won't
be even visible that much. All the signs that are that we are like putting
so much effort it alright, so I think in my
opinion, this much is enough. I don't know how this alpha
was selected in the razor, you can remove the
alpha from over here. Let's see. Let's fill it out
a little bit over here and then I
think we'll be done. I did not put this
in the corner. So being summit, please get rid of it isn't a straight line, makes it a little easier. Again, click over
here and then hold Control and Shift,
and just click. Alright, so I think this
image is pretty good. Let's move on and give it a
different kind of detail. So next we will be using the duct tape material
that we export it to add a little bit more
detail to cardboard boxes. Let's go over to the
important resources only. If you are not over here. If you are in your normal shelf, you can just open this up, this menu road project. And yet over here you will
find a duck tape material. Come back to layers, drag and drop the ductile
material over here on top of your cardboard and you will see
something like this. So yeah, don't worry about it. Just add a black mass to this. Set this back to two k so
that it is a little bit easier to move around
in Substance Painter. Now select your brush and let's
remove the alpha for now. And if you paint, you can see you appending
in basically a tape. If you press X to switch to black color, you
are removing it. But right now we haven't
selected any alpha. That's why it is
like very jittery. So what we can do is go back to all libraries in
the layer section. Currently painting in the
duct tape black mask. Select any brush. Let's go for some
kind of nice brush. So let's try different ones. Definitely not this. We can even use
something like this. Looks pretty nice. But let's
just find something better. I'm just trying to find
something that resembles a tape. This one is pretty nice. All of them look
pretty same to read. They're just go
with this one only. You can select any one
you've got, you might like. So to make the brush mode hard, you can hold Control and then
hold your right-click also. So hold control and right-click and move your mouse
upwards like this. You can also increase or
decreases slider from over here. Let's scale down the
brush a little bit. Click over here once, then hold Control and Shift and just paint in a straight
line like this. And yeah, you can see we have added a pretty
good-looking tape. We can definitely we
cannot add over here, or maybe we can try. This kind of looks weird. Usually it works only overhead, but what we can do it, you can add like like little
tapes around here and there. Just to add some detail. Click over here, then
hold Control and Shift. And add some tape around
the corners like this, you can decrease the
size of the brush. So I'm just holding
Control and Shift. Right-click wherever
you want to start from, then hold Control and Shift. And yeah, it's like that. They can see it looks pretty organic and it
looks nice to add. So you can definitely
use this to add some more detail to
your cardboard boxes. I think that's too much. Adding one or two border-box
is fine, I think. Now I think a cardboard boxes look pretty good and
ready, believable. We can definitely
work with this. And if you want, you can
spend some more time like, let's go back to reject
and the alphas section. We're going to again
select some alphas and personally to come back over
here in the ink black mask, you can just select
a couple more of them and it is rotated. So far as to rotate it, you can just hold control and left-click and you
can see you can rotate it like this.
This tampered with. So the reason this is not
working is because we have selected a different
kind of brush. So to fix this first, go back to all libraries
in the brush section. We need to select the
basic hard brush. So basic hard-won. And now
come back to project alphas. Now if we selected, now it is working correctly. So as I was saying earlier, you can spend some
more time with this, select different kinds
of alphas and stamp it and make your like cardboard
boxes even more detail. But now I think
they're pretty good. Alright, so a couple
of more things then we will finish
with this lecture. If you open up your
cardboard standard again and come over here
in the surface. Let's expand the global. So you can change a couple of
more settings over here for this material that you can see if you increase
the number of why, you can increase the number of divisions in your cardboard box. You can definitely
increase that. You're going to adjust the
color of the cardboard, lightness, maturation,
and all those things. We also have the cardboard age over here so you can adjust
the age of your cardboard. But I think that's
also pretty handy. You can increase or decrease
in number of spots. As you can see
these small spots. These are all things I wanted to mention about these material. And you can also adjust
the brightness of these lines so that you can
see it is pretty handy. I would suggest you guys to look through this complete
material, all these layers. And you can also come back
over here in the folder. And if you look over here in the cardboard
material folder, there is also an isolated tutorial that you
can go through, understand these materials
a little bit more. It is a nice set of
cardboard materials that you can use to make your
projects even better. And one thing that I
completely forgot, I forgot to do anything
to these little boxes. Let's just quickly do that
and finish this lecture. Right-click and exclude all
from cardboard standard. And I will just
select these five. Then I will duplicate
this cardboard standard. It right-click, exclude
all, and select these two. And let's change
the color for them. I will set them to white. So open up your main folder, go over to surface. And in the global section, Let's just increase
the lightness. And they will be
automatically set to Y. And yeah, I think that's better. These boxes. Yeah,
so now how to save? Last thing, I will
select this duck tape. Remove the alpha, and I will just remove this top table here, press X and remove it. So adding this much is fine. You can definitely add little bit of more
things if you want to, with all these alphas and their tape to
create more detail. And yeah, I think
this lecture is pretty long now, so
I will end it here. Thank you for watching. I'll
see you in the next one.
27. Importing the Props into UE5: Hello guys. So we are back in and we'll now, and in this video we
will be basically exporting and importing
all our textures and models in Unreal
Engine so that we can set them up over here and start with placing them all
around our scene. Alright, so let's start First, I will go in the models folder, right-click and
create a new folder. And the first one is
grades and bottles. It end overdue I inborn and select the
green bottles if Vx, vy it open and just
select Import All. Alright, so all the
files over here now, x coming back, create
another folder. And the next problem set that
we created was fine, Good. Open it up over, add in bold and important, the sign boards, it in bold. All pretty basic stuff. Right-click new folder. And this time cardboard boxes in board and cardboard boxes. Next, let's start exporting our textures from Substance
Painter into Unreal Engine. Come back to content, textures and right-click,
create a new folder. This will be our grades waters. Right-click and
show in Explorer. Again, same thing. Copy this part up. We can close this now, come back to Substance Painter. And let's open up our project. So go over to Open and
just open it from here. And the substance painter
files open up the grades. Now we don't need to do much. Just hit Control Shift
and click over here, the bot, and make sure
to hit enter first. And then you can
select folder and make sure the part over
here is correct because sometimes it gets wrong. Output template would be Unreal Engine 458 bits
plus D3 and for k, So it export and wait for
the export to finish. As soon as it is done, come back to Unreal Engine. And you will see this thing
up your overhead. It import. And yet not all our texture. So here, first, let's import all our pictures at
once to create another folder. This will be sine boards. So I think this is pretty
repetitive stuff now, so I will be just good
luck finishing it off. Again. Recent files
and sign boards. It Control Shift and E.
I'm back to Unreal Engine. Right-click and
show in Explorer. Copy this, but let's
paste it over here. Now I'm just making
the same settings so I wouldn't be
talking that much. Alright, so again, I'll
exercise over here. Let's move on to the next one. New folder in cardboard boxes. But a mattress Substance Painter and open up the
cardboard box is fine. Going back to Unreal
Engine and it import. And now I think we are done with all the importing
and exporting. So after this is done, I will just quickly
close Substance Painter, save, and come back
to Unreal Engine. Now basically, we will be
setting up our materials. Come back to content models. And first let's select
the cardboard boxes. Open up the material. First, let's select this
and delete this one. Press Control plus space. Open up the cardboard
boxes texture folder, and select them all. Drag and drop it over here. If you remember, the base
color goes into base color, normal goes into normal, r goes into ambient occlusion, g goes into roughness, and blue goes into metallic. We also need to make a fix
to this leg shiny thing. So just click over here. While you're bad, texture
is selected and disabled SRGB and set color to linear. Now we're good to go hit Save. Let's basically do this
for all of the materials that we imported this up. And you will see now
the material will start to appear over the boxes. You can drag and drop and check if everything
is working correctly. Yeah, it is over here. And it is a little bit large
according to the size, but we can just reduce the size. And also the pivot point
is like kind of messed up, but we can also fix that. So I will be showing
that in the next video. For now, let's just delete this and move on to
the next material. Next is our crates in bottles. Open it up and let's
do the same things. Okay, if you don't
know, you can press Control plus space to bring up this Unreal Engine
Content Browser menu. And you can also dock it like that so that it stays
on your screen. But you open up the create bottle folder
and drag and drop them. Now, log base color
into base color, normal goes into normal. Inr goes into AL, green goes into roughness. And then last one
goes into metallic. Double-click disabled SRGB
and set this to linear. So all the same
stuff, it's saved. Let's close this and do
for the last material. That is our sign votes. Again, open the material, delete this thing, press
Control Backspace, and drag and drop the
sign bold textures. Log everything accordingly. And yeah, basically
we are done now. Alright guys, so now all the textures have
appeared over here. And I think this is
it for this video, we are embodied and exploded everything
related to our props. In the next video, we will
be placing them around the scene so that everything looks a little bit
more populated. After that, we can look forward like what are prompts that
we need to make more. But here in the next
video, first we will start by placing them on. I will see you in the next
video. Thanks for watching.
28. Placing the Props: Hello and welcome everyone. In this lecture, we will finally start placing our
props in our scene. So let's start open
up the models folder. And let's start by placing
our beer great bottles. So if you select all three of these models that
are of the same red, great, so let's select
all three of them. And now you drag-and-drop them. You can see there are like three different
objects over here. So it can be really difficult
for us when we want to duplicate them and
place them somewhere else. So what we can do instead is as soon as you drag and
drop them into the scene, just press Control plus
g. We join them together. Now, if it will, press
G just one time, just press G to view all
the game icon like this. And click over here you can
see this green colored icon. That means this is a group
of different objects. So now all of these objects
are joined together. Alright, so let's place
this one over here. Obviously we need
to scale this down. So let's just scale
it down by 0.25. So you can see on the scale, just lock this and
set it to 0.25. And I think that's a pretty
good size for a grade. This one like this. Here. You can also, you can see it is little
bit flying off the ground. So what you can do is just disabled this thing
that is snapping. If you disable it,
you can move it freely. Okay, not this thing. We have to disable this one. This one is for scaling, this one is for rotation, and
this one is for movement. So just disable this. And now we can move this fluidic freely. Let's place it on the
ground like this. Alright, let's bring in another
grade listed over here, press Control plus g
and scale it to 0.25. Hey, like this, you can press E and rotate it a little bit. Maybe we can increase the size a little bit.
So just select this. Let's put in 0.3. And
I think that's better. Again, select this
place 0.3 over here. Let's view it through our
camera and see how it looks. Yeah, I think this
size looks better. Let's try setting it to 0.35. I'm just checking
what looks best. Again, let's view
through a camera. And yeah, I think this
seems perfect to me. So I will put in the size
0.35 for all the grades. Next, let's drag and
drop the blue one. First, change the scale to 0.35. Now press Control
plus g to join them together so that the pivot is overhead at directly
at the center. Select this and place
it on the second floor. Just like that. You can
rotate it a little bit. Also going to
disable snapping for rotation so that you can
rotate freely like this. There's just select
the red grade, copy it up here. Bringing the white great. Place it. Where is it over here? First set the size to 0.35. Then risk control and
plus g to join them. And let's place this one
over here. At this corner. We can also bring in the bottle. Just hold control and select
this one and this one. Make sure they are
for the right bottles so you can see that the lid
of the bottle is wrong. So just hit Undo and
select this one, then select this one
while holding control. Then bringing it. Then just drag-and-drop
them both into the sea. And over here. This
one is correct. Set this to 0.35, then press
Control plus g to join them. And we can place
one bottle lying around over here
like this, rotated. Again. Let's view to a camera once and see how
everything is looking. I think the bottles seems a little too large for the size. Also dislike flying
off the ground. Let's set this to zero point V. I think that's better. All right, let's move further. I would bring in
this large grid, select all three of them,
grabbed and drop it. So the size, again, 2.35, press Control G. And
let's place it over here. And definitely all
these settings are like very preference based. If you want the size to
be a little bit smaller, you can definitely go for it. Yeah, I think the size
looks fine for me. This duplicate this. Let's place one over here also. And make sure the rotation is different so that
they don't look same. I will select this yellow create and bring it out over
here in the front. Like this. Like the green gate. Again, duplicate it. Next I will select the bottle, place it in over here, set the size to 0.3. This control blood due to join it will come out of my camera. I will place this
bottle inside of the great like this
that we have some kind of like wastewater
negated up a couple of times. Select all four of
them. Again, duplicate. Yeah, that looks pretty
good in my opinion. We can also select this bottle. Again, duplicate this and place one over here
lying around line tag. We can rotate it. Yeah, something like that. Now let's start tracing
stuff over here. Drag-and-drop it. Set the size to 0.35. Join it. We need to
come out of the camera. See where it is. Yep. Here. Select the blue colored. Great. I'm pleased.
One over here, together with this yellow grid. Basically I'm copying of different grades and
placing them around my scene to make it look
just a bit more populated. So you can definitely do
this according to yourself. However you may like it. All right, So I
think in my opinion, this matches pretty good. We can also place a
couple of them over here, although they won't be visible, managed to get this and
place one just like this. Yeah, so I think that
looks pretty nice. One thing that I'm
noticing is that the color of these
grades is like a very saturated and a little
bit too bright for my liking. So I will just go over the content in the
textures folder. We don't need to go back
to substance painter who are like turn down
the saturation a bit. I would just go into
create bottles, texture folder, open up
the main base color. Over here. If you see
we have saturation. So just set this to point date. I think as soon as you do that you will see the texture
will update over here. A little bit higher
than 0.80, 0.85. Yeah, I think 0.85
looks pretty good. Here. Just save. And yeah,
I think that's better. All right, next, let's move
on to next piece of models. I will select the sign boards. And this is kind of
difficult because a lot of them have the
same type of object, so we cannot really join them. So what I will do is just
select them all at once. Drag-and-drop them like this. Come out of the camera and
just select them one by one. And join them. Select this, this,
this, and this. Then press Control G. Join this. I can see whenever I
select this object, all of its speed is
selected at once. Let's do the same
thing for all of them. This makes sure you don't select anything else by mistake. Alright. So again, I'm feeling like the color is
a little bit too saturated. So let's move over to take
shares and the sign boards. Select this and just
reduce the saturation to again 0.80, 0.85. Again. I think this is fine. Save. And yeah, let's start
placing them in our scene. So I will select this
speed one place or just over here. Rotate this. Again. For this one,
we can enable back the rotation snapping and
set this to 90-degree. Thanks TO will select this one. Let's place this one
just about here. You're feeling like
the buildings are too close to the sign boards. You can move them
a little bit of a space discipline just over here. And the rest you can
place however you like. Let's just place this
one over here like this. We can figure it out later on. Let's viewed through a camera and see how everything looks. I think the sign boards
look pretty nice. You don't have to go too
overboard with this. Let's just move on to
the cardboard boxes. And again, I will
place them just around over here to have a little bit of
more variation and fill out the empty
spaces around here. Later on, we can
look through some of the pixel mega scan
drops and place them in, in our scene so that it is a
little bit more filled out. Alright, so let's start. I will place this
one cardboard box. And again, you can see this one feels a little bit
too saturated. So first let's go
back to content. Thanks, shares cardboard boxes and reduce saturation of this. Again, let's set this to 0.85. I'm trying adjusting a
couple of other things. They're set the
brightness to 0.6. I think this is
better. So you can set the brightness to 0.6
and saturation to 0.85. It'll save and close this. I think this looks much better. Now as you can see, we cannot really move up
pivot point because this is just a single object and we cannot really join
it with anything. So what we can do is there
is a very easy method. Select it, splits it like this. Go over to perspective
of, I mean, click on this perspective
icon and set top box. And this is currently
are pivot point. Let's w and then hold Alt. And then use your scroll
wheel to move this. So make sure you're holding
Alt and then moving using your scroll wheel
and just place it right about at the center. It does not have to be perfect. Again, come back to perspective and just see if it is fine. Now, just hit right-click. Go to pivot and select
Set as pivot offset. Soon as you do that,
you will see now it is exactly at the center. Not exactly, but we can
definitely work with that. So just set this to 0.35, please, one over here. Push this back. We can definitely change the scale of different boxes to
fit according to our C. Like I might want to
increase the size of this one. Let's set this to 0.45. That seems pretty good. Now let's do the same
thing for all the boxes. Open up cardboard boxes, and I'll select this one. Again. Go over to hold Alt
and use the scroll wheel. Took place it just
about at the center. Right-click and set the pivot off sick set as pivot offset, please, this one over
here at the second flow. Let's set the size
to 0.4 for this one. That's pretty good. Let's
bring in another box. Again, more to the
adult perspective. And use this scrolling me. Right-click vivid
set as pivot offset. Come back to perspective. And let's place
this one over here. They're set the size to 0.5. And I will just copy this one and this one over
here, the corner. We can definitely
reduce the size 2.35. And yeah, now let's
viewed through a camera. And yet the boxes fit in very nicely spaced. This one next. And one more thing
you can definitely work with this skewed
pivot offset also, you can just place it like this, but it is a little
bit tedious to do. But yeah, you can
definitely work with that. If you don't want to
change the pivot offset, you can place it like this. Also. Scale it down 2.35 maybe. Now let's just place it like
this. That is also fine. But I think it is
better to change the pivot offset because
it will be easier for us to duplicate the box and place it in
other directions. You can see even the
rotation is so weird. All right, Let's bring in the next one and start
placing some over here. Job for this one, like this. Right-click the word
set as vivid offset. Let's come back to Perspective. Set the size to 0.4. And we can place this
one right about here. Move it up. Like this. We can place a couple of
small boxes with this. Hold Alt and move the pivot. I'm just roughly moving it. I don't need to change my view. Right-click and set
as pivot offset. Scale it down. Mindful. I think this is really
small for this box, so let's set this to 0.55. Bigger, this is W. And
one over here at the top. And scale this one down 2.3. Next I will just
select this box, duplicate this, this down 2.3, and place it right at front. Like that. That looks pretty
good in my opinion. Let's bring in the last box. The pivot for this right leg, vivid set as pivot offset. So now we have brought
in all the boxes so we don't need to do those
steps again and again. And we can now just
duplicate them very easily. Set the size to 0.5 versus duplicate these two. Press Control C
and V is stem over here and just rotate them so that they look
like different boxes. We can also place
a grade over here. Alright, so yeah, I think
we're pretty good to go. We can copy these two boxes
or maybe a different one. Let's just and copy
them over here. Again. Make sure to rotate
or scale them up just a little bit so that we have a
different kind of radiation. Alright, lets you
to a camera once. And yeah, I think
the props are now placed pretty well and RC
looks pretty filled in now, it does not look that empty. I will just hit Save. And I would suggest you guys to experiment through
with this and this, these props, however
you may like. I will end this video
over here and in the next lecture we will
create one another problem. And that will be a street
poll with a couple of cables hanging around that will add a nice bit of touch
into our environment. Also, we will be adding the
text over this building. Yeah, I think that
would be the couple of last thing to do in
this environment. And at last we will look over in Excel omega scans and
add in a couple of last prompts just to give
this a finishing touch. And yet then we will
finish with the course with taking some screenshots. So thanks for watching. I'll
see you in the next one.
29. Modelling the Electric Pole: Hello and welcome guys. So as I mentioned in the
last lecture in this video, we will be creating a new prop that is the electric
board for our scene. So for this particular problem, I won't be creating
in this fight. I will just go over here and
open up my Blackout again. So let's to this and open
up your block out so that you can easily measure
the size of your poll. So press Shift plus a, and let's add a cylinder
seven for the top view. And I will be placing it
somewhere around here like this. Let's scale it down
and press S and Z. Scale it up. I'm scaling
it around 10 m in height. Yeah, that's pretty good size. I think it Shade Smooth and
also enable auto smooth. Just scale on the x
and y plane like this. You can see now the
height is not changing. It is just increasing
and decreasing on the x, y plane, as you
can see over here. So to do that, you
can just press S and then press
Shift plus dead, so that it leaves out the z axis and only
scales on the X and Y. That is a pretty handy shortcut. Set this to 0.16 m. And yeah, I think
that's pretty nice. Open up pure ref now. Right-click load
and load recent. When this particular
C, We have like a electric bowl-like
thing over here. So this is something
that I wanted to create. I think it is pretty
easy to replicate. We will be going
for a pretty simple electrical poles, not that much. So let's go here, something
like this over here. So now I will just select the poll press Slash to go
into the isolation mode. There's three for
the right side view. And let's first select this press Shift plus
S goes into select it. Press Shift a and add a plane. Let's place the plane over here. Rotate the plane by 90 degrees
on the y-axis like this. And let's just scale it down. Scale it down a little bit. Yeah, something like that. Press Tab to go into the
Edit mode enabled X-ray. Let's select these two
vertices as G and X. Given Y. Let's move it to here. Risky move downwards. This again brings even why we have created
something like this. Let's make it a little
bit short like this. I think it looks pretty similar. Next weekend, just
first apply the scale. And now I add a
solid if I modify it to this thickness, 0.02. Okay, let's increase
the thickness now. Around 0.2 m. That's too much. I think. It's decrease it. This much is pretty good. So 0.04 m next weekend, again plus three for
the right side view, but Shift a and add a plane. Or we can just
duplicate this plate. So press Shift plus
de-select this, duplicate this,
rotated like this. Let's scale it down. And yeah, I think
this works nicely. If you want, we can express that and delete
these two vertices, m, edges like this and this
f to fill out the face. Create a straight line.
And let's move it inwards. Make sure to apply the scale and then reduce the
thickness to 0.02. Yeah, that's pretty
good. I think. Let's see, next weekend. Again, select this
press Shift plus S goes into Selected Shift a to add a queue of
scale this down, please. This insane. Scale it up
on the x-axis like this. Increase the scale on the
x-axis to around 1.5 liters. Something around this. Also, I will increase the scale a little bit
on the other to access. This looks pretty good, I think. Next weekend again, redshift, they add a cylinder. Scale it down over here. To create these shapes. We don't have to give
them too much detail. Just a little bit. So press Tab, press three for Face Select, select this face. Would help us control
our add an edge loop. Three, hold Alt and
select this loop, press Alt plus e and
extrude faces along normal. The bottom face is i. And insert this like this. Yeah, I think it's pretty good. Next we can add a
modifier to this. Let's see from the front view, I think it looks pretty good. Let's add another cube. Scale this down. Instead back over here. And create something like this. Alright, I think this
looks pretty good. Next, what we can
do is we can just select all of these things
that we just created. Seven for the top
view press Shift plus D to duplicate them are to rotate and
prototyping 90 or -90. And then place it
like this over here. Let's move it down a little bit. And also move it
inwards like this. Now let's just select all of it. Hold Control and
deselect the poll. Then again, press Shift
plus D and move it down. Like that. Again, select all
of it, de-select the poll. Move it a little bit downwards. Select the ball, press Tab, press Control R. Add an
edge loop at the top. Make sure to apply the scale,
establishing there's three, hold Alt and select the loop is extruded
outwards like this. Next weekend, just select this one, this one and this one. These three,
duplicate this place this over here like this. To create the
cylinder. The shapes. Now add a cylinder down and
place it over here like this. It's more of this and
also enable auto smooth. There's two daily
it a little bit, so press Tab plus three. Instead, this extruded outwards something like this. Let's move it a little bit
downwards by Shift plus S and closer to select
it, add a cylinder. Again, scale this down and just create a
small metal ring. Select that. Again, I will
duplicate all of this. There's just leave
out the cylinder. Again. This rotated by -90
degrees, by 180 degree. So there's our basic
tradable here. Move it a little bit upwards. I'm just tired just thinking of different things
around the pool. Yeah, I think that looks better. Select this press Shift plus
s goes to the selected. Let's add another cylinder. Scale this down, scale it up. This one goes on
the top like this. Move it over here. Also, we have this
thing over here, so I will select
this, duplicate it, rotate it by 90 degrees, and place it over here. All right, that's pretty good. Next, let's select
this slider scale. Stab, two edge loops, and scale this
down a little bit. Add another edge loop, and
this time I will extrude this. Next press three for
facie leg hold Alt, select all the face loop, press I to insert them
and press I once again, we insert them like this. Then press Alt plus
E, extrude them. We have got a similar shape now. You can add a bevel modifier
to make it look even better. You can see it
looks pretty good, but didn't want to even visible. So I don't think we have to
waste our geometry on this. I think it is pretty
good. This family. Again, let's insert this and
extraordinary downwards. Alright, so we have got ourselves with a pretty
good looking forward. We can now select
this press Shift plus S goes into selected shift, they add a cylinder, Scale the cylinder down. The z-axis. Enable auto smooth. And you can see there
are bunch of cylinders added along the
surface of the bowl. So let's do the same. There are something like this. Next we have to
create the cables, but we will create them
later on because you don't really need to export them into Substance Painter
for texturing, we will be just exporting this
bowl only electrical pool. For now. Press a to select
everything. Then press M. If you press M, You can see it is a different kind
of thing written removed from local
view because we are currently in local
municipal slash. First to come out
of the local view, then press M and create
a new collection. And let's move it to the
new collection bowl. Before applying all the
modifiers and doing all that, we will be also creating the Japanese texts that
we need to add over here. So let's do that now. Alright guys, so my computer just restarted itself while I was recording this video and I was unable to save my file. So I had to D model
the entire poll again. So it might look a little bit different to yours
here and there. But yeah, rest everything
is same. As I mentioned. Now we will be starting with
adding the text over here, the Japanese texts that
I mentioned earlier. Alright, so let's start. I'll just disable everything
except this building. Then we need to add like a normal tastes like
normal English text. It is pretty easy. You can just press Shift plus j, then go over to bash and you can just press Shift plus j and then add a text like this. And you will see this text
has appeared over here. If you press tab,
you can edit this. You can like, I can type my name and we can
do all sorts of things like giving
it a thickness. If you go over here in the
object data properties, you can increase or decrease the extrude and give
it a thickness. You can also
increase or decrease the bevel amount to give
the edges of bevel. As you can see, adding a
English bond is pretty easy. You can also change
the font over here. If you open up this font, then you can just
click over here. And you can select from any of the fonts that you might like, as you can see, as soon as you selected, the font changes. So it is pretty simple to add English text and customize it. But to add a Japanese texts, it gets a little bit tricky. So I will be showing you
the steps on how to do it. But if you are unable to do it, you can just copy the
object from my fight. It, it's pretty easy. Let's start now. The first
thing that you need to do is go over here in your search bar and now search for
language settings. So you can select language
settings over here. Let's bring this window
up and as you can see, we have English added. You can click on
this, Add a language, and you can see we have
all different kinds of languages over here. So type in Japanese, it over here, and
just select Next. And the default
settings are fine. You don't need to do anything. Just hit Install. Now
wait for it to install. It might take a little while, so I will just resume
when the video is done. Alright guys, so now
the download is done. If you see something like this, like all the icons
are appearing, then that means the
download is done. If you just eat one Eigen
appearing over here, that means that download
is still going on. If you click over
the options button, you can see properly if anything is still
downloading over here. But if you see all the
icons like this showing up overhead that needs
to download is done and we can proceed further. So the next step is to open
up a simple text editor. So I will just search
for word because the word pad is already pre-installed in
all of the windows. So even just select
this, open it up. And now we need to select a font that supports
Japanese writing. So if you scroll down,
you will find this. You gotta think that is also already pre-installed
in your window so you don't have to worry about this down and select
you will take. And now if we type,
nothing really happens. But wait, but we need
to do is you will see this thing over here,
English and Japanese. You can click on this icon after you have
downloaded your languages, you will see this thing up
during click over here and select Japanese now,
still have to type. Nothing really happens. But now one more icon has
appeared, that is this AI. So besides this japanese thing, you will find this a thing. Click on it, or you can just right-click on
it or just click on it once. And you will see now this
Japanese I can appearing. Now if you start typing, you'll see you can finally
type in Japanese now. So yeah, that's pretty handy. But if you right-click on it, you can also select between
the different types of Japanese writings like there is a dogma that is
currently selected, then there is also
full-width katakana. I don't really know if I'm pronouncing them
correctly, but yeah, if you select them,
you will see how different all of them
or look when written. So first let me select this
and I will just type my name. Let's press Enter two times
to get in the next line, right-click and select this one. And you can see now I'm
just typing my name, but it's a very different
in both the writings. Let's try the third one. This is basically English-only. And yeah, this one also seems
a little bit different. So you can select from
anyone that you might like. I don't really know
the difference, but I will just go with the first one because I
think it looks the best. So just right-click
and select Hiragana. And I will be just typing my name because I
don't really know Japanese, so I don't know what we
can put up on the store. So you can type in anything
that you might want. I will just type my first
name and my last name. And you can do the
same basically all just type any word
that you might like. Alright, so the next thing
to do is select this one. It's Control C, and then
come back to Blender. And now what we need
to do is first, if you go over here in the corner of the
window like this, you can divide the window in two parts. So just divide it. Click over this icon and
now select text editor. Over here. Select Text Editor. Now, create a new text and now paste it over here
that you just copied. The next thing to do is you
can just select everything. So press Control a to
select everything, go into Edit and select
text to 3D object. And now select one object. And as soon as you do that, you can see a text
object was added. But nothing really happened
because the form that is currently selected does not really support Japanese writing. So what we need to do
is select the text. You can see the text
object has appeared, but it has nothing
really right now. So select the text object, go into the object data
properties, open up the font. Click on this icon in front of the regular,
scroll down again. And again I will select, you gotta take only just a
simple one. You got irregular. And as soon as you
do that you can see the text has appeared now. And finally, we have
Japanese text in. But what I will do is instead
of you got the gray color, Let's just go with
something bold. So click over here again and I will select you
Gothic bold, I think. Yeah, let's select this one. And this one looks a
little bit better. Now, rotated on the
x by 90 degrees. And then on the
data by 90 degrees. One for the front view or three for the front
view of this building. And we can place it
over here very easily. Now what I will do is this tab. And we can just sort
of flip REST-based. Stem in the center. We just need four of them. So I will delete
the rest of them. Now what I will do is
let's move it backwards. Don't worry, we will place
them properly later on. Right now I'm just
placing them roughly. Then I will go to
geometry and increase the extrude like this so that they have a
bit of thickness. And you can see the render. We can decrease the
render a little bit just to save
on the vertices. You will see if I decrease
the resolution preview, the vertices are going down. So we definitely want to
keep this at a low number. Like three maybe.
Looks pretty good. Yeah, I think that's fine. Now to place them properly
like real objects, like in 3D objects, we need to go over to S3
and typing convert to mesh. And now we basically don't have any of the texts
properties of them. If you press tab, you can see now we are in the edit mode. So just make sure
you're satisfied with all the settings before converting it to match
because you will lose all the texts
properties of it. You can still undo it. It just the things like
extrude or the debt. That is basically the bevel, I won't be giving it because
it adds a lot of vertices. I will just keep
the depth at zero. Also, you can create a duplicate
of this and place it in another collection so
that you have it saved somewhere if you want to keep
the text properties of it. But I will just now select it, press F3 and hit
Convert to mesh. Now what I will do
is I will just press Tab three for the front
view. Enable X-ray. You can enable extra from
here, select all of them, and just place them
in the center, like this. This one also. And at last this one. Make sure to enable
X-ray so that you're selecting all the
vertices at once. If you want, it might
mess up the text. Now let's select this
and move it inwards. We have basically your
Japanese taste in London, and I think it
looks pretty good. Next weekend, select
this bottom text. Control C, this, and delete this old text
and paste it over here. Again. Go to Edit Text to
3D object and one object. Again, nothing was really added. So change the font from
before and regular two. You've got the bold. Now we can see the text. Rotate this on the x by
90 and on the z by 90. And we're going to place
it over here like this. Again, let's give the text
a little bit of thickness. Make sure it is placed in
the center of the building. Also selected and reduce the
resolution to three maybe. Yeah, Basically, this is how
you can add Japanese text. I'll maybe take stuff any
language that you want. This method would work
for any kind of language. I think you can go over here and just make it a single window
once again like this. And yeah, let's just hit Save. Enable Backup pool.
Select these two. And I will place them under
a single election only. So there's place
this over or we can place this in the ETC. Let's place it in a
new collection and Navy text disabled the middling. And we will be texturing
all of them together only. I think that works better. So go to Materials and let's add a new
material to the poll. Let's leave this bowl and text. Press a to select everything. One more thing.
Select this thing. And you forgot to
convert it to a mesh. So press F3 and it
converted to match. It is actually like a 3D model and not
just a text object. Now select your main pull
and press a to select everything and press Control L and link all the materials. Now all of them have
the same material. Press Control a,
apply the scale. Now head over to UV Editing. And while everything is
selected, just press Tab, press a to select everything, then press U and
smart UV project. So now as you can see, the unwrap is fine,
but this thing, whatever it is causing
issues for us because the unwrap it not covering
the whole texture area, but it is being covered
in a small place only. This is because of this thing. So this particular island. So let's see how
we can solve this. But first we need to figure out which model this
island belongs to. So to do that, just first
enable this and overhead. Press one for the
vertices selected. Now when you select this, you will see now all
the vertices are selected that are
causing this issue. So it is basically this complete thing,
this pole over here. So now what I will do
is I will manually UV, unwrap this and
rest of the things. I will just keep them same. So slash to go into the isolation mode and to manually, we ended up something. Just press two for the edge. Select, select this edge, right-click and select Maxime. You can select any
of these edges. Don't just select the particular
one that I've selected. You can select any one of these vertical edges
and then select Maxime. Now press a danger to you. And instead of smart TV
project, just hit and wrap. And you can see nothing
really hadn't happened. We don't have a
desired desserts. So this time is to
again hold Alt, select this complete
loop, again, right-click and Maxime
as E, and you unwrap. This time we have something
but it is still very weird looking to do further
elaborate on this. But I will do is I will
select this bottom face risk to select the complete edge
loop and select Maxime. So basically three seems now, the ones or the bottom,
one at the top, and one running
along the pool with a new and again unwrapped. And you can see now we have
got a very nice and wrap. Basically now we have
three different islands. One, this huge island is fought all these horizontal
lines and two of them for the caps
of the cylinder. So now it will be
really easy to manage this press Tab to come out
of the isolation mode. Again, press a to
select everything. Press tab again. This time. Don't just press a and
just hit U and then hit smart UV project
because that will mess up everything.
Let's just show. If I hit smart even project
again and hit Okay, you will see I basically have
the same UV unwrap again. So now what I need to do
is I need to make use of both of them and adjust them
into the texture space. So how we can do that? While everything is selected, just press Tab for
the edit mode, press a to select everything. Now go ahead, UV and four
select average island skin. This will average all
of the island scales. And you can see the scale is now different
for all of them. And go over to UV and
then select pack islands. You can see basically
now everything is fitting perfectly and
we have solved the issue. This is how you can
solve UV island issues. When you have a particular
island that is causing issues, you can select that item or that particular model
individually and UV unwrap it separately. And then you can
just adjust it with all the smart UV project
by going over to UV first averaging the island scale and then selecting pack islands. So this might be a little
bit confusing at first, but you can just rewatch this and I'm sure you will get it. Now you can see we have got
a perfect UV unwrapped. And now we will be exporting
these two Substance Painter super safe for us to save this blender file while
everything is selected, go to File export, FBX. There's rename this to
all selected objects. Mesh, come back in the export
folder and now hit Export. Alright, so basically the export is done now and in
the next video, we will be exploring this. I will see you then
thank you for watching.
30. Texturing the Electric Pole: Hello and welcome guys. So now we are in Substance
Painter and we will start with the texturing
process of our electric pole. So let's start by
creating a new project and selecting the
file we exported it. Okay? And now we will be
making the mesh maps. Go over to the texture
such settings he'd baked mashed maps and just
quickly hit back. Alright guys, so the
vagus, they're not it. Okay. And quickly look
through your model for any kind of shading issues. I don't think there are any, so I will first save my project. So hit Control S. And
let's save it. Save. And now let's start with
the texturing process. Come over to layer and let's
remove this layer one first. And before starting, I will just quickly open up your first. And let's right-click and
loading our reference images. Alright, so far the poll, we can just directly use a smart material to go over
to the smart materials tab. And I found this copper red
material to work pretty nice. So just select this
corporate bleach and drag and drop
it onto a pole. And now obviously we need to
change the color of this. To open the folder, select the base metal, and click over here and set the color. Something like this. Let's set it to 0.7. Next we can increase the
roughness a little bit 2.5, Something like that. Now to give it a little bit
of more color variation. First, there's
duplicate this folder, select this press
control C control V. Open it up, and let's
make the color a little bit darker around here. And now select this
right-click exclude all. And I will just select a
couple of things to have this darker color that we have a little bit of
variation in our bowl. We can select all of
these rings also. Say, I think that's pretty
good in my opinion. Let's come back. This way. I think opposed seems fine
because either way it will be a little bit in the background and won't be that much visible. So we are good to go on the
board next for this text. First, we need to remove this
material from over here. So select this instead of right-clicking and
excluding everything. Just click over
here and now just de-select it from this text, like this on it. So let's look over this image. The text is kind of
pinkish, bluish. Come back to the
base material or search for simple on grid. We have this concrete clean
that we used for our walls. So I will drag and
drop this onto them. Right-click, exclude all,
and just select these two in select private in prediction and
increase the tiling. Look over this Eyedropper Tool. And just set the color to this. Click over here again on
the geometric mask and remove it from this
thing like this text. Let's duplicate this again. Go here and select this text because we need to change the colors
of them both. Now click over here
and select this color. Is zoom in a little bit. Alright, so I think
this is pretty good. And make it a
little bit lighter. And yeah, that was
pretty simple. Now let's quickly open up Unreal Engine and let's export them both into
Unreal Engine now. Alright, so Unreal
Engine has opened up. Now, come back to content
and open up your level. Now we need to import our models and textures
into Unreal Engine. I will just quickly
close pure ref for now. Alright, open up the models, right-click, create
a new folder. This to do back in bold. And important, this pole
FBX file, it import. All. Next, go into
the textures folder. Right-click again,
create a new folder, read the industry oil. Again, right-click and show in Explorer so that we
can copy this part. And now let's head over
back to Substance Painter, press Control Shift
and E, extrude. Click over the path,
paste it over here, hit Enter, and then
hit Select Folder. Let's quickly do the
same settings that we have done for all
of the other projects. Alright, now we can just hit Export and wait
for it to finish. Alright, so the
export is done back in and religion and hit Import. Now you can come back to
the models and open up the material and just add the
textures to this material. So let's delete this. Risk control plus space. Drag-and-drop all
three of these. And again, plug base
color into base color. I'm willing to normal. Red channel goes into AL, green channel goes into roughness and the blue
and goes into metallic. Makes sure to select
your texture. Double-click over here,
I'm disabled sRGB. Answered sampler type
two linear color. It's safe. So the texture is
added to the material and you can see disappearing
over our models. But right now I won't
drag and drop in like the electric pole into RC because we need to
create the cables first. So first I will just select the text, drag-and-drop
the text. Set the location to zero
comma zero, comma zero. And automatically you
can see it appears directly where we
want it to appear. So we don't need to waste
our time basing it around, press Control G to
join them together and place it a little bit outward so the shadow is visible like this. Let's see through a camera once Zhe to turn
off the game view. And yeah, I think it
looks pretty good. Next we will be now are
creating the cables for both. So I think for this video,
this much is enough. In the next video, we will
be creating the cables, the bowl, and then we will export those cables
into Unreal Engine. And that would be the last thing to do in
our environment. After that, we can
add a little bit of both drops from
Goodwill mega scans. And then we will take
some screenshots and end with the course. Thank you guys for watching.
I'll see you next time.
31. Adding the Cables: Hello and welcome back. In
this lecture we will be making some cables that will
be running along a bowl. So there's disabled
this text collection. And creating a cable
is fairly easy. First, let's press Shift
plus S. Select this, press Shift plus esco
them selected and the shift day to
go and add a pot. If you don't see this
path object over here, you first need to enable the add-on to go to
Edit Preferences. And I don't section search for extra and just enable both
of them extra objects. And then if every
shift per se you will find this part over here. So press shift it either
go then add apart. You can see something
like this has been added. Press rotate this and just rotate it on the
z axis by 90 degrees. Press three for the
right side view. Let's just place
it first this way. And now go over to the
object data properties. And now just like the text, you can change things like the thickness and
the bevel of this. So let's give it a little bit of depth this time like this. I will set that to 0.01 m. I
think that is thick enough. Now press three press Tab
to go into the Edit mode. And you will see these
points and you can see you can edit them
however you may like. And just move them
randomly along your scene like this so that we have a little bit of
variation among the wires. Make them deeper little bit. Then you can just basically
select this press Shift plus dy plus x and placed
one over here. And select this
press tab and make it just a little bit
different to the last one so that everything does
not look like it is the same via make this
one a little bit more. We can even duplicate two wires
from over here like this. Something like this. Let's select all three of them, redshift plus D to duplicate and place them overhead
also at the bottom. You can also use a very
nice feature of blender. Press Tab, press a to
select everything, and then press F3 and
searched for randomized. You will find this
randomized curve transform. So select this one. And you'll see as you
increase the amount, the points are moving in random directions.
That helps us a lot. You can set it to whichever
amount you might like. But you have to pay attention because if you increase
the random too much, then you will see that it is
deviated from this point. So you can just select this,
place it back over here. Adding a little
bit of randomized into the transforms
of all the buyer, adds a little bit more value and look a little bit different. Let's just add the
same two Ds also, select all three of them. Press F3, first Risk tab, then a to select everything, then press F3 and
randomized Transform. Make sure to place this point
back in its original place. Let's keep duplicating
everything redshift plus d x plus one over here. Like this. Select all of them,
press tab and just select the
last word, disease. So all these ones and move
them a little bit like this that they
don't end abruptly. Yeah, something like that. Now I will just
select all of them, receive seven for the top
view press Shift plus D to duplicate and rotate
them by 90 degrees. Rotate them by -90 degrees.
List them over here. While all of them are selected. Press Tab, press a to
select everything is F3. And again, add randomize. And then just place these
points back over here. Like this. Alright, so now I think I
pulled it looks pretty good. And the cables also
look pretty believable. So what we can do now
is select all of them. First, press M and move them to a new collection and
rename this two cables. The one thing that
we should recheck before starting to
explore these cables is let's just enable
all the buildings which are the blackouts,
the buildings underground. And yeah, My doubt was correct. As you can see, the cables don't even fit the
entire street, so we need to make them a
little bit more longer. Ones over here are pretty good. But over here we
need to extend them. Suggest quickly, let's
disable everything. Select these press tab, select the end vertices and move them a little bit more further. And now what we need to
do is as you can see, the distance overhead
is like too much. Just right-click
and hit sub-divide. So yeah, they're like a bunch of more vertices between them. Next, but I want to do is, I think I will be adding a bit more randomized
variation in these wires. So let's just select
these ones. Press Tab. And now a better way to do this would be to press K
to select everything. And now a hold Control. While holding control,
just de-select all these points so that they
actually stay over here, but all of the rest of
them get randomized. Now press F3 and search for random and hit
Randomized transform. Now we can just increase the amount that
much around 0.4 m, I think press tab and
let's see how it looks. You can also add a little bit
of sub-divided over here. Let's select these
vertices and again, add a liquid of randomized. Alright, so I think
this is much better. Next, let's do the same
thing for these. Also. Select them all. Select everything and just
de-select the starting points, press F3 and randomize. Yeah, I think now
we're good to go. That's enabled back
the buildings and see if everything is
fitting correctly. We can maybe increase the
length a little bit more. I think this is pretty
good in my opinion. Let's look at it
once from over here. Let's select these ones
also and move them a little bit more towards the left. Alright, now let's
just see our poll and Cable wants from
over here like this. And I think it
looks pretty nice. We can save first. Now we can disable the poll. And first thing that we need to do is if you go over here, we need to decrease
the resolution. As you can see, the vertices
are currently set to 16,000. Now, while all of
them are selected, if you just decrease the
resolution to one or any number, you will see only one
cable is being changed. That is the one that is selected with the yellow
selection over here. But if you want to change like the vertices or the resolution of all of them selected at once. You need to hold Alt. And now when you use, you need to hold Alt. And now when you increase
or decreases solution, you will see all of them
are being affected. So just decrease the number to a point where the shape
is not being affected. I think around four is
pretty good. Four or five. I will keep it around five. Now, press a to
select everything. Press F3 and hit
Convert to mesh. Now all of the curve
properties are gone and now these are
basically meshes. As you can see. Press tab again, go over to materials and
let's add a new material, rename these two cables. Bile all of them are selected, it control plus L and link
the materials together. Now we can basically export
them to Unreal Engine. Alright, so while we
export them from Blender, Let's quickly open up our
Unreal Engine project. Now select them all. Go over to File Export. It has the x, and let's
export them as cables. Selected objects
and mesh it export. Unreal engine has opened up, open up your project and
wait for it to load. Alright, so now
open up your level. First thing that we need to do is open up the models folder. We need to import our cables
model in Unreal Engine. So I will not create
a new folder for it. I will just export it in
the poll folder only. The reason, the
reason for this is because if I imported
in some other folder, it can get a little difficult for me to
group them together. So yeah, I will export them
over here only go to Add, Import and select cables. Now, press Control a
to select them all. But makes sure to de-select
the cables material, the Pauline texts material, and also bought
the text objects. So just scroll down over
here these two things. So just de-select them. And now you can drag and drop
your ball into your scene. Wait for it to load. Now just hit Control G
to group them together. Just place it
somewhere around here. Or we can just set
the location to zero comma zero, comma zero. Enter displays exactly
where it was in a blender. Let's select it and move it a little bit
towards the left like this. Let's view it through a camera
once and see how it looks. I think it looks pretty nice. We can first select
the cables material. And you can see we
have a pedometer or hear that changes
the base color. You can just select the
default value and set it to a dark color and hit Okay. And you can see the cables are no black color and
that's pretty good. I think we don't
need to do much. It save. And then what we can do is we can select this,
just duplicate this, press Control C Control V. And just place one overhead at the backside of a
camera like this. Like this, and place
this one over here. I'm basically adding
this one so that we get a little bit of shadow in
our scene of the camp, of the hole at the back. If you do through your camera, once you will
understand like this, we can even move it a little bit more further to
come out of the camera. Selected overdose hair at the back. And yeah,
that's perfect. I don't really want
it to be in my scene. I just want the shadow
to come over here. It adds a little bit
of detail towards him. And yeah, I think with this
we are pretty much done. I will select this building moving towards the
right a little bit. Okay, All to select the text, amount of the camera. Select both the text
and the building. Then again, press Control
G to group them together. Move it over here like this. Yeah, that's pretty good. We can also press Control. L change the lighting
a little bit. Like I think something like
this looks much better. And one more thing that I'm not feeling that is quite right. It's like the texture of this pole is looking
like two metallic. If you want, we
can decrease that red squiggly handover
be Substance Painter. And we will change this. And I think with this we are
done with our environment. Let's hit Save first, open UP Substance Painter and open up the Trig polar
substance painter file. Let's open up this first one. Select base metal.
And let's take the metallic value 2.6, maybe. Let's see how that works. Maybe increase that a
little bit to 0.75. This one also I will just
set the base metal to 0.75. Again, export this and
let's see how this looks. After the export is done. Handover to Unreal Engine. And we will see a pop-up
over here. It import. And yeah, I think honestly
this looks better. So yeah, we're pretty much
done with our environment. Let's hit Save first. And in the next
video, we will add a couple more breaths from Cookson mega scans to add that last bit of
finishing touch. But yeah, we are mainly
done with our environment. After that, we can take
some screenshots and yet we will be finished
with the course then. So thank you for watching. I'll see you next time.
32. Finishing Touches: Hello and welcome guys. So finally we are on the
last lecture of our course. So in this lecture we
will be using a couple of mega scan assets to add that finishing touches
to our environment. And then at the end we
will take a couple of screenshots so that we can post our environment
as a portfolio piece. Alright, so let's start. I will just press G quickly
to enable game view. Go over here and select bridge. Over here. Let's
search for street. Some street assets. In here. You can go in decals. And as I mentioned earlier, they are like a lot of different details that
you can go through. You can see this manhole cover. We also have these graffiti
is that we can put in over r, maybe our shadow over here. I won't do, but I'm just telling you the different
uses that you can use that also there are a lot of damage details like this
concrete batch over here, so that you can showcase a little bit of damage
in your environment. Maybe we can try
something like this. Over here we have
this newly designed, I have already downloaded this, so you can export this in
after downloading. Add this. Over here, you will
see it has a beard. I really made me drag and
drop it and put it over here. Press G, and we need to rotate it by 90 degrees so that
it is visible on the wall. Now to increase or
decrease the size of the decals instead of
like a scaling it down. This way, it can
cause some issues. You can see that the
cat has gone black and said you can just adjust
the size from over here. Just reduce it like this. We can place this one
over here like this. Let's look for something else. We also have this
Japanese sign over here. If you want to, jab
is no poster sign. I will add this one also, fair now it is added in
your content browser. Let's base this one over here. Rotate it by 90 degrees. And let's scale it down again next week and maybe bring in some assets. Let's come back
over here and this time let's go into 3D assets. And in the street over here you can see all these like concrete pavement
assets that you can use. Like we have these
curves that you can add maybe along the
sides of your roads. If you want to add
a bit more detail, we can maybe add
something like this. You can download this
and added in your scene. Just place it somewhere
around here like this. We also have this traffic
cones that we can add. So let's maybe
download these two. Just click on Download,
YOU look for other assets. We can also add distinct
******* road sign. We can maybe place it
somewhere around here. Let's look through
our camera lens. One thing I think
is pretty small, so I will skip the sides bringing those traffic. And we also have this trash bags that you can add these also. You can place them
somewhere around here. I just copy these two and
put one over here also. Scroll up, and let's come
in this traffic cone, and let's import these to
see if he can place them. Next, place them around. I don't know if it
really fits in. I think I will just remove it. You can see we have also
these type of drugs. If you want to add
them somewhere. I got to leave meters. We all have these like
the barriers that you can add along the
edges of your road. I think it would look good, but I won't be adding it. So yeah, I think
this much is enough. I won't add much, like through Quicksilver
mega scans into our scene. I think this one is pretty good. The environment
looks really nice. You can increase the
screen percentage to view it properly. We'll select the poll. Just move it downwards
a little bit. Now let's just hit Save. And now I will show you how we can take screenshots
of our environment. So to do that, you
can simply go here, click on these three lines and select high resolution
screenshot. And as soon as you
do that you can see we have the screenshot
size multiplier. So make sure you don't
increase this too much. Usually I never go
over the value of two. I think that is pretty good. First, we can just set it
to one and hit capture. As soon as you do that, you
will see this over here. Click on this, and you can see the screenshot has
appeared over here. It is like really low in
size and can be a little bit blurry because the screenshot
multipliers size or one. So we can maybe increase it to. Now the resolution is doubled. It capture it might
take a little bit while to load and
click on it again. You can see the size
difference between these two. You can increase
in size even more. But I don't recommend
going over the value of two because it can cause it
to graphic drivers to crash. So here you can
see we have easily captured the screenshot. You can change the
view of your camera, like you to camera two. So we have this
different kind of view. You can select. Then you can go over here,
senate resolution screenshot. It's put in again to overhear. What we can do is we can
increase the size of our screen so that we have more area to capture
from. Then he'd capture. Wait for it to load.
And you can see took a much longer time because
now the size was even larger. You can see this way we can capture a different screenshots. So you have this
way you can take different screenshots from different angles through
different cameras, often environment, we
showcase it properly. What I would suggest you is to add more cameras and
experiment with it. As I mentioned earlier, I just duplicate your camera
three, pilot through it. You can adjust things like your lens and everything like that and place
it accordingly. And then just place your camera and take a couple
of screenshots. I would just suggest you
to experiment with it and create various angles and
take different screenshots. You can also take them into Photoshop and edit your photos a little bit to get that final
bit of finishing touch. But yeah, I think from my side, this is it for this course and this environment tangos for watching and I hope you
guys learned a lot. Thank you.
 Aniket Rawat, 3D Artist