Transcripts
1. Introduction to Class: Hello everyone and welcome
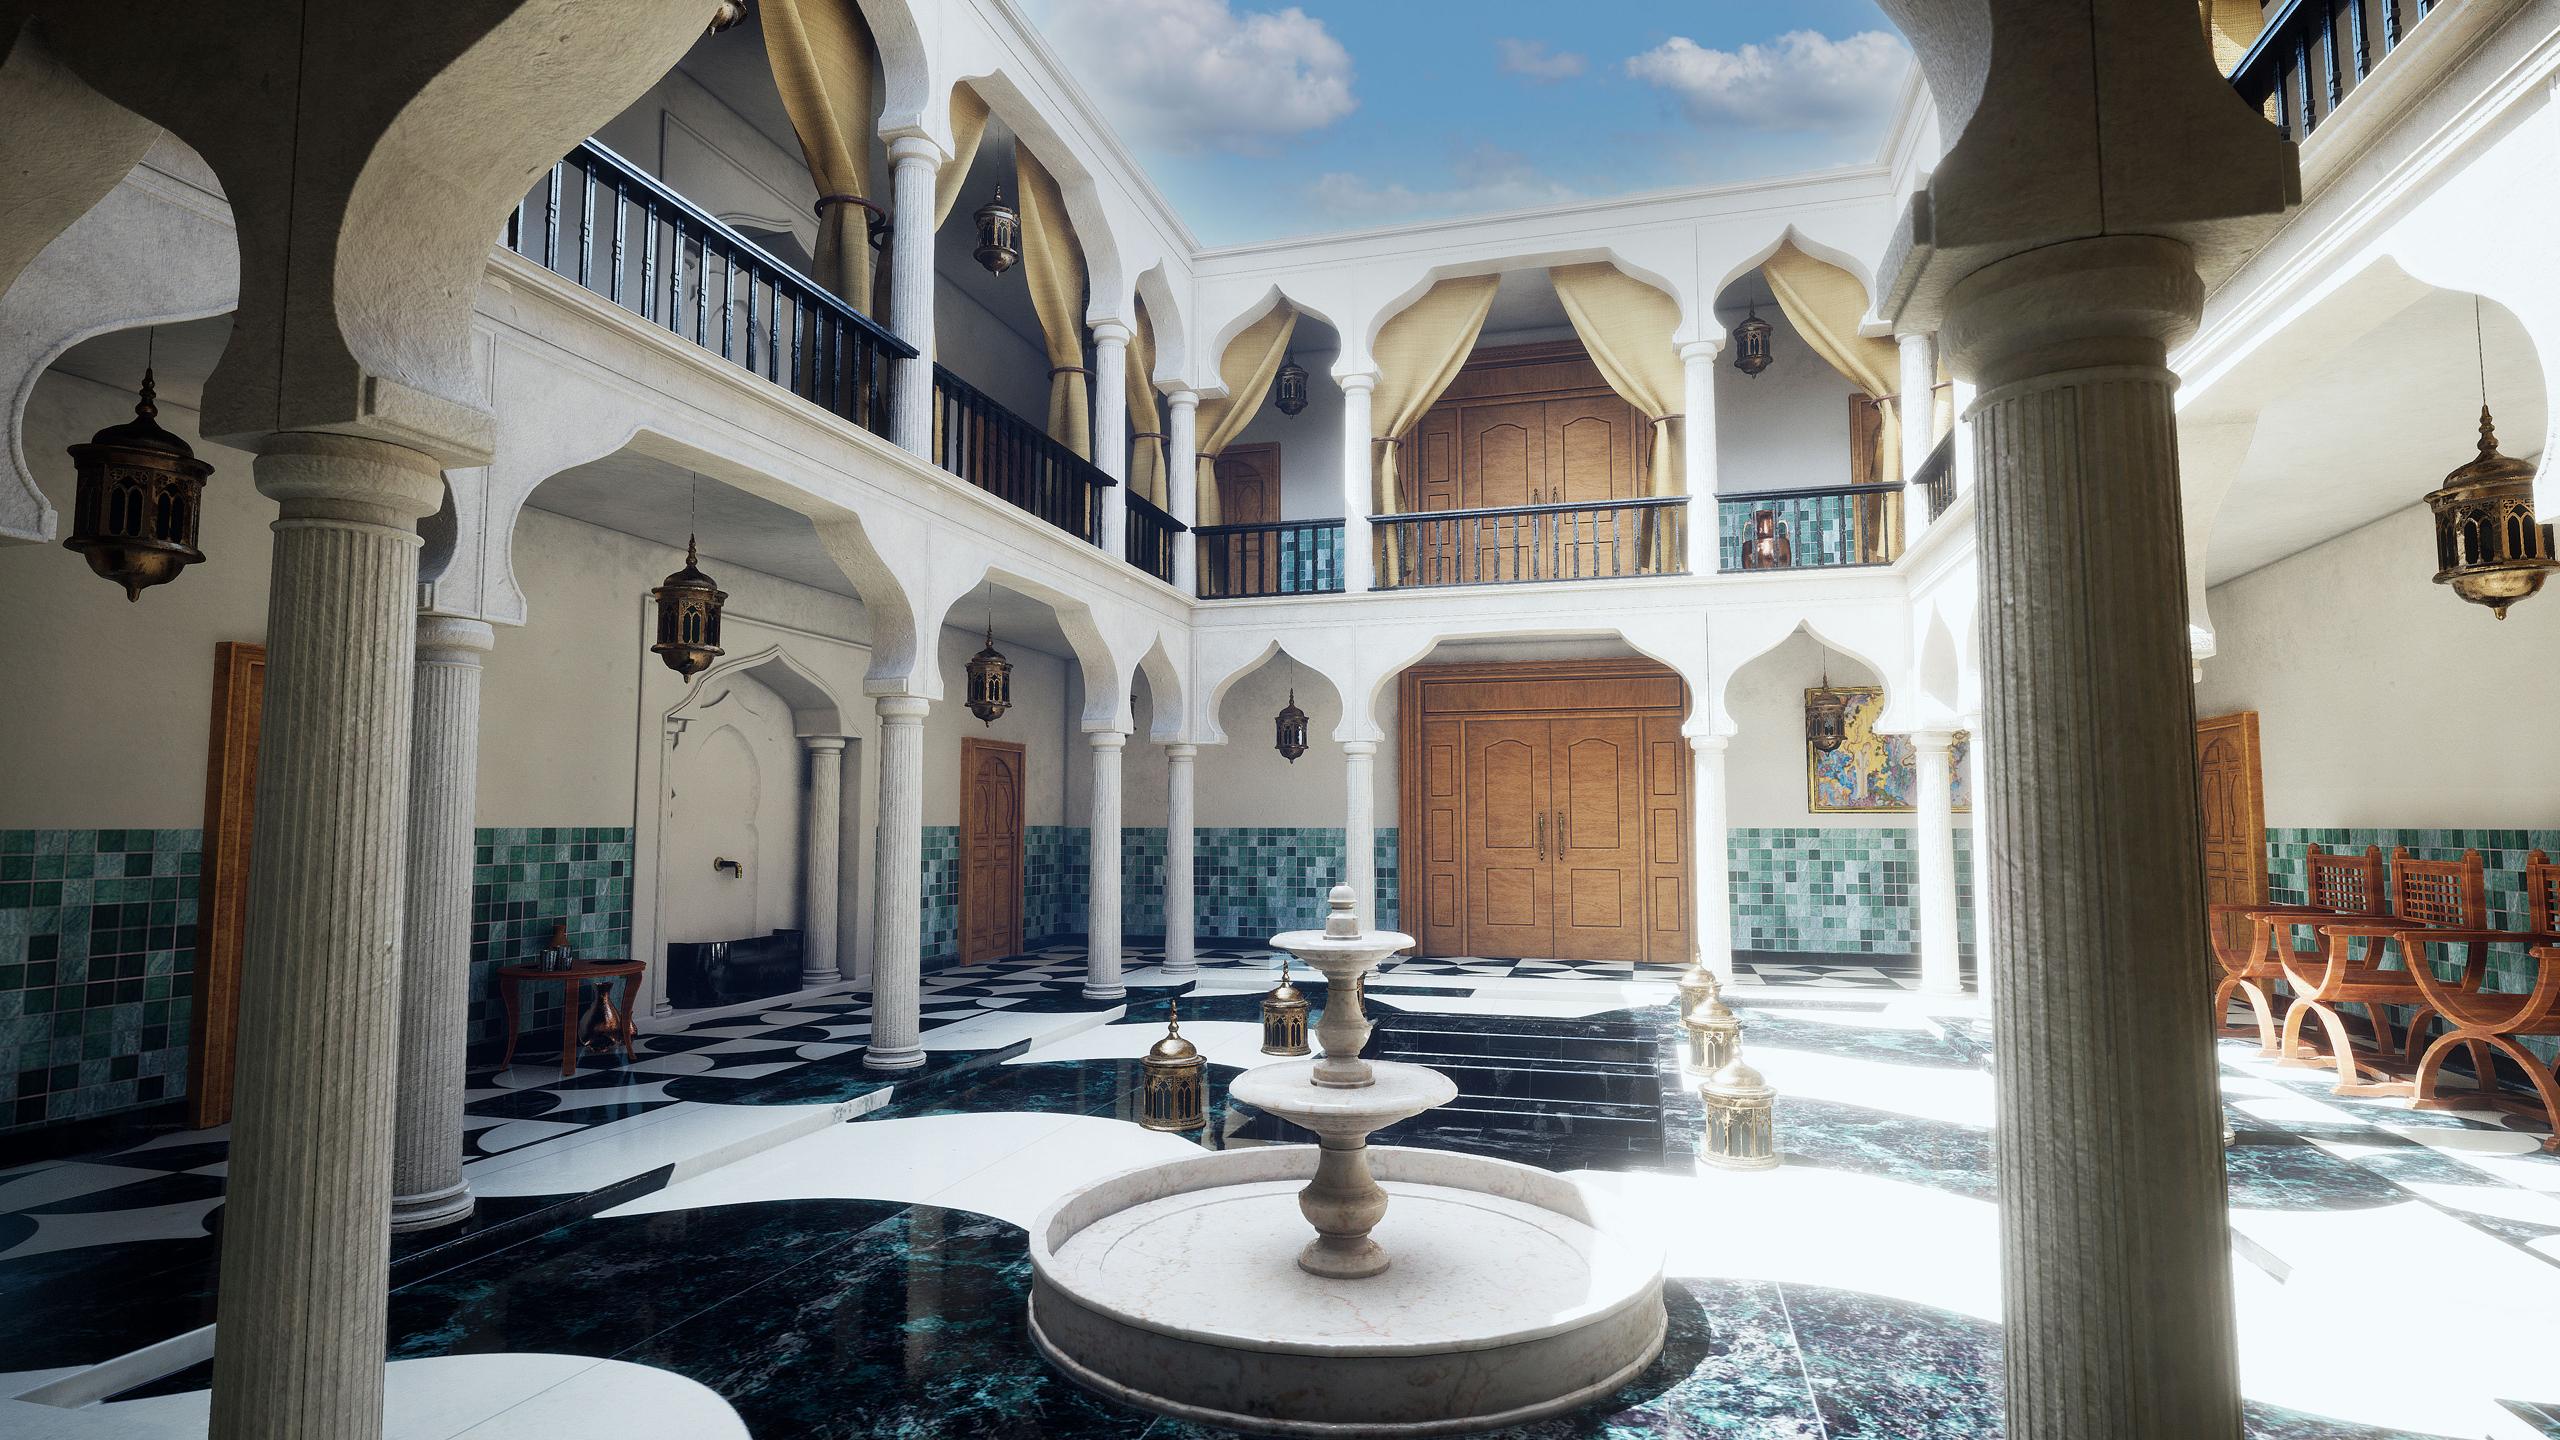
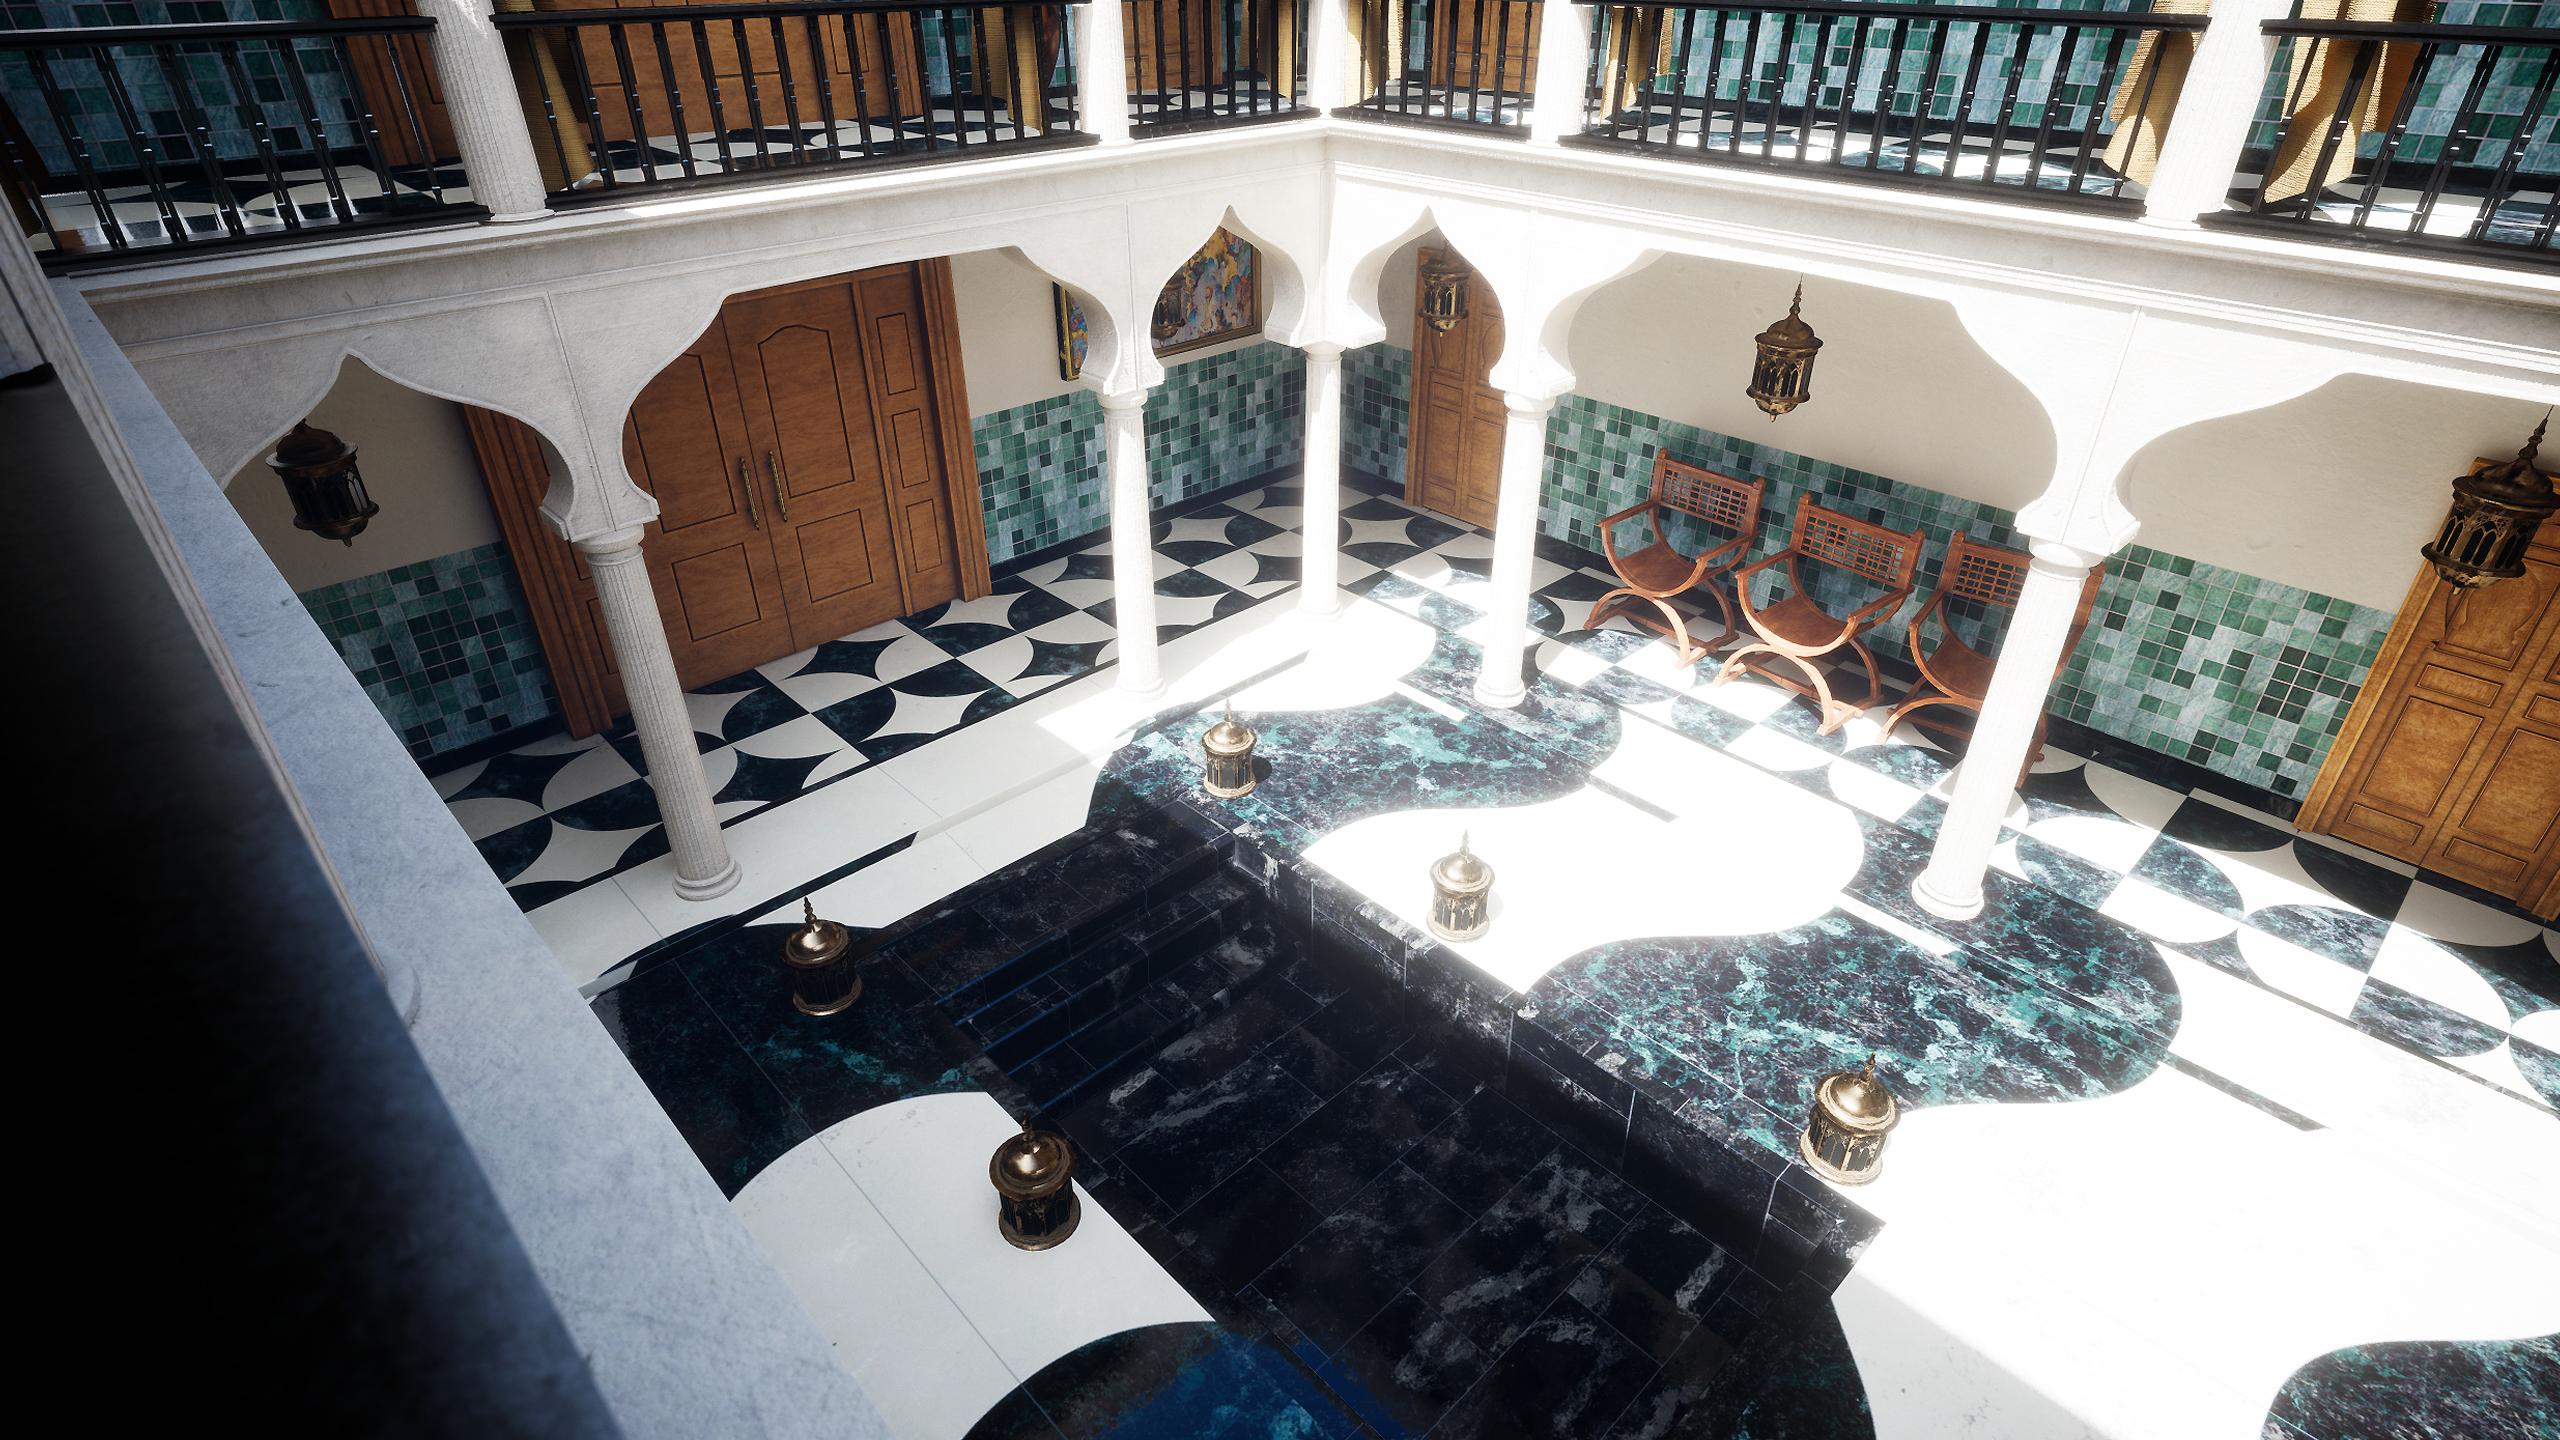
to this new course. In this course, we will go over the entire process of creating this Moroccan real environment
using Unreal Engine five, blender and Substance Painter. We will go over
modelling in Blender, texturing using
Substance Painter and setting up the scene, lighting and materials
in Unreal Engine five. This course includes
over nine hours of content and we will go over each and every step
in this course together and nothing
will be skipped. The course does not
have any kind of time lapses so that you can
follow every step easily. You will also be provided with all the source files required
to complete the course. This includes all the
reference images, textures, blend files,
unreal project files. This course is
perfect for students that have a basic
knowledge of modeling, texturing, and want to learn
how to create environments. Everything in this course
will be explained in detail, but some prior knowledge of the software would be helpful. You will learn everything
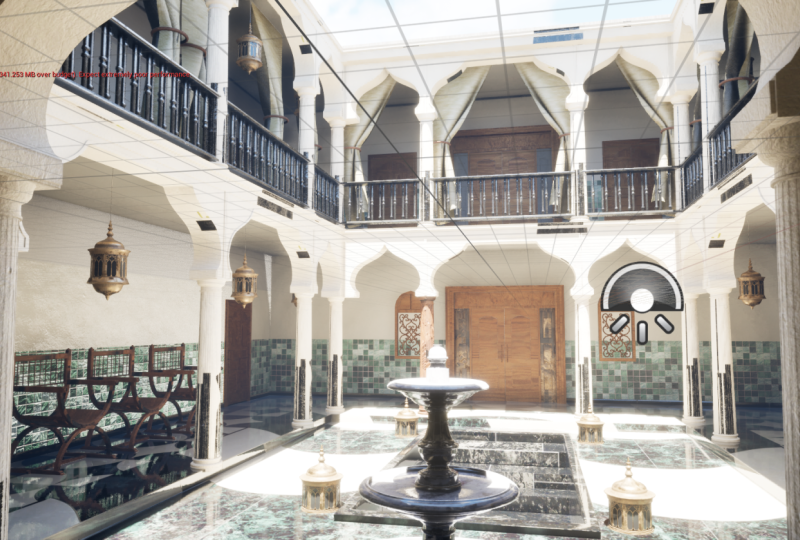
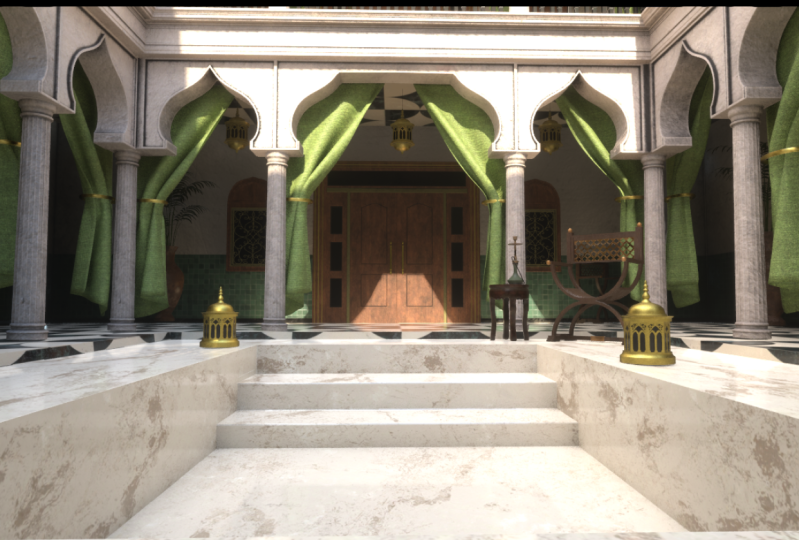
you need to know to create the final results
that you've seen, the images and trailers. The same techniques
can be applied to almost any type
of environment. The main focus of this course is to teach
how we can create multiple assets and combine them to create a larger scene. We will start by gathering
some reference images to gain some initial ideas
and the mood for RC. We will arrange these
reference images in a free program
called pure ref. After this, we will
move onto blender and start modeling our
assets one-by-one. We will model all
the assets that you can see in the trailer
and the images. We will be creating
different pieces, billers, balconies,
doors, windows, etc. After we had murdered
all our main assets, we will export them to Substance
Painter to texture them. After texturing, we will
move to Unreal Engine five and set up our scene
and lighting over there. We will make use of
the new features of Unreal Engine five, such as human, to get realistic lighting and global
illumination in our scenes. Then we will spend some
more time creating some small props for our scene to further enhance
the look of the scene. We will end this course with setting up different
camera angles, taking high-resolution
screenshot for our portfolio. Some put, some post-processing
and compositing. I hope to see you
there in the course. Thank you.
2. Going Over Our References: Hello guys. In this new course,
we will create a complete Moroccan courtyard, or better known as rewards, from start to finish. In this very first lecture, what we will do is
we will go over our reference images and learn how to organize them properly with the help of a
free software called. I'm pretty sure most of you
guys already know about it. For those who don't know, Let's quickly install it. I type in pure ref
in the search bar, and click on the first link, head over to download and
select your operating system. So I am currently on
a Windows ten PC. I'll select this one. And although it is
a free software, you can pay for it if you want to support the development. But right now I'll go over to customer mount and set it to 0. You can just pick
download as I've already downloaded and
installed this software before, I won't do it again. So you can just click
on this file and install pure RREF if you
haven't already done it. I'll just open it up from here. Now, let's bring in
our reference images. So just select them all and drag and drop them onto the
period referendum. First, we will go over
some basics of pure ref. We can hold a right-click to move our periodic
window over our screen. We can also increase or
decrease the size of the pure ref window just
by moving its edges. Next, go over, hovered over
the periodic window and just right-click and you can access all the
functions from here. First, let's save our scene. Save our scene. So we'll do save, and let's save the
file limit reference. The next thing is, when you right-click first,
let's save this. Now if you
right-click, Make sure your mode is set
to always on top. What this will do is
whenever we open up Blender, this pure ref
window will stay on top so that we can, for example, easily work while viewing our reference images in PRF and we can also
work in Blender. Next, if you want
to minimize this, you can just right-click, go over to Window
and minimize this. Either use the
shortcut Control M. Just use the task
bar from here to minimize or maximize it. Also, there are a
lot of functions. We actually don't
need all of them. You can just experiment
it on your own if you wanted to go over some of the functions
of pure ref. One thing that I will tell you, if you want to focus on a
certain image, you can just, for example, double-click
on it and it will become full screen
on the left window. If I wanted to work on
this particular image, I'll just double-click on
it and it will focus over. Alright, so first let me
organize my reference images. These are all the images
that I, for example, found on art station
and Pinterest. Obviously, right now, there
are not a lot of them. But as we keep moving on
further with the course, I will keep adding more
reference images to these. You can get all these
reference images from the course files that
I've given to you. You can use them from there. Also. You can add some of your
reference images if you want to. Create a little bit
variation of your own, that would be great. Right now. There are not a lot of them, but we will add more
of them as we keep on working. All right. I'm just an ending. All of these, these are
some of the images of arcs and windows and pillars that these
designs we will create. So I've just downloaded
them from Pinterest only. This is the kind of environment that I'm
actually aiming for. What we will start
with this first, we will create all the pieces that we need to create
this environment, for example, we will create these art pieces, these pillars. These are all these
floors, doors and windows, and we will assemble them and then we'll texture
them and everything. In the next video, what
we will do is we will start by creating
this arc over here. I have found this design on the Internet and I will
clear this one only, but there is no limit. You can download any image, any arguments from the Internet, and you can create your
own design of the app, or you can follow
just mine only. It does not matter. Alright, so I think this much
is enough for this video, and I'll see you
in the next one, and we'll start with
that modelling part. Thank you for watching.
3. Creating the Arch : Hello guys, welcome to the
second lecture of this course. In this video, we will
create our art piece. So I opened up a
new blender scene. As you can see, I've also turned on my
screencast keys over here in the bottom left
corner so that I performed, if I perform any
of the shortcuts, you can easily see what
I am doing currently on my keyboard and mouse so that you can
easily follow me. So let's just delete all
of these existing objects. So press a to select everything
and then there's delete. Next, let's add our
reference image, which would be this image to Blender so that
we can recreate it. So I press one on my number back to go to the front
orthographic view. And this is a 2D view from
the front side of a model. We use this when we're working with reference images so that
we can easily create them. You will just see what
I'm talking about. We can move into
different views. For example, one is for
front orthographic view, three is four, right? Seven is four top. And if you hold Control, then you can just
reverse all the views. For example, one is for front and control
plus one is four. Back view, you can
see over here, three is four right view and control plus three
is four, left view. And in a similar way, seven is four top
view and control plus seven is four bottom. So I'll press one to move to
the front orthographic view. Press Shift a and go to image
and add a reference image. Just select this image, go over to where your
reference images are saved and just double-click and
this image will open up. As you can see, it is
aligned with my front view, which is very handy. Next, let's add a plane. So press Shift a and either plain press R to
rotate it and press X, lock it on the x-axis,
then press 90. Again. Let's move it over here and also enable this
X-ray so that you can easily see the image
also at the backside. Now I'll press Tab to
go into the Edit mode, select these left side edges
and move it over here, matching with these
gardener edges. Now let's select
the bottom vertex and move them over here. Now select this right side vertices and move
them over here. Next what I will do
is press Control R and add the edge loop
right down the middle. And select these
right side vertex and press X and delete
these vertices. Why I did this was
because I will mirror this left side over to the right side so that it
is easier to work with. So go over to modify it and
let's add up mirror modifier. As you see, it is not
mirroring properly. And that is because our origin point is currently
at the wrong location. So we need to move
an origin point over here so that it
mirrors properly. So how we do this is I will. But estab Br2 for Edge
Select and select this edge. Press Shift S and closer to select it to move the
cursor over here. Next, what I will do is while
this plane is selected, go to Object, set origin and check the
origin to 3D cursor. This moves this orange point
from here to over here. And now if I made it my plane, you can see it emitters
perfectly because you see how the mirror
modifier works is it mirrors the model
piece along the, if I choose the
x-axis so it will move along this origin point. We need to have an origin
point at the right location. So now let's start by tracing all the
tracing this outline of the piece suppressed one for the vertex select and move
this vertex over here. And let's just delete
these vertices and select this vertex, press E, extrude this resulted to lock it on the
z-axis and move it over here. And now just keep on pressing E and displacing all
the vertex along the edge of this reference image will just quickly trace
this complete our cout. Also one more thing that
I wanted to tell you. For example, if I press E and you feel like this movement, movement is too
fast of the vertex. You can just hold shift. And it will move a lot slower so that you can do
precise movements. If you want to place
it like very properly. You can just press
E and then hold shift and then
move it like this. Next, what I will do is as
you can see now if I press E, you see both of these
are overlapping. To avoid this, we need
to just enable clipping. And now if I press G
to move my vertex, you see it will properly joined. And now let's move it here. Alright, Next, select
this vertex at the top and press E. Press X to lock
it on the X and join them. Alright, now at peace is done. Let's move this reference
image at the back, press G and then y to
move it over here. And also let's move it to
a different collection. So press M and select
New Collection, and let's name this
collection reference images. We can put all our images
that we bring into Blender. This reference images
section collection. Sorry, let's just delete, disable this for now and
work with a model piece. Press Tab to go into edit mode, press a to select everything, and press F to fill in the face. Next, what I will do is what
I will do is I will add a solidify modifier to give this piece a bit of thickness. You see if I increase this, I'm giving you a
thickness, so I will give it a thickness
of one meter. Right-click, Shade Smooth this. You see all the shading is
now weird and messed up. Don't worry, there is
an easy fix for this. Go over to normals, are sorry. Go over to Object Data
Properties in normal section. That is auto smooth. So you should enable auto smooth and this fixes
all our normals. Also, if you want to see
all these edges properly, you can just go over
here and enabled cavity. It just highlights the
edges more properly and it is better to look at and
also able to shadow. Alright, next what I will
do is add a bevel modifier. Go over here, you see
the edges right now look very harsh because we
enabled auto smooth to fix, test, fixed that, yes,
enabled hard normals. This will smoothen
out your edges. Yeah, now it looks
much, much better. Alright guys, so
next I will press Control a and apply the
scale of my model piece. So we need to remember
that anytime we change the scale of any model, we need to apply the scale. What I mean by that is, for example, I have
added two cubes. I will scale both
of these cubes. So press S and X to
scale it on the x-axis. And I will press three
on my number pad to scale it three
times on the x-axis. Similarly, I will do the same
thing for the another cube. So press S then x, then I will apply the scale for this
model based control a, and apply the scale. And I will not apply
the scale for this one. Let's add a bevel
modifier, both of them. Now if you increase the
bevel modifier like this, you can clearly see
that this cube, the bevel modifier
looks very weird. Bevel is very stretched
and not at all uniform. And this cube, it is
uniform all over. If right now I select
this cube and press Control a and just
apply the scale for it. The bubble will be back to normal and it is
uniform from all sides. Now, this is the
thing we need to remember that anytime we
change the scale of an object, we need to apply the scale. So just press Control
a and apply the scale. Alright? So again, I will just apply
the scale for this model, press Control a and scale. Next what I will do is press, press N on my keyboard and
this menu will appear. You can go over to
the item section to check the dimensions
of this model piece. So we will just correct
it a little bit. For the solidify modifier, I will go with a
thickness of 0.5 rather than one because 11
would be too thick. So 0.5 here. Next, just press Tab
to go into edit mode. Press two, The Edge, Select, select this edge and move this over here to just squeeze
it up a little bit. I just wanted to get this x dimension it
around 2.5 meters. Just push this a
little bit more. Now I can just select
it and target 2.5. All right, I think this is fine. Alright guys, so I think this much is enough for this video. We will detail our art
piece a little bit more. So we need to create one more RPs that would be
a little bit longer one. So we can do those things
in the next video. So I'll see you in the next one. Thank you for watching.
4. Finishing the Arch Piece: Hello guys, welcome
to chapter three. So let's continue
from where we left. But before that, let's
save our Blender files. So just hit Control
S and I will save my file over here. Just name it. Limit sin. Hit,
Save blender file. Make sure you keep saving
your files regularly. All right, so now let's start. There is one thing that
I wanted to mention. If you just select
your model press Tab to go into edit mode. Just make sure none of your vertices are too
close to each other. For example, these two, these two right now are very close and that can
cause some issues. So let us just move them a
little bit further apart. I will just press one to go into the front
orthographic view, press G to move it. And you can see how the bevel modifier
is reacting because the Boolean modifier
times to not work correctly if the vertices
are too close to each other. So I'll just keep this
one over here somewhere. This one, I think over here. Now if I just decrease the bevel modifier to assert
an acceptable amount, you can see our model
looks much, much better. So just make sure there are no two vertices very
close to each other. Alright? Now I will select my model, right Shift D to duplicate it. While I have per shift
DoD Breast X lock it loved the movement on
x-axis and move it over here. What we will do is we will
create a longer version of this arc just to create
a bit of variation. So press Tab to go
into edit mode. Let's bring in the
right side menu, press N to bring it up. And you can see
currently the x's 2.5. I want to maybe double
it to maybe five. Just press Tab, press
one for the front view. Let's enable X-ray and select all these vertices
except these two. Press G and then x, and then move it over here. Let's check the length. It is 5.14. Just decrease it a bit. When it is like
very close to five. I can just selected and
type in five over here. Alright? So this can be a longer
version of the arc. What I can do is
again press tab, select this particular
vertices and then press Control Shift and B to bevel this
particular vertices and just smoothing out this edge. I think this looks
much, much better. Also, I'll select these
vertices and bring it down on the z-axis. Right? Now I think this is fine. Let us give it a little
bit more detail. Both are RPCs. Select this one. Right now if I press tab, you can see our
model is currently just this single plane because we are using
the solidify modifier. If I just disabled this, you can see it is
just a single plane. So we can't really
edit anything. For example, if I try to in circuit or
extruded something, you can see it is going on. It is going to be
a very weirdly. Before we make any edits, a model, we need to apply
some of the modifiers. So just select the first module. Let's apply the
mirror modifier and the solidify modifier.
Both of them. We don't really need to apply the bevel modifier right now because we might want to change the bubble amount at
a later on stage. So I just keep it. This will only select the
first apiece press Tab. And now as you can see, I can select any of the
phase of the model. And now it is a
complete 3D model and not just a single 3D plane. I'll select both of
these front phases. Press I to insert it and
just insert it this much. I think this is fine. Also, for example,
if you don't want to insert it like this on the edge, you can just press I once again. If you press i2 times, it will insert the
individual phases. So I will instead display, I think this much is fine. And now press Alt E, extrude it and extrude
faces along normal. Let's extrude it
does match, I think. Yeah, just fine. Next what I will
do is press tab, select these bottom phases. Again, press I to
insert it a bit. Again, extruded
along the normal. You can do the same thing
for this piece also, estab to go into edit mode. Select both these front faces, press I to insert it. Again, Alt E and extrude the
phases along the normal. Both these bottom
faces and Aldi. First I need to insert the face, extrude faces along
normal mixture. Both of them have similar
amounts of extrudes an insect because we don't want to make
them too different, but a little bit of
variation is fine. Now select this piece and
let's rename it to arc one. This one to R2. All right, so yeah, I think this much is
enough for this video. In the next video,
we will create some more pieces like the
maybe the pillar or something. I'll see you there. Thank you for watching.
5. Creating the Pillar: Hello guys, welcome
to Lecture four. So in this video, we will be creating
this pillar model. Let's bring in this reference
image into Blender. For now I will hide
my app models suggest click on this icon
and hide them both. Press one on the number pad. Let's add the reference image. Press Shift a image
and reference. Now let's press Shift
a and add a plane. Rotate this by 90
degrees on the x-axis. First, I will create
this top piece, so enable X-Ray mode. What I will do is press
Tab to go into edit mode, run for vertex select. And I just need
this one vertices. I will select all these three. Press X and delete the vertices because
I just need this one. Place it over here, then press E to extrude
this downwards. Then extrude this here. And let's just trace
this complete boundary. These are just
representative tasks, so you can just skip this
ahead and do it on your own. So now we have computed it next. What I will do is press Tab
to come out of the edit mode. Select this image and let's
move this a little bit back on this piece. Press Tab to go into edit mode, press a to select everything, and then hold e. Then press Y to extrude on the
y-axis like this. Alright, so this piece will go over the top of
the OCT pieces. Let's just place it right now. I will rotate it 90 degrees
from the x. Like this. Bring this over here. Scale it. I'm just testing
it out how it looks. Now press Tab to
go into edit mode. Press two for the H Select
and select this top edge and this one
pre-survey top view. And then let's extrude this
again on the y, like this. Like this edge. Let's enable vertex
snapping from here, plus g. Then why to move it
on the y, then hold Control. And if you hover over here, you can snap it along
with the vertex, that they are
completely in line. Now again, select this
edge and select this edge, press F to make a face. Then press one for
the vertex select. Let's hold Alt and click over here to select
this complete loop. And then again press F
to fill in the face. Similarly for this site too. Alright, so now let's add a bevel modifier
to this top piece. Enabled hard normals and also enabled auto smooth from here. Alright, next, let's
create a pillar piece. Again plus one. Let's
hide all of this again. Select this image, press M, and move this to
reference images. Now press Shift a cylinder. I've seen even exiting. Bleed, please the
cylinder over here, matching with this top
plane of the cylinder. Tab. Select all these
bottom vertices and move them over here
on the z axis. All right, now we just
need to add a bunch of edge loops and scale them in
or out to make the shape. Press Control R. And
let say the edge loop here and scale this down to match with
the reference image. Another one over here. Now I will just keep adding
edge loops by pressing Control R. It's cleared
the shift quickly. This is a prediction task, I'm just pressing
Control R and then you receive S to scale it in or out. Just matching it defends
image over here. So let's disable x-ray
and see how it looks. Right-click and shoots. Move this again,
enable auto smooth. Alright, so yeah, I think
it looks pretty good. Next what I will do is press
Tab to go into edit mode, press three for free, select and hold Alt and select
this complete phase loop. Before we need to press
Control a and apply the scale. Now, selecting this
complete face loop, they say to insect this and press I again to insert
individual phases. Obviously we don't want
to insert this much. I think this much will be fine. Now press Alt and
extrude faces along normal and extrude this inverts. I think this. Next let's
add a bevel modifier. I think it looks pretty good. Enabled a hard normals,
an auto smooth. We have already enabled, disabled the reference images and enable all the
rest of the PCs. The pillar looks really small
compared to an art piece. Let's just scale it according to I'm just checking how
much we need to scale. So press Control plus seven, or the bottom view, Let's place it somewhere
here. Scale it up. I think this much is
a much better site. I didn't look, this
looks much better. Double-click over here and
let's rename this to pillar. I don't know what we
really call these pieces. I'll just call
this a wall piece. I think this is enough
for this video. We will continue from
here in the next one. Thank you for watching and don't forget to
save your scenes. Thank you.
6. Creating the Layout For Our Scene: Hello guys. Welcome to chapter five. Now that we have
made a few props, what we will do in
this video is we will arrange these props to create a rough layout of our scene. Let's start. First, I will create a corner piece
for these arcs. To do that, just
select this piece, press Tab to go into edit mode. And let's select this face, Shift D to duplicate this. Let me down on the screencast
keys. Let's start again. Tap for rigid mode, select this face,
shift B for duplicate. Now when you press shift D, you can move this phase
however you want. But if you hit right-click, it will go back to this
location only it's still there. But if you hit right-click, you can cancel the moment. For anything Like, for example, if you are rotating something and you just hit right-click, it will cancel the moment. I will hit P and separate the selection so that now
it is a separate object. So this piece is different and this certain phases
different array now Tab to select the ability to extrude this and let's
extruded 0.6 meters. Okay, so if you're wondering how these numbers are appearing, you need to just go over here, volume the edit mode. We'll go ahead and
enable edge length. I did this while I was
working off camera. So it is really helpful. It tells the measurements
of all the edges. But first you can see we
extruded it 0.6 meter, but it is coming
out to be 0.607. Actually, this is
because this does not work correctly if we
haven't applied the scale. So just press Control
a and apply the scale. Now if you press
tab, you can see all the measurements
are accurate. Now, if you just select
this piece again, press Tab and let's
hide this 1 first. Yeah, I will select this
piece, go into edit mode. If you select this edge, you can see that this
is 0.5 meter length. So we need to create a face over here that is of 0.5 meter. How we will do that
is pressed tab. This whole edges of 0.6 meters. Let's add an edge
loop over here. Now both these edges are 0.30.3. Select this edge or by holding Alt and it's
complete edge loop. Press G and X to move it on the x-axis and move
it by 0 into meters. Now, we have a face
over here of 0.5 meters and it's linked
to affair of 0.1 meter. Now I will select this face
and extrude it by 0.1. From everywhere our
calculations are accurate. Measurements are accurate. This is 0.10.1 and
this edge is 0.5, and this edge is 0.5. Why I did this was
because when I just duplicate this
and for example, rotate it by 90 degrees, I will place it this way so
that it comes perfectly. That's why I made this agent decision of same
length. Let's delete this. Alright, so now our
corner pieces done next, what I will do is let's
open up pure ref from here. Right-click. Go to load, and let's load recent. Alright, so I will create
something like this, this courtyard scene,
as you can see, all are very similar. We can just follow any
single one of these. Now, let's select this piece, risk control plus
seven, the bottom view. Shift D to duplicate this and press X to
lock it on the x-axis. And let's move it around here. I'm also mentioning this again. If you hold shift, like
if you are moving, if it is moving very fast, you can just hold shift and it will move a
little bit slower, so you can do precise movements. Let's place it over here. Next, let's select this
one and press shift D, G, and X and move it over here. Something like this. Next, let's duplicate this corner piece. Now. We need to just flip, flip this canopies
because right now it is not in the correct orientation. But before that first, if you see, if I
tried to scale this, you can see the origin point
is located in a weird place. That's why it is scaling. Weirdly. You see
if I rotate this, rotating from this particular
origin point only. So we need to
change the location of the origin point to do, to do that, select this piece, go to Object, Set Origin,
origin to geometric. Now it is fine. What
I will do is press S, then x, and then hit on
number backtype minus one. To flip it in the
opposite direction. Now it is correct. Now select this one
and this one also. Press seven for the top view, press Shift D to duplicate this. Let's move it over here and
rotate this by 90 degrees. Pleased with this
face over here. Select this one again,
duplicate this. I put on the y-axis like this. Now select all
these pieces except the pillar and Shift
D to duplicate them. Press R to rotate it by degrees, and play with this
piece over here. Alright. Now, select these
three d x over here, again rotating by Wednesday. Just look at your
complete model. If everything looks right. Now, Let's bring back the
piece that we had earlier so we can just click this
button over here. All weekend. Hit the shortcut alt plus H to bring back any of
the hidden objects. All right, so let's
move it over here. Then press S, then x, scale it on the x-axis. Let's scale it
till here I think. Again, duplicate this press
shift D, Right-click. Rotate it by 90 degrees, and place it over here. Press S the next. Scale it down like this. Duplicate this again
and move it over here. Rotate this around and type
in 180 on the number pad. Make sure they all are correctly placed towards the
edge of the RPCs. The last one, just
duplicate this one, move it on the X, rotated
when you two degrees. This is fine. Next, let's duplicate our pillars
in a similar way. Okay, So I forgot to
turn on Screencast keys. Press Control plus seven. Select this press Shift
D Lockett on the x. Move it over here. Again, do a similar per shift. Select all three
of them should be, and this time move it on
the y and place them. Just check if
everything looks fine. Just select this one. Over here. These pieces, I will just move it a
little bit in words. Over here. Select this one per shift, the place it on
this corner to now select them both and move them
towards the other corners. Again, vary the
predictive things. We just need to duplicate
them again and again. We have created a basic
structure. Let's move this. Move D objects to a
proper collection. Select all the pillars. Press M on the keyboard, moved into a new collection. Let's name this
collection pillars. For the top one,
select all of them. Press M, move them to pieces. Alright, Next, select them all. Shift D and duplicate
all of them and move it. Just at the top
of this overhead. To create two floors. We will have two floors of this 40-odd that we
are creating non way. We will create floors
and everything, but for now just
duplicated this way. Okay, so now what
I want to do is I want to create the ground for this building that we have created or the structure
we have created. I want to create a
plane exactly at the center of this structure. So to do that, we need
to move our cursor point that is currently located
over here to the center, over here of center of this
complete thing over here. What I can do is just select
all of these pillars. Then press Shift S, and then select because
the two selected, this will move this
cursor point to the center of all these
pillars that we have selected. Exactly the center of
this thing we created. Now press Shift a and
let's add a plane. Let's move this reference
image somewhere over here and decrease
the size of it. Now, over to this item section, press N to bring up
this menu and go to Items section and just check
the dimensions on the plane. I will scale it up. I think around 0.5 meters, maybe 30.1716 meters,
maybe on the light, around maybe 23 on the x. Move it downwards over here. The base of all the pillars. All right. We can always
change this later on. For now I think I
will go with this. Now select the tab to go into the Edit
mode of this plane. We can disable this edge length. We don't need it anymore. Best a to select everything and then hit E to extrude this. Let's extrude this deal here. Just for the sake
of easier working, what I will do is I will delete one face of this building. From this face, I
will delete it. So press X and
then select faces. I have just deleted this face temporarily because
if it is there, it is difficult to work
at because we need to zoom in again and
again in this cube. So I will just
delete this face for now and we will
fill it later on. When we have finalized
the module completely. For now, I've deleted it. Next, I will add loop, press Control R to
add an edge loop. Then press F to fill in the
face and move it over here. Now press Tab again, select both these phases. 34 fifth, select and
select both these phases, 74, top view and enable X-ray. Pressed I instead
both the phases. Instead them in-between anywhere
this boundary over here. Then press X and delete
both these phases. And we have got ourselves
a basic structure. So this will be open from all, so that light can come in, as you can see in all of
these reference images. These are open from the top. We can have a gate over here
and some doors or windows. Doors and windows for rooms. Obviously, we won't create
the rooms from the integers. We will just create
this courtyard scene. So we can have some windows
and doors over here, all over this courtyard, as you can see in the
reference images, we have some doors, windows at the top in
the second flow too. Again, we will also create
these railings and everything. So yeah, I think this much is enough for this video to
create the basic structure. In the next, what we can
do is we can create some, most of, you can see most of them have a
pool in the center. So we can create that in the next video and maybe
add a few more things, will keep bugging. Now,
thank you for watching. I'll see you in the next one.
7. Creating the Balcony: Welcome to Chapter six. So in this one, we will create our railings. For the second flow,
we need to have railings or over the
border over here. So we will clear
them in this video. But before alerts getting
these pieces a bit, they are not aligned
properly with the pillars. I'll just select
this building peace. And first let's rename it to building maybe and
just hide it for now. Select this piece, best
tab or the edit mode, 34 fifth, select, and
select this face, press G and then x. And let's move it
over here. This face. Select this piece and
move it with outwards. Let's do it similar, similarly for all the sides. I think this is fine. Now. Next, let's create our railings. So first what I will do is select this pillar, this pillar, and this pillar also, and press Slash on my number
to isolate them this way. This is a very handy
shortcut in Blender. If you press Slash
on the number, but you can easily
isolate any object. This shortcut is especially
helpful when, for example, we want to work on a
single piece, for example, this, and we don't want the
other pieces to distract us. We can just hit Slash on the number pad and we can easily isolate it
and work on it. If you press Slash again. And then we will come out
of the isolation mode. Now let's select this pillar, this pillar and spiller, rest slash rest one
for the front view. This pillar and spill
up press Shift S and closer to selected to bring
the cursor in the center. Let's add a cube. So press Shift a and add a cube. Now let's cleared, sorry, scaled accordingly, I will
check the dimensions first. Though, maybe 2.5 meters here. I think something
like this is fine. Next, select this
piece press Control a. Let's apply the scale
press tab for rigid mode. Press Control R. And let's
add an edge loop over here. Press three for Fe,
select and hold Alt. And just click over here. Sorry, let's isolate this
single piece for establishing and hold Alt and click over this edge
to select this loop. Press salty and extrude
faces along normal. I will again isolate
all these pieces. Move it somewhere over here
and first, replicate this. Rotate it by one or two degrees. Let us just join both
of these pieces. So select both of them
and press Control J. Okay, So select
this piece estab, and let's select
enabled this x-ray. Just select this top piece and let's bring it a
little bit down. Now select this
piece over here onto object and set origin,
origin indigeneity. Press Shift S and causal to select it to bring
the cursor over here. Now let's create a railings. So add a cube. Next, scale this down,
something like this. Upon something like this. Select this again, Control
a and apply the scale. But estab for a gig mode
and press Control R. Let's start the loop
exactly in the middle. Enable axially and select
these bottom vertices. And I will press X and delete these vertices because I
will be middling this piece. Now go over to the
Modify tab and let's add a mirror modifier
and select z-axis, middle it on the z-axis. Now if I just added
it over here, for example, I just
move this vertices. You can see it is not
mirrored over the z, so it will be easier for us. Let's add an edge loop, press Control R, and
use your scroll wheel. To increase the
number of edge loops. I would like to edge loops. Press S and Z. Scale this down and let's
bring it over here. Press three for
facilities and hit Aldi and extrude
faces along normal. Something like this. Then again press S and Z, and let's scale it down
like this whole piece. Then press S and
then Shift plus z. Just scale it on the XY plane. Right? Now I will select
this piece again, press Shift D, press X, and move it a little
bit over here. And let's just create a
little bit of variation. So press Tab enable actually select all these vertices and
let's move them over here. Next, what I will do
is just joined both of them to select both of
them and press Control J. Next I will add, add a modifier. Just keep duplicating this. I think this will be a railing. We are already done. Now. Just select them all by Shift D, G, and X and move
them over here. Railing piece press
Tab. Enable X-ray. Select all these vertices and move them over here
in the corner. Now, we need to
increase the number of, we need to increase the
count of the array. I think a railing looks fine. Now what we need to do is we need to just make
this into a single piece. What I will do is
select everything instead of just going one-by-one and applying
all the modifiers. But I will do is
just press F3 and type in hair convert mesh. And now just join everything. I selected both of them
and pest control J. Similarly for this one also, select everything, press F3
and select Convert to mesh. Then press Control J. Doing convert two meshes
like a shortcut of applying all the modifiers of all
the selected objects. So we don't have to, we don't have to select each
and every object and go over here and apply the
modifiers to select them, press F3 and convert to mesh. Now we can join them press
Control G. And these are our two balcony bigamy pieces. Let's name this balcony one. And this one is balcony. Move long. This one is value can eat sharp. Alright, so now it is just a matter of
duplicating these pieces. Press Slash to come out
of the isolation mode. Select this piece by Shift
and move it over here. This one, move it over here. Now select all four
of these per shift D. I move them onto the
y-axis or the right side. Alright, select the short one, press shift D, rotated
on the z-axis. So press Z and type in
97 for the top tube. Enable X-ray. Please. Carefully over here. You can select the
rotated on z axis by 90. Place it over here. Just checking if they
both match properly. I think this is fine. Now select this
one, press shift D, and move it over here on the y. Now select all these
three pieces per shift and move them
over the last one. Over the last side.
Balconies are done. I think the blue pretty nice. I think they go well
with the scene. Let's select all of them from here and put them into
a single collection. Press M and new collection, and move them to balcony. Alright, so we are
finished rid of balconies. So I think this much is
enough for this video. We continue from here
in the next one. Thank you for watching.
8. Creating the Entrance Door: Hello, Welcome to chapter seven. In this video, we
will be creating a large door that will
be here at the center. If you go over in your
reference images folder, you will find a door image here. So let's bring this in. First. I will hide everything to just disable it from here. Press one for the front view. Now press Shift. And select
goes there to world origin. This will bring this
piece over here at the center of the
world that is the origin. Now press Shift a and image, and let's add a reference image. This one. Now press Shift a plane. Rotate displayed
on the x-axis by 90 degrees for rigid mode. And let's scale this up. Enable remote from here. Line all these vertices up
with the reference image. Registry for face.
Select, select this face and let's
insert it now. Press I. Scale this inverted on the x-axis. We need to match
it with this line. Press two for H, Select and
select this bottom edge. And let's delete it
because we don't need it. Suppress x and delete this edge. Now press one for vertex select and select both these vertices. Let's enable vertex
snapping from here. Then press G. And while moving
it, hold control and snap it with this vertex. Now press three for facilitate and select the center face. And let's dilute this
outer frame is done. Let's move this reference image backwards on the
y-axis over here. Now select this, and
let's extrude this. So press Tab, press a to select everything and then just
extrude this backwards. I think this much we
can always change it. Let us give it a
little bit of bevel, press Control a and
also apply the scale, adjust the bevel amount. Enabled hard normals and
obviously auto smooth. Okay, so now let us move
further best one again. Next, let's create
this inside piece. So press Shift a again, and let's add a plane. In a similar way, match it, match all the vertices with the reference image like this. Now what I will do is just press Control R and add edge loops. Now press three and just
delete rest of the phases. X and delete faces. The bevel modifier to this also. Now let's work on our main tool, press Shift a and add a plane. Again rotating by 90
degrees on the x. We will just create a single,
match it accordingly. With this dot on the left
side only and the right side, we will just use the
mirror modifier, Item minute modifier to this. Make sure there is
a little bit gap in-between both of them. Just move them backwards over here and alerts
just extrude them. Now. Again, apply the scale
and I the bevel modifier. Now, let's create the shapes. So again, I will add a plane. This by 90 degrees. We can do is just
for now done off. Did I stop the objects maybe
except reference image? Now scale this down. Let's line this up for a select and let's
delete this age. So press X and delete edge. Now press one for vertex Select. And now just extrude
this by pressing E. Raise this complete line out. Alright, now let's select
these bottom two vertices. Press shift D, then z, and let's move them over here to extrude them and present
block on the z-axis. And move them to press
a to select everything, then press F to
fill in the feces. What I will do is I will use this mesh to create a cutout of it on this particular mesh. And Azure already mirrored
this particular piece. We don't need to
merge this one again. Okay, to do that first press
one to go into front view. Select this model, then select
this dual model for stab, and then press a to
select everything. Then press F3 and search
for knife project. Press enter to select this
knife project command. Now we can do is
just delete this. Let me just create it. Now if you select this piece
and go into the Edit mode, you can easily see
that we have created this cutout over here in this
particular machine only. Let's create the shapes now. Press I to insert this. Then press E to extrude them. Inverts. Again reside
to insert them. Then press E, extrude
them outwards like this. Now let's create this
piece side of the cube. Skim this down, enable X-ray and let's
match the vertices. Now if we try to
mirror this object, you will see if I add a
modifier to mirror modifier. You will see this is
not mirroring properly. This is because the origin
point is over here. For all the objects
that we mirrored, the origin point was
right at the center. So to mirror this piece, what we will do is just go over here in the mirror
objects section. Select this dropper
tool and select any one of these pieces
that have the origin point, the center, maybe this one. Right away, we have
mirrored piece over here. Press Tab to edit
mode enable X-ray. And let's add a
bunch of edge loops. Now, restrict for
facilities and select all these faces to insect them. First, let's apply the scale. So select this press Control
a, and apply the scale. Now please, I want you
to extrude backwards. Again insect. Then extrude outwards. Side the bevel modifier to this. Alright, next, for
this outer frame, did not create these ridges. Create them now, press Tab or
the edit mode risk control. Loop right down the center. Press Control V to
bevel this scroll, your mouse will just once to add edge loop right
down the middle. So there are three
edge loops and just give it a very
small level like this. Now what I will do is press Select and just hold
Alt and select this. Middle edge loop of both
of that is in the center. Now press Alt S.
Scale it like this. The milliliter. I will
add more edge loops. Again. Make sure there are
only three bevel segments. Again, select the middle
edge loop by holding Alt, then press Alt plus S. Let's
do it outwards like this. Now I will add a
few more of them. Alright, maybe something
like this is fine. Let's create our last piece now. Scale this down. Elected press until a
and apply the scale. Estab for mode. Select this front
face I to insert it. Let's match it with
this inner tube. Like this. Again, I will
extrude this backwards first. Then press I to insert it
and extrude this outwards. Left side the modifier. I think we are done
with a dome model. So first let us
save a blend files. Okay, so the last thing
that we need to do is we need to create
a door handle. Press one for one
for front view. And let's move, move
this reference image into the reference
images collection. So press M and move
this over here. Now let's add another
reference image. So press Shift a and
this handle limit. Scale this down. Let's the cylinder now press
Shift a and add a cylinder. Scale this down and let's match it with the
reference image. I think this is fine. Now, first let's
apply the scale. So press Control a and
apply the scale, press Tab. And best Control R and add an edge loop right
down the middle. One for vertex select and
delete all these vertices. Now I will use the
mirror modifier on the z axis that we don't have to repeat
every process two times. So we'll just make
this top part and the bottom part will be done
by the mirror modifier. Press tab, select
all the vertices, move them up here. Now we just need to extrude and scale to match our
reference image. Suppress. Move this
upwards, extrude. Guest match with the reference. Then scale it out or scale it inverts
according to the image. This is very representative, just I'm just pressing E then basically you
to extrude it, then scaling it
inverts or outwards. According to the
reference image. You guys, maybe you can
pause it and try to do this on your own
or just follow me. And also it is not like necessarily that
you have to follow this particular reference image that I have provided
for any model. You can just go over on the Internet
and find something of your own reference image
does not match properly, but I will just
kind of eyeball it like this. Maybe. All I'm going to just come
out of the X-ray mode. You can focus on any
object by passing the full stop button that is on the number
by Keep this leg, you can focus on any
particular object. So again, press Tab, press three for facilities. Let's select this top face. Press I to insert this. After inserting, Let's extrude this upwards and
scale it this way. Alright, yeah, I
think this is fine. Now let us move our
reference image into the reference
image collection. Right-click, Shade Smooth,
enabled auto smooth. From here. There's one
for the front view, and let's move it
over here like this. Maybe we can scale it a
little bit on the xy-plane. So press S, then Shift plus z, scale it on the x-y. Scale it a little bit just to
move it inverts like this. And what I will do is I would like
another mirror modifier. This time what I will do is I
will mirror it according to this object so that it mirrors on the left
side door also, we can do this like we have
to mirror modifier this time. First. This is mirroring
it on the z-axis, then on this particular axis
according to this object. Now let's select this
press Shift S and closer to select it,
add another cylinder. Scale this down,
located on the X by 90. Again, I will mirror this piece. Let's add a mirror
modifier to this. I will choose this as
the mirror object. And on the z-axis. Again, another minute modifier. Let's use this one. Alright, so I think
our model is complete. So first let's select
everything and press M and move it into a new
collection. Let's name it. Enabled everything back. I will place my door now. First, let's rotate it on
the Z suppress art and z and 90 minus 93. Risk control plus three or
two viewed from the side. Let's place it here somewhere. Moving backwards. Like this. Now we need to scale it up because right now
it is very small. Writing something
of this size maybe. Yep, I think it
looks pretty good. I'll scale it a little bit more. Alright, so I think this much
is enough for this video. This video was a
pretty long one, so we'll continue from
here in the next one. So thank you for watching.
I'll see you in the next one.
9. Creating Another Door: Hello, Welcome to chapter eight. In this chapter we
will create another. Right now we created
this large door, that will be our entrance door, but we have to create
those for a room. Rooms also, that will be along this direction only and
on the second floor also, if you go into the
resources folder, you will find this image. We will be creating this dough. It has a more
traditional loop to it. So let's bring it into blender.
Again, I will hide it. One for the front view. Shift a, and let's add, Let's add the image. Now the process to
create this door is pretty similar
to the last one. Again, I will add a plane
rotated 90 degrees on the x. And first let's create
this art piece that is altering the front press tab. And let's just line
up the vertices. First, let's add an edge
loop right down the center, elute all these vertices, and just use the mirror modifier to duplicate it on
the right side. Let us delete this vertices. So just select this one, press X and delete vertices. Select this word c plus
EEG to extrude it, and then press X to
lock it on the x-axis. Somewhere around
here I think again, I will extrude this,
move this upwards. Now we just need to trace the
a complete reference image. So I will just press E and keep on moving along the edges. If it is not really visible
to where the line is going, you can just eyeball it and place it
approximately where you feel like the line would be going because it does not really matter that we have to exactly follow this reference image. We can just roughly follow it. Now, we will see these two
lines are crossing each other. We don't want this to happen. So just enable
clipping from here. Now if I join them, they will
join right at the center. Alright. Now press Tab, press a to select everything. Then press F to
fill in the face. Let's move this reference
image at the back. This over here, extrude this, press a to select everything. Then you to extrude
this, like this. Right-click and change mood. Enable auto smooth. Let's also add a bevel modifier. Crosstab 34 Face Select, select this top face, press I to insert it and make sure we are not
overlapping something, any of the vertices,
for example, this way, if you insert it too much, you see all the vertices
here are overlapping. We don't want this to happen. Suggest instead it, I think right about
this will be fine. Then just extrude it
inverts like this. Next one again. Let's create this door now, press Shift a and add a plane. Let's again use the
mirror modifier. And this time I will use the middle object function
and select this one. I selected this art
piece because this has the origin point right at the center. So this will mirror. Are those correctly? First, let's apply the
scale modifier to this. Also extrude our
doors. Like this. Reduce the bevel modifier, and also enabled harder normals. Now let's create the shapes. So press Tab. I had a bunch of edge loops. Now select all these phases. Again. We need to just insect and extrude
a couple of times. Insert again. And this time what I will do is select all these face loops
for hold Alt and select this face loop and
extrude this like this. We weren't like you can
detail this even more. I can even insects
this face loop once again and extrude this backwards to create
something more interesting, but I will not go that far. I think it's fine. Next, let's move this
a little bit inwards. Let's create this cutout next. To do that, I will
add another plane. Let's hide both of
them for now and just rotate this plane first. Again, we basically just need
to press everything out. We can delete this edge and
start tracing from here. I'm just pressing E and
moving the vertices. Whereas a to select everything. And let's fill in the face, bringing back both
of these objects. And again, I will
create that cutout that I created in earlier door. I think no press tab, index moves vertices a little
bit upwards over here. Follow exact same steps. Make sure you are
in the front view. First, select this object, then select the doors, press Tab, press a to select
everything. Then press F3. F3. Search for knife project. Now, I will delete this object. Just hit delete. And if you press tab, you will see we have
created this cutout. Now. Just press I to insert this and let's extrude
this inverts this way. Also right-click
on the right-click on the door and
hit Shade Smooth. Press Tab again, and
let's delete this face. Press X and delete face, select this face also, and just hit Delete because we really won't be
able to see it from the back, so it does not matter. The next first create this. Let's create the outside frame. It is not in the reference, but I will just create it
like I did in the last. Suggest add a plane,
rotated 90 degrees. Move it in the front. Is something like this. Now press Tab and
then press first. Let's apply the scale. So hit controlling,
apply the scale. Let's insert this face now. I think something around here. Press two for the edge select, let's again delete this edge, press X, this edge. Select this edge. Make sure that is selected
to vertex snapping. Move it on the z-axis. Z, hold Control. And just hovered
over this vertex. It will snap all in line and then press three enlarged
dilute the center face. Now I will just extrude
this backwards till here. Now add a Boolean modifier to this lecture just a
bit and modify it. Enabled hardened
normals are too smooth. Estab and let's start again, a bunch of edge loops to select it Control
plus b, two, bevel them. Scroll to give it. The number of segments
should be three. Just tighten the bevel a bit. Let's select the
middle edge loop. Hold Alt and select this. Then hit Alt plus S and alerts, move this outwards like this. Just decrease the web
for this too much. Again, I would like
to more edge loops. Shift and select both the loops. Control plus V. Again,
Veblen like this. Let us select the middle
edge loop for both of them while holding Alt, hold Shift also to select
both these edge loops. Now Alt plus S and move
them inwards this time. I think something
like this is fine. You can add more if you want. Invert, I will
decide this majorly. Alright guys, so the
next thing to do is let's enable the
reference image. And if you see here these like grilled designs
that we can also create. But the thing is, if you
create something like this, the amount of vertices
would go up by a lot. And I actually don't want that. I will create
something very basic. But before that, if some of you want to create
something like this, I will just show you
quickly how it can be done. Just press shift D, Let's
add a plane. This time. What I will do is press
tab and let's delete all these vertices
except one, please. This vertices over
here. Just quickly. Trace this out this way by pressing E and just lining it up with
the reference image. After you have created
something like this, I will just clear
this one piece. If you want to clear
this complete, you can just duplicate this and rotate it and keep
it, place it everywhere. I will just show you how to create it further
on the grid design. There are two ways to do this. The first would be
to just press tab, select everything, Prezi, an extrude this a little bit
on the y-axis like this. And just use the
solidify modifier. Now. You can now just to
solidify modifier. And we have our design. You can now just duplicate
this however you want, then create the
design that you like. And other way to
do this would be, let's just undo everything. This time what I will do
is either skin modifier. So go over here to modifiers
are the skin modifier. Everything is very
much Deb I know, but it can be easily corrected. Just press tab. Let's select everything
then press Control a, and you can adjust
the skin modifier. I think skin modifies
the one that you might need if you wanted to
create something like this, enables smooth shading and
also auto smooth from here. You can also select
this word CAN just to keep on extruding it to
create something like this. As I said, I will, I will
not create these grid lines, so I will just delete this, bringing back everything again, and I will just start
something very basic. I will add a cylinder,
scale this down, scale it up on the best S, then Shift plus z to scale it on just the x and y
plane like this. Alright, next I will go over here into modifiers
and add, modify it. Now just increase the count, like this, and I will just duplicate this over here
to the right side also. Write something like this
also looks pretty good. I think as much as the
enough for this video, what I will do is just select
everything and press M and move this to a new collection
name door, door to. I will select this
reference image. I move this to a
frenzy mix section. Alright, so just hit Save
on your Blender files, and I'll see you
in the next video. Thank you.
10. Creating the Windows: Hello guys, welcome
to a new video. So in this one we will create
our notes. Let's start. If you go into the
reference image folder, you will find this image. This is the window that
we will be creating. It is pretty basic, but we'll go with
that. Let's start. I will first hide everything. Let me down on the
screencast keys. The procedure is pretty similar. Redshift day. Let's add the
reference image first. By now we have created
a lot of props. We have created two doors
in many pieces also. If you want, you
can try to create this window piece by yourself. First. Then you cannot make it. Then you can watch the
video and follow me. Let's start. And let's start the cube
first. Enable X-ray. Post. I will add the mirror modifier, press Control R. And let's add an edge loop
right down the middle. I will delete all the
right side vertices. Let's start the mirror modifier. I'm just lining up
all the vertices. Now. Let's move these top
vertices around. You can see I match this edge with this particular
vertices around here only. And then select
just this vertex. Also makes sure to
enable clipping and move this here at
the top, like this. Okay, so next what I will
do is press two for H. Select, select this
edge, rest one again. And now press Control B to
bevel your edge like this. And now increase the segments by moving your scroll wheel. Just match it with
the reference in which you can add
as many segments, but try to keep it
low so that we have a low number of vertices and polygon that our
model is optimized. I think this image is fine. It looks pretty similar
with the reference. Let's disable x-ray. First. Let's move the reference
image over here at the back. Right-click. Shade Smooth Model
enabled or the smooth. And obviously we'll
add a bevel modifier. Apply the scale,
adjust the bevel. Next I press Tab, press three for free. Select, let's select this face and give it a
thickness of around. Maybe something like this. Again. Now I will select this top face. Let's select both
of these phases, the front and the
backbone also know plus one and it I insect. First, let's enable X-ray. Now the tie. Make
sure to press B. B does it. You won't
get this boundary. You can see over here, if you just go over here, you can see the
boundaries of right now. So if you press V
again, violin setting, the boundaries now on, it will instead this week, this will create
two separate races, but we do not want that. So I will just key
boundary of like this. Alright, now, let's press X
and delete both these phases. Press one for the vertex, select hold Alt, and
select this edge loop. Then hold Shift and Alt, and drag this back edge loop. Then hit Control Plus e and
select bridge edge loops. This will join like bridges the edges and create this
the type of structure. Let's decrease the Babele bit. Alright. Next, this
piece is pretty basic. I will just start a cube, scale it down, enable X-ray. Let's quickly match it with
the reference like this. Move it over here and obviously decrease
the thickness of it. Also apply the scale
and bevel modifier. Alright, so again,
select this piece and select this piece also press
Tab, press three for free. Select hold Alt, and select
this complete edge loop, and then select this
face inside them. Let's insert it this much E and extrude faces along normal
and extrude them downwards. Decrease the tech
necessarily little bit more. Yeah, something around here. Make sure to apply the scale every time we change the scale. All right, For this piece, what we can do is
press tab over here. On this piece, I
add an edge loop, press Control R, and
add an edge loop. Here in the middle,
hold edge loop, hover over this edge
and add a blue. Then I will press B and
separate the selection. What this will do
is this will create this edge loop or different
object name this piece. Let me do that once again, I first started at edge loop. While this edge
loop is selected, I will press B and then separate the selection because only
this edge loop are selected. Now it is a separate piece. Now press one again, press tab for mood in a flexor. Press one for vertex. Let's delete all these
bottom vertices. Vertices, press X and
then delete the vertices. Let's select this
vertex and press E and just move it over here. Members II again,
and then move it on the x-axis like this. Alright, Now press Tab, press a and then press
a to select everything. And then F2 will
the face like this. Bring it over here. Then again, the process
is pretty similar. First, let's extrude
this backwards. Here I think. Again face select, Suppress
three, select this face. This time I will press B
and I'll give the boundary on to create two separate
facing texts like this. I forgot to match it
with the reference. But actually it does
not matter if you don't follow the
reference exactly, but let's follow it here. So something around year I
think, extrude this backwards. Then again in
certainly still here. And again extrude backwards. Not decrease the globe. Celebrate it is I think, too harsh. Something like that. Alright, so very basic windows, Window Model piece is done. First, let's move
this reference image into the reference
image collection. And the next thing
that we need to do is we need to add one more
piece to this window. If you see in the
reference images. I don't know if you
can see properly, like these windows have these
types of grilled designs. So we will create
something like this. So I found image
on the Internet. There are a lots of them, but I chose this one, this kind of design. You can find it in
the reference images. We will create this one. So let's bring this
into the blender now. Press one for front view. Let's press Shift a,
go to image reference. And let's select this one. Alright, for now,
I will just hide everything except the
reference image reservoir. Let's add a play. Now, shift a lane. This time, what I
will do is just press Tab one for the vertex select, select everything, press
a to select everything, then press M and merge
them at the center. There is just a single
vertex remaining. Let's select this
vertex and move it over here to exactly at the
center of this image. Now what do we need to
do is, as you can see, the vertex is at the center of this image or this grid design, but the origin point is
currently at the cursorily. We need to move the origin
point at the same location as this vertex so that we can
better this on all four sides. It is easier for us to
create this design. So just go over to Object, set origin and set origin to geometry will say the
vertex and origin point at the same location. So this is what we wanted. Press E to extrude
this just a little bit so that we can see if the
mirror modifier is working. Next, let's go to the Modify tab and add
a mirror modifier. Enable it on the zed
also, it is working. It is not matching with the reference image
completely, but that's fine. We will just follow this one particular side and
rest of the three sides. We will let the mirror
modifier handle them. Let's just extrude. Keep on extruding and match with all the lines that you can
see in the reference image. This is pretty simple.
I'm just pressing E and aligning it with designing the image. Also one more time, I will tell you that
if you want to make precise movements
when you press E or any of the blender command, you can just hold shift
so that you can move your vertex slowly so that
you can easily place it. Next. Let's start from here
and just keep on pressing E. Make sure you enable you to flipping so that when your mirror
modifier minutes, you can just join
them this week. Let's go over from here. Also. You can just go here and right away at
the skin modifier. The skin modifier is a
bit too much right now. Just press a to select everything
violin, the edit mode. Then press Control a and just
adjust the skin modifier. Something around here, I think. Now it is like a little bit
easier to follow the thing. I know. Like you can see the
are not exactly following the difference image because the reference
images symmetrical. But because of our
middle modifier, everything in our model
is pretty symmetrical. You can see it looks pretty good and we cannot even tell if, if you are not following
the reference image because no one knows what kind of
reference image VR following. Let's just continue. This will only select the plane
press tab again. Let's talk from here maybe. All right, I think all the
major parts are now covered. I would just leave it at
that only. I think I agree. Design looks pretty nice. You can just select
it, press Tab, press a to select
everything and hold. Then press Control plus a and just adjust
the thickness of it. I think something
around here is fine. The main problem
that arises with this type of workflow is that our polygon has won by what we can do
to reduce this. What we can do to reduce this. Let's add another modifier, and this time I will
add a decimal modifier. So what this does is
this will optimize our model a little bit
by trying triangulating. It suggests enabled
triangulation. Decrease this to see
it affects our model. So if you see, if I
go to completely 0, our model is a completely ruined and we do not want
this to happen. So just keep on increasing
and just see at what point, at what point we are
satisfied with the result. I think something around
here looks pretty nice. If you just done off to see the changes and the changes
are pretty negligible. I cannot even
notice that we have applied the decimate modified. But if you see very
closely, there are changes. If you see around here, around the edges and corners. It I think I will go 0.3 if
you just disable this now, you can see our vertices
are around 7,200, and if I just enable it now, they've dropped to 2 thousand. So I think it does
a pretty good job. Alright, so the
next thing would be is let's enable the
reference image again. Let's create these
rectangular things too. I will add a plane
rotated on the x by 90, scale it up, enabled,
obviously x-ray. Press two for the edge select
and I'm just matching it up with all the lines
in the reference image. Estab, then press Control a and make sure the
scale is applied. Select this face and I to
insert this like this. Again, hit I. And magic
with the inside face. One small like this. It did not matching
from a few slides of over here because I think this is
because of the image. The image is not perfectly
orthographic view. It did not matching up, but I think this will be
fine for our model. Just hide the reference
image for now. Let's select this face, this edge loop, and
then this phase, I selected this phase
loop by holding Alt and then clicking
over here to select this, then hold shift and
select this face rest x, then delete the phases to
create something like this. Let's scale it up a bit
around here, I guess. Now I will just extrude
them backwards like this. Design is done. I will increase
the thickness a bit more. So the design is
bit more obvious. Sector decimal 2.4.3 is too low. I think. Yeah, this is fine. Let's enable everything back
on the reference image. Let's move this to the
reference image collection. Select the grid design, rest one for the front view, and just scale this down. Let's match it with the
insights of the window. Second, yeah. I was wondering why it is
scaling down a weird manner. The reason of that
is because right now we have selected a scale
according to individual origins. Select these two bounding box, bounding box, and then
select them both. And now I can scale
them in an even manner. Now just press S then
x to scale it a little bit on the cover, the entire window like this. Right? I think our
window is done. It looks pretty nice. What I will do is I
will add another plane, rotated 90 degrees,
move it over here. This can act as our glass, or maybe your glass B,
something like that. Let's stay over here. Now. Let us just
select all of them, press M, and move them
to a new collection. And let's name this windows. Window. Alright, so make sure to
save your Blender files. And I think this much is
enough for this lecture. We'll continue from here and the next one. Thank
you for watching.
11. Finalizing the Scene: Hello, Welcome to chapter ten. So in this video we will be doing a bunch of
things. So let's start. First. Let me enable the pieces and just
select this piece. And this piece and disable
everything except this piece. What I will do is I will like
this is a whole big model. I will divide it into a
bunch of smaller models. So let us do that. So press Tab. First, I will
select this ground, select this press P, and then separate the selection. This way. These are two different pieces. Now the ground is different and this whole big pieces different. Next I will just hold
Alt, select this loop, and then press B and
separate the selection against similarly for
this top of float also, I'll just select it then
press P and separate. All right, the next
thing to do is let us give both these
floors a bit of thickness. First I will select everything
and apply the scale. So press Control a
and apply the scale. For thickness. We can
either just select it. First pre-step to
go into edit mode, then press a to
select everything, then just give it
a little bit of thickness by pressing extrude. Another thing that we can do
is we can just add solidify modifier and increase
the thickness. 0.30.25, maybe. Both of them. This way like non-disruptive and we can change the thickness
at any point that we want. Alright, so the
next thing is to, again select this
piece press tab. Let's move this edge loop tool and move this edge loop
over here somewhere. And I will create
two separate floors. Let's select the walls
of the bottom flow. So press and hold Alt and
select all these three, then press B again and
separate the selection. Now if we see there are
123455 different pieces. That way it will be
easier to work with even when we textured everything
in Substance Painter. It will be easier to texture everything because
everything is separate. Now let's open up your ref to
view our reference images. Right-click and load. And I will load reset
my reference images. If you take a look at all
these reference images, you will find that most of these courtyards have a
pool at the middle of them. So let's create that. Now. You see, we will
be creating that. Let's enable It's
back. The objects. Select the ground. B7 for top view
alerts enable X-ray, press tab, and press
three for facilities. And let's move this over here. Select the single-phase
press I to insert this. And let's insert
till here first. It should be just in the
front of all the pillars. So I think I will just
scale it down a bit more. Press S then Shift plus z. Now let's extrude
this downwards, suppress E. Extrude this
delay here I think. Next let's add a bevel
modifier and apply the scale. Adjust the bevel modifier and enabled hardened
normals and smooth. Next press Tab again, select the smaller
face in the middle. I will again insert
this suppressed. I again, I think a pool of
this size would be fine. Something like this. Now I will just extrude this
downwards again, like this. Now press Control R to add an
edge loop and add edge loop here and move it very
close to our pool. Now press three for face select, hold Alt, edge, like this. This one over here. Let's extrude the
support like this. I think this looks fine. You can change the scale
of it to your preference. You can just press seven, press tab and select all these vertices
and just scale the scale of it
however you want. You can make it smaller one, maybe even a large
one like this. It is totally up to
your preference. I will maybe make it a
little bit more smaller. Also, if you see this weird
shading issues coming, just select the piece, right-click, Shade,
Smooth, this will go away. Alright, so the next thing to do is we can maybe add
a bunch of stairs, like you see in this reference. Let's add them right now. Press shift D.
Let's add the cube. Move the cube over here,
scale it on the y, and let's move it down on the x. I will do is I will
select this ground piece, then select the stairs
and press Slash on my number pad to isolate the, this way I can easily work with them without
any distractions. If I wanted to come out
of the isolation mode, I can just press Slash again
and I will come out of it. This is especially helpful when all these objects
that again and again causing distractions for me to work with these
particular objects. I can just select any of
the object rest slash, and I can easily isolate it. Let's do that and select
this object and this one, and then press Slash. Let's move this piece over here. The size of it accordingly. Okay, so the next thing
to do would be best tab. First, let's apply the scale
dab and add edge loops. Around here, maybe
press three for free, select and let's extrude
this outwards this week. Let's create one more step. I will add a bevel modifier
to this to smoothen outages. Let me just see
if it looks fine. I will just decrease the scale
of it a bit on the x-axis. So press S the next, scale it down this week. Alright, I think it looks, it's much better now. The next thing that we
will do is just enabled this door and window
that we just created. And let's place them now. First I will replace
the windows. Collect them all.
Rotate on the z-axis by 90 by minus
1937 for top view. And let's play along
with the main gate. Decrease the scale of it. I think this is fine. Now let's just press shift D and duplicate it over
to the right side. Here. By chance forgot the plane that was acting as a glass plane
for these windows. So I will just quickly
undo everything, select the glass plane, rotate it by minus 90 on
the move this over here. Alright, now I'll just duplicate this over
to the right side. I'm using Shift D to
duplicate and move it on the y. Alright guys, so let's work on our model now. Enabled the collection and
just select all of the pieces. The easy way to do this would be to just open the collection and hold Shift and select
all the objects like this. Impressed slash to go
into the isolation mode, as there are a lot of
objects in this model. And we don't like, we don't want to again and again select all of them
and duplicate them. The easier way out
of this would be to just click on the Collection, duplicate this
duplicate collection. Let's disable the old one. Name, the new collection
as door to light. What I will be doing is I will apply all the modifiers
to this model. What I mean by that
is, for example, right now if you just
select any of the model, for example, I want to change the bevel on this
particular model. I can quickly do
that just by editing the bevel modifier.
In a similar way. If I want to increase the count
of this particular thing, I can increase it to any number, decrease the distance
between them. I can do that. This is because I haven't
applied the modifier. But if I just go ahead
and for example, I select this atom order, sorry, I select this
and modify it and go over here and click
this arrow and hit Apply. I can no longer change a count of this added or
the distance or anything. So applying modifiers means
that I have permanently applied the change that
I cannot edit from now. So applying modifiers
is like a big step. Make sure you're happy
with your model, then only apply the modifiers. That's why I like to
separate instance where the door for the dual model where none of the
modifiers are applied. So that if we wanted
to change something, we can just go back to
this model and change it. Let's disable this dog2
and enabled applied one. Select all of them. And the quickest way to apply
all the modifiers is just hit F3 and search
for Convert to mesh. Now if you just select
any of the model, you can see none of the
modifiers appeared. That means all the modifiers
have been applied. Now let's select all of
them and then just hit Control plus J to make
them into a single model, makes sure auto
smooth is inhibited. And now all of them are
joined in a single mesh. If I just select it, it will be easier to move and duplicate. That's why I did this. Let's scale it down
backwards over here. I think this is too small, so just increase
the scale a bit. I think something
like this is fine. Now I will hit Shift
D to duplicate this and place one
over here also. Now select both of them. Now select both of them again, then hit Shift D and just duplicate them to
the top floor also. Just to see how
everything looks. I'll select all four of them. Let's just join
all four of them. The middle, modify
the middle object as this ground plane maybe, and select the accidents. Why? There's just check. Everything looks fine. Now I will select this
huge door, please. Hold Shift and select all of it to remove something
from selection. Just hold Control and do this to remove it
from the selection. Now just press Shift D to
duplicate here at the top. All right, the next thing that
I will do is I'm going to add two more doors over here because the space looks
quite empty right here. Also one more thing that I
wanted to tell you guys, this, this is very experimental
and you can say a blog called stage to see how our final scene
is gonna look like. So you can make any
kind of changes. It is not like necessarily
that you have to follow me. For example, like if you want, you can add this window
or hair also Arabia had three doors over here and
add some windows over here. Like it is completely up to you that how you want
to make the scene. Obviously this is not
defined the state, we might change this later on
as we keep moving further. This is block out just to see how our final
scene is gonna look like. So for now, I will just
select these doors. Press Shift D to duplicate them. Let's move them on
the vibe first. Remove the middle, modified
because we do not need it. Let's rotate it on
the Z by 90 degrees. Minus 90 degrees plus suppress
our than z and minus 90. Hey, so press three for the right side view and let's
place them around here. Obviously, I will remove the
doors from the bottom flow. So press Tab, enable X-ray
and just select all of them. Make sure you enable X-ray and select the bottom to those, press X and then
lead the vertices. Now for the top ones, just move them back for
seven for top view. And just move them around here. Alright guys, so if I look at
my scene from around here, I think it looks pretty nice. Our seniors coming along pretty nicely and the assets
look good together. So I think this much is
enough for this video. In the next video, we will
create one more piece. Maybe I will create a huge
like a fountain arc over here. Yeah, I'll see you then. Thank you for watching.
12. Creating the Fountain Arch: Hello, welcome to Chapter 11. So let's continue
from where we left. As you can see, we've created this complete scene
and the last video. But as you can see,
there is kind of a little bit of an
empty space right here. So I think it does
not look that good. We will create something
to fill out this space. If you go into the
reference images folder, you will find this argument. We will use this to create our arc over here and
fountain Lake thing. So let's do that. First. I will just turn off everything. Move both of these
to this collection. Let's rename this collection
to building because this has all the parts of the complete
our building knowledge, just the same level of thing. Press one for the front view. Let's shift it and add
the reference image. Okay, so this will be very similar to what we did
in the earlier would use. If you want, you can
try to create this arc completely on your own
and then watch the video. Start press Shift
a and add a plane. Rotating this on the extra
90 mirror modifier to this. I'm just placing the vertices according to the
reference image. Mixture began to do is
add an edge loop over here. One like this. Select this edge loop and press X and delete the vertices. Now I will just select
this edge loop from here and press E
to extrude this. And let us just move this black line will be
easier for us to follow. You can enable this so that
you can see both the sides of the mirror modifier
and also enabled clipping that you joined
it right down the center. Like this. Next, let's add
an edge loop over here. And just select
these vertices plus a0 and then X to
lock it on the x. Let's fill this
face by pressing F. I selected this edge and distressed F to
fill in the face. In a similar way, we will
fill this complete phase. So just select this
press F, we join them. And now let's select
all these vertices. Press F to fill the face. Next, let's create
in the bottom. Ok, so I will just
select anyone dizzy, press shift D and
just duplicate that. Place it, place it over here. Then extrude this
on the x like this. Again, I'm just tracing out
using the reference image. Now let's start again from here. They're just delete
this vertices that we created earlier and
join them this way. And then press a to
select everything. We don't have to select
everything because right now both of these are
as the same object. So just hold Alt and
select this edge loop, press F to fill in the face. Now what we can do is just press Tab to select everything and let's extrude
this backwards. Move this reference
image over here. Let's shoot mode. This
enable artist would obviously we'll add a
modifier, apply the scale. The next thing that
we can do is we can make them as
separate objects. So to do that, Let's tab
to select everything, then press B, and then
separate by loose parts. Now there are separate, they are separate objects. Select this piece and let's
adjust the bevel on it. Next. Also make sure to enable hard enormous step over this piece and let's give it the insect to select
all these phases. Rest. Insert them. Looks
extrude this backwards. One thing I will do not
want lake when we insect, I do not want this partition to happen to avoid that risk. And then just press V that
the boundaries turned off. Now we can properly extrude this backwards. It looks good. Next let's add the pillars. The pillars we will use
the same pillars that we created for the main
courtyard scene. So just enable them. Let's select one of them, press Shift D to duplicate. Let's move separately over here, press M and add this to seem collection so that when we
turn off pillars, it stays on. Suppress one. Let's
scale this down. Place it over here. I think this is fine. Next, let us just mirror
it to the right side. So add a mirror modifier. And right now, it
does not matter in properly because the
origin point is over here. Now let us use a
different mirror object that has center point over here. Select the eyedropper and
let's select this arc. Now. Miller's work correctly. All right, so the next thing
to do is this is done. So let's move this
reference image into the reference
image collection. If you go into the folder, you will find another image of this function will create
something like this. Now I will add this into
Blender suppressed one. Again, press Shift D, image reference size of around. This would be fine. First let's add a plane. Or the plane on the x
rotated on the extra 90. Let's place it over here. Hide the reference
image for now. Make sure it is not
overlapping with the pillar. If you want, we
can just move it a little bit back. Alright. One again, Let's
enable the image. Shift the outer plane,
rotated 90 degrees. Move it in the
front of the image. And let me just
select all of them and then press H to hide them. Well, let's let start
the mirror modifier. Not I'll just move the vertices according
to the reference image. And then again, just
trace them out. And let us just
do for excellent. And let's just delete this edge. Start with this
vertex e to extrude. Again, we need to just keep on extruding to praise
this out completely. Again, enable clipping so that
they joined at the center. Alright, let's just delete
this vertices in the middle. Select everything, and press
F to fill in the face. The next thing that
we need to create it will also create
this inside structure. Again, let's add a plane and
follow a similar procedure. This world to see.
And let's just delete this and quickly trace this out. Flipping to avoid this. So press tab and let's
fill in the face. Let's move this reference
image to the folder for now and enable
everything back on. You can also press Alt H as an alternative tool to quickly just make
everything visible again, just hit the shortcut
or voltage first one. And let's hide this for now. Just select this
one and this plane, and we'll create a cutout of
this object onto this plane. We also did this earlier, so we'll do it in the same way. Select both of them. Press tab and press a
to select everything. And then F3 and search
for life project. Now we can just delete this. We have created this, this particular plane, this
cutout of the earlier object. Now let's bring this back on. Select this and this. Then press a to
select everything. Then F3 and knife project. Now we have created two cutouts. Let's start working from the press Tab to
go into edit mode. Now, let's select
both these phases. Let's extrude them just a bit in the forward
direction like this. Next, let's select
this inside face. First, move it on the y. Then press I to insert this. Now instead of extruding
this backwards, what I will do is I will just move this face in the
backward direction. Plus g didn't write and
move it back like this. Then press I again. Move this face even for
the back like this. Right-click, Shade Smooth. This enabled auto smooth. And let's add a bevel modifier. Next, estab, enable X-ray. First select all these
vertices and move them here. All of them. And let's move them here. They're not visible. Next, let's select this plane, press Slash and isolate this
seven for the top view. And let's add a cube around here. Scale it up, slash to come out
of isolation mode just to see how
everything looks, press Tab again, and let's
move this face over here. Alright, Next, select the
Cube, press Control a, and apply the scale estab again. And let's select
both these edges and press Control B to Babylon. Give them a few amount
of segments like this. Right-click, Shade Smooth,
enable auto smooth. Just the pivot to a
low amount like this. Tab again. And let's
select this face. Press I to insert this. Now let us just extrude
this downwards. This way. Estab, enable X-ray
seven for top view. Select all these
backwards Cs and move them back that they
are not visible. Alright, next let's create
a small bipartite like tea. So to do that, I will
just add a cylinder. Rotate this 90 degrees on the x, scale it down. Somewhere around here. Click and chips mode
this and also apply the scale bevel modifier. Alright, so press Tab,
press three for Face. Select. Next, insert this
and extrude this inwards. Insert this again, extrude this, scale it down first circle, and now extrude this outwards. Let's just isolate
this super slash to isolate 34 right view. And now I will use the
Spring tool to do that. Press tab, select
this phase three, then hold Shift and use
right-click to move your cursor, ellipse, move this around here. There is no precise location. Just move it around here
somewhere just below the face. Select the spring tool. Now try to spin this and see if you get
results like this. Now let us just extrude this
downwards in this week. And we have something
looking like for something maybe from where
water can come on. Next. Establishing the select
the spline tool, select the selection to login. I insect and move
this up my extruding. There are some artifacts being caused because
of the bevel maybe. So let's just reduce this. Apply the scale. Alright,
I think we are good to go. Now let's press Tab to
come out of edit mode, select everything, and press M to move this into
a new collection. Let's name this form Dana arc. Now, let's place it. So turn back on everything. Right-click on the phone. They knock and select objects so that all the objects are selected of that
particular collection. Move it over here somewhere. Let's scale it up. What do we need to do
now is like a stab. Not this. Select
this volume behind the Funding up press tab. And let's add an edge
loop here somewhere. And add another edge loop here. Now, I will add one
edge loop like this, this edge loop and
move it a little bit on the right like this. Then just select this face, press three and select this
face as x and delete this, sorry, delete the face. Now what we can do is we can just select all the objects
of the form t naught. And we can now move them backwards without being
interrupted by the wall. Will move them around here, I think. All right. I think our scene
looks pretty good now. Just save your Blender files. And I think this will be
enough for this video. I'll see you in the next one. Thank you.
13. Creating Another Fountain: Hello guys, welcome
to Chapter 12. So in this video, we will be creating another
fountain that we'll be going over here just
in front of a bool. Because if you just look, because if you just
look at it this way, the space here kind
of looks empty. So we'll create a fountain
here right before the pool. So let's start. Just hide everything for now. First let us move out, goes up point now you can
see to the world origin. So press Shift S and
closer to the origin. There's one for the front view. And if you just check in
the reference image folder, you will find this
fountain to image. We will be creating a
founding of this kind. So let's do that. I will add the image, shift a image reference. All right. There are two ways
to create this fountain, or one of them would be
to just add a cylinder. Best stab, risk control
at the edge loop, and then just scale the
edge loop according to the reference
image that we can just match it with the reference image and
create something like this. This process is quite tedious and there is a better
way to do this. Press Delete, delete
the cylinder, press Shift a, and add a plane. Rotate this plane on
the x by 90 degrees. Press Tab, press one
electrode rating, suppress a. And then we have to merge all of the vertices into a single one, just press M. And while everything is selected,
press at center. Now we have one vertices. I will place it around here
at the bottom, right here. Now, we will just extrude, keep on extruding
this vertices and just trace the complete, you can see this boundary of this fountain and then
we'll work from there. So first let's keep on extruding
and trace this boundary. Just keep pressing E and then place the new vertices according
to the reference image. This is pretty simple. Take a bit of time, but it is nothing complex. So just keep on pressing E and aligning the vertices
with the reference image. Let's create these ridges. Also place these
vertices over here. Press E, G, and Z to move
this over here, like this. Again, please. Even zag
and E and X mood on the x. And let us just
keep on extruding. Again, you can complete
this on your own. This is quite basic and we have done this quite
a lot of times. Now. Again, whenever there
is a straight line, I'm just pressing E, then aligning it to the
axis by pressing X, xor z plus e then z to
move it up like this. Otherwise, just use your
mouse to place the vertex. We are almost done now. Just extrude a few more times. Now I will just finish
it right here, press E, and then move it like this to the half of
it and we are done. Now what we can
do is we can move the reference image at
the back over here. And how I will create
this shape using this, just the outline of this
spontaneous, pretty simple. We're just going to add up
new modify, that is screw. So add this to your object. If you just disabled X-ray, you can see everything
is messed up because right now we have
chosen the wrong axis, suggests choose y
as your access. And you can see we
have our fountain. And it looks perfect. How does modify boxes? If you just see I
reduced the angle. If I said the angular 0, this was a model
that we created. And now if I just keep
on increasing the angle, you can see how the screen
modifier is working. We wanted at 360, like this. Alright, next, let's
enable auto smooth. From here. I will
add a new modifier. So instead of adding
a bevel modifier, because you see if I
add a bevel modifier, our vertex count
would go up by a lot. So instead of a bevel modifier
or what I will artist, I will either weighted normal modifier to
smoothen out the edges. As you can see, it
works pretty well. If I just disable it from here, you can easily see
the difference. But you can see it has caused some weird shading issues
over here and here. We will solve these issues after we apply the screw modify. So let's take care of
few things before that. First, as you can see, the model is not looking
like realist mode. You can see these
steps over here. So to solve this, what you
can do is you can increase this steps viewport
and the render amount from here to something big. And as you can see now it
is looking pretty smooth. But the thing is, our
vertices count has gone up by a lot and we
don't want this to happen, so we will keep this at a
low number, maybe at 3232. It looks quite smooth. And I think because we
will see at found in, from a distance, I
think this works fine. We can even decrease
it a little bit more. Maybe something like
2828 works fine. Next set the
renderer amount 228. Now what I will do
is I will just apply the screen modifier
because I want to make some changes to the model and I cannot do that before I
apply the screen modifier. So right now if I press tab, you see I can just see this vertices boundary that we
just created right now. To edit all these
phases and everything, I have to apply the modify it. So go over here and
apply it. First. Let's solve this shading
issues. Just press Tab. It's Control R and add
two edge loops like this. Press S then Z, and just tighten up that
there is no shading issue. Similarly over here also, I would like to edge loops, scale them up on the z, and rest everything
is fine, I think. Next press Tab again, hold Alt and select
this edge loop. Press F to fill it. Let's press Control R and
add an edge loop over here. Let us join this
phase also hold Alt, select this edge loop, press F to fill the face. I think this is fine. Now press Tab again, press three for Face. Select hold Alt and select
this complete face loop. Then hold Shift and Alt. And select this face loop also. Press I, and let's
inspect this like this. I think this is fine. And then press E and then extruded the
downwards direction. Sorry, one edge loop over here. Won't really be visible, but let us just do them. Right now our
fountain is finished. Next, let's add a huge cylinder. Scale it down over here. Establishing press three, and let's move this face over here. Right-click and shade smooth. This enable auto
smooth left side, the bevel modifier. Apply the scale. This phase, insert
this and let's extrude this
non-words direction. I think this is too
thin, so there's three. Hold Alt and select
this edge glue, press S and scale it inverts. I think this is fine. Let's move the fountain
over here. Alright. Let's create it. Let's make this big cylinder
a little bit more deep. Around here. I think it's fine. Establishing the big cylinder
press tab to insert this. Insert it over here, and press E to extrude this. Let's do this one more time. Two edge loops over here, and let's move them at
the top and the bottom. Press three, and select both these edge loops by
holding Shift and Alt, Alt E and extrude
faces along normal. All right, now I think our
founding set is complete, so let's move this
reference image to the reference
image collection. Select them both. Let's
bring everything back. Not this door two. Alright, so press seven
for the top view. Also, if your viewport
is a bit laggy, you can go over here and
disabled both shadow and cavity. Now let's place this
over here somewhere. Reduce the size of it. Enable X-ray. Alright, I think I will
scale this down a bit more. If you want. We can
place it exactly at the center to do that for shift test and
closer to select it to move the cursor to
this ground plane. Next, select both of them. Shift S selection to Causal. Now both of them are exactly
at the center of this pool. Let's move this
fountain up over here. Also, I will enable
back shadow and gravity because it is a little bit difficult
for me to work. Alright. Now I think our
scene looks pretty good. This much is enough
for this video. We'll continue from here in the next one. Thank
you for watching.
14. Making Some Adjustments: Hello, welcome to a new video. We're almost done with the modelling section
of our course. This is just a quick video
to make some changes and corrections to our
earlier models only. So let's start. First thing that I will do
is select this ground plane and let me enable
the screencast keys. So now select the ground
plane rest slash. To go into the isolation mode. You can see this daylight thing for this swimming pool
that we have created. I will just delete this. I have no particular reason
but just a preference thing. I'm not liking it. I'm going to delete this. If you think it looks
fine, you can keep it, but I'll just go ahead
and delete this. So press Tab, press
three for Face. Select, hold Alt, and
select this complete loop. Press X and delete
the word sees. Next, press one
for the vertices, select hold Alt, and select both these loops
by holding Shift and Alt. Then press Control E. I'm bridged edge loops. Next, press seven for top view and hold Alt and select
this outer loop. Press S The next. Let's scale it up a bit. Then S and Y and
scale it like this on the next slash to come out of the isolation
mode risk control. And let's add an edge
loop around here. The reason I'm adding this
edge loop is because when we export all our models
to Substance Painter, this will help us with texturing because you can easily select these faces and give them the different textures
that we want. So that's why I'm
adding this a division. So I suggest you
guys also do this. Next, I will press
Control R again and just add an edge loop
close to this, like this. Next, yes, let me check. Alright. Next I will select the door model slash to
go into the Edit mode. If you see these
railings like this, I'm really not liking them, so I'll go ahead
and delete them. But again, if you want,
you can keep them. It is really a preference thing. So all of this is
just a single model. How can we select
these railings? Press Tab to go into edit mode. Enabled actually. First, let's select
all of this and press full stop to focus this. Next rest 34 fifth, select. When you hover over any
of the cylinder, press. This will select
the complete model. So just quickly
hover over each of the cylinder and press
L on your keyboard. To select them. Make sure you hover
over the correct thing. Now just press X and
delete the vertices. Now I'm going to add a plane, press Shift a and the plane. Move this plane over here. Seven for top to rotate
it on the x-axis and place it here in this down. Alright? So as you see all these other models
already have these railings. We don't have to go over to the each model and
delete all of these because in Substance
Painter we will just be exporting this
one single DO model. Either ways we are going
to delete all of the rest. So I will just leave it at that. Because in the next
video we will just export this single door model. Alright, so the next
thing that I will do is select both
these waltz slash. Let us just quickly
select both the edges. Press F, select this edge, this edge, this one and
this one, and press F. The pill in the phases we call, obviously I will not
going to leave this open because when we export this into substance
or Unreal Engine, we don't want the light
coming in through here. So I will fill this up next for establishing this wall piece, press Control R and add
edge loop over here. Move this down here. Add another edge loop
close to this, like this. Okay, so the last
edition that I wanted to make is select the
wall piece again. Add an edge loop over
here at the bottom. 34 phase, select hold Alt and
select this complete loop. Next, press Alt E and
extrude faces along normal and extrude this
just to vote here, I think. Also let's adjust these edges from here just to enable the X3. Move them on the
x-axis like this, and select this one also. Alright, so yeah, I think now we're done with
all the changes. So in the next video, what we'll be doing is we
will finalize our assets, apply all the modifiers and UV, unwrap all the assets
and export them to Substance Painter to
texture them over there. So I'll see you in
the next video. Thank you for watching.
15. UV Unwrapping the Assets: Hello guys, welcome
to Chapter 14. So now that we're done with the modelling section of
our course, in this video, we will apply all our
modifiers and UV, unwrap all the assets to export them to
substance painter. Let's start. The first thing that I
will do is I will create a duplicate of this
particular blender file. Just hit Control Shift and S. Let's name this duplicate
as applied modifiers. Because we will be applying
all the modifiers. The reason I'm doing this is because as I've
told you before, after applying the modifiers, we cannot really make
any change to the model. Maybe if something
goes wrong afterwards, or maybe we want to make a certain change to
a certain model. We can go back to this scene file and make
that particular change. So that's why duplicated them. Now press a to select everything best F3 and
search for Convert to mesh. This convert to mesh command automatically applies
all the modifiers for all the selected objects
that we don't have to select each and every object and apply the
modifiers one-by-one. Now all the modifiers
have been applied. The next step is to delete
all the duplicate models. For example, you can
see all these pillars. Obviously when we export everything into
Substance Painter, we don't want to like texture each and every
bullet again and again. So for this reason, we will delete all are
duplicates and export only single models to Substance Painter and
actual them over there. Then we can reuse them
over and over again. Now let's start by deleting
all the duplicates. First for the pillars. Let's just disable everything except the pillars
of collection. Now, I've selected
this one pillar and now to invert my selection, I will press Control plus I. Now all of the pillars are
selected except this one. Now I can press Delete
to delete all of them. Let's enable everything back, not the reference images. We can even delete the
defense image collection. Select everything, press Delete, and delete the collection also. Next, let's remove all the
duplicates art pieces. We need this piece, this piece, this piece, and this one, these four pieces and rest
all of them are duplicates. So press Control I to invert the selection and
let's delete all of them. Also, we do not need
this door to collection. Let's just delete this and delete this
door to collection. Select all of these pieces. Let's move them over here. This one also. Let us separate all of them a bit so that it is easier to texture. Next, let's delete
all the extra links. So we need this piece
and this piece. Now press Control,
I rest of them we do not need, okay, sorry. First we need to disable
all the collections and only enabled the
balcony collection. Now I can invert my selection
by pressing Control. I then press Delete. That's also move them over here. Let's work on these doors Next. Actually, this one
in the last video. So we will just need this
door rest all of them. We do not need, so press
a to select everything. But before that,
these two doors are separate objects so we can just hit Delete to remove
both of them. And now for these doors, press Tab to go into
edit mode, enable X-ray. Just select this
door that we need. And the rest of them we
do not suppress control. I do invert the
selection breast x and delete the vertices. And we have got our similar
tool that we needed to enable everything back on
and move this piece or here. Alright, so next. Next let's remove
one of the windows. The same level, the thing
except the window collection. Select this right
side window and press X and delete this. Select all of them. Looked, all of the
window pieces. Move them outside over here. Let's rotate them on
the X-axis by 90. Okay, so next for the building, we do not need this
top flow because obviously we're just going to duplicate the bottom
float over the top. Don't need to texture
it again and again. We will just share
this bottom fluid and duplicate that
as the second flow. Similarly, this door,
we only need one of it. So select of the thing
and press Delete. I think these are all
the assets that are unique and we need
protection. All of them. We can create a
whole scene by just using all of these assets by duplicating them
again and again. Now, let's add materials
to all our assets. First, select all these, and let's give this a material. Go over here, click on New. And let's name this
material as art pieces. I want to apply this material to all these objects and
this pillar also. Let's select everything. Then select this piece
that has the material. Then press Control
L link materials. This will automatically copy the material to all
the selected objects. So as you can see, all of these objects have
now the RPCs material. You can also see these
five written over here. This means that this
material is being used by five different
objects. 12345. Next, let us give this the let us give this
a balcony material. This piece press Control L. Make sure this one is
the active object. The active object is the one
with the yellow outline. Make sure the one you added the material to is
the active object. Segue both of them and make this the active object and press Control L and link
the materials. Next let's apply, let us
apply a new material to this. Let's name this door, windows. Select all of it. Make sure this dog is
the active object and press Control L. I
linked the materials. Alright, Next, I will
select this ground plane, the stairs and the fountain. And let's put all of them into a single material, like New. And let's name this
material is ground. Press Control L, and then link the materials for the walls. Select this piece and
this piece. Click New. And let's put this in the walls collection or Control
L and link the materials. Now select all the dual pieces. Make sure you're not
selecting the wall. Just hold Control and
deselect it this way. Now they're just give
it a new material. First, let me check if
everything is selected. Click on New type in big dog, press Control L, and
link the materials. The last material will be
this found Dana makes sure you make sure you have
selected everything, then hold Control and deselect all the unnecessary objects. Press New, and let's give this
material press Control L, and link the materials. All right, so the
only thing left is to UV unwrap them.
So let's start. Now before we start
UV unwrapping, we must apply the scale
of all the objects. Press a to select everything, control a and apply the scale. This is necessary because if
you don't apply the scale, it can cause some
weird scaling issues with our UVs and
affect the textures. So make sure you always apply the skill before you
reenter rapping. Now let's move on to
the UV Editing tab. We will unwrap our UVs according to the material sets
we just created. What do I mean by that is
all the objects having the same material would
be unwrapped together, will be on the same UV map. So for example, all five of these objects have
the same material, that is the RPCs material. So all of them would
be unwrapped together. To do that, you can
either just select all of them or there is
another way to do it. Just select any one object.
Then press Shift L. This is the shortcut
for select linked. Then you can select
all the objects with the same link,
the material. So select material. And now it will select
all the objects that have the same material as
this particular object. All right, Now press Tab. Press a to select everything. Make sure you go over here
and enable display stretch. This helps us in visualizing whether are you results
stretched or not. For example, if I
just select some of the vertices and
try to move them, you can see how the
color is changing. If I stretch it too much, the color changes to red. And if it is a deliberate strategy that is
yellow or green, maybe the color that we are aiming for is this blue color, this dark blue kind of color. If you see this
colored in your UVs, that means your UVs are
not stretched and they are correctly UEN dragged. So yeah, let's start. Also makes sure you enable this. What this will do is if I select some of the
vertices here, those same vertices would
be selected in at UVU. And I also, let me
just select like this, the same vertices that
were selected here. I have also been selected in this viewport also now press a to select everything because you and then hit
smart UV project. This is like an automatic tool. This will help us
in UV unwrapping all our assets. So hit Okay. Make sure you don't click
anywhere and open this up. And just increase the
island margin just a little bit to make
sure that you reserve, like governing whole
of the area and not just in a corner like this, just increase the
island margin to something like 0.01 maybe. And I think this is good. As you can see, all of our UV islands have the dark
blue color, except this one. This much stretching is fine. I think it does not matter. It should not be extreme
like red color or maybe green or yellow is something
you should worry about, but this much is fine. So we will proceed from here. Now let us move on
to the balconies. Select both of them. Estab press a to
select everything. Then again, you and smart
UV project hit Okay. And let's decrease
the island margin. Something like this is
fine for the balconies. Now let us select
all the doors and the windows were established in press a to select everything. Then you and smart UV project. I think this is
fine for the SEC. Next, let's keep moving. I will select both these walls. Only these two objects
have this volume material, this piece and this piece. So press Tab to
select everything. Then hit U and smart UV project. For this year, it does not
really matter what type of island margin we use because
it has large phases. So maybe something
like this is fine. Okay, so next, I will
UV unwrap the phone. Dana said all of it. And make sure you
select all these volts. So hold Control
and deselect them. We have selected
everything now press Tab, press a to select everything. You and the smart UV project. Hit Okay. Try
increasing it a bit. Something like this is fine. Next is the ground. Let's select the ground
plane, press Shift L, and select link,
then hit material. All of the objects will be selected with
the same material. Now press Tab, press a
to select everything. You and smart UV project. Something like this. The last set that is
remaining, the big door one. I will just select
one object from it. Press Shift L, and
then hit Material. Tab. Select everything, and
then you and smart, if we project, I think this is fine for this one. Now we have UV unwrapped
all of our material sets. Let's move back to
the layout tab. Save our files. Yeah, I think this much
is enough for this video. In the next one, we will export the model to Substance Painter, and then we will start with
the texturing process. So I'll see you there. Thank you for watching.
16. Exporting to Substance Painter: Hello guys, welcome
to Chapter 15. So in this video we will be
exporting all our models in Substance Painter
and we will make our mesh maps and then we will start with the
texturing process. Before we export, we
need to check for one thing and that is
based orientation. So you can go over here, enabled face
orientation from here. The blue color here means
that the normals of the object are correct and we do not need to make
any changes to it. But if it is in red, that means the normals
are flipped and we need to correct them. To do that. As you can see, this piece has a lot of red colored pieces, so we need to turn
them into blue. So to do that, press Tab, press a to select everything, then press Shift N to
recalculate the normals. One of them is still red. So press Tab again. Now just select this
single plane only. Then press Shift N. Open this up from here and enabled
inside to flip the normals. Next, let's select this piece, press Tab to go into edit mode, press a to select everything, then press Shift N. Next. Let's correct this fountain. Again, select it, press
Tab to select everything. Then press Shift to
recalculate them. As you can see. As soon
as I press Shift Enter and we calculated the normals are shedding became all
weird as you can see. So to correct this, there is a pretty easy fix. You can just go
to the Modify tab and add a weekend
normal modifier. This miter might
not occur for you. If it occurs, you
need to just add a weighted normal modifier
and now just apply it enabled back the
face orientation and everything is correct. Now. Next, let's
correct this door. Suppress tab. Select everything shift in. I wouldn't do it
for every piece. The next is the ground selected press Tab to select everything. Shift pen. Now for our walls, as our walls are completely
black 3D planes. So once I wouldn't be blue and the other
one would be right. But the thing is we will
be viewing our volts only from the inside, like this. So we want the blue
color to be on the inside and the right
to be on the outside. So let us quickly flip
the normals press tab, there's a big shift in. And if the normals don't flip, you need to just enable inside. And now we have blue
color normals on the inside and the incorrect
ones on the outside. If you want to have correct
normals on both the sides. But we need to do is we need to give a wall some
kind of thickness. We can do that by adding
a solidify modifier. Now if you just increase
it a bit and adjust this, you can see we have
correct normals on both the sides, but
I won't do this. I will just remove
the solidify modifier because it does not matter. We will not be viewing our models from the
outside in this way. We will just reviewing them
like this. Let's proceed. The last piece
remaining is this one. Select it, press Tab. Then shifting. Now all of the models have
correct normals. You can disabled the face
or the addition from here. And now let's
export all of them. Press a to select everything
and go over to File Export. And I will be exporting as FBX. Make sure you first, you
have selected everything and then go over
here and select FBX. Alright, so I will save
it as applied modifiers only enabled selected objects. What this will do is it will only export the
selected objects. So that's why selecting
all of them is necessary. We enable this
because we don't want any unnecessary objects to
be exported with the models like the camera light
suddenly enabled selected objects and go
over here and select mesh. We're just exporting mesh
only and not anything else. Alright, so now that
everything is done, just hit export FBX. Now let's open up
Substance Painter. Before we export our models
into substance painter, let me show you something. You don't have to
follow me for this. This is just for
demonstration purpose. I'm going to show you what
would happen if we will actually export the model
with a Flip Normals? Let me just deliberately
flip unnormal of disbelief. So best stab a to
select everything. And I will be shifting. Then flip the normals. Press a to select everything. Now let's export this quickly. So export FBX, I will
name this wrong. Normals. Just hit Export. Go back to substance. You don't have to
follow me for this, create a new project and I
will select an important. Now I will import this wrong
normal FBX and hit Okay. As you can see,
look at the pillar. You can see the normals are
flipped a weekend only see the backside of the fillet
and not from the front. Rest all the models
looking correct. But this particular pillar, the normals are
completely flipped. And as you can see, we can see right
through our volts. But don't worry if you go
inside and see from here, we can see everything perfectly. But from the outside, we won't be able
to see our walls because they actually
don't have any thickness. This is what will happen if you export the model with
drawing normals. Let's quickly create
a new project and export the correct file. So just double-click on
this applied modifiers. Rest. Everything remains same. 1024 OpenGL and hit Okay. Discard, I will, I will
not save this project. Alright, so let's quickly search for any kind
of shooting issues. If there are any project. If you can't see this arc right here has kind
of a weird shading. So let's see what we can do. Let's go back to Blender. First, I will look back
the normals of the pellet. So press a to select
everything and shift pen. Let's disable the
sodium addition first. Now, there is a
chance that you might not face this exact same issue, but some other object of yours
is having a shading issue. So make sure you check properly. But to solve these
kinds of problems, I have a few sex solutions, so let us go over them now. This was the piece
that was having shading issues and
Substance Painter. So the first thing
that I do is I will add a weighted
normal modify it. Enabled keep shot. First, let's apply this. Now let's export
everything again and see if the
issues are sought. Mc, if the issues are solved. Let's import
everything back again. Select. If you can see it
is still there, so that did not solve it. The next thing that I usually do is select the model, press Tab. To select everything. Then just press Control T. This will triangulate your
model completely, and then I will
press Alt plus j. The first step, completely
triangulate all your faces. And the next one just reduces
some access triangulation. So that will help us. Now let's export everything back again and see if the
issues are sold. I think they will be solved now. Alright, so as you can see, the shading issues are now gone and objects look
completely perfect. Let's check some more if there are any other
shading issues. Even this piece has some
glitches going on over here. Let us quickly triangular
discipline also. This generally happens when we have N once and everything. And our model has this
big 112 and launch. Just select everything
by pressing a, then Control T, and then Alt G to remove the
excess triangulation. Let's export everything again. And actually when, whenever we export our models from
blender to substance, we have to go back and forth like 34 times until we
get everything perfect. Now the shading issues are gone. So our most shading issues
are being caused by N1. So adding triangulation to the phases would solve
pretty much most of them. I think rest of the objects do not have
any kind of issues now. Alright, so let's, let's move further and be
caught mesh maps. Now, to make the mesh bags, you need to go over to
the texture set settings. If you do not find this. First, let me place this here
along with the layers only. Alright, so if you don't find
your texture set settings, you can just go over here in the window views and enable textures set
settings from here, scroll down and you will
find big mesh maps. Is click over here. I won't change much
of the settings because the default
ones are pretty good. We don't need to change much. Just disabled this ID maps because we won't
be using id maps. I will set the output
size to somewhere around two k. You can go higher or lower it depending on depending on your
configuration of PC, if you're good enough, you can go for to care for k. And if you have a
low spec computer, you can go for one K. But
I suggest to go for Duke. The Big comes out nice. Next, I will enable this applied diffusion and use low poly mesh as high poly. An anti-aliasing you can say
to somewhere around four X4. Again, if you have a
good enough computer, you can even say
to eight by eight, but it actually does
not really matter much. I will say two to
four by four and you address everything I will
keep on default only. Let us take big
selected textures. Now. It might take
a little while, depending on your computer. Just got the video and continue
when everything is done. Alright, so now begging of
HashMaps has been done. So the reason we bake mesh maps is actually because
of a substance has a lot of cool features like smart mosques and
smart materials. Without breaking the mash mash, we cannot really use them. Whenever we export something
to Substance Painter, it is necessary to first check for any kind of issues
in your export. And then the next
step is to pick the mesh maps and then we can
get on with the texturing. Next, I will go over here
in the display settings and enable and put it
into releasing. All right, Let's
save our project, hit Control plus S. And I
will save it over here only. Let's name it as textures. Alright, so I think a big
came out pretty good. Just quickly check if there are any issues with your bake. This BIG came out pretty good. I will finish the video here. We will continue from here in the next video. Thank
you for watching.
17. Fixing A Small Issue: Hello. This is just a very quick
video to mention an issue that I did not cover
in the last video. So let's just quickly
go over that. If you just zoom in over here, what our edges of
every single object, you will see that edges have some kind of weird
sharing going on. And I'll just zoom into
different objects. And you can see like there
is some kind of we're changing over all our edges
even on this object also. Let us just quickly fix that. Again, there is a very
easy fix for this. Go back to blend it. If we zoom in over
here on this edge, you can see that
in Blender also. We can see the
same shading issue going on over here also, but it is really small, so I did not notice
at that time, again, very simple, fixed, just add a weighted
normal modifier. As you can see, the
issue is already gone. Now the next thing
is to copy this modified to each and
every single object. We don't have to select each and every object and then
add this, modify it. There is a quick shortcut, but first for that you
need to enable the add-on. So go over to Edit Preferences. In section search for the
copy attributes menu 30. Yes, this one enable this
add-on copy attributes menu. Now, best a to
select everything. Then select this ground plane that is having this
within normal modify it, then press Control
plus C. This menu will appear and go over to
copy selected modifiers. Now here we can
select this modifier, we can normal and
it and hit, Okay. Now each and every single one of our object is having the
weekend normal modifier. We can just quickly
check that. You can see. Alright, so this modified might cause some issues in
some of our objects. Like if you just zoom in
over here on this object, you can see the shading has got all weird because
of the weekend normal suggest enable keeps
shot for these kinds of objects and it
will solve itself. Let's search for some of
these objects that are having these issues like this one also there is a little
bit of shading issue, just enabled keep shot, and it will solve itself. This object we did not
enable auto smooth, so let's quickly do that. Now the shading is all
weird because this really happens in the objects that
are having flat shading. Just enabled to keep sharp for them and it will solve itself. Enabled auto smooth. Alright, so I think let's stop. The objects are fine. Maybe for this piece also
I will enable keep sharp. All right, So I think the
rest of them are fine. Again, I will export
this quickly, press a to select everything. For the volume piece also, we did not enable auto smooth. Enable keep shot, and now let's export this first save
your Blender files. Go over to File export FBX. Let's replace this file only. Now hit Export. Now that we have saved that
substance painter file, we don't have to create a
new project every time we can just go to Edit
Project configuration. And we can select the
file from here only, and it will just automatically
replace everything itself. We don't even have to
bake the mesh maps again. So that is pretty handy
if you just zoom in now or the normals
are not fixed. But if you still see some
glitches or something, you can just quickly
rebuild the mesh mats, which I will be doing. So you guys can do that too. But aside from that, I think rest everything is fine. We don't have any
motor issues now. Finally, we can start with the texturing in the next video. So thank you for watching.
I'll see you in the next one.
18. Texturing the Floor: Hello, welcome to Chapter 17. So let's start with our
texturing process in this one. In this video, we will be
texturing our ground plane. If you see this texture
second list over here. If you do not see this, you can just go over to windows, Window View and enable this
texture set lists from here. This is actually
all the materials that we exported from Blender. So now they are divided
into different texture, sex in substance painter. For example, if
you are working on this art pieces or texture sec, we can just click over here. This will isolate this
particular texture is set for us and hide all of the other texture
sets so that we can easily texture these models. You can just click over here again to enable
everything back on. This is quite handy. That's why we divide. That's why we divided this into like different materials
or texture sets. So like we are working on ground so we can
disable everything and easily work on this ground
plane without any of the other models like
obstructing our vision. The shortcut key for
this is Alt plus H plus q. Rescues for
isolating the texture, say, Alright, so let's start
with the ground plane. So first, let's
open up your ref. Take a look at our
reference images. Right-click and load
the reason file. If you will notice most of
these reference images, the grounds and floors in these reference images have different kinds of tile designs, which is very common in
these types of ideas. If you see in these images, you can see that there are three different types of tiles, even in this also there are two different title
designs here too. We will try and replicate this. So first, let's
start by downloading some of the textures
that we will be using. So open up your browsers. I will just close
pure ref for now. And in the search bar, search for ambient CG. Click on the first
link that pops up. This is a really great website. It has a lot of free
textures and models. And the best part is
we can use all of them like for commercial
purposes also. So that's where
it's really great. Let's click on materials because we are
looking for textures, search for tiles, and hit Enter. There are a few titled
designs that I have shortlisted and I will
be using in my project. But this is really
a preference thing. You can choose any kind of
title designs that you find, that, that you'll find will
look good in your project. So it is really up to you what kind of
textures you will use. The ones that I have finalized
that one of them is this. So right-click and let's
open this new tab. One of them is this. The last one is this one. Alright, so let's download
them in for K. You can just click over here for
all three of them. Download them in for K. Or maybe you can go lower to kill also. But I wanted to go for
the highest quality. So I, so I chose
for architectures, but actually I've
already downloaded them, so I won't download them
again just to save some time. When you will download them, you will find these
three ZIP files. So let's just copy
them from here. And let's paste them in
our tutorial folder only. I will create a new folder. And let's name this textures. Click and paste. Now let's export all
three of them together. Or I mean, extract
all three of them. Alright? The next part is to bring them into
Substance Painter. So to do that, first, let's open this up. So there are various
different types of maps, but we just need 31 of
them is the colormap. The other one is the roughness, and we will use the
normal of OpenGL format. Actually there are
two different forms, two different
formats of normals. One is the direct text one
and the other one is OpenGL. We will be using the OpenGL when there is no difference
between them. But in one of them, like the green
channel is flipped. So like devote that actually
went and the same thing. So we will use the G L1. Now, drag and drop this
onto substance painter. Select all three of them
together, like this, dragging your mouse this way. Or you can just press Control a to select
all three of them. Click over here
and we will export them as textures. Right? The last thing is to
import your resources to the first one is
current session. If you import your resources
to the current session, that means that these
textures would only be exported to this
particular session only, which means if few clothes
Substance Painter right now after exporting
them and then open up, open UP Substance Painter again, you won't find these
textures because you have only imported them to
this particular session. Only. The next one is. To project the
particular project. That means if you try to find these textures in some
other project of yours, maybe you are working on
something else later on. And if you try to find
these styles texture, you won't find them
because they are imported to this
particular project. Only. The last one is to import these resources
to the library. That means they will stay
in your library forever for all of the projects that you will be working in the future. Also, I will just select the project textures
because I will be using these textures in this
particular project tonally. Now I will hit Import. Now all three of them are here. Let us quickly
export all of them. Again, I will select the color, that roughness map
and the OpenGL. Drag and drop this
into substance. Select all of them, share project and import. Alright, so now all of
them have been exported. So let us start with
detection process. First, we need to select
the ground texture sec. One way to do that is to
directly click over here. Now we're working in
the ground state. And another way to do this
would be, for example, if you are currently in
a different texture sets like this one out pieces. And I want to go into
the ground texture sec. I will just hold Control Alt and right-click over the ground. Now the ground texture
set has been selected. This works for everything. If I select, if I click over here while holding Control
Alt and right-click. Now the fountain architecture
set has been selected. Now do big door one. So yeah, you get the point. Just hold Control Alt
and right-click over any object to select that
particular picture set. Now click over ground. First, I will delete this layer. Just click over here
to delete the layer. Now let's add a fill layer. Click on this icon
to either Philip. Affiliate is essentially
a type of layer that fills the texture set
completely with its content. So for example, if I change the color to
something like read, it fills the ground
texture sake, with the red color completely. And we can also
change the properties like roughness or metallic NAS, but we won't be using that. We will use this layer to
add newly imported textures. So let's search for tiles here. The texture I want to add
first is this one, title 75. This is the color map. So I will drag and drop this
onto the base color channel. Now are complete texture set and all its objects are filled
with this fill layer. Let's add the other maps also. Next I will add the normal map, drag and drop it here. The next is the roughness map. Right now this layer is
covering the entire texture. But actually we don't want that. We want to add this fillet at this swimming pool portion
only. Let us do that. So to achieve this
kind of thing, we will use something
that is called masks. If you have used Photoshop, you will understand the
use of them right away. But but if you haven't, let me explain it to you. So I'm asking Substance
Painter is essentially a black and white
image that decides where and where not to
show particular layer. I will just explain it to you
with a practical example. I will add a black mask to
this particular Fill layer. So go over here and
add a black mask, you see the whole
layer disappears. So the thing is, you
can understand it. This black means
everything would be invisible wherever
there is black color, the particular layer won't
be visible, but as soon as, as soon as we painted
with white, for example, if I take the brush and
right now I'm painting with white color onto
this ground plane. So as I'm painting, wherever I'm painting
with the white color, the texture starts to appear
or the failure starts to appear at that portion
only y, it means visible. And if I just go down here at the bottom
and choose black color, then I'm removing this. I'm filled in. This explains what I
just said earlier. Mask is this is the mask. Mask is like a black
and white image. If I just print it with white, you can see this is this black and white image
with which we are painting. White means the one that texture to be visible at that point. And black means we don't want the texture to be
visible at that point. So let's just undo everything. Now I want to texture to appear only at this swimming
pool area only. So we won't like painted
with white color. Very precisely. Obviously we cannot do that. You'd won't even look good. There is a perfect
tool for these kinds of tasks. Go over here. And select this tool. This tool is called
the polygon fill tool, and as the name suggests, it feels black and
white color into the, into our masks according
to four different modes. So let me just explain
it to you by showing it. So make sure you have not
selected this fill layer, but you have selected this mask. Click over this mask. This tool only works with masks. Alright, so the first mode
is the triangle fill. As we know that 3D face is divided into two parts,
into two triangles. If I just click on
this one huge phase, it will fill like this
into two triangles. It divides everything
in two triangles. Feels like this. This is sometimes handy
and sometimes not, but I mostly use this one. This is the polygon fit. These fields complete
phases at a time. So if I just click over here, you can see I'm just easily
filling a white girl into my mask with the help
of this polygon fill. The second mode is the
one that I use the most. The third one is mesh fill. Symmetrically feels
complete 3D meshes at a time like this is
usually not very handy. So you see it will feel a
complete mesh at a time. Fill this whole
complete ground plane. It feels a complete mesh at a one single tiny polar,
just undo everything. And if I just select the fill, I selected all
four these phases. I want the extra to appear here, like just for example. But for example, if you want to remove texture form some part, you can just select
this polygon field, set the color from
white to black. And if you click
on this face now, the texture is now removed. So this tool is very handy
and it will help us a lot. Now back to our original task. That is, we want this failure to appear at this
swimming pool portion. So click on this mask, make sure you have
selected the polygon tool. And then select this
polygon fill mode. And carefully just
select the faces. One more way to fill into phases is we can just make a
selection like this. First, we need to
change the color to white because we are, because right now we want to make the texture visible
and not invisible. So we want the
color to be white. We can make a selection
this week and you'll see we are coloring multiple
phases at a time. Alright, so next, I want to, I want to texture at this phase also over here on these
phases and the stairs also on this face. I will also add it
to this loop also. Now you will understand why I
did that loop at that time. Now you can see how easily
we did that and added this bilayer at this exact
portion only that we wanted. Let me show you another
use of this polygon tool. For example, let's consider, I want to remove this
from these tiers. How I will achieve that is, instead of using
this polygon filled, I will just select the mesh
field because I know for a fact the stairs are a separate mesh from
this ground plane. I will just select, sorry, I need to change
the color to black. And now I can easily remove from these tiers this texture
by using the polygon film. We just need to use their heads went to use the right mode. Let's fill it back again. Change the color to
white, and fill it back. All right, so now we
have achieved our tasks. Let's change the name
from Fill Layer one to maybe pull tails. All right, so now I will
add a new fill layer. Everything suddenly disappear. So don't wait. That is
because this failure is overriding this fill layer
because it is on top of it. So if I just bring it over here, you see this comes back. But I will just bring this down because otherwise this
failure won't be visible. Alright, so let's add the
other textures to this fillet. So let's start this one. Drag and drop this color
onto the base color. Next, the normal map to
the nominal channel. Roughness, roughness. Again. First, let's change the
name to something like outer tiles because I want these tiles to be
on the outer area only. Again, I will add a black mask, go over here and add a black mass in,
everything disappears. And now we can select the
polygon fill and choose where we want this particular
failure to appear. I want this failure to
appear only over here. So select this face. Sorry, we were currently
in the mesh fit. Next white fill
the complete mesh is go back to the polygon field. Also one thing I
forgot to completely mentioned was that
is one mode more, that is the UV chunk field. I rarely use this. But let me tell you
what it is about. If we select the UV chunk field, it will fill the mask
according to the UV islands. So let's press F to
bring the 2D view also. If I just select the fill
and now click over here. You see it fills this
complete UV Island at a time. The first more fields
according to triangles, it divides one
phase into two and fills two triangles at a
time in a single phase. The next one is
the polygon fill, and it fills one
phase at a time. The next one is the mesh way. It feels a complete
mesh at a time. And the last one is
the EU, which amphi, that feels like one
UV Island at a time. So this is one big island. So when I selected
just this face, it filled this complete
island at a time. If I select this loop, it will fill this complete loop. So this is the UV chum field. I rarely use this. I mainly use the second
and the third one. Again, I will select
the second one and start filling these phases. Let's press F2 to go
back to the 3D view. And you see how easy it was. Also, I will select
this pool tiles again, Google select the mask
of the pool tiles. And I also want this pool
tiles to appear in this loop. Again, I will click here, here, here, and here. Like create a partition
between two different tiles. Let's add the third one. Now, again, I will
add a new fill layer and it overwrite both
are older failures, but don't worry, we'll
just solve that. I will add the color channel. This is the color
channel only at somehow input two times. Next is a normal hand. Last one is roughness. Again, I will add a black mask in the rest of the area
I want this to appear. Choose the polygon fill only. And let's start willing. I'm just dragging my mouse
to make a selection. To fill multiple phases are make sure you don't
accidentally select some phases. You don't want to like if I increase my
selection to hear it. These spaces also come into the selection that
are actually of the pool tiles layer must be extra careful
while selecting our feces. Right? So I think all
the phases are selected. Now, let's change the name to something like
inner tiles maybe. Alright, so now we have a
texture dark ground plane, but the texture still
don't look very good. So the next thing that
we need to do is we need to set proper styling
for our layers. Let me select the ground plane. First. Let's select this outer tiles. And to change the
tiling of the texture, we need to just increase
the scale from here, hold Shift to
increase it slowly. We can just increase
it bit by bit. Maybe somewhere around well, maybe somewhere
around, maybe three. I think this looks fine. Again, this is very much
according to a preference. You can set any scale you want. Also, if you are feeling like the texture
is looking very blurry. The reason is, right now
the size of the texture is one key only if we go
and just increase it. From here. You can see now the
texture is looking sharp. If we can even
increase it to fork. But obviously now working
in substance painter would be a lot slower compared
to working in 1k. Then we will export
the textures, we will export them in for K. But right now let's
just work in one Q only because it is
pretty quick and snappy. Alright, so next, select
this inner tiles. Now, if we increase the scale of these styles to create
something nice, we will face a problem
that as you can see, if you look at the scaling, the tiling over here feels different and here it is
completely different. Next slide detection
looks completely disconnected and it
looks very weird. So again, that is a very
simple fix for this. Instead of the UV protection, we will select try
planar projection. And now when we select this, you can see a
complete texture is now a single one over the whole. Overall, overall the phases. Now we can just easily
adjust the scale to get something like this
may be just degrees. This a bit around here maybe, again, this is according
to your preference. You can set any scale you want. Last left, select
the pool tiles. For this scale really
doesn't matter much. Let's see if, what
if you like degrees, the scalar load, the texture
would look very blurry. So I suggest you to give
it a little bit of tiling. I think somewhere around
this is looking good. Now, I'll ground plane
looks much better. Now we are done with the basic texturing
of the ground plane. Obviously, we will
add more layers to this lake, roughness variation, dust and everything to build up upon the texture and make it
even look more realistic. But first what I want
to do is I want to add the basic materials to
all of the textures. So I think I will end it
here in the next video, we will be adding
base materials to all the remaining assets. First, we will add base
materials to each one of them. Then we will add more
layers and build up upon it to make the textures
even more realistic. I'll see you in the next
one. Thank you for watching.
19. Texturing the Walls: Hello, welcome to Chapter 18. So let us start
from where we left. In this video. Let's picture
some of our other assets. So I will start with
these art pieces. For all these models, I will just use a single material that would
be a concrete texture. Let's download that. Open up this website again. Click on Materials and
let's search for concrete. Now there are lots of
options to go for. But I wanted to go
for something clean. So I chose this one, right-click and open it up. I will download this
in for K. All right, so the download is finished. Now, let's copy this
file from here, and I will paste this
into my textures folder. Right-click and extract it. Select the color map, the normal map, and
the roughness map. Let's drag and drop this
into Substance Painter. Select all of them. We will export them as texture. I will import them
to my project. So let's delete this layer
and add a new failure. Let's name this filler
first concrete. Now I will drag and drop
these maps into the channels. So first the colormap goes
into the base color channel, anomaly map into the
nominal map one, and the roughness
into the roughness. Alright, so the next thing is, let's scale this up a bit. Maybe around five would be fine. Maybe let's try, try putting a prediction to see
how everything looks. In this case, try playing or
UV really does not matter. There's a little bit
dry planar only. Scale this down. Alright, so the next step is that right now the
color is very dark. I don't want to go for
this kind of ballot. To change that, what I need to do is I need to add a filter. So go over here, click this, and add the filter. And the type of filter that
we're going for is HSL. Perceptive. With the
help of this filter, we can easily change the hue, saturation and lightness of
this particular layer only. Alright, So I will say the lightness first two
maybe a little brighter. I think something like this. Next, saturation. First, let's change the
hue, a hue for you. I want it to be somewhat
like light yellowish. Let's see. It is around 0.26, maybe. Something like this
and saturation. I will increase it to maybe completely at one
only. This looks fine. Let's increase the
lightness of 0.79 maybe. Again, if the texture
is looking to bloody, that's because the size is low. If I increase it to k. Now the textures
look pretty sharp. Alright, for now,
this much is fine. Let's move on to the volts. I will also use this same
texture over our vaults. Also, press Control Alt and right-click to select
the voltage set list. Select the texture set. Two layers. Let's again
delete this layer. Now one thing that
we can do is we can just Control Alt and right-click on this
art pieces texture, and copy this concrete layer and directly paste it
onto our Waltz. Just right-click Copy layer. Again, I will select this texture sec and
just paste it over here. Let's increase the size a
bit to view things properly. I will scale this down
just a little bit. Alright, so next. Next let's add a black mask, because obviously we don't want this concrete material
all over our walls. We obviously don't
want to do over here and also not on this bottom. Let's add a black mask. Select the polygon tool. Now, make sure you are
using the polygon field. And now let's select
faces that we want. The concrete material. Where we want the concrete
failure to appear. Over here. Next, I will also add it
on this phase, this phase, this phase and this phase also follow these top faces. I will just use this diet
actually only because this, because all these top
faces will act as the floor of the second float
or maybe the first float. So we will use this outer
tiles texture or the layer, and we will copy it over here
to use it on these phases. For these bottom tiles, I will maybe use the
swimming pool texture. So let's do that now. Click over here and again
I will just copy paste it. So let's select the
ground texture sets. So Control Alt and
right-click over it. We will copy the outer tiles, fill it and the pool tiles. So hold Shift to
select them both. Then press control
C to copy them. Now let's select the
wall structure sets. So Control Alt and right-click. Now I'll just paste
them over here. Make sure to just
right-click and clear mask that we are starting
with a fresh mask. Now for the pool tiles, I want them to appear over here. Make sure you're selecting
the phases properly. Alright, so now all the
phases are selected. Now for the outer tiles, I want them over here. This looks kind of weird
right now, but don't worry, because these phases will be acting as the floor
for the first float. So when we will export
everything into Unreal, then it will look fine. Again. First let's
set the tiling. Increase it a bit so that it at least matches some
work with the bottom flow. I think somewhere
around here is fine. Let's select the pool tiles. Increase their tiling a bit. Maybe the last one was fine. You to three only. Okay, So now I will
download another texture that I will be using
in a waltz only. Let us go back to ambient
CG website and search for the one that I will be using is this one right-click and
open it in a new tab. Just hit download.
The download is done. And again, let us quickly copy this and paste it into
my textures folder. I will extract it over here. Also, if you go into
your resources folder, you will find this
download links, Notepad file where you can find the links to all these textures that I'm using so that you can easily just copy
these links and paste them and download
the textures quickly. If you want, you can just
go over and use this file. Now, I will drag and drop these textures
into substance painter. So select the color map, normal map, and
the roughness map. Select all of them, protest texture into the
project, hit Import. Now I will quickly create
another fill layer. Let's name this fill
layer green tiles. And I will drag and drop
these maps onto the channels. First is the base color. Next is denominator map. Now the roughness. First, let's add a black mask. Select the polygon
tool and fill mode. Now I just want this
green tiles failure to appear over
here in this loop. So I will just
select this phase, this phase, this phase, and this phase also. Maybe these phases also for now, I will see if I can add
something else to them later on. But for now let's add this
green tile section only. Alright, so next,
let's click over here to change the settings
of the fill layer. First, let's increase the scale Because right now
it is very large. Maybe somewhere around 15. Let's select dribbling
a prediction. This is much better. Alright, So now we
have added that these materials to the walls, to the ground, to these pieces and now only
some pieces are left. We will continue from here in the next one, save your files. And thank you for watching.
20. Texturing the Remaining Assets: Hello, welcome to Chapter 19. So before we start adding textures to the rest
of the remaining assets, I wanted to fix up a few things, go into the world's texture set. And right now the dollar
of these voltages kind of light yellow. I wanted to change it to white. So to do that, I
will just increase the lightness, maybe around 0.9. Next thing that I want to do is the normal detail
that you can see the scratches and bumps are looking at degree too
much on these walls. So to reduce them, there is a pretty easy, you see here this base color
and this opacity value. If you reduce this to 0, then the base color would be completely removed
from this failure. In a similar way, we
can select any channel. For example, if I select now the normal channel and reduce
this opacity value to 0, you can see all the normal
details have gone and now our walls are completely
plain and flagged. Obviously, I don't
want to do that. I just wanted to remove
them a little bit. So maybe I'll put
it at around 50, that we have a good
amount of details and also they're not too harsh. The next thing that
I wanted to do is if you just see over here, right now, Let's go back
to first the base color. Alright, so the next thing to do is that we need to remove all the phases that have the green tiles from
the concrete mask. What I mean by that is if I just disabled the green
tile layer for now, you will see that it still has the concrete layer below it. We need to remove all
these phases that have the green tie lit from
this concrete mask. The reason we're doing this is because if we don't
remove these faces, the height information and
the normal information of the concrete layer
would still be visible over our green tiles. So let me show this
by an example. I will just increase the normal opacity to 100%
just to show something. Now if you just look
over here on our tiles, now I will just disable the concrete layer and you
will see the difference. You can see that the concrete
layer is still giving off some of the height
information over our tiles. Do you see? To prevent that,
we need to remove all these visits that have the green tile from
the complete mosque. So quickly let us just do that. Disabled the green tiles. Select the concrete mask, go to the polygon fill. And I will set this to black to change between two interchange between white and black color. You can just use a shortcut
that is x like this. You see I'm flipping
between black and white. So I will choose black and
select this face, this face. All of those visits that have the green tile lecture
or the failure. Now it's done. If I
just come back here, enabled back the green tiles. Now, if I, now if I just try to enable and
disable my concrete layer, you will see there is
no effect on the tiles. That means now the
compute layer is not giving off any of its
information onto the, onto any other layer. Alright, this is what we wanted. Now let's segue back
the normal value to 15. Next thing is to go back
to the green tiles, and I will add another
filter to this. Click over here
and add a filter. This time the filter that I'm adding is a sharpened filter. This will enhance our texture. That it looks much better. You will just see right now
if I just type in here, sharpen and enter this filter, you will see now the title
set popping a lot mode. But actually this is too much. I want you to keep it at maybe
0 for something like this. And now just enabling disabled the sharpen
filter to see its effects. You can see the tiles
now pop a lot more. And I think this is much better. We can maybe increase
the projection to 17, bring in more tiles. I don't know, I
think this is fine. It is really like a
preference thing. Also, let us go back
to the base color. I will decrease the
lightness a little bit, just to have a little bit
mode of yellow color too. So maybe set it to 0.87. All right, this is done for now. Next, let's move on to
the ground plane again, hold Control and Alt
and right-click. I will try to align these textural deliberate
mode, these inner titles. One. The way I will do that, it'll open up 3D
projection settings. Make sure you are. Make sure you have selected
dribbling and projection. And we will try to
offset this a bit. Now increase the
x-value a bit to align these structures may be
properly little bit more. Somewhere around
here, 0.07, I think. Looks fine. Next, select the outer
tiles. For these lead. Select dribbling a
prediction instead of UV. And I will increase
the scale a bit. Maybe around here. Six is fine, I think. Alright, let's do the
same for these top tiles. Back to the wall structure set, select the outer tiles in a prediction and try to
just match it with this. I think around 4 something. Let's try 445, I think is fine. Yep. Alright. So these were some of the changes
that I wanted to make. These changes were like based on my preference,
how I liked things. If you don't like these changes, you can just skip them. Now let's move on to
the texturing part. Let's start with this
fountain, OK one. So I will hold Control
and Alt and press Delete. Let's remove this layer. And for this textures
that I will use the walls familiar only
go over the walls. And let's copy this
concrete fillet. I'm pressing Control C, and let's go to the fountain
architecture set and paste this. For now. Let's remove the mask. Now, I will show
you one more type of mask that is the
geometric mass. That is like pretty
basic to use. Just click over here. Now we are in the geometric mask of that particular field. Now, whichever mesh
that I select, this geometry mass can only, only be used, don't match it. So if I click on this mesh, now this fill layer
is automatically removed from this
particular mesh only. So if I click on this now, both of these objects are
removed from the failure. And the Ford here means
that this filter is being applied to four
different objects. This 1234. This is basically
used when you have two separate a fill layer
from different objects, but it cannot be used for faces. If I just add a black mouse to this black in a black mask, you can just add a fill layer to a single phase like
just this face only. This is not possible
with geometry mask. Black masks like give
you final control. Geometry, masses like fall. If you wanted to
do stuff quickly, just click over here and
let's click on exclude all. So now the filter is not being
used by any of the object. So now if I click on it again, whichever object I select, that object will have this particular field
later applied to it. So let's select
this one, this one, this one and this one.
These four objects. And these two objects I will
either separate familiar, alright, for this tablet, use the gold type metal thing. So add a new fill layer. We can create this on our own. Let's take the
metallic value to one, roughness to maybe 0.25
and color to a yellowish. Like this. We can't do this with
a black mask also. So let me show you that first
I will add the black mask, select the polygon fill, and this time select the mesh. Geometry mask is basically
like a mesh fill. Only. Now we have used the
black mass to only apply this golden material
on this step only if he had to do this
with the geometric mass. So now I will remove the fill, remove the mask.
For diametric mass. I will just click over here, right-click and
exclude everything. And just click on the tab now. And now I'm using
the geometric mask. A geometric masses
basically like the mesh fill of
the polygon tool. Let's move forward. Also one more thing
that I want to tell it. If you don't want to make
your own familiar like this, there is a gold pure material in our shelf only we can
directly use this one also has the accurate properties of Bolden Everything and
the color also is nice. So let's use this one only. I will remove this fill layer. Click here, let's exclude
everything and select the tap. So now for basic things like just separating
different objects from affiliate will directly
use the geometric mass. And if we weren't
like final control, we want to select
faces and everything, then we will use
the black masks. All right, for this thing, let's use these styles only
these black color tiles. Control Alt and
click on the ground. Let's select the pool tiles. Copy this, select
this texture set, and let's paste it here. I will remove the
black mask. For now. Let's use the geometric mask. Exclude everything. Select this. Alright, so this
is fine for now. Maybe later on state I will add more stuff to dislike
designer or something. But for now, we're just
adding the base material. So for now this is fine. Let's try UV protection. I think for this UE
prediction is much better. Let's decrease the scale a bit. 2.5. Let's try 2.5. This is fine, I think. Next for these balconies, if you search for
steel in the shelf. If you search here, these
are like basic materials, but if you click on here, you will also find
some smart materials. Also, smart materials
are like they have stuff like roughness, radiation does thrust
all these things added to them already. If you find a smart material that is that matches your
needs directly, use that. It will save a lot of time. Let's use this dark. Keep it here. Alright, let us move
to the balcony. Now if you open up this folder, you will see it has
two layers already. The scratches have already been added to this particular left. So if I enable the scratches, you can see maybe for the
balconies we will go with this. Let us remove this layer. Alright, let's move
on to the fountain. For the fountain, I will
download a marble texture. Maybe. Let's head
back to the browser. Search for Ambien CG. And this time let's
download a mobile material. Again, like a lot of
options to go for. Maybe I will go with something
like this or this may be, I think this one
will look better. The download is done. Now,
let's copy our zip file up. Ps2 denied access folder extracted. And now let's import
this substance painter. Import all of them as
textures to your project. Go back to the ground. I think, I think the fountain was the part
of the brown texture. Sec, yeah, let's press Alt plus q so that
we can isolate it. Failure. Let's drag and drop these textures onto
the respective channels. Select, try planar, maybe
alerts reduce the scale. Maybe you will only
use was much better. Let's try eight, increase the texture size two
things properly. Let us use the geometric masks
because we only have two, separate these two objects
from the rest of them. Click on, click here,
exclude everything, and select both of
these result Q again, to bring everything back, and I don't know if
it looks good or not. Maybe let's try another one over here and let's
download this one. Download is done. Let us again quickly copy
everything unexplored. And extract the textures out. Right now I'm just trying stuff out how everything
will look together. Let's export this one and
see how this one looks. Let's quickly replace
these textures, will drag and drop the
color on the color. Normal over here. Roughness. Let's try, try playing it again. Okay, I think this one looks a little bit better
than the earlier one. Again, I cannot really tell at this stage after
we export everything into substance and see how everything goes in the engine with the lighting
and everything. Then we will finally be able to tell if the textures are
looking right or not. They're looking good together. But for now, let's
just go with this one. Again, I will give
you an oxygen if you just go over here
and add a filter, Let's add the HSL perspective
perceptive to this. If you want, you
can maybe change a little bit of its colors, increase the lightness,
change the saturation, or the hue of it. But again, I won't get into these things too much as of now. So I'll remove this. We will
do these things later on. Like if you find
in Unreal Engine that something is
not looking good, then we will try and fix that. But for now, let's just, let's just add base colors to everything and move on for now. The last thing that
is remaining is these doors and the windows. For them, I will be
using a wood material, so let's download them now. If you go into the
resources folder, open the download
links, Notepad file. You will find the
link over here. Just copy this link and
open it up in your browser. So these are a bunch of
free smart materials. All of these are pretty good. I have already purchased them. You can type 0 here
and purchase them. Get new content. Just simply download
them from here. So again, let's just bring this into our
Textures folder only. Extract this. You need to select SPSS files, select all of them. Just drag and drop them
into Substance Painter. Now it has already
recognize that it is a smart material so we do not need to
change anything. I suggest you guys
that you should import these resources to your
library so that you can use them for future
projects also because wood is something that is pretty
common and you might need to use some of
these materials. Again, I suggest you that you should import
them to your library. I will import them to the
current session because I don't want to import them two
times. I already have them. So yeah, let's just hit Import. Select the door and
windows texture sec. So it is pretty basic from now, there are a bunch of
different wood materials you can drag and drop and see
what fits your needs. Let's just try some stuff out. I think the first one that
I tried was pretty good. You can go for any material that you like according
to your preference. I think maybe I will
go for this one only. Just drag and drop
this over here. Also let us drag and drop it
over here on this big toe. Hold Control and Alt
and right-click. Delete this layer and this crossover here
and search for gold. Let's drag and drop
the gold pure one. Because for these handles we will be using the
Goldberg material. Click over here, it excludes. Select this object. And you can also hold Shift and use your right-click to
rotate the lighting. If you are like feeling like if you're feeling
like it is too dark, you can just rotate
the lighting to check your objects
from your check your texturing from all angles. All right, let's move back
to the door and windows. We don't need to change much for the door. It pretty
much remains. This will only let us
see for the window. First, let's delete this layer. Click on the Geometric
Mask and just right-click and
exclude everything. I want wood over
here on this one, this one and this one. And for these, we will
choose something like a metal or something because these are like railings
and everything. Now let's add the new familiar. Give it a dark color. Set the roughness to 0. Against click here,
exclude everything. I will apply this fill
layer to this plane over here to give it a
glass-like feeling. Let's rename this to gloss only. Right for the railing. Let's create new fill layer and give this metallic value of one. Maybe 0.2 of roughness. Let's give it a
grayish dark color. Exclude everything and give
this relate to the Rayleigh. Make the color a
little bit lighter. Rename this layer to metal. Alright, I think this
is fine for now. We will add some
more stuff to this. Or just for base material, I think this is fine for now. So I forgot to add the metal
fill layer to the other. Really just click over here again and let's also
add this piece, the metal failure only. Alright, let's move
to the big door now. Hold Shift and right-click and
rotate our lighting a bit. Hold Control and Alt and
right-click. Select the door. Extra. If you see, if you open
up your good wood folder, you will find there
are multiple, multiple failures to help
detail the smart material. There is like grunge, see dirt and SVR also. So what I wanted to do is I want to change the styling
of the door a bit. Rest, everything is fine. So select the fill
layer over here. We need to just increase
the scale a bit. Maybe at around
five or six, maybe. I think six looks much better. Be increased digest. If you just increase the size of the exercise to see
stuff properly. Yeah, I think this is better. If you want, you can even dial the texture on the small door. So let's select this. It up over here, it to six. Let's try six. Over here. It really does not matter. Let's put it at six
only for uniformity. Alright, so now we have our base textures to
each one of our objects. We will add more
layers over this to Lake further details,
textures even more. But for now I think this much
is enough for this video. Thank you for watching. I'll
see you in the next one.
21. Adding Dust: Hello guys, welcome
to Chapter 20. In this video, we will
be adding dust or our textures to give them
a more realistic look, a little bit of variation. To add those two, we will
be using smart masks. That is a feature of
Substance Painter only. This is a really great
feature that helps us in adding natural and realistic
looking dust edge. We're most rust and
many other things. So we can use them
to create a variety of realistic looking materials. So a smart mask is essentially
a type of mask only. But it, but it uses different mesh
maps that we baked earlier at the start of
our texturing process, like the ambient
occlusion mesh map of the thickness HashMap. So also you can view
all your maps by pressing M, by pressing B. Right now, I'm doing the
ambient occlusion HashMap. If you keep pressing B, it will keep switching between
all the mesh maps. This is the thickness, this one is the normal
world space normal ID. We did not build index
where it is empty. This one is ambient occlusion. Now if you want to bring
back your material, you just need to
press M. All right, so let's start by adding dust. First, I will add
this to this volts. So click over the
world texture set. Let's add a new fill layer. Rename this to dust. I will set the color to black. And let's increase the roughness to somewhere around 0.67. Alright. Next I will add a
black mass to this. And now we do not
need to do anything. Now just go over here. Over here in the
smart Mask section. There are a variety of smart
masks that we can use, but let's search for dust, the one we will be using it. There are also different types
of ducts that you can use. But the one that we will be using is this one
That's the occlusion. Now just drag and drop
this over our mask. Now you see automatically that is being added
to our walls. But obviously this
is way too much. We don't want to add this much. We will decrease this.
We will decrease this. So the great thing about
these masks is that we can completely adjust
their various parameters. Now if you click over
here or this one dirt, you can just change the dirt
level from here, you see. You can also increase
the contrast, will make the dust
a lot sharper. Alright, so let's set
this up a little bit. Let's set the DOD level
to somewhere around 0.1. This is still a bit too much, but we will reduce this. I will show you how we
increased the contrast. No, definitely not want
to increase the contrast. Let's decrease the contrast
somewhere around 0.05. Also, one more thing that you
can do is you can also view your mask by just going over
here and selecting mask. As I told you, a mask is essentially a black
and white image. Only the white section means that the failure has to
be visible over here. And the black part
means the filled it has to be
invisible over here. So if now I go back to my
material by pressing M, You can see over the
white areas with this black colored display ads showing up and over
the black areas. If you go to mosque again, the dust is invisible. This is how masks work. Alright, so now
let's head back to our material and adjust this a bit more like a bunch of other settings
also like the grunge, if you increase the
orange than the amount of dust particles
would increase. But obviously I don't want
to make it too dirty, so I will decrease this. So let's just keep
it at default only. I think the default
value of 0.51 is fine. Next, I will increase
the contrast to somewhere around 0.3 to five. Maybe. I think
this looks better. Obviously, this is again
like a preference thing. You can increase the dust
on your walls if you want, and you're going to
decrease them if you do not want them at all. Next, what I will do is obviously still I think
the dust is too much, but instead of decreasing it from the DOD level of contrast, I will just go over here in the opacity value and
degrees you to somewhere around 60, maybe 65 something. Maybe 65, something like that. Yeah, I think 60 is fine. I wanted us to be settled
and not enough faces. I think this looks better if you just enable and disable
the dust layer. Now you will see the
difference that it creates. It makes the wall to look
much more realistic. Alright, so we will
just copy this layer. Selected press control
C to copy this. And now we will one by one, just paste it over
every texture set so that every texture
set hazardous layer. We will adjust them according to each and every texture sec, but I think this one
will be fine too. Now let's go over to ground. Let's rename this to mobile. Based. Based on dust fill it. It is not visible right away. But if you just disable
and enable this, you can see over the
corners that the dust, it's showing its effect. Alright. I think this is fine
for the ground. Also makes sure that you keep
the dust layer at the top. Like for example, if I bring the marble layer
above the desk layer, you will see now the dust is
just affecting the ground only and not on
marble fill layer. So we need to keep the dust
layer at the top so that it affects all the
failures below it. Next, let's move on
to the fountain. Ok. The dust filled and you see immediately
it looks much better. We can also maybe increase
the DOD level of big no, I think this is fine. Next, let's move
to this big door. I'm using Control Alt
and right-click based. Industry will increase the contrast a bit for the doors. Something like this. I guess. You see how much of a
difference that it creates. Next, let's move on to the
rest of the texture sets. Select paste the link over here. And now let's adjust this. I will increase the DOD level somewhere around 0.53, I think. Next, I will increase the
scaling of the concrete. Also, let's rotate the lighting and check it from all angles. Just hold Shift and right-click. I think it looks fine. Now let me tell you
about one more thing. So for example, you are happy
with how your dust looks, but maybe you want to remove
it from a very small part. So how you will do
that is just click off your mask and add a
paint layer to this. Now make sure you're
selected the brush tool. Now we just need to paint over and you'll see I'm
removing the dust very easily. If you press X, that means
your brushes turn to white. Now you are painting
back the dust. So x is to switch
between black and white. So black will
remove the dust and white will add even more. The thing is, we don't want
to remove dust this way. We want to remove, in a more
natural way to do that, go over here, and let's select some of the dirt
brushes like this one. Now you see we have applied the dirt brush to change
the scale of the brush. Just hold Control and
use your right-click or change the size
from here. Alright? Now, you see it is
black right now. And if I print it, you see
I'm removing dust in Laker, very organic and natural way. That it looks good also if
you try to remove the dust. And now if you press X
to change it to white, you are now you are
not like painting. Even more dislike, for example, you want to add some dust, do some of the corners and
not to the whole model. You can just add up paint layer, use a custom brush like any other brushes
or any other one. Make sure you are
in white color. Just press X to switch
between black and white. And white means you are
painting more layers to this. All right, so I just wanted
to show you how to do this, but I will just undo
everything or simply remove the paint layer because we don't need this extra information. Alright, now I will move
over to doors and windows. Let's paste the desk layer. I will increase the DOD level and also increase the contrast. I think something
like this is fine. Obviously I'm not worrying about this too much
because right now, because first I want to
export everything to Unreal Engine just to check
how everything looks, then I want to make
more decisions. How I want to change
some of the textures. But first I want to export
everything to Unreal. Let's add this to this one also. This piece. I don't
think the dusk matters statement because the
color of our dust is black. If you increase it too much, you can see it because
it has a difference, because it has a different
roughness value. Let us increase it around here. Increase the contrast
also little bit. For this one, I will
reduce the opacity to 50, change to the roughness channel. And for this also, if you
just move the opacity, you will see how it
makes a difference. I will set the opacity to 50. I will say capacity to
254 roughness also. Alright, I think this
is good for this layer. I don't want to put too much
just over these balconies. Alright, so I have added this
to all of the texture sets. Now first, before
adding more layers, I want to export everything to Unreal Engine just to see
how everything looks. And then we will move
on further from there. Do I add more things on more
layers to our textures? Or maybe if you wanted to like
change some of the things, maybe some colored is
not looking properly. We can change it after, after just checking
everything in unreal, how everything looks together. Alright, so I'll see
you in the next video. Thank you for watching. Make
sure to save your files.
22. Importing to Unreal Engine: Hello, welcome to Chapter 21. So now that we're done
with the basic texturing of all our models,
in this video, what we will doing is we
will export everything into Unreal Engine and
set up our scene or the just to see how
everything looks, then we will move
further on from that. So let's open up Unreal Engine. So I will be using Unreal
Engine five to use the new features
that are human in the night. Now click on games. Select a blank project. Let's name this project as you can choose the project location wherever you want to save the project, I will just liquid
stare default only. Rest everything remains same. Also, if you have
RTX graphics card, you can enable retracing. We won't be using that, we will be using human. Using human, you actually do not need redressing graphic card. You can, you just need
a normal graphic card. But if you have
RTX graphics card, you can just enable
this and hit on Create. While it opens up. Let's close
substance painter for now, don't need it.
Saved the changes. Alright, so now
unreal has opened up. You can hit update over here and we can
just dismiss this. Alright. Now
right-click and create a new level named
this scene one. We will be working in
this double-click to open it up and hit
Save Selected. Right now, everything is
black, you can see nothing. So first let's add some
lights to our scene. You can go over to Create. First, let's add a
directional light. This light, this light
will act as our sun. You can see even though we added a directional light,
nothing has happened. Next, we need to add atmosphere. Instead of going over to
create again and again, I will just go to Window
and enabled place actors. Now I can search for atmosphere, drag and drop sky atmosphere. All right, Next, select
your directional light. Just search for MOSFET. In its properties. You will see here atmospheres
and just hit enabled. So that the Indian
knows that this one is the atmosphere sunlight it
as soon as you enable this, you can see now we can see
our sky and everything. But below this middle
part, everything is black. So to solve that,
you can just add an exponential height
fog. All right. Let's reduce the fog density. Low number. One more thing that we need to
add is a skylight. Make sure you enabled real-time capture for your skylight. Alright, so now in the
new Unreal Engine, you can just hit Control L, control plus L, and you can just move your lighting
this way, adjusted. You can see that
is pretty handy. We can adjust our lighting just by hitting one shortcut
and moving our mouse. All right, so let's place
our Sun like this for now. Okay, so the next thing to do is open up your resources files. If you remember, we exported
this applied modifiers FBX file to use in
substance painter. Let's bring this in
now in Unreal Engine. So to import things
into Unreal Engine, you just need to hit Add
on your content browser. If by chance you don't
see your content browser, you can just press Control plus. And the content
browser would pop up. You can just hit L so
that it stays on here. For now, we can remove the place actors window or maybe before that
just add clouds also looks at clouds
also search for volumetric and drag and
drop volumetric clouds. Alright, so now let's
remove place actors. Hit Import to game. Let's bring in our export. Before that, I need to
create a new folder. Let's name this model. Now I will export
everything here. So we generally don't
need to change anything. We can just we can
just hit import all. You need to wait a little bit. Violent, jealous
processing everything. Alright, so now everything
has been exported correctly. You can see all our materials also have been exported with us. So it will be easier for
us to just add textures to these so that we can easily
texture our models in unreal. Now while everything
is selected, just drag and drop this. On 200. You can see our whole scene has been
brought into unreal. Now we are faced
with one problem. And that is that we need to
create a complete scene. Again, we need to just select everything and
move it over here. And now we need to again
and again duplicate this to create the
complete scene. So now we're faced
with two options. One thing that we can
do is we can just, again and again duplicate
everything and set up everything in Unreal only
just by using these heads. Just by using these assets only. Or the another thing that we can do is we can open up Blender. Now I will just open my applied modifiers
blend file from here. This one, which has all the modifiers and
use everything applied. Now, I just need to quickly create that
whole scene again by, again and again,
duplicating everything. So the reason I'm
doing this in Blender is because of
handling everything in Blender and moving
and duplicating stuff is easier than blender. So it will be much quicker creating everything back
in blender again and just exporting
everything into Andriod rather than just duplicating
stuff in unreal. Because like moving
around in maneuvering In Unreal is kind of a
bit difficult for me. If you are comfortable
in Unreal, you can just duplicate everything and create
that whole scene again. But I will do that in Blender only because it is
one and the same thing. I will just create that
whole scene and export that complete scene directly
into Unreal. Let's start. Instead of working
in this file only, let's just hit Control Shift and S and create a new file by
the name of complete scene. Now we just need
to duplicate and place everything back at their
original positions only. So let's start. So let me open up
screencast keys. Let's start. First, I will
select these three pieces. Rest seven for the top view. And let's move them over here. Let's move this piece over here, select this one and just
connected with this piece. Now press Shift D, press X
to lock it on the x-axis, and let's move it over here. Now before we just
duplicate this, press Select Object
checked origin, and take the origin
to geometric. Now, we can just duplicate
this. Move it over here. Press S then x minus
one to flip this. Alright, so this side is done. Next, let's select this
piece and move it over here. Make sure it is
aligning properly. I think this is fine. Next, I will just select all of them. While you're selected
all of them, just press shift
D, duplicate them. Write lock on the y-axis. And let's just rotate
them by two degrees. Enable X-ray to just see properly where we are
aligning things up. Around here, I think is fine. Next, let's link this
piece and this piece. Move them over here and
let's rotate them by one degrees, 90 degrees. Place them over here, matching with this
piece. Like this. Now to select this piece and
duplicate this over here. Select all of them. And let's just move this a
little bit backwards. Like this on the x, that just everything
lines up properly. Now I will select these
three pieces again, press Shift D and duplicate
them by one or two degrees. Now I need to just line
up this piece over here. Alright, so now all the pieces
are lining up correctly. Select this top piece and
let's just duplicate this. Move it on the y-axis, and move it a little bit
on the x out in the front. We can also reduce the
size of this a bit. But I think it is better
to keep it that way. Only. Pressure of D again and large duplicated
over here also. All right, next to the
return of the pillars. I will do is I will
just hide the wall. All these extra objects that could just
easier to place them. Select the pillar, press Control plus seven
for the bottom view. Let's move this over here. Duplicate this again. Enable X-ray and let's place
it correctly like this. Make sure to check once
everything lines up properly. I think this is fine. So I'll just quickly
duplicate everything. Both of these pieces
press seven for top view, enable X-ray and alerts. Move them over here also. I'll just keep
duplicating everything. Let's select this
pillar and move it to all the corners.
Select both of them. Press shift D again
and move it to this, these two corners also. Select all three of these pieces or Shift D
and move them over here. Now let's just check everything. If everything looks fine, I think everything is static, so press or attach to
bring everything back. Press one, enable X-ray. Let's select everything over here except the founding
these tiers and the ground. Because we need to duplicate
it for the second flow. Select these pieces also. Express G to move them
once and check everything. Now press right-click
to cancel the moment Shift D to duplicate this and place this over
here like this. We need to correct these pieces. Press S and scale
it down on the Y. Allele for this one
on is less than y. Sorry. Need to increase
the size of this on the x. All right, so everything
looks fine for now. Place the railings. Now. I'll select this one and let's just hit duplicate this one and
place it over here. Select all four of these. Let's move them over to
the right side pillars. I will select two of these, educate them on the x. Now let's select
these three pieces and move them over
to the last side. Alright, So the remaining thing is the doors and the windows. Let's select our dough. It is a single piece only. Let's move the origin
to genetic tree. Placed one over here. Duplicate this, and
place one over here. We can also increase
or decrease the number of these doors at a
later on stage also. So let us just keep it
like this way for now. Duplicate them and
move them over here. Over here also. Select all of them. Seven for top view. Shift them on the zed. Before rotating
them just enabled individual origins so
that when I rotate them, they all rotate over their individual origin and
not like a single object. Let's just place them like this. All right, So the only
remaining thing is the Windows. Reason they advocating
in a weird way is because we have enable
individual origin, we now need to move
back to bounding box. Rotate this by
minus 90, I think. Yes. Place it over here. I'm
really pressing everything. Very lovely because
I can always change the location of these
things in unreal. Let's duplicate this and move this over to
the right side. All right, So now we're
done with the whole scene. Let's just select everything. First. Let's save this. And let's just export our
complete seem to unreal. Now, I will go over
to File export FBX. Let's export this into
our exports folder, selected objects and mesh. I will name this complete scene only and hit Export it vx. Let's open up our
Unreal Project. Control a. Control a to select all these
applied modifiers object. Because we do not want to
delete our lights. Hit Delete. Just delete the
complete models folder also that we can export
everything from new. Alright, so let's
explore that new FBX, import and complete import. All. It is going to
take a bit of time. Now the compute export is done. Now while everything
is selected, Let's just drag and drop
this into an unreal scene. Wait for everything to load up. Now our complete scene
is in Unreal Engine. If you want to know how
I'm moving in Unreal, just hold right-click and use your WASD keys to move
in the unreal scene. Next, what I will do is
I will send the location of all these assets
to 0 comma 0, comma 0 at the origin. Make sure each and every
asset is selected so that they all get moved
to 0 comma 0, comma 0. Alright, so now
there are a couple of issues with our model. Let us just quickly
fix them first. So the first thing
is these pieces have been exported
as completely black. And these two also,
surprisingly, these two are fine and
these two are also fine, but only these four
have been affected. Let's just solve that right now. When I was earlier
testing of camera, this same issue appeared, so I really don't know
what is causing this, but we can easily fix this
just by deleting them both. From here also. Now select this piece. Hold shift and select
this piece also. Now press Control G to
group them both together. And let's just
press Control C and Control V to duplicate them. Move them over here. The scale section in the
y scale type minus one, so that they get flipped
on the y-axis like this. Now let's just move
them to the position. It was this easy. Now
select these two also. Press Control G to
group both of them. Then press Control C and
V, you duplicate them. Let's move them over here and make sure to flip them
on the y-axis like this. All right, Now
these issues fixed. The next problem with models
is that as you can see, some of the walls and
some of the other models not casting any shadows. That is because they have been exported as symbol 3D planes. There is again, a pretty
easy fix for this. Let's just open up our
walls material over here. There is an option that
we need to enable and it will fix this just
enabled two-sided, which tells the
Unreal Engine that this particular model
is a two-sided. Just enable this and hit Save. And you will immediately
see the results. You see now all our
walls are casting shadows and the lighting
is looking much better. Next, let's enable
this two-sided for each and every
material of ours. Now if you see this
fountain art is also not casting any shadow. Now we will enable
two-sided for this. Now the shadow issues fixed. I will just quickly one by one enabled this for each
and every material. Alright guys, so
now we have enabled two-sided for each
and every material. We have exported everything
into unreal correctly. Now, I think Ms. Much is
enough for this video. You can also press Control L, and they would delighting a bit. As you can see, lighting is
updating quite responsively. We can create various moods
using just this lighting. We continue from here in the next video. Thank
you for watching.
23. Applying All the Textures: Hello, welcome to Chapter 22. In this video, we will be exporting our textures
from Substance Painter, and then we will bring
them into unreal and apply them on
all our models. But before that, there are a few more issues
that we need to fix. One of them is if you
see in these corners, you will see that light
is leaking to them. I don't know if you guys are
facing this issue or not, but let me just solve
this right now. In all these corners, you can see there it is. You can see that light
is leaking through. So to solve that, there is no like a solid, fixed but pretty hacky way. But I will do is I
will create a cube. Go over to Create
and add a cube. Move this Q over
here at the outside. Just scale it on the x
and the z, like this. Now if you'll see over
the right side of a vault over here,
as you can see, there is no light leaking issue because we have added
a big cube over here that is acting
like a shadow box. Maybe it is casting shadows so that no light gets through here. We can see that clearly light is leaking
through over here, here and the rest
of the corners. So let's just quickly add four cubes on all
the four sides. Control C and Control V.
One more cube over here. Make sure it does not overlap
with any of our geometry. Let's just copy
paste this again, rotate it 90 degrees. Now again, copy paste
and move on Over here. Now you will see in
any of the corners now no light is leaking
through any of them. So make sure you add these
big cubes on all the sides of the walls so that you
don't have that issue. Let's just move
our lighting press Control L and check if there
is any limiting issue. The lighting and everything. If I put it like this, then we can see some of the
light leaking issue again. I think we can just move
the lighting a bit. Press Control L again, and let's move the
directional light a bit so that there is
no light leaking. All right, So now I think
that issue salt next. We forgot to change the
scale of these big pieces. So let me just select both
of them, delete them. Delete both of them, and then select these two
pieces from here. Copy them, and paste them, and let's move them over here. If anything is not
lining up properly, you can just enable
snapping from here so that you can move
things freely like this. Alright, Next I will
select all of these bulk. Nice. Let's just, let's just
bring them down a bit. You can also press Control
G to group them together. Now just move them
over here. Like this. Alright, so I think
this is fine. Next what I will do is I will add a camera so
that we can place our camera and then we will view our scene from
the camera view only. Go over to Create in
cinematic camera actor. Now we can easily replace
our camera first, move your view by using the
right-click and WASD keys. And please, please the scene, how you want your
camera to look like. Maybe this angle is
fine, like this. I think this angle is fine. Next, what I will do is
from the World Outliner, select your camera,
right-click on it. Select Snap object to view. Make sure you select
Snap object to view. Now let's right-click and pilot so that we can
view our cameras. So now we are currently
viewing through our camera. So as you see, it is not
like viewing properly. So go over here and over here
and change this to 12 MN. And now we can see see the same angle
through our cameras. So this will be our main shot. So you can frame your
camera like this. Just move your view and
then go over here and right-click and then
Snap object to view. Let's select all
of these models, except the light. Select all of them,
and let's just move them into a single folder. Name this folder models only. Alright? Now you can view
from your camera just by right-clicking and go to pile even just move your
scene however you want. Then just come over to the
camera and right-click and pilot that you can
view are seen at once. All right, Now let's hit save, open up Substance
Painter in Unreal, right-click and
create a new folder. Let's name this textures. We will export all our
textures directly to unreal only so that we don't have to
copy paste again and again. We will just directly export
them from substance 200. Alright, open up your project. Now hit Control Shift and
e. In the output directly, select output directory and handover to wherever you
saved your Unreal Project. Mine I think is in Documents, Unreal, and go over to content. Then in Textures folder, select the folder
we want to output. For output template, I will
select Unreal Engine four. There is already a
output templates, so just select
Unreal Engine four, bad file type I will
go with which Plus D3. For size, I will go for, for k because I wanted to
get the highest quality. But again, if you don't have
the high-speed computer, you can just refer to key only. I will select OK, and now just hit Export. And we need to wait
a few seconds. We'll be done. Alright,
so the export is done. Now, open up unreal again and make sure
you hit Import From here for all the
textures to import. Okay, So now all the
textures have been imported. Click Content from here, and textures, all other
textures are now here. Now we need to just add all
of them into our materials. Go over to content
again, models. Open up your RPCs material and double-click to open it up. Now, we need to just
add a few textures. Let's delete this default. Risk control plus base to
bring up the content browser. Open up pictures. Select these 3 first
textures, the pieces, one, this one, this
one and this one. Drag and drop them over here. Now collect. Now
connect this base color into basically the normal
map into normal map. And for this bag,
this will do it. This will help us save
memory because this has three different
channels, that roughness, the ambient occlusion and
the metallic all packed into one texture only but
in just different channels, like one is in our channel
when it's G and one is in B. So the R channel mixture goes
into the ambient occlusion. The G goes into roughness, the B goes into metallic. Now hit Save. Let's close this window and you can
see all of our materials have not appeared
over our pieces. Next, just select each and
every material one-by-one, add textures to them. Next is the bulk of new ones. Again, base color to base
color, normal into normal. And I was into
ambient occlusion, g into roughness,
and B into metallic. Make sure you remember
this four for the projectile for
further projects also. Now I'm just doing the same
thing over and over again, but all of the materials just follow me or you
can do it on your own. Also. Scroll down. You will find the rest of
the materials over here. Alright, so this is
the last material. Now, let's add these textures
and then we're done. Alright guys, so now we have architectures to all of
our models in the scene. I feel like are seen
already. Looks pretty good. Let's just right-click and come out of the piloting mode first. And I can see these doors a little bit
backwards behind this style. We need to bring them
a bit in the front. Whereas the smooth them a tad
bit in the front like this. This is fine. Next,
what I'm seeing is that our railings are
looking very weird. They have these parts. I think this is being
caused because of our slip. Let's move to substance. And in our bulk new texture sec, you select the texture
set by clicking here. And I think this issue is
being caused by the slave. It is not being
caused by this layer. Let's open up the smart material and let's check for
all the layers. You can just enable and disable all of them to see which one of these is causing
these patches like things that you
can see over here. These I think it is not
because of this layer also. Select the metal layer. If you go into
advanced parameters, you will find this resting saying the rest
intensity over here. I think it is this, if you decrease this
to 0 and you are not, all of the spots
have disappeared. Now I will press Control Shift
E and export this again. Again. Now we do not need to do
any of those processes. This will just export. And now we will need to
hit one button in Unreal, and it will automatically
import all the textures. That is pretty handy.
The export is done. Now let's open up unreal
and hit import or here, Let's see if it solves all
these patches like things. Okay, So some of them
are still there. Let's try disabling
our dust layer. Maybe. Let's disable
our dust layer and export this again. Exported this again. In Unreal. We need to import the textures. One more time. I think it will, this will solve this. Alright, so now all of
them have disappeared. Let's move back to our camera and let's see
if everything looks fine. Alright guys, so one thing
that we forgot to do is we, we forgot to add two doors over here that we added earlier. So let's do that right now. I will right-click
and come out of the piloting mode.
Select your door. First thing that we need
to do is we need to reset this pivot offset because we
can't duplicate like this, it will be very difficult
to rotate things. So let's reset this pivot. So how we can do
that is press Alt. And then by using
your scroll wheel, you can move this
pivot like this. Use Alt and hold your scroll wheel and move
your pivot like this. And let's move it to
roughly around rich Santa. Give you move too far back. All right, So now I think this
position here it is fine. Now you need to
right-click and go over to pivot and set as pivot offset. Now we have a reset the pivot now we can just duplicate this. Press Control C and V.
Move this over here. Let's rotate by 90 degrees. Let's place it
somewhere around here. Let's just go to a camera view and check how things
are looking from there. I think I'll place it
somewhere around here. Next, just select this again, press Control C and V, and let's just duplicate it
over on the right side also. I will just move it over here. This one also over
here somewhere. Let us just check once more and then we will finish this video. I think this is fine. This is enough for this video. I think we will continue
from here in the next one. So thank you for watching. I'll see you in the next one.
24. Modelling the Lamps: Hello guys, welcome
to chapter 23. Now that we have already done
models to unreal and also we have added the texture
to them. Right now. I'm pretty satisfied
with the scene, so let's move further and add a few more small
props to the scene. Next, I will be adding
a lamp to the scene. In this video we will
be more limited lamp. So let's open up blender again. Also we can save and
close and drill for now. Open a new blender seen. Let me turn on Screencast. So press a to select everything, and let's just delete this. Press one for front view. And if you go into
your resources folder, you will find a reference
image with the name of lamp. So press Shift a image and reference and let's
add the image now. Go to the reference
image folder and add this lamp or PNG. And we will be creating
a lamp of this design. Load is not that difficult. So let's add a plane first. Rotate it on the
X by 90 degrees. Enable X-ray. Let's move
this plane over here now. And we will create this, just this one, face and rest. We will duplicate, place the plane over here and
let's try to scale it. Okay, I think something
like this matching, match it with these lines on the both sides and
these lines on the top. Next, what we can do is press Control a
and apply the scale. Alright, now let's add another plane rotated
by 90 degrees. Move this over here. Let's create the
inside shifts now. Scale this down. Place it like this. Press tab. Select both of these
vertices, move them here. Press two for edge select, and let's just delete
both of these images. Press one for vertex Select. And now we again need to extrude and just trace
the inside figure. We have already done this
quite a lot of times now. So I think this is pretty basic. Now. Both of the vertices
press F to join them. Alright, so I think we're
done with the shape. Let's move this over here. And yeah, I think this is fine. Obviously this will
be very small, so no one will be able to
notice the difference. Even leave something
like not very perfect. Now we again need to do that cutout thing
that we did earlier. Press tab and press a. Let's fill the face first. Let's hide the reference
image for now. Okay, so before we use the
knife project commands, first let's mirror plane. So press tab, go into edit mode, and let's add an edge loop
right down the middle and delete both of these
vertices. The mirror modifier. Alright, Next, let's
select both of them. Press F3. First press tab and press a to
select everything. Then press F3 and
search for my project. Now we can just delete this one. Let's delete this face. And we have created the
shape that we wanted it. Now in a similar way, Let's create all
the other shapes. I will add a plane
one more time. This time what we can do
is just select this plane, press Shift S and
closer to selected. Let's add a plane. Now. What I will do is I will also
mirror this plane, also easier to
create the shapes. Alright, so now scale this
down, place it over here. Now we need to just
trace everything out. Enable clipping and alerts
just joined both of them. Delete this word, and
then fill the face. Let's apply the mirror modifier. Bring this out a
little bit on the y. Again, let's use
the knife project. Select both of them, press
F3 and knife project. This phase, and let
us delete this. All right, so now let's create these small chips. For them. Let's add a single plane. Rotate this by 90 degrees. Make sure you press tab. Let's move this plane over here. Why I press tab
first was because this way the origin stays here
only right in the middle. And now if I add a
mirror modifier, you will see I've
created two planes now. I can easily meter the complete all these small shifts like I can easily mirror them. Now I'm adding just
a few edge loops and extruding them to
create the shapes. Now make sure you are
in the edit mode only. Now press Shift a
and add a plane. We can add all the
shapes in a single mesh. I'm just duplicating this
plane by brushing shift the meeting all these shapes. Obviously it is not necessarily to create
the exact same shifts. We need to just
roughly follow them. Now for this shape, what I will do is I will just
delete all the vertices. Just quickly trace this out
like this, only a scene. Just tracing out the lines. Now just select both
of them and press F. Model the Edit mode. Let's bring this over here. Now hold Alt and select
this complete loop. Press F to fill in the face. Now we have created
all the shapes. So again, let's
use knife project. What we can do is we can even
remove middle modified from this because this plane
already has a mirror modifier. We actually don't need
to meet and modifiers. Let's select this and this first tab In a to select everything. Then F3 and knife project. Let's do this. Select this plane and press
X and delete all the phases. Alright, let's move this
reference image a bit backwards. To this, I will add the solidify
modifier. Press Control. A scale. Also enabled cavity from here. Let us give it a
thickness of 0.03. I don't know. I
think this is fine. Alright, next, let's
create this top thing now. Then we will duplicate
the rest of the pieces. Okay, so first let's just
duplicate all the pieces. So hide the reference
image for now. 74 top view Shift S. And let's move the
cursor towards the origin. Then select this
piece load object, set origin and set the
origin to geometric. First we need to apply
limited modifier. Now I can set origin, origin to geometrically redshift tests and selection to causal, to move the selection
to the cursor. Now, I will show you how we can duplicate this in a circular way that we can create a lamp
lighting suppress G and then y. And let's move it a little bit forward in the y-direction. Let's just round it off
and put it to minus one. Let's see if it works. So the process is pretty simple. Press Tab, press a to select everything and then make sure you have selected
the spring tool. Just click over your
causal point and rotated this way to create
something like this. I know right now
everything is a mess. Or don't worry, just
put the angle here 360 degrees and enable
use duplicates. Now, we just need to reduce
the number of steps, that is, number of these pieces that they can fit perfectly. I think seven is two less because there is
spaces in between, but it overlaps a bit. What do I need to do is we
need to just undo everything. And now I will just move it
a little bit more forward. We moved it to minus one meters. Let's, let's move
at minus 1.1 again, and let's try spin tool again. I think they won't
collide with each other. Now, put the step size enable US duplicates
and also 360 degrees. Yeah, I think now it is perfect. We have got a perfect
circular array. You can use this spring tool this way to create
something like this. Next, let's clear this part, this top part and the
bottom part of the lamp. So for now I will
hide this plane. Rest one, Shift a
and add a cylinder. Enable X-ray. And let's move this cylinder
with this line. Let's match it with this line. You can see scale this down. I think this is fine.
Press Tab again, press one for vertex select. Sorry, we're still
in the spring tool. Make sure you select
the selection tool. Select all of these words. Sees. Move this over here. Now again, we just
need to add a bunch of edge loops and scale
them down first, hold Alt, and let's scale this down to somewhere around here. Next, select this one
and scale this down. Just keep adding edge
loops and scale them to maintain the shape
of the cylinder. Press three, select this and press E and extrude
it till here. That we can easily add
edge loops in-between. We are almost done now. Let's just keep it this way. Press Tab to come
out of added more. Let's see if it looks fine. Yeah, I think it
looks pretty good. Enabled, enabled back the plane. Press H to hide this. Now select this plane. This is the center. The
center of this plane is this. Goes up to only select this go to Object Set Origin,
origin to geometric. And now what I will do
is select this piece and just move it to Gaza. That it is exactly
at the center. Now, I just need to
scale it this way. First I will set the
origin to geometric. Now I will scale it. Right? So now we
have created a lamp. Now what we can do is we can
either just duplicate this, rotate it by two degrees, have the same thing
at the bottom. Also like this. We have a pretty good
looking lamp to ourselves. We can use all we can just use the same thing that was in
the reference image only. It is a bit simple, so let us just add a
cylinder again and try to match this shape
is bottom one. Okay, I think something
like this is fine. Press Tab again and again, add some edge loops. Match with the shape. Alright, so I think
this is fine. Again, I will just say dog
object, church smooth. This enabled lots of smooth. And move this to let us
disable the reference. Imagine enabled back
both of these things. Move this piece over here
and let's scale it up. I think I lamps, lamp looks pretty good. The next thing that
I will do is I will just select all of it. Duplicate this, and
create another version of a lamp in which I will
bleed this bottom piece. Let's select this press
Shift S and goes into selected, add another cylinder. Let's scale the
cylinder accordingly. I am creating this.
Another version is because I will be keeping some lamps on the float and some of them like hanging
with the ball. So it is better to
have two versions. One that we can keep on the fluid and the other
one that can be hanging. Set the cursor to this
selection to closer. I think this is fine. Estab, enabled. And let's move this over here. Now let's create something on our own only controller and
add a bunch of edge loops. See if we can create something a little bit
interesting by salty. And let's exclude the phases
along normal like this. And hold Alt and
select this loop, press I to insert this e. And then let's extrude
this inverts like this. This enable auto smooth. Next item, limited modifier, Lord, and select this loop. Again. Then press one more time I do times to insert the
individual, individual phases. Let's press Alt E again and extrude this inwards like this. I think something like
this looks pretty fine. Plus three. And let's move this phase
a little bit downwards. Press S, then Shift plus z, and let's extrude this outward. This way. I'm extruding
this a little bit. Alright, so I think
something like this is fine. Okay, so now we have created out to lunch that
we will be using. Next, I will do is
just select both of these pieces per slash
for the isolation. Let's add a plane. Rotate this by 90 degrees. The x place to place the
plane somewhere around here. Scale it on the x like this. Make sure it is in-between
this piece like this, and scale this down on the z. The reason I'm creating this, this will be an MSF plane. This will emit light. So we will add the MVC
material to this later on. We'll press tab again, enable X-ray, press
one for vertex, select both of these
vertices and extruded along the lines of these
pieces only so that it stays between
these two lines, this one and this one. Not just press to select this
edge and then select this edge is controlled
and rigid edge loops. Join them. Alright,
select this piece. Shift D to duplicate. And let's just
move it over here. It cannot really see it
in the orthographic mode. Let's place it like this only. I think this is fine. Let's come out of the isolation mode. I'm just checking if
everything is perfect. It is a little bit skewed. Now I think it's fine. All right, so let's save this
file and save it as lamp. One more thing that I will do is press Shift S and closer to
selected add a cylinder. Scale the cylinder down. Pretty much like a wire. Like this will be like a wire
like thing that we'll do, which like lamps
would be hanging. So let's create that. I think this much
long would we find? Next press tab. First, let's apply
the scale estab, press Control R, and let's
add a bunch of edge loops. Now what I will
do is just select all of these edge loops
like one-by-one and move them just a little bit so that they are not
exactly straight. Because if it is
exactly straight, it would look kind of here. I'm just selecting all
of them one-by-one. Moving them just a
little, not too much. You'll see that it looks
like a wire or string maybe, and does not look like
completely straight. Look weird. So just
move them a little bit from the original places. Make sure they're
not too straight. Alright, so I think
something like this is fine. Let's save our files. In the next chapter, I will let the video here. In the next video we
will be like texturing these lamps and adding
them to our scene. I'll see you there.
Thank you for watching.
25. Texturing and Adding the Lamps: Hello guys, welcome
to chapter 24. In this video, we will
be texturing our lamps and exporting them
to Unreal Engine, and then we will place
them over there. But before that, I need to
fix a couple of issues. So let's just select
this piece and this piece and
let's isolate them. If you remember,
we used spin tool to create both of these
lakes circular things. There's one problem
with Sprint tool that whenever we use that tool, it creates like duplicates
of your vertices. So let me just show you
what I mean by that. If I just select this
piece press tab, selecting some of the
vertices and move them. It is not this 11 piece. One of the pieces will have duplicate vertices,
not this one. Yes, this one, as you can see, if I try to move this piece, there is one mode vertices. There are two of them. These are duplicate vertices
overlapping each other. You can just select any of
the vertices and you will see there is one
more beneath them. As you can see. Again,
this is annoying problem, but there is a very
simple fix for this. If you just need to press a, then press M to merge vertices, and now we need to select
Merge by distance. This will remove any of the overlapping vertices if
you select this command. So let's select
Merge by distance. And you can see
removed 254 vertices. This just, this
just means we had 254 vertices as doubles. Now our problem is solved. If you just see this, now we don't have
any WAR disease. Similarly, let us do the
same thing for this piece. Also, press Tab, press a to
select everything and then m, then merge by distance. You see it removed 254 vertices. You can just try this on
some other piece also, if I select this one plus
a to select everything m, the m by distance, you see removed 0 vertices. This means it has
no double vertices. So we are fine now. One another thing that
is the lamps right now look like too big to me, so I will just reduce
them insights. What I will do is select
this piece first, press S, then press Shift plus z, so that I only scale it in
the xy-plane like this. So S then Shift plus z. And let's just scale
it a bit like this. So that is like more thin. Yeah, this is better
similarly for this one also. Then shift plus z. I
think this is fine. Now they look much
better. I think. Next what I will do is first let's delete the
reference image. Press a to select everything. Best m, and let's put them in a new collection
and name it lamps. Let us write not applied. So because we have not applied
the modifiers to them, now I will create a duplicate of this collection,
duplicated Collection. And let's name this
lamps applying because we are going to
apply the modifiers. The reason I created two separate ones
because maybe if you're not satisfied with the models
further down the course, we can come back to this not
applied collection and make changes in this model
again and reuse them. So that's like you
to duplicate because if I apply the modifiers, I won't be able to make
any kind of changes. Let us just hide
this one for now. And this collection. Sorry, press a to
select everything. Just right-click
and shade smooth. And you see these pieces have like kind of
messed up shading. What I will do is select both of them and just select
shade flag for them. Because we really don't need
smooth shading for them. And shade flag works better. These pieces also I will
just shade flag for now. Alright, so now press a, press F3 and convert to mesh. Let us save this material. Let's name this material lamp. Now press Control L to link the materials while
everything is selected and link materials. And now the material is on
nine different objects. Now overdue UV Editing. First let's apply the scale
suppress controlling, apply the scale press Tab
to select everything. Enable this and also
enabled stretching. Let's pursue and just
shoot smart UV project. And I think the unwrap
is pretty good. Let's just export this to
Substance Painter and let us see how things
work from there. If there are any issues with the export, we will fix them. Alright, so let's
hit export FBX. I will export this to
my exports folder. Let's name it lamp only enabled selected objects and
also enabled mesh, export and open up
Substance Painter. Now, a new version is available. I will download it later on. Create a new project. File selection. I will select this lamp, FBX. Okay? The reason our
lamps are looking hollow, we cannot see the plane
is because we forgot one step that was very important to check
the face orientation. The face orientation of
these planes is incorrect. Press tab, select everything, then Shift N to
flip the normals. Let's export this again. There's a export FBX, creating a new project. Discard on this one. And I think this export is fine. I don't see any issues
with our models. The next step is to
make the mesh maps. So head over to texture set
settings, make mesh maps. The circuit to 2k,
enable this and this disabled ID maps
because we are not using id maps anti-aliasing I will set to four X4 and the rest of the
settings are finite default. Again, you can increases sampling if you have a
good enough computer, but I will set it to this
only. Let's hit big. And it won't take long, I think because it is really a small modern only. It's done. I think the big game
out. Pretty much fine. I don't I don't see any
problems with the big. Let's increase the size of
this material. Alright? The texturing part of this
model would be fairly simple. I will be using directly
as smart material only. If you go over to the
smart materials section and search for bronze, you will find this
bronze armor material. Let's just drag and
drop this onto a lamps. Lamps look perfect. This material is made for
these kinds of things only. I think they look pretty good. The only thing, the
only thing that we need to do is add another layer. Let's name this layer and
set the color to black. Let's say roughness to 0. Right-click and exclude all. I just wanted this glass
filter over our planes. As you can see, at
planes are right now not looking
smooth like glass. That is because the
bronze armor is showing its effect
on display in also. So the only thing that we need
to do is select this one. Just de-select the plane from this material on both of them. Now click over here
and now you will see glass looks
perfectly smooth. I think our material
looks pretty good. The MSC material that I was talking about earlier
that I will add an unreal only so
we do not need to do anything in
substance for that. Let's search for
item, maybe steal. Let's use this one. This one I will use for the VIA. Let's hit Save on
our projects first. Let's save this as lamp. Alright, so I don't
think we don't, I don't think we need
to do much anymore. That's open up unreal
and export our textures. Alright, so unreal
is all opened up. Let's open our scene. And the first thing that we need to do is obviously we need to add the models
of the lamp first. Then we will architectures, and then we will. Add them to our scene. Let's start open up the models folder and let's
create a new folder in here. And create a new folder. Let's name this lamp again, and let's import
our models first. Let's export. Let's import the file that we
exported from Blender. This lambda dot FBX
hit Open Import. All right, so they
are here now next, let's import the textures first. Let's bring this into the scene. Alright, so the first
thing that I will do is I will select this piece, this piece, this piece, one more, this one. Then press Control G. To
group them all together. It is easier to move them. Then select this one, this one, this
piece, and this one. Then press again Control G to group all of these together. Next, let's go over
to the textures. I've already created one
when I was like trying things out, I had a new folder. Let's name it lamp.
I'd say textures. We don't have to
add the textures, we need to just directly export them from
substance to unreal. So press control shift and
E. For the output directory, I will select my real project. And the project go into content, textures and then lamp, select the folder, the template. The template will be
same as the last one, Unreal Engine 48
bits plus D3 size. I will go for Forky
only and hit export. All right, So the
export is done now, open up unreal and just
hit Import from here. Next, let's open up
this lamp material. Go to models lamp and
open the lamp material. Let's enable two-sided
for this one also. Now add the textures. So press Control plus
space to bring up the content browser in
the textures folder, lamp, drag-and-drop all
three of these textures. So this is pretty basic. We have done this a
lot of times now. Connect the RGB to base color and the normal
to the normal. The R channel, as I told you, goes into ambient occlusion, the green golden roughness, and Lou goes into metallic. Let's save material. Now let's close this and check
if everything looks fine. All right, so let's select them. Now place, let's place them now. First we need to
decrease their scale. One I will place
around somewhere here. Just copy this and paste this. One over here.
Select both of them. Copy paste and place them here. I think they look
good over here. We can also add one more
to this if you want. Let's select both of them. Copy paste. Let's place
one here to here. Select this piece and
set the scale to 0.25, as in the allele, 131 of them goes over here. Copy paste, this one. I don't know. Again, this is
a really a preference thing. You can place them
wherever you want, wherever you feel like
they will look good. Right now I'm just placing them anywhere to see how things look. Again, let's copy them and move them to
over this side also. Let's select all of them and move them to
the second floor. I mean, the first
blue. Like this. It's somewhere around here. Let's checkout camera if
things are looking good. I think it looks fine. One thing that I
definitely need to do is select all of them, all of the lab materials, and place them into
a single folder. Let's name these lamps. Press F2 to change name, to rename the folder. Also let us come out
of the pilot mode. Let's copy this again. Placed one over here. One of them over here. Again, copy paste and
move them over here. Yeah, I think that's
a lot of lamps now. I'm not sure if too many
of them will look good, but right now I will
just let them stay. I might remove
them at a later on state if I don't feel
like they're looking. Again, it's really
a preference thing. If you want to put
them, you can put them. You can even put like very few of them,
like three-fold only. It's really up to you. I think right now
they look fine. I might remove them later on. So this much is enough
for this video. I will continue from
here and the next one. Thank you for watching.
26. Fixing a Texturing Issue: Hello guys, welcome
to this quick video. In this chapter, we will be fixing issue that I
completely forgot to mention. Let me just demonstrate what
is the issue right now. If you just see over the lamps, you will see that the lamps
look really, really shiny. And if you just open UP
Substance beta and checking that our material is
not really that shiny. It shouldn't look at, it shouldn't look like
that in unreal. But instead, it is
looking like really, really shiny and
reflective in Unreal. The materials are wrong. Actually the thing is, let me show you
the material only. This texture is the one that is causing this issue,
this bag texture, the reason is this step, this texture is
currently in sRGB space, and we just need to change
this into RGB color space. So that is pretty easy to do. Open up the lamp material, just click over here and
then click on this texture. Let us just see our lamps. First. Click on this texture. We just need to disable SRGB. Now you will see
all architectures completely disappear
from our lamps. And this texture sample
shows the error. And if you just read
the edit over here, that the sampler type is color and that should
be linear color. That is pretty easy to fix. It says that sampler type
is color and we just need to change this to linear color. Now. Wait for it to compile. And if now you see
all our lamps, you will see they
are not reflective, pretty similar to the ones
that are in substance. Let's just go back
and see they are not really reflective
law and look, now, look like
much, much better. Alright, So now we need to change this texture thing
in all of our materials. It is kind of like a pain, but we need to do this. So double-click on the RPCs one. This texture. Double-click over
here, disabled sRGB. Go back here and change
the color space to linear. Whereas Make sure you
need to remember this whenever you import bag textures
from Substance Painter, you need to disable
sRGB for them and then change the sampler
type two linear color. This was the reason that a balconies were
looking all weird. And now if I just change
this to if I just disabled this RGB and change sampler type II linear color will automatically look
much, much better. Now delight, don't look
back at reflective. Much similar to the ones we made in unreal or
a substance only. They are much more
accurate now and not reflective, just
reflective, Oliver. Yeah, Let's continue. Select the big dome material. This thing like really cause
an issue, issues when, when your materials are
like two reflective, like they're very reflective, the roughness value is very low. But not really in the
rest of the materials. But still, that would be incorrect if you
don't change it. So we need to change for
each and every material. These three are done. These four are left. Make sure you remember
this thing I start, we need to disable the sRGB. I can also change the
sampler type linear, like a important fixed ion. I absolutely forgot that. So that is, that is
wrong on my part. We'll now we're almost done. We'll do we'll just
be above this only. This and we will
continue in the next, creating some more
small props to fill our C. Alright, so we are done. Let's just check once in the camera to see how
everything is looking. And if you just
think about written, nothing much has changed. As a matter of fact,
nothing has changed except these lamps are
looking much better now. Balconies are looking
much better now because they were like
really reflective, but the rest of the things
pretty much look the same. This was the error and it is
very necessary to fix this. And you all should remember
that you need to change. You need to just
disable SRGB and change the color space to
linear, linear color. All right, so thank
you for watching. I'll see you in the next one.
27. Creating the Curtains: Hello guys. Welcome to chapter 26. So in this video, let's create another prop. So now I will be adding some
curtains over to my scene. Now the secure first flow kind
of looks like very empty. So let's add some curtains along the lake bulk of the first law. Now open a blender. In Blender, I've opened
this compute scene file that we were working on earlier. You, I should open up that. Now let's start
making the curtain. We will be using
floats simulations to make some gardens. And
it's pretty simple. Just select this piece, this piece, maybe
this one, this one, this one also press Slash to isolate them so that we can
work on them pretty easily. I will press three
for right-side view. Maybe control press
34, left side. Now select all of them, press Shift tests and closer to select it and bring
the cursor over here. The steps to create a
curtain are pretty easy. Press Shift T, and
let's add a plane. First. Let me turn on Screencast keys. Shift tape plane. Let's rotate this on the x, on the y by 90. Place it somewhere over here
and scale it accordingly. Like how long or wide you
want the curtain to be. It is really up to
your preference. It does not matter much. Let's make it
something like this. Place it over here, the back. Let's select this
and apply the scale. So press control
a lighter scale, estab, select everything and then right-click Alex
subdivided this. Because to create
closed simulations, we need some kind of geometry
like this is pretty low. Increase the number
of cuts to ten, and that is the maximum. Right-click. And let's sub-divide one small. I think something like this
is fine, this is enough. Next, go over here. No, not here, over here
in the Physics tab. And let's add a cloth
cloth simulation to this. All right, so now I will
show you something. If I just press play on
here on the animation, you will see our plain falls
down because obviously now gravity has started to act on it and it is falling down
because it is a simulation. As soon as I press Play,
it will fall down. That actually we
do not want that. We want this to stay over here. So to do that it
is pretty simple. Press tab and select everything. Breast one for vertex, select. Just select all
the top vertices. Come over here. And let's
add them to a vertex group. We will add all
these top vertices, just these top vertices
into this group. Let's name this group. Pin. Hit Assign, make
sure you hit the sine. Let's move back to
our Physics tab. If you scroll down over here. Just a second. Yeah. In shape, you
will find PIN group. And if you just select
it and select Pin, come out of the edit mode. And now if I press Space Plane or cloth is hanging to these pins and it is
not falling down. But obviously it is looking
nothing like gotten. We need to do something to create to make it
look more like. Curtain. Let's first cover to select it to bring the
cursor over here. What I will be doing
is I will press Shift and add a torus. Reduced the minor radius to
somewhere around 0.1 only. Alright, now I will
use this Doris, I would like collisions to
this and I will show you how we can use this to
create a curtain. Let's increase the scale. Just like a little bit. Increase the scale
to just a little bit more than the plane
or the curtain. Let's shade smooth this. And now I will show
you how we can animate this Doris normal, but it is nothing too difficult. Let's move the
keyframes to first. And I will press I, and I will add a keyframe
to the location. And then please I again, and I will add a
keyframe to the scale. That means I am animating
my scale and my location. Both the things. Place
it over here at a 100. Then plus I again, and I will animate the scale and precise
again and then location. Now, actually I did
one thing wrong. I first need to scale
this down like this. I think this much is fine. And move it over here. Now press I again. And add keyframes. If you now move
to 0, REST-based. Still nothing happens
because right now, this is not like
a physics object. There are no collisions on it. That's why the cloth
simulation is not working. Just select this tourist thing and press and click
on collisions. This will add a
collision to this more to the Physics tab
and add a collision. Now if you'll press space, you will see a close
simulation is working. But something very
weird is going on. But something very weird is
going on with our plot here. It is looking like very weird
and not like a curtain. There is one more thing
that we need to do. If you move back to
0, select the plane, come down over here
and then collisions, you will see object
collisions is enabled, but self collision
is not enabled. That is, that was causing
this weird issue of older machines like merging together just enables
self collisions, let's say the friction to
one and distance to 0.10.01. And let's try it. The simulation now. Just find a good enough frame. If you're feeling like
this is looking too weird. If you just add a subdivision
surface modifier, everything will smooth out and now everything
looks much better. Just find up good enough
frame that we can use. Above a 100. Everything goes a
little bit weird. So let's move back to
somewhere around 8085. I think something like
this looks pretty good. What I need to do now
is select both of them, press F3 and search for
it, convert to mesh. This will like this will
apply all our modifiers. And now if you'd like to
change the keyframes, the simulation is
not working because the clot modifier is applied and the changes are
completely done. Now, just this torus is animating because we
added the keyframes. But the simulation
is not working. So what I will do is I will just delete the storage for now. Let's add another
torus that does not have any animation
on it because every time we do any other
simulation and try to move, like anyway, it's something like Doris would also be moving. So that's why I directly
diluted it and added a new one. Shapes move this. And now if I press
Space, nothing happens. Perfect, We have got a first curtain that's come out of the
isolation mode and see, I think it looks pretty good. Let's just isolate
everything once again. Now we have two options. One of them is we can just
select this press shift D, move it over here,
press S then y, and type in minus one over here. And we can just flip it and
use this one as a curtain. And I don't think there
is any issue with this. It looks perfectly fine. It looks pretty good. But the thing is, it might look like
repetitive to some guys. What you can do is you can
add maybe another plane, create another
clause stimulation. Try to create two
different curtains. So let us do that now. Otherwise, if someone does not
want to do that because it is taking too much time,
you can just do this. You can use a two same curtains, is flip them over. But just to show you guys, I will add another curtain. Again, a plane. It does not matter
that we need to have the same size
for both of them. Because at the end
of the simulation, it will be crammed in a corner so no one would be able to tell. Let us just roughly make
them off same-sized. Press Control, apply
the scale, estab, again sub-divide,
increase it to ten, and let's subdivided once more. Now we will add the
cloth simulation. The reason it disappeared
this because I was currently on the 52nd frame, just move it back to 0
and it will come back. Now we need to
create a pin group. Select all of them, hold Alt, and select
this whole loop. Add another group
and let's assign. This will be our pin group. Alright, redshift test and
goals are to select it. Let's add a torus. Increase the scale of it. Shared smooth rest. I animate the location
and the scale. I mean add keyframes on
location and scale with 200. And let's scale it down.
Move it over here. Press I for scale
and for location. Obviously we need
to add collisions. And one more thing
we need to enable self-publishing
service to 1.010. Let's just see how our
simulation is looking. Alright, so as soon
as we go past a 100, everything kind of goes haywire. Let's just shared smooth this subdivision surface to
this to make things smooth. Yeah, I think somewhere
around T7 is fine. Alright, so I think
this is good enough. I will just again select this. And let's convert to mesh, apply modifiers and
apply the changes. Let's delete the storage because this one has
the animation on it. Use this Doris, I will
duplicate this one. Increase the scale of it a bit. All right, so now
let's come on up. Edit mode. I think
gardens look pretty good. I think this much is enough for this video. Let's hit Save. And what I will do is
in the next video, we will create a bunch of more curtains for this
side and this side also. Again, if you want,
you can just duplicate these pieces and use
them over here and here. But just to have a
lot of variation, I will create two more of them. So that could work as
your homework also, you can try and make two more, two more or three more even coordinates and place
them in your scene. And then further we
will texture them and export them to unreal. So you know the complete story. Tell us watching, I'll
see you in the next one.
28. Texturing and Adding the Curtains to Scene: Hello, Welcome to chapter 27. So if you remember
in the last video, I mentioned that we
will be creating two more curtains for
this side and this side, but I'm thinking of skipping
that part actually. I will just duplicate these
pieces that we created in the earlier video
and use them only. The reason for that is because
the process of creating more content would
be exactly the same that we followed
in the last video only. Instead of repeating the same
steps in the last video, I have decided to save some time and move on further
into the course. If you want, you can create two more curtains to
have more variation in your scene that will be
good for you and leave, but I will just
duplicate them and use these only to
save some time. Alright, so in this video we
will just duplicate them, apply all the
modifiers and after UV unwrapping them will export
them to Substance Painter, protection them over there, and then we will bring
them back in Unreal. Alright, so let's start. I will just select this piece and both of them press shift D, then g, n y plus g and
invite to move it over here. Let's press S to scale this on the y-axis and type in minus
one on your number bag. We just flip it like this. Let's place it over here. For this one, Let's
select both of these. Press shift D.
Move it over here. Again. Let's scale them
on the y minus one. Let's place it like this. Alright, now what I will do
is just select all of them. Press M, alex, move them
to a new collection. Let's name this
collection coordinates. And now I will just
and everything that I can walk easily. Alright, so the
next thing that I will do is let us give them all the same material
that we'll go over to Material
tab, new material. Let's name this curtains. While this object is selected, press a to select everything and make sure this is
the active object. Then press Control L, and then link materials. All of them have
the same material. You can see here
that it is written. Alright, so now let's
apply the modifiers. So press F3 and let's
search for Convert to mesh. Press Enter, and now all
the modifiers are applied. So let's move on to
the UV Editing tab. Before we start UV editing, make sure you press Control
a and apply the scale. Then press Tab, Let's press
a to select everything. Then you and smart UV project. All right, I think that
came out pretty good. Make sure you have been able to stretching to just view
you're stretching from here and make sure everything is blue and in the
shades of blue, nothing like green, yellow, or red, because that
would cause some issues. But this blue and the
shades of blue are fine because the lake curtains have curvatures that why we are seeing these
light shades of blue in-between where we find it won't cause
any problems. Alright, Next, let's just check the
face orientation first. And then we will import
them into unreal or saudi, export them to
Substance Painter. This one is flipped, so press Tab to select
everything and shifting. Similarly for this whole, for these pieces also, let's flip the normals. Alright, so now
everything is done. Let's move back to
the layout tab. There's a select everything. Go over to File, Export, export them as FBX. Export them into
my exports folder. Let's name this curtains. Make sure to enable
selected objects and select mesh from here. Now let's just hit export. Open up substance. Alright, so now let's create
a new project for them. Select the file, you
just exported it. Okay? Alright, so it does not matter
that we cannot see them from the back because
they are just splint. But in Unreal we will
enabled two-sided. So we will be able to see them
from the back also in 100. But for now we just
need to see them from the front in
substance painter. I think the exporters find
there are no issues with it. Now, let's big the mesh mats. Go over to the texture
such settings. And let's hit big mesh maps. I will select to disable the ID maps because we
are not using them. Miscible both enabled both of these options and
set this to four X4. And let's just hit bake. The cake is done. Now. I think the big also came particular. There are no issues with this. Let's move on with the
texturing these small rings. I will use the wood material. So let's type in wood over here in our smart
materials section. We can just use
any type of wood. Just drag and drop this one. If you're seeing all these weird things appear
on your hood, just go over here and
delete this paint layer. Because that is
causing these issues. Obviously, we don't want
wood over our curtains, so again, we will use the mask. We can also use a black mask, or we can directly use
the geometric mask. Solars do that and
use geometric mosque. Exclude everything and
select the species only. Okay guys, so now
for the curtains, search for a fabric
material and use that. Let's type in fabric over here. Now there are a lot of good
materials to choose from. It really depends
on preference now, whichever one you
want to go for. So let's try and use some of
these and see how they look. Definitely not this. Drag and drop this one. If you see, you can use this as the curtain material.
It looks good. You can just go over here. The surface detail, I think yes. Now I need to increase
the tiling of these dots. So I will click over here and select the
circle's fill layer. To dry planar projection.
Please the scale. If you will notice, when I
was in the UV protection, I was able to see
like I was able to see these like if you
see closely these UV seams, they look kind of weird. But as soon as I said it
to drive them prediction, they all disappear and
look smooth. Drive it in. A prediction is also used
to hide you received. I think I will not use this one. So let's just delete this layer. Let's try some more of them. Definitely not this. We can use something
like this also. We need to just disabled all
these tears and one edges. But I think maybe something like this because
this looks pretty clean. Alright, so let's adjust the color for this
and then we will see, then we will just export it to unreal and see if it looks good, then we will just keep this one. Looks good. We'll try to
change it for the base colors. First, let's change
the color of this. I've already decided on a color. Again, you can go for
any color you want, but I want to go for something like orangeish,
brownish type color. Just select the Base Color. Click over here in
the color properties. Let's type in here
0.0840.50.593, something like this. Actually we have an
extra layer over here. If you see this, this is also affecting the color
of our base layer, basically because you see it
has HCN perceptive freed up. That's why it is
changing the color. So either we're gonna just
completely disable this, or what we can do is we can just adjust this a little bit. Then we can decrease
the opacity from here. Let's keep redact 50. Something like this. Let's try this. One more thing. If you'll just
zoom in over here. We can see this very weird
edge over here that is because of the UV
islands. This is a UVC. So let's just enable and
disable the layers and see which one of them is
causing this, not this one. This edge is fold is causing this seem to be more prominent. I will just disable
this next head also like some kind of still we can see
a little bit of SIM. I think this is because
of this fibrous layer. What I will do is select this fill layer and set the
projection to try planar. For this one also set the
projection to dry cleaner. Now, it is still there. I can still see a
bit of the USC, but it is not as much prominent and if you see it from far
away, we cannot even tell. So I think I will go with this. You can also, if you want
disabled the dust layer, if you don't want the lake
coordinates to be too dirty. But let's just keep
it on for now. Maybe let's just disable this. I don't know. First let's just try in unreal how
everything looks. Then we will see. Now let's open up unreal. Alright, so I have
opened up unreal now. First let's import
our models to unreal. So let's open the models folder, right-click and
create a new folder. Let's name this coordinates. Let's import our curtains. Now. Import this curtain start FBX and just hit Import. All right, so now all
of them are here. Let us just drag and drop
them into our scene. Now what I need to do is
just set the location to 0 comma 0, comma 0. All of them are here now. They're exactly the same way the way they were in Blender. Next, let us see. Alright, so now let's just select all of them
one by 1 first. I will move them
back a little bit. Before that, let us just
make things easier for us. Select this piece
and then this piece, then press Control G to
group them together. Just do that. Just do that quickly for each and
every one of them. Now I can just select
all four of these very easily and move them a little bit back like this so that they don't
merge with the balcony. All right, I think
this much is fine. Next, let's enabled two-sided. As you can see, we cannot see
the curtains from the back. Just open up the
curtains material and enable two-sided for it. Alright, let's see next, let's import our textures now. Move to the textures folder. I've already created
the curtains folder. You can just go over to either new folder.
Name this curtains. And let's bring in
our textures now. We need to just directly
export them from substance. Now in substance press
Control Shift and E. Let's select our
output directory. I will export this obviously
to my project only. The left output template
as an Indian food packed. Everything like this
remains the same, I would say to fork
and just hit Export. Now the export is done. Let's open up Unreal. You will see this
pop-up over here. Yes, hit Import. All right, so let's open up the
curtains material. Delete this press Control plus space to bring
the Content Browser. Drag and drop these three
textures over here, and let's just
connect them quickly. One more thing we need
to remember that we need to change this to sRGB. I mean, we need to
disable sRGB so that the color spaces RGB only and set the sampler
type two linear color. Let's hit Save and
Close the shader. And let's see how it looks. Let's move to our camera
view and let's see. Okay guys, so the
curtains are done now. I think they look pretty good. Even the color and
everything is looking fine. If you want, you can go
back to substance and make some changes
with the colors according to your needs. Maybe we want to light
in it or darken it, or maybe go for something else. You can just change
some values over here and re-expand the
textures to unreal. But for me I'm satisfied
with this color. So the next thing is that
we need to duplicate all these like curtains
over here on all sides. So let's do that now. Just right-click and let's
come out of the piloting mode. Select all four of them. Just Control C and
Control V. By 90 degrees. Let's bring them
in the front over here and look a bit
at the top like this. Make sure that nothing is overlapping or
anything like that. Alright, Next, select this one, and let's move this
one over here. Select both of these. And again copy paste and
move them over here. Now let's let it all six of them and paste them over
to the right side also. Also like the mic
overlap with your lamps. So you might want to make
some are distance or dismantle the positions of the lamps so you can't do that. You can just move them a little bit to the left and the right so that they don't overlap
with the curtains. Again, if you weren't
late on this side, you can also add if you want some doors and coordinates
over here also. But I think I will leave this empty only I won't
add anything over here. Let's move this lamp
over here a little bit. Alright, so let us check from the camera view how
everything is looking. I hope everything looks good. But before that, let's move
them to a single folder because it is getting too messy over here in our outliner. I didn't new folder, Let's
name these curtains. Go to the camera and let's check how
everything is looking. We can kind of see
the seam of the leg, the end of the plane
on this curtain. So what I will do is
select all of them. Later on we can add like
a wooden frame over here. We'll just cover this up. I will add that later on. Move them up a little
bit for now, like this. Let's check now. Alright, so I think they
look pretty good now, you can make some adjustments
according to you, according to your preferences. Like you can move
the position of the lamps, the
curtains, anything. Maybe you want to select
both of these curtains and move them who were here
at the bottom also like this. You can do that also. You in this looks good, but at the bottom floor I will just
leave everything empty. I won't add any
kind of curtains. Make sure you hit Save
on your unreal file and also make sure to save
your substance file also. I think this much is
enough for this lecture. We will continue from here, we'll add some more props, do a little bit
more finishing to RC in the next videos.
Thank you for watching. I'll see you in the next one.
29. Modelling the Chairs: Hello, Welcome to chapter 28. So in this video we will
be creating some chairs. To add in our
scene. Let's start. If you open up the
reference images folder. New find this chair image. I saw this kind of
chair designing some of the pigs and thought
it was interesting. So let's create this one
only to add in our scene. Alright, so I will
open up your reef. Just drag and drop this chair
image onto the pure grief that we can easily view this image while
working in random. Alright, let me turn on
the screencast keys. Now press a and let's
delete everything. Alright, so let's
start with this piece over here by shifting. And let's start a cube. This cube up over here. Meet me, see the
dimensions of it. And let's scale this
down on the z-axis. I think somewhere around 0.8. Index scale it on the X now. Little 1165 maybe or maybe 0.16. Alright, let's turn
on shadowing cavity. Start to go into edit mode. Let's press Control R
and R, two edge loops. Then press S, then please
them roughly around here. To create this leg
extrusion over here. Press three and let's
select both of the phases. Press E to extrude them. Let's extrude them
till here I think. Now press Tab and now
I will just cleared some insects and extrusions to make the shape a
bit more interesting. Let's select both
of these phases. Press eye. You will notice
that if I insert this, this is not inserting properly. Instead is mode over here. The space over here is more
than the space over here. This is because we did
not apply the scale. So press Control a, and let's apply the scale. Now if I press I to insert this message inserts perfectly. One more thing that
we can do is we can just directly mirror
this completely. So press Control R to add an edge loop in the middle only. Let select all of
these right sideward sees and dilute them. Now at the mirror modifier
to this, select the y-axis. Alright, so I'll
select this face. Let's press I to insert this. Extrude this outwards like this. Now I will just scale
this face on the y and x-axis like this. Click on Shade Smooth and
let's add a bevel modifier. Enabled harder normals and also enabled to smooth to
get the ride-sharing. Next, let's select
this face again. Please. Make sure to
make sure to press B. So you get this type of insect, insect it till here and
extrude this backwards. If you are getting this
face in the middle, let me solve this quickly. You need to just enable
clipping from here. Now I think if we try and
insert an extrude this, yeah, now it is not there. Make sure to enable clipping. Again, let's insert
this one more time and extrude this backwards. Let's push it in a
little bit more. So plus g Then x, and let's move it a little
bit more towards the back. I think this much is fine. Now let's press Control
R and add edge loop. I will paste. I'll place the edge loop
somewhere around here, I think. Alright, now let's select this face and press E to
extrude this backwards. Let's extrude this
somewhere around here. Now I will press X and
delete this face again, select the back face, and then plus x and delete
this one for the vertices, select hold Alt and select
this complete loop. Now select this loop hold Shift and then select
this loop control, ie. And breached edge loops. All right, next
let's add a plane. This plane by 90 degrees, and just scale it
according to the lake. Size of this cutout. Like this has a very
fancy kind of design. We will create
something like that. I will just create
a very basic Zane. So press Tab, excited a bunch
of edge loops like this. And I had a couple of
edge loops like this. Next I will just add
a skin modifier. And everything is messed up. So press Tab Escape, select everything,
then press Control a. And now we can adjust
the skin, modify it. Make sure you apply the scale. So press Control,
apply the scale. Let's scale it
something like this. Alright, so I think
something like this looks good. It
is pretty simple. It looks good, also enables smooth shading and enabled
auto smooth from here. Next, let's move on
to this curved part. For this, what I will do is let's move the cause of
back to World origin. I will add a cylinder.
Let's rotate this cylinder on the
y-axis by 90 degrees. Like this. Press one for the front view
or three for the right view. Then estab, let's enable X-ray. Select all of these top
vertices just above this line. Select all of the
vertices that are just above this y-axis. Then plus x, delete the
faces, delete the vertices. Next, what I will do is select this piece and also
select this piece. Let's move it
somewhere around here. Shared smooth this. Move the cylinder with the stock piece close to
this top piece like this. Now I will adjust the size of this cylinder
surface S then x. And let's reduce the
size on the x-axis. I will take it to 1.5. And let's move it a little
bit back over here. One more thing that I wanted
to do is that I wanted to reduce the thickness
of this piece. So plus seven for the top view. Select this piece, press
Tab, enable X-ray, and let's select all of
these vertices and move them over here like this to
reduce the thickness of this. Next, let's select the
cylinder, press Control a, and apply the scale estab, and let's add edge
loops like this. Then best s the next. Scale them up till here when we find best x
and let us see the phases. Alright, next I will add
the solidify modifier. Apply the scale,
enable auto smooth. Alerts increase the thickness, increases in the opposite
direction like this. Or no, in the inverse
direction only like this started to 0.1. Now let's start the mirror
modifier to correct this, just press Tab to
select everything. Then let's move this up
on the z axis like this. Make sure to enable clipping. Now let's move this piece
over here like this. Alright guys, so
next let's create the seed lighting for our chair. So creating this
is pretty basic. Let's just select this piece
estab to go into edit mode. Press seven for the top
view, enable X-ray. Now what I will do is I will be selecting these
edges symmetrically. So according to this lake, I will take this x
axis as my defense. I will select four edges on the right side
of this x-axis. Now I will select four edges of the left side to keep
things symmetrical. Now, after you've
selected for this delay, eight edges, press Shift
D to duplicate them. Now, wrestler, now, let's right-click to cancel
the moment like this, to give them like in their
original position only. Now I will press B to separate this from
the original piece to create two different pieces. So press P and separate
the selection. Now, this is a different piece and this one is a
different beast. Alright, next dispersed tab
is a to select everything. Now press E and X, and now we need to just
extrude this like this. Just to close to. Please, sir, Just
close to this piece. I think somewhere
around here is fine. Right-click and sheets mode. This enable auto smooth. You see the solidify modifier, it's not working correctly, it is just flipped. Just select this piece and set the thickness to negative 0.1. And it will be fine. What I want to do is I want to decrease the thickness a bit, so I will just set
it to negative or 0.09 for this piece
also specific to 0.09. All right, Next, I will
add the modifiers. Make sure to apply the scale. Let's just put it as 0.0010.01. Maybe. Enabled hardened normals. This one also, let's keep
the same value, 0.01. Alright, so if you don't want this piece in the
difference over here, we just have this wouldn't be so overhead only
and not at the bottom. You can just go over
here, select species, go into the modifier section and just disabled the
mirror modifier. But if you are
liking it this way only you can enable
limited modify. What I will do is I
will just remove this. Let's first create this one. There's one for the front view,
three for the right side. Let's add a cylinder.
Place it over here. Scale it like just according
to the size of this piece. Just increase the
thickness of this a bit. Somewhere around here. Three for the right side view. And let's just try and create something like
this. Enable X-ray. And let's select all
these top vertices, move them over here. There's keep on extruding and scaling it
down a little bit. I think something
like this is fine. Let's just duplicate it over
to the right side also. Next, let's create the
legs of the chair. I will add a cube.
Let's scale it down. Just one for the front
view, sorry, three. Split it over here and scale
on the x-axis like this. Let us see what we
can do with this. So let's select
this piece first. Let's shade smooth and
it will auto smooth. Also, let's add a
bevel modifier and apply the scale mode. Select this face
at the edge loop. First. Three for facilities. And let's extrude
this like this. One more edge loops. And
again, extrude this. Let us select this middle edge
loop and press Control B. Just this middle
one. Let's press Control V and bevel this. To create something like this, Let's add an edge loop
right down the middle. And I will just duplicate it
over to the left side also. The mirror modifier.
Alright, estab again, let's add one more
edge loop over here. Three for the face select or Alt and select this
complete loop. Let's press I to
insert this like this. Now let's press G and then
z and move it upwards. We can do is we can also
select all of them. Let's move them a
little bit more. Next, I can just select only D, that is risk control
plus b two pebble them. This will smoothen out this
coordinate a bit like this. I think this looks pretty good. Let's duplicate it over
to the right side. Alright, let's create
something like this. I will add another
scale this down. Best one. Let's place
it somewhere here. Now press S. Then let's
try Shift plus y. Scale it on the x z
plane, like this. Alright, let's apply the scale first and add a
bevel modifier to this also enabled hard,
enormous and smooth. Decrease the bubble. Let's see, for this one I will
just press tab, select this face again
first, let's mirror this. So press control alt. Delete the side of the vertices. Mirror modifier on the
y-axis, disable it on the X. Now let's select this face. Control. V to W is like this. Press Tab again. Let's either edge loop somewhere around here. T for facilitate hold Alt and select this complete
loop and press, I believe somewhere around here. This time let's
scale it outwards. So plus S then Shift plus
y scalar flake this. Scale it a bit more. Alright, I think something
like this is fine. It will increase the scale
of it overall on the y-axis. These pieces left, this
is a pretty basic piece. I will just start a cube. 74 top view are distinct the scale of it. To get some thing like that
looks good with the chair. Thank something
like this is fine. Let's just add a bevel modifier to this first, apply the scale. I'm not doing too
much to this piece. Just as much only enabled
hard and normals. Let's add this piece also. Shift D to duplicate
and rotate it on my 90. We need to scale it down a bit. We can just increase
the scale of this piece a little
bit like this. Let's increase the
scale of this also. Alright, I think, I think something
like this is fine. I will just duplicate it over to the right side correctly. I can also use
minute modifier for duplicating these over
to the right side also. But I just duplicated. But I just duplicated it
manually using shifty. But you can definitely use
like mirror modifier also. Let's just hit Save and
save it as chairs file. File folder. Alright guys, so yeah, I think this much
was enough for our chairs. I will continue from here
in the next lecture. So thank you for watching. I'll see you the next one.
30. Texturing and Adding the Chairs: Hello and welcome to chapter 29. So now that we're done with the modelling part of our job, in this video, we will export
it to Substance Painter. Then we will shift it over there and exported back to unreal. But first we need to apply all the modifiers and
you, We interrupt this. Before I apply the
modifiers, Let's press. Let's proceed to
select everything. And let's move this to a
new collection. Press M. Let's move it to not applied. Let's create a duplicate
of this whole collection. Make sure you turn off
the old collection. Let's name this new
collection as applied. And I am going to apply
the modifiers for this particular, this
particular collection. Alright, so now to apply
the modifiers plus a, press F3 and let's search
for Convert to mesh. Move on to the UV Editing tab. First, let's apply the scale, suppress controlling
lie the scale. Now pre-step for a read
mode to select everything and make sure you enable this and also enabled stretching. From here. Now pursue and select
Smart UV project. Let's increase the
island margin a bit. I think this is fine. Alright, let's check for
the face orientation first. Everything is correct. Alright, let's move back
to the layout tab now. Material to this name,
this material chair. Now while selecting this
piece that has the material, press a to select everything, then press Control L, ligament the link materials. Alright, just export
this as if vx. Let's name this chair only. Enabled selected objects, mesh, export, open UP
Substance Painter. Now let us open
up a new project. Now select the file, you
just export it over here. Hit Okay. And let's
start by making the mesh maps first check the export if there
are any issues. I don't think there are any. Now I will make the mesh maps come over to the
texture such settings. Come over to the texture
set settings and scroll down and
select big HashMaps. I will disable the ID
maps circuit Q to K, enabled both of these
things and also saved the anti-aliasing
at four by four. And let's just hit bake. The cake is done. I don't see any
issues with this. We will be just using a wood material for this
complete generally. So again, I will just
search for word. If you remember, we downloaded a couple of smart materials, I will be using one
of them really. Again, you can just use any
of the ones you find good. All of them are pretty good. Maybe I will use not this one. I think this one looks fine. But let's just open
up the folder. Select this sacred to
try peer prediction. Because I think that
looks much better. Alright, I will
delete this layer. Again. You can use any of
these would materials. I'm just going with this one. Let me just open up the
fill layer again and let's try to rotate it 90 degrees. Maybe I think this was better. Now open up Unreal Engine. While it is opening up, let's just see what
substance projects. Okay, so unreal
has opened up now. So let's start by
importing our models. First, one of the models folder. Let's create a new folder
named these chairs. Google to add import. Let's import the file we just exported from
Blender, this one. Now we can just drag and
drop this over unreal. First thing I will do is I will select all
of these pieces, press Control G to
group them together. I will scale it down because
it is obviously too big. Let's see. Let's scale it by 0.25
because the snapping is on, so it will scale by 0.25 only like in multiples of
zerocoin to five. I think somewhere around
0.7 would be fine. Set all the values to 0.7. I will place them somewhere
around here for now. Like this. I think
this size is perfect. Open up our camera. View it from there. Let's press Control C and
V and duplicate this. Rotate it just a little bit. Also, you can just disable
snapping from here. You can rotate it very fluidly. That's true table on this way. Let's duplicate and create one more and rotate
it the other way. I will select all
three of them and just move them like this. Alright, so now let's add our textures, Textures
folder login. Let's create a new folder
named these chairs. Now back to Substance
Painter and we will export the
textures from here. Press Control Shift E, the output directory in your Unreal Project
folder, oldie. So in content, textures, chairs, and select this folder. Output template
would be the rest. Everything would be
the same Unreal Engine four packed. These two. Dagger eight, which
was D3, size of Forky. Just hit Export. And it will
be done pretty quickly. All right, let's
move back to unreal. It important over here. Let's go back to
the models folder, open up these chairs. Let's delete this one and
add architectures to this. So press Control plus base, drag and drop these
three GR textures. Base color to base color. Okay, So we are faced
with a problem. Normal map, I think is not
important in the correct way. The sampler type is
currently linear color. We need to set this to normal. Also. We need to go back
to the textures folder. Over here. Make sure you change
this from default to compression settings from
default to nominal map. I don't know. I think sometimes this happens, you might or might
not face this issue. Saving. Let's just connect this. Now the R channel goes
into ambient occlusion, green goes into roughness, and blue goes into metallic. Save. I am check if our
textures look fine. I think that lectures
came out pretty good. They're going relevant are seen and I think the
cheers look fine. Put them all into a single model or I
mean a single folder. Select all of the chair pieces, add a new folder and
name this chairs. We can do is we
can maybe create, delivering bit more variation. Move this one in the front. We can also select all of them, copy them, and move
them up all year also. Again, this is very much
according to your preference. You can place them anywhere
you want in your scene. Here would be fine. Checkout camera once again. All right, So I think
they look good. One more thing that we
can do is if you want, you can go back to substance. Maybe try some other
would like this one, place it over on top
of this material. You can just disable this one. Now press Control shift in E, and let's try and
export this one. To see how this looks. Go back to unreal. Select Import. If
you think about it, even this one looks fine. Maybe I'll just revert
back to the old one only. So I will delete this quickly, enable this, export it back. You can go back and forth many times just to see how
everything feels in Unreal, you can export things twice, trace the number of times to get the right
look for your scene. All right guys. So I think this is much was enough
for this lecture. We'll continue from
here in the next one. Thank you for watching.
31. Creating Some Small Props: Hello guys, welcome
to Chapter 30. In this video, we
will be creating some more small
props for our scene. First, let's delete everything, suppress a, then press Delete. Press one for the front view. Again, if you go into the
reference images folder, you will find this Arabic
versus reference image. We will use this to create
some vases of our own. So let's just bring
this into Blender, redshift, and let's
add the image. Let's add this image. Obviously I won't be creating like every single one of these. It is really up to
you which one of them you want to create
because the process is pretty similar to the ones that I will be
creating is this one, this one, this one, and maybe this one. Because I just want
to create like basic small metal
parts or metal vases. And some of them we can
make clearances like that. We will be using them
as small proximately. So let's not put too
much time into them. I will add a cylinder
enable X-ray. Now you know what we need to do. We just need to add a bunch of edge loops and keep scaling them to match
with the reference image. I think as much space
for this is fine. Let's press Tab and go
into the Edit mode. First, let's apply the scale. So press Control,
apply the scale. There, stab. Let's say this. Let's move this one
directly over here. Now let's just keep adding
a bunch of edge loops. Match with the reference
image like this. Like this is a pretty
easy thing and we have the nucleic whiter lot of
times now in the course. So I won't be like
narrating over this. You can just quickly
cleared this on your own only or just follow me by
seeing what I'm doing. Basically, I'm basically just adding a loop and then scaling it to match
with that a friend. Alright, so let's
quickly finish this now. We can just scale this
out like this then. Then just press Control
B and Beverly like this. Alright, let's just quickly
move on to the next one. Move this one back
that sheet smooth. This enabled auto smooth. And I don't think we need to add like double modifiers to this, but I will do is just press tab, select this top face, press I to insert this. Now press one for the
front view enable X-ray. And now let's just
extrude this like this. According to the outer
boundary of this vase. Makes sure you don't cross
this outer boundary. Obviously no one would be
able to see it like this, but let's just create it
for the sake of creating. I think this is fine. Let's move on to the next one. Now. Let's add another cylinder. Place it over here. Again, I will be doing
the same steps over. So keep on following me. Alright guys, so it is done. Now, let us again to
smooth this top face. Insert this like
this, then press one. Again. I will extrude
this in words. Alright, I think something
like this is fine. Let's move on to the next one. Next I will appear this way. The process for this
one is pretty similar. We will just not create
these two headers. We will create them separately. I had another cylinder
and scale it accordingly. Just do the same steps over mode. This enable auto smooth. Again, Let's extrude, I mean, first in check, then we
will extrude this inwards. I think something
like this is fine. Next, let's create these
handles for this face. Suppress one. This time
let's select this piece, press Shift S and
goes into selected. Let's add a plane. Move this plane over here, located on the X, Y 90. Now what we can do is press Tab, press a to select everything, then press M. And let's merge it at the center so that we have just
a single vertex. List is would see over here. And let's just quickly
extrude this. Like this. You can just move over like this to create
the inside edge. Alright, I think now we
will just join them. So press F, then press
a to select everything, then F to fill the face. That's come out
of the edit mode. And let's see. Now press Tab plus c, then extrude this like this. This much what do we find? Shared small disk
enable auto smooth. And we will be adding a
bevel modifier to this. Don't forget to apply the scale. Decrease the thickness of
this display a bit much. Right now let us just mirror
it over to the right side. Select this at the
mirror modifier. Select the mirror
object as this one. Now make sure to
set the origin of this piece are the
correct location. So go over to Object Set
Origin, origin to geometric. Alright, so I think
this is fine. Alright, so let's first
stable Blender files. Let's name this small props because we will be adding
a few more of them. Next, let's clear this one. I think this would be the last. If you weren't, you can
create like this one, this one, any of them. Or maybe you can search on the internet to
find some more. But it is really
up to preference. Let's just create
another cylinder. Mortgage over here. Scale this down first,
let's enable X-ray. Alright, so let's share solute dissolves
will auto smooth. What I will do is press tab. Let's select this edge. So hold Alt and select
this complete Edge. Press Control B. Let's just
move it out like this. Smooth out this one also. I think this one was fine. In this one, you need to
smooth out a little bit. Alright, I think
this looks fine. Now, let's insert the top
phase and extrude it in words. Let's now create the
handles for these. So first let's
check the origin to geometric and Shift
S goes to selected. Let's add a plane. Again, I will press Tab
to select everything, then merge the vertices
are at the center. That's enabled x-ray and place
this word, see over here. Not create the handle, just trace out.
Just trace it out. Now select both of them. Press a to select everything. Let me just quickly this one now press F to
fill in the face. Let's extrude this
backwards like this. This enable auto
smooth modifier. It's also enabled shadow and cavity to see
everything properly. Now let's mirror
this mirror modifier and set the mirror
object to this one. Alright, so I think this
much basis would be enough. Again, if you want to add more, you can create more of them. It's totally up to you. Let's hit Save on a files. Next, let's create
a small table. Let's turn off everything for
now that we have created. Let's move on. World origin back to like move cursor point
back to World origin. So Shift plus S and
closer to world origin. Next, let's go back to the reference image
folders and you will find this image of
multiple table legs will be creating one of these. You can go for any one of them, but I will be creating this one. It is pretty basic
and it looks good. So let's go with this. But you can go with any
one of these you want. Some of them are pretty easy to create and some of them are
like kind of difficult. Let's bring this
reference image. Whereas one for the front
view and press Shift a. And let's start the
reference image. Alright, so the process to create this leg
is pretty basic. Just Blinn. And let's don't display
in into a single vertex. So press Tab to
select everything. Then press M and
merge and center. Let's place this
vertex over here. And then just keep on
extruding and trace out the complete boundary
of the reference image. Now let's connect both
of these vertices. So select both of them, press F to fill in to join them. And let's press a to
select everything. Just a second. Let's just delete this reference image because we are done with this. Select this one, press
Tab to select everything, then F to fill in the face. And let's just extrude this. Like I think this much. Let's shoot move this
enabled or smooth. And either bevel modifier also makes sure to
apply the scale. Alright, so now what we will do is first select this piece, go to object and set the
origin to Geometric. Next, I will place this
somewhere around here between this x and the y-axis between lake
in the third quadrant, I will place this over here, then just rotate
it by 45 degrees. By negative 45 degrees. Like this. It is like
this, somewhere like this. Next what I will do is
I will add a cylinder. Let's place the
cylinder like this. This will be like our tabletop. So let's just place it
like this shared smooth, this enable auto smooth. Now let's press N
for the side view. Let's keep the dementia is let's keep the dimensions
are two meters only. Next, just select this leg. Place it over here. Now what we need to
do is we need to duplicate this or middle
it on all four sides. So doing that it's pretty easy. Just add a mirror modifier, select the object
as the cylinder, and also enabled y-axis. Alright. Now what
we can do is just select this leg and move it over here at the
corner. Like this. Let's decrease the
thickness of our tabletop a little bit at the bevel modifier to
this and apply the scale. Tab. Sorry the edge loop. Hold Alt and select
this complete loop. And let's just extrude this. Like this. Let's enable hard and normals. I think something like this. It looks pretty basic, but it will be again, a pretty small prop. So I think this much is
fine for this year's. Move them up a little bit. Move them in words
just to keep it. I will just select
all of these edges. Are all of these vertices
maybe move them up like this. Let's select this edge, press Control B and
bevel this like this. Alright, I think
looks pretty good. Let's enable backup
collection and what I will do is select this piece, place it in a new collection. Let's name this table. Select all of them and put
them in a single collection. Let's name this is M and
add a new collection. We can also remove this
reference image also. And also let's dilute
this collection. Alright, let's move
this table over here. Hit Save on a project. One more thing that I want
to do is let's take both of these vases, just
duplicate them. We will try and give them some different material to have a little bit
of more variation. We will work with that
in substance painter. You can also, if you're seeing this kind
of shading issue, if you towards three
mode like edge loops, it will solve itself. You can just add edge loops
to the corners like this. Supporting edge loops. The shading will look fine, but it will increase the volume. So make sure you're
not putting too much. Just a few. Be fine to
solve that shading issue. Alright, Let's just hit Save. And next I wanted to
create something like a wall hanging painting
or a photograph. So let us do that. For that, we need to open a complete
scene blender file. So go to File Open. And let's open this file up. Maybe I will add a
bending over here over this empty space or the
cube. Where does it? Let's move it over here. Let us just try to get the
right size for the frame. Let's scale this much. And maybe something like this. I think something like
this will be fine. Next what I will do is first let's adjust the
thickness of this. Also apply the scale, superscript rolling,
apply the scale. Let's copy this press Control C. If you are not seeing
this kind of menu, you can just go over
to Edit Preferences, Add-ons and enabled
copy attributes, menu item enabled this. Now when you press
Control plus C, this menu will appear. So hit copy objects, and I will just
delete it from here. Save this file. Let's open up our small
props brain file again, because I will be pasting
it over here. Here it is. Let's move it over here
along with these pieces. And now let's try to
create our photo frame. What I will do is set the
origin back to geometric. Let's scale it up
a bit on the y, like this. Next press Tab. Just a second. Let me enable screencast keys. Now for stab was three
for free, select, select this face, press I, and let's inspect
this like this. Now I will insert this invert. Let's start a bevel
modifier to this. Next, let's press tab and
add an edge loop over here. Let's add edge loops over here. Select this middle
loop by holding Alt. Let's extrude this
outwards like this. Let's decrease the Babele
amount to 0.01, maybe 0.008. This is better, I think. Just press tab, select
this outer loop. Press S then Shift plus
Shift plus x, I think. No SN Shift plus y. Two scalars like this. Let's add another
edge loop towards the corner and select this
and press E to extrude this. Next what I will do is
press Tab best 34 Face, Select and select this face. Then press P, and then separate the selection so that this
will be our photograph. Let's bring this over here. Alright, let's hit
save and move. Both of these two are
different collection, so plus m, new collection. Let's name this
photograph movie. Alright, lets you save. Now, I think these are the only small process
that I will create. Maybe we will add a few more, or maybe you can add
few on your own. I think this much is enough for this lecture. Let us save this. In the next one, we will capture them and place them in RC. I will see you there.
Thank you for watching.
32. Texturing and Adding the Small Props: Hello guys, welcome
to chapter 31. In this one, we
will be exporting all of these to substance
and texturing them. But first, I'm thinking of
adding a few more props. Let's just create
a few more like utensils to add on this table. Let's select this tabletop, press Shift tests and
closer to select it, Alex create them now suppressed
one for the front view. Let's add a cylinder. Let's create a last leg thing. I will scale this down. I think somewhere around
this. Scale it on. Creating a glasses. I think very, very basic. Shapes move this and also enabled or to smooth,
then apply the scale. So press Control,
apply the scale mode. Let's enable X-ray. Select all of these
bottom edges. Let's first scale
them down like this. Then press Control B,
bevel these edges. Next, let's select
the top vertices and scale them outwards. Alright? I will just decrease the, move them like move all
these vertices down a little bit because the size of the glasses looking
like two weeks. Yeah, I think this
is fine. All right. So now let's clear the lake
hollow thing in the glass. There are two ways to do this. One thing is we can
just insert this, then extrude this downwards. Another is we can just
delete this face. So press X, delete the face. And now we can just add the
solidify modifier to this. You'll see it works
pretty much the same. Now we can even adjust the
thickness of the glass. So I think that's pretty good. Let's set the thickness
to somewhere around this. Place, this one over here. Let's duplicate this and create
a smaller version of it. Let's duplicate this
one again and create a little bit larger version. Recess then Shift plus
Z to just decrease the scale on the xy-plane
and alerts to this. Alright, next, let's
create a plate. For that. I will add a circle. Make sure you add the circuit. Alerts, decrease the size of it, estab and press F to
fill in the face. Now what I will do is let's
press I to insert this. A couple of times like this. Let's select disk. Let's select this complete loop. So hold Alt and
select this loop, then select this face and move
this downwards like this. Now, let's select this loop. And now if you press G2 times, you can move the
complete edge loop along the edge only like this. Double press G, and
let's move it over here and bevel this. Decrease the bevel
to three, I think. Move this like
this and hold Alt, select this outer loop and
move this down like this. Alright, let's
share to move this. Enable auto smooth side, solidify modifier to this, also, apply the scale. Let's adjust the thickness. Think something like
this would be fine. Just decrease the
size of the subject. And select this loop, ran this one, and decrease
the size of this also. I think this looks better. If you want. We can just duplicate this
and create a smaller one. Also like this. We can place this
class over here. I think this is fine. That kind of looking small, so I will just
increase the scale of all of them just a bit. All right, so I think these
many prompts will be enough. We're just select all of them, press M and move them
to a new collection. Let's name these vessels. Next, what I will do is
press a to select all of them by Shift D to
duplicate all of them. And let's just move
them over here best em. And move them all into a single collection
name, small props. Because we are going to
apply all our modifiers. So that's why
creating a duplicate. This collection has all of them. All of these props impose
single collection only and we can just disable
these remaining. These are late for backup only. Now if something goes wrong. In our course, we
can come back to these collections because these will have modifiers
not applied to them. Now we're going to apply
all of the modifiers. These species. Press a to select
everything and press F3, and let's convert to mesh. What we can do is we can delete these two glasses and we will just duplicate them in Unreal only because this one and
these two are the same. So we'll just duplicate
this and Unreal. Alright, so press
a convert to mesh. Let's apply the
scale also suppress a and controlling Apply Scale. Let us give them
all the material. So go over to the Material
tab, new material. Let's name this small
approximately risk control and link all the materials. Alright, now let's move
over to you reediting. We just need to press a then tab here to
select everything. Let's enable this
and stretching. Now let's just press U
and smart UV project. Let us give the island
margin of 0.03. And also make sure
to apply the scale. I think I already did that, but just be sure. Alright, so now the
UV unwrap is done. Let's just export them now. But before that, let's
check for sodium addition. Only. These are withdrawn
normal suppress tab, select everything and shifting. If you see when we
flip the normals, the shading kind of got weird. So let's just add a
weighted normal to this. Now apply this. Alright,
so there's export them, select everything by pressing a. Let's save our files. Make sure you have
disabled all of these collections and only
this collection is enabled. Go to File export, FBX, enabled selected
objects and mesh. Export. Let's name
this small props. Hit Export and let's open
up Substance Painter. Now. Now let's create
a new project. Select the file we just
exported this small props. Okay, let's check for any
possible shooting issues. I don't think there are any. Let's just be HashMaps now. Before that, I will just go over here to display settings and enable indeed leasing that
are edges looks smooth. Now in the texture
such settings, Let's pick HashMaps
enabled or disabled ID. Duke enabled this.
Alright, rest, everything is finite default. Let's just hit bake now. Alright, so the biggest, make sure you make has
no like making issues. Check for any possible
cheating issues. If they're not,
let's move further. Alright, I don't see any. Let's first save our projects. So hit Control plus S and let
us save it as small props. Let's start by texturing
our photo frame. The frame material
I will directly go for maybe a goal material, I think gold frame. Let's just drag and
drop this material. Let's use geometry
mass to isolate it. Hit Exclude all, and
let's just select this. I will increase the size of the texture sec, Let's say 2k. And if you see it has something
like a grainy pattern. Just open this up and
let's disable this one. I think for this green, we will delete this layer. We don't need this light
green texture thing. Alright, so I think this
looks fine for the picture. I just downloaded a Google
image of a painting. You can just go for
any one of them. But I'm going to use this one. So let's just drag and drop
it to substance painter. Import it as a
texture and I will just import this to my project. Hit Import. Alright, so let's add
a fill layer to this. Drag and drop this painting
over to the base color. Next click over this
Geometric Mask. Let's hit exclude all and
just select this piece. Now press F1, F1. What do we need to
do is we need to set this image properly
onto this, this phase. This is the corresponding UV for this particular phase or plane. So let's just scale it up. I think before we
need to rotate this, I think this is the rotation. Now let us just line it up with all the four
sides like this. Right? I think it looks fine. We can just shoot him
a little bit more. I think the painting
looks fine or we do not need to do anything more. We can just disable
all of the channels. So hold Alt and just
select the Base Color. Let's say the roughness
and set it to 0.3 is fine. Let's try and add roughness
variation over this. So to do that first, let's rename this
layer to photo. Let's add roughness video. Roughness radiation is
basically if you see this whole surface right
now is like having the same roughness and there
are no roughness variations. So to create them, first, we need to
enable this layer. Let's rename this to
roughness variation. Next, I will disable all of the channels except
the roughness channel. I will increase the roughness
a little bit for this one, the check you got 0.5. Next looks at a black mask and now go over here and
add a fill layer. Now we just need to choose
an appropriate fill layer. Click over here and
type in grunge. And we will use a grungy map. Grungy map is
basically like a mask only substance has a multiple
grunge maps to useful. They give different types
of effects like maybe dust, dirt and roughness variations, anything we can to
create some variation. Let's select, maybe,
let's try this one. It is really not
Reservoir. I think. Let's try increasing
the roughness. Click on this layer again, and let's increase the contrast. Like it is affecting. Literally. If I just
increase the balance, then you can see we have
some radiation over here. Now. What I don't think
it is looking at groups, so let's just remove
this one. Type in 0. Let us use grunge maps 007. Let's scale this
up a little bit. Now you clearly can see that we have lots of
roughness variation. Now, if you increase
the balance, we can just adjust it. We can also increase
the contrast to make it sharper or just smooth. I will do is I
will just decrease the roughness that
it is not too harsh. Roughness radiation is fine. Now if you see the surface is
not looking smooth anymore. It has a lot of
roughness variations. You can see over here. If I just disable this layer, now you will see, alright. Next let's move on
to our vessels. So far, the vessels
I will directly use, I think a copper material. I think this one would be fine. These look good. Now, I will just click over here
and exclude everything. Select this one, this one, this one, this also,
and these two. For these two, let's create
a separate clay material. We will do that at the
last these vessels. Let's use the item material. Maybe. I didn't let us use steel. Let's try this one. Could definitely not this one. Let's try this. I think the first one
was looking the best. So let's just drag
and drop that. Let's use the geometric mask, exclude everything, and
select only the vessels. Next, let's press F1 to come
out of this mode. So the F2. Next what I will do
is open this up. Let's remove some of the
layers so that it does not, it is looking kind
of rough right now. I will remove this
surface details. Next I will remove the
roughness details. Select the base, and let's decrease the
roughness to maybe 0.2. All right, I think
this is better. Just move the color
towards white little bit. Maybe you can enable
the roughness details, but just go back to the
roughness channel from here. Decrease the opacity so that they are not
affecting too much. I think this is fine. One more thing that you guys
want to do is you need to keep this reference
radiation layer at the top. 42 effects. You can see
all of these objects. But I don't want this softness variation layer
to affect the steel. So I'll just put it below this. Next, let's use a basic wood
material for our table. So let's go with
the wood material that we used for the chairs. So that was, I think
fifth goodwill five. I think this one.
Exclude everything and let's select the
table. Open this up. Let's move back to the
base color Shannon. And I will select the
fill layer and set it to dry cleaner. All right. The last thing that is left
is to create a clay material. Let's do that. First, I
will create a new folder. Let's add a fill
layer to this folder. Name this folder. I right-click
exclude everything. Let's add this cliff older to
both of these objects only. Name this layer as base
layer. The base color. Let's go for something
orangeish, brownish like this. Next what I will do is let us
just duplicate this layer. I will just decrease the
saturation like this. Black mask. Add a fill layer. Let us use another grunge map. Let's try to eight, I think. Check you could try planar so that you don't see the seams. And you can see
how easily we can create some kind of
variation just by using a desaturated version
of this layer and using using a mask
to mask it out, to give it like this
kind of variation. Next, I will just
increase the balance or maybe decrease it and
increase the contrast. Just a little bit like this. Next, let's add a new
roughness variation layer. I will add a new fill layer. Only use the roughness
channel to do. To do that, hold Alt and
select the softness channel. I will decrease the roughness to give it like it
is like feeling. I will add a black mask,
another fill layer. Let's use another grunge maps. So maybe this one. Let's increase the balance. So this time we need to decrease the balance to reduce
the effect of it. I don't want to be like all over our meshes
just a little bit. So you see, if you
see over here, you can see the
variations clearly. You can also increase
them just to liquidate. Let's name this
roughness variation. Next, I will again
duplicate this layer, and this time let's
create a darker version. Let's desaturated a bit. Make it a little bit darker. Just to let you delete this. Remove this leg, the mask, add a new fill layer and
let's choose a new mosque. Let's go for
something different. I think zeros 03. Let's try this again. To avoid this seems said the
UE prediction to try planar. I'm not quite liking
this range maps. Let's just remove this. I knew something else. Let's try this one. I think
this one looks much better. Alright, let's add
another layer. Dry glue with something
without edges. Let's start a black mask on. This time, instead of
adding a fill layer, I will use a smart mosque. Let's go with the smart mosque
with edges and something. Let's try this one. Edge is just t. Go to the mosque editor and let's try increasing the balance. The contrast. A little
bit of it is fine. Now I wanted to just tell
you guys you can create more layers to give
more color variation. If I just duplicate
this layer and give it a completely different
color of yellow, maybe changed the grungy map to completely something else. Let's try this. There's decreased balance
so that it is not too much. Now what you can do is you can just decrease the
opacity of this. Like maybe something that just adds a little
bit of variation, but not too much. So many layers to create
more complex materials. But let's just
remove this for now. Next. If you are seeing this seem in
some of the materials, that is because of, I think of our roughness
variation layer. Let's select this. Instead of UV set, you could try planar projection. And I think most of it
is, it's solid now. Alright, so I think I'll
clay material looks fine. We can maybe I think D
saturate the base layer just to let you know, I think the earlier
one was fine. Just save our substance, meaning the project.
Open up, unreal. Unreal has opened up. Now. Let's import our models
and textures to unreal. Press Control plus base for the content browser to pop
up in your model's folder. Let's create a new folder
named this small props. Let's import our props now, so add an import. Alright, next we need to
bring in our textures. In the textures folder.
Again, create a new folder. Create a new folder. And let's name this small props. Now in substance painter, Let's export our textures now, press Control Shift and
E. Let's set the project. Rest. Everything remains same
Unreal Engine four back. 34 k is the size
for the textures. Let's just hit Export now. Now open up unreal, and let's import our textures. Now, open up the small
prompts material. Let's enabled
two-sided for this. Remove this. And
let's architectures. I think again, the normal map
was not imported correctly. The sampler type set to color. Let's change this to normal. Shows up just to
solve this editor. Open up content browser. Open this normal structure. Let's change the compression. Let's change the
compression settings to normal map and hit Save. Now, let's just delete this and bring in the
normal texture again. Now I think it will be fine. Let's connect it to the
normal and hit Save. Now let's lectures are done. Let's bring in our
models one by one. Now. First let's see, let's bring in, let's bring
in our photograph first. So select both of these pieces, drag and drop them over here. Let's press Control G
to group them together. Enable snapping and let's rotate it by one or two degrees. I'm thinking instead
of placing it here, I will place it
somewhere around here. I think. You can maybe
place this here only. You can also create two
different paintings and add one of them here. The other one over there. But I will be placing
it over here. Next, let's add a plane. Rotate this plane by
90 degrees, like this. And let's just place it just in the front of our painting. And we will create the
grass material out of this. Alright. So few press Control plus space and open up
the content browser, move back to content
and search for glass. You will find this glass
material instance over here. Let's just drag and
drop this onto a plane. You see we have a glass material and I think it
looks pretty good. All right, let's move back to the camera view and let's see. I think it looks fine. Next, let's bring
in our other props. Maybe we can change
the frame material. It is looking, I
think kind of weird. Let's see. Maybe we can go for
a wooden frame. Let's type in Word and
drag and drop this one. Disabled the goal damaged. Right-click, exclude everything. Let's just select this frame. Export this once again, the export is done. Let's import everything back to unreal and let us
see how this looks. Alright, I think
this looks better, so I will just go with
this wooden frame only. Next, hertz bringing
the other props. So press Control plus space. Let's select this one, this one, this, this, all these glasses. Drag and drop them over here. Press Control G to
group them together. Let's see first let's
reduce the scale. I think this much will be fine. Place them all over
here. I think. Again, this is very much up to you where you want to
place all the assets. Let's scale it up a bit. All right, guys. So let me tell you about
one more thing then. We will just place
all of the assets. If you like, drag and drop
this piece like this, you will see the pivot
point is quite far away, which can make it a little bit difficult to place the asset because the pivot point is
not very close to the model. So let me tell you
how we can change the pivot point of the object. Let us just go into the
top orthographic view plus press W for the
movement tool, hold Alt. And using your scroll wheel, just move it like this. And let's place it. We do not need to place it at the center, we just need to place
it close to the object. Then in perspective, hold Alt again and let's
move it over here. Then without clicking anywhere, right-click on this
object and pivot, then set S pivot offset. Then we can easily place this. Alright, so now we need to displace some
of the assets you can go according to yourself and place
whichever assets you want, wherever you want to place them. I won't be doing any
voice coming through now. I will just place some
of the assets here and then we will
finish with the video. Alright, so let's start. All right guys. So I think
this much is fine for now. I will be adding maybe
some more off camera. Again, you can add
as many EC2 one. But I think this much is
enough for this video. We will continue from
here in the next one. Thank you for watching. I'll
see you in the next one.
33. Post-Processing and Taking High-Res Screenshots: Hello guys, welcome
to chapter 32. So we are almost at
the end of our course. We have modeled everything
and even textured everything. In this video, we will be
adding a post-process volume to further increase the
visuals of our scene. And also we will take some
high-tech solution screenshots for portfolio. Let's start. First. I will select all of
these groups and all of these small props and place
them into a single folder. Let's name this
small profs only. Alright, next, I will go over here to volumes and I will add a post-process volume. Now, the post-process
volume is here, this purple color box. So the thing is for anything
to be affected by the light, all the settings are
changes that we make. It needs to be inside this
box, that particular thing. But what we can do is we can just search
for a command that is infinite extent enabled this, what this will do
is this will make this post-process volume
of infinite extent. And our whole scene would be covered with this
post-process volume only so that any of the changes we make the whole
scene would be affected. We do not need to scale
this postpone volume up and place everything in our
scene in-between this volume, we can just enable this
infinite extent command. And now everything would be
affected by this volume. All right, so let's select the post-process volume
now and we will make some changes and adjustments to all the properties and make
our scene look even better. So all these things
that I'm doing now are up to my professors. But you can make changes according to yourself
because there are a lot of options and all the changes will
be like visual based. So it is up to you
how you want to make them and by what value
you want to make them. The first thing that we will
change the bloom value. So if you just enable
this intensity, so if you increase the
intensity value of bloom, you will see all the parts that the light is
hitting on your scene. The glue, the glue even mode. If you increase the
intensity value, then the global increase. But obviously we do not want
to go like this height. Let's set it at 1 to next. Let's adjust the threshold. I will just increase
it a little bit. Because at minus
one the whole scene would be affected by the blue. But if we increase it, but if we increase it
just a little bit, then the only the brighter parts will be affected by the blue. So let's set it at
one maybe and see the difference. I
think this is better. Next, I will set the
exposure properly. So what I will do is I will enable minimum and
maximum brightness, set them both to one. This has made our
scene go very dark, but don't worry, we will just enable exposure compensation. Now we can use the exposure
compensation command would adjust the brightness
or darkness in our scene. So the reason I did this was because the reason I did this was because
now I'd like brightness will remain the
same throughout the scene. It will stay
constant and it will not change when we are
moving our camera. Some people might
like that thing, that the exposure is
changing again and again. It is called adaptation. I personally don't like it. I said minimum and
maximum both to one. And then I will increase
the exposure compensation to maybe somewhere
around 3.2, I think. Yeah, I think this is fine. Next, you can also enable
like chromatic aberration. I really don't like this effect. What this will do is
you'll just see if I increase the intensity
you are seeing how we're seeing this kind of visual effect of
different colors. I really don't know
how to explain this. It is self-explanatory, but people really go
overboard with this effect. I tend to not use this, so I will keep this are 0 only. But if you like it, you
can obviously go for it. All right, so the next
effect is lens flares. Again, this is one of those
verbs that I rarely used. But if you just enable this, you will see, you will see
all these lens flares. If you increase the intensity, they will increase in brightness
and the more prominent. You can also play with
the bouquets eyes. If you just increase it, the size of the lens
flares would increase. You can also see this
effect in action if you change the orientation
of your lighting. So press control
plus L and you will see how the lens flares are
reacting to your light. There is no light, there
are no lens flares. And if you just
move your lighting, you can see how the lens flares
are changing with light. But again, I barely use this, so I will just
disable this for now. You can go for it if you want. The next is linear. It is already set to 0.4. So what this effect
does is it will add a little bit darkness around your corner so
that people can move. Focus at the center
of your renders. If you just increase this, you will see how the
corners go dark. I use a little bit
of this effect. I really maybe set it to 0.6. The next set of effects is green jitter and then intensity, if you enabled both of them
and set both of them to one. At the max values, you will see this
is the kind of felt like that might look
good iffy user, just like very
little amount of it. I will take both of
these values to 0.1. We just get that little bit of Judah that is barely noticeable, but it will add some sort
of realism to your project. I will select both of
these values to 0.1. Next is the white balance. If you enable this temp option, if you increase the value, it will make your
scene look hotter. That means you could add like warm tones to yellow and orange. And if you decrease this, it will add cool tones
and more bluish colors. You can totally up to prevent what kind of like those
you want to go for it. But in my case, I will decrease them to give it a
more cooler field. I will say this, maybe 5500. The next is the tint. If you increase this, you will get like
a pinkish tint. And if you decrease this, you will get like
a greenish color. Let me show you how this works. If you just increase
this, you will get this pinkish color. And if you decrease, you
will get this greenish. But again, I'm really
not going to use this. I will say this RD only. Next is all these are
pretty self-explanatory. The saturation contrast, you can play with
these accordingly. I will set the
saturation to maybe 1.5. Okay, I think this is too much. Let's set it to 1.2. Contrast to 1.1. Let's try 1.5. This is too much. I
think 1.1 was fine. I'm really not going to play too much with this because I can, again make all these changes in Photoshop also
after the integration. But if you want, you can
make all these changes here. Only. The first one was for global. It will affect everything. The saturation contrast. Next is for shadows, like if you change
the saturation here, it will affect
only your shadows. The shadows, which is
the same thing for your mid tones also
and your highlights. I think these are all
the changes that I will make, the post-process volume. You can also increase the final gather quality
of your human to, to, to increase
lighting quality. But if your computer is
not very high aspect, you can just check
it at one only, but I will just bump it up to the next thing I want to tell you
guys is if you change the lighting of your scene by pressing Control L
and if you guys like go for some wet evening
kind of scene and you are getting
this really thick fall. And if you don't want that, you can just disable this
exponential height for company. This is the reason that it's
causing that technophobe. You can disable that if you're
not liking that effect. Also, if you like a
one, very little of it, you can just select the
exponential height fog and decrease the density of it from here,
the fog density. But I think I will
just disable it if I was creating a
very dark scene, because it is not really
useful for indoor scenes. In outdoor scenes it is useful. This was it for the
post-process volume. You can maybe make some more changes to
your options and values. But for me, I think
this was enough. I will hit save and let's
not take some screenshots. I will tell you
how to take them, and we will create
some more angles also. So what we can do is, first let's go into
our camera view. We are already in that. I will just remove
the content browser and press F11 for
the full-screen. Next to take a screenshot, you just need to go over here and scroll down to
high-resolution screenshot. Here, you can increase
the resolution of the screenshot by
increasing this multiply. But let me warn you, please don't increase this
too much because it can cause a crash your PC or unreal. So please keep it at one only. But if you have a
good enough PC, you can maybe say go-to, but please don't go
over the value of two. I think one would
be fine for now, so I will just hit
take a screenshot. The screenshot is done
and it will go over two. If you go in your project, you will find the saved folder. In the same folder, you can go to screenshots and Windows. You will find here all
of your screenshots. This was how we can
take the screenshot. Next. First, let's come out
of full-screen mode. Press F11. And I will show you that
I have created two more angles of our scene. So if you just select this
camera sacred to pilot, this is like a random, this one. You can see that I have
created a separate angle. You can create many
angles like this for your portfolio from all the different
angles of the scene, to capture many screenshots, to showcase the environment. Let's take a screenshot
from here also. Alright, so let me
show you how we can create these various angles. You can just go
over to cinematics, go to Create camera actor. So first let's stop
piloting this one. Right-click and stop piloting. Let's place this camera somewhere
around here, like this. When you are finding
the view in your scene, you can just go
over to the camera, right-click and Snap
object to view. Then you can select pilot. You can further edit it by
choosing the lens settings. So if you go for 12 MM, it will fit exactly
in your scene. But when you are going for maybe something like a
close-up shot like this, you can even increase
the lens setting. Then everything is
looking like a very blurry because the focus
is not set properly. You can enable this
drawer debug focus plane. This will show you
where the camera is currently focusing. Then you can adjust
the distance. Wherever this plane
is currently act. That will be the focus of your camera if you
just disable this, now everything
looks pretty sharp. This is the way you can
create like a close-up shots. You, for getting closer shots, you should increase the
focal length of your camera. Maybe go for 85 or
105 also. Like this. Then you can further adjust
the focus like this. Now I remember the
reason everything is looking like very Chinese because we forgot to change
one thing over here. If you need to send this to linear color
and disabled sRGB. Somehow forgot that. Let's take this to linear. Now let us go back to our C. Now everything is
looking much better. I was wondering why my port and everything
is looking so shiny. So this is the way you can use various angles and
close-up shots. You can maybe. First
let's come out of the camera mode. The camera. This time let's place
it over here like this. Click, oh sorry, snap
objects to view. Then we can violet. To cover the complete view, you need to just set
the focus to 12 MM, like cover it completely. Now if we enable this
Draw Debug focus plane, you can see where your
camera is focusing. If you set it to
completely two zeros, if everything is out-of-focus
and as you increase it, things will start
to get in focus. So if you enable
the focus plane, you will see what your camera
is currently focusing. This is quite helpful. This
draw a deeper focus split. This is the way you can
create various angles. So I suggest you to go for 56 different angles to
showcase your project. Then you can go over here and take some high-resolution
screenshots. All right guys, I think
this is it for this video. We will continue from here and the next one. Thank
you for watching.
34. Compositing and Final Thoughts: Check, check, check.
Hello. Welcome to the last lecture of this course. So now that we have
completed with everything, we are done with the
modeling texturing. We have placed all
our assets and we are also done with the
post-processing and setting up the cameras. In this last lecture, we
will be doing a little bit of compositing and then we
will finish with a course. For this, you guys
will need Photoshop. In Photoshop, I've opened up a screenshot that I took
in the last lecture. Usually I don't do
much of compositing. But in this lecture I
will be showing you in just a couple of few things
that what we can do. One of the things that a 100% do in every single of my project is go over here onto filter and use this
sharpened mode command. What this will do is
this will sharpen all your edges and make
your details pop even more. I don't know if you even
can see it on my recording, but if you do this on
your render in Photoshop, you will immediately
see the change that all your light Edison
details look very sharp and render looks
immediately very good. But they can be a
single problem. Like if the resolution of your images like
a little too low, the sharpen more command
won't work correctly. It will look very weird. In that case, there
are two options, like one of them is, instead of going
for sharpen mode, you can just use sharpen edges. The other one is to just simply increase your resolution
by increasing the multiplier in the highest resolution
screenshot in your unreal. Alright, the next thing, the last thing that
we will do is I will change the sky of our render right now it is looking
like very plain and boring. We'll change this to
something a little more interesting and that
goes well with our c. That will be our last
task for this course. In Photoshop or recently, new tool has been added. That is the Sky Replacement too. If you have Photoshop
2021 or 2022, then you are good to go. But if you don't have
it, then I'm sorry, I didn't know how
it is to do this, you will need the new
sky replacement tool. If you have Photoshop or 22, you can just select
your layer from here, then go over to Edit and
select the sky replacement. Just wait for a second. And immediately you will
see that our sky is replaced with this
light blue type of sky. We can just click
over here and there are multiple scales that
we can select from. So for example, if I
just select this one, maybe you will see how immediately our
sky completely changed and are seen
immediately looks like much better if you just
enabling disabled. This preview. You will see
how better our scene looks. With a couple of clouds. We can try some
spectacular Skype. These look like very moody. If you see over here, this is causing some issues like this, but I will show you
how to fix them. You can try some more also. This is basically the
sky replacement tool. It was this easy to just click on it and we are immediately like sky is replaced
with a better man. I think I will go
with a blue colored, a basic kind of sky. So I will select maybe this one. Alright, so for this already
the edges look fine. They are no opacity
kind of issues. But over here you
can see volume kind of looking thin now and it
is looking transparent. To solve this, what
we need to do is first we need to
set field h to 0. If you increase the shift edge, you can see how we can control this edge of the
Skype like till where we want to keep this sky so we need to decrease
the shift edge. Let's decrease it. I think somewhere around
minus 50 would be fine. Now what you can do is, sorry, I accidentally hit Enter. Let's select this again, set
the Shift Edge to minus 50. But right now if you see
it is looking very cloudy. That is because field edges at currently at a 100,
you can set it to 0. Even now it looks like fine, but I will show you
one more thing. What you can do is if I decrease the shift
edge a little bit more, increase it like this. I think this is much better. Now, one thing that
I will show you right now if you see over here, still looking a little
bit transparent. So what you can do is you
can select this tool. Now what this will do is
if you paint for this, this will tell Photoshop where
we want the sky to appear. If you see I'm
painting over here and skies little bit appearing
over our vaults also. Obviously we don't want this. Sorry, I cannot undo this. So I will just do it once again. The shift edge T2
minus 30, I think fidgets to 0 and let's adjust
the shift edge once more. I think something
like this is fine. So to solve this
transparency issue, just select this tool. Hold Alt to if you
see this minus sign. So this will remove the clouds. So if I now paint, you will see the
transparency is now gone and our vaults
are looking fine. But make sure you don't like
paint this over your clouds, otherwise your
crowd will start to disappear from that
area you paint. So hold Alt and just paint over your vaults
carefully paint over your vaults to remove
that transparency issue. Yeah, I think rest
everywhere it is fine. Let's see some other properties. If you just zoom out now. We can also adjust the
brightness of our Skype. Let's check it at ten maybe. Next is the temperature. This temperature is the
same as we used in unreal. If we increase this, we will get yellow
tones in our clouds. But if we decrease this, we will get a glue tones. I quite favorite the blue tones. So I will set this
to minus 15 maybe. Again, this is very much
up to your preference. You can even choose any clouds
you want or anything you, or any kind of colors or values you want to go for
it, you should go for it. I will send the lighting
adjustment 200 because it kind of creates a better looking effect
at the boundaries. I will take this 200. If you increase this
color adjustment value, the skies lighting effects will start to show in the rest
of your environment. If I just take this 200, you will see now whole
environment is kind of bluish. That is the lighting of our sky, but you feel like degrees this then it is more of
our original lighting, our annual little bit of the sky lighting
also set this at 40. All right. I think
this much for the sky. I think this guy is
look perfect now if I just hit Okay, now, as we hit Okay, this guy
replacement group layer has been added over our
original random. If you disable
this, you will see how much of an effect this guy has put on our render right now it is looking
like plain and boring, but as soon as we enable this, you see it looks much, much better and are, and
even looks more realistic. You can also create multiple
variations of the scene. Like you can go for
an evening kind of lighting and even use
the yellow color, spectacular skies for
that kind of mood. I think this is it for this course guide.
I'm glad you made it. Congratulations on
finishing the course, and I hope you are happy with
the results and discourse. If you like the course, please leave some good
reviews and ratings. And from here on out, you can maybe add some
mode props to the scene. You can even create a short
animation kind of thing, maybe adding few more cameras
and animating them to pan through your
complete scene and make a short little 30-second movie. From here on out, the
possibilities are endless, tenuous and watching the course. And yeah, this is the name
for it. So thank you. I'll see you in the next one.
 Aniket Rawat, 3D Artist