Transcripts
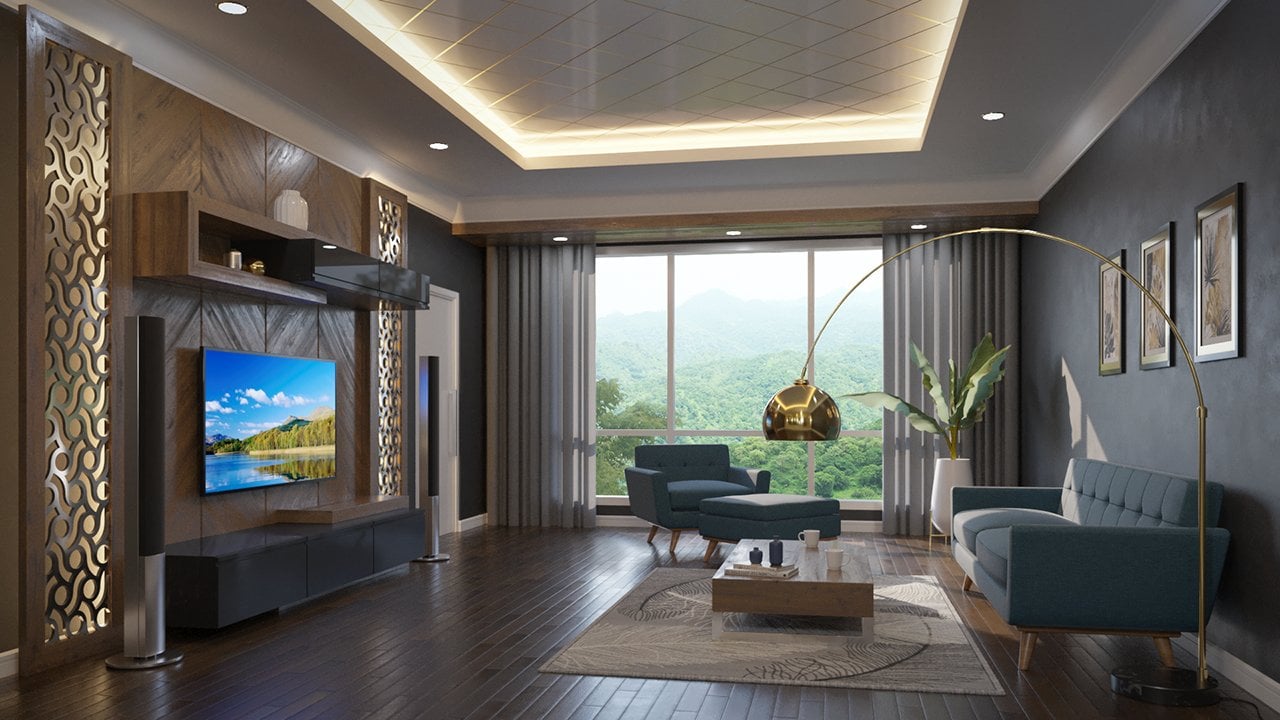
1. Introduction: I'm Jo Samuel, and
I'd like to welcome you to my interior
visualization course. In this course, we'll
be going through several steps needed to take an interior from
start to finish. We'll go through building
a reference board and using a floor plan, Muddling both the
individual assets and structural elements using physically
based rendering or PBR to texture our
created assets, lighting the scene use in both natural and
artificial light sources before finally adjusting
the s and use in the compositor to create
our final renders. We'll try to group
things so that all the modeling is done
first, then the texturing, then the lighting, et cetera, but feel free to jump to whichever topic or
element you need to use. And lastly, I hope you both find value in and
enjoy this course. I'm Looking forward to
seeing what you create, and I'll see you
in the next video.
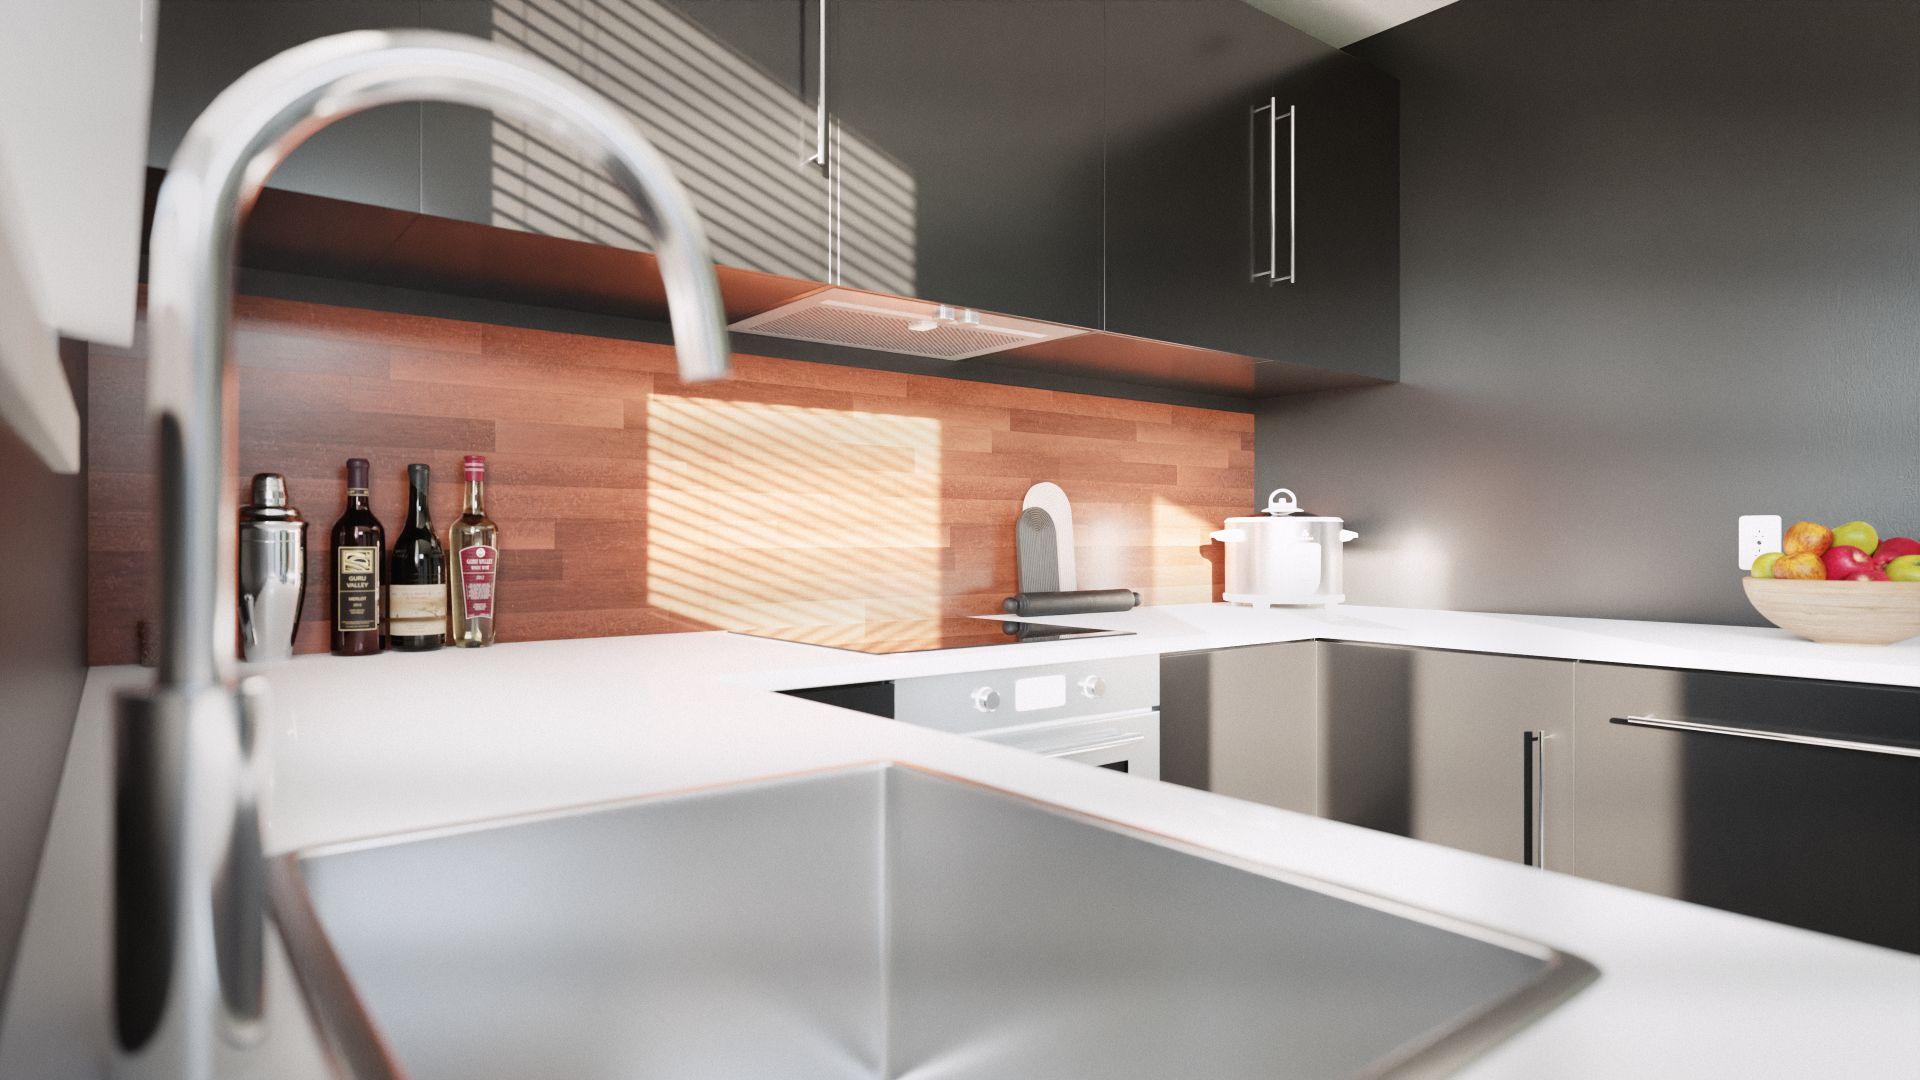
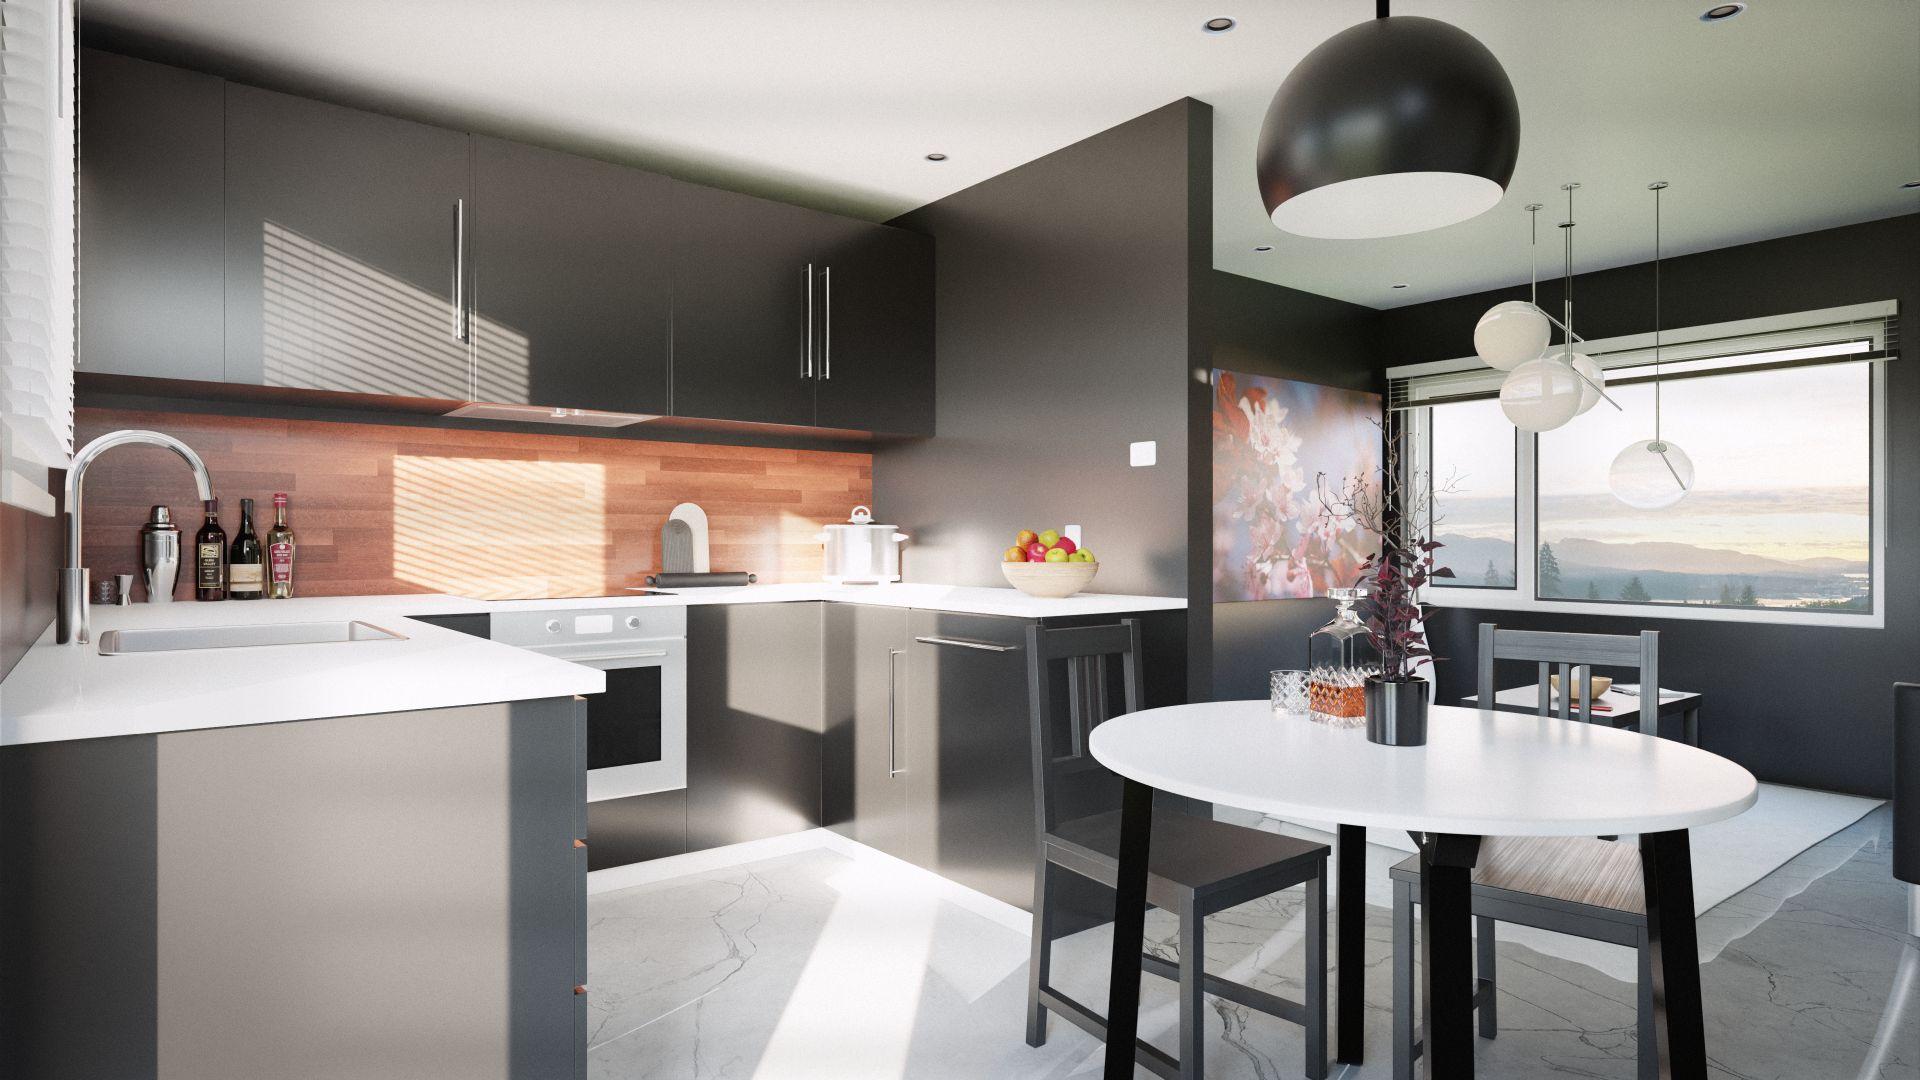
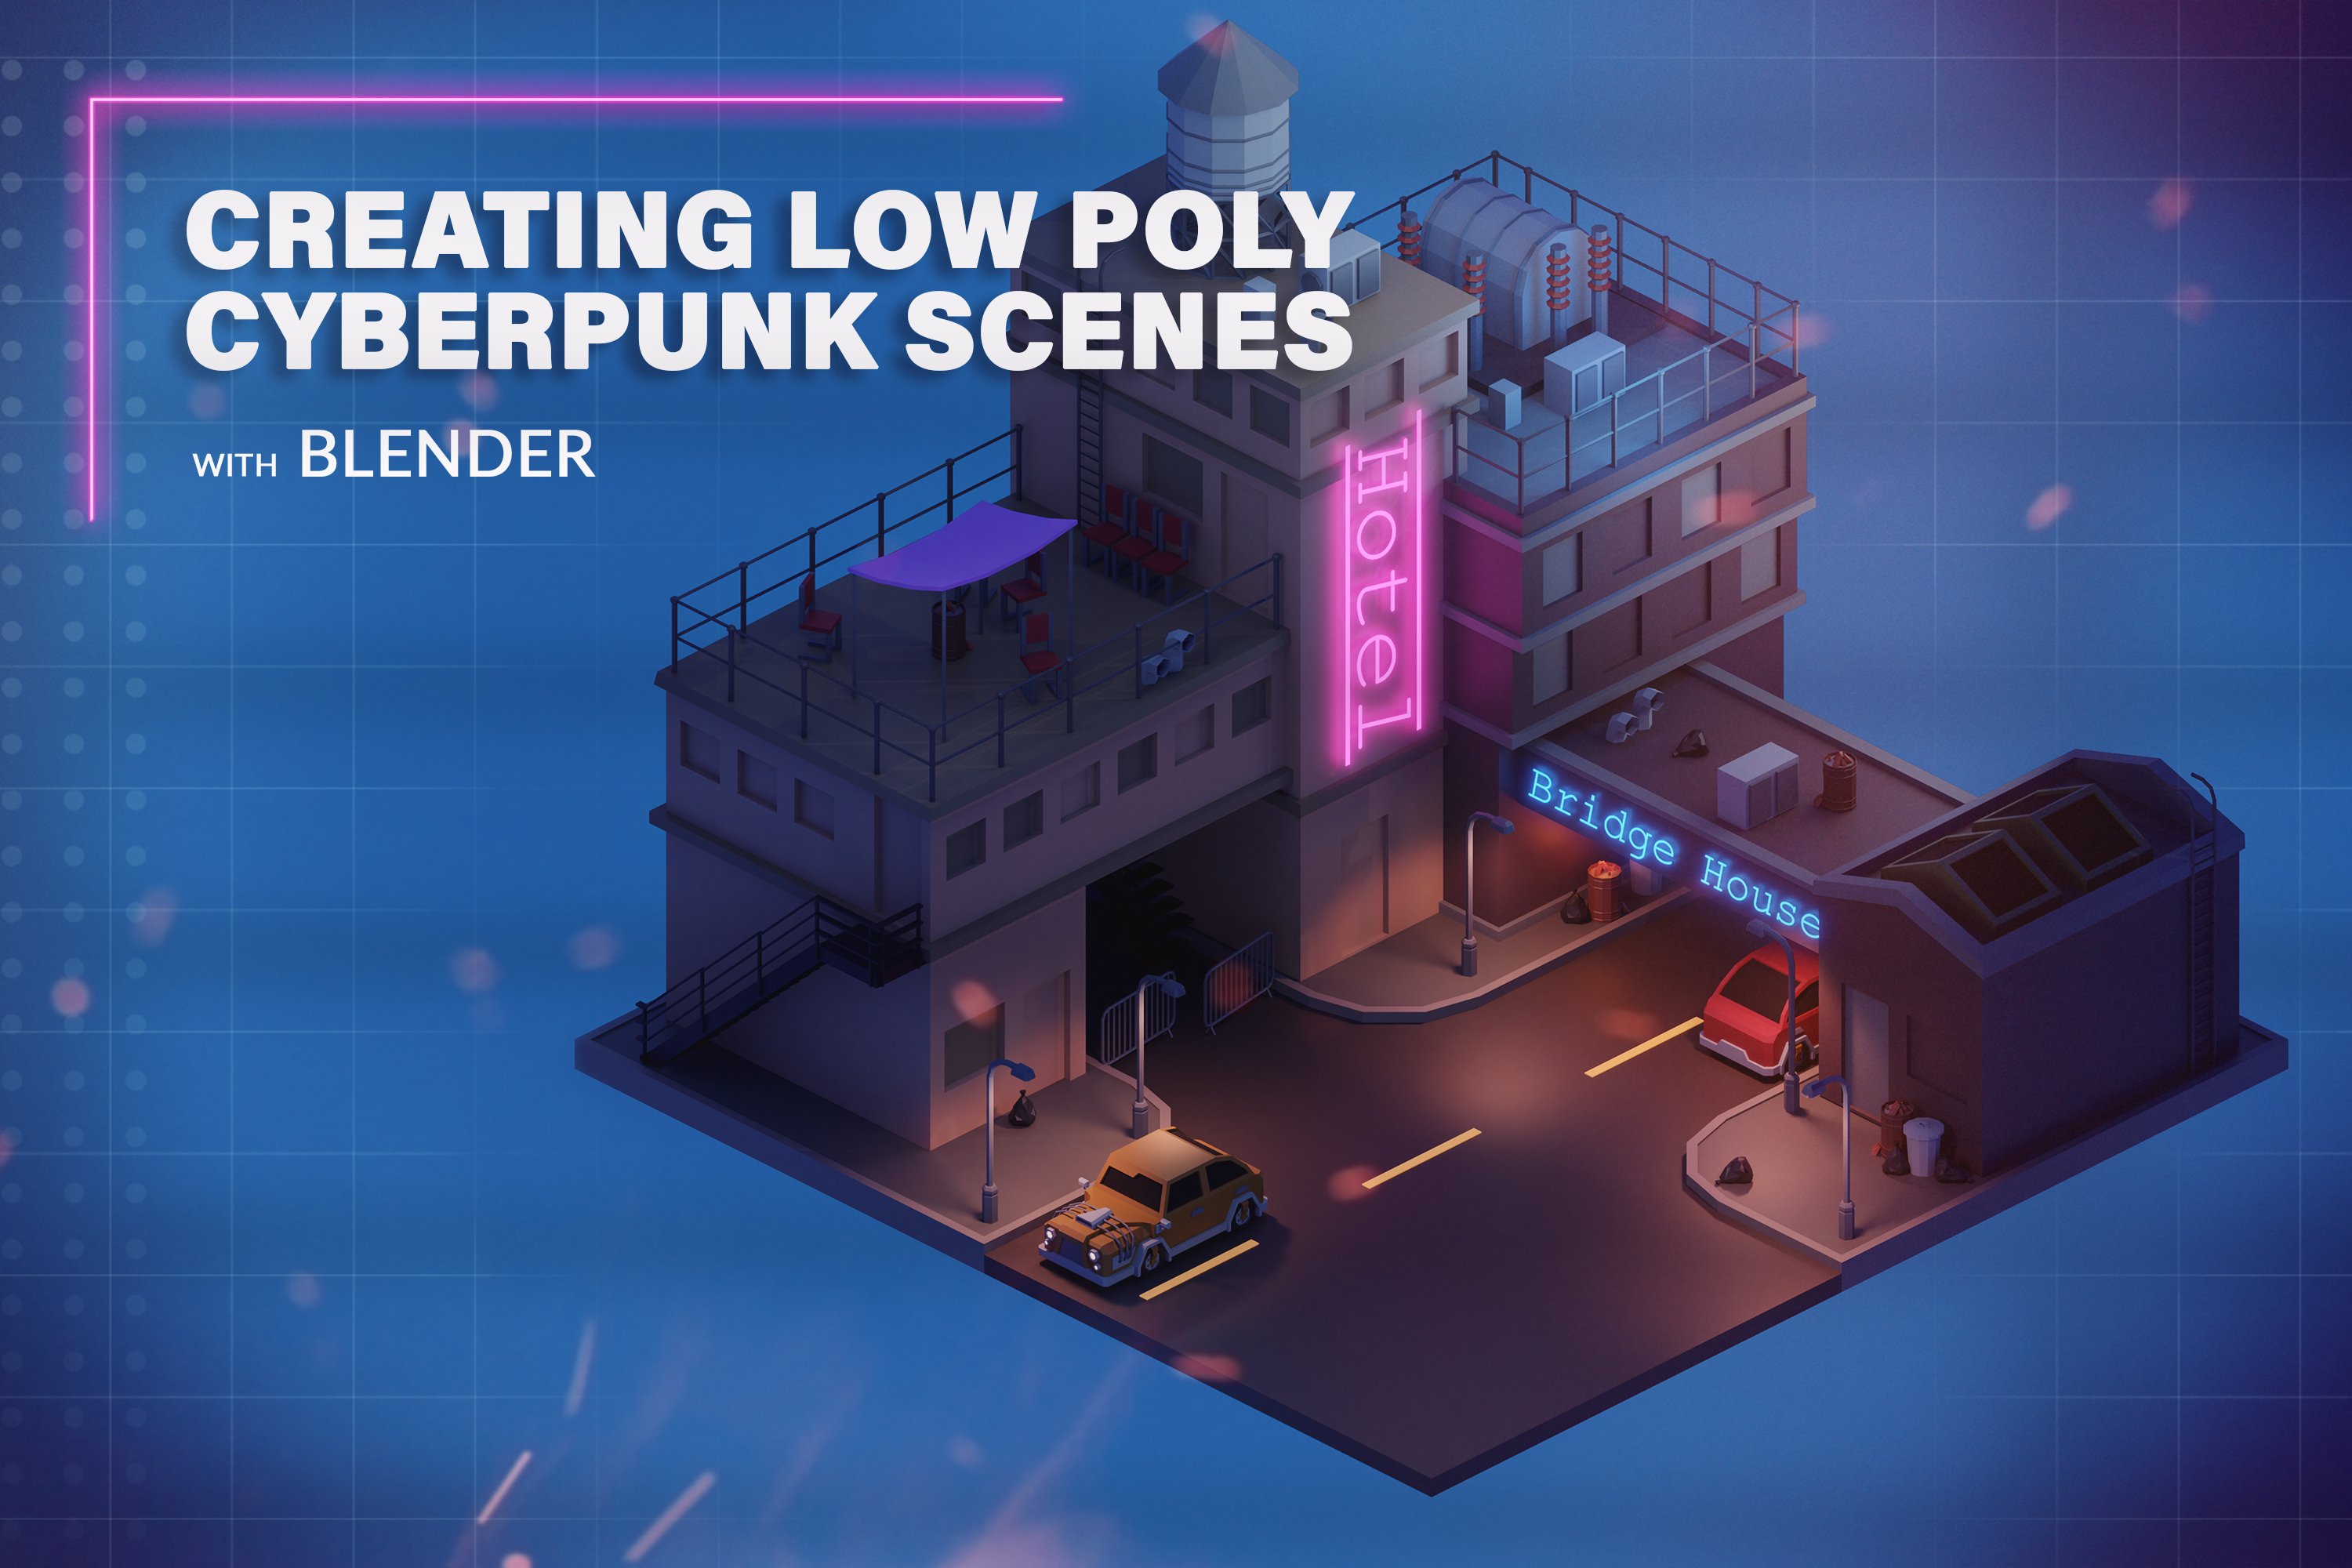
2. References: So this is the first video in a series to create a
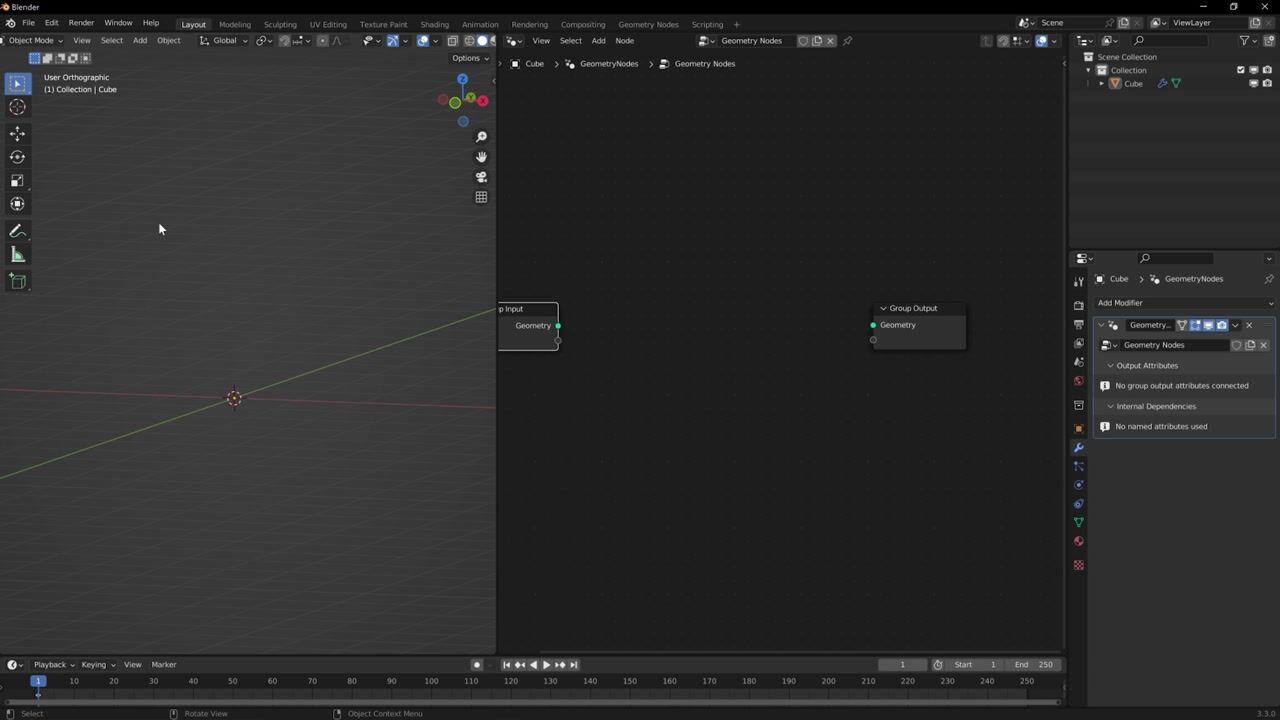
modern house and blender. So one of the first
things you need to do is download blender
if you haven't already. And if you have, then the
next thing you want to do is look at building some reference
some reference images. So we have an idea of what we're going to
create and blender. So a good tool for this is pure R. So you just go on their site
and you can download it. Can pay an amount if you want, or you can get it for free if you want to try
out contribute later. It's up to you. And then essentially image just delete some of the.
You'll open it up. You'll have just a blank canvas. And what we're going
to do is populate this with some reference images. So there's a few
places you can go. Of course, you've
got Google images. Can use sites like House? There's a few other kind
of places you can go, and you just want to grab
some reference images and start populating it. So what we'll do is first, we'll just look at
some images for the Modern House for just a kind of style
that we're looking for. Then just see any
images we like, and then we'll just start
adding them to the Canvas. So it's going to drag. You can just left lick drag, and just start dragging
images in brain that peak your interest.'s gonna
grab, maybe a few more. This one looks Nice. And let's see. Got free
there.'s grab this one as well. It's going to resize
them. Add a note. We'll just call this
modern house exterior. Then just going to
reposition these. And then what I'll do?
Just grab a few more, type it Modern House here, see what comes up, see if we see anything else
that's interesting. Again, we can just grab
in any that we like. You don't have to be super
picky at this stage. It's just building
a kind of idea like a moodboard of
images that you like. I got a few more over here. See if there's any you want
to grab from this part, them. So we've got some
exterior images, we want to do this for each of the rooms that we
have in the house. So if we do, for example, do a
knot, we do kitchen, then we'll just grab a few
images for the kitchen, a type in modern kitchen. Lot of kind of woods and glass surfaces are
you see in here? L et's go with let's
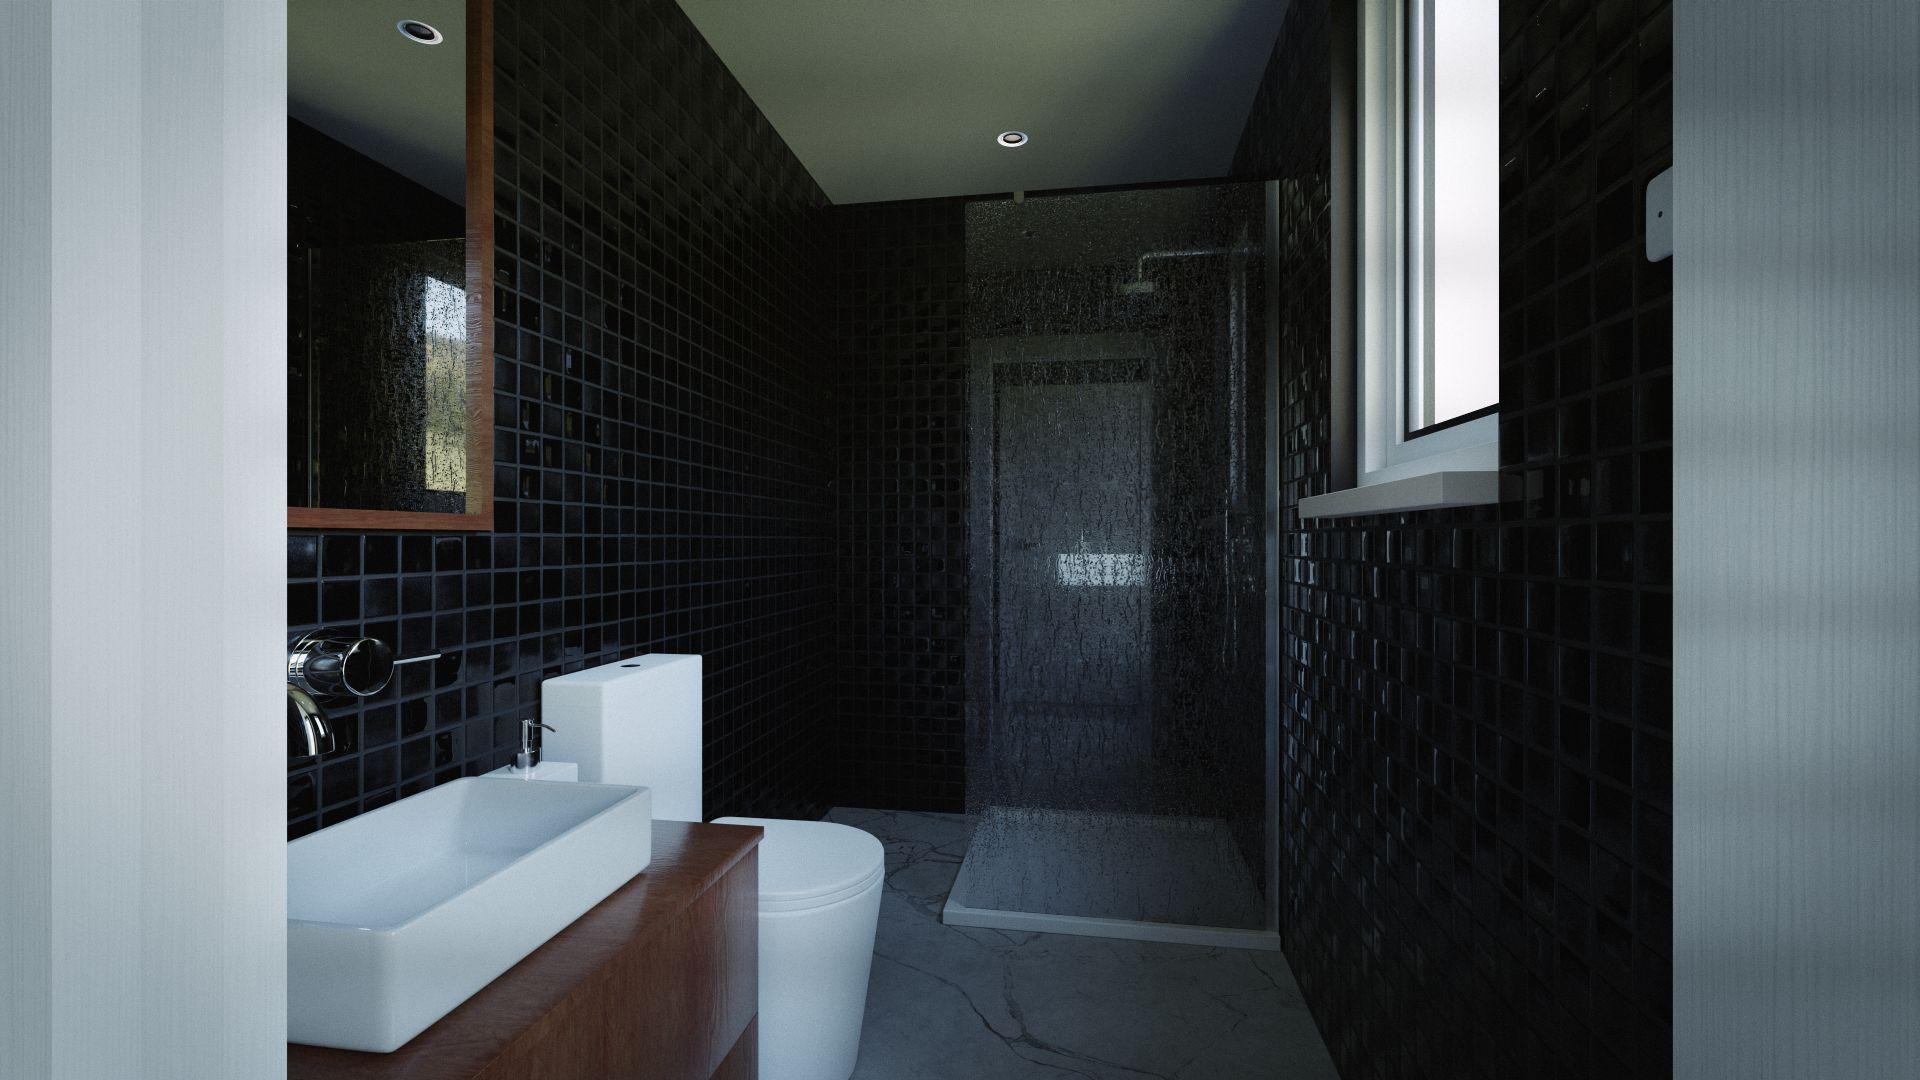
grab one more. Kitchen, Let's go for bathroom. She's house for this one. And let's go Modern bathroom. There we go. Okay. So we
got kitchen, bathroom. Let's go for a bedroom.
Maybe that one. Okay so we've got
our modern exterior. Of course, you can just
resize everything if you need to or just zoom in as you need. We've got our modern exterior. We have our kitchen,
our bathroom, bedroom. This will be our living room. Okay, scrap a few more. Probably got a good idea how the living rooms going to
look because I'm pulling a lot of simular images. There's a lot of wood wood
kind of paneled walls. There's a lot of wood in this in these properties in these
like in the modern style, where it's like a wood kind
of feature wall or panels. I kind of when you do this, you get a sense of what
sort of materials, you're going to
kind of be looking at needing to create the house. You can see there's
a lot of wood, a lot of kind of
plain textured walls. Or like panels, got some
brick in there as well. And it's pretty neutral, a lot of brown, black, white. So doing something
like this before you start makes your
design a lot more cohesive because you're
building with a gold in mind as opposed to you do
say you just did one room, and then you did another and
in totally different styles. Not that that's not
natural or anything, but if you're doing
like a modern house, for example, you might want
to do all everything modern. And even though they
look different, they'll have the same elements
that hold them together. But essentially, this
is just the first part, so this is just to
get an idea of the, how the style is going
to actually look. And then that'll just inform
the decisions with regard to the actual what models
we're using and texturing. So what kind of wood textures, concrete textures or carpets, and material like textiles
that we're going to use. Yeah. This is part one, and see you in the next part.
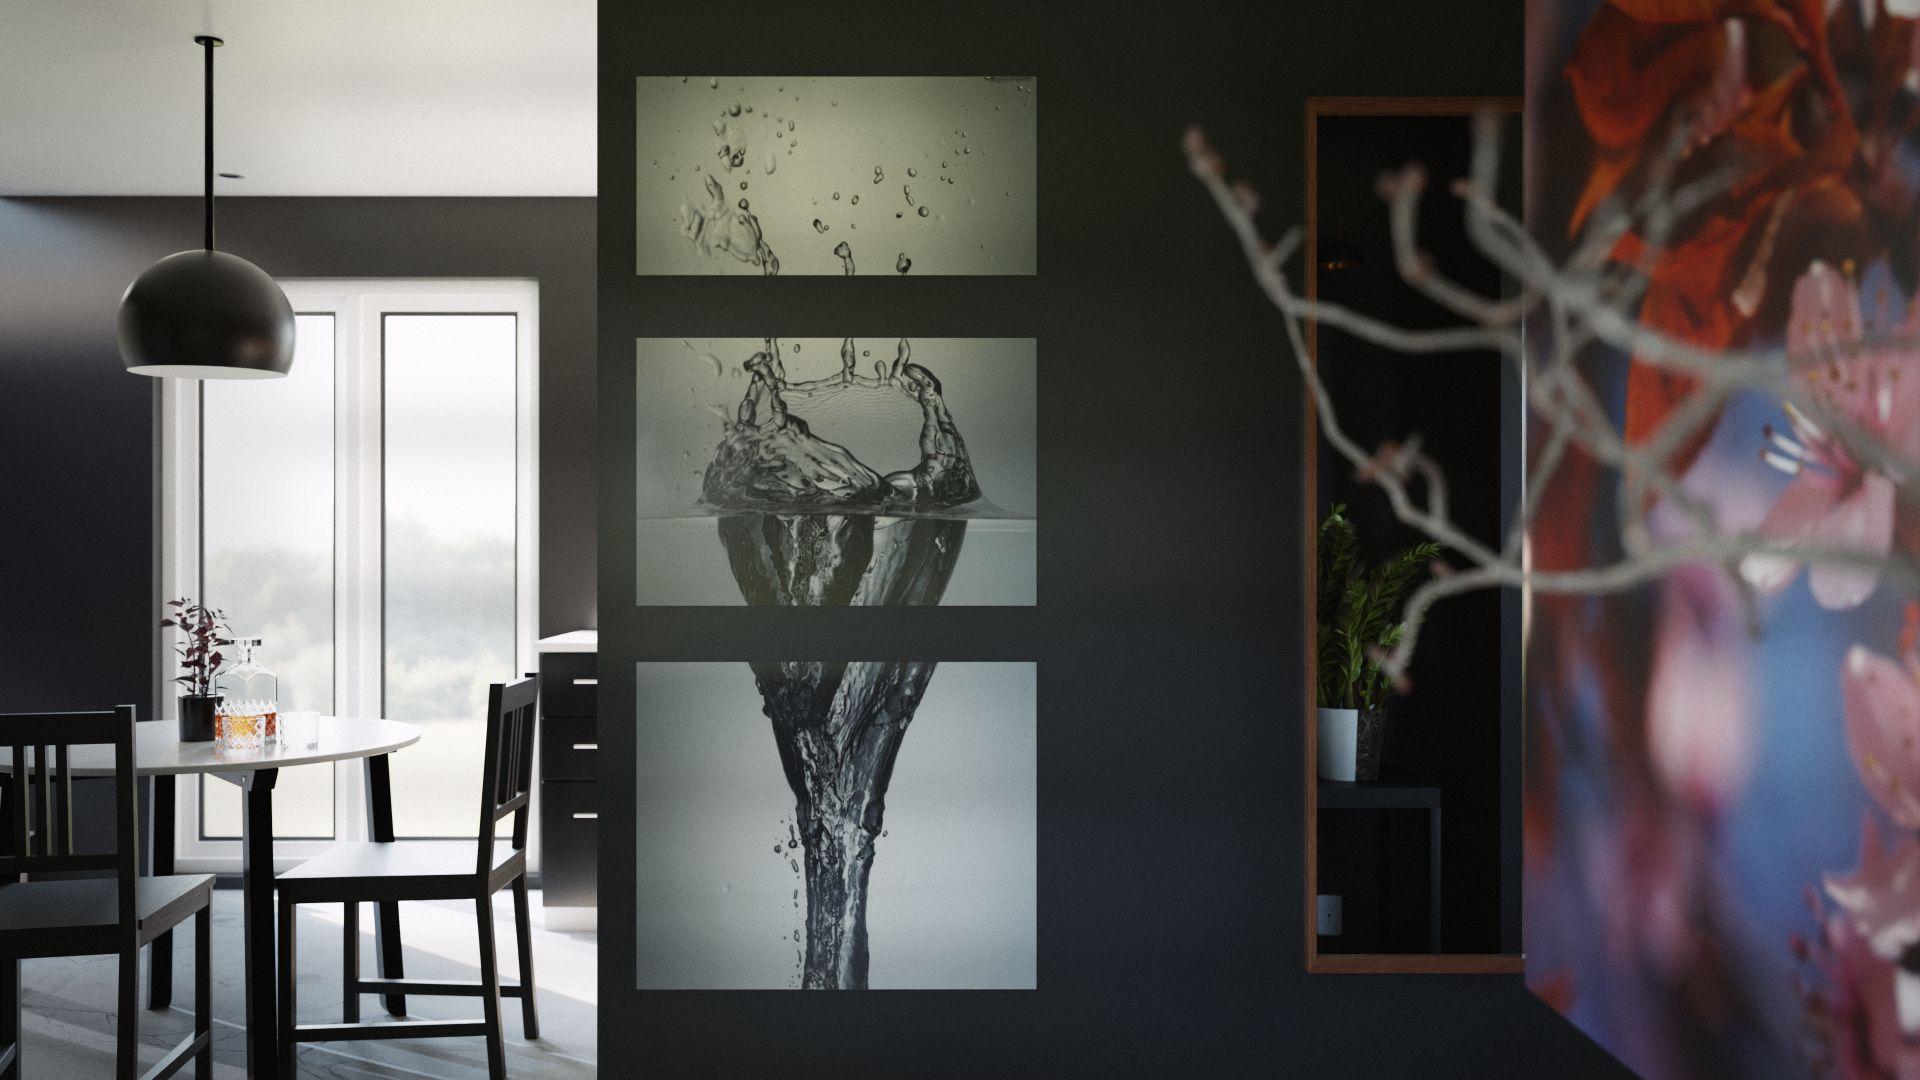
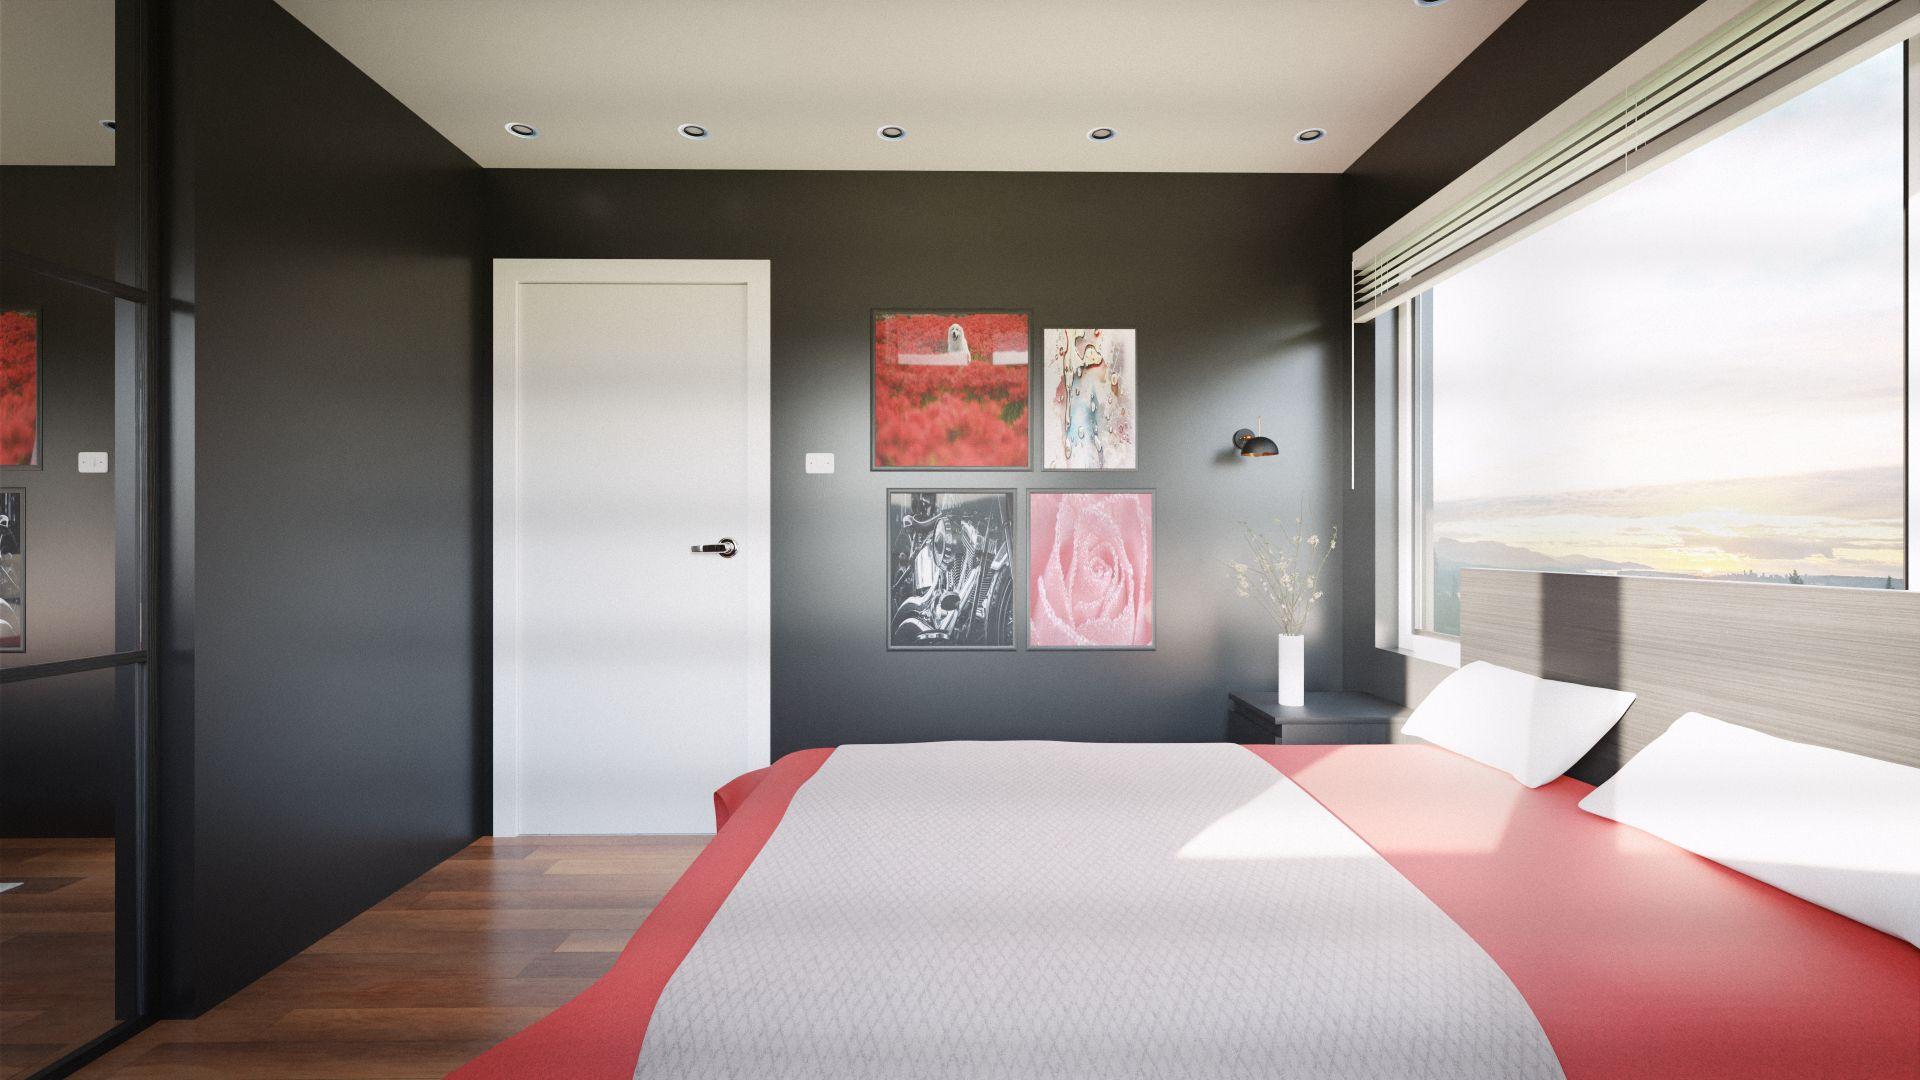
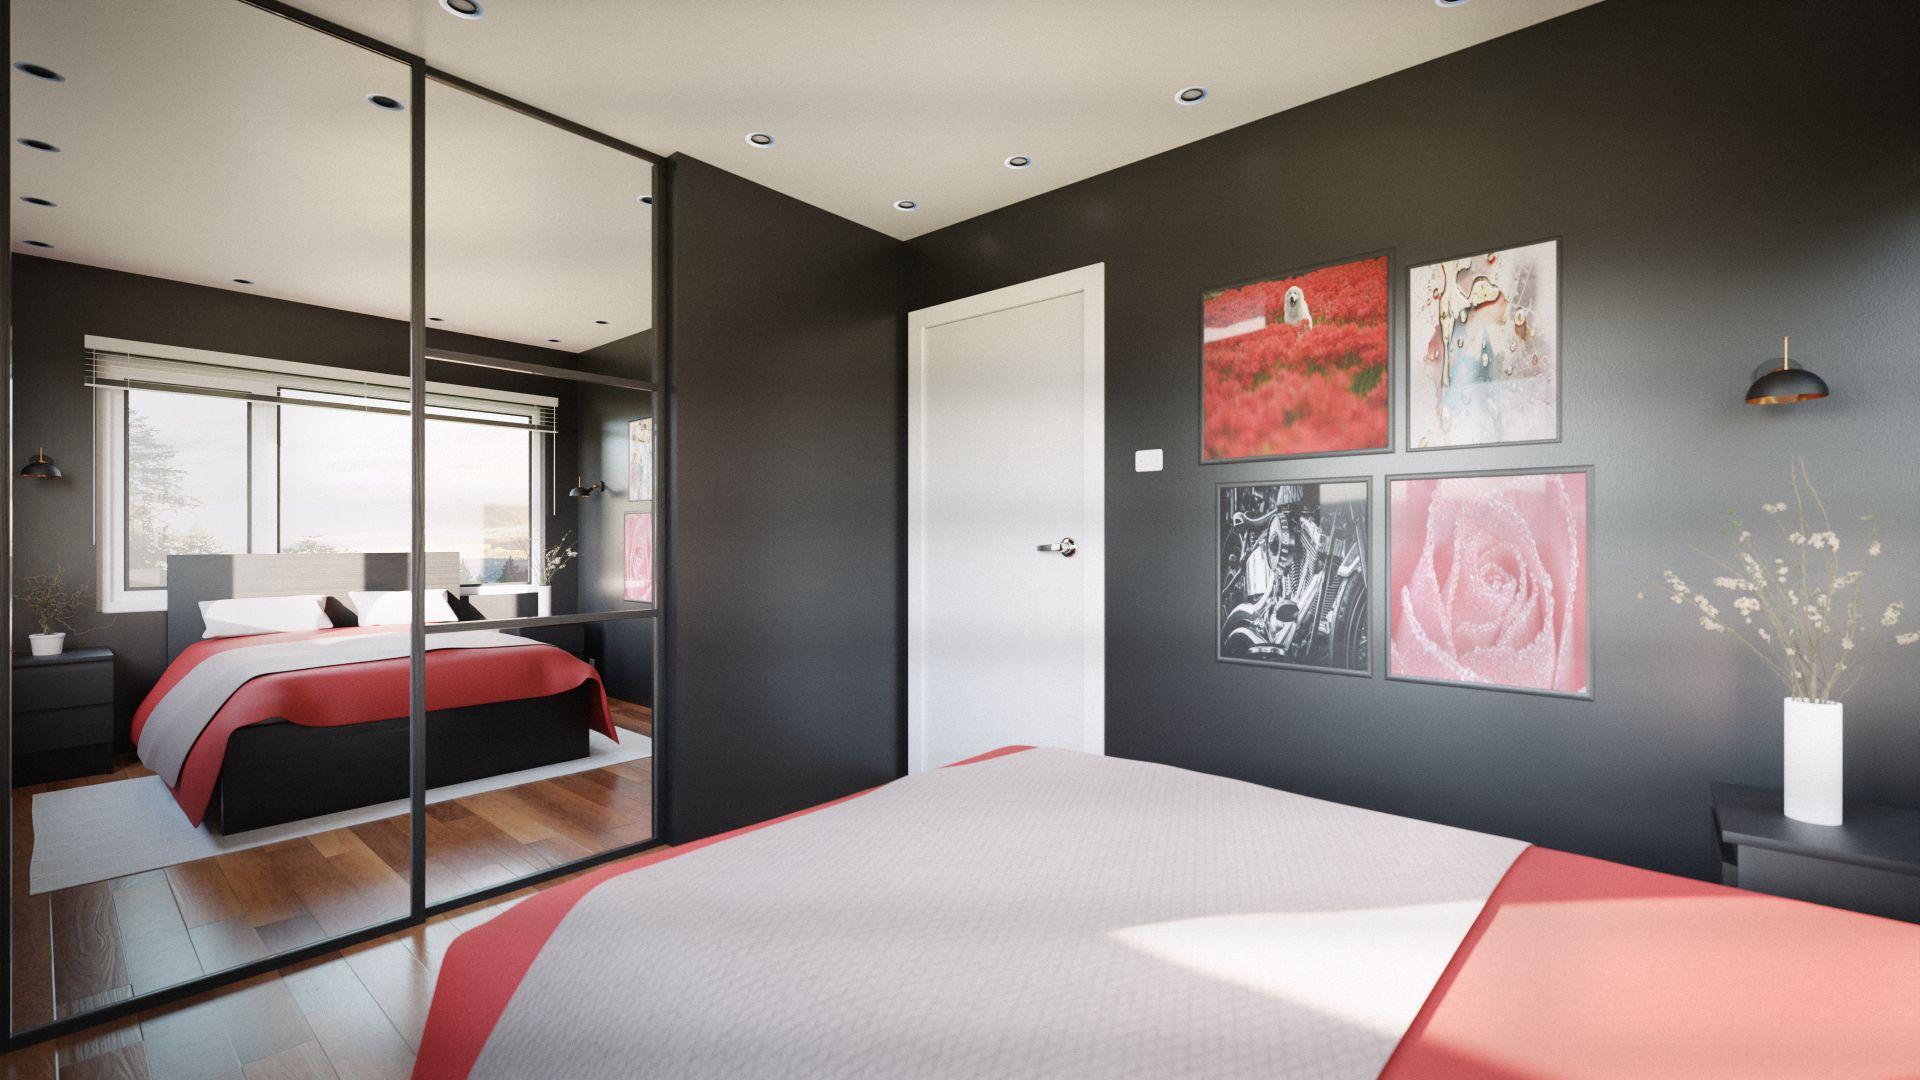
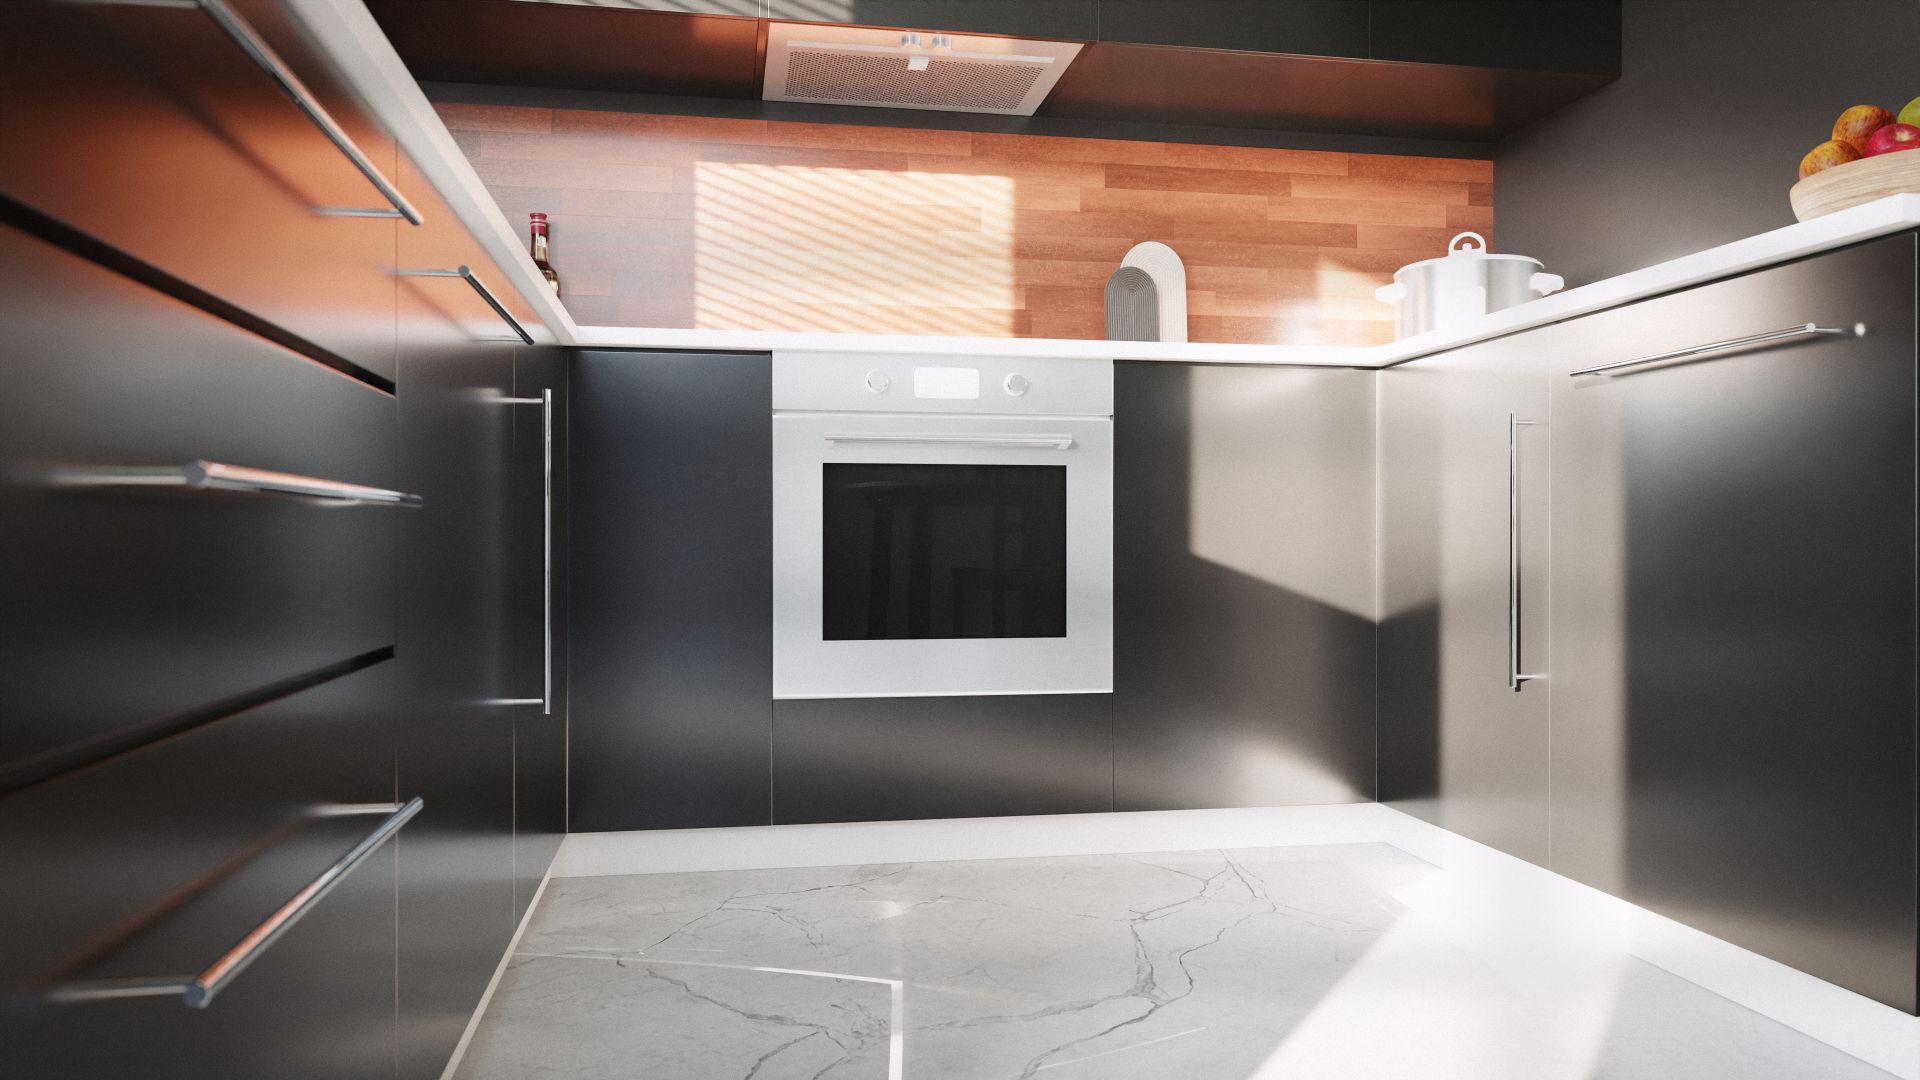
3. Creating Ground Floor Walls: Following on from the
previous tutorial, we're going to be
treating the walls and the floors of the modern house using a couple of floor plants. So this is what the finished
results going to look like. And we've got two
floors for this house, and then a deck area. So this is the second floor. And that's the basic kind of shape we're going
to be going for. So first things first, what you need to do is
open up a new blend file, and these are the floor plans
we're going to be using. So that's the ground floor. That's the first or upper floor. And what we're going
to do is in top view. I'm just going to load
in a image backgrounds. And then we're just going
to look for the floor plan, we're going to load in the
ground floor floor plan. And at present, it's
not just scale. So what we need to do is adjust the floor plan so
there the right scale. So when we load in
and do any models, modeling and adding any
models later that they all the right scale and everything looks in
proportion to each other. So I've just added
in a plane here. And then what I want
to do is adjust it. So the floor plan dis the
dimensions of the plane. So for here, we're
going to have 9 meters, which is over here,
and then we're going to have 6.3 meters. This is going to be the
scale if the floor plan. So I'm just going to apply scale and going to
grab the floor plan. And we're scaling up so the walls fifth
dimensions of the plan. Look, a touch more
doesn't have to be exact. Okay. And then we're
just going to check. So I'm just moving
along the y axis, just to check that the
walls are fitting nicely. Okay, near enough.
And while we're here, we're just going to go to this tab object data
properties, and for capacity, going to just turn this down, maybe to like 0.3 ish, just so it's a bit
easier on the eye, and you can kind of
see what's it called your plane and any other
wire frames beneath it. Then what we're going to
do is with this plane, guess we'll apply scale, and then we'll duplicate it. And then on the duplicates, we're going to change the
image to the upper floor plan. So now we've got
both the floor plan. Because we we
duplicate the plane, they're both at the same scale. So what I'm going to do now, going to get rid of the
sun. We don't need it. And we're going to just
clean up the file, so we keep things
organized as we go. So I've selected this plane, and then I'm just going to
rename it using the F two key, or you can double click
here and rename it. And I'm just going to call
this ground floor plan. And then I'm going to
select the other one. And we're going to
call this upper floor. Lam Then we're going to move
these into a new collection. We're going to call
this low plans. So if we need to, we can
toggle this on Earth. It's going to move
them both in here. To move it, you can either
drag it in your outliner, or you can select the
item you want to move, press the key, and then choose which floor plan or create a new one to add it into. And then lastly,
what we're going to do is we're going to
turn on two options, the selectable and the V
por restriction toggles. And then for the collection, we're going to make it so we can't click on the collection, so we can't accidentally move them out of place or
anything like that. At present, they're only
viewable in orthographic view, but if you wanted to,
you could have it so they're viewable in
a different view. But see that we'll be
working in orthographic. We'll just leave it
on orthographic. And lastly, for now, we'll turn off the
upper floor plan. And we're we're turning
it off by disableing viewports as if you turn
it off just on the hide, then when you unhide the un hide and we don't
want to do that, we just want it, so
it's permanently until we decide otherwise. So we've got the
first bit sorted. What we're going to do
is select the plane. This is a plane we
had originally, and we're going to
create a first wall. So I'm just in edit mode, dragging it along the x axis. We're just going to keep
things in proportion. We're going to use edge
length measurements. And then we're going to drag
it down, extrude it up, to make a square, and we've
got. Let's have a look. If we can make it 2 meters, 2.2. We've got 0.2, and then I'm going to
select this wall here. Drag it, hold shift for
smaller increments. So now we've got a
square here, 0.2 0.2. I'll just use that for
the outside walls. So I'm going to move
this down, g y, 0.2. Then we need to move this.
So we've got 0.2 0.2. Then whilst we're here, I'm
going to use a loop tool, control r. We're just going
to add some loop cuts in. So we've got one there, and
we've got another one here. We'll do the window first. Outlining where things
are going to go. Especially for these
boolean tools that will just make it a bit cleaner. That will be so we've
got a sliding door here. We've got a b little post for where the door
to slide into. Well, slide and stop, so I'm just going to add that got this area
for the window here. Essentially, we're
just going to go around the floor plant and
just do all of the walls. So we've got the
first wall done. Then whenever you extrude, just make sure you tell it which axis you're
aligning it to. So when I'm going
left and right, the red one is the x
axis to green one, the y axis, in this case, and the blue one fz in three D, for right to move it up
would be the z axis. You can tell it's being aligned because you can see there's a green
line in the center. If there's not, then
it means you're just free moving for
the most part lighter, but we want to lock it in place to keep
everything straight. Sometimes you'll use
the extrude tool, sometimes you used to grab tool, extrude when you want to
make a new point piece of geometry and then grab
if you just want to adjust what's already there. We've got another corner,
so we've got 0.2. And you can grab the
whole thing if you want, and then just shift
it over a touch. Of none of these
window locations, all sizes are set in stone, but we can adjust
the actual edges as needed at a later date. As before, get your corner
to the right side first, and if you want to reposition, it just move the whole corner. This bits of exterior facades. So we don't need to worry
about that little stump. And then for here,
we can have maybe a shoe rack or coat
hangers or something. So we won't have this as a wall. But you could if you add some
sort of wardrobe or closet. Then for these
two, just going to press the F key to fill in. As you can see,
they're not aligned. So we'll adjust
these in a moment. We'll straighten everything out. So I'm just going to grab
this point, strew this up. Strew it up again. And
extrude this area. These interior walls
are a little smaller. You wanted to you could
have the more the same size as the same way we did
with these 0.2 ones. Let's going into a side view. I can see at a glance, what I've got left,
which is this area. It's going to extrude
this. Extrude this again. We have a staircase. This area. I'm not sure exactly
what that would be. So we're just stream, it might be
something, but we can also just fill it in later. We don't know what
to do with it. Be it inside the wardrobe. Okay. So let's have a look. Then one last piece. So we've got the walls
done for the first bit. They're all accounted for. What we need to do is
just align everything, make sure it looks
right before we start doing the floor
for the first part.
4. Aligning and Creating Floor Plans - Part 1: Okay, so first things first, what we're going to do is just check that everything
is aligned. So same with what we did with the corners,
can just check. We have a edge length file. Check everything's 0.2, but
no these ones are fine. What we want to do is
we're going to box select that whole line there, Sy zero, and then the
line above it, Sy zero. So we know that's all the lines. If it isn't and it moved, you'll be able to tell because
it would say, for example, I select this did be off like that and then you just need to grab that line and
pull it back in. Essentially, we're just going
to do that for all of them. But we know the
exterior ones are fine. It was only this one
that had an issue. Then ones that line up
across the lower plan, we're just going to select. So I select in that
area, S y zero, bottom one, just make
sure you accidentally select and edge that's
above or below. So we just want one, S
y zero, that's lines, Sex zero, Sx zero.
What else do we have? This one here, S y zero, so that one lived. Then Sy zero. T specially our doorways that weren't
connected because we built that one out separately
to build no out separately. But we want the door, so
if it has to be those two. To be straight want
it to be connected straight to both
points, not crooked, to be the same with
like this bit here, S y, zero, t that line. But would be the
same kind of thing. And that's done. Everything's lined up nicely. What we're going to do
is adjust the floors. Well, not adjust the
floors, create the floors. So let's start St this little room over here. Going to select. You can see slit the edges. You can turn off edge length, just to make it a
little clearer. We've got all the edges. Press the F key, we
can see filled nicely, separate by selection, then we can clean
up a little later. G slit this, slit. Press and shift when
I'll just want to select one or holding shift and left clicking to
select one edge. One to select to line. From the last active
element to a new one, then I can hold control. I'm just going to swap
between the two as needed. When you hold control, it
picks the shortest path. So sometimes you don't
want to go too far, or it might react in a
way you don't want it to. Okay? So that one's done nicely. So I'm going to separate
that selection. And we've got a bigger room. Now I'll add the these in. But if you don't have those, Then what you need to
do is adding loop cuts. I'll say we added to there
and they're not aligned. Then if you press,
we slit them both, and then Sx zero to align them, then we can just move
them into position. And now we know these two
will be nicely aligned. So I'm going to
select this edge, work my way around. T I press control, they went this way, but I
wanted it to slit this way. That's why sometimes
you have to shift. But here we'll have we do this. And this one, the doors there. So yeah, we'll
have this floor as its own thing. It's going round. If you press fill here, it's not going to do
what we want it to. So we're going to press shift
D to duplicate those edges, and then p separate
by selection. Then we're going
to find it again, so I'm just going to hide that, find this area, front slash
on numpad, to isolate it. And then in vertex select, we're just going
to connect dots. So I'm just going to
fill the gaps in here. That gap in e, then if we press
F now is filled, and we'll have to do
a little cleaner. But we'll do order the flows at the same time or sequentially. So I'm going to
bring the wall back. You can do it in
vertex select as well. That one is nice and easy, separate by selection.
I did that. When I just grabbed
that just to check, I had to accidentally
move something else. So I'd see it moving
around as well. These little checks you perform as you get used to doing things. So make sure you haven't
made any mistakes. See if that feels. It does. Separate by selection. Then what we want to do.
Now, we got the walls here. So we're going to hide
that. We just want to see the floors, kill. And we're going to for this, Is going to select actually
are going to decide, turn off the group,
go in top view, select this one first, and
we're going to get rid of the excess vertices. So these are vertices that don't actually impact the shape. So like these ones, it's a straight line, they're
not doing anything. Some is going to dissolve them. This one, on the other hand, is holding the shape. Because if we want
to dissolve that, you can see change the shape. So all these excess vertices, because they're stopping
us from adding loop cuts. Meaning that a lot
of tools would react weird if we say we wanted
to subdivide something. It might act in a certain
way that we don't want it to so got rid of that now. What I'm going to do is use the knife tool in some areas in the doin
tool and some others. Not the fill tool because it creates an edge over
the top, you can see. But it's not actually
created a face. So they're not two
separate faces. It's just an edge. So
let's delete that edge. But with the join tool,
I've pressed J there, you can see there's two
separate faces now, which is what we
want then you can see there's nothing
to connect it to on this side or up above. So what we do is we
use the knife tool. K. Then you press A just to
constrain it to an angle. You can see it's calling
it straight lines. That's what we want. K,
and we've got this point, this point we can join, and we can use a knife
tool over there, and then we've got
a few more to do. Then you can see we
can add leap cuts now. We've missed one here.
Let's just join them. Join these two together. There we go. So that's
going to craft, goes in. Cool. That one's done. Got this one here, 02, three. That's it. Join nes together because we
straightened realigned things. Don't need to worry so much. Join. Worst case scenario, if you had a crooked line because I weren't
perfectly aligned, we could just straighten
it at that point. Just do a check.
Everything's working as is, go on to the next
one. So we've got. Those up there is here. You want to see, I'm just going to
hide the others just to make it a
little easier to see. I believe that's everything. Dissolve, and then we're going to just join
things together. So let's go over there. Join join knife
tool. Cut that down. We just want to
establish the quids. We'll go like that. Got
another little one here. We've got a split here. So
if we needed to you like to separate out the kitchen
diner from the living room, we could and we've got one more. You got to do this one. D them out a little. That works. That works. That works. That works. Got one
here. Cool. That works. Cool. H, bring them back. We have this one. So we got to dissolve
these vertices. Disolve those as well.
It's just a square. Well, rectangle, get my shapes, and we got this one. Let's make the cuts. That straight. Yes. Okay. So these ones are
working as well. You're bring everything back. A little bit of
an overlap there, but it doesn't matter. Turn the floor plan back on. But in this instance,
it doesn't matter. Usually it does. But what we want to do now is
just rename everything. So we've got these
are going to be rock ground low score walls, walls, ground floor,
go to move it into a collection building,
ground floor. Okay. And what we'll
do. So we hide that. Whenever we move something
in there for now, it'll hide it so we know
what we've got left. We have bedroom. So we go we'll name this
floor ground bedroom. Then move it into
the ground floor. And then we'll name
all of the floors. We'll start with floor. So so it's a lot more organized
in our outliner here. We'll go floor kitchen. You know, let's separate
out. Now, we want for now. Floor kitchen,
diner floor ground, kitchen, diner
living, finer living. Diner living, building ground
floor, but laundry room, floor ground laundry,
ground bathroom. Floor ground entry. We've got a and then we'll select all three
of them and just move them at the same time
with the M key move to collection,
building ground floor. Okay, so far, if I
bring that back to you, we've got the wall plan
done for the ground floor, and we've got the flooring. The next, what we'll do is we'll just create, we can do this now. So we've got the wall selected. We're going to just
extrude these up by 2.44. Kind of the average
height of a room. And now you can
see we've got what actually looked like walls as opposed to what
they were before. Then if we hide that, then we've got the floors underneath. That is the floor plan
for the ground floor. Then what we'll do next
is do the upper floor.
5. Aligning and Creating Floor Plans - Part 2: So next, what we're
going to do is do the walls on the floor for the first floor
or the upper floor. So what we want to do is, as you can see, we're currently using
the ground floor plan. So we're going to turn this off temporarily and turn on
the upper floor ground plan. And we can see it lining
up pretty nicely, and what we want to do. We're going to grab a vertice. So I'm just going to
select a vertice from the corner of the wall. We're going to duplicate
this. Let me turn this on. So I'll just press shift
there to duplicate that. Then we're going to separate it from now this vertices in
the same spot we want it, and it's on the first floor, so this can be the
walls going upwards. So I'm just going to
go back into top view. I'm going to grab
this verte vertex. And let's just grab it actually we will
make the same corner. So to do that, going
to turn snapping on, snap it to vertex, and if I press G x,
can slap that there. And then this will be G y. Snap that there, and
just extrude in them, and then I'll grab
those to fill. So now we've got face. Then again, you could have just selected all four and split it, but we've done it now, so we'll keep moving on. And just to check,
it's the same size. You can turn on length, so you can check the
edge length and this 0.20 0.2 0.2, so
we've got a square. Then let's have a look. So we've got a deck here, and then we've got the bedroom
on this side of an site. So because we haven't decided what we're
going to do for this, we won't do the
walls for the deck, because we don't know if
we're going to have a fence or like a half wall or whatnot, so we can leave
that bit from now, but we still need the square. I'm going to grab this and just snap it to this
corner over here. Then we're going to
turn snapping up. Then we're going to
just start extruding. So I'm just grabbing
this edge here, can extrude it down. Extrude it to here. Strad
it again. Strew it again. Check something. So because
it looks like this window, these windows are
the stair windows. They'll be in the same place. So what I'm going
to do actually is move this edge to line
up with this edge. So they're just in
the same place. I'll do the same for this one
if it's not done already. So slap those in place, our window will be aligned. And then when we
extrude this out, we'll do the same
for this window. I'm just going to grab
this. We can extrude it. Let me just turn off this
so I can't see it for now. Well, first things first. B we're doing that because
this is still in the group, we're going to move this outside
into its own collection, and we'll call this
building upper floor. Motor collection. Cool.
Now when we hide there, we're not getting
that overlapping the geometry on two meshes. Can drag this all the
way down to here. This window should be exclusive. So we've got a
ground floor window there. We're in the same place. We have a big one. Yeah,
we'll line them up as well, so I'll just turn that
back on temporarily, snap it back to there. Then I'll turn this back up. Get up per floor plan. Well, should leave this on because we need to do the
upper side of the window. So those two are lined up. The same with that
bottom window. Yes to this. So we
just trace around. Extrude, extrude,
grab these, strut. Extrude it to there. I
put extra geometry there. A hide this for now.
So we look at this. We've just got the two there. Okay. Let's go back to this. Hide the ground floor, make the upper floor visible. Then we have, so it changes a little bit over here
because on the ground floor, it keeps going on, but it's
like one room in the deck, so we don't need this anymore. And then we'll turn on the
measure tool for edge length, stre for 2 meters. You can go you could
type it in as well if you wanted. Ero 0.2. We've got that, and then we
can move this into position. Then we'll just extrude this up. There shouldn't be a window on that floor because it
would be a wall on the door. So we don't need to
worry about that. The window for the toilet. Just adding some loops here, and we might change
this area because it looks a bit weird
because we've got a sink like in open
in your bedroom, and then you've got your toilet and stuff in an
open kind of plan. So we might just close this
off and make it ann suite. But we can remove edges
as we need to anyway. So we just put them in for now, but we'll most
likely remove them. Then we're just
going to keep going around, got the window. Same with here, because we just got a little bit out here. I guess the smaller size shower. We might just make
the shower flush, depending on the size
of the E shower tray, and stuff we model. We'll see when we
get to that bit. And let's get 0.2 as well. There we go. And what I
want to do is we all press. Let's scale these together. Actually, I don't want
to adjust these ones. So turn on let's go change the
transform to free Dcursor. Well, not free Dcursor. We want active elements. We'll select these
two. Select that press S Y zero to line those up, select those two,
select that one, S Y zero, just to make sure
they're all lined up nicely. Then we'll extrude these.
Extrude them again. Then for the window, we'll
turn on the ground floor, and we'll use
sapping, that there. And then snap that
there and then select those for fill. Turn this back. So now, we've got the
walls nearly done. We just need to do this
bit for the staircase. So we can see there
is some overlap here. As go solids. You can see, so we need some of it to match. So I'm just going to add. Let's go to upper floor. We've got geometry here. Going to extrude this down, and then we'll sap it onto
this. So that's in line. So because I've got
vertex select on, I had to put my
mouse on a vertex. You could also go edge select and then use
the edge there. Just had to bear in mind which snapping like method
you're using. And then we'll snap
again to that vertex. And then we'll snap to
this. Snap to that. Then we'll grab this E Y, and we'll move it
all down there, turn off building
ground floor for now. And what we'll do. So if we have our door here, we'll need some loops here,
and then we'll line them up. I've got some loops there. Got some loops
there, grab these, S Y zero, and then
we'll got S Y zero. We've got our entrance
for the door. Once we extrude this, we've
got our sliding door here. Cool, and that is
the walls done. Then what we'll do is we'll do the floors while we're here, we're going to grab
one, two, three, four, five, grab all
of the vertices. What I'm thinking is if we can line up
these with the window, and we'll have some
way where we can separate the flooring
for 1 minute on site. So I'm grabbing the. I want to keep the window one in place, so I'm selecting that last to
make it the active element. And then if we press S
y, we can have a look. So it's going to be a
little short if we do that. So what we will do is because we don't
want to touch this. We don't want to make
the door too small. We'll do one big
piece of flooring, and then we'll just adjust
it manually afterwards. So we're going to select all of the vertices
for the floor. For the whole floor, we'll
just have one big one thinner. So that is all of them. Shifty to duplicate, separate
it. But all of them. Missed one. So I'm
going to grab this, extrude it, and snap it to that. Select all of them now, press F to fill. There, we've got our
floor in place for now. And then we can just decide where we're doing it
and we can make a cut. We've got our floor, going
to select the walls, select all of the vertices, and then we'll move it
up, so we'll extrude it. It's going up on the Z axis, and we'll go 2.44. Some reason, I've
got a face missing. So I'm just going
to fill that in, and we'll do the same here. But before that, you can see
there's some interior faces. So we've got some faces inside the mesh, we're just
going to delete those. Cool. Grab everything
that face, till that in. And then lastly, what we'll do is just create a floor
f for the deck area. So what I'll do is
I'll select, so look. I slit two of them.
Slit these two. Shift D, separate by selection. Rab them, extrude them
along the x axis, and then press F to fill, slit everything,
press F to fill. For now, we've just
used that as D, just the floor for the deck. If we bring everything back, You can see we've got the
walls for the upper floor and the deck areas that's
covering the roof, essentially. And as you can see, there is some overlap going on, and that's because there's some faces that
are intersecting. So first, we'll just make
sure we organize this. So we'll call this as
with the upper ones, walls, and we call this
walls upper floor. So walls upper floor. Hide that. This will be
called floor upper floor. Well, upper bedroom.
Probably a better one. And we call this
floor upper deck. So we've got our
bedroom, deck, floor. We'll hide these for now. And then what we need
to do is just delete the top faces of these walls. So I'm just selecting
them more now. Because essentially
the floor and these faces are in
the same place, and Blender is not sure
which one you want to show. So you'll get some weird
graphical kind of issues. So we're just going
to grab all of those, delete the faces. So
now they're open. And then if we were
to bring these b, you can see now
we're not getting that issue. And
there we have it. We have both floors
done upper and lower, and they're ready for
modeling and texturing. So we can start building out the actual rooms and making
this look more like a house. Courses, we can put
a roof on here and stuff after once we
decide what kind of roof, but for now, it's fine to
leave it open, so yeah.
6. Modeling Bed Frame and Mattress: Okay. So now that we've done
the walls and the flooring, what we need to do next is
fill the space with furniture. So if we start with
the ground floor, let's hide the upper floor, and we'll start
with the bedroom. And for the bedroom, of course, the prime piece of furniture
you're going to need to bed, so we'll start with that. So if we look at our references, you see some of the
kind of beds we've got, it's kind of like wooden kind of just boxy kind of frames. So, it's good to usually get an example to look
at like a reference. So what I've done, for example, I'm going to base the bed I'm going to do off of this one. This is off of ICA, just a nice, simple kind of wooden frame, and then we'll just alter
it as needed for our use. So what we'll do we just look
at the measurements here. And what I'd like to
do, especially if it's something like
this is to create a box with the measurements and then build the model into width. So as far as to make a cube, and we'll look at what
measurements we've got here, so we've got a width of
150 and the length of 199. So let's do that now. So for the width here, it's going to be 1.5 meters,
which 150 centimeters. And then for the length
19 9 centimeters, and then for the height, it's going to be 1 meter. So I'm just going to do that now and then position
it on the floor. So I'm just going
to me it up 5.5 e. Then we'll just position
it where we need it. So what we need to do because
this is the upper floor, we need to swap the floor plan. So now we've got the ground
floor. Now, let me turn this. So we've got the
ground floor on now. And as you can see this
beds a little smaller, then the upstairs one, this one fits a lot closer. So for the ground floor
bed, what we'll do? We'll just look at some
dimensions for beds. And we can see 150 would
be for a king size. So just to make it fit the room, we're going to go
a little smaller. So we'll go for 135. And then that'll be times 190. So for the width, we'll go 1.5, and then for the length, we'll go 1.9, t to make it
fit the room a little better. Then for now, we'll
hide the walls. Tool so at the moment, we've got the container, you could say, and
we're just going to build everything into that. So what I'll do for now. We'll move this into the scene collection just
so I can see where it is, and then we'll duplicate it. The original one, we will change the viewport display
so that it's a wire. So if I was to grab this over, we can move out the way
you can see a wire box. Then we'll start building
out the elements using the measurements we have and fitting
it into the cube, so then we know we've got
the right kind of shape. So if we go to this is if we
go to the bed, and we look, if we do this piece first, we can see that it's the
hundred centimeters height, so it's going to have the
whole height of the box, but not the whole length. So if we say approximately that the headboard is going
to be about 5 centimeters, we'll adjust this cube to
be 5 centimeters in length. So we'll just type in
5 centimeters here. Then we'll just apply the scale. And then in top view, I'm just going to
move it so that it fits in the cube nicely. Cool. So we've got the head board in place.
And then what we'll do? Because we know
there's a headboard, we're going to have to get
the foot side of the bed. So I'm just going to
move it to there. So this is in side
view, or a graphic. And we'll move that to there. And then what we'll want
to do next is then adjust the height so that the
height is correct as well. For the height of this
element, it's 38 centimeters. So for the z, we'll put it to
0.38, move it down. And apply the scale. So we've got. This
here, this here. We need this part now. And you can see it's 22
centimeters off of the ground. So first, and we'll look
at how it connects. You can see so we've
got the headboard. And then we've got this element that connects the headboard, you can say to the foot stick of side or the feet
side of the bed, and it's flush, and then it has an indent where this bit is. So what we'll do is we'll
grab this bit and rotate it, and that will be the
bit that's flush because it will have
the same width, and then we'll adjust it
to fit the length first. I'm going to grab
this piece here, duplicate it, and then
we can rotate it, in my case its going to be
along the x axis by 90, and then we'll look at the measurements just to
see where it's going to go. Okay. So as you can see, it's 22 centimeters
before the bottom bit, then the bottom bit
goes up for a bit. We can't really see,
and then it comes up, but this doesn't go to
the top of the foot area. So if it's to look, if we
have an image of that side, which I don't believe we do, it just stops a little short. So we'll just have to
improvise that a little bit. So it'd be, for example,
something like that. But then we'll know
where the other bit ends because we
could just add in another cube and make
this 120 2 centimeters. That's the wrong side. For me, 22 centimeters is here because my cubes rotated
and it comes in. That's just a setting
I have on preferences. So if you go to preferences, and it is a line to view here. So in editing, a line to view is probably
be set on world, but when it's view it adjusts it depending on where
you're looking. So if I was to add a cube in, you can see my cube
doesn't load in straight, it will load in my
view was over there. But what we'll do
from now anyway. So I've just added in this cube, so we know that that bottom area of the
bed needs to go here. And then we'll have
a little space or I might move
this upper touch. Same about there. And then we'll just duplicate this down. And then you could turn
snapping on if you wanted, turn it to face projects, and then press G Z, choose this face
because we know that the top of the 22 centimeters. So we know, that that works, grab this top face in edit mode, and then project that onto that one if it
decides it wants to do it. You do get some weird things
happen sometimes where it doesn't want to do what
you want it to do. So let's go for, let's
change it to edge, G Z, and it works
in that instance. It might have been, yeah, it would have been because I've got a box here, so
there's another phase. If I has to hide that,
it should work now. There's normal phase projects. And if it doesn't, then
it's y it's working now. It's because there was
another actual box that it couldn't select the face
that was inside the face. So we've got this kind of bit. That's going to be the
indented portion of the bed. And then we've got this, that's going to be the top of the bed. And then what we'll do
is we'll grab this. G, G Y, select the headboard. That goes a whole
length of cross. G Y, that goes a whole
length of cross, going to select everything
of the bottom portion, turn off slapping,
and then we'll go S. And we'll just scale it along the x
axis in with slightly. That looks like might done
it a little too much. So Sx, and we'll look
to scale it out. This portion here looks
a little smaller. So what we'll do is grab this
top face, push that down. And let's have a look. Let's go back to measurements. Yeah. We can't really see
where those that lines are, but we want to fin
piece with there, and then there's a
bigger one underneath. Okay. That looks about right. Of course, you could
play around of it. We don't need that
piece anymore, so I'm going to delete that. And let's see. We don't need this piece anymore, so
I'm going to delete that. Then we're going to
select the four pieces that make up the bed frame, control J to join them together. Scale is fine, but you
can apply the scale. You can apply rotation
and scale just to zero the rotation
and one the scale. And then we'll just rename
this for now, bed frame. Then what we want to do is
if we look at the images, you can see that they aren't
90 degrees by angles here. They're kind of rounded.
Their corners are beveled. So we're just going to
apply that to the bed now, so everything doesn't
look so straight. You can see as a pretty sharp. So we're going to
add a modifier, and this is going to
be the bevel modifier. And then we're going to
adjust the segments. So you can see
we're just getting more lines going across now, and then the amounts. So we're going to
make this a little smaller, zero, zero, two. And then we'll add
smooth shading as well. And you can adjust these
numbers as you need. But more cuts is going
to be more geometry, and then how big you want the kind of
curve to be on that, but we just want a small one. Then let's have a look. So then that's applied it to one of the different pieces because these pieces aren't
actually connected, so it's not going to
do anything weird. So it looks pretty
cool at the moment. And let's have a look. What we'll need to add
next is the bed mattress. So look at this mattress, we're going to look at the
measurements for this. See you've got 145190. We've made that bed smaller, we're going to make the mattress a little
smaller as well, so we'll go that one. So we'll go 135-120. So to do that, quick where, we'll just grab
the top bit here, duplicate it, move
it up a little, separate by selection, and then we've got this
piece in this 135, and then we'll change the
dimension here to 1.2, which is one 20 centimeters, and then apply the scale. Then we'll adjust the thickness, which is going to be the size of the mattress on the z axis. That's 20 centimeters. So we'll put this to 0.2,
plus 20 centimeters, ply scale, put snapping on, and then snap it down. So the mattresses in position. We're not really going
to see the mattress because we'll have
a duvet over it. But you might see it in
the corners or something, depending on how you
position you do there, so it's always good
to have it there. And when you're doing the sheets and you want to do physics, it's good to have
an actual object that the sheet can
kind of fold over. If you want your mattress to
be more flush than you can, just based on this one, you can see the bed
frame sticks out, and then you see your mattress. So we're just doing
that for now. But we can because
it's just a rectangle, we can adjust this easily
if we need to in future. What we'll do is we'll turn off the bevel here because it's a little box and we'll
add in a custom one. So I'm going to go into edge
select mode and then select everything and then press
Control B to bevel. And then if you move up on
your mouth scroll wheel, you can adjust the
number of cuts. So I'm just going to go
scroll up a few times. So I've got three segments. You might be able
to see that the bottom section
with all the text, and I'm just going to
round it off a little bit. So to give us more of a
kind of rounder mattress. Q on then, we'll just
rename this mattress. We've got the bed
frame mattress. We'll move this into
a new collection, and we'll call this
collection furniture. Burn it. Then we also, what we'll do is grab the bed. We'll hide the mattress for now, grab the beds, there's
something else we need to do. But this steps isn't necessary, but might be depending on what you're
ending in the future. But it's just for the
I guess you could say the slats because it's not just a flat thing underneath. You can say it's more like a so you've got a
piece of wood here, piece of wood here,
piece of w here, piece of w here like a box. But it's more of an
open box to the postal are closed box or to
do that, I'm going to. I'm going to hide this piece
for now. Grab this piece. And then what we'll do
is grab this face, G, y, or Gx and we'll just
scale it all the way down. What might make it easier is
if we separate it for now. So we've got this piece. We can see or look at the sizes. Okay, what we want to do
is duplicate it over. So one way to do it
is to select the bed, set origin to geometry, to put the origin point
in the center of the bed. And then if we grab this piece, add a mirror modifier, strag it to the top, and
then select the bed. It's going to add the piece
of wood on the other side. You could also just
manually do it, but this will just keep it
exactly on the other side. And then we'll just apply
that going to top view. I'm going to select
this piece over here, then rotate it 90 degrees, and then we'll see if it
snaps how I want it to. Now, we won't do that yet. We'll just position it to
roughly where we want it to go. Then I'm going to
grab this face here. And for this face, we'll
snap it using edge snap. G, select that edge there, and then we'll do the
same with this edge. Then we'll press L, select that whole bit, duplicate it, G Y. If it's snapped in
the right place. You might go a bit too far down. Just move it manually. So we've got an open box now. Then we'll select select frame, control J, to join them back together. We've
got one piece. Then lastly, if we bring
the mattress back. The mattress will
bow right click, set origin into geometry. And then we'll move the
cursor to selected, put the three D cursor here. Add in a empty. I'm doing this in
top view just so it doesn't give
empty a weird angle. C so we've got an empty here, and then we'll
select the mattress. Hold shift, select the frame. Then select the empty
as a last object. Set parent to object. And now we can move around the whole bed ment to select
the individual parts. And this will become more useful as we add in the pillows, we add in the blankets, anything else you want
to move as one unit, because you can
move it like this, but you can also move the
individual elements as well. So it just give us more control. And then this empty, we'll just move it to the
furniture group, and then we'll rename
it as beds controller. So we can see it here,
we can drill down into it and see what's
contained in it as well. And then we can also just
hide everything if we need to So that's the bed
frame of the mattress. Next, what we'll do is do
the bed sheets and pillows.
7. Modeling Bedsheets and Pillows: Okay, so where we left off
was we did the bed frame, we did the mattress, and next, what we're going to do is
do the sheets for the bed, so we're going to do
a duve a blanket, and then we'll do some
pillows as well to go on top. So the first thing we need
to do is in top view. We're going to add in a plane. Just go to add in a plane now. Just going to move
it up on the z axis, position it a bit,
and then we'll adjust the side slightly. So I'm going to widen it
a little to 2.2 the mit, and then we'll just
apply the scale. This is just so it pulls
over the side a little bit, but it doesn't get
all the way down to the floor. So we've
got that there. Then what we're going to do is, I'm just going to extrude
it up ever so slightly, to give it a little
bit of thickness. Then we'll select
everything and mark seam. So that's just going to mark
all the seams of this red. And this will just help with
the Uviion mapping later. Next, what we'll do is we'll
just add some geometry. I'm just going to
add 30 loop cuts, and we'll add about 26. We're looking for square fases, we as close to
square as possible. Okay, so we've got the
square faces there. Then what we want to
do is add collision. So I already had it on there, but we want to add collision to the mattress and
to the bed frame. That's this tab here, and
you just click collision. And then we're going to
add a cloth modifier, make sure your time
frame is a one. Then if we suppress play, you can see this is
what's happening. So mine's a little off center, so I'm just going to move mine a little bit. You don't have to. However you want it
to look, really, but want mine a bit
more balanced cure. And then just going
to shade smooth. And then we'll also add in a subdivision
surface modifier. Just set that to
two, just to make it just to make it
look a little nicer. And we'll go into the cloth sm. And there's a few things
we want to adjust. The first being self collisions, who want to turn that on,
strop the distance down. This is just to stop any of the intersecting kind of stuff
the mesh was doing before, if I'll show you if
it pops up anyway. So you can qui to see it here where the mesh is
going in on itself. And when we have that on,
It's not doing that anymore. So that's why we've just
turned the self collisions on. E. If your Duve is slide enough, it's because of your friction. So by default, it'd be
on zero on the mattress, and then if used
to play the sim, you might see like this
is starting to slide off. So what you need to do is
just click the mattress, go into the collision, bit for it and just turn the
friction just max out to 80. Then we can see
we've got a dv here. Now, one more thing we can do, and this is the optional bit, it depends how you
want the dv to look, is you can add a little thickness
to this using pressure, and just turning
this to say one. So go 1.2. How that looks. Of course, you don't
want to go too big with the sales to go to, probably like four or ten. As you can see, this is
more for like a cushion. That's what we'll be
doing for the cushions, but not for the dev,
that's too thick. So you want to kind of adjust. So that's a bit that could work. So der those kind of
puffy ones, if you want. It's a nice ick dev. Let's try just a little
less vu if that's the word. Mm. Yeah I'll do. That I'll do. So we've got
our do the. Got our cloth. We've got our
subdivisions on it. And then one more
thing you could do is if you wanted to add a
little more detail to this. You could use the sculpt tool. And just add some you could
say creases and creases, et cetera to it, and I'll just give
you an example. So you'd get rid of
the subdivision mud, and you would then add in a
multi resolution modifier, and then you'd go to sculpt, choose the draw brush. There is a cloth brush somewhere in the effer over here that you
could use as well. Then you'd click subdivides. And then if I was
to show this is the should be the drawbrsh. You'd start adding some details. You can see there's
some lines forming now. Of course, it's adjusted
depending on your strength, so you can see them going now and you just look at
some reference images, see what kind of creases
you've got in your bit, and then you start drawing those in just to make it
look a bit more. So it's not just a flat
plane like it was before. The cloth brush does do
something a little different, but this is a brush I
haven't really used. So I couldn't say too
much on this one, but there'll be resources
out there for that brush, and all of the other ones. The one I tend to just use uh is the scalt one and
just draw the lines, adding another level of
subdivision if I need to. Adjust this, maybe
I'll make it stronger, drop the radius down, so get sharper lines, maybe. And then you'd start adding
in just creases and then just refining whatever kind of pattern you wanted to
form on your sheet. And then you just
keep going until you decide you're happy with it. But these ones are
a little crazy. If you want to undo
it, you can just go down the level,
delete higher. And then whatever you did on the higher level will be deleted. But we'll leave
this as is for now. But of course, spend as
long as you want to on it. What we'll do next
is add a blanket. But before that, I'm just
going to rename this to Duve move it into
the furniture group, and then we'll add a blanket. So I'm just going
to go into top w, add in a another
plane for this one, we will set the y
axis to b the meter, leave it at 2 meters. Of course, set to whatever
you want, apply the scale, and then we'll Control E, mark seams, add some loop
cuts to make square faces. So I'm going to go 25
and 15 more slightly. O now we'll go
ten. So we've got, se more rectangle,
and more rectangular. Let's add some more. At
this, so we've got 12. And then what we'll do is select the Duve
and we want to add collision to the
Duve cause we want the blanket to collide to the Duve not the
mattress underneath it. And then what we'll
do is add a clog SIM. Now we need to apply this one first. Let's get rid of this. Clog play, what
we're happy with. Apply this. Have a
look at this one. Add the clogs in
that has collision. You can see it's
act really weird. So what we'll do is we'll click the Duve go into the collision there and
turn off single sided. Clip play, e fit in nice liner. Then we'll just reset, position the clouf wherever
you want it to go. Maybe give it a
tilt, if you want, or whatnot, play it, G it in position, Shade smooth. Can see it's sticking out a bit, so we'll go into the
Duve collision again. Thickness outer, we'll turn
that as low as possible. Just so there's
not as big a gap. And then on the Duve, what we'll do is add
a solidify modifier. Tet this down to 0.005. If you want it, you could
add in a subdivision, set that to two
levels. There we go. We've got a dove going. We've got a dove, re
blanket going not Duve. We'll call this blanket, call it fro sheet. And we've got this
got this next, do add in some pillow. Oh, and the same with
the blank with the Duve. You can add creases and stuff on there as
well if you want it. With the pillows, what we'll do? Is add in a another plane. Then for this, we will
adjust it so it's 0.55 across, and
this will be 0.3. Of course, you use
whatever size for your pillow as before. I'll just rose this size because
I can fit two with them. It currently fits a
roughly about size of the Duve because
the Duv is 1.2, so gs I'll go up to six, and there'd be flush. Just to have a little
bit of a gap, 0.55. Then 0.3. I believe was
the measurement of well, close enough, is about 0.3 0.35. Was it about the
size of my pilar going that way, so I use that. And then what we
want to do is grab, go into it, extrude it
up, and we'll go a point 01, select everything,
mark Seam. You can see we've got a
really small rectangle. Then for this. Same as
before. We'll go into it. Add some loop cuts, add some more loop cuts, with the goal being
square faces, and add the cloths,
zero your timeline. You can see I forgot to do to apply the cloths
in to the blanket. So I'm just going
to apply that now. There we go. Add
this one back in. Can see it's looking a little
limp. We don't want that. So what we're going to
do is go to pressure. So this is what we did before, and we're going to turn this. Let's try for the
little bit limp. Let's try ten. And if you haven't
applied your scale, make sure you apply your scale, Control A to apply scale. So we can see we get
in a pillow shape now. Choose rectangular ones. You can go for square
ones, circular ones, I guess, if those exist, and what we'll do is add in a subdivision, set
this to level two. You can see it looks a lot
more like a pillow now. Then for the duve collision, just check the thickness
outer as small as possible. We'll look at this.
What we'll do is move the subdivision up
above, apply that first. There's more geometry for
the clap sim to work with. Can see that's going
a little weird there. We'll increase the pressure,
see if that resolves it. If that's helping.
Round about the same. I'm going to do that, and we'll just
keep it below just so we don't have to
apply the subdve. And for the cloth SIM, what we can do is have
a look at options, we can do to just reduce the gap there because you can see
there's a bit of a gap, and we don't really want that. Of course, you can apply and
just move it down manually. But if we can just get it to act a little bit,
that's also good. So we will go to the object collisions
and turn this down first. There we go. So I'm just going to go
back on the timeline, duplicate the pillow
and move it across. They be rotate it a little
in a different position. Could also mess with the cloth settings just to get a slightly
different result. And instead of a pressure
of ten you go 9.75. Then if we play our two pillows, and then what we can do is apply the cloth to both of them. Ion them. With bear in mind, if you move the positioning, it might adjust how they're interacting with the mesh below. So optimally, you want to
position it before hand. But you're free to if you
just bear that in mind. You don't want to move
it, and there's a lump or something and
it's just floating. And let's name this Pillow one. Call this pillow two. So you've got Pillow
one, pillow two. Well sel, this, this, then select the empty,
and then parent. Which is Control P. You select the empty last to
make it the active element. So we're telling it all
your objects before, we want them to be
parented to that object. And now we can move the whole
bed around independently, can also hide and show it. If you press when you
just click the the icon, it won't do anything,
but if you hold shift, and then click, it will hide
everything in that group. E. So we've got
some pillows there. Got some sheets. Of course, you can add more pillows, you can add different sizes. You could adjust
them if you wanted. So maybe you grab one,
rotate it, position it, so it's more like
that, like propped up against the headdress,
I might do that. You might look a little
cooler, hide this one. We don't want to
unhide everything. But maybe you have
something like that. But then of course,
'cause we've moved it, you just want to
make sure it's not super unrealistic how the
pillows and now sitting. But they look about right. And there we have it. Next, what we'll do is look at making modeling the dressers. Well the bedside tables, see if and then see where
else we can fit in. Both side for this room, for the bedside tables. Then we could do
the wardrobe doors. Do some mirror to
the wardrobe doors, and then we can move on
to a different room. But that's it for now.
8. Modeling Bedside Table: So next, what we're
going to do is do the bedside tables for the next to the bed and the bottom room that
we're working on. So I've just got
this image up here, pretty simple, pretty modern. We're going to be using
this as a template to be creating the
bedside table. So we've got the
measurements here. So what we'll do first
is turn this on. And then we'll add a cube. Nod in this, I'll
add it in top view. Just move it to
the side for now, and then we'll start
working on dimensions. So for the height, we've
got 55 centimeters. Let's move this up Go to
just turn on slapping. Press ge, we'll just snap it, so it's on the floor. And then for the width, we've got 40 centimeters. That's x here, so we'll go 0.4. And then for the y, it's 50 55. Now it's 48. We'll go 0.48. I need to change this from
putting the wrong box. 0.55 48 and four. Apply the scale, lap
it back to the floor. You'll turn slapping off, and then we'll just position it roughly to where
it's going to be. To. Then let's have a look
at how this is put together. So we have a bit on the top. We've got two drawers gap, and then at the bottom,
there's an indent. You can see we get
a little closer. We've got the side bits, and then you've got kind
of an indent down here. So let's start working on that. What we'll do is
I'm going to press forward slash just to
isolate this element, and we'll turn on edge length. I'll have to approximate
quite a few bits of this, but I'll do what we can. So we can see that
it's 48 across, but the whole area is invented in apart
from this bit here. So to do that, I guess
the quickest way if we go into side view is
we'll add a leap cut. That's going to add it there. Decide how far we
want it to protrudes. We're going to go
for 2 centimeters. Is that 2 centimeters? T 0.02. Then we make it a square. So we've got 0.2 there. And then what I'll do is
I'm going to face select, selecting this bottom face, just delete that, select the
one next to it, delete that, delete the front face, the bottom face, select, select the side faces and
the bottom one, fill that. Then we'll select this edge. Fill that. We've
got the first bit. What we could do
is separate this. And the reason we do that is just to add a
little bit of separation, so you can see them as two
separate pieces of wood as opposed to now where it
just looks a little too flush. So we'll separate
this by selection. Got this piece. I'll
just hide this one. We'll move these into
scene collection, so we've got access
to them there. I'll hide this piece first. And then for this piece, I'm just going to select
border there, fill that in. And then we can even get
rid of this edge loop, so I'll just dissolve that edge. Just got a rectangle there. B that, bring the
other one back, and we'll just fill the top in. Now you can see
there's a line here. And if we add like subdivision or a bevel
of some sort, as well, it'll just exacerbate, well, increase the separation a bit, so it'd be a bit
more noticeable. Okay. What we want to do now is add the drawers
on the fronts. So we've got two drawers, and they are 16 centimeters. So what we'll do is, let's see. We grab the front
face, duplicate that. Separate by selection,
and is going to adjust this to 16.16, apply the scale. C just move it into position and we'll extrude it
by 2 centimeters. So E 0.02. So we can see. We've
got a drawer there, and the drawer in
this case is slanted. So we've got a little
bit of a slant on it. So we're going to select, select this edge here. Then you can just
slant it down as much as you need on the Z axis. 02 will have it straight.
So we've got the first one. Pretty simple, can
duplicate that. But we're going to
edit mode for now, duplicate it there and
then just move it down. So we've got the
two drawers there. And then the last bit
we've got to do is this bottom kind of area
where it's extruded in. So to do that, we'll
hit the drawers, the top. Actually
as bringing back. S. We want an idea of where we're going to
do this area as well. So I'm going to select the body, going to wire frame. And then we'll just
add a loop cut. Let's decide. We say we
go about 15 centimeters. So it's going to be too
tall. No, she'd be okay. And then we're adjust
the drawers and the gap. There's not much of a gap there. It's slightly bigger
gap there, it seems. So we're adjust as needed, but now we've got a line
to measure that by. So I'm going to
grab the drawers. G ZED, move them up. Go to edit modes. Select the other drawer. Pull this down.
Maybe about there. We've got a little gap
there, bigger gap there. And then for this one, we'll add in a couple loop cuts
I'm in front view. We're going to add in loop cuts. Let's see what kind of gap
we've got. We'll go 0.02. Then we do the same
on the other side. 0.02 0.02. So we've got our little wooden
frame bits there there. So we should have just a face
that we are able to select. And then what we'll do is we'll
extrude this in by a bit. I mean, you could go 0.2 as well there, but
we've got to get. And then what we need to do is select there's some errors on the bottom face now because
we've done an extrusion. So we're going to select
the bottom face delete, select this little cut up, face errors of, delete that. And then with just
the body selected, going to isolate it
by using front slash. Then go into bottom view, which is control non pad seven, bottom morpho graphic,
going to wire frame, and we're just going to
re establish some cuts. So what we would want to do is, so we're looking at this
point at the moment, press K for the knife tool. And you want to
select that vertex. If it lets us, my knife
tools doing some else. Okay. You should see it go red when it's
in the right area. Sometimes it goes
a little wonky. If it is, then what we'll do is we'll just make a knife
cut somewhere separates. I'm pressing A just to
straight in the angle, and then I'm going to
press C for cut through. Do we need to cut
through? Yes, we do. I'm going to cut through the whole mesh and then press Enter. So what we've done now is
just cut to the top as well. And then what we'll do is use the transform pivot points
to active elements. And then we'll select the
new vertices we made. Select this point last because we want to line every
other point to that one. And then we'll find
the axis around, so we're on the y axis. So we'll press S y zero,
and now we've lined the mo. And then merge by distance, should you move the one
extra vertice we had. So now this point is connected. And then we'll do the same for the other side
because at present, this vertex isn't
actually on this edge, and we want it to be like
how we've just done here, where it's all one part, because then you can adjust
the measure a lot easier. So same again, bottom view, just add in a knife cut
angle, cut through, enter, This should be the active point because it's
the white one, but select reselect
it if it isn't, and then S y zero to align them, then merge by distance to remove the one
vertex that's extra. Now, because we've done that, we'll be able to select the bottom vertices
and make a face, and we can see if we've done it right because
we'll be able to make what's it
called? Aleap cut. Now, it's nearly done, but because these two
aren't connected, you can see it's
not letting us do a loop cut around
the whole mesh. So we're going to
select these two, press J to join them. And now when I was
working because we can add a leap cut around
the whole mesh. I'm just going to
dissolve the edge there. And we can see, we've
got a little indents, bars to bring everything back. I don't want to bring
that much stuff back. Let's hide the beds
holding shift. We can see it's
coming along nicely. Now, last thing we
can do is some of the so there's two ways you can kind of round out the corners. So they're not so straight. First one is using
the bevel tool. It's a lot easier to implement on simple shapes because it does have it's less complicated to figure out where you want
things to curve around. So you could do something
like this three segments, set it to something
really small, few millimeters, and you
get something like that. Maybe even go a little smaller, get the corners sharp, but not that sharp. So just being light kind of interacts with this a lot
better than it will be this, might be able to even see it. If I do that, where it's just the light kind of catches the
edge a lot better. Then with these ones, it's you don't get
anything like that. And of course, when you add
in the materials and stuff, you want the light to catch
like this a lot better. Looks more realistic. So we'll do something like that. Let's turn this off and now. Then with this shape, what we can do, we've got these two, so we can just join
them together, then they'll have
the same modifier. And the order is the
one on one to be the active or the one last will be active and will
carry the modifiers it has, if I did it the
other way around, might lose the bevel. Now we can see this one's got these kind of
sharp corners as well. Sometimes the bevel in its kind of unaltered
form won't work. And so if we was to add
a bevel modifier here, go to three, to move it, and go to 0.002 0002. Let's have a look. So if I
hide there, see if it works. In this one, it's working, so that's fine so
we can keep it. Sometimes it doesn't, where
it might not work at all, it might give you some
weird kind of glitching. Then we do a different
kind of method. This one's looking fine, but I'll show you the
other method anyway. Say. The 01, if Bevel
wasn't working, because otherwise,
you have to kind of go into, for example, choosing different
ways to kind of add bevel is you can
either add it manually on an edge by selecting the edge control B and then
adding like cuts and stuff, or you can use a subdivision so we can subdivide the mesh, and then add some
container loops. So I'm just adding loops
around each of the main edges. So if I go like
that, go like that, for example, you can see this
one's starting to shaper. Want to make it a
little sharper. We can't move this edge because that's for the little cut out, so we'd have to add
in a another loop, and then the close I drag
it to the edge of the sharper and this
corner is getting, but you have to do it
on both sides as well. So for example, like that. This one's got one. Got one. I just like you want
it sharper at the top. And then you just essentially
go around the model, the shot and do and add
containers for each part. If it's hard to see
what's going on when you're in edit mold,
you can press this button. You'll turn off the modifier, and then you can just press tab to flick between
object and edit mod, just to see, Okay, this
area is being weird. Let's have a look.
Let me add one here, one here inside.
That's looking better. Can see there's some
issue going on here. You need to add one to
the top to contain it. Okay. We can see, let
me hide the floor. The bottoms being weird. Let's add one here. So we're going to have
to add one on this side. Add one on this side. We need to add one going down. You can see that we're starting to hold the shape a lot better. Corners two rounded, so we'll have a look at
what's going on in here. You can see there's
no container for the bottom part of the pocket.
So we'll add one here. Then we'll have to
do the sides of it. We just check I've
done this one first. We'll add one here,
add one here. That one here. And the closer
you drag it to an edge, the sharper that angle is
going to be further away. The more kind of a
bend you'll give it. So it's a lot less
precise initially, I could say than the
bevel where you're choosing a specific number. But then you also have
greater control as well. You could say, well
because you're moving the edge as much
as you want it to, you can use the measure tools to see exactly how far each
edge is from another. So then this is
the kind of result you'd get without
using the bevel tool. Difference being when
using the subdivision, it's going to add
extra geometry. That you might want to get
rid of after the fact. So it's pretty clean now, but if I was to apply this, you can see there's edges that aren't actually
doing stuff, and you want to go after
the fact and remove them to keep your mesh kind of clean. We won't do that
for now. We need to with certain
models in the future. We may take this approach. But because the one we've
done initially, it's a table. Yes. The one we've
done initially with the Bevel seems fine at present. We'll just keep it
at this because this one's a lot cleaner. Then we can just bring
everything back. On everything. Turn that on, Bevel, Bevel, the bevels are the same, so we can join these together. And then we'll just call
this bedside table, move it to furniture,
and there we have it.
9. Modeling Wardrobe Doors: Next, what we're going to do
is make the wardrobe doors. We're going to make two different
kinds of wardrobe door, one with a plain glass. The one that's
slatted, can be glass, can be wood or whatnot, can mix and match as you need, but I'll just show you how to do the two different kinds
of door here now. So first things first, with the walls selected, we're going to go
into edit mold, and then we're going
to select two faces, which are going to be this base, and this pace, and we're going to shift de duplicate
and separate them. And we can hide the walls now. We just want these two faces, and we're going to go into
top view, select them. Actually, we'll go
in object mode. On the y axis,
we'll make it 0.03. Then on the x axis, we'll halve this by two. Then we'll just apply
the scale there. I just going to isolate that, select one of the faces, and then we're going to
extrude it in by 0.03. And then we'll go
for the other one, extrude it in by 0.03. Tue. And what we'll do
is in front view, we'll add in two loop
cuts, just in the center, go into wi frame, and then
we'll move them both up, make a little squares
or 0.03 or the rounds. Bolding shift left shift to
make smaller increments. Then we'll add in
another two loop cuts and do the same for the bottom. Next, what I'll do is we'll add in a we'll bridge
these faces together. So I'm just going to bring up the search function and
bridge the edge loops, like so I selected
to show you again, this face and this face. So I got both of the
selected bridge edge loops. Then what we'll do, this is
one door almost complete, we'll duplicate the, move
it along the x axis. And for this one, this will
be the door on the right. So we're going to
add two loop cuts both parts of the frame, leave them in place so
they evenly spread. Then we'll select
those two edgings, and then also select those two. So we've got all four selected. And then what we'll
do is bevel them. And's going to press control B, and we'll make this
about 0.250 0.025 fi. And then for these
were also bridge. So you can see we've got the
frame for this one as well. Then what we'll do is we'll go back to the first
door, finish it up. So I'm going to add
in two loop cuts, and let's scale them under
way until they are take it. Let's keep it. 0.003, ick. Y 0.003. And I'm going to select that loop of faces
and then delete faces. The edge loop and press F to fill and do the same
for the back side. We deleted the inside phases so we don't have any
interior faces. And if we just check
pace orientation, we can see everything's blue, the faces are pointing
in the right direction. And then we'll do the
same for this one here. Add two loops, scale
them in the 0.003, or as close two as possible, delete faces, wild were there, then do the next one, S Y, zero, zero or three,
delete fases. This one now. Delete fases. Then just fill that. Fill that. Fill that. Fill that. Fill that. Fill that. Then last thing,
we're going to do. Is just round off the corner, so we're just going to add a subdivision
surface, leave one. Actually, let's do a bevel. Shade smooth. Can see we're going to get some potentially weird shading. So we'll do a subdivision first. That's a little fi subdivision, add some loops, and then we'll see if the bevel
looks any better. Okay. So first things
first. We'll do this one. We're going to turn off
the edge length for no, just to make the view
a little clearer. And then just add that in. If you want to do both at the same time, so if
I get rid of that, you can add two loops like so, and then scale them along
the corresponded axis. So in this case, it's X. I can go like so. Then for here a y, well, as Z, not that far, get a little closer as s check
in object mode, K to here, two here, a z on top, this will be a y a X. Then let's have a
look at this side. You can see beneath this partner because we're getting
a bit stretching. And about there, and then
inside the frame. S y. I'm going to go through to check everything. Looking good. Might want to pull this
edge a bit further. It's not curving as much. Of course that would mean,
we need to do the other one. Let's get closer to this. And we need to do
this one, S z Q. Then lastly, we need to do the same thing for
the other one. But this is just rounding
our kleos to our edges. Suppose that this one where
they're really sharp, and potentially we might
not need the subdore. Bevel, 3.005. And see it looks a lot better. But with the bevel.
We're getting some weird bits on
some of the areas, and then we'd have
to mess around with some more different kind
of settings like weight or percentage or something. Instead of doing that, we'll
just do a sub Dive for now. Put that. Let's do this one. It's the same process. Subdi turn it to
two, smooth shading. Start there. You can see it'll
slowly get cleaned up as we add more loops.
We've done that. Let's do the top here
to the frame this way. Let's do inside S Y. This one goes right
the way through, but we can do two here. Like that. Two here. And we need to do some
more of this bit. And you can just tie back into object mode to see
how it's progressing, so we can see we still
need to do some here, and of course, we haven't
touched the bottom bit yet. That's why I have
it turned off here. It's easier to work with when the subdiive isn't in your face. But then you can quickly see, there's something
going on over here. You see, there's not an
edge at the top over here, why the corn is bending so much. So we'll add in two here. Do that. See s that bit now. I'll just bring them
a little closer. Got the last little bit. And add in more fix the
shading on this area. And the bottom need some. So let's do that. I
did inside that one. I do inside here. Verse side. Don't have to do the reverse. But I guess if you're
opening up the wardrobe, maybe you have a shot in there, doesn't h to have
done it preemptively. We're just adding a bit there. That one. Y cure. So we've got our two doors. Check. Nothing odd
look going on. Just looking at the reflections, making sure every thing's Nice
because if we had mirrors, we'll have a mirror in this one, might change this
one to the both mid. Maybe just a mired with
wooden frame or it's wooden. You don't want any kind of
weird reflections to go on. So done those two doors now. We'll just bring them
back. We'll place this one first over here. Grab this one. Ashley, we'll move
it over here first. We want the tours to
be basically touching. But you leave enough
room so the can slide. I guess friction burn. And then we'll move
this now to the wall. You can use snapping if you want to make it a
bit more precise. And then we'll move these, so I'm going to
going to edit mode. Make sure I select only
this post over here, just to keep the
proportions right. And then we'll
move this by 0.02, and we'll do the same
for the other door. So just select the one post, Gx 0.02, and press
minus to flip it. Cool. So we've got our
doors intersecting. You can do a bit more if you
need to, same kind of thing. But I'll leave it
like that for now. If we bring back the wall, so you can see cool. We've got it's in the room. There's the walls, and
then you could grab a door and we can slide the one door in front
the other right versa. That's the wardrobe
doors done for now.
10. Modeling Dining Table: Okay, so next, what
we're going to do is start working on some of the models
in the other rooms. But first, we're just going to grab this and add
a mirror modifier, move it to the top,
and then we'll select the bed
controller object, which will mirror it to
the other side of the bed. If it's coming up like
this or like this, we just need to change the axis to whichever one
will work for you. In my case, it's the x axis, but we just try whichever
one it is for you. The model we're going to do now is we'll do the dining table. So I got this reference up here, and we'll use this as the
basis for the model within. So first things first,
we need a circle. Just going to scale
it down to about 0.9. Then just apply the scale, and then we will extrude
it along the z axis by 0.02 to make it
2 centimeters fi, which is this one, I believe. 05, about two, 3 centimeters. So we've got that
out of the way. What we'll do is with the table, we'll select everything, and
then we'll extrude it in. So E S to scale inward and
then we'll press shift Z. So we don't scale on the Z axis, and we'll scale it until it
almost all the way p closed. Then we're going
to select all of the faces inside here
and delete them. We'll then fill the two gaps. I'm just selecting the
bottom ding first, pressing F to fill, and we'll do the same
with the top one. Then we'll shade this smooth. You can see it's got a
bit of an issue here. So what we'll do is just
add a few edgings in about five or five loop cuts, and then we'll do the
same for the bottom. If we use to add a subdivision just to round out the table, so it's not so blocky
because we use a low amount of subdivisions
on the original circle. We'll just add the sub diive in. Can see it's bending
a bit too much here, so we're going to
add two loops here. Scale them along the Z axis, and we'll use bounding box
center as the pivot points, and then we'll just scale it to give this a bit more
of a straight edge. And it's looking good so far. What we'll do is we'll
isolate this for now, and we'll add in a cube. M this cube mean 05 or 5
centimeters, apply the scale. And we want this to be in
the center of the table. So I'm just going to move
first I'll select the table, make sure the origin,
is it the center point. Then move with the
table still selected. We'll go cursor to selected just to make sure
it's at that point. Then select the cube, selection to cursor, and I'll move it to the
center of the table. Then we'll move it to the edge. So I just moving it along the
x axis to get to the edge, and then we'll place
it on the floor. The height of the table. You can see about so we can
see the top of the table 75. We've got this portion, so this is about 5 centimeters
for this little area. And then we're giving it
about two 3 centimeters, so we want to move it
to 73 centimeters. No good for the
bottom of the table. So a quick way to measure that, add a plane in mines
the Y axis here, so I'm going to put this 0.73 and move this down to the floor. Then if you need to, you just move the table along the z axis until it's
sitting on top of the plane, and that's roughly where we want the table to sit so we
can measure at the legs. Then you can get
rid of the plane, grab the cube, set the top face, and then we can either just
scale up quickly like that, or you can adjust the
y of the cube to 0.73. Again, we didn't really
need to use the plane. We could have just
done that measured up. But either or is fine, then just apply the scale. And now you can see
the legs bend in. They're not going
straight up to down. They're slanted. So with the top face selected, we'll just move
this in slightly. So I'm just moving it, so you can see the bottom faces here. I'm just moving it so it's one square across so it'd be
about 5 centimeters across, just to give us a slight slant. Can also see that it's
curved at the bottom. So we'll do that in
a moment. Check in. Let's move it across
a little more. So I'm going to grab the leg. I'm going to move the leg slightly and just to give us
a bit more space up here. And if needs be, we can just move this in a little bit more. But to curve the bottom, what we'll do is
select the edge, and select in this edge here, and they're going to bevel it. And the segments are
going to be five. You just move up on
the scroll wheel, so we'll do five segments. Something like
that, shade smooth. Then we'll add two
loop cuts here. Scale them along the y axis. Like so going into
y frame modes, vertex, and we'll
just make some cuts. I'm just going to
select this point here, press A to constrain to angle, C for cut, enter, and we'll do that for the
other points as well. I'm just pressing k, A, C, er, and we'll do it for
this last point here. Then we'll leave the
bottom one as is. This is just cutting all
the way around for us. Then we'll add a couple
of loop cuts and press E F, just to align it. F choosing which side to
align this edge with. And I want the back one first, I'm aligning it with that. And then I want to
aligned with the front. I'll do it as so. Make sure
it's not too close down here. Chill. Then we'll just add
a loop cut at the top. Then we'll just put one more. E. That's our first leg done. What we'll do next, we'll
do this little area here, so we can add in another
cube at 5 centimeters. Et's position it here, doing this in front
orthographic at the moment. Keep things straight, we
can go into wire frame. Move it a bit more in line. Grab this vertex here. Just move it in place,
have a look at this one. Move in place of the
angles about right. Of course, you could snap
it to the edge potentially. Got edge, see if it
lets us do it that way. G X. Ok, e. So we've got it
snap nicely there. And then for this
side, you can see, we're going to bevel this let the bevels not as
rounded as this side, that we'll grab this edge
here, and then blevel it. But we'll probably only
need probably two bevels. Let's see. We've got 11 there. Might do one, and then
bevel this edge as well. So bevel this additional time,
get something like that. Or if you want to keep
it a bit straighter. I will just do this one.
Get something like this. He. I'll just bevel
this one again, just to straighten that aft, but then it still curves
a bit on this bevel here. Then we've got a bit
of a bevel there. He. Add another cube,
5 centimeters again. Then we'll move
this into position. Lining things up on the Z axis. Then we'll go into y
frame, grab the vertices, and then align those,
ex over there. I won't be gx over there. G x, move it close to
the center points. We want to leave a
bit of space because we'll align it
separately in a second. Let's go back to
this, shade smooth. Then we'll add a
few loop cuts in. I'm turning off snapping, adding two loop cuts, scaling them along the Y. We got that bit done. Then what we can do for
the face here to add loops because it's going to be a bit awkward at the moment, because it's not a quad is
we can just insert the face, which is the I K.
This will just add bounding box on the edge because it's a flat
surface, it will be fine. We'll do the same
for the other side. So a little one. There we go. We don't want to do another one like that, we gain a border. This one's fine. Got that
one. We've got this here. If we go into top view, hide the top face. What we want to do
is grab these three, and then we'll duplicate them and rotate them around
the center points. So I'm going to go
three D cursors, the pivot points, shift, and then rotate 90 degrees, and then do that again,
and one more time. Then to get it in the center, what we'll do is
add a another cube, put it at 0.05, and then we'll just snap
the faces together. The face project.
Grab that face, snap it along the x axis. This one's also x, and then two y faces. And one more. Then
we'll delete the cube. It also needed to do
the top face here, so we'll just insert this one. That we might adjust this a bit later because it's given
some weird trading. But for now we'll
leave it as is, especially because it's
going to be under the table, you're going to see it at
most at an angle like this. You're not going to be looking
at this kind of top face. So it doesn't really matter. To be honest, we
could leave it like this where how it was before. But it doesn't
matter either way. To fill the gap here. What we'll do,
select these four, and press control J,
join them together, and we'll delete
the inside fases, then select everything
and merge by distance. This will get rid of
all of the vertices that will overlapping
each other. Then we can select the
bottom four vertices, fill and the top four
and fill as well. Then we'll just add
some container loops. I'm just going to
grab the x plus, whatever it is here,
add loop there, there, or you could also just
added to and scale them, whichever way you find easiest
to four say shade Smith, so you'll be working
with, and we'll add one there, one there. One here and there. I'm just doing these on the top, and they go along
the bottom as well. Then we do on this one as well. Let me just check e. That's fine. We want
to add another. You can just to sharpen up
the edges a little bit. Let's bring the table back. Chill. Then we've got little
screws and little feet. H same as before can add let. For the screws, what
we'll do add a sphere. Just going to rotate this 90, and then we'll delete
half of the sphere. Like so scale it down, so it's almost flat, going to go to bounding
box and just scale it in, rotate it 90, so it's going to be the same side on as
the point we put in it. It's going to go this pot here, scale it down a little more. I made mine a little to flats, but I can skate it
back on the y axis just to give it a
little more volume, and then we'll position
it shade smooth. Just have it intersecting
ever so slightly, apply the scale, then we can then change the pivot
back to three D cursor. Actually, we'll keep on
bounding box, rotate it, 180 degrees, move it
to the other side, position that one as well. Back to free D cursor, then we'll shift duplicate, and then rotate 90 degrees, position it where we want it
on the next bit, duplicate, rotate 90, duplicate, rotate 90. Lastly, we'll do something with the legs if we need to see. It's almost the
same kind of thing. I'll just add in circle, rotate 90, scale it down,
bounding box scaling. Place it position
it on the floor. And then we'll extrude it down. Something really small, L
light so, shade smooth. Let's fill the bottom face, fill the top face, press eye to inst.
Grab the other face. We'll inst this as well. Add two loops on the side. We've got something like
this. Ply the scale. Then we'll position
it about there. Grab this inside face, and then we'll scale it in. Something really small
like S and a few loops and grab this middle face now and just extrude
that upwards. We'll just do
something like that. Then lastly, shift back to
three D cursor, rotate 90, rotate 90, rotate 90, and we'll we'll
select everything. If this is the only thing in your scene like it is
a mine at the moment, because I've isolated it, I can grab everything
like so, Control J, join it together, then we'll
call this dining table. And let's have a look. Because we had, if
I go back a bit, a subdivision on here. When we joined
everything together, we lost that, depending on which order you
select things in. You can see but the
subdivision is going to do some weird stuff so we
want do that for now. But what you could
do, if you wanted to keep the subdivision
on a certain object is apply that first. That way, you don't have to put a subdivision on everything. So if I has to apply that, then join everything together. The table stays subdivided. But the other elements
don't get that, so we can keep it somewhat lean. Then we'll just call this
dining table. There we have it.
11. Modeling Dining Chair - Part 1: So the next thing
we're going to work on are the dining chairs. So we're going to use this as a baseline kind of model that we're going
to base it off of. So first things first, what we need to do is have
a look at the measurements. And then back in Blender, what we'll do is add a cube. First, just going to
isolate that cube, and we'll use this as
the container just so we can get the rough
measurements right. So the height, we're
looking at 90 centimeters. So if we go to the cube, then for the Z axis, we're going to put it at 0.9. Then move the cube down
just to where the floor is. Then we want to
adjust the height, well, the width and the depth. We've got a width of 42, which is at the
front, and then it goes down to fay three. For now, we'll do 42, the width. 0.42. And for the depth, we've got a 49 centimeters.
We've got 0.49. Then in top view, we're just going to
go to edit molds, put edge length on and
select the back face. This is the one that's
going to be 33 centimeters. They're going to scale it along the x axis until we
get 3 centimeters. 0.33. And, that's a
little too small. So what you want to do
is make sure you apply the scale and then adjust it. 0.33, that looks better. But we've got 4,249.9,
33 at the ba. Then what we'll do is
we'll add in another cube, and this is going
to be for the legs, and we're going to
I'm going to drag, select all three of them,
so I can adjust them at the same time and
put it at 0.03, so we make it 3 centimeters
for the chair leg. Rabbits. Move it into position for this is the back
leg. And then what I'll do. I'm happy with where it is, is we'll duplicate this, move into position
for the front leg. Chill. Then what we'll
do is grab the back leg. We're going to go into
left orthographic, which is control numpad three. So we're looking
at the back, and then we're going to
select the top face, and we're going to
move it upwards. The C tight is at
45 centimeters. So just to get an idea
of where that is. First, I'm going
to grab the cube, and see we can't really
see for it in the ment. Going to change it from
the object properties, display to wire. And then we're going
to add a loop cut, and we'll put this at 45 centimeters. You
can see it goes 45. This is where the
top of the seat is. And what we want to do is essentially create the
back leg, but it's curved. You can see it curves in, then it's straight
for a little bit to about where the
seat height is, and then it curves back out. So to do that, what we'll do is we'll move
this along the z axis, up to maybe roughly there. Then we'll extrude
it. To the C tight. Then we'll check the length. So for this edge, we've got about two let's just
add the scale first. So I've applied the scale just so we get the right
measurements. So we've got about 0.3. We're going to make
it make it even, maybe about 4 centimeters. We're going to have that. I'm
going to grab the top face. Actually in y frame,
we're going to grab the whole cube bit here and then move it forward to give
the first bit that. We've got the edge. This curving in,
got a straight bit. Then I'm going to grab
just the top face, extrude it up to the top
of the height of the cube, and then we'll move it back. Cha. Now we've got
that curve going that's similar to this kind of curve of the
scored on the chair. Then what we'll do is
for the front leg, we'll just extrude this up, so this comes up to where the seat would be
sitting on top. So grab the front leg,
grab the top face. Then we'll just move
it up on the z axis, and then just to get
them the same height. I'm going to select the top
facia using edge select, then select one of the edges. If we select them both
at the same time, we can do this, or actually, we'll join them together now. I'm just going to
press control J, join the two legs together, and then I can select
one of these edges, change the pivot to active
elements, active elements. Then we can adjust the height. I said, zero. Make sure nothing else
is selected that you don't want it to be, zero. Now this will be the
same height as that, but also add in
another loop cut, select this edge for the active
elements and match that. These edges will form
the bit underneath here. You can see there's
a bit that goes all around the bottom of the seat, and that's what these edges
will help accomplish. And we need to do a similar
thing for the bottom. I'm just going to add
in some loop cuts. So we've got four loop cuts. Then we're going to grab
the edge ring here, and then double tap
g, so we slide it. You don't want to
just move up on the z axis because
we're going to adjust the shape of the leg
due to it being at an angle. But if you double tap G, we're going to slide the edge and maintain the
shape of the leg. We'll move this down let's put it at about 10 centimeters
off the ground. Brush, and then we'll
grab this double tap G. We've got a
square here. 0.03. Then we'll match up these edges. I'll grab this edge,
one of these, S said, zero, these edges, one
of these, S said zero. Now these are lined
up nicely as well. Then what we'll do is add
a couple of loop cuts. The leg isn't flush, so it's a little indented, or this joining kind
of piece of wood. So we'll add a
couple of loop cuts to give it that effect. We add a couple of so that are close to the
edge, but a little, they go all the
way up to the top, and then we'll do the
same on this leg. You can be super precise, if you need to, you just
line them up as before, or you can just approximately as no what you're not really
going to be able to tell. Then we'll grab this
face, grab this face, bridge edge loops, we've got the first leg
down there done. The reason we're only working
on half of the model is we can mirror the model. So if we were to
select the cube, that the basis point, and then you'd go Shift
S, cursor to selected, put three D cursor on the
origin point of the cube, which should be at the
middle of the cube. If it's not, you put the cube, set origin, origin to geometry, and then you go Shift S. Cursor to selected for
the cube selected. Then we can select the chair
legs we've been working on, and go set origin
to three D cursor. Then add a mirror modifier. Choose the appropriate axis. In my case, it's going to be Z, Z X, and then we've got both
sides of the chair prepared. Next, what we'll do
is add in a cube, set the let me just
change the my cubes, plus rotation, change
the Z axis, 2.02. So we're giving the C to
fitness to 2 centimeters. Breast it on top of the legs. Then we'll scale it on
everything but the z axis. So to do that is
S, then shift Z, scale on everything
but the Z axis. And then we're just
going to match up the chair with the
cube underneath. So first, going to grab
this face at the front, going to top S, scale it down, and we'll
have it so it's just overlapping the chair
leg by a little bit. So I'm going to do that,
move it forward on the y, just so this a little
bit of overlap. As you can see, this seat comes over the chair
leg just a little. But then it's a little
different at the back. Come it matches roughly
flush on the back side, but it doesn't wrap
around the chair leg. It's cut out. It
does like a cut out. So let's do The touch more then S.
Then let's grab the back. So this one's flush at the back, but then the x is going
to get scaled in, have another look around, and then you can't
see it at the back. I need to move it
along the y a little bit to about there. Then if you really want
to can grab this edge, G Y, and pull it forward a
little bit to match the angle. Then grab this face, G y, and pull that forward. Then for the cut out
here, have another. It's going to come out
just in front of the leg, and then it cuts in
and goes around. So I'm going to
go into top view. It might be easier if
we mirror the subject. So I'm going to add
a cut in the middle, delete half of the shape. Then we can add a mirror, and then we only have
to work on half of the we'll have to do the same
cut out on both sides. And then what we're going
to do is make a knife cut. In front of the leg,
it's going to go around. It's going to be pretty flush. I'm going to use a knife tool. Click here, going to
click C for cut through. Then we'll go A to
constrain the angle. Going to cancel that come a little misalign that slightly. Let's see cut through, go to go to about there. Now you can have it inside the leg a little because really, it's just this little portion
we really want to cut out. You can see mines a
little to far forwards. So the better way to do it might just be to cut inside the leg. So if we go there, C A, and
do something like that. I still a little forward. So I'm going to just
pull the vertices. Just check it went
under, which it did. Then I'm going to grab these
vertices here, slide them. Then then grab this one here, and then line it up, so it's S y is going
to be close enough. I'm just going to hide
the legs temporarily. And then what we're going to
do is just make a cut here, face face, face, and then
fill these gaps back. So there might not necessary. Then if I bring the legs back, bring too much back there. Legs, scrub one, two,
three, isolate those. You can see we've
got a cut out there. Next, what we're going
to do is let's add. So we've got this
bit at the top. Let's add the bridge
edge loops here. I'm just going to
select this face. Select this face,
bridge them together. We need to add some
loop cuts on this side. And try to get them about the same and one d, about the same. We'll grab this face, and then it'll be an extrusion, but you can see it's
going straight through. We're going to leave it there
for now turn clipping on, then g x. I'll meet
in the middle, and then we'll delete the face. Then we'll do the same
for the backside. I'm just going to add
a couple more loops. A. Grab this face. Strewed leap face. Chill. Now we've got to
work on this bit up here. So what I'm going to do, we're going to add a couple
of loop cuts near the top. I' going to the front
view just to see a bit better and put one
roughly there. So it's near the
top, but not quite. And then we'll put
another loop cut. It's a little difficult
for you to see then just turn off the measuring tool, and we'll put it out there. As this top one is a lot wider, wider, taller, not
than this one. So we'll do it about there. Then let's have a look. I'm going to grab this face. We've got the leap
cuts already in place. Then we can extrude there. Might want to make
it a little taller. So what I'm going to
do, I'm going to undo. And then I'm going to
grab these edges and just slide them a
little further down. I have to slide because
it's at an angle, and then I can grab this
face, extrude again. It's closer to what
I'm looking for. So I'll just leave it
at that and then delete the face this in between. Then we'll do the
same four bottom one. This one's going to
be 3 centimeters. This is a lot more of
the same kind of length width as the side legs.
So we'll do that. I'm going to add this
in. I'm going to move. This will be the bottom
one, it's about there, so we'll leave some space, add in another one. Dom so I can see
what's going on. 0.2, got to grab this, move it up a little, 0.3. Then if you need to
adjust it, like so, I'm going to move it up a
bit. I'm going to grab this. Move it up a bit, grab
this. Move it up a bit. A about there, and
then we'll extrude. Then lastly, I'm going to
add these 3 bars in between. So I'm just going to first, we'll add some loop cuts. I'm just going to add one there. One there, then in top
view, let's check. Have we add them cool so
we've got them there as well. Then in top view, we're going
to add some more loop cuts. This first one is going
to be the middle one, but it's going to
be half the size of the regular ones because it's going to mirror this
one over to this size. You can see there's an edge here and there's an
edge here as well. That will make the middle piece. If we say, let's
see, go about there. And just to check that
going that way in the wrong place as we
want the edge here. Sometimes it's easy
to put the edge in first and then slide
it after the fact. Let's have a look. Then we
can try with this one edge. So if I was to grab this, and then we're not extruding, we're going to be
using the bridge. But to do that, we need to
make another edge at the top. I'm going to do that. And
then we'll line it up. I've got Sex zero, just to line up the edge
of the bottom edge, grab the face, and then
bridge edge tools. Then have a look at that.
Sit the right kind of width, g. Then what we'll do is
match that with the next one. We'll leave a little bit of a g. That's about
nearly two cubes. And then we'll try to board it. Of course, if it
matched up with a grid, it'd be a bit easier to do, but in this case,
the chairs off, so you can't really
use the grid. Let's say about there, do the same for
the top. Ex zero. Sex zero. Grab that face, grab that face, bridge
edge loops, chill. And I believe have
we missed anything. For this part, that
will be everything. Next, what we would
need to do is do some refinements to the shape of the chair just to make
it look a little better. We'll do that in the next part.
12. Modeling Dining Chair - Part 2: Now that we've got the base
model of the chair down, what we're going to do next is refine some of the shape add loop cuts in and just make
it look a little better. So what we're going to do is
add a sub dive modifier in, but just turn this
up to two, turn off, display in edit mode,
add shade smooth. We don't need this no more,
so we can delete that. And what we'll do is start going through the
model and cleaning the. So you can see,
there's an issue here. And that's because there's
a face in the middle of the b call inside the model, which I've just selected here. So I'm going to delete that. You can see it that scow. Next, we just need to add
loop cuts in the clean up, the shape here to make
it look a lot better. So a turn off, you can see,
this is what it looks like. So sm with flat shading. Everything's too sharp, with smooth shading. The
shadings all we. So we'll start from the top and start
adding in loop cuts, going to turn off edge length because it's just going
to be distracting, and we're going to start
adding in loop cuts around we bounding like borders
to the whole model. Just going to go
through. You can see got one there,
need one here. We're going to need
some at the top. This is to rounded. At present, we're just using the
subdivision because it gives us a more visual representation of where we need to make the cuts. But then we can turn
it off after that. You can see there's issues here. We don't have a leap cut here. Got one on the other side. Going to add the shoe here. You're wondering where to put
them for each of the edges. Usually I'll put
one on either side. An edge, so there'll
be one on that side. There'll need to be one
on this side as well. But the reason you're seeing these big gaps is the subdivisions kind of
averaging out two edges. So if you look on this side, from that edge to that
edge is curve in them. And then when you
add some lookups, you kind of contain
what's going on. So we've got a big
curve here for us to add one here and one here. You can see it's
contained that now. And then to contain the
other part of the curve, we'd add them on the
top and the bottom. But before I get lost, let's finish the top area. Then we need, we've got one inside here, need
one on this side. We need one on the bottom. And you can see the
shading changes as you add these cuts. We need one here. You don't need to
be super precise. You don't need to be
measuring them to the exact middle need to unless you're doing
some of engineering, and we need one in the middle. But once we apply the mirror, we might have to delete faces. If there are any faces
that appear in the middle. I need one here on there. Then we're leaving the
mirror on because otherwise, if we applied the mirror, then we'll have to do all
this work on the other side, which would be unnecessary. Then that is asymmetrical or relatively
symmetrical objects. No relatively asymmetrical. Let's add one to the
bottom here and one here. I'm just going to hide.
Something to just pass the time, or keep it somewhat engaged
because some of these pits aren't exactly the most fun
parts, but they're necessary. Through modeling because you're not really
seeing anything. You're not seeing
like the full picture when you're just
lost in the edges. Let's move this up there. And you can just slide
an edge if you put it in the wrong position
instead of removing it, pulling it back in. And you missed one over here, over there, got them at the
top, got them on the sides. And he had one here.
And we'll need them. I flicking between the two with tab just
helps you to see. Okay, this is too rounded, it's a lot more rounded
than I want it to be. Well, won't be this one
to be the side one. If you want it to
still be rounded, then you leave the edge
a lot further away. The closer you pull
it the tighter so, the straighter the
lines are going to be. Us our models straight. We want them tight, but we still want
to be of a bevel. And near bottom there. I'm on the top on the
bottom over here. There's one missing somewhere. I'm just trying to
identify Put one here. And one ******* on the top. Under the bottom.
I believe we hair. Of course, you'll
probably notice things as you're
going along yourself. You can add things
on after the fact. Sometimes good to just
get them done now, and we'll add the seat in, have a look at the seats, tube, shade smooth,
turn to level two. Turn the mirror for the seat, what I'm going to do is apply the mirror to let this edge in the middle,
well dissolve it. Isolate the seats. Because we've added
this bit at the back, We can't really add a sub diff. I'm going to clean
up the mesh a bit. I'm going to select this. Well, I'm going to get rid of the edge loops we put in first. Dissolve edge that flat for now. Let these two vertices, j to join, et these
two j to join. And then what we'll do is
add a couple of extra loops. I'm going to just add one
there, add one there. Then connect them to this
J to join, J to join. To drawing, cool. Now the geometry
is a lot cleaner. Now we can start adding the
loupus that we want to add. I'm just going to add the
thickness ones first. Give the seat some thickness. Going to bring back the
rest of the seat to look at just so we can make sure
our cuts line up nicely. But this one's going
to be really sharp. Pad Smith, have a
really sharp one here. One at the back. Hi this is it. Let's have a look
in here, one there. We need one at the
front as well. Just leave it off
a little just so a little still retain
some of that roundness. We need one here.
Bring this chair back. Now, if we were to
take the sub off, if I click the
chair, take it off. You can see there's just
a bit with a mirror. Before we do that, sub back on. We'll apply the mirror. Grab this edge in the middle, dissolve as we didn't
need that edge. And then we've just
got to turn off in edit modes and
add a few here. Sure. You can see what the subdivisions are
in slight difference. Sharpening some of these
edges in motiometry, but we don't need
to have it on as well because the models
looking pretty similar. But compared to the base
one, it's a lot better. That's what we were
going for. So just to keep the model clean for
now, we'll take the subdiv, take it off of the seat as well, and we will join these
two objects together, and then we'll call this
dining chair. There we gear. So we have our dining chair. The sub is something, but
I don't believe I have. Then if we wanted to later,
add the subdivision. So we have that
optionality there. And going into the model
is pretty low poly. My would be pretty
efficient in the scene. We've only got the
edges of a miss one here where we need them on earth e. So if we
bring the scene back, what we'll do is just
position a chair or two, or several.'s going to rotate the table because we've got the little bit of
the legs underneath. So we want to give it space, a chair to actually be there, pull it out a little
bit if we need to Maybe we just have
two chairs for now. Don't need to be straight arm. We can have two chairs
like S, select the table. Three D cursors here for me. So I'm just going
to add in a empty. And then we can just call this dining table chair controller, select the two chairs, table parent to object. Now I can move all these
around and until the next one.
13. Modeling Staircase: Next, what we'll do
is the staircase. So first things first is we'll
add a cube into the scam, and then we'll adjust
the dimensions to roughly that of a stair. So firstly, we'll
go with the Z axis, and we'll go 0.205 enter, and then for the width, we'll go for 1 meter. Then for the depth, we'll go for 0.23. We've got our one
stair here or step, and then we'll apply the scale, then we'll position it
roughly about here, T snapping on and
snap it to the floor. Then we'll add a array modifier. Then we want it, as you can see, it's going
the wrong way. So for me, I'm going
to go minus one. Then on the Z axis, go, so we can see it's going on. And then I'm going
to add seven counts. Then to a line it.
Properly, what we're going to do
is add snapping, add edge snap, and snap
it to this edge here. I'm going to press G x. Snap it to that
edge, so it's flush. Then we've got a
bit of a gap here. You can see in top view, Q, and then we'll just
snap it to the wall. I'm going to go G. Snap
it to this edge here, so it's flush on this side. I looks right on there
was a little gap here, what I'm going to do
is going to edit Mud, grab this edge here, and then we'll snap
it to the wall. It's a nice flush on both sides. K. Then I'm just going
to isolate the element, we'll remove some of the
surplus because it's flush, we don't need these faces on the side or underneath
the stair or at the back. So we're going to delete faces. So we've just got something
looking like this. Then next, we're
going to side view, going to turn on edge length, and we're going to
add this nosing. So we just add it
on the front part, distill overhang bit
on the staircase. So to do that, we're just
going to add a loop com. So you can see imagine it there. Then we're going to
move it up until it's a centimeter going
up and down. 0.01. We've got this little
thing at the front, but we're not going to
put it forward yet, because we've got it in the
array. We'll put it forward. Just to illustrate,
it's going to create a gap in the staircase,
so we don't want that. So we'll leave this for now, but we can select it and just
leave it selected anyway. And then when we
apply the array, that will be the
finger selected. But before that, what we'll
do is duplicate this, then move it up above the staircase, and
then we'll snap it. Well, before we do that, we'll add one more stair. Because this will be for
the little landing kind of turny bit of the staircase. Then we'll grab this one,
snap it to the top of that. This is going to be the
flush with the landing. And then if we bring
all the elements back, we're going to turn off
slapping temporarily, rotate this, and we'll go -90, and we want the
staircase over here. We're going to drop
this count to four. And then we'll just line
things up for this side. So snapping on, going to
snap it to this edge, so it's flush on this side, go to top view, grab
these edges here, and then we'll snap
it to this edge. And now the staircases
flush on this side. And then for the first one, we can apply the rana. Then when we go into it,
you can see we've got that those faces selected
on all the steps. And then what we'll
do is extrude this. So we'll extrude it by pressing
the e Key by 0.2 0.02. Now we've got a little overhang. And this will be on
all other steps, and we'll do the
same for this one. I was just going to select
that, apply the array, then extrude by 0.024. Of course, if we write
it just a flush one, then we can undo
that later because this is just an extrusion,
it's pretty simple. And what we'll do now is
just finish off the landing. So I'm going to grab
this edge here. Then we'll extrude we don't
even need to extrude. We'll just grab
scale along the x axis to an edge along the walls whereever
this one or this one. Now we've got our
landing and it's flush. This staircase looks like
it's a little positioned. I'm just going to move this
back, do this manually. E, if you want it to be exact, then just grab that face, and then you can just snap it. G, y, snap it, and then you just
straighten out everything. But should be fine. So Mini school we
probably wouldn't notice. I don't think anyone
will unless the zoomed in super cloths. Then what we'll do now is bring the visibility
of the upper floor back. We're going to grab
this edge here. Then G y, bring
it to that point. So we can see it's a little
higher than the floor. So we're going to grab
the top face here, top face here, and then we'll
snap them to the floor. V can see, it's going to cause
a little bit of a problem. If we do that, it's
now inverted this bit. So before we do that, what we'll do is get rid of the extrusion, so
I'm deleting the face. I got a little bit of excess. I'm going to get rid of that. Fill that back in,
remove this edge, and now we can pull this down. I'm going to just
add it back in. Close, and then extrude. Extrude 0.024 hi. You can see there's some
intersecting going on. So we're going to grab
these doors because they're intersecting and just pull
them down along the elaxis. In shift just to make
slight adjustments, pull them down a little more. So now they're no
longer intersecting. We won't get any
visibility glitches. So I can just check that. I'm just going
into rendered view and put the background to it. I see everything's
looking flush. If you go inside the model, there's no weird cracks
or anything showing, so everything's nicer flush. Then I'm just going
to bring these stairs back because there's a bit
this is just a bit extra here, but it's just these faces that we're going to
just get rid of. So I'm just going to go
delete face, delete face. It's just the sides of the
little nosing on the stairs. Just going to grab
them and delete them. If it's not visible, but they're adding to the geometry
in the scene. Over time, it will kind
of add up and make you renders a lot slower and just moving around
in the viewport and doing your texture wrapping. The way possible. We'll
just get rid of this. Okay. Leave that one. Queue and bring everything back. And then if you need to go over, just make sure everything's
lined up nicely. And then we'll select
this staircase. St the other one. So we'll let both of them control
J, join together, rename staircase, and we will move this into
building ground floor. I know it's in both of them, but we don't really have anything else that's
going to be either. We just know it's going to be
one of the building groups, and there you have it.
14. Modeling Coffee Table: What we're going to do next is a coffee table based
on this model here. So first things first, we're going to the file. We're just going to
hide the upper floor, and we'll hide the other
furniture as well. If you've got
furniture that's not being hidden it could mean that it's in another group
like this as well, so it's in two areas. So we're just going to move
this into furniture now. Now it's working properly. And then what we'll do
is go into top view, grab a cube, while new
cube add it to the scene. And for the heights, we're looking at 45 centimeters, so I'm going to adjust
the SD axis to 0.45, and then we'll snap
it to the floor. Like, so we can hide the ground floor. We
don't need it anymore. We're just going to position
it here for the width. We've got 90 centimeters. So let's do that
now. We've got 0.9. Then for the depth,
we've got 55, so we'll adjust this one. Just position it roughly
where we need it. Te. Then what we'll
do, apply the scale. We've got the cube in scene
collection at the moment, so it's easiest to adjust. And then what we'll
do is duplicate it, select the original change
that you display to wire. Then we'll select the new
one, go into side view. And we can see, we've
got the 45 centimeters. We've got a 20 centimeter,
part of the leg, then this table bit in
between is a centimeter, then we've got 19, so this is about 5 centimeters. So we're going to
go into edit molds, grab the bottom face. Move it up along
the z axis by 0.4. I was going up 40 centimeters. So now our dimensions 0.05, which is 5 centimeters. And we did it like that. Because if you just scaled it, it would have scaled like that, then we'd have had
to have adjusted it again, well, like this. But we want to just keep the top face in
position where it is. So that's why we're
doing it this way. Four, I'll just redo that. Then what we'll do is duplicate
that and move it down. And we want to 19
centimeter gap here, and this table is going
to be a centimeter. So first, we'll make this a
centimeter, same as before. Move it up on the
Z axis by 0.04. So this is a centimeter. Then we'll just quickly
add a plane in, change this to edge snapping
and make this 0.19. And then we'll snap
this to there, and then snap this to there. So we know we've got our
five centimeter table, 19 centimeter gap, 1
centimeter table now, and then this will
be 20 centimeters. And if you want to double check, just adjust the plane to 0.20, snap it down to the ground, and you can see it's
fitting nicer than slug. Well, snug, N slug. And that's we want. So we've got the big table, got the under table,
whereever that's called. Now we're going to do the legs. So we're going to do in top
view, add another cube. Turn off snapping for
now, move it here. I'm going to adjust it, so
it's 5 centimeters all around. We turn snapping on again, and snap it on the
x and the y axis. So it's blush in the corner. And then we'll just snap it to the bottom of the top
portion of the table. And then we'll grab the bottom face and
snap it to the ground, which is where this wire
frame cube's going to be. So now we've got the leg, which is the right length, it's coming up to 40. And as you can see,
this intersecting here. But on the image,
if we have a look, find a good example of it, that's the other corner. You can see it stops a
little short on this length, which would be the
same on that length, and the long length, it's inside the legs, so we'll adjust that now. But first, what we'll
do is apply the scale, we'll have put the
other legs in, so we're going to
apply the scale first, and then we'll press
D just to make a linked duplicate and
position this in the corner. And then I'll do
the same l D again. I'm just moving it
along the relevant ax, so x or y together
into each corner, and we're using lt D so that if we need
to adjust the leg, it'll adjust all of them. We've already a plied the
scale, so that's fine. And then what we'll do is grab turn snapping
back on once more, grab this face here. Snap it inside there, and do the same for this side, grab that face, snap
it to this edge. And then we'll
grab this face and this face, turn snapping off, and then we'll scale
it based on bounding box center and scale it
using the white axis. Just a little, just so
it's a little short. It's not flush is like
where it is here. It's not flushed there, but it's inside the legs on
the other axis. E. And we've got so we've got all our scales
applied and all the objects. That's good. What we want to
do now is bevel everything. So I'm going to select one of the legs add a bevel modifier. Put the segments to two, let's try 0.0 005. So we've got just a slight
bevel, shade smooth. It's going to hide
our wireframe box. Cool, so we can see we've
just got just a little bevel. And Shades moves
effective all of them, but these don't have bevels
because the modifiers don't carry over on
the duplicated link. Well, yeah. So what we'll do is select all the objects that don't have the
modifier first. Then select the object that
does have the modifier last, and then if we go control L, we can copy the modifiers. So now all of these objects have the exact same modifier with
the variables we've put in. And now, everything's
got the bevel on it. We've got those nice
almost like seams, you could say where you can
just see the different pieces of wood, touching. We've got little bevels there, and then just those nice gaps. That's why we didn't
join them together. Well, like, just
extrude something out. It's easier to do it this
way with a simple object. And desk. So what we'll do is
grab this buttom face, actually, grab this one,
join them together. Our legs here. Now, we could just join
everything together. But if we decide
to do some else, then we can as well, so often now, what we'll do, grab an axis, put
this on the table. I'm just going to select
the top of the table go, cursor to select it, select the axis, and then go selection to cursor
just to center it. And then if we select all of the objects and
then select that last. We can go parent two objects, which is control P. We can
just move this around. If we decide we want to join it just so it's one
object, we can later. But for now, this is
at our coffee table. So we're just going
to rename this. We'll call this
coffee table tops, and we'll call this
coffee table legs. Let's just join them. It's unlikely we'll need to adjust these separately
in the future, so we'll just join them now,
join this to the table. And if we do anyway, we can undo what we're doing. We can just separate things. So we'll just call
this coffee table. But there at least you
know how the old duplicate works and beverly
multiple objects. But because we've joined
everything anyway, it's just got one bevel
modifier on the whole thing. So it's not made an
actual difference, but we just have one object to manipulate instead of multiple. We can leave this empty here, because if we were to add, say you adding So if
we look at this image, you've got stuff on
top of the table, you can just join
them to the empty, and then just move the table and all of the objects
on it together. Same way we've got it with the bed set up and the pillows. And we'll just call this
coffee table controller. So I'm just naming the empty. We don't need this cube anymore, so we can delete the
wire frame cube. And then we can select
this and the actual table, move them into furniture. If we bring everything back
apart from the upper floor, got a coffee table in
position. That's it for now.
15. Sofa Blockout: Next, what we'll do is a
couch similar to this one. So first things first, we're going to go into blender, but we're not going
to be working in this file because
the couch is side on might make it a little messy to follow when
you're thinking, Okay, I need to change the view to side on for
like a front view. So instead of doing
it like that, we'll go into a fresh scene, just a fresh blender scene, and then we can have
the front view being the front view and
side being the side. So what we'll do is first
things first add a plane, and then add a cube. And then we'll just move
the cube above the plane. Looking at the dimensions, We've got for the
heights, 86 centimeters. So we'll do that first, 0.86. And then we'll just snap
this onto the floor. E We don't need this plane anymore, so we'll
just delete it. And then for the
width of the couch, we have 165 centimeters. So let's do that now 1.65. And for the depth, we have 80 centimeters. So we've got 0.8 here. Then apply the scale. Then let's add some of
these various markers. So we have, with the height of the arms on the floor,
69 centimeters. So I'm just going to
go in to edit modes, turn on edge length, if you haven't already, and then we're going to go 69. Scroll I'm holding shift for
smaller increments, 69.1. Of course, you'd
have to be like act. You can zoom in if you want to make even smaller
increments as well. So we've got 69 here. Then this is the remainder 17, which should be 69
plus eight well, eight, six take away, 69. And then we have the legs, which are 15 centimeters. So let's add those. Let's put urs back to the world. We've got 15 there, so we've got the legs, the body of the couch, and then the top where
the pillows are. Whilst we here we'll
add a leap cut in the middle of the couch because we'll be mirroring one
side of the other, so we need the center points, so we can just cut the rest
off, see what else we need. For the arm rest. For the arm rest, it is
13 centimeters wide. To add a lot in front view here. We have it. We got it
right the first time. That's nice. E. So we've got
the arm rest in position. Then we have the seat cushions and the support for the seats. And from the ground to
the top of the seats, we have 47 centimeters. So what I'm going to
do is add a plane. We'll change this to 0.47, then edge snapping on
it to the bottom edge, and then we'll go back
to the wire frame here. And if you haven't already
just set object properties, and then change it to a wire for the cube that we're using. And then we want to make a
loop cut and just snap it to the top of this so that
would be for the sat height. And then for the split, because we'll have a
measurement between the seat height and
this kind of base bit, we'll have to approximate that. So what we're going to do
is add another loop cut, and for the seat itself, we'll have that 15 centimeters. I'm just going to
go up a little, and then the remainder will
be about 17 centimeters. E. Then in top view, we'll add the depth of
the seat, which is 53. So from the front,
which is down here, I'll just turn slapping off go 0.53 e. And then for
the back of the seat, we'll go four 6 centimeters. Doom in a little more.
Yeah, close enough. Cool, so let's just check,
we've got everything. So in front of view got
the gap for the seats, while the legs, the seat bottom, the actual seat itself. This will be the back rest body, and then we've got
where cushions will go. Then what we can do is
delete half of the mesh. I'm just going into a wide
frame, vertex select, selecting the right vertices, and deleting them, that we've
only got half of an object. It's fine because we'll
be to this mirror. We won't have to do the
changes on both sides. And let's see, then
what we'll do is start blocking things off to
prepare for the next steps. So what we'll do
is duplicate this, change it to solid view. And first, we'll do the armors. So we're so we're
missing the bottom bit and missing the top bit
and missing all of this. So with the armors, well, the new cube selected, going to go into wire frame, we'll delete, or of the vertices here, because
we don't need them. Let the top vertices and
the bottom vertices. Then we're going to go
back into solid view, see what we've got.
Just going to hide. I'm just going to call
this wire frame cube, so we don't get confused. Hide the wire frame cube. And then we'll just
build this arm rest into a solid block shape. So I'm just going to fill that. Grab this, f, fill, fill, fill. For the top and the bottom, I'm going to fill them
just a little differently. I'm just going to select or
other the vertices fill. Just so this vertices actually
connected to the face, to do the same with the bottom. So they actually connected. Then in top view, we'll press k for the n tool. A for angle
constraints, C for cut. And then we'll make cut like S and we'll do the
same for this one. A, C. Now, we've got a few
edges here that we might need. We might get rid of,
but everything's all connected and
what looks right. Then what we'll do, bring the wireframe cube back
and do another piece. So stew the seat bottom
with a base at the couch. So in front view, we'll grab the wire frame cube. Duplicate it again. If you want to you name
it something temporary, just got a seat base
with something, and we'll delete the
stuff we don't need. We don't need these
vertices, I'll delete those. We don't need the bottom
vertices, but delete those, and we don't need
these side vertices. We'll delete those. So we've just got
something like this. Just going to isolate it, change this to solid view, then we'll just connect
everything back up. I just selecting the edges, I want to connect and
pressing F to fill, cool. There's two pieces done. The next bit will do
the actual set itself. Same again, duplicate there, call it C cushion, get rid of the excess,
which in this case, is going to be the top, this
side here, the bottom here. So just got this square. And then we'll isolate that. Go to solid view,
and just bridge. Yeah. We've done one, two. Let's do O the thing we
needed to do with this, so I'm just going to
grab this backface of the actual seat. Turn on edge snapping,
then in top view, we'll press g y to snap
it to this line here. So we've only got it
for the length we need. And then let's see.
For the next bit, what we'll do it add aother loop cut into
this seat base here. Snap it to this edge, which
is for the back rest, grab that face at the top, and then in front view, we'll extrude it to the
top of the big wire frame, so we've got our
back rest coming up like actually it doesn't
it goes to the here, so we'll just snap it to there. There we go. Got a
few more pieces. Next, what we'll do is the legs. For the legs, we'll
get a cylinder, change the dimensions
to 0.0 or five. And then we'll snap
it to the bottom. Like, so grab the top
face of the cylinder. Snap it to the bottom of the
couch, turn snapping off. Let's just position it
a bit more centrally. And then shift D
to duplicate G y, the move along its axis. So we'll just position it roughly where we
wanted at the back. Then we'll grab this cushion, duplicate it, and we'll have a look what we
need to do with this. We can see the dimensions
are going to fit, so we'll make this
a little smaller. We'll to about 0.38, see
if that's about right. Apply scale, make it a bigger. We need to make it bigger. That's the question. Let's
just check everything. Check all of our
dimensions first. 53. I think eight. Just check that's right, 0.8. Yeah, because this one is
if we just were to rotate this a little too small,
that's not how it would look. We can see this is
sitting on top. That's not what we want to do. But for now anyway, we'll leave it as is, and
then we'll adjust it. We might just tilt it
a little more like so. And we've got it
close enough ideways. Or if we needed to, we could adjust the
height a little more, maybe we got 0.41 0.4 this. There's something like that.
But that's the first part. In the next part, what we'll do is start
refining the shape, making it look
more like a couch.
16. Refining 3D Sofa Modeling - Part 1: Next, what we'll do is start finding the
shapes that we've got into looking more like a couch instead of a bunch
of rectangles and squares. So let's get to that. First things first,
we'll grab. Let's see. We don't need the wire
frame cube anymore, so we can just hide
that, have a look. Let's do the back rest first. Just check your scales
applied or if not, just apply that scale. Then we'll just
isolate this element. Actually, now, what
we'll do is first thing, so we'll add a mirror modifier just so we can see
an natural couch. So I'm just going to
select an object like S. And what we'll do is
add two modifiers, subdivision, and mirror. Then we select everything, select the object to
put the modifiers on, then reselect it, control L, and then we'll copy modifiers, so all of the objects
get modifiers. Then for the legs, we won't need subdivision,
so we'll just turn the. Then we'll select the
body of the couch. And what we'll do is move the mirror before the subdivision so we
don't get a split. We have a few faces in the
middle that we don't want. So we're just going
to go in top view, wide frame, face elect,
and delete faces. Then we'll just go shade smooth. Turn up the sub diive to two. Then we'll look
at our reference, and we can see that on
the front of the couch, pretty flat apart from near the top where it
kind of rounds off a bit. So we'll try to
emulate that bit. So I'm just going to add some
loop cuts. Add one here. Turn off a edge length, just so we got a bit
more clear scene. Add another loop here. Drag this one a little closer. You know, we want to drag
this to the other way. We want this to be the rounding. Now, we'll have it here because
we need it at the bottom, the bottom needs to be flat. So let's see if this, this one's controlling both. So what we'll do is
grab the top edge, double tap G, and you
can see we can slide it. But before we do that,
we're just going to add another loop cut to control
where it curves from. So we don't want the
whole thing bending, but just closer to the top. We'll have this loop
cut closer to the top, then we'll grab these edges. And then when we slide these, it's only going to
impact this area here. So it's pretty flat,
then it curves. Add a few more leap cuts in, and the press E,
which is for even, and then if you press F, it dictates which side you're aligning your
various sees to. So you'll see like a rage dt. So where my mouse is
there's a little orange dt showing this aligning it
to that side if I press F, it'll align to the other side, which will change if it's straight or if it's
jagged like this side. So because we're aligning
it to this side, we're going to press F
for the dt on this side, drag it like so, and we're going to drag
this near the bottom. And then for up here,
we're going to have one, but it's not going to
go all the way up to the top because it's a
little curved on the back. So if we look at the
back here a bit rounded. So we'll leave it
something like that. E. Let's bring things back. Let's work on another piece. Let's go for the cushions. So we're happy to leave the sub diive above the mirror
for the cushions. And what we'll do is
add some loop cuts. Let's go for eight, we shading, and we'll add eight about, let's see, but have
a central face. Then for here, we'll
add just two leap cuts. So we've got a boxy
kind of question. And then what we want
to do is get this to kind of puff up just a
little so to do that, we're going to use
proportional editing, and we're going to
use inverse square. It's just to show an
example of what that does. If we select a face, with it turned up the square. You can see as I move the cursors bending it in
a certain kind of shape, but we don't want it to be
that quite the drastic. So we're going to use the
scroll wheel, turn it down. We're also going to lock it to the Z axis by
just pressing G Z. So it's only going to move up. But we don't want the bottom
to be coming up as well. So what we'll do is
isolate the seat cushion, and then I'm going to select the bottom faces and hide them. And what this will
mean is that they aren't affected by the
proportional editing. Then I'm going to reselect
the face or one that edit. Then press G s, move it up as much as I want. Maybe something
like that. You can kind of see on this
side what's scoring on. And then if s to tap
back into object mold, you can see we've
still got a flat base and it's pulled everything else. So it's rounded it like so, e. Then for this one, we'll do similar thing. So I'm just going to
put smooth shading on, turn the sub dives up to two. We'll add eight cuts as well. So we've got eight
there. Got eight there. Then we'll go two there. And this one's a
little different. So we'll grab what we'll
do is isolate this. We want to grab this face here, and we want to push this up
to bring the corners down. So we're going to press G,
and then it's y y to go on to adjust by the local y axis of the object because
the objects rotated, so you can see we can
push it up right so. We're just going to go G Y Y. Push it up a little bit like so, just to give it a
bit of a bend there. And then in the top. You see it just sags a little. We can do something similar. Because if you wanted
to play out a bit more, could choose a weird
off face like so, but we just do a center one. Y Y, scroll the muscle in a bit, so we get more of
a drastic change. We got something like that. And then I guess
if you wanted to bring out the middle a little, it could go G Z Z, and we can pull this out
a little bit like so. Bring that back.
Then what we'll do? I'm just going to hide
the arm rest for now. I just position this
a little better. So I'm just going to turn
off proportional editing, sit this down, rotate it. So it's like sitting on
top of the sat cushion. And it's supported there. Nice. Next, what we'll do is grab the arm rest
and do the same thing. So for the arm rest, arm rest is a little
bit of a strange shape. So we've got a rounded
kind of corner here, and then this side is flat, and then it's also
rounded on this corner. And then it flattens
out at the back, but it's rounded in this corner. First things first, sub dip
to level two, smooth shading. Let's add some loops in. So we get rid of these
pre established ones. We'll just dissolve these. Add in before I add in the loop I'm I'm going to bevel
this corner. Like so. Let's to round it a bit. You can see if I do that, it
won't let me add in loops. Before doing that, we'll
add in some loops. It's going to add in eights. So we've got
something like that. Now I'll level this corner. But because it's
breaking the geometry, it's going to make things
a bit complicated to do in the sense that you can't add loop cuts on this side now. But have to do something
like this where you add two loop cuts, and then you connect
them manually. So we can go J,
then grab this one, hide legs, this one, press J. Then we've got a lookup, we can add look cuts on this side. Let's have a look back
at our reference. You can see it's
rounded on that side. So we're maintaining that turn off proportional editing
if you still had it on. Just going to add loop cuts where needed and
start manipulating the geometry just to get the shape closer to
what we're looking for. Though, for example,
on the bottom, it shouldn't be rounded. So I'm going to
select both objects. Then if I'm going to edit modes, I can see both of them, and then if needed
match of the geometry, so they look a bit more similar, where the loop cuts
are, for example. And then this side, the one closest to the couch
needs to be flush, so we need to add a
loop cut there as well. So front view, going to have it roughly the same distance apart from this point
here is that one? Cure. So we can see
this cores rounded. This one's, but then we want to around the top up.
But not the back. To do that, what we'll do
is grab these vertices, this vertice, all the
way up to this vertice. Let's see if we can slide this, the double tap and G
to do a edge slide and just slide them
away from this points. Just check hasn't damage
the geometry too much. It's made this be
a bit too soft. For us to undo, you
can see sharp there, so we don't want to select. Let's try these two vertices. Then edge slide again. So we're preserving this here, and then it starts
to mellow out. Then we'll do the
same for this well, a similar thing for this one. We'll select that up until this point,
going to front view, and then we're going
to press G and pull this edge left and
and then have a look, see if we need to do more. If we were to go extreme, you can see, they started
to mellow out this. We'll have to adjust
a few things as well, just to get it to look, right? S. If it's too much.
Let's try there. And then what we'll do is just rearrange some of the gamey just to give things more space. I'm just going to
slide this edge, a longer a little more. Because I think this edge
is still a bit too close. So I'm going to grab this
all the way up to there, slide that little more. B this and just space it
a bit more in between. We'll grab this edge, or this vertex all the
way up to about there. Let's see if we pull this down a little bit just to give
it a bit more space. Se we don't want to
deform the mesh too much. O look. We've got
the front bit here, that it's a bit flat. So we'll add a loop here. It's going to pull
it close like so, and then we'll connect
it this vertex here. So we've got
something like this. We've got a bit of
a broken mesh here. See if we can add this without tightening up
anything too much. So we've re established
quads almost, need to connect the bottom ones, see which mps this vertex
for at the bottom, so it's not really going
to be an issue. Anyway. But we quit if for Y two,
just do something like that. Then we've got the legs, so we've done the armor, done these, done the back, then is the legs. So we're just going to grab
the leg, go shade smooth. Then another leg. I did. We'll do it with one leg and
then just move it around. So we'll delete the other one. Grab this leg, just add in
a loop cut near the top, one near the bottom,
add some in between. You go into edit mode, go to shift d to duplicate G
y to move it into position. Then when we check. So just check the mirror. You can see it's
not working because the origin point is on the leg, but it needs to be where
the three D cursor is. So we're going to go set
origin to three D cursor. Now it's mirroring correctly. And that is our little couch. What we'll do now is
add a called an empty. I'm just flap an n down
here. Select everything. On select the empty,
select it last. Control P, pair it to objects. Now we can move
the couch around. Call this sulfur
sulfur controller. I just go into this group. We got seat cushions, call this seat back rest. Breath for this arm rest. Mm. Yeah, arm rests. Be a bit more specific. Sofa arm rests, Sofa cushion, just because if we
have more objects in the scene that
have arm rests, like if we do an
armchair or something, we want to be able to know
which one's which. So. So we've got sofa
back rest, legs, cue. We don't need the cube,
so we delete there. And then that's it for now. Next thing we'll be doing is sculpt in some
details onto the couch.
17. Refining 3D Sofa Modeling - Part 2: We have a few more tweaks to do, and then we'll be
finished with the sulfur. So first things first, with our sulfa model, what we're going to do is select the back cushions and
we'll apply the modifiers. Just make sure you
don't have clipping or merge turned
on because merge, if we get in real
close, you can see, it's meshing both of the bits together with
that were in contact. We don't want that. We want the cushions
to stay separate, so we can turn other, and
apply the subdivision, and then the mirror modifier. Then go into the edit modes. Select if you press L to
select one of the ctions, I'll just select everything
that's connected. So we've got one whole ction, then we can press P,
separate by selection. And now we have two
back rest separated. Next, what we'll do is
go to the cloth sum. So either in physics properties
or modifier, add cloth, and click here, and we'll add pressure to a
small amount like one. And then turn the field
weights, gravity to zero. And if we are to hit play
just to illustrate that. We don't want anything like
this because it's not like a pillow as pre
hard as an object, but we're just going to
do this just so we get a slight kind of creasing
effect on the edges. So maybe if we look at the
first couple kind of frames, can see we get in the beginnings of something here that we want, and we're also going
to do the same on the other cushion
back rest thing. So I'll just cla Go
into the clop sim. We'll change the number.
So we've got this as one. We'll have this one
as 1.1 gravity, and then we'll just
play it just so they get they look
slightly different. And this is just something s just to deform the
cushion a little bit. And we could do with
the bottom ones, but they basically about how we want them to be,
so there's no need. So what we'll do is
go back to the well, with the question anyway, we'll apply the
modifier turnoff merge, apply subdiF, and the
mirror, separate them out. So we've got two. Okay. So if you've just seen
what's happened there, There was a little
bit of an issue. And that's because
when we separated, we still had hidden faces from when we pull the cushions up. So before you separate
the cushions, what we want to do is
reveal the hidden faces. And then when we select the
cushion and separate it, it's going to do as
what we want it to do. Okay. Now, there are a couple of other things you can do just to increase the kind of
quality of your final results. One of them being sculpting
as we did in the bed. So I'm just checking
if there's any frame, I kind of like a little bit
more. Something like that. I'll just turn it down
just ever so slightly. And then what we're going to
do is apply the cloths in. On both the cushions, just supplying both of them. Then we'll click a
cushion, going to sculpts. And what we'll do is
use the cloth brush, go to go to tool over here, and we'll change it drags fine, but the strength, if you look, is going to be a bit too strong for what
we're trying to do. So we're going to turn
this down to at 0.1 and start dragging down just to kind of pull the fabric
down a little bit. Then we'll do the
bottom as well, and just click in and
just dragging up, and we'll just pull it in
on the sides a little bit. Then we'll just hold shift
and then left click and holds and just get rid
of some of the middle. Cause we won't really have wrinkles here because
the cuts being pulled, and this is a lot more taut. So we won't have those kin that kind of weird
wrinkling we had there. So we'll be looking like
something like this, of course, spend more
time on it than I am, just taking your time just to look at looking at
reference images, looking at a variety to see where the creases are and just doing going over the cushion until you get something
you're happy with. One other thing we
can do is add seams. So if we look at the
reference image, and see if we've
got this kind of seam going along the cushions. So, to do that, we're
going to object mode, and we'll select
this edge loop here, and then select one
on the back side. So I've got those two selected, shifty, duplicate them
separate by selection. Then we'll select
them, right clip, go in to convert to a curve, and then we'll go
to this tab here, geometry, bevel, and
we'll add a slight bevel. That's not slight, that's huge. So we'll add another zero. So we've got 0.0 005. Now we've got the seams. And if you want to have it
a bit higher resolution, then what we'll do is
convert it back to a mesh, and then add subdivision, add it to say second level. You can see it's kind of
intersecting a little bit. But all you'd need to do
if you want is just to pull bits up and just adjust them a little
intersected with the mesh, or you could try scaling
it just e so slightly, just to put it out. I'm scaling from a median point, but you can try some of the
other scale pivot points if you don't get the
result you want. Q. We've done this one. Then what we'll do,
P to let the seam, apply the subdive, click the other cushion,
join them together. That's one cushion done. And then it's the same
on the other cushions. Let's do this one now. Go into it, grab the edge one, grab the other edge, duplicate, separate, convert at the bevel. B back or I'll leave it on this without adding another subdiive,
just for comparison. You can see you really to
guess if you're out here, you're not going to
notice it if you zoom in really close and you'll notice the low
resolution a bit more. So I sat to which one you want, but I'll just leave discussion
as the lower version. I'm just going to grab
it and join it to this. We've got back rest, we've got back rest as well. Rename this. We'll call
this back rest. Right. Guess if you're looking
it from that way. Left. Got two more to do,
same processes before. Now with these ones, because they're the same. We could just delete
this and mirror this onto the other side.
So we'll do that. Convert to curve,
the bevel, B back. So divide this one.
Sad it up a little. You have to just be careful where you're scaling
from as well. You don't want to scale
it too much because it might come off the
actual mesh itself. But just ever so slide
just to pull it off. Shade it smooth, apply, join. You got a sort of cushion. Then we can go mirror, mired in place. Then off this. Apply. Then for this one, we'll press L to select the cushion L again on
each of these seams, and then press P to
separate it together. So we've got sulfur cushion. This one's right, this
one will be right. And this will be
sf cushion left. Let's see. Got one, two, three, four seams. And then yeah, add brushes
as you see fit to add more creases in any of the areas based on whatever your reference
images are saying. Then also, as a last little bit. You can use the if I'll
go back to sculpt, sculpt brush and put
it on instead of drag, go to grab, and you can use that to pull the
strips a bit low. Oh, I'm on the wrong
objects. O' got objects. If you use this one as a
reference sculpt, that crazy, but You can pull the cushion,
say it's a little off, or you wanted us adjust to
position a little and do that, but optimally, you want to do that before you add the seams. So if s to do
something like this, pull it up, say it was
too much on the back, or if they were touching and you wanted to just
pull it up a little bit, adjust it like, but
just be careful with your strength and
how much you move because you can kind
of deform it too much. But do that before you
do the seams optimally. Let me just undo the damage
I've just done there. Cute. So we've got our sulfidom, got our legs, got our
seats. So what we'll do? Just go to for our extra, got a camera, delete that. Just go to select everything. Copy, go to the scene, go in top view, paste, rub the sulfa
controller, rotate it. Negative 90 in my case, position it where we
want the couch to be. We've got a little
space before the wall. Cool. Nothing is intersecting. Just the table a
little bit just so there aligned a bit better. There we have it. Coming along. We've got we've got some
models in the bedroom, got some in the kitchen, living room, we just got a few more models to
do in the kitchen. Got some more kitchen stuff got some bathroom stuff to do, but nearly there and the
modeling side of things anyway.
18. Creating Archimesh Doors: The next thing we're going
to do is the interior doors. So before we start with that, just going to clean
up the model a bit. We're just going to move
all of these objects that are pertaining to the sulfa
inside the furniture group. Sure. Then for the doors, I'm going to select this
face, cursor to selected, and we're going to
be using chu mesh, chimes, however you
want to say it, which is found in add ons, just type in arch
and enable chu mesh. E. And then we're going
to add in some doors. So there's two ways to do doors. One is using like chi mesh, and the other you could say is building the door from scratch. We'll be doing both of them. But for some of the
interior doors, the ones that are hinged, we're going to be using chi mesh
because it's quicker. Then for the sliding ones, we have a slid on
one here, and we also have a slid
on one upstairs. We'll be making
that door manually. As the only ones in this arch
mesh pack are hinge doors. I guess you could
take the handle and make it a sliding door, but we're going to do
some a little difference. Just to show you if you
want to do a custom door. So first thing first,
we've got our door. We're going to rotate
it, 270 degrees. This is just so the
flush side here is facing in the room and
the deeper side that the door is facing
out of the room. That seems to be how it works. Then we're going to
click the frame itself. And for the frame thickness, we're going to set this to 0.134 just so the door frame peaks
on both sides of the wall. That's just the size that works with the size of the
wall that we have here. And then we're also
going to make sure that the door frame
isn't flush against the corner of the
room as that also seems to be a thing that
wouldn't be correct. So we're going to
make sure there's a bit of wall before the corner. We've got our door, can open, close it, but the handles
on the wrong side. As you can see, it's
opening like so. So we're just going to
click the frame and it's on the create menu to edit these options and
we'll go left open, put the handle on this side. Then also, when you adjust
the frame thickness, it adjusts the thickness
of the door as well. So for us to edit this back to standard door
kind of thickness. We're going to just guess you can rotate it out,
select the door, going in to edit modes, we'll put edge length on, and I'm going to press S y, y, scaling on its
local y axis until the doors 0.035 thickness, they'll turn snapping on, select the handle
Select face projects, S G Y Y, and sap the
handles back onto the door. Q. If you want to quickly just put the door back
in its default location, click the door on
the Z rotation, just set that back to zero. And we can do this for
each of the spaces here. O cursor to selected,
add a door in. We'll click the frame, click Create, rotate 270, fitness 0.134, click the empty to position
the door as needed. So move it down a bit, have the frame peaking on
both sides of the wall. E. Just rotate this out,
and then scale it in. A 0.35, base project. Cap the handles
back onto the door. And let's see. Set this back to zero. Swap the handle to left open. So we've got to go
in the right way. And we've got one more
interior door here. Same again, select the floor, select this, cursor to selected. You could also just place
the cursor like this. If you find that a little
quicker, add in a door. And for this one, let's see. Let's try to check which
way around the door is. So rotate this one as well. This should be just 1360, not 360, I be 180. I 0.134 handle on the
left side as well. Let this move it into position. Imagine getting gist
of it and cure. So those are free kind of
default interior doors. You can also, if you want. There's options to
change the handle and the kind of door we've got. So you can see, we've got a few options
here to work with. Just a quick kind of way
to get a door in you see, change the handle if
you want, as well. But we'll just leave
it on default for now. And there's one more
thing we need to do. Well, first, let's slim
this door down. C. That yy. Yy. Them.
As you can see, the walls are kind of piercing into the door, so
we need to adjust that. So what I'm going to
do is grab the walls, grab this face here, press snapping, put edge on G Y, slap it to the edge of the door. We'll do the same
on this face here. We'll do this for
each of the walls. I'll press in G Y, just to lock it onto one axis, if it only snaps
where I want it to. And then this one, as it's
the other orientation, we'll use G x. Gx. Then what we'll do is add a loop cut and sap it to
the top of the door frame. Then we'll select these faces, and we're going to
delete just the faces. There and then we'll select the edges and
just press F two fill. Let's go back to object
Mold you can see. We've just framed the
doors with the walls. Now, e. Lastly, we need to
do the same with the floors. As there are going to be a little gaps
that we don't want. I'm just going to hide
the door for now. Hide the frame, select
this floor first. Going to select this whole edge here and just snap
it to the wall. J to keep this line straight, and we'll do the
same with this one. I'm going to grab this.
Grab wa the edges there, G Y, snap that in place. Hide this, this. Sure. Got one more. This. Go this one. This is G X. To unhide everything. So there aren't any gaps. Sure. So we've got
our doors in place, still open in the
right direction. And then what we need to do next is some sliding doors
that go inside. So we'll do that
in the next bit.
19. Modeling a Sliding Door: Next, we'll do the slide
in door for the bathroom. So first things first. We'll just widen this gap just to make it a little bigger. So I'm going to select
this face here, this face here, and we're snapping on edge
snapping enables. We're going to press g x. Snap it to this edge here. And then we'll do the
same for this side, so I'm going to grab this and we'll snap it to this edge here. And then we'll do the
same with the floor. This edge and this edge, we'll slap to here, this edge, this edge,
we'll slap to there. Now we've got a bigger space, e. Then with the wall selected, canoe slap this
face and this face, duplicate them, leave
them in position, separate by selection,
and There we have it. We've got our two faces. So I'm going to isolate them. Going to edit mode,
select one face, we'll extrude it by 0.1, and then select the other
one, extrude it by 0.1. So both of them have gone in
by 0.1, so 10 centimeters. And then for the tops, what we'll do is add
two loop cuts like S, press G Z and move them until
we've got a nice square. We're going to 1.1. Chi, and then we'll select
this face this face, bridge edge loops, k. Then the door we're going to be making is
something like this. So we've just done the frame, and now we just
need to finish off. We've got a few cuts on the top. So with these faces selected, going to press and separate
them by selection. Then let's hide
this temporarily, and we'll fill this gap, face to the same on the other
side, fill with the face. Then I'm going to
hide these and just fill with a face here and here, bring things back, e. So we've got the basic
frame there and done. Then next, we need
to do the door. So what we'll do is I'm
going to grab this, duplicate it, move it
down a little bit, and then snap it to this edge. Grab this face at the bottom, and then snap it to the ground. I'm going to press G Z, nap it all the way down. At the moment, we look at
our y Y is a bit too big. But what we'll do first is
set origin to geometry, and then we'll make
the door inner. So we'll go points. Let's try 0.035. So we've got our door now, and we've got our frame cool. And if we need to, we can
adjust this and later, cool. So with this door, if I can find a better picture. You can see we've got two kind
of solid bits of the door, and then it got all these cuts going
down the mid section. So, let's do that. So with the door selected, going to add two loop cuts like tur snapping on press S X, and we'll just drag the moth. If we can get a side by side, we can see it's bigger than
our actual frame itself, which is 0.1, or
maybe we can try 0.2 for this wit fee or 0.15. Let's go 1.15. So I'm just
grabbing one edge loop. So I've grabbed it
all the way around. Maybe it along G x 0.15, do the other G X 0.15. And then what we'll do
is add the loop cuts for the bottom in the top
first because they're a little smaller than all of
the ones in the middle. So we'll just add two loop cuts, scale along the z axis
til we get something, maybe about 0.1, like so, and then we'll just
add some cuts, maybe one more like so. Sure. And then if I can get
a little closer in the door, I can see these are kind of raised and these lines in
between the depressed. So we'll do that
now. So to do that. First, we'll select. Let me just hide the frame as we don't
need it at the moment. Select all of the edges like
so, and we'll level them. I'm just going to
level it slightly. Roll up on the scroll
wheel. Seem in even more. We can see I've I've rolled
up so about two segments. That should be fine.
I'm just going to have it ever so
slight like that. And then what we'll do
is select all the faces. I select in everything
but the beveled edges. Actually, what we
want to do is select the beveled edges in between
as well for the flat bits. So that's going to box select, drag that, box
select, drag that. If we go in close, it's not done it as intended. So what we'll do,
click that face, hold control and click the bottom one, see
he's done that. Then press shift, left
click on that face. Then control to do that, and then we'll select these ones manually by just pressing
shift and clicking each time. So the edges that we want to stay at a lower level, do so. And then we'll extra
ever so slightly. Get strewed up a little lighter. That might be a little difficult to see right now,
what's going on. But the faces are raised, and the gaps in between
these faces aren't. So if I was to subdivide, for example, can start to see a little better.
Shades smooth. Once we put some of the
bounding kind of edges in, so I'm just going to
start doing that now. I'm going to have
one at the top, going to turn this
off temporarily, put an edge loop on this edge, one at this edge,
go to put c Sure. So you can start
to see the shapes taken form as we put some
of these edge loops in. We're going to have
one here, this site. It's going to press
double tap g and slide it up just to get
it a little closer, or alternatively
what you could do. If you're putting on both sides, put two edge loops in scale
them away from each other. This will keep it even. So if we do in the middle. Two edge loops, scale them away, so this is the x axis. S x a little more. Then do the next
ones, like, Sir. It's going to do this all
the way down the door. Starting to take shape.
We have to do this side. So we've got one at the front because
we've got raised bits, but we need a couple here, so I's do this,
scale on under y. We've got two light s. Then we're going to put
two here here. Then two here into the edge. That's going to add
edge loops where I think they're needed to
tighten up some areas. As to be on the same on
this side. Add another one. Q. So if we have a
look at the door, you can see, we've got
a pretty good match. Bring back the frame, and what we'll do with
the frame is add a bevel. So we've got bevel,
three segments, 005, 0002, Shade Smooth, and we'll select the
other two pieces. Well the other piece,
and copy modifier. So this has bevel, this has
bevel, shade this smooth. Now the frames got that
kind of slit there. We'd have to worry about
adding a subdivision to it. We've got a door.
And that's the door. Well, nearly, in the next bit, what we'll do is add a handle to the door. So I'll
show you that then.
20. Modeling Door Handle and Mirror: Chair. Next, what
we're going to do. Please just prepare the
door on the other side. As you can see,
it's pretty blank, and you can have it like that. But for this door, what
we're going to do is have it so it's the same
style on both sides. And we're also going
to add little kind of guess slits or a slit in the top and the side frame where the door would slide into. So first, we'll grab the door, and have a look in top
vi and grab the top bit. So we just got the
top bit selected. We're going to add
two edge lips. Scale them on the y axis, so they're just a little
bigger than the door. You don't need it too much
bigger, just a little bigger. Then we'll grab the side piece, and we'll add two
loop cuts as well. And then we'll turn
edge snapping on. Snap it to the edge we
just made on the top bit, do the same with a bottom piece, we don't need to do it for this bit because the door
doesn't slide into that side. And then what we'll do
is just add a loop cut, like so I'm just going to
slide it pretty far in, so we've got
something like that. Just going to isolate this piece so we can see it a bit better. And then we'll grab the side faces like so,
turn snapping arm, and then we'll extrude
it to that part there, select everything,
merge by distance, we've moved four vertices. So that means it should
have done it correctly. Then we'll delete the top face here and we'll delete
the bottom face as well. We've just got this
block looking thing and bring everything back and we'll do the
same for the top. I'm just going to slip both
of them. We'll grab this. We've got this one face, and we'll extrude
this up a little bit. So G D. Don't need
to go too much. Something like that, higher dth. And in this case, we
didn't delete cut now. We'll add it at this point, G D, and snap it to the
new aerial remade, select everything,
merge by distance. Four vertices we
removed. So that's good. Then we'll delete that face. Delete that face. So we've
got these little blocks now. I was to bring the doors back. So you can see we've got
this, bring everything back. And we're just doing
this essentially. So if you used to
have this door and your door was partially
turned snapping of open, or's doing an animation
where it is opening, you'd actually see the kind of runner where fails to go here, that the door runs along. That's all we're making there. But as you can see, the
door is a little short, so I'm just going
to put it back in position, hide the walls. And then with the door selected, let me just hide this door in front because it's in the way. Going to have the door selected. We're going to select
just the top of the door. So all these vertices
in this area. We can see where the edge is that we extruded upwards
for the door frame. So we can press G Y and just move it a little
closer to that edge. So now, our door actually goes up into
the frame a little bit. Though you can see
something like that, and it's not going all
the way up to the top, but it's encapsulated
in these two kind of sidewalls, and
that's what we want. And we've already got our bevel. O, let's just check it's
working as intended. I was to edit this. Yep. Sure. Now, what we need to do is add
a handle to the door. So I'm going to select the
door, going to front view. W it isolated, I'm going
to add a plane in. And for this handle, it is 102 centimeters sube. That's the wrong thing.
102 centimeters. Yes, by 51. So for this plane,
we're going to set it to 102 centimeters, millimeters by 51 millimeters. Nest wrong way around. This one is 102 millimeters. This one's 51 millimeters. You go to add another plane in. Snap this, and for the y axis, we'll set this to
about 91 centimeters. Snap it to the
bottom of the door. And this will just be for where the handle is going to start. So I'm just going to snap the
handle to the edge there, center it in the
location we want. The handles on the
right side of the door because you'll pull the
door from right to left. So if it was on this side, you wouldn't be able to put it very far because the handle got into the side of the frame. So we want it at
this location there. And then will also
press G Y and snap it to the door itself.
C delete this down. And with the door selected, what we'll do, we will keep snapping on is add
a loop cut above. And for each bit, we're
going to just kind of surround the handle
with loop cuts. So I'm just press I'm
adding a loop cut in and I'm pressing the
axis I wanted to snap to. So for left and right here is the x axis for me, of down ZD. So we're just going to
add in four loop cuts to perfectly surround this. Can hide this fel
select the door again. And then we'll go into
face select modes and select these faces
here, the loop faces. That will select these
four faces and fill them, then these two
vertices and press F, or you can hold F just
to fill the whole gap. We're here. What we'll do is add a loop cut in
the middle of the door, like so go into wire frame, and we'll delete the
top half of the door. Then we'll reselect
that runner vertices, press cursor to selected, just to put the three Dcursor
in the middle of the door, and then set origin
to three Dcursor. But make sure we
apply the scale, and set origin to three Dcursor. So we've got the free
decurs on the mos points, and then we're going to add a
mirror modifier to the top, change the axis to y, and now our door looks
the same on both sides, and there's no like
gap or anything. Then in edit mode, going to just grab this run
because it's got rid of it. Press E, to extrude, and then y, make sure you have clipping on, so you can press G y. And get that together.
E. Then we'll just add a loop cuff, like so, and we'll just add them
just to prove the shading, just to support some of
these other edges, two here, scale them away from each
other under i axis x axis, add one here, to add
one at the bottom, one on the side, on
this side as well. Add one more here, one more
there. Same for the top. Add one more in between, to add one on this
part of the corner. I'm just flick in between object and it's true
just to have a look. Chill out spine. Maybe I'll
just add one more there. Then we'll bring the handle back and we'll set
the handle origin. To the free Dcursor as well. Apply scale and rotation. And for the handle, what
we'll do is press I to in inset it by let's go 0.01, so you can go 0.01,
if you type that in. And then we'll extrude
it by 0.01 as well. Press negative to send
it the other way. We've got our handle here now. Then we'll just add a subdi set to level one, shade smooth, and just add some loop cuts the inside,
one of the outside, and then we'll add one
here on the left and the right, up and down. Ks. And then inside
the little area, we'll add one there at the top
one at the bottom as well. We've got that handle, and we
will add a mirror modifier, move it to the top just to
check it in the right place. We'll set this to y, so we can see a handles going
into the right location. And the last thing we'll do. I'm just going to isolate
the handle is we'll grab the outermost edge loop, and we'll just extrude this
in along the y axis a little, like so go a little further. Just so there's no weird
leakage going in when you're looking through at
the handle, like lightws. And then we'll just add cut
near that part of the edge, one near that part
of the edge as well. S. And then because
we're going to join the door and
the handle together, and they already have modifiers, we'll remove it from the handle. And then we'll select
the door control J to join them together. So now our handle is mirrored, and it has the subdivision
that door has, but we haven't added
more than we need to. Last thing we need to do
is delete this face here, delete this face, and fill
this gap. Fill this gap. There we have it.
We've got our door, and if we're to slide it, or whichever camera
angles you kind of got, you still got your runner there. And there is one there, but you're not really going
to see it anywhere. But it's just good
to have anywhere. Case you do something crazy
like the door breaks, I'll know what you might
want to do with it. But there we go. That's our sliding door. And then if we want to later, we can as there's one upstairs, we can just delete, delete, duplicate this whole
thing and move it up. But for now, what we'll
do is select this, select the top one,
join them together. We'll call this
sliding door frame. Door frame, grab this, call this sliding door,
or sliding bathroom. Door to let them both move them into building ground floor. Yeah, we'll do that for
now. Building ground floor. Grab these, building
ground floor. It's going to expand, grab these, building
ground floor. Tool. So now if we is
to turn the other, get rid of everything,
turn off our furniture, get rid of everything, got
a bit of control there. Of course, we could
put the doors into a separate group
along with windows. But for now, we'll
just keep it all in the building itself,
there we have it
21. Creating Archimesh Windows: The next element we'll
add will be windows. So if we look at our floor plan, we can see we've
got window here, got a few there, got
a few here, one here. Not here, this will be like double doors or something if you want to go out
into a garden. Then we've got a few upstairs. Some more doors to get out
onto this kind of roof area, then we've got one more here. So let's start with
the ground floor. What we'll do, we'll just
move the three Dcursor, place it over at this
window. So we'll start here. And in Arch meesh, we will go to panel
window, drop on him. You can see we've
got a window here. And as before with the doors, if we go to the create tab, we've got all these
options to kind of edit. The properties of the window. So as you can see
it's a small area, we're only going
to have one pane, so we can turn the horizontal
count. Down to one. And then we're going to
rotate this 270 degrees, so we've got this kind of indented portion
facing inwards. We're this bit going
to be facing outwards. We're just going to grab this, or just turn it
back to the select. The empty, and we'll just place the window where we want it. We're going to just drag it down and have it
roughly in place, and we can edit how tall or
short we want it to be later. And what we want to do
next, as you can see, the windows going into the wall, but you can't see through it. So what we need to do is there's two ways
we can go about it. With the doors, for example, we cut holes into the mesh. So you can see there's no actual wall behind,
but for the windows, what we're going to do is
use a Boolean modifier, So, I've clicked on the walls, and we're going to go to the
modifier tab, go to Boolean. And you can see these
windows, same with the doors, they come with this kind of box around it like a wire
frame box called Control Hale. This one's number
three because we have a few hovers for the doors. So on the Boolean, we're going to type in control. So let's control Hale free. And you can see now
it's cut a section into the wall that is this box here. And now we can move
the window around. And it we'll just cut
whatever section this window, this box is around
and see through it. So if I was to position
the camera like so, and then turn the
upper floor around. So we're just downstairs, going to rendered view. You can see now we're getting
some light coming in, and it's just coming
in through the window. Nothing interesting on
the other side yet, but we know it's
working as intended. Of course, bear in mind
if we edit the window. So if we click back on the frame and we edit some
of some of the properties, it will break the boolean, and we'll have to
just go back onto the modifier and reselect it. So you can see I'll
change the variable here, for to change the
height to the window. Maybe you just have a
little smaller one. Grab this, you
pull it higher up. You could do that, but then you'd have to go
back to the wall, and then re add the
Boolean, like so. But for now, we'll
leave the window as is. She might just put it
back to what was it 190, have a bigger window for now. And we're just getting some
of the pieces into place. So then later, it's a lot
easier to kind of make changes. So we've got control hall free. We've got one window here. So now, we're going
to move to bathroom. Go to add another panel
window, and rotate this. Go 90, 70, some the same sides. See how much space we
have for this one. Not a lot, so we'll
leave it as one as well. We'll make this one smaller. Go for a hundreds, have a little bathroom window. Of course, when
we design a room, we can decide how
big we want it or not because we still got
some models to do in here. But something's more like
that will work for now. We'll duplicate this boolean, and then we'll select, so you can use the
eye dropper to select which cutout you want to use.
So we'll select this one. We've got a cutout here
now, second window done. You can also have
a seal a window sill or not by just
clicking on the frame, ticking or tick and seal. Don't need to decide
on that quiet. We have a window here, so as before, we click there. And by the way, whichever collection you have selected will be where
new models are added. So at the moment, this one is the highlighted one. You can see here it's kind
of got a little area here that's a bit less showing up a bit more
than the other ones. So that's why all of
the window models, if I go into here, are being added into here. So it may save some time if you select one of
them beforehand. Then you don't have to
worry about moving objects into a collection afterwards. So we'll add another window, so let's go for panel again. This one's going to be
a high window as well, because it's going to be above
the sink in the counters. So we'll go let's go for a hundreds and we'll
move it into position. You have to worry too, just as long as it's in the
general direction, we can edit shape
and size later. Duplicate this again. Let the next one face
in the right way. That's good. Got one here. This one's a little bigger. So for this, let's go for two. We rotated 90 degrees,
and let's see. Do we want both of
them for this one? Maybe we'll have both
of them to open, so we'll tick both boxes. You can see if you look at a window and they'll
tick and untick it, you kind of get this extra bit to show like the
window can open. It's not just like a
flat plane of glass. So we'll have both
of them ticked. And these are controlling
the sizes of each window, width wise as this
controls the height. So if we set them
both to, for example, 60, they'll be they'll
be the same size. That will let's go 65 65, a little touch bigger. Move this roughly into
position, move it down the bit. And let's go 120. And as before, We'll
duplicate this, the control with one, and we've got
another window here. And begin to see. So we've got like how everything's
going to look. We've got couple windows here. So let's do those next. Panel window, count one, we'll go 100, got a
little window here. Just move this up a touch. Now, with certain windows, for example, say we was
to put it down here. You could see if we
added the two buildings, the bounding box isn't
going to cover both holes. So if you wanted it like so, you would add a
bounding box here. So we're going to just
duplicate this B, so the bounding box
for this portion. And then we would also
add one for this wall, Boulan here. Let
the bounding box. And in that way, if you ever had a window that's gone
through two objects, you can have it,
you could move it fluidly between the
two different objects. But for this one, we can probably just
have the window at a height of say about here and have both of them roughly in about
the same height. So we don't need to have the
boolean on the lower floor. But if you ever did, that's what you do
if you want to have maybe a high taller window here. So, let's add one here. So it's going to
add another window, panel window,
hundreds, rotate it. Jack, we've got it
going the right way. And we do drag it down. I su concerned about
them being perfect right now to let this Ducate. One more window. Let's check should be two more.
So floor plans. We just swap the floor plans
over. Have we look upstairs. We've got one window here, one window here, three here. But this will be one, one big
one with two little ones. So we'll put the cursor there. Add a new window. We don't want to do that.
Let's do it from top down. Window. There we go, rotate 90, the size of this one. Okay, I need to hide some stuff because I can't
really see too well. And let's go for a plane. Just do one big plane. I'll go one turn this off, you can't open this one
and we'll make it a little bigger. Let's go 130. This Be honest, to what
we could probably do. We've got this one at
165, 65, 120, 130. Yeah, so it's the same
size as the one below. Adjust in slightly
different positions. I'm just going to line them up. Because this one is one plane, and this one's two windows. The bits that the
borders for each window, the frames are taken up
that little extra space. So if we wired it
to be the same, we'd have to increase the
size of the window slightly. But we haven't decided on
permanent numbers yet, so we don't need to
worry about that right now. Let's do this. Let's put this here,
get the Boolean, duplicates the Blean, this wind actually will
turn the seal off. It's control c2rl
nine, I believe, nine? You can see, there's
an issue now. Because we've
turned the cyl off, the actual border, the bounding box of the
window is too small. So it's making the cutouts, but the cutout is not
going to either side. So I was going to go
into edit mods and scale it up along the x axis to make the border bigger
for this window. But now it's actually
cutting out the window. We could also make the
frame itself bigger, which would also
achieve the same thing. But before we start editing
the actual mesh itself, we just keep this here
as is as a placeholder. It's going to drag this down. Tue. And then we have one
more window for the bedroom, one more for the bathroom. So let's add this
now panel window. It's going to be f windows, but rotate it 180. And we'll make this
see about 1:50, 61 90 is the default,
then the seal, not have these ones
to open for now, but we might change it as
we'll want something to open, unless we just leave
it as the doors to I guess the ando or deck area
or whatnot, that can open. Because we'll be
a bit lazy here. We'll leave salon just to have the bounding box at the
bigger size. Duplicate this. This will be control ten. We've got our window here. Last one, add a
window here, a 100. We rotate it 270. O chill. And as before, duplicate the blem
11. There we go. So if you used to go into the mesh in rooms with
windows, and rendered mode, you'd either some light
actually coming into the sea and see into one
of the different windows, see into the different rooms. Of course, we haven't messed around with the
light at the moment, so it's pretty weak and bland. But we know we're going
to have some light here, have some light
coming in from other light sources as well. But for now, those are windows,
and see in the next part.
22. Modeling Kitchen Cabinets: Before we start
on the next part, we'll just do a little
house cleaning. So as before, you can see we've got some window groups
lurking out here. So what we'll do is
right click on each one, select hierarchy, and then you'll select everything
in that group. Then we can just move it
to building upper floor. As easily upper floor
windows we need to do. Building upper floor, hierarchy,
build an upper floor. These ones are in the
building ground floor, so we'll locate the group, and then select hierarchy, building upper floor,
select hierarchy, build an upper floor. R. Now, the next thing
we'll do is a few cabinets. So we've got a cabinet
with a solid door. We've got a cabinet,
the split off, so you can have your cutlery and stuff whatever se
separated in each one. And this is built
up by a plinth. So we've got this bottom
bit, which is the plinth, and then we've got a
door at the front, which will make up
the whole cabinet, and we'll do the two of them. So first things first, add a cubin and let's have
a look at the measurements. We'll do this one first. So we've got the frame height, well, that height, 88
centimeters in total. And this is made
up by the plinth, which is 8 centimeters, and then the frame itself, which is 8 centimeters. So what we'll do is make the cube 88 centimeters
under the z axis. Then we'll just snap
this down to the ground. And then the x and the
y are 60 centimeters. Once we've done that,
we'll apply for the scale. And just move it
roughly into position, isolate it so we can
work on justice, and we'll turn the
measuring tool um, and add a loop cut at
about 8 centimeters. Rig. So that will be the plan
area below, and up above, we'll add some cut
outs for where doors are going to be or the drawers, and we'll have them at 20 centimeters for the
top two loop cuts. As it looks like these two
are the same distance apart, and then the third one big part. That's about even f 2020. Next, what we'll do is
grab this bottom face and we'll extrude it inwards
by 2 centimeters, 0.00 202, and type. We've got 2
centimeters and press negative to make sure it goes the way I want
it to, which is in. Then I'll turn snapping on, create a loop cut
going vertically, and we want this
loop cut to line up with that edge we've made. Then we'll select everything
merge by distance, which will join
everything together, leaving us to be able to get
rid of these free faces. Because if I didn't do that, if I just demonstrate,
I'll go back again. So sometimes, just think if
I've gone back far enough. You'll get weird
bits of geometry where it'll be like
I've deleted that face, and then it'll be like there's just a longer kind of face. So just to avoid that happening, you just join things together
when they're overlapping, because it might
just mean there's two faces in the same spot, and we don't want
that or two pieces of two edges or two vertices. Extra stuff, we don't need. Cool. Now we've got. So we've got this
little area down here, and now we need to do the doors. So first things first, we'll select these three. Actually, before that, we're going to no, we'll
do it this way. So we'll select
all three like so, duplicate them,
leave them in place, separate by selection,
then select the door again, separate each area. So we've got three
separate drawers. Then we'll select
all three drawers and extrude them by 0.017. 1.7 centimeters. So we've got our doors here now. And we'll look closer to
looking like Catal cabinets. Just got to do a few things like rounding off the corners. So what we'll do is select
one of the objects, add subdivision, then select
the other three objects. Select that object last. Copy modifiers. So let's go copy modifiers now. So, yeah, they've all cuts. We've turned off this, so when
we're going to edit mode, subdivision gets turned off. You can select everything. Shade smooth. Then I'm just going to hide
the back cabinet for now. Select the three
drawers at di front, and we'll add some loop cuts in. So I'll just adding again, let me add one in the middle. Some look cuts to
all three objects, to select all three. G X. M mass I want to find
the middle objects. We'll just do that
one like that. Select them again. G X. Q. We'll add in two lights, two lights, two lights so. Let these two top ones, G, two bottom ones, G. This one, we'll move it up until it's an equal distance away from
this edge roughly anyway, as this one, do the
same for the bottom. We see the corner
is a bit funky, so we'll just add in
some more edge loops, like so, just to give the
corner a bit more support, and while at the bottom, same at the top,
one, two, three, four add two loops to
then we'll select. The three front ones, press G Y, just move
them forward together, set the three back ones, G Y, move them together. I just check everything out. Looks nice. Probably be safe to set the sub just down to one. Then we'll just bring back the back cabinet and do the same. We'll just add in some loops, but we don't need these
middle edge loops so we can dissolve the edges as we're not putting the
actual internal drawers in. We've just got the
drawer fronts. I go to add two
like so scale them. We add two there. Add one near the bottom. So this is the edge
above the plain. Then we've got two for
the plinth themselves. Add one there just
to help it out. The plinth area itself
needs some help. Just having a look around. So we're going to add one
more above the plinth, out co it looks a lot better. Check on this side, make sure there isn't
anything with missed. To that the tops looking
a bit too rounded, so we'll add another loop
to sharpen that up a bit, we can see F to side on that these edge loops are a lot looser than the
ones on the doors. That's why this corner is a
lot rounder than this one. If we tighten this, going to get basically thee we'll get the same kind of
curve on that corner, which is going to
look better. Cure. Now, if were to go into
rendered view mode, you can see, doesn't
really look too exciting. Can't see what's going on. So
we're going to add a HDRO. So if we go to Poly
haven, for example, this is the one I'm
going to be using just to view some of the models. So it's just HDR doors
spry chien Hill, and it's free, which
is always good. We can download the EXR, hit the download bum over here. Download the size you want. Go to the world properties tab, click the yellow dot,
environment texture, open, find your HDRI. There we go. So now we can see it a lot better to
see how the shadows look, if anything looks
a little funky. Looking pretty cute. Then this is where you might
want to, for example, you can see this kind of
shading is a little soft up the top because our
loop is pretty loose. It's a good thing about having a look at stuff like
this where you can see, let's add, for example, another loop cut, just to sharpen that a bit if
we feel it needs it. If I go back, you can see the shadings
coming out all over there, but I'm adding
another loop cut in. The shading closely
matching this. Course, as an
example, there'd be a countertop on this
particular bit, but then it will apply
to that instead. So what we'll do now is
just do the solid door. So first, things first, we'll grab the big door, grab the back cabinets, duplicate them,
move them across, so let the door
going to edit mode. And then we'll drag this door. Actually snapping,
snap it to the top, like so, There we have two
different kinds of cabinet. And essentially what
this will allow us to do is if we were to, for example, as are
using the same subs, we can join them
together, go join. We'll call this cabinet. If I can spell cabinets, one and door, do
the same for this. Select the free doors and
the cabinet join together, call this cabinet,
free and door. And then we could also
move them into furniture. Of course, you can
instead of just having one big furniture group separate them room to room if you wanted, but we'll move them into
furniture in the future. And then if we to
bring back the room, it just means that we can drain needs together
while duplicate them. So I can have if I'll
go to the layouts. We've got a cabinet there, maybe we have one by the sink. Maybe you have one
over this side. We haven't of course
decided how big the sink is going to be,
et cetera, et cetera. And then we could duplicate one, rotate it 180, slat
it back there. And to get the picture. Of course, there's not a lot of cabinet room in this kitchen. So we'll probably only have the two or maybe three
because we of course, can have a sink to decide
to a harp or an oven, have one of those as well. And then we'll just we'll
do a countertop and they have some sort of like
frontage for the corners. So we'll have the
corner go around, but it won't be something
that can actually open up. So those will be
the manual bits. But if you're doing
a bigger kitchen, you could just design this, design a few different elements, duplicate them together, snap
them next to each other. So as far as to go in top view, G, snap like so. G Y, snap like so, and then just keep duplicating the different elements
to make e kitchen. If we look at the room, you can see starting to look with the different
lighting with the HRI, starting to look a
little better now. Of course, we need
to add textures in, but we'll do that later. The
23. Modeling Kitchen Cabinet Handles: The next thing we'll work on is putting some handles on the
kitchen cabinets we've got. So we're going to model
something looking like this. So first things first. It's going to blender, and we'll hide all
stuff we don't need. We'll hide these
for now, as well. Then what we'll do
is add a cylinder, 32 vertices is fine, and we will adjust the radius, which is this value
here to 0.005. And we adjust the depth to 0.45 We've got something
like this and the depth, just affecting the length there. Next, what I'll do
is add a circle. We'll have the circle
on 32 vertices as well, and we'll adjust the
radius to 0.005, as well. The circles fitting
snugly over here, and this will form
the cutout we'll make for the little cylinders that
pk into the drawer ferns. Next what we'll do is
select the cylinder itself, going to edit mold, and
we'll just add a loop cut. I'll just put it in the center. That's where the cylinder is. This means we can use a
mirror modifier later, and the cylinder cutout will be on the same
position on both sides. Next, what we'll do
is select the circle. And we'll just move
it up to near top. Rotate it on the Z axis. X axis, 90 degrees, turn this on pure, and we'll square the top view
and just put it forward, u in front of our shape. Next, we want to
go into edit mode. Let me turn off edge length, and we'll scale it
down to 0.68 roughly. So we've got a shape
about this size. Of course, you can make
it bigger or smaller. This is one I just found to work in this
particular instance, and you can see is
positioned in this edge, in this edge as well. And what we'll do is move some I'm just going to
slip both objects and just reposition
them a little. So I'm going to have the just
whoever point of reference, the top of the cylinder where these cubes are to the floor, the measurement
floor, and we'll move this down on the Z axis. So we've got one big cube away. And then we're in
this big cube here. I'll try to center a bit, but I'm just moving
just on the Z axis. And then what we'll do
is turn snapping on, face project and project
individual elements. Then I'm going to go
into edit mold of the what's it called the circle. And then I'm just
going to press G. Then left click to
leave it in place. And now you can see
it snapped and curved the circle onto the
surface of the cylinder. That's what we want. Then I'm going to go into the cylinder, and I'm going to add
an edgy and bring it up to about this
big cube line here, and then I'm going to do
the same on the other side. That's why we lined
it up with the cube, just so we could get a
good idea of where to match these two edge
loaps to keep it even. This means when we
add loop cuts in the middle to which we will add nine spaced evenly in relation
to where the circle is. I've got one bang in the middle. And let's have a look. What we'll do next is
select all the faces that the circle
kind of intersects with and just make it
a square kind of grid. So even though they not
intersect there, they do here, and we're just
going to keep it as a kind of evenly square grid. We have 64 faces, eight down, eight across, and then we're
going to delete those faces. Then we're going to
select the circle, select the cylinder,
join them together, with turn off snapping,
with edge select, going to select the border of this cut out we've
just made and the circle. And then we're going to
bridge edge loops together. And as you can see, it's
bridged it pretty nicely. If it didn't, and it
gave you triangles, then you could press J to
try to get tris to quads. Or manually dissolving
certain edges to get the same kind of effect. But with the example, I shot I did eight by eight, with a 32 vert
circle and that just seemed to give an even kind of result without having to mess around trying to clean up
the geometry afterwards. So now we've got this
kind of cut out here. And then what we're
going to want to do is select all of the vertices, and we're going to press
F to fill the face. And then we're going to inset and we'll inset it in slightly. I'm just going to
go about there. And then what we'll do
next is extrude it. So I'm just going
to press E extrude. So you can see about
the beginnings of this. For the actual length itself, looking about let's look. 38 millimeters. So just as a quick way, I'm just going to
add in a plane, set this to 38 millimeters. Match it up. So we know
how far to drag this. With these faces, with these
varices still selected, I'm going to press S. Check
what axis I'm on the y axis. S y zero, just to straighten
this out. And then G, y. And drag this to about where I want to about the end of the plane, we
just made there. So we've got 38 millimeters e. I'm going to delete the plane because we no longer need it. If we go to shade smooth, see, we've got a little
weirdness going on here. So we're going to clean
this up a little. If you get in where you can't zoom in without
missing off the mesh, if you go to view and
change the clipping, someone's going
to press it down, means you can get a lot closer. Without it while clipping. So I'm just going what I'm
going to do is add a subdive, fission surface or
to set it to one. So it's made the
faces on the tops, the circular faces that
are not quads, wrong. So I'm just going to inset this face like so I'll
make it really small, and then you could just
add a loop cut like so. Now that's not an issue. Add some more in if you really want, just to flatten it out. Then add one near the
top for that part there. To just drag it a
little further to the top of that nice and sharp. But here, what we'll
do is going to turn this fan edit part is, I'm going to add a
couple of loops in this little inst we made
here that's clean that area. And then on the shaft itself, to sra a loop down
near the bottom. Nice clean bit there. Something you might
notice if you look really close is
there's a little, I guess let's see if I can change it to make it
a bit more viewable, almost like a dimple, or like a kind of
flat spot, I guess, which is which may be noticeable if you're
looking really closely, and that's because we've got these kind of big faces here. So just bear that in mind. And that's just how it is flat. I can't curve on the
plane. You'd have to add even more geometry and
kind of bend it around. But It's highly unlikely
on a door handle, you're going to be seeing
these kind of parts really. So we'll just leave it as is. I'll just quickly fix
up this face as well. So I'm just going
to select the face, inset it, are to the bottom, add some loops like that. If you want, or just
add one light sell. This is going to be in the Cbd. So actually, what we can do, say it in top view, select, diverts delete face,
just leave it so, because this is
going into the Cbd. Don't even need that
geometry to be honest. Q. And let's see. What we'll do is we'll
add one more loop cut just to kind of wind this, but on the outside of
the insep we need. So I'm just going to
add a loop cut here. You see it's a weird shape,
so I'm going to press E, and then F to make sure it's
flipped onto the right side. You see this little
orange dt by my cursor, which is just showing
which direction the E for even is when it's on and which flip, which
direction it's on. So I want it on this circle, so it's the right shape, and I'll just put it
pretty close side, so we've got this nice
kind of shape now. Te. And now what we'll do is as we've got this cut
in the middle of our bar, we can select the bottom verses, delete them, and then we
can add a mirror modifier, like so, add it before subdivision to let the right axis in my case,
it's going to be Z. So now we've got
to handle like so, and then we'll apply
the mirror modifier. We bring back everything. Well, bring back the cabinets. We'll just position
this. So I'm just going to rotate it 90 degrees, drag it down, rotate it 180. Going to side view. And then we can just put them roughly into place
of where we want. Just have it so they're
slightly inside the drawers. Like, so Of course, you can be more
scientific if you want at a certain location, just using the edge
length, measuring it down. As we're going to adjust
these drawers in a moment, we won't do that for now. I'm just going to place one
to put this one there, free. Then the handy thing
about this is, if we wanted to add one here, for example, we could
add one up top, line it up, which I guess would make more sense if we did this. Or if you want to have one that's side on, you
could just rotate it. So if I was to rotate
it 90 degrees, say like a handle like so, and then you'd go
into edit mode. Going to edit mode, and then you could
just move the points. So wy frame, select all of
it like so. B it like that. If you have to move this
on all the way down, B it like that, you could get like a long one, for example. But for now, we'll just
have another one at top. Because these are
kind of things you want to experiment with, like, different kind of
handles, different positions. So none of this is perfect. Might not have
this handle, might have just a handless
kind of ones. Oh, this is this
cabinet this throw. So there we go. Then, of course, once we've
done with the drawers, we'll attach them to the
rest of the cabinet. So they're just one
thing we won't have to worry about moving around. Or alternatively, you could
use a empty parent together, like we've done with the
couches and the beds, if you want to keep that
independence on the handles, but that's it for now. M.
24. Modeling Kitchen Countertop: First things, first, we'll just rename the handles
in our outliner. So I'm just going to
select one of the objects, and we'll call this
cabinet handle. I'm going to copy that,
and then just paste it. For the name and
the other objects, like so, and it'll
just number it for us. We've got cabinet handle,
and we've got one more. We got them done there. What we'll do next is
select the two cabinets, and we'll introduce some gaps. So more prominent gaps. So you could have
door handles up top, or if you want to do
just with out handles, you have the option
as well because there's no real space for you
to get anything in there. So especially with
when the tops on top, you want a little
space underneath. So what we'll do is
select the doors. I've selected both cabinets. I'm going to edit molts, I'm going to edit both of them, and I'm going to select the
little door and a big door, like so, control I to
invert the selection, and then hide everything. Then in a side view, I'm just going to select all
the top vertices like S, we're going to move it
down by 1 centimeter. So I'm just going to hit minus to put it so it goes
down instead of up. If you look at the top left, this -1 centimeter no, If we bring it back
into object mold, you can see, now
we've got a gap. I'm going to do the same
for these two gaps. So I'm going to select
this cabinet and hide it, and then select this one. Got to edit mold, bring
everything else back, select. The two doors, invert
selection, grab this one, cheese it, 1 centimeter, hide this, and then do the
same for the bottom one. Like so. Now we've got
some nice little gaps. Then I'm going to
bring everything back. I'm just going to add because it's a bit
curved at the back, another loop near the back, and I'll do the same
for the other one. Sharpen up the back a bit. And then we'll
select the cabinets and the handles and move
them against the wall. Or near enough. Que. Next, what we'll do is model A countertop. So we're going to use these
dimensions for reference. Of course, if you
want it thicker, you can adjust the
thickness as well. But we'll use this for now. We'll add a cube, and the fitness will be
2.8 centimeters. I'm going to do that
now, 2.8 centimeters. And then for the depth, we've got 63.5
centimeters. C 3.5. Then it's going to
apply the scale. Turn snapping on on
edge snapping and we'll snap it and the y axis
against the wall. And then for the Z axis, we'll snap it to the
top of the counters. Then if we just temporarily
turn off the building and look in side view,
just want to check. This is sitting nicely on top, which it is Q. And we'll move it
across on the x axis. Just so there's a little
bit of overhang for now on both sides.
Looks about even. I guess that would be even. Of course, if you want it
flush, push it a bit further. We might do that, Layer. But for now, this is fine, then we'll bring
the building back. And we're going to
grab this face, Turn snapping arm and
snap it to the wall. We're going to press g x. Snap I'm snapping it
to this edge here, and then we're going to turn
snapping and in edit mode, we're going to put edge
length measurement, and we want to make an extruion here that is the
same depth as this. So we've got 0.635. So we're going to add a
leak cut move it across until we get 0.635
at the bottom. Building shift for smaller
increments, 0.635. We've got a nice square here. Then I'm going to
grab this face, and we'll extrude it
to this edge here. I'm going to press E. You
can see, extruded it nicely. Then we need to do the same
thing again on this side. 0.635, and we'll get
in a bit closer. There we go. And
then we'll extrude. We'll get rid of
this cabinet first. We'll grab this
one, duplicate it, rotate it, and position it. And then we'll extrude this face and we'll have it
flushed against the wall. Grade. Then what we'll do?'s going to isolate
the counter tar, and we'll add a
barrel tool for now. Set it to two maybe
three segments. Set this to 0.002. So we've just got to be a more rounded edge on the counter. It is right the way around and it's non
destructive as well. So we can edit this
without having to fa about with the actual
underlying geometry because that hasn't changed. If we applied this,
then it would change, but we're not going to do that. So we have our countertop, can rename it, countertop. And of course, we've got
our cabinets so we can duplicate as we
needed, as we need to. And if we need to make
adjustments for the sink cutout, we can just add edge
loops in to dictate, for example, where
we're going to cut. But once we've done the sink, then we'll know where to cut. But yeah, that's it for now.
25. Sink Modeling: Next, we're going to work
on modeling the sink. So I'm just going to
look at the reference and have a look at
the measurements. We've got 54 centimeters by 44. So we'll get to
the work on that. What we'll do is hide
most of the scene. I go to hide Everything like S, go to add in a plane, so we'll start with a
plane and 0.54 0.44. 54 centimeters by
44 centimeters, apply the scale, and we'll leave it in
place here for now. And then what we'll do
is bevel the vertices. I'll just turn off
edge length for a second. So I'm going to bevel. You can see it's not
doing anything because it's trying to level the edges. So we're going to
press the V key. And now we can bevel the
vertices as you can see. But let's just turn vertices so tons you can
see a bit better. B, and we're going to
have it so there is four verts in each corner. Then bubble it to about that. We've got some rounded
kind of corners. Then we're going to
select everything and insets by 0.02 like so. Then we're going to
extrude it down to about if we have a
look, on sync depths. We're looking at about
anywhere 6-12 ". So we're going to
go for about 10 ", which is 25.4 centimeters. So with this face selected, I'm going to extrude
it by 0.254. Make sure it's going
the right direction. Now we have the body
of our sync here. Next, what we'll do
is add a few bevels. So with the bottom face selected still going to bevel this. And for the bottom one, we'll bevel it for two segments. So if I'll get it closer,
it might be easier to see. Roll it down. We've got
two segments there. We put a bevel
looking like that. Then we're going to
bevel this edge. We do this one to three. We'll have this
one pretty sharp. As well. We close together. It's smooth shading, so we can see what
we're working with. So we've got a little bevels, got a smoother one there, sharp one there, so you
could do that if you wanted. Just be laying the bevel
a bit further out, but happy with this one. So, what we'll do next is add
the area for this cutout. So to do that, we're going
to be using loop tools. On the add ons, type loop
tools and activate that, then we'll select
the bottom face, delete the face, select
the bottom vertices, then we're going to extrude
them and scale them in, like, so now for the drainage area, we've got a lid, and
then we've got this kind of bigger drain pipe hole. I guess. So what we'll do is have a look at
the lid dimensions. So if we grab that looking at a diameter
of 8 centimeters. So we'll add in a cylinder to represent that,
leave it at 32. And for the radius, we'll set this to 0.04, should give us a diameter
of 8 centimeters. Then leave it at like 0.005, actually, just so we got a
bit of something to see. We'll leave it 0.1
for and change it later.'s going to move
this down into the hole. And then with these
back to the sink, with the vertices selected on
this inner, the edge ring. We're going to right click. Lutetols circle, and it's going to put
it in a circle shape. See it's a bit distorted, so we're just going to rotate this until these edges
are straightened out, so it's not anything crazy. Cure, then we can scale this in. And we don't want to scale it to that size because
that's the lid size. We want to leave a bit of an area for where we can
model this area here. But think you can see it
better in this image. So we've got a bit of a slope, then an area, then it kind of the slopes down and the
lid sit in in top of it. So we've got these
vertices selected. And what we'll do first
is extrude in slightly, like so, and then we'll move it down on the Z axis to
give it a bit of a slope. And then we'll extrude it in. But still leaving space. What we want to do is just add a sub dive just so we
don't get too close, we still leave a bit of
a gap so you can see, I've got a bit of
too close there, so I'm just going to scale
it out just to touch. So we've got a bit
of a nice gap there, and then we'll extrude this down like so because that would be where
the drain pipe is. Then we're going to just
turn this off and add some loops just to clean
sharpen up some of these edges. So first, on the outside, just going to add a
few loop cuts like so, to give more geometry
here in these areas, so there's not weird reflection. If I got back, you can see, kind of a little distorted here. Because these faces
are a bit stretched, so we're deciding
some geometry there, just give it more room. Then we're going to add a loop here, sharpen up this edge. We're going to add one on the inside near the
bottom as well. So we've got that sharp
kind of slope there, and we add one on this
inside here inside there. I'll just have a look
at the reference, going to hide this cylinder, then we'll add another one. There to make that
a little sharper, add on at the bottom. And there bigger. Then for our lids, we'll set this to
depth of 0.005, move it into position. Shade smooth, but add a
sub diive of one level. Then with the top face
selected and it's going to inset it to
make a small circle, add some loop cuts
at the top, like so. It's going to isolate this for a second and do the
same on the bottom. Then add a couple of loop
cuts in the mid section. So we've just got
some kind of disc. Like so. Q. Then just check
back with the reference. Next, what we need to do is grab the outer edge and we'll
extrude this down a little. Those are just that, and
that's just going to be bit the scene on
top of the counter, just to give you a bit
of depth of nervla. Then we're going to add
this little square here. So to do that,
we're going to add a cube or the
dimensions of the cube, for the x axis, we'll set this to about
5 centimeters point f 5 centimeters there. And for the depth, we'll
set it to 2 centimeters. Then for the front to back, set it to something small. Like ply the scale, going to set it even smaller. Let it to 1 centimeter, and then we're going to
move it along the y axis, and we'll just position
it to where we want. It's intersecting with the mesh, then we'll duplicate it. You got cube and Cube one
for the original one. We'll turn it to a wire frame, and then we'll click
back on the sink and add a bolean modifier
and select cube. If we hide cube one, you see we made a little cutout, And then what we'll do is
bring Q back Qb one back, which is the actual kind of metal piece that's
going to be sitting there. And for this, we'll
just scale it down. So we'll scale it by 0.9, I'm just going to
press Control one, so I can try to get
it evenly spread, so I'm going to scale
it across the x axis. Until the border, this
little gap looks round about even, apply scale, cool. And for this bit,
what I'm going to do is going to edit mode, control B to add a bevel, and we just want to add
a slight bevel to this. Just going to use two segments, just a slight bevel,
smooth shading. Then we'll duplicate this piece, and then move this piece back. And scale this and
we'll press shift y, so it scales on the
x and the z axis, but not the y axis, and just to fit the gap behind. If I move this, you
can see straight through it, and now you can't. Then we're just going to want to position these
cubes so this one. It's just about coming out, have a looking top view,
something like that. And then this piece is
just sitting behind. E. Then we'll just have a
looking different view. Check our reflections are okay. Using MCA here. Try another one. Q. Then what we'll do is apply
the subdivision to this. That's going to apply there. Click the cube. These are the pieces
that go back here, not the Boolean, and this, and we'll join them together. And then we'll just name
this sync cap sync cap, I guess, we've got the layer and we've got whatever
this piece is. That's just one
object, and we'll just call this sync basin, and we'll just leave those
modifiers unapplied. Then what we want to do is
attach this to the sync, but we'll do that
in the next part.
26. Sink Countertop Placement: So what I meant to say
was we're going to attach the sink to
the counter top. So let's do that now. We're going to grab
actually first, what we'll do to make it
easier to move things around. We'll add an empty, and
then we'll select all of the objects related to the sink. So I've got the
three objects here, and then the empty
parent it to it. So now we can just
move the sink. W I have to worry
about the bullion or the caps moving around. We can see where
our counter top is. So what we want to do is just position this. I'm
going to look. I'm looking not at
the references now, but at the actual
cabinet itself, and just placing it roughly
central to the cabinet. Then we're going
to move it down. Then where the lip is, we just want the lip to be intersecting with the
counterter like so. And you can see that
we have an issue here. You can't see into the sink, so we're going to
hide the counter. First thing we're going to do is go into this cabinet here. Now, we've made a duplicate
of this particular cabinet, so we can edit this one
and not have to worry. But if you haven't, make a duplicate and just move
it somewhere else for now, so you have something
to go back to. B, what we're going to do is select this top fac
here and delete it. And then we're going to just
add a few leap cuts because you can see the
subdivision is warping, some of the diametry. So on this inside
edge, Zoom there, just going to move
this to about there, do the same on the other side. Then side on, we'll
do the same thing. Tool. Then if we bring
back the counter top, you can see we still
have a problem. So first things first, we're going to add a loop cut that runs through this
part of the sink. Then we'll do one on the
other side, one on the top. And one at the bottom. Like, so, another thing is, if we were to hide this ase, hide the one underneath, Curve a look, it
looks like it's fine. If it wasn't, then
we'd have to add some more geometry
and curve it around, so I'll just show you
how to do that as well. So what we would do is
add a few more loops. So I'll grab this loop. I'll just move it
to say over here. Then we'll add maybe
three loops like so, were the same on this side. Then in so I'm in top of you, we'd adjust the vertices to bend the geometry
a little bit. I'm just going to slide
these into place. I'm going to box
select or select the top and the bottom vertice. Then I'm going to
just pull this, so it's intersecting a bit more. I'll just select the
whole thing like so. Pull it inwards a little bit. Grab this, slide it up. This one's fine. I'll just
round it off a little bit. And this one's fine. So then
when we cut the inside face, and be a little cleaner. I'm just moving this,
going to grab this one. Slide it like so.
Grab this like so. Then if I was to
just isolate this, can see we've got
this face here, delete that, delete
the bottom one, bring back the sing, and then you'd get the same
kind of results. Then if anything's intersecting, like I can see
there's a plane here, can find out what piece
of geometry that is and just adjusted. Grab these. It's going to move them. And then the same
on the other side. That edge is a little too
close to the outside. Cute. Then let's bring
everything back. So we have ground floor, got our sink, it's in position. Embrll just our window, so it's lined up a bit bare with this sink now
that it's in place. Let's make sure I've
grab the right thing. Center it on the sink no, Q Boolean still in
place. That's good. Then we'll rename
the sink empty. We'll just call this
sink controller, and just check everything is in the right
kind of position. If so, we can move
all of the cabinets, sink counter into furniture. Press Co furniture, regular
ter furniture as well. Now we can toggle this.
There we have it.
27. Modeling Kitchen Tap: So the last part of the sync
we need to do is the tap. So we're going to do a
tap based on this model. So first things first. We're going to add a
plane into the scene. So I'm just going to hide everything for now,
go at the top view, actually, right or graphic, add a plane, and then we'll use these measurements
to shape the plane. So for the total height
you're looking at. 35.9 centimeters. So let's go quite
359. For the width. We're looking at 19.6 from the mid section
of the cylinder to the midsection of the
cylinder over here, 19.6 0.16. Its apply for the scale, going to edit mold. Turn on edge length
measurements, and for the final
measurements is from the base to where the
tap would end over here. So that's 24.9 centimeters. It's going to be 0.249 like, so then what we'll do is add a cylinder is going to make
the tube shafti thing, and we'll have it
at f two vertices, and for the radius, we're looking at about
2.2 centimeters roughly. So instead of that,
we'll got 0.011, for the radius, which will make 2.2 centimeters
for the diameter. We've got 0.22, which
is 2.2 centimeters. And for the height, we'll set this at 24.9 for that. And that's in centimeters. Then we'll just
move this over so the base lines up and it's
roughly in the right position. The edge of the plane matches up about the mid
section of the cylinder there. Then we'll select the
top part of the plane. I'll just do this, do this, top part of the plane,
and we'll move this up, maybe about a few squares
as it's still straight, a little bit past this area
before it starts to curve. And to get it to curve, we're going to use
the spin tool. So I'm going to check. X axis as we're in right orthographic. You can see the circles
showing up here. If we drag one of the handles, it will spin from the
area we have selected, but it's not doing
what we want it to do. So this is because it's based on where the
free D cursor is. So we're going to move
the free D cursor to be in line with these
vertices at the top, set it to about there, and then we'll try
to spin again. You see it's looking
a lot better now. Then we'll set it
to about there. We don't want it to
come all the way down here just yet as it curves, and then it straightens out for that last kind a little
bit of the area. So for the last bit, we're
just going to hit extrudes. And now we've got a curve
which straightens out. Then you can see it's a
bit blocky at the moment. Even with shade smooths, we're just going
to add subdivision just to give it a
bit more geometry. Can have it at two, but it
looks like one will be fine, and then we'll
select their face at the end on both ends
and delete them. So the geometry is
not getting what. We'll also add a solid
modifier set to 0.001, just to give some thickness
to the actual tube itself. Finally, for this part, we'll add a loop cut and drag the edge
close to the end here. Add one more. Like so, just to sharpen up
that edge there. Then we'll just add one,
something like that, because this is going to be
inside the base tube anyway, so it's not super important. Then we'll speaking of the
base bit, we'll do that next. So we're going to add. We're going to select first, the edge the vertices over here. So select them like so,
select the whole ring, and then go cursor is selected the three D cursor in
the middle of that area. So when we add the
next cylinder, it's lined up nicely. And for the radius,
we'll go 0.022, just to make it a little bigger, and for the depth, we'll
go 13 centimeters. Then just line this up near enough to where
the bottom is. Just a little lower so don't get some intersection as
well, which is fine. Like so, can hit shade smooth. Then we'll add ten
loop cuts, like so, and then add a loop cut
at the top like that, and one near the bottom. If you really wanted to, we can just delete the bottom face. You don't actually need it. And for this face
here, we'll inset it, just to touch like so, and then inset it to inside the cylinder and add
a few loop cuts. L so. Chew. We've got
two parts done so far. We have two mortig. We have the little extruion
here and the handle. So for the extion, what we'll do is go into right
orthographic numpad three, and we'll add in a circle. S is pretty big. We'll set it to 0.022 to the same
radius as the cylinder. Then in edit pod, We'll hit. We'll
scale it by 0.9. We'll just scale
it in a tiny bit. Mave it up on the Z
axis to where we want the handle to go,
roughly in the middle. And just so it's inside. We can see the edge here, it's inside that, and on the top side, is
also inside that. And it's not like going too far over
where it's intercept. And then what we'll
do is in top view, we'll move along the x axis. Just so it's outside
of the cylinder. We can delete this
plane, by the way. And then we'll turn snapping on. Face projects, project
individual elements. Go back into edit mold
with the circle selected, and then press G.
Then left click, and you can see, all of the varices are now
snapped onto the face. Turn that back off,
select the cylinder. Go into edit modes, and then we want to
select all of the faces, not all of the faces like there, but all of the ones where the circle is kind of
coming into contact with, but forming a square. Though like S, can
see us down here, we select order these, like S, and all these ones
in the middle as well. And we should have
48 faces selected. Which is an important
number because it means when we select
these vertices, we have 32 vertices, which is the same
as our circle here, which means when we
join them together, it'll make some nice
clean geometry. So we're going to do that now. We're going to
select the circle, select the cylinder, control J, and then select
the circle again, select the vertices in the
scaping hall, and then bridge. And see we've got some
nice clean geometry there. Now, what we'll do is select
the varices for the circle, fill them, and then we'll
inset the face a little bit, like so just to
give this border, that we can add a
lover loop cut around it and just scale it in just to sharpen
this outside edge. And if we add a sub dive, modifier, you can see
what's going on here. A little better. Burn
it off an edit mode. Then we'll add one more
inside this area here. To sharpen that up even more. Then we delete the face, grab the innermost
ring of vertices, go into front orthographic, and we'll extrude them
along the x axis, then scale them to straighten out along
the x axis as well. Now, as to how far we want
the handle to come out. We're going to go for about
let's say 7 centimeters. I'm just going to add a plane
in as a rough guide 0.1. Then looking back
at our reference. We can see it's kind of
split off into two parts, where it's out, goes in a
little and then it's out again. So we do something
similar to that. So if we move this along the x a little
further, for example, and then what we'll
do is extrude it in slightly, like so, and then we'll shift d to duplicate it, leave
it in position, and then back into front view, then we'll extrude this
the rest of the way. Then extrude it, scale
it in a little bit, extrude, scale it
almost all the way in, and then fill the circle. Add a few loops on the
edge there, shade smooth. And then if we hit
L on this area, because we separated it
by duplicating the gamer, we've got a separate
area here now. Then we can press P
separate by selection. Now require a separate piece. And this will be
useful if we set origin to geometry
to center the point. Meaning we can rotate this independent of
the rest of the tap. So if you want to
do any animations, it's going to be set up,
especially if you're turning the tap on and
turning the or whatnot. So next bit we need to do, can delete this plane, and then select this
outermost parts. And we're going to add
in some loop cuts. We're going to keep
them pretty close together to make the handle bit. I'm just going to add
two loop cuts like so, me, and then we'll
drag them like so. And then I'm going to make
this one pretty close. Select two faces. T two want two, two or three. So if we have two, yeah,
it looks about right. Then I'm going to select two
faces shifty to duplicate, P separate by selection, then select those two faces, and then we'll extrude them out. And we want it to be,
let's say, about, maybe not that far, but somewhere along
those kind of lines. I'm just going to rotate
it a bit so we can see, look at the reference because it comes higher than the base
area by a little bit. But we can of course
edit this if we need to. D I'm just going to hit S s zero just to flatten
the top a bit. We need to add some
leap cuts in as well, because you can see the
geometry is a bit weird due to the subdif modifier, so I'm just adding
leap cuts now. D three. Add the one
near the bottom. You can see it's not
touching the handle area. So what we're going to
do to resolve that is add a shrink wrap modifier. Firstly, so we've got
the shrink crap there. I'm going to delete the
faces on the bottom. So I'm going to select
the big faces and the press control plus numpad plus to expand
the selection, so it's going to select
the faces further out, then we can just delete faces. Going to bring the
selection back. And if we choose the target on the shrink crap
to be this handle, you can see it's done
something weird here. Use of string crap in the whole like handle bathing
onto this cylinder, and we don't want it to do that, but we can use a vertex root to specify which vertices we
want to be shrink wrapped. So I'm just going to turn
this off temporarily. We can select all of the
vertices on the bottom. We want to be shrink
crap, go to object data, Blues object data properties. Yes, click vertex groups
to add a new one. We'll rename this shrink, maybe like all caps. Hit enter, and then
we'll hit a sign with those vertices only selected. So you just want those
ones to be the ones. And it's not doing anything at the moment until
we got back here. Choose the vertex group, shrink. And now you can see
the vertices are actually like snapping
onto the surface. And that's what
we want it to do. Now we just have a little
check over and make sure reverence missed
anything. That's good. That's good. We've
missed a bit here, we need to add some more
loops because you can see there's not any
definition here. I'm just going to add
a loop, drag it there. Just define this area
a little better. E, need to drag one
to the other sides. And closer, but add
two loop cuts here, this area, add a loop
cut near the bottom. So see it looks a
lot more defined, which is what we
wanted to do to be. Te the shading is
a bit weird here, so we're just going to
add in another loop cut to sharpen that area a little. Then what we'll do is
select this cylinder, curser to select it, going to go in top
few, add a empty. I'm going to scale it down, so it's going to
scale it up a little. About that kind of
size, apply the scale. And then we'll
select the handle, select the cylinder, select
the empty last and parent, set parent to object, and then select the empty, and we'll lock the axises we
don't want it to rotate on. So we only want it to
rotate on the x axis, so we'll lock y and z. And now we can just rotate
this handle freely, like so Of course, if yours is a different axis, then lock the appropriate axis. And what we also
want to do is select this cylinder,
cursor to selected, and then add another empty, scale it down, apply scale, and then we'll select
all of the object. That the new empty last
control p, parent it. Now we can move the
whole as one piece, and we can also
well not move this, but we can also rotate this
one. It hasn't broken. If it has, let's do that again, select select select
set parent to object. So that's working,
and we can move it. Yeah, must have as we
did the parenting, so we did this one last, the overri this one. But we don't want it to do that, so we just set this one. E. So now we've got a working tap, and we just need to
place it into the scene. So we're going to
bring the building back and the furniture. As as person is going
to save just in case my blender crashes
as it's done that, and we're going to move
the tap into position. We go to move it to about there. That's roughly
centered, where we want it to be. Then move it down. Let's just intersecting
with the counter slightly. Y. And then if you wanted to, you could then grab this parent and parent it to the sink. So you could then
move it as one unit. But for now, don't
need to do that. What I will do, though, just check my tap straight. We do it touch like so, and then we'll name
all of the pieces. So I'm just going
to call this empty, which is the Well, kitchen ta master controller. We'll call this one, the
kitchen tap controller. You can think of a better name. Call it that. Call
this tap main hose. Call this tap base, tap handle. Probably got a better name. We'll call this tap handle one, tap, ever. We've got lever. We've got tap lever, tap handle, tap base, tap main hose. I've got select hierarchy
to select everything, and then we'll move
it into furniture. Check that works, so we
can hide everything. Check there's no intersections. There we have it. We've
got a working tap.
28. Modeling Oven Door: So the next thing
we're going to do is an oven based on
this model here. So first things first, let's hide all the
things we don't need for now and going to front view, and we'll add a plane. Looking at the d
dimensions we have, we're going to look at
just doing the frontage. So we've got the door, we've
got the control panel, as it's going to be
a built in unit. We don't need to really worry about the back end
or the internals. So we've got 59.4 centimeters
across. Let's do that. Now, 0.594. And then for the down
the height, we got 58.9. So 589, apply scale rotation, and let's have a look. What we'll do next is separate the control panel kind
of area from the door. So we're going to
add in a loop cut. And we'll have it
about 10 centimeters. Then with those
vertices selected, we can just go rip vertices, and ride it that don't
crash. There we go. Separated. Now we can just select those vertices
and hide them for now. We grab these two
top vertices here. And we'll move them down
by a centimeter just so that we've got a gap between the control
panel and the door. Then what we'll do
is add a plane. So it's in the same position as the door because of
the free de cursor, and we'll set this door. So this plane is going to be just an outline for where
the window is going to be. So we're going to set this
roughly at 0.4 to five across and 0.3 easy. Let's do that again,
apply a scale, and then we'll just move it into roughly
where we want it. So Looking at the reference, it's a little higher up than
like a central kind of cut. So we'll just leave a bit more space down here than up here, by just the touch. And then we'll go to the plane and we'll add some loop cuts. I'm just going to add
two in the middle, scale them away from each
other to about there, add one for the top. On for the button. C. Then we can get
rid of the plane. We don't need it no more. Whilst we're here, let's call this oven door. Got to top here. And what we want
to do is just make sure we have just
the door selected. And we're going to extrude this. So I'm going to extrude
by 0.002, 2 millimeters. I want to make sure it's going. Right direction. Zero,
zero, zero, two. 02. D G. Then I want to select. The whole door, duplicate it, and then we'll move it
along the y axis by 0.0 18. And then we'll
unhide everything. So we've got the top panel. I'll select just the
top panel this time, and then we want to
extrude this by 0.02. Now, in total, the depth of
the door is 2 centimeters, which is what we have
for the reference. And then we've got these
two smaller panels of 2 millimeters and then 16
millimeter gap in between, what we want to do next,
we'll just hide this. Actually, let's separate it. So we'll just separate this
top panel totally, hide that. And what we want to do is we should have done this before, but we're just going
to add some loop cuts. Each of these axes here. So I've got an extra loop cut, got an extra loop cut, and then we're going
to go on face select. And we want to select
the outer faces, the outer inside faces,
going all the way across. I'm just pressing control
to select the whole line. We have something like
that, and we want to do the same for the other side. Like so, and then we're going
to go bridge edge loops, and we're going to set
this two loop pairs. Q. Then we're going to select
the two outer middle faces, separate by selection, hide those and go back in and these two inner
faces will delete those. Then what we want to
do. Edge select mold, we'll select these two
button faces, fill, then select this edge here
and just hold the FK, and we'll just fill the faces all the way around
to the other side, and we'll do the same
on the other side. L et these two feel feel
all the way around. Then you can check it's worked properly by trying
to add loop cuts. So just hovering over
different places in your mesh and
seeing if the loop cuts go all the way around, which they do, meaning that
the mesh is set up properly. What we've done,
we've got our two little panels for the door. So the front panel,
the back panel. And then we've got this area
in between, which would be, I guess, if you
looked into the door, you'd see this kind of edge. And it's a little as we've added dis leap cuts in between, it's a little closer than the
outermost edge of the door, and we can adjust
it if we want to bring it closer or
further away as well. So if we look back at
the door at the moment, we've got a panel here, panel up here, and then the
main kind of door panel. And if we go and rendered mold, you can see, this is
what we look like, and what we're going
to do is just add some temporary materials just to check everything's
working properly. So to do that, we'll
select the glass. Well, this will be
the glass door first. And what I've done,
I did that again, I'm just going over
there left click and dragon to split my screen. And then I'm going to change this screen to the
Shader editor. We'll go over to this tab here. Click a new for material. So we're just going to
add the new material. I'm going to call
this one glass. We'll get rid of the
principal Shader. So now, add a glass. Shader, shade
glass, add this in. You can see we can
see through the mesh. And what we actually want
to do is just tint this. I'm just moving the color down. Somewhat. So we're getting a
strange kind of reflection. So we're just going to have a look at the face
orientation and the faces of the
wrong way around as denoted by the red
color, and we want blue. So we're going to
press, left control, left shift to just flip those. Then if we go back to
face orientation off, we can see we're not getting
that weird reflection. Like bending reflection
was getting before, because the normals are facing
outwards instead of in, and this is what we wanted, and we'll do the same with
the rest of the pieces. So I'm just going to
select that piece. I'll slip the normals,
select everything. Flip normals, just shift
n to flip normals. If it's the wrong way around,
just click that box to recalculate them in the
opposite direction. So we want everything
to be blue. And then the insides
will be red, which is what we
want. Tuggle that. And then temporarily for this, we'll just make a
quick metal material. It's go to go metal with
the door frame selected, and then I'm going to change
this metallic shader. So this node here, I'm just going to turn it
all the way to one. Then the roughness will just put right down, let's
do something like that. Then I'll just change this
control panel to metal temporarily so we have an idea as to what
we're working with. Now, what we'll do is just add a I'm just going to select
the door frame first, and we'll add a sub
diive modifier. We'll just leave this at one. Just going to isolate this, and we'll add some loop cuts
just to clean up the model. Smoother shading, and
let's have a look. So we're going to add a loop
cut on the outer edge here. Move it close.
We'll add one more. Add two in the top, scale them away from each other, and then just add one in
between there to the same on this side. I. Then we'll add one, like, so add on more in between add one for
the top, add one more. And we'll add two here, scale them away from each other, there, scale them
away a little more. I'm just trying to match this
edge roughly with that one. So then we can add one
in between like that. Flip between object
and edit mode, so we can see the
progress we're making. This side, can add one there. Need to add one at
the bottom here, there, add one more. Let's go to this side. F the bottom here,
we'll add another two, scale them away from each other. Then we need to
add two more here. O there on there. Then what we'll do is add a couple on this inside
edge, g them away. And I'm just having a look, see if I'm happy with that, if I want to make it ale sharp, to make it sharper,
we can decrab this, for example, and move
it up even more, do the same with this one, pull those edges in. And do that. Q. T this one needs
to come down. The so there is a little
bit of a bevel on it, but it's not super strong. And then we've got the
outer portion to do. It's going to add a loop
here add on for the bottom. Add one for the top here. A little look around. If you want to do
the inside portion, the quickest way would be to add a lot in the middle,
going to top view. Select the topmost
portion now, delete it. Then select the next
set of verses here, cursor to select it to put
the cursor in the middle. Then we can set the origin
to the three D cursor. And now we can mirror it. So we can just add a mirror, modifier, choose the right axis, which would be z. No, no, it's not going to be. Something's weird here. B y z. There we go. Make
sure it's on top of the sub Diive. Curse. You might get a weird line
somewhere in your mesh. But we look like we're okay, checking over the model. Then we can bring the
glass doors back. I'm just going to bring
everything back like S. For the glass doors, what we're going to do is
with all of them selected, shift E one, which, if I was to go control E, shift E to edge crease. So that's if we were to join this back with this model here, it would add the subdivision
on, and we don't want that. So doing edge crease a keeps it, keeps those edges
straight for us. E. To add it back, what we'll do is just
delete one of the faces, select the while the glass, select the door,
join them together. Then they all just mirror the glass pane onto
the back for us. Then if I was to
take the edge crease away just to illustrate, so I'll just select this
face invert everything. Is to shift E minus one, that's why we add
decrease because it's subdivide in that face
and we don't want that. They have a qu looking
rendered view. Can see. We've got a nice door
front kind of go in there. So we've got this
kind of bit done now. You can see into it
on the other side if you want to edit the material. But as it's going to be off, you won't really be
able to see into it, but it's still kind
of like glass. So we're just going to
adjust this even more, especially when it's in
a darker kind of area, you won't really
be able to know, it says nothing
actually inside it. But that's it for the nap. In the next part, we'll do the rest, so
we'll do the handle. We've got the frontage here, so like the knobs and
the cluck. See them.
29. Modeling Oven Handle: The next thing we'll do
is model the handle. So I've had a little look found this image that's a
similar kind of handle at a slightly different angle to the reference images
we have here that we can't really make
the shape out of. So if we have a look at this, we can see the
handles made out of, you could say two main parts. We have the cylinder that's going through the main
body of the handle. Or that makes up the main body
of the handler should say, and then we've got this kind
of shape here that would actually connect on to the door. Built first things
first in blender. What we'll do is add a circle. Then we'll just
bring up the panel here and we'll make this about 1.75 centimeters
on the x and the y. We've got this
kind of size here. Just apply the scale. So we're going to edit mode. What we want to do, by zooming
is we want to look for the vertices that are just under the halfway
point of the circle. So we've got these two here, where it starts to curve
back in on itself. And we want to extrude
these downwards by, let's call 0.0 or 3 centimeters. A 3 centimeters down, got roughly 4 centimeters for
the height of this handle, and then we'll scale them away
from each other slightly, just to give it that
kind of outward curve this where the base is a
little wider than the tip. C. So what we'll do next
is select that vertice, select all the way around
to this vertice here. Then we'll just duplicate this. Separate by selection. T we've got these two circles. We'll hide one, go
back to the original, then delete these two vertices. So we've got one, that's
going to make the cylinder. So if I was to hide
this bigger piece, we've got the cylinder here, which you could just
extrude along the y axis, in my case, just to
make the cylinder, call this cylinder for n,
so we know what it is. Then we've got this,
that's going to make up this shape here. So what we'll do is grab all of the vertices and then extrude them by two millimetres
of zero, zero, two. In the y axis. I'm just
going to flip it there. So if we look, this is what
we're working with so far, inside the cylinder again. Cool. Then what we
want to do is we just we'll fill the faces in, so I'm just going to select all of the vertices on one side, fill to the same in the other, fill, then we'll
fill the bottom. So we have this kind of I guess it's like
a keyhole shape. Then what we'll do is select
this very this vertice, press J to join them to the
same on the other side, just to separate these
two parts of the shape. Then with this face selected. We'll grab this face
actually first in top view, and then we what we want
to do is make this part of the handle roughly about
1.5 centimeters wide, and the moment with
2 millimeters. So we can extrude it, and we'll go for zero, one, square in there. G Y. 015. It's a little low this got. I guess you could go 013
if you want to make it exact and just pull
that back in a touch. But this is an estimation and we don't have the
exact measurements. So we'll just go with
something around about that kind of size. And what we'll do
now is select this face and then inset it, and we'll put a
subdiv on just so we get a better idea of what's
going on with the shade. We are shading,
what's going on here. Turn it off in edit mode. Then we'll just grab
all of the faces, and then recalculate normals, so that's shift n, just to make sure the normals are
facing the right way. Then we just want to clean up, we'll redirect
some of the faces. What we'll do is
add two edge loops, like so scale them
away from each other. We'll scaling on the x axis there just to bring them
closer to the edge. So it's in line with
this edge loop here. Then we'll look in,
add another edge loop, drag it down here and do
the same on the other side. And then we'll select
this dis, vertex, this vertex, that vertex last, and then we'll hit
M, merge at last. Like so select these
two triangles, press F, and now we
have a face there. Now we can add, for example,
if we like to add a edge, I should say, or run
right the way around, but we need to do the
same on this side. So actually makes more sense. So we'll grab these two, grab
at one last, merge at last. Grab these two faces. You can see stopping at the back because the back has
different kind of issue. So with this one, we
haven't inset it, so we'll inset
this face as well. Grab these two faces, these this vertice, get a
bit closer to that vertice, the middle one last,
merge at last, then grab these two faces, press F, do the same
on the other side. Go to grab this vertex and just have a look at
which one's which. So this one's the top one. Grab this one, grab
that one last, merge it last, then merge
these two faces together. Allow the edge the loop cut is running where we want it to. Now we just need to sharpen
up this shape because it's pretty sharp in this image, like the cuts, you could say. So we'll add a loop cut here, so just double tap G, drag it a little
closer to the edge, add the same on the other side. Or add one for the
outer border here. You need to add
one here going up. And for these ones, it depends how much
curvature we want here. If we bring them too close
to this middle line, you'll get a sharp cut here. To illustrate that,
what we can do is add the metal material and have
a look at rendered view, so you can see we've got
a bit of a line there. So if you don't want that, just drag this edge a
little further away, we can grab this edge
and slide it up as well, just to smooth
that out a little. Let's go back in and just check, we've got edges where we want. Need to add one here, add one here as well. Then if we bring
the cylinder back, Shade Smith, you can see
it's intersecting here. So we're going to
grab the other part, this shape here,
and then scale it. I've got it in
bounding box scaling, and we want to
scale it up just a little just into this
bigger than the cylinder. So it's like the cylinders
inside this part. About there. So if it's looking
rendered view, and we was to add
the metal material to this as well, Shade Smith. We can see we haven't got that intersection
issue anymore, cure, and it looks like
the referencia, shapewize anywhere, not counting the kind of metal that
we're looking at. But we can see we've got the
two different pieces there. We just need to actually
make it a proper handle. So what we'll do is we'll
take the subive half, join them together, and then we can have a
subdivision on this one, have it at one to two, one level two render, or we could possibly leave it, get away with just one level because it's such a small part. And it looks like
I've missed a loop. I'm going to add
one for the bottom. So you can see sometimes
if you don't have one, you'll see something
weird like this. You like I need to add another
loop. Bring that down. I've got one at the front. So I do chew. What we'll do is
call it to top view, t going to move the handle
roughly into place, rotate it 90 degrees. It's going in the
right direction, so I don't need to press
negative to flip it. Then we want to rotate. In y case, it's going
to be along the x. So I'm going to rotate x 90. So we have the fat part of the handle going
into the oven door. Then we'll position it roughly
where we need it to be. We can see it in line with the glass window, you could say. So I'm going to make
sure it's in line there, roughly in the middle
of this area here. S. No, and then we'll
go in to side view, pull it out a little bit. It does look like it's slightly
tilted upwards anglewi. But this isn't a let's see if we can see
a better picture. Yeah, so we'll just
angle it like so, and we can always
adjust this as needed, if we want to do
something like that, but I'll just have a
shallower angle for now. Making sure at least
the base is inside. And then what we'll do to
get it onto the other side, we'll add a mirror modifier. Like, so we'll click
the door, shift this. And then we'll go cursor
to selected to put the free Dcursor in
on the door object, which has the origin point
in the middle of the door. We set that up prior. So we're going to
get the free Dcursor central to where we want
to mirror the handle. Then we'll click the handle.
See the origin point in this orange dot is over here, and we don't want
it there because the mirror is going
to be based off of that point at the moment. And there's two ways we could
mirror could use an object, so we could click the
door, for example. It might do something weird, depending on what axis, so it's doing what
we wanted to do now. But we could also set the
origin to the free Dcursor, which is in the midpoints, for example, of the door and
the orange dots down here. And then if we get rid of this, and then we choose
the right axis, depending on what
your rotations are, so I'll just apply
rotation and scale, change it to x, to see it's doing the same
thing as mirroring there. But this would be using the mirror object will
be handy if we wanted to add another object and
mirror it based on there. So if we wanted, if
I rotate this, I 90, provided the door to
mirror off of that plane, we could use the mirror
object, set the plane. You see, we'd have
to change the axis. But we could get the mirror to mirror in a different location. But we don't need that for now, so we'll just set it up like so, we'll turn clipping on, and then we'll select this
ring of vertices here. They were on the press G x to move them towards each other. They'll meet in the
middle. We'll have the mirror as the first object. There we have we have the handle in the location that
we need it to be. We can move it around as It's not based on
the mirror object, we can move this around, and
it won't affect the mirror. Whereas if we use
the mirror object, we'd have to also move the mirror object to
retain this modifier. We've got that, can have a look at it in rendered view for now. You see it's coming
along nicely. Got the handle and the door. Just need to do the
control panel now. We'll do that in the next bit, where we're adding the
knobs and the cluck.
30. Modeling Oven Control Panel: The next thing we're
going to do is work on the clock face and the dials
for the control panel. So in Blender, we're
going to add a plane, set the dimensions to
12 centimeters across, and then 6 centimeters
up and down. P on. Then we'll just go scroll up and adjust it on the Z axis. As the three Dcursor was centered on the oven,
when we added the plane, it was also centered, which means we just add
to adjust the Z axis. Now, K, then we're just going to go in top view, put it forward, and then going into edit modes, and then we're going
to bevel the corners. So you can see nothing's
happening because we have bevel, and it's only
affecting the edges. So as the V key, now it's going to affect the vertices instead,
and we can scroller. But you can see the bevels
looking a bit uneven. That's because we need
to apply the scale. So to do that control A, and you can go apply rotation
in scale w we're there. Now the bevel, is
a lot more even. So we're just going to
round off the corners a little bit as per the reference. Then what we can do is going
into top view and then extrude everything to the other side of
the control panel. Like, so next, what we can
do is hit shade smooth. Then we can select
the front face inset it to create the border. Look in this, we've
got a metal border, so we can just inset, and then we can extrude
inwards just slightly. And then we can insert again, because you can see the face, we've got this weird
shading going on, so we're going to give
a border to that face, a small one, and now
that shading is gone. Then we're just going
to add a loop cut on this ridge on the inner
side, and the outer side. L S, then we're going to add
another one on this side. Then we'll add one at the
back. Sure. Then what we need to do is
duplicate this object. And then we'll call
this lean out. And then the original one, we'll call control panel face. L, and then for the Boolean, so you can see it's
a bit or so blacky. So if you want to improve it, you can add a subdivision rounds off a bit more to
one or two levels, depends how much detail
you want to go into, but I'll just stick
with one level here. And then we'll add
a Boolean modifier to the control panel, select the object
called Boolean. And then if we
were to hide this, I'm just going to
disable in viewport, can see nothing's
happening at the moment. And that is because
if we go back, you can see the
face orientation. This is backwards, is red. Taking of which the handle
shorten up is red as well. So we'll just adjust
that, so that's blue. And the Boolean were
to select everything, shift in to recalculate
the normals. Now it's blue, and now
if we are to hide it. We've got a boolean cutout, and you want the normals to face the right way
because it will affect your reflections and give you some weird
stuff sometimes. Though we've got a
cut out as we want. As we added the subdivision
to the Boolean, we need to add the
same to the face. And just bear in mind that because they're
two separate objects, as you can see when I'm
adjusting the levels, it's also adjusting the
actual shape of the cutout. So you want to make them match. So I'm going to go to the control panel
face, bring it up. Se this one's got a normals
at the backwards as well. And then we're going to add a subdivision surface muds and just leave it at level one. Then what we want to
do, we'll just turn off this face orientation
is in top view, we're just going to
pull the face back, so it's nearly flush, but just sticking out
ever so slightly. To ol. And then what we'll do is select the control
panel itself, and we'll just bevel everything and just
have it matching up. Similar to this. We use the
subdivision on this one. But for this one, we're just going to
use the Barrel tool. So I'm just going to eyeball it. To thinks about right,
hit Shade Smooth, looks about the same, but you can see
we've got an issue here because of the
Boolean cut out. What we're going to do
first is add two loop cuts, scale them in, and we're
just going to give borders, you could say to the cutout just to isolate
where the damage is. So I'm just going to add
two more on this side, scale them away from each
other on the Z axis. You can see we're going to
localize this weird shading. And then what we're
going to do is add a edge split modifier
to the control panel. You can see it's fixed
the issue we had here, but it's also giving us issues
here, which we don't want. What we can do is
use sharp edges, so we only affect the edges
that we define as sharp. So as far as to turn this off, just leave sharp edges on, you can see it's
basically turned it off everywhere because we haven't
defined any areas as sharp. I'm just going to hide
the control panel face. But you can see there's
no at the moment, because we have a boolean cut out, but we haven't applied it. There's no actual changed
geometry here to mark So we could mark
the outside ones, but the issues on the
inside, not the outside. So what we need to do is
apply the Boolean first. And now you can see we've got some geometry
here to work with. So I'm just going to select
this outer ring of edges. Just make sure, select
everything inside. So we've got all of
the edges at the top, and then we can mark a sharp, control E, mark sharp. And you can see now we'll
fix the shade in issues. And then nothing else is being affected,
which is what we want. Then we can delete the Boolean
as we no longer need it. Bring back the
control panel face. Just remember to regularly save. The blender has a bit of crashing when you
don't want it to. So we've done that. Next part we need to
do are the dials. What we'll do is add in a circle that the radius
to 2 centimeters, which will give us a
diameter of 4 centimeters. Let's put it up on the z axis, and it crashed, which
thought it might. Let's just load back the file. I've got a circle already. Y. So we'll select this one, this two 4 centimeters, move it so I'm just centering it based on
this subject here. Then going to put it
approximately where I think it should go,
move it a bit closer. Then we'll put it
actually what we'll do. Put it out first, and
then we'll use snapping, and then just press
G, left click. So we've got it resting
on the control panel. And then let's turn this. What we'll do if we can look at a better pitch and see
what we're working with. So we can see it kind
of goes up and in, bit this kind of
rim for the dials. But what we'll do
is we'll extrude. I'm just going to go
on vertex select, go to extrude and then scale it in just
to create the rim. And then we'll move it along
the y axis to pull it out. And that's it for
the rim really. So then what we'll
do next is with those vertices still
selected, duplicate them. So we can get a separate
selection that's independent, and then we can extrude
these to create the button, we, the dial button
kind of thing. And then what we can do, if we look at the You
can see it goes up. There's a kind of
indent ring thing here, and then it has this
kind of sharp bevel, and then it has a flat area. So we'll do the lung body
first, which we've got. And then we'll do we'll
press F to fill the face. And then we'll bevel this. Make sure your
scales are applied before you do any beveling. Now our bevels working properly. T we've got something like that. Then if we're to shade smooth, you can see a bit weird, so we need to add
some loop cuts. So we just add one
here, add one here. We've sharpened up that area, add one on the other side. Temporarily hide this rim. Then we'll add one at
the bottom of this dial, like, then what we can do
actually select the outermost. At will slit we'll
select both of them, and we'll just move them along the y axis just to pull
that button all the way in, so we've got a bit more
button to play with. And then we'll add a actually let's isolate this
so we can see a bit better. We'll add bring everything back, add loop cuts to about here,
then we'll level this. Two segments, so
there's a edge in between and leave them
really close together, like so then select
the middle one, and the ult S, so we're
scaling it inwards. Base sure you scale it
in the right direction, and we just want
to do it slightly. You can see we've
got this kind of inset area. If I can get close. You've got this
kind of ring there, so we're just going
to build that out, add another loop cuff
on the outside of that beveled area we made
and drag it really close. Then will do the same
on the other side. Now we've got the
same kind of thing. Then for this rim area, we'll just add a couple
of loop cuts like so, for the face, we'll
just inset it as well. Then we've got a dial
and save again in case my blended crashes and
check it on MacA Check you. Shading is all consistent. We'll bring everything back. We can see there's some issues
with the control panel. So like the shadings not going
all the way to the edge, and it's also not
going in tandem. So it's like there's a
weirdness going on here. So we're going to look
on the control panel. And what we'll do
is add a loop cuff, drag it all the way
to the edge like so. Then check that side. I to add one on the
other side as well. I see the lights
moving in tandem now, where it wasn't before
if I was to undo this. You can already see
that difference. That is needed,
let's add that back. Then we need to add some loops on the top and the
bottom as well. Let's go to add one there, add one up there. You can see the
lights looking a lot more consistent across
both of the panels, which is what we want it to do. Let's check face orientation. So you could already see with the mat cap for turn turn this, that the button shadings weird, and that's because
the face is wrong. So now it's lit up
because we have the orientation That's why
that's pretty useful as well. So you get consistent
kind of reflections, especially as everything here is going to be metal,
depending on, well, what star we're go for, if we go for this black kind of one, or if we go for something
more silvery s, then you want your
reflections to be consistent. E. And then what we'll do is
we've got this button here. We'll add a mirror modifier, and then we'll select this
object as the mirror object. So then we just get the button
on the other side of it, and they're evenly distributed,
which is what we want. And then the last
thing we can do is select the rim and
then separate it. So now, if we need to, we can adjust the
button independently. So you have the way,
it might be like in the off position, I guess, and then you
kind of activate it, and then you'd rotate, well, not rotate that way, but you'd rotate on its axis to kind of choose what temperature
you want for you. Oven. And then last thing we'll do is just
name everything. So you just so you can
reference it, so we've got, like dial oven dial rim. Got oven dial, board
that control panel face. But circle, which is
oven door handle, chill. So we've named and
done everything here, the next bit we'll just be putting this into the
actual scene itself.
31. Plinth and Oven Placement: X thing we need to
do is build out the back of the oven and
then place it in the sea, so we'll just do something
pretty simple here, which is to add a cube, and let's scale it down. So It's go going to edit mode, scale it on the x axis. So we have it flush with
the edge of the oven here. Like so round about there. And then we'll do the
same on the z axis. Just going to move it up,
and we can have it so it's a little shorter
on this axis here, so it doesn't need
to match perfectly. And then for the back,
you can see the depth, if we look at the oven, we've got 54.7 centimeters, so we can use that
measurement there. 54.7 centimeters. They are going to side view, and we'll just move this until it's in the
right position. So it's just about
intersecting with the back of the control panel in
the oven door here. And this is just so
that there's not a big gaping space between the control panel and the oven door. It
looks like one unit. And then what we want
to do is add a empty, select everything, so I'll go to wireframe, select everything, deselect the empty,
then reselect it, parent to object, control P, then we can just move
around the whole oven unit. And we'll rename this to
oven Controller. Like so. Okay. What we'll
do next is bring the furniture back
and the floor plans, and then we can just move
the oven into position. So I'll just pull it
there, rotate it 90. It's going look where
the counter is. Then we can place
it roughly there. And then we want to place it, so it's just underneath
the counter on a z axis. If the tables in the
way, what we can do, is let the empty there, find the object to shift. Then press the i icon, and we'll hide the whole groof. Then we can just move
this one down that it's just underneath
the counter like, so accidentally move
this at some point. Let's just put it
back in position. Cut don't know why that moved. Must have clicked
it on accident. That's why sometimes you want to make sure you
know what you're selecting before you move stuff in case you
select something. To the empties are
too big, for example. But no matter, what we'll do is make a plinth to
go around the bottom. And then we can adjust
it a little later. So we'll select one of
these cabinets here, going into edit mode, face select and select
three faces here, that make up this bottom area, duplicate them, and then
separate by selection. So we've got this object here. Then we go into this
objected edit modes, select everything, and then
we can dissolve edges. Let's press x to delete
to dissolve edges, so we just have one face. And then we want to
grab this edge here, and then we'll extrude it. Press E, we want to
extrude it along the x axis. We'll put it. A there for now, and
we'll adjust it after a little difficult
to see where we're going to put move
a little further. So it's a little bit beyond. So you've got this space here, and we'll try to match it up. So there is a equal
amount of space there, and then we'll extrude
it and press d y, so we extrud along the y axis. And for this one, we can
use snapping, snap to edge, G, and snap it to
this edge here, and then we can extrude
along the x axis. Then snap it to this edge. And we can turn off the takeaway the subdivision modifier. And instead, what we'll do is
add a solidifier modifier. You can see, if I turn this off, it's going the wrong way. So with the offset, we can swap it to one, and now it's going out instead of in, which is what we want. And we can also add
a bevel modifier, that this to about zero, zero, two, 2 millimeters
and three segments, just to round it off
just a little bit. Then we can just have
a look around and make sure looks fine. No issues there.
And then what we can also do is select
this cabinet again, press out to select
the door here, and we'll duplicate that, move it along, let
me turn sapping on, move it along the x axis, then separate it from selection, so we've just got this,
rotate it 90 degrees, and we'll use this to create like a piece
underneath the oven. So I'm just going to
move it into position, overhead. This about right. And then we'll go into left or for graphics so we can
see in front of the oven, position it, and then
we'll edit the piece now. So I'm just going to
grab the top vertices, move them down, til they're
at the bottom of the oven. Like so, grab the left ones, pull them along the wy axis. But they're in line, can use snapping as
well if you want. So I'll just got
order them selected, and the snapping
this left most edge, can do the same on this side. Then snap it into position. Then if we were to look, you can see we've got this piece here. But of course, we'll
adjust as needed. Once we put the cabinets in, we'll most likely move all
of this back a little bit. But for now, this is the oven, and it's roughly in position
for where we want it.
32. Modeling Corner Cabinets: Next thing we'll do I'll make corner cabinets
similar to this one, but using models that
we've already created. So we're going to use
this cabinet here. So what we're going
to do is going to top view and duplicate it. And then we're just
going to move it next to the cabinet it came from, like, so I'm going to
duplicate it again and rotate it negative 90 degrees. So go anti clockwise. And then we'll
position it above. And then we just want to have the same spacing from
the counter top edge, which is this one
to this edge here. So it's about a square and a half for just over
a square and a half. So let's move this about there, then we'll check in solid view. And it looks about
looks close enough. So what we'll do next
is select this counter, b to edit, select
all the vertices on the top and move them
next to the cookers edge. L S. And then what we'll do
is check the other side. So I'm just going to hide
while do I'll select both of the counters that
we're working on the cabinets. I should say, isolate them, so we'll have anything
else in the way. Then we can select this bottom
edge, and then line it up. So I's going to go vertex
select, select both cabinets. Then we'll press G Y axis. Yeah. Turn snapping arm, G Y, snap it in place like so. And then we'll grab all
the vertices on this edge. Move the to the far left, snap them in place like so. So we've got a joint corner. Then I'll select both doors and then separate by selection. So our doors are separate
to our cabinets. Then what we'll do is select all the vertices on the
bottom of one cabinet. We've got two rows there, press G y, and snap
it into position, and then grab all
of the vertices on the bottom there on
the right most side. We've got two rows as well, or one, two, three on this one. Then we press g x to form
this kind of corner here. And then what we want to do
essentially is start making extrusions so that these
cabinets can kind of become one. So what we'll do is select
all of the bottom vertices, and this is only
one run this time. And you can see
they're kind of hard to select just one because
they're overlapping. So what we can do is
press L to select all linked vertices
on one cabinet, and then hit D select. You might have you drop down
like that. Hit D select. And now we've only got vertices
on one cabinet selected. Then what we want to do
is extrude so we can hit. So we're going to top, E, and then it's going to be y, then snap it to that vertex, Ey again, snap to that vertex. Let's have a look, how
far we need to go. We need to go one more. So we'll hit E y one more time. Then what we'll do is go onto
or start from this vertex. So I'm going to select. Let's go box select, select these vertices, go all
the way out to the bottom, select the vertices
in the same row, hit L on the other
cabinet, D selects. So we've only got one run again, and then this time,
we'll extrude. We'll go in the other direction, and hitting each run of
vertices on the way. We're going to hit E, E x, and there should be a
line, but we're just pressing x just to make
sure in a straight line. That's Ex each time. X, ex, ex. So if we have a look, they
have a nice field gap, but there's still
two separate kind of cabinets at the moment. So what we're going to do
is select both cabinets, control J to join them together, and this is why we we're
lining up the vertices because then we can select everything
and then merge by distance, and the overlapping vertices
will join together. But you can still see cabinets, still got some issues with it. So what we're going to do is select all by interior faces. So you can just
type in interior, select all by interior faces, can see selecting the
faces in the mesh. They're inside the mesh
that we don't want. So we're going to
just delete those. And now we don't have any of that weird kind of
shading going on there. And if we look at the cabinet, you can see it's just one
piece now going all the way around for press A going
to select the whole thing. It's all joined. And we want to do the same
with the door. So we select both we'll
hide this cabinet now. We'll select both of the doors, go into wire frame, select a run of vertices, press out on the 01
and de select it, and then we'll just
press Ex, ex, ex. Select everything. Well,
go into object mold, select both doors,
join them together. Then with everything selected, we can merge by distance. You can see, got a shading issue due to the being a face inside. So we can select interior faces, delete, shading issues gone. Then we can just
check to make sure there have no issues or we need to add any more loop cuts. It doesn't seem to
be, so that's fine. We bring everything back, I'm going to press old H, can have a look at this corner. Aside from the plinth,
we need to adjust. Corners looking
good, so what we'll do is select both pieces, turn snapping up, it
crashes my machine. And just in case we'll hit safe. And then what we'll do
is join them together. So now we've just got one
piece, it's got the two doors, while the one door now, like one of those
kind of bendy doors, and we've got the cabinets. What we can do is use this
to go into the other corner. I'm just going to duplicate it, rotate it 90 degrees, hit negative, so it
goes the other way. And then as before, we'll place it into position. What I'm going to do is select the other
cabinet, the original, select it, isolate it, and this is just so
we can line them up. I'm just going to line
it up first along the x axis, that
looks about right. And then we can bring
everything back and then line it up with
the side of the cooker. Like, so, then you can see we need to adjust
the shape of it. So we can go in to edit mode, going to select all of
these vertices here, that make the kind of
almost an L shape. And then we can press G Y and just move the
whole thing like, we'll pull this down. And then as before we try to
keep the spacing the same, you can look at the
one on the left as well for reference
to keep that flush. If we were to press gx, you can see it's still
a little too high, we'll pull it down a bit more. It's sttle bit high. I'm just pressing Gx then
right clicking to cancel, just so I can see if
the doors line up. I stay doing now. And then we've got a little bit of a gap. So we can just select this run and then
move it to the left. Because if you want it
to add another cabinets, you can make these
cones smaller and just use one of the
pre existing cabinets, like that one, that one, and just adjust the wit
to check in solid view, Q, and then let's
adjust the plinth. So we've got the plinth. We're going to edit mode, see if we can see
what's going on. You can see that it
needs to be brand forward as the plinth goes
into this side a bit too much. So we'll press G and x and
put it forward like so. So it's in front of the
bottom of the cabinet. Make sure you do
it in wire frame. So you selecting all of them. G like that. Check and go around, see
if we need to just it, but should be fine verse. And then what we can
do now that we've done that is move this so it's
flush with everything else. So we can just press G x and just move it into
position like so. And grab this as we
haven't attached it to the crooked thing and move
it as well. Like that. Cue. Then you can see we've got a little bit
of a issue at the bottom. But what we'll do
is use this box at the back just to
cover that kind of gap. I'm just going to grab this. And then what we'll do is
we'll duplicate it actually. In case we need to do
something else with it later, so I'll just duplicate it, move it down, grab the
bottom face, rub it up. But you can see it
move it about there. I'll just turn snapping on. As it. Snap it like so. That should be next to
impossible to see up there because you wouldn't
have your camera here, but just to kind of block
some of any kind of light, we'll get seeping
through the mesh. We can of co, just that if needs be. But
there we have it. We have the cooker in place. Just got a few more parts to do. Got a hop and possibly a extractor hood fan thing
above the top as well.
33. Blockout Extractor Hood: The next thing we'll do
is the extractor hood. So we'll do a model like
this and we'll do it in two parts where we
block out the model, and then we add the detail in. So our first things
first in blender. Let's just prepare the scene, so we'll turn off the furniture. Grab this, select hierarchy to select all of it and
drag it into furniture. In one go. Do we will
go out to top view, add a cube, and this will
make the shot to shaft. And the measurements
we've got are 23.7, for the width for the y, we'll go 0.237 for the x, will go 24.70 0.247. And then for the length, we've got 63.3 as the minimum
because it goes up to 108. So we'll go 63.3
centimeters for now, which is 0.633, and
then apply the scale. We've got the first part. And
then for the second part, we'll add in a another cube. This is this bottom area here, and for the width, we've got 59.8 0.598. We have 45.8 as well, 458. And then we also have 4.1. So for this bit
here, we'll go 4.1, centimeters, and then
we'll apply the scale. We're going into side Vienna, and then we'll turn
the snapping two edge, move it down on the Z axis, and then sap it to the bottom. Top view, we'll move it on the x axis and snap it like so. So we have the basic shape
here of the two parts. Then what we need to do is position them where we need it. So I'm going to turn the
building ground floor on, select both pieces,
and then we're going to want to snap
it to this wall here. So I'm going to press G x, got snapping and it's
snapped to this wall now. And then what we need to
do is get the height. So we're going to turn the
furniture back on so we can see where the countertop
is, go to turn snapping. We're going to add in a
cube and set this cube to 0.5 on everything
so 50 centimeters. As we can see, the
minimum kind of clearance you need from the
hubs are 50 centimeters, so I'm just going to
apply that scale. We can lease snapping
on face projects, and I'm just going to
snap it it lets me. If it doesn't, we'll
just use edge. I'll just put edge on,
working a lot better. And then we turn it, and we know we need to
bring this down. So we'll grab both of
these, bring it down. Don't need to be right there because it's going to
be raised a little because of the p. So we can leave maybe something
like this as the space. Then select the shaft, select the top face. Then snapping on and snap it
to the top edge of the wall. So if we were to turn
the upper floor back on, you can see our shafts
going to the ceiling now. And we can get rid of this cube because we don't
need it anymore. Now we're going to hide the
floors and the furniture. So now we've just got
our two components here. I would just need to block
out the rest of the areas. Though for this area. I guess the face, you could say, you can see it got
a kind of border, so you got this little area, and before it becomes this
kind of silver metal area. So what we'll do is select
the bottom face of this cube, make sure have a
scale is applied, and then we'll inset
this, like so. So now we've got a border, and then we'll press P, and then separate by selection
to separate this face. Then we'll isolate it with numpad forward slash,
go at the top view, add two loop cuts, and we'll just scale them
away from each other, just to create this space here. So our loop cuts
running up like so, got a little space on this side, and there'll be space
on the other side. Now we just need to add
a loop cut going for this bottom area and one for the top of
this kind of grid. But we'll add one at the
bottom roughly about there, Add one at the top about there. Then what we'll do
is add a circle, and this will be for the dial, and we'll set this to
sc for centimeters. We'll go to wire frame,
apply the scale. Then we'll position
it about there. Can see the two dials
are pretty close to each other and
somewhat central. But what we could do,
if we want to get it central is first select
one of these pieces, and then go cursor to selected, select the circle, and then
go selection to cursor. So in all this circles
in the middle. So we can see it's going
to be on that line. You could say, duplicate it, move one, down
somewhat, Let's see. Move both of them up, like so, and then we can pull these away from each
other a little bit. We have something
roughly like that. I guess, if you want
to be super precise, you'd add a plane,
rotate it on the x axis. So you know where
the midpoint is. You can see that
one was a bit away. And we'll go like that, a
little more. Yeah, that'll do. That'll do. And then we'll get rid of that plane,
add another one. And then for the width, we'll set this on
the x23 centimeters. This is the light, maybe 2.5, 2.5 centimeters. And then you could say
the width on this side, we want this to be in
line with this edge, so we're going to
select this one here. Ten slapping, slap it like so, do the same for
the butt. Like so. We've got our two
dials in place, roughly the lights in place, and we've got an
area for the grid. Dix, so we'll grab
these three parts now, and then press G s
d and just slap it to this plane to an
edge on the plane, so they're in line roughly
with where we need them to go. Then we'll just
check the spacing. We've got some
little space here, little space here, a
little space here. Grab these two circles, we'll just move
them a little more. This, Maybe we'll have
this at 3 centimeters, like so and move it a
little bit as well. There we go. If we were
to bring things back, you can see we've got
the beginnings of the extractor that we'll add the rest of the detail and
stuff in the next part.
34. Finishing with Extractor Hood: So the next thing
we're going to do is add the detail to
this face here. So we'll start with this
area here and the mesh. So if we look
closer, you can see, we've got a little bit
of a border before the actual circle area starts. And then beyond that, there's a kind of
grid inside that. So first things first, what we'll do is
select this face here. Isolate it, going into top view, and we want this face. So we're going to
just separate that. So we've got his own thing. Then we'll just hide the rest, we'll select this face, and then we'll inset it. So we're going to press the key, inset to create a
border like so. Then we want to invert the
selection and hide the border. So now we only have
the inner face. For the inner face, what we'll
do is add some loop cuts. So we'll add about 20 and
about 35 and the horizontal. We've got this kind of grid, and then we'll
select everything. And then what we'll do is
go control, poke faces. So we get these triangles, and then we'll go
control that again, tries to quid short F one
more time, Polk faces. And then we're going to vertex, select mold, select the vertice in the middle of this diamonds, and then we're going to select similar amount of
adjacent faces, and it'll select all of the vertices that are
inside diamonds like so. And then what we
want to do is first, we'll change our pivots to individual origins, And
then we'll bevel this. So we'll press
control B to bevel. See nothing's happening
because it's beveling edges. And we want to bevel vertices, so we'll press the V key, and now it's beveling. And we're just going to drag
it up about there just to create these kind
of inner diamonds. And then we'll press
control ship B, and then we'll bevel
again. About there. So you can see we've
got two vertices on each corner of this kind of
well, square like shape. Then we're going to face select
mold, select this shape. Then we're going to select
similar polygon size, and we'll select all of
the similar shapes now. Then we're going to go back
into vertex, select mold, subdivide it to give a bit more geometry because we want to turn
this into a circle. So we use loop tools. I'll just right click
Loop tools circle. Now we've got these circles. So if I Zoom out, you can see, we've got a grid for
the circles now. And what we want
to do is go into front view just to make sure we move these in
the right direction. So now we're going
to extrude upwards, I'm going to just do
it slightly like so, and then we'll delete the faces. So if we're going back
into object mold now, you can see we've got this grid, and we've got some space
here on the outside. So we're going to go
back into edit mold. Bring back the selection
and select the border. So to press control nu pad plus. So now we've just got
the border selected, I'll going to face select mold, and we want to extrude
this down a little. So in front view,
and press the ekey, and just pull this
a little down, just to define this
kind of border a little better. So it's so. Then what we'll do is
add a another plane, so I'm just going
to get a plane, go to scale it down
and just adjust it, and we want it just a little
bit bigger, then this grid. So I'll do this, grab
everything, scale under Y. We just want it a
little bit bigger, so the grid encompasses the whole area when
looked at from below. They will the supply scale. And then what we'll do? This
is a bit of trial and error, but we want to add
some loop cuts to get diamonds essentially. So first, like before, we'll add let's go 50 this time. Then we'll add go about 90. We'll select everything. If it's a little
difficult to see, we can grab Cube six in my case, it does hide it, and then we'll select everything of
the new planar making. Then we want to
poke faces again. Then go tries to quads. We've got the diamonds. But instead of doing
everything to make circles, what we'll do is from
this point, we can inst. We can see insting a bit weird as it is
treating it as one thing. We're going to press
the Key again, so it insets individually. I'll just zoom in closer
so you can see it on so's we just want to create
these tiny little borders Like so. And then if
we were to delete faces now and go back
into object mode, you can see we've got
this diamond shaped grid. Then what we want to
do is bring everything back to let the diamond
grid go at a front view, and you want to pull
it down on a Z axis, so it's just above where
the circle grid is. Whilst we're here, What we'll do is just
rename some of these. We'll just call
this grid diamond, select the circle grids. We'll call this grid circle. A calling it, I'm
putting grid at the beginning just
so alphabetically, they're in third
next to each other. If you at circle grid
and diamond grid, As you have more
objects, obviously, CD now, but if you
add more objects, C and whatever this was called, if it was caught some else
will be further away. This is a good way
to organize things. If it was called, it
was a different shape. It was an L shape, if it
was grid L or something. Well, L grid, I should say. So let's bring things, but you can see at the moment, we've got this part done. Now we need to do this area. So what we'll do is ba, ba, select this cut out here, but this is the outer
kind of metal bit. And then we're going
to add two loop cuts to encase the lights. So I'm just going
to turn snapping on and slap it to the light, add another one, slap it to
the other side of the light, and then we'll isolate the lights just so we
can see the face select, and we'll select this face, and then we'll just extrude
it up a little lights. So This is just as you can see, it looks like the
lights kind of in a little space on its own. So now if we were to bring the light plane back or
bring everything back, we can select the plane that's
going to be for the light, and we can pull this up
into its own little space, and we'll just call
this bid light. Some of these things will most likely joined together anyway, but sometimes quicker
just do it as you go. We'll hide this. We want
the circle selected, we'll select one
circle, isolate it. And then in front view, we'll extrude this down
to create this dial here. So I'm just going
to extrude it down, let's see 0.1, and
do it in vertex. So you have some actual
geometry to move. So we'll go extrude
Z, let's go 0.1. That's going to be 10
centimeters, it'll be too big. Let's go above. Let's see, 5 centimeters, 0505. It's been weird. I'll do it this way. I'll
type too much stuff there. Probably a little too
big. Let's go 0.02. And have a look at it. Then what we'll do is with
the bottom vertices selected. We'll extrude them in, like so, extrude them in again, and then press F to show. And then for this outer one, we'll bevel this to give it
a similar kind of edge here. Like so, shade smooth, and then we'll just sharpen
up. Some of the geometry. So I'm going to add
another loop cut. Like so, add one
near at the top. We add it here. Add on here, we have
something like this. Of course, I'm not going to
add a subdivision on here, but you have the option
to if you wanted to just sh make the circle
look a bit more high poly. Then what we'll do? We know we've got the circle cut out
so we can go into top view, duplicate the one
we've just made, move it into position of
the other circle, like so. Grab the old circle
and just delete it. Bring everything back. And
let's just have a look, what else we have to do. So we have. So we'll just adjust
this area here. So I'm just going
to hide this grid, we'll select this part here, select the vertices on this
inner part of this border, and then we'll
extrude them up on a Z axis and just
pull them up like so. Then bring back this part. And then we'll go into top view, and with it selected,
select the border. So I'm just drag selecting the whole border
would be like so. And we just want
to scale this in a little just to give it
a touch of separation. So it's a little
bit of a gap there. And then we'll just extrude
this upwards a little. So that's going to
press A, the like so. We've got this little
kind of space here. And then what we'll do is we have this kind of
switch to do as well. So we will add a plane adjust the size something
that looks about right. Let's go about Sy to
something like that. We have a rectangle, about about 4 centimeters on
4.5 centimeters on the x, about 3.5 on the
right and the y. Then we want this
to be if the image, where it's just by
the border here, and then going over this grid. So I'm just going to move
it down to about there. And then we'll pull it
down to about here. Then what we'll do
is duplicate it, and this duplicate will
be for a Boolean cut out. So we get with the
duplicate selected, we're going to go to edit mode, extrude it up on a Z axis, and then press the F key if
you need to create a box. So we've got a cube here. And then what we'll do is
select this grid here, add a Boolean modifier, and with the eye dropper, select the cube we just made. So far as to hide it, want to see if it's done what
it's supposed to have done, which it hasn't, so we want to check cube has the normals
that are the right way around. As a first point of call, heck if it's worked, it hasn't, then we'll look at what
we can do to adjust it. But for now, what we'll
do is select the plane, going to hide the other cube, and we'll design
the kind of button. Well, they'll switch here. So we're going to
inset this first, go control numpad
seven to inset, make a little inset like so. Then we want to
extrude this upwards. We will do something like that. I'm just going to isolate it
so we can see a little bit. Then we've got just a
little switch in here. So what we'll do is
duplicate this face, and then I'm going
to press control I to flip the
selection and hide it. Grab these two
verts on the face, and we'll just slide
them press GG 0.5, just to turn the switch
into half its size. What we'll do is
extrude it back. I'm just going to
extrude it down like so, bring everything back so
we can see the size of it. Grab this face. As you can see, want
it to be flush. We're going to use snapping, G Z snap like S. Then we'll
grab the whole button, so I'll just press the
k to select all of it. Turn snapping off, and
then what we want to do is just make
it touch smaller. I'm just going to
we go to top view, we want to scale, but
not on the Z axis or S, and then shift Z, and then just scale
it in a tiny Shift, sir, just go to scale
it out a little more. Like so, we've got
a switch here. Then let's bring
everything back and have a look. We've got the switch. We just need to
make the cut out. You can see if I was to
bring back the cutout, so we have the cube here that it's not exactly doing
what we want it to do. Let's fix that. Add a
solidify before the cutout, like so, turn this to 0.002. Then with the cutout,
we'll change this to a display as wire, so we can see what's going on. See if that's a bit
too big, 0.002, um pad numb Luck 001, need to put a Boolean
on this as well. So on our criss cross grid, put Bole we'll select
the plane 001. See if we actually need this
solidify, get rid of it. E. So we'll go and just
have a look and just check. This is in the right place, and looking as intended, which seems to be. So if s to hide this, you can see it's cut out
the area where the cube is. Which is what we want.
And if you keep say, we sit, we just adjust it. But it just needs to
be on the Z axis, essentially, where
we'd be adjusting it. Just to make sure it's going
through the whole area. But we have just
checking everything. This Booleans on the
wrong actual thing. We want it on plane zero, zero, one. There we go. Our court will rename
this extractor B. So now if we is to
hide the switch. You can see it's just
got a nice clean cut out going through both of the grids, and that's where our
kind the switch is in. And then if we were
to look at the scene, so if we just bring
the furniture there and we'll go ground floor. You can see if you need
to make any adjustments. Maybe make these buttons
a little more flush. These are a bit tall, so we're going to wire frame, select both for them
at the same time, and we can just pull
them up, for example. Just about a centimeter, just under, pull it
out a tiny bit more. There we have it. That's
the extractor as before. All we need to do is
join things together. So I'm just going to grab
both of these parts, so they don't have anything
complex with them. Okay, let me just
check something. Okay, we have a face
here we don't need. So on the actual chute itself, we can delete the
face at the bottom. So we don't need it. Then we'll select both of these parts. Control J, join them together. We can join the buttons to it for now, join them together. Same with the lights. Join it together. And then
we'll bring everything back. We can join the two grids together as they're using
one boolean anyway. We can join those together, the Boolean cut outs the same. And then for now, what we'll do? So we've got the
button, we'll just call this extractor switch like so we'll call this
extractor hoods. So we've got extractor
hood, extractor blean. We can join this part to
the extractor as well. As before, we'll add just
some slight blevels, just to round off everything. So I'm just going to
isolate this part. Have a look at. Let's see. Let's grab these
four edges here. And then we'll bevel these. We'll just keep it very fine. I go shade smooth just to have
a look at what's going on. You see we've got some
very fine bevel there, and we'll just add a couple of loop cuts to the top and
bottom of the shoots. I can see we need to add some bevels and some loop
cuts to the rest of it. So I'm just going to select this inverse selection
and hide to isolate it. What we can do is
grab everything in edge select, and then bevel. Et's have a very slight
bevel. Have a look. Then we'll add a
few more loop cuts, one on this inside edge, like S, we'll add one on the outside, like S and you can just check in MT cap just to see how
things are looking. We can see we need to do some work here on
the other pieces, so we're going to
bring these back. To add a loap cut
here on this side, we've got a problem area here. We'll add a loap
cut on both sides. Need to add one inside here on the other
side of this edge. And there going to be the same on the other side,
you've got an issue here. But add one there and one there. One over here, two
on this side of one. Two. Just have a look
the bottoms a bit weird. So add a around this edge
and one in the other. We need to add more. There's a good cheese
mat cap just so you can see how your reflections
are looking. But if it gets a bit
overbearing, turn it off. Course as before, you could
use the sub modifier to have a look at where you need to add geometries so we
can see this corner, and then you could always
turn it off as well. It's a bit laggy to work with
sub Divon. I usually does. Add one down here, I believe. Yeah. So add one down
here and flip between, you can see the light
area needs some help. So let's get a little closer. And we'll add some
loop cuts inside. Well let's bring things back
because as you can see, it's the missing parts that
are causing the issue. Let's go by O H. Is going
to show then the Mat Cap. We can see Invert. Bring things back, sel
this face hide it, and just do the inner area. Have a look on this side,
and just add a couple more. Either corner needs
a bit more help. And we'll just check the
other areas as well. Can see the actual plane itself for the light,
needs some more help. Let's do that. Cause there's
a bit of a distance here. We'll just add
another one quicker. Let's go so, tighten
that right up, check the other corners. Q. And last check
with the Mat cat. It's something weird going
on here as we miss a loop. There we go. Don't need the sub dive, so we'll
just turn it off. But of course, if you want it, then you can have it
then. There we go. No not flat, score studio. We have our hoot and
it's in position, and it looks nice. See
you in the next bit.
35. Modeling Hob Backsplash and Wall Cabinet: Have a few more elements
to add to the kitchen, just to round it off,
including the hub, a back splash and the wall cabinet that we'll use based off of the previous
cabinets we've made. So first, things, first, what we'll do is just hide
building ground floor group. And then we're going to add
a empty right where it is, so it's by the extractor. Then we're going to
select all the elements that are related
to the extractor, like so select the
extractor lass. And then we'll parent it. Set parent to objects. Now we can move
everything together. Now, if you find it a bit laggy, what you want to do is
turn off the boolean. So we just hide the
Boolean in viewports. It's going to hide this objects. Got everything. And
now we'll move around. No Lagan because it was updating the Boolean every time
we try to move it. And then we'll just
rename this empty or this extract empty. And then we'll just
go into top view, then y frame, and we'll
look where our oven is, which is around there, and we want to just
line up the empty so that our extractor is directly over the oven,
so they're in line. Like so, can look in front
view or left up for graphic, and see if it looks about right. Y e. Next, what we can do is move this into
the furniture groups, or select hierarchy,
drag into furniture, and then we can add a plane, which will make the hub. And looking at the measurements, it's going to be pretty
similar to the oven, so we've got 59
centimeters for the width. So we do that first
on the y axis 0.59, and then front to
back, we've got 52. So we've got 0.52.
Then for the depth, we've got 4 millimeters there. We're going to edit mold, and then we'll extrude it
along the Z axis, 0.004. Then select everything,
just recalculate normals. Then we've got this little thing here that's going
to make up the hub. So let's just put
this into position, but in line width wise. I go to just apply a
scale while we're here. E, and then we can snap it. Like so and then the
last thing we want to do is just grab the four edges that make
up the corners here. You're good say three and four, and then we'll just
round these off. I'm just going to bevel
them. Be about that. And for now, that
will be the hub. We'll just rename this,
so we'll call this hub, drag it into furniture, because of course, the
hub is primarily just going to be a material
and a texture on top. There's nothing much to
the actual shape itself. And we've got the backsplash, and it's a similar story. So just look at
the measurements, and we have for the height, we've got 55 centimeters. So we're going to go
back into the scene, add a plane, rotate it, so it's in the right alignment. Then I'm going to adjust
the x to be 0.59, 59, or 5555, 0.55. Then we'll just adjust the
depth or the thickness to 0.2. We're going to extrude. We'll go 0.02 002. We've got 2 millimeters. Then we'll just apply the scale, and then we'll bring the
building ground floor back so we can see
where the wall is, and we'll just snap
it to the wall. Like, then we want to snap
it to the counter as well. Like, so And then for now, what we'll do is for each edge, we'll snap it to a corner. I'm just going to grab
all of the edges there, or you could descrab the face, snap it like so along the y, grab everything on the
other side and do the same. E. As before, this is
just primarily a texture, nothing more to the shape. So we can just rename
this back splash, give it into furniture, Q. Then what we'll do now, as we haven't decided
on the kind of configuration for the top side, is we'll just press A
cupboard or cabinet for now. So let's select this
cabinet and duplicate it. We'll just drag it up, so we can see it a bit better, Isolate it. And the difference with the wall cabinets is
there isn't a plinth, so there's no bit underneath, so we just need to remove that. So what we'll do is going
into side view, wire frame, vertex select all of the bottom vertices like so, then
we'll have a look. We can see, we need
to go a bit higher. So we'll press control
numpad plus to select all the vertices They're like next in line,
you could say. So it's gone up again. It's
increased the selection, and then we can delete
vertices like so, and now we've got this gap, and then we're going
to fill this gap, so we're going to select all
of the vertices left click, and then we'll put
our selection vertice as the one in the corner. Then when we use grid
fill, it'll work. So you might have
to adjust the span, say you get something
that doesn't quite look right until you get a shape and then just
check all of the corners to make sure everything
looks clean. E. Let's bring everything back. Let's grab a handle, wild at it. Drag it up. I'll
rotate this one. So let's go, y, 90, move it on the x axis. Then we'll select them bow. You can see it's going
to rotate like that because we've got
individual origins. Let's go bounding box center, and now we can rotate 90 and place it roughly
in the scene. For now, I'm just checking
where the wall is, going to drag it back manually, like so, and then we'll just have it resting just
above the backsplash. Like so. Then we can decide later how we
want them organized, but at least we always
it's prepared already. Speaking of which, you don't
add a top on this one. As before, we'll just add a top, select all of the top vertices, make the active one the corner, grid fill, and then check every
things cleaned up nicely. So there we have it. We've got our backsplash, we've got cabinet that we
can duplicate as needed, move around, and
we've got our hub. And for now, that
should be the kitchen.
36. Modeling Bathroom Sink: The next thing we're going
to do is the bathroom sink, and it's comprised of two parts. We have the actual sink itself, and then the unit it's
sitting on top of. So first things first, let's go into blender, and then we'll move the three Dcursor to where we want the sink to be roughly, then we'll add a cube and
adjust the measurements. So for the sinc, we'll do first. We're looking at a width for 45. That front to back, 32 and the height of 12. So we'll go 45 in y ero 0.45, x will be 0.32, and
then Z will be 0.12. Then we'll just hide the
collections we don't need and apply the
scale on the cube. But to edit modes and
we'll delete the top face. L S, and then we'll add
a solidify modifier, set the thickness to
1.5 centimeters, don. And then what we'll do is tick even thickness and then
apply the solidifier. Then we'll go back
into edit modes, select the four edge loops. So that's left she
left mouse click. So we selected these edges here, and then we're going
to front orthographic, box select all of
the bottom vertices. So we have all the V selected, and then we'll bevel them just
to round off the corners, like the reference.
We're going to do so. We're going to have
three segments, set it to about there, and
then we'll smooth shades. Then what we'll do
back in edit mode, I select that edge loop and the inner edge loops of
both of the ones on the top, and then we'll double
these slightly as well. So then we'll add a solidify
modifier to two levels. Then add a cylinder and
we'll set this to 0.04. And a scale it up on the Z axis, so it's going right the
way through the sink, and it will be going into the
cabinet as well underneath. And then what we'll do is
a s of smooth shading, select the sink unit itself, add a boolean, and then
select the cylinder, can hide the cylinder for now. And then we'll add a
edge split modifier. You can see it's doing
what we want it to do. But we're going to turn off the angle and have it
just for sharp edges. And then we'll just define
which edges we want to edit for the edge split. We'll apply the sub
dith, apply the boolean, and then go into edit modes, and then we'll select or of the edges that
make up this ring. Like so don't need
to do the bottom, but you can, if you want. If you just want it to
look clean, B yourself. And then we'll
control E mark sharp. You can see there's something
we're going on here, so I'm going to select
everything and then merge by distance to
remove any extra geometry, removed eight vertices, and
now it was looking fine. Then we can apply
that. Chile. Then what we'll do is just cap of the top, so we mad just a
little lid like so. So we're going to select
these top edges again. Duplicate them, separate
them by selection. Then select it again. Select everything in edit mode from the separate a geometry, we'll just clear
the sharp up bit, and then we'll extrude it and
scale it in to about 0.8, like so we'll
duplicate it again. Scale this in slightly, just to create a little
tiny bit of a gap, and then extrude it right
the way in, and then fill. Then add some geometry so loops like so we'll turn
proportional editing on. Then I'm just going to box
select all of these faces. And then if we press G, scroll on the mouse w or
the circle smaller. You can see we get
something like this. And then we just want to
pull up the mouse slightly. W to make sure it's going
in the right direction, so this looks like it's
going the wrong way. We'll go inverse square.
Let's go in the right way. But we don't want to
move the outer faces, so we'll select,
order them with L, and then press H to hide. And then when we
box select this, we can edit it without
impacting the other geometry. So let's just create just
a little bit of a curve, that we'll bring
everything back. Turn off proportional editing, select the inner area,
and we'll pull this down. Put it up a tiny bit. And then what we'll do is select the outer edge, the outer edge, I guess you could call it
the inner edge of this side, and we'll let that edge as well, and we'll extrude them all
down a little on a Z axis. So E Z, and we'll just
pull it down like so. Shade smooth, and then
we'll just add some loops. One there, one there,
one out there. Then we have
something like this. It's going to isolate it. Add a few more liaps. I'm going to select this
outer ring, hide it. Then we'll just add a
couple more like saw. And just checking, we'll add one on the
inside here as well. But this is for the outer ring, just adding some loops
or I feel it needs some. Cool. There we can bring
it back. There we go. But the basic sink. Next, we need to do
the unit underneath. So if you just look
at the measurements, we've got 82, centimeters
for the whip. So we're going to top, add another cube for the
y we'll put 0.82, for the front tob or the
depth. We've got 19. So on x, we've got 0.49. And then for Z, we've
got 60 I believe. So we've got 0.6, and
then apply scale. Move it down for now. So, then we can
just hide the sink, hide a little cap, and then we'll select this unit, apply scale if you
haven't already. And then what we'll
do is just map out where the countertop is going to be in the drawer fronts
are going to be. So we're going to edit mode, turn edge length on, then add loop cut, and move it up so that the counter is about
2 centimeters thick. That's going to be 0.02. E. There will add
another loop curt and we'll make this for
the draw reference. We'll make this 0.017. E. And then we'll just
separate things out. So I'm going to
going to wire frame, select all these top vertices, turn off edge length, and then we'll
separate by selection. So just that, I'm just going to hide the other thing
and we'll fill the buttom. But I'm going to
take, get rid of this load of edges
as we don't need it, so I'll grab them dissolve. Then select all
the bottom edges, fill, create a face,
then bring stuff back. We just want this piece, so I'm going to isolate it. And then what we'll
do is in wire frame, select all of the edges that
make up the drawer fronts. I will move them by 0.02. So 2 centimeters inwards. Is to bring everything back. You can see we've
created a little bit of a lip on the drawer front. Let's move it back a bit. So I'm going to go 0.01. In total, we've already
moved it 1 centimeter. Tool. Then let's
isolate this once more. Then what we'll do, separate. Ds piece of geometry, hide the back, and then
we'll create a face here. So I'll just selected
all the edges, 123, created a face, selected all the ones at the
top, created another. Adding a loop cut
right in the middle. And then what we can
do is bevel this. I'm just going to bevel, and it's going to be one time. So I'm just going to bevel, create a little bit of
a separation like so. And we only want one
line to become two. So we can turn the
segments down to one. Bevel just a touch,
about a square wide. And then what we can
do is separate them. So I'm going to select
this edge at the bottom, and then select all the
edges at the bottom there and the ones in between
separate by selection. And then we'll go
to the top one, The let these vertices. Now we've got a little gap, and then we'll just fill
in any gaps we have. I'm going to select
those, fill in. Then we'll select the
other drawer prints, Isolate it, fill the
gap at the bottom, we. We've got a little bit
of a separation there, and we can add a door handle, for example, Well drawer
handle, if we sell wish. Then what we'll do next is select the drawer friends
and the countertop, join them all together,
add a bevel modifier, set the segments to three, set it to 0.001. We've got a little
bit of a bevel, and then smooth shades. I see we're missing a
bit of geometry here. So the bevels going to show
it, so I'm going to select. Order the vertices
for the back unit, control to invert my
selection, then hide it. And then we're just
going to create a face at the front,
face at the top. We need the face at the front, so there's not a gap here, and then the wall at the top. So the bevel doesn't kind of put through
into nothingness. And then we can get rids if this cylinder, we
don't need it anymore. And just give everything
a final check over. Make sure nothing's amiss. Then we'll just rename
some of these elements. We'll call this bathroom sink, for this bathroom sink unit. Then we've got this
last piece here. We'll call this bathroom since. And that's it for now.
See you in the next bit.
37. Modeling Bathroom Tap - Part 1: The next thing we're going to do is the taps for the bathroom, so we're going to do a
different one where it's war mounted instead as per some
of our reference images. So the tap we're going to
base it off of is this one. So in blender, what
we'll do first is move the three D cursor
above our sink area, and we'll add a circle, setting the radius
to 4 centimeters, giving us 8
centimeters diameter. And then what we'll do
is going to side view, so front orthographic
in this case, and then we'll extrude it
out by 0.0 1 centimeter. And then we'll duplicate
this ring here, and we'll use this as
a measuring guide. I'm going to then
separate by selection, and then we can
reselect that ring, going into left orthographic. And then we can adjust this
to make the next part. So we can see on
this base kind of bit the tap that we've
done the first bit, and then it goes in,
then it goes out, then it goes in, and then
the actual bout comes out. I've done that bit,
then we need to go in. We'll scale into
about 5 centimeters. I'm going to grab all of the vertices on the
separated circle. Actually, we'll do
it in object mold. We'll just set this
to 5 centimeters. Then we'll select the base unit, select the outermost vertices
and then extrude and scale in to match where the circle is does
have to be perfect. Then we'll go back to
the separated circle and then set this to 4 centimeters
back to this object, and then we'll extrude
this by 4 centimeters to give this base kind of unit
a depth of 5 centimeters. So extrude along the x, 0.04, truss going the right way. Les. So and then back
into left orthographic. With these vertices selected, we'll scale it in one last time to get the four
centimeter diameter. Then if we look in
front orthographic, we want to then move this. So I'm just going to
move a along the x, so it's in line with the
back of the cabinet unit. So you can imagine if
the wall was here, it'd be flush with the
wall, so with this. But we can adjust later. It doesn't need to be
perfect right now. And then we'll grab
the inner vertices. Go into front orthographic, and we want to extrude this
by 0.1 or 10 centimeters. We've got 15 centimeters
along the z in this case, as we have in applied rotation. And there we can see,
for the actual spout, we've got 20 centimeters. So we're about 5
centimeters shy, but that's okay because
we can adjust afterwards. We want the spout to end roughly in line with
where the drain is. So what we're going to do first is move the
free Dcursor to above go almost four squares down and in line
with the edge here. We can use a spin tool, set it to y in this case, and we want to spin
like so to create spout and set it
to an angle of 90. So we have something like this. And then we don't need the
circle, so we can delete it. We want to add smooth shading, and then there's
a few modifiers, we want to add solidify, and then set this
to a millimeter. And this is just to give it
some thickness on the rim. Then we're going to
add a subdivision and we'll set this to one level. We'll turn both of these
off temporarily and then just add some
container edge loops, just to sharpen up
some of the edges. Is going to go
through the model, adding these edge loops. And we'll add one
more cs to this side, and then the last
one at the bottom, and we'll turn the modifier arm. I a look to see if there's
anything weird going on. Q. If you're having
anything weird, just check, you face
orientations right way around, we want blue any outside. If it was, for
example, like this, then you'd notice by what's
happening with the solidify because the offsets based on which way the
faces are facing. But you could get
something weird going on, is to turn it on. You can see this doesn't
look right here. If it's to the normals
the right way, now it looks a lot better.
That's something to check. You could also adjust this, but generally, you always want the normal to be
in the right direction. And lastly, we'll just check. Don't need to add
anymore edge loops. Everything looks right. Yeah and we'll call
this bath room tat. And then I'll see you in the next part where
we do the next bit.
38. Modeling Bathroom Tap - Part 2: Next, we're going to work on the tap lever part of the tap. So in blender, what we'll do
is going into front view, and then we'll go
cursor to selected to just center the free D
cursor on the spout. Then we'll add a circle. We want to a little bigger. Then the spout, which we had about 8 centimeters
for diameter. So for this circle,
we'll set it to 10 centimeters on the x and the y, make it a little bigger. And then what we'll do is
extrude it out 1 centimeter. Make sure it's going in
the right direction. And then we'll go back
into left off a graphic. So we're looking front on. And we want to
extrude then scale it in until the boundaries line up, like so And then we'll
hide the spout for now, going to edit mold on this
shap heer, this donut almost, and then we're going
to extrude it in, but put it a bit
further back, like so. Then we'll select this
ring of vertices, duplicate it, and then
separate by selection. We'll go back to to this ring, and then we'll just add
a subdivision modifier, and then set this to one level. Then we'll add some
supporting loop cuts. Shade smooth. We just go through the model and
just add some loop cuts. Longo of the edges, see if it's improving,
the result we're getting, don't get any wi shading or
curves that we don't want. Then we'll select the circle
that we separated earlier, and this will make
up the cylinder. So if we go into
front orographic, can we bring back the spouts? We can see based on
the reference that this cylinder looks to be a
bit bigger than this area, that require how much we
just have to estimate it. So I'm just going to grab all of the vertices
on that circle. And then inside view,
we extrude along the x. Let's go to about two
more centimeters. Let's make it about
7 centimeters. Close enough. Then I'll
hide the spelt once more. Go back to the cylinder, with the top ring of
vertice selected, we extrude, scale it in, scale it right the way, and then fill to make a face, add some loop cuts, and then we'll go back
into print orthographic. And we'll select before
we do that, I guess, we'll select all of these faces, add proportional editing on, and we want to an
inverse square. This is so that when if we
grab a movie under way, the curve goes the
right kind of way. As if you have it on,
for example, smooth, you can see we get a different
kind of curve there, and that's not what we want. We want this kind of curve, so we'll do inverse square and
just bump it out slightly. Shade smooth, at
subdivision, at two levels. We want to apply the scale. And then we want to
level one of the edges. We'll level this edge, like so. I'm going to hide this
ring at the base for now. We want to select the
bottom ring of tics, SG X, make sure
proportional editing is up, and we want to pull it in. Then we'll add a loop cut
right at the bottom, like so, add some supporting loop cuts, and we want to make
square faces to keep the subdivision even because we're going to apply it. Then we'll apply this. This will give us some geometry to work with when
we make a cut aft. So if it's to bring
everything back, for example, and hide the spot, you can see what we're working
with at the moment. And we just dragged
it in just so you don't see any weird gaps here. Then we'll just
hide the base unit, so we just have the
cylinder to work with. And what we want to do
is add another circle. This is going to make the lever, and we're going to set
the x and the y to 1.5 centimeters, go to top view, and we'll move it in front
of the cylinder, save below, like so from top
view's perspective, and we want it nearer the
top of the cylinder as well. So I'm going to put
it about there. We'll go into wire frame
and just position it. Roughly, so we've got
it something like this. Try not to have any trying to give some space between
the borders as well. We've got the circle and it's
in the middle of the face. And then what we want to
do is with the circle selected and making sure it's in it in front
of the cylinder. We want to add snapping, face, project, project
individual elements, and then we want to go into
edit mode, press the GK, and then left click, just to snap the circle
onto the cylinder. Then we'll select
both of the well, select the Cylinder first. Going to go into front view, and we want to
select all the faces that intersect with the circle. Like so let's go one more. Then we've got a little space. We have something like this,
and then we'll delete faces. Then we want to
select the Cylinder and the circle,
join them together. What's going on
there. Scale wasn't applied on the
circle most likely, and that was what was
giving it that weird thing, that weird kind of lines there. So if as to undo, you can see
when we join them together, x and y, have been adjusted. And that's why
we're getting these weird kind of lines here. So just apply scale. Things to do. If you ever
get anything weird going on, check your normals of
the right way around. Check you've applied scale. Those generally
the big two things that it can give you
weird kind of issues, especially when you're
messing around with things and object mold and
joining objects together. And then what we want to do. The previous time we made a cutout with a circle
for the other tap. We made a perfect cutout, and we didn't have to do
any cleanup afterwards, but sometimes that's not
going to be possible. So this time we're going to do it where you have to do the
cleanup after the fact, just so you have both kind of ways available
to approach this. So we're going to select all the diversities that make the cutout and the
ones with the circle. And then we'll go
bridge edge loops. Can see we've got
loads of triangles, then we're going to
go tries to quads, You can see it's removed
some of the triangles, but we still have some as well. So we need to make some
manual adjustments to this. So in the next bit, I'll show you how to make the manual adjustments
to clean this up, and then we can round off the rest of the handle
and the leave here.
39. Modeling Bathroom Tap - Part 3: Next, we're going to
continue work on this area, getting rid of the triangles, cleaning the up sole, the tools we're using
work as intended. The reason we want quads as opposed to triangles,
is, for example, if we were to use loop tools, you can see it makes a
nice clean loop around, the areas that are quads. But when we come to the
triangles, the tools don't work. You can see it's
cutting off here. It's cutting off here because
it's a triangle as well. Some of the modifiers will behave weirdly as
well with triangles. So we're going to try to
erase somewhere possible. So let's go to MTCAP, so we can see the we
can work them with. We can also see we've got a little bit of an
issue here as well. I some of the shading, so we're going to
try to address that. So what we're going to do
is first turn off snapping, and then we're going
to look at it in front orthographic and
use the knife tool. And we're going to
cut around the shape, clicking on the
edges, not the faces. We're just going to
create a border. We have to do this
with the knife tool as Luke tools won't work because
the triangles involved, and you won't know
which way to go. We're telling it we want it to go around the circle we've made. And then we're going
to click the vertices, the ring of vertices with made, double tap G, hit E, and then flip it if you need to. So it's going so it makes a
circle instead of a square. Then we're going to
put it out to about there to about halfway
in some of these faces. And you can see at the moment, this is the kind of issue we're getting and we'll
look to fix that. So what we're going to do,
we've got some quads here. We're going to try to get rid of these triangles
in this face. So let's click on
vertex select molds. You can see we've
got a quad here, quad here, got a triangle here. And what we can do is introduce some more vertexes onto this inner ring and
then connect them up. So if I was to
look this is fine, this is fine, this one isn't, so I need another
vertice somewhere here. I'm going to select these two. And then hit right
click subdivides. Quick way, just put a vertex
in the middle of an edge. And actually, what we'll do, select the whole
inner ring, hit Phil. Yeah, select the
whole inner ring and that vertex hit phil. Just so wet accidently
select anything inside the mesh inside the hole. And then we're going to
click to this vertex, this one, hit J to join, then we'll dissolve this edge. You can see we've got ids going up in there,
Cards going up there. Then we can just grab this
vertex and space it out, and we can move this one. Want to be careful with
moving vertices on the inner circle
as it will adjust the shape of the circle apart
from the ones we add in. Because if we look at, for
example, if we zoom in here, this vertex isn't helping
the shape of the circle, but you could say like
these corner ones are if we adjust this or change
the shape of the circle. If we just this, if we're sliding
it left or right, it won't because it's
on the straight line. It doesn't matter where it is. So all the ones aren't
on straight lines. There are a angles
near to staus M. Let's have a look
with guts quads, here, and they're
going into this area. So what we're going to do is select that vertex and this one, merge at last, do the same
on this side, merge at last. Then we'll select this
one and this one. Merge at last, so
we've got quads here. And then we're going to add some more vertices to
connect up to that. So we'll click here subdivides, click these two subdivides. And then we'll click this one. Use the knife tool. Click that edge. Click
the edge up there. So now we've got Quads up here. We can select this edge, dissolve it, got
Quads down here, then select this vertex
or just use a knife tool, knife to there, knife to there. Move there. I've done the right
way around. This one. We'll remove this one for now
and we'll add another cut. So we'll go one to there
to there to there. Then we'll just space them
out just a little bit. And we can space these out a little as well. That
one needs to stay. And we'll just work our
way around the circle. This area next. I'm going to merge those two at last to move
this, merge at last. We've got quads here, divide, and as before, we'll connect them like so and then get rid of the edges,
we don't need. Same again. So we'll
need a vertex in here. Join, join, join. Now you can just click from the start there
to the end there. But then if you need to, you manually have to move the middle one if you
want to reposition it. The evil works. We've
got quad there now. Now, for this one,
we have a triangle, so we can let's see, we'll add a vertex there. We'll slide this one along, join it up to there.
Resolve that. And let's do the same over here. Merge at last, merge at last, merge at last,
subdivide, subdivide. And so we have the vertex here. For this one, we need
it to go over there. And do that. This needs
to go over there. So we need to do something
a bit different here. That we'll figure it
out. Dissolve that. Need one more here. We'll
doin these together. Dissolve that, Dissolve that. I must have click something extra there because that
was a little different. And let's see. Space this out. That's the core in the one,
so we'll leave that in place. And then you can see that we have three faces
on this circle, that are connected
to the circle, but we only have two lots of
runs of faces on this side. So if we combine these, we'll have an extra. So what we can do instead is remove one of these vertices
and shift things over. So it looks something like this. So if I was to say
connect This one, merge this one at last, like so. You've got that run,
and then you'll need to connect
this one to this. You can just press J just
to draw dissolve edge. Then we're just going to look for which ones is extra vertex. We have one here. We'll
get rid of the edge first. And then look at where we
can shift things over. I can grab this one, go to
that one, merge at last, then join those two together, dissolve that edge,
and then we'll just space everything
out a little. Then we have the
last one over here, merge at last, merge at last, go merge at last, subdivide subdivide, and to need one more
slide this over there. It's going to draw press t
to doin nos. There we go. So now if we were to use a
loop tool, we loop cuts, you can see it
works on this ring, and it works on the
outer area as well. So what we're going
to do is just add another one to
the outer area. We can add one to this area just to get more geometry because
some of these faces, if we were to not have this one, you can see this face is
covering a large area. So we're getting
this kind of we're getting flat spots
that we don't want. You can see it hasn't
done anything, but we're going to
use a modifier. That's going to
adjust the position. So we can use smooth. It's going to kind of smooth
out the angles between faces and what we want to do. Is set it to a number on the factor that
impacts this area, but doesn't make
everything look crazy. So you can see if I'll go to that extreme or that extreme. We'll get results
with don't ones. So we're going to
just have a look and see what number we
can kind of get to. So maybe about there. We to
turn it off, turn it on. Then we're just looking
in MCA just to see, so you can see the difference. That's with, that's
with the arm, and the rest of our
shape isn't impacted. Then what we'll do
is grab this face, delete, and select before we do anything else,
we'll apply this. And you can see far as to
just demonstrate what it did, the position of our faces, and then we apply,
adjusted them. Everything looks a lot more, a lot better spaced out. We don't get those issues
that we were having before. And then what we want to do is grab this inner
ring of vertices. We're going to top view,
and we want to extrude them along the y axis like so. For the handle, we're looking at about 8 centimeters
approximately. Let's type in 8 centimeters on this plane and use
this as a marker. How far we need to drag it out. We'll set it there. Gy. Then we're going
to press S y zero, just to flatten the end, drag it to the end of the plane, and then we'll click
back onto this object. Add a face to the top in set it. And then we'll inset it again. Gale it right the way down. Just going to add some loop cuts to the borders as before. Ad one down the bottom as well. And we'll just check to see if we've got any issues or not. And going to leave this one
fla I'm not going to round it off, like we
did with this one. But if you want to the
same process as before. You just add ops. But that looks out right. Look back at our reference. It does look like it's
tilted upwards a bit. So what we could do
if we wanted to do the same thing is first, we will remove this edge at
the bottom that we added, remove this one at the
top that we added. And this is just so that
when we move these vertices, it doesn't go straight
and then move because of those
vertices at the bottom. So we could do
something like this, rotate the end, just
moving in the x axis, are up down in this case, and then rotating along the
but if you're in top view, or rotate along one
plane, but if you're not, it'd be the Z so it
stroke kind of bar. There we go. And let's bring everything back
together to have a look at. Grab the cylinder,
want to move it away, but make sure you
grab the cylinder and it's kind of base area. We move those two
parts together. There are two pieces. We just want to apply the
scale on the base unit. We have a level one subdivision. So we'll apply that
on the base unit. Click both of them,
join them together. This one has a few modifiers,
but we'll apply those, subdivision and the solidify and solidify first,
then the subdivision. And then we can just join
these together for now. And we'll just call
it bathroom tap. Then we'll put it
roughly where we want. I'm just going to move it like, so I want to adjust this piece
to space out a bit more. As we've joined them, I've
gone into edit modes, and they're just going
to put it separately, so we have something like this. Of course, we can adjust
the height if we so wish. And then let's
bring back on going term MATCAP, back to studio, go to ground floor, and let's put everything
into position. I'm selecting all of
the bathroom items. We're going to move them up, so they're on the floor,
and then we'll rotate them. One e t, then we'll just leave an ever so slight
gap between the wall, and we check everything
is connected to the wall. So we can see a slight
intersection, which is good. And there we have it. What we can do is let the sink, add go shift,
cursor to selected, add an empty, like so, and then we'll select the bathroom objects and
make up the bathroom sink. Select the empty last and
as before, parent it. We'll call this bathroom
sink controller. Select hierarchy,
move to furniture, see, we forgot the ca. So what I'm going to do is click furniture just so I
can see where everything is, click the cap, move it
up, and into position. And then we'll select
the cat first, select the empty last, and then we'll just parent it. And now everything's
moving together. Select hierarchy, drag
drag to furniture. If it wants to do it,
it might already be in then which it is, that's doing something weird
where it duplicates itself. But no matter, there we go. Move it different way, key and then furniture. So
now we can hide that. Everything's hidden,
and that is test.
40. Modeling Bathroom Toilet Base: Next, we're going to
work on the toilet, and we're going to base it
off of this model here. We have a few dimensions
that we can work with. The important ones to
know to the height, width, depth and the C tight. So let's go to Blender
and hide this. Then we're going to go into
top view and add a cube. This is going to be where we reference those
different measurements. So first things first, we have the height, which is going to
be 825 millimeters. We've got the depth, which is going to
be 618 millimeters, then we have the width, which is 380 millimeters. We have something
like this. Then we're going to apply the scale. Then the last thing we need
is to go into edit mold and then turn edge length so we
can mark out the s height. So we're going to add
a loop cut and have it at 0.405. But there. So you can see from the
bottom to that loop is 0.405, and that's where
the seat will be. Next, what we want
to do is going to top view and add a circle. And then we'll just
scale this down to the width matches the toilet. So about there, so
the widest point of the circles touching the
edges on both sides. I want to plow the scale, going to edit mold
for the circle. And then what we want to do is select the vertices
after the circle. So this is the widest point. And then we have where it
starts to curve back in. We want to select the
vertices underneath that. L s and delete them, then we want to select. The next vertices in lime, we'll t snapping on edge
and we'll snap it to the back like so I'm just
pressing G Y to constrain it, so it only does the y axis, and we have something like this. And then what we
want to do is press the F key to fill that back bit. We'll select the cube for now and just hide
it in the viewport. Actually, no, we'll keep on. And then what we'll
do is select all of the vertices for this
toilet based model bit, and then extrude along
the Z axis to the bottom. Like, we'll grab these top ones, and press G Z, and just
snap it to the C type. And if all is done well, we can see that the Z, the height of this
part we've made this 0.4 or five, which
is what we want. Now we can hide this final. And then like the
reference, we can see, it's further forward here
than it is at the bottom. So we need to adjust it to
get this slant as well. So we're going to
select this object, going in to right orthographic, so we're looking at it side on. Select all of the
bottom vertices on the front only, not the back. Then we want to press G y, and then we can move it left to create that kind of slant. So we have something like this. Then what we want to do is select all the bottom vertices, fill to create a phase,
or of the top ones, fill to create a phase. We'll turn snapping off, select the top and
the bottom vertices. Then we want to inset them. And we'll so we press, and then we'll go 0.03. So we've created a three
centimeter inset there, approximately, so we
got some thickness. And that's if you wanted to create the inside of the toilet, then you could, for example, extrude this in and
then make adjustments. But we don't need that, but we still need this area to create the bevels
on the corners. We'll do that in a bit. What we'll do for now
is just Shade Sm. Then what we'll do is create
the back bit of the toilet. So let's have a look at
what measurements we have. We have a height. So we can see doesn't go
right the way to the top, and we also have a depth of 138. So we're going to top here. We'll add a another cube the y axis will go
138 millimeters. And then for the z
with the height, we will go hundred
and 7 millimeters. Four or 7 millimeters. And then the width will be 380. The x three 80 millimeters, like so, then we can just
snap it to the back, and we'll snap it
to the top as well. So I'll just go into y frame, and then we'll apply the scale. Both shades smooth as well. Next, what we want to
do is hide this unit, and we need to make
a few adjustments to this bottom unit here. And what we'll do is just change the edge flow a little bit. As you can see, if we wanted to make loop cuts around this room, they're going in this
kind of fashion, and we want to just change that. So we're going to go into
top view, vertex select. And we're going to
use a knife tool to create some new edges. So I'm going to select,
wait till my cursor goes ready green red border
around this green square, click, press the C key to
cut through the whole match, and then A to constrain
it to an angle. So you can see, it's
going in increments now. And we want it to
dec straight across, like so, and then we'll do
the same for this area. So we've created
the square here, and we'll do the
same for this side. So A C knife tool, and then A C. Then if we look,
you can see we've cut through the whole mesh. Then we just want to
grab these edges and dissolve them.
Then we get quads. Then we'll select everything and just recalculate normals, which is shift n. Then we'll
bring back the top bit. Next, what we'll do is select the top bit and the
bottom bit altogether, and we want to select the
edges that we want to bevel. So for the top bit, it
will be everything. For the bottom bit, we'll
select the whole outer rim. Just check that's done. You can see that there's some
areas that it hasn't done. So we'll do those manually. So we've got the
whole top rim now. And then we'll select
the back two edges. Then we want to select
the whole bottom outer rim and the back edge. There. And then for the top bit, as it's just all edges,
we can just select that. Press L, select everything, we'll bevel the whole unit. And we're selecting all of these edges at the same time so we can give them
the same bevel. So if we press control B, you can see we're beveling
everything at once. Then we just scroll up
on the mouse wheel, and we'll just give it a
little bit of a bevel like so. You can see the bevels even between the two
different units. And just have a look around. Check there isn't
any abnormalities. Chuck against the
reference image. If you need to make
your bevel any bigger, then just undo. So you can just
undo the last deep and then reapply the bevel. Like, so you wanted to
make it a bit bulkier, which I believe looks a bit closer to what we have
in the reference. And there we go.
That's the first part. In the next part,
we'll add the seat. We'll add the cut here
and then we'll add the little extra details
like the flushing bits, and some of these
boolean cutouts.
41. Modeling Bathroom Toilet Seat: Next, we're going to start
work on the toilet seat. But first, we need to
adjust the size of the toilet to match a cube
that we made earlier. So we're going to
go into top view, select the base
part of the toilet, and then go into pedit modes, vertet select, select all
the diverts on the front. They're going to ps G Y, and just move it to the front. It should be 0.618, which matches the
projection. At here. And then what we're
going to do is use this image to build
the toilet seat. So back in blender. We're going to add
a image reference, find that image. I'll attach it. So you have access
to it as well. Then we're just going to
rotate it 180 degrees, so it's in the right direction. Then we're going
to add a plane and scale this to 6 centimeters, so we can scale the
reference to the right size. We want this area here to
match this area on the plan. Going to wire frame,
so I can just see. Keep adjusting the
scale until it matches. Like so, and then we can
get rid of this plane, select the reference image, and then we can go selection to cursor, just to center it, by the cube in viewports, it doesn't show up again, and then we'll select
this reference. Turn on capacity,
set it to about 0.2, so it's not so bright, and we'll just rename
this toilet seat. And let's have a look. What we'll do is
just move it along the y axis until the front
of it is roughly in place. Then we'll select the
base part of the toilet, isolate it and select the faces that we want to
build the toilet seat from. So I'm just going to select, go to start on this face, and we're going to just select
around to the other side, duplicate, move it up, and then separates by selection. So we have this U shape. And then we're going to
go back into top view, bring the reference back. And then just check it in
the right place first. Then what we'll do is select
the separated part remate. Going to edit modes, select everything,
and then we'll scale this up a little bit. So it's touching the
edge of the toilet base. Then we're going
to vertex, select, select all of the inner
vertices, double tap G, so we can slide in, press C, constrain it to an axis, and then we can slide it the other way and
we'll keep it aligned. Then we'll scale it to
this middle line here. Then what we want to do
is delete half of this. And I just use a
mirror modifier. We're going to delete
half of the shape, delete vertices, add
a mirror modifier. Now we only have to work
on half of the shape. Then we're going to select edge, select mold, select this
edge, turn clipping on. Then we want to
extrude this along the x axis until it
snaps into place. Then we're going to grab
the bottom vertices. Of this shape and pull them up and we'll pull them
up to this line here. We've got a bit of a gap between the toilet seat and the
back of the toilet, where you'd have this
kind of bit here. Now what we want to do is
add a score four loop cuts. Then we'll add a loop
cut near the bottom, and we'll place it, so this text is on
the middle line. Then for each vertex afterwards, we'll press G Y and
just move it into place and just follow
it along this line. The grab this one, slide just so it levels
out at the end. Then we can select
these faces here. We don't need them
anymore, delete face, and we can add a
subdivision surface just to round out
this curve of b. If you curve still look
in a little blocker, you can add additional Vertexes, vertices to this edge. But I believe that's what
I'll leave it as is. But then select this vertex. Control B to bevel
to affect vertices. Then we'll just add
one extra segments, so we have two segments, and then leave it lights
so then we'll add a loop cut that
pit to the bottom, so I'll press the e key. So it's basing on the bottom
and not the top curve. So we've got the straight line
line up with this vertex, Then we can select
these two vertexes and press to Jake to drain. And then we'll do the
same one more time. We'll leave this
one in the middle, that, that one,
press J to draw in. Then we'll just add a d loop cut just through the middle like so. Now, what we'll do is select all of the
vertices on the outside, duplicate them, and
then move them upwards. Then we'll separate
those by selection. And this will make the basis
of our top toilet seat. This one will be for the bottom. But the bottom one, what
we'll do is select the inner versus the F key to fill, to create a face and
then we press the I key, just the inset B
key for boundary. So we don't have this border
because we don't want that. So that's what the B Key does, gets rid of it, and then faces that will be
on the outside. We don't have a mirror, te to clear at the moment
to have applied it. And then what we'll
do you want to inset it to this
inner line roughly. Then we can just
delete that face. We can select the
vertices on the inside, vertices on the outsides, and then we'll extrude these
down by 2 centimeters. 0.02. Then we'll select
the outside vertices. Actually, what we'll do is
select this vertex here, then go cursor to selected. Back in object mold, we'll go origin 23d cursor, so you can use this
as a mirror point, and then we'll mirror
on the Zeaxis, and this will give us the
reverse side as well. And it's made it a
little big enough, so we'll put 0.02. So each half a centimeter, and then we'll add
two loop cuts, just to flatten this out a
bit as per the reference. Go have a look at it.
This is pretty flat here. Then we're just want
to add two loop cuts in the inside as well. And that's our bottom one. Now for the top
one, what we'll do, go into top view, and we want to remove surplus vertices first. So we're going to select
all of these vertices, dissolve, and then on the side. We'll sel Ct dot needs. Just this one, Dissolve, and then we'll add vertices
and just fill the faces in. Let's add five cuts that select. These four fil these two f
fel our way down. Like so. Then we'll just add some
geometry like that. Then for the top, you can see this
one's flat as well, and it's got a little
bit of thickness, but not as much as the other toilets see done
of the images will show it. But we'll go for about a
centimeter and a half. So we're going to
set the outside edge once more ext miss sum,
extrude down 0.015. And with the shade smooth, two loop cuts as before, and then we'll pull this down on top of the other toilet seat. Then as we did the
mirror on this one, you could either do
the mirror as well, or what you could do is we'll hide the
bottom toilet seat. Select all of the bottom verses, and then extrude them inwards, E S, then shift Z. So we'll only scale in on
the x and the y axis and just give it some
pseudo thickness like S. Add a couple
of loop cuts, and then we'll get a
similar kind of effect. So far as to bring the
other toilet seat back. This is what we have, and
we can select them both. I'm just going to hide
the reference image, set them both, pull them down. And just check them.
So this is what we're working with at the
moment for the toilet seats, and this is the reference. Getting closer.
Looks about right. And we'll just
rename everything so far for the toilet seats
so we've got toilet seats. We'll just call it toilet and then we'll join
these together. So we'll join both toilet seats together after applying
the mirror modifier. So I apply mirror, ply mirror, and then we'll just have one
subdivision on both of them, or join them together. Add subdivision
surface on level one, and we've got toilet seat.
We've got the bottom. We'll call this toilet base. Toilet. We got what
this is called, let's call it top for now. We'll just change this in case we need it to a
wire frame for now. So we've got object
properties display as wire. There we go. I'll see
you in the next part.
42. Toilet Booleans: Next, we're going to
make the boolean cutouts for this area here
and the flush button. So in blender, what we're
going to do is add a cylinder. We'll adjust the x and
the y to 4 centimeters, like so and apply the scale. Then we're going to edit more, to scale it down on the Z axis. I'm going to just position it. So it's intersecting with the top area on the and
place it about there, and then what we'll
do is shade smooth, and then remove the
top and bottom face. Then we'll duplicate this
and rotate it nine degrees, and position it here. So I'm going to go to the front orthographic or
right orthographic, and let's place it about there, duplicate it once more, adjust the x and the y to 1
centimeter and apply scale, then we'll position
this to where this second hole is,
or we think it is. Then we'll select
the toilet base, and we need to add
some more geometry. So I'm going to add five loops. And we'll add five the
other way as well. Then we'll adjust this cylinder, so it's in one of the faces. And let's see if we can do
the same for the other one. Let's place it about there. Then what we'll do is
select the toilet base, add a Boolean modifier,
duplicate it. So we have two, and
then for each one, select a different cylinder. Then we'll add a
edge split modifier, and we'll just want
to check that we don't have any weird
glitching going on. At this point, if your
cylinder is too far down, for example, say
it's about there, you'll see the edge
split won't help it. And this is because
there's not a loop cut. Ad the border between where the bevel is and where
this area is going to be. And we need that
that's why we've added some more
geometry as well. So even this one could give us some issue because
there's not one below. But we can add one
in if we need to, which we're going to do
just in case back there, and we'll do the same
for each area near the bevel and near A
bevel, on near the top. And then once we're
happy with that, what we'll do is
apply the booleans, and then we can remove the cylinders to get
rid of those two. Then we'll select. We're
going to edit mode, select all of the vertices
on the back of the cylinder, and move them along the x axis. Just so there's a small
kind of area here. Then we can hit F to
fill I to insect, and we have the first area done. Now we don't want the
edge split on everything, so we'll adjust
that in a moment. But for this one, we're
happy to leave as is. Then what we want to do
is change the edge split. So untick this, leave
it on sharp edges only, and then select all of the vertices around the
circle cutouts we made. Do not need that one or
that one or that one. Then we'll mark Shah and
there we go. Just check. There isn't anything amiss. Doesn't appear to be the case. Can have a look in
MTCAp, as well. Everything looks fine,
turn that back off. Then we've got a
cut out at the top. So what we'll do first is
just add some odiometry, just going to add five cuts
horizontally and vertically. And then we'll just add
and container loops near the bevels. On here. Okay. And then we'll just
check that in Macup. And what we want to do is duplicate this because we
need this for a future part. So I'll grab this,
duplicate, rename. We'll call this guide
toilet guide mesh. And turn it off in viewport. Then we have the toilet top. We'll call this toilet top base, and we'll add a Boolean
cutout, select the cylinder, add a edge split after the fact, and then we can apply the
Boolean, delete the cylinder. Then what we can do is select or of the vertices at the top
and mark sharp as before, change the edge split to sharp edges only,
and there we go. We have our cuto For the bottom ring vertices,
we can just delete those. And just check nothing's amiss. Then what we need to do is add some little circular
cylindrical disc kind of things by the toilet seat. So what we'll do is going
into top view, add a circle, bring back the reference image, and then we'll scale it down until it's about
the size of a Do's disc. To about there, apply the scale, and then we want to extrude this downwards by a
centimeter, 0.01, and then I'm going
to isolate that, fill both the top
and the bottom, and then we'll select the
top of the bottom faces and bevel them to about there. We just want it on one segment. Then we're going to add
some supporting leap cuts, and we're going to
add them inside this beveled area,
just to sharpen it. Same for the bottom. Then we'll grab the top
face and we'll just inset this just to give a
border around this face. Shades smooth. This
is what we go. We don't need to
worry about beveling insting the bottom face.
You're not going to see it. And if you want, you
can add a subdivision just to give this more of
a smooth kind of shape, but it's not necessary, so I'm going to get rid of it. And then what we'll
do is position this. So it's intersecting
with the toilet seats, and there's a bit of a gap before it hits the
back of the toilet. And then we'll just
move this down on the Z axis into
position. About there. Just going to line this
up so the center point of this disc is roughly where
this is in the y axis. So it'd be about
there, but we're keeping it at that location. Then we'll duplicate
and do the same, just check, send the
right kind of place. There we go. And we can select both the cylinders and
join them together. And you know what, F now, we'll draw it
to the toilet seats. So we have toilet seat. It's got a subdivision
of one anyway on it. There we go. Let's
hide the reference, and just check everything. So we have a free cutouts. Finish the toilet seats. So we got this done. And then the next
thing we'll need to do is this the cutout
for this area, the button, and then fixing some of the shading that's split in
this mesh course, but we'll do that
in the next bit.
43. Modeling Toilet Flush Button and Shrinkwrap: The next thing we'll do is the flush button for the top of the toilet,
which is sitting here. We'll use this as the reference. So, what we'll do is select
the top toilet base. Then we want to select all of the vertices that
make up the circle. The sitting at the
top, and then we'll go shift this
cursor to selected, just to put our free
Dcursor at a point. Then when we add a circle in, it can scale it down
to 4 centimeters, and it'll be
perfectly in position as we made our cut
out 4 centimeters. Then what we want to do is
start work on the circle. So we can see it goes there's this kind of area where it looks like it slopes up slightly, then they go slow slides down. Then there's a bit of a gap before the actual button itself, and the button split into two parts that
have these kind of faces that sat on top of these kind of
sloped areas as well. So what we'll do is just
isolate this for now. Then with all the
vertices selected, and we the extrude and then
scale in, and we'll go 0.8. Then we'll pull this up on the Z axis slightly just to
give you that bit of a slope. And then we want to
extrude again, scale in, and we'll go 0.9, as this
area is a bit smaller, well, quite a bit
smaller than this area. So something like that. And then what we'll do is duplicate these vertices and
then scale them in by 0.98 just to create the gap. So these vertices that we have now are going to
make up the button. So then we'll fill this
to create the face, and then we'll
select the vertices one to the right of
the center line. So we've got the center here, one to the right, and then
we'll press j to join them. So we've got this bigger area, this smaller area, like so. And then what we'll do is let both faces in face let mode, and then we'll hit
the Iikey to inst. But you can see it inserting
both faces together. So we ei again, so it's inserting
them individually. And then we'll
scale this by 0.00, 09, we have something like this. And then we'll just grab
both of those faces, pull them up on the
Z axis a little bit. There we go. That's the
basis of the button. We need to do a few things now. So what we're going to do is select both of the well,
the whole button area. We'll duplicate this, pull
this down on the Z axis. We'll just use that as a outline for what
we're about to do. Then we'll select
all of the faces that make up one
half of the button. So I'm just selecting all
the ones on the right side. Make sure I'm not
selecting anything below, and then we'll
separate by selection. And then we'll do the
same on the left side, but we can just press in this case and then
separate by selection. And then what we can do is grab this vertex
and this vertex, and we want to move
them along the x axis, but ever so slightly. So I'm going to press g x point, zero, zero trial
one, to zero, two. And then you can see
that we've moved it, but we're kind of breaking
up the shape a little bit. So we're going to
grab this vertex first, turn slapping on. Ave it along the y axis and just snap it onto the
circle that's below, and we'll do the
same at the top one. G, y, snap it blips. Then we'll select the left half, and we want to do
the same thing. So we'll grab turn snapping off, grab that vertex,
grab that vertex, G x 0.0 002, negative or the minus key, so it goes in the
right direction, and then we'll snap these
as well along the y axis. Then we can go into edit modes and delete the
stencil. We don't need anymore. Now we've got our
gap in between, and it's still conforming
to the original shape. Now what we want to do is we're just going to
do some cleanup. I'm going to select
both of these faces, join them together
for the button. And if we were to go
so smooth shading, you can see it looks like we've undone some of
the work we've done. So we're going to
add some look cuts just to define the
shape a lot better. As you can see this
is pretty sharp. So we're going to add a loop cut near the top, turn snapping off, so you don't snap and let's
add one near the bottom, do the same on the other side. And for now, what we
want to do is too far. Now, what we want
to do is delete the top face and the facia. So we've got just these areas, and we're going to
add some loop cuts just to make these corners, I would say a lot sharper. So we're going to add
a loop cut like so, we're going to press
E and flip it, so it snaps to the
right direction. So it's aligned, I should say, correctly, the
same on this side, to this corner as well. To see it's looking sharp. I bring them even
closer together. But this pretty sharp. You can see the difference. So we'll do the
same with this one. We it right next to it. I'm just sliding
with G. There we go. Let's see the other side.
Then as you can see, it's pretty low poly, so we can add a
subdivision modifier, just to round out
of a little bit, and what we'll do next is
add the faces back in. I'm just turning this
off in edit mode, going to go vertex select, and then select all of the vertices that make
up the inner face. And there's two ways you
could go about this. It just depends on what kind of result you get,
what you're happy with. So we can extrude
them in a little bit, to create a border, extrude it in a lot more
and just hit fill. And even though that
looks kind of hurried, that's one way you
could go about it, provide you don't
have any issues. Which you might have a
slight one around here. But to resolve that I can add eight another loop cut
that looks a lot better. I was going to grab this one, slide it up even more. Define that edge a bit better, grab this one, style
it up as well. The other way we
could do this is to select the inner
vertices for this hole, and then we'll extrude in, scale in slightly just to
create a bit of a border, and then we'll select this edge and its counterpart
on the opposite side, the F key to fill, then
fill this area in as well. Then we can select this edge, hold the F key, and
fill all the faces in. And then we'll just check
if everything's in order. It is. If something like that, pretty simple way to do it. Then we can just select
both the objects, join them back together. Then we'll call this
toilet flush button. Just check it
against a reference. And here, then just
click it Shade Smooth. We need to add some
more loop cuts for this outer ring as
that one's sharp as well. We'll just add one
here, one here. Alternatively, you
could have bevel that. So if we selected that, bevel, add a segment, and it
achieve the same result. And we'll just add one near
the bottom near there. D have a look at it. So you can see the
light hits it, that's what it kind
of looks like. Then we'll select
everything, shift n, just to recalculate normals, see that made a big
difference as well, some of the normals
of the wrong way. And there we have the button let's actually don't need
to save. That's fine. What we will do is
then make the cutout. So for the cutout, we'll go back to the
top to the base area, and let's make some adjustments. If we'll go back
to the reference, with this sky the area, and then there's this big gap. I guess you not really that big, but there's this kind of
noticeable difference between this part and this
part. So let's do that. Now, we add, we'll
grab this loop cut, move it up into roughly where we think it needs to
be to about there. And then I'm just going
to remove these edges. So I'm just going to disolve
these edges. And let's see. Then what we'll do is select
the top ar and separate it. So I'm going to grab
this whole top area, separated by selection. So we've got this
area and this area. Then, what we'll do is grab this top bit and hit the F Key. Then we can bevel it. But
I've hit the F K on that one. I'm not going to bevel
yet because we want the bevels to be
somewhat similar. So I'm going to grab
the bottom one, select all the
vertices at the top, hit the F K as well. And then if you
select both objects at the same time in edit modes, select all the vertices, we can bevel them in Unison. So that's call for about there. That we've got, but
there's an issue. We were to go in to look
at the reflections. You can see the
light doesn't pass cleanly from one kind
object to the other now. So with the reflections, if there was like an
environment or something, it'll be a lot more noticeable. So we're going to change that or remedy
that, I should say. And that is where the
part the guide mesh that we got rid of while duplicated and hidden
comes in handy here. So let's see what that does. Go back to studio for now. And what we will do is
select one of the object. And we will add a
modifier to this, and it's going to be the
shrink wrap modifier. And what this does
is if we select a target and we were to set
the target as guide mesh, it will edit the mesh to
match the one underneath. Well, they're one
that the target is, which is the guide mesh. The reflection of the
stuff will be consistent. So if we'd slit the
bottom part as well, we could drain these
back together, so drain the bottom
and the top back together because we've
already made the boolean, and then the string crap, and see alter the
boolean a little bit. But if we were to look
at the reflections, we can see the reflections
are passing through. But what we need to do is
just bring back some of the geometry as we removed
some loop cuts before, so we'll just add some
in add about six there. I'll add two on the side. And then for the guide mesh, what we want to do is bring
it back to visibility, add a subdivision modifier, set levels to four, as this impacts
the ps it called. The mesh on the sinker, then we'll just turn
it off from viewport, so it doesn't slower down. And then just check
everything looks right. Which I believe it does, and we've got a nice, noticeable kind of gap here. And if we wanted to adjust
the gap even more, we could. So say I select
this area, hide it, and then we were to select or of the vertices
for this top area. I could pull these down a
little bit, not that much, because that's too
much of a gap, but if I was to pull
them just enough, you could emphasize
that gap a bit more. But the light and the
reflections will still pass pretty seamlessly
between the two pieces. But I'm going to just undo that, leave it pretty close together. But, you know, it'll still work if you do. So there we go. That's the toilet
done, I believe. Let's have a little check. Got the button at the
top, got this gap here, got the toilet seat,
got these gaps. But yeah, see you
in the next part.
44. Modeling Shower Tray: The next thing we're
going to do is the shower walk in shower, and we're going to do it
based off of this model here. Now, we're going to
do a smaller version, so we're not going to
do this big version, but we're going to
do a smaller one. And the reason for that is
if we go back to blend, see and have a look
at the space we have, we can see the bigger ones
a 120 by 90 centimeters. But on the X 120 cm. Then we've got 90 centimeters. So if we was to put
this in our space, we'd only have 30 centimeters there to get in and
out of the shower, which isn't a lot
of space at all. So you always want to consider the space you're working with when s and what models you put in in the scene to
make it make sense. So we're going to go
with the 90 by 90 so we have more space to feasibly
get in and out of the shower. No, we're just going to place
it about there in top view, it's a bit high, but
fine at the moment. Then we'll just hide
it building once more. Then what we want to do
is see what measurements we can glean from our images. So we have 4 centimeters for the height of
this shower tray. So let's extrude this down
on the Z axis by 0.4. And that's good. Then what we want to do
is select the top face, and then we want to inset it. So we're going to inset
it by 5 centimeters, and then we want to extrude
it down by 2 centimeters, which is about halfway
into its height. And then we'll scale it in. So we're just going
to scale this face in and we'll go points and 95. And we want to just get
a bit of a slant here. And then we'll select all of the geometry, and
we're going to bevel it. You could also just bevel things independently if you want to adjust vevels independently, but we're just going to
do all of them at once. Add a bit of a bevel
two segments like so. And we're going to just add some extra supporting
loops to some of these areas top, the sides. Then we'll just hit shade smooth and have a look
at what we have so far. And compare it to
our reference model. Then what we want to do is select this interface
on the top. And we're going to just inset this just to get a
bit of a border. And you can say,
like a safety zone, and we just go 0.002. And that's because when we
add these little bumps, so we can add some
bumps like this. Es it's the grip for
the shower tray. We want to have a
safe area where the shading can
kind of have space to rest before it meets
off with the bevel. If you want to have
this larger area where there aren't any bumps, then we can just
increase the inst. So I could just scale that
in a bit more if needed, or you just under and you choose something at
a bigger increments. It's 0.005 or even bigger, but up to you.
That's fine for now. What we'll do next
is go into top few. And we'll add a cylinder. The cylinder is going
to be for the drain, so we'll set this all
to 5 centimeters. Place it in the top left as
per the reference image. Make sure as poking at the top bottom doesn't
matter so much. And then we'll just apply
the scale, it Shade Smooth. Then we'll go back
to the shower tray, select the top face, invert the selection,
and then hides. So we're only working with
this plane at the moment. Then we want to
add f e loop cuts to the vertical and
the horizontal axis. You can type it out if
you find that easier. And then we'll go
into wire frame. Object mold, select
the cylinder, and we want to place it. So there's at least a
border around the circle. So we have the faces
that it intersects with, and then we have
faces that it's not intersected with that
are surrounding the. And that looks about right. Then we'll go back to the
shower tray at two modifiers, Boolean and a edge splits. Boolean will be
for the cylinder, and the edge split
will be as before, where we mark out
the sharp edges. Because as you can see
here, for example, our edge splits
effect and then we don't want it to want
it in this area. And then what we'll do is
apply the Boolean final. But we have this nice cutout, and then we can
select the vertices along the top and mark sharp. And then we'll just tick. So it's only ticked
on sharp edges. See we've got our
nice bubble here, but there's no weirdness
going on here. And then what we want to do is we have those vertices
selected. That's good. We also want to select an
additional all the vertices, well, in addition, the
vertices at the bottom. Hide them as well. So we have
this nice square cutout. And then we're going to do something similar
to what we did with the hood extractor to create
circles in this mesh. So we're going to select
everything first. And then we're going
to go to poke faces. So that is control air. We're going to go poke faces
and then tries to quads, and then we're going
to poke faces again. Like so, then what we'll
do is what's going to top, select one of the vertices
inside a diamond. Then we're going
to select similar, and we want to go amount
of adjacent faces. So that where we select one of the similar kind of geometry. And then what we'll do is set our pivot to
individual origins, and then we want to bevel this. If the bevels not working, hit the V key, and then we want to move
the segments down. So it's just the diamond
again inner diamond. Then what we'll do
is control shift B. We Bevel again, just to get some additional
vertices in here. Then we'll select
the inner face, select similar ones more, and we will go for
polygon sides. Select all of the similar
ones, right click, subdivide, vertex select, and then we'll go
a Lot Tool circle. But we have some nice circles. And then we will inset this. If the insets too sensitive, then try zooming in or out or holding shift to make
smaller increments. And then we'll create just
a small border there. We'll extrude it up
ever so slightly, create another border there, and then we'll extrude
it even further. Maybe 0.018 is too much, zero, zero, 18, the 1.8
millimeters looks better. We have the faces here, and then we'll bevel
the top faces. Adjust it to it looks right. Just holding shifts. I don't want it
to be so extreme. Just trying to round it
off at the top a little. More, but there we have
something like this. Then we're going to
select the top face, select similar polygon sides, and then we'll inst all of them, and we just want to
inset them slightly. You might find it
a little laggy. They're working with
so many faces at once. You can sometimes find
it easier to just type in a number and
then adjust after that. Instead trying to do
it by mouse movements. The one millimeters
a bit too much. That's 0.0 005. Let's go 0.0 002. I enter, and there we go. Got these nice little bumps, similar to what we have here, and we have this kind of area as well where there aren't
any bumps near the drim. And then this is that safe area. I just want to check in Maka
that the shading is okay. Nothing stands out as crazy. Then what we'll do is just add a kind of metal bit to
the dram, like the cap. So what we'll do is got to
top view, add a circle. Let's move it over where the whole made is,
scale it down. To about there, and that's
going to pull it up, going to edit mold for the circle after
we've applied scale. And then we'll
just pull it down. Let's go zero, zero,
five, 5 millimeters. With the top verts he selected, we'll hit the extrude, scale it in a little bit, just to create a
boarder at the top, scale it right the way in, it phil, add some loops. Turn on proportional editing, and then we'll select
the middle face. Then we want to scroll the radio up until it's encapsulating
the whole shape, and then we'll just give
it a slight bump up. Then we'll hit shade smooth. Add some supporting
loops where needed. I need one more there.
We'll isolate this. Let the bottom ring of vertices. We want to turn proportional
editing up first, extrude and scale in, and then extrude and scale down. T we have something like this. Then add a few more
supporting loops. C heck your normals are okay. Then we'll just pull
this a bit further down. So we have something like this. And then we'll just
see if there's anything we missed
for the shower tree. We got something there,
got the grooves, got all the bevels. Yeah. C leave it at that, and I'll see you
in the next part.
45. Modeling Shower Screen and Support Rail: Next, let's work on
the glass screen and this kind of support
rod that we have. So let's go into Blender, and we'll add a plane. And then we're going to see
what measurements we have. So, we can see we've got
some measurements here, and we also have some on the actual glass
screen item itself. So we're going to
use these ones. So we've got 84
centimeters for the width. Well left to right in
this skate in that image, and in 199 centimeters
of the height. You can see it says 23 here, but that's including
the 4 centimeters for the shower tray. So for the glass
itself, it's 199, and we'll do that on the y
axis, one 9 centimeters. And then x is AE 4 centimeters. And then we'll apply the scale. For the thickness, we're
going to use solidify. And let's have a look at where we can find
that information. If we look at the
product details, we can see the glass is
6 millimeters thick. So for the solidify, we can set the thickness
to 6 millimeters. Now we know we've got
the right thickness. Then we can just
apply the solidify, and we're to set the
origin into geometry, just the center
the origin point. Then we're just going to place this glass in the
location that we want it. So have a look. It's pretty close to the inside edge there, so we'll leave it about there. And then what we want to do
is make a little holster, you could say, this little metal bit that the
glass is sitting in. So to do that, we can
add a another plane. I was going to add a plane. We want the plane to be
the same dimensions, so 199 centimeters, and the x will be
different in this case. So for this x, we'll
put 3 centimeters. Can you slapping and just slap it to the bottom edge
of the glass plane, so they're aligned that way. And then what we want to
do is got a top view, move along the x axis, and grab the right edge. Then we're going to extrude this along the x by 5 millimeters. Meters, G x, 5 millimeters.
I thing not working. Zero, 05. There we go. So we've got 3 centimeters
there, 5 millimeters there. And then what we'll
do is add a solidify. There we go, and we will set
this to score 2 millimeters. We just want this to be
a really thin piece, score 1.5 millimeters and apply scale because you can see this was a bit
weird prior to that. And then let's
place this next to the glass is going to slide into the glass is s
line into this piece, and we want even thickness. And we'll just have it a little further back
than the glass. Then what we want to do
is add a mirror modifier. We'll apply the rotation, apply the rotation to
the glass as well, and then select the mirror
object to be the glass. So now we've got this
piece on both sides of the glass. Just
check everything. Then we'll select this piece, isolate it for a moment. Then we want to select
this inner edge and bevel it and bubble
it just to touch. Add a few loops we segments, or bevel it to about there. Shade smooth, and add a
loop cut to the top and the bottom. Add one more. Add on to the right to the left, and add one to the bottom. I'm going to select
that piece. H one more. There we go. We have
the first part done. We've got the shower screen. We've got the
holder. Check it in the location we want it.
We're going to move this. So it's in line with the back
edge of the shower tree. Like saw, and then we'll grab them both and
pull them down. So let's sit in on top
of the shower tray. You can, of course, use
snapping if you wish. Then what we'll do is
build out the holster. So to do that, let's have
a look at the reference. Can see we've got a
part here, cylinder, that goes into another cylinder, and we've got a rounded
up kind of shape here. So let's add a cylinder first. We'll set this cylinder to
let's go 3 centimeters. Leave it above the shower array, and then we'll just
rotate it as well. So it is the right direction. And then this is
the first piece. So this is going to
be the bit that's on the left side that's
against the wall. And then we'll just
have to improvise how far we're going
with these adjustments, but we're going to
pull it out a bit. Let's make this 5
centimeters on the zd, ply scale, and we
will add a loop cut. Let's add one about
three quarters of the way to the right. Then we'll want
to grab this face and scale it in a little bit. Then we'll grab this whole edge. Well, all of these vertices, and we'll level this just to give it this kind
of rounded shape. So it's rounding in slightly. Shades smooth and just add support and loop cut near
the top and the bottom. And then what we'll
do is grab this face, shift to duplicate, move it
along the x a little bit, and then we'll separate
it by selection. And for this disc, we want
it to be 2.5 centimeters, and this is going to be the pole that goes from the
left to the right. So for this part,
we're going to select the circle first, then
we'll extrude it. Into this part. And then we'll extrude. Well, we don't need to extrude. We can just grab and move it. Now we know why it's going to look like
going into this piece. We can select this piece, select this face and delete it. Then select the
ring of vertices, extrude, scale in, leave
a little bit of a gap. Between it and the cylinder, and then we want to scale
it and extrude it in. So I'll just extruding inside itself to about
there. That's fine. I'll just add a few loops
on that inner portion. And you can just check if
you hide the cylinder here. What we've done. And then we'll add loop cut and
another one there. And we have this
piece nicely done. That's against the wall. We have our cylindrical bit here, and let's have a look
how far it goes. That's going to go all the
way across to the door. So we'll grab this
side, going top view, and then put it to about there, so leave it a bit
further back for now. And what we can do is
duplicate this face once more, put it further to the right, and we'll use this to build out the shape because you can see
it's rounded at the bottom, and then it straightens
out near the top. So we'll build that
using the circle. So I'm just going
to separate this by selection so we can hide
this part and this part. And for this, what we'll
do to make that shape is delete the vertices
above the halfway point. So we'll treat this as
the curve bottom bit, and then it would straighten
out from these vertices. So we don't need all
of the ones above it. We can delete those.
And then what we'll do is select all
of those vertices, fill insects, and then
we'll use the knife tool, and we'll just press C A, cut straight up, and then do
the same for the corners. We just need to press A
to constrain the angle. There's nothing to cut through, and we'll dissolve
these excess edges. I do for one at a time, if let's say, I'll
just delete the edge. Then we'll just refill the face. There we cure, and then
what we can do is grab the top row of vertices
and extrude them upwards. And now we have that shape, and the dimensions
are as follows. So we can pull it.
So we've got it about 3 centimeters,
or just over. Let's see if we move
it up a little bit. Well adjust this down to there, so it fits into three
squares. Let's see. Yeah. And we can always adjust it afterwards
if we need to. And then what we'll do, go to top for you, and we want to extrude the whole thing. So we can extrude
along the x axis, and let's go 0.0, 02. So we have something like this. And then we'll
select everything, duplicate it, move it
to the other side. And then what we'll do is
bridge everything together. So I'm going to select the
faces I want to connect. The free here and the three identical
ones on the other side, and then we can bridge edge
loops to link everything. Then we can go into top view. Vertex selects all of one side, put it to the side of the glass, select all of the other, and we'll put it to the
glass on that side. Then we'll put it
down into position. Now we'll go back
to working on it, so we can shade smooth, have a look at what's going on, add some loops to the top and the bottom
of this new segment. Add some to these parts here, and to the insides. Nice. And let's bring
the cylinder back, and it's part and position it. I can place it to about there. Of course, if we need to, we can adjust the size of this. I'm going to click on this, set origin to geometry, so we can scale, and
we just don't want to scale on the x axis. I'm going to press S, shift x, and we can just
scale it out a bit. That's too much, about there. And let's just have a check. Then we'll select the cylinder. We need a edge loop
near the right side. Double tap G just
to drag, us better, isolate it, can remove the
top face and the bottom face. Add the edge loop to the left side. Bring
everything back. Then we can select
the three parts that make up this rail,
join them together. Let's bring everything
back, have a look at it. And check the position in. So we can move this bit further
forward. Maybe too far. Of course, you can also
just remove the rail if you want because this
particular one uses a rail. But if we look at
our references, there's references where
they don't have a rail. I can't really see on this one, but it doesn't have to be exact unless you're doing it for
something that's exact. But I'm happy with the rail, so we'll keep it for now, and we'll just name
this shower support. Rail to let the door
call this shower screen. We can select this little bit that's connected this
surrounding the door. Apply the solid,
apply the mirror, and then join it to the screen. Then we've just got shower
screen. We've got the rail. We can do the same
with the bottom, where we just select
this little plug part. We can remove this cylinder
as we don't need it. So let the plug part
select the tray. First check your modifiers. So we've got the edge split. What we'll do, actually, will
add a small detail here, which is going to be akin to
this little rim that it has. So to do that, what
we'll do is going to edit mode can select the
bottom ring of vertices, it's going to go around, select the bottom ring, and delete. We'll just deleted the bottom
face with the bottom ring. Then we'll select the top ring. Sold and controllers
that go around. And then first we'll extrude
it down ever so slightly, then we'll extrude it in, and then we'll extrude
it down again. And add some loops. If it's lagged, and you want to hide the modifying viewport. So it's not being
impacted in real time. Then we can remove
the edge split from edges we don't
want, impacting. So like this one
and the bottom one, clear, sharp, check the model. Apply the edge split. Then bring the plug back,
doin them together. Once she happy with the position in so I'm
just going to pull this up slightly, actually. I'm just going to scale it in. So S, and I'm just
going to shift Z, so I'll scale under SED axis. Put it in a bit just so you get just a hint of that
detail, really. And then I'll join
them together, and we will call
this shower tree. And let's bring everything back. So we've got our
first parts done. The next part we'll
look at doing the actual shower head unit
itself. So I'll see you then.
46. Modeling Shower Head - Part 1: Next thing we're going to do is create a shower head
based off of this bottle. We're going to use
a few other images just to help us create that. So let's go to Blender, and we'll hide everything. Then in top view, we want to move the cursor
to the world origin, and then we'll add in a
circle for the shower head. We're going to set
the vertices to 64, just to make it a bit more high resolution as we won't
be subdividing this. And then what we want
to do is set the x and the y to 300 millimeters. And this is for the shower head, so I'm just going
to apply the scale. And then what we want to
do is add in a cylinder, and we're going to set this. We're going to move everything
down to 1 millimeter. Like so, and then for the Z, we'll set this to 1 centimeter. So we have something like this. Then we'll just apply
the scale as well. Then we want to press g y 0.02 to move it up to
this second square. So you see these bigger squares, we're moving it
up to this point, and then we want to
apply all transforms. So we apply the location
rotation and the scale. And then what we want to
do is add in a empty. So we're just going to
add empty plane axis. Then we're going to go
back to our cylinder, add a array by the fire, and then we're going to
turn off relative offset, turn on object offset, and then we want to use
the empty we've just made. And then what this is going
to do is when we rotate this, we can create the
additional arrays in a circular fashion. For this first one, we're
going to set the counter five. Illustrate, so we
can rotate like so, and this will create the
first bit of the shower head. So to look at create
one of these rings. And we'll do zero this for now. So we've got the
basis of it set off. Then what we want to do is we'll turn off the
array viewport, select the cylinder
select the empty, and then we want to duplicate this and leave it in position, and we'll do this for five, six, seven, strike eight times. And then what we want to do is for each additional cylinder, we're going to
move its position, and we've just done this, so it's connected all of the modifiers to their
appropriate empties, and we'll grab cylinder one, so this is a duplicate. Move it up on the
y axis by 0.02, and then we'll apply
all transforms. Select the next cylinder
in the list, go 0.04. So we're going to
add two each time, and then we'll apply
all transforms again. Next one, gy, 0.06, and we'll just do
this for each one. And one more. So six
was the one we needed. So 78 of both the
cylinder and the empty. We can just delete
them. Then we'll go through each one and create this each circle.
Circle of arrays. So the first one, we'll
turn the array back. We've got a counter
five, and we'll select the corresponding empty, which is just called
empty and rotate this until we get a
circular kind of shape. I'm just going to round
this to -72 degrees. Then we'll select the next one. And for each one, we go up, we're just going to
increase the count. So I'm just going to
add five each time. I'll bring it back to viewport so we can see what's going on. Change account to ten, select the empty in
the list, rotate. We've got a nice
round number there. Next one in the list. 15. -24 d three. We went 15 there. This one will be
20 for the counts. Then we'll select the
appropriate empty and rotate it. 25 for the counts. F 0.5 looks about five
went 25 here, here. We got that one. This f, so this will be ft five. Make sure it's turned
on, empty six. And she's doing
something with there. You can see I haven't
applied the locations, so apply all transforms, and the rotations
working as intended. Go ten. Tens a bit too much, so this one's going to be a
bit weird on this number, but it's not going
to be noticeable. Cool. So now we've got
this array of cylinders. It's going to go back
to top orthographic. And then what we want
to do is for each one, we're going to just
apply the array. So you can just press
control A with your cursor over the modifiers
panel and auto flight, and we're just going
to apply all of them. And then once we've done that, we can grab all of the
empties and delete them. Then we can grab all of the cylinders and
join them together. And then what we'll do is
select this circle here, going to edit modes. First, we'll just extrude
in ever so slightly, just to create a border, and then we'll extrude
all the way in. Go about there. Then we can add some loop cuts
to the outside area. I'm going to add
about 20 loop cuts. And then what we can do is add a Boolean modifier,
select the cylinders. And if we was to hide the
cylinders temporarily, you can see we have
some cutouts there. Go to just change it too
fast, instead of exact. And hopefully, it's cut
off all of the circles. You can see exact. Sometimes you can get some weird
business going on. I'll just try both
of them otherwise. Even if it is like, where do you get these issues, you're
just going manually. So if I was to apply this, I could go manually
and delete them. So I'll do this
just to illustrate. Then we could go into this
is front orthography, select everything,
going to wire frame. Vertex select, select the
tops of all of the cylinders, and then we can
just delete them. Now we've got these cut outs, and we can leave
this middle area to create something like this. So we'll do that. Now, we'll
select the inner ring. You're going to check
which way you're going. So we'll select the
inner ring first and we'll extrude in a little bit, and we'll put it
down on the zd axis. And then we'll fill, Inset right down to the
tip to a small point, add a lot of loop cuts. And then if we select
the innermost face, we can add proportional editing, scroll on the scroll wheel down, and pull it up, and we
have something like that. And then what we can
do, shade smooth, add some loop cuts where needed, just to sharpen the
area up atle bit. Adds one more. There we go. And now back on to
the main topic. What we'll do is we'll
bring back the cylinder. We need this. And what
we'll do is create these little bits
that are coming that are peaking out where
the water comes out of. So first, we'll move
this down on the Z axis, so they're all peaking
out just a little bit. Then going into edit
mode for all of them. We want to turn
individual origins on for the pivot points. We'll scroll in We want to scale these
all at the same time. So I'm going to scale, so, but we don't want to
scale on the Z axis. So I scale, shift Z, and then we'll scale these in
a little bit just to create a little bit of a gap between these cylinders and
the showerhead item. Like that. We'll select
one of the faces, and then we'll go
select simular. Let's go area is
not going to work. L's go polygon sides. So now we have all of the tops and it's done
the bottom as well. And if we look at our reference, we can see it's solid apart from the small area at the front where the
water would come out of. So what we'll do next
is bevel everything. So we're going to
press control B, introduce a bit of a bevel, set it to three segments. Something like that. Then we'll select the inner circular face, select similar, polygon sides. It's going to select the
same on all of them. And then first we'll insert slightly to
create a border here. Then we'll inset again close to the size
of the final shape. And then we'll inset again. We just did that to create
another border on this side. Now what we can do is
bridge edge loops, and it's doing
something weird here. So we're going to change
the connect loops from open to loop pairs, which will loop the
circle at the top, the face with the face that was at the bottom
of the cylinder, to create a sort of tunnel. And that's what we want. So we can go back into object mode, shade smooth, can see it
looks pretty clean here. That's just the clipping
because I'm too zoomed in, but we don't have
any issues there. Then what we want to do is just check the shading for now. So we're going to go into
MacA We don't have to worry about an edge split because
this is a flat surface. So even though there's
issues with the geometry, it's not going to
appear anywhere, so we'll get some nice
good reflections. Let's bring back
these little bits, and then we can adjust these
on the Z axis a little bit, if want to make them not
protrude out as much. And there we have it. That is the first part done. We have the guess most gruesome part of
the shower head done. And in the next part,
we'll round off the rest of the shower
head. So see you there.
47. Modeling Shower Head - Part 2: L et's continue with
our shower head. So the first thing we
want to do is select both the disc and the
cylinders we made, then going into front view, and we want to rotate
it 180 degrees. And then we'll just
grab our cylinders, move them up on the
axis until they're just peaking slightly down through the circle that we made. Check that I'll got
it where I want it. Put a little tiny bit more. And then what we'll do is going
into bart morpho graphic, select the disc, and
going to edit mode, then we want to select the
most outer ringer vertices. And what we're
going to do is just establish this little gap and then the rim of this casing. So first, we will
duplicate this ring. I'm going to grab
that duplicate. And then we want to scale
it up a little bit, so we'll scale by 1.01. We've got a little gap,
and we want to extrude and scale again and we'll
go 1.05 this time. So we've created a
little gap in the rim. And then what we want to
do is add a new circle, set the dimensions
to 300 millimeters as that was our original size. Then we'll select
the cylinder we made and the original disc
for the shower head, change the bounding box to well, the pivot point to
bounding box center, and then scale it down until it meets with the circle
that we've just added. So we've got 300 millimeters
for the disc now, then we can get rid
of this circle. Then what we want to do is extrude this most
outer rim upwards. So if we're going to front view, and this will create
the thickness. We've got e z 0.03, go for 3 centimeters. Like that. And then if we go
inside the mesh, in edit mode, we can grab this edge here for
the actual face, and this edge here, grab the whole edge
right the way around, and we'll extrude
and pull these up, not as much as this
most outer rim. And we'll just add some
loops on the inside. If it's hard for you to see, press L on this mill's
outer section, hide it. Let me just bring
that back, make sure I got just that selected, hide that, and we'll
just add some loops. Here. We'll just add
one near the top. Bring this section back,
hide this section, and do the same on this side. And don't forget the rim, because if you were
to shade smooth, you can see, it's rounded
it a bit too much, so we want to add
loop loop there. And we'll add one
there, one there. So we have something
like this so far. We can turn it back to
studio viewport shading. Then what we want to
do is start to work. I I bring back the
reference we're using on this area up here, rounding it off to the bit
that connects to the wall. So if we go to the back, we'll select the
topmost ring of tics, go into top view, and let's actually go to object
mold and get a reference. We'll add a circle. Into wire frame, we'll set
this circle to 5 centimeters. So this will be where we
extrude in the ring to. So if we go back to
this object here, then we can extrude
scale in to that ring. And if it's a bit hard to see, you can try the shading flat, and what we'll do is then
extrude up a little bit. So let's extrude up, and we'll just make the
shape as we go along. So for this first bit goes up, and then it slopes in. So ex up the first bit, strew it up again, scale it in. And for this circle, we'll make it 3 centimeters. So if we select the
circle we added, we'll change the
dimensions to 0.03. I'm going top view, select
our shower head again, and then have a
look at the circle. As close, need to do touch more, and that's going to be for the pipe length, the thickness. So for this bit,
we're going to just extrude up a tiny bit, and then extrude up some more. And then we'll extrude up again. We'll go on to face select mode, select this row
or ring of faces. And then we want to extrude, but then also scale it out, but not on the Z axis,
so I'm going to press. S for scale, then shift z, and we want to just scale it out a little
bit just to create this kind of not
well, extruded area. So we have something like that. And then this will
be for the pipe. So if we get a measurement,
I'm going to add a plane, I'm going to set the plane to, let's call 10 centimeters. And the y in this case, in front of vi might be Z for you as rotations
are changed on Mm. And let's make this bit
to about 10 centimeters. And then we want
the pipe to kill. So as before, we'll
grab the free Dcursor, the free Dcursor,
to about there, use a spin tool, and
then we'll spin it. I'm going to set
this to -90 degrees, get a 90 degree
bend in the pipe. Then you can see it just goes
all the way up to the wall. So we'll improvise
this part G x, and pull it to maybe there as we can adjust this
pipe length later. Then we'll just do
the connection. So for this part, you can
just extrude scale to there. What I'm going to do is go
into left off a graphic add a circle just so we
can see how big this is. If we set this to
10 centimeters, can say let's just scale
it up a little bit more. And then I can get
rid of the cycle. I'll just select that
circle, delete it. Then for this part, we'll
extrude it again along the x, and let's go 0.01. So we'll do a centimeter. There we go. Let's get rid of this plane as we don't need it, and then let's just go to smooth shading and add
loops where we need them. We're going to add
one here, one here. And we're just
going to go through and add them where we need them. And this bit as well. And just a final check. Have a look at the reference so that about wraps
up this part. The next bits we need to do are the control panel and this kind of hand
unit. I'll see you.
48. Modeling Shower Control Panel: Next, we're going to work
on the control panel. So let's add a plane fast
and we'll change the x to let's go 12 centimeters
and the up down, we'll go for 28 centimeters. Let's move it over
here. Ply transforms, and then we'll just set
our rig into geometry. Then we'll move the
cursor to selected. Then what we'll do is add a cylinder and set board of the dimensions
to 4 centimeters. And then move it
up on the Z axis. Then we want to add a array, set the counter free. And then for you up down. We want to adjust that as well, but apply your scale first, comply rotation as well. T to zero that. Then we'll adjust like let's
try about there. Then what we want to do is add a plane just to gauge
the size of the handles. So we'll set this
to 2.3 centimeters. Let's place this at the
location for each handle. So we know they don't collide
when they're rotating. So we know how much spacing we need on that array
for the cylinders. And any one at the top. To pull it down slightly. So I'll select everything. Move the whole thing, just to space a little
better. There we go. Then what we'll do is grab the cylinder and let's
add ten loop cuts. Then we'll add a
subdivision surface, drag it to the top
for one level, delete the top and
the bottom face in edit mode, and then apply. So give us some
geometry to work with. And then what we want to do is let's say separate the them. So first, what we'll
do is create the base. If we look at the
reference image, each of them has a ring at the bottom at the
base of the nub. So we'll create that first, and then we'll separate
them. Well let's select one. We'll select these ices, this ring of vertices,
duplicate it. I look in front view
and then we want to extrude and scale. We'll go 1.2. Then we'll pull it
in a direction. So I'm going to grab
the whole thing, the whole ring, and
let's move it up. Let's move it g y,
it's got 0.005. So we've got 5
millimeters there. Then we'll grab the outermost
ring and extrude it back. So it goes in, so we have
something like that. And while we're here, we'll grab this face, extrude in slightly, extruding a lot
further, and then fill. So we have something like that. And then we'll apply the array. Then we're for each one. So we'll select press on both objects, separate
by selection. Actually, it's not
even for each one. We just need to do this one. These two are identical,
this one's unique. In that, this one has a longer handle and
a small little bit, whereas these two just
have the one handle. We can get away with
using these in the array. So what we'll do is
select all of them, isolate them, then
look at them front on. And what we want to do. So I'm just saying
top orthographic, this is the half we
want to work with. So I'm going to
going to edit mode, and we're going
to select an area that's even so here's the free D cursor.
This is the midpoint. Let's select from
this square if we go a scut we've got a small area here that we
can use for the handle. So we're going to
scrid of four by four, and it's two left two left
of the free D cursor, two right to the free Dcursor. And that's going to
select for all of the objects as we going to
edit mold at the same time, but we don't want to work
on a mod at the same time. So we'll go back
into object mold, select one object first, then we'll isolate this. We can work on these
simultaneously because they're identical. And what we want to do is
unselect one half of it. We're just going to select
the top of both of them. So we've just got
the bottom selected. Then we want to use loop tools, circle, and we don't
want to flatten. So we want it to
follow the curve. And then what we'll do is inset. This is going to
insert both of them. And then we want to extrude. And for now, it doesn't
matter how much we can adjust this using the cutouts
we made with the planes. And then we'll bring
the other one back. Isolate this. We have
the same area selected, so they're going to
be lined up nicely. And then we want to
do the same thing. Loop tools, circle. Make sure flats not ticked. Insert a little bit. Then for this, we can extrude. We want to press Z twice, so it's going along
the global Z, and then scale scale them
away from each other. Whilst we're here,
if we look at them, we can delete faces, and then we'll grab
these vertices first, line them up on the Z axis, S Z zero, just to
flatten them both, and then we'll extrude scale in, extrude all the way, flatten
on that flatten fill, to the same on this side. Bring them back,
bring this object, and we'll do the same for this. So I'll just grab
this, delete faces. Then flatten. Then fill that we extrude in. Now, if we look at it, front, we're going to
go back orthographic. Front orthographic is
going to work as well. And we're going to one, grab the verts, pull
them down on the z axis. And let's see, and
see this one's moved, so we'll have to
adjust the positioning of this. No matter. We'll just pull
it up on the ZDs. Actually, what we can do. As we applied the array, we can just delete this. And then for this one, just duplicate everything,
pull it down. And then separate by selection. Create a new copy. Let's do
this one. We'll grab this. This is the 1 centimeter one, so we need to make
this 1 centimeter. Make sure you line up with
the right part of the shape. So not the outer most. We want an inner ring. Then we'll grab the
verts and pull them in. Make the smaller parts. And then we'll make
the bigger parts. There we go. Then let's just
check. We can rotate this. Doesn't intersect, rotate this. See the origin points in a different location
to where we want it. So I'm going to select this
ring of vertices at the top, and then we'll go
cursor to selected. Then we'll go origin
to three D cursor. D rotate at central points. We can go rotate one e, and see it's fine, and then we'll do the
same for this one. Origin, pre decursor. We can see we need to space
these out a little better. So we'll grab this one.
It's going to push it up. So it works on that side and pull this up to leave
of space, rotate. Then we rotate this 1180, so none of the intersects. And of course, if you
want to perfect it, you can just measure
the distance, et cetera, and do it that way, but it's not super important. Then lastly, what we need to do is just add smooth shading
and add loops where needed. You can see this has gone weird. That's the normals. So if
we get face orientation, you can see there's
an issue here with which we
normals are facing. So we're going to go into it, shift n, and just do that
for all of them quickly. And this one is just the plane, so it's going to have one side, so we could either rotate these objects or invert
the plane on the normals. But for now, we'll just
rotate the objects 180, so this is the right side. See this objects needed
to be sorted as well. There we go. And
let's turn other. Then we'll go into this objects. We've got smooth shading on. Let's add some
loops to this ring. Just going to isolate it. So invert the selection hide just so we can
access the inside, and we descrab this inside edge, and we're going to
move it along the y, so we just extrude along
the y just a little bit, just so we can add a loop here. And let's bring everything back. And let's bevel this area here. I'm going to do first is just scale this
in a little more, just to give us a bit
more space on the bevel. Then I can bevel this. Then I can scale this out, or you can just double
tap. There we go. And we need to add one here and for the bottom.
Bring things back. Now, if you want
to be expedient, then we'll just grab this one, duplicate, move it into the position of the bottom
one as they're identical. Select the old one,
that's the old one. See we have applied shades
move, just delete it. Then this one's a little unique, so we'll have to do
this one separately, so let's just do that quickly. And add a few there,
invert selection heights. Remember, this one has
two bit sticking outs, so we have to do both of them. Scrab this, slide that in, bevel, slide this back up. Bevel this. We will need to slide this first.
Now we can blevel. Bring everything back, and we'll just add a little
iness to this panel. So I'm going to
select the panel, and we'll extrude it. Along the y. Let's go 0.005. It's fine, the panel
is going to be, so we're going to set
it into the wall. But there we go. Then just give it a quick
check in MTC, if you so wish. Check against the reference. We can see we need to
just round it off. So we'll select this, and we'll just babel it. Or you can use the modifier. Set this to 0.002
and a few segments, shade smooth, set
this to even smaller. There we have a control panel. And the last thing
we'll need to do is this hand washer in
this kind of holes bit. I'll see
49. Modeling Shower Hand: The next thing we're
going to do is work on the hand shower portion. So let's go to Blender, and we'll go to top view, the three Dcursor,
over this way, and we'll add a cylinder, adjust the x and the
y to 21 millimeters, and the Z to 193.5 millimeters. Then we'll just apply the scale. And if we look at our reference, we can see we've got this
long cylindrical portion, then it's in dented
a little bit. Then we have the base part that goes in on itself slightly
before the holes. So let's make that basic shape. We'll add a loop cut
in the middle area, and then add one more
near the bottom. For this one, we'll
bevel it slightly, and we'll just put it down
on the Z axis a little bit. Then with these middle
faces selected, we'll extrude and scale them in, and then shift Z, so it doesn't scale
on the Z axis. So we have something like this. Then we'll grab the bottom face, and then we'll
scale it in by 0.9, just so it starts thicker here and then thinner
at the bottom. Then what we'll do is make the
grid kind of section here, and we've got four
holes and then three, and it repeats itself
and ends on the four. So let's add a circle to start, and we're going to adjust
the size of the circle. So we've got 2 millimeters and apply the scale.
Then add an array. We want to add some separation
between the circle, so we'll put this to 1.5 and have it repeating
at four for the count. Then we'll add aother array, and we want it to be going down, so we'll set the
y two minus one. And we'll move the X. Let's go 1.3. So this is our basic pattern, and we want this
pattern to repeat, so we'll add a third
ray modifier and set the y to minus one
and the x to zero. And then we can change
this count to eight. We have our basic
grid shape here. Then we'll just reposition it, move it in front
of our cylinder. L et's go for there. And
then we want to leave some space from the top
to where the grid starts, as per the reference image, pull it down a little more. Let's move it a little there, but it's somewhat central. There we go. Then we'll go back into edit mode on the cylinder. We want to add a loop cut close to the bottom
of this grid here. We've got this
section of that area, and we're going
to add some loops to give us some square
faces in this area. We added this loop cut
so we don't have to add extra loop cuts on the other
parts of the geometry. And what we'll do next is add a subdivision modifier,
set level to two, delete the top and bottom faces, and then we'll add
some loop cuts so we can better
define the shape. Turn it off in edit, so we can see what's going on. Ka. And then we'll
apply the subdivision. See we've got detailed
mess around here, and then it's less
everywhere else. And we want it detailed
here as we're going to have a lot of boolean cutouts
for these circles. So we want to give it as much geometry to work
with as possible. And we'll add a Boolean
cutout to this. Select the circles. See nothing's happening because
there's no intersection. So we're going to select
the cylinder first, turn it off in viewport, so it doesn't lag
going top view, and then we want to extrude
this back into the cylinder. And then check your orientation. You can see the normals
of the wrong way around. So we're just going to
recalculate normals, and now it's the right way
around, blue on the outside, red on the inside, we
can turn that off. If we're to hide the now cylinders and have
a look at the modifier, you can see we're cutting
through the mesh, which is what we wanted to do. So let's bring back the cylinders that
we're working with. And I'll hide that temporarily. We're going to just
make a few edits. We're going to edit ds, going to select this ring of
vertices, make some edits. If it's laggy, like it is for me at the moment, then
what you want to do, I select cylinder, turn off the boolean modifier
in viewport, so it's not be
updated in real time. Then we'll select this
ring and we'll extrude it, scale it in. We'll go 0.1. So we've got this guess nozzle or area where the
water comes out of. Then we'll select this
outer ring. Bevel it. Let's go for
something like that, shade smooth, and
then check against the reference little
small detail. Can't really get a
good image of it, but something like
that shape will do. And then what we'll do is
go back to the cylinder. And we want to
apply the Boolean, to the check or
the cutouts there, and we can keep this shape, or there's an alternative
which is to use this shape, while the count that
they're using so goes 43, 43, 43, and then
it ends on a four, the moment as is 44444. So you can either apply it
as is or change the counts. If you want to
change the accounts, before applying the
array modifier, actually, no, no, you apply the array modifier,
so we'll do that. And then we'll delete
the ones we don't need. So I'm just going to box select the right most circles or
cylinders, delete them. We've got a four count and
the follow by three counts. Then we'll select a ring
a row, duplicate it, and then move it down, and
then space it as needed, about there, go a bit higher up. And then we've got the four followed by the three,
ended on the four. Then if we were to go
back to the cylinder, now we can apply the
Boolean modifier. You can see we've got
all our cut outs. We can select the
cylinder going top view, delete, the vertices
at the back. We've got this nice
looking bit here. Check in MACA. I haven't really got
any issues here. So we've got quite a
bit of geometry so any weirdness has been
distributed pretty well, and let's go back to Studio. Then we'll bring
back the cylinders. And what we want to do
is going to top here, and we're just going to pull
them back into position. The wire frame selects
their left most portion, trying not to select too much. So we're just getting one ring of one column of these objects, and then we're going to
pull them in on the y axis. So they're closer
to the cylinder. And then we're going to
do that for each column. On pressing control L
to select all link. And just putting them in, like so do the next
one, select order them. You can kind of estimate how far you need to
go in from top view, looking at that curvature there, leaving a bit of space before it bevels before the bevel goes in. Let's leave those
about the same. And just check against
it. Looks fine. If you want, what
you can do is go into edit mold, got
individual origins. And then you can see we can
scale them down a little bit. So the only axis we don't want
to scale on is the y axis. So we can scale, shift Y, scale them
down ever so slightly. If you want to establish just a little bit
of a gap there. And then what we'll do,
select the main cylinder, select the top ring of vertices, extrude them in like that, and then we'll just
hit F to fill, and we'll do the
same for the bottom. There we go. Then just check
against the reference. And let's see, looks
like we need to add a little detail here to
another inset portion. So for that, we'll just
select this ring of vertices, Bevel this, and then we'll
just extrude this in. Scale, shift sets
to light there, and then just add some
supporting edge loops. Pull this one closer. Almost looks like a light saber. But there we have. The next
thing ping we'll do is create a simple ster for
this hand shower. So first ing we'll do, going in to edit molds, and we'll select
this No that one. Then, this ring of vertices, and we'll select this
ring of vertices as well. Duplicate and separate
by selection. Then we'll hide this object. Select this object now, going into edit mold, and then we'll bridge edge
loops together. So we have something like this. Then we're going
into front view. Face select, and we'll remove some of the front
faces, create a gap. A couple more, whoever
little gap like that. Then we'll right click,
set rig into geometry, and then we'll go a cursor to selected to move
the three D cursor. Then we'll add a
circle, scale it down. Let's set it to
try 6 centimeters. This will be for the back
portion that's against a wall. Let's just move that for now. Then what we'll do is
add another circle. This circle will
be even smaller. It'll be 0.018. We have two circles
at the moment. We'll pull this one back. Then we'll select the bigger
circle going to edit mode, and we'll go back orthographic, and then extrude scale in to the size of
the smaller circle. We're using that as
a measuring tool, and then we'll just extrude
it along the y axis to about there and get rid
of this measuring circle. We'll select the back
ring of vertices, strewed Y, and we'll go
0.005. Something like this. And then we'll select
this ring of vertices. And what we want to do
is we'll snap it onto this after we've made
this and extruded. So we'll select this
one extrude, scale, and then shift Z just to give this a little
bit of thickness. And now we can snap this. So we're got to select this
ring invert selection, hide, so we can see
what we're doing. Then go back to back or for
graphic, phase project, project individual
elements, press the G tool, well G Key, and then left click. So we're just snapping
this into place. And when we bring
it back, you can see it's conforming
to the shape now. Then we'll just shade
smooth, going to edit mold, bring everything back, and add some loops
where we need them. Going to bevel this edge, to round that edge off a bit. Add a loop there, one near this portion, going to bevel this one as well. And then we'll add a loop
cut near the end or there. And for this one, the
shade smooth as well. And then add a few loops, one near the top,
one near the bottom. Then two for the thickness. Just go to drag make
sure snapping is not on. You don't get anything weird
going on. Drag this closer. Ga add one there, drag this one closer to the top. Out of one. There. There we go. So if we bring everything back, we can see we've got a nice, quick holster to hold
the hand shower. And the next thing we'll do is the hose that connects the hand shower to
the water supply, so I'll see you
in the next part.
50. Modeling Hand Shower Hose: Next, we're going to work
on the holes that connects the hand washer shower
to the wall unit here. So let's first go into top
view and we'll add a circle. And we're going to
adjust the size of the x and the y to
1.7 centimeters. And then we'll just
position it for going to wire frame about here. Then just apply the scale. We also want to
apply the scale to the other bits here if
you haven't already, and we'll join this part
in this part together. Then we'll select the circle and bring it underneath
this bit here. Then we want to going in to
edit mold and extrude it down by 2.5 centimeters. And then we'll just check
our scales applied here. Then we want to hide
the ring of vertices, select the top ring of
vertice turn snapping on, then go to bottom orthographic. Make sure project
individual elements is on, then press the GK left click. So we'll just snap it
to the bottom here. We'll go back into object mold, we can see it's done
what we wanted to, and we'll just shade
smooth for now, leave this pot as is, go back into edit molds, select the bottom
ring of vertices, and then we'll go cursor to select it to move the
three D cursor here. Then what we want to do
is add a bezier curve. And then we're just going to
select one of the points. Move it to where the three
D cursor is in top view, bring it down, and then we'll
select the other points. Move it underneath,
rotate, scale it down. The other one scale it in. I selecting the vertice, and just pressing that
scale the whole thing as this will affect the curvature if you grab
one of these handles, and we just want to make a loop. So it just loops
back in on itself. So we're going to grab
the bottom vertice, extrude it, rotate. Then we'll extrude it again, rotate, reposition the
handles as needed. And this one, we want
to go into top view, and we want it to be underneath the front portion this time. They're can go into wire frame, have a look for where that is. They're going into front view, bring it down on the Z axis. About there. You can
see to form the shape. So first, we'll make sure we're grabbing the right vertex, scaling it in, and
pull that one in. And then adjust as needed to get the right
kind of curvature here. If you want to add a
new control points, select two vertices subdivide, I'll create a new
one in between. And what we'll do is move this directly underneath
the midpoint, rotate. So we have this straight area. This will be useful later. So we've got a straight area, and then it bulges out, and then we want to do the
same on the back portion. So I also let the two
vertices there subdivide, and then we want to
pull this underneath, try to match it out and
describe this one, rotate. And just check various camera angles just to check
your curve looks right. We're just looking for
this kind of shape if I grab a se image we can use. So just a tear
drop shape almost. Pressing the G Key to
shorten these handles. Okay, and we'll go
with this for now. We can adjust the curve later. What we want to do now
is add in a cylinder, and we want to set
the x and the y of 1.7 centimeters as well. And the less ad justice done, might as well make it the same scale it even further down. And this is just going
to make up one portion, one part of the holes 0.02, ply scale, going
to pull it down. And what we want to do
is going to edit mode, but add two loop cuts, and then we'll
extrude scale shaped, so all the scales
on the x and the y. So we'll have this
kind of shape, and this will be the
basic shape we replicate, and shade smooth, add some
loop cuts where appropriate. And then we'll isolate it
for a second and delete the top and the bottom face
as we will need it as a pipe. And then what we'll do is go
and add a array modifier. You can see it's going the
wrong way at the moment, we want it to go in
the z, but go down, so it's going to be negative,
so we'll put zero for the x minus one for the z. And then what we also want to do is change the fit
type to fit curve. And then we want to select
the curve we want it to fit. You can see the lengths change, but it's not farther
in the curve we have. So what we'll do
to address that is add a second modifier
curve modifier, so the curve object, which is going to be the
bezier curve we made, change the deform axis
to negative z as well. You can see we've got our pipe. And nothing intersecting. And of course, if you
want to adjust the shape, adjust the curve
before applying these, but we need to do another step before we get to that point. And that's just checking
everything lines up, how we wants on the ends, we can have a look here, can see it's a bit slanted. And if you want to
make adjustments, go to the Bezier curve, going in to edit mode, and then you can edit
the actual curve. So I can rotate. We can
see it at a slight angle. Let's rotate that,
straighten up a bit, shut back with the actual
image itself or the model. And scale it down.
Grab this handle. Then it's also the
bottom one that we need to adjust a little bit. And what we'll do, we'll add
a third controller here. I'll just subdivide
it one more time. Just going to move
this one underneath. I'll temporarily
turn off the array. We'll grab this one, and this is why we needed that
straight element first. So the pipe has a bit of
space kind of straighten out, and then we'll do the
same on the fronts. As check back. I'll sel this, bring the array back. Let the curve make
any further tweaks. Make sure slapping st on. And it's fine if
it's not perfectly matching here
because we can make a small adjustment
on this pipe bit. So what we can do, select
the bottom ring of vertices, extrude scale out the vertices, scale them out a little bit. Scale them, extrude it again, pull it down, extrude one
last time, scale it in, check it out doubles, add some container
loops. Got a few more. Then we can pull the
pipe down just to touch. So I'm going to let the
bezier, grab this vertex, pull it down a little bit, just so we can't see any
visible intersecting. Add a loop cut to the
top of this pipe, and we need to just do the same on the other
side of the bezier. I'm going to let this
point here. Pull it up. Rotate it. I can see. What we need to do is adjust the actual shower unit
itself, a tiny bit. We're going to select
the shower pieces, this piece, this piece, and remember to select
these dot bits as well, join them together, and then we'll just move this
up on the Z axis. Just a little bit, so
it's sitting on top here. Then back to the Bezier, and we just need to
rotate it a little bit, just to straighten it out, check in a couple of different views. There we go. No, we have it. We have the pipe. And what we can do now is
select the pipe. And if you're happy
with everything, apply the array and
apply the curve. Then we can get rid
of the Bezier curve because we don't
need it anymore. And we can join the hand
shower to the holes path. We'll just call
this hand shower. Call this shower control panel. Head shower, and let's grab all three things.
We missed the bit. So we have the buttons, so we'll select the three buttons, join them to the control unit, or the control panel. What do you do miss here? These little bits here, join them to the head
shower. We also we miss. Can delete this plane as
we no longer need it, and we can delete
this circle as well. Can delete this cube. Just clean up bits
we don't need. This can be joined
to the hand shower, and we're just
looking for things that haven't been renamed as a gauge to what we need
to either remove or add, and everything's been
named, so that's fine. And what we'll do, move everything into position in the bathroom. So
let's bring back. The ground floor and move
things into position. So we have the actual
shower itself, going to top view, can bring the floor plan back if you want to
see where that goes, got a bath on the floor plan, but we're using a shower. So we need to rotate this first. It's rotate it, and
we'll rotate it based on bounding box center and
put it about there. This is where we can make any little adjustments
that we need to make, such as adjusting
this support rail, so it gets to the wall. And then we'll
select the next bit. Let's hide the
building for a second, wrap the toilet parts. For the toilet, as we're
using a shrink wrap modifier. We need to bring the
mesh back as well, and we'll add a empty and
move everything together. So let's go curser two
selected mesh, play axis. A everything selected,
then parents object. Now we can move this,
and for the toilet, for the mesh, we can
hide it once more. Then rename the empty. We'll call this
toilet controller. Bring the building
back. Then position it. We live out there. Of course, to temporary positions, as you can see, be a little cramped. But we have our sink, so we can see how far we
can move it this way. Move it a little more that way. Give some space to
get into the shower. Then we have the
actual show pieces. So we'll grab these
one at a time. This will need to be rotated. I can put it in set it into the wall a bit more about there. And if you want to
check the heights, then just add in a plane, set it for example to a meter, but we can see where the
control panel would sit. So it seems about a
decent height for it. And, let's grab the
hand shower portion. Put that in position. O. And we'll have something
like that for now. Check in front view. They're both somewhat central, one to the left
one to the right. The image, this
one's more central, and this is on the left of it. So I'll just make
that adjustments. Here's a bit more to left. And there we go. We can, of course, adjust
these if we need to later, but for now, that's our Shodan, and that's our
modeling done for now. Next thing we'll
look at doing is the text to start texturing
everything. So I'll see them.
51. Texturing Overview: Taking a model from start to finish usually consists
of three parts. The first is the modeling
process, which we've done. The second is UV
mapping the object, and the third is then applying the textures usually
in the shader editor. So we'll go on the
second step and just have a look at that
with the UV editor. Here and our object. So UV mapping is just projecting a three D model surface
to a two D image. So if we were to look
at this in edit mode, you can see each of our faces here corresponds to
a face on this side, and it's laid out in a
flat kind of way there. And let's go to rendered view and just show the difference. So with a square, you might
get something like this, and with a circle, you might
have something like this. Cause essentially you have
to have some sort of way. To apply a texture image, and texture image is a two
D. So you need to turn this three D object
into a way that the texture image can
then be overlaid onto. So with this one, for example, you can see there's
bricks underneath. So each area for us to move
around the face on this side, you'd get a different part of the brickwork
showing on the model. Once we connected up
in the Shader editor, so let's have a look at that. And here's the shader editor. The main nodes will be using
typically the base color, which you'll have a
diffused map for, and that just defines the color and the pattern on the object. So far as to hook the other, now you can see the
bricks showing through. And it's only the
color in the pattern, so there's no other
information on this map. And we need some
other information to make it look more realistic. The other node will be generally using is
the metallic node, which just defines if an
object metallic or not, zero being it's not metallic, while being it is metallic. And that's usually a black
and white value there. So if we were to add
black here into metallic, you can see nothing has changed because black means
it's not metallic, which is zero in the value. Turning it to one is white's
and it means it is metallic. And a lot of these nodes,
like the roughness, and some of the other ones
that go 0-1 working that way. So if we go back to our
brick texture here, you can see for metallic, looks a bit weird now. So one. Let's turn that to zero. The slight metallic object. The next node, we'll be looking at is the
roughness nodes. And that just defines how
shiny your matin object is. So you can see if it's
rough, the moments, it's pretty math, pretty
dull. Turn it to one. Now you can see a bright
spot of shiny bit here. Bit easier to see
on this object, for example, the roughness, when it's on zero, it's shiny, it's glossy, and when
it's on one, it's math. So maps that you get will be gloss maps instead
of roughness maps. And as this shade here is
taking a roughness input. If using the glass map like I am for example, you
need to invert it. So this bear in mind
if which map using. If it's gloss inverted because roughness and glass
are inversions at each other. And for this map, if we
look a little bit close, you can see there's a
couple of different values here with black and white. And essentially, with the
roughness map, white is rough, black is glass, and
with a glass map, it's the opposite, so white
is gloss and black is map. So that's so you can see the blacker areas are
going to be more mat, then the whitter areas. So using the gloss map here. Let's bring that back. Then the last main node we're going to be using is a normal, is this normal node here, and this is just to simulate fake bump in a little bit
of detail in that regard. So if we were to
fake bump the dense, the little gaps in the bricks, if we were to add this in, it'd look something like this. I'll just turn that way. Let me go to e V just so it's a little
easier for you to see. Then I'll turn this back to its default strength,
so it's a lot stronger. You can see is simulating that kind of three D
aspect to the object, even though this
is way too strong, but it's just to show
what it looks like. And these maps are a little different in that they're not black and white values to have kind of RGB color scheme to it to show which parts are
raised and which parts are. And typically, when we're
texture in an object, we would be using texture maps, like these, for example,
each of these maps, if we're look in the UV editor, it's just a two D map. So that's the color one we've got black and white one glass. Normal. Got this kind of blue purply one and
so on and so forth, or we'll be using
just the shaders themselves to make
custom textures, where we're going to shader. We might add a diffused
texture, for example, change the color of
it, or maybe we're adding like a brick texture. So you to make just a
custom kind of brick. So you can see the sir changing the color of each
of the bits and bobs and just going through the whole manual process
to create textures. Generally, it's a lot easier
to use these image textures. Takes a lot more time
to combine all of these different nodes to get
the luck you're looking for. So where do you get these
textures from the Internet? And there are a few
sites that you can use. You can get quite a
few of them free, but in generally, you
need to pay for them. So the sites I'd like to use are polygon and textures.com, and they do have free
textures you can get, say, for example, you
wanted to look at this one. You can download
free versions of it insert in different
resolutions. You might be able to use free credits to
get some of them, but it's generally going
to be in lower resolution. Same with polygon, where
you can have a free option, and you'll have some
selections available to you. This one, for example,
is the one we're looking at in blender, go b. So this one's the free version. But you'll be limited in
the selection you have. So where possible, I'll
try to use free textures, but it's not always going to be possible depending on
what we're trying to make. And I'll just try
to find something similar in the free versions. But that about wraps it up, I'll see you in the
next bit where we start to texture the buildings.
52. Texturing Walls and Floor: So before we get started on the textures for the
walls and the floor, let's just clean up the
scene a little bit. I'm going to turn off the
building ground floor, floor plans, and
furniture for now. You can see we've
still got some items that aren't in the
furniture group. So we can select everything and then
move it into furniture. Then for the toilet
seat reference, we'll drag this to floor plans, for the toilet guide mesh, we'll just drag
this to furniture. And we want to make
sure that we have the nod wrangler add on enabled. So let's type in nodes. Make sure Nod
wrangler is checked. Now just make the
next part easier. Then we want to bring the
building ground floor back and select the walls. We'll split the window, and then we can set
this to UV editor. Go to edit mode,
select everything, then press the U Key to bring
up the UV mapping window, and we'll just go
Smart UV projects. Here, just got a quick
UV unwrap done there. Then what we'll do is go
to the Shader editor. Click on materials properties, material properties here, or
you can just click New Pre, which is the same as this one. Click that or rename
this wall material. We can see we've got a
basic node setup now, which is material output, and we have the
principled BST Shader. And let's go into rendered view so you can
see what's happening. You can also just click viewport shading if your systems
a little laggy. And then what we'll do is create a simple kind of painted
texture for the walls. And the first node we need
to add is a noise texture. But it's got a texture,
noise texture. And to bring up that
window a shift A, or you can press space bar if you've got space
bar set up to search, type in noise, click
noise texture. If you click left
control and shift, and then left click a node, you can see what
the node's doing. You can see where we've
got this dark gray, light gray kind of blotchy
mess at the moment, and we want to just
change this a bit. So we're going to press
control t on the nodes, and it bring up a mapping node, and bring up a texture
coordinate node. And we can use this to
influence the noise texture. If we set if we drag
object to the vector, we can see we've got a more
uniform pattern everywhere, instead of it being stretched. And what we want to do is
make this so it's a bump map, and it's really subtle,
just to give a bit of a bump kind of
texture to the walls. So first, we want to
adjust the scale. If we set this to about 300, we can see we've got
this really fine grain. Then you can edit these, we can set the
roughness up to one. And then what we
can do is add in a color mix our GB in
between this node here. We want to set the factor
to the factor here. And then these two
color one and color two will be we'll
have the two colors, and the factor will
mix them together. So if s to set one to red, one to blue, for example, you can see instead of it being
that black and white one, we'll make in the red and the blue based on
this noise texture. What we want to do is have them both really close together, so there's only a
subtle difference. And so if we set this, so it's on a kind of gray. We'll set this one to a
let's set this to 0.9, and then we can set
this one to 0.85. So it's going to
be really subtle. And then we want to use
this for the normal map. So we're going to add a normal
map, vector normal map. Actually, let's add a bump. Let's use bump. So we
add a bump map here, connect this to the normal. And then we'll connect
the mix to the height. Then if you have a look
what this is doing, you can see we've got this
kind of raised texture, but we don't want
it this strong, so we're going to
adjust the strength. Sc 0.05. And then if we
were to preview that, we might not be able to see too well because of the color. So let's just change the color to something that's not white. Then if you look
closely at the wall, you can see it's got
this texture on it. And if you adjust this,
it'll be stronger or weaker. And we'll just use this as a simple kind of
painted texture. You can also drag the mix to
the base color if you want. For the roughness, let's
go to rendered view. And of course, we can adjust this up or down at our leisure, but let's just set it
to maybe 0.3 for now. And there we go, we've got our walls done. Might not look too different because it's a
pretty white wall, but when we add in the
floors and the ceiling, then you'll see it a lot more. So let's do the floors. Now, for the flows,
we're going to be using the Stone marble Calcata 004, which is a free
textur on polygon. Is download that I've got mine downloaded a
two k resolution. So we'll just use that one. And then once you've
downloaded that, what we want to do is
go to top orthographic, and then select
all of the flows. So there's one, two, three, 45 floors that we have, and in top orthographic, we'll go to the UV editor, going to edit mold,
select everything. We can go project from view. So this will just have this flat projection
because we're in top orthographic in
the same layouts that we have our
current floor in. And then what we'll do, go to Shader Editor, select one of the floors. So I'm just selecting this
big one in the middle. Then we're going to
add a new material. We'll just call
this marble floor. And then we're going to add the textures that
we've downloaded. So the first texture,
we're going to add. So it's going to texture
image texture, open textures, and you want to find the
one that we're looking for, which is s marble Calcata, and we're looking for the color, which is just the
diffused color. And we want to load this in, and then connect the color
node here to the base color. So you can see this
is what it's doing. Then, we'll just drag this up, duplicate it, and then
we want to click Open. The next one we'll
do is the roughness, which is gloss in this case. So we'll add the gloss, connect it to roughness, and then we want to invert this. So we'll go to color, invert, and put it in there. And you want to see the
better, what it's doing. Just call it to rendered view. You can see if we were
to set the roughness at one is flat, zero,
it's reflective. And then when we add dm, you can see we've got a
little bit of a shine there. And if you control and left shift and click, you
can see the color, and we can also edit
this if we needed to, as well, using a color ramp, but we won't do
that at the moment. Then we'll just change the
color space to non color. As we don't want any color data, it's a black and white map, or gray scale map, so we just want the gray scale. The only one we
want color for is the one that's going into
the color node here. Then we'll just
duplicate this again, and then select the next one, which is going to
be a normal map. We're going to
choose the ti file, which is normal 162 k ti, which will give us
a better result than just the standard one, and we'll drag this to normal, then we'll add a normal mapping and just put that in between, and then we can use the
strength to impact it. As the normal map
is a marble thing, there's not much
bumps or anything. It won't really matter
with the strength. If we had, for example,
wood planks or a brick, then you might want
to adjust this. Then we'll just have a look. So we've got our floor. You can see we've got a bit of a shine because its marble, and that's the floor for now. And that's the walk. And just check. We've
got everything done. We need to add it to
the other ones now. So a quick way to do that is if you select the
other floors first, then select the one we
have the material on as, then Control L link materials. And now they've all got the
marble texture on the floors. Just going to isolate
that for a sec, going to top view, and then
go to viewport shading. Now, you can see the
scale could be an issue. It's a bit too big there. So there are two ways we could go about adjusting the scale. The first is if we went
into the UV editor, we could go into edit modes, and then you can scale this. I I just press S, you'll
scale it in a uniform way, or we can scale
along to x or the y. It's two D, so there's not no there isn't a Z
axis to scale on. So as we've done this
with a project from view, everything's in scale in relation to the
rest of the floors. So scaling in Unison
will just work here. But if we were doing
them individually, we might need to scale, for example, just this plane
and scale it on an x or y. So the select everything again, and we can scale to get
the right kind of size. Just bear in mind that if
you scale it too much, you'll get something called tiling where the pattern
starts to repeat. So you can kind of see it here, where this big line here, this big line, this big
line, this big line. This is because if we were
to look at the color, this is the texture
that we use it. And if the if the bit here, so the face is here,
go beyond the border, this pattern essentially
repeats itself. So if Is to move this up, it's going to be
this square layer on top of it square again
on top of itself again. So you want to just
bear in mind if it scale too much or get tiling. Might it not be noticeable, if depending on
what you're doing, but, just bear that in mind. And the other way, so if I just reproject this that we can adjust the scaling
is in the Shader editor. So if I was to click one of these image textures
and press Control T, you can see we've got
this mapping nod, and it has scaling options here. So we could, for example, type in another number, so we type in if ten, so it's some one as default, and if you make it, for example, two,
you can see it's adjusted the size
three and so on. So if you'll go to ten, it's
made it really small now, and you can go the opposite way, and it's really large. And then you just connect
each one to the vector here, because otherwise, each map would have a different scaling, and you might want
that sometimes, but in this case, we don't. So we'll just set
this to a C free, and we'll leave
this as is for now. And the good thing, the reason we did project
from view is that as the textures have been
unmapped next to each other, it means that you don't get
the pattern restarting. So you can see this line
just flows continuously from this plane even though it's
not connected to this plane. Whereas if we unwrap
them individually, if I was to smart U V project this one and then
project this one, then select them both. You can see there's no
continuation here because their faces are in
totally different places. This one's looking like
this, this one's over here. So if we want the
pattern to continue, if you had like wooden
planks or bricks, it might be a good idea
to use project from view. You can see if a smart UV
project breaks the pattern. Let's go back to project
from view there. And now it just looks like
a continuous material. So that is the floors and
the walls done for now. Next, we'll look at doing
the ceiling, and I'll see
53. Ground Floor Ceiling Material and Additional Windows: Next thing we're
going to do is add the ceiling and add
a material to that. And currently, we do have a floor that's
doubling up as a ceiling, but it won't work for what we want to do next for
a couple of reasons. The first is that the actual
shape of the floor for this upper floor doesn't match the downstairs
profile, you could say. So you can see that there's
gaps here, for example, and there'll be little
areas if we go through where It might not match so cleanly, and
we don't want that. And the second reason, the more important reason
is that it's a plane. So a plane, if you select it, there's only actually
one face there, and if you were to
put a texture on it, you'd texture both sides. You wouldn't be able to
split the texture up. So if we had, like, wooden
floorboards on the top, it would also be the ceiling on the bottom, so we
don't want that. We want to have
different materials. So what we're going to do
is use the ground floor, so let's hide the right
collection there. And we'll select the
ground floor floors and use these as the ceiling as they
have the right shape. And we can make separate planes here that we can then
texture individually. Just make the window
bigger for now. Just grab duplicated
all of the floors. G to move them near to the top of the ground
floor area here. Go about there, and they're going to join them all together. And if we wanted to add different ceiling
materials for any reason, we have different faces still as we haven't joined
the edges together. But for now, what we'll do, we'll just rename this
as browns floor ceiling. And we'll move it into a
new collection and just call this ground floor
ceiling as well. And this is just so
we have a quick way to hide the ceiling if we
want to work in the scene without having to either go into this ground
floor collection or selecting individual elements if you had them
still individual. We just have an easy tule here. We can leave it on
disable viewports. So when we hide
and unhide things, it doesn't bring this back, and we don't have to dig in here to unhide it from the viewports. But for now, we want it
viewable, as we working gun it. And what we want to do first is just remove
this material, and we're going to add the
warm material to this. The moment has the same
material as the warm material. But what we want to do
is make a copy of this. So now we can edit this material without affecting
the warm material, and we'll call this
ceiling material. And just to check, we'll change the
viewport display color to anything else for now, and we can see it hasn't
changed the wall color. So we know the
materials are separate. And then we can
go into the scene and see that it's fing,
there aren't any gap. And the only gaps
are actually inside walls where we remove
the top faces so five. And what we want to do now is just edit the
material slightly. So if we go into Shade editor, we can see we've got this
white material here. For the ceiling, we'll
leave it at a white, for the warm material, so we want to select the wall. We'll darken this
to more of a gray. I's going to go into the
scene into rendered view. And what we'll do
for now is turn up the strength of the
world lighting, go to something like ten. And we'll go to an area, where we can see it
a little better, and let's change the colors. So you can see if I to change this to a red or a reddy orange, you can see the
walls are changing. So let's change this to a gray. I'm going to set this to a, let's go 0.2, then we'll
set this one to 0.20 0.22. Then we just check
our normal map, still has a little bit of
variance, which it does. Of course, we can freely
edit this color later. But as you've probably noticed, the scene is pretty
dark, we need to add some more lighting. And if we look at
our floor plan, there are a few more areas
where we need to add windows. So what I'm going to do is
just hide the ceiling for now. But the wire frame, we can
bring back the floor plans. We can see we've got
these double doors here, so French doors. So if you want to
go for a garden, you could have that, so
let's just add that now. We'll do is mesh comes, and we will add panel windows. Then we'll pass the n key, go to create, and
we'll just edit this. We'll change the count to two, the horizontal count, and
let's take off the seal. We'll make both of them doors, and we'll want to
make them even, so we'll set them both at 60. And for the heights,
we'll set this to 200. So you can see we have
something like this. And let's go to top view, and we'll just place it
where we want it from above, bear in mind where
our staircase starts. And if you want to bring
back the furniture, we can make sure it's
not intersecting with the cabinets there. So that looks like a decent
place for us to put it. And let's see, going
to front view, pull it a little further down, L right to the bottom, as there's typically
a little step for a bit of a raised area before you get to
the French doors. And what we want to do is
select the empty, well, the box that's for
the boolean cut out, and we'll just scale
this along the y. So it's bigger than the wall. You can see it's protruding
out of both sides. Then we'll select the wall duplicate one of these bullions, and then we'll change the
object to this new cut out. There we go. Then if we is
to look back at our sea, now you can see some more
lighting coming through. And we need to add some more as the other sides pretty dark. So let's go back to top view. And we've got these two
large windows here. So then we'll do the same again. Just move it the three D cursor, Acmesh, add a panel window. And for this one, we'll
set the counter two. We want two also. Let's just change the
sizing a little bit. So we'll have the one window because we're going
to rotate this, so the little window
will be on this side. So 60 is fine, and we'll set this to 140, and we'll make it
a little smaller, so let's go 120. And then we can rotate this. Let's go rotate 180, then go to front view. We'll pull it down, and we
leave it about there from now. Let's remove the seal of
the seals there, that one, and then same as before, select the box and
scale it on the y axis. Then we can duplicate the
modifier a further time, change the object to
this new control. And rotate it again. There we go so the windows
facing the right way. When you make changes
in the create panel, we'll typically
reset, for example, the rotation in this case. So what we want to do is
we'll select the empty, select the window and
the control butt, go control hole as it's called, duplicate it, and then we'll
move it into position. Over here, Then we want to just adjust some
of these values. So we have the smaller
window on the other side. So I'll just hide the wall temporarily, select the window, change the ticked
box to this one, and then this to 60
and this to 140. Then in top view, just let the empty, rotate 180. Now this small windows
on the correct side, and we'll bring the wall back, select it, duplicate
the boolean. And then we want to
select the control le. And I can see we have
the cut out there. And whilst we're here, let's just change
the solver for all of these booleans to fast. The reason being, if I was
to select one and show you, so this is a control hall
five, which is this one. If we look at it
in rendered view, you can see there's
this black kind of area in the cutout. And if we swap it to fast, now it just looks
like a regular wall. And that's it. We can bring back the
ceiling if we saw wish. And if we look inside the scene, we've got our lighting
set up, and we can, of course, adjust the size of
the windows if you want to let more light into the scene. For now, there we have it. We have the ceiling,
we have the walls. Got all of the windows
in the ground floor, and I'll see you
in the next part.
54. Texturing Bathroom - Part 1: The next thing we're going to
do is texture the bathroom. So let's just set up the scene. We're going to grab the toilet, move it up a bit as
it's poking underneath. To touch more and the
same with the shower. So Is going to select
all of the parts of the shower and we'll
move them together. There we go. And then we'll
isolate those objects. We're going to be working
on the head shower first. And for the show, we're using this metal
material on polygon. It's a free material in two k resolution and
the Melnus work flow. So just download that. You can also use this texture. It's a paid one, but this
will be for the shower tray. We'll be making something
similar to this, anyway, so if you don't want
to download this, we'll have a free
option available as well or alternative,
I should say. And what we want to do is
just set up our views. So we're just going to split
the window, split it again. Set the top one to Shader, set the bottom one to UV editor. Then if we look at what we're
working with in edit mode, we can see we have this here, and what we want to do, is just hit Rap for it. So it's done
something like this. We're going to hit
options, live wrap. So when we make
changes to the seams, it will update in real time, and we're going to
tick this so in sync, so we can see the whole UV, instead of it being where you
only see what's selected. And what we'll do is
add a new material. Let's call this shower metal. And then we'll add a
texture, brick texture, go to the material view, and then we'll connect this
up to the material output. So we just have some visual way of seeing what's going on. Change the scale to 100, add the mapping and
texture coordinate nodes, and we'll set this
to object to U V. The representation
of our UV is doing, so we can see some
of it looks fine, but then there's some warping in areas that we don't want it to. So we're going to just address that before applying
the metal material. And what we'll do is add seams. So let's start with the one main seam that's going to be running
underneath it. So if we go to this view, we're going to just select the
whole row or run of edges. So I'll just press an
lt and left clicking on edges to select one that's either out of view somewhat or well,
out of somewhat. So either like on the
side or underneath. I'm just going to select
this one underneath here. And then we'll go Mark Sam. We see is changing what's
going on over here. And then we'll go underneath. And if you want to see it a bit better, you can do it like this. Then we want to select
or go into the view, this ring of edges. Another one, this
one, Mark Seam. I'll just go through. Select this one,
might as well select top one as well.
Mark both of them. You see it kind of
straightening out these rings. Then let's go to this one
at the base. Mark seam. See how it's getting along. You can see it's looking
a lot cleaner now, and we want one at
this base here. One at this edge. I'm just selecting the whole
ring each time. Now this face is flat. Then we'll st the
buttom as well. Now you can see we've
got a cleaner flow. It's not perfect, but
it's a brush material, it doesn't need to be, but it got some sort
of border to it. And now if we go back
to the shader editor, just going to make
this window bigger, we'll add the day
metal material in. So we're going to go
textures, Image texture, and find the stainless
steel brush. And first, we'll select
the color two K texture. Connect the color
with the base color, connect the base
color to the output. You're not going to be able
to see too much right now. And then we'll just
hook this up to a mapping nods and
texture coordinate nodes. Then we'll duplicate this. Select the next one. This
will be the metalnes form. Connect this to the
metal metallic. And then we want to change the color space to
non color data, the non color there, connect
it to the mapping nodes. As we one time textures to share the same scaling
if we adjust that. This is why we used a brick texture because you can't really see the metal kind of the brush drugs and stuff
on these kind of textures. And let's add a another one. Next one, we will
add the metalness. We have the roughness. So we can just hook
this straight up. As it's a roughness map, we don't need to invert
it. Non color as well. We'll add the normal, and this will be the last
one we'll add the normal 16, which is the T file, no color, then we will
go to vector normal map. Connect that up, co to co, then normal to normal. You can see, you can see this faint brushed
texture that we have, and we want to make sure we
hook the vectors up as well. So we have something like this. And if we want, for example, we can see the
brushes are going down. If we want to edit that, we
can go to the UV editor, going to edit mode. Find the area on the UVM. So I've just clicked
on a face here, I can see this whole area. So if I press L here, for example, I've selected
that whole run of faces. There are some faces on
the top and the bottom. I can get a better look at it. We've got this one
here, this one here. So we've selected all of them
in that area. That's fine. We can just rotate 90
degrees in the UV editor. And now you can see the bruh, the brush textures
going this way now. And we can do that
for any area that we want to adjust like that. But for the most part,
it should be fine. If we look at this area,
can't really see it. But if it was more
apparent, we could edit it. So if we select that face there, let's have a look, this area
needs to be rotated as well. As we can see this one, the one that's going
from left to right, was the one we
rotated down there. So this one may
need to be rotated. But actually, no, it's not noticeable at all. That's fine. And what we'll do is use this material for some
of the other areas. So let's select the screen. We'll add the
material, show metal. Then what we'll do is add aother material,
call this glass. Then we're going to edit modes. And what we want to do is
select the glass material press L. So we've got the
whole glass screen here, and then select the material
here and here sign. And tell us what because we have this little
bracketed slot thing, there's gray, and then
the screen is white. And then what we want to do
is if we get a bit closer, is have a look at the brush, we might need to adjust
the scaling here, so we're going to shower metal and click this number
here to make a duplicate, call this screen brackets. And then we're going
to edit modes. Select everything. It's on rep. It's smart on rep.
Go to the UV editor. And then we'll
select the brackets. So we to select
everything in edit mode, select screen
bracket, it select. I'll only select the D mesh
that has this material on it. So we can see only
selected that, and then we'll rotate
this 90 degrees. So the brush strokes
are going up and down. And then we're also free to adjust the scaling
if we saw wish. We set it to about two, can leave it at that for now. See, we've got the
brushing going down. And then for the glass material, We're going to render view. You can see, it's not acting
like glass at the moment. And we could just turn
the transmission up, turn the roughness down,
get something like that. But we're going to do
something a little different here to give us some
reflections as well. So we're going to delete
the principled shader. The first thing we'll
add is a glass shader. If you give us what we just
had with the principles. But then we're going
to add a mix shader. And a transparent shader,
mix them together. Then for the factor, what we want to do is
add a Franl nodes, connect it up and set
this to score for 40. Then we'll add another mix shade connect the transparent
to this one as well. And for the factor this time, we'll use a light path nodes. Is shadow ray and
used as the factor. Now you might be able
to see it a little bit, but you can see we're
starting to get a bit of reflection there.
So we want it. L that, you can see bits
of the objects behind it. It's more like a glass window. It is cool. We've done that. We'll do this next or
the control panel. Let's select it, then we'll
add shower metal to it. A UV window, select it in edit
modes, go smart projects. We want to see what's going on. We can use the brick texture. It looks pretty clean, and we'll most likely need to rotate the
brush strokes down, so we'll select the back panel, and then press L to
select everything and cot mount over
the UV side, R 90. Now brush strokes
are going down. You can do the same with the
knobs as well if you want. And for the hand shower, same again, shower metal. Smart UV project. And then have a quick check. If you want to be more precise, then as we did with
the first one with the head shower
at the U D seams. But in general, with metal, it's not particularly
noticeable. As you can see, we're going
to render it for you. You can't really see
that kind of detail. But if you're doing
some at super close, you want to spend
more time on that. And let's do the
shower tray last. So add a new material,
shower tray. And for this one, what we'll do if we're
looking rendered view. And let's go. Let's
edit the roughness. So we'll go 0.15.
And essentially, we can leave it at that as
there's not much to it. Of course, if you're using, for example, using
this material, you get a bit more detail
with the roughness, like the kind of graining
and stuff you have on it. But we'll just leave it as
something simple like this. Of course, we don't need
to adjust the color. And let's bring back the scene and have a look
at what we have so far, we have the shower,
going to rendered view. Today you have it. And
with this material, we can add it to quite
a few different areas that just have simple, stainless steel,
chrome kind of looks, and I'll see you
in the next part.
55. Texturing Bathroom - Part 2: So let's continue
text in the bathroom. The next thing we'll
do is the toilets. So let's select the
three items here, four, and we'll isolate it, go to rendered view,
just the lighting, and we'll select one
of the items first, and then add a new material
or this toilet ceramic, and let's make this black. So we'll change the base
color down to rather 0.01. And for the roughness, what we'll do we
say this to 0.3. So we don't want it to
lower it like a mirror. Unless you're going
for that kind of look, we don't want it super Mteal.
So there's about right. There are two different
ways we can texture this ones just using the nodes. So making a custom one, the
other ones used in texture, and I'll show you them both. So we've got this here. We can just then select. The other two toilet objects, select the toilet seat. Last, control L link materials. And that's the first
way we can do it. So a quick way, got a toilet. But if we wanted to
get a bit more detail, we would use some textures. And before we move on, let's add a material to this. And currently, we have
the shower metal, but let's rename this to
differentiate it a bit better. We'll call this steel. There we go. So using, let's call it stainless steel. But we're not going
to use this one. We're going to use
a custom one here. So lets us remove that, add a new one, and
we'll call this rum. Then for this material, what we'll do is set metallic
to one roughness to zero. And we've got say
chrome button now. And we'll also add it to these disc bits on the
back of the toilet seat, so we'll select the toilet seat. Click the plus,
search for chrome, then going to edit modes. You want to select one
of the faces, press L, press L on the other disc, and then assign chrome to it. We've got these
chrome bits there, and the button is chrome. And if we wanted
to add textures, using, for example, we have these options here.
These are paid ones. So I'll just show
you how you'd apply them and what they'd look
like difference was. But if you don't
want to do that, you can just leave it as is. But if you do, this is what
you do and go toilet ceramic, and let's just add
a image texture. As before, look for
what we're looking for. Add a cool one to base color, and then what we'll
do is duplicate this. Add a gloss map we have, add it to roughness,
add it's gloss. You need to invert
it so color invert. You can see that
the roughness is two shiny there or reflective, so we're going to edit this, we're going to use
a color ramp nodes. Start it in here if we
have a look at what Less is doing, at the moment, it's just black and white, and with the color ramp, we can adjust the black
and white values. And if you remember before,
if you're not sure, you can always go to RGB, plug it into a slot, and then go, if you want it, if you set it more to black, it's more reflective, more
to white, is more mat. As we want this to be more mats. Well, let's have a look at it because it's too reflective. We're going to set
this more to white, so we're going to select this node here on the
left of the color ramp. And then as we drag this up, you can see, it's becoming
more and more mats. We'll just find a
value we're happy with and leave it out
about there for now. And then we can go to the
next node. Open it up. We have a normal map. So we'll select that
non color data, and add a normal map node, collect coolor to color, normal map to normal. And as you probably
noticed when is looking at the roughness map, if it loads up. You can see that we have something going on here
in regards to the map, but not on the other objects. And if we look at
the UV unwrapping, we haven't done it on
these other objects. So let's do that now, select the toilet seats. Smart UV projects. Can see we have
something going on here. Select the bottom one,
Smart UV project again. Can see something's
going on here. But we have a seam in a
place that we don't want it. So what we'll do is
isolate the base. I'm going to delete this top face because
we don't need it. We're going to add some seams. Let's add one at the bottom. I'm going to select this run of edges and this run of edges. So it goes all the way
around the bottom. Troll E, mark seam. See, we've got this
kind of result. Still interesting. And we'll also add one the let's go for
this one mark seam. And it looks a lot better,
got the seam in the back, which is going to be
against a wall so it won't be noticeable. And
that looks fine. Then we can bring it back
together, can look you can see. We've got that little bit
more detail in the material. And let's add the mapping and
texture coordinate nodes, and we'll connect them all up. I'm just going to
make these smaller. Bikes, then we can
just connect the map. Just the scale. If we look at the roughness,
we can see the scale. Let's try to, just make
it a little smaller, and then bring it back. And we've just got this little
extra kind of detail on the roughness and on
the normal map. E. Now we can bring back
the rest of the toilet. Select the top bits,
select it all. Old, if you're missing the top, select everything
smart UV projects. And see this one looks fine, it's pretty boxy on the UV map. And the scalings fine. If the scaling was an issue, then you could either
adjust it on the UV map itself or create a
duplicate the material and adjust the scale
independently. And then we have
the toilet seats, which look fine as well. And we'll do the
same for the sink. So let's just bring
everything back. So we have the the tap. And the little controller here. We'll use chrome
for this for now, so we'll just add chrome, and that's all we need to
do for this bit for now. And just bear in mind things
like colors and materials, we can swap around as needed, but we want to just get a feel for how the scenes
going to look. And lastly, what we'll do is
add eight material to this. So same as before with
the ceramic material, we can add plain white one. So leave the color on whites, and for the roughness, we can set it to
it's called 0.1, it'll be more reflective than the toilet which we had
at a roughness of 0.3. So we could leave it at that
or use D textures as before. I be m is texture, finds the white ceramic, and as before, add
the mom, gloss. Remember, if it's
not base color, then they all need to
be non color data. Add a mapping, text
coordinate nodes, and that's just control T, then we'll just connect
it up to all of them. Have a look, select
everything, Smart projects. We'll adjust the
scaling as well. Let it to free. And if you want the
add seams as needed. But it most likely
won't be noticeable. But if it is same as
before, just add a seam. There we go. I believe
that's everything. Let's just check
back on the scene. We have the cover for the drain. So we'll just add
chrome to this as well. And something you can also
do is start adding colors on the viewport display just so it's a little
more readable as to what's been worked
on and what hasn't. Maybe we'll add
something like that. And just go through the scene, glass, can make it like a blur. Green bracket. Okay. And stainless steel,
something like that. This one. I doing that, we can see the support
rail needs materials. For the support rail, what we'll do is add let's go for the stainless
steel to add the material. Isolate it, it, SmartV project. Have a look under brickwork. I can see we'll need to
rotate the bar itself. Well select the bar, rotate 90, we know our brush texture is going
to go the right way. And what we'll do is make a copy of this
so we can edit this lightly and we'll call
this support rail steal. And the reason we
want to do this is to adjust the
roughness a little. So add a color ramp in. And let's see. So we have roughness there. Let's set this more to a white, just to make it a little
less reflective, more mat. And for this little bit here, what we'll do is add a newt
material for the shower tray, we'll use that material. So we'll add this in, make
a duplicate support rail, clip, whatever you
want to call that. And for the color, let's go for a gray. See nothing's happening
because we need to go in, select it, and assign. Then we'll just look at it in
rendered view. There we go. And we can add one
more material here. Let's add support real clip. Again, make it its own copy. We'll just call this two. Then we could set this
to say like a white. Select this, a sign. Course, you could have it
as to gray if you want. And let's just change the
roughness a little bit. So there we go. We've
got a support rail for bring everything back. See dark, of course, the strengths low, and
it's coming along. Just got a few more bits to do, cabinet, and I'll see
you in the next part.
56. Texturing Bathroom - Part 3: Let's finish up the
bathroom textures. So in Blender, before we start, there's one thing we
need to add back. As you can see, we actually did need that face
on the toilet. So let's just select this edge of faces
and just fill that. Q. Let's go to this cabineer. And the texture we're
going to be using is this free polygon texture. Wo find dark. And what we'll
do is go into blender, go into edit mode, and we'll just do a cube
projection for the nra. Then if we go to the materials, let's add a material. We'll call this wood fine Dark. Let's just add the
textures to it. As before, find the
images and match them up. We have color, so you
can see what's going on. Gloss, and we'll invert it. We have a normal map as well. Non colored data, non colored
data for the gloss map, and we want to add a
vector normal map. Then let's hook them up to a mapping textural
coordinate node, leave us all the maps we have, and we will add
the displacement. But actually, if you did, what you would do is with us
make a little more space, then we'll add a bump
after the normal ma, and duplicate the texture here. Go for the displacement
two k tier. Collect the color
up to the height, set it to non color data. You can see what
impact it's making, and then we'll just tweak
some of the values. We don't want it this strong. This is way too strong, but let's first adjust
the scale. Let's go. Let's try four for now. We can always make this
bigger or smaller, too small, so yeah,
about four looks fine. Then over here, what we'll do? See if we adjust this one, this is for the normal map, but it's the bump map
that we need to adjust, so we need to adjust
the strength here. Let's try 0.1. To the difference as made, where that was the defaults. G from 0.05, just so you've got just the faintest
kind of texture there. Then if you want, you can
adjust the normal map as well. We will set this to 0.2. We have something like this,
and all of the grains are going in ways we're
happy with the side one, these are going down, like these grains here,
so that's fine. Can leave it at that,
bring everything back. And what we'll do
next is the door. What we'll do, select
the door, isolate it. And let's actually what we'll do is take off
the subdivision. We'll just keep this
door a bit lower poly. If you want to adjust these
kind of grooves here, then we can go into edit
mode and move them, slide them up or down
to make those sharper. I'll leave it as is. On M one, just so they're a bit more visible
from further away. You can see when
they're tighter, they're a little harder to say, if you want that, you're
welcome to do that. And what we'll do is apply
the mirror modifier. I'll show you why. So if we go to add the material,
we're going to search. We'll find Dart, add that. And then we'll go in, Q project. And because we have a mirror
going through the door, you can see that it's
mirroring the textures, so we're getting this kind of effect on where
the mirror is. So to alleviate that, if we apply the mirror first, and then Que project, you can see we're getting a more consistent kind of unwrap now. And we've got it on the door. And of course, if
you want to change the direction of the green, you can just rotate 90 degrees, now you can see
it's going up down. And if we want to
adjust the scale, what we can do is hit the
duplicate duplicate button. Rename this, maybe
we'll call this door. And now if we adjust the scale here or any of the other values, like the normal
strength for what it won't affect the
cabinet with made. But I'll leave that
add is for now, but there's separate
things to edit. The other thing we want to do is let's add a chrome material. And we'll select
the door handles on both sides and apply that
we have chrome there. Que, and we'll leave
that for the door. For this bit here, what we'll do is add a wooden texture to it
and then paint it hit. Is at the moment it's
got no material on it. The material we'll be using is this quartered chiffon wood. It's also a free one. And let's add that in. So we'll call new material
door frame C chiffon. Then as before,
add the textures. There we go. As you
can see it stretched, so we'll unwrap this. Let's go for a smart project and see giving us a
pretty good result. And it's splitting in the
right places as well. So this looks like
a solid piece. We've got this middle bit,
that's a solid piece, and then the other side. That looks fine, but we
want to adjust the color. So for this node here, what we'll do is
add a color ramp. Let's see, we've got
black and white now, and then for the black value, we'll set this to about 0.8. So it looks like it's
just painted wood. Then if you want to adjust
the scale as before, just add the mapping nodes
and connect them up. But I'm happy with the scaling, and let's bring the scam
back so we can see, this is what we have so far. Just the lighting a bit. The other thing we're going
to do is texture the walls. So to do that, let's
isolate the building, and then we'll add
a new material. This is if you want to have
different wallpapers, tiles, whatever in different rooms, and we'll select the faces
we want to apply this to. I just going around, selecting all the
faces, at this room. There we go. And then
we'll go new material. I just call this k
tile, it a sign. We'll set this to a
color of gray black. Can see we've hit all
of the correct faces. And the material we're going
to be using is this one, though I say another free one. And let's apply that now. Same processes before.
Now, of course, this is just to show you how
to do the different things. Feel free to experiment and
try different materials, textures to get some
a look that you like. Cue. Let's go gloss. So you can see we need
to adjust the scaling of this gl one, so we invert. A normal map, and we
have a displacement, which are just deleted. There we go, on color
for all of them. Then we'll add a
normal map and a bump, and then we'll hook them
up to a mapping note, so we can adjust the scale. So let's go for scale of ten. Of a look at it.
What we want to do, now I'm going to just
change the color. I don't want these white kind of gaps in between the tiles. I want them more of a black. So add a color ram, can see what this is doing. And for the white value, we can bring this
white value down. So we have something like this. And we can also adjust the bump if you want
flatter kind of tiles, and then we can adjust
the normals as well. So let's fit the strength, let's set this two.
Let's go er 0.2. Go for something like that,
and have a look at it, and we can bring back the rest of the scene apart
from the roof, this was high depths, e. So this is what we're
working with so far. And of course, if you wanted
to have different materials, say we wanted to
let me demonstrate, have a different
material up here. We just choose the
faces a sign it. So you could have
something weird like this. Even further down, you add a loop cut and you do the same. So you could have half walls, where some tiles some plain, but just going to have it
all tiled at the moment. Cube, and for the toilet. What we'll do is
set something up so we can adjust the toilet
real quick as well. So just add a color ramp here, set the black value to 0.8, connect it up to
the color texture. And now if we want to swap
the color of the toilet, we can do pretty quickly. So we could have a white
one, can have a black one. As we've got black tiles, now, I'll leave it like this. And lastly, what we'll
do is just add a mirror. So let's go into front
view. Get a cube. And for the cube,
what we'll do is set it's going to be
the z for this case. So front back, 0.03. So we've got a free
centimeter thick mirror, and for the width, we'll set it to 0.7, and
then for the height, we'll set it to one by scale top view.'s move the
mirror above the sink. Let's making sure it's against
a wall. Roughly central. Of course, we're can adjust
the size if we need to later. Then I'm going to
grab this face, inset it, to get a frame. And then let's go top
view, wire frame, and we'll extrude it in
go about there halfway. I've got a quick Isolate it, and let's just add
a texture to this. We'll go with the
wood one we used, so Wood find dark. Then we'll just go into it,
select everything, smart, unwrap. And that's fine. Then what we'll do,
add a new material, call this material harp
material, call this mirror. Assign it to the middle face. Now you can see we've got
this white face here. Then for the materials, we'll set the roughness
to zero, metallic to one. Now we have a mirror. And
just check it O check. You've got grain all going
the right way you want it to. If you want to make
adjustments to this, then duplicate it again, and you can just call
this wood mirror, and then you can adjust scale or the normals or anything else. And the sa L at scene. And that's the bathroom done. I'll see you in the next part.
57. Texturing Living Room Sofa: Next, we're going to
do the living room. So let's start with the sulfa, and we'll select the arm
first and isolate it. Then we'll add a new material. Let's just call this
sulfa material lever. And a material view, we'll add our trusty
brick texture. So we can just search that and let's add the mapping texture, set it to U V, We can see
what we're working with, and then we can
start wrapping this. So first, what we'll do is
select the bottom edges. So we'll go all the
way around the bottom. Mark Seam. And then what we'll do is select this
edge running across here, then just follow
it round and down. Mark Seam as well. And let's adjust
the scale of this. We can see it a little bell, and we'll apply the subdivision. Then go back in and just hit rap. We have
something like this. Q. And then what I'll
do is we're going to use this material
here, say free one. Or you can use this
one if you prefer, but I'm using this
animal vinyl one, and let's apply that. So we're going to go
into the Shader editor, add the texture, Is texture. Let's have a look for that. Add a node. Let's try scaling of four. Let's see if we scale it
up a little more, go ten. Let's go for ten, and then let's add the
rest of the maps. G for gloss. Same as before. Non color data, glass map
needs to be inverted. Then always remember
to hook it up to the mapping node at the end. Add the normal end. As you can see the maps are at different sizes because I
haven't hooked them up yet. And add the
displacements, non color, vector, normal map, vector bump, bump up to the height, and
then let's hook them all. And we'll adjust the strength, let's go to 0.2 with
the normal mapa, and for the bump, we'll set this to 0.1. And let's also adjust the color. So we're going to
add a color ram, and then we'll adjust the white value to give us
more of a black kind of lever. I will look at this in
rendered view quickly. Just a strength. Nice, and we will apply this to
the rest of the couch. So let's go back to the
scene, grab another piece. Grab this cushion, want
to apply the material. So I guess let's just grab everything,
apply the material. So I'll select the one with the material last,
link materials. And then we can go to each
piece and just add seams. For this piece as we
have actual seams, we need to add another material. We'll just call this sofa seam, we'll select the seams. So the one at the
bottom one at the top, assign it to sulfa seams. You see that's done
because it's white. Then we'll set the base color, go close to black or similar
to the color of that sulfur. And we will also
adjust the roughness. Let's set this to about 0.7. Then we'll go back
in, going to select the bottom edges to add
seams to the main material. The grab af at the bottom
mark seam. Here we go. And if you want to adjust the
scale separately as before, if you need to then just add a copy of the lever
for the tats. Now you can see we need
to do these individually, especially if you've
sculpted them individually. But if you haven't
done that yet, you can just duplicate
the original lo. But I will just add
the seams in again. So grab in bottom
ons, mark seam, selecting bits here, add in the material for
Sam, the signing. There we go. Let's go back in, and we'll do the
same for these two. So I'll just go into them
add the Sam material. Link, add the seams, and then add the
seams at the back. As a way possible. We don't
want the seams to be visible. A bit unavoidable with the arms, but with the cushions, we can just have the
seams at the back. They be hard to
see anyway because the material allows that Seams. Shall select slit the back one. There we go. Bring it back. Got the piece here,
for this one, we'll apply the mirror, then apply the subdivision, go into it, and then we
can just smart unrat. Give us just a quick
way to do this piece. And we get a good
result out of the gift. Lastly, let's go to the legs. Isolate them. We'll do
metal legs for this. So let's select our
chrome material as a base to start
with, duplicate it, call it sulfa legs, and then we'll adjust
the roughness. Let's set this to about 0.5, so it's not reflective
like the chrome. Let's got this kind of
look to it. There we go. We've got our couch,
have a look check. The everything's
applied properly. Look it, and I'll see
you in the next part.
58. Texturing Table and Chairs: Let's continue
texturing the scene, and we'll start with
the coffee table. So let's just isolate this. We'll add in the chiffon wood material that
we use for the door. Make a copy, and then we'll rename this coffee table wood. There we go. Let's
adjust the color. So we want black on the far left side and
for the right one. We'll set this to near
black for the value, just so we retain
a variance there, and let's adjust
the scale as well. We'll just set this to four. And you can see we
need to unwrap this, so we can use our brick
texture to visualize this and got a UV set
the scale to about 50. And then let's try
the smart UV project, see if we get a good
result out of the gate, and it is pretty good. Need to adjust the
rotation here. So it's the same
direction as our texture. If we were to bring the
texture back, we can see, it looks okay, but we have some of the wood grain
going in the wrong way. So let's add some
seams to adjusice, because you could either manually select
all of the faces, and then rotate them in
a UV editor to do that or add some UV seams to do
the same kind of thing. So we can select for this piece, for example, these two edges, this edge, these bottom two
edges, and these edges. And you imagine if you
was cutting these edges, you could fold the object out, the light flatten it. Then we'll mark sm. Now you can see this is going up and around this big piece, and then our two
side lung pieces are going across
the length as well. So we'll do the same
for the bottom. I'll go to select
this invert selection and select the same edges. There we go, and our legs are
going down, so that's fine. And there we go, can, of course, adjust any of the other
settings if we saw a wish, but we'll leave it at that
final whilst we're here. Let's just check our
face orientation. See the floor needs
to be inverted, so as control left and the key as we want the floor to be faced in the
right direction. And let's go to the
dining table next. We'll be using
this texture here. Se free painted
metal gold texture. So we can go into Blender, once you've downloaded it. Add a new material. We'll call this
dining table metal and add a image texture. Then just locate it. And let's as before, add the color, add the mapping and texture
coordinate nodes. We can isolate this so we
can see what's going on and add the rest of the
maps or the image textures. We have a metalness one,
so we'll connect the. We have roughness. And let's see. But the normal and the
displacement map, as well. Then at the normal map, at the bump, connect them up, set the color space
to non color for everyone that's not the one
going into the base color. On color on color. Then we also want to hook
them up to the mapping note. Okay, so we can see we need to make some
adjustments to it. Let's go for a Smart rap. See what we get.
Adjust the scale of this as it's pretty big. Let's go for ten, and
let's turn this way down. So we'll set this to about
0.2 and this to about 0.1, and let's set it
even further down, 0.05, and pot it one. And we look at the UVs. So you can see we've
got these criss cross patterns here for the
legs, which is underneath. So if I was to show that on
the brick brick texture, You could see what would
be happening there. So in this case, it's fine, but if you were using
wood that had a grain, the grain would be
going diagonally. So then you'd need to as before, add the appropriate seams. But as we're using this
metallic kind of texture, you'll see it's not
noticeable at all, so we don't need to
worry about that. But what we do need to
do is adjust the color. So we're going to do two
different colors for this table. We're going to have a
t, and we're going to have the legs as a
different color. So for the tar, we'll
have it set to a white. So let's go dining table
metal top and add a color a And we'll unplug the metallic. You can see now we've got
this kind of white top. Then what we want to do is
then add a new material, find the dining table one again. Then we'll call this after
we've duplicated it, dining to metal legs. And then we'll select the legs, all the pieces for the legs. Sign. Then we'll plug back
in the metallic nodes, and for the color, we'll set this to black. Now we've got this
two tons table, and we've got this painted kind of texture on this as well. And you can see if
it's to just this. That is what would happen, but not for the
legs for the top. So if we want to turn it
down even more, we can, I believe we will this to 0.01. Just for the table top, one that really s. Then
the legs are fine as is. Then let's add one
more material. Let's find the steel
port steel rail. Let's go for the chrome. And we'll add this
to the screws here. I'll select the
screws at chrome. I'm just going to tone
this down a touch, the legs. There we go. We have our table. And
let's do the dining chairs. We'll grab one because we can always duplicate it
to the other one. And for this one, we will add the chiffon material that we use for
the coffee table. So let's use let's go for coffee table,
coffee table woods, and we'll go in smart, have a look what sort
of result we get first. We have our break
texture here still. The right out of the gate. We've got a good result. Let's just have a look, make sure everything
looks all right. And for this, what we're going
to do is adjust the scale. I was going to set this to two, and let's tone down the normal
a little bit. Just check. We've got everything fine, and it looks to be the case, so I just bring it back.
Then what we'll do? Quicker to delete this
one than add it back. So we delete that
chair. Grab this one. Were into position, and it's still connected to the parent duplicated one that had
that setting already, and then we can
have a look at it. There we have a dining table, some chairs, and our
coffee table done, and I will see you
in the next part.
59. Texturing Kitchen - Part 1 : Next, we have the
kitchen to texture. So let's start with the cabinet. We'll just add a new material. We'll call this kitchen cabinet. And let's make it a black gloss. So we'll just change the
base color to black. So I'm just setting the
value close to zero, but not on zero. And let's also adjust
the roughness. We'll set the roughness to 0.2. See in a preview what
it looks like here. And what we want to do is
select all the other cabinets, and then select the one we
added the material to last, Control L link materials. Then for the handle, we'll use the rol
material we made earlier, and as we did with the cabinets, we'll select the other ones
first and then link material. For the plinth, what we can do add a material called plinth, and we'll just tone down
the roughness slightly, and you can either
leave it as white. If you want this white, black, white kind of love, set it to the same color as
you cabinet, for example. But I'll leave mine as white as I'm going to
do white cower tops. So for the countertop, you can either use textures, something plain
like this or that. Or just a simple kind of glass one that I'll
walk you through now. So we'll just add
a new material. We'll call this counter top. Leave it as what? And instead of changing
the roughness, what we'll do is
add a clear cut, which is like a
transparent layer that sits on top of the cabinet. And then we can adjust
the roughness here. So as far as just to show you, that might be a little
difficult to see. But essentially,
there's a reflection here that you get that you
wouldn't get otherwise. You get a similar result with the roughness, so
it's up to you. I'll leave mine like this. And let's go over to the sink. For the sink, we can use
the chrome material, and then duplicate
it to make a copy. We'll call this kitchen sink. And for this, we want to
adjust the roughness. So let's set this to about 0.4, have more of a mat sync look. And with the plunger
plug hole thing, we'll add the same material. Then for the kitchen tap. Let's start with the
chrome as a base, make a copy, call this
kitchen tap, chrome, and then we'll adjust
this slightly, so the roughness to 0.1, and then add it to the rest
of the kitchen tap pieces. There we go. And we need to add the kitchen
material to that as well. This cube, I believe
is not visible. It's just for the Boolean. Let me just check
before we delete that. Yes, for the Boolean. So whilst we have this object
selected, we can refind it. We want to turn it
off in rendered view, so it doesn't turn off
in viewport as well. And we have this metal piece, we applied the kitchen
sink material to. And let's continue on. We have this piece next, which is the extractor hood, so we select the extractor, this button underneath and
the grate and isolate them. Then what we want to do
is add a new material. We'll call this
extractor hoods bra. And if we select or left click the principled shaders left
control shift and the Tkey, we can add multiple textra
maps at the same time. So what we want to do is find
the metal we'll be using, which is the brush
stainless steel. Elongate five, we've used four, and then we can press control, we'll hold control and
select multiple maps. So we'll select
color, metalness. Let's go roughness,
and we have normal 16, and we'll click the
execute button. And you can see it's made
the set up for us already. And then if we go
to brick texture, just so we can visualize this. We can see what
the UVs are doing. So let's go into edit modes. Let's try a smart project, and we get a pretty good
result at the gate. But you can see these
are going vertically, and we want them to
go horizontally. So what we'll do is
select these faces, going into the UV editor, and then press L over each of the four faces to select the borders that they're
associated with. So now, if we rotate them, You can see we're moving
them on the UV map, but because we've
rotated them 90 degrees, now they're going horizontally. The reason we pressed
L is because we added these smaller faces
that we didn't select, but pressing L on the
UV selects them for us. Otherwise, they
wouldn't have rotated. And let's go back
to the texture. I'm just going to
adjust the scale. Let's set it to ten, have a look and rendered view, and we're looking to emulate
the color scheme with this. We have the black in the
casing on the outside, and then the gray or silver on the inside
with a white button. So let's go back to Blender. We'll add a new material. Find the extractor hood gray. Select the first one, make that the copy, and then we'll call this
black extractor hood black. And what we want to
do is add a color ram in between the
base color texture and the base color nodes, and we'll set the
white value to black. And now, what we want to
do is go into edit modes, select one of the
faces on the inside, press the K, to select
all of the linked ones, and then we can assign
the gray to it. And then we want to
select this ps here, press A to select all of it, add a new material. We'll call this
extractor hood life. It a sign, and that's just so that when
we do the lighting, those faces are
already ready to go. And then let's select
the knobs here. Sign it to gray, and then we'll add a another material for this button here. Extract button. Then we'll select the
button and add that in. So we don't need
the extract button on the hood bit itself there, so we can remove that, but just on the button as it
is a separate object. And then for the grates, we'll use the gray
material. There we go. And as you remember, we've
turned off the boolean there, so you can't actually
see it on the grate, the cutouts, but it
looked like that. And there's our hoods. Let's bring the scene. But And let's add the cabinet material to this
bit underneath the cooker. And then let's add a
material to the backsplash. So new material, call
this back splash. And the material I'm going to be using is this wooden one here. So let's assign that color
we using the displacement, gloss, normal, and, and then
we're going to edit modes. Let's go for a cube projection. And I want to rotate
this 90 degrees. And scales pretty big, so let's adjust the
scale. Try four. Let's try to, think
about free. But now. And what we want
to do, also, well, what is optional is adjust
the color a little bit. So I'm going to add a color ram. Then for the white value, I'm going to set it to
more of a ready brown. So for the hex code that I used, it was FF 886. And that's how we look at this. E. But of course, feel free to try
different textures, materials, layouts, combinations, and all that stuff until you get something
you're happy with. But for now, that is it, and I'll see you
in the next part.
60. Texturing Kitchen - Part 2: Next, we're going
to texture the hub. So we're going into this, select the hub, select
everything, smart UV project. And this is all we have. Now, if we were to look at
the bottom left corner, for example, we can see it's
the bottom right on the UV, and this will be a bit
problematic when we export it as a where we're placing
things on this map, will be in the wrong location. So what we're going to
do is go to face select. I'm going to select
everything on the right side, just scale it way down, move it off into the corner. This is the bottom face and the side faces,
that are important. And this face, we're going
to rotate 90 degrees. So now the bottom left corner is the bottom left
corner and the U VMA. And now we can select everything again and export the UV layout. And let's just call this up two and pay attention
to the Canvas size, so we'd have 1024 here, and we're going to
export the UV layoff. Then we're going
to gimp Po Osha, and we're going to just
create a new file. Use the same Canvas size, we exported the UV map out as. So 1024, H. Then open as layers, find the UV map and open it. So we can see it in
the same as blender. Now when we make
any edits to this, they'll show up in
the correct location. And what we're going to do
is create some b rings. So just any design
we'll do and obviously, spend more time in it
than I'm going to to get all the little details right that you want
to add include. So in GIMP, what I'm going
to do is add a new layer. Let's call this ring and Stern's going
to create a circle. So I'm just using
the ellipse select. Then I'm going to hold shift to just lock
the aspect ratio, and then we'll
create some circles. That might be a bit too big. Go about there and then we'll
do a dit select border. We'll just call select border. Let's set this to one. I zoom in, you can see
we've got this fin border, and then we're going
to fill with a color. So let's set this
color to white, and then fill with
four ground color. And now for us to
select nothing, you can see we've got one ring. And then we just need to
do this multiple times. So what I'm going to do is
with this one selected, I'm just going to
duplicate the layer. We have a copy of the ring. Select it, like so, and then just scale it. And then we're going to do
this four or four of them. About there. Touch it, get it down a touch. And then once you've done that, ply that, duplicate
the layer again. And then we'll just
move this across. Duplicate the first
layer, that ring across, we just got some rings there, then once we're done with that, we can export export
it back out and save. So we'll call this
harp export two, exporting as a PN, and we can go back into blender or isolate the
harp for a moment, and we're going to go
add a material to this. If we go material,
call this harp, Then what we want
to do is we'll set the roughness to zero,
the color two pla. We have a harp kind
of surface now. And then we're going to add our texture that we just made. We'll just look for where
that is the export file, so we can have a preview, and we can see it
showing up nicely, and we'll connect
this up to the color. Then we want to add a mix RGB, so color mix RGB in between. We want to set this to overlay, and then the factor to one. And then for color two, we want to set this to black. And there you go.
We have a hob done. And let's bring it back. Let's go through the
rest of the scene. So we did do a basic
metal material, but what we're going to do
is at the brushed textures. So let's just re
make a copy of this, and we'll call this oven deal
at the textures as before. So we'll use the steer
brushed eelngated 1234 And let's add the brick texture as well so we can have a
look at what's going on, and we'll adjust the scale. So we can see there's an
issue here. Will do at it. We'll add the door
and the handle, add the same material. And then we'll
isolate them so we can see it a little better. We'll go in and
smart wrap this one. You can see the textures
going up and down so we want to rotate
this 90 degrees, so just rotate the UV map there. Then we'll select the
door, select everything. Near to hides to reveal
the rest of the geometry, and now smart rep, am as before, rotate 90, then the handle,
Smart np, rotate 90. And then we need to
adjust the scaling, as you can see, all three of
them at different scales. So let's go to this one first, and we'll scale it by 0.6. So that's about center. And then for the handle, we'll scale this by
points as try 0.3. So if we were to add
everything back, the brush texture will
be going right to left. So let's bring this
back to the scene. And then what we want to do
is add materials to this. So to the dials. So let's use the
chrome material. Make a copy, call
this oven dial, and then let's just change
some of the properties. L's change the roughness to 0.2. Kill. And lastly,
something missing here. Okay. So for the door, we've just got rid of the glass, so let's add that back
just that black glass, and we'll just call
this oven blast. And then we have
the clock, lastly. So let's isolate this, going to edit mode, Smart nap. And then we'll rotate
everything here. So let's rotate 90, and then have a look for
which face is the front face. So we can see this one here. And as before,
select everything, export EV layout, and let's
go export it, save it. Then going into GIMP, create a new file, pen as layers, find the one we exported at control
panel face two. Recall, is this face here
that we need to mess with. And what we're doing is I've
got a fund from d fun.com, C find free funds there, and we're just going to be using this to create the clock face. So add it export installs
the file into GIMP. And now, what we can do
is draw a clock face. So I've got DS digital, which was the font
to download it. And now, if we type in whatever we want to
appear on a clock face, in text, it will appear, and then we can
just adjust the ge, do that, and
position it as well. And then once she
happy with that, just export it back out. So recall this export two And then we'll go back into blender
and create a material. We'll call this
control panel face. And let's find the
texture we made. Control panel, face. Wait port, not face. So we can see. So what happened here was we didn't
check the orientation, so it's upside down. So we can just select this face, select everything
that's linked to it, and we can just rotate 180. That's why you always want
to check which corners, which, for example,
to center yourself. But now it's the right way. And let's connect it up. We'll connect it as before, add a mix RGB set to overlay with a pure black value on the bottom factor of one. And what we'll do
for this one as well is set the where is
it the clear coat to one just so we get that
kind of look where it's a little bit behind glass
form some sort of screen. As without it, just
looking flat like that. And let's add one more material. So the other material will
be the oven material, the steel. So oven steel. Then aside from the face, so I'm going to select the face, expand my selection, so
that's control plus. So we know we've got
all of the face, or you could just
press L on the UVs, inverts, and then we'll
assign it to oven steel. And there we go. Let's just bring
everything back. Then just have a little look. And there we go.
We have our oven. Of course, like I said, just spend more time doing adding detail to the
stuff we did in Gim, as needed adding all the
little buttons and stuff, or the little interface
kind of bits. And you'll get a good result. But y, that's the oven, and I will see you in the next.
61. Texturing Bedroom - Part 1: Next, let's move
on to the bedroom, and the first thing we'll
do is select the duvet, isolate it, have a look
at it in rendered view, and let's just
expand this window. And we can see we've got some weird shading
going on here. And if we look at our
geometer underneath, we've got these
pretty big faces. So to get rid of this, what we're going to do is just subdivide in additional time, so these faces ain't aren't
covering so much ground. And the angle changes
aren't as apparent. So if we subdivide this, you can see we've
got rid of that. And if you feel you need to, you can subdivide again, but I'm going to leave mint two. We'll add a new material. We'll call this duvet material. And we're going to be
using this texture here, b f or free to use a
different one, if you wish. And just going to download that, and let's add it in. So control shift
T, go to Velvet. I'm using two K. And
let's go grab the color, grab this placement, metalness, normal, and the roughness. Add the moulin. And you can see we have
something like this, and we're just going
to adjust the scale. I think this might
be a little big. Go to something like five, just so it's smaller. And what else we're going to do is adjust the displacement. So the strength of it. So far as to remove
this and get closer. You can see what it's doing. So we have two maps. We have a normal, and we have
a displacement. They're affecting the bump, you can see that's what
the displacements doing. And for the scale, we're going to just turn this 0.001, to make it really weak. And then we're going to connect the normal mapper and then
set this to above 0.2. So we've got this
raised detailing, but it's not super strong. QF. Of course, if you want
bigger shapes, just a scale. And let's go back
into the scene, and I'll grab the pillows neck. I'm going to be using
the same material. I'll grab all three of
them and slit the pillow, go to duvate material, make a copy, and then we'll
call this pillow material. And the reason we're making
a copy is that the scaling, because we've adjusted the
scaling in the Shader editor, isn't going to work
for the pillar, you can see it's way too small. So for the scaling, if we set everything
back to one, we can see it's closer to
what we want, but not quite. So we can adjust the
So if we pull this up, you can see what
it's doing here, because it's a bit too wide, so we want it to
be a little finer. So we can set the x to 1.8 and just fin out
the shape a little bit, just to make it match
what we have on the Duvae a bit better. And we can also adjust the displacement as well
if we feel the net. Totally remove it. So it's more of a pattern than
actual thing you can feel. And if we look on
this side here, you can see we've
got an issue here. So if we look at the U VMA, we can have a look
at what's going on. So I going into the pillow. And if I was to
select these faces, you can see whereas these faces have
actual matching faces. The faces that run along the
edge here are just lines, which is a problem because we're getting
stretched geometry here. What we want to do is
select one edge at a time. So I'm selecting an edge here. Let me going to material of you make a little
easier to see. I have one edge in
the UV map as well, and I'm going to move it along the x axis to just pull it out. You can see as I pull that
out, the material normalizes. About there maybe a similar size in with to the other face. It doesn't need to be perfect. Of course, the pillows
shape is what. It's not a boxy
pillow kind of thing. So it doesn't need
to be perfect, and it's a lot less
noticeable like that. And we want to do that
for each of the edges. But we can look at the top one, select one of the edges. So this one is the bottom edge, and then we can pull
this along the y axis. Bike, so then we'll
select ather edge. So that's going to
isolate just the pillows, so I can see underneath it, grab an edge there,
pull this one up. Something like that. Then grab this back edge and we'll move this along the
x axis as well. Or something like that, so
you can't notice it anymore. Then let's bring the
other pillow back. I'll select them both
going into material view. Then we'll select the
plane pillow first, select the one with
the material last, Control L, link materials. You can see we have
that issue there, but we can also copy
the UV maps over. And now we don't have to make the manual adjustments
on the other pillow. There we go. We
have two pillows, and let's go back
into the scene, add a another material. So we'll select this Duve
Well not do the blanket, and we'll add a fleece
material to it. So I'm just going to add
that in new material, call this blanket, and let's add those materials of
the texture to it. Select let's go for the
variant displacement, glass, normal, and add that in. This is what we have, and
let's adjust the scale. Don't want to go over to scale, set it to two. And let's see, we might want to adjust
the displacement as well. But is take it away,
see what it's doing, take it out a way,
set this to zero. But pretty flat. You add this in, turn
it down a touch, add the displacement in. And we want to tone
this down as well. So we set the scale.
It's got 0.005. 0.0 001, and have a look
at it in rendered view. We have one, a bit too rough. So 0.005 looks good for now. And the last thing we'll do is select the
bed frame itself. Isolate that. And the material we'll use for this
is the chiffon. So let's add a new material. We'll call this bed frame. Go in. Use the C chiffon
you've downloaded before. Color, glass, normal, add it in. And let's see what
adjustments we need to make. We can see we need
to unwrap this. So I'm going to go
into edit mode, unhide the parts
that are hidden. We'll go for a smart unwrap. Giving us a good result, we just need to
adjust the scale. So let's go for scale
of two. Try three. Think about either two or
three will work for this. I'm going to leave
it at f for now, and let's bring things back, and we'll also apply this material to the
bedside cabinet. So let's add the bed frame, call it bed frame
wood, duplicate it, and then we'll call this
bedside cabinet wood. We need to make
separate adjustments I going to edit mold. So this is the
original on this side. Let's go for a smart
rat And it looks fine. Only thing we want to do
is select this face here, see what's connected to. If I hide this hide this straw and potentially
rotate this face if we want, depending on which way
you want the grain to go. If you wanted to,
you could select all three and then just rotate. So now it's going
in the same way as the drawers on the front. And, that's it for now, and I'll see you
in the next part.
62. Texturing Bedroom - Part 2: The next thing we're going to do is change the floor material. So with the floor selected, we're going to be adding this wooden flooring,
so download that. And then we'll isolate this. We can remove the
marble flooring and let's add a new material, call it wooden floor. And let's add the textures. Boring, color, displacements,
glass and normal, grabbing the 16 and the 16
tiff of both of them there. Go to add them in, and you can see what we have. Here, one thing we're going
to do first is rotate. So we want to rotate along
the Z. You can see that. I want to do 90 degrees. And let's adjust
the scale as well. Let's go to about 3.5 and we're just
rotating it this way. That the long length of the room as opposed to
what it was originally. But of course, you can
have it like that as well. And then if we want to
adjust anything we can, but pretty happy with
it out of the gate. And if you want to just
mute any of the maps, you can press the key just to see what it looks
like with it removed. That looks like an
all the kind of floor if we turn
this right down. So let's leave it
turn it like that. And let's move on. We'll do the
wardrobe doors next. So I'm going to select
both of the doors. And we'll select the first one. We'll use the Shift on
material again. Add that in. Make a duplicate, and
let's have a look at it. Can see we have
unwrapped the door, so we'll go into it,
select everything. And let's smart R. They
were getting some bending, and this is due to
the subdivision. So you could either
go through add more loop cuts just to
tighten up everything. Us to pull one right the way up, S tie up then, go through the
model and do that. Or because it's a small
detail, we can swap this out, add in a bevel modifier and
set it to about zero, 05. We still get rounded
corners, three segments, but we'll have to go
through the whole model and add in a bunch of loop cuts
to tien everything up. So let's go with that. What else we will do is add another material,
call this mirror. Select the middle face. Let's make the middle face on each of these
panels mirrored. So with them selected, we'll press control numpad
plus to expand our selection. As we have borders. So when you press it, you expand your
selection like w around, whatever you had selected, and then we can turn them
all into mirrors there. And let's do the
same for this one. So we'll go in Smart and Rrap, select the plain one first, then the textured one,
then link materials. Now this has the door and
the shift on and the mirror. Select the thing we
want to make mids, and then expand that selection
again, assigned to mirror. Of course, if you want any
of them to be wooden panels, just have the shift on there. But I'm going to go
for double mirrored. And we also want to rotate
some of these wooden pieces. So for example,
we're going to this, we can select this face here, expand our selection
to catch the border. Then in the UV editor, rotate 90, and now you can see these wooden pieces
going horizontally. And we'll do that for all
of those little pieces. So I can select the top
face there, the face there, the face at the bottom, expand the selection for all three, and then rotate all three. Let's do it for
this piece as well, and the bottom piece on
this side. There we go. And for this door on the
left, same as before, so we can just select the
other one, copy modifiers. Now they both have bevel
modifiers as well. And let's bring everything back. We've got our two doors here. What I'm going to do for now is we'll leave it as the wife. We've got these done.
We've got these done. And see the door handles. We can see, we need
to do as well. So we've got handle
material here. So what you can do, if
you want to be quick, go into the chrome one. So we know this is chrome. We can just select everything, control C to copy, go to the door handle
material, delete what's there, control V, paste it in, all of the door handles. And now because we've
just replaced what's in the handle material
and they already had handle material assigned, they've all got the chrome. Like so, but they're also
separate to the chrome. And we've done
that door already. And let's go to the windows. And for the windows, what we'll do is add
a bevel, as well. Cause they're a little
sharp at the moment. So we can go in add a bevel, three segments, let's
just go zero, zero, two. Shade Smooth, soften up
pull of these edges. And then we can select
the other windows. I'm selecting them
first. But this as well. Then select the one we
edited as Control L, copy modifiers, to give
them all the bevel, and then right click,
the shade smooth. Now that windows have
been softened up. Lastly, what we'll do is
select this door frame here. Isolate it. We go into
it at the moment, it just has door material. So what we're going to do
go door frame chiffon. So go into that. Can copy either copy it, or dis replace it,
or di replace it. But now, and we will call
this door frame two, and let's have a look at it. As the door frame we've currently done is
the bathroom one, but we made that on manually. These are the ones on
all the other doors. So you can see they
need to be unwrapped. So we can go in smart wrapped. Can see that we need to
adjust the top face, so we can select that here, select the other sides, or you can just
quick, select them on the EV map if you know which
faces you're going for, and we can just rotate those and just move
them over like that. So like a door frame, if you to look
around your house, you can see the one
wooden piece here, you've got the split, and then you've got the wooden
piece going down. And let's add the white back. And then we'll go
back into the scene, select the other door
frames, not the bathroom. And if you just want to make
sure it's done properly, just temporarily
change the color back. Make sure you don't
have the bathroom on selected like I do. So then you can see
a little clearer. So we can see that
one's got the change. These two haven't. I'll
select these two first. So let this one lasts, then we can copy
linked materials, and then we can
also copy UV maps. The wet have to go in and
do those manually either. Then if you want, you can adjust the material
of the door itself. We'll just leave it plain, which we'll do for now. And there is there. See
you in the next part.
63. Adding Extra 3D Models: Now that we have the core
models done for the room, for the different rooms. What we want to do next is
start populating the scene with extra models that
are more like fluff. So you can say like
plates, parts and pans, cutlery, maybe clucks,
those kind of things. And one of the best
ways to do that is using three D models
that you can get online. So you can get these
both free and paid for from a variety
of different places. And the prime reason you want to do that is to save time really. So instead of spending a
load of time moddling, 700 different kind of spoons, you could just
download a spoon pack, and it gives you a lot more time to experiment with things. When you're starting
out, it makes sense to try modeling
you handle everything, but eventually, you
want to kind of spend your time where
you most enjoy it or you find most valuable. And generally, I guess
that's in the latter stages, composite in the scene when you bring it
everything together. So what we're going to do
is download a rug model, and walk you through how
to add that into blender, and the different kind of ways
you can add it in as well. So I'm going to go
blender, cycles, download it in two K, and then in blender, what we'll do is
hide everything. And one way you can add it in, if it's a blend file, you can just drag it
straight into the scene, so we can select the blend
file here, drag it in, a pen, and then we
want to go object, and select the object. And you can also do
it through import, where you can go
Link a pen here. But the difference between Link and a Pen is when you
append something, you make a copy of it, so this copy I can edit, and it won't affect
the original. When you link it, it's tied to the original, so Any changes you
make here will be reflected and the original and anything else
that's linked to it. So generally, depending
what you want to do, you probably want a penc your
changes aren't permanent. They're only localized
to that file that is in. So we've got it in
the scene here, you can see scold
materials applied. If you if you're
adding a model from a blend file as the Shader editors a
blender specific thing, then all of the textures
and stuff, or materials, sliders, et cetera will be set up before
you're ready to go. They'll be instantly compatible. If you're using a
different format, say you've imported
you're going in for FBX, OBJ and your the others. The setup for the shaders
won't be done for you, and you'll have to
do it manually. So if we were to do the
same rug, but as an FBX, so we've got to import FBX, it's going to find the
rug, see FBX there. More often than sometimes it
works, sometimes it doesn't, but more often than not,
it probably won't work and you'll have to manually
add the image textures. So you can see we've
got nothing here. I've had to add a neut material, and then you'd have to
go in to the folder. So if you have some sort of folder with all of the textures, and as we've done before, you'd add the textures
in, so you go color. You'd go for the
displacement, normal, depending on what you
get, and the scope plus. You can see added it in for
us to get a little closer. You can see it looks the same. So generally, that's
the difference. If it's a blend file, straight out of the gate usually works. If it's not, usually FBX OBD, they're probably made
in other pieces of software that don't have
the same node setups, and that's usually why they
don't transfer over cleanly. But yeah, we saw just delete one of them,
so we only need one. Then let's bring the
rest of the objects in the scene but wait for
blender to catch up. Founding the material molts
loading all the materials in, and then we'll just
position this rug. I'm going to adjust the scale. I'm going to select
the scale here. I'm going to change this to 0.8 as it is a little bit
too big for the room. Let's rotate it at
90 degrees as well. Slide it under the beds. Let's check it's on the floor, going to wire view, and see over here, looks
like it's on the floor, and then we'll have to move
the bed up a little bit. So I'll select the
empty for the beds. Then we just want to pull
this so it's seeing on the rug that we're can have
a look in rendered view. Just check, of course, your rug is not too low into the ground. So you don't see any bits of the wood going through there. And then that your bed looks like is seeing
nicely on the rug. Can see here this might be
a bit too high off the bed, so it's going to pull
this down holding shift. And then just check none of
the Duves poking through. And lastly, let's just clean
up this part of the scene. So we can see we need to call this bathroom mirror,
drag into furniture. We've got the rug here,
drag into furniture. Select the free window
group, select hierarchy. I do one at a time, drag them into let's go for
building ground floor. Archy, building ground floor,
building ground floor. And now the next thing that you want to do is start
experimenting, Oh, and let's
change this back to white for now, prior to that. So we've got white
door frames there. And now what you want to
do is just experiment, try out different materials, textures, looks, and try to arrive at something you're
relatively happy with. Try out different configurations for your kitchen, with the top. Add some models in, some extra bits,
plants, balls, clocks. Candles, whatever it is, you kind of want to
add into the scene, and once you've done all that, I'll see you in the next part.
64. Scene Overview: So this is where we're
currently at with the scene. Let's just switch
to rendered view. I'll just walk you through it, and we'll turn the noise around. It's loaded up. I for it just a bit easier
for you to see. So for the bedroom, just change some
of the colors of the bedside table bed and the wooden frame
for the sliding doors. Did a few plants, added
some pictures as well. And any bits of note, I just going into
further detail. So with the pictures. It was similar to how
we've done the mirrors, square a frame, create
a plane inside it. And for this, what we've done is just mixed a plain
paper texture. We just have a little
bit of a material there, mixed in with an image with
a column mixed note here, set the screen, and
also just added the paper to the roughness just to make it a
little more math. Also, if I go, look side on, you can see
we've got some shine to this. And that's because I've
added a clear coat. So if I turn it off, you
can see that goes away. It looks a bit flat. But
with the clear coat, gives that appearance that
you've got that kind of plastic or glass front
that you'd have on the picture frame,
and that's there. Let's go back into the scene. Next room we have
is the living room. Just added a rug, added some bits and bobs just to fill up the
scene a little bit more. Another plant, bigger canvass. I added some materials onto the cushions, added
some cushions, we didn't have them,
just into the scene, added one of a different
shape as well. But some more pictures here. Then you can see for this, we have one image
and it's been split. So if we look at
the UV map here, you can see we've just got
it all laid out for one. So what I did for this is just had one
plane unwrapped it, and then split the plane, and then I could move them, and the UVs would stay intact. And added a mirror, similar to the bathroom here, got another random plant hidden away here,
but could remove it. Maybe just leave it in
some way to put your keys, or a telephone, or
something going over there. And we have the kitchen
and the kitchen dyna bits. So added some more stuff here, and gone with this for
the wall cabinets. C see we've still
got our extractor, and it's just hidden away. And for this, we've got a few
pieces that are making the, like, just filling up the space. There's a block here, so the simple blocks,
different sizes. And we've made, if I go to
top view, these are narrower. They don't have as much steth of the lower ones just to give it a bit more
of an open space. Tried a few different ideas, but didn't really like having too many cabinets
on the side walls as the kitchen is pretty small. Of course, if we had one of
those free standing bridges, we'd most likely have to
go in this kind of area, which would be a bit small, so we'd just come with,
if you imagine one of those small kind of mini bridges here hidden the way
behind the door, but don't have to worry about modeling that as
it's not visible. And let's see, keep
the bathroom as it is, pretty happy with that for now. And if we look here, we can see that we've got a bit the wooden
floor sticking out. As the plane, I select it
has this little piece here, so we're just going to
change that to the marble. We're just going to add
a another material, select marble floor. Going to edit molds, ect that plane, and then we'll just assign
it to marble floor. We'd have to worry about
SsnerO with the UVs as the scales being adjusted by the different nodes here
in the shader editor. So we have one for the wooden
floor, one for the marble. One we switched between them. The new scale will take over. So you can see it's work
perfectly right out the gate. And if we were for some reason
to switch it back to wood, it would work as well. Uh And let's have a look. And that's the scene
we're going to go with. So we've got all of our
extra models in place. For now, of course, we can move around things
if we need to. But that's it for
now, in the next bit, we'll just look at
adding further detail to different kind of surfaces and possibly models
that we have, but I'll see
65. Adding Surface Imperfections: Next, we're going
to look at adding little final bits of detail to the various surfaces
we have seen, adding surface imperfections,
like smudges, scratches, bits of like water droplets
and stuff like that, just to make the scene
look a bit more realistic. Look at this as a bonus to do. You don't have to do it, but it really adds to your
scene if you do. So First one we'll do is go
over to the shower screen, and let's just isolate it. Go to remove the glass material. We're going to just add
inate new material, and we'll call this
shower screen glass. Let's go to rendered view, and we'll just turn
the strength of the world down so
we can see easier. And what we want to do is just the transmission to one
and the roughness to zero. Now, if we look at this, if you look through the glass, you can see it's darker behind the glass than it
is on the site. So what we want to do is
look at the base color, and I want to set
this from a value of 0.8 as it's not pure white to
a pure white, which is one. And now they're the same color. So the glass is how
we want it to be. Then what we'll do is
add a image texture. We'll be using this one is
the free one that we can use. I'm going to just swap it out for this one as I
want the streaks, but it's the same
process for both. So just find the texture, and we're looking for
the normal 61 k T file. And then we want non color data, go to connect it
up to a normal map and just plug it in there. Then we'll connect
this to a mapping and texture coordinate nodes, and let's adjust the scale. There we go, we
got a nice, quick, easy way to put
some water droplets and streaks on our scene. If we wanted to adjust
where they appear, we could use a noise texture. Example, so we just can either nose texturin add a color ramp, connect the factor
to the factor. And then we can use this to dictate where the material
is going to appear. So black areas, there won't be any water and white areas or lighter areas, there will be. So if we connect this
to the strength, we'll be able to see it better. So now you can see the areas. I guess it's a little hard
to see because it's cla. I do that, should
be a bit easier. You can see now
it's not uniform. So this is one way we can get a little bit more
control over this. And we can, of course,
adjust each of these handles to control the high points and
the low points. So if s to adjust this
white value down, you can see the water
is less prominent, and it would be the
opposite if s to adjust the darkest
value up as well. So if we have
something like this, set this all the way back
up, Os, for the most part, we want it to be across
the whole shower screen, but this is just a way for us to have some more
control over it. And let's move on. What we'll do next is select the floor, isolate this, and we'll look at putting
smudges on the floor. So using this texture here. And what we'll do is for now, we'll just remove the
base color nodes, just set it to something just so it's a little easier to see. It's hard to see what's going
on with a white material. And we can see we've got something affecting
the roughness already, which is this here, but we can layer another
texture on top of this. So what we'll do is just
make some more space. And we're going to add
that smudge texture in. So let's move this down. Move this below. I'm going to look
for the texture. Smudges. We'll go for overlay
two variant two v two, which is mostly black, and then where the
smudges are are white. And we'll just load that in. Go to non color, and then we want to add in a color mix nodes,
add it in here. So after inverts. We've got glass
invert to roughness. Add it into either
say color one or A, and then the smudges, we want to add into B. So we can see this here, and we want to set it to screen. And then the factor will control how visible
these smudges are. So at zero, it's just using
that original roughness map, which is for the marble,
and then at one, you can see it's added
all these smudges on top, which is this map. And we can add a
separate mapping and testcordinate node to this, and then we can adjust the
scale of this, for example. So let's just make sure we
have enough space here. And what we can do is control this factor as before
with a noise texture. I'm going to move this up, add a noise texture just so the smoge is aren't uniform
across the whole surface, and we'll add a color
ramp in, them up. Let's set this
maybe to like ten, but to pull these
closer together, and we'll just manipulate
it a little bit. Then if we were to hook
this into the factor, we'll see as I adjust
the settings here, it'll make it either
stronger or weaker. So if I lower this value, you see the whole area, it's less noticeable,
more noticeable now. And then if we want less area to be covered, we can adjust, for example, the scale,
Mas something like that. And we can also adjust
these handles as well. The more or we
could go for less. Adjust this down as well. Make it not as obvious. Let's just pull it
up a little bit. Of course, you want to trial some of these things
with Renders as well. When you render out your scene, especially because
if we add back in our proper base color, and then we have our
proper lighting, even though, of course,
it'll be inside, so maybe we'll put
it to about five, it's going to be harder
to tell what's going on, but you'll see it in renders. You only want it to
be subtle anywhere, but you want to know
what's going on as well. So we've got it set up and
we can edit that as needed. And you can do that for any of the surfaces
that you have. So we've got something
to manipulate normals, so with the water
droplets, for example, to do the roughness,
say you had dust. If you want to use
a dust texture, it'd be the same
process as the floor. We just **** it
into the roughness. You can control
where the dust is. And if we want it to add
scratches, say it to this table, so we could use this, and we'll just go
through that as well. So if the table selected, we'll just add a texture
in scratches Life. We're looking for the normal. And this one is
going to be a little different when we did
the water droplets. We're going to use a bump map, connect it after
the normal map for the original material.
We move this down. C set this to non color, and then connect it
up to the height. You can see this
is way too strong. And the scales huge, so we're going to add
the mapping nodes. Let's set this, let's try. Maybe something like five. And then turn it down. We adjust the bump, so we can set this to
0.00. Let's try two. You can see we've just got
these faint scratches, and we can also adjust
this value down as well. You can see it's harder to see. Let's just turn off the noser. Have a. So yet, you can make out some
of the scratches. They're a lot more subtle, but you just play
around with that until you find something
you're happy with. Of course, look at it in relation to the objects
you've got and you seen. Let's turn the lighting back up. So it's not
particularly obvious. But when you're doing
the proper renders, you'll see it a lot
better, especially without the noise run. Noise tends to blur
things together. The sort of details
get blurred out. But we know it's there, and you just do that to as many or as little objects
as you want. Look for different kind of maps. Maybe you want to put a smudge. Maybe you want to put
fingerprints on, say for example. One of these glasses, you could do that,
you could just set it to the roughness. So if it's something that
affects how reflected, well transparent or
not something is. So if it's a fingerprint, you'd see it appear, you'd
put it in the roughness. If it's something
like a scratch or a droplet that has some sort of you could say
free D form on it, then it'll most likely
go into the normal. And then if it's something
that affects the color, of course, it'll
going into the color. So if you wanted something
to be a visible color, say you want it to change
the color of the scratches, Then you'd look for
as you can see, we've got the maps
for the overlay, and you'd feed them
into the color, and similar to if we
look at the flooring, where we have this screen node, you do the same thing
with the base color. But there we have it.
Essentially, you just do that to as many or as
little surface as you want. And I believe that is that what we'll look at doing next is just prepping
the scene to render. So adjusting the lighting, saying the cameras,
and I'll see you.
66. Placing Portals and Blinds: Next, what we're
going to do is play some portals and
blinds in our scene. So let's just make the
window a bit bigger. And portals are a
way for us to focus the light rays in our
scene and give us a less noisy render
for the final result. And to do that, what we're
going to do is place portals in the openings where light
comes into the scene, so our windows predominantly, and Let's start with
going to top view. End up being a little slow. Let's remove the furniture just to speed it
up a little bit. And to add a portal. What we need to do is go
to Light, go to area. You can see we have
this area light, and we're just going to
rotate it 90 degrees, rotate it like S, and let's
place it in an opening. So I'm going to start with
these double French doors. And what we want to do is go to the settings here for shape. We'll set it as rectangle, and then we can adjust
the x and the y. And see it down. So that's the right size. Then we just place it
in the door, like so. And then what we want to
do is duplicate it and we'll go through to each
window and just resize it. I'm going to wire
frame just so we can see through the scene. I'm setting up the width. So it's where this frame is
so as to width for the frame, and just remember to rotate it. Actually, what we should do is make a adjustment
before we duplicate it, so we'll have to do
it on all of them. We'll have to do it on these
three, but not the others. Let's just move this into
furniture first. There we go. And then on one of the planes that we have
for the area lights, we're just going to tick
this box that says portal. We'll just do it
for these three. And then when we
duplicate further run, they'll all have portal already done for us. Let's do this one. B if you don't tick portal, it'll just act as a
normal area lights, so it'll give off lights, and we don't want to do that. And we're adjusting the size here instead of on the scale, because if we, for
example, adjust the scale, and then we use to apply the
scale, it will resize it. So we want to just
make the changes here. I see being weird now. Let's just do it. B there. Okay, and we'll do two
more for the staircase. Some of the light for
coming from that direction. So let's re activate
the upper floor, and we'll do these two
little windows here. And we'll just do those
for now, of course, when you get to the upstairs and you'll want to do
it for the rest of the windows, and last one. Q. And let's hide
upstairs again, and we'll just select all of these and we'll move them
into a new collection. We'll call this
portals and lines, and we can just hide it for now. Then we'll select it. Actually, let's not hide it
because we're going to add the b lines into this group and we want them to be
visible for now. So what we'll do is move the f Dcursor
to our first window. We'll do this kitchen one here. And then we'll go to mesh, Arce mesh, and then we
want to go for blinds. And if I just move
it out a little bit, we can see what we've got. So we've got blinds here and we can customize
various properties. If we go to the create tab here. You can see up here,
we've got a window. And we can adjust the width. We've got the height.
And the heights, the total height when
it's fully extended. So adjusting this will give you the fully
extended version, and then extend, we'll adjust
how far it's extended. And these both are important because when you have it
where it's fully shut, the height will affect how
many slats you have here. But you can see we're
getting more slats. So it'll look right
because if you only had a small amount there and you try to fully extend it, that's as far as it will go. So both of these work in tandem. Slat depth is the
width of your slats. You can see. We don't
need to worry about that. And angle just refers to
what angle the slats are, so if you're having them shut, like so, or if you want to let b little bits
a light through. So now we've done that, and if you want to
move it around, select the ret angle at the top and you can move
the whole thing around. And we don't have to
worry about doing the final set up to it because once we've
moved it around, we can just select
the rectangle, go to create and adjust it. We're just going to put
this into position. Going to adjust the wi,
place it just above the extruded area for the window and make sure it's
not going into the wall. About there. Then
we want to check our height, let's have it. So it sits just above the window sill when
it's fully extended. About there. And then we
can set this to about ten. But now, just so we're not obscuring the light that's
coming into the scene. Then we can select hierarchy, which will select
all of the blinds. And then we can duplicate
this all together, move it to another window. So we won't put it in front of the french doors,
not the bathroom, not this one in the corridor, so we'll go to the living
room, rotate it 180. So the string that control the blinds with is in the right place.
Set against a wall. Let's center it to where
the window is so we can adjust the width
of the blinds. And then we'll pull it down. A there, can see we need to adjust the
height a little more. A here, then let's set it back. Or you could just leave this at 100 and do them all
together at the end. Let hierarchy once more, duplicate, or shift this over. So do might be set up. I believe we have the
same size windows, let's do one more. And t in gas to war. Need to adjust the
height on this one. And the width. This holding shift. Go out there. The heights fine. Then we'll just set
these all to ten. Whichever number you prefer. But we'll adjust
these, of course, or experimenting
with our lighting, to get our final results. And what we also want to do is we're not
intersecting models, so we want to bring
the furniture back. Check this one because we can
see our taps pretty close. And if we were to
fully extend this, we want to make sure that it's
not going inside the tap. Wise you might render it
out and have an issue, 'cause you can see if
this was lowered down, if it's going to
low intersect with a sill and with the tap,
we don't want that. But this height, it's fine. And there we go. We've got our portals. We've got our blinds, and I will see you
in the next part.
67. Adding Lights and Switches: You may have noticed our
scene is missing some lights, so we're going to address
that now and we're going to do that with some free D
models from CG trader. There's all sorts of lights
here that we can use. Go to be looking
at the free ones, but feel free to choose whichever lights you want
to make your senior role. The four I've selected
out here are this one, this one, this
one, and this one. So what we're going to do
is just download them. And preferably, we're
looking for ones that blender files as they're the easiest to kind of
transition into our scene. But where that's not possible, we'll be using OBJ or FBA. So in Blender, what
we're going to do is create a new collection. And let's just call this
collection lighting. And what we're
going to do is just hide everything else for now. And then we're going
to start importing the models, so we can edit them. So it will be first
one we're going to do. This one's in the blend file, so we don't need to import it, but we can just open it. Generally, I either
like to open it up in its own separate file or hide
everything else so I can see what the model
looks like and see what adjustments I
need to make without it being sluggish due to being in a pretty
populated scene already. We can look at this one. We
can see looks pretty fine, except it's got a light on,
so we need to turn other. We look at the
material this has. We can see the emission. No here has a emission strength, but we want to put that
zero. And there we go. Then, we just want to make
sure everything selected, and we'll just d
join it together. But before doing
that, just check, the objects don't have
any modifiers on them. As when you draw them
together, it might apply, might not apply,
depending on which ones the active object. It's always best to check and
apply them yourself first. And this is also too big, so we're going to
adjust a scale, and we're going
to set it to 0.2. This is what I found
to be an case size. And let's just copy that. Apply the scale, and then copy. We'll move into our scene. And let's just paste it in, paste into the
lighting group here. And then let's go
and position it. We want to bring
back the ceiling and the ground floor
and the furniture, and we'll place it
above the dining table. And let's put it down. And I want to pull
this up a little more. There. And then what we'll
do is go into edit modes, vertex select wire frame, and we'll pull down
the vertices here. So it's in the ceiling. Maybe we'll put it
down a little more. So I can just go to edit modes, select all of the bottom parts. Let position it, and we'll
go with that for now. And let's have a look at
the next one we need. This one's also a blender file. So first, I'll close the
old one, keep organized, don't want to save anything, and we'll pull up a new one. And this one looks ready
to go out the gate. So let's just hide the block.
We don't need the block. And we want to make
sure there aren't any modifiers on the
objects, which there aren't. And then we want to select or three pieces, join
them together. We'll call this all lamp copy, and we'll paste it
into our scene. We also need to
rename the old one. Just going to place
this in the bedroom, call this dining il, lab hide the ceiling, and let's position this one. Rotate 90. Let's see. Maybe we'll place a few
one there, one over here. Q. And let's go
for the next one. This is Tevech, this one here, and we've got an
FBX ceiling clamp. So import FB. Let's just make
sure the collection selected, B Ling lamp. Let's just isolate it
so we can just see this object and
in rendered view. Turn down the strength
of the world. Can see we need to make
a few adjustments here. So I'm going to bring
up the Shader editor. And first, let's just sort this out in quite a
few different pieces. There'd be a pain
to move around. So you could either join
things together or add things to a parent because
you can see there's a few parents here and just
parent everything together. What I'm going to do is d
join everything together. So I'm just going to check
there aren't any modifiers, because there aren't and then just join everything together,
select everything join. Then we want to
change the materials. First, we'll go
to this material, which is the bowl. Set the emission strip to zero. You can see there's an issue here because without
the emission, they're just black, so we're
going to actually get rid of this material and
make a bd material. Remove these notes. Let's just rename
this bowl material. And what we'll do is make
something like this. So it's obscured. It's like a clear bab where
you can see the filament. And to do that, let's
go to the right scene. Okay, we can close
this splendor scene. And with this one,
what we'll do is add a glass shader first. And we also want to add a translucent and a
transparent shader. No normally for glass
reduced transparent, but we want to translucent one, so it lets some of the
light pass through, but you can't see it clearly
through into the center. And we're going to mix
all three of these nodes, create the effect of one. And let's add a mix shader, and then we'll mix the
translucent with the glass. And then for the factor, we'll use a Franl node. And set it to 40. Check the values of absolute y, which they are, we'll add aother mix shader and
connect it to transparent. And then for this factor, we use a light path node. And we'll also use a math node. Then we'll go is
shadow, is diffuse, add it together, and then
we'll add this output, the first input
of this add node, and then glossy to the bottom, and then connect
this to the factor. We get this kind of
bulb material here. You can see if we
wanted to clear bulb, can hook up the transparent, but we don't have a filament inside, so we don't want this. I look weird. I saw
using translucent, but it still lets
the light through. So if when we add a
light source inside, it'll come out, but
you can't really see into it. Pm. There we go. For the gold material, we're going to use a texture. So we're going to use this
free texture from polygon, and let's add that in. So we've got metal gold here. Control Shift T.
Let's go look for it. Metal gold pane, add
color, metal roughness. First, Duplicate the roughness. Search for the normal
add that into color. And let's do the
displacement as well. So we'll add dis add
them ad the bump map, non colored data, and
let's use bump here, connect that, connect
it to the height. Book it up to the mapping node. Then let's turn the
strength down. There we go. And for this one, what we'll
do, bring back the seam, we'll call this living
room pendant lamp, and let's place the
above the coffee table. Bring the ceiling back. And
let's pull this down a bit. Just make sure you only
have the lamp selected. And then we want to
go into edit more. And you can see, we
can't just pull this down to clean we have to be careful what we're pulling down because it'll change
the look a bit. So we're going to select
this area to keep the wires together about there. Put it up a little bit. So
it's going into the ceiling. Because you can see we
have this thicker kind of wire and then this finer one. So we want to make sure
we're putting them both, just so it looks right. And Q to leave it
like that for now. We have one more to do. And this one is LED, and we're going to use
the object file for this. So we're going to
hide the ceiling for now, the collection port, go to go OB, LED, and make sure you
download the MTL file. This has the textures
on it as well. And you can see this is huge. So we're going to
scale this down. We're going to scale
it by 0.0 005. And let's pull this way down. Scale it up ever so slightly until the z and the
x are about 0.1. Again, that way too small,
let's make that bigger. Let's go till the 0.1. Better. Well, the 10 centimeters
instead of 1 centimeter, which was way too small. And let's bring
the ceiling back. Let's call this recessed light, and the size spell lift. And we're going to a view
like front orthographic, we can put this into position to intersect of the ceiling, or we can select the
ceiling and the lights. Isolate them, select the
ceiling, b the light, and then we want to have it, so it's just eking
out ever so slightly. But you can see we
have an issue here because we can't
see into the light, and it needs to be recessed. So what we can do is if we
hide the ceiling temporarily, we can go into edit
modes of the light, select one of these edge
rings, duplicate it, separate by selection, and we'll use this to create
a Boolean object. So we're going into
edit mold for the ring, extrude it upwards, and then we'll just
pull it down like so. And just calculate normals to make sure they're
the right way around. And let's turn face orientation. Shade Smooth. We'll
call this recess pool. And we want to select
that and the ceiling. Isolate them,
select the ceiling, add a modifier, and
it will be boolean, then select the recessed ball, like so, and let's
just set it to fast. So now we've got a
nice cut out there. And if we were to go
back into our scene, you can see we can see
the whole light now. And then we just want to
go to this recess ball, turn it off in VP and render. And then we just
essentially want to put multiples of these around
in the different areas, but so we'll be
using this light, for example, the kitchen, just in the kitchen ceiling
parts, and the bathroom. So I'll just place that wherever you see fit. But
that's it for now. I'll do that myself, and I'll see you
in the next part.
68. Adding Point and Area Lights: So this is where we
are at the moment. I've added some ceiling lights, just all around the bedroom. I've also added light switches and power outlets in
various locations. We've got our lamps as before, and just light switches, added a few more to
this ceiling here, a few for the corridor, and if we go to our bathroom, you can see at the top
of this two there. Then we have this here,
another lightswitch, kitchen lights power outlets. The power outlet
and light switch. I just got from polygon, but frail for you to spend
your time moddling your. And let's see. What I want to do before we start is just adjust the
size of this window. So I'm going to go to select
the window, go to create. Going to set this to a hundreds. Just scare bit more
line to the scene. Then we just need to
reset the boolean. So get the eye dropper,
select the objects, the control hole again, and let's just adjust
the blinds as well. Go to about there.
I'm going to hide everything except for the
polls and blinds group. You can see these are no
longer inside the group, so we'll select the more, can just select
everything actually, move it to polls and blinds. And what we want to do
is link the materials. So we'll select everything. Deselect one of
the blind objects, reselect it, and then
we'll just link materials. So they all share
that one material, and we want to change it
from purple or lilac. I believe that is, so
let's just set it to whites. So there we go. So now, it's just
a white material. Leave it something
simple like that. We can confirm it worked by changing the
viewport display color. We change it to something else. You can see all of the
blinds and now that color. So in or we're all sharing
the same material. C. Let's go back into our scene. Let's bring everything back. What we want to do
is start adding some point lights and area
lights into our lights. So I won't do all of them, I'll just do a few, and then you can go
around because otherwise, it take forever
because we have so many why I have so
many lights here. So four, the first one, what we'll do, select
this object, isolate it. And what we want to do is
select one of the balls. So we've got the
whole ball selected. Then we're going to go
cursor to selected, put the three D
cursor in the middle, and then what we want
to do is add a light. So we've got light
at the point light, and we're going to put this
into a new collection. We'll call this point lights. That we. And the
reason we're putting all of the point lights and
we'll put the area lights in the same group
is if we want to adjust all of the lights at the same time as in
turn them on ugh, so they render or they dance, we have a collection
that we can just toll on enough without having to dig into any of these collections and
select the items. So a daytime scene, we can have this
collection just turned, and a nighttime scene, for example, or evening,
we can turn it on. And what we'll do is let's
bring everything back. And if we're going
to render view, we can see what this is doing. We'll just turn off
the world for now. We'll dig into this
a bit further later, but for now, we'll just
sat a little cursory. Look at it. So we can see
we've got our point light. It's got a radius. If we click on this icon here, the date of properties,
we've got some options here. And for the radius, you can see if I've
made this bigger. It's making the radius of
the light itself bigger, but you can see the reflections also bigger, which
won't look right. So generally, we
want to set this to the sides of the
actual light about there, and you can go into
like a sided view if you're not sure or w frame. Okay, that looks about right. And then what we can do is look at some of
these other sets. We've got power, so the wattage. Going to set it to
about 40 watts, and if we click Use notes, we can edit it in
the shader editor. And let's see. There's a
few ways we can do it. What we'll be doing using black body like
color temperature, which is where you can use a value that can
kind of represent different kinds of lighting like candle lights, LED, sunlight. So on. And you got kind of you can Google this to find a
handy little guide here. So if you want to emulate
a certain kind of light, for example, looking
at the wattage, looking at, Okay, I want
this kind of color, instead of messing around with a color wheel, and
as you can see, getting results where was changing the whole kind
of color of the room, what we can do is add
a black body note. Example, plug it into color, and then you
can have a look. So I'll say we wanted 4,000. We tight churn this to 4,000. You can see we're getting
that kind of light now. F white 7,000, it'll be the
same and anything in between. So it's a good way,
a quick way to kind of gauge what type
of light you want. If you go into a
store where you're buying a certain kind of
light bulb for your house, can look at the values and
kind of replicate that. And that's what we'll be
doing for all the bad lights. So essentially, what we want to do is for the point lights. We'll just duplicate,
so get the point light, move the cursor, so
I can select this. G cursor to selected, go to the point
light, duplicate. Then I can go to
selection two cursor. B, what we can do, which for this one
in particular, we won't go duplicate. In that sense, we'll go D.
So we make a linked copy. And then if we go
selection to cursor, this means if we
adjust the values, so if I said this to 1,500, both of them will change 7,000. If you adjust the
strength, it'll change. And this will help
if you're animating, for example, this one light, you're not going to
have four switches to control the different bulbs. Just going to have one switch. If you have a dimmer
or something, have it turned in era. If you're doing
something different, maybe a flickering light, you might want to have
them separate. But for now, we'll just
have them the same. So let's go to the next
one. Let duplicate that. We want to select
cursor to selected, select one of the lights, D, and then selection to cursor. And let's do the last one. Cursor to selected,
grab one of the lights, shift D, selection to cursor. So you can see, we've got
them in the right locations, and they're giving off light. We don't want them to be
doing that at the moment, so we're just going
to turn that off. And this last one
was not duplicated. So let's do that. D,
selection to cursor, zero, Cs pitch black. Let's turn the world's
back on for now. Got these into position,
and call this. What did we call this light?
Living room pendants. So we'll call this
living room lights one. I'll just copy the name, and then we can just go
through each of them, and just rename them. So I know which light we're referencing where we
want to make edits. And Q. Let's go to this one. And essentially,
it's the same thing. We do have emission that we
could do for the lights. If we look at the material here, and we could turn
this on this way. But for the most part, those
lights tend to be weak. It's usually better
to use a point light, you get less noise as well. So if we was to turn this off, you can see pretty dark. We'd have to crank it way
up to kind of get Light. So we're not going
to do that, we're going to use the
point light instead. So as before, let's go into it. Select the area, we want
to put the point light. So on the bub,
curse the selected, and we'll add a new
light here, a radius. We can make this one a
little bit bigger here. Then we'll just move it down. Then we can check it
in rendered view. So you can see, it's
not going to be noticeable because it's
in a cover cn thing. And let's just name this. We'll call this dining room. It's not really a dining room, but we'll know what
it's referencing. And click, I set this to, maybe we'll got 45 e nodes, black body, go 6,000, and we'll set this to zero. And the last kind of light we'll be doing is
this light here. And as before, we'll need to
make some adjustments to it. We can't use the extractor
line and just have an emission on it because it
won't give in enough life. So do that, you can see
we have to crank it away. So we'll add a area
light this time. So let's just set this back
to black and isolate it. G for life, go for area. I'll go to wide frame so I
can see where we need to go and let's adjust
the dimensions, change it to rectangle. That's
what we're dealing with. Well you could have
selected the face. One cursor to selected
together even. Se about the. You can go
through a little bit, and we'll select this face, cursor to selected, select
this selection to cursor. And then if we go
to rendered view, we'll select the
extractor hood first. On extractor hood light, we'll change the material, let's go for bulb material, go back to the area light, and then we'll just
adjust its position. But we want to check
our faces first, to make sure our normals
are the right way around, and they are. So if we go back
to rendered view, we'll move the area
light into position. I'm just holding shift till
it's right in position there. So you can see it looks
right, it's bright as well. Whereas before when
we had the other one, it wasn't because
if we were to bring the scene back, loads. You can see already
a lot brighter, and if we have to set this, let's go for 45, get in a better resolve. For the beam shape, the spread, this is how
far it kind of fans out. So if we decrease this, the light won't go out as wide. We don't want a
spot light though, so let's set it to maybe one. Use nodes, call this or
rename this extractor. Hoods light. And e. Then we'll just set this up as well with a black body notes. Maybe like 7,000
or maybe 10,000. Of course, we can change
these values afterwards, and we'll just set that to zero. Bring the world light back. And for now, we're good to go. We have our area light set up. Just need to go for all of them, which might take a little while. All of these little ones need their own point lights and
the ones in the bathroom. But get on with that. I'll do the same, and I'll
see you in the next one.
69. Adding Cameras: Next, what we want
to do is start adding cameras to our scene, because if we want to
render, we need cameras. So if we add a camera in, we can see, I'll
just move it up. This is what we've got. And to make it our
active camera, we can click this
green icon here. And if we go to the
scene properties, we can see camera is
in this place here. And to view it, we can press non pad zero. So let's do that on one side. What I'd like to do is
usually have two windows, so I can see what
the camera sees, but then adjust it
in another view. Because trying to adjust it in this view in the camera sides, can be awkward sometimes. And what we can do to quickly set our camera to view something is press control, ult num pad, zero. You can see how cameras look snapped to
where we were looking, and then we can
adjust from there. So let's just move the camera about and just place it
somewhere roughly for now. So let's do that. Go
to rendered view. Have a look what we can see. Okay. Just rotate in
the y for the up down. We have x for the tilt, and then z for left and right. We put y to zero, just so the cameras not crooked, and we'll set x to 90, so we're just
looking straight on. So let's look at
something like this. And what you want to do is make a new collection set of some cameras around
the house already, but does make a collection go
camera, place it in there. So when you have
multiple cameras, if we were to look
inside this collection, for example, you have a
place where you can go and then switch between
your active cameras. But I'll going into more detail
in a little bit for that. For now, what we
want to do is click this icon so we can adjust
the properties of the camera. There are a few areas
that are of import to us. First, being focal length,
because typically, we're not going to be going
for an orthographic view, whereas like a flat kind of
view will be in perspective. And you can use panoramic
if you're trying to make panoramic image like the 360
kind of images you can make, but we'll leave it on
perspective for this. And the focal is essentially
like our field of view, and you could think of
it as your zoom level. So we can zoom in,
we can zoom out, but it'll also wop the look if you go too
far out in one direction. So if we go like this, you can
see things are starting to get stretched as it's too low, and you can have the same
if you go too high as well. If you do a search on
Google, for example, you can have a look
at the different focal lengths that are typically used for
different types of activities of a camera. So if we're looking
at interiors, for example, 40-85 is
a good place to go. For your close ups, you're
looking at more 50 60, and then you can go higher and higher for different
kinds of close ups. But you can find more detail, read this article, a few
others, for example. And for this, we'll say, in general, probably
15-50 will work. So if we were to set it for 15, which is as low as we could go, see nothing looks
particularly w, and we get a wide field of view. Whereas if we were
to set it at 25, you can see we lose some
of that. So it depends. You can just play around
with your camera, have a look at what you
can see in the view, decide if you like it, or not. I mean, top view
so I can rotate, and it's just going
left and right here, and I can just place it in the scene quickly
for different rooms. Like, so we have depth
of field as well. And what we can do for this
is set a focus object. So if I want it to
be the focus object, and then the F star will dictate where the
defocus starts. So the object, this to focus
object will be in focus. And if we were to lower this, and we need to turn off, it might be a little difficult
to see close this window, the denser because it's
blurring everything. But you can see
everything's blurry here. Oh, and for the window, if you press control B
and highlight a portion, you'll render only
in that window. If you do it across
the whole camera, we'll only render
what's in view of the camera and not
the outside of it, just so it's a bit faster. So you can see everything's
looking blurry at the moment. That's because we've set
our F start pretty low. If you put your mouse over one of these boxes,
we'll give you more detail. And if you can see if we
start to move this higher, the object in focus
will still be in focus, and then the area outside of
that will be more in focus, and the defocus will
start further away. So 5.6 or 12 is a good
kind of point to be. And the other way we can adjust the focus object is
just using distance. So if I was to show this, if we go to the
distance here, it down, I've turned on viewport
display limits, which is shown
where the distance is currently that we can see, we should start losing focus just after the rugs
and everything else, will start to blur out depending
on what our F stop is. But if we bring it a
little closer on distance, you can see everything's pretty blurry because it's
pretty close here, and it's less blurry there. If we push this out, it
will start a little later. So we can use these
to kind of toggle if we want something
to be in view, and everything else
is out of focus or vice versa for the foreground
or the background. If you have a particular object, you want to be the highlights. But those are different
settings for the camera. And what we want to
do is just set up the cameras with various
different focal lengths, and if you want depth
for fields as well. So what we can do is I'll delete this camera because
I've set some up already. And let's start
with the kitchen. So I'll just click
this one. I'll show you some of the ones
I've got set up. So for example,'s got one here. Of course, look at some sort
of like photographic views of the different
room to get an idea of maybe where you want
to place two cameras, or what looks nice, but of course, you have to
try things out as well. Got something like this.
Decent focal length here. We've got a second kitchen one, this up here for the living
room, got what out here, with a wide field of view, so we can see into the distance, got a another living
room one here, the smaller field of view. And we've got some bedroom ones. Few there and some
bathroom ones. Got one looking up, so this one, just to the camera, just to look upwards. Maybe someh interesting
to try out, and we have a another
bathroom one. You can see it would
typically look like this. But remember, with
doors, for example, we can slide them, move them around or hide
them from the render. So because we've built it, so we could slide the door, we could just position the
door in a new location, if you had an animation, for example, You could key frame it and just
have it slide in open, and you have access to a different view you
wouldn't normally have because we'd have to put
the camera in the bathroom. So always remember that
same with if we wanted to capture a different view
into the dining room, you could look at it from
the bedroom like this, or we have that room just like a laundry room
at the moment. You could hide this door, look into your kitchen from that way, of course, hide the
handle as well. And there we go, set up some cameras in
various locations for the different
rooms you have, try out different vocal temps. Maybe you'll decide you
want to move around, different bits of furniture with the camera views in mind. And I'll see you
in the next bit. What we'll be doing is
adjusting the light. Now we've got our camera set
up. So I'll see you then.
70. Lighting Adjustments: Now that we've got
our camera setter. We'll be better able to
adjust our lighting. So I'll just set up a
another camera here, and we have some of the
other ones from before. And what we are now able to do is better look at the
current light we've got. So I have a HDR setter, which is this kind of one here. But of course, you can
grab one from HDR Hn, Po Han, or the HDRIs
from Polygon as well. Scrab whichever one you kind of like to look of and
one ad you've seen. But I'll be using this one. And for this, one
of the first things we can do is look at where how strong our
light is in the scene. So if we click the
render properties, we can go down to color
management at the bottom, and where it says filmic, we can change this
to false color. And we get this kind of funky looking set up and it's telling us where
the high areas are, so where the areas of a
lot of brightness are. You see mostly outside, and where areas that aren't
getting a lot of lighter, which is represented by
these kind of blue shades. So if we were to look at
this image, for example, the range we kind of want to
get it to is here optimally. These green kind of ranges. You can see as it gets all
yellow and red and white. It's really bright. And then the blues
and purples or pinky purple is where you're not getting a lot
of light into your sin. We can see, for example, most of our kitchens
pretty dark, and that's because our light's not coming from that direction. So we can adjust this. And what you might
want to do as well is adjust it per can
per camera basis. So we've got a current setup
for the world lighting. So it's just your shade the
editor, and then worlds. We're going to add a
mapping node here. And then we can adjust
the Z rotation. You can see CFO can make
it a little easier to see. You can see this is changing where the
lighting is coming from. And if we set it to
about, for example, 184185, you can see the lightings coming in from the windows in the kitchen now. So we're getting
a lot more light coming into the scene
from this direction. So if we're doing a render of the kitchen, Using, for example, this first camera,
it's going to look a lot different to where
it's pretty dark here. And if we were to look back
at it in this regular filmic, see it's pretty dark,
if we go to about 185, there's a whole
load of difference. You can see the sun streaks as well coming in to the scene. And what we can do in this
part, if for example, you want to save
different setups, is we can press control J to create frames
and rename these. So for the label, we
could go kitchen, lighting, and you can see
we've got one set up there. Make another mapping node. Maybe call this, going into the bathroom, change
the rotation. You could even, of course,
join it with this. If you had a different HDRI
for the different ones, call it bathroom, and
so on and so forth. So you have a quick way to reference which lighting
setups for what? But let's undo that. B for now, we'll just be
focusing on this one. We've got this there.
And the other thing that I don't particularly
like at the moment, which is just a
product of the HDRI, is we're getting a
lot of green lighting coming into our scene, because, of course,
my Hi is grassy, so we're getting a lot of green. So if I want to limit that, what we can do is use a
huge saturation node, which is Where is it? Let's just type in uh set
Hue saturation value here, and we can **** it in between, and we can take some of the
color out of our lighting. We don't want to go down to
zero, where it's like this. But say we just set
it to like 0.9. We can just take a little bit out of the color
there or maybe even 0.8 if we were to go
to the first one here, And let's take off the D noiser. You can just play around
with some of these values. So I'll just take a little
bit the edge off there. And cure. So so far, so good, if we were to look at
this camera, for example, and look at the window, the fing you'll notice is when we're moving the z rotation, we rotate in the actual HDRI. So let's do that. So the image is
actually changing. So what's outside your window? And that might be a problem, depending on what kind
of HDRI you're using. So you could even
see, for example, we've got grassy fields
now on the default one, it's going to look
like this, which looks a little weird, potentially. So what we can do is use a backdrop to put an
image in front of the window so that we can rotate the HDRI and not worry what's outside because we'll have
some es static outside. So if we were to use one, for example, you
can get back drops, you can just use your
own image if you want. You can just find something
to stick outside your window. So, I'll just download. Let's say, I've got this one. I believe there's a
free one as well. So like a tree line, or just find an image
somewhere on like Google. And what we can do is go
image image as planes, look for the backdrop. Let's see, what's
it called B plates, B drop mountains, can
download the high rests. Wait a moment, so it
doesn't crash on me, and we'll get a plane. Just going to rotate
it 90 degrees. You see I'm positioning
it outside the window, going to scale it,
try five times. And just adjust its position,
a little too close. And let's have a look. Pull it up a little. You can see, we've got
the image out here. This one is the one with
the bolts and the ocean. And if I was to adjust the HDRA, it won't mess with this now. I'll adjust the lighting, but not what's
outside the window. And we just need to do a few adjustments on
the back plate itself. So we'll go to object, and we'll just change
the node layouts. We will add a mix shader and a light bath node,
and a transparent. Shader, connect this
to the bottom input. Lot the shallow array to
the mix. And there we go. We've got our window. And of course, you'd want to
make sure you do that for your different windows
and just bear in mind the camera angles as well. Because if we were
to get too close, you can see if we're
looking at this angle, the HDRI, while the back plate is you can see it over here. So you'll need to
position it for your different angles
if you're looking at certain kind of angles. And of course, for your
different windows, don't have one here,
don't have one here, so you have to place
them around scene. But for this one, it'll work. And let's see. The other thing you want to not is when setting
up the settings. We can adjust it for
the different HDRIs for the different times of day. So if I wanted to do
an evening scene, and this is why we set up
the lighting separately, we could go to the walls, grab another HDRI, grab, let's grab an evening one. Let's go two K. If
we hook this up, you can see the
lightings totally changed now. That's
a lot darker. And let's see.
We'll hook this up. We'll duplicate the background, connect that one up, how
something like this. And let's see. For the lighting, we've
got point lights. What we'd want to do is then
go into the point lights, and you can either
just leave them on all the time and
hide the group. So if we were to go got 0.1, you can see that's come
on the hood light, and the different lights. We don't want to go too high because you can see
that's way too bright. So you can try going
up in 0.1 increments. These are all linked, so we only had to adjust one. And we do the same
for these lights. I haven't done the
recessed lights yet, but do that for all the lights. What I would do for
the recessed lights is group them where
it would make sense. So maybe the group in the kitchen are all
linked together, and then the ones
in the bathroom, the ones in the c the hallway, and then the ones
in the bedroom. Less you want the mo on
together at the same time. And then we can just hide this group when we
want to turn it. So we can just go where
the point light group is, hides, and then not render. So if you're doing
your daytime scene, you have both of
these just unchecked, go to your world settings, swap your HDR to
the daytime scene. S we can group this
because this is the night scene
or evening scene, we'll call this
evening lighting. Then if we want to
swap to the evening, swap the HDRI there, and then go to the point
lights, turn these on. And then we can quickly
swap between the two. Of course, spend time making
adjustments to the color. These are pretty white,
maybe make them more yellow. Maybe you don't have them
more, different rooms, different kind of lights. And let's see. T.
So we've got that. We'll go to the camera that I'll be doing
the render from. So I'll be rendering this scene. I'll just set it up, so I'll
have it in the daytime. We don't want the lights
on. So we'll turn off, not lighting point lights. Check the rotations in the right place.
Looks bright enough. You're happy with
the camera stings. If you want depth of fields, turn them, make sure you set
that to the correct place. Go to your render settings. We're going to be
rendering in cycles. Now, if you're doing
a quick render, then it's fine to
use, for example, the noser noise threshold
set the MC samples, and the noise
threshold will stop if it gets to this number
before the MC samples. So the noise threshold
will be when there's a certain amount of noise left in your scene,
it will stop. So you want to check if that numbers acceptable kind of
render quality for you. If it isn't, you
can either lower this because it is yeah, lower, it is the less noise
you're having your scene, you'll take longer
or just turn it off and have a
fixed render count. But the bear mind some scenes will will render the same
quality at lower samples, depending on what's
in the scene. Interiors, you generally
have to render more samples because there's left light coming
into the scene, so you get a lot of noisy image just in general
the outdoor scenes. But just experiment with that. The noiser, if you
set this too low, you start to get
visual glitches. You can see there's some
weird stuff going on up here because of the the noiser. And if we were to turn
that half in well, the viewport, see
you don't get that, but we'd have to render to
get rid of all of this noise. But render the scene, and I'll see your next bit where we look at compositing and
adding the final touches.
71. Compositing: Now that we've got our
scene rendered out, done a quick render here. We're going to do
some composited on it to do some post processing. So if we hit the
compositing tab, we can click used nodes, and we've got this
render layers node, which has our image composite, which is our final output. And we want to also
add a viewer node, so that if we
connect the image to the image on the viewer node, we can see what we're
doing as we do it. P V to Zoom out, t V, to move in. So we've got our image
nicely in view here. Just go one more. And the
first node we're going to add is a glare node
or filter glare, and we're just going to add
a little glow to the scene. Pardon me. And we can see at the moment,
you've got the streaks. Guess if you was doing more
glass chandeliers, something, you'd use this, but what we're
going to do use fog glow. And you can see we've
got this kind of aura around the bright
spots in scene, and we've got a few
different values here, which we can alter this by. First, we're just going to set the mix temporarily to one, so we can see all the areas that the glow is affecting, which, of course, are the bits that
are brightest in scene, the threshold dictates what constitutes a bright
area in scene. So the higher we set this, higher epixel brightness has to be for it to be
affected by the glow. So you can see if I'll set this as I'll go higher and higher. Only the brightest parts of the scene are still being
affected by the glow, and the reverse set it to zero. Now the whole scene has applied. So let's just set
it to about four. So we've got some
sparks affected, where you can see the
suns directly hitting it, the counters and stuff. And the size affects how big
the aura around the glow is. So if the lower we go, the lesser of that
kind of a we get, the higher we go, the
more of an a we get. Let's go. There we
go seven for now. And then the mix, if we
set it to minus one, it's that unedited image, or everything without the glass, or there's no glare applied, one is only glare, zeros, a balance of both. We only want a small
amount of globe, we're going to set it
close to minus one. Let's go -0.9, so there's only a slight
amount of glee for now, and we can press the
key on a node, target, off for m. So we can
see if look here, for example, the
glowes only slight. And then we can alter the threshold in size
to get look we want. Can set this to high as well when you're doing
your final render, but for now, we'll just
leave it on medium. Next node we want to add is a
huge saturation value node, but this one's going to
affect the whole image. And before we edit that,
what we want to do, because the image is looking a little washts go
to color management, just set the look
to high contrast. And then when we ton
this down slightly, we just take some of the color in just a few
parts of the image. You can see it's like really saturated in certain areas, and we're
just getting more of it a well, not -0.9, but just more of a
uniform kind of look. So it's a bit more consistent. Then just press the M Key, so you can just see
the difference. So you can just always bear in mind on the
changes you're making. We don't want to make
too extreme a change. And next, we'll add a
color balance note. And we'll just searched it. We'll add this in here. We're adding them
into the slot for viewer so we can see the
changes as we make them. And then at the end, we'll hook it up to the
composite node, so our final results composite. And for this, we're going to swap this to offset power slope. And the different radials here or or wheels
dictate the high lights, the mid tolls, you can say
the low areas as well. So if we were to go to extremes, you can see change is
changing the whole image, but we don't want
it this extreme. So we're going to go about here just to give it a
cooler kind of look. You know, like warm
tones, you've got the cooler kind of colors. Maybe something about
that, or about there. Turning off, you see it's
got a lot more yellow in it. So we've got the opposite
kind of way just to take that out of the image. This middle wheel
works in opposites, which is really strange, where if you go green,
it'll go purple. If you go blue, you go yellow, and so on and so forth. We I kind of get it in this blue area. So
we're going to go for the yellow on the wheel, and just we want
it to be slights, so that we don't want
it to go too far. Then I'll always just check
between you two. You see. And the last one is
for, like, dark areas. So we're just going
to leave that. So we're happy for it to be
pretty dark in dark spots. We don't have areas
need to worry about. If we were to adjust
this, you can see it's changing the lowest
pixels on the screen. But we want it black,
so that is fine. The next what we'll
do is add a vignette. When we're making images
on digital software, we end up with perfect images, and what we want
to do is start to incorporate imperfections
into the images, so they look a little
more realistic. So vignette, is one of
the ways we can do that, where we just darken
the edges of the image. So the first node we'll add RGB. Let's set it to a max white, and then we'll connect it up to a is or ellipse mask,
which is somewhere. Let's just go search,
probably in Mt. Ses it in Mt. Yes it is ellipse mask there. We'll hook up the RGB, of the Max white to the mask. If we click on that, we can
see we have this box here, and we'll just move the box
out a little bit for now. Set the mask tight to multiply, and we'll connect this
two a blur nodes. So we can go filter, blur D fas gaussian
mask into image, relative ti aspect on X. Set this to about 20%. And we can see we've
got this run out. So you can see if
we need to set this further out because the vignette is going
to start too deep. So if we get this a lot
closer to the edge, on both the horizontal
and the vertical, you can see only the corners are really getting the vignette, where it's super dark, and then it goes to
a regular scene. And we want to also
use a color inverts. And what we want to do
is mix these together. So we'll use a color mix. Plug that in. We'll use this for the factor to control
where the vignette is. The color balance
to the first slot. You can see the vignettes white because our second
value is white. So we want to ton
this down to like a gray and set this to multiply. Now you can see we've
got a vignette. If we were to go to
our image without it, it's just all uniform. Then with it, you can see
we've got these dark areas. Let's just adjust
it slightly more. And then we can adjust how
dark it is based on this. But if we set it really low, you can see we've
got strong vignette, set it really bright, we'll get a weaker vignet we just want it just to start beginning,
something like that. And the other node we can add. Let's just grab
everything, move this. So we can sharpen the
edges if we need to. So we can add a filter
to the first node here. You see it on soften, but we just want to sharpen. We've got a couple
types of sharpen here. So we've got a more
aggressive one. You see what this is doing and
less of an aggressive one, and we can turn it
down even more, maybe 0.01, just to define some of our
edges a little better. And then we want to connect this last point
to our composite, so our final output takes into
consideration these notes. And if we press F 11 to go
back to our rendered image, we can flick between the
base one or the raw image that we had before compositing
and then our final result. And then what we'd want to do is as you go through
your different cameras, may need to change
some of these nodes, especially if you're
doing day versus night, because if we have lights on, the fog glows can
look different. You might want to layer fog
glow with maybe the stars or maybe streaks and just play around with some of the
nodes to get the right look. Because, of course,
the pixel values, the brightness is can be
different as the scene changes. But this is just a basic kind of node layout you can use that
will work with most scenes. Right out of the
gate, and you just tweak some of these values
and you'll get a good result. But that's that, I'm going to just do a few different renders of
the different rooms, a few different angles. You did the same,
make any changes to the furniture, to any colors. The one thing I'm most
likely going to do if we go to the scene is just
change the color of the walls. As I want to try out, for example, darker walls. So that I could do that, render it out again, and
see what that looks like. You can see this is
too lighter gray. I think it might be
better with a black. If we go to 0.020
0.01 0.01 there, might look cooler, we'll
see, but experiment, move around furniture,
try stuff out, and I'll see you
in the final part.
72. Interior Renders and Edits of Note: The renders are done. What we'll do now is
just go through them and bring up any points of note, any changes are made that
I think are significant. Each render has three to
four different versions to it, we have a raw version, which is without
the compositing, one with the compositing, and then some of
them have daylight and evening lighting as well. So we'll just start with
this one, just go across. You can see it composite
in here, the evening one. Got the raw versions. This is just without any
of the composite effects, and then I'll just
go through them. E. So the first wing we'll look at is let's go
with the shower screen. So the first change here, if we zoom in on
the shower screen, as you can see on
this side, we've got water starting from the top, going all the way to the bottom. And on this side, you can see the water
starts about halfway. So what I've done is
added a gradient here. You can see this is the one
before making the change, and it wouldn't
really make sense to have water on the
whole shower screen. It would run down, so there'd be less at the top,
more at the bottom. Like this one. So if
I going to blender, I'll just show you
how I did that. Let's just go to camera
one for the bathroom. Let's just go into
render D. So you can see we've got this
node set up here. It's a lot bigger than
the one we had before. And the original one was
this principled node, and then we had these
nodes down here. We had the nose one just
dictating the kind of water pattern and the water
itself at the bottom. Added a gradient texture here. We've got gradient texture
with a color ramp. So you can see
black has no water. And as we go further down, more and more water
is introduced. There are also a two UV maps
that have been introduced. So I've just created
a second one. We've got UV map
and the shower UV. So if I just go into this, can just have a look at them. So you can see ones
just being rotated. This is just the regular one
we're using for the water. This is the one that's
working for the gradient, and this is just how
the gradient works. If we don't set
this up like this, so to take that up, you can see the gradient isn't working. So we've just got
that here for that. We're combining together with
a overlay color mix node. So just so we don't get such a sharp cut off with
the water that's consistent. It's a bit more random, but it all starts at
a similar kind level, just to make it
look more natural. And the other thing of note is if we just
look at this node, so we've got all of the
nodes up to this point. You can see we've
got this big shadow. And if I was to hide
the shower screen, now this sides brighter,
and that's what we want. We want the light to pass
through it properly, not to cast this big shadow. And that's what this is doing. I have a light path, shadow ray set up. So if I look at
just these nodes, so this group here, you can see we've just got a
clean plane of glass. The lights passing three, start casting a shadow, and
that's what we want. So we want to mix
these two together, so we're mixing them together. We get the water on the glass. We also get the light
passing through the glass, and that's how we get
to this result here. The next thing we did, if I was to show you, for example, we can
see this render, you can see the light is
coming through the top, but we've got this white
kind of rim on the lights, and they're not
supposed to have that. They're supposed to look more like this when
they're turned off, because this is also turned off, but you can see it's got
this kind of look to it. That's because on
the prior file, we have our recessed lights
poking through the ceiling, so they go they're getting
shone on directly by the sun. Same with this one
to a lesser degree, you have a roof here. But there two reasons that we
want to change this one is, of course, we don't
want anything to impact how this light looks. It's a glass materials
being affected by above. We don't want that to happen. And two is if you're building a scene up
on the second floor. If you build out the deck, you build out another
bedroom on suites up here, we don't want these
poking through the floor. It's not
going to make sense. So we want to introduce an
area where these can sit and not be impacted by lighting and also not
impact the floor above. So what we're going to do is move the second
floor up a little bit. So I'm just going
to turn off all of the areas that are not relevant, so we only want the
upstairs. Like so. And we've got the off
sairs deck as well. And then we're just going
to go into wire frame. Object mold,
describe everything, and we can just move it up. So I'm going to go GZ 0.1, move up 10 centimeters. We bring back the rest
of the building floor. You can see we've
got this gap here. The recess lights are no longer
peaking through the top. But we've got a gap. So what we'll do is select the
walls of the ground floor, can just isolate them, go into edit modes, go into select, select
all of the top edges. So we're just selecting the top, so we can make this
bigger or smaller. Then we just move this up
by 10 centimeters as well. Now if we bring everything back, you can see there's
no gap anymore. And now we've got a
gap a a staircase. So we're going to
select the staircase, going to wire frame. We'll first select the
whole upper area here. I'm just going to
move this up by 0.1. So we know this is flush like S, and then we just
want to redistribute the spacing in
these stairs here. As you can see,
they're a bit too big. A good way to do this. We can
just look at edge length. Of course, you don't
have to do this if you're never gonna see it, but I'm just doing
demonstrate here. So we've got 0.195. We're not going to have
it exactly the same. We'd have to have
another stair here. See, this is 0.295 175-19-5195. So we're just going to
grab all of these first. Let's move them by 0.08 down. We've got 215 here. We'll grab these middle ones, let's move them by points
near a bit more. Point. Let's go points 02, 215, and then we want to move, let's see, this one up. So we're going
select this 10.02, it's another all 215. So these are all even slightly
bigger than these ones, but it's going to look a bit
more consistent like that. And it also matches where
our upper floor is now. Okay. And the next
thing we've got. I'll just go through some of the lighting changes I've made. We bring back, let's just
bring back furniture, the cameras, and the
polls and blinds. So if we go to cameras, we've got on our world lighting, not on this scene, let's
go to the final scene. So, world lighting, a more
comprehensive kind of setup. So we've got different
lighting setups, and the Z has been changed depending on which room I
want to do a render for. So if we was to go
to the kitchen, let's go kitchen free, I would connect it to. I want to do a daytime render. These are my daytime
lighting set. These are my evening setups. Then I would kitchen
lighting, plug that in. And then this is the
lighting that I've decided to go for for the
kitchen that I'll find works. Just give me the lighting,
for example, across here. You can see let's just turn
this of fiscal living room. Turn that bat plate on. And the other thing is
I've added tip bat plates, but going to that
in a bit later. As you can see kitchen
lighting works here. This one doubles for
the living room, as we've got one kind of
big area here that is open, so I can switch between
the different cameras. And the lighting is lighting off found
works for all of these. And the way the reason I've
set it up like this is, as you can see with
the different rooms, if we were to go to
the bathroom and turn off the skull
point lights, bathroom, turns off and the
ceiling lights, it's pretty dark here because the lights not actually
coming through this window, coming from the left side. This would be north, you could say coming
in through the north. So if I wanted to
light the scam bear, I would use a different
rotation on Mzt, which is bathroom lighting. You can see more lights
being introduced now. So we're still
limited because we only have this
little window here. But what we can do, we can change the rotation. And you can see it a little
better if I go to this one, so you can see the
lights coming through the window here, going
to this wall here. So we've got that angle
as opposed to that one, where the lights
not even coming in. And the bedroom. You
can see the same thing. But if we were to go
into the bedroom, you can see the lines
coming into the bedroom, a place that I found a like. And it wouldn't work
with the other one. So all of these
different set ups you can save as just little group, so you can just quickly
switch between each of them. And it's the same
for the evening. I won't go through them, but I'll go through the first one. So if you was to go
in the living room. The way of setting up
is in, like, you know, the sunrises and sets
if it's east or west, depending on which way
your house is facing. If we're starting with this way in the
kitchen for daytime, where the light's coming
in from the left side, you could say from the evening, I want it to be coming
from the right side. So for the kitchen evening, if I have to plug this in, turn the light mine,
you can see it is coming through
these windows now. Of course, if you're
not showing both, you could just have it so you light it the
best way you can. But if you want it
to make more sense, if that's what you care about, if you're doing an
animation, for example, you might want it to be rotating in one consistent direction. And that is the world
lighting setter. For the point lights, I've got a similar setup
for the ceiling lights, I should say, where I've got some daytime lighting and
some night time lighting. So if we go to these, can see I've got just
a little selpia, a value for daytime. This, you can see this is
pretty bright at the moment. If I plug this one in. It's not really contributing too much to the lighting,
but it's still lighter. That's where we get the images, where it's like, For example, it's not blowing out the bottom of the floor,
making the room too bright, but you're still getting
these little bits of spotlights on the
different surfaces. Of course, you can edit this, but you can just save have
two different nodes here. These are just emission shades,
I've just renamed them. You press N, can just
change the label here, if you don't want to
put it into a group. And let's see. You may have noticed with the ones with the light compared to the ones
without the light, the ones with the lights
are a little darker, and that's due to clamping. So clamping is
used to get rid of fireflies is where you
get these bright pixels, these white darts
that are like noise, where you have loads of,
for example, small lights, or just lots of
light in the scene, and it's just getting
thrown everywhere and use clamping to get
rid of these kind of these little fireflies. But it also crushes the
bright parts of the scene. So that's why this
scene's darker than the one without all
of these little lights. And the clamping can be found
in your render settings. If you look down here,
the defaults ten, but I've got mind set for
30 for those renders. The higher you set it, the less impact that clamping
will have on your scene, but you'll get more
fireflies going through. But the light would be
closer to the original. So if I was to set
this, for example, to zero, and then was to
look between the two, there'd be the same brightness, or this one would be slightly brighter because it's got
a little more lights, but there'd be a lot of
fireflies in the scene. So you'd have to then render for a longer period of time
and hope that solves it. These renders took between
about two and 4 hours to do. But if you were to
turn clamping up, maybe you have to double
the amount of time. And you just have to test it, maybe you test it
in a smaller area. You use box select, so you control B. You do an area, say like that. Render that out with clamping turned off, see how it looks, turn up the render samples
or the noise threshold, and just toggle that until you get to something
you're happy with. Maybe you leave a render going for 24 hours, or you don't. The settings I used
noise threshold, 0.002, and just 100,000 samples, and that was two to 4
hours for a render. So something I was relatively happy with,
like, time wise. Of course, maybe you
want to do some four K, you want to turn clamping off, maybe you're happy
to leave a computer. For one, two days rendering, then you can crank
these settings up. Well this one down. Crank up the amount
of samples you do, change the textures and get
to a value you're happy with. The back plates I've got free back plates
here, so I've got. So this is the normal living
room one for daytime. Fs got a evening ba plate, which just had light
that was a bit more consistent with the
HDRI to get more of the RNG kind of evening sunset you kind of that colors coming in with this back plate, because it just looks like
that has the image itself. So I just thought that
might be appropriate. You don't have to do
that. But it's an option. For the bedroom, if we
look at this, for example, with the default HR I was using for the living
room by bring that in, you can see it doesn't work. So what I've done is added, so I just duplicated
that and positioned it. So it makes sense for
this window here. And also, if we
change the angle, because at this angle, you get a reflection, it
makes sense for that. And you'd need to do the
same if you did the evening. You can see I haven't
done the evening one. So if I have pull that
in, there's a gap here. So I'll just bear
that in mind with you adding bat plates to
your various windows. And composite in similar kind of story where cause we're
using different HDRIs, we're bringing in
different kinds of light into the scene. For the color balance
nodes, especially, you might want to have
different ones for the different HDRIs
you're setting up, maybe a daytime
one, evening one. Any particular rooms, say
like the bathroom were, you want to make it
look a certain way. And same with like any
of your other nodes, if you've got glare, them
these values are the same, but you can swap
one out, maybe you want less glare in
the day or more, depends on what image you're doing and what
line set up you've got. And there we have it. Those are all of the major
changes that we've made, but used, do some renders, and that is the interior
73. Animating The Camera - Part 1: In this video,
we're going to look at animating the
camera in Blender, and there are two ways
we can go about this. The first being key framing, which we'll look
at in this video. And first, what we'll do is grab this camera and just
duplicate it and we'll use this
position as a base. So we have camera here. We're just going to
rename this Annie one. And make it the active camera. And we've just got our windows split here so we can move
this a little easier, but also see what
the camera sees. And what we need to look at is this timeline
at the bottom. We're just going to
set it to frame one. And you can see here we
have a start and an end, and this just shows the
length of the animation. So start at frame one, end at frame 150. And we can also see this here and the render what
the output properties here. We can also adjust
the frame rate. So by default, we have 24 FPS, which is useful in
most circumstances, if we hit play, you can see in the top left here is 24 FPS, and it'll play 24
frames in a second. We can also adjust this.
You can set it for custom or choose any of the
default ones here. So if you could go, for example, 60 seconds, and it'll play
60 frames in a second. If you look up here,
while I'm playing this, and the actual output
at the moment, we can see it solely
capping at 30, And this is because
of the amount of objects we have in the scene. If you have things like physics, particles, and
simulations of that such, and a lot of objects, it won't actively
show the amount here, but when you render the frames, your outputs will be a
such salt in 60 frames, you'll have 1 second of footage. And let's just turn
this back to 24. And the first thing
we'll do is make a key frame of the base
state of this camera. So for frame one, we want to set the properties that we want to remain consistent to
and this first frame. So to do that, we
can press the key in the location rotation
boxes on transform, or you can right click
insert key frames. So let's do that now. You can see we have the
location rottation, and we've key framed them. On the bottom in
the timeline here, we now have a yellow diamond to show there's a key frame
here on that frame. And these boxes are
yellow because there's a key frame set on this current frame in
these properties here. So if we were to
go to frame two, for example, you can
see that turns green. And that's to say there's no key frame on this current
frame for these properties. Reason this doesn't
have a color is there's no key frame at all in
the whole animation, but these ones have a key frame, but just not on this frame here. If we were to, for example, go to let's go frame 40 A, and just alter this camera, so we're going to
move it on the white axis into a new location. So we're just going to
move it to about here. Can see they're green, and one of them
is turned orange. And this means that this
property here has been altered. All the other
properties or values haven't changed because we've only moved along the y axis, and it's orange because
it's been changed, but it isn't key framed. So if we were to go
back or forward, you can see the cameras
just jump back to the key framed values here. So let's just move
the camera, but Then if we press the key now, we're lucking in these values. So I'm going to press
it on both of them. And now if we hit play, the camera will go from
frame one to frame 48, and it'll play that
transform here, so it moves the
location of the y. And we can further look at
this in the graph editor, so we can see what's
going on here. As we only need to look
at the y location, we can just hide
the other values, and we can see we've
got this curve here, and this is showing this
camera movement here. We're starting at one point, ending at a point down here, and it's it's like
a bezier curve. And if we were to move
this on the x axis, this will dictate where
it starts on the frame. So this is frame one, and this is frame 48
where it ends so if I got back a few where
this transform ends. So if I was to move this on the x axis, it will start later. You can see the
diamonds moved as well. So now, for the first bit, it won't actually move the camera until it
reaches this point, which is also echoed
on the graph editor. Now we will start to move. And let's just move this back. So I can just grab this
point here, move it back. And if we were to move
it on the y axis, this will adjust the
y location itself. So if we go to the first frame, where this point is, and I move it up or down, you can see it's moving
the location of that. We also have two handles, so it's like a bezier curve. We have two handles
on each point, and we can adjust how it moves
from one point to another, so the transition, so you could make it so you
could adjust it here. We or two, for example, make it something really
crazy, like that. You'll see that it'll
play differently. Went higher as the points gone higher it's gone under
y axis gone higher, and then it'll sharply go
to the original point now. So that's one way
we can use it to adjust how the points
move from one to another. We can also change the
interpellation type. So at the moment, we have Bezier set. Also use constant,
which is more of a digital kind of transfer, so it has a or an off state. So if we put it play now, nothing's going to happen, it's on a state, and then it will just
go to an off state. So it just goes straight
to the next frame. And we can also use linear. So it'll just move
a consistent speed, there won't be an
ease in and an ease out as like a bezier curve. So you can see it's
just going to go at the same speed and
then just stop. So if we were to go back, so we have the
Bezier, generally, we can use either
bezier or linear. And we'll just create a
small animation here, so we'll move the camera
to next key frame. Let's go back to
the F D viewport. And what we'll do is let's
add let's go 12 frames. We can do maps in these boxes. So if you're not sure, say you want to multiply something, divide something, you
can do it in a box. I'll give you the answer one. So we just added
12 frames to 48. We get 60 there. And, for example, let's
just rotate the camera, to see the rotations change. We'll just keyframe
both these values. Then you can just play
the animation again. You can see it's doing that. As we only moved 12 frames here, this transition happens a
lot faster than this one. Then, for example,
maybe we want to add a another 48
frames or 2 seconds. So you get 100 and eights, and we can move the camera
into the new location. Let's move it along the x axis. And then we'll key
frame this again, and then you'll see it
play out like this. And you can also just look at the graph
editor. You can see. As we have more values
that we're adjusting, you can add these back in, and you can click any one of these curves and adjust them
separately if you want to. But we don't need to
worry about that. You can either just
keep it on linear. If you select an object, press A on the timeline to make all of these
diamonds yellow, like you've selected them all, then you can just change
the interpolation type or a ts or any of
these other settings. So if you didn't like Bezier,
you could turn to linear, and you can see I'll
just have a lot more of a sharp kind of transition
it want. Blend as much. But it could be useful if you're just doing panning shots, where the cameras
just moving one way, and then you go to
another camera, and then it's just
going in another. So, for example, we have this animation
here at the moment. And where it ends
at this point here, we could just have it go
in to another camera. So let's pick another camera, we'll pick bedroom two, we'll duplicate this,
call this AI two. Got two cameras now. And then what we can do
is use something called markers to switch between
different cameras. So for the first camera, if we go back to the beginning, we can press Control B. You can see there's a
little camera icon here. You can also look at
marker add marker, and it will add the active
camera to the timeline. And then if we go to
the last key frame, we can just go for up
another frame after that. Then mark a new camera. So let's go to A two, Control B. And now, what will happen is once it gets to that
point or switch cameras, so you can see in
another camera. And then as before, you can just key frame anything
you want at that point. So let's go to the end
of this animation, go to where the
camera switches over. Remember to set a default state. So we're getting some
key frames here. These are our default values, and then we want to change it otherwise, if you
didn't do this, and then you key frame say
48 seconds after that point, So if we were to go plus 48. Well, let's go back 119 plus 48. It's 157. We need to make this a
little. Make this 200. And if we didn't
key frame these, but we changed the
values and keyframed it, there'd be no transition because there'd be
no origin point. It has to be from one
keyframe to another. So we're going to
transform this. Let's just say just a little bit of a panning or rotating shot. And then we can
key frame them in. And then they'll play through. And you can do that
with as many or as little cameras as you want. But it's easier if you
have multiple cameras instead of moving
just one camera. If you want it to
move just one camera, then what you could do is say we just wanted to
keep one camera here. We can go to the end frame, so we've got 157. And then like a digital
transition for frame 158, if we move this camera to
a new location, like so, and then key frame
in the values, once it moves over, it will just switch to the new
frame with a new location, and there won't be a transition as there's no frames in between frame 157158 for a
transition to happen. Fucket play. You'll see
it do the rotation, camera straight away
in a new position, and you can just use one camera, have a frame in between
just to transition, and then move that as normal. But those are the few kind
of options you have in regards to animating the
camera with key frames. In the next video, we'll look at using object constraints to manipulate the camera and create
an animation. See
74. Animating The Camera - Part 2: In this video, we'll look at animating the camera
using object constraints. So I'm just going to
remove these cameras for now and remove the markers. And you can think of object
constraints as modifiers that influence how the camera moves around the scene or
interactive objects. So if we just first set the three D cursor
to the world origin, we can add a new camera
on sees facing down, and that's fine at the moment. And we'll first add a curving. Let's just add a path. Move it higher up
into the scene. And the first modifier
or object constraint, we're going to be using. Click on this tab is
add object constraint, and then we'll go follow path. And let's just name this camera, Ai p, and we'll name
this Ai curve one. And if we go to the camera, we can use the
target Ai curve one. You can see the cameras snapped onto one
part of the curve, and we have something
here that's an offset. And as we move this, it will move the camera
along the curve. Can hit fixed position. So now the camera
won't leave the curve. So zero will be one end of the curve, one
will be the other. So let's just select
the curve now, and we'll move it into a
position that we want. Just going to move
it down on the z, position it about there. Then what we can do
is going to edit mold on this curve
and adjust it. And let's just rotate
this in object first, and then we can adjust
it let's delete some of these vertices
here. We can grab this one. Then we can just hit
E and extrude it. So you can see we have this
curve that just goes from the kitchen dining area to living room and then just
ends in the hallway. And if we select the camera, so we've got an three,
let's just move it into the camera group. Now if we use the offsets, the camera will just
follow that curve nicely. And as you can see,
there's a little dot here. If you write a click,
we can also key frame different parts of this curve, which
will be useful. The other main constraint
that we'll be using is to make the camera
look at a certain object. So we can add in a
axis while empty, for example, and have the
camera looking at this. Let's just call this Ai empty. Just going to select the
curve and the empty. We'll just move them
into a new collection. We'll call this Ai objects. So we don't lose track
of where they are, and what we can do. Is select the camera, add a new constraint, and we're going to
be using Track two. And then we want to
select the an empty. And if we go into camera view, you can see the camera is now looking at the empty object. And if we were to
move the camera, it will always stay fixed
at wherever the empty is. And that is due to
the influence here. So both of these constraints
have influences, and this just tells
you how strong or we this constraint
is going to be. So if we were to turn off, so we're looking at the empty n, as we lower the
influence of this track, it's going to default the camera back to its original position. Our camera was
originally looking straight down. That's
where it was len. And we can use this
to switch between different focal focus objects
if we have multiple tracts. So if we were to
duplicate this and go to the Ai empty
and duplicate this, move it to the
kitchen, for example, we'll just call
this Ai empty two. G this Ai empty one,
go to the camera, and then switch the modifier, so we have any empty two,
and then the empty one. We would be able to turn one of them to zero, one
of them to one. So at the moment, it's
looking at an empty one. And then if we were
to flip this around, now it's looking
at any empty two. And these are values
we can key frame. So we could have a transition, say over, let's go 48 frames. So the first state
we have is this, we'll have this at
one, this at zero, go to 48 frames. Then we'll have this at zero, this at one, key frame
both for those again. Then you can see the cameras going to flip between the two. You can see it's going down a bit as both of these
have half the influence, so the camera is defaulting
to its original point. So just bear that in mind. You might want to either keep one strong or change
the camera's position. So its default state
isn't looking down, or just have it, so it's binary, so it just flips straight away. But these are some
of the ways you can use to influence
where the camera is looking and combined with the track two with
the follow path. Can have the camera
following along, changing the focal elements without having to manue
a key frame that's in. So if we were to let's just remove these
clear key frames, just get rid of A two for now, and we'll have it
just at any one. We could key frame
the follow pair, so we're going to
have this on zero. As we're only going
to be using one track two objects, we want
key frame this. And what we could do is
let's say 48 frames in. We want the object to have
moved along the track. Say to about there, and
we'll keyframe this in. If we want to adjust
where the empty is, then we can go back
to the first frame, select the empty,
and then as before, just keyframe the
location of the empty. And then when we
go to the camera, we can move the empty
and keyframe it again. So let's select the empty. Choose another location. Maybe we want it to focus on the table, so we move it here. Key frame that in,
and you can see the camera is going to move
here, follow the objects. And you can do this as much as you want with as many
cameras as you want and combine it with some of the other techniques for switching between
multiple cameras. Say we want it to Follow along
the path. Okay, let's go. So we have this keyframe here. Maybe we want it to
slow down a little bit. So what we'll do is add a
another 48 frames to a 96, we've moved 0.26 in
the previous 48. So maybe we only
want it to be 0.3. Five. So we'll do that
key frame that in. And then have a look, can see
it slowed right down there. Especially because
where the key curve is. So it's still moving along
the curve just really slowly. And we could have that
further if you want it. If you want it, maybe it
to go a little closer, and then just overwrite
the key frame. So we go to about the
key frame this in, and then just build it on. Maybe we move the empty objects. And key frame that
in. Lo what happens. You can imagine if there was
an object moving around, can see you're just
following it or a person or whatever you
want in your animation, get to the next point. And then maybe we
want the camera to start following
along the track again. So we'll key framing. So we have this
point key framed in, add in another 48, then maybe we move it to there. Let's look where the empty is. Maybe just adjust the
positioning a little bit here. Then just remember to
key frame both of them. There we go, and as before, set a marker if you want
to use multiple cameras. So maybe this is the
first one that plays. And then we could swap
the camera as before. So well, we won't be
using Annie free. Maybe we want to use one
of the bathroom ones, snap it to there,
set it to that. You can see using a combination
of all these things, you can build up whereever
sort of animation you want, using either key frames, which is more manual, or
if you want to use curves, then you can also do that
as well as it gives you different options to control how you move your
camera in the scene. But daga, those are two ways. You can animate your camera and create a animation in blender. And the last thing I guess is just rendering
out the animation. So what we can do. Normally, you just hit, render, can just render an image, but we also have the option
to render out an animation. Generally, what I would recommend is
rendering out images. So, you do have the option to render out it in video format. But if you blender
crashes for any reason, you lose power or anything,
you'll have to start again. If you render in images, you'll have the frames. So you'll have frame
one frame two, frame three, et cetera, and it'll render
from whatever you set for the frame
start to the finish. So this would render
out 200 frames, and you'll have 200 images, which you could then
put into a video. Just remember to set the
FPS you want for that, so it's not choppy
and just have a look. But there you go and
see you in the next.
 Eldamar Studio