Transcripts
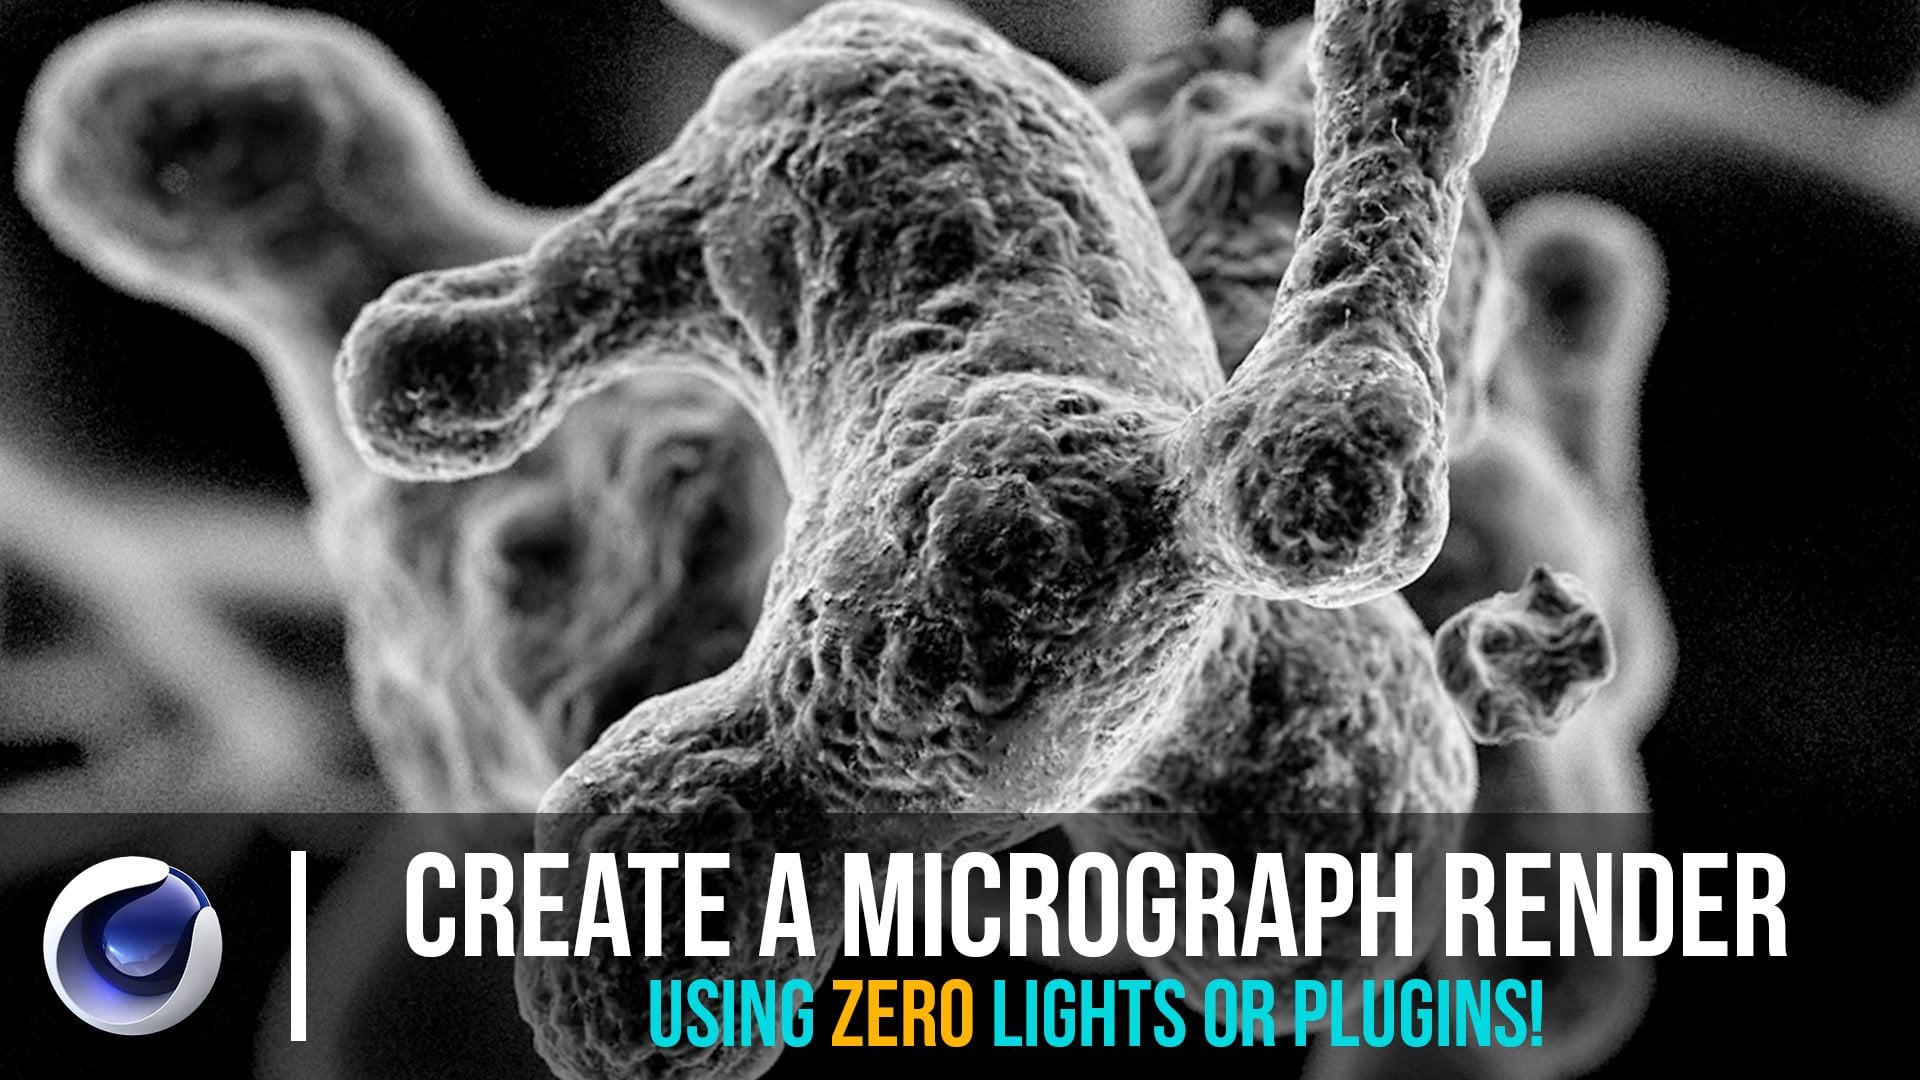
1. INTRO: What's going on, guys? This is Patrick Foley. We got another sweet class for you today. We're going to be talking about how to make a microscopic still life in Cinema 4D. We're going to be using a lot of tactics that a lot of you have been requesting lately, including how to bake in water into our scenes, making some pretty intricate geometry based on displacers, and things of that nature. You're going to need Cinema 4D and Adobe Photoshop for some post coloring processing stuff. This will be a pretty lengthy one, so hopefully, we get a lot of this. I can't wait to see what you guys will come up with. Let's jump right in.
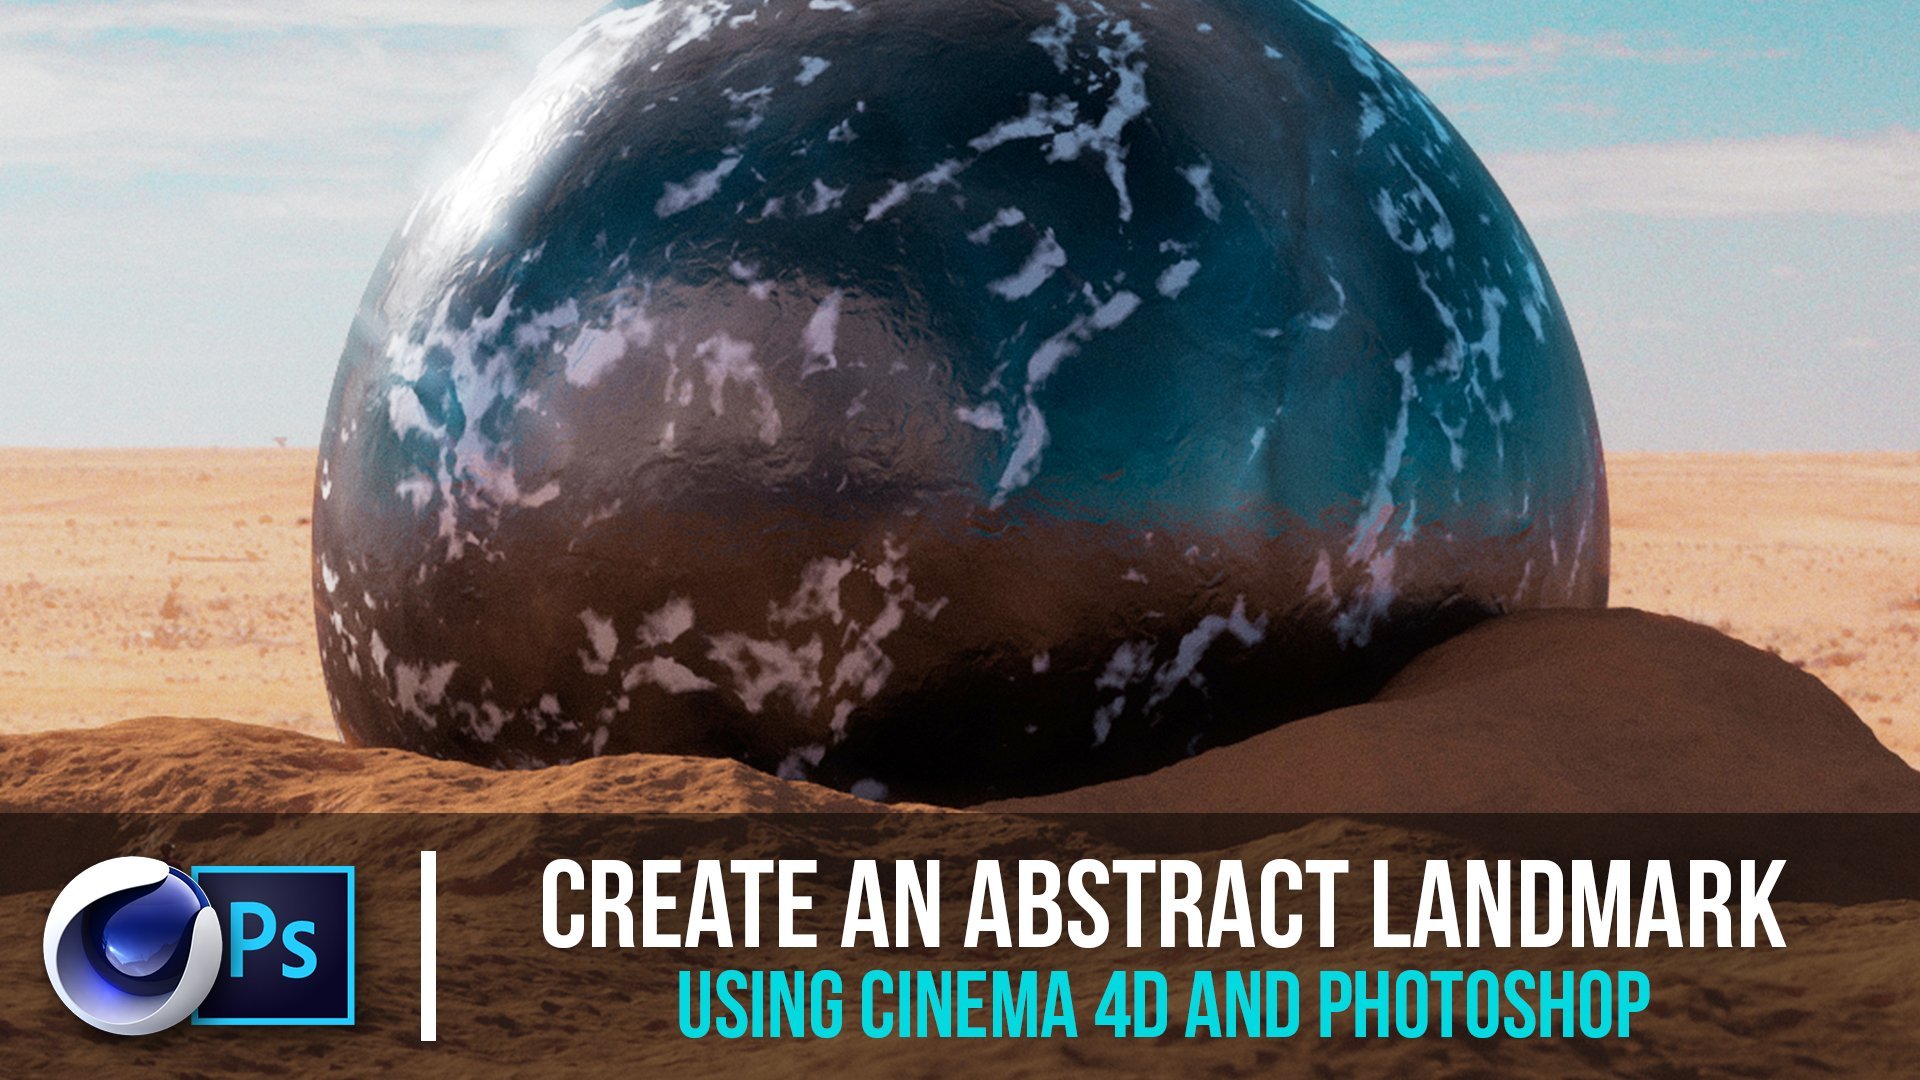
2. Introduction / Layout: Hi guys, we're here in Cinema 4-D, we got a blank template here. But before this we're actually going to go into Instagram or quick, just so I can show you the style I'm going for now. Lately I've been doing more of these complex background ones with shallow depth of field instead of stuff like this. But today, I was requested that I do something like this and I think it'll be cool because we'll be going over a lot of stuff we haven't even gone through in previous classes. We're going to be doing everything from showing you guys how to make these little water, little pond area things here that go all throughout these landscapes. They look pretty natural, they look pretty cool. Also here you can see there's just a glare coming from the top left of this thing. It's almost like the sun's giving some glare to the camera lens. We can clearly see it's like really faded over here and not as much here where the shadows are, and you can see the shadows left by these balls here are pretty harsh and they're pretty cool, something that would resemble sunlight shadows, and you'll be surprised to know that we used a spotlight for that. We used HGRI and spotlight. In the spotlight, there's a bunch of settings. Within the spotlight that you can control the different dilations between how much noise is actually coming through, how much mist or haze, whatever you call it. We're going to get into all of that now along with how to create pretty much this whole image and we'll make our own version, but you'll find out how to do that. Let's get right into it. We got a blank template. I'll explain a little bit here. To begin here, I put my render settings Window here. I just made my default layout, and I did make a previous video on how to make this layout. But I have the external render panel here to make it you just go to New View Panel. It'll pop up a new one and then you place it wherever you want, and then you'll hop in the camera. Once you select users render view, and vice versa, to switch back and forth. We got a material editor here. We're not going to be using our content browser at all for this and I think we're good so far to start.
3. Ground (Displacement): The first thing I'm going to do is create a plane. This will be our ground, and I'm going to go to display and use constant shading lines, I'd like to see the segments really clearly. I'm going to change the width segments to 400 by 400 for now. Before I go any further, what I'm going to do is hop into the camera and take this classic 36 millimeter lens in the objects tab and go to something like telephoto, so 135 for much more zoomed in. Again, it's not like zooming in, it's literally changing the focal length. So it's going to mess with the depth of field settings and pretty much the proportions that we're looking at. To me this looks better for this instance here. What we're going to do is then take this plane here and scale it up a little bit till it goes out of frame. This doesn't have to be centered as long as it's covering everything here. Then we can zoom in a little bit as well to compensate. We got this nice little plane here or the tone of segments covering the whole frame here, which is nice. The next thing we're going to do is click shift v, that's going to pop up your view panel here. We're going to go to view and take this opacity here to a 100. So we can see our boundaries. You see we got our camera hopped into both windows here, but if I wanted to hop out of this main window, click this thing, but you'll see moving around this panel is still inside of it, because if we use it as your interview, if you pay attention to this camera right here, once I click this, it turns white. So now, we're inside of this guy. I like to keep this one in there 24-7, and I'd like to hop in here once and awhile and exactly see what I'm looking at, change a few things, but that can always happen when I need to. The next thing we're going to do is work on displacing this ground and giving us a cool little ground texture here. So what I'm going to do is click the displacer, which you can find over here. I have since made different adjustments here because I use a lot of these things a lot. I'm going to take the displacer and put it down inside of the plane, or a child of the plane. So we're going to go to the shadings tab and add a new shader, add a noise. As you can see, we've got some cool geometry going here, some classic stuff. We're going to click the noise panel here, and we're going to something like, this is where you can get funky and go off and do whatever noise you think looks best. But I think which ones this, gases, gaseous, or whatever you call it. I'm going to click that and go to maybe a scale of like 1300. As you can see, when you scale these things up, they don't look like patterns anymore really. You're scaling up so far that they're doing their own thing here. I'm actually not too happy with that, so I'm going to change it. Let's go to something like Looker. This looks cool, I always like this ground look. If you go to like 1800, again, we're getting these nice big craters. So depending on how we change these, we can get some pretty cool results. I'm happy with something like this. Once we have this, we're going to change segments, actually typed in five they're bringing to go 500 by 500. We get our cool little textures back that we had, and I may even want to mess with seat a little bit, see what different looks are. Suddenly is a cool, maybe take this to like 2500, maybe like 1500. Cool. Something like that is cool. Again, I don't like these things getting too rigidly here, I'm just looking for the basic structure, what I'm going for here. Even changing things like the low clip can add plateaus to this thing. It'll give you some really cool results, so I'm happy with some like this.
4. Water Creation : The next thing that we're going to work on is the water. You'll be surprised to know that the water is literally just a plane, at least how I've been making it. All we have to do is create a low plane here, and you'll see it peaks through here. If we scale, let's move this up actually, the farther we move up the plane we see it's literally just like water. That's literally as simple as it gets. There are other ways to do water simulations and create water, but a really easy way, and I think the fastest way is doing something like this. You can make it, this thing mostly water. You can make it just little spouts of water. But for this, I'm probably going to keep something somewhat in the middle, probably like this. That's just scaling them up. Moving the sky around, making sure we're in the whole frame here, which is nice. Now, we have our water, we can name this water, and we can name this ground. Looks good to me. We've got the water and the ground here. We pretty much have done nothing really complex. You've just made this little atmosphere. The next thing we're going to do is create a dome for the HGRI around everything. We're just going to scale this up a ton to like 1,300 percent. Now, when we drop out of this thing, we are clearly inside a dome. Another thing I think is cool is just looking at this, what we got going on here, this doesn't look realistic at all. We're literally just this floating little square plane within a big dome. This looks nothing realistic, but the only thing you really have to do is cheat it so it looks realistic. Jumping in this thing, you wouldn't be able to tell.
5. Objects: Now, onto the objects. For that last runner I did, all I did was create a sphere for the most part. Let's move this guy over here, more forward, scale it down, and then drop it into a cloner. We're going to click ''Cloner'' and drag the sphere inside of the cloner, it's going to make three of them of course. We can render instances and change the mode to grid array, and obviously that's going to make a bunch of these little clones here. I'm going to move this guy up. It fits in the frame. I'm going to go more centered here. I'm going to scale the whole cloner down a little bit. Maybe for this one I'm actually going to use the Shader Effector instead of randomize, so with the cloner selected as we have here, I'm going to select the ''Shader Effector''. Within the Shader Effector, let's say I drop in a noise and then go to the Parameters. It's actually easier to see when you have maybe like five by five by five. You got a decent amount of guys here. Once you have your shader, there's a little noise that's got like 500 for noise. You can see changing this value, bring in all the way down and pass the zero mark will give you some really cool equal formations here. Depending on where that value is, you'll get some different looks that looks pretty cool to me. What I would actually do for this is go six by six by six. That's where you can even see this effect be much more heightened and it looks really cool to me. We're going to keep it that way, we're going to increase this whole cloner here. Let's see where this is compared to the ground. Even if it goes to the ground, I'm not even mad at that. Something like this would be cool. Maybe just changing the seed of the noise to where maybe the larger parts are more towards the bottom. You could do that with a gradient and be more precise, but so it's cool to see what different seeds and how the randomization will work with these. Let's see what happens here. You can see that just with seeds, when you using different shaders are immensely helpful when trying to go for a random look and you see all these things popping up on Instagram and people like, ''How do you think of this?'' A lot of times it has to do with different random effectors they're using. I used to think people placed all these balls here from scratch and I was like, ''Wow, these guys put way too much time into this.'' That's before I knew stuff like this. It's cool to know that this stuff is not easier than it looks. Let's see what we got here, we can mess with the deform a little bit, see how this is messing with everything. Once you have something like this, we can increase this to like eight. Looks cool to me.
6. Camera Settings / Render Settings: We can start putting in some depth of field even before we start messing with lighting. If we look at this guy here, this interactive runner raging, I pop this up by clicking Option R with the view port selected, and it's like we got this cool little thing here, looks nice. Sure, but there's no depth of field, there's no lighting. We going to click Depth of field real quick, and you'll see that if we change the F stop now, if you go to the camera, and we're doing this a little bit about order. But either way, we're going to physical and we're going to click F-stop of one, and this whole thing is blurry. Reason for that is because if I were to jump out of this camera, we're looking now at, this thing is way out of focus clearly because the focus distances all the way down there. You can tell because here let me click the camera. This focus distance is super out of distance here, and that's why it's hard to even navigate here. But if I were to bring this back, this is a manual way to do it. Bringing this back to around here. You'll see that these balls are now in focus, and the background is completely out of focus in the foreground is even out of focus too. Which is a very cool look, or you could do a much easier way that I usually do, is click the camera and from the objects panel, click this guy here, focus distance, and click where you want it to be focused. So something like here. Depending on the F-stop on the physical tab, if I were to go to like point four even crazier amount of depth to field, and so it's all just preference. I'm just going to go with one for this instance. Because once we actually start messing with the lighting and everything and the textures is going to look beautiful with the depth field. So of course, the next thing we're going to do here is check on ambient occlusion within the physical render. Before I forget, I think you should know that the settings I have are where you could see it from the beginning, I guess. Keep these things low and on progressive and with the ambient occlusion. I'm sorry not ambient occlusion. When we start adding ambient occlusion, global illumination will talk about the low sample settings you'll need to get these faster renders through this interactive render region here as well. So I'm going to click on ambient occlusion. Already we're getting some nicer shadows without even adding lighting or anything, that's nicer, and with the ambient occlusion checked on, I would check on evaluates transparency, because sometimes you can get some funky glass, imperfections without this check down that I've seen. Last but not least we're going to click on Global Illumination. It's going to erase everything. Which is normal because we have not given it a light source, and this is actually a good time to show you the spotlight we're going to add in with the noise because once we have the HDRI might be a little bit harder to see the crazy amount of differences that the spotlights given us, but this would be a good time to show you. So with the global illumination tab and go to samples, custom samples count in 20, and that may rough up our image like you've seen a little bit, but we'll bump that up before you write it out. It's going to give us a faster preview.
7. Lighting (HDRI / SPOTLIGHT): The next thing we're going to do is create a spotlight so up here spotlight. Will it give us any light? Yeah, it's given us a little bit light here. What we're going to do here is take the spotlight and obviously we can rotate this thing around. Let's see what this thing is given us. It's clearly a spotlight which is not emitting light any other direction, which is totally fine but for now I'm going to go hop out of this camera and move this thing myself and I like these things to come from like an angle towards the back, so I'm literally just going to take the spotlight, move it way back. Move this way back over here, so we can see on this tab that we're actually getting, we can see in real time where this is hitting, which is a very cool feature. So I'm going to move this thing, let's go a little bit up and rotate this a little bit towards all of this. Looks good to me for the most part. Move this a little bit up. So this will be our light, like it'll be our sun pretty much regardless of where the Sun in our HDRI because this will be much more prominent. So let's see what this has given us. Cool. So it's giving us a spotlight, but we're not actually getting what we want yet. We don't see any kind of glare or anything like that and for that we're just going to go click the light settings. We're going to give it a shadow area, visible light. Let's go and see the visible volumetric. I think it's volumetric. Now when it loads you can see clearly it's giving us some volumetric light, which looks amazing. We haven't even added HDRI, we haven't added textures even but the next thing we'll do here to give it a little more difference in lighting, so it's not perfect. A perfect gradient is we're going to change, we are going to go to the noise and go to noise type both and take this from soft turbulence to wavy turbulence and you'll see now we're starting to get a little bit of texture in this noise, which I think looks cool. If you hop on the camera again, actually that's not how upon quite yet. Let's circle round and remember this value. I think we can actually take this light and bring it forward a little bit, a little up. Looks good and then these things here are where the noise drops off or where the visible light drops off. So the farther you make this, the crazier the glare will be. So you'll see now that we're getting an insane amount of light which might end up being too much but let's add the HDRI now and see how this is really affecting this thing. So we got the dome already set, now it's just down to lighting this thing. So I'm going to create my first material by double-clicking here, or create new material and I'm going to drag it on the globe, the dome. We can name this HDI because we already created that and I'm going to take off to color, take off the reflectance and add illuminance and right off the back, we're getting some light, but you can still see the light over here, which is good, and we still got the depth of field. So even though we haven't textured this or properly lit it all, it's actually coming together and you can see that's why I wanted to use the depth of field early on so you guys could see this. Other people may have a different set of orders when they're making certain things but for this purpose, I just want to show you. So we're going to take the luminance and add a texture and this comes down to creating HDRI. You can use an HDRI you've made, or you can get a whole folder of HDRIs here that I use pretty frequently. This one I've made, yeah, these are ones I've made in the previous class but for this, I can probably use something like this. There's another one. This is my guy holding the camera here and I like this again because this is just brief, but we have one clear light source. This is where the light will be. I might just place this where my current light is set up, and we have a clear dark side and that'll create some really nice shadows. So we can either use that or something like this with an even lighting tone. We'll test both maybe if this doesn't look good. So it's going to be much darker obviously because we got much less going on. But we do have some light, so it's cool. It just depends on what look we're going for, I guess. So let's see here. This lighting is coming from here so if anything, I would want to move. You can see with the lights coming from, the globe. So if anything, you'd probably want to add, you know, change to this direction over here, and then we can take the luminance and because this is only 100 percent, we can boost this up, select 140 and nothing happened because the mixed mode is set to normal so let's go to multiply, okay? So this is looking better, the spotlights looking a little intense. It depends on where you're going, but I might end up bringing it back a little bit. So what I'm going to do is just take the red, bring it back. I have to change angle, you see what I'm doing here. We can make it more of the, so this is coming away from overhead, which is fine. Again, it's all specific to what you're trying to achieve here. This might be cool. I just wanted to add it back so this probably wasn't too intense but this is a cool light. I mean, it looks like God's overlooking this thing. If we change the angle here, we can change how far this light is going. So you can make a really thin spotlight or like this hazy picture here and both look cool. I'm not sure which one I want to go with. I'm really good with both. It just depends on what I'm feeling for. If anything, I might just back this up. So I'm going to take the blue and literally back it up. This thing won't be so intense, but we'll still get some glare. So that looks really good to me. That looks perfect and the only other thing we got to worry about is the HDRI. If we want to change that a little bit, we could bump that up to like 160, maybe 180. Again, this image, the HDRI image that we use is definitely getting beat up and distorted from this as we can see but it really doesn't matter too much especially to me, one for this tutorial because I'm just trying to show you guys the basics of what I'm doing and two, because it really doesn't matter for the most part. A lot of my images that I use for HDRIs do get heavily distorted when I brighten them because they're JPEGs but for lighting purposes, it does the job regardless and for reflection purposes half the time unless we are so close up on a reflected object and it's like Chrome and you can physically see distortion in the HDRI, it really doesn't matter. We literally just have to, because 90 percent of time you are just seeing little objects with subtle reflections and no one can notice any imperfections in that sense. So maybe from a technical standpoint, you wouldn't want that but from a realistic standpoint, it's definitely worth it. So I'm happy with what I got here, so we can start texturing this thing and looking at other types of textures that make this thing work. So let's start texturing this thing.
8. Texturing / Exporting: We're going to create our first texture, I'm going to jump back into the camera here, the main camera and I create my first one, double-click here. The first one can be for the water, let's see. After the that you'll be able to see clearly what this thing is doing. It's going to be like milk or whatever. For the water, all I did was add a Chrome reflection. We can take the color off actually, right after that let's see what happens here. It looks like it's reflecting, the only other things that make this thing look like water and what make anything else look like water is because of the environments and so if we were to have an HDRI with a blue sky, it would be blue. You would see that. Maybe we would actually be better to do that in this purpose, so let's duplicate this material here. Actually instead do it, let's just do like this. Create another one, let's call this HDRI 2. We can drag this on top of the HDRI we have here. This way we can always go back. Let's change the brightness back to 100 and change the image to the other one I had where we're outside. Looks good. Perfect. Now let's see what we're getting here. We're not getting the blue skies. I guess it depends. It's reflecting this thing right here. All you have to do is just move it a little bit. One, I'm actually going to make it a little bit more realistic by moving this up, because before technically we were just like sinking into the ground. I'm just going to move the whole globe here around a little bit and that looks good because it looks like the sun is coming from this direction, same thing with the spotlights or even maybe here. Now we should see some blue reflected waters if I'm not mistaken. We're getting some sky here. It's definitely reflecting different stuff here and it all depends on what environment you want. This could work too. It all depends on whether you're happy with this or you're happy with this darker thing that we had before. It really all depends. I'm probably going to keep this guy here. Let's see. Yes, I'm happy with that. We can keep this guy here and we going to start messing with the textures. Even if the water still actually, because we want to make sure we put a bump on this which will simulate a little bit of action going on in the water. You can put a noise and for the noise, we could take something subtle like luker and then bump it up to like 500 global-scale. Yes. We're definitely getting some stuff and then to make it a little bit more realistic, take it down to like 10 and again, this is an abstract, it doesn't have to look 100 percent like anything. If you're making a 100 percent water, we would do it in a different way, we could use transparency and actually use displays around these things but this is cool. This makes people question what this thing actually is and I'm happy with it. The other thing if you want it to be more blue or anything, just change the reflection layer color. We go to the color of the layer in the reflection tab and go to something like blue, nothing crazy but just a little bit of a tint and it's blue. That can be inferred by anyone that this is water. I like to go crazy sometimes like to do some stuff that you wouldn't imagine, maybe go for like a rose gold. It's all what you're feeling but for this, I might just even go straight chrome because I think that looks fun and then for the landscape, let's make another texture. You can call this water and then we can call this landscape, drag it on land, now we got a specific material going on here. A lot of times I like the snowy look, which I in fact might even do because I think that looks cool even now, but some of the stuff we need is some bump in some subtle displacement. We're going to add a bump, little noise here and then we're going to add a packs of noise obviously, that's a great noise. Let's go to 50 percent global scale and then 20 percent strength should actually be pretty good and if I want to check on this for real, I can take this, changing this thing right here. What I'm doing is making this smaller and trying to compensate by moving this arrow all the way up so we can see all the detail but making the layer smaller. Now we can see all the detail we've got going on here, we can actually see this subtle stuff going on here. Anything I'm missing, I think that's a good size because I don't want this noise to be big at all. That looks perfect and you might not be able to see it from your screen, but when you actually start looking at it, if you have the correct camera settings and the proportions laid out correctly, like I did, this noise would fit pretty well, so that looks good. I guess if we want to keep this here and start messing with the displacement a little bit. Again, adding displacement, especially with some polygon displacement, we're going to have to make this window much smaller. So we don't have to wait every single second for awhile. We're going to go back to the layers tap here and add a displacement, check this on. Then we're just going to add a texture and it depends on, sometimes I upload an image that I have for textures. In this sense, [inaudible] and I crop them square because I'm always using a square plane. I have a certain setup that I always use. Different stuff like that, concrete textures, earth, it really doesn't matter. Whatever you guys are feeling, snow sometimes. There are good and bad textures to use. Some are way too harsh, and we'll give you jagged edges, but in our previous class we'd look, how to create your own textures, especially using a phone by all means, do that. It's a very useful video and you don't have to rely on textures off the internet anymore. You can take textures anywhere from your house to right outside your house whatever you've got, anything ends up being a cool texture. For this, probably I'm just going to use, what do you call it? A noise, a procedural noise. I'm going to click noise here and right after that we'll see what happens. We're getting this noisy texture, let's go and add what I like actually, I like the [inaudible] noises a little bit. Let's go to something like that and then bounce this up to like 500 percent. Maybe for this actually I want something more unless we're layering stuff, I'm going to get something more fun. Maybe something just like this tuple noise on 500 percent scale and if I sub polygon displacement, which is going to kill this render time. You can decrease the render time by changing this value here, this number 4 in the subdivision level. But if we just wait a little second, we probably don't want this all the way up there. Let's see what we got. Depending on how long this takes and this is why I always do this the very last. Because this definitely hits your render the hardest set polygon displacing, especially with all the lights hitting everything. We have the spotlight we have the HDRI. We have these textures that are being reflected. It looks like this is going to take a while, it's already 30 seconds and it should be doing it now. You can't really tell that much, but it is adding a ton of realism and a ton more detail to this ground. I'm more than likely happy. This is where sometimes since I don't have a render farm, I don't have a crazy system. I'm using an iMac, a pretty decent iMac, but it's an iMac. I didn't speck out this crazy computer. I do not use Octane. A lot of times I'm guessing a little bit. Instead of waiting like a minute for each pre-render on how this stuff looks. But I'll prior take this down to like three centimeters and call it a day. I think that would be good, so that's fine for now. The next thing I'm going to worry about now is first off, what I'm going to do is uncheck displacement and bump from this render region here. As you can see, it renders everything pretty fast. We want to do that because we just have to texture the spheres now. When we're texturing this spheres, we don't want to wait for everything. We know that just checking them on that's going to make this ground more realistic. But we can just focus on the spheres now with faster render times. For the spheres, we're going to create another one, another texture, spheres. I'll take that and apply it to the spheres. Of course and a lot of times I like using for these guys especially when we get to light hitting it a certain way, you could always go the reflected route. Add like a Chrome texture, make these things like a little bit, take the color channel off, make these things like Chrome, like a rose gold looking. If that's your style, it's definitely play. I like that a lot. With these lighting conditions, I like using subsurface scattering. We've gone through this in a previous class, but I'll try to test that in this as well. With the reflectance, I'm going to kill this right here. Let's take this down, the reflectance layer to like 12. Take the specular out default specular, put the color back on. Actually we can take this layer, take the color layer to white and right now we just have shiny white balls as I assume, or gray or whatever. But subpart, whereas subsurface scattering, we're going to check on luminance and we don't want them to emit light, we just want them to radiate light from the inside. Go to affects subsurface scattering and as you can see, this thing is starting to look a little waxy. We're going to take this to, I would say 200. Take the path length to four and let's see what we got now. Of course I was assuming the light on the top left to hit these things a little bit harder which is a cool look like I think even if those are a little bit overexposed, that's what I'm going for in this instance. But if they are a little bit too overexposed you can change that a little bit just by what I would probably do is take this down a little bit. But I do like how this things are very pearly white and radiating from the inside. Let's see what we got here. Yeah, I am happy with that. I do like that, I even like the probably the previous one before. They're really white. Yeah, that could actually be good for me for this render, I do like the whole all white type look. But we will continue this in Photoshop in the next section. I'm going to render this out exactly like it is after I show you the Render Settings. But of course, we cannot forget, go to the ground, let's uncheck the render region. Option are if you want so this is easier on the eyes. We can go to, tick off the textures here. But everything set, the cameras set. If you want to save the camera position, let's just go to tags, Cinema 4D settings and put a protection tag. Now, no matter how I move this stuff, I can not move the camera, which is very secure. For the Render Settings, we're going to take this output, lock the ratio to 1080 by 1080. Just like that, all these settings here, physical tab, let's go to fixed. Let's go five sampling subdivisions, and let's go four, four for every single section. Because we have subsurface scattering and these balls, spheres, I should say, we should also have a good subsurface scattering subdivision as well. We're going to go to global illumination sample count, let's go 150. When I use a lot of white, there's always a bigger chance that you could have sampling issues with the, what you call, the splotches and a lot of submissions last time on skill share. Even after following the tutorial, they were getting some splotches on white backdrops and stuff like that. If you're re-getting that, that most likely has to do with the sample count or if you're using a illuminance object like a plane light or something like that going to the illumination tab and going to GI area light. Those two will fix your problems. Most likely, inevitably, so I think that's all for the settings here. I just want to make sure we checked on the ground again, went to landscape and check on the, let's check the bump on again and the displacement. After that we should be good with a height of three, subdivision level four. It's time to bump this thing out. I think we're good so we'll see you in the next section. We're just going to go here and go render picture view.
9. Photoshop / Conclusion: Guys, so we just found this out and it took a little bit long, it took 43 minutes, and I don't have the best computer, but it's definitely decent considering we did use a lot of subsurface scattering within a ton of spheres here, so that's mainly what took up the render time, and the sub polygon, that displacement that we used. We got 43 minutes, but it looks nice and it's a good starting point for the photoshop. We're going to take this, right-click it, save as a 16-bit tiff to give us a little bit more and latitude when editing. We're probably going to save this as ''Tutorial skill share water thing.'' Doesn't it really matter. It will save it as a tiff, so we're going to jump into photoshop, and what I'm going to do is, grab this file here, and we got to here, so it's a pretty flat image, which is exactly what we want, we're going to command J it and duplicate it, and from there we're going to go and make this a smart filter. We're going to convert for smart filters, which is going to allow us to edit in Camera Raw non-destructively. We're going to go to Camera Raw Filter, and first thing we see here is obviously the raw image and it's very nice. I'm liking it. I'm going to push the blacks up all the way to make it even flatter. Maybe even add some contrast now. The next thing we'll do is take the vibrance up a little bit to 35. The settings are good as of now, we're getting a little bit more vibrance to this thing already. We're going to take down the exposure just a little bit. A lot of things aren't being overexposed. We're going to split tone is we're going to take a little bit of red, maybe 15, and then add maybe 35 value to the hue and change this more so towards something like this. It depends on what you're going for, like what color scheme, and what time of day you want, wanted sun set more towards the morning. Then I usually take the temperature towards the blue's a little bit. Test out the grains, should be good. It's all about playing with these values. Because a lot of times I don't know exactly what I'm going for at the very beginning. But it's fun to mess around with this stuff. I don't think we need as much, because I didn't know whether I wanted to go more bluish or more neutral. Again, messing with the hues of the certain values, and a lot of times I push these to more of a neon, and for that we probably wouldn't need as much of the saturation here. Six, cool, want some reds. Again, you can pause this and go back, see exactly what I'm doing for most of it, but because I didn't rehearse this, I'm figuring out as I go along now, and of course adding every once in a while, depending on the samples and the subdivisions you'll see with the blur with the different objects, the grain values change, which I am not a fan of, so I had my own grain to give it a photo-realistic quality to so to make it look generally even, and you would think, ''Oh, why are you messing up the image, why are you adding grain? But if you step back, it definitely looks more like a photo. I've explained this in other classes. But I usually like that look as well. Again, it depends on what vibraphone you're going for, are you going for a cool, or more of a warmish at the end of the day, because both look really cool to me. I'm still trying to figure that out, this is obviously way too cool. You don't want everything, otherwise you could have just made it black and white and done something like this, which I mean, some people think that looks cool. But the realism aspect; you want to see different colors in this thing for the most part, so whether we're going for little cool vibe, you can still see other colors punching through here or if you're going for more warmer. I'm really having a hard time ciphering which one I'm trying to use. Even something like that looks pretty cool. This is for more like a natural look. I'm liking that yellow. If you compare to the beginning, it is vastly different. This is like uncolored grids, it's like editing rod footage, so this is the uncolored graded, this is the color graded. You can see, you're getting a much more cinematic look with this, and you can see the demonstrating the grain and not having grain. I am personally a fan. I used to not actually like the grain, but my tastes changed over a couple of years. Then adding subtle differences in the shadows, make for a more, depends on the fade you want. A big look nowadays, at least in film is having everything faded. But it depends on ultimately what you're going for. This for the most part looks good to me. Adding maybe a little bit more contrast, little bit less blue. I'm still trying to figure out; I'll probably make the stuff in the background a little bit more reddish, because that's a cool color scheme, the blue and the red, that's for the most part. The rest we can do in the change in hues, once we export this out. But for the most part, I think this looks somewhat decent. You can see it's all subjective, what you're going for at the end of the day, that looks good to me, maybe a tiny bit of bare. That looks cool. You know, we're really picking apart this image, Which is you got to do for the most part. That looks fine for me at least to start taking up the vibrance also helps a little bit to give the other color values, not just the blue's, a little bit more of an emphasis, so we can focus a little bit more on the other colors and not just the general blue color of the whole thing. But this looks good to me, so I'm going okay this. You can see before and after, you can even uncheck the camera or filter, or just simply erase the layer to see it before and after. That looks good to me, I was at the end, as you guys know. Click Hue and Saturation, make an adjustment layer that changes everything below this layer here. It's cool to see different ways we could have gone, or still have the option to go. Because it's non-destructive, there's really nothing to lose by checking it out. This stuff looks cool, made messing with the saturation a little bit more to, can add some cool vibes. But for the most part, even adding a little bit of aqua green looks cool. Something like that. I'm cool with that, so we started like this, eventually came to this, and ended with this. For this class, that's it. The next one hopefully I can make it, and I took a little bit longer. It took almost a month, it took a few weeks to get you this one guys. It had nothing to do with this class taking a long time to make it, just I've been so busy with other stuff in my life now. But that's what I want you guys to do, I want you guys to try to see what you guys can make from this class using water, using some other techniques we went over, and you can see there's some jagged edges here, some stuff that I didn't take the time, because I didn't want this class to be like two hours long and we have to find tweak everything. But using what we've just taught, I'm sure you guys can figure it out and do a little bit more troubleshooting, so you don't end up with stuff like this. For the most part it looks good, I like these areas over here, and the cool thing about this, is because everything's blurred out in the background, you don't have to worry about it as much. But since we're so close up, you're going to see certain things like this. The water looks really cool, I like this. Try this guys, try something like this, change the colors of the objects. You don't even have to use spheres. Use whatever you guys want, use some HCIs, check the spotlight out for sure, and can we just see what you guys come up with. Thanks for watching. Please leave a review and rate this because it helps so much. That's what's gotten me on the feature page now because I think if I go to skill share, literally as we speak, if I go to the classes section, and I go to creative, I'm literally right here at the top. They featured my class for the top and the creative, and if you go to animation, I'm also featured a 100 percent on the animation tab. Very thankful guys, seriously it's all because of you, and I'm going to continue making this as long as I see that there's a need, and you guys really want to see this. Appreciate it and we'll see you next class.
 Patrick Foley, 3D Artist