Transcripts
1. Introduction: What's going on, guys? This is Patrick again, here with another Skillshare class. Glad you came to see this one. This one in particular is going to be a little bit shorter than usual, because for one, we don't have to worry about lightings, no HDRIs, no placing lights back and forth to create nice shadows. We really don't have to worry about that because we're going to be using a certain technique within the shading of these materials that will allow us to make these micrograph-looking renders. I've been getting a lot of request for this one. Really simple to do and there's lot of applications if you want to make those cells, really microscopic-looking pictures. There's really less steps and it's surprisingly easy to make these scientific textbook-looking images that look really realistic. I hope you guys enjoy this one. We're going to using just Cinema 4D. No external plug-ins. Yes, this one's a fun one. Let's jump on into it and get started.
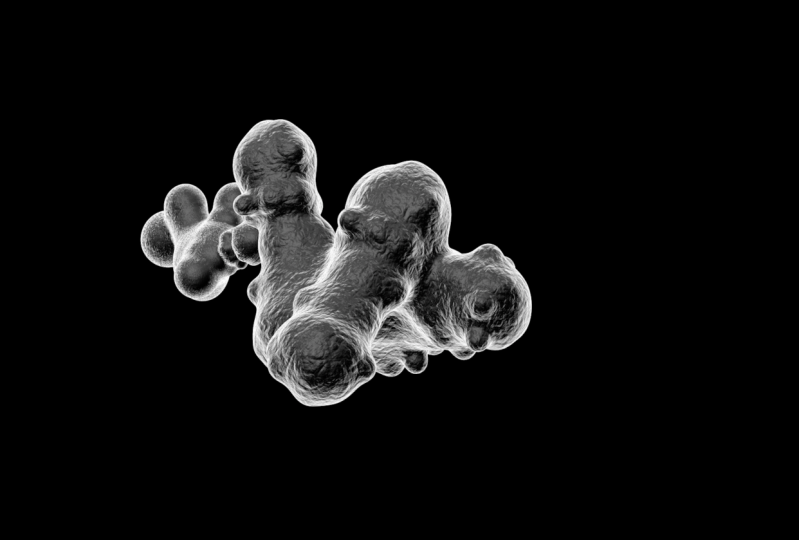
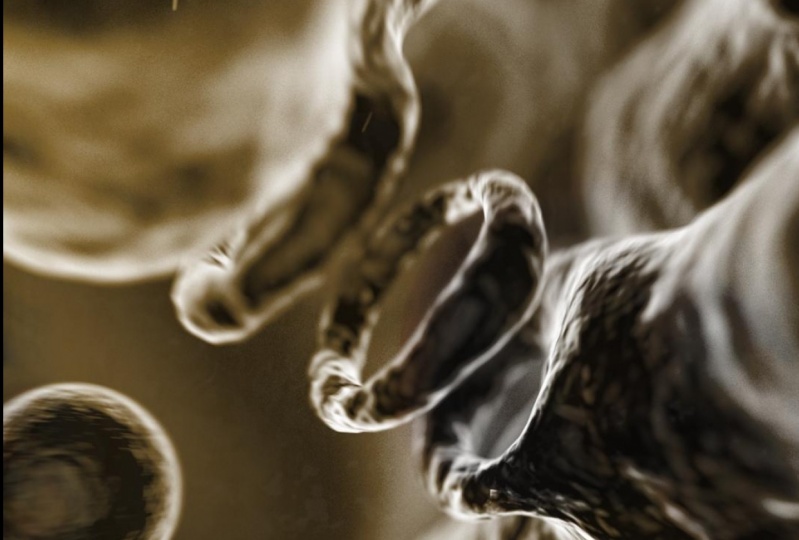
2. Setting Up: Okay, before we start here I'm going to go through what we're making here. These three photos in a row right here are what we're going for. As you can see, they're mostly black and white. Something about these really looks microscopic and we've all seen those micrograph pictures pop up at some point or another without even realizing what micrograph even was. It's pretty much taking an image from a microscope. That's one of the really cool things about these types of renders is because the pictures that are rendered from micrographs are so unworldly and abstract in itself that you can't really tell them apart sometimes. Because if someone were to show me something like this and say this was taken from a microscope this is a close-up above her hair, a split-end, I'd be like "wow, that looks really cool." I wouldn't really know that it's of course 3D. That's the really cool thing about these types of renders. I'm going to go through this one and you guys will be surprised this is going to be a shorter class than usual because there's one thing we actually don't have to worry about and that is lighting. No HDIs, no anything like that. You'll see in a second how we actually make these. Let's start here in Cinema 4D. We've got a blank template here or even kill the camera. Therefore we're starting with nothing and compared to some other classes, I think just because of my last project, I was working on a different layout slightly. I think really the only difference is that I moved the external panel here and sort of like up here or something. However you guys will be able to follow along if you don't know anything about the way this layout is set up you can go to one of my layout classes and I think that's the only free one I have on skillshare to see more about that. But anything I click on, I should be pretty good with explaining what it is. It shouldn't be that hard and no plug-ins used for this one either. Without further ado, let's get started making this thing.
3. Shading: I guess the first thing I wanted to go through with you guys is shading and how these things actually begin to look microscopic, and the answer is actually very easy. The first thing we're going to do is mess around with making different types of shapes and show you what the shader does. If we just start with a basic sphere here, we can see the lines here. We rotate around this guy and we click option r, this is our interactive runner region here. Looks like what you would expect a basic sphere with pretty flat lighting, default lighting. The thing is to make this thing pop out and look microscopic. It's actually very easy. If you were to create a new material here, create new material and you drag this material on here. This looks wide, it's like, Okay, cool. But you'll notice everything revolving around these images have something in common, that is the outer structure of these things are always more highlighted and white while the inside of them is darker. You can see that with this on the outside it's white and that's actually not due to lights that I've placed behind hitting it like this. More so just the shader we have. Really quickly, this is how we make that. So you're going to kill the color channel and we have a black sphere. Next thing we're going to do is take the luminous channel, turn it on and now we have this thing glowing white, so we're like okay, cool. But if you just wanted the edges that glow white, you're going to go to texture within the luminous channel you go to funnel. Already we have this basic shape or basic shaders that actually resembles what we're going for. If you were to click inside the funnel, we can increase the contrast between the outer lines and the inside of the sphere. If we take that back, you can see that now we're getting like this really defined outer radius light thing happening here and you're like okay, that looks cool, that looks microscopic. But we're missing a lot of detail in the cool thing about applying the funnel lighting that we just applied is it applies to everything I'm affecting including bump. If we go to bump and add a normal noise texture or a normal procedural noise here into the texture. You'll see that now that we have this noise affecting this thing, you can see how there's actually no lighting hitting these things from all around as it appears. But because of the funnel we added, that's why the bump is acting this way, which is really cool because no matter what bump you use, it's going to affect it correctly. Right now this is already how you make one of those microscopic sperm entering the egg pictures. This looks like one of those eggs that we often see. You can see if you go back to luminesce here and mess with the funnel, you can change the way this actually looks. So that decreases the contrast, if you wanted it really tighten and defined a lot of contrast you would go all the way forward. You can see how we're almost get like an eclipse looking thing here. I like to keep it somewhere around maybe here. Have some detail, and you can see the difference in noises that we choose really affect the look we're going for here. If we use something like this, we got that thing happening there. Every different noise has its own way of working, bouncing off this light. In a way we really don't have to mess with lighting, adding external lights at all. You can see if we were to add ambient inclusion and global illumination. At least to me, brings these things, gives it a little bit more photo-realistic mists, if you will, so change in the bump around these parts. There's not really a bump that makes these things look too bad. I mean, all of these things have their own features. Usually more subtle bumps look a little bit more detailed and fine. We have this basic texture here, which is really cool. Now anything we were to do to this sphere [inaudible] going to have this one be the interactive render region.
4. Geometry: Anything we want to do to the sphere, including displacing it and displacer. Placing the displacer on top of or as a child, of the sphere, and you can see this thing has been displaced properly, and if I already come and pop this thing out, it is still being affected, but because it is really low poly, you're going to get this weird kind of artifact going on, and so if we were to just add like a subdivision surface, it is easy to see how these things can morph into like these microscopic organism, looking things really grows. Something that you could see probably floating around in the body. Just as some applications. Now that we have like a basic shader saved here in this material, we can come and get started here. There is so many ways that you can actually mess around with the chaise. One of the cool ways is actually taking certain objects, let's just say a capsule for now, making it longer. Making another one may be rotating it, and the only thing you really have to make sure you do is make sure these things are constantly touching each other, in some way or form, something like this. Let's go over here, and you will be looking at this like, how is this ever going to look? This looks just like he is stacking random shapes. It is not going to look that good, but you will see in a second how it is actually easier to make these things pop out and morph these things in a cool shapes, by using actually like a metal ball. You can see something like this, something really, not that good looking as of yet, but if we were to put these guys in a null, Right-click and I believe, I'm so used to doing this in a group objects, so now they are I'm null, and if we were to skip the metal ball out, and then put this underneath the metal ball, and as you can see, it starts off just blowing this thing out because of the initial settings that the metabolic is in. If we take the whole valley and drag it all the way up, you will see that we will begin to retain our shape a little bit, and the one thing you have to do is actually decrease the editor subdivisions to something like 300, 200 and 100, and if that is not starting to reveal the objects here, then literally shrinking the objects one-by-one. You have to do. Something I have learnt is, selecting everything here and shrinking it altogether, won't really do anything because you are shrinking everything as a whole, but if you click object axis and per object manipulation, just taking off the metal off for now, you actually shrink everyone individually, and that is how we can start to shrink these guys, and form these things into a correct k figure here. Just taking these segments down, will shrink this object entirely. You can see this thing is actually coming down to size and shrinking with the actual objects here. Now we are starting to get this molecular looking shape, organic mind you, and it was just by stacking these shapes and do the same thing with these guys, because we are technically moving around just regular shapes like that is all we are really doing to get these organic or not using x particles, and of course, increasing. The thing is here, that you're not actually seeing is whether these look rougher not now, when we add some displacement to this shape as a whole, it is actually going to make some really cool formations. I'm almost done making this thing, so something like this for now. Whether this looks realistic or not, I think it looks pretty cool, and we can keep this like this, and I'm pretty happy with this. What I will do is take the metal ball and make sure the editor and render subdivisions are the same, and then we are going to take that and click "C", and right now this is one sought object. That is what we want, and if you didn't want to work destructively, just current stick to object, and you can just hide the original layer so you can go back and edit. What I'm going to do now is make a camera and set everything in place, so right now we are in this view, and I'm going to go back to this view panel, click "uses render view" and open the camera. Now I'm just going to zero out these coordinates, everything, and just move back on the z axis and see where we are. Make sure everything is actually centered. Cool. The first thing I'm actually going to do is shrink this whole thing, because obviously we should be actually working in microscopic terms, and then pick a formation or position to place this that looks cool, maybe something like this. Actually, instead of moving this thing on every axis and making sure because now we are moving back and forth. If you want this thing to got to be centered, you can click this guy right here, the coordinates system, and it will place it back to the very default, like wherever this thing is actually placed, it will make it. Wherever you are positioned, it is always going 90 degrees in every direction. Places some like that, make sure we are all good, and if you run it.
5. Camera Settings/Composition/Rendering: What's going to happen? Nothing because we have no light source, because the only light source that should be happening is the luminance funnel that we had. Let's take this material that we built previously and apply it. You can see, try to bump up the quality here using this little guy here. By the way, I'm not sure if I've explained this before, but this little arrow, is within your interactive render region, how defined you want this render. If your computer is using a lot of power, and pretty slow, and you want to see the general shape of what you got going here. That's what you would use. But for this, something pretty simple, we'll use pretty maximum quality here. I'm going to change the camera settings. Let's go portrait. Of course, it's going to zoom in because, when we go up in the millimeters, we're zooming in and we're just going to combat that by scaling back a little bit moving this within the tidal action safe. So right there we're getting this organic shape here, but it doesn't look totally realistic because although we have bump, it's still this overly smooth shape. We're going to take the same material and add a displacement. You can use anything. What I'll use for this specific class is a procedural noise. So let's go to a noise, because this thing already has a decent amount of segments to it, I'm using the metal ball. We're not going to have to use too much sub polygon. We might have to use only one level. I'm going to change the noise to something maybe [inaudible] something like that and then bump it up maybe to 250 in the global scale. Then let's see what happens when we sub-polygon displace it. We don't need four layers. Let's go with one for now. Let's try two. Of course every level we go up, it's going to increase the render time. That maybe pretty good. That's looking good. Let's choose a different noise. With this, because reasons [inaudible] we don't need the global scale to be anything too small. So 250 definitely works well. Let's go to like maybe displaced VR noise. So you can see different noises depending on their complexity, will change the render speed drastically. This actually looks good to be honest. Let's see if we take this back little bit to subdivision level. The thing is for this class I don't want to use a noise that takes too long. So even though I really like this one, just for the sake of render times, I'm going to choose something, maybe like VL noise, let's see what happens. Okay. Maybe increase by one. So subdivision level two. Let's see, when it increases 100. We can deal with like 40 millimeters here. By the way, I changed my units to millimeters. I can change that back, if you go to edit preferences, you bring the preferences down here and you go to units, you can change it from everything to millimeters, inches. I guess we can go inches for now. Actually now let's go centimeters. That's the default. So 4 centimeters. Still not 100 percent satisfied with the noise yet, let's choose something like [inaudible]. That'll work for now. You see how already we got this cool looking shape that we've made with just general shapes. Through the metal ball with displacement, it's easy to see how anything you make can turn into these abstract, organic medical looking things because this material we have is not 100 percent destructive. We can go back and edit the settings. We can go luminance for now, take this all the way up if we want. We're getting a totally different look. It's the same micrograph feel, but a different sense in different settings. I actually like this to be honest. You can see just by adding, if you want to multiply this, you go to the split view, which you can also get to by clicking here. Which you can do is, let's multiply this guy, whip them around here, increase the scale and move him. It can move, duplicate him again, and just move him around. So we've got three of these guys just showing now. Just by adding depth of field, we can differentiate these things. So that's what we can do next. We can just make sure these guys fit correctly in the composition, I don't want anything too weird going on here. Something like this. So whatever you're comfortable with, as long as the composition works. So we got a 3-meter ball things that are identical using the same material. Let's now work with the depth of field, which can really help since we're using a portrait lens, it'll be easier to get a shallower depth of field. Let's set the focus distance. We can either just do it the easy way and click where we want, or we can manually do it. So let's have the focus distance be, right on this guy. Go to the physical tab. We are working on the physical render. Let's go to depth of field, let's check that on and let's see what we're looking at. We're probably not going to see too much of a change now because we need to adjust the f-stop. The next thing we're going to do is go to the camera settings. Now that we have the depth of field checked on, we're going to go to the physical tab, go to the f-stop, and go to one. The next thing is, let's see here, let's go to the f-stop. See, this thing is clearly in front of both of these. We're getting a shallow depth of field in the back. But let's really boost this because we're really inside here. We're really going microscopic. Let's go 0.4. This should work much better. Things in the back should be heavily out of focus, which they are and I'm actually happy with that. That's looking pretty good. Now if I were to add something simple like a sphere, of course we always love the spheres. Let's zoom out, get this thing way in the back. Move these things all the way back, and this may or may not work, but we'll see and we probably don't even need. Let's create another material, duplicate this material that we've been using. We can use everything the same except the displacement. Let's take off because we don't want to kill the render times and take that for now and move this thing back. Just to create some cool little [inaudible] , if that's even a word, in the scene. I mean, in a sense that looks cool. It looks like it's floating in this base here. Some people even like it just black. What we can probably do is instead of having this color to be black, we can move it slightly up to a gray. Then maybe move this guy over here, duplicate another guy. Move this behind. Just see how these work out. We're definitely getting a cool composition here on this, maybe a little too faded. It looks like the picture is just faded in general, so we move that darker. To be honest, what we might have to do is just go back to black, and to make these things look at least somewhat deformed, just displace them. By the way, I'm doing that by having these selected and just clicking Shift, holding down shift and clicking in Displacer right here. Then it automatically places it as a child of whatever we want to displace. Add a little noise, and see where we are deforming this guy here. If we were to just add a subdivision surface to the this guy, we're now getting a little blobby guy by scaling it up and down. That's fine. To be honest, I'm just going to kill these other spheres. Let's see what this guy looks like. Yeah, so something like that. We're just going to copy and paste this same sphere that we have here, maybe rotate it, send it back a little bit. Just see how this is messing with the composition. Instead of just guessing where our lines are here, our aspect ratio, once we have this panel selected, we can go shift V view, take the opacity to 100. We don't have to guess now where our aspect ratio is. Let's see what we're getting. Cool. To be honest, what I've done in previous renders, I've had things in the background like this, but it's actually not always the right play. Like sometimes you just want a clean black background and that actually might be what's best for this specific instance. We'll just have to see how this plays out. That's pretty cool as long as it's not too distracting. But I think this definitely works. Maybe just zooming in a little bit, something like that, and refocusing the camera. Cool. In a way this looks like a drumstick, sadly. But I think we can all agree that the whole highlighted outer edges is actually working pretty well. If we wanted to add something, matter of fact, maybe even copy and paste one of these objects we got going on here, and actually getting it in the frame here. Let's just grab it by z, duplicating. Now we're really just picking and choosing where we think these would look best. Placing these guys behind the scenes. There's no right or wrong answer for any of this really. As long as these things look somewhat good. Let's see. For these previous guys we just made, I think we can actually apply the original [inaudible] on. Excuse me. Perfect. It looks like we're definitely getting a microscopic looking image here. I'm not really here to create, at least for this class, the most beautiful composition, but more to show you how I was able to create the shaders and mock-up different shapes from all of this. You can start with a sphere using displacer modifiers and then displacements within the materials or you can start with regular shapes combining them using a metal ball or x particles or whatever you use to make these things. But there's obviously no limit to what you can actually create using this kind of effect. I actually can't wait to see what you guys make. I'm actually going to render this out and measure how long this class was, but I think it was pretty short. That's really it. There's not too much else to this specific technique besides making sure the composition is nice and making specific shapes that you wanted. But for this specific instance, I was just making the shaders for you guys. Really two shaders were used, pretty easy. I think the thing to take out of all of this is when you're building these shapes, you want to make the general shape with a displacement modifier like we have here. Then any of the really specific displacements and anything detailed you want in the bump and displacement within the shader, so within this displacement channel. Any big changes you want, displacement modifier and anything really subtle and intricate you want in the displacement tab within the shader itself. I hope you guys got something out of this and I can't wait to see what you guys submit. As always, if you guys could please give this a thumbs up if you enjoyed it. If not even a thumbs down. If you enjoyed it, help a brother out and help this get out there a little more. I really appreciate you guys watching from the beginning and please submit me your projects and I'd love to give you some feedback. Take it easy guys.
 Patrick Foley, 3D Artist