Transcripts
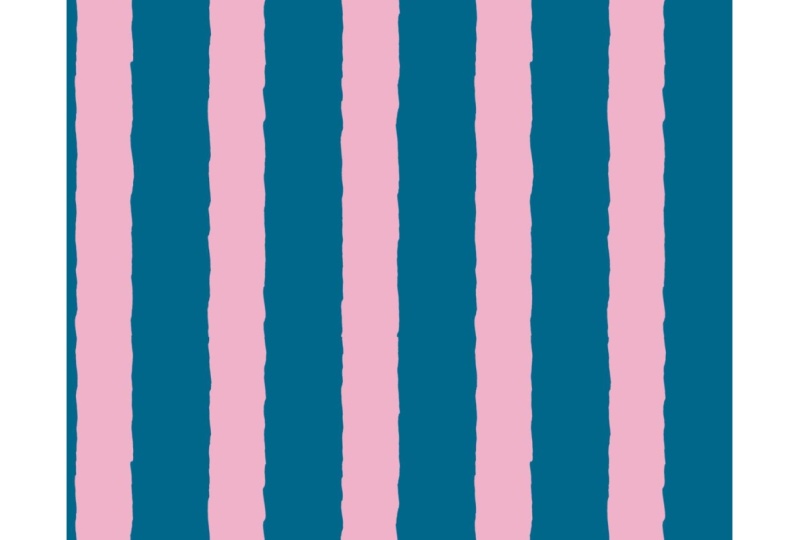
1. Welcome + Intro: Welcome to this class
on how to create your own striped patterns
with Adobe Photoshop. Hello, my name is Trisha. I am a artist and designer, and I love creating patterns
in Adobe Photoshop. In this course, I'm going to
take you through the basics of creating striped patterns, Including horizontal
stripes, vertical stripes, diagonal stripes,
creating a grid pattern. Show you how to create a gingham pattern and also create a diagonal
version as well. In addition to these
essential striped patterns, I'm going to show you how to
use a displacement map in Adobe Photoshop to create
a jacket stripe pattern. As a bonus to this course, I've also included my multicolor stripes
pattern maker set. This template offers
a quick way to create multicolor striped
patterns in Adobe Photoshop. By the end of this course,
for your class project, you'll be able to create your own fun, seamless
striped patterns. Thanks for joining
me on this class. Let's go ahead and get started.
2. Horizontal and Vertical Stripes: In this video, I'm going
to show you how to create horizontal and vertical
stripes in Adobe Photoshop. To start off with,
let's go ahead and create a new file for this. I'm going to use the
dimensions of 1,200 pixels by 1,200 pixels. You can set your dimensions
to any size here. Then we're going to leave
artboards unselected, and then I like to set my resolution at 300
pixels per inch. Color mode is RGB color, and then background content
set to transparent. And then let's go
ahead and create a nude file here to create
our horizontal stripe. I'm going to use the line tool here under the Shape Tools here. I'm going to access
the line tool. Then just holding down
Shift and clicking, I'll just draw out a line
using that Shift key. We'll just keep it at the
perfect degree there. Then when it comes to lines, you need to give your
stroke of color. In this case, I'm just
going to turn off the fill. Then for the stroke, let's just select black at the moment. Then let's go ahead and
change the stroke width here. I'm going to go ahead and
select 600 pixels here. Let's go ahead and
center this line here. I'm going to go ahead and
access the marquee tool. Here's the marquee tool, that is the keyboard shortcut
M. Then I'm going to go Commander Control A to select everything and then I'm going
to use the move tool B. We have the move tool here and again the keyboard shortcut is V. Then what that does is it now allows us to use
these align controls. We'll just align it centrally, both vertically and
horizontally there. Then with those, just
go ahead and select it with Commander control D
to remove that selection. There we have our
line centered here. Now you can save
this as a pattern. There's a couple ways
you can do this. One way is to go to
Edit, Define Pattern. Then you have the option
to give your pattern a name and then go ahead
and click on. Okay, here. We'll see here in
my patterns panel that my new pattern
has shown up here. If you do not have your
patterns panel open, you can go to window and
select patterns here. I'm just going to go ahead
and drag this and bring this to the end of my
pattern swatches here. Let's test this pattern
in a new document. I'm going to go to file new. This time I'm going
to use the dimensions of digital scrapbook paper, which is 3,600 pixels
by 3,600 pixels. For this document, I am going to use art boards
because we're going to be looking at a number
of patterns in this core. We'll just leave it
in one document here. And then just resolution
set to 300 pixels per inch. Color modes, RGB color and then background content
set transparent. And then I'll just
click Create here. With patterns, I like to use a pattern fill layer in
the layers panel here, you can click on the
icon and select Pattern. You can also drag it from your
patterns panel and it will create a pattern fill
adjustment layer for you. Here we can see our
horizontal pattern here. When you click double
click on the layer here, you have the option to scale it. Let's go ahead and try 50% You can see how
that looks and you can even try, maybe smaller. If you want to go smaller
with your pattern here. When this dialog box is open, you can change the positioning of your pattern on
the canvas here. If you always want to get
back to the original, just click on Snap to Origin. We have our pattern here. I'm going to go ahead
and click on Okay there. Then to change the
color of your pattern, I'm going to use a solid
color adjustment layer. Let's go ahead and pick a color. I'm just going to select
one of my swatches here. And then just clicking on okay, Then I'm going to
create a clipping mask. We're going to go right
click, Create Clipping mask. Then your pattern will take
on the color of that layer. Then let's go ahead and
duplicate that layer. You can go right click
Duplicate Layer. You can give it a name. Then we're going to drag
that layer to the bottom. And then we'll double
click and select a color. Let's try maybe a little bit lighter, all the
way to the corner. You can select white here. And then we'll just go
ahead and click on. Okay, We have our two colors
with this color filler. I'm just going to
drag it in here. And now we can see
that it's a part of our artboard before it
was on the outside. Now it's a part of our artboard. I just wanted to fix that
there in the layers panel. Now we have our first
horizontal strip pattern. Then let's go ahead
and jump back in to our original
document here. If you want to create your
vertical stripe pattern, all we need to do with
this line is to rotate it. I'm going to go ahead and
duplicate this layer. So I'm going to go
Commander Control J for the keyboard shortcuts here. We'll just turn off that bottom
line with this one here. Let's go ahead and
rotate at 90 degrees. I like to use the free
transform tool for this. You're going to go
Commander Control. Then with this you
can enter your value, the 90 degrees here. And then we'll go ahead
and click on Okay there. And we see our vertical stripe. Before we used Edit, Define Pattern to save it. Another way to save a
pattern is to click on this little plus icon
in your Patterns panel. And it will go
ahead and save it. You can give it a name and
then just clicking on Okay. And we can see our new Swatch
here in our Patterns panel. And if we go back to
our document here, we'll be able to test it out. I'm going to go
ahead and zoom out. I'm going to go
command or control. And the minus key. Then let's go ahead and create a duplicate of this artboard. We can see our patterns
as we create them. For that, I'm going to
use the Artboard tool. We'll right click and
select the Artboard tool. You do have the option to
click on these plus icons and it will create
a new artboard. But I'm going to undo that. I'm going to go command or
control Z to undo that. In this case, I want to actually
duplicate this artboard. I'm going to hit the
Option key for Mac users. This would be the
Alt key for Windows. Then you'll just hit that
key and click and drag. And it will allow
you to duplicate that artboard with all of the contents on it with your
artboard and give it a name. Let's go horizontal stripe then. I like to have that
position on the top. And then we'll go
vertical stripe here. Currently we're still on our
board tool, you can write. Click and just get back to
the normal move tool here. Then we'll click on
that pattern filler. And let's select our
vertical stripe pattern. Maybe we give it
a new color here, just so we can see it there. Now we've created our horizontal
and vertical stripes. Let's go ahead and jump back into our previous document here. When you're working
with the stripes, if you want to change the thickness and you go
back to the line tool, you can always adjust
the stroke width here. Let's say we do 300 pixels. Then we can save our pattern again with that plus icon here, and we can test it out
for a different scale. And we get thinner stripes here. You can easily save multiple
versions of stripes by changing the
stroke of your line. In the next video, we're
going to take this one step further and create more
of a grid type pattern.
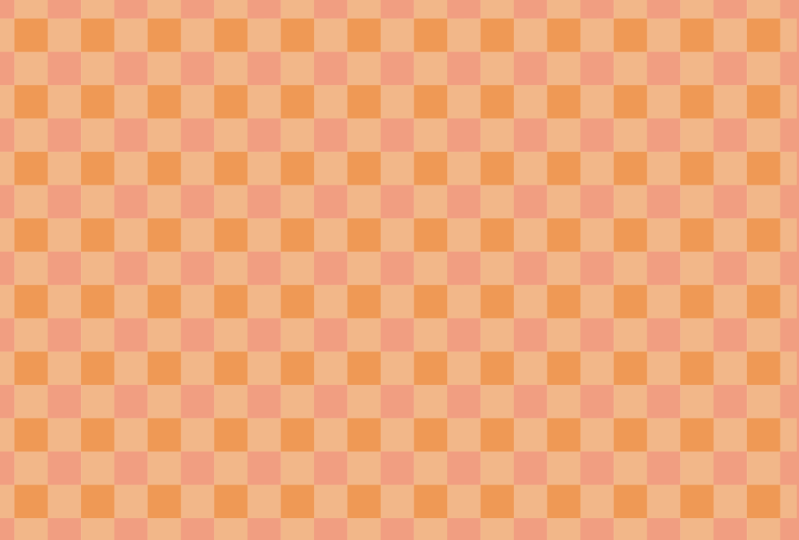
3. Grid and Gingham Plaid Patterns: In this video, we are going
to take it one step further and create a grid pattern
from our document. Let's go ahead and
jump back into our original document here. I'm going to go ahead and
delete this top layer. And then let's go
ahead and bring this horizontal stripe back. We are going to create a
grid, but before I do that, I'm going to convert this
layer into a smart object. To do that, you're
going to write, click and convert
to smart object. Whenever you are going
to duplicate something, it's always a good idea to use smart objects that
way if you ever. In this case, if we want to change the thickness
of our line again, that it will happen for all of the instances of that object. In this case, we are
going to duplicate it. Let's go right click
Duplicate Layer. And then we will
rotate it again, Commander Control to get
that free transform tool. And then we'll just again
set it at 90 degrees. Here we have our grid. Typically when you think
of a grid pattern, the lines are a little thinner. Let's go ahead and just
jump into the smart object. We have it saved here, and then let's make
a thinner line. Let's try 100 pixels here
and see how that looks. I'm going to go ahead and
save that with smart objects. Whenever you make it change,
you'll need to save it, in this case, Commander
Control to save it. Then the keyboard shortcut to quickly close out of this
would be Commander Control. We see that it has
updated it for both our horizontal
vertical line. And that is why
smart objects are a great tool in Photoshop when you are
duplicating an object. Let's go ahead and save
this grid pattern. We'll click to save it. You can give it a
name, clicking on it. Okay. Then we'll jump back
over to test our pattern. Right now we have our
horizontal stripe and our vertical stripe. Let's click on this layer here. Then let's access our
artboard tool again, which is shift V. We'll hit that again one more time to make sure we
have our artboard tool. Then we'll add Duplicate
this one again. I'm going to go option click
four Mac users, that's all. Click four PC and then
just click to drag it to create our
new artboard here. While we're here, I'm going
to go ahead and create a second one because we will be creating another pattern there. Let's get back to
our move tool here. Right click, select
the move tool. We'll click on this
artboard here. Let's go ahead and give
it a name grid pattern. Then we'll select our
new grid pattern here, and we can see it there. Then again, we have the
option to scale this down. Let's go a lot smaller here, then let's change
our colors here. Let's give it a darker color
here in the background. And then let's set
this one to white. Let's change a
different color here, just so we're using different
color options here. I can zoom in on this
command bless key. You can see the grid pattern
here. We'll zoom back out. Let's go ahead and jump
back into our original. I'm going to adjust the
size on this again, let's just double click in, Then I want to get it back
to our 600 pixels again. Here. Then we'll just save that. Commander control S and then Commander
control to close it out. I also wanted to show you how
you can change the opacity of your layer to change
how your pattern looks. If we click on opacity
here and drop it down to 50% and we'll do that one
for this layer as well. With that, we see the
overlapping effect, and this is called a
gingham style pattern. Let's go ahead and save
that and see how it looks. We'll hit our button here. We'll jump back over, finding our artboard here. Let's give it a name
Gingham pattern. Then we'll select that
pattern layer here. Then zooming in, you can see
that gingham pattern there. We can play with a
different color here. Maybe we do an orange one there. And then I'll just
zoom out here. We went from our basic
horizontal stripe and we created this
vertical stripe as well. I showed you how you
can easily change the, the stroke thickness
of your line to save multiple versions of strike patterns with different
thicknesses of the strike. Then we took it one step further to create our
grid style pattern. And then with the
skiing and pattern, we adjusted the opacity, which allows you to give that overlapping illusion
effect of the different colors. Here, in the next video, we will look at creating similar patterns for
a diagonal strike.
4. Diagonal Stripes: In this video, we
are going to look at creating a diagonal
stripe pattern. Let's go ahead and
jump back into our original document
here with these layers, I'm just going to go ahead
and turn off the visibility. Let's go ahead and
create a new layer. We are going to use the
line tool here again. Then starting in this
bottom left corner, I'm going to hold
down the shift key. And then I'm going to click, and then just drag by
holding that shift key, it's going to constrain
it to that 45 degrees. Then we can release
those keys again. Let's go ahead and turn
off that fill color. We'll select a stroke, and then let's go ahead and do, let's try 400 pixels here
for our stroke width. At the next step, we'll
go ahead and center that. I'm going to go hit
that marquee tool. We'll go Command or control A so we can
select everything. And then we'll access
that move tool which is V on the keyboard. In this case, we're
seeing the artboard tool. You can just right click
to get that move tool. And we'll get our Align tool. We'll just align it both vertically and
horizontally here. Then I'll just select those
pixels command or control D, and we have our diagonal line, okay, with the diagonal line. If I saved the
pattern like this, if I just click to
save the pattern, we jump back over. Let's just test it here. What you'll notice is
it gets this effect. We're missing a part
of our pattern. We need it to add it
to the bottom corners. Here, we'll jump back
into our original. One way to do that is to
duplicate this layer, and then we'll add it
to each of the corners. Another way to do that is with the pattern preview
feature of Photoshop. To turn on the pattern
preview feature, we're going to go to
view pattern preview. Photoshop will automatically
fill in that space for us. We don't have to physically duplicate it and move
it to those locations. This feature
automatically repeats it. If I zoom out command or
control with the minus key, you can get a preview of what your pattern
will look like. Let's go ahead and save
that pattern there. Then when you go to turn off that pattern preview feature, you'll notice that it no longer stays in
the corner there. That continuation is only there when you actually
have pattern preview on. Let's zoom back in
like we did before. Let's go ahead and convert
this line into a smart object. Right click, convert
to smart object. Let's go ahead and duplicate this layer Commander Control J. And we'll turn off the
visibility of this layer. Then let's go ahead
and rotate this. I'm going to go
Commander Control. And we'll add in the values of 90 degrees here and
clicking on the plus icon. So for this I'm going to
walk you through the steps of duplicating it and we'll add it to each
of the corners. That way if you don't want to use the
pattern preview tool or that way you
know how to do it if you need to do it without
the pattern preview tool. So we have our
original line here. Let's duplicate it,
Commander Control J. Then we are going to access
that free transform tool. Again, Commander Control. In this case we need to move
it to this top right corner. For this, you're going to
consider your canvas size. I use the dimensions of 1,200
pixels by 1,200 pixels. Each corner has a point. This corner would be 00. This one would be 1,200
for x and zero for Y. One way you can do this is by
entering those coordinates. In this case, for the x axis, we are going to move
1,200 side of our canvas. And then for the Y axis, the position would be zero. You can accept
that change there. Then we'll go ahead and
duplicate this one. Again, Commander control J, we'll access that
free transform tool. Again, commander control,
another way to do it, besides entering the
actual positional value is plus or minus a
certain amount of pixels. In this case we are
sitting at 600. Pixels for X and
600 pixels for Y. If we want to get it to the
bottom left corner here, we need to subtract
600 pixels for X. Then when you move
down in Photoshop, that is adding 600 pixels, because this value would be our 1,200 and this value
would be zero. If we needed to move up, you would go minus. If you want to go
down with the x, you'll go plus to get
to this position. And to show you what
I'm talking about, to get to our x value here, you could also enter
a minus key 600. Then for y, in this
case it would be a positive 600 and that would
also get us in our position. Those are just a little
tips on how to use this free transform tool to
position different objects. You can do it by the
position on the canvas, or you can do it by
adding or subtracting pixels from where
you are located. We'll accept that change now. Let's go ahead and save
that pattern here. We'll hit that plus
icon clicking Okay, We have our two diagonal
strike patterns. Let's go ahead and
test those now. We'll zoom out here with
our horizontal stripe. Let's just select our
original pattern there. We'll zoom out then let's create some more artboards that way we can test our patterns here. I'm going to click on
this artboard here, selecting the artboard layer before I use the artboard tool. Accessing my artboard tool, shift V, we see our
artboard tool here. Then just duplicating
this layer here, we'll go option click for Mac, click for Windows, and you
can just drag it down. Then let's go ahead and create four additional copies here for the patterns in
which we'll create. Select this layer, we're
back on our move tool here. Let's just give it a name
diagonal stripe one. We'll select our
stripe pattern here. I'm going to change the scale on this one so we can see
it a little bit better. Then you can just
pick another color. Let's try a purple this time. Then we'll click on
this board here. We'll go diagonal stripe two. We can select our stripes, go up to 50% there. And then again, you can select another color just
to test it out. Let's pick a red. These
are just random colors. We have our two
different variations of our diagonal stripes
here can minimize your artboards just to
see what you have here. Let's go ahead and
create our grid version of our diagonal stripes. We'll come back
into our original here with these three layers. I'm going to shift, click Select all of them. I'm going to write
click Duplicate Layers. Then we need to rotate them
because we didn't actually. Then we'll need to rotate them. I'm going to go
command or control. Then we'll just rotate this 90 degrees so we
can get the cross there. Then we can select
all of these layers to adjust our opacity here. Let's go ahead and
save that pattern. Then we can bring back
the 100% opacity. And then let's play with the
stroke width of our line. They're all smart objects. We can double click into
our smart object here. Let's access that line tool and then we'll bring down
our stroke width. Here, we'll go 100 pixels, we get a thinner line. And then we'll go
ahead and save that. Commander Control,
Closing it out. Commander Control. And we can
see our cross pattern here. We will go ahead and
save that as well. Let's jump back in, test out these patterns,
see how they look. Just accessing my move tool
to select the artboard. Here we will select
our grid pattern. We can zoom in to
see that maybe we'll go a little bit bigger scale so we can see a little
better there. Can pick a different color name our artboard grid, so you know which one
is wet. Then we'll go. Select our pattern,
let's change our scale. Clicking on Okay, then we
can change our color here. If we zoom out, that one doesn't look quite
as nice as that one. We can play with
our color order. Maybe we make this one white, this top one blue. Then we get our more traditional gingham
pattern here with the white as the background and the color as the
pattern color here. Zooming out, we can just see the various patterns
that we have created. I'm using these
different techniques because we are using
smart objects. We can even take it
one step further. Let's go ahead and jump back
into our document here, and then let's access
our smart object. Then let's go ahead
and duplicate this layer Commander control J. Let's go ahead and move this
commander control then. I'm just going to bring
it up into the side here. Let's go ahead and click in. Then in this case we
are going to go minus, let's go 150 here. Then for Y, we'll go
-150 here as well. And then let's go ahead
and accept those changes. I'm going to highlight
both of these layers here. With these two layers selected, I'm just going to use my move
tool and then just drag it until a Photoshop gives me those guides to say
that I'm in the center. Let's save this
Commander Control, then to close it,
Commander Control. Then let's get back to
the original one here. We can see that we have
double lines here. Let's see how this
pattern looks. Let's test it. Bring it up here. Then let's just go ahead and select this layer
here to test it. And we can zoom in. What you can see is now we have a
double line effect. And you could always play with the stroke thickness
of your lines. But I just wanted to show you that by using a smart object. You can think outside
the box per se, and you can use it as a template and play
around with your lines. In this case, we added two
lines versus just the one line to create some unique
patterns here in Photoshop, it's definitely a powerful tool. I love using smart objects to help create patterns
in Photoshop. We'll just select
our original one there for our patterns there. In the next video, I'm going
to show you how you can use a displacement map to create a jagged stripe
effect in Photoshop.
5. Jagged Stripes using Displacement Map: In this video where
you're going to look at how to use a displacement map to create a jagged stripe
pattern in Photoshop. One thing to note when you're using a displacement map is you should create your
displacement map the size of your end document. In this case, we are
going to do a 12 by 12, 3,600 pixels by 3,600 pixels. And I'm going to
demonstrate this in a new. I'm going to go file new. We're going to go 3,600
pixels by 3,600 pixels. I'm going to de select
artboards for this. We'll set our resolution
to 300 pixels per inch. Color mode, RGB, color
background contents transparent. And then just click on Create. I'm going to get
my default colors back here, D on the keyboard. Then for this I'm going to
go to Filter Render Clouds. That will just fill
in my document here with a cloudy look. I'm just going to save this
document as my displacement. We're going to go
file save as you can. Give it a name clouds
displacement map. And then just go
ahead and save it on your computer where
you can find it. You have your document saved. And then let's just go
ahead and exit out of that. We'll create a new one file, new same dimensions, 3,600
pixels by 3,600 pixels. I'll go ahead and click Create. For this, let's demonstrate it with our horizontal stripes. We'll bring those stripes in. I'm going to bring
that scale down. We'll go down to our
25% here and click on. Okay, Then with this pattern
Fi layer I'm going to write. Click then I'm just
going to rasterize it. We have, it's no longer
a pattern layer. Then just with this extra part, I'm just going to delete
the layer mask and we see our pattern here with
this layer selected, we're going to go
to filter distort. And then we then for
horizontal scale. Vertical scale, this is the degree to which
it will displace it, we'll just leave it in. This case I have 10.10 selected
under displacement map, we'll just have stretch to fit selected and then undefined
areas, repeat edge pixels. And then we'll just
click on Okay. Then Photoshop will
then prompt you to select your displacement map. This is where you'll navigate to that displacement map
that we just created. Then just click on Open. Then let's go ahead and give it a background color
so we can see it. Let's just go white here and we'll drag that below
our pattern filler. And as you can see, it's created more of a organic fill to these
stripes where they're a little bit more jagged
edges then if you want to. In this case, I did
not convert my object, our horizontal stripes
into a smart object. Right now, I don't have any way to go back and adjust that, that it's better
to convert it to a smart object before
you apply any filter. Let's go ahead and just
repeat that process. We'll create a new layer here. We'll add our
pattern fill layer. We'll bring it down to the 25% We can just
turn off that one. I'm going to right click and convert this
to a smart object. Then we'll go through
that step again. This time we'll go to
filter distort display. Before we saw the effects
of 10.10 Maybe we bring it up to 20 just for
comparison's sake here. And then just clicking
on Okay again, it will prompt you to select
that displacement map. And we'll go ahead
and click on Open. Now we can see the effect
of that displacement. This one was the
one where we had a horizontal and a vertical of 20 versus we have a horizontal
and vertical of ten. It's a little bit more
subtle for the ten, but what we'll notice here is because we converted this
into a smart object, see this little bit
of detail which is the smart filters that
we have this layer. Let's turn our layer back on. If I click on Displace here, you can now edit the
degree of displacement. If we want to get back to
ten for these values here, you can click on Okay. When it comes to this filter, if you go to edit it, you'll just need to select
that displacement map again and then it will
make those changes there. This is just a tip when
using filters within Photoshop to make sure that you convert it to a
smart object first. That way you have the option
to go back and change any of those filters if you need to because it is a smart object. Let's go ahead and test
this one again on one of our diagonal stripe
patterns here just to see how liquids turn off
the visibility of that layer. Let's bring down our scale here. And then we'll convert
that to a smart object. Then we'll go to filter. What you'll notice that when
you use filters is that your last filter here will be positioned at the top so you
can quickly access it again. We'll keep the same
displacement here. And then just click on okay, selecting that displacement map. Then we can see that fun effect here with
our displacement map. If we saved this as a pattern, if I turn off my
color fill layer and I define this as a pattern here, then we'll test this
over in our document. Let's select this layer here. Let me zoom in so we can see it. Then just zooming in. Not too noticeable with
this pattern here, but it's not necessarily a seamless pattern the way we created it with
a displacement map. Just be aware that using
the displacement map won't necessarily yield a seamless
pattern from side to side. In the next video, I have
a little bonus for you, a template that I've
created to help create multicolor patterns
in Photoshop. Be sure to keep watching
the next video.
6. Bonus: Multicolor Pattern Maker Template: In this video, I'm going
to show you how to create multicolor stripe patterns using some templates that
I have created. This is my free gift to you
for taking this course. In the description and
resources section, you'll be able to access the
link to get these templates, but I'm going to
show you how you can use them to create
multicolor striped patterns. Let's go ahead and
open up the file. After you have
downloaded your files, go ahead and navigate
to the files. And you're going to
open the one that is called Stripes Pattern
Maker template. We'll just double click
to open that here. Here you have a number of
different art boards here. What we are interested in is this smart object
here at the top. If we double click here on the smart object and
access the line tool, we can modify the A
stroke width here. Say we bring it down
just a little bit, 200 pixels here to
make it smaller. We can save that commander
control to save it. Then if we just into
our document here, it will automatically update it through all of
these artboards after you have adjusted your smart object and have saved it and it's been updated
in this document. The next step is we are going to use a action that I've
created for this template. To import your action, you're going to go to
your actions panel. If you don't see
your actions panel, go to window and
select Actions here. From the side of the Actions
here in the Options menu. Here, you are going to
click to Load Actions. Navigate to your
downloaded file, and you should see a
file that's called Multicolor Stripes Maker with an extension that stands
for Actions in Photoshop. And then just click to open it. Then here we see
that it has been loaded into our actions panel. If I click the arrow here, we have two different actions. We have one for stripes and
one for diagonal stripes. We'll go ahead and
click on this stripes because we are in the
stripes template here. Then I'm just going to
go ahead and click Play. What we notice here in the
patterns panel is that a bunch of pattern swatches
have been saved. This action has been created
to automatically save a swatch of each
of these patterns. Here also included in your download is
another Photoshop file. Let's go ahead and open that. We'll go file open again. Navigate to your folder, and this time we are
going to access the one that has the digital
paper here at the end. We'll go ahead and
click on Open. Basically, this document
was created so you can test your patterns here
accessing this first board. We can click on our new pattern, and we can see that it makes slightly
smaller stripes here. If we move to this
next art board, we have a two color version. In this case, we'll
navigate to the two color, so we'll select this pattern
here, this pattern here. We have the option
for two colors here. There's also three color,
four color version. Then we also have it for
the vertical stripes. Then we have it for the
gingham style pattern, and we have it for the
grid style pattern. Let's get our move tool here. We'll move to this
fourth one here, which is here at the bottom. We can go ahead
and let me zoom in here on this art board. I'm going to change this one. And then I'm also going to, we'll go 123 here
to change this one. I just want to show you with this multicolor pattern
maker templates, you can combine them. You can save a, a pattern in one size. And then you can go and adjust the ethicness of your
line and then resave it. Then you can combine
it together to create patterns like this where
you have multiple stripes, but they are of different sizes here to create your pattern. Zooming out this template is just a quick way to
test your patterns here, similar to what we
were doing before. You can adjust the
smart object to create new pattern variations. Then what this template does, it automatically
gives you the option of different pattern
swatches up to four colors. With that particular design, let's go ahead and open the line for our diagonal stripes. We have the one for the
diagonal stripes here, we're looking at the
template one here. We'll open it up,
accessing my Smart object. Double clicking in can
access my line tool. If we want to go smaller here, let's try 150 pixels. We'll go ahead and save
that Commander control S. And then it will automatically update
the smart objects in our template document. Then we'll close out of this commander control
W to close it. Then it will automatically update it here in our template. Coming to our action here again, there's one for the
diagonal stripes. And we'll go ahead and play that action then it will automatically save
the swatches there. We'll test that
pattern maker here. I've included one for the stripes and one for
the diagonal stripes. Let's go ahead and open
that diagonal stripe one, we're looking at the one with digital paper here at the end. And clicking on open then I can just zoom in here
a little bit to see it. We'll go ahead and test
that first pattern. See that we have
a smaller version of our diagonal stripes. Then you also have the
option for the two color. Then we can see the three
color version here, as well as we have the
four color version. And then we also have
opposite stripes. And then we have
the gingham style. And then the grid. Let's select our grid board, see how it looks thinner. We have thinner stripes here. I just wanted to
include these templates with this course
here on skill share, just as another
way to take it to the next level for
creating horizontal, vertical, and diagonal
stripes in Adobe Photoshop. In the next video, I'll
go ahead and explain the class project
for this corpse.
7. Class Project: Thank you so much for
joining me in this course on how to create horizontal, vertical, and diagonal stripe patterns in Adobe Photoshop. Your class project
for this course is to take some of the
techniques that you've learned in this
course and create your own stripe pattern in
Photoshop with your pattern. Go ahead and upload
it to this course. Under the class projects, fellow students can see the patterns in which
you have created.
 Tricia Lish, Graphic Designer