Create Your Own Motion Poster: Quickly and Simple with Touch Designer | Li Zhang | Skillshare

Playback Speed


1.0x


  • 0.5x
  • 0.75x
  • 1x (Normal)
  • 1.25x
  • 1.5x
  • 1.75x
  • 2x

Create Your Own Motion Poster: Quickly and Simple with Touch Designer

teacher avatar Li Zhang, Illustrator, Designer, Visual artist

Watch this class and thousands more

Get unlimited access to every class
Taught by industry leaders & working professionals
Topics include illustration, design, photography, and more

Watch this class and thousands more

Get unlimited access to every class
Taught by industry leaders & working professionals
Topics include illustration, design, photography, and more

Lessons in This Class

    • 1.

      Introduction

      2:30

    • 2.

      Project

      1:59

    • 3.

      Creating your moodboard and static poster

      2:25

    • 4.

      Getting started in Touch Designer

      4:43

    • 5.

      Generating motion effect by Noise and displace

      5:33

    • 6.

      Exporting

      2:43

    • 7.

      Conclusion

      1:05

  • --
  • Beginner level
  • Intermediate level
  • Advanced level
  • All levels

Community Generated

The level is determined by a majority opinion of students who have reviewed this class. The teacher's recommendation is shown until at least 5 student responses are collected.

265

Students

4

Projects

About This Class

This class is an introduction to create your Motion Poster quickly by Touch Designer. Touch Designer is the software for anyone who’s interested in 2D design, new media art, interactive design, generative art, or 3D design. It’s the node-based visual programming software. So you don’t need any prior knowledge of programming language at all. In this class, I will teach you how to quickly design a Motion Poster by Touch Designer. Unlike other design software After Effects, Touch Designer will save your design time by simply connecting each operator and generating diverse motion effects. 

Hi, My name is Li Zhang. I’m an illustrator, designer, and visual artist.  I love to create stylish art & designs and always love to explore the possibilities for a combination of new technology and art.

In this class, I’m going to teach you how to create a motion poster in Touch Designer. I’ll show you everything you need to know to get started on  Touch Designer even if it’s your first time opening the program.  Unlike other motion design software After Effects, Touch Designer will save your time by simply connecting each operator and generating diverse motion effects.

What You Will Learn: In this class, you will learn:

  • The basics of the Touch Designer Interface and  fundamental steps of the designing process
  • How to source inspiration from Pinterest and create a project Moodboard
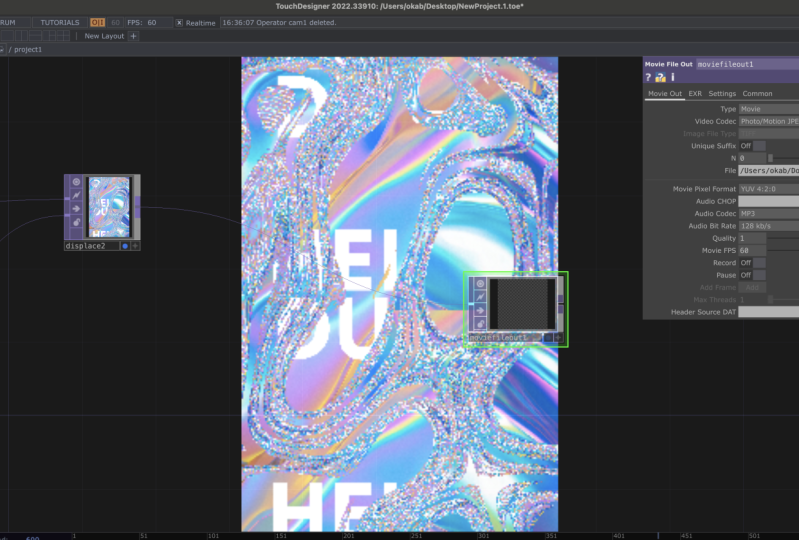
  • How to install the software and import a file into Touch Designer
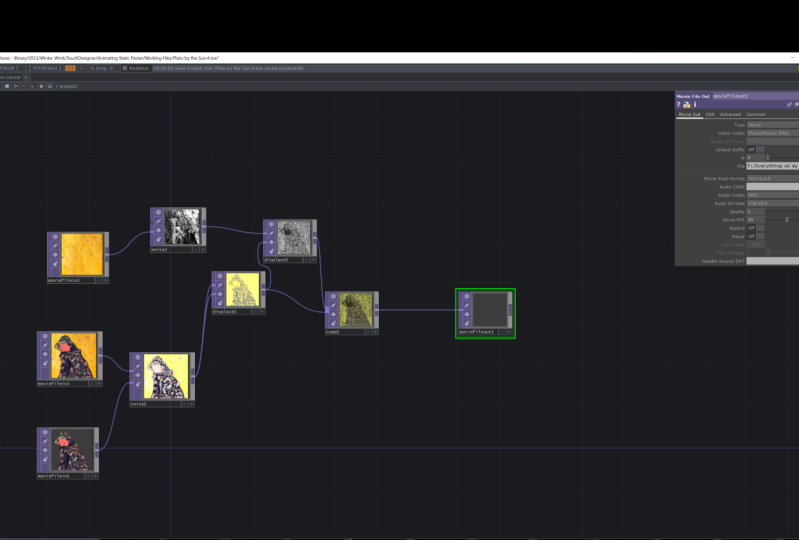
  • How to generate diverse motion effects by Noise and Displace function, and finally export an amazing motion poster! 

You’ll be creating:

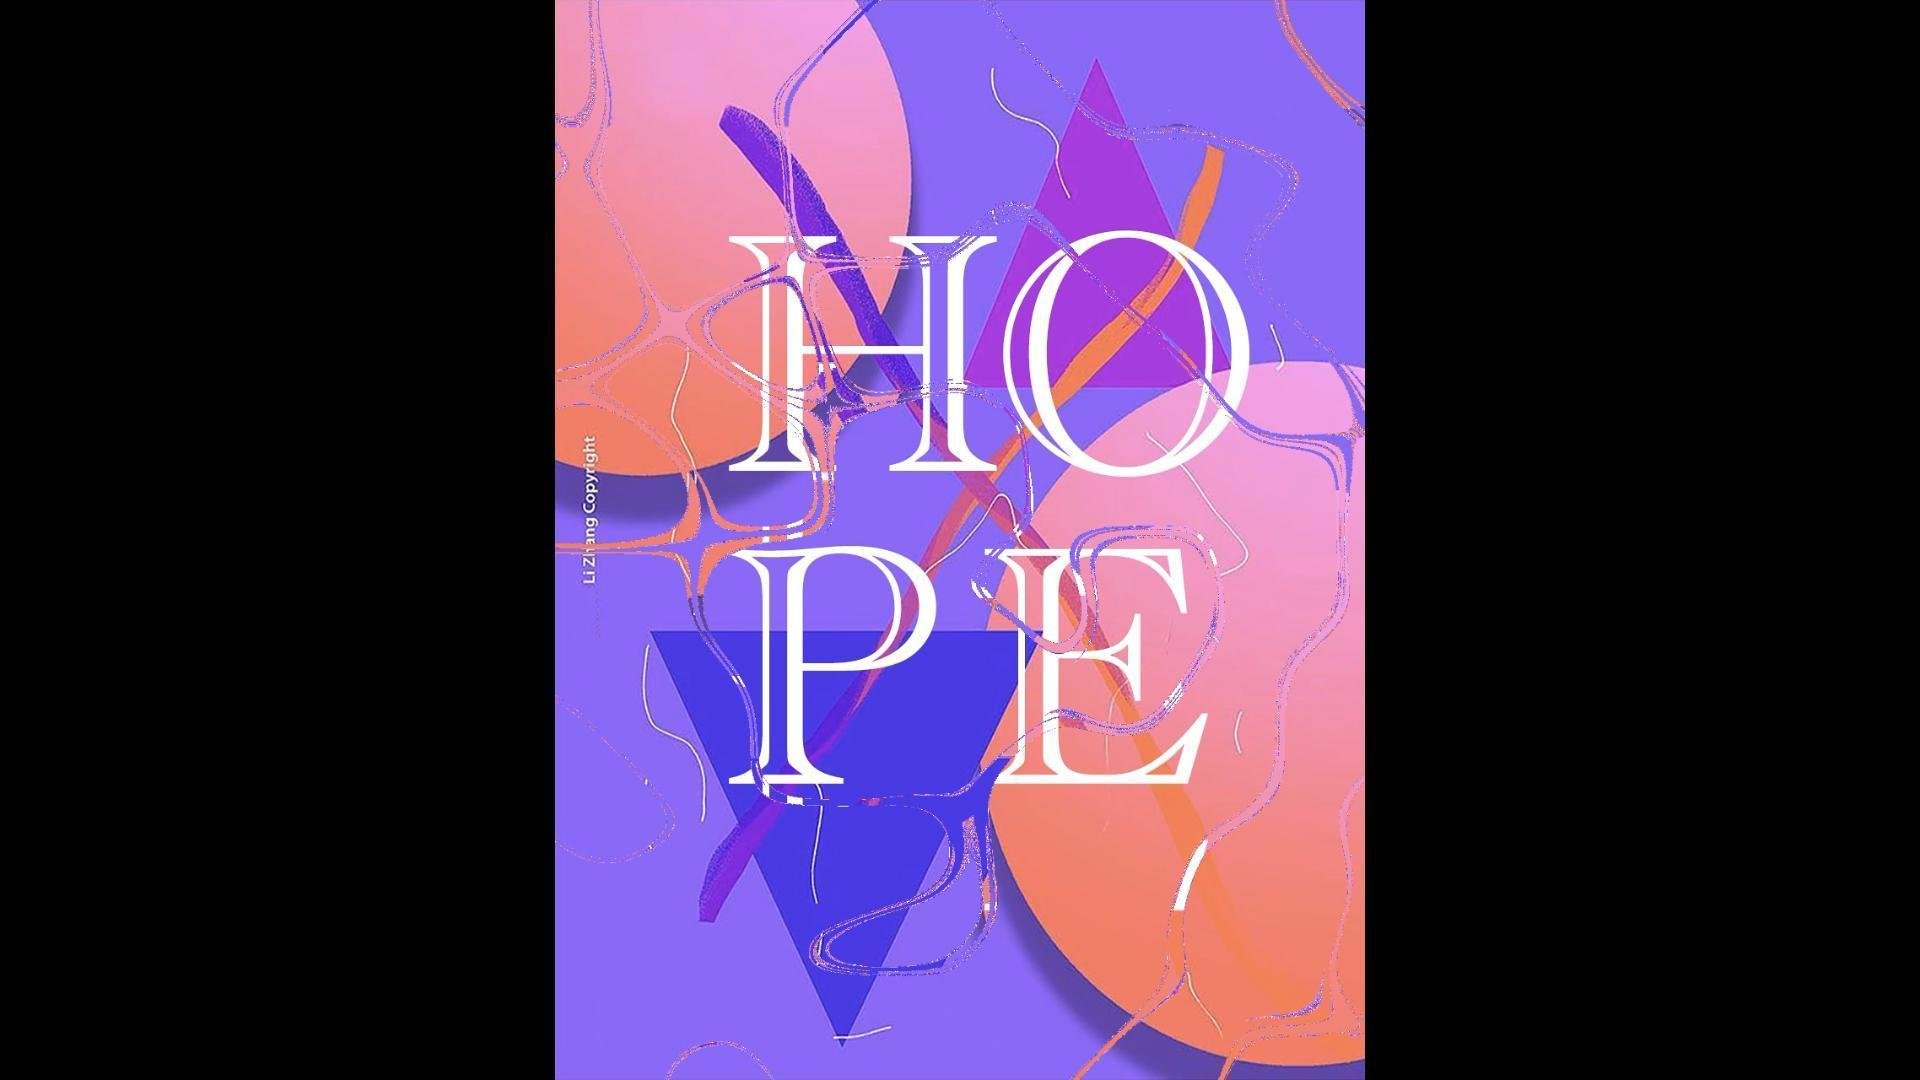
A personalized Motion Poster by Touch Designer while developing your Touch Designer foundational skills. Even if you’re new to Poster Design and Touch Designer, you’ll find these simple and effective techniques easy to use and apply to your work!

 Why You Should Take This Class:

Touch Designer's visual programming environment makes it easy and quick for visual designers to experiment and test new ideas to stay creative.

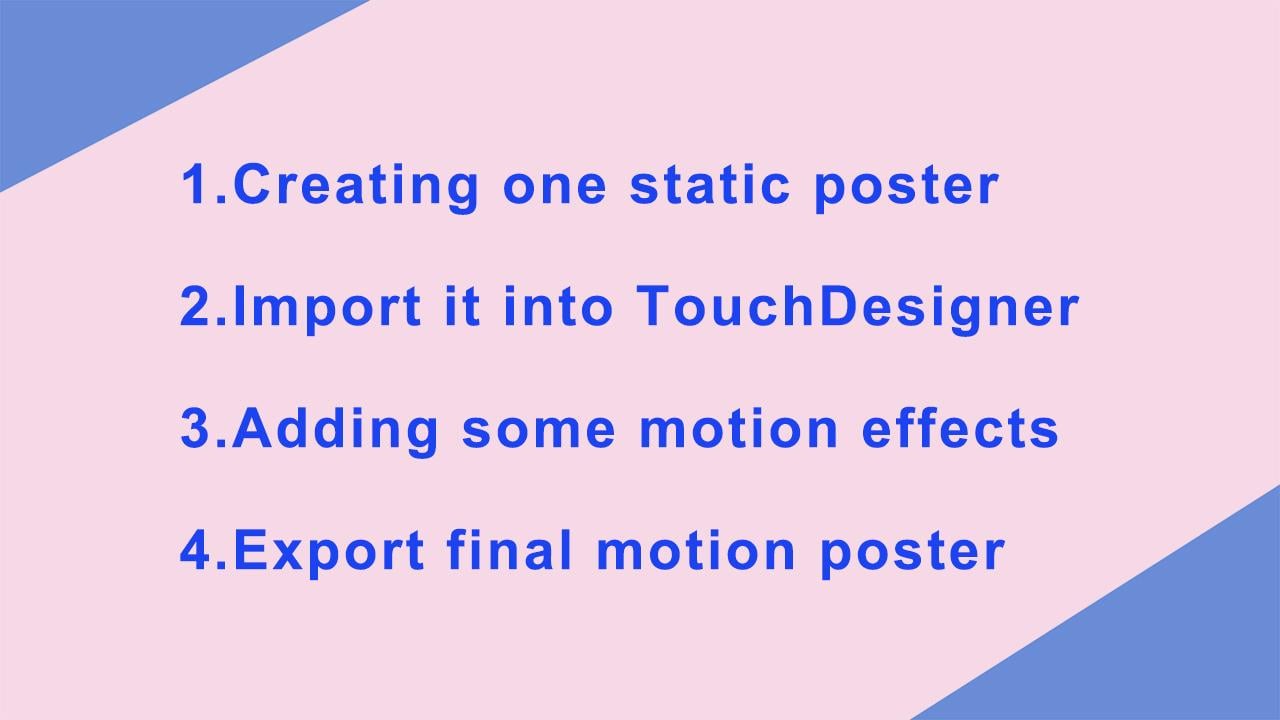
In this class, I’ll show you how to make a dynamic Motion Poster simply by four steps by Touch Designer, and through the process, you’ll learn the basic operators in TOP of Touch Designer.

The final class project will be a 10-second video of a Motion Poster.

Who This Class is For: This class is suitable for students of all skill levels without any requirement of design and programming background. As long as you’re interested in new media and interactive art.

I can’t wait to see your First Motion Poster by Touch Designer! Don't forget to post your final projects in the Project Section!

Enjoy the class! :)

Meet Your Teacher

Teacher Profile Image

Li Zhang

Illustrator, Designer, Visual artist

Teacher


Hello, I'm Li. An Independent Illustrator/Designer based in New York City. Prior to moving to the States, I used to work as a product engineer for Groupe PSA in Shanghai. Combining rational logical thinking with creative imagination, I enjoy creating intricate, symbolic, geometrical illustrations that celebrate diversity and the power of storytelling through a colorful pattern-based style. My works are mainly focused on publishing/Ads/Tech/Healthcare Industry. The Clients I've collaborated are included :

Nasdaq/ Dior/Microsoft / Washington Post / Meredith / Sierra Magazine/Reader's Digest/ Melissa etc.

Here I want to share some useful skills along with my passion for a creative journey. If you'd like to be updated on my new classes, just hit the +Follow button... See full profile

Level: Beginner

Class Ratings

Expectations Met?
    Exceeded!
  • 0%
  • Yes
  • 0%
  • Somewhat
  • 0%
  • Not really
  • 0%

Why Join Skillshare?

Take award-winning Skillshare Original Classes

Each class has short lessons, hands-on projects

Your membership supports Skillshare teachers

Learn From Anywhere

Take classes on the go with the Skillshare app. Stream or download to watch on the plane, the subway, or wherever you learn best.

Transcripts

1. Introduction: Have you thought about creating your own motion poster by simple four steps? What is a motion poster? It's nothing but giving a movement to a static poster. Hey, welcome to my class. How to design a motion poster in Touch Designer. Hi, my name is Li Zhang. I'm an illustrator, designer and visual artist in New York. I used it to be an engineer, and switched my career into art industry since 2016. I love to create stylish art and designs and always love to explore the possibilities for combination of new technology and art. In this class, I'm going to share with you how to create motion post in Touch Designer. I'll show you everything you need to know to get started in Touch Designer, even if it is your first time opening the program. What is Touch Designer? It's a node based programming software. Unlike After Effects Touch Designer will save your time by simply connecting each operator and generate diverse motion effects. In this course, we'll be working on the simple motion poster together, we're going to cover a basic introduction of Touch Designer interface. And you'll learn the complete, full professional workflow from knowing first how to source inspiration and create the mood board for design, how to install the software and import a file, how to generate diverse motion, effect by noise and display function. And finally, export your work. Other than that, we will be also covering tones of keyboard shortcuts, tips for improving design process. In this class project, you'll be applying the skills learned here to create your own motion poster. You can either take my illustration and customize it with your own design, make something that you feel proud of. To help you get started. I will provide the project template for reference and my illustration poster. This class is for anyone who is interested in new media and interactive art, or for someone who wants to make a motion poster in an easy way by Touch Designer. For this class, you don't need any prior knowledge about programming. I'm so excited to see your masterpiece and hope you have a lot of fun learning and creating. I'll see you in the next lesson. 2. Project: Hi, welcome to the class. Before we begin, I'd love to talk about the class project. For this project, you will create your own 10-second motion poster based on the static poster provided. And don't worry, I'll take you through the whole process from how to source 00:00:18.015 --> 00:00:20.775 inspiration to finally export your work. First of all, I would like you to read through the project description that I've listed in the class resource section. And then you will find that the steps you need to take to complete this project. Getting familiar with what we are doing, and I'll take you on the journey of creating a motion poster. First of all, since it's a Touch Designer introduction class for beginners, I want you to download the Touch Designer first and getting familiar with the interface. And to help you get started. I've provided some useful resources for your reference, such as mood board demo, static poster file that I created by myself and the project file, you can use it customized to fit your needs. In this class, I'm not going to give you a lot of direction on how to design your static poster. You can use my poster demo or any pictures you like. The key part of the class is the process of how to use Touch Designer to make the poster becomes dynamic. So just follow the steps in the class, I'm here to help you get the most out of the course and answer any questions you may have. Once you follow me and complete the project, you will get an idea of what the full process is to create a emotion poster by Touch Designer. Even if you are new to Touch Designer, you will find these simple and effective techniques easy to use. I'd love to see what you come up with. Don't be shy to show it off, as well as the process in the group discussion. That's it. I'll see you in the next lesson. 3. Creating your moodboard and static poster: The overall process is like this. We'll create one static poster and the import it into Touch Designer, after adding some motion effects and export it. So before we open the Touch Designer, I'm going to source some inspiration for the static poster and create a simple moodboard for poster design. So what is a moodboard? It is a collection of images, fonts, colors, art styles, patterns, textures, and any other design elements that helps define the the direction of the design. In this class, we make it simple by just collecting some motion posters. So this is the mood board I created it for this class. You can tell the first three images, the colors are just black and white and others are more colorful. Since the theme of the poster is named "hope". I prefer to use vivid colors that brighten people's mind. That is to show more positive vibes. As I said before in this class, I'm not going to give you a lot of direction on how to design the static poster. Just show the process of design. Here we are. This is the final poster "Hope". The background is very colorful and dreaming, The word "Hope" I choose to use the font. Academy Engraved LET. So you can change another one if you'd like to try another font. There are a lot of our choices. I've attached the PSD as a project resource so you can use it as a demo. And if you don't want it, you can create your own static poster. And otherwise you can just download your own images you like online and import into Touch Designer. Save the image as the PNG and now the the file is ready to use. Next lesson, we will introduce the interface of Touch Designer and know how to import the file into it. And that's it. I'll see you in the next lesson. 4. Getting started in Touch Designer: In this lesson, we're going to introduce the interface of Touch Designer and then know how to import the static poster into it. Since our post file is ready to use. Now we get started with Touch Designer and talk about the introduction of interface. If you haven't downloaded the Touch Designer, please go to the office website and download it. Once you're on this page. Click on get it now and download the version fit for your computer system. It's available for Windows and Mac, and I'll do Mac. After you finish the installation, click the launchpad and double click the Icon. And here we go. So if you launched the TouchDesigner for the first time, you can see there is a simple work example in the middle of the interface. You can see we have the Canvas, timeline and there's some initial palette in the categories. The operator connects with each other. And here is the parameter window. If you don't want to say the parameter window, you can press P and it will disappear. And every time you click the operator, the related parameter window will turn out. As you can see, it's very easy to understand how this is node based programming software you have all these operators, which are these rectangles right here. And they transform the information they have inside, and it then transferred information to another of these operators. And in the bottom left is a timeline. You will pause or play the project by press Spacebar. In Touch Designer interface. The information flows from left to right. A network is created by connecting the output of the operator to the input of the next operator. Usually, you import inputs on the left right here. Then you will have the transpiration on the right to the next one. Some of them won't have the inputs like this. This is basically because they have very important from somewhere else. For example, That's movie file into this operator. Basically, they let you import the file from outside. So this is basically how the software works. And if you don't want this template, you can right-click the mouse. And it will select all the operators and click, Delete. Then they disapear. After we are familiar with the interface and we already have our static poster. We can import it into Touch Designer. So now you can create your operators. You can double-click the Canvas somewhere and you will see all the operators tab which contains. There are different types of operators. In this class, we focus on the Top. First, we need to input to the static posts are appropriate. In last lesson. Here we use Movie Fighting, click and drag it into the interface, the pickup, the banana. And this is a system default. Pick the parameter window in the right corner and click the plus sign. Then we search for the static poster, we have design and import it. Then when we set the parameter, don't forget to set the output image size and same as the poster, that is 170 to 86 plus 960. So if you want to see the image larger. Lastly, you can click the Play button and operator. Then image would appear in the middle of the canvas. So that's in next lesson. We will talk about is the noise and it displays operators. By adding them, the poster would have some motion effects. See you in the next lesson. 5. Generating motion effect by Noise and displace: Yes, we have come to the most important step in next class, generating motion effects by nice and that displays operator. So first, let's add noise operator, same as before. Let's double-click the Kayla's to open the operator create dialogue. Funds is a label, top and type nice jacket age into the canvas. And then we set some parameters. For now, click the noise parameter window and the period as one and funded the harmonics as 0. And the ponens here as 0.5. Okay? So now the nodes become like this. They have the more clear boundary. But how to make the noise move, check the trends from the second one, and then fund the translated a third option and input eight times seconds. Click the entering button. So nice movie. You can see the noise these movie. And don't forget to change the resolution. Here is trained to custom model. Those are the 296 day. Saw them AT okay. Mackay, the same as the poster. Next, we will make the motion effect more fun and complicated. We're going to add displays function. The displays will cause white images to be a web to buy another image. So let's double-click the interface and the place function into the working area. Next, we will connect to the noise operator and the displays operator. Click the output part of the noise on the right side and then drag the line to the displays input port and connect the line to another input part out displays. You can see the viewers become interesting, fluid filling. This beautiful. And then we add another displays operator, connect as a movie file in operator with the first. And then we add another displays operator connected the movie phi operator with the first in part, pot. And the first displays output. To the second though, displays input emotion effects. And can say, let's click the displays. We can say that the movie effects already at, into the static poster. But the effect of Simpson not what I want and it's not moving. So let's modify the parameters. So click the first two displays. Operator, set sauce made it potent and it's 11, set of set as 00. And input the code abs Tom dot seconds divided by two In the offset wet, click the second displays operator and the set, the sauce meet Poland as 11. Set to the displays weight as 0.5 and abs Tom dot two seconds, divide two. And finally set to the offset as 00. No big change. So let's change the extent type from code to repeat. Wow, I like it. So that's effect. I want look at the motion effects. That's amazing. And if you don't like, it is moving too fast or you can change the time period here by dividing by five. So that's it. The next lesson, we're going to talk about how to export as a motion poster. See you in the next lesson. 6. Exporting: Finally, we come to the last step in the class, exporting the emotion poster. We're going to use the operator moving buyout. So double-click the interface and choose the operator. And a connected with the displays. There is nothing changing y. Let's check the parameter window. First. We set the type as movie format, and then click the plus y in the file and save the file name as these motion poster dot MOV. You can set your own name. Don't forget to add the five-step IRS. You cannot successfully exported. The king step is the recoded pattern. Clicked it and does it off, change to arm? It means now it's starting to recall this animation. And the way you want to just stop the record, click it again. It become off. So it means it's the ending of the animation. Now we click the button, stay for awhile. And click data again. It's over. Now the video will be saved into this specify photo. Hello, it is, We did it. Finally. I will. Motion poster is finished. Well down. Now we only use four steps to design a motion poster in touch designer. You could try to modify the parameter in noise and the displays operator. And we'll generate amazing various effects. That's the magic of Touch Designer. You can always explore new stuff with the parameter. And that if you wanted to go deeper about the prison pole behind the screen, you can click the question mark here. And it explains a lot of details about each operator. Last, let's enjoy every emotion poster together by reviewing it. And you can add some background music to make it pop. 7. Conclusion: Congratulations, you've finished the course. I hope you enjoyed this class and I hope that you had fun. If you did, please let me know because this is my first day of class. I will be more than happy to receive your precious feedback. If that is your first dive into Touch Designer, I hope it gives you some confidence to show you that just a few simple effects in touch designer, you can really bring something more to your design. Touch. The center is amazing software. I hope it's a good start for you to explore. Also, don't feel shy to share your work in the project. And I can't wait to see what you've created. If you have any questions along the way, please leave them in the discussion panel and I'll make sure to answer them. Okay, Thank you so much for taking my class. I'm really proud of all the hard work you put into the class. And I look forward to create another class with you some great work. And I see you in the project section.