Transcripts
1. Class Intro: Here is how to create your first professional motion
design project in After Effects without
years of trial and error and without doom
scrolling tutorial. Most beginners assume that client level animation will be as easy as following a tutorial. It isn't tutorials steach tools, not professional thinking. I learned this the hard
way. I landed the cli. At line ten days. I had after effects skills, but no system, no
process, just tutorials. I delivered in 17 days, late, burnt out,
and embarrassed. I knew the basics, but when it was time
to create on my own, my mind went completely blank. So I went back to fundamentals. I studied how real
motion designers plan, structure, and execute projects
before they even animate. And that's how I created the animation
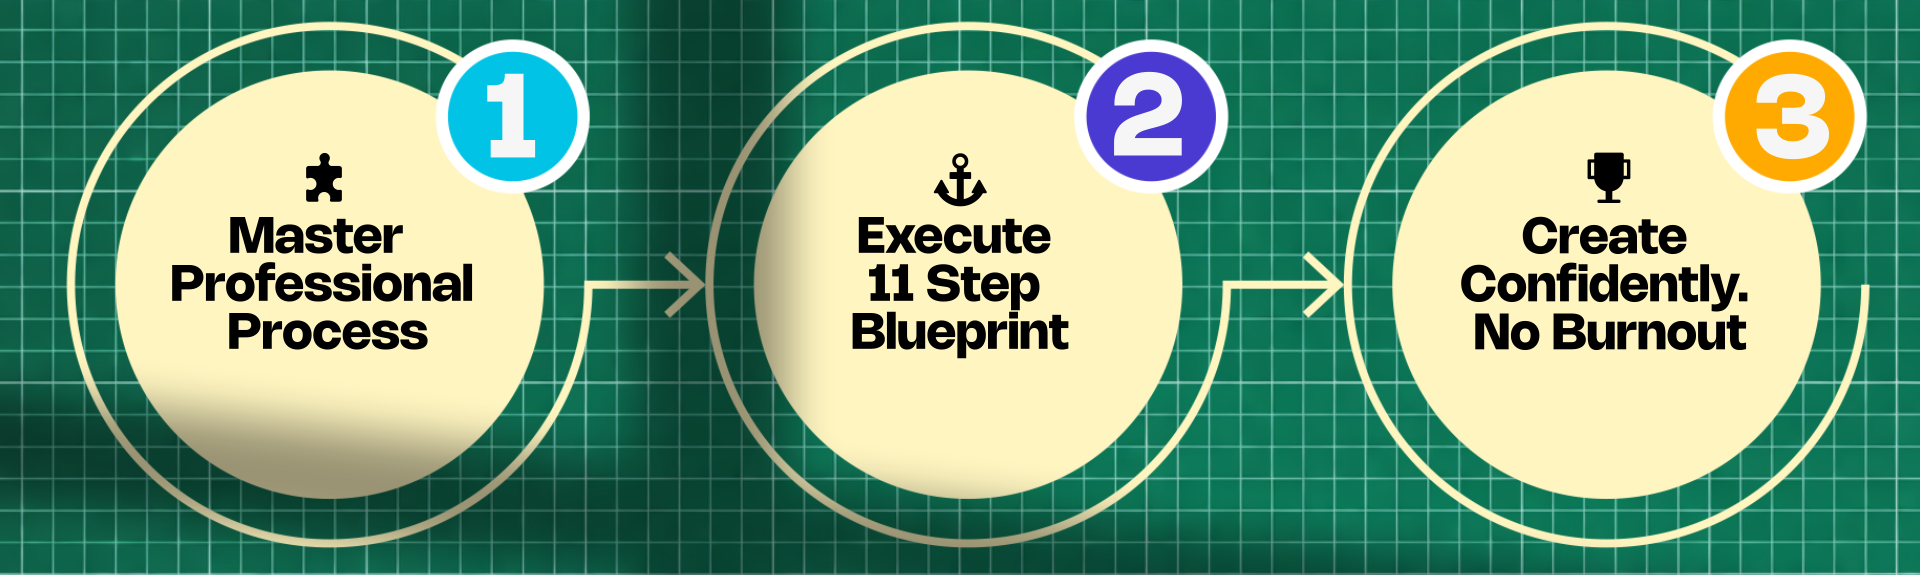
production blueprint, an 11 step system that shows what to do at every stage, why each decision
is made and how to complete a full
motion design project without guesswork and born out. By the end of this course, you will be able
to develop strong concepts and a clear story. You will be able to
plan and execute complete motion design projects. You will be able to think
like a professional, even if you are a
complete beginner. Now, this course doesn't
teach you tutorials. It teaches you how
to think and make decisions inside and
outside of after effects. This blueprint, you can create explainer videos,
social media content, short films, animated films, educational animations
and client work. Now, this blueprint is for you if you know After
Effects basics, but struggle to
finish the project. Tutorials haven't helped you create professional
looking work. You want a clear system, not a random tip. You freeze at blank timeline and don't know what to do first. You want to complete a real polished motion
design projects. You want confidence to start and finish projects on your own.
2. Pick your mountain: Ly, there was this video
of a penguin, right? It has been going viral
and it's a great story. So a penguin normally live in the ary where
everything is safe, like they get enough food and they are with
other penguins, right? But this penguin goes
towards this mountain, which is almost 70 kilometers away from where it's being shot. And this imagery,
I don't know why, but it's really
inspiring the Internet, and it's inspiring me, as well. Okay? So I have a
suggestion for you that you have to pick
your mountain, okay? For example, the mountain
for me right now is producing this course
as soon as possible. Mountain for you
could be just staying consistent or mountain
for you could be learning after effects as
quickly as possible so that you can do or make money
by doing what you love. Mountain, for some people
could be staying healthy. Mountain for some people
could be going to the gym. Mountain for some people
could be anything. Whatever your mountain is. Pick it right now. For example, it could be finishing
this course, or it could be producing your first explainer video
or first animated video, or you need to find a
client which is not easy. And no matter what,
you don't stop until you reach the peak of
the mountain, okay? That's what this little penguin inspires us to do is to
move towards the mountain, even if no one is with
us or even if we might perish on our way and we might feel that's
completely fine. Okay? So if this little
penguin can go for a mountain, well, I'm pretty sure you
can make a freaking video. Okay. So make sure that
you stick to your guts, make sure that you
follow your bliss, make sure that you chase and
move towards your mountain.
3. Class project: Client Briefs: Class project, I have given you six fictional client briefs. These are designed to feel
like a real world client work, and they are not
random practice ideas. Okay? So you can
pick any one brief and follow along with
the entire process. Okay? So I have to tell you something that
is really important. So I will not show you
the animation like we normally do in a
tutorial type of way, okay, and ask you
to follow along. I'm not going to do
that for this class. Okay. Instead, I will break the project down step by step, exactly the way
professional thinks and works so that I can explain
it in more details. Okay? And so I will show
you how decisions are made, why a certain approach
is chosen and how problems are solved
during animation. Okay? So if I take that older approach of teaching
course like a tutorial, like I tell you what I'm doing on the screen,
while doing that, I may forget to include how a professional
might think, okay? And that's why I have taken this
4. Animation Production Blueprint: Animation production blueprint. Now, let me quickly
walk you through all the ten or 11 steps
of the production. First, we have pre production, then we have production
and then post production. Although sometimes editing
is in the post production, but since we don't edit
as much as editor, when it comes to animation, I have kept it in the
production instead of post production is
where we start. Okay? So first, we
understand client brief. Once the client
brief is understood, we move on to second step,
which is conceptualization. Here we create concepts
from the scratch. Then we move on to step three,
which is visualization. So in visualizations,
we try to visualize the look and feel of
the final product. So we basically pick colors, we see how things will look, what it will feel. Okay. Then we move on to fourth step, which
is exploration. So in exploration,
we basically explore the references and inspirations that we need for our project, then we move on to fifth step. So fifth step is different. It's strategy, okay? So strategies are
really crucial. So here, we basically make strategies that will help us to finish the
project on time. Okay? This looks scary and long, but don't worry, it's not
that long in the course. Okay. Then once this is done, the pre production is finished. And we don't need the
client's approval, everything that has AA will
need an approval, okay? So once that is done, we move on to sc story and voiceover. Okay? In this step, we write the script or we
write the story. We use three X structure or
the structures that will be given in the course and we
record the voiceover, okay? So if you're making
an explainer video, you would need script, okay? And then you get
script approved, and then you go with voiceover. If you're not making
an explainer video, it is just a story driven video. You would need only a story, and then you can get approval and then move on to
the next step, okay? So every A here means
you need approval. Okay. Then we move on to
storyboard and style frame. In the storyboard
and style frame, we will be creating
storyboard and style frame. Storyboards are rough
images of what will happen. Okay. It's basically a
drawing of what will happen. Style frame is basically a screenshot from
your final video, but we make this before
we make the actual video. Then in asset creation, we will be creating
assets for our animation. This step is really crucial, but you won't need
approval here. By the way, I forgot to mention that in storyboard
and style frame, you must get your
client's approval because if you
don't get approval, you will have issues here, okay? So make sure that you get
your client's approval, and once that is
done, you can start creating the final assets
for the animation. Editing. Okay, so in animation and editing, well, it's obvious. Okay, here we
animate and we edit. Then we have sound
design and music. We pick sound effects and
whatever it is that we need, we need music because music and sound design
are really crucial. In this course, I
will show you how to pick great music as well, and what to do about
it. It's really simple. Okay. Then the final
step is we deliver, and if our clients wants
revision, we provide revision. This is the basic
blueprint of this course. Okay? So if you want
to make an animation, okay, which is this,
you would need this. Most people, what
they do is they are focused so much on this that they forget
the parts, right? Pre don't know how to
do pre production. And that's why they create
these poor concepts, and these poor concepts end up making not only
poor animation, but they will not
have any impact on your audiences, okay? But we do deep dive
into our concept, into visualizing things
into exploration. This blueprint can
be used for movie. It can be used for
video editing. It can be used for almost
anything related to videos. Okay? So that's it for the animation
production blueprint. I will see you in
the next lecture.
5. Step 1: Analyzing Client brief: So let's understand how to analyze the
client brief, okay? And so the first thing that I used to do was I would go through the
entire client brief. This is a logo. These are the visual references
that they have sent. Okay? And so once I go
through the entire brief, I would point out the most
important part, for example, key message here is
pollution harms marine life, but with care and action, the ocean can heal, okay? So this is the key message
they want to share, okay? And so this is going to
be really crucial when we write stories and we
design our visuals, okay. Then audiences is also
going to be really crucial. It's for general viewers ages 10-30 family students
and eco audiences, okay? People who prefer gentle, friendly storytelling
rather than aggressive activism, okay? And so you have to keep
this in mind as well. Because this is what
the clients want, okay? Then these clients are
really nice because they have given us tone
and style as well. Okay? So here, they want soft, friendly, approachable,
emotional, but not heavy, clean, illustrative visuals,
warm and hopeful ending, minimal text, strong
visuals, okay? So the points, all of these
are really, really crucial. So I'm going to write
them out or type them in some other document so
that I can remember whenever we are creating
concepts or anything, right? Then this is really
crucial as well, okay? Because here you will be
given the time, okay? So timing in animation is really crucial
because when you are learning from a tutorial, they don't really care
about the timing, right? Because all they are
focused is on teaching how to get this thing done or how to get this effect right. But what if there is this
time crance you have to show entire thing in
20 to 25 seconds. How are you going to show that? So this or how are you going to show this
in 20 to 25 seconds? If you think about it,
it's really challenging. It's like telling an entire
story in 25 seconds, and it's not easy, right, because you have to show
them effects of pollution, you have to show them the
problems of escalating. You have to show a
rescue operation. You have to show them or transferred before,
after state, okay? And how you choose to show
this is entirely up to you. You can interpret the
steps in any creative, symbolic or literal way, right? And also, they have given us
this creative constraints. So it must include a whale it must show
pollution to clean up, and it should end with
positive feeling, no realistic go or
disturbing imagery. Okay? And so this is
the name of the brand, which is, well, it's AI
generated and it's fake. Don't worry about that.
Okay, so it's a blue heaven
6. Step 2: Conceptualization: First step in any creative
process is conceptualization. This happens right after you break down and
understand the brief. Once the brief is clear, you build the concept
from the scratch. At this stage, the concept
doesn't need to be perfect. It just needs to give
you a clear direction, a rough idea of what
the visuals could be. One critical rule that
you have to remember is this concepts must come from
stories, not just visuals. As motion designers,
we often focus too much on visuals and
forget our real job. Well, our real job is
to make people feel something if your animation
doesn't create emotion, it doesn't matter
how good it looks. The goal isn't to
impress other animators. It is to communicate with general audiences
and inspire change. Weak concept equals weak story, and no amount of visual
polish can fix that. To create strong concepts, I follow a four step system. First, you ask yourself
the right questions. Second, you extract
keywords, heard, create rough stories, and four, you create sketch
from your ideas. Okay? So step one is ask
the right questions. The biggest difference
between beginners and professionals
is how they think. Asking the right
questions instantly shifts your thinking towards
a professional mindset. So here are the questions. First, what does the client
want and what is my role? Now, this is for
you, not the client. Okay? So mistakes are fine. In this case, the client wants a short emotional animation
about ocean pollution, a clear before and after story, a family friendly, hopeful tone, clean and soft visuals, and a video that is usable
across all platforms. Now, your role is to turn
this into a clear story, clear design and animation ideally without any
dialogues or voice over. Number two, what concept do the already existing
ideas inspire? Now, some immediate ideas are a central character like whale showing the effects of
pollution and rescue a strong sense of transformation
in the character. So one idea is whale
suffering from pollution and later
being rescued, another one is mother and baby whale separated and
reunited at the end, but this may be too
complex for a beginner and a seven day deadline
so we keep it simple. The third question is, what
is core message and emotion? The message would be
defined in one clear line. So for example, pollution
harms marine life, but with care and action, the ocean can heal itself. And emotionally, the audiences
should feel concern, empathy, sadness, relief, hope. Now, these emotions are
roughly written, okay? Now, I wrote these
emotions by keeping the concept that we defined in the last question
in mind, okay? So if you cannot come up with the emotions, that's
completely fine. But you have to remember
that these emotions guide color, pacing,
and composition. So if you cannot define these
emotions for each scenes, because we haven't
defined scenes yet, but I can since I'm up, I have been working in this
field for seven years. And so if you can't
completely fine. You can start with
two or three emotions that you think are right. Okay? Number four, what is the simplest visual metaphor
for this project? Now the clearest solution
is before and after. So for example, before there
was pollution, darkness, hum, after we have rescue,
clarity, and healing. It is really simple, it is
readable and it is effective. Once you define all this, we move on to step two, which
is to extract keywords. So keywords help you visualize design and final animation. So these keywords
are extracted from the brief and already
answered questions, okay? For example, whale before
and after, pollution, healing, clean ocean plastic, darkness, rescue, et cetera. Okay? So they will be our guide for sketching
and storytelling. Step three is to
craft a rough story. Okay, really simple. Story one, a whale trapped in
pollution suffers. And basically, in after version, the client rescues and cleans the ocean and
the whale survives. Then I have created
another story. So this is emotional
but complex. Okay? So a mother and a baby whale are
separated because of the pollution and they unite at the end because
of the rescue team. And for beginners
and tight deadlines, story one works the best, okay? Then we move on to final part, which is step four, and that is sketch, okay? So use keywords to sketch
rough ideas, okay? They don't need to
look good. Just clear. This step is for clarity,
not for perfectionism. Okay? And if drawing
isn't your strength, you can use references. We are going to go into
references in the later chapters, or you can use AI for that, especially on short headlines, I think you should rely on AI AI is really helpful, right? But here, the goal
isn't perfectionism. It is clarity and gaining that
momentum that will help us execute our project in a way that is helpful and that
can be done on time.
7. Step 3: Visualization: Visualization, we
imagine the look and feel of the final animation. This is where we explore
rough ideas that will later guide scripting
and execution. Although people often
say look and feel, we will define them in
the opposite order. First, the feeling
and then the look. The first part is feeling. This is the emotion you want
the audience to experience. The key question
to ask yourself is what emotion do I want the
audience to feel at the end. Once you answer that, your emotional direction
becomes clear. For this project, I want
audience to feel hopeful, soft, friendly,
gentle, and warm. Now, once the feeling is clear, we translate it into look. Okay? So ask yourself
what colors, shapes, elements, and textures communicate
these emotions. Because our emotions
are warm and hopeful defining the look
becomes much easier. You can even paste
your emotion list into ChaGPD or Gemini and
ask which color, which shapes, which elements, and which texture represents
these emotions and feeling. When it comes to color,
you will usually get warm colors like
yellow or orange, and that becomes our primary
color for the project. Now, once the color is chosen, it stays consistent
throughout the project. For example, if the e is orange, it remains orange
throughout the project. Only brightness or darkness can change depending
on the mood. I won't go deep into
color theory here. Because we already have an
entire course dedicated to it. The point is simply this, you need a color palette. To create a color palette,
you need to first of all, pick the feeling
that is hopeful, soft, friendly,
gentle, and warm. Then you can ask Gemini or Cha GPT which
colors match that. And take the suggested
primary color and go to any color harmony
site like adopt cooler and use color wheel and
different harmonies around the primary color to
build your color palette. Again, color is a deep topic, so we will keep it simple here. Then shapes also carry emotion. Since the core emotion
here is hopeful, we use rounded shapes. This was already
established in the sketch, so there is no need
to overthink it. Another thing you must add here is your personal
preferences. This is your project. So your preferences matter. For me, that includes color
like yellow and blue. They are my favorite
color noise texture, color shadows, a half tone, which is my personal favorite, and I include it in each
project that I can, okay? Even if these choices
aren't perfectly logical, they reflect who I am. And that's important to me. And I want you to
remember the same. Your style matters,
you matter, okay? Now, we have kept
references last intensely. References comes
later. Not forced. Most people start
with references, and that's where they go wrong. If you rely on
references too early, you will end up copying
instead of creating. When you are clear
about emotions, colors, shapes, textures, you will know exactly which references to accept
and which ones to reject. Stay true to yourself, even if that means
rejecting styles that look cool but don't
match who you are. Finally, we define the elements. In this project, we
already have the whale, bottle, and the wave. We can also add the sun, boards, trash or boats. Elements come from
simple question what objects relate to the
project and the subject. Okay? List them
out, and that's it. So visualization is about
clearly defining the emotions, colors, shapes,
textures and elements. Basically, we are
visualizing what our final project or final
video could look like. Once these are clear, everything else becomes easier.
8. Step 4: Exploration: Step is exploration.
In exploration, we'll look for inspiration
based on our needs. Once we find it, we
use it to create strategy that helps us
finish the project on time. Thise are the references
that I have collected. Now, references are important, but you have to be careful not to get lost in them
because it's really attractive to look
at references and scroll instead of
working on your project. Okay? Most people spend too much time
collecting references, and in the end, their work starts to look
exactly like what they collect. We don't use references to copy, we use them for inspiration. If you simply re
create references, you are misleading the clients, but you are also
deceiving yourself, and that's something
you should avoid. Finding references doesn't need to be deep or complicated. That's why this part
is extremely short. The one rule to remember is this a useful reference must
support your concept. A simple approach is to take everything we
have done so far, the client brief
conceptualization and visualization
and then paste it into chat GPT or
Gemini and ask it to extract useful keywords for your references
for this project. Once you have clear keywords, finding the right
references becomes easy. The biggest mistake
people make is spending too much
time on references. They get lost then
struggle during execution. This happens because they
rely too much on references and not on their own ability and not on their own thinking. Always rely on your thinking
and your ability first. References are just references. Also, don't expect to find references that perfectly
match your final animation. If your project has multiple
scenes, that's unrealistic. And if you do find
the perfect matches, well, you are coping,
and we don't want that. The goal is to create something honest and true to yourself. It doesn't need to be
completely original, but it does need
to be authentic. Beginners often copy references, and that's
understandable. They lack the guidance. They imitate professionals to learn but now you have a way. So you don't need to do that. You have a clear
process to think. You know how to think, how
to plan, and how to decide. So naturally, the time you spend on references will reduce, and that's exactly how it so
9. Step 5: Strategy: The next step is strategy. Most animators and most courses don't talk about strategy,
but it's essential. So strategy is a clear plan to finish the project on
time without burnout. Without strategy, one of these
three things will happen. First, you might
burn out or second, the client asks for revisions
you weren't ready for, and third, you
missed the deadline. Well, all three hurt your
health, confidence, and income. Without strategies,
project feel overwhelming. You don't know where to
start, so you freeze. With strategy, everything
becomes clear and manageable. Strategy is the
difference between finishing a project
and abandoning it. Professional who delivers and a beginner who never starts. Okay? So strategy is crucial. First, define the scope, decide the animation length, number of scenes, what's essential and what
can be simplified. Here, you can ask yourself how long the animation will be. How many scenes will it have? Which moments are
crucial and what can be simplified mode. Now, remember, if
you are beginner, you don't need to
answer each of them. Now, if you feel
stuck somewhere, you can just move ahead and
skip that question. Okay? You don't need all
the answers yet. So for this project, video is going to be 20 to 25 seconds. It will have four
to five scenes, and this prevents project
from going out of control. Number two, decide the approach. Choose the style that
fits the deadline, okay? Ask yourself what style is actually achievable
within the deadline. Okay? So here the
approach will be flat, simple, rounded, minimal. That's realistic and achievable. Number three, decide the tools. Ask yourself, what
tools will help me move fast and what tools will
I need for this project. So here I will need
after effects, Illustrator, AI, so AI reduces friction
and speed things up. If you don't want to go into Illustrator and
separate things out, you can use AI, okay? It really makes things easy. Number four, decide
scene details, okay? Now, this is reproduction. We are in pre production phase,
not perfectionism, okay? So remember that. So scenes
will be simple and clean. Just detail enough to
show emotions and change. Number five, choose technique. Ask what animation techniques are realistic for
my skill level. If you're a complete beginner, this will feel challenging
and that's normal. Once you look at
your storyboard, you will understand what
needs to be animated. From there, you can
identify what skills and tutorials you will need
to complete the project. You can answer this
question later. For this project, I will
need shapier animation, basic position, and
scale animation and simple wave loops. I don't want normal
waves, by the way, I want waves that feel rich,
almost watercolor like. The animation itself
is easy for me, but making it look
good is the hard part. So I clearly note that I need to learn or research watercolor
style wave looks. Number six, break it into steps. Now we break everything down. So here, ask yourself, what steps do I need to take in order to finish
this project on the time. Okay? So first, I will
be creating assets, then I will be preparing scenes in after effects or Illustrator. Then I will animate the
core elements first. For example, waves,
sun, water movement. These elements stay consistent across the entire animation. So if I animate them once, I can use them everywhere. Only colors or
expressions will change. Then I focus on the main
story animation of the whale. O bottle is especially
important here. It acts as the container
for the entire story. After that, we have
transitions polishing, making things look
good, and yes, making things look
good matters a lot. Okay? If animation is
great but looks bad, clients feel
something is missing. If animation is average, but looks amazing, clients
often don't notice. I'm not asking you
to cheat clients. I'm telling you that visual
polish is powerful. Okay? And final step is to
render and review. Now, from this step, we will create a timeline
for our project, okay? A simple timeline. So day one is going to be pre production and set creation. Day two to four is
going to be animation. Day five is going to be
polishing or final animation, Day six is render and review, and day seven is final delivery. Now, preproduction
is the foundation. If you skip it,
everything will collapse. It's like the foundation
of the house. If you skip the foundation of
the house sooner or later, bricks will fall on your head. Then we have number eight, which is to set your
priorities straight. Ask yourself, what do I need to prioritize to finish on time? Okay, so to finish on time, keep the story simple. Focus on key scenes, reuse elements and animation
as much as you could, finish rough animations
first, avoid perfectionism. Emotions matter
more than detail. So if you mess up, make sure that the emotion and the heart of the scene
is at the right place. Finally, the
animations that people remember aren't the most
complex ones, okay? They are the ones that
made them feel something. If your audiences
feel something, they will remember it
even if it's not perfect. But to execute that,
you need a strategy. Okay?
10. Step 6: Story, Script & VO: So the script or the story, whatever it is that
you are making, whether it's an
animated video or an explant video or even a gift, Jiff however you say it, the script and the story are
the heart of your animation. If you want to make something memorable, you have
to remember this. Humans are and will
always be driven by stories no matter how advanced technologies
will get, okay? Even if there will
be a time where human and AI will be
synced into a same body, we will still be
inspired by stories. If you can't tell
stories that move people your animated
videos won't have impact. You might create something
visually stunning, but people forget visually
stunning videos all the time. What they don't
forget are stories, stories that move their hearts. This is something you
must always remember when you are inside
after effects animating. Now, there are two
types of scripts, and these are the two
components here. Okay? So the first one is when you are creating an explanatory
second is when you're creating a
story driven video like the one we are
working on here. Okay? So let's explain
explainer video scripts first. So an explainer video script is critical component
that determines the final result of the video. It's the blueprint
designers use to create and animate
characters and environments. And explainer scripts are mostly written for
the voice over. Okay? So you record
the voice over first and then animate
based on the script, and from the script, you
create the storyboard. Now, story driven videos
also have storytelling, but there is one key difference. In explainer videos,
you have voiceover, which gives you a lot of control over pacing, clarity,
and emotion. Story driven videos
like this one, there is no voice over. It means double the challenge. That means the story
itself has to be strong enough to communicate
everything surely. You need to be much more intentional about
how the story flow, how the visuals are what the
characters are doing, right? Now, let's look at how to
write the story, okay? So to tell a story, you need a structure is a very popular structure used
in most successful movies. It's called the
three X structure. So act one shows the problem. Act two shows how the problem is being
addressed or challenged. Act three shows the resolution. Okay so for example,
in explanatory videos, act one introduces the conflict, the character and the
situation the character is in. Act two shows the
obstacles, complications, and they also shows clients
products as a solution. And Act three delivers
the resolution on how the client's products
solve their problem. We will go through
that in just a second. Okay? Now, this
structure is extremely useful when writing
explantc Okay. Here is how to actually use it. You literally start by writing Act one Act
two, act three. Okay? In Act one,
what is the problem? Act two is, how does the client's product or
service solve the problem? Act three, why should the viewer choose the client over
anyone else? That's it. Okay? Now, let's apply this structure to
our project, okay? So we start with the before in the before we
introduce conflict. We slowly increase the
scale of the conflict in a way that's emotionally
painful for the audience. First, we show the whale
surrounded by plastic. Then we show the whale dead
with even more plastic, and the sun is sad. Now, this is the
emotional low point. This is where we
introduce the solution. The solution is the client's
service cleaning the ocean. We show ocean being cleaned. And in the end, the
whale is happy, the sun is happy, the
bird is soaring and the ocean is
beautiful, it's clean. Okay? And finally, we
end with client's logo. So that's the story, right? Now, here is
something important. Structure matters, especially if you are
a beginner. Follow it. That's completely fine. Structures like
three X structure. And there are many
structures of storytelling, not just three X
structure, okay? But more important than
structure is intuition. Not every great movie
follows a stream structure. You don't have to
copy a formula. What matters is this? Your characters must go
through something meaningful. There must be clear
transformation either in the character
or in the world. And story must make
audience feel something. It doesn't always need to leave a deep
lasting impression, but it must create that
emotional connection, right? If the audience feels something, you have already won whether you follow TX structure
perfectly or not. That's the most important
thing to remember. Right? So if you're working
on an explainer video, this is the stage where you
write the entire script. Once it's written,
you send it to your client for the feedback
after the approval, you record the voice over, and then you move forward
into the production. That's why this phase
is so important. That's why scripting
and storytelling sit right at the core of
the production process. And that's it for
the storytelling and scripting and voice
11. Importance of sketchbook: We are in after effects, and the first thing
that I want to explain is the
importance of sketches. Let me quickly walk you
through my sketches, which I don't think are the greatest of all,
and that's fine. Okay? The reason why
we sketch is not to show other people how
great we are because, well, you can tell how great I am, but to overcome this fear of creating bad
things, ugly things. When you start drawing and
you are not an expert, what will happen is you will
likely feel uncomfortable. Why? Because world
wants us to be perfect. And well, we are
not at all perfect. And so what you will end up making will be things
that are not perfect. And this will trigger you. So when this triggers you, what you need to do is
you need to sit with it, okay, and you need to sketch even if it feels uncomfortable. And so for example, this one
is from my personal journal. So basically, I wanted
to develop a habit of sleeping on time
and waking up on time. And so I draw this on
that occasion, okay. And so you can do
so many things. But the thing that you
have to remember is that sketching will
make you uncomfortable. The habits that makes you
uncomfortable right now, but you know someday
they will be useful are the habits that you must
develop as quickly as possible. Okay? And so that's
why I developed this habit of sleeping on
time and waking up on time. That's the first thing,
and another habit that I developed was sketching, okay? And let me show you
something else. Okay? This is well, I was trying to make one of my personal favorite
characters, okay. But unfortunately, well, I'm pretty sure you
can tell who this is, but if you can't, well, then I was learning from
a course about sketching. Okay, this you see is
called line of action. I'm not going to go
much deeper into that. This is another entry
from my personal journal. I like to sketch my ideas about myself than this is from
an older journal of mine. Okay, so this is
basically a cover, and as you can tell that
it's rusted here, see? It's rusted and it's really
old, well, but I liked it. Then this is a cloud. I don't know why
it's small here, but well it's a cloud and there is this
swing and it's cute. Then we have this cactus, okay? This one is my
personal favorite. I haven't found ways
to animate this. Well, but if you
can, well, go ahead. Okay? And then finally this one. So this inspired this. Okay? And this sketch was just a
random thought that I had. And before drawing, I found
inspirations on Pinterest, and then I thought, why not? And so I drew this
probably years ago, and then it came handy
for this project. Okay? So this sketchbook, keeping this sketchbook
will come in handy at times that
you won't even
12. Step 7: Storyboard, Style frames & Animatics: Storyboard, style
frames and animatics. A storyboard is a
representation of what's going to happen,
but it's rough. Storyboarding is
planning motion. It is not drawing art. So how do we draw a storyboard? So we start by breaking the
script into beats, okay? So a beat equals one clear
idea or action in the story, and you draw the most important
beats, not everything. Okay? Style frames.
Style frames are a simple visual representation of how the final
animation will look. Okay? Think of it like a
screenshot from the final video, but we make this screenshot
before we animate. So also a warning here. Don't use AI to generate
style frames because if clients approve
it and you cannot create the same look and
feel in after effects, your client will feel cheated and will leave a
bad reputation for you. Okay so that's it for
the style frames. Then we have animatic. Okay? So an animatic is
your storyboard plus your voice over turned
into a rough video, okay? So it shows timing, pacing, and flow before the
final animation. So animatic is crucial for
explainer videos, okay, because it lets you
fix timing, pacing, and clarity before expensive
animation starts, okay? Animatic is the place or time where you
will realize which storyboard or which beats needs more time and which beads
can have less time. Okay? So animatics are
mostly used for movies, but they can be also
used for explant videos. Clarity for explanatory videos is really, really crucial, okay? So here are the things
that animatic shows, okay? So animatic will show you whether your message
is working or not. It will show you
whether some scenes are too fast, too slow, okay? And it will also show you
that whether your visuals are actually supporting the
voiceover or not, okay? So the goal of the animatic is to test before we try, okay? So if the animatic feels
boring or confusing, the final animation
will not fix it. It will just be a
polished problem, okay? So let me give you
tools for this. Okay, so you can draw
storyboards on your paper. Okay? For style frames, what we normally use
is adobillustrator. Okay? But if you are not
that into adobillustrator, you can use after effects. But I will repeat that do
not use AI for style frames because it will get you
in trouble because you might not be able to
create things, okay. So if you are sure that you can create all those effects,
well, go ahead. Okay? But if you can't and
if you are a beginner, don't go the AIA. Okay? And for animatic, all you have to do is just
you need a video editor, just import your voiceover, then import your storyboards and align storyboard with
your voiceover and just render it out and
just look at it in the full screen and you will see whether it's working or not. Okay? These three steps are
really, really crucial. Okay, you don't have to follow the animatic steps all the time. But if you are charging high, and if you have a
hired people, well, I think you should do animatic because most animated
movies use that. Okay? Many big studios use that, and they don't take
even a single step until they get the animatic
13. Step 8: Asset creation: We jump into animation, the final part of the production we need is we need some assets. Okay? So asset
creation is the phase where we create everything that will be needed
in the animation. I don't know why I keep pointing my fingers on the screen. I'm aware that I'm not
using cameras here, but I have developed
this weird habit. Anyways. Okay, so let's
move on to asset creation. Let me just change this
into full screen, okay? So first, this whale is
really cute. I like this. Okay? So this whale
is AI generated. This is AI generated as well. Okay? So we are going
to use both of them, o then I have used this boat, but this boat is
not AI generated. It is a vector. I got this vector from the
Internet and I'm going to use this as well because I tried
using AI generated boat. But what I wanted is I
want this to move as well. And also, you have to ask your clients whether
they are okay with AI generated content
in their videos or not. Because many clients are
not because this is new, people are already
uncomfortable about AI, okay. So we ask clients beforehand that we are not going to
use AI generated video, we are going to
create the video, but we may use generated
content in the video. For example, this
is AI generated, but it will be animated
in After Effects. This is really easy. Imagine creating this in Illustrator. It will
take time, right? And so you have to ask them, you have to be clear on that. Okay? And so that's it
for the asset creation. The next step is
your favorite part, which is animation. Okay
14. Step 9: Animation A: Lesson, I want to show
you how to break a story into clear beats before
you start animation. Okay? And so this project, although I have kept it
intentionally very simple so that I can explain it in more
details to the beginners. And so there are only
four beats here. One, two, three, and four. Okay, these are the four
bits of this storyboard. Okay? Now, simple doesn't
always necessarily mean easy. Execution becomes easy only
when you are thinking clear. If you are not thinking clearly, if your thinking is messy, your project is going to
reflect that messiness, okay. So make sure that you
are thinking correctly. You are calm with yourself. You are not anxious on this. Okay, it's just a stupid
video. You can do this. Okay. And so let's understand beats in motion
design really quickly, okay? So like I have
already mentioned in the previous lectures that
one scene equals one idea, and that equals one beat. Okay? So a beat in
motion design is an important moment
in the story, okay? So a moment where something
meaningful happens. If something is not important, we don't do that, okay? So that's why when I have
drawn the storyboard, I haven't included,
let me go back. Okay? So I haven't included
this before and after text, because they are not
important, right? And that's why they
are not included. So that's why when
you storyboard, you should draw only the most important elements,
not everything. Now, why you don't show
everything in storyboard? For example, if I go, I'm already in the
rando comp, right? And you will notice that
some elements appear later. For example, we don't
have this, the stand. Okay, the stand is here, right, then we have the color or the
noise at the bottom, right? So there are many things
that appear later. They are not drawn
in the storyboard, but they appear after we
make the decisions, right? And that's completely fine. You have to stay
flexible for this, but you have to remember
that while storyboarding, they are not crucial to
the story at the moment. You are storyboarding
to show a story, the script, and the message. So if you skip preproduction, you will never have the clarity that I'm
talking right now. So preproduction
is really crucial. Reproduction is
basically the heart of your motion design
and animation. Okay? If you don't
do pre production, you don't or you won't
have a clear story, and you won't have a
strong storyboard, and you won't have
great animation in return because while
your story sucks, your concept sucks, your
video will suck big time. Okay? And without preproduction, animation will become guesswork. So make sure that you understand the pre production chapters once again if you haven't because they are really,
really important. Okay? Now, lots
of people believe that just because you
know after effects, you will be a good
motion designer. Well, let me tell you something
that is a hard truth. If you can't come up with
strong concepts, great stories, your animation skills
won't matter, okay? Because there is no
story to support them. Okay? How will you make
your audience care for the character if you don't have a great
character, right? So let's go back to beats
and our storyboards. So each beat answers a question. For example, let me
go to scene one. And so the question is, what is the current emotional
state of this world, okay? And each beat or each scene
here answers this question. For example, see how
everything is so clear. For example, the sun looks
sad, the bid is flying, the whale is
surrounded by plastic, it's not very happy. Okay? And so all you have to do is
ask yourself one question. Right, for example, the
whale is suffering, the body is feeding off of it. The plastic has
tremendously increased the emotional pain point has gone to a different
level, if you think about it. The sun is sadder than
it used to be, see? Here, it's like, Well,
it's fine, right? But here, the sun understands the consequences
of more plastics, and the sun has basically
lost his friend here, right? And that's what's
going on here, okay? So you have to understand that you have to
translate your emotions, your story into beats and then translate them
into the animation. Now, let's go to scene
one. Where is scene one? So I'm going to go
back to scene one. I'm going to hide this for now. I'm going to hide this for now. We don't need them anymore. I'm not going to
explain anything that is related to animation. Right now, I'm just
teaching you how to think as a
professional, right? So here, question, what is the current emotional state of this world will be
answered through colors. Through expressions,
through composition, through elements,
different elements. Like, for example,
one element that you see is the waves color here. It has this like
texture here, right? See, okay? And it
basically reflects to the mood of what it is that we are trying to tell
to the audience, right? And so now let's compare
scene one to scene two, okay? So well scene two is extremely dark and hence the color
goes darker as well, okay See here, this one is mild. But this one is extreme, okay? And it reflects on the mood. This creates a mood. Now, both the scenes, if you look closely, scene one and scene two, both the scenes are
duplicates, okay? But the mood, emotion, and messages are completely
different. Okay. And that's the power of beats, that's the power of storyboard, that's the power of
color and composition. Now, you don't need
new assets every time. You just need clear intent
and clear thinking. If you cannot think clearly, your product will
reflect your thinking. Everything reflects our
thinking, unfortunately. And so you have to be clear with whatever it is that
you are thinking. If you're not clear, well,
your clients will find out. Okay? Now, one of
the things that most beginners will
suffer or I don't know, suffer, but will
have issues with is the problem of
over animation. You don't need over animation
to tell great stories. You just like you don't
need crazy animation, okay? For example, in this scenes, in this scene, animation
or emotion is minimal. The animation is controlled, nothing is overdone,
except these plastic bags, but they are exaggerated
just to show the importance and
the consequences of human actions, right? Since the beat here is clear, animation becomes
supportive, not distracting. Now, all I have to do is
I have to just look at this and I have to figure out how I am going to animate this. And this comes from great story, great concept, in short,
great reproduction. Okay? Now, the key takeaway from this chapter is that you have to decide
the beats first, make sure that each beat
communicates one idea. Clearly, you don't have to
take two steps at a time, take a single step at a time. Okay, then start animating. Okay? Also, thinking will
reflect in your composition. If your thinking is messy, it will reflect in
your animation. I will reflect in your
composition, okay. So make sure that your
thinking is nice. You are nice. Okay? You deserve
good things in your life. Okay? And so you deserve to
make good animations as well. Okay? So that's it
for this chapter. And by the way, strong
animation. I have to say this. Okay? So strong animation starts even before you
open after effects. It starts with clarity. Okay? And so make sure that
you remember this quote, and I will see you
in the next lecture.
15. Step 9: Animation B: In this lesson, I
want to show you how to decide what should move and what should stay still inside or seen because
when you think of it, you might think, Okay,
so I'm going to make those plastic bags move. I'm also going to
make the whale float. I'm going to make this
bird do something. I'm going to animate the sun. I might even animate
the bottle as if it's flipping with the waves,
and it might ruin this. And this is where
beginners go wrong. They animate or they
want to animate everything since they are
learning this amazing software, and now they want to use their skills to just show
people how great they are. Right? And when everything moves, nothing feels important. Okay, so you have to be
intentional with that as well. Okay? So before anything
in after effects, ask yourself or while you are just going through
your storyboard, ask yourself one question. Okay? So what is this
scene trying to say? The answer decides what moves, what stays still, and how
much motion is needed. And also, I have
to tell you this that motion is not a decoration. Motion has to
support your story. It has to support the beat
that you are trying to tell. Once the scene is done, all you have to do is
choose a focal point, okay? So every scene should
have one main focus. For example, in
this second beat, I'm going to go to scene two. Here, the focal point of this scene is a
character that is suffering and the bird that is basically
eating the whale, although it's not that gory, but well, it's implied, right? Once the focal point is clear, everything else
becomes secondary. If multiple things
compete for attention, the scene feels noisy. That is why over animation is a bad thing for your career. Primary motion versus
secondary motion. Okay? So what is that? So primary motion
is the motion that supports your beat
directly, okay? And secondary motion supports
the mood of the scene. For example, the whale here
is the primary motion. Now, waves here and this sun's sad expressions
are the secondary motion. The secondary motion must
support the primary emotion. For example, if the whale
is here like suffering and the sun was smiling and
the ocean was clear, well, the message would have
something extremely different, and it would have
been more disturbing than the gore, right, okay? And it would have
been horrible choice. And so secondary motion
should be subtle. Is job is to add life, and its job is not to steal
the attention, right? For example, if the
bird wasn't here, see? Okay? If the bird wasn't here, sun would have been
the focal point, but we don't want that. And to create the whale
as our primary character, we had to add Segel
o or this bird, and we had to add that
so that we can make our audience focus on that
because in most of the scene, all you see is bird flying
at the same position, okay? And so when the
audiences sees that, they think that, okay, this is a normal part of
this world, okay? But when you see the same
bird that was once flying, hating the flash off of the whale, you are
shocked by this. And they so will make sure that the whale is the
primary focal point. Now, you don't need
complex animations. Good scenes don't need
complex animations. Most of the time,
small position shifts, slight scale changes, timing offsets are
more than enough. The most complicated animation, if you ask me, are the
animation of the waves. Okay. Apart from that,
everything really simple. I haven't used any
plug ins for this because this project is
really, really simple. So when you over animate
and when everything moves, the story becomes unclear. Okay? The viewer doesn't
know where to look, the animation feels
beginner like, right? And so here are the key
takeaways from this. So decide the beat first, choose one focal point,
animate with intention. Okay? Good motion design is
not about more movement, it's about the right movement.
16. Step 9: Animation C: Lesson, I want to talk about timing, pacing, and transition. This is where animation
starts to feel professional, even if the motion itself
is extensively simple. So let's understand
the difference between timing and pacing. So timing is how long
something takes to happen, and pacing is how moments are
arranged over time, okay? So you can have good
animation with bad pacing. And that's why you may have seen those animation
that feel boring, even though you can
tell that they are animated really,
really well, okay? So pacing is really, really crucial if
you want to keep your audiences engaged
over the time. Okay? So how do
you decide timing? So timing is not
decided randomly. Here is the point where
animatic comes in, okay? So animatic is mainly
used for timing. For example, if
you have made and explainer videos animatic from the storyboard, plus
the voice over, the animatic will tell you
when you need to slow down, when you need to speed up and which part of the
animation needs to go and which part of the
animation needs more time, okay? If the moment is
important, give it time. If it's just connecting
ideas, o, keep it short. That's the whole principle
behind this, right? Let's talk about
transitions, okay? So transitions are
really crucial. Okay. Transitions are
also not decorations. For example, in some
of my other videos, what I have done is I have created some advanced
transitions, for example, they are match cut or they could
be something else. But here, they are
very, very simple. And the reason why they
are simple is because the transition does not
depend on my skill. The transition depends
on the story, okay? So if the story
needs a transition, is complex, you create a
transition that is complex. If a story demands a
simple transition, you keep a simple transition. What most beginners do is that they see their skills and then they create
the animations. This is not something
that you should do. What you should do is
you should see the story and you should ask what
this story demands, okay? So if it demands
advanced transitions, and if you don't know the
advanced transitions, you should learn it, and
then you should execute it. But if it demands
simple transitions because the story is simple, the clients want
it to be simple, then it has to be simple, okay? So don't focus on your skills because skills can
be built over time. Focus on what the story demands. Okay? So a good transition
has three major qualities. First one is that it will
guide viewers' eyes. It will prepare the
next idea, okay? And it will maintain the rhythm without
punching the audience. By punching the
audience, I mean, sometimes some transitions
are so out of the blue that they pull the audience
out of this whole video. And they make them
realize that, Okay, I'm not watching a story,
I'm just watching a video. And this is the punch
that I'm talking about, okay? You should not do this. You should not have
the transitions that are not in sync
with the story. If you look at these layers, the major work that goes in this video has been in
the transitions, okay? And so let me show you, okay? So here, the transition happens 30 seconds or few frames before the
actual transitions happens. Okay? So here is where
the transition begins, and here the transition begins. Okay. Let me just
bring this to third. Okay. And then the
next scene appears. So both of them are the same
composition, by the way. And the reason why this
is done is because this prepares audience
for the transition, Okay, and it doesn't have
to feel like a punch. It has to feel natural, okay? So here is how it looks when
you go frame by frame, okay? So this might be
a little glitch. It's not a glitch, I think. It's called continuity
error. Okay? So every movie has
this continuity error. So what is supposed
to happen is whenever there are multiple scenes
staged, for example, let's say that the actor
is standing on the right, but somehow the actor is now doing something else
in the different scene. And this is called
continuity error. Basically, there is no
continuity in two scenes. Okay? So this might be called
a bit of continuity error. But since this is really fast, audience on the first
watch may not notice it. Okay? So the only thing that changes here is the smiles
location, right? Okay. So this is why transitions
are really, really important. They should feel
natural to your world. Okay, this is my
world right now, and this transition
feels natural because, A, the color matches
what I'm trying to say. Example, here the
transition's color was red. And it was because, well, you can see
what's going on, right? But here, the transition
is going to be green, and it's green because, well, that's what I'm telling
the audience, right? And so this little things makes
a huge difference, right? Now, one of the things that
I've already said that you don't need to
overdo transitions. Transitions are really,
really cool from a motion design perspective because it's really
challenging sometimes. But if the transition is
louder than the scene, and if it doesn't add
anything into a story, and it's still louder
than the scene, well, then you are
doing it wrong, okay? So, most of the time, it
could be simple reveal. It could be a simple cut. It could be a simple wipe
or something like that. Okay, that is also enough. Remember, transition is
there to support your story. It is not there to
show off your skill. This one is really,
really crucial. Okay, now, the timing of the transitions could be messy for some people
because if you are new, you are going to
have a hard time. And we have covered
transition in different core, so I'm not going to go
into much detail on this, but to have a great transition, there is something
that you need to understand and that
is called continuity. So here are the core or
key takeaways from this. Okay? So animate with intention. Second, you need to control the pacing and the timing
in the main composition. Now, another thing is that your transitions must
support the story, okay? No your skills. If you don't have a
skill, build a skill, but it must support
your story, okay? So professional animation is about rhythm. It's
not about showing
17. Step 10: Sound design: Design is really important
because it engages audiences. It helps deliver information,
increases production value, even though your video is cheap, sound design can help you make it feel premium and expensive. It evokes emotional responses. It emphasizes what's
on the screen, and it is used to
indicate the mood. Okay. And so there are five different aspects of sound design that you
need to remember. Okay? So first one is ambience. So ambience is the
sound that set the tone and the environment
of the animation. For example, the sound
of the wind blowing or the birds and we have folly. Okay? So foli is used to
represent what's being seen. For example, the
footsteps on the ground, the sound of the bushes
leaves moving, right? Then we have sound effects. Sound effect is an aspect
of sound design, right? Sound effects are
the effects that enhances other sounds,
actions, or elements. For example, the sound of the low growl behind the bushes, subtle sound of the
character trembling in fear while he
approaches the bush. Right? Then we have voiceover. Well, voiceover is voiceover, but for example, the mysterious narrator
telling you the story, right? Then we have music.
So the E music in the background works together with the ambience and all the other aspects to
set the tone of the story. Okay? Now, sound design doesn't
just tell us the story, but it teleports us
inside the story. It is this immersive factor that allows an animation to be truly experienced
and messaged to be delivered with purpose, okay? Now, you don't need to have all the aspect of the sound
design with you, right? For example, you
don't need folly. If you are making
an explainer video, you might need
ambience sometimes, but you will need sound effects, voice over, and music. Okay? So let me quickly tell you how to pick sound effects. How to pick the music, right? So I'm going to quickly
tell you how to do that. Okay? So sound effects
are pretty simple. All you do is just
look at the screen and see what's happening
and just ask yourself, what does this sound like? What does this
visual sound like? And you will have a feeling
or you will have a thought and just go to Google or
Chat GBD and ask them. Right? This is the first way. And the second way is
to find the music. For example, in all our
explanatory videos, what we do is we break down the entire script
into three parts, the beginning, the
middle, and the end. This is basically a three
act structure, right? So Act one, Act
two, and Act three. So each act has a
different feeling. And based on this
feeling, use the music. For example, Act one is sad, okay so we will play sad music. Act two, is not exactly happy. The character is
not exactly happy, but he's going somewhere, right? And so we might add some motivation, some
motivational music. I'm just giving an
example, by the way. Okay, so it could be some motivational music or something that is bit
uplifting, right? Then in the third act, we see the character making
a breakthrough, okay? So here we will have completely
different music, right? So divide your story into three parts or whatever you
feel as the right thing. And then based on those parts, ask yourself what
feeling does this or what feeling do I want to evoke in the audience during this act? Okay? So for example,
Act one is sad, okay? So you go to Chat
GPT and ask, hi, ha GPT, what is the
best music for sadness? And don't go there are lots of copyright
laws for the music, so make sure that you are
aware of that as well. So don't go just blindly into that and pick whatever
it tells you to, okay? And the best platform
to do that is YouTube. Okay. YouTube has already build studio that has lots of sound effects for
absolutely free. They are copyright free. And if you can, you can
buy the music as well. But most of the time
you can get things done with YouTube and now you can
generate AI music as well. So if you can't find a song
that matches the feeling, okay, you can create it, right? And so that's it for
the sound design, sound design is my personal
favorite thing, okay? Because I spend a lot of
time in sound design. I don't know why, but I just love to walk on the sound
design personally, okay? And it's really fun, okay? And so make sure that you
enjoy the process as well, o
18. Step 11: Delivery: Finally, we deliver the
video for the feedback. Now, if the clients like it, we send it to them
in various qualities and sometimes we send
them with invoice. For example, let's say
that some clients pay 50% before the production
starts and 50% after. So we demand the remaining 50% once the deal is done, right? Or if there are
some minor changes, we change it and get
done with it, right? And the biggest thing that
you have to remember is that you have to ask your
clients for the references because you will
get most clients through word of mouth
than just marketing. And to tell you the truth, we never had any website or social media
handle, anything. Okay? We never had
that, like we do now, but back in the day, we didn't have anything because we couldn't
afford it, to be honest. And so that's fine. What we did is just we went out, we met clients, we got rejected. We met another client, we got rejected until
we got what we want. Okay? So you may
have to deal with lots of rejection before
you get an acceptance, and that's part of life,
and that's completely okay.
 Animator's Oasis, Simplifying the complex!