Transcripts
1. Intro: You just came across
the perfect stock image to showcase your latest design. The motos pose, the
lighting. It's all there. Except that the place
in the photo where you want to put your design
already has something on it. In this class, I'm going
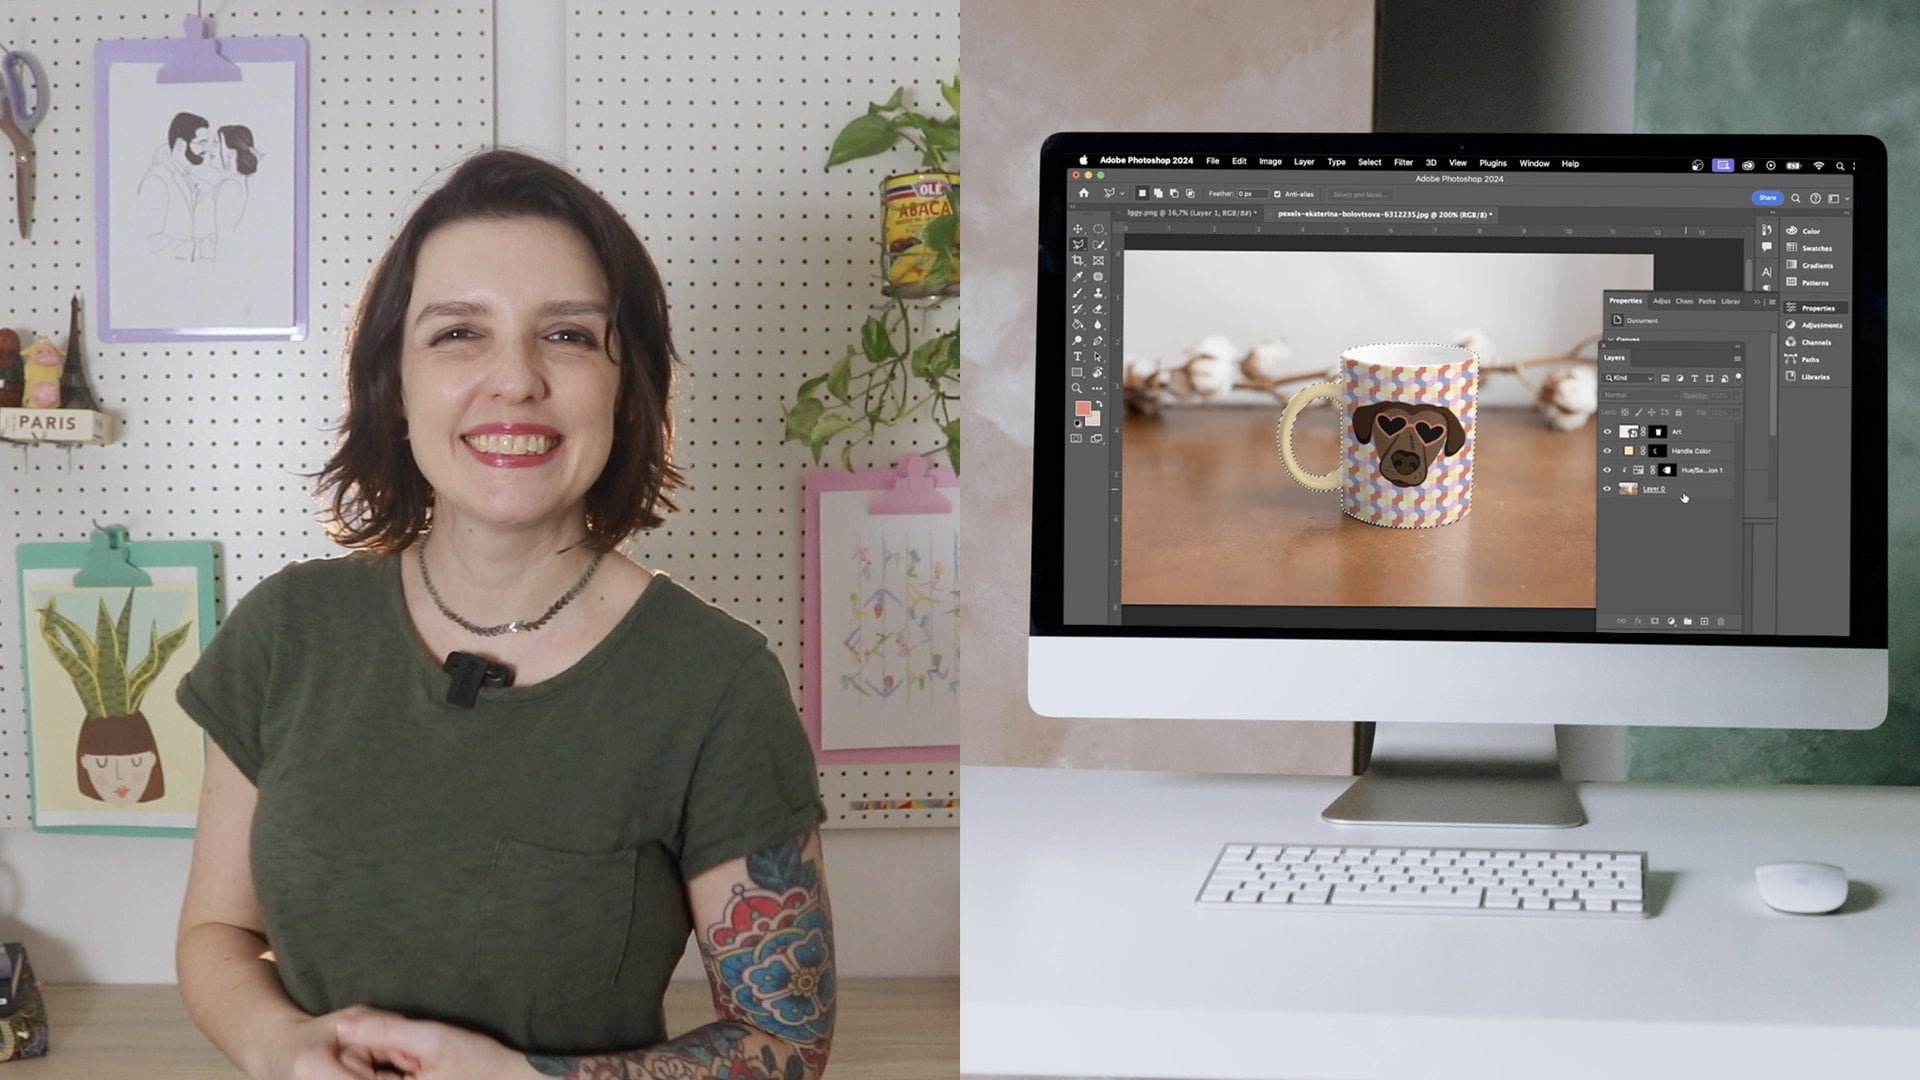
to show you how to easily remove existing designs
from stock photos, using Adobe photoshop to make the perfect mockup
face. My name is Tais. I'm an artist and a designer. And years ago, I worked with
the Children's brand that needed to present a new line to buyers before the products
were actually made. The challenge was that not only the new samples were ready, but also they didn't have any blank products to
use for mockups. With the help of
Adobe Photoshop, I was able to patiently erase all the designs from
their previous products and replace them
with a new print. This way, I was able to showcase the latest
collection effectively, and the catalog and the
new line were a success. This class was also inspired
by a student question I received about using stock
images with existing designs. That's when I realized that this technique deserved
its own spotlight. So, consider our prequel to my class on creating mockups
with Adobe Photoshop, which I'll link to in
the class description. We'll dive right into
photoshop retouching tools, like the clone stamp, the constant aware fill, the healing brush, the path
full. And don't worry. These skills aren't just
useful for removing designs. You can also use them to erase any unwanted objects
from your photos. So if you ever had
a great stock image that just needed a little tweak to become the perfect mockup, you're in the right
place. Let's get started.
2. Choosing Images: Here are three tips for choosing stock images that work well from cups and won't
drive you crazy in the process of erasing
the designs. Number one. The more solid space,
the easier it will be. To erase a design, we're going to sample from the
object's background, so a busy all overprint will be a lot harder
than a more subtle one. Even better if the
design has a clear area around it. Number two. Flatter and structured surfaces
will be a lot easier to erase the softy draping
materials with lots of fold. This is mostly because we
have to consider the shading, and it can be tricky
with a lot of variation. Number three, consider what type of design you want to
use as a replacement. Placing an all over pattern
will be easier than a smaller graphic because over pattern tends to cover a
lot of the imperfections. So basically, try to replace the area you're removing
with something bigger. Having said that,
let's get to work.
3. Erasing The Designs: So I got this photo
from Unsplash. And this is great because
all this white space around the graphic will make
it super easy to remove. Also, there's no
hair going across, no necklaces, not too
many folds on your shirt. So I'm going to grab
the remove tool from the retouching tools
here on the side menu. And if you have a different
tool up here on the spot, just click and hold
it for a second, and all the other hidden
tools will appear. Now, I'm just going to draw a circle around the area I want to remove. And magic. Yep, it's that easy. And you can do the
same process for anything that has
clear boundaries, like the image in
the sictur frame. For something like this one, we have to add an extra step. So here I'm going to use
the Clone Stamp tool. The Clone Stamp tool copies the pixels from one
area to another. So when you have
this tool selected, put the cursor over the spot you want to copy and
hold the option key. Notice that it changes into
this target looking symbol. So I want to copy
this blank area with the frame into this
area with the artwork. So I'm going to hold the option
key and click over here. See how it samples the
spot that I click. Well, now I'm going
to place it where I want to copy it to
and click again. The thing to note here is that the distance between the spot you sampled and where you're
copying to stays the same. You have to resample the
area a few times as you go. I can also use the clone stamp
to separate these areas. And then I can go back to the remove tool
and get rid of it. Okay, so back to the
clone stamp tool to finish separating the frame. And the remove tool to
make the area blank. Now, see how I forgot
this little spot here. This is why we need
those boundaries. It's an easy fix
because it was small, but you can see how
messy it can get. But since it's tiny,
I'm just going to brush over with the remove
tool and it's done. Ted just a frame that
turned out a bit aged, I can use a patch
tool that matches the texture lighting and
shading of the area. Then just do the same
on the other side and you'll have a blank frame. One more example. Let's make her poka dot shirt
into your blank shirt. I'm going to start
off by selecting her entire shirt with a
quick selection tool, making sure I'm not
grabbing anything else. Like her belt buckle. Just hold the option
key to change the plus into a minus and remove
any unwanted areas. Now I'm going to hit Command J to duplicate the section
into a new layer. With the new layer selected, I'm going to remove the
color and desaturate. I'm going to hide the
original layer for a second. Then go to select color range. When the menu pops up
here on the drop down, I'm going to select shadows because the poca dots I
want to remove are black. If I were removing white poca
dots on the black shirt, I would select highlights. In this window, you can see exactly what's
being selected. If I drag the slider
all the way up, you can see that I'm
also grabbing a lot of the shadows on her blouse,
which is not what I want. So this is going to
depend on your image. Play around with these until
you get just the dots, and when you're done, Okay. So I grabbed a little
bit of the shadow here, and with my selection tool, I'm going to hold Option and de select just like I did before. Now, going to select,
modify, expand. And here, I'm going to
expend about five pixels. This is not an exact number. Just play around
with your image. But basically, you want to
grab just a little bit of the blank area around the print without it all merging
into one big selection. Now go to it, fill, and in contents, select
content aware fill. Not that most of
the print is gone, I can just go back and do
the small adjustments, and it's a lot faster
than if you had to erase each individual poka. The spot healing tool is
your best option here. Just click and
magically disappears. Just make sure you don't go
over the edge of the image. And remember, if you're going to replace with a new
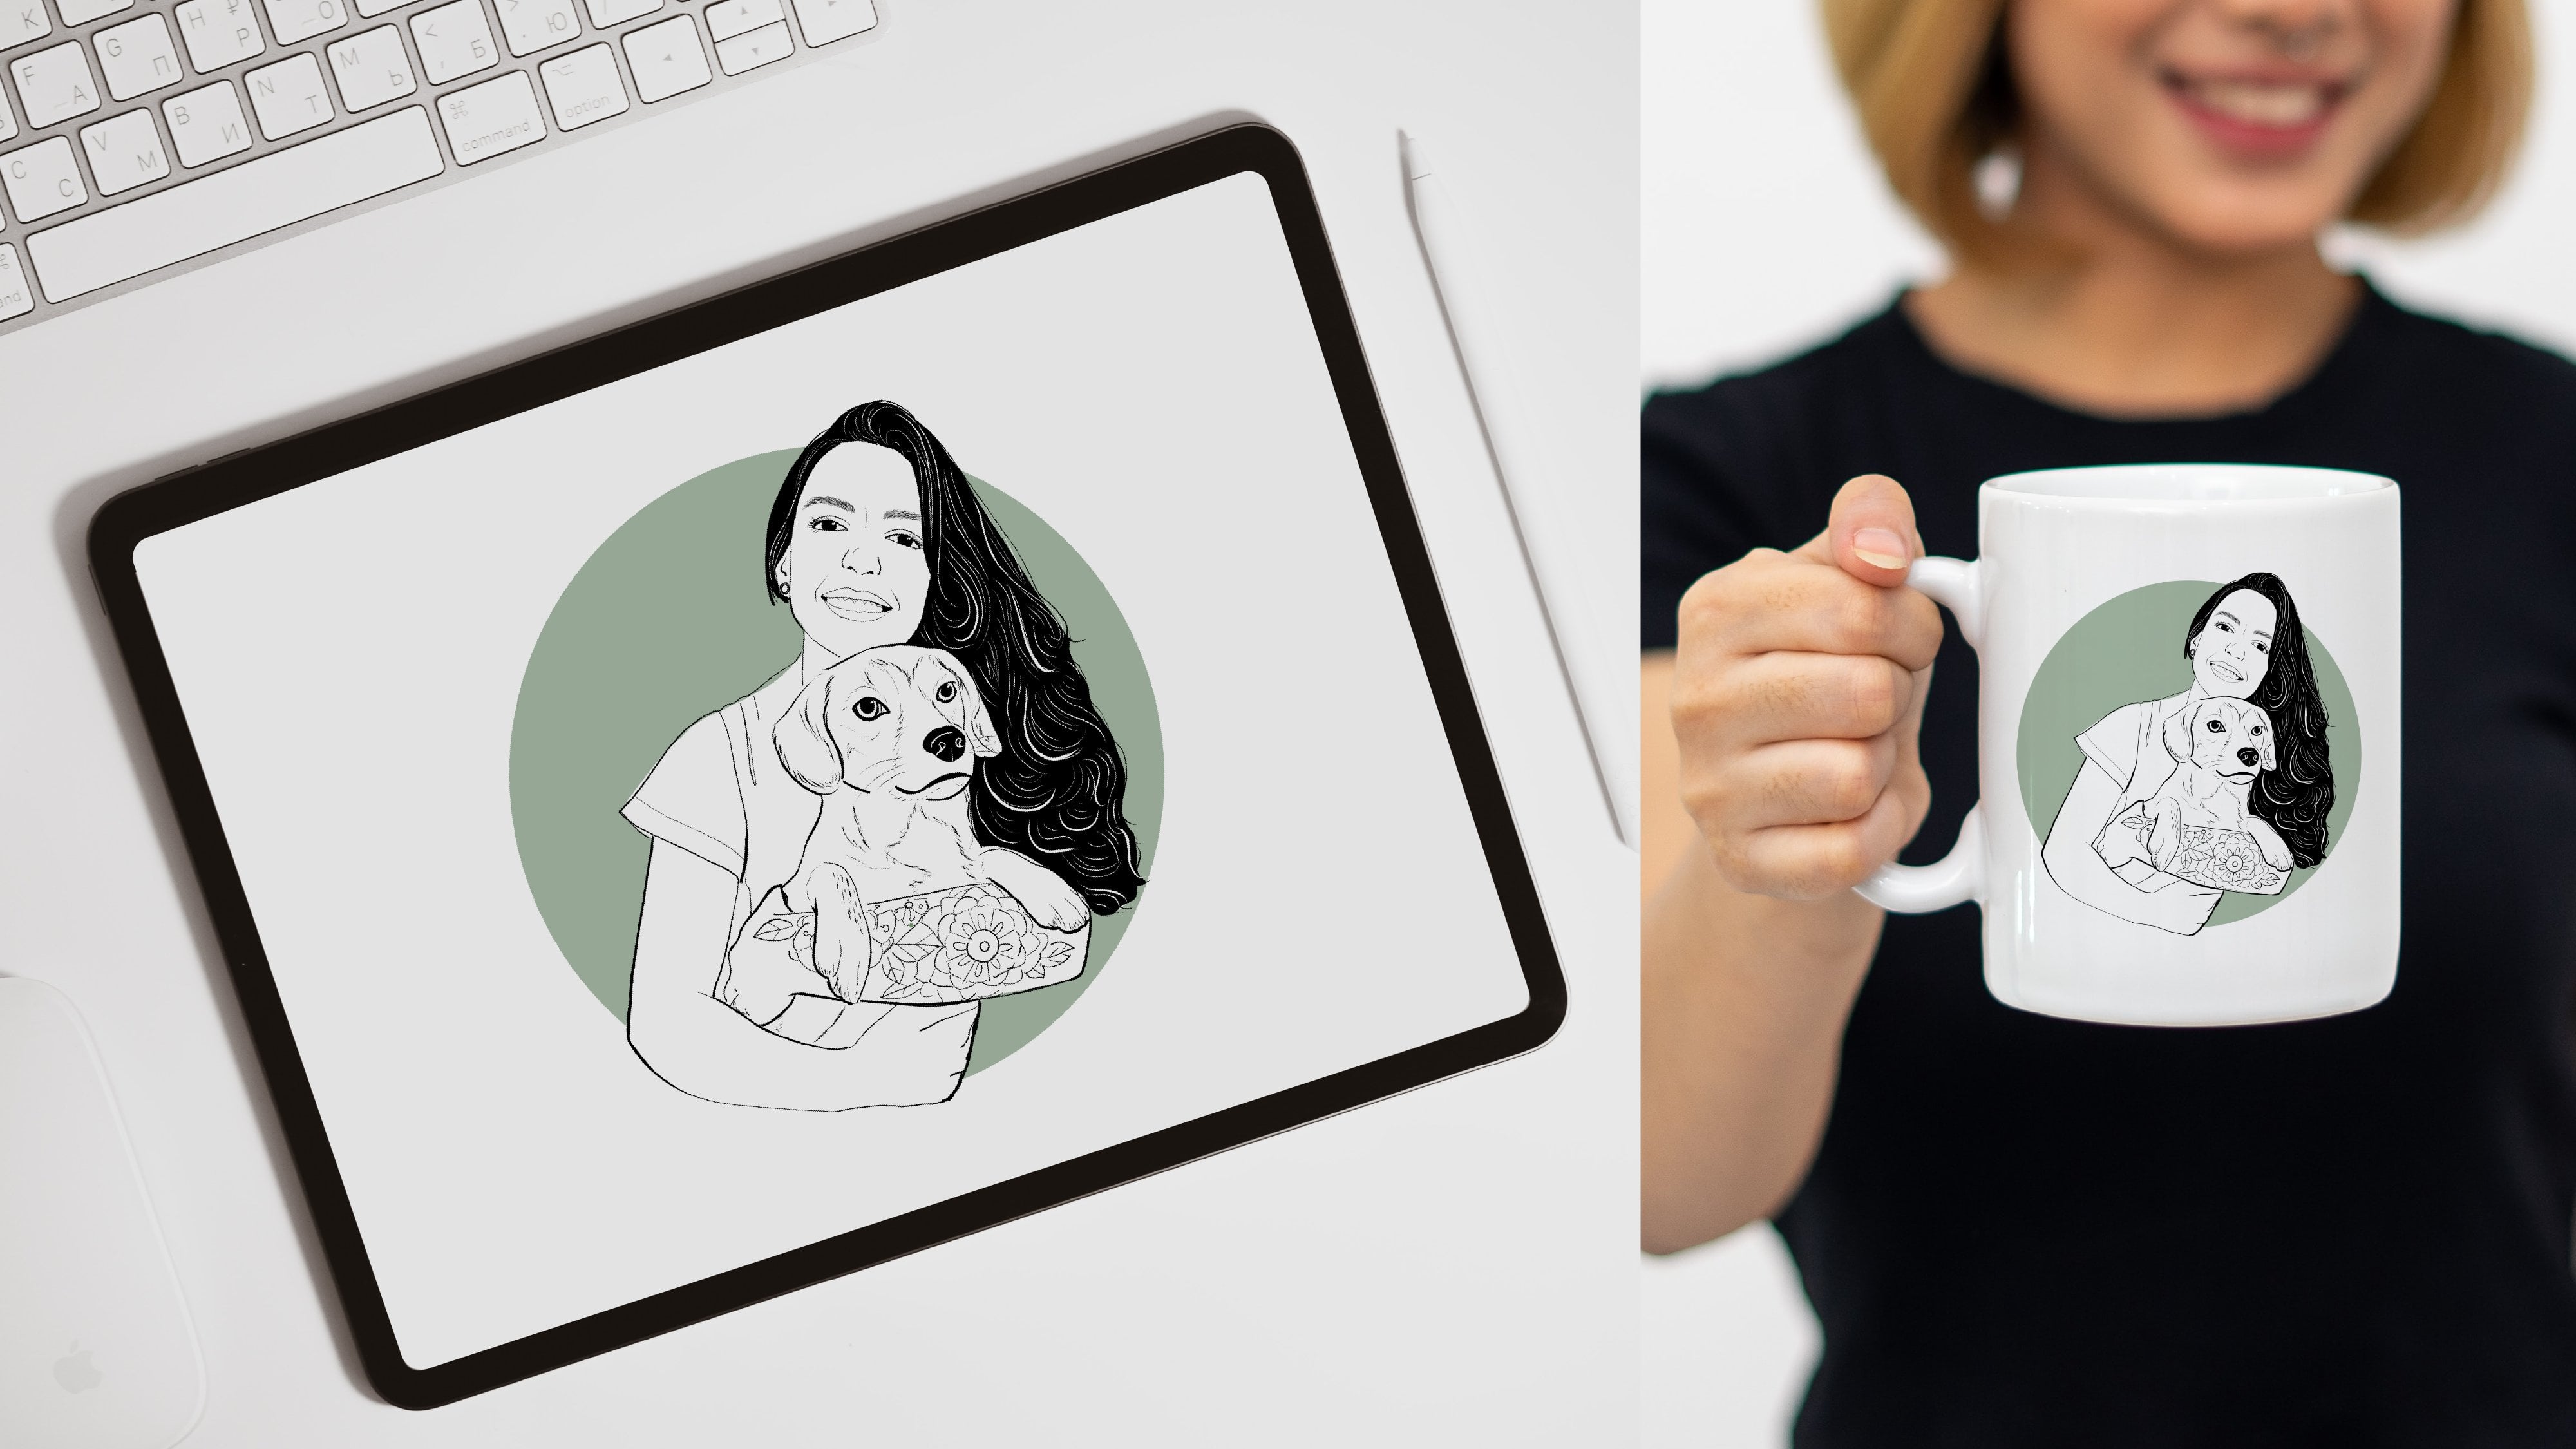
all over pattern, it's okay if it's not
completely perfect. The new print is gonna hide any imperfections. And that's it
4. Conclusion: Be. Thank you so
much for watching. I hope you enjoy
this mini class and feel inspired to create
your own mock up lengths. If you have any questions, feel free to share them in
the class discussion. Who knows? I might even turn
it into a whole new class. To take your mockups
to the next level, make sure to check out
my magic mockups and efficient workflows
class here on Scotia. I have it linked on
the class description. And your reviews mean
the world to me. So if you found
this class helpful, please consider leaving one. I can't wait to see
what you create, and I'll see you
next time. Bye bye.
 Thais Queiroz, Designer/ Artist/ Curious Creative