Transcripts
1. Introduction: Hi there and welcome
to this class where you're going to
learn how to create thumbnails like this one or this one using Adobe Photoshop. My name is Dan. I'm a
photographer and a YouTuber. This is one of the first videos I upload it and as you can see, the thumbnail is terrible. However, this is one of my latest designs and
the difference is quite noticeable just by changing the style
of my thumbnails, I was able to go from 1,000 subscribers to almost 16,000
in one of my channels. Take a look at some
of the topics we're going to cover in this course. First, I'm going to
show you how to create a new document with
the best settings, as well as some keyboard
shortcuts to make the design and the
editing process easier. Next, we're going to take
a look at how to import your own images or how to find
the best ones on the web, you're going to
learn how to remove the background of an image
with two different methods. We're also going to see how
to create our own background. Then we'll make our subject stand out from the background. You're also going to learn
how to add an enhanced text, as well as adding some
eye-catching effects. And at the end of the
class we're going to apply everything to create a different style of thumbnails from start to finish. So hopefully I'll see you on the other side and
thanks for joining.
2. Settings and Keyboard Shortcuts: When we opened
Photoshop, this is a main window we're
going to see. So we need to create
a new blank document. And we're going to
come up here where it says New File and click there. And Photoshop gives
you the option to load some of these presets, Photo, Print, art and illustration,
and so on and so forth. In our case, we're
going to come up here to film and video. And we're going to
select this option here to avoid it by 720, which are the YouTube
thumbnail dimension. So we're going to click here, create, and this is
our blank thumbnail. Let's take a look at some
keyboard shortcuts first, if we press Control minus, this will zoom out. And if we press control
plus, this will zoom in. If we press Control minus
and we zoom out too much, we can also press Control Zero and it fits the
whole image in view. Now let's press Control minus
again or Command Minus. And as you can see, we
have these grid lines on top of the document. If you want to hide them, you're going to press Control H. And if you want to
bring them back, control H again or
Command H on Mac. And along the following classes, we're going to see more
keyboard shortcuts. Now let's move on
to the next lesson where we're going to be choosing the main subject or selecting the main image
for a YouTube thumbnail.
3. Image Selection: When choosing an image for the subject of a
YouTube thumbnail, we basically have two
different options. We can either choose an
image that we have on our computer or we can choose
an image from the Internet. So let me show you how
to choose an image from the Internet and
place it on the thumbnail. We are going to fire
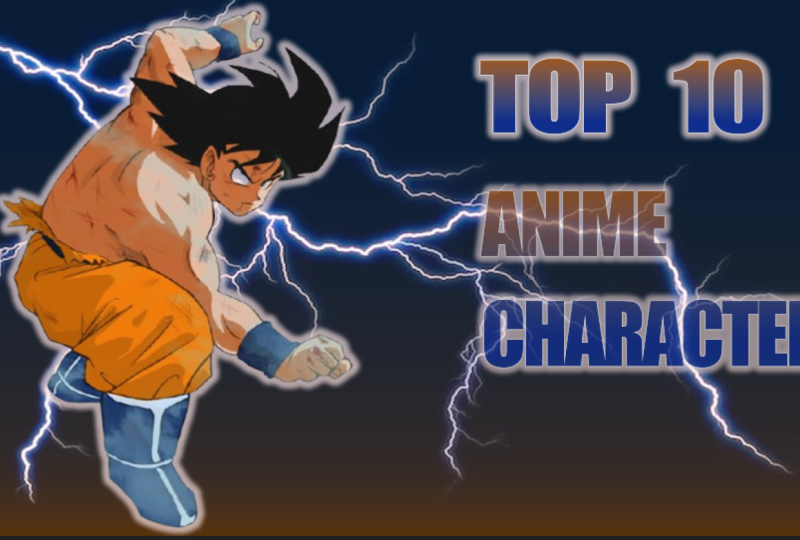
up our browser. And let's say for this example, we're going to try to create a gaming thumbnail or an
anime style thumbnail. So we would type in the
name of a character, let's say Go called Dragon ballsy than come here to images. And we're going to
look for an image. Obviously, you can
choose any image. In my case, I like images
without a background because I like to create my own background
and I'm going to show you how to
do that later on. You can choose this
image here, e.g. or this one, and so
on and so forth. Let's say you want to look for something without a background, you will type in P and G. And as you can see here, these images already have the subject without
the background. So I could come here,
open this image, right-click and then Copy Image, and now go back to Photoshop. Let's press Control H or
Command H to hide these lines. And now Control V or
Command V on Mac. And as you can see, the image has been placed
on our thumbnail, but we also have these
squares on the background. So we're going to
try and remove this. We're going to come here
to the left column. If we click and hold, these three options show up. So objects selection tool, Quick Selection Tool,
or magic wand tool. If we select the magic wand and we click on this background, photoshop is going
to automatically detect the subject
and the background. Now we just have to press
backspace on our keyboard and photoshop automatically
removes that background. Now we can press Control D
or Command D to de-select, and background has been removed. We still have some of
these squares here. So let's zoom in by pressing Control plus and
Control plus again, and we're going to
select this area here. And once again, we're going
to press backspace on our keyboard and the
background has been removed. Now we're going to
de-select that area, pressing Control D
or Command D on Mac. And remember if you
want to zoom out, you would press Control or
Command Minus on a Mac. And now if we come back
to the left column once again and we click
on the Move tool. We can move our subject
around the thumbnail. Another tip is how to change the dimensions of this image. So we will click Control T, which stands for transform, and this blue square shows up. And now we can click and drag
and make this bigger, e.g. or smaller like so. You can also click and
drag while holding the shift key to
distort the image. And once you're happy, you've come here to the
checkmark and click there. Now let's say instead of using an image from the Internet, you want to use an image
from your computer. We're going to delete layer. So we're going to take a look at this area here on the right. We have our background and the image that we
just placed here. In this case, we're going
to delete this layer, so we're going to click
and drag to the garbage. Now let's say I want to open
an image from my computer. I'm going to minimize this and I'm going to look for the
image on my computer. So I have it in this folder. I'm going to use one of my
pictures as an example. So I'm going to click,
hold and drag photoshop, bring it here and then
let go of the mouse. And photoshop
automatically places my image on top of
the background. If I'm okay with the
size and the placement, I'm going to press the
Enter key on my keyboard or just click here
on the check mark. Now, obviously for a
YouTube thumbnail, I don't want this
background and I could use the same
method as before. So coming here to
the selection tool, selecting a part of the
background and removing it. But that takes too much time. So I'm going to press
Control D to de-select. And we're going to
move to the next lesson where I'm
going to show you the easiest and quickest
way possible to remove the background
from your image.
4. Background Removal: As I said, the background is quite disturbing and
we don't want this. So we're going to open
the browser again. We're going to open a new tab, and we're going to type in this address here
and press enter. And this is a tool
I use for all of my YouTube channels and for
other pictures as well. So as you can see here, we can
upload an image or a file. So we're going to
click Upload image. We're going to look for
the image on our computer. And once we find our image, we're going to
double-click the website automatically is going to
remove the background. And it does an amazing job. There was some
kind of mistake or you could still see a
bit of the background. You can always
come here to Edit, click on Edit, and you would
come to this tab, erase, restore, change the brush size and remove the
remaining background. In this case, I don't
need it because the selection is almost perfect. So I'm going to click the X
and I will download my image. The only downside of this
website is, as you can see, the size of the downloaded
image isn't too big. So if you want to
download the full image, you would have to click
here, download HD. And if it's your
first time using the website or signing up, you could download
this image for free. But if you want to download
more full-size images, you would have to pay the
price for more credits. And you can click here pricing and sign up
for a paid version. In my case, I don't
use the paid version, I just use the free
website and I always click here and download and
download the regular image, not the full HD version. So let's click Download. Let's go back to Photoshop. And once again, I'm
going to remove this layer by coming
to the Layers panel, clicking and holding and dragging this to
the trash can icon. Now that layer has disappeared and now I'm going to look for
the other image on my computer and
place it on top of the YouTube thumbnail so I
can either open up my folder, come here to downloads, and simply click and
drag and let go. And the image has been placed
on top of the background. Once again, when this
square shows up, it means I can change the size so I can make this a bit bigger. And once I'm happy
with the result, I'm going to press the
Enter key on my keyboard, or click here on the checkmark. Let's say I want to
move this to this side. I'm going to come here
to the left column, click on the Move tool. And now I can click and hold and drag the image
wherever I want to. Let's bring this here, and that looks good for me. So now we can move on to the next lesson
where we're going to start creating our own
background for the thumbnail.
5. Creating Your Own Background: We're going to leave this
example as it is for now, and we're going to
come back to it later. We're going to create
a new project. So File New and we have
our recent items here. Remember it's 12, 80 by 720. So we're going to click here and create a new blank thumbnail. We're going to create a sort of gaming slash anime
character thumbnail. So once again, we're going
to come to our browser, look for an image that we want. Let's say this one here, e.g. we're going to right-click Copy open, remove
background again. We're going to click Control
V or Command V to paste. And once again, as you can see, the website has automatically removed the background
of this picture. So now I'm going to click, download and save a
copy on my computer. Go back to Photoshop,
open my folders, look for the downloaded
picture here, and I'm going to click and
drag onto my thumbnail. I'm going to change the
size of the character. So I'm going to make it a
bit bigger by clicking and dragging here and here. And I'm going to click and move to this side
of the thumbnail. Let's make this a bit
smaller so it doesn't touch the edge here
nor here, like this. I think this looks okay. So once I'm done, again, I'm going to press
the Enter key on my keyboard or the
check mark here. And now we're going
to start creating our background for this subject. We're going to come down
here to the layers panel. Click on this icon here. And as you can see, if you
hover the mouse over it, it says create new fill
or adjustment layer. So what we're going to create
a new adjustment layer, we have many different
options here. For this example, I'm
going to choose Gradient. This window shows up
and inside gradient, I'm going to click on this arrow here to drop down this menu. We have many different folders. So we can drop down
this menu, blues, e.g. and we have different
blue gradients or purple, and we have different
purple gradients. And the same applies to each and every one
of these folders. So let's say for this example, I'm going to choose
the blue folder, but you can choose any
color that you like. I'm going to click on the
arrow to open this folder. And I'm going to
choose this blue here. So I'm going to click on it. And obviously the
subject has disappeared, but we're going to
fix this in a bit. Now let's take a look
at the other options. So let's close this here and you can change
the style of the gradient. By default, it's linear, but you can choose radial
or angle or reflected. Usually I use linear and
leave it by default. You can also change the angle of the gradient so you click and drag and then I go and this changes the angle
and everything else. I never touch it. So I'm going to click Okay, and now as I said, the subject
seems to have disappeared. So we're going to come back
here to the Layers panel. And if you take a closer look, we have the background on the bottom than the
image that we created with our subject on top and further on top we have
the new gradient. So the only thing we
need to do is click and hold on the gradient layer and drag it underneath
the other layer. So as you can see, we
can move this layer. And now if I let go, the subject will
appear on top of the new gradient that
we just created. And obviously, if you don't like how the background looks, you can always
come here again to the Layers panel and
double-click on this icon here, and this pops up this
window once more. Again, you can change
any of these options. So I could click reverse, e.g. and I could change
the angle once again, or I could change the
style of the gradient, so radio and so on and so forth. And of course, you
can also click here, and instead of blue, you can
open another folder, pink. And you could click
here on this square and completely change the
look of the background. I'm going to click Cancel
because I like how this looks. And now we can move
on to the next lesson where we're going to enhance how the subject looks and make it pop out a bit more
against the background.
6. Make Your Subject Stand Out: Now as I said, I want to
make this subject pop or make it stand out a bit
more against the background. So once again, I'm going to come here to the Layers panel. And instead of selecting the gradient that
we just created, I'm going to select the
image of the character. And if you want to make
things easier for you, you can double-click on the
layer and change the name. So e.g. subject, and this
makes it a bit easier. And what we're gonna
do is right-click on the layer and come
all the way up here, Blending Options
and click there. And this window shows up and we have different options
here on the left. Once we choose one
of these options, we will have more tools
here and then we'll be able to apply those
changes or canceled. So for this example, I want to drop a shadow
on this subject. So I'm going to look
for that option here, and it's the last one. I'm going to click here. And automatically, a
shadow has been created, but I want to change
the look of the shadow. So if I move this so
you can see better, as I said, we have
different options here. First, you want to make
sure the blend mode is set to normal. And let's say instead
of a black shadow, I want to change the color. So I'm going to click here and select any color that I want. Let's say white,
e.g. and click Okay, I can also decrease the
opacity or increase, Change the angle once again. So this moves the shadow from
left to right, up and down. This looks okay. I can also make a harsh
shadow or a blurred shadow. I can also increase the
spread or make it smaller. So in my case, I think
this looks okay. And once I'm done, I'm
going to click Okay. And of course, if
you want to take a look at the before and after, you can come down here
to the layers panel once again and
click on the I to, toggle the visibility on
and off of these effects. So if I click here, the effects are hidden. If I click here again, the effects show up and I
can click on this arrow to hide or reveal the
effects of the layer. Now we can move on to
the next lesson where we're going to add
text to our thumbnail.
7. Adding and Enhancing Text: We want to start
adding our texts. So we're going to come
here to the left column and click here on letter T. And we're going to
click on any part of the image where we
want to add our text. I'm going to click here
and this shows up. So first of all, I'm
going to click and drag and move the text
wherever I want. And I can come up here and
change the font of the text. So instead of impact, let's say I want to try
this one or this one. And as you can see, this
changes the font for the text. So once again, let's go with
impact for this example. And we can also
change the size here, so make it smaller or bigger. And we can also click here, change the color of the text. So instead of white, we could choose black
or blue or green. And you know how this
works for this example, let's say white click, Okay, and I'm going
to start typing. So let's say I want
to create a video about the ten
strongest characters. So I'm gonna type top ten for the first
part of the texts. And later I'm going to create a new layer of texts
with the second word. So once I'm done, I'm going to click here on the checkmark. And as you can see, this
looks quite boring and bland. So once again, we can come
here to the layers panel, right-click, select
Blending Options. And again, I can
enhance this text. So e.g. I. Can come here to drop shadow. This time instead
of a white shadow, I'm going to change
the color to black. I'm going to click Okay, and I can change the angle, I can change the distance, I can change the spread
and also the size. I can also add a gradient
overlay, e.g. I. Can change the color
of the text with a gradient as we did with the background
of the thumbnail. So I can come here to gradient, and here I have from
yellow to orange H. And if I want to
change these colors, I'm going to click
here on the square, and then here and change the color so I can select
any color that I want. Then click Okay, and come here to the other
side of the gradient, like this square click here, make this darker, e.g. and once I'm done,
I'm going to click Okay and Okay again, but I still think the text
is missing something. So I'm going to
choose outer glow. And this creates, as
the name implies, an outer glow for the text. And I think this
looks much better. So I'm going to
click here, okay, I'm going to make
the text bigger by clicking Control T or
Command T on my keyboard. And now once again, I
can click and drag on these squares to
re-size the text. So let's say like this, e.g. I'm going to click
on the check mark. I'm going to come here to the Move tool and
move the text around. And now I'm going to create
another layer of text by clicking the T again and
clicking on the background. And I'm going to type
an MA characters. I'm going to click
on the check mark. Let's go back to
the layers panel, right-click, then
blending options. And once again, I'm going
to select Gradient Overlay, outer glow, and drop shadow. But this time I'm going to change the color
of the gradient. So I'm going to click here, come here to gradient. And as before, we're going
to click here on the square, select Color and select
one of these colors here. So let's say I
want a blue color. I'm going to move until I
find something that I like. And I'm going to move
this circle here. Like this. I'm going to click Okay, I'm going to come
here to this square. Click on the square,
click on Color and select a different tone of
blue. This one, e.g. and make this a bit
darker and click Okay, click Okay here once again, okay, Now once more I'm going to press Control T to transform, make this a bit bigger. And let's say I want to have
this in two different lines. I'm going to click
on the check mark. Come here to the layers panel, double-click on the text, move my mouse here in
between these two words, click and then press
the Enter key. Now this brings a word
character is underneath. Once I'm done, I'm going
to click here again on the checkmark and Control
T to make it bigger, I'm going to press
Enter to apply these changes with the move
tool on the left column, I'm going to move this, and this looks good
for this example. As you can see now the text
is on top of the subject, but let me show you another tip. Once again, we can come
to the layers panel. Let's hide these by
clicking on the arrows, so it looks a bit
more organized. And again, we have
two different layers of texts in the top ten, which is this one here, and the animated characters,
which is this one here. Now let's say I want to
go COO the character on top of the text
as we did before. The only thing we need to
do is click on the layer, which is our subject, and click and hold and drag this layer on top
of the last layer. I can bring it underneath, or I can bring it on top. And now the text is
behind our subject layer. And I think this
looks better now that we've seen how to add
text to our thumbnail, Let's move on to the next lesson where I'm going to
show you how to add other effects and images from the Internet to make this
thumbnail stand out even more.
8. Adding Effects: In this case, we're creating a top ten animate
character thumbnail. And this is a very strong
and powerful character. So we want to spice
things up a bit. We're going to open our browser. And for this example, I'm going to type in this year
lightning background PNG. So every time you type
in something PNG, going to show you
images that don't have a background which
are much easier to edit. So let's come here to
the Images tab and look for a lightning
background that we like. Let's say this one, e.g. I'm going to
right-click Copy Image. I'm going to go over
to Photoshop again. We had copied the image, so we just have to press Control G on our
keyboard to paste. This is how it will look
like, but obviously we don't want this on top of
everything else. So once again, we're
going to come here to the Layers panel and
where it says normal, we're going to open the menu. And among all of these options, we're going to select
Screen click there. And this is how it will
look like right now. And of course, we can also move this layer with the move tool
here on the left column. Now we could click
and drag and move the lightning wherever
we want here, e.g. but once again, we want to
subject on top of this layer. We come back here to
the Layers panel. And as we did before, we're going to click and
hold on the subject layer and drag it on top of
the lightening layer. And this is how it will look like if I bring it underneath. This is how it looks like. If I bring it on
top, the subject will be on top of the
lightening layer. And of course you could do the
same with the text layers. So I could click and hold on the anime characters
texts and bring it on top of the
lightening layer. And this is how it
will look like. In my case, I prefer
how it looked before. So I'm going to bring up the lightening layer on top of the anime
characters texts. Now we can move on to the next lesson where I'm going to show you how to create a different
style of thumbnail, in this case for
an online course. And I'm going to be using
my own face as an example.
9. Sample Thumbnail Design: Before moving on to the
other style of thumbnail, if I click here to
close this tab, it's going to ask me if
I want to save changes. I'm going to click Yes, I'm going to give
this a name, some N1. And I'm going to
save on my computer, save on my computer. And if I save it on
Photoshop PSD format, I can always come back
to this thumbnail later and re-edit
anything that I want to. So I'm going to click Save. And now the thumbnail has been closed and we're back on the other document that
I had created before. So as I said, we're
going to make an online course thumbnail
for this example. And this is me here. Let's say I'm creating
a coding class. I'm going to come here
to my browser again. And inside Google images, I'm going to type
coding background. And I'm going to look for
an image that I like. For this example, I'm going
to choose this image here. I'm going to
right-click Copy Image, move over to Photoshop and press Control V or Command
V on Mac to paste. And now I'm going
to press Control T to transform and resize this image or to make
it a bit bigger so it fills up the whole
thumbnail like this. I'm going to press Control Z
on my keyboard to zoom out. I'm going to move
this like this. And once I'm happy
with how this looks, I'm going to press on the
checkmark and of course, I need the subject to be
on top of the background. So once again, we're
going to come here to the Layers panel and simply drag the subject on top of the
background like this. And I'm going to make
myself a bit bigger. So once again Control
T to transform, click and drag like this. I'm going to press Enter. And now I'm going to blur
the background a bit. So we're going to select
the background layer here by clicking on top of it. And now up here where
it says filter, we're going to look
for the Blur option and then Gaussian blur. And we're going to increase
the radius of the blur. So as you can see, more blur or less blur like
this looks okay, 3.4. I'm going to click Okay. Now I'm going to
add some text here. So again, let's come
to the left column, click on the letter
T, and click here. We could type in
coding one-on-one. Let's double-click on the text and come up here
to the Font tab, drop down this menu and we
can start hovering our mouse over each and every one of these fonts until we
find one that we like. Let's say this one, e.g. I'm going to click here, press the Enter key on my keyboard to bring
the number down. I'm going to click
here on the checkmark. And once again Control
T. Make this much bigger and move this
around here, e.g. click on the check mark. And once again, I'm here
to the layers panel, right-click on the
layer of texts. We just created
blending options. I'm gonna move this
here so you can see we can create a
stroke for the text. So this is without and with, it doesn't make a difference. And we can also come into
a drop shadow once again. But instead of black,
we're going to click here and change from
black to white. Click Okay, and click
Okay once again. And this is how it
will look like. If I want to make myself
standout as well, I can come here to
the Layers panel, select my layer, so the subject layer,
right-click blending options. And once again, I can drop shadow and I can create
a stroke as well. This is a very thick stroke, so I'm going to click here, change the size and
make it a bit smaller. Like this click, Okay, and this is what
it will look like. I'm not very satisfied
with the font of the text. So I'm going to double-click
here and come up here again to the menu of fonts and search for
a different one. I think impact looks okay. And to click there and
click on the check mark. And again, make this a bit
bigger by pressing Control T and clicking and dragging like this and clicking
on the check mark. Yes, I think this font
looks much better. Now, let's say you don't
want the one-on-one here, and you wanted this
in the middle. So I'm going to
click here and press the space-bar as many
times as I need to. To move the one-on-one
to the middle, I'm going to click
on the check mark. And this is how it
would look like if I was teaching an online
course about coding, this would be my
YouTube thumbnail. And now we can move on
to the last lesson.
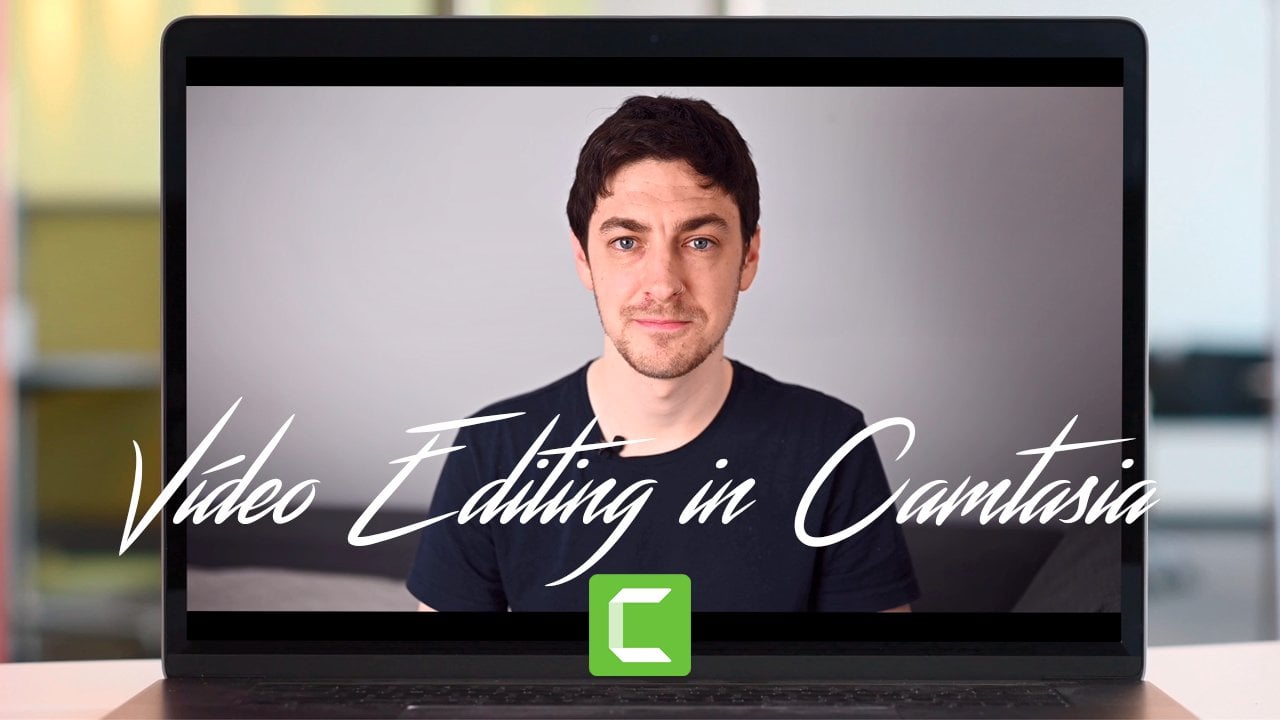
10. Class Recommendations: Before finishing this class, just a quick reminder, you can check out my profile on Skillshare where you're going to find courses like this one, how to make YouTube thumbnails in Canva instead of Photoshop, as well as classes on other
topics like content creation, photo editing, or video editing. As always, thank
you very much for watching and hopefully I'll
see you in the next class.
 Dan Prizont, Photographer & YouTuber