Transcripts
1. Introduction: Hello everyone and welcome to
photo editing in luminaire. Or you're going to
learn how to edit your own pictures and
turn this into this, this into this, and
this into this. I'm going to show
you how to download and install their program
into your computer, how the interface of
the program works, how to import your own images. We're going to see how
to use templates in luminaire and also how to
edit an image from scratch. And last but not least, how to export your image
with the best settings. So hopefully I'll see you on the other side, and
thanks for joining.
2. Downloading Luminar: In order to get started, we need to install a
luminaire AI in our computer. We're going to open up our browser and type
luminaire and press Enter. And then we're going to
select the first option. And this is the main
page for the website. We have two options here, either by now or free download. In my case for this class, I've downloaded the free trial and I recommend that
you do the same. You're going to
have seven days to try each and every
function of the program. And once you get to
know how it works, you can then buy
the full version. We're going to download
the free trial first. We're going to click here. And automatically the
download will start. In my case, I already have the free trial downloaded
for this class, but once you get this
download window, you can double-click and
follow the instructions. And then we're going
to fire up luminaires. In my case, I'm using Mac, so I'm going to press
Command Spacebar and type luminaire
and press enter. This window is going to show up because I'm using
the free trial. I have six days remaining. Remember, the trial lasts for seven days and wants
to trial is over. You can click Buy. Now,
let's click Continue trial. And this is a main
window of the program. Now let's move on
to the next lesson where we're going to talk
about the interface.
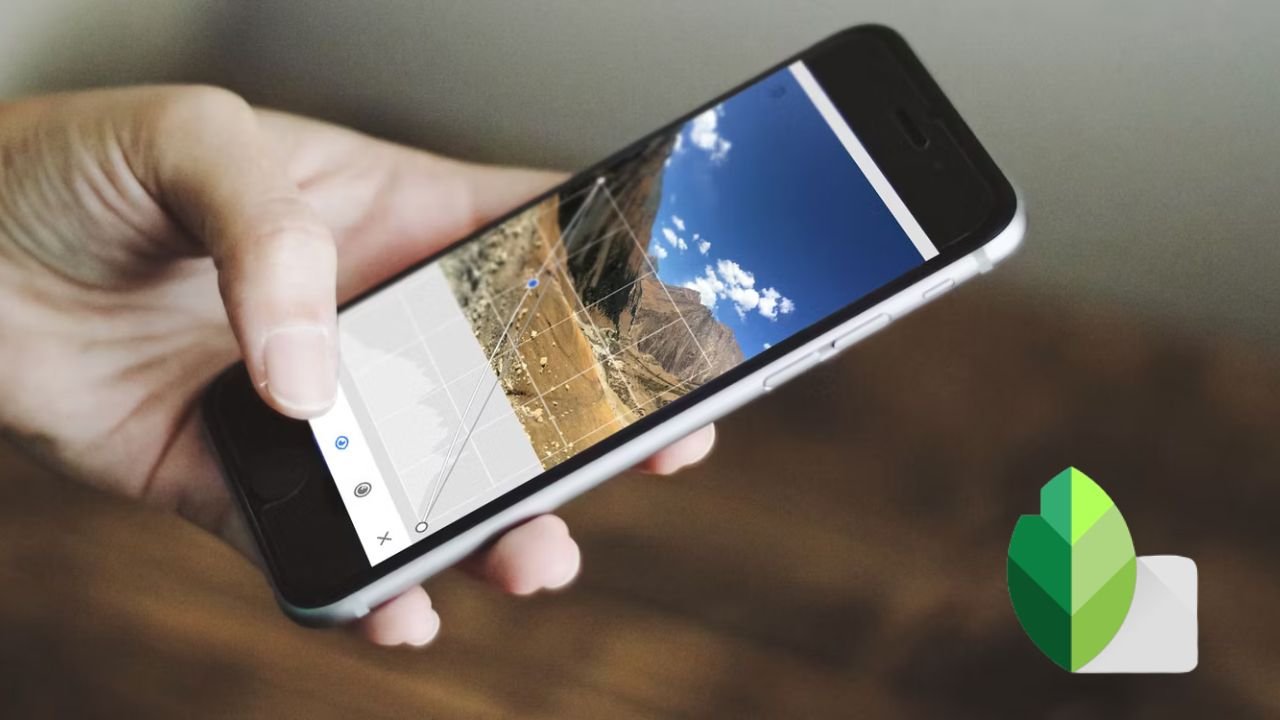
3. Interface and How to Import: This is the main
window of aluminum. I'm going to show you
how the interface works and how to
import your footage. As you can see, it's quite simple and very straightforward. We can either add a folder
here or add an image. If we just want to edit a single image, we
would click here. And if we want to
edit several images, we would add a whole folder. As you can see down here, it says your alumina AI
catalog is located here. So it's basically
telling you where your backup is located
inside of your computer. But you can always
change the folder. If we come up here to the
plus icon and we click on it. We can also add a new
folder or add an image. Clicking the plus icon or clicking here
is the same thing. Now as you can see here, we also have templates,
edit and export. They're not available at
the moment because we haven't imported any
kind of picture. But once we import our pictures, these options will
become available. So let's do that. As I said, you can add a new folder with
different images, but for this tutorial, I'm only going to add one image. So let's click here and
let's look for our image. In my case, it's inside
this folder here. I'm going to select this
picture here and click Open. And now as you can
see, the templates, edit and export tabs
have become available. And this is showing up now. If we go back to catalogue, is going to show us the image
that we've just loaded. And if we come
here to the right, we can choose All Photos, single image edits,
recently added, or trash. We just imported one image. But if we add more than one, each and every one of those
pictures which show up here. So let's go back to templates. And now that you've learned
how to import your footage, we're going to move
on to the next lesson where we're going to talk
about the Templates tab. And we're going to
dive a bit deeper into the interface of luminaire AI.
4. Using Templates: As I showed you in
the previous lesson, once we open our image, this right column shows up. So these are called templates. They're basically
some adjustments that are premade and you can apply those adjustments to your image just by clicking
on one of these templates. So luminaries, as
its name implies, is based on artificial
intelligence. So they already give you some options based on
the type of picture. But of course,
there's many more. If we scroll down here, we have landscape and we have different options inside
of each one of them. Let's start with big city
lights, for example. If we click on it, these five different
templates show up. If I want to choose one of them, I just have to click on it. Frosty, for example.
As you can see, the template has been
added to our image. Now when it comes
to the interface, if we come up here to
the upper right corner, we have two different icons. This one here will show
us a before and after. So let's click there. Now. We can click and drag to
see the before and after. This was the original image. And if we move the slider, we can see the effect
that the template has before and after,
before and after. And we can also click again
to remove the slider. We also have this icon here, which is the preview icon. If we click on it. We can
also see before and after, but you need to make
sure that you click and hold to see the before. And once you let
go of the mouse, you're going to see the after. Click and hold before and
let go to see the after. That's one of the templates. Let's say you don't want
to choose this one. And you wanted to try. City thrills, for example, we just have to click there. And this gives the
image a different tone. Or we can also choose
black and white streets. And it turns our
original picture into a black and white image. And we can choose between these templates just
by clicking on them. So we can go back to
frosty or city throws, or electric city, or a street theatre and
so on and so forth. And if we come down here, we have a heart icon. So if we click on it, we would add this template
to our favorites. We also have a slider, so we can move this. And as you can see, the
template starts to fade. We can choose the intensity
of the template and more. And we can also click
here on the three dots. And we can either edit
the template that we just added or reset adjustments. So let's reset our adjustments and our image goes back
to its original state. Now if we come back here
to templates, once again, instead of big city lights, we can move to the right
and choose urban style. Once again, we have six different templates of
the urban style collection. So let's try Old
Town, for example. As you can see, the attempted
it has been applied, changing the style of the image. And we can come here once again. Click to see a preview
of the before and after. Let's try Edenburg for example. Or Toronto, or Melbourne, Abbey Street, or New York. Once again, we can also
click here and we can move the slider to see the before
and after, before and after. And we're going to click
again to remove the slider. And if you'd like this, you
could leave it like that. Or once again, we can come down here and reset adjustments, and our picture goes back
to its original state. Let's come to
templates once again. And as you can see, we
have favorites here. If you usually choose
the same template, you can save it under Favorites so you can access and choose that
template quickly. Because you can see here,
we also have purchased. If you come down here and
we scroll down to the end, you can click, Get
More Templates. And it will take
you to luminaires website where you can buy new templates that don't come included with the
regular version. If I click here, There's many different
templates that you can buy for different prices. In my case, I don't necessarily
recommend that you buy new templates because
the ones that come included are very good. But if you want to buy new stuff, this is
the way to do it. So let's go back to
luminaire scroll backup. And as you can see here,
we have essentials. Landscape, Mother,
Nature, portrait, macro and so on and so forth. Depending on the type of picture that we load into our program, luminaire is going
to recommend some of these templates you're
going to see in one of the next lessons once
we load a portrait, these are going to show up
as recommended templates. And one more tip. If you place your
mouse on top of your image and you use the
scroll wheel on your mouse, you can zoom in and zoom out. So now we've seen how to
use templates on luminaire. We're going to move on
to the next lesson, where we're going to
learn how to edit our picture either
by changing some of the adjustments of the templates themselves or editing a
picture from scratch.
5. Editing a Picture From Scratch: Now we're going to see how
to edit one of our images. So as I said in the
previous lesson, we can either adjust
and make edits to the baked in templates or we
can edit an image from 0. That's where we're going
to do in this lesson. We're going to come up here to the plus icon and
select Add Image. And I'm going to choose
this image here. Click and then open. This is the raw image taken
straight out of my camera. So if we come up
here to catalog, we're going to see in this
image and the previous one. Instead of clicking
on templates and using one of these
templates here, we're going to move
straight to the edit tab. As you can see
here on the right, we have a column with
many different options. And we can scroll down to
see even more options. Now we're going to
focus on these. Here are the essentials tab. In this case, as you can see, the image is a bit dark. So we're going to
come here to light, click on it to display the menu. And we're going to bring
up the exposure a bit. We're going to bring
down the highlights, up the shadows a bit like. So. As you can see, we
can also change the color, temperature and tint. But if you scroll down a bit, you can also come here to black and whites or
the curves adjustment. We can change whatever
we want here. Raise similar to
Lightroom or Photoshop. If you want to undo these
dots on the curves, you only have to
double-click and they disappear and go back
to its original state. And also we have
this arrow here. So if we want to reset
everything that we just did, we can click here and the image goes back to
its original state. Now let's say we want to
redo those adjustments. We're going to come up
here to edit and undo. This brings us back to the
edit that we just made. Now let's say we also want
to change the composition. So for example, I want to
crop these bicycles here. I'm going to click on light
to hide this sub menu. And I'm going to
click on composition. And here I can change the ratio. For example, if you're
uploading to Instagram, you can change to
four or five or 11. We can also change
the perspective or we can rotate the image. And of course we can go
back and reset this. Now let's say I want to remove these bicycles from the bottom. I can come here to
ratio and click free. I can crop as much as I want and where I
want and I'm gonna click and drag here more or less than I'm going to press
Enter on my keyboard. Now the image has been
cropped, but as you can see, we still have this here and this here that
I want to remove. So how do we remove this? If you come here to
the right column, you can see we also
have an erase tab, so we're going to
click there and we can either select or deselect. In this case, we need to
select what we want to erase. I'm going to bring up the brush
radius to make it bigger, more or less like this. And I'm going to draw on top
of what I want to erase. Then I'm going to
let go of the mouse. And luminaire is going
to automatically erase this when I
click here, erase. And as you can see, it has removed the thing that I
didn't want him to picture. This looks pretty good, but I still have this bicycle
here that I want to erase. I'm going to make
the radius smaller. Once again, going to go over this part here
that I want to erase, I'm going to click
erase luminaries, going to try its best
to remove that object. Though obviously,
it's not perfect. If we zoom in with the
scroll wheel on your mouse, we can see it doesn't
look perfect, but now that we've zoomed in, we can keep erasing things
that we don't need. Let's erase once again, and let's erase a bit more. I think that looks good enough. If we zoom out, this is
what it will look like. Now let's keep
editing this image. Let's close this sub menu here. We can also come here
to color, for example, and increase the saturation
and the vibrance. And if you watch closely here, we have a new icon
that says Add Mask. So we can add a
mask to our edit to choose exactly where we want
to apply this adjustment. So let's do that.
Let's click here. Now we can draw a mask. So let's say we
only want to apply the adjustment to this
portion of the image. We're going to paint on top. Now, we can remove the saturation and the vibrance of just the part that
we painted our mask on. Now let's undo that. And we removed the whole
color adjustment. Once again, let's bring up the saturation and the vibrance, and that looks much better. Now let's say we want to turn this image into black and white. We can also do this
by clicking here, convert to black and white, or of course, go back
and leave it in color. We can also come here to
landscape and the haze. There's a lot of
haze in our picture, or increase the golden hour
slider to give it this look. Or if it's a landscape picture
with a lot of foliage, we can also enhance it, but it won't affect this picture a lot because we only
have some trees here. But if you look here, you're going to see the
difference when we move this slider down or up. So let's undo this. Let's zoom out. And finally, let's say we
want to add a vignette. So we're going to
bring this down. We're going to start
to create a vignette, let's say like this. And as you can see down here, we also have advanced settings, so we can click here and choose the roundness
of the vignette, the feather, or the inner light. So you can play around with
each and every slider. It's very similar to
other editing programs like Lightroom or Photoshop, and it's very easy
and straightforward. Now once again, we can
close this sub menu. We can come up here to
see the before and after. So we're gonna click here. Now we have them before
and after, before. After. We can deselect this
option and click here before, after, before, after. So as you can see, it's
a huge improvement and the image looks
very different. You can edit your
own images and under two minutes and the
results are quite amazing. But as I showed you before, we have many different
options here, and we've just seen these ear. In the next lesson, I'm
going to show you how to replace the sky of an image. Lumen or AI uses artificial
intelligence to change almost everything
inside a picture. So we can also replace this guy just using
a couple of clicks. So let's see how to do that.
6. Sky Replacement: Let's take a look
at how to replace the sky of this image. So we're going to come here to the right column and scroll down to creative and z
first option is sky. So let's click here and we have two different options here. We can look here, for
example, as you can see, luminaire, AI has
created this fate sky. It has blended it
with our picture. We can also come and
click here instead. Now we have a different sky, but that's not everything. We can come down here
and click on this box. And then we can choose from
all of these different skies. And we can scroll down. And then we have
different tones, different Clouds and
different colors. For example, we
could click here, but obviously, this
doesn't look very unreal. So let's choose a different one. This one looks
quite fake as well, but you can see how it works. Let's come back up here. Choose this one for example, let's close this now. And if we look below this box, we also have a sky orientation. For example, we can change the vertical
position on the sky, and we can also change the horizontal position,
left or right. Here for example,
we can hide this. There's also other options
like masker refinements, scene relighting, or reflection. I personally don't
use these ones, but feel free to play
around with them. So in my case, I do use Sky adjustments so I can
increase the defocus, for example, and make this guy more blurry
or less blurry. I can also increase
the atmospheric k's. We can also change the warms and the brightness will make
it warmer or cooler, or increase the brightness
of the sky or lower it down. Of course, if we
want to go back, we can either edit, undo once or we can come here to the arrow and
resets the whole tool. If I reset here, everything that we just
created disappears. But I can come here
to edit and undo. Then we get this
guy back up again. If we take a look at
the before and after. This was a before. This is the after. Before and after. Yes, this guy is fake. But if you don't
go too overboard, I think the result
is pretty good. Now that we've seen how to
replace this guy in a picture, we're going to move on
to portrait editing.
7. Portrait Editing: And now let's take a look
at how to edit a portrait. So obviously, first of
all, we need a portrait. We're going to come up
here to the plus icon. We're going to add an image, and we're going to choose
this one here open. And this is a picture I shot
straight out of camera. We need to take care
of the skin a bit. So we need to smaller than
the skin and get rid of some imperfection and maybe
enhance her eyes or her lips. By default, luminaire
has already detected this is a portrait. So we have these templates here that are being
recommended to us. So in my case, I'm not
going to use monochrome here and I'm not going to
use experimental either. I'm going to look for essence. I'm going to click
there. And once again, I have five different templates
that I can choose from. So let's say we want to
take a look at steel frame. And of course we can see
the before and after. So this was the original. This is the after,
before and after. And as you can see, it does a pretty decent job at
softening the skin, but I'm not a big
fan of the colors. So let's try a different one. Let's remove this
by clicking here. And instead of steel frame, Let's take a look at Marquis also does a good
job. So let's see. Before, after, before,
after will not bad. We have good lighting
on the eyes. The skin has been smaller
than quite a bit. We still have a bit
of green and reds that we maybe need
to tone down a bit, but the before and
after, it's quite nice. And that was just by
clicking once and we haven't even
edited the picture. So let's stay with marquee and we can
either come down here and press Edit or we can
come up here and press Edit. So let's do that. Let's close the sky tab. And if you take a closer look
to the left of each tab, we have a dot, a small dot here. And here and here. These dots are
telling us that we've changed some setting
inside of these menus. So vignette, for example, we lowered the amount as of yet, and that's why we
have a small dot. So you can come inside
each and every one of these sub menus if you need
to make more adjustments, Let's come down to portrait and weekend click on face and we can increase the light of
the face or remove it. We can also slim the face
and make it thinner. And let's say we were at
26 and we move up to 80. But it's too much. We
can always double-click on the circle and
it goes back to 0. Let's bringing this up a bit. And as you can see down here, we also have an EIS and we can even change the
color of the eye. So let's say instead of
brown, we choose blue. And obviously, this
looks quite vague, but if you want to play
around with it, you can. So let's bring this
back to the original. Of course, we can
make the eyes bigger. It also doesn't look very good, but you can play around with
the slider or double-click. We can also improve
the eyebrows. It's making them
darker as you can see. And we can also come here
to a mouth and increase the ellipse saturation
and the redness. It's quite subtle, but you
definitely can't see it. We can also see the before and after by disabling this tool. If we disable it, we go back to the
original portrait. And if we enable this tool, we go back to the
adjustments we just made. We also have teeth
whitening here. Obviously, her mouth is
shut so we can't see them. But if you take a portrait
of someone smiling, you can increase the whitening
with this slider here. Now, we can close the face
sub menu and open the skin, and we can play around
with this slider as well. So now we have the
original image, but if we move the
slider to the right, we're going to increase
the softening of the skin. Now if we want to
remove some spots, this one, for example, some skin imperfections,
we can do that as well by going back
up to the erase. We're going to make
the brush quite small. So 20 is okay for this example, we're going to brush on top the imperfection and
then click Erase. And as you can see, the
imperfection is now gone. So let's take a look at
the before and after, before, after, before, after. The difference is also quite
noticeable in this case. And these are some examples
on how to edit a portrait. And finally, we can move on
to the export tab to take a look at the settings in order to export your final image.
8. How To Export in Luminar: Basically once we've finished
making every adjustments, we're ready to export our image. So we're gonna come
up here to Export. And we have these
different options. So we can either save to disc, send by e-mail messages
SmugMug or 500 px, which is a photography website. So in my case, I'm just
going to save to disc. So let's click here. This window shows up. So obviously we can change
the name of our file. We can select the folder where we're going
to save our image. We can apply some sharpness, low, medium or high. In my case, I leave it
by default that none. But if you want to sharpen
a bit more your image, you can also click in here. We can also resize the image once again
for the long edge, short edge, or select the dimensions that
we want to choose. If we don't want to
change the dimensions, we can always come
back here to original. We're going to choose
the color space, so we have three
different options. But if you're uploading
to Instagram, for example, I do recommend
that you use sRGB. And lastly, we can change
the format for this example. If I'm going to export to Instagram or Facebook
or another website, I'm going to select JPEG or PNG. And of course, the quantity, you can always and bring down the quantity if you don't
want a bigger file. But remember it's going to
affect the overall image. So I prefer to leave it in
100th, but if you want, you can bring down the
quantity 275 or 80%, 75 or higher as the sweet spot. And of course, once we finished, we're going to click Save and the edited image will be
saved in our computer.
9. Class Recommendations: That's it for this class. Thank you very
much for watching. If you're interested, I have a more classes on my profile. Aside from photography, I also manage three different
YouTube channels and I've uploaded different classes about video editing with
different softwares. So for example, for
more at ten iMovie, Final Cut Pro or Camtasia for free to check
them out if you want. And also subscribe to my profile if you want to see more
classes coming soon, take care, and I'll see
you in the next one.
 Dan Prizont, Photographer & YouTuber