Transcripts
1. Course Overview: Welcome to create and animate a vehicle with Blender
and Substance Painter. I'm daring Lyle. And
in this course we will go through the
process of modeling, UV mapping, texturing, rigging, animating, and rendering
a vehicle animation. You'll see the
entire process from the first polygon to the
final rendered video. And at every stage of the
process you will have access to the project files that were used in the
creation of the course. Each blender same
file has been saved individually to
match each video. So at any point, you can open the blender file
that I was working on and examine the settings and the progress to that point. All of the reference
images are also included as well as the substance
painter project I used. Now, this course
is geared toward beginner users of Blender
and Substance Painter. But I do assume some basic knowledge
of the programs used. I assume that you've
successfully installed the programs on your
computer and that you know, basic navigation like move, rotate and scale and blender. But I do show all of my
keystrokes in each video. So you'll be able
to see exactly what I've pressed to
access each tool. I really enjoy working
on a project like this, one that goes from
the very beginning all the way through to
a finished animation. There is so much
that blender can do. And I hope this course
inspires you to use these tools and techniques
to create your own vehicles, your own worlds, and animations. Because once you
get the tools down, you really can create
whatever you imagine. So I'm looking forward
to getting started. I hope you are too. In the next video,
we will work on preparing our reference
drawings to take into Blender
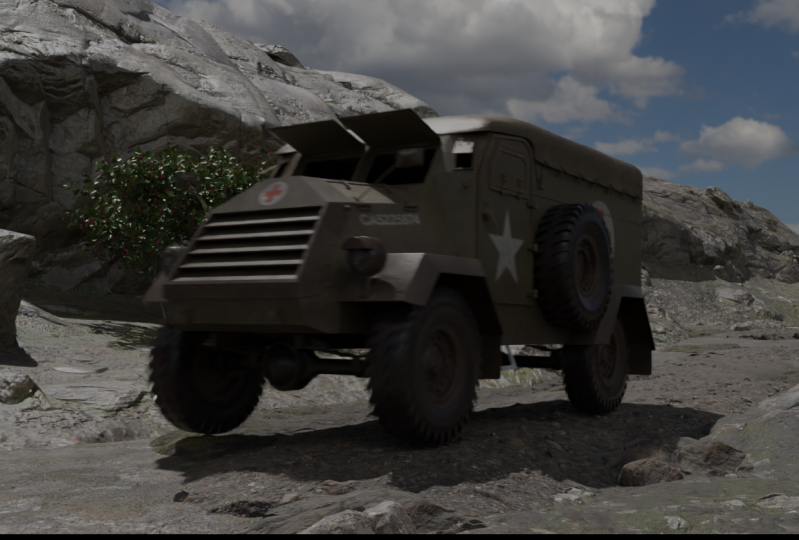
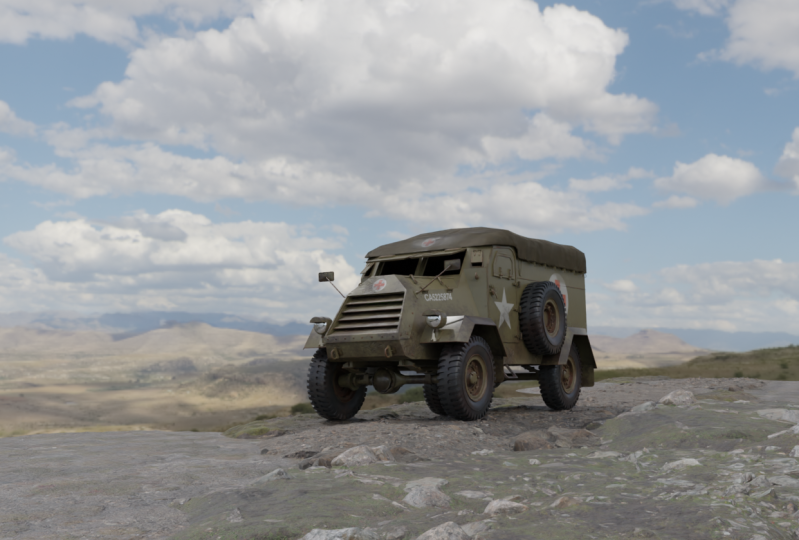
2. Preparing Reference Images in Krita: Well, the first thing
let's do is take a look at our reference images. Here we've got in
our project files, you can find in the reference images folder
here some blueprints, some photos that I've
found on the Internet. I also found a person
who builds scale models. And it turns out this is one of the best collection of reference images
that I could find. He is at this website here, and it's just a blog where he documents all of the mini
scale models that he creates. So here it is. And on down There's just
some wonderful images here of the vehicle in its final form with all the
texturing and the painting. And I contacted him and
I asked him if we could use some of his images in
this course and he said, Sure, So that was
extremely nice of him. And also over here
in the blueprints, we're gonna be using this set of blueprints here within blender. And these come from a website
drawing database.com. And this is a free website. You can go and download
any of these images. And I found this CT
15 ambulance here. And that's what we'll be using
for our images in Blender. But first, before we do, we need to cut this apart
so that we can have individual images here in
Blender for our references. And to do that, I'm
going to use Krita. So let me bring this over
here and I'll go to Krita. And if you don't have created, you can just go to krita.org, KR ITA. Here it is here. And you can just download
the latest version. It is also an open
source free programs so you can download it and
use it for any reason. But what I'm gonna do here
is just click Open and I will browse to that
blueprint here. I'll click Open. And here it is. Now from here,
we're just going to need to cut these apart. So what I will do
is come over here to the rectangular
selection tool here. And I'll just begin by clicking
and dragging a marquee around this part
of the image right here for the side view. And once I have that selected, I'll press control
C to copy that. And then I'll go to File New. And then here I'll create
a clip from the clipboard. So I will just click Create, and I'll use sRGB and click. Okay. And here we have our new document
in a new tab here. And now we can add the
other ones to this as well. So I'm gonna come over here to the Layers panel and change
this to the side view. And then I'll go back
to the original tab and I'll just click
out here to deselect. And then I'm going to
just click right in here and drag another
area around this. About like that. Maybe I need to give it
a little bit more room. I'll bring it out
here like that. There we go. And then
I'll press Control C, go over to this
tab and then press Control V. And now
we've got the top. I'll change the name
of this layer and I'll reduce the opacity over here until can kinda see through it. And I want to make
it so it lines up with the other
one underneath it. So I'm going to
click right here on the transform tool and
just click and drag and move this around until
I kind of line up the front here in
lineup, the back. So it's just about
the right size. Maybe I'll hit the arrow key and move it up a bit
into the center. Then I'll hit Enter, bring the opacity up again. So there we have the top view. Now let's go get the front view. I'll click out here. And then I will click and drag a frame around here
and select this Control C. Go over here, control V. And now change that
layer to front. And I'll bring the opacity
down for this one as well. Maybe I'll hide the top. And then I want to
bring this insurer, I've got Transform
Tool selected and then maybe I'm going to bring
this over and just line this up right here. Yes. So the tires are in line and then that top part
right there is in line. And then I'll just use Shift and the left
arrow key and move this back over into the
center, kinda like that. And then press Enter and
bring the opacity back up. Alright, so there
we've got the front, the top, and the side. I will just hide the
front and the top. Actually, I'll need the front. Let me hide the side there
and then let's go back here. And let's do this once again. For the back view, I'll just click and drag here. Control C, Control V. Let's reduce the opacity. Let's change the name to back, and then I'll click on
it and let's move this so it's in line with everything else from
the front as well. But I really want to line up the tires and that top
little piece here. Alright, I'll hit Enter. Return the opacity to 100. And then we've got all of these ready to go and be exported out. So let's begin with
the side view. I'll hide all of these. And with this selected, I will then come up
here too, File Export. And in the reference
images folder, I'll just go into blueprints
and put them in here. So this is a side view, and I will export this
out as a JPEG here. So I'll click Save. And Okay, and now let's
turn this one off. Turn on the top view. Now, we've got some empty
space around the sides here. Maybe I'll just fill that. I'm going to come
over here and click on this to create a new layer. Then I'll drag that layer to the bottom and I'll just
call this background. And then I want to fill
it with this color. So I'll come over here to
the eyedropper right here. Click on that. And if I click on the white
outside here, right there. And then I'll come over here to the fill tool and click out there with
this layer selected, I'll click out here and
that'll fill that with white. Alright, so now we go
to the top layer here, and let's go to File Export. And for this, I'll
call it top view. There we go. Okay, now let's do
that for the front. I'll select it
here, File Export. We'll call this front
view. There we go. And one more for the back
view file, export back view. And then finally, I want to save this as accretive file so I can come back
to it if I want. I'm gonna go to File Save. And I'll put this in the
Blueprints folder as well. And we'll just call
this ambulance views. I'll just call it that. So now we have all of our individual images that
we can bring into Blender. So if we go back to Blender, now what we can do is bring those images in here
into the 3D view. So in the next video,
we will do that
3. Reference Images in Blender: Okay, Let's now bring in our prepared images
here in the blender. I'll hit the a key to select
everything and hit Delete. And now let's just go to the front view to bring
in that front image. You can go to the
front view with the one key on the numpad. You can go to the side
view with the three key and the top view
with the seven key. Now, if you do not
have a numpad, you can always press
the Tilde key, the key below the escape key, and then choose whichever
one you want here. So the front view you
can choose here, right? So what I'll do is I'll
hit the one key and then I will go over and
bring in my blueprints. Here they are. Here is that front view. So all I really
need to do is just take this and drag it
in. And there it is. So now move this aside. Let's take this and put it
in the center of the grid. I'll hit the End key to
open up the side panel. And we can just take all
of these three fields. I'll just click and drag
on all three of them. They're pressed zero and enter and it comes into the
center of the grid. Now, my front view isn't exactly aligned with the center
and we will fix that. But first let's come over here to the object data
properties of this image. And let's turn on opacity, which allows us to
click and drag on the slider here and
reduce the opacity sum. I'll actually just type in 0.25, so we have that. And then I will take
my move tool over here and I'll just drag it so it's in the center
of this grid here. So that blue line hit
the one key again. So that blue line is
right down the center. And I'm looking at the center between the two windows here because it looks like the crosses here are
a little bit off. But if we go right down the
center of those two windows, I think we'll be okay. Alright, so now I'm
just going to take the z-axis and drag it up so the tires aligned with the x-axis or the
grid right there. And now we've got our first
image in Blender here. We're going to want to drag
this back in the y-axis here. And in fact, so the y-axis
currently I've got it at 4.9. I'll just type in four. So it's four units back or 4 m, because each one
of these squares is a meter here in Blender. Alright, we've got that one
and let's give it a name. I'll call that front. And let's do the side view now. I'll press the three key
on the numpad or recall, you can also press the Tilde
key and I will bring in, well, I'll bring in that
side view here it is. I'll just drag this in and drop. And then once again, I'm going to center this
completely so I'll press is zero and enter for
the location field. And once again, let's go to
the object data properties. Turn on our opacity and
I'll type in 0.25 here. Now I'm going to drag
it up and put it right on that green line on the grid. So the tires are sitting there. And I'm gonna click and
drag and move it this way. And maybe this side
could be negative three. Let's try that negative
three in the x axis. There we go. Alright? Now the question is, is this the right size? Ultimately, we're going to want our model to be real-world size. Because so many things
here in Blender as well as other programs work best
at real-world scale. So like the lighting here
in Blender attempts to simulate real-world
lighting based on the distance from the light. So we're going to want our 3D objects to be
in the proper scale. And the same goes for any game engine like
Unity or Unreal. And it also goes for real-time texturing programs
like Substance Painter. So ultimately, it's just
really a good idea to have all of your 3D models
be real-world size. Now we can do that
at the beginning, or we can model the whole
thing and then scale it all down or up to the
proper size at the end. Either way is fine. For this particular project. I'm gonna do it here
at the beginning. So I have in the
reference images folder, I've got this image here. And this is just an image
from the Wikipedia page. And this tells us generally
how big this thing is, the length, the
width, the height. So we can create a
reference object for this and then see if our images
are the right size. So let's do that. Let's say
we've got a width here, which would be the
x-axis of 2.34. Okay? But we need an object to
scale to 2.34 m in the width. So let's just press Shift
a mesh and create a cube. And now we can use the dimensions fields here
to get this the correct size Now other objects like these image planes do not
have a dimension field. So we need to do this
with a 3D object. Alright, so the width in the x-axis here
was what, 2.34 m. Okay. And then what else? We've got in the length 4.75 m. Let's do that in the
y-axis, 4.75, alright? And then in the height, which would be the z-axis, to 0.312, 0.31. Alright? So that is the size of the
actual real-world thing. Okay, Let's give it a name. I'll call it reference size. We go, oh, I should probably
give this a name to. Let's call that side. And let's go ahead and
apply the scale so that we know exactly how big this should be in case we
accidentally change it. So what I'll do is you see how the scale is non-uniform here, Let's press Control a with that object selected
and apply the scale. And what that will do is reset that to ones
and tell blender, this is the default
size of this object. So if we accidentally do this, we know that we can just
take these fields type in one and our object will be
back to its default size. Alright, now let's press
Shift Z to go to wireframe. And what I'll do is
hit the one key. And let's move this up. Set it on the grid
here, right there. And now is our image
the right size? Well, not quite, right. We could reduce it just a bit. Let's select it, hit the S
key and bring it down a bit. And then bring
this down to right about maybe a little bit more. I'm going to scale it
down just a hair more and put those tires
on the x-axis here, and now we've got it, so it's just the
right height here. I'm going to say that
this is the height and not that little
piece on the top. And we've got the
image centered there along the blue z-axis. So I think that's
pretty good there. That's how big this
thing should be. Alright, so now what
we can do is we can apply the scale
for that as well. Control a apply the scale. And now we know if we
accidentally change that, we can bring it back to all
ones and it will be good. Now let's hit the
three key and let's select this image,
the side view. And I'm just going to
hit the S key and scale that down just a bit as well. Move the tires down
to the grid floor. And I think that's
about right there. Right. We're right on the top of that. There we go. Now, our box is a little
bit too long here, on the front and the back. But I think that'll be okay. I think what I'm gonna do
is tab into edit mode and go to Face Select mode and
select this face here. Turn on the Move Tool, hit the three key on the numpad to go to
the side view again. And I'm just going to
bring this back like that. Same thing over here,
just right here, so that when we bring in, the top image will know exactly
how long it needs to be. I'll hit the Tab key to go
into object mode again. And now let's bring
in that top view. I'll hit the seven key on the numpad to go
to the top view. Let's come over here
into our blueprints. Here is the top view. I'll click and drag
and drop it in. And it's going the wrong way. So we need to turn it. Let's go ahead and do that. We can, of course, click on the rotate tool. And with this blue circle here, I can click and drag, but I can also hold the
control key down and that will snap it in five
degree increments. And you can see up in the
upper left-hand corner of the interface the degrees
that I'm turning it here. So I'm going to turn
it to 90 degrees. There we go. Then I'll go
back to the move tool. Let's move it over. Bring it down or bring
it over in the y-axis and about right here. So now we know I've got to
scale it in just a bit. I'm going to hit the S key, scale it in just a bit,
bring it back in the y. And there we go. So now we've got the
very front and the very back lined up with
that 3D object, that reference size object. And let's also make sure it's going right down
the center here. I can't really see the line. So let's turn on the
opacity setting over here. Type in 0.25. And yeah, I think that's pretty good. That's going just about
right down the center there. Okay. That's good. So if we tumble around There it is. Now we can
take it and move it down a bit and maybe I'll
move it down in the z. Negative 1 m,
negative one, enter. And there we go. Now once again, I'll press Control a and apply
the scale here. Did we do that here? No, we didn't control
a apply the scale. And lastly, let's just put
in the other view back here. So the back view to
go to the back view, instead of pressing the one key, I'll press Control one and
that'll go to the back view. I'm gonna hide this temporarily. So the front view, I'll just hide here. Oh, this would be the top view. Let me give that a name. There we go. Then
let's just bring in the back view J peg here. There we go. Now, I'll turn
on the opacity type in 0.25. We go, I'll hit the
G key and move it into the center a little
bit more like that. Then it looks like we need
to scale it down some, so I'll hit the S key, scale it down a bit. And something about like that, that looks pretty good. Are we in the center here? Yeah. I'm looking at the
center right there. That looks pretty good. Okay. So now we've got that. So if we tumble around, we can move this
out here like this. Now let's change the
name to the back view. I'll bring back our front. And our front was 4 m in the Y. Let's type negative
4 m in the Y here. Let's also apply the
scale with control a. Alright, and now we've
got our images in. But one last thing I wanna do, I wanna be able to see through these without seeing
him in the back. And to do that. And we can just select them and come over here. And for the side setting, I'm just going to click front. And now we can only
see it from the front. So I'll do that over
here, front, here, front. And for this one too, I'll click front so that if we are looking at the back of the
images, we don't see them. And lastly, let's hide the reference size
object when it's changed the name of this
collection to reference. And just so we
don't accidentally select these and move
them off of their place. What we can do is actually
make it so we can't select things in this
group, in this collection. To do that, I need to
add a new column here so I can pull the filter menu down and add a new restriction
toggle called selectable. If I click here. Now you can see we have
a new column here. And all we need to do
is just click this. And now anything in this
collection is uncollectable. In the 3D view, we cannot select any of
these and move them around. So now we won't accidentally mess up our placement
of the images. Alright, in the next video, we will begin our modeling
4. Beginning the Basic Shapes: Alright, now that we have
our reference images in, I think I'd like to
begin blocking out the general shapes before I jump right into
all the details, I really feel like I
need to get a sense of kind of what the basic
shapes are going to be, how things are going
to fit together. And one of the things I'm seeing is this little part
right in here, this little triangle angled
back part right here. That's difficult for me to kinda understand
what's going on. I can see it over here too. And I think what I'll do is I'll bring in another
reference image here. I'm just going to
hover over a corner of the window here until my
cursor turns into a cross. And then I'm going
to click and drag down to create a
new window here. And then I'm going to
change this window to an image editor. And then I can go to
Image and open and bring in one of the
reference images. So in the reference images, in the photos folder, I'm going to bring
in one of these. I don't know, maybe
this one I can kind of see a little bit better. Let's see. I'm going to press Control and spacebar to maximize
that screen. And then this right here. So this goes flat. I think this is kind of angled. This is angled but tilted back, and then this goes flat across. So I feel like there's some interesting
angles here that I'm really not quite
understanding. And these angles here too, I feel like I need to block this in to understand this
a little bit better. So I'm going to press
Control and Spacebar. And let's work first of all on just establishing all
the tires and the wheels. I'm going to press
Shift a mesh cylinder. And if I open this
panel up down here, I can see that
it's got 32 sides. And that's fine. I
think I will select it, but I can't select it. And that is because, okay, I think I may need
to change this over here. That is because when
I created this, It came into the
Reference Collection which I have made uncollectible. So anything that
comes into here, I'm not gonna be able to select. So probably what I should do is re-enable this for
the collection and then disable these for the
actual images in here. And then now that
that's enabled, I can select that over here. And what I'll do is
I'll just take this and drag it and drag it out of the reference
collection and just put it out here in the
main scene collection. And in fact, what I
can do is go ahead and create a new collection here. I'll just right-click
new collection and let's call this tires. And I'll drag this into here. And then I could take the reference collection
and drag it down beneath here just so things
tend to come into here first. Alright, now that
I've done that, let's take this cylinder
and maybe I'll press R y non-0 to turn it 90
degrees and the y axis. And let's scale it down a bit
and then I'll hit the three key on the numpad to go
to the side view here. And I'll press Shift
Z to go to wireframe. I could also press Z and
go to wireframe from here. Either way, I'm going to
hit G and move this over here and hit the S key
and scale it down. So it's about the size of
one of these tires here. And then I'll go
to the front view with the one key on the numpad. And also keep in
mind you can press the Tilde key to
change viewpoints. So I could press the Tilde key underneath the Escape key
and then click on front. Same thing. And then I'll move this over and I'll scale it in the x-axis. I'll press the S key and the X key and scale
this down so it's about the same size as one of the tires and I don't
need it to be exact. I'm just trying to block
out the basic shapes here. With this tire selected, I'm going to press Shift D to duplicate and then the Y key to slide it along the y-axis
here, and then click. And then let's do a
similar thing over here. I'll hit the one
key on the numpad. And with these two
objects selected, I'll press Shift
D and the X key, and then move these over here and put them
about right there. Alright, now let's maybe
get this one on the side. I'll hit the three key again
with this one selected, I'll press Shift D and
move that over here. I can hit the Z key, go to wireframe to see if I'm in about the right
place. There we go. And then, well, let me
move it over some I'll hit the one key and it
looks like it's kinda sticking out
like that a bit. Okay. So now we've got the
tires and that gives me a sense of the dimensions
of the car here, at least in 3D space, right? I know we have the
image planes in here, but I think it helps to get it just blocked out in 3D space So before I do anything, I think I'm going to
try and deal with this strange angle here. I find that sometimes if there's a difficult place on a model, dealing with it first and then expanding everything out
from that can be helpful. So let's try that. I think what I'm
gonna do is press Shift a and just create
a polygon plane. And this polygon plane I want to bring up and put right
up here on the front, on the windshield so I can
begin working on that angle. So I'll hit the three
key on the numpad. Hit G, move this up here, Our key and turn it some. And then I'll just hit
the S key and scale it down until it's about
the right size. I want it to be about like
this on the front here. And then let's hit
the one key on the numpad and go
to the front view. And now what I wanna do
is mirror this over. So one way to do that is
to tab into edit mode. So we're here in edit
mode so we can select the vertices and the
edges and the faces. And we can do that by coming
up here to vertex select or edge select or
face select up here. These can also be accessed
with the one key, two, or three key on the keyboard, the ones up near the Tab key. So let's just say I hit the
one key to go to vertex mode, and I hit the a key
to select everything. And then I'm just going
to take the x-axis and drag it like this. Now that it's over on one side, let's add a mirror modifier. I'm gonna come over here
to the modifiers panel, add modifier, and
click on mirror. Now we've got this
mirrored over to the other side around the
origin of that object. Because when we move an
object in object mode, we move its origin. But when we move an object
in edit mode, like this, the origin stays in place
and the mirror modifier, by default, mirrors around
the origin of that object. So let's now turn
on clipping here. And I'm going to turn
on the cage here so we can see points on the other side of
the mirror as well. Now all I'm gonna
do is just drag and clip these together
about like that. And with clipping on, what that means is these points here can't
be pulled apart now. I can't just click
and drag them. When they come
together, they clip. So now we can just
click and drag these two points over here
and drag them this way. And maybe I'll click and drag on these two points down here. Let's go to the side
view with the three key. And I'll bring this down. Oh, about like this here. There we go. So now we've got the front windshield
kind of blocked out. The next thing I wanna do, Let's go back to the
front view as I want to extrude this piece
out right here. Now, it looks as if our images are a bit
off and that's fine. That happens when people
draw these images. They don't get, say, the front view exactly the
same as the side view. So what I often do is choose a side that's
gonna be the default one. And I think for me this side view is going
to be the default. So what I see in the side is
what I'm going to go with. If the front is slightly off
and it is here, That's fine. I'm not going to worry
too much about it. But, well, let's do
is let's add an edge Control R and click and drag this edge down
to about right here. And let's go to the side view
and take a look at that. It looks like it's pretty good. I might want to
bring it down a bit. With these points selected here, I can hit the G key two times, which will slide
those points along the existing edges
of that object. So I'm going to hit G two times and then slide that point down just a little
bit like that. Alright? Now what Let's do
is take this edge right here and let's extrude it
to get that angle right, to get this piece right here. So let's try that. I'm going to go to the front
view with the one key. And I'm going to hit E and
pull this out like this. And then I'm gonna go to the
side view and let's pull it back in the y-axis,
about like this. There we go. So we're just
beginning to get that angle. Alright, so in the
next video where Let's do is continue
on with this angle, try and get it blocked in. And then from that, we'll be able to
extrude forward for the hood and back for
the body of the truck?
5. Blocking in the Complex Angles: Now you may have
noticed that each time we have a new video, I've got a new blender
file here, a new version. And the way I do that
is just first of all, pressing Control S
to actually save the scene and then to
increment the file number, I just press Control Shift S. And then while the cursor is
hovering over this window, I can just press the plus key on the numpad and it will
increment the file number. And then I can just hit Enter. For now, I'll just
hit Escape though. But also to ensure that you have these images in
your blender file. No matter where
you take the file, what you can do is come
up here and go to File external data and then put a checkmark next to
automatically Pack Resources. And when you do that,
here it is here. The next time you
save control S, it will pack these files
into the blender scene file. So you can take this file and go to another computer
and open it up. These images will
still be there. If you do not have
a checkmark here, it's going to expect
to try and find those files in the folder and path that it
originally found them. When we turned on external data. It's actually now copying
these images and putting them into the blender scene file as well as this image over here. So it's just a handy way to ensure that you don't
lose any of your images. If you're going to work on the blender file on
any other computer. Alright, so let's get
back to this here. Let's say I take this edge and let's extrude this down to
get that triangle there. Let's try that. I'll go to this side view
with the three key again. And I'm just going to
hit E and pull down like this to about right
here, I think. Let's try that.
And then I'll hit the one key to go
to vertex select, and I'll click this point and
hit G. And let's move this up and flows in like
this. Let's try that. Now let's go to the front view. I'll hit the one key. If I press Shift Z, I can see through here now. Now I want to take this
and move this out. So it's in line with this here. Now, I'm not sure that that
angle is quite what we think it should be because
these are off as well, right? So we got to take this
line with a grain of salt. Alright, now let's
press Shift Z, tumble around and
see what we think. Alright, so from here
what Let's do then is take this edge and begin
extruding forward. So let's just hit E and Y to move the extrusion
and the y axis. And I'm going to move it up
to this point right here. Alright, so now let's tumble
around and see what we have. So if I take these two points, this point and this point
and merge them together, will we get something that
we think we want here? Let's give it a try. I'm going to select this point first and then Shift-click this, and then press the M key to
bring up the merge menu. And then I'm going
to choose to merge these two points at
the last one selected. And there we go. So now
we've got this angle here. Let's go back here. And it looks like
this continues down. But I think let's
just try and take these two edges and
extrude them forward. The problem I'm seeing is
getting this part right here. So what I'm gonna do is just take this
and I'm going to hit E and bring this
forward like this. And I'm also going to take this point here and move
this forward up like this. Let's just move it all
the way up to here. Let's say we've got
that basic shape, but it isn't yet conforming
to all of this here. So what I think we can do is, first of all, let's create
an edge or this right here. Let's go to the side
view, press Shift Z, and I want to press Control
R to create an edge loop. But first let's tab
into edit mode here. Then I want to press Control
R. And I'm going to bring this up to here,
right about this. Then let's take these
points back here. I'm going to just click
and drag on these points. And I'm going to
once again press G2 times to slide these along those existing edges like this until we get
something like this. See how that's angled there. Let's see what we have here. Alright, we have
something that will work because I think if we
take this point up here, move it in, we'll get this here. And then theoretically
if we take this point and hit G and
move it into here like this, we get that angle of the hood. So let's try that shifts
z. See what we think. Yeah, I think we're
getting there. I'm going to take this
and move it up like this. The main problem I see is
this piece still right here. So if I go back here, I'm going to come
into here and it's this piece right here
that goes from here. To hear. So I'm
thinking what we can do is actually use the
knife tool for this. I'm going to hit the three key, press Shift Z, and let's create another edge
loop with Control R. And I'm going to hover
over one of these edges, so it's vertical and
I'm going to click and drag until we get
right about here. At that point right there. Then what I wanna do is basically draw an edge
from here to here. So let's try that. Let's hit K and click here, and then drag and click here. And that will knife and
edge into that polygon. So now I can just hit Enter. And now we have that
new edge there. Now I don't really
want this whole edge, so I could just take this edge. I'll hit the two key
to go to Edge mode. Take this edge and then
I can dissolve it. Now I can press the X key and dissolve edges.
So there we go. Now we've got that. So do we have something now
that looks kind of like that? The problem is, is
this is flat here and this area isn't
flat on mine yet. So I will take this
and move it out some, and let's try and get this
more of a flat plane here. Well, we could try is
we could right-click on the object in object mode and
choose shade auto smooth. And now that's helping us
flatten that out a bit. I can click and drag in the
auto smooth area down here. I'm just trying to
find, There we go. If I take it down to 25, I can get this flat and
these angled, right. So now we're kind of
getting this piece here. So we've got this
piece that goes up and down and forward like this. It's all flat. We've got that angle. And then we've also got an angle here that really we should see, but we aren't seeing
because of the smoothing. So what I could
do is once again, go to shade auto smooth and maybe take the auto
smooth down just a bit. There we go. You can
see that there we go. So really I'm at
about 20 degrees, I'll just type in 20
on the auto smooth. And now we've got pretty
much what we want. We've got this flat piece. And then we've got
this strange angle that I think is working for us. Let's go to the front view
and just take a look at it. Yeah, I think that's
what we want. The only problem I can see
is that here we need to come in towards this
area right in here. Let's try that. And we could also bring these in
to be in line with that, I think let's hit the seven
key to go to the top view. And let's then start bringing these in just a bit like this. But I think it kind of works. We could also just
take this piece here and hit the G key two
times and slide that down. So we have more of a
straight line there. We could also come in down here with these points
and begin moving these. And so it's more
of a straight line going toward the front as well. And also maybe I'll
take these points down here and go to the top view and move
these out just a smidge. Maybe a need to bring all of these points
along. Let me do that. Grab these and pull these
out just a bit like this. So it's oftentimes not exactly a straightforward
process to get the shapes that you're
seeing in the reference image. And that's fine, that happens. But sometimes you've
gotta be willing to play around and see what
you can come up with. Alright, so in the next video, Let's start extruding off
of this piece and began closing it up and creating
the rest of the truck
6. Extruding the Back of the Truck: Well, the more I look at this, I feel like we're close, but we're not quite there. I feel like there's just
one more little triangle in here that I'm
not accounting for. And that is this little
thing right in here. I feel like that
this is flat here before the angle goes forward toward the
front of the hood. And let's think about that. If I tab into edit mode, I feel like maybe I could just once again use the knife tool, press the K key. And if we go from
here to here to here, I think Let's try this. I want to maybe
go right into it. Here. Let's say. Then
I'm gonna hit Enter. And then what if I take this point and this point
and merge them together? Will that then flatten that
to give us that triangle? Let's see. I'm going to press M Once again and merge at the
last one selected. And there we go. Let's see now. Yeah, I think that gives us that flat triangle right there that we
didn't have before. Alright, Now ultimately
we're going to put in the windshield frames here. I feel like that needed
just a little bit of flat right there. Okay. I think we're in a
pretty good place now to begin extruding back. So if I go to the side
view with the three key on the numpad
again or once again, you can hit the
Tilde key and go to the right orthographic
view either way. But I'm going to tab into edit mode and I just want
to select this edge here. I'm going to press Alt
and click that edge. And it'll select all of
those edges along there. I don't want the top edge yet. I just want this edge. And what I wanna do is just extrude this and
take it all the way back and then extrude down
to get this area here. So let's give that a try. I'm just going to hit E and y. And let's pull this back
to about right here to where the door kind of ends, maybe right here
along this line. And then let's
flatten these lifts. Press S, Y, and then hit zero. And that will flatten
that in the y-axis. And then I'll click. And now I can move that
to about right here. And then let's just keep
going right on back. I think well, this could
maybe come up a bit. It looks like there's an area here where that continues on. And now maybe this can come
up like that to kind of angle up and then
continue on back. Alright, so we've got those
and then I'm going to press E y and take it all the
way back like that. Okay. I feel like up here in
the front before we do any more extruding down here, we need to take care
of this area here. If we press Shift Z, you
can see that there's this area that goes straight
down and then down. So I feel like I want
to get that piece. If I just take this
point and move it, I won't get that. I need an edge in here. So I'm going to press Control R. And I'm going to
click and bring this down to about right here. And then I'll take this
point and drag it back. So we have that little
notch there. Okay. But I don't think I want
to extrude this down at the same time I'm doing
the part back here. I feel like there's
an empty area in here that we're going
to have to deal with. So what I will do is just take this point and this,
and this here. And let's extrude this
down to about right here. I'll hit E, z and pull these
down to about right here. You can see that right there. And then let's maybe add an
edge loop right in here. And take these two points
right here and right here, and pull these, so we get
this area right here. So just got this kind of angling down as if it's following
the fender there. Okay, let's see how we're
doing Shift Z and take a look. Okay. Now we are going
to have to think about this area down here. Does this angled down? Does it go straight and then just cut down like this
here behind the vendor? I really don't know. And at this point in time, let's not worry about it. We can take a look at the
reference images a little more. But for now, let's
close off the back. We can just select
these points here. I'll select one
down here and then control-click one up here. And that will select everything in-between
those two points. And now let's hit E and the X key and extrude
and the x-axis. And as we pull these together, they will clip because
we have clipping turned on in the
mirror modifier. Now for the bottom, I think we probably
need to select this and this and extrude these in the x-axis as well.
Let's do that. So I'll press E x and let's pull these in until they
clip, and there we go. Now, one thing we've done here is we've created two points
in the same place right here. So if I click on this
and bring it up, you can see or down. You can see that
there are actually two points here and
they aren't connected. So what I can do is
just take this point, Shift-click this,
press the M key And merge these at the
last one selected. And there we go. So
now that's one point. And in fact, what we can do to ensure that we can
come over here to the viewport overlays and we can turn on statistics right here. Now we have over here
in our viewport, the statistics of what
we have selected. So you can see here, I've got one vertex
selected right here. So if I select another
one, Shift-click here, you can see I've got two
selected, 34 selected. So we can keep an eye
on that to make sure we don't have duplicate
vertices in the same place. We do not want that. Any vertex that is in the same place needs
to be merged together. So now let's work on
creating the wheel. Well, for the back tires, you can see how
they're cutting into the body of the truck
and we don't want that. So I think let's
begin by creating some edge loops around
here to outline that. We'll, well, so I'll go to the side view with the
three key on the numpad. I'll press Shift Z so
we can go to wireframe. And here in edit mode, Let's just press Control R. And let's add an edge
loop right here. And then let's add
another one over here. And I think I want to add another edge
loop right up here. We could maybe use this by
just pulling that edge up. But I don t think
I wanna do that. I think at least for now, I want to add another
edge loop right in here and bring that
down right there. Now what we need to do
is take these points and angle them in line
with the vendor. And we can do that
with the shear tool. So with these points selected, I can right-click
and choose shear. And now when I click that, if I move the mouse, you can see it's turning it, but it's keeping
all of the points in line with the existing edges. So I just want to turn
this and get it in line with the vendor about like this. And then I'm just going
to move those over here. Now I can take these points
and move these over. And let's do the same
thing over here. I'll drag select these points
and right-click shear. And now I can turn these
in line with that vendor there and drag them
over. And there we go. Now we've got the
outline of that wheel. Well, I'll just move
these over a bit here. Now let's take a look at it
again and see what we think. Yes, so that's a good
outline for the wheel. Well there, we also need to establish how far
it goes in here. So maybe if I add
an edge loop here, press Control R and
add an edge loop, maybe I bring it into
about right here. Right? Now if I hit the three
key and go to face mode, I can select these faces
in here and delete them. Delete and delete faces. And now let's just grab these
edges right along here. I'll hit the two key and select these edges all the
way around. We go. And let's bring these in to
meet up with this edge here. So Control seven. Now I'm going to extrude E x and let's bring it
in to right about here. So it's right in line with
that edge right there. Okay, So now as I said, we've got these points that are in practically the same place. I'm going to press Alt
and click to choose that whole edge again, right? And then I can bring that back. So it's just right in the
same place as those points. So how do we get these
points merge together? We can do the same thing
that we did before. We can select one, move it to one side, and then merge it together
with the last one selected. But also I just want to show
you you can use a tool, this cleanup tool here, merged by distance to
do the same thing. So let's try that. I'm going to press
Shift Z to go to wireframe and then I'm going to drag select these two points. And you can see I've
got two selected here. And then I'm gonna come
over here and shift, click and drag these
two points I'm dragging to ensure that I
select both of the points. Now we've got four
vertices selected here. Okay? Now let's come over here, go to the Mesh pull-down menu, cleanup, merged by distance. And down here by default, it begins with 0.0 001 meters. And that may be a little bit
too small because you can see those points haven't
been merged together yet. So it's only going
to merge points that are within this distance. So let's try 0.001
and hit Enter. And that still
didn't merge those together because we still
have four vertices. Alright, let's try
0.01 and Enter. And there we go. Now they're merged
together because we only have two vertices
selected now. So that's another way to
merge points together when you have them in the same
place within the 3D space. Alright? And lastly,
let's close these off. Let's, let me hide
the tires here. Oh, I'm in the tires collection, so let's take this and drag it out into the
scene collection. Now this tire selection
I can hide here. And let's now take these edges
and bridge them together. So I'm gonna hit the two
key to go to Edge mode, and I'll select these
edges here and then shift, click on these edges here. And now we can bridge
these edge loops. To do that, we can
go to the edges menu here and bridge edge loops. Or we can press
Control E to bring up that same edges menu and
choose bridge edge loops. And there we go. Now
we've closed that off. And also I do want
to mention for the vertex and the face menus, you can press Control
V for the vertex menu, and control for the faces menu. Alright, there is the wheel. Well, let's bring back
the tires collection. There we go. I think in terms of clean up, I'll just create a new
collection over here. We had a new collection. I'll call it a truck. I'll put this object in
that collection and I'll drag the truck collection
to the top of the list. So anything that comes in
will by default go in there. And there we go. So now we're beginning to get the basic shapes of
our vehicle here. In the next video, let's work on the fenders and the
front of the truck.
7. Adding the Fenders: I think now it'd
be a good time to work on the fenders here. Let's begin with the front. I'll just create
a polygon plane, shifts a mesh plane. Then let's move this up
and put it over the tire. So I'm just going to hit the S key and scale
this down quite a bit. Go to the side view with the
three key on the numpad. And let's just hit G
and move this up here. And I'll press Shift
Z so we can see it. So maybe right
about up like this. I'll just bring it
right over here so that we can tab into edit mode. Hit the one key to go to vertex select and I'm
going to drag select. So I select both of
the points there. And then I'm going to bring
it forward like this. And then let's go to the top
view with the seven key. And I'll hit the a key to select all of this and
move it over here. And we could probably
just drag these, select them and bring
them over here like this. And maybe this one here, I'll bring over like that. So we're just kinda getting
this very basic shape here of the fender. Alright, so now
we tumble around, press Shift Z, Let's hit the two key and select that edge there. And now if we go back to this
side view into Wireframe, I'm just going to hit E
and Z and pull straight down and then maybe hit the
S key and scale in a bit. So we get that shape there. And so we're just beginning
to get the top of the fender there in front view. I can maybe take this and let me select this
and I'll just pull this out like this because
you can see here the fender comes out and kind
of angles out like this. And once again, this front view, I don t know that we should really trust it all that much. So I'm going to stick
with the side view here for matching things
up to the reference image. And let's see what else. Well, we're going to need, I think, this edge right here. So let's go to the
side view and let's just hit E and pull
this down like this. And we're going to
need these as well. So I'll hit E and pulled
this down here like this. Let's see how we're doing here. Shift Z to go back
to Solid mode. And yeah, I think
that's pretty good. We're cutting in here and we're not quite
to the side here. So I'll just pull
this way a bit. Something like that. I think that's working out. Okay, let's connect
these up here. I'll hit the two key
and select that edge. And then once again the three
key and Shift Z and hit E. And I'll pull this down
to about right here. So I'm at this
corner right here. And then I'll just take
this point and this point, I'd better spin around. Yeah, I selected
that one back there. Let's try that
again. I'll select this point and this point, and then hit em and merge those two at the
last one selected. There we go. And now let's do that
same thing over here. Let's select this
side view Shift Z, hit E and bring this down
to that corner right there. And then I'll take this one
and I better go back here. There we go. I'll take this one and
shift click this one, and then press M
and merge at last. Okay? So we've got that. Now. They're cutting in here. They're not exactly the way we want them, but that's okay. I just want to block in the basic shapes and then
we can move on from there. And for this, we can mirror
it over to the other side. I still have my origin of this object in the
center of the grid. And therefore, I could just add a mirror modifier here and it will pop over
to the other side. If your origin isn't
in the center, you can always just choose
an object that is say, this origin is still
in the center. I can just click on the
eyedropper here and select this object and it'll
mirror around that point. Or ultimately what you can
do is just set the origin of the object into the center of the grid
at the 3D cursor. So we could assure that the cursor is in the center
of the grid by pressing Shift S and then cursor to
world origin or the one key. And then we can
right-click this object, choose set origin to 3D cursor. And now we know that the
origin of this object is in the center of
the grids so that it will mirror over properly. Alright, so in the back, we could pretty much
do the same thing. So let's just press
Shift a mesh plane. I will scale it down. Let's go to the top view with the seven key
on the numpad. Press Shift Z to
go to wireframe, and I'll hit G and
move this over here. The problem is going to be we've got part of the fender
here hidden by the tire. So maybe maybe I'm going to
bring this over here for now. And work on it over
here on this side. So I'll move this in,
select these points, move them up like these
points and move them back. So let's just see
how it looks here. I'll go to the side view
and let's take a look. So I do need to bring
this whole thing up. I hit the a key to select
all the points there, bring them up here. And yeah, we've got some work
to do on the fender here. So let me grab these
points, bring them back. There we go. Now, just take these points, hit E and bring
this down to here. Drag select these points, hit E and bring
them down to here. Now, we don't yet have a
solution for what's going on. Right here. Right? It looks like this angles down and then goes
straight here. But I don't know, I don't know that that's
actually the way it works. It's really hard to tell in
any of our reference images. So we're going to have to think about that a
little bit more. But we can take this now. And I'm just going to move
it over to the other side. Shift Z, which is going to take this and
move it over here, put it here like this. Right? Then we can go ahead
and mirror the silver. Well, actually before I do, let me get the little part
that comes down here. Let's do that first. So with this edge
selected right here, I'll go to the
side view Shift Z, and let's extrude
this down e, z. So we pull it down
in the z-axis here. And then I'll hit
the S key and scale that in to get that right there. Now once again, we can select this edge and I'll extrude
this down with the E key, bring it down to this
point right here. The one key to go
to vertex mode. And then I want to select this
and this point right here, Shift-click that am at
last, and there we go. Now, we probably need
to pull this out. Don't leave. Let me try that real quick. I'll select these edges. Go to the back view with
control one, shift Z. And let's take a look at this. If I pull this out some, you can kinda see that here. And maybe I can just move
this up here like this. Alright. And then back
here, same thing. Select this. In our side view. I'll hit E and pull it
down to about right here. Take these points, this
point and this point, because the M key
and merge at last. Okay, so now we have the
backup vendor once again, pretty rough, but I
think it's a good start. We are poking through here
a bit with that tire, so I'm just going to move
that over just a smudge. And this is why we're
blocking things in to try and get
the basic shapes. Yes, but also to get the placement of things in
relation to everything else. So this now can be mirrored
over to the other side. But as I said, the origin can be out
of the center here. So we've seen how we
can move the origin to the center of the grid
and then mirror over. But we can also add a
mirror modifier to this. And you can see it's now just mirroring around this point. But what we can
do is we can just select the eyedropper and select an object whose origin is in the center line
there on the x-axis. And that will just
mirrored around that. Now, these are all
just temporary. Ultimately, we'll be applying the modifiers and maybe even joining the
objects together. But for now, I think
that'll be just fine. Alright, we've got defenders on. In the next video, Let's begin closing up the front and maybe put a tarp on the top.
8. Creating the Front Wheel Wells: What I'd like to do now is to
try and close up this front and the bottom here of the
front part of the truck. And I think to do that, the best reference images we
have are those scale models. And that's really
why I wanted to use those is because I
think just seeing in here and down behind
the tires and stuff, I think I think that's probably
going to be our best bet. So let's come over here
and let's change these up. I'm going to click Image
and then open here in the image editor and go to
the scale model photos. And we can see inside here on this one I believe let me just press Control and spacebar. Now we can see
inside here what's happening and what we already have these
back here, right? But these we need to have available to look at
while we're doing this. And then maybe I can add
another one down here as well. I'll just hover over this corner again and click and drag. And let's create another
image editor here. And click Image and open. And for this one in our
reference images scale model, maybe let's look
at this one here. Let's see here because
it kinda gives us a view into what's
happening back here. So okay, now we have some
information that we can use. Let's now, well, let's give
these fenders and name. I'm going to call
this fender front. And I'll call these
fender back so we know what those are and this is just kinda call
this truck main. We know what that is. And we've got our tires down
here in this collection, so I'm going to hide the tires. And now let's go to the side view and go to
wireframe with Shift Z. And I'll tab into edit
mode with the truck here. And let's see what we
can do to kind of create an outline like we
see here, right? This is kind of an outline
of the fender Ahmose. So it looks like we
may be able to take this edge right here by tumble around and
press Shift Z again, you can see it's this edge here and it goes on and extends back. So this is the edge I used
for the top of the wheel, well, in the back. But it doesn't quite
go up high enough. For the front. You can see how
the front is just a little bit higher
than the back. So I think we're going
to need to move this up with this edge selected here. I'm going to hit G two times
so I can slide it along this corner over here because if I just grabbed
the z-axis and pull up, we will distort that
front part right there. So I don't want to do that. I'm going to hit G
two times and then slide it like that, right? So maybe something like this. And then with this point here, I could hit G2 times
and slide it back down along that edge there. Okay? And then we really need
an edge along here. Now, I could just cut that
in with the knife tool, but let me see if I
can press Control R and get an edge maybe
right along here. So I brought it until
that point was there. And then I'll take these points, hit G2 times and slide them back like this to get
that line along there. So we've got this, this, this, and this so far. I feel like all of these
could be moved back. Let me just select these G2
times and slide them back. But actually I think I can
just pull it in the y. Let me do that. Yeah, I'll just pull that down. I've got this now. And then back here. Maybe we could just
take these points. Maybe I'll drag select these
and pull these forward. And maybe this, pull this back. Let's try this. All right, now let's take a
look at what we've done here. I'm going
to press Shift Z. I'll hide that front fender. And this is what we've done. We've pulled these around. So we have that outline
of this indentation. So that's not bad, but we've kind of
thrown off this here. So I'm going to hit the seven key and take a look
at it from the top. And it looks like, yeah, we could begin maybe
pulling these out some to get them in line
a little bit more with the reference image. Maybe I'll grab this
point and pull it out. So I'm just trying to get these lined up before we
do any extrusion. So let me see. Maybe this and this, I'm just pulling them out, trying to get them in line here. Alright, so I've got those kind of pulled
out and in line. You know what, I'm
also going to do. I had smooth this before. I'm gonna go back to
shade flat just so I can see everything
that's going on here. Ultimately, we will smooth it, but I just want
to be able to see all the different polygons
that are happening in here. So now we could take these
faces here that we've created by adding and
removing those edges around. And we can extrude this in to get this flat piece
right in here. So let's try that. I'm going to press E and X
and extrude in like that And then I'm going to
straighten it in the x. Now, I'm going to press
S for scale x and then zero to flatten
everything in the x-axis. There we go. Now we've
got that going in. We've got these faces here. We don't need these. I'll press Delete and choose
to delete faces there. Alright, so now we've
got the beginnings of that interior thing
right here, right? Alright, so from here I feel like we should
go ahead and close off this part right here
at the back of the tire. And it almost seems like that this edge should come back and be in line with this
part back here, right? So it's flat going down
to the bottom here. So what I think we should do is probably
combine these points. Now we're going to create a
couple of triangles here, but I think that's okay for now. So what I'm gonna
do is I'm gonna go ahead and merge these. I'm going to press
M and Atlassian and m. And at last here, then I will take this point
back here and move it so it's in line with this
right along here. Which means I could probably
take this edge now. Move it back a bit. Right? Alright, so now we've
got that piece there. What we could do now is take, say this point here and line it up a little
bit better with this. We could then take
this edge here, this one, and this one. And we could just press
the F key to fill a face. They're right here. And then add an edge with
Control R right here. And then bring this back in line with this
one right here. Right? And then once we do that, we need to do our trick
again of selecting one point and then the other,
merge at last. So we connect those up. So now we've got this part here. We've got this part up in here, which we can also
see from the inside. So I think that's what we want. That's the kind
of thing we want. Let's bring back the vendors and the tires and just
see what we think. So I could also maybe take this edge here that
we've got right here and maybe pull this out toward the fender a little bit as well as any of these
that we wanna do. To bring these out toward the fender just
a bit and then bring the vendor in just a bit to
meet them up right in there. And let's try that. Once again, this is why we're blocking things in like this to see how they fit together
and to see if it'll work. Alright in the next video. But let's do is, let's continue
on with connecting up, down here on the bottom and
in the front and see if we can just get all the
basic shapes in place. And then see what we
can do about the top
9. Closing Up the Front: Okay, let's see if we can get
this front part closed off. I think first of all,
I'm going to work on down here, I think. And before I do anything else, it almost looks to me like this goes and connects
and then goes down. So at least for now
I think what I will do is go ahead and
connect these up. Maybe I could select
these two points here. Let's try this in this, hit em and choose at last. And this one, I'll just pull in some like this so we don't
connect all of them. Maybe just that
one on the bottom. That throws us off
a little bit in terms of the flatness of this. But I think that's okay for now. I'm just once again trying
to get the basic shape. So let's hide the tires and I'll go ahead and
hide the front fender. And now we need to figure out how to bring these things down. So maybe what I'll do is
take all of this here. And let's just extrude this down to this
point right here, to this edge right there. So let's just hit Easy
and pull that down. Well, I'll go ahead and come
down to here and then take this point and drag it
back. Let's try that. We could close this off in here. I guess. We could just in edge mode, select these edges
and hit the F key. And that'll close that off. We can take this
edge here and hit G2 times and pull it down. So it flattens that a bit. It angles this here,
but that's okay. And then let's try again. Let's see what else
we can do here. Shift Z. I think what I'll do
is I'll select these two and I'll hit E
z and pulled down. And then I'll just grab this point here and pull
this back like that. See how that works. Well, I don't really like that. So maybe what I need to do is
go to the bottom view with control seven on the numpad and I'm just going to
hit G and move that. So it's in line with
these others here. I may be able to move this. Let's see if that works at all. Okay. Yeah, I think
that's pretty good. That should allow us
to connect this up. But we don't have an edge here. So I'm just going
to press Control R and drop an edge right in here. And then that should
allow us to take these edges here and hit the
F key and close that off. Okay? Now what we can do is close things off
here on the bottom. So maybe what Let's do is
take these edges here. Try that again. These here, there we go. And let's extrude and take
these into the center EX. And as we bring them in, they'll clip together because we have clipping turned
on over here in the mirror modifier that I think will allow
us to take this, this, and this and hit the
F key. And there we go. And close that up. Alright, We're getting close. Now what Let's do is, well, let's come up here and
let's select this, this, this, and this. And let's do the same thing. Let's just extrude
this in the x-axis EX, and clip them into the
center there like that. And then down here we
should be able to choose three edges and hit the
F key and close that. Okay? And this up here, Let's select these, hit
the F key and close that. Alright, so I think
we're doing pretty well. This end here isn't very flat. I could select these
here again like this, and scale them in the X by pressing sx zero and
see what happens here. So that kind of
flattens that out. Let's tab back into object mode. Well, let me bring back the
tires and the offender. I think we're doing
pretty well here. But if we go to one of the var photos of the
actual truck itself, like this, Let's
take a look at this. So I'm going to press
Control and Spacebar. And all of this is
pretty flat, right? I can't tell if here there's
a band or a shadow or what, but I think all of
this is pretty flat. Let's take a look
at another one. Image open. And I'll
open this one up here. Yeah, Now, everything on
this plane is pretty flat. So what we could do
here is we could try and move some points around to kinda
flatten this area up. But another way to do it
is to use the loop tool. Let me show you those. If I hide the front fender here, we can see that a
little bit better. And if I hit the End key Over here I've got an edit tab, and in here I've got loop tools. And the way you get this, it's automatically
here in Blender. It just isn't
enabled by default. So if you go over to
Edit and Preferences, and if you come over
here to Add-ons, you can search for loop. And right here, all you need to do is add a checkmark to this. If I take this checkmark
away, it goes away. If I put it back,
there's that tab. So all you gotta do is just add a check mark and
then close this. And then in edit mode, when you hit the End key, you should have this Edit
tab and these various tools. Now, you can twirl this down and have a couple of settings
that you can adjust. But generally you can
just click on one of these as a button and
it'll enable the tool. So let's just say, I want to make all of
this nice and flat. So everything here, yeah, let's do everything
down to there. Needs to be perfectly flat
and currently it isn't. I mean, we can go in as we've done before and
use our Shade smooth. But in addition to
that, we can try this. We can take this, select all these faces, and come over here
and click flattened. And when we do that,
look at what happens. It takes all of those and it flattens them up very nicely. Now, one thing it did is it
kind of overlapped here. We may need to move some things. So like if we just try
and move these in here, like this, Let's
see what happens. Yeah, we can move that
in a bit like that. So it just goes through
and takes all of the selected faces and tries to flatten them in line
with all the others. Now look at this over here. When I did this, it bulged out this area here. We can probably just use our
scale in the x trick here. Actually let me take this point and just move it
back in there. There we go. I'm gonna go to face
mode with the three key, and then I'm going
to hit the C key for the circle select tool. And you can scroll
the mouse wheel to make the brush
bigger or smaller. But then I'm just going to
click and drag on all of these faces here to select them. And then right-click to
get out of that tool. And then I'll just
select these here. So now I should be
able to press S, x and zero and flatten those up. And now, well, I've pushed
that little piece in, so maybe I could just
take this whole thing, pull it out just a bit. So that'll flatten up. Just a little bit like that. Yeah, Well like that. There we go. Okay. So now we've got this part
flat and that part flat. That's looking pretty good. I imagine if we selected this and right-click and
shows auto smooth, we could smooth out some of
these other places as well. Yeah, that's not bad. So I think we're getting there. I think we're doing pretty well in just getting
the basic shape. Now finally, in the next video, I'll begin working
on the top cover
10. Adding the Top of the Vehicle: Now as I kinda step
back and look at this, I see that there's an angle
to this line right here. Currently the one I've
got isn't really angled, It's just kinda flat. So let's take a look
at that real quick. I think it looks like that line comes down from
behind the fender. I've got a line here that's kind of at
the top of the fender. This might work if we take this and tab into edit
mode and hit the one key. And I'm just going to grab
this edge right along here. Let's hit the two key. And I want to slide this
down along this edge here. So I'll hit the G key two times and slide it
down pretty close. And then I will merge these points
together right down here. So if I hit the one
key here and here, the M key and merge at last, and these two here
merged at last. Now I've got that
angle with an edge, but I don't see it here. So there's a couple of
things I can do with that. It looks like these are pulled in some so I
could pull this out, but I've already
got all this flat. Maybe if I just pulled one of these in a bit, Let's just see. Like this. That doesn't yet give me
that angle right there. I could pull that one out just a bit like this and
see what happens. Still don't get that. So we can actually mark
that edge is sharp. So with that edge selected, I can press Control E to
bring up the edges menu. And right down here, mark sharp. Let's try this. I'll click that. And now we've got that
edge right there. And I think that really mirrors or is similar to that,
at least for now. As I said once again, I'm trying to block in the basic shapes
here and get these in so we can see how it looks and that
looks pretty good to me. I might want to pull that
down a bit at some point, but for now, it's really
pretty similar to this. As you can see,
it's a little off, but I kinda like it. I kinda like that being there. So let's go ahead and keep going and we'll come back
and take a look at that. But as I mentioned, I wanted to get the roof
on here or the tarp cover. So let's work on that. I'm going to find another
reference image here, maybe one in my photos. And here's one
from the top view. Let's press Control and Spacebar
and take a look at that. It's got some framing here
that kinda holds it up. So I may want to try
and hint at that too. As we create this, I'm going to press
Control and Spacebar again to minimize that. And well, let's just begin
with a polygon plane. Let's just press
Shift a mesh plane. And with the 3D cursor here
in the center of the grid, it will come in at that point. And then I'm gonna bring it up. And let's go to the top
view with the seven key. And before we really
do too much here, let's split it in half and add a mirror modifier so that whatever we do on one side
happens on the other. I'm going to tab into
edit mode here and press Control R and drop an edge
right down the center. Now, what I'm gonna
do is I'm gonna hit the Enter key two times
instead of clicking. Because sometimes when
I click the mouse, I accidentally move
it a bit and the edge isn't exactly
in the center. So I'm just going to
hit Enter two times to ensure that that straight
down the center there. And then I'll hit the three
key and choose this face. And let's hit the Delete
key and delete faces. And then now you can see
we only have one side. Let's add a mirror
modifier here. Then we can turn on clipping. Alright, so I am
just going to hit the one key and let's
take these points. And I can see the points
on the other side. Let's go ahead and
turn on the cage here. Here we go, so I can
see those there. And let's just drag this back. And we're going to try and
just get it in shape here. Maybe I'll hit the a key
and pull it up a bit. And then I'll drag select
these points and maybe I can't drag select them currently because
I'm in solid mode. And even though I drag
select these points, only the one on the end will be selected because I'm
not in wireframe. So drag selecting
multiple points behind each other only works
when we're in wireframe. So I press Shift Z, drag, select these, and now
they're all being selected. Alright, let's
move this to here. Drag select these and
move this to here. And I think I want to
take these and just hit E and bring them
down to here, let's say. And then I think I need to take this edge right
here, right here. And let's extrude this down and also the back
here, let's do that. So back here into the side view with the
three key on the numpad, I'm going to hit
E and then press the Z key to extrude
down only in the z-axis. And let's bring that down. Let me go to a
wireframe so I can see how far down it should go. And I'm going to take
it to about right here. Alright, So now that we've
got that front and sides Let's begin creating
this area up here. I'll take this edge and I'm
going to press one key so I can see those
points and then hit E and bring these down to here. And then let's press Shift Z. And it looks like I need to have an edge right along here. So what I'm gonna do
is this right here. I'm going to add an
edge right here with Control R and bring it down. And now let's press Shift Z
and see where it should be. I'll hit the G key to
move it into about here. And then we need to
connect all this up. So let me grab this and
move it back up as smudge. And then this right here, these edges, this,
this, and this. We can hit the F key
and close that up. Okay, so we've got a very
basic shape for that tarp. We could come into the front, Let's say here Shift Z and it looks like
it comes up some. So I will tab into edit
mode, hit the one key. And with these points here, maybe let's just
bring these up a bit. And I'm making this whole thing a little big because I'm going to add a subdivision
surface modifier and it's going to
collapse it some. Let me show you
what I mean here. If we take this
whole piece here, I'll come over to the
modifiers panel here. Let me twirl. This
went up so we can see the next one we put in. And that's gonna be a
subdivision surface modifier. So I add that and you
can see what I mean, it just kinda collapses here. And now we need to add
some edge loops to hold those corners in
the shape that we want. So if I tab into edit mode, you can see the original
cage here, right? And then the sub-divided mesh, which is just trying to curve or smooth out every
corner it can. But the closer we put edges, if I add one here
with Control R, you can see we can kinda
tighten those curves up a bit. So I'm going to bring
this back like this. And we could probably
use one up here. I'm going to maybe
try one up like this. Let's bring one up here. We could maybe add
one down along here to tighten this
corner up just a bit. Let's see if that works. Yeah, that's not bad. Let's do that. We could add one down here, Control R and bring this and that'll tighten those
edges up a bit. Alright, let's tap back into
object mode and see what we think we're getting there. The back part needs to come
back a bit, I believe. So. Let's just maybe go to the side view Shift
Z for wireframe. And I'll just grab these
first and move these back. Maybe move these back like that. Let's try that. Yeah, I think that helps some. Okay. Now it's still a
little bigger than it actually needs to
be. And that's fine. I just want to get the basic
shapes and we talked about getting these little pieces and let's see if we
can get that wet. Let's do is maybe we don't
need this one right here. I'm going to Alt click this, hit the Delete key
and dissolve edges. And what Let's do is
let's try and use our crease tool to add a crease to this
and then pull it up. So let's press Control E
and go to edge crease. And you can also just go
directly to it with Shift E. But if we select this, we can drag the mouse
and you can see it kind of adds a crease there, which is, I think
working out pretty well. I don't wanna go all the way, maybe about like that. And let's pull it up a bit. Yeah. I think we're getting
there and I'm maybe we do need another edge in here. I'm going to take this
and move it like this. Okay? And these, maybe we can
pull down a bit like this and grab all of the points
there and pull that down. Okay, and then let's add
another one in the middle here, Control R, something like this. And then let's take
these points here. Let's pull them up a bit and
then once again press Shift E and add a crease
to that, like this. Alright, and maybe I can
take this edge again, Alt click and just move
it into the center here. Okay? So we've got zero points going
up and then down and up. So we're just
beginning to hint it that basic shape there. Maybe we take this
edge, we pull it up, press Shift E at a crease
to it. Maybe like that. Control our drop one
here in the middle. And then just take these and pull them
down a bit like that. Alright, let's see
what we think. We're getting there so you
can see what I'm doing, just trying to hint at
those little ridges there. We've also got one here. I think, that we
could maybe take this edge and pull up
and crease shift E. And then add an edge right here. And maybe just take
these three points and pull them down a bit. Maybe could do a
little bit more, but I think that's
getting there. Yeah. Then let's
try and smooth it. I'll go ahead and right-click
and choose auto smooth. And we've got a very
sharp edge here. Let's increase the
viewport level in the subdivision
surface modifier here. That helps there. We've
got a little bit here, so we can take this
auto smooth and drag that up a bit. There we go. So I've taped mine
up to about 57. And just for now that's
looking pretty good. I think that kind of thing
is what I was after. Yeah. I think ultimately
that'll work pretty well. We've still got work to do for the little things that
hold it on there. But I think that's
a good basic shape. Alright, so speaking
of basic shape, I think we've got it
pretty much there. So now we're going to begin
building out the doors, the grill, the windows, etc. To make it look a
little more realistic.
11. Creating the Side Doors: Alright, let's start working
on one of the doors here, maybe on a side door. We've also got the backdoors. Now, I'll work on the
side, let's do that. So I think what we need to
do is really just create a polygon plane
and begin getting the shape of it and
then go from there. So if we hit the three key and go to
wireframe was Shift Z, we can see that it kinda
overlaps with the tarp here. So I think what I'll do
is I'll hide the tarp. Let me select that and I can bring down the viewport
levels to one again, I'll do that and that
looks pretty good. That's not bad. So let me give this a name. I'll just call it tarp, and then let's hide it. I'll just click
here to hide that. Now let's go to
the side view and wireframe was Shift Z and let's just create
a polygon plane. Now, I've got the cursor here
in the center of the grid. If yours is not in the
center of the grid, you can always press Shift S
to bring up the snap menu. And then you can choose
cursor to world origin, and that'll pop it
into the center there. But I'm going to press
Shift a mesh plane. And here it is,
Here's that plane. I'm going to turn
it in the y-axis, 90 degrees RY 90, like that. Let's bring it out
to this side here, so it's kind of
outside of the truck. And then I'll just hit
G and bring it up. And let's just see
what we can do here. I'm going to scale it in, hit the S key and
scale that in a bit. And then I'll go ahead
and tab into edit mode. And let's try and bring these in just a bit so we can
get it the right shape. I'm going to drag
select these points and move them into about right here, in line with this corner here. Right down here. Maybe I'll bring these up a bit. Yeah, something like that. And then these I'll bring
in like this, let's say. And I could take these
up top and bring it down so it's in line with
this corner right here. And then when we hit E and Z and go straight
up like this, we could then take
this point and drag it over to get that line there. And then this line
here, this edge. I'm going to bring it up
until it's in line with this. You can see that edge
right there, right? And it's also in line
with this side as well. Now to get this curve here, let's just bevel this vertex
and we can come over here to vertex and Bevel vertices
or Shift Control B. But I'll go ahead
and just click this. And then as I move
the mouse out, it will bevel that edge. And then I can scroll the mouse wheel and
add points to that. So I'm going to just
move the mouse, scroll the mouse wheel, that kind of thing until I get a shape that's
about right there. And then this panel down here has settings
that we can adjust to. Now I've got five segments. We can, of course, take that
up higher or down lower, but I think five is
probably pretty good there. That's not bad.
Maybe I'll take it up to six, that's okay. Then you can click and
drag in the shape and the width to change what
you want out of this. So I'll just click
and drag and bring that back to about right there. Alright, so that should give
us the basic shape here. I'm going to press
Shift Z and go back. So yeah, I think
that's pretty good. If we take this and
move it back some. I think what I'd like to
do before we begin adding detail on the front is add
a little bit of thickness. So it comes through
here as well. Because I don't know that we're really going
to see the insights. I may add some of the signs, but I don't know that
we're really going to see inside very much, but just in case, let's keep our options open
at this point in time. So what I'm gonna do is just
come over here and click on Add Modifier and add
a solidify modifier. And that will just
allow us to give it some thickness and to
control how much we want. So click this and then I'll
click on even thickness. And then I'll click and drag
in the thickness field. And you can see I can
add thickness to it here now I can hold
the Shift key down. As I move the mouse, it moves a little bit slower, so I'm kind of add
that right in here, let's say something like that. So we just have a little bit of thickness going through
to the other side. Alright, I think that'll
be just fine for now. I'm gonna go ahead
and apply this. I'll pull the arrow down
here and click Apply. There we go. So now it is an object with thickness and
not just a polygon plane So from here I think
what I'd like to do is select these faces here and I want to inset these to get
this frame around the outside. We can kinda see that here. So let's do that. I'll hit the three key. Go to wireframe with Shift Z and the inset tool
is just the icky. So I'm going to press I and I'll push in just a little
bit with the mouse. And you can see, I can
just bring this in just a little bit like this
to kind of get that frame. You can see that frame in the
drawing here pretty well. Maybe something like that. And I might just slide it
over just a hair like this. Alright, now that we've got, then I'll press Shift Z again
to go back to Solid View. Let's extrude this in. To get that rich. I'll hit E and push
in just a little bit. That's a little too
much. How about like that? Let's do that. Okay, so now we've got that ridge there that
may be too much. Let me just bring
it back out just a little bit like
this. There we go. So now we've got the
basic frame of the door. There are a couple of things
on here like these hinges. I think maybe I wanna go
ahead and try adding those. Now, let's go to this side
view again and to wireframe. And it looks like these are just kind of cubes
and then extrusions there or are they cylinders hits really hard to
tell with these images. Let me see if I can
find anything else. Let me try this. Can we see at all
what these are? Yeah, they look like cylinders. I'm going to press
Control and spacebar, but it does look like those are cylinders with an
extrusion going out. So let me press Control
and Space bar and let's try and just see what
we can get with this. So it appears that
it's a cylinder. Let me go to another one
and we try this one now. Well, it's certainly up
to you what you wanna do, but I think I'm going to add a cylinder here for these and then a cube for these over
here. So let's do that. I'm going to press
Shift a mesh cylinder. Currently it's got 32 sides. I don't think I need that much, so I'm going to take
this down to maybe 16. And then I'll go ahead and
keep an end gun on the top, which is just a polygon that
is more than four sides. You can see it has
six sides here, so I'll go ahead and
keep that for now. Then let's see what
we can do with this. I'm going to hit the S key
and scale it down the G key. Move it up into here. And let's just hit the S key. Get it about the
right size here. Maybe something like this, and then press S and Z
and scale it up a bit. There we go. Then let's bring it out to where
we think it should be. I'll press Shift Z,
hit the period key on the number pad to zoom
in to the selected object. Bring it out to maybe like this. Let's try that. And then I'd
like to create a cube here. So what I'm gonna do is move
the 3D cursor to this point. To do that, once
again, I'll bring up the snap menu with Shift S. Then let's take the cursor to the selected are the two key. And there it is, there now, so let's press
Shift a mesh cube, hit the S key,
scale it way down. And let's try and
get this in place. So Shift Z, I'm going
to move it over a bit. Scaled up sum. So it's kind of
like this I think. And then I will hit the tab key at the one key and
then I'll take these, bring them out like this, and then scale them
in the z as z, kinda taper that down. Maybe these can come up
as something like this. Okay, now let's take a look
at what we've done here. Yeah, so I'll press
S and scale in a bit and then move
that in like this. So that's just a very
basic shape there. I'm going to take
this and right-click and choose shade auto smooth, and that kinda helps that. Alright, so now let's
just join these together. Control J. Now we can duplicate
these on down. Shift D and the Z key to duplicate and move
down in the z axis, shift DZ, move that down there. And let's see how we did to move this cursor back
into the center of the grid. I'm going to press Shift S one. So we don't have
that in our way. Now, this is overlapping. And once again, this is
why we want to block these basic shapes out to see
where we have any problems. I can take this and move
it out for now, like that. But we're probably
going to have to adjust that size to fit that on there. But I think that's
looking pretty good. We've got a basic door there. In the next video,
I think what we should do is kinda go through a similar process for the window frames here and
see if we can get those on
12. Beginning the Side Window: Alright, let's now
block in the window here really pretty
much the same process. I think what Let's do is once again begin with
a polygon plane. So I'll press Shift a mesh plane and let's turn it
into y-axis RY 90. And I'll bring it out here
to this side of the vehicle. And then if we hit
the three key on the numpad Shift Z for wireframe, Let's just hit G and bring this up and of where that
window should be. And I'll scale it down
quite a bit about that. So now let's kind of get this about the right
width at least. So I'm looking at this line
here and this over here. And then if we tab
into edit mode and hit the one key to go
to vertex select, I'll just drag select these. And I think I'm going
to pull them up to right here in the drawing here. There's this cut in right
here on either side, but I'm not seeing that at all. Maybe just a tiny bit, but really not much at all here. So I'm going to leave
this out like this. And then I'm going to drag select these up here
on top and pull it down to right here to
this point right here. And then let's hit
E and Z and pull these straight up to
about right here. And I can just take this
point then and just drag it in, right? So now we've got
this angle here. For this over here. I think we can just use our vertex Bevel tool again
with Control Shift B. And then I'm going
to drag out a bit. Now, if you've got zero
points still in here, you can just scroll the mouse
wheel to get rid of them. And I'll just bring
that down like this. There we go. So now if we go back to Solid
View with Shift Z, there is the basic
outline of our window. And what I wanna do is add some thickness to this so
it comes through as well. As I said, I'm not sure if we're gonna do more
on the inside here, but I want to leave
that as a possibility, so I'll just bring that through. Let's come down here and go
to Add Modifier, solidify. And I'll choose even thickness. And then I'm going
to click and drag in the thickness field to
bring this out like this. Maybe just something like that. Just not a whole lot, just a little bit there. Alright, I'm going
to press Alt aided de-select and I
can't really see it. Did I not bring that out enough? No, I guess I didn't
let me bring this out. So it extends out beyond here. And then I'll add a little
more thickness again. So there we go. Let me do that. Okay, so we've got
this basic outline. Now I need to extrude,
or excuse me, inset in to get this line
right here all the way around. So let's do that. I think we can see
that in the drawing. Yeah, I think this
is it right here. So I will tab into edit mode and hit the
three key to go to Face, Select and select
these two faces. And then I'll go back to the side view,
back to wireframe. And then let's hit the I key and inset into right about here. And then let's do that
again to bring it into this area where
it extrudes in. So once again, I'll hit
the I key and bring this in to about
right here. Okay? Now from here we
should just be able to extrude in just a bit. I'll hit E and push in some. I don't want to go
through that like that. I just want to come
right into there. Okay? And for that edge
that we created here, alt, click that edge. I think we can just use our edge Bevel tool to add
that little ridge there. So let's try that. We used the vertex bevel, which was Control Shift B, but just edge bevel
is Control B. So I'm just going to
press Control B and then pull out with
the mouse just a bit. And I just want it to be really thin like that. Now click. And now with that selected, I'm going to press
the three key to switch to face mode here. And now I'm going to extrude in, I'm just going to hit E and
push in some like that. There we go. So that just gives us that ridge all the
way around there. Alright, so I think that's a
pretty good basic outline. Let's take a look at
these hinge pieces. I think it's, well, this may be, might be a little
bit better for us here. It looks like once again, we've got a cylinder
here, a piece here, and then almost two pieces here it seems, with some bolts. So Let's work on this. I'm gonna begin with
just a cylinder, I think let's do that. In fact, what we could do
is just grab one of these. I'm going to hit the period
key on the numpad to zoom in. And if we tab into edit mode, we could just hover over one of these and press
the L key and that will select linked
components of that piece. And then we can
just duplicate it. Let's press shift D y
and move it over here. So this is what we'll use now, we need to split it out as
its own object from this. So to do that, we can hit
the P key to bring up the separate menu and then click Separate by
selection. There we go. Now if we tap back into
object mode and select this, it is its own object and we can move it around and do
what we want with it. But look at the origin. It's still back here
where we began. So we need to move this origin into the center of
this new object. To do that, we can just
right-click choose Set Origin and go to origin
to geometry right there. Now we've got that origin
in the center of that. Alright, so let's hit the
three key press Shift Z again, and I'm going to turn
this are nine zeros. This, now this is interesting. This drawing has the window open and these have
the window close. I'd like to have
the side windows closed and the
front windows open. So we're kind of doing something a little
bit different here, which is okay, that's, that's fine, but we're
going to have to wing it a bit in terms of
what we want here. And we'll probably
wanna do it more like this and keep
an eye on it here. So I'm gonna move
this up to just above or at that ridge that
we created there. So I'll bring that
down like this. Okay, let's create
this little piece. I'm going to bring the cursor to the origin of
this object with Shift S to bring up
the snap menu and then cursor to selected
or the two key. Now the cursor is here. So any object that we now create is going to
come into that point, shift a mesh cube. It's here, but it's
just really big and we're inside it.
We can't see it. Let's bring it down
from 2 m wide to say 0.1. There we go. So that shrinks it down
a bit. That's good. Let's scale it down a bit. And it looks like we
could scale in the x Sx. I think that we can bring
this down here like this. And maybe I'll tab
into edit mode. Grab this face right here,
and let's bring it up. I'm going to scale
in the x again, bring that back out like that, and then kinda push it
in just a bit like this. Let's try that for now. Once again, blocking in
the basic shapes, right? We don't have to have it
perfect at this point in time. I am going to tab into edit mode and grab these two
edges right here, press the two key and
then select these edges. And I want to bevel these to get that kind of curve
that we're seeing there. But I'm afraid that when I do, because this object
is not uniform scale, you can see here we've got
0.1 and then 0.50, 0.5. Because I've scaled this in, in a non-uniform way, we now have non-uniform scale. And when we do some of our tools and lender can act weird
like the Bevel tool. So if I take these two, Let's just see what happens. I'm going to press Control B, and we can move these in and those are looking pretty good. That's not too bad. I can scroll the mouse
wheel like this and kind of curve those edges.
So that's not bad. Sometimes when you've
got non-uniform scale, those kinds of bevels
don't work real well. And we'll keep an
eye out for that as we go on through the course. I think I will scale this out in the x again and then
bring it in like this. So it comes in and connects underneath there like
that. There we go. And then we've got
these pieces up here. So once again, I'm
going to create a cube, shift a mesh cube, and I'll scale it down. It held that 0.1 m that
we typed in before. And I'm going to scale
this in the Y, S, Y. And I'm going to bring
it up into here. And let's scale it in
the Z, kinda like this. So what I wanna do is
bring this down like this. You can see there's kind
of an extension here. So maybe if we take this
face here, bring it in. And then we insert an edge
loop right in here, like this. I'm going to bring
this in just a bit. Then we can take this face
that we just created by inserting that edge and hit E and bring this
down like this. Let's try that.
See what happened. Yeah, I think it's
something like that. I would like to move this up just a little bit
more like this. Let's try that. I'll move the cursor back into the center of the
grid width, shift S1. And maybe I'll
take these two and scale them in the y just a bit. And maybe take this
and scale it in the Y. We're just trying to get
those basic shapes there. Alright, I think
that's pretty good. In the next video, let's add some bolts
on here and then we'll duplicate it over to
the other side as well. So let's work on that. Coming up next.
13. Refining the Door Hinges: Alright, continuing
with the door. I think it looks like these kind of taper
in a bit as well. So I'm going to
select this and hit the period key on the
number pad to zoom in. And let's just select these
faces here and press S, Y and kinda scale those
in just a little bit, so they taper in a bit. And then we could also add
these bolts onto here. I mean, we can't really
see exactly what they are, but we can add our own kind of bolt to
that if we want it to. I'm going to select this
face and press Shift S to, to move the cursor
to that point. I'll tap back into
object mode and press Shift a mesh cylinder. Now it's really big. So I'm going to change the
radius and the depth to say 0.1 and 0.2
so we can see it. And then I'm going to change
the number of sides, 32-6, and that will give us a
bowl-like shape, I think. So. Let me scale that down and I'll turn it in
the y-axis, RY 90. And let's bring it back, scale it down some more. And so something like this. I want to press S,
scale on the x-axis. And let's bring it. Maybe scale it up
a bit like this. So yeah, we're
just kinda getting that basic bowl-like
shape there. And then we could do this again. We can move the cursor to
the center of this object, shift us to, let's
create a new cylinder. And for this one, let's give it 16 side. Let's do that. And then
let's scale it down. Turn it into why RY non-zero, and maybe scale this down
so it fits inside of here. So it looks kind of
like a bolt like that. Yeah. So maybe we could scale
this down a little more. Yeah, so maybe
something like this. I'll smooth this. I'll right-click
and choose shade, auto smooth and yeah, something like that maybe. And then let's join
these together. I'll select one and then
shift select the other one. Press Control J to join them. And oh, it looks like I'm
going to have to shade them. Shade auto smooth. There we go. And now let's
just put this in place. So maybe I want this
one to be here, but I don't want it
to be so even or so on the global axes here. So I'm going to turn
it in the x-axis, RX. Turn it just a bit here. Let's press shift D Z
and bring this down. And then I'll spin it
in the x here as well, RX just a little bit, so they are exactly the same. Okay, Now let's take
a look at that. I'm going to move
the cursor back to the center of the
grid with shift S1. And let's take a look,
see what we think. Yeah, that's not bad. I feel like those could
be a little bit bigger. Maybe. I'll just select them both and hit the S key
and scale them up a bit and then move
them back into place, will get this one. And then I'll just
select this one and move it up again like that. So it's just a little
bit bigger there. Maybe I could take all of this and move it in
a bit like this. And once again, we're
just trying to get the basic shapes, right? Alright, so now let's
take these and this, and this and this, and let's join these
together Control J. And we may need to redo our smoothing,
shade, auto smooth. And then I'm going
to click and drag in here and drag this up. Yeah, about like
that. There we go. And then I'll move this origin into the center of this object. Right-click Set Origin,
origin to geometry. And then we can just duplicate
it and move it over. I'll just select it, shift D, y and move that over here
like this. There we go. Now, it looks like
there may be something just sticking out of
the sides of these. Let's just do that real quick. Let me press Alt aided
de-select everything, hit the three key, and I'll select these two here. Hit the period key to
zoom in on the numpad. And then let's insert these. I'll press I and in
set this in a bit. Oh, and look, it's
not going in evenly. So that I think is an example, as I talked about earlier, of applying our scale, of ensuring that our
scale is uniform. So let's press Control
Z to undo that, and let's go back
to object mode. And if I hit the End key, you can see once again, our scale is not uniform
because I combined a bunch of different objects with a
bunch of different scales. So it is non-uniform currently. So let's press Control
a and apply the scale. Now we have all ones here and
let's try that inset again. With these two faces selected, let's hit the I key in, set in. And yeah, that's looking a
whole lot better, right? So once again, making
sure your scale is uniform when you
run a tool in Blender, like the Bevel tool
can be really helpful. So now I'm going
to extrude these out and then scale out in the y. So I'll press E S, Y and pull out in the y. And now we have them pulling out just a little bit
on either side. Yeah, so I think that
helps just a bit. I'll take this whole thing
and delete it, grab this. And then let's
press shift D y and move this over again
like this, right? So we have just a little
bit of extra detail there. And that's what we'll be doing. We'll be adding or blocking out the basic shapes
and as we've been doing, and then just adding detail bit by bit as
we feel we need it. So once again, we
could say, okay, what about these
hinges over here? It looks like they have
bolts on these as well. Alright, well, maybe we
could take one of these. We could come over
here and we can press the L key over one of the bolts and the L key again
to select this whole thing. And then we can press
shift D y, move it over. Now we need to split it
out as its own object. So I'll press the P key and choose to separate by
selection right there. And then if we tap back into
object mode and select this, we now have a whole new object, but we need to move this object origin into
the geometry here. So let's go ahead and
right-click origin to geometry. Now we have a bolt
that we can bring down here and put in here. So let me go to the
three key shifts, z. Do we see anything in here? Not really. I mean, maybe that's
a bolt there, but it's really hard to tell. I'll put one right about
here and maybe scale it up a bit. Shift Z. And then now let's just take this and press shift D y and move this out
here like this. So we've got bolts on that. Okay? And then this
is kinda hanging out and isn't connected to the mainframe or the main
part of the truck here. Maybe we could take this
and extend this out. Let me hit the three key
press Shift Z tab into edit mode and will
hit the one key to go to vertex select. And maybe we could just drag
selected these points here. We've got that face selected. And then I'm just
going to hit extrude. I'll press E and pull out to maybe about here.
Let's try that. Now if we go back Shift Z, we can see it here. So we just need to
kind of bring it back to connect with
the truck here. So let's press Shift Z and
go round here in the back. Press the three key
to go to face mode. And maybe we can select
this face and this face, these two back here. And then we could just move them back until they intersect
with the truck right there. Right. So we've just got that
a little bit more grounded, a little bit more
connecting things, so things aren't kinda floating
off of the vehicle there. And then maybe we
could take this edge right here and just give it
a little bit of a bevel. Now, once again, we should
take a look at that scale. So I'll tap back
into object mode. And we have non-uniform
scale here. Before I do anything, I'm going
to take these two and add them to this Control
J. And we go. Now we've still got
non-uniform scale, of course. So let's press Control
a and apply the scale. Now we've got all
ones, That's good. So when we select
this edge right here, we should get a clean bevel. Now Control B. Pull this out. Yeah, that looks pretty good. It's centered on that edge. There we go. Let's try that. All right, then I'll
right-click, Shade auto smooth. And yeah, that's
looking pretty good. So that's all I wanted. It's just kind of connecting that with the
rest of the vehicle. It looks to me like it may
be a little bit off center. I can tab into edit mode and press the L key to select this. Move it up just a bit to
get it more centered. There we go. So now that we've
added more detail to that, Let's take these
and delete them. And then we can just
duplicate this out. And also, oh, you know, what we could do is add
little things coming out of the top and the bottom of this like we did
those other hinges. Let's do that. And now that we've
applied our scale, we should be able to inset
these pretty nicely. So something like this
maybe, and then hit E, z so that we pull both of
those out, top and bottom. There we go. Alright, now let's go back to our side
view and wireframe. And let's press shift D Z. Bring this down to here, shift easy, and bring
this down to here we go. So once again, just beginning to add or refine our
details as we go, but first blocking things in so that we get the proper
placement and proportion. Alright, so in the next video, Let's start working on
the door handle here. This image is actually kind of helpful because it shows us what the handle or that base piece of the handle looks like
without the handle. Since we have kind of
a broken piece here, that's actually
going to be helpful. So we will work on
this coming up next
14. Modeling the Door Handles: Alright, the handle. Let's think about this. Perhaps I should just begin creating the cube here
and then add the handles. So what I'm gonna do is
just hide all of this, all of our collections here. So we just have a clean scene. And then let's begin
with the cube, shift day mesh cube. And I think right
away I'm going to add a subdivision surface modifier
because I kind of liked this curved angles or the
curved edges of this. So I'm gonna come
over here and add a subdivision surface modifier. And then I will tab
into edit mode here. So we can see our
original cage here. And the sub-divided mesh inside. What will begin doing
is just add edges like say I'll press Control R here
and begin moving this up. And you can see how
it's already beginning to tighten up those edges there. But maybe on the bottom, Let's go to face
mode and just select this bottom face and then I'll hit Delete and delete faces. And now, Yeah, I think
that bottom edge will hold a little bit better
without a face on the bottom. And then let's just add
edges down the center here and Control R and add an
edge down the center here. And now we're getting
a little bit more of that squarish shape there. We could of course do
a little bit more. We could, instead of
having one edge here, we could try to edges. So at this edge selected, we could use our Bevel tool, Control B and pull out. And now we have two edges. And you can see as
I pull these out, it kinda sharpens up
those edges there. So maybe something like this. And then Alt, click
this edge and control B and pull
these out. There we go. Now we're getting
more of a cube shape. And then let me go to edge mode and alt click
this edge and I'll bring it up to about where
we think it should be, something like that. And then it looks like there's
an edge around the bottom. So let's work on that. Maybe I could hit E, S and scale out
just a bit and then press E and Z and bring
this down a bit like this. So we're beginning to
get that edge there. And to make them a
little bit sharper, we can just add an
edge loop control are and bring this down. Some control are bringing
this up into here. Alright, so we're beginning
to get that basic shape. Now for that center hole, Let's tab back into edit
mode and I'll hit the three key and choose
this face here. Let's maybe inset
this with the I key. Let's just do that,
bring that in like this. And then we could
just extrude down. I'll hit E and pull
straight down. Now because we have the
subdivision surface modifier, it's looking a little bit more like a circle than a square. But once again, we can add edges in the center here so
I can press Control R. And we can scroll
the mouse wheel and click there to add two edges. Control are down
the center here, scroll the mouse wheel
for two edges and then click twice there. Alright? Yes, So we're getting there. We could add an edge inside
here and bring it up a bit, add another one in
here and bring it down some. Here we go. Now, when we tab into edit mode, now that we've got
these edges in here, we can go ahead and turn on cage here so the edges conform
to the sub-divided mesh. Now we could try and
smooth this a bit. I could right-click and
choose shade smooth. That's not bad. We could turn on
auto smooth as well. See what we can do with that. We need to click and
drag in that field to bring that up
a bit like that. So either way, and then let's add a new object for
the handle here. So maybe I will press Shift a mesh and create
a polygon plane. Let's do that first. I'm going to bring it up.
I'm going to scale it down to about the right size here and make it a
little bit bigger. And then I'm just
going to extend this out with the two key, select that edge and
just extend it out. So I don't really know
exactly how big it needs to be quite yet until
we get it on the truck here. But from here, we could maybe add a subdivision
surface modifier to this. Let's try that. And then I'm going
to press Control R. And maybe let's add three edges. Let's do that. And
if I select, say, one of these edges, I could bring this
up and you can see it's beginning to
kind of curve there. But I think what I'll do is turn on the
proportional editing tool. And what this will do is give us a range of influence
on the object. So I'll turn this on and then I will turn
on connected only. So now if I hit G and Z, you can see I've got a
circle of influence here. And as I drag up in the z, I can extend this influence out And there we've got a nice curve there because it
looks to me like it's curved and that's what I'm after is just kind of
a nice bend to it. So as I scroll the
mouse wheel out, I get a bend. That's kinda nice,
so I'll click there. Now let's add a
solidify modifier to this because we want a
bit of thickness to this. So maybe I'll just
pull this up a bit and then add modifier, solidify. And now let's just click and
drag in the thickness field. And you can see we can
add thickness here. Now if I change
the order in which these modifiers
are in the stack, if I say take the solidifying, drag it up, you can see
it changes it like that. It does The solidify first
and then the subdivision. So we could maybe drag
this out a bit like this. And then maybe we could
just go ahead and apply that subdivision
surface modifier. And they'll bring it in a
little bit more like that. Let's do that. I'll click the pull down
arrow here and click Apply. And now if I tab into edit mode, you can see it has thickness. And we can add a couple
of edges along here to give it a little bit
more of an edge there. Yeah, and then maybe add a
new edge right down here. There we go. Then let's go ahead and add
an edge down here. Alright, so we've got what
I think we need here. I'm going to smooth that. I'm going to bring
it back down into that hole there like this. And then it kinda looks
like it's tilted out. So if I rotate it in the y-axis RY and just pull it
up a bit, maybe. Alright, so let's try that. What I'm gonna do is take this, it has a subdivision
surface modifier with Viewport level one. This it also has a subdivision surface modifier
with Viewport level one. So let's take this
and then combine it with this control
J. There we go. So now let's take it up and try and put it on the
truck and see how we're doing. I might raise smooth this, let me do shade, auto smooth and drag
it up just a bit. You can see that
edge on the handle. There we go. I just
dragged it up just a bit. Alright, now let's bring back the truck and maybe the
tires and the reference. Now we're going to have
to put it in place here. I'm going to bring it out.
And I want to turn it into y ry90 and then turn
it in the x or x90. Wrong way. I'm gonna hit the negative key
here and then enter. Now let's go to the
side view and wireframe and I'll scale it down and see if we can put it
right into here. G, bring it up into here. Scale it way down. Keep going. It looks like if the
archae turn it a bit and let's scale it down
just a little bit more. And let's see what we have. I think that's kind of going
to the right place here. Let's see. I haven't brought it to
the side of the truck yet, so let's do that. I'll bring it in, hit the period key on the
numpad to zoom in. And then let's bring it
in to about right here. And is it intersecting? It looks like it's
intersecting here. I want to bring that out. Yeah, actually,
that's not too bad. I think that's going
to work pretty well. Now that we've got that there, we could also add these
bolts here on top. I could just take one of these. Let's zoom in with
the period key on the numpad and then
I'll just with the L key, select this and this. Then let's press shift
D y, move it over. Let's split it out as
its own object with the P key and separate
by selection. And then let's select this
object now in object mode and right-click set origin
to the geometry. Now we have a new object and
we can use right over here. So I'll zoom in with
the period key. Let's put it in
place here, right? So it's just on top of the door. And maybe I'll hit the
three key and go to wireframe and kinda
see what we have here. Yeah, So it looks like these maybe a little bit
bigger. There we go. And then Shift D. Why? The R key? Turn it a bit. Alright, let's take a look. And we doing, maybe I'll pull it out just a
bit. There we go. So now I think we've
got that handle there is of course, a
different resolution. We can see these
curved edges, right? And that's because we have
more geometry in here. If I come over here and turn off the optimal display and then go to wireframe and
back to object mode. Here's actually how many
polygons we have in that. And because we have
quite a bit more, we can have those curved edges. Shift Z, turn this
optimal display back on. So for these other pieces, they have these
very sharp edges. And we'll begin working
with those two. Curve those a bit so they
are a little more realistic. No edge in the real-world
is this sharp. So we'll be using our Bevel tool for quite a bit of those to kind of give those corners a little bit more
realism, kinda like this.
15. Modeling the Grill Frame: Alright, continuing on, I think let's work on
this front grill. Now, if we move
our images a bit, we can see that front grill and it looks like
it's just a thing that's kinda put
onto the front of the vehicle and then
just bolted on there. So I think what we can do is
maybe duplicate some faces off of here and then build that off of
that piece of geometry. But first, before we do that, I think I want to
adjust this line here. I had talked about that
earlier that I didn't think it was quite
in the right place because you see
it kinda comes in around the middle
of the fender here. So let's try and redo
this line right here. I think first of all, I
want to hide these vendors. I'm gonna come over here
and press the period key on the numpad and that will then
find the selected object. Here's the fender front. I'll just hide that here. And now if we select this
and tab into edit mode, I think what I wanna
do first of all, is since I'm gonna be
moving this down a bit, I need something coming off of here or else we're going to have polygons greater than
four sides and we will, and we already have, but generally
speaking, I'm going to try and keep those to a minimum. So what I'm gonna do
is use the knife tool. I'll just press K and then I'll hover over this point
right here and click. And then let's bring
this on around here, and then on around here. And then I will just
hit the Enter key. Alright, so now we've
got these points. I think I'll take
this and maybe hit G2 times and slide it
down a little bit. So it's a little bit
more in line there. And now we can just
take this edge right here. We can dissolve it. I'll just hit the delete key and then choose dissolve edges. Now we can begin again, we can just create
a new one of those. So once again with the
knife tool with the K key, maybe I'll begin right
here and then move down to right here and click and
then just hit the Enter key. Alright, so now that
we have this one, Let's make this one sharp. Once again, we can press Control
E or with this selected, we can also right-click and come down here and
choose mark sharp. There we go. Then if we tap back into
object mode, there we go. So now we have that edge there that's a little bit farther
down than we had it. So I'll come back over here
and turn the vendor back on. And yeah, that's kind of where I wanted that line to go in. Alright, so we tap back
into object mode here. Now, let's take a look at our front and make
sure it's fairly flat. I'm going to go to the
side view with the three key on the numpad
and press Shift Z. And it looks like our points
are a little bit off. So maybe we ought to try and flatten these with that
flattened tool again, Let's take maybe
these faces here. And let's try and flatten these. I'll, I'll go back to the
side view and press Shift Z. Maybe I'll go to vertex, select the one case so
I can see the points. And then let's come
back over here to our edit tab and
click on flattened. Now recall that you just
get this edit tab by coming over here to Edit
Preferences Add-ons. And we typed in loop to get the loop tools here and
just put a checkmark there. Alright, so I'm gonna click on flatten right here and
let's see what happens. Well, it's better, right? I mean, it really did a pretty good job of bringing
those in and we could maybe do a little bit
better if I just took these two here and
scaled them in the y, S, y and zero. That'll flatten them up. And then I'll hit Enter. And then I could also
flatten them in the Z. Now Z zero Enter, so now they're pretty
much in line there. Let's do that with
these down here. As y0z0. There you go. That's looking pretty good.
And now let's try these. Sy zero, Enter Z, Enter. There we go. Alright, so that's, I think
now going to be pretty flat. That's good. So from here, let's just duplicate these off. Now, one thing I would say is that we probably need to move this in and look at this here. This Here's a straight line and then this is over the top of it. And the way I had it
here I think is, yeah, see I included this shape in this line and I don't
think we need to do that. I think we can move this back
like this and maybe move this up a bit like this. So that's a straight line. And then our new object
will have this line here. So let's do that. I'm just trying to kinda
think ahead as we go here. So now that we've
got this and oh, it looks like this point could pull out
just a little bit. Let me do that. So you can see as we go, It's just a lot of
keeping an eye on the whole thing and
refining it and getting it more and more
detailed with each pass. So for this now, what I'm gonna do is
just duplicate this. I'll press shift D Y and pull it straight out like
that just a little bit. Now this is going to be the
base of this grill here. Now I want to split it
out into its own objects. So I'm going to press
the P key again and choose to separate by selection. And now if we tap back into object mode and select that
there is our new piece, and I think what I'm gonna
do is move it out of the truck collection
and move it out here into the scene collection
where we can see it. So to do that, I can
press the M key. I can hover over here
and press the M key and move this to the
scene collection. And there it is. So let's change the name of it. I'm just going to call
it grill for now. And what is this here? Well, that's the door handle. Let's call it door handle. And then I will move this
into that truck collection. Now I can click and drag it over here in the outliner
and drop it in there. Or once again, I can just hit the End key and move it to
the truck collection. There. There we go. Alright, so now we have
this grill outside of the tires and
reference collections. So we just have that out
here so we can see it. Now what I'd like to do is
scale this out just a bit, kinda make it a little bit
wider, a little bit bigger. But if I scale it, now, if I hit the S key,
you can see I'm scaling from that point there. So what I wanna do is move
this origin to the geometry. So to do that, I can
right-click choose set origin and
origin to geometry. But look what happens. We've got a mirror
modifier and so the only real geometry
was on this side. And so it moved that origin
to the center of this side. And now it's
mirroring around here and isn't exactly mirroring
the way we want it. So let me press control Z. And what I wanna do is just get this origin
into the center here. So I can just maybe select
an edge here and move the 3D cursor to it with Shift S and the two key
cursor to selected. Now I can go back to object mode and right-click Set Origin, origin to 3D cursor. Now it's in the center
of the geometry, but it's also in the
center of the grids, so it's mirroring around
that point properly. Okay? Now what I can do is from this point I can
hit the S key and scale it out just a little bit. It a little bit bigger. Right? So that now I
can tab into edit mode, hit the two key to
select these edges here. And let's try and
extrude these back. Let's see how that works. Since these flare out a bit, we're going to need
to do some adjusting. We're not gonna be
able to do it just straight back into y
and be done with it. So let's just try it here, E y. I'm going to
move it back and Yap, see it kind of
intersects with that. Okay, Now I'm going
to press Shift Z. Let's select these
edges here and pull these out a bit
like this. We go. Then let's select
this edge here and maybe I'll grab this
little green square. And what that will do is
as I click and drag on it, it will turn off
that green axis or the y-axis and only slide
in the z and the x. So I'll click on that green square and kinda
move that up some, if that helps any. I'm trying to line it up
with this right here. Now, these over here, of course we'll need
some adjusting. Let's do that. Let's bring this down. And I'm going to have
to move this out so it expands out with this
line right here. Yeah, okay, We're
getting there and maybe bring this down a bit
so it's in line with that. Okay. We probably want
to bring this up, so it's in line
with this, right? Like this, maybe let's try this. See how that works. Okay, Let's go to the side view with the
three key press Shift Z. And let's see what we think. Okay, we've got a
little bit of work to do because it looks like these come back quite a bit
farther like this. Let's take these and hit
G and move these out. Oh, I need to drag
select all of these. Hit G, move these out like this. Select this point, hit
G and move it to you. Here. I'll select this point and
move it out like this. Now we're going to have to
pull these out again, right? But let's move this to here. And then it looks like this
could come back like this. Let me drag select these points and move them
back to here like that. Let's try this. Okay. Shift Z. Yep, going to have to
do some work again. That's fine. So I'm going to take this
and move it out to here. Take this and move it out. Take this and move
it out just a bit. Okay. Does it Oh, it does go in here. Okay. I don't think it goes
in quite that much, but we can pull this back
a little bit like that. There we go. Yeah, I think that's
the basic shape of it. Alright, and so in
the next video, but let's do is let's start
working on this grill part, the actual slats on the front. But I think generally that's a pretty good shape
to begin with. All right. We'll keep working on
it coming up next.
16. Finishing the Grill: To create these slats, let's first of all, create an opening here. I think what I'll do
is maybe just select these faces here and let's inset them and
then extrude them in. However, when we do that, we're going to run up
against the vehicle here. So let's hide the
truck right here. I'll go ahead and
hide the tires. And then let's go
ahead and set this. Let me tap into object mode first and take a
look at our scale. It is uniform, but I'll go ahead and press Control
a and apply the scale. And then with these
faces selected, let's hit the I key
and I'll inset in, and we've got a boundary in
the middle between these. And if you look up at the top of the interface
right up here, you can see boundary is
on and in parentheses, it's the B key. So if we press the
B key currently, that will turn boundary off. And now we can insert this all as one piece.
So let's do that. Let's maybe bring it in
to about right here. Then I'm going to
extrude this back. Ey, let's just bring this
straight back like this. And I think once I get to here, think I'm just going to
delete this and let's hit Delete and delete bases. Alright, so now we've
got that border there. Let's now just add a
slat. Let's do that. Let's press Shift
a mesh and plane. And let's bring it
up to the top here. And I'm going to scale it in quite a bit till it's
just the right width. And then maybe I'll
scale on the y s. Why? Bring it in like this, maybe something like that. Let's try that. So I'll bring it back in and
let's turn it in the x-axis, our x, and maybe
tilt it like this. Bring it down some facts. I'm just trying to get it in a generally the right place and position that we want here. So I'm going to set
it right about here. Let's try that. Then. We need a few others. I think I'm gonna go ahead
and make this a slat like this down here.
Let's do that. So that would mean I need 12345 of these if I use an array modifier.
Well, let's try it. I'll come over here, add modifier, click on array. And now it's giving
me a new one on the x-axis here I should say. And if I increase the count, that will continue out this way. So I don't want that. So that's in the x.
Let's take the x to zero and then maybe the z21. Let's do that. Well, that didn't work, but I think we may
have a problem with both the rotation
and the scale here. Let's apply those. I'm going to press Control a and apply the rotation
and the scale. Here we go, Now we
can see them all. We're going in the
wrong direction. So I think we need
maybe negative one. Let's do that. Alright, that's
looking pretty good. Now what Let's do is kind
of angle this out in the y. So I'm gonna click and drag in the y field and just
kinda move this forward and back until we
get it about where we want. I'll hold the Shift key down
while I move the mouse here. There we go, and
let's click and drag on the z as well and
bring this down. Maybe something like that. Let's try that. Alright, now we
could go and select, save this one and turn it
in the x-axis just to see, we could turn it in the x-axis, turn it down more,
more like that. I think we're getting there. But the problem is, is this is angled out
and these aren't. So what are we gonna
do about that? Well, I think maybe we can use our proportional editing tool
to get it at least close. And then we might have to do
a little bit of adjusting, but to do that
we're going to have to apply the array modifier. So is it about where I want it? I think I want it a
little bit farther down. I'm going to click
and drag on the Z, bring that down just a bit. So what Let's do is let's apply
this array modifier here. I'll pull this down
and click Apply. Now this is all one object. What we can do
here is just hover over one of these panels and press the L key to select it. And now I'm gonna
come up here and turn on the proportional
editing tool again. Now I've still got
connected only turned on. And if I scale out and the
x by pressing S and X, I'm going to scroll
the mouse wheel so I can see the influence here. If I do that, it only affects that one panel because the
others are not connected Alright, so I need to
turn off connected only. Now if I hit the S key and x, and I scale these out a bit, I can maybe scroll the mouse wheel a bit
and scale these out. Just a hair. Let's
try this. Try that. Now I've got them sticking out out front just a
little bit too much. Let me bring them back in. Just a hair like that. There we go. Alright, so now we've got our panels in are
those little slats. Let's do now is give
them some thickness. So I'll come over here to the modifiers panel
again at a solidify. And we've got our scale and rotation properly applied now so we don't have to
worry about that. I'm going to turn
on even thickness. Click and drag in the
thickness field on it. See how thick we
want to make these. I think I'm just gonna do that. Okay? And then what Let's do
is let's apply this. And then I'm going to add a
bevel to each of these edges. So let's do that. I'll pull
this down and click Apply. Then if we tap back
into edit mode, I'll select these edges in here. All of these in here. And do I want to
select this one? Now? I don t think I do. Just keep that one as is. Now that I've got
these selected, I'm going to press Control E and recall that the bevel
edges is Control B. So I'm going to press
Control B and pull this out, scroll the mouse wheel once
or twice, and then click. Now I can control it a little
bit more from this panel. So what do I wanna do here? I think maybe I want to
click and drag in the width, hold the Shift key
down and bring these together so we have
an even curve there. Now. Yeah, I think
that's pretty good. I'm going to want
to smooth this, but I'll wait to smooth it until I get these
joined together. So first of all, I've got a mirror on the frame, but I do not have a
mirror on the slats. And you can really only
join objects together that have similar modifiers panel. Because if I combine, say this with the slats, with Control J, I
would lose the mirror. So you really need
to apply or get your modifiers the same
before you join objects. So for this frame here, Let's go ahead and apply
the mirror modifier. And then I will take the slats, Shift-click the grill
frame, press Control J. And now they've all come into
the object called grill. That's good. Now let's smooth it. Let's right-click, choose
shade, auto smooth. And maybe I'll click
and drag these up a little bit so those
are a little smoother. Let's try that. Yeah. So I think there's our grill now
putting it back on, we may need to do a
little bit of work here. So yeah, now that piece right there blocks
out those slats. So let's take these faces here. And let's see what these are. I'm going to press Shift Z. Okay, so we could take
these and inset these, right, and then
extrude these back. So they're beyond the slats. Let's try that. I'm going to tab back
into object mode. And let's just take
a look at, well, we've got uniform scale, but I'll go ahead
and press Control a and apply the scale so that when we take this
and use the Insert tool, hopefully it'll be even so
I'm gonna press the I key and inset this just to about here. And then let's hit the
E key and y to extrude just in the y and pull those back until they're
beyond the slats there. Is that about where
we want them? Let me up. I have the proportional
editing tool turned on. Let me turn that off. Alright,
now if I move this back, I'm just looking for
a point where it intersects here. There we go. I think that's good. Yeah, I'll move
the cursor back to the center of the grid
with shift us one. There we go. There is our front grill. Now of course,
we're going to need to add a bunch of bolts on that. But before we do that, I think I'll wait on that. I think what I would like to
do is just extrude here off these edges to close off this space so we don't
have this big gap here. So I think let me
go back to here. Shifted. See, Yeah, I think we
need to close that off. Okay. So what I'll do is maybe just take these edges right here. Recall that we've applied
the mirror modifier here. So we're going to have to do this for all of these,
I'm going to press E, y and pull this out
like this, let's say. And then I'm going
to press Sx and scale this in. There we go. Now, I think I will
take these edges here and these edges over here. And let's extrude and
scale these in, in the x, so ESX and bring
those in some fat. Okay? And then now we
can select these here, this, this, and this, and hit the F key. And that will close that off. And let's do the same
thing over here. This hit the F key. Alright, so you see
what I'm doing? I'm just kinda closing these
off so we can't see in here, we may want to adjust
this out or in a bit. But for now I think it'll
be just fine the way it is. What I'm gonna do
is take this point. And I'll take this point here. And let's move him down a bit, scale them out in the x. Just a little bit. There we go. Then let's take
these edges here, this edge and this edge. And let's hit E, z and
pull that down a bit. We go and maybe we can
scale in the x as well, Sx and pull that in
just a bit like that. Now we take this edge, this, this hit the F key. And we can take this,
this, and this. Let me grab those again. Still having trouble
grabbing them. There we go and hit
the F key there. Now, I probably could
have done that a little easier way back before we
ever extruded those faces in. But sometimes you
don't really know what you need and couldn't
tell you need it. This looks pretty good. This edge here isn't
visible anymore. So I think let me go
back to shade auto smooth and if I
take it down some, you can see it down to 30. But do I lose my
curves on these? No, they still look pretty good. Okay. So now we've got
our front grill. As I said, I'll wait till a later time to begin putting
all the bolts on this. And we may just do a pass where we put the bolts
everywhere all over it
17. Beginning the Rear Doors: Well, we've got a door so
far and this front grill, let's maybe take a
look at the back now. Let's see if we can
work on these doors. I think we have one black
and white reference image of the rear doors. But for this, I think
let's work with that scale model first. Let's take a look. I'll come over here
to Image open, and let's go into the
scale model folder here. And I've got an
image right here. We've got some images
of it painted. We can take a look at that. I'm going to press Control and
Spacebar. And there it is. So it's got a frame around
the frame of the door. Right. So it's got the doors
with a frame and then a frame around
the two doors as well. Let's see if we can
find a better image of that to work with. Image open. This one here, this is
the one I was thinking. I've let me press Control
Spacebar again and I'm going to create a door and then maybe create this frame
around the whole thing. I'll go ahead and create
the top of the frame here. This has this arch, but I don't think we'll
need that sensible, have the tarp coming over that. So let's work on this.
Let's see what we can do. When I press Control
Spacebar again. And I guess Let's take
this grill chicken, Let's drag it up into the
truck collection there. And I think we can just work
without the truck geometry, just with the reference
images for now. So let's hide the
tires and the truck. And then let's go to
the rearview with control and one
key on the numpad. Now you can also once again
press the Tilde key on your keyboard and go to the
back view here as well. But let's just, let's begin with the cube and
let's see what we can do. I'll press Shift a mesh cube and let's press Shift
Z to go to wireframe. And I'll just hit
G and bring this up and put it in here
and scale it down. And let's see what we can do about getting it
the proper size. So it really doesn't look like this image has
those double frame. So we'll have to work with
this to see what we can do. So I'm going to tab
into edit mode, hit the one key, and drag
select these points. And I'm going to move
it to the center here. And I guess we could take these and move
them down to here. So I'm going to assume that
this is the outer frame. Let's do that. And I'll bring this up
to about right here. And then let's press Shift
Z and take a look at it. So it's a little bit wide here, a little bit too deep. I'll press S y and let's scale it in,
something like that. We don't have to get
it to thin right now. So if I press Control one again, here we are, I think
that's pretty good. So what I'm gonna do now is
just create that inner frame. You can see the
inner frame here. And I want to bring
that all the way around because I feel like
we can see that here. So once again, the
drawings a little bit off from what I think I
want, but that's okay. That happens. I'm going to hit the
three key and choose this face here before
I do anything, actually, let's apply the scale, its tab back into object mode. And yes, since I've
scaled it down, our scale is non-uniform. So let's press Control
a and apply the scale. So that's uniform once again. And now that'll help us as
we attempt to inset this. So I'll press the I
key and insert it in. And I'm just going to insert
it in this width right here. I can see that in the center and that'll give us that width
all the way around there. And then once we have that, I'll press Shift Z and
let's now extrude this in. I'll hit E and push in just
a little bit like that to get that rim around
there in the center. Okay. So now we've got kind
of a basic door. What I'd like to do now is
create that outward frame, create that frame on
the outside here, going all the way around. And to do that, I think what I wanna do is tab into edit mode and
hit the three key. And I'm just going to press Alt and click an edge between
two of the faces, and that will then select that entire face loop all
the way around there. So now what Let's do is let's duplicate this and then scale
it out just a little bit. So I'm going to
want to scale this out in the x and the z, but not the why. So let's press
shift D and enter. And now I'm going to scale
it and turn off the y-axis. So I'll press S, Shift Y, and now I've turned off the y-axis and I can
scale this out like this. Now. I'm going to hold
the Shift key down. So I own and move it out
kinda slowly here like this. Let's see what we have here. And it looks like the top
is going to be a little bit Farther out than this side. So I'm going to press S and scale that top end
just a little bit like that, so it matches the side. Okay, there we go. So now what I'm gonna do is I'm
going to just going to hover over it and hit the
L key to select only that. And now let's split it
out as its own object. Once again, we'll
press the P key, choose to separate by selection. And now if we tap back
into object mode, we can select just that object. Now let's tab back
into edit mode, hit the a key to
select everything. And this time I'm
going to extrude and scale and turn off the y-axis. So let's hit E, S Shift Y. Now, I'll hold the
Shift key down and let's bring these out now. And I better go back to the back view with
control one and Shift Z so I can see
it and I want to bring it out so it's
about as thick as well. I've got it about as
thick as the bottom here. Now. I'm going to press S, Shift Y again and maybe bring
it in just a bit. And then I'm going
to scale out in the x Sx and scale out like that to bring it out to where
the drawing is, like. Okay. So now what do we have? We've got a frame around
that door, right? And that frame is
its own object. So now what I wanna do is
expand that frame to the right. I'm going to press
Control one Shift Z. Okay, so now I'm going to select that frame tab into edit mode, hit the one key to
go to vertex mode. And I'll just take
these points here. I'll just drag
select these points and move them over
here like that. Now I've got that frame right. Now we can take this and just duplicate
it and move it over. We may need to mirror. I'm gonna see if I can
kinda do it by eye, but we may need
to split this and then use the mirror modifier. Let's see if we can
kinda make it work. I'm going to press Shift D
X and let's move it over. And I'll bring it over
until it's sitting right against this right over here. Alright, let's take a look. Yeah, we've got quite a
bit of a space there. Do I want to use
the mirror modifier to get it a little more precise. Yeah, I think I will. I'm just kinda that way. I like things to be a
little more precise. So I'm gonna go ahead
and delete this. And four, the frame. I'll tab into edit mode and
let's create an edge up here, Control R and hit the
Enter key two times, and then Control R down here and hit the
Enter key two times. Now, I can take all of this, press Shift Z, go to face mode, and I'm just going to drag select all of this
and delete it. Delete and delete faces. Now I can mirror this over. So I'm going to move the cursor to the
center of the grid. It is there, but
I'll go ahead and press Shift S1 to put it
in the center of the grid. Now I'm going to move the
origin of the object. Right-click Set Origin,
origin to 3D cursor. Now that it's there, Let's go ahead and add
a mirror modifier. Come over here, mirror.
And there we go. Now let's see if
it's connected up. Well here, it isn't really
connected up very well. It's tab into edit mode
and hit the one key. And you can see that we
have some overlap here. And that's okay because
what we can do is just turn on clipping and then drag these together
and pop their clipped together in the
center of the grid there. So let's do that same
thing down here. Let's just drag, select these poem and that
snaps into the center, so they're clipped
in the center now. Alright, so that's good. Now what we can do is just take this and mirror
this over, right? We could move our origin to 3D cursor here and then click Add Modifier mirror.
And here we go. Now, do we want to do a
little bit of adjusting? And this is the problem
I was seeing was that I felt like there was too big
of a gap in the center here. So what Let's do is
let's go back to wireframe and tab
back into edit mode. And I'll just drag select
these points of the door. Let's just drag these
in a little bit now. I do not have
clipping turned on, so they aren't going to
clip, which is good. But I just wanted
to be a little bit closer, kinda like that. Let's try that. Yeah, that kind of tighten
things up just a little bit. Alright, now let's bring back
the tires and the truck. And I will select the
doors and the frame. And let's just bring these so that it fits
right on the back. I'm going to press G
Y and just bring him back and maybe put them right
up against here like that. Let's try that. Now because the origin
of these objects was down at the 3D cursor, the origin is still down here. And that's okay. I'm not
too worried about that. Let's press GY and
move back a bit and then move forward till we get
it about maybe like that. Yeah, Let's try that. Alright, so in the next video, let's work on
grabbing these hinges and the door handle
and bring them back and put them in place?
18. Beginning the Headlights: Continuing with the back door, let's go ahead and grab
one of these hinge pieces. I'm just going to zoom in with the period key on the numpad. And yeah, So it looks like I've got all of this as one object. So let's just duplicate this shift D and Y and
bring this back here. Let's turn it in
the z-axis, RZ 90. And then we go and
let's bring it over and put it in place. I'm going to press
Control and one to go to the back view Shift Z so you can see through
it and let's just place it where we think we need these. Maybe this can go right
about here, let's say. And then let's bring it in
and get it right in here. So I'm gonna take it into
point where it's just not quite intersecting
with the hinge. Maybe something like that. Let's try that. And then let's go and just do that
again with Shift D z. Put that here, Shift D z, and put that here. Now, let's take all of these and mirror them
over to the other side. And we can use a mirror
modifier for this, but you can also use
just the mirror tool. And to do that, let's just take these
here, select these. And we need to get the center of that selection into the
center of the grid. So what we can do
is just change from median point temporarily
to 3D cursor. And now we're going to center around wherever
the 3D cursor is. Now, if your 3D cursor isn't
in the center of the grid, of course, you can press
Shift S one and do that. But now that it's in
the center of the grid, we can duplicate these and
then mirror them over. And to mirror in object
mode is just Control M. So let's press shift
D, Enter Control M, and then we have to tell
blender what access we want to mirror along and we want
to do that in the x-axis. I'll press X and then press
Enter. And there we go. So now we've just duplicated and mirrored these over
to the other side. Alright, let's now take a
look at the door handles. And at least here, these door handles look
fairly similar to this here. So I think I'm just going to duplicate it and
put it in the back. Let's change our pivot
point back to median. And then let's just
press shift D. Why bring this back? And let's turn it into
z again, our z zero. And then control one Shift
Z to go to wireframe. And let's just hit G
and move it down here. And I think all I want
to do is just turn it. Actually, I'll hold the control key down and you can see in the upper left-hand corner of the interface the
rotation there, with Control held down, it snaps in five
degree increments. So I'll just turn
it back until it's negative 45 degrees there and hit G and move this
over like that. Alright, and then
we just need to move it back into the door. Something like that maybe. And then let's duplicate
it over to the other side. So once again, I'll change the pivot point
to the 3D cursor. Press Shift, Enter Control M, the X key, and then
Enter. There we go. I'll change back to
my median point. And you can change
these up here, this global and local, the transform
orientations and the pivot points with the
comma and the period key. So for the transform
orientations, it's the comma key. And four, I'll just
hit Escape here. And for the pivot point, It's the period key. So you can also bring those menus up with
those shortcut keys. Alright, so I think we have the rear doors pretty
well done now. Let's we can continue
more on the back, but I'm kind of interested
in this headlight here. I was looking at that
earlier and I thought, well let's try that. Let's press the three key and then Shift Z and take
a look at it here. Alright, well let's
begin with the cylinder. I'll press Shift a
mesh cylinder here. And I've got 32 sides. That's probably fine. And I'll go ahead and leave
the cap fill as N gun. Let's now turn it or 90, and I'll scale it
in the Y, S, Y. So it's about the
same width here. And then I'm just
going to hit G and move it into the center there. Hit the period key on the number pad and
take a look at this. My pivot point is
still 3D cursor. So once again, let's
change to median point Now we're going to scale from
the center of that object. There we go. I'll
scale it down to about the proper height.
Let's do that. And then I'll scale it in the width and we're
pretty close, S Y, maybe something like that. Let's try that. And now let's get it over
to its place over here. I'll just click and drag
over here in the x and it's looking a little
off and bigger. So these reference images aren't always the
greatest and that's fine. We're just using
them as a guide. So if I wanted to, I could split the
difference here. I could just scale
this up a little bit, maybe that so it's a little bit bigger here than
it is on the side. But I think I'll just undo that and bring it back
the way it was so it fits on the fender there
a little bit better. So once again, I think
I'm gonna go with the side view as being the
authoritative view here. Alright, so let's take a look at what this is going to look like. I think I want to bring
this back to this edge right here and then
extrude it forward again. So I'm going to tab
into edit mode, hit the three key and
select this face here. And then I just
want to bring this back just a little bit. Maybe something like
this right here. And then I want to get that edge here and I'm going to inset it. But to begin using
these tools like inset, bevel, et cetera, I do
need to apply the scale, so I'm going to tab
back into object mode, and yet our scale
is non-uniform, so I'm gonna press Control
a and apply the scale. Now it's uniform. We have all ones, so that'll help our tools
work a little bit better. I'm hit the I key and inset in just a
little bit like that. Yeah, something like that. And then I'm going
to extrude forward E and pull forward
some right here. I'm going to give this a
bevel there, that edge. So I'll hit the two key. Select that edge,
and then let's press Control B and pull out. And then I'm going to
scroll the mouse wheel a bit and get a curve,
something like that. Let's say, alright, tab
back into object mode. That's looking okay. I'm going to right-click
and choose Shade Smooth. No, that's not very good. I'll right-click and
choose auto smooth. That's quite a bit better. Okay, so let's go with that. Now. Once again, I'm going to
select this face here. And let's extrude
back just a bit. I'll hit E and pulled back. Then I think I want
to just delete this. I'm going to create a
lens for this on its own. So I'm just going to hit
the X key and delete faces. There we go. Now before I do that, I'm going to come
back around here. It looks like this
has got kind of a curved edge on the
back here as well. So I'll select these edges here and press Control B
and pull out just a bit. Let me scroll the
mouse wheel and I want it a little bit
smaller than the other ones, something like that.
Yeah, there we go. Then let's go ahead and
work on the lens here. So by tab back into edit mode and select this
edge loop right here, alt click and edge here. So I get the center
pivot point right there. I'm going to move the cursor
to that center point of the selection Shift S
or cursor to selected. Now I'm going to create
a new object in here, and I think I want to
create a UV sphere, so I'll press Shift
a mesh UV sphere. I will scale this
down quite a bit. The three key and scale it down. So it kind of fits in here. Something like this. I'll bring it in trying
to see, there we go. So I'm going to bring it out. So it's about like this. Then I want to get rid
of this part back here. So I'll press the three key
to go to the side view. And let's tab into
edit mode here. And I'll press Alt
aided de-select. And then I would just
want to click and drag and select just the back
here like this, I think. Yeah, I think
that's what I want, just the back there and
then I'm going to hit X and delete those bases. Now if I go back to solid view and see that
we just have that half. And what I'm gonna do is in object mode just
scaling the y. So I'll press S y, and let's just scale on
the y and bring that back. Maybe adjust that they're
just a curved feature there. And then let's go ahead
and auto smooth that. There we go. So we've got
kind of a curved lens. And so now that we've got that, I think we can begin working
on this stuff down here, the actual things
that are going to hold it to the vendor. But let's work on that
in the next video.
19. Continuing the Headlight: Now I think as
I've been working, I've made this a
little bit too thick. Let's go to the side view here. And yeah, I feel like maybe I need to
bring this in just a bit. I'm going to press S Y and
scale that in just a bit. And then I'll bring
this end to finish off the thickness here like
that. There we go. Just something like that. I just felt like it was a
little bit too, too thick. Alright, so for these
things down here, Let's begin building this. And it's kind of hard to see, of course, once again, with these images,
but I think we can do something
pretty good here. Let's go to the bottom
and I'm going to select faces here to
get this little panel. There's like a little panel
that holds this up, it seems. So let's select some
faces along here, maybe eight faces, we
could select that. And then I'm going
to press shift D Z and just bring these down just a little
bit like that. And then I want to
scale in the Y S, Y. And it's about, It looks like it's about maybe that thick. So maybe about like that, let's say then let's add
some thickness to that. First of all,
however, I'm going to split it off as its own object. So I'm going to press the P key and separate by selection. And we'll tap into object
mode and select just that. Now, I want to add a solidify modifier to
give it some thickness. But once again, our scale
control a, apply the scale. Now it's uniform. And now tools and modifiers can work on
that a little bit easier. So I'm gonna come over here, click on solidify
even thickness, and I'm going to click and
drag in this field here, bring it out and hold the Shift key so it moves
a little bit slower. And maybe I want to bring
it out to about right here. I think that looks pretty good. I'm gonna go ahead
and apply that, pull this down and click Apply. So now we have a piece of geometry that has polygons
all the way around, has thickness to it. And I want to move
this pivot point or this origin to the geometry. So I'll right-click and choose Set Origin, origin to geometry. Now we have that there. And I can bring it up, kinda fit it on there
a little bit better. Alright, next up this cylinder. Let's take this piece, press Shift S2 and
move the cursor there. So that when we create a new object shift
day mesh cylinder, it comes into that point. I don't need cap fills on the
top and the bottom of this, so I'll change that to nothing. And then I'll just
hit the S key and scale down quite a bit. Let's come over
here, press Shift Z. And yeah, it's actually about
that looks about right. And I'll bring this down. And then tab into edit mode
and grab these points. And let's bring this
down so it inserts or goes through the vendor
there, at least for now. Alright, so now
I'll select it and right-click and choose
shade, auto smooth. I guess I'll do that for
that one up here too. Now that we've got that, we need this little
piece right here. So in the similar way, we can take this tube
and duplicate it, shift D Enter, I'm going to scale it out
just a little bit. Scale it in the Z, s, z. And that'll be this
little guy right here, this little cylinder
right there. Maybe a little bit narrower. There we go. Something like that. Now I want to split it out
as its own object again, so the P key and
choose selection. And now we go back to
object mode, select it. And then let's come
over here and add a solidify modifier here. And then I want
to just drag out, I'll choose even thickness, see how that works and I'll drag out and I'll hold
that shift key down. And as we do this, look at this, it's got some strangeness
here, some artifacts. And I'm wondering, Let me see. I'm gonna come up here
and pull this menu down, this viewport overlay, and
turn on face orientation. And it looks like that the polygons here
are flipped outside. So what you want is you want
the red to be on the inside, the blue to be on the outside. Blue is good, red is bad. And this just means that
those polygons are flipped. So the backside of the
polygons are facing out. And we don't want that. So what we need to do is go back into edit mode
and select everything. I'm just going to hit
the a key and I'll press Shift Z so we can see this here. Alright, so I've
selected all of this. Now what I wanna do is come
over to Mesh normals and flip Now let's see what happens. So that helps quite a bit. So sometimes when using
these tools, when extruding, when duplicating things off, the polygons get flipped. And this face
orientation here is really helpful for visualizing whether or not that's happened. So now that we've
flipped those polygons, I can shift and
click and drag in this field and bring it down
a little bit more like that. So now everything's properly
scaled and flipped, etc. Alright, so let's go
ahead and apply that. I'll just pull this
down and click Apply. And there we go. Then there's this panel here
that holds it to the vendor. If we go to the front Shift Z, we can see it's kind of wider at the top than it
is at the bottom here, and it looks like it may have bolts on it here in the drawing, although I'm not seeing
them here in the image, although they could be there, it's just hard to see. So for this, for
that angled face, what I'm gonna do for
that angled piece, what I'm going do is just select the vendor and then just
maybe select this right here. And let's just use this because it's already at
the angle that we want. I'll press shift D Enter
and maybe I'll just move it out just a
little bit like that. Just a little bit off
the vendor there. And then let's separate
it out as its own object. It will press P,
choose selection, tab back into object mode
and just select that. And let's move the
origin to the geometry. Set origin to geometry here. And look, it got a
little weird here. So i 0, it's because we
have a mirror modifier. This fender had a mirror on it. This does too. And when I brought the origin to the center
of this geometry, it moved the mirrored
part over here as well. So we just need to click the
X here to get rid of that. There we go. We don't need
a mirror on that quite yet. So I'm going to tab
into edit mode, hit the a key, and let's
just scale it in the x. And that's good. But I want to scale it
this way in the height, but we're at an angle. So we could try changing
global to local here. But that doesn't help because our gizmo is still
in the global axes. So I think what Let's do is
change from local to normal. There we go. Now those arrows are in
line with the object and I can press S and scale
that in like that, S and X and scale that. And so I can move
this now into place. I'll bring this here. Bring it down in the y, right? Maybe I could take
this edge up here, bring it down in the x, maybe it down here. So we can begin to get
that in the proper place. Alright, so in the next video, Let's continue with this and see if we can finish
up the headlights.
20. Finishing the Headlights: Now, as I've been working, my sidebar has been opened
here with the N key. You can bring that up. And you may have
noticed that I've got this Edit tab and I've got rigor phi and ARP and quaternary mesh and
all these other tabs that you may not have. And that's fine. These are add-ons that I've enabled or installed
into Blender. Many add-ons come with Blender, but aren't enabled yet. And this particular one
is called loop tools. I don't believe
we've used this yet. We may use it in the future in this
project, I don't know, but I just wanted to
show you that if you come over here to
Edit and Preferences, you can go to Add-ons and
you can enable loop tools. Oop, in the search field. And all you have to do is
just add a check mark here, and it will appear over here
when you're in edit mode. So I can uncheck it and it
will go away and recheck it, and it will come back. Alright, so that's all of those are if you happen to have
seen those and wondered, why don't I have those? It's just because those particular add-ons
haven't been enabled. Alright, so I'm gonna go
back to the front view here. And let's press Shift
Z so we can see, and it looks like, it looks like this is about
the right width, I think. Let me kind of
center it up here. Maybe I'll scale it out in
the x just a little bit. And for these, I
think what I'm gonna do is scale in the y here, I'm in normal transformation
and that's why my gizmo changes depending
on what I select. So I'm going to press S Y
and bring this in some. And I'm also going
to press Control R and add an edge loop. Maybe right in here
I see right here, it's kind of wider. So I'm going to press S Y and
bring this out like this. So it's just got that
basic shape there. Alright, let's take a look. Yeah, something like that. Now I'm going to
take this and once again add a solidify
modifier to this. My scale is uniform, but I'm going to
go ahead and press Control a and apply
the scale anyway. I'm going to add a
solidify even thickness, click and drag,
and I'll drag it. So it comes out like this. And I will tab into edit
mode, select everything. So I can bring this
down a bit like this. Yeah, there we go. Okay, I'm gonna go
ahead and apply this. Pull this down, click Apply. Now I kind of feel like I
want to add a couple of those bolts that we're seeing
in the drawing up here, but not really seeing in here. But I think that'd
be kinda nice. Let's do that. Grab
this bolt here, go back to global
transformation here. And let's just press shift
D and move this up here. I'll bring it down, hit the period key
on the numpad. And let's turn this
in the z or z90. It went the wrong way, so I'm going to hit
the negative key. There we go and spin
it around. Hit Enter. Let's bring it over. Place here, let's say go to the
side view and I will turn it until it's about the
right angle here, like that. Bring it up, get it
kinda in place there. And then let's change to
local transformation. And now we can bring
it up and down in alignment with the
angle of the object there. Alright, so let's actually that size doesn't look too bad. Let's go ahead and go with that. So here in the front
view I'll press Shift D. And then it looks like
it's the z-axis now in local transformation that I can use to bring it down here. So I'll press shift D, Z, bring it down, move
it over in the y. And then I can press shift D Y and bring that over
here like this. Then I'm going to
turn them, I'll press RX and turn them a bit so they're not all
perfectly the same. I don't like that little
bit different for each one. The next thing I see
is that it's got this little shield on
it over the, the light. Let's take a look at
another image and see if we can see that. Here. Let's take a look at this
so you can see that here. And I'm going to open another one about
this one here. Yeah. Well, here's the
interesting thing. It doesn't look like it's a
lens for a light in there. So I'm not exactly
sure what that was. I had just assumed that was
over one of the lights, but I don't know what that is. So I'll go ahead and
create it and keep a lens in there until maybe
at a future time I can figure out what
exactly is in there. So let's go ahead and just create the geometry for
it and put it in here. I'll select some
faces along here. 345. Let me go to the side view
and see how far down it goes. So maybe something
like this, I think. And let's do 123456 on
either side, I think. Yeah. Let's do that. And then let's just press shift D. But I'm gonna go
back to global here. Global transformations,
shift D, Y, move it forward, some, maybe move it down a bit. And then I'm going to split
it out as its own object, P key Separate by
selection. There we go. Now if we tap back into
object mode and select it, we can begin putting
it in place here. I think it's going to
need to be scaled a bit. So I'm going to
right-click and set the origin back to the
geometry itself here. Now we should be able
to scale this, say, in the x Sx and bring it in. So it fits around that
a little bit better. And now let's give it a
little bit of thickness. Well, before we do it's got
this part in the front. So let's I think that's
about the right size. So let's go ahead and do that. For that, I think, Well, we can select edges all along here except
two on either side. And then I'll go
to the front view. I'll hit the one key so
we can see those points. And then I'm going to
extrude down in the z-axis. Easy. Bring this down and then
I want to scale in the Z. I'll press S, Z and zero, and that will flatten
everything and click. And let's bring that so it
aligns with these here. Now let's select
these faces and hit the F key to fill that face. And these edges here, F key. And now that is a
little bit off here. So once again, I'm
going to press Alt and click that edge, and I'll press sz01. More time to get
all of those, even. There we go. And we need a little
curve here on the end. Let's do that. Before we bevel anything
we should apply our scale control
a, apply the scale. Now it's all ones. I'll hit the two key, alt click this edge. We need to add these
edges down here. And then let's press Control B and bring that out
a bit like that. See how that looks. Yeah,
that's pretty good. Then I want to add a little
bit of thickness to this. So I'll come down
here once again, add a solidify, choose
even thickness. That's a little too much because we've got
some overlap there. I don't need that much at all. So I'm just going to
hold the Shift key, click and drag and that thickness field and
just bring it back. So we've just got the
smallest amount, right? Maybe something like that. That's all we need. I think. So. Now let's apply this,
apply that there. And now we've got one
of the lights here. Let's now combine everything. I'm going to select
all of these, the bolts, this
panel, this stuff, this, the light and
the shade here, I'm going to keep the lens
separate, at least for now. And I'm going to
press Control J. There we go. Now we've got that
all one piece. Let's now take this and duplicate it and move it
over to the other side. So I'll take this and the lens. And let's press Shift D x. Bring this over and put it
right about here, Let's say. Alright, let's take a look. Yeah, I think that
looks pretty good. Now, what I'm seeing here
in the top view is that there's only one shade on this. And I'm seeing that here, that it's only got one
of those little shades. Although in the front drawing, they've got them both there. So maybe we only need one. In this top view, it has the one on this side, so I'll just do that. I will tab into edit
mode and then just hover over this piece right
here and hit the L key. And then we can just hit X or delete and delete
faces. There we go. So we've got one that has
it and one that does not. Alright. So now we've
got our headlights
21. The Bisect and Shear Tools: So one thing I didn't do
in the last video was right down here to
trim off this tube, this cylinder at the
angle of the fender. And there are a couple of
ways that we can do that. And I thought I'd go over to
tools where we can do that. I thought this might be a
good opportunity to try that. So let's, um, do a
little clean up here. First of all, I'm going
to take this over here. And my outliner is
pretty cramped. You can, if you want
to come over here and right-click and choose
duplicate area into new window. So that temporarily you can view your Outliner a
little bit bigger. So maybe something like this. Now I can hit the Minus key in the number pad to
collapse everything. And so maybe I want to rename this so we
know what this is. So this is the headlight
R for the right side. And I'll copy this
and take this one. And let's call this one. I'm going to paste
this controls the, I'll call it
headlight, our lens. Let's do that. And over here, same thing. I'm going to paste this
control V and change that to an L. And then this, I will just once
again Control V, change that to an l
and call it lens, just so we know what those are. These things here. Oh, those are the doors
and the door frames. Let's just take these
and drag this and this into the truck container just so we get those
out of the way. Alright, so now what let's do, I'm going to close this here. And now I can see that
over here in the outliner. I'm going to hide this
one over on the right. So I'll hide it here
with the eye icons. So we just see this one for now. Because what I'm gonna
do is use one tool for this one and another
tool for the other one, just so we can see
the two inaction. So the first one I want to
talk about is the bisect tool. And let's go to the
side view here and Control z for wireframe. And I will tab into edit mode, press Alt aided
de-select everything, hit the three key
to go to face mode. And I'll just hover
over that cylinder and press the L key to
select link components. Now, up here under the Mesh
menu, you've got bisect. And if we click this, you do have to have the geometry selected that you want
to make the cut through. But if we go over here, mesh and bisect, now
we can click and drag. And you can see I can
click and drag an angle, a cut right through
here like that. And now if I click
outside of here, we have a cut right
there in that cylinder. Let me zoom out a bit here. I'm just going to hit the L key here and just zoom in
with the period key. So now you can see if I hover over this and
press the L key, you can kinda see that
cut through there. Now what I can do
is just Alt click between two of the faces here, alt click and it will select that entire edge loop
all the way around. And now we can just delete this. I'll hit the Delete key and delete faces. And there we go. Now we've cut that tube at
the angle of the fender. Alright, so that's one way to
do it with the bisect tool. Alright, so let's
hide this one and let's bring back
the other one here. Alright, so now we're gonna
deal with this one over here. Once again, I'll hit the
three key and press Shift Z, and let's take a look at it. I'll tab into edit mode. And this time I'm gonna go to vertex select
with the one key. And this time I'm just
going to drag select these. Now what I wanna do is rotate this selection so it's
in line with the vendor. And if I just hit the R
key, it'll go like that. It'll kinda collapse it if I get it in line with
the vendor there. So that's not quite what I want. I'm going to press Control Z. So for this we can
use the shear tool. I'm going to bring
this up so it's kinda centered into that area
that I want to angle it. And then I'm going
to click on shear. And since I have my transform pivot
point at median point, I can see the shear tool here
centered on that selection. So then I can just take one
of these and click and drag. And now it's going to
rotate that edge but maintain the volume of
the cylinder like that. That's what the
shear tool will do. Okay, and then I can
just click out here on another tool like on the
move tool. And there we go. Now we've got this one Over here, angled in such a way. So it looks like it's been cut in the angle of the
fender there as well. So that's two different ways
to make a cut like that. There's actually
more ways to do it, but I thought I'd go over those two tools
while we're here. Alright, What should
we begin now? You know, I think maybe let's
work on the windows here, the front windows and these door protective shield kind of
things on the front there. We can go to an image. I'm going to go to Image open. And in our scale model folder, it's got a few images here that we can take a
look at it like this. Like this. We can see
what's on the top there. And you can kinda see that from the top view of the
drawings here as well. I'm going to bring
back the tarp. Let's go into the
truck collection. If I scroll down here, I
think I called it tarp. Yeah, here it is and
it's hidden away. So I'm gonna go ahead
and bring that back. And now let's take a look at what we wanna do
for these windows. It looks like in
the actual image, it's in a little bit farther
than they have it here. Like it actually goes in
and it looks like there may be a window in
there. I'm not sure. But at least for now
I'm going to work on it based on this one here. So let's tab into edit mode
and see what we have here. I've got this face and this face that we might
be able to use to inset. To begin this, Let's go
to the front view and press Shift Z so we
can see through here. And it looks to me like, so here's the frame. And then you've got the
inset of the window. I'm going to first of
all go back object mode, and we've got all ones
here, so that's good. Okay? So that if we instead, I feel like we're gonna get
a pretty good shape there. So let's just try it. I'm gonna hit I
and inset in a bit to about right here I think. And I may want to bring it
in just a smidge like that. Let's go to Solid View with
Shift Z to take a look at it. Okay? And then I'm going to want to even off
this side here. So maybe if I select
this edge and this edge, I could scale it in the x-axis. So press S, x and zero to
flatten that up a bit. Then we can bring it in just
a little bit like that. And also let's
change from global to local so that if I want to, I can select an
edge like this and drag it in line with the
angle of the object here. So I can drag it here on the y-axis maybe to
move that down a bit. Okay, So I think
that's not too bad. Let's take these faces here
and let's extrude them back. And then we'll take
them in some here. I think maybe I'll
take these edges first and bring them out
just a bit like this. Bring them, excuse me, bring them in some like that. So we get a little bit thicker
panel there in the middle. And then, alright,
with these selected, let's change to local
transformation. And then I think I'm going to, well, do I want to
extrude in the z here? Or do I want to
extrude in the global? Why? Because it kinda
looks like this goes back, like that, straight back. So let's try that. I'm going to hit E and y, and it goes straight back
like this. Let's try that. And then I want to
inset just a bit. I'm going to hit
I and bring that in because there's a ridge right there that I think I want to get and then I'm going to hit EY and pull straight back again. And then let's then inset again. And maybe what I'll do is get this little edge right here. So I will press E y and pull
out some inset just a bit, and then EY and pull in
some there, we've got that. Yeah, So I think
that's kinda what I want from that window. I feel like this goes in the global Y-axis rather than going down in line with
the object itself. So let's give that a try
and see what we think. And then in the next video, what Let's do is begin
creating these flaps here, these Protection little panels
that go over the windows
22. Beginning the Front Shield Panels: Alright, now, looking
at the window here, I think I'm correct in
this bottom part here, like it looks like it
goes kinda flat here, but up here, it does look
like it kind of angles in line with the object here
with this angle of the truck. So it might be kind of
cool if we could do that, if we could do
this flat and this angled in line with
this part of the mesh. So let's see if we can do that. I'm going to tab into
edit mode and go to the side view with the
three key Shift Z. Let's hit the one key
to go to vertex mode. And so what I'm
thinking is all of these angles here
that go horizontal, should maybe go
perpendicular to this. I wonder, can we do that? So if I grabbed all of these and then changed
from global to local, Can we take this
and drag it down so it's now perpendicular
to this line. Yeah, let's do that. And then we can
take these now and drag it down so it's
perpendicular to this line. I'm just wondering
how this would look. If we take this and drag it down bad and maybe take
this and drag this down. So they're all kind of either parallel or perpendicular
to this line here. Let's see what we think. Let me see tab back
into object mode. Yeah, that's kinda cool. Actually, the flat here
and the angle there. Anyway, I'm not sure
that that's actually the way it works on this thing. It's really, once again, our images aren't great, but that kinda looks cool. So I'm gonna go with that. Alright. So for these panels now, I really want them to
fit on here really well. So what we can do is just
maybe use an edge right here. Let's say just Alt, click that edge and use that
edge to begin the panel. So what I'll do is just
press shift D and Enter. And then I'm going to
scale in just a bit, hit the S key and hold the Shift key down and scale
in just a tiny bit. And then I'm going
to extrude in, I'm going to hit E, S and extrude and scale
in a bit like this. I want all of these pieces
to be of similar size. So I may need to drag up a bit in the y and
then scale in the Y, S Y, and bring that down so they're all evenly spaced
all the way around. And then at this point, let's split this out so
it's its own object. I'm going to hover over
this and press the L key. So we just select that
new geometry there, hit the P key, choose to separate by selection. Then we tapped into object mode, select that piece, and now we've got a new piece of geometry. Alright, so let's alt click
this edge right here. And to continue, I'm going to
extrude in, in the z-axis. So easy in the local z-axis
and pull that in a bit. And then just to get
this panel right here, we can just hit the F key. Hit F and that'll fill
that as a face there. Alright, so now I
feel like I want to finish this off on
the backside as well. So I guess to do that, let's just isolate this. I'm going to twirl this up. Let's see what we have here. I'm going to bring this out of the truck collection and bring it out into the
scene collection. I'm just going to press M to
move to scene collection. And here it is. Here. I'll just call this
front shield for now. And I can take all
of the headlights, drag them into the
truck container. So now I can hide all of this to just have these
shields visible for now. Now for this it looks
like there's a rim. So let's select this
edge all the way around. And then let's extrude easy
and pulled out just a bit. And then it looks like we need to extrude and scale in ES. And I'll bring this in some. And it looks like these
edges are causing a problem. It looks like because
of this edge, this is kind of bent. Let's see if we can
get rid of that. Yeah, you see how that's
kind of bent there. Let's just take these
edges, alt, click this, and delete and choose
dissolve edges. We don't need that There. We don't need this here. Dissolve edges and we
don't need this over here. Alt, click, Delete,
dissolve edges. So we would just be kind of fighting those and we
don't wanna do that. Alright, so Alt click
this edge again It looks like I could
scale in the y s, why we're still in local
transformation mode here. Alright, so we've
got that maybe a little bit in the x. We go. And then let's extrude now to
get this piece right here. Easy, pull that down a bit. And then let's just close
this off with the F key. There we go. Alright,
so we've got that. Now let's work on these
pieces on the top. Once again, we can't really
see them anywhere else except in this scale
model and of course, on the reference images here. But we can start working
on this if we want. And it looks like we've got some detail on the
inside here as well. So it looks like on
the inside here of these squares or cubes
here are kind of hinges. I'm not really seeing them here. Maybe we can see them
in another view, but maybe we'll
work on those two. First of all though, let's
just work on the front parts. I will tab into edit mode. I'm going to select this
face here and press Shift S f2 to bring
the cursor to there. And then in object mode, I'll press Shift a mesh cube. Let's take this down to
say 0.1 here in the size. And let's just get it about
the right size that we think. Maybe I'll press Sx
and bring it out a bit and maybe we can
scale it in the y s. Why bring it in a bit like that. There we go. Then let's put it in place. I'm going to come back to the side view and just hit
the R key and kinda get it. So it's in line here. And now I can just take this green square here and drag it up to where we
think it needs to be in. It still feels a
little bit bigger. There we go. There we go. I think that's pretty good. And for this little
part right here, I don't know if that's
goes all the way through. We could do it. We could go ahead and have it go all the way through
if we wanted. I will tab into edit
mode and select this face and this face here. And then let's press Shift
Z to see through it. Let's hit the I key and
inset these like this. Maybe it goes about like that. Will scale in the z. And we go, and then
we'll move in the z and bring that up a little bit
above center like that. And then now that we have this, we can bridge these
two together. So it's kind of an opening or a tunnel between the
two. Let's do that. Let's press Control E
and bridge edge loop. And there we go. So now we've got a whole
going through that. If we go back to Solid
View though with Shift Z, if you can see that
this is blocking it, we could make a hole through that as well if we
need to. Let's see. We won't do that immediately. And then let's give it a bevel or two here it looks like those corners
are kind of curved. So once again, let's
apply our scale here. Control a, apply the scale. We'll tab into edit
mode and in edge mode. First of all, let's select
these corners here. And then let's get
these corners as well. Are these edges all
the way around. And then if we press
Control B and bevel this, we can get kind of a curve on those edges as well like that. And then I'll smooth this. No, Let's try auto smooth. Yeah, that's a
little bit better. And then it almost
appears that well, they don't have them
here, but it appears these slots have kind
of a rounded side. So maybe let's take
these edges in here, and let's give these
a bevel as well. Let's do that right in here. Control be pullout and we'll make those kind of rounded like that.
Let's try that. Yeah, that's pretty good. Now we have these
little artifacts here. We could try shade smooth, that doesn't really work. We could try and drag
this up and auto smooth. That doesn't really help. Sometimes what you can do
if you have these kind of artifacts is you can actually inset and sometimes that
helps. So let's try it. Let's just say take
these faces around here, and let's just inset this, hit the I key and inset. And then yeah, that
cleans it up pretty well. Alright, so we've got that. And then let's take a look
at this panel right here. So once again, we
want this panel to be in line with this object. So we could just
take this face here, duplicate it, hit Enter, and then scale in the x. Scale on the y. Maybe I'll bring it out
just a hair so we can see it in the z and the local z. There we go. Now we can
slide it around and it'll be in the same
angle as our object here. Now we're getting it over
here on the other side. We do not have it
on the other side, but what we can do is we can split this off as
its own object. And I'll do that here
in just a minute. But first of all,
I'm going to take it and bring it out just a bit. And maybe I want it to
be a little bit taller. Sy something like this. Let's say. Then let's get that
little rim there. Let's hit the I key
and set in that. And then let's hit Easy
and pull in just a bit like this, like that. Alright, so now what we can do is we can take this whole thing, hit the L key, press P,
separate by selection. Go back to object
mode, select this. And now we have our own
object that we can come over here and remove the
mirror from that. I'll just hit the
X and now we have that just on one side. So I'll Alt click this edge, it easy and pull in some, so we intersect with that. And now we've got the
beginnings of this panel here. Alright, so in the next video, let's work on creating
these hinges on the front. And also we'll see if
we can figure out more about the insides of
these panels as well.
23. Finishing the Front Shields: Well, since we've already put
some hinges on elsewhere, let's just grab that off of the, say off of the side here. Let's just do this again. I'm going to press shift D
y and move it over here are the 900 and hit the negative
key and flip it around. There we go. And then also Turn it
in the x, don't we? So RX 90. There we go. And then let's just set
it up at an angle here like we have done before,
where we want it. And let's see. Well, it's a little
big, isn't it? So let's scale this down. And I think I'd like to put it. So the hinge is just
intersecting or just about to intersect
with this edge right here. So I'll just get it
right about here. Let's say, let's
see how that looks. Now that's not too bad. And it looks like the bolts
are in a pretty good place, but it looks a little
bit longer here. Let's just maybe take
this face right here. And once again, we're still
in local transformation, so I'll just take that
and drag it down a bit. Then maybe we could just, with the L key, hover over each one of these
with the L key and kinda bring these down
a bit like that. Let's try that. Yeah, that's not bad. And then Shift D z
over here like that. Now, I'm going to take this and let's just duplicate it and move it over to the other side. Shift dx. And I'll just bring
this over here like that, something like that. And then we should maybe combine these pieces here and
then turn it up a bit, rotate it up at that edge. What I'm gonna do is
apply this mirror. I'm gonna come down
here, click Apply here. And then I'm going to
separate these two out. I want to hover over this
one in edit mode and hit the P key and choose to
separate by selection. So we have these two
that are separated. I just want to work on
one at a time here. I'm going to grab all of
this now and combine it. Control J. There we go. And maybe I'll move the origin to the center
of this just for now. It looks like we could shade smooth here,
shade auto smooth. I think that helps there. Now let us do is
just take this one and I want to find an
edge back here and let me see if I can press Alt a and find an edge. Where would that? There we go, I see
it right there. So let's grab this edge
right here for that panel. And let's make that kind of
the hinge with this selected. I'm going to press Shift S to, to move the cursor
to that point. And then I can move the
origin to this right here. So right-click set
origin to 3D cursor. Now, if I go back to global, I can press RX and this
will rotate up like that. So that's what I want. So ultimately it will
probably be like this, like, like we see it here. But for now and
move it up sum so I can see it on the
inside like this. And from here, let's
see if we can find a better image of what's
going on on the inside there, I'm going to go image open. And let's take a look in here. Let's see what this is. Yeah, So it looks like There's some sort of something here. If we look at it from
the front view here, Shift Z, we can see
that right there. So it looks like these have been broken off and
they're hanging down. But we could maybe get something in there
that looks like that. I don't think it needs
to be a whole lot. But maybe if we come in here, I'm just going to create a
cube at this point here, shift a mesh cube. Let's do that and
I'll bring it over. And maybe scale on the Z, scale in the x,
something like this. And then maybe I
will turn it a bit. So in here I'm just
going to press R and turn it so it's kind
of at that angle there. I'll change from global to
local transformation so we can kind of move it in line with
the angle of the object. And then I feel like
in this there's, it's kind of well, it looks like there's maybe
some cylinders there. It's very hard to tell. Maybe I'll move that
down into here. And then let's just take this
press Shift a mesh cylinder Maybe I'll take the
sides down to 16. I'll take the radius and
depth down to 0.1 and 0.2. So it's a little bit smaller. Let's turn it in the y ry90. And I'm going to scale
this down quite a bit. And I think I'm
just going to place it right in here, right? So let me scale
it down some s z. And I feel like I just want
to get it right in here. So there's just something that kind of looks like
there's a hinge in here. And I will select it and
smooth it like this. And then maybe just
take this shift DZ. So because I can't
really see what it is, I'm not going to spend a
whole lot of time on it. But to have something
in there might be, might be kinda nice. It very well could be
that this should be a cylinder instead
of a square, right? So we could just take one of these shift DX and
let's test this. I'll scale it down a bit. And then Sx scale
that out a bit. See what we think of that. Yeah, I think that's
a little bit better. So I will tab into edit mode, take this and let me
just scale it back, and then I'll select
this and remove it. And sometimes I do that. I just tried different shapes
and primitives and tell I kinda get the right look of whatever it is
I'm trying to make, but I think for this That's
probably a better way to go. Let me see. Yeah, I kinda like that. It's similar to this. Not the same. And it looks like it's got a little thing
that sticks out in the middle there or this way. So we could take this and just hit the I key
and inset this. Oh, look at what's happening. It isn't in setting
in a uniform way, which tells me that we do not have uniform
scale over here. So I'll press Control
a and apply the scale. And then with this selected, now we get a more uniform inset. So I'll just bring this out a bit and let's see
what we have here. Yeah, we've got something that just looks like
there's a hinge there. It may be too big. We could scale it down a bit
and bring it back up some. Sometimes with these
older photographs, you just really don't
know what it is and you just kinda have to put something in there so
there's a connection. One thing I do
like to do is have some sort of a connection
between pieces. So there isn't anything floating even though the
connection piece and may not be exactly correct. At least it's there. So the piece isn't just floating off of the
rest of the object. Alright, so I will press RX
and bring this down a bit. Alright, so we have that there. We can of course take this and let's maybe do
the same thing here. Tab into edit mode, shift z. Let's find that edge, a similar edge that we had, yeah, and press Shift S2 to
take the cursor to that. And then for this, Let's move the origin, set origin to 3D cursor. Now if we take this and combine
it with this control J, that will be our pivot point. And we can press
RX and bring this up and put it like
that. There we go. Shift us one to take
that back to the center. And there we go. I think that's pretty good. That's gonna give us some
geometry there for that piece. And we can also take
this and once again, we can duplicate
and mirror over. So I will change
to the 3D cursor, also changed to global
transformation. And then let's
press Shift, Enter, Control M, the X key,
and enter again. And there we go. Now that hinge is over on the other side. So we have our front
window shields. I think that's going to be good. In the next video,
Let's start working on one of these
here. On the side
24. Adding the Small Window Shields: Now let's see if we can create this little window right here. And the first thing I wanna do is just make the hole in there. And I don t think I can
just take this face and inset it for this because you
can see it's at an angle, whereas the only thing that's matching the angle
here is the bottom of the hole and the
other parts are kind of a little bit off
from the other side. So I don t think
this would work. I'm going to press
Control Z here. So I think what I wanna
do is use a Boolean, just create a cube
and cut a hole into this with a
Boolean modifier. So let's give that a try. I'm going to tab back into edit mode here and press Shift S to with this face selected so that I moved
the cursor to that point. And then I'm going to
press Shift a mesh cube. And it's a little big. Let's take this
down to maybe 0.1. There we go. And I think first of all, let's try and get
it aligned to this. And what I'm gonna do is changed
to local transformation. And with the z-axis, I'm just going to press
RZ and turn this a bit. And I'm going to try
and get it lined up with this edge that
looks pretty good there. And let me zoom in
here and see if I can just get it lined up. Press RZ and just want to get it lined up
with this edge right there. Yeah, something like that. And then I also want to angle it so it's in line
with this edge right here. So I'm just going to hit the
R key and turn it like that. Alright, so now I'm
going to press S, scale it up a bit here. Move it up. And it looks like I need to
maybe scale in the y r y. Just align this up
on the bottom here. So you can see what
I mean by if we line this up on the bottom
with this angle, everything else is just a
little off from the side. So that's why I felt like I couldn't really just inset that. Alright, so maybe
not quite that big. Let's bring it down
some, move it here. And maybe I'll move it
over just a bit like that. Alright, so, yeah, let's just
say it's about that big. I'm going to maybe
move it up a bit too. Alright, so what we
can do now is use the Boolean modifier on this vehicle object right
here, this main part. So now I'll twirl this up and I'll add a Boolean
modifier here. And with the eyedropper, I will take this and click on this cube object that
we just created. Now, you can't really see if
anything's happened here. So one of the things
I like to do is change this to a wireframe. You can do that by
coming over here to the object properties. If we scroll down under
view-port display, you've got display as and
we can change this to wire. Now you can see the
effect it's having. And the question I have here, do we want it to go in like this at this angle
or do we want it to go at an angle here like we
did for the front windows. I mean, I can turn this, I can press RX and
turn this a bit. So it goes more like that. Is that better? I mean, it really just depends on what we
want to do, of course. So maybe if I take it like this, let's just take a look at that. I can also hide this over
here just for the time being. And of course I'm going to
delete that face out of there. But now what we
need to do is just select this and we can apply it. Now, you can also test
this out with the union. So that's the joining
of the two objects. And if we choose Intersect, That's just the object of the intersection
between the two. So I don't think we want that. I'm going to go
back to difference. And I'll go ahead
and apply this. I'll pull this down. Click Apply, and there we go. Now. It's over here now too, which is good, right? I'm just going to
tab into edit mode. And let's just select
these faces here. And we'll delete these, just hit the X key
and delete bases. And then what we can do
is use this object here. Oh, I've disabled the
selection on that. Let me turn that on
again. There we go. What we can do is
take this and now we can turn it and have
this be the frame. Let's give that a try. I'm going to go over here. So we're kind of
on the side here. And then I'll turn it
in the x-axis, RX. And I'm going to Tilt it like this, bring it down RX and I just want it to
be about like this. Sy. Bring this up. There we go. Then let's go back to a textured view
here so we can see it. There we go. And I'll press S to get it
about the right size here. And maybe just scale
it out like this. Just a little bit. So what I'm trying to do is just have this be the
frame right there. So maybe I'll take this
face here and insert it. Oh, I should apply the scale
if I'm going to do an inset, right, let's apply the scale. But let's also inset
the other side as well. Why don't we do that? I will select this one as well. And then what we can do is press Shift Z so we can
see them both in there. And I'm going to change
to individual origins. And now let's just press I
and inset these n like this. Then what we can do is just
bridge these edge loops. So these are two
faces that we can now just press Control E
and bridge edge loops. And they will connect
together and give us a frame. There we go. Now we've got our frame here. We could, if we wanted to give a little bit more interests to the inside to that maybe
get a ridge in there. We can press I and
inset that in a bit. And then we could extrude
and scale these n, but we don't want to
scale them in the, Why do we, we don't want it to become flatter as
we pull it out. So what I'm gonna do is turn off the y-axis as we
extrude and scale in. So I'm going to press E
for Extrude, S for scale. And then I'm going to press Shift Y to turn off the y-axis. So we're only extruding
and scaling in the z and the x and bring
that in a bit like that. Maybe Sx and bring it
in and sit like that. There we go. So now we've
got the hole and, you know, what we could do is just take this and bring it
over and put it there. I mean, we already have
this panel and hinges. Why don't we just reuse this and then we can adjust the size. So let's just take this
tab into edit mode. And with the L key, I'll just hover over
all these pieces here. And l just hover
over each piece. Pressing the L key to select linked components and
then press Shift dx, drag this over P key and
separate this by selection. Now that we've got this, It's tab back into object mode and then select this object. Now, I want to move the
origin of this object into the center of these
hinges here. Let's see. We don't have any modifiers
on here, so that's good. Let's tab into edit mode
and press this and this. And then I'm going to move the
3D cursor to that shift us to now back in object mode. I will move the cursor
or the origins, excuse me, to the 3D
cursor. There we go. Now, let's see if we
can get this in place. I'm going to turn
it into Z or Z. So it's kinda like this. Move this up here. Looks like it's a
little bit off in the y here you can
see how it's tilted. So I'm going to press RY kinda get that straightened
up just a bit. And then let's try and
rotate it down in the x. So RX bring it down like that
and get it in place here. Okay, So now that we've
got it generally in place, we can scale this and
see how it works. I think I'm going to
move it up a bit. And then maybe in a bit. And now let's just select
this panel right here. And let's just scale this so, well, it looks like I
need to move it a bit. Okay, so now that that's here, let's press the L key and
just select that panel. And then what I'm gonna do is maybe scale out a bit in the x. And then in wireframe, Let's just select these here. And let's pull these
down like this. See how that works. Our Z. I'm going to select
that whole thing again, move it up a bit,
scale it in the y. So the good thing is it doesn't have to be
exactly perfect because I'm just going to
rotate this up anyway. So I'm going to press S and X and bring that out
a bit like that. Then I'm just going to select it and press R x and bring it up. There we go. That's really all I wanted out of that. Yeah. I think that'll
work pretty well. We could also, if we wanted to take these faces here
and maybe I will, maybe I'll take these and
bring them down some. And then I want to select these and select these kinda bring
these down here like that. Just so they're a little bit
different than the others. That's all. Alright, now
that I have those in place, let's put it over
on the other side. I'm going to take this and this, go back to global here. Change my pivot point
to the 3D cursor. Ensure that it's in the center
of the grid with shift S1. And then let's give this a try duplicating and mirroring
these over to the other side. So I'm going to
press Shift Enter, Control M, the X
key, and then Enter. And that should duplicate and mirror those over to the
other side. There we go. Oh, and you know what? I think I am just going to take these here and delete these. Let's just do that. There we go.
25. Fixes, Clean up, and Organization: Well, we've been plowing
ahead for some time now. I think maybe it's time for a little cleanup
and a few fixes. One thing I wanna do is I noticed that this particular
thing has no back, so we need to add
it back to that. I also noticed that if
we tumble around here, look at the inside of
this, that looks terrible. So we need to work on that, kind of fix that. Also, maybe up
here in the front. I feel like this right
here isn't quite straight. We may need to deal with this. So let's work on these few things to kinda
do a little clean up here. And in addition, we could also take a look at the
outliner here. And there are some objects that we've created here
that we could just take and move into the truck collection just
to clean that up a bit. And then so any new objects
come into this area. I'll choose the scene
collection at the top. Alright, so for this, I think all I really wanna do is just maybe select
this edge right here and just extrude in
for the back of the panel. Now, actually, maybe I should
take these pieces here. Let's do that. Let's take these. Yeah, and I'm going
to move these up. Now let me go back to
local transformation. To do that, I'm just
going to move these up a bit into here. Right? There we go. And then let's take
these edges right here. Alt, click that edge and then
press S, scale in a bit. And maybe scale on the x. And then let's just press
easy and push up a bit. And then let's just
hit the F key. Hit F and close that off. Maybe bring that down a bit. So we just have that closed off so we don't see the
back of it like that. And speaking of the
back of things, this thing is awful. So let's try and figure out what the problem is with this. I think maybe it's because
of this solidify modifier. I don't think we
need that on here. We can just do what we just did for this piece
without a solidify. I think what I did is
I added the solidified before I begin
extruding in here. And it got pretty confused. So let's just hit the X
here and get rid of that. And then, yeah,
let's just tab into edit mode and alt click this
edge all the way around. And then let's just go
back to global here. Let's hit E and X and
pull this in like this. And then we can just
hit extrude in a bit. Maybe I'll scale and the z as z. Then once again,
let's just hit EX, push in just a bit. And then for now we can just hit the F key and fill that face. There we go. Alright,
so that clean that up. Another little bit of clean up, I think could happen
right up here. I think if we look at
the drawings here, that line is pretty straight. And I think we could
select this edge, maybe this point as well. And let's just press the S
key and x and then zero, and that should flatten
those up pretty well. And then I'm just going to bring this out to match
this one because if we tried to do that
with this Sx zero, yes, See, that would kind
of bring this in too much. So what I wanna do is take these and bring them out
to match this right here. Let's try that. I'm bringing them
out, maybe like this. Let's try that. Getting there. Let me do it a little bit more. Yeah. Yeah. I like that kind of
crisp edge there. And it doesn't look like it's messed with the flatness of
this quite yet, That's good. Now, in addition, we
could take these guys and we could give them
a solidify modifier. Let's try that. Add
modifier solidify. We should probably
apply our scale. Let's do that. Control a apply the scale. Turn on even thickness
and see what we think. Yeah, that's not bad. We could probably do something
with this up in here. But until then let me add
a solidified to here. There we go. Even thickness. And then we could even maybe add a bevel to this whole object because these look
like they're fairly, they've got a bit of
a curve on the edges. Let's try it. Let's just select this. And once again, our
scale has been applied. So I'm just gonna go to
Add Modifier and Bevel. And then let's increase the
number of segments here. Maybe I'll add two segments, and then let's try
and smooth it. I'll use shade auto
smooth for that. And that's kinda nice. Let's do that back here too. I will add a bevel. And let's increase. Oh, I need to apply the scale
so we can see that a little bit better control a apply
the scale. There we go. Now we can see that
a little bit better. Let's add two more segments to it, and then let's smooth it. Yeah, there we go, that's, that's kinda nice. And lastly, now that
we've cleaned this up, let's mirror this whole door, all those pieces over to the other side to
see how it looks. So let's just select
this and this, all of these pieces and the
bolts and the handle here. And then once again, let's ensure that
we're in global. Let's change to our 3D
cursor for our pivot point. Let's ensure it's in the center of the grid with shift S1. And then let's press Shift and Enter Control M for mirror and then the
x key, and then Enter. There we go. Now we have that on the other side too. Alright. Well there we've
done a little bit of cleanup, That's good. In addition, I guess
we can take a look at this top piece here.
Let's do that. Let me press Shift Z
and it kind of looks like we could maybe
bring some of this down. Let's take all of this. I'll change back to median point and let's just
bring this down just a bit. Maybe bring that forward. So I'm just trying to get
this down a little bit closer to where the reference image is. Take this and bring it
down a little more. Maybe take this
and bring it down some and maybe take
these back here. Bring those down just a bit. And then why don't we also take a look at
this thing right here. So let's press
Shift a mesh cube. It's pretty small because we'd change the size to 0.1 earlier. So let's just take that
and drag that up here. Hit the period key to
zoom in on the numpad. And let's just bring
this. Like this. I'll just hit the S
key and then Shift Z. And now we're going to
scale out in the x and the y and bring
that out like this. We go. And then also I
think I see Let me see. I thought I saw a
little other piece. Yeah. It looks like there's just a
little other piece in there. Come over here. And I think
I'm going to press Shift, Enter and then just scale in just a bit and bring
it down like that. Let's try that. See what we
think of that. Yeah, Okay. And then maybe we add a bit of a bevel to
these edges as well. So control a, apply
the scale and then I'll just select
these edges around here. And these as well. Control B, bring those out, scroll the mouse wheel, and now let's smooth
it. There we go. Maybe drag it up just a bit. There we go. Something like that. Alright, so now we've got
that top piece as well.
26. Beginning the Tires and Wheels: Well, we are moving right along, but I think it's time to work
on the wheels and tires. And to do that,
I'm going to take this particular tire and I'm going to move it out of the
collection here that it's n. I'm going to press the M key and move it to the scene
collection here, so it's outside these
other collections. I'm going to call it Tire. Let's just do that. And I will hide these
collections here. Oh, we've still got this hanging out in the reference
collection, it looks like. So let me just grab
these and I'll press the M key and let's move these into the truck
collection here. Anything else? No, I think that's
it. Okay. So what I wanna do is first create the basic tire and then create the treads
around that tire. And of course, I
also wanted to do the wheel and all the
bolts inside here. So let's see where we get. I think maybe I'll
create the tire. And then while we're doing that, we'll go ahead and do the wheel and then come back
and do the tire treads. Let's give that a try. First of all, what
I'd like to do is just take this and
shrink it down a bit because I feel like those
tire treads are going to be sticking out just a
bit from the main tire. Right. So I'm just going to try and maybe bring this
in just a little bit, maybe Sx and bring
this in just a smudge. And this is in just a
little bit here too, just to give it some room
for those tire treads, we can always then scale
it back up if we need to. And I think what I'll do as well is split this
down the center. As I work on one side, I want the other
side to do the same. So to do that, let's go to the front view. And here I'll just press
Control R and then hit Enter two times to ensure that that edge is exactly
in the center. I didn't want to accidentally move the mouse when clicking. So I want that to be exactly
in the center there. So I'll hit the
three key Shift Z. And now just drag select this side and we
will delete faces. And now we can add a mirror
modifier to this here. And it didn't seem
to work, did it? And the problem is, is we've got a 90 degree
turn in the y-axis here. When I created it, I then turned it in that axis. Let's apply both the
scale and the rotation, and I think that'll
take care of that. So control a rotation and scale. And there we go. I will also turn on the
cage because if I tab into edit mode here you
can see I don't see the edges or the points here. If I hit the one key,
you can see that. So I'm going to click this
little guy right here to turn on the cage for the
other side as well. And in addition, I want to
turn on clipping so that these particular points down the center cannot
split apart like this. So if I turn on clipping now, I take this and I drag
it back into the center. Now I can't pull it apart. So that's good. We want those clipped. So I'll go ahead and
select this edge here. And let's just press Control
B and Bevel an edge here. Maybe scroll the
mouse wheel a bit. And I'm just trying to
get a general tire shape. Maybe something like this. Let's see. Yeah, something like that. And then here we can
take this face here and hit the I key and in
set this in just a bit. And then let's do that again. In fact, what I'm
gonna do is hit the three key and
press Shift Z so I can see where the inside of the tire is and it goes
to right about there. So let's just hit
the I key and inset again into that
point right there. In addition, I'll probably
want to push in just a bit here like that and maybe take this edge
and bring it back. Let me select this and I'm
going to hit G two times and then pull it back just
a little bit like that. We could even pull
that out as smudge just so it bulges out
in the center there. Maybe take this one
and pull it out, hold the Shift key, something like
that just so we're getting that general shape. And maybe I could take one
and insert an edge loop here and pull this out a bit just so we're getting
more of that curve there. And then let's go
ahead and smooth it. Oh, I need to select it. And then we'll smooth it. Yeah, I think
that's what I want. I might want to add an
extra edge right in here. Like this. Pull this out, just a smudge. Let's try that. Yeah, we're getting a
nice smooth curve there. Okay, so now if we
tab into edit mode, I'm going to select this face here and let's
go ahead and delete it. Delete faces. And then what I wanna do
is begin while I'm here, and we've got this edge. Let's go ahead and begin
creating the wheels here. Let me see if I can
find a better image. Or this. Let me go into the Photos and maybe this one
here, Let's try this. Yeah, I think that's
helpful there. So we've just got
a couple of images here that we can use. So with this selected here, this edge right here, what I'm gonna do
is I'm going to duplicate it, shift D Enter, and then I'm going to push
it back just a bit into the tire and then
I'm going to press the S key and scale
it out just a bit. Now, I'm going to extrude
it out in the x-axis. I'll press EX and pull it out so it comes
out through there. Just a smudge. That's all I wanted there. And then so we're looking
at this edge right there. I'll press S and scale in a bit. And then it looks like
it goes in some TSO E and X push in just
a bit like this. Now we're looking at this
little line right there. So ES and pull in and then it looks like it kind of
angles in just a bit, I think. And then we've got
another one here. So e s pull out like that. Then let's go in, in fact, let's go take a look
and see where we are here. Yeah, we're pretty good. So that's about
where we want to be. Right about here, I think, before we go in right here. So let's do that. And you can see how
deep that is here. So let's press EX and push in. Pretty far like that I think. And now let's go to this point. So let's go over to
the side view again. And then if we hit E, S and scale in, we can go to this circle
right there, okay? And it looks like
we want to push in a little bit there as well. So EX, push you in a bit. And then this little thing, let's see what we can do here. So it looks like
it comes in a bit. Let's do that. Es, pull in some and
then it looks like it. Let's take a look at it here. Yes, So if we first extrude and scale into this
inner circle here, Let's do that ES, into there. That's where that
curved bit begins, but we need to pull
up right, like that. Okay? And then with
this selected, let's go ahead and extrude
out again, EX pull out. And now what I'll do is
I'm just going to hit E S and pull in and then merge these points together by pressing the M
key and merge at the center. Alright, so now we've got that. Well we can do now is
take this edge and let's use the Bevel tool again to
get that curved feel to it. So Control B, pull
out like this. And maybe something. Yeah, I think
that's pretty good. Maybe something like that. There we go. Okay, So I will go ahead
and smooth this now. Here. And let's see what
we need to do. Now, one thing I do need to do, I've feel is that I
need to split this out as its own object.
Let's go ahead and do that. If I hit the L key, it'll just select that one
piece ON keep in mind, we are doing this
on the other side, but we do want to do that. We'll remove that center part for the inside of the wheel, but It's good that it's being created
while we're doing this. But let's go ahead
and split this out. I'll press the P key and
separate by selection. And now we've got
this right here. So now we can come
in and add some of these bevels to this
that we're seeing in here. So maybe we select
this control B and let's pull
that in some that. Yeah, How about in here? Let's do this. This we're probably
going to want, well, this is pretty sharp
right in here, but this seems to curve. I'll press Control B and
bring that in like that. Yeah, okay. And then we might be able to give these a couple
of bevels here. Let's do that. I better go to the
Edge tool or edge select Alt, click those. There we go. And let's bevel these. We don't need quite so many. Yeah, something like that. We go and this little
guy right here is kind of just kind of blending in
with our smoothed part here. So, well, you know, I think what I wanna do
is maybe add an edge here and then pull this
out just a bit like this. There we go. That gives us a
bit of that edge. And then we could bevel that
just a little bit like this. See how that works. Yeah, that's kinda
what I wanted. So we kinda have that
little indentation there. Alright, so I think we've got the beginnings
of our wheel here. In the next video, let's
work on applying some of the bolts and work on finishing off the back
of the wheel as well.
27. Adding the Bolts to the Wheel: Alright, now that
we've got the wheel pretty much in shape, Let's go ahead and apply the mirror modifier and then we'll deal with this
on the back real quick. So I'll go ahead
and come over here. I'll select this, pull
this down, click Apply. Now that's all one object. And then I'm gonna take
this side and press the L key and just split
this out as its own object. So I'll press the P key
and separate by selection. Now that we have this
as its own thing, Let's go in and I want to take away this center
piece right here. So I'm going to select
this edge right here, and I'm going to
rip the vertices. You can find that
tool over here, under vertex, repeat vertices. But here I'm just going
to press the V key, which is the shortcut. So I'll press V and
then I'll hit Enter. And now if I de-select everything and press
the L key over this, you can see that
it's its own thing. It's just been separated
out as another piece. So now we'll just hit
delete and delete faces. And then we can take
this piece right here. Just merge these together. So I'll press the MK and
merge at the center. There we go. So now we've
got our wheel on the back. And that'll be just fine. There'll be other things
kind of covering that up. I think that'll work. Okay.
But for this part over here, Let's start adding
these bolts onto here. And it kind of looks to me like the red ones are these kind of lug nuts that are
curved on the top and then the silver ones
are flat bolts. And I don't know if I
want completely flat. Actually, I may want something that has a little
bit more interest to it. In fact, let me bring back
the truck real quick here. I think I'm just going
to grab one of these and use this for the
silver ones there. So I'm going to press Shift D. Why? Bring this down? And let's just put it
down here for now. And I want to bring it out
of the truck collection, so I'll press M and move to
the main scene collection. So we have that here now. I'll go ahead and
hide the truck again. There we go. And now let's see if we
can put this in place. So I'm gonna hit the
three key Shift Z, and I want to put it right here. Let's say maybe
scale it up a bit. This is the silver
ones on the inside. So I want that kinda like this. I think. There we go. And then let's take it back and put it
in place back here. So it's just sitting on
that geometry there. Okay, now let's see. How many do we have here? 368. Okay. So 360/8, is that 45
degrees? I think so. So let's go to the
side view again. And what I wanna do is just take this object and select
this point right here, and then press Shift S2
to move the cursor to it. Now we can go back
to the bolt and I'll change to my 3D cursor
pivot point here. So we're going to rotate
around that pivot point. And then I want to duplicate
and rotate 45 degrees. So Shift D R4, R5 and hit enter. Now we should be able to press Shift R and rotate
this on around, continue it by repeating the process with Shift R. So
let's see how we did here. Yeah, that looks pretty
good. There we go. So now let's work
on the next one. I will take one of these again. Let's go back to
the median point. And I'll duplicate and move this out in the x-axis
just so we can see it. And now I want to take this. I want to remove the cylinder, delete faces, and then
I want to add a sphere. So maybe I will select
this face here, press Shift S to, to move the cursor there. Shift a mesh UV sphere. Now it's huge of course. So we could probably take it
down to like, I don't know, 18.12 sides and maybe
bring it down to 0.01. Yeah, there we go.
Let me smooth it. And then let's just scale this up until we think it's about where
we want it to be. So I think I want it
to be kinda like that, kind of a lug nut there, right? And then I think we
can combine these, then I'll hit the one
key here we go to go to the side view and Shift
Z tab into edit mode. And in face mode,
I'll just drag, select this back part here
and delete these faces. And then I'll just
maybe scale in the x Sx just to pull
it out just a bit. Move it in some
something like that. Let's see. Yeah, that's about
what I wanted, I think so now just
combine these two. Control J And then I will move the cursor
back to this point here. Let's just select this
face here, Shift S to. I could go ahead and
delete that face as well, and then set origin
to 3D cursor. So we have the origin
on the back there. That just sometimes
helps in placing things. Alright, so now
let's go ahead and, well, I'll move this up
and let's take it back. And then we'll try and
put it in place here. So I'll move it in like this. So it's just sitting
on the top of that. Let's go to the side view. Feel like it needs to
be a little bit bigger. I'm going to scale it up a bit. Maybe turn it some. Maybe it's something like that. And then let's do the
same thing again. I'm going to clear
the rotation here. I'll press Control a and
apply the rotation and scale. And then let's take this object, select this point shift S2
to move the cursor to it, changed to 3D cursor. So we rotate around that
point and then Shift D R4, R5, Enter, and then Shift
R to repeat the tool here. There we go. Then
let's see how we did. Yeah, okay. I think that works pretty well. Now. Lastly, I feel like
there's this thing right here. It almost seems like
there's kind of a kind of a cut in this, like three of them here. I'm wondering if we can
do something about that. I'm thinking maybe
it's a cylinder. Let me bring the cursor
to this point again, and I'm going to press Shift a mesh cylinder, keep it at 32. I'll take it down
to 0.1 and 0.2. So it's a little bit smaller. And then let's turn it. Oh, let me change back
to median point here. Let's turn it in the
y-axis, RY non-zero. And I think what I wanna do is kind of spread
it out a bit. So I'm going to go to
the side view and let me just move it over so I can
see it a little bit better. And in wireframe, I
think what I wanna do is basically take half of this
like this and bring it up. Then I want to take this and
bring this up like that. And then maybe just
remove these edges, delete and dissolve edges. And now we've got a shape that
I think can fit in there. I'm going to scale
it down quite a bit and then let's go see
if we can put it in place. I'm going to go back to
the side view at the G key and think I want to take this and make it
a little bit longer, and then make it a
little bit smaller also, I'm going to
right-click on it and move the origin to the geometry now so it's in the center there. And then what if we did
something like this? This, and this would be our
Boolean cutting object. Let's move that in there
and see what we think. So I'm just trying to
find a way to make a cut in there,
something like that, that we can then move spin around the way we did the
bolts and make a cut in there. Maybe I'll smooth it as well. I'll use auto smooth. There we go, that's better. So yeah, I'm thinking we can maybe use something
like this to make these cuts and then place a small bolt in there
and see how that works. So why don't we work on
that in the next video, and we'll see if we can
finish off the wheel
28. Finishing the Wheels: Alright, let's do
our trick here with rotating it around
the 3D cursor again. I'll come back over here and we'll change to 3D cursor here. So now we're going to
rotate around here and maybe I could just rotate
it here like this. And we begin there. We could give that
a try and then let's press well, 360/3. What one-twenty. Okay. So Shift D are one-twenty. Enter and then shift our, there we go. And then Enter. So we've got these now kind
of cutting into that piece. I think that's
about what we want. So I'm gonna take these
and join them together. So they're all one
object Control J. And now we want to take this piece right here,
the actual wheel, and we want to add
a Boolean modifier to this and we're going to
choose difference here. But one problem I see, let me take these here and let's hide these.
Where are these? Here and here let's hide these. One problem I see is that
this is an open object. And when we use a boolean on
an open object like this, sometimes you can get a hole straight
through without having kind of an inside piece like we did on those windows
that were angled, those smaller windows here. We had to delete the
interior of that. But sometimes when you
have a piece like this, you don't get those. Sometimes it's just a whole. So we're going to
need to see how this works and if we
need to adjust anything. So what I'm gonna do
is first click on the eyedropper and then click on the object that
we want to do, the cutting right here. Now we can see
something happened, but let's change
this to wireframe. Let's come down here, go to our object properties and scroll down to Viewport Display. And here we want to
change it to wire. Now, you can see that there's a hole right
through there, right? We can change this to median
point and pull these out. And you can see as
we cut into it, we just get a hole
straight through it. So I'd like geometry in there so we don't have just a whole going straight through. But to do that, this needs to be a solid piece. So let's go back to
our Boolean modifier. If I select the wheel, I'm just going to remove
this for now temporarily. And what I'm gonna
do is once again, use that rib tool. I'm just going to select
this edge right here. I'm just going to
Alt click this, so we only have that selected. And then I'm going
to press the V key. And now this is its own object. So if I press L here, you can see it's
just it's own thing. So now what I'm gonna
do is I'm going to hit the P key and separate
by selection. Now it's its own object. Now I'll take this
and I'll hide this as well for the time being. There we go. So now this is its own object. And what we can do now with
its own object is we can take this edge and just hit
the F key and fill this. And now it's a solid object. Now let's try this Boolean
again and see what happens. Don't once again,
with that selected, I will add a Boolean modifier. Click on the eyedropper, click on the thing
that we want to be the cutter object
and look at that. Now, we've got geometry in
there when we do the cut. So let me change to median
point and then I'll select the cutting object here and we can
move it in and out. And you can see that we do not have a hole straight
through there. Now, we've got some issues here, some kind of artifacts. What we can do, one
of the problems sometimes happens if you do a Boolean through a
curve and flat polygons, you can sometimes get an issue. So what I'm gonna do is
just go to face mode, hit the C key for the
circle select tool, and I'll just select this area. And then I'm going hit
the I key and inset in beyond the cutter object
and let's see what happens. Yeah, that cleans
that up a little bit. That's good.
Alright. So now that we've got our cuts
pretty much the way we want Am I think
that's what I want. If I move these here,
move these in or out. I think I want it to be
about like this actually. So now that we have that, let's just select our
main object and apply this Boolean modifier
here, click Apply. And now we can take
these and delete them because we do not
need them anymore. Alright, now, we need to put all this back
together again. So let's come over here
and select this face here. We will delete that
face there and then Let's bring back our wheel here. Let's bring back
this, this, and this. There we go. Actually, I
don't want the tire yet. Let me bring that back. And actually I'll hide this too. Let me hide this one. There we go. So we can see here. And what I wanna do is take
this object and join it back together with the wheel object
with Control J, and we go. And now this is still two different objects are
two different pieces, I should say, of
the same object. So what I wanna do is just
merge these all back together. And what we can do is use
the cleanup function, hit the a key, and let's
select everything. Now with all of these selected, what we wanna do is merge
these points back together. Let's go up to the Mesh menu. Clean up, and we're going
to use merged by distance. So I'll click this. And did we have anything
removed 34 vertices? That actually may
have done the trick? Let's see. So if it didn't work, what you can do is come
through here and change the size of the merge distance. So what if I typed in like
0.01, what would happen? That? So points would just begin
collapsing together. So I'm going to press Control Z. And let's try that again. I'm gonna go up to mesh
cleanup, merge by distance. And I'm gonna change
this to 0.0 001 enter. And there we go. So now 34
vertices have been removed. I think that's pretty good. We didn't collapse these here. This is what I was
concerned about. Things like this would
collapse into each other. I think we're okay here. Yeah, so now if I de-select this and hover over this
part and press the L key. Now you can see
it's all one piece. And if we select just
this edge and press G, you can see they're
all joined together, right? That's what we want. Okay? So I will bring back the other part of
the wheel and tire. And now let's just take one of these bolts and drop it in here. I'll go to the
side view Shift Z. Let's press shift D. I'll move it over here and
we'll just scale this down until it fits right in here. Something like this,
I think, let's see. Let's bring it out. Maybe
I'll drop it right in here. Something like this. Let's see. Yeah, I think that's
all I wanted in there. And then let's go ahead and
do our trick once again. Change to 3D cursor. And from here, we can press
shift D are one-twenty, Enter and then Shift R and repeat the
process. There we go. Alright, in the next video, what Let's do is let's
begin working on these tire treads here and see what we can
do to create these
29. Beginning the Tire Treads: Alright, let's take
a look at how we might make these tire treads. Now we've got a couple of
different examples of this. I mean, we've got
these here that looks like there's a
curve to it, right? But then these here look
like they're straight. It looks like these
have a curve here, but then I've noticed that
let me look over here. This, this looks like they're
straight, like these. So I feel like we've
got some choices here. You know, I think I am
going to go ahead and do it straight like this
and like these. But the process would go
through if you're interested in creating a different
kind of pattern. It's a very similar process. So first of all,
what I want to do is create an outline
of the pattern. So I think let's
take a look at this. Yeah, this is similar to this. So there every other one, like they're kind
of staggered here. So let's begin with
a polygon plane. Let me select this and move the 3D cursor
into that object, but shift S2 and we go So we
know it's centered there. And then I'm going to
press Shift a mesh plane. And let's turn it in
the x-axis are X9 zero. Here we go. Let's move it forward
some out here. Let's scale it down quite. Oh, I'm scaling
from the 3D cursor. Let me change to
median point here. And then if we hit
the S key now it scales down from
that point. Okay? And I guess what I could
do is also just hide this tire and we could just take a look at it from
the reference image. Let's do that first. Let me go to the side
view here and I'll just take these objects right here. Well, I don't want this. I'll press Control
and drag select that. And for this, I think I'll join these
together with Control J. And oh, it didn't do it because there isn't
an active object. And active object is usually the last one
in the selection. So if I say hold the Shift key and click
on the wheel here. Now you can see that
that wheel has changed color because it's the
last one I selected, and that is the active
object in Blender. So now press Control J, and that combines all
of those together. Let me right-click and
shade auto smooth. And I think that's pretty good. Let's go ahead and go with that. I will call this wheel
front like that. And this in the back, I'll just call,
we'll back For now. We may change the
names on these. And so I'll go ahead and hide
the tire and the wheels. I'll just go ahead
and hide them all. And now let's zoom into this. I'll go to the one
key on the numpad. And let's begin with this. So I think what I wanted to do is scale this in some like this. So we have that
center piece here. You can see that there. And then I want to get those alternating pieces
coming out of it. So let me tab into edit
mode and press Control R. And I'm going to scroll
the mouse wheel so I get three cuts and
four segments there. So I'll just click that. I've got three cuts there. And then to get this
alternating pattern, Let's select the edges
like here and here, and here and here. And with those alternating
edges selected, let's press ESX to scale out or extrude out
and scale like this. The next thing we should
probably do is given an angle. So it's kind of like this. Let's hit the, a key come
down here to our shear tool. And I'm just going to
click and drag like this. So it angles it kinda like that, kind of in line with
what we're seeing there in the reference image. Okay, I'll go back to
the move tool there. So now we've got something
that looks kinda like this. While I'm here,
I'm gonna go ahead and apply the rotation and scale control a
rotation and scale. There we go. Alright, so now let's
see if it's going to work with an array modifier. I'm just curious how
this is going to go. I'm going to come over
here to the add modifiers, pull-down menu, click on array. And so we've got an array there. Let's, as a test, change this from x. I'll type in zero here. Actually, I'm going
to right-click choose join area and bring
this up like that. So we have a little
bit more room in here. And instead of the x-axis, I want to go in the z-axis. I'll type one here. Okay, so then I'm going
to hold the Shift key, click and drag and the
z-axis and move this down. So it looks kinda like this. Just want to bring
it down like that. Those seem to go
together pretty well. Let's give it a few more counts just to test it out. Yeah. I think that's pretty good. Okay. So now that we have that, I'm going to bring
this back down to two. Let's bring back the tire. I'm going to bring
back the tire. And what we need to do is
spin it around the tire So to do that,
we're going to need to do a couple of things. First of all, we're
going to need a thing to spin it around because if you look at
the array modifier, we've got what's called
an object offset. You can create an object
in the center here and use that as an offset so that
when we increase the count, it will go around
that object instead of just going up and
down or left and right. So let's create an object
where that 3D cursor is. I'm going to press Shift a, and I'm going to create
an empty object. And we have different
shapes here. These are just display shapes. They don't actually appear
in a render or anything. So I'm just going to
use a plane axes. And here we go. Now we've got our empty object. I'm going to move it out
into the scene collection. I'll press the M key and
go to Scene Collection. So here we have it
here so we can see it. And then what Let's do
is let's move the origin of this object into the center of our empty into the 3D cursor. So I'll right-click choose set origin and
origin to 3D cursor. There we go. So let's try that. Now in our array, Let's turn off relative offset, turn on Object Offset, and let's click on the eyedropper and then
click on the empty. Now, did anything
really happened? Well, let's see. Let's take this empty and
press RX and turn it. And you can see now that's
going around the object. Now what Let's do is let's just add more to the count
of the array modifier. So when I press RX, bring
this back like this, kinda fits right back there, I'll hold the Shift key down. Let me do that again. Our x hold the Shift key. And I'm going to bring this
forward about like that, just about like that. Alright, so now let's
select the tread, go into the array modifier, and let's increase the count. And now we can begin extending this on
around the tire here. Let's see how it goes. And back to here. So got 21. Well, there's some
overlap here. Our x. Okay, so maybe what I can do is shrink this down just a bit. So I'm going to
hit the S key and scale it down as smudge. Now let's see what
we can do here. I'll select that empty RX, hold the Shift key and bring
it so it connects there. How are we doing
all the way around? Not bad, it's pretty
good all the way around. Ultimately, we're going to
merge these points together. So if they aren't exact, I think it's okay. Right. Even in here, I think it's okay. So for me, I've got 21. Now. It depends on the
size of your treads, how many you're going to
get around the tire there. But we've got an issue here. We created this piece
straight, right? But we're trying to
curve it around. And so this is just a bunch of straight objects placed
around a circle. I'd like these to bend a little bit more
around the object. So to do that, we're probably going
to need to use a shrink wrap modifier. And we'll begin that
in the next video.
30. Finishing the Tire Treads: Alright, let's begin by adding a shrink wrap modifier to this. I'll just come over to
the add modifiers panel and let's add a shrink wrap. And let's then take
the eyedropper here, click there, and
click on the tire. And now it's shrink
ramps to that tire. But because it's curved
on the edges here, because we created those curves, the edges here aren't
really that uniform. So let's just see what
we can do with this. I'm gonna change this
to outside surface, see if that helps Any. Not really. Let me click and drag in the
offset and move this out. So I'm, I'll hold the
Shift key and move it out. And the more we move it out, the more it moves
away from the tire. But it still has some strange in this theory
are on the edges, I think. Although as we go out,
It's not terrible. But I don't know that we
want to go out that far. Let me go out to about here where the
reference images are. And let's take a look at this. One thing we could try
is we haven't added any edges in here to this one. It may need some edges
to curve around that. So we could try that. We could press
Control R and add, say three edges here, Control R. And I'll just go through each one of these
and add three cuts. See if that helps it
bend around that curve. Not really high. I'm going to choose
auto smooth here. And that didn't
really help these. We could change the
wrap method from nearest service point
to say project. That straightens it
out quite a bit, but that doesn't really help us. We can try nearest vertex. We could try tangent normal. And actually tangent normal
isn't bad here, is it? Yeah, why don't we try that. Let me go back to here
and click and drag on the offset to get him about
where we want them here. Let's try that. Yeah, I think that looks a
little bit better. So let's go with that. What we can do now
is go ahead and just apply the shrink
wrap modifier here. So now it's been molded
into that shape. Now we could go ahead and
apply the array modifier. Let's try that. I will take this, pull
this down, and apply this. So now that's all one piece. And now I want to go through
and merge these points. So let's take, let's go to the
front view, press Shift Z. And let's go through, and
let's select these points, say right down the center here. Like this, because these are the ones we want
to merge together. So let's now take these and come over here to the Mesh menu. Choose cleanup,
merged by distance. And now we see we've
removed the zero vertices. Let's change this from three
zeros from 0.0 001 to 0.001. Now we've removed 42 vertices. And that makes sense
because we had 21 around here, right? So let's, I think that's going
to help us clean that up. And since we've applied
the auto smooth, it looks pretty good. Now, one last thing we could do. We could see if
we could get this curved bit right in
the center here. I know it doesn't have it
on the reference image, but it's kind of nice here. So once again, let's go to
the front view Shift Z, and let's in edit mode, select those points again, right in here, like this. And then let's try and
Bevel those vertices. So we could come up to vertex bevel vertices Shift Control
B. So let's do that. I'll press Control Shift P. And now let's pull these out. We get a bit of a curve there. I don't want them to overlap. I'm going to hold the Shift key. I don't want those points
to meet in the middle. We don't want that. But if we can get
them close like that, that'll give us
that curve there. That's kinda nice. Now the next thing we need to do is extrude all of that inward. And to do that,
we want to select all of the outside edges here. So what we can do is
select the boundary edges. I'm going to hit the, a key, come up here to Select, go to select loops and
select boundary loop. Now we've got all the edges
on the outside selected. Now I want to do is
extrude and scale them inward without
scaling them in the x. So we want to scale
in the z and the y and turn off the x-axis. So let's press E, S, Shift X, and now we can
scale in like this. Here we go. Alright, let's
take a look at that. Yeah, I think that's kind
of what we're wanting here. Maybe I'm going to scale
out in the x now I'm gonna hit Sx and just pull
them out a bit. This. Then if we
tab into edit mode, will need to just Alt
click all of these, and then Alt Shift
click all of these. And we can bring these in. Now, we can hit Shift X, bring them in a little
bit more like that. Once again, maybe we could press Sx and scale
them out a bit. Let me go to the front view and just come out to where they're just almost outside
of here, like that. And then let's alt, click this edge, Alt Shift, click this edge, and once again S Shift X and
bring them in like this. So something like that. And then let's press Sx and
scale them in just a smudge. I want to bring them in
like that. There we go. So now we've got
the basic treads, but now I want to add a bevel
along these edges here. So for these, we're probably
going to have to do the hard work of going in here and actually selecting
these individually. But I can just click
and drag this shift, click and drag this
side. There we go. We've got these selected. And now if we go
to the side view, I can press the C key. Well, I need to go to wireframe first with Shift Z
and then the C key. And I can middle mouse
button click and drag and de-select
all of these here. Now that we've got that, I can bevel these, Let's try this, press Control B, and let's bevel
these out like this. There we go. Let's try that. Yeah, there we go. So now what we can do
is let me save this. I'll take this, select the tire. Oh, we've got a mirror
modifier on that tire. So let me select the tire, pull this down and click Apply. Alright, let's
take those treads, Shift-click the tire, and join them together
with Control J. And there we go.
So now let's bring back our wheel. Here we are. Yeah, I think that's going
to work pretty well. So that just allows us
to have a little bit of a curve there as well as a smooth curve all
the way around. Alright, let's bring back
everything else here. And then we just need to copy these over to the other tires. I don't think we need our
empty object anymore. We can delete that. We can take the
wheel and the tire. And if I take this tire here, I could basically
snap this to here. I could move the cursor, Shift S to do that. And then I'm going
to delete this tire. Take these two objects. They both have their
origin in the center here. So I can snap both of these
objects to the cursor. So let's do that.
Let's duplicate it. First shift D Enter, and then let's press
Shift S and eight. And there we go. Now we've got our
tire over there. Now, let's also put it up here. I will take this and snap
the cursor to it, delete it. Take these two Shift D to duplicate Shift S
eight to put there. And there we go. All right, how about if we take these now and duplicate and mirror them over to the
other side over here. Let's take these and
just delete those. Let's move the 3D cursor
to the center of the grid. Shift us one. Let's change to our 3D
cursor pivot point. And then let's select
these objects. Here we go. Press shift
D and Enter Control M, the X key, and Enter. There we go. Now, I
didn't get these. Oh, I didn't get these. I thought these were
all the same object. But that's okay. We
can do the same thing. We can take this move
the cursor to it, Shift S to select this Shift, Enter Shift S eight, and we go. Right. Now we can do the
same thing again. We can press Shift S1 to move the cursor to the
center of the grid. Select these two,
and then once again, shift the Enter Control M, the X key, and
enter. There we go. So that just gave us
an opportunity to practice those techniques
one more time. Alright, we've got the
wheels pretty much in place. I do notice that if
we take a look at, say, this image here, you can see that the
wheel on the side, the center is out and then it's just kinda
hanging on a hook. So we're going to need to deal with that here pretty soon. But other than that, I think the wheels and the tires are pretty much all done. In the next video,
Let's maybe start working on the
ladder in the back.
31. Modeling the Rear Ladder: To begin the ladder on the back, let's bring in some
new reference images. I'll maybe bring
in this one here. And I'll hover over a
corner here and drag down. And then let's change to an image editor here
and image open. And let's see. I'm going to take a look
at this scale model. And here's one with
a ladder down, but we really want
one with it up here. So let me use this. So it looks to me like the ladder is really
more similar to this in design here on
the reference image. But the actual texture here is more similar to this on the reference
image there. So once again, we
kinda have our choice. I don't think I'll do this
with the holes in it. I think I'll just do
it plain like this. But before we do that, let's take a look at our
wheels and tires here. I think I'll just take all of these and let's create
a new collection. I'll press M, new collection and I'll call
this wheels and tires. There we go. Alright. And this one is just empty. So we could delete this. I'll right-click
and choose Delete. There we go. Okay, So let's just hide the
truck and the wheels. And now let's begin
like this here. I guess first of all, let's
begin with the cylinders. I'm going to press
Control one to go to the back view and then I'll
press Shift a mesh cylinder. Let's take this cylinder
down to 16 sides. And maybe I'll type
in 0.1 and 0.2 here. And then I'll scale it down. Let's bring it up into here. And I'll change from 3D
cursor to median point here, just so we can see our
move manipulator and then I will press S and
scale out like this. I'll press Shift Z and yeah, maybe scale it down
a little bit more. And then I can scale it out
again in the z, z like this. Okay, so now we've got that. I'll smooth it. Let's press Shift dx and move
that over here. So we have these two. We could also create
cubes appear on the top. It looks like we've
got cubes here, so I'll press Shift
day mesh cube. Let's take this down to 0.1. Hit the G key,
move this up here, hit the period key
on the numpad, Shift Z to go to wireframe. And let's move this and then
I'll scale it in the Z, bring it down just
a bit like this. Let's try that. And then once again, we want it over here
on the other side. So shift dx. Then I wanted a cylinder
between these two, so I'll just select these two. So we have the move
manipulator in the center, shift S2 to move the
cursor there and then shift a cylinder. I do not need any
cat fills here, so I'm gonna change
this to nothing. And then let's turn
it in the y-axis. Ry 90, scale it way down. Go back to the back view
and I'll keep scaling down. Looks like it's
pretty small here. And then S and X and scale out like that and
I'll smooth it. Alright, so there we go. We've got those
cylinders in place. Let's now take it. I'm just going to
select all of these. Go to the side view and
let's take this and move it back here like this. Then we want to start
creating those steps there. Well, let's begin with this
one on the bottom here. I'll go to the back view again, press Shift a mesh plane. And I'm going to
bring this down. And we'll scale it
down like this. Kind of fits between the
cylinders like that. We need to move it up some. I'll go to the side view
with the three key. And I'm going to put
it right about here where this is tab
into edit mode. Press the one key to
go to vertex select, and then I'll just
drag select these two. Let's bring it back to here. And then I'll extrude
straight down with e z. Let's just take this
down like that, right? Okay, So now that we have that, Let's give it a little
bit of thickness. Let me move these up here
so we can see down here, I will add a solidify modifier,
choose even thickness. I'm going to apply the scale is press Control a
and apply the scale. And then I will click and
drag in the thickness field holding the shift key down so it moves a
little bit slower. So maybe something like
this. Let's try that. And then we want another one. So Up here, it almost looks
like it's flipped over. So let's take a look at that. I will press shift D
Z and bring this up. Go to the side view. And let's just move the origin into the center of the
geometry, origin to geometry. And I'll press the
R key and spin it around G and move
it up like this. Now, maybe I'll give it a
little bit more thickness. Let me just try. Yeah, I'm gonna go with
0.007 online like that. And now for the next one here, Let's go to the side view. And for this it looks like it's got ridges on either side. Let me just see what
we wanna do here. I'm going to press shift
D, move it up here, turn it, get it in
place like this. And then maybe I'll just
select this edge right here. This one down here like this. We go and then I'll change
to local transformation. And then let's extrude
out in the z-axis here, the local z, e, z, and pull out like that. So we've got those two. Alright, so now it might be a good idea to angle
are cylinders. So let's select
these two cylinders and tab into edit mode. And I will just select
this face and this face. And let's move the cursor to the center of these
two selections. Shift us to. Now if we select all of these pieces and
change to our 3D cursor, I can come up here to
this menu, of course, but I can also press the period key to bring up the same menu. And for this menu over here, it's just the comma key. So the comma key and the period
key are these menus here. So I'll press period, change to 3D cursor.
There we go. And now let's just take this
from the side view and hit R and rotate this back like
that, something like that. Alright, Now I think there are these cylinders going across. So let's see what we
wanna do with this. I think I'll put one down here. First of all, I may
need to actually move these faces down here. I'll just kind of drag down
a little bit like that. So they give me a place to
insert that cross cylinder. Let's do that. I'll press
Shift a mesh cylinder. I do want CAT fills on this, so I'll change it to end gun. I'll press RY 90, scale it down quite a bit. And let's then
scale it out in the Z. I'm gonna hit the
Comma key and go to global and press Sx
and bring that out. Like this. Then we probably want
to scale it down some. So I will press Shift X to reduce the circumference
of that. I'll smooth it. And maybe I'll just
select these edges here and these edges over here. And let's give this
a bit of a bevel. I will have to tab into
edit mode and press Control a and apply the
scale and the rotation. I'll go ahead and do that. And then I'll press Control, be in edit mode and pull out. So we get a little bit of a
curved in there like that. Alright, so we've got that. Let's now take it up. Maybe I will go to
the side view and press shift D and just bring
it up right into here. Let's say, let's try it. That's kinda what I'm
seeing here I think. And then let's do that again. It looks like up on top. I don't really see it here. Maybe I'll put it behind
there or in front. It's hard to know. So I will go ahead and just press shift
D and I'm going to move it right here for now as if it's in the
center there like that. Alright, and then I'll
go ahead and apply the solidify modifier
is for each of these. I'll do that here, apply. And I'll apply each of these. And you can hover over
this and press Control a, and that will apply
that as well. Alright, so there we've got
the ladder on the back. In the next video, let's work
on these pieces underneath. On the back bumper
32. Creating the Rear Bumper: Now these pieces underneath the ladder are kind
of hard to see. So we may have to
wing it a little bit, but we'll get as
close as we can. First of all, I think
maybe I'll just create a cube going across here. I'm going to press
Shift a mesh cube here. And maybe I'll take
it down to 0.1. And then I'll go to the rearview
with control numpad one. And let's just bring this
down about like this. Then. Oh, let me change
back to median point. I'll press the period key
and choose median point. And then I'll press Sx and scale this out
a bit like this. And we go and then let's
go to the side view and I'll bring it back and
maybe SY, something like this. So here it's a lot bigger
than it is on the front view. So once again, we've got
quite a bit of leeway. I think I'm going to
kind of go like this. I think let's do that. And then you can see this
hook thing coming out here as well as you can
see that back here too. But let's first deal with
these pieces on the side. I think that's really
just a polygon plane. I'm going to select this face
here and press shift us to move the cursor there and
then shift a mesh plane. Let's take it down
to 0.1 as well. Let's also turn it, I'll turn it in the x-axis, RX 90, and we go, and then I'm going
to move this back. Well, let me get it in
a line here with this. There we go. Press Z. And it looks like
these are a little bit taller than that block there. So I'll do that. Maybe I will scale it out in
the x just a bit like that. Let's tab into edit mode
and select this edge right here and press E y
and bring this out. And it looks like that comes out a little bit
farther as well. Then with this, let's
go ahead and add a solidify modifier and
I'll come over here. Solidify, turn on
even thickness. And let's see what
we wanna do here. Maybe I'll bring it in a bit. I will apply the rotation and
the scale with Control a. And then I'll click and drag
in the thickness field just to bring that in just
a bit like that. Okay, now while we have
the 3D cursor here, let's press Shift
a mesh cylinder. Maybe I only need 16 sides here. And then I'll type 0.1 and
0.2 here to shrink that down. I do not need any
cat fills for this, so I'll choose
nothing and then I'll scale down like this. And maybe scale up in
the z about like that. So I'm looking at this here. So maybe it's a
little bit bigger, a little bit like this,
something like that. Maybe I'll smooth it. And then let's add solidify
modifier to it as well. Here, I'll apply the scale
control a, apply the scale. Even thickness, reduce the thickness a bit
here in the thickness field, and better move it over a
bit so it touches that. And I'll move it
out some as well. It looks like it's
out from there a bit. Now. There's also something
going on in here. I don't know what it is. And then on in here looks like there's
more cylinders maybe. Let's see, I think I will take this and I'll press
Control one, shift z. I will take this and duplicate
it and move it in the x. Then I will scale it
down, scale it in the z. And we go something like that. And I'll go ahead
and while I'm here, duplicate it and move it over. Let's then take these two
and move them out like that. And these over here, I should probably take these and mirror them
over to the other side. So once again, shift us one to move the cursor to
the center of the grid. Period key, go to 3D cursor, Shift D Enter,
Control M, X enter. So we have that mirrored over
to the other side there. Then this hook thing we
can see a bit of it here, can't really see
it very well here. You can see a straight on view
here and a side view here. So I'm going to look
at the side view and just make it very basic. I don't think anyone's
really going to see a whole lot of it,
kinda like here. So let's just try that. I'll go to the side view. I'll select this and move
the cursor to it with Shift S to shift a mesh cube. Let's move this down. I will change back to median
point with the period key Sz, bring this down like this. And then let's just take
this base here, right there. And let's bring it out. I'm going to bring
it out to here. Then I'm going to add an
edge loop right here. And then I'm going to take this face here and extrude
this up like this. There we go. So not a
whole lot to it there. I'll go to the back view shifts z and let's move it over here. And I want to bring it
down in the x-axis. So it's about this wide. I want to bring it up sum. And then it's kinda blocky. So I want to, I want to add a few
bevels to it to kinda rounded out at
least a little bit. So with this, I'm going to press Control a and apply the scale. And then maybe I'll take this latter part here and just
hide this with the H key. And then let's tab
into edit mode. And I think I want to select
these edges along here, these edges along
here, maybe this. And let's do these as well. Up here like this. Well, maybe all
the way like that. There we go. Let's try that. I'll press Control,
be pulled these out, scroll the mouse wheel a bit. I'll smooth it. And I think that's probably
going to be good enough. Let's come over here and unhide these pieces just so
we can see what we have here. I think the only
thing I wanna do is add a plate right in here. So I will take this cube right here and duplicate
it with Shift D. Move it out a bit,
scale it in the y, scale, in the x, and bring
this down a bit to like this. Alright, at least for now, That kind of gives us
something back there. I'm going to press Shift us one. Let's also bring back the
wheels and the truck. And let's take a look. Yeah. I mean, it gives
us a general sense of there's things
going on there. I may want to redo this. I'm not sure this. I feel like it needs a
curvier bottom here. So that may be something
in our future here. But for now I think
that's a good kind of temporary thing just
to see how it looks. We've got a few bolts here so we could once again grab a bolt, press Shift, DY,
bring it back here. We could turn it with
our z zero Enter. And then let's bring
it down into here. I'll press Shift Z to
go to wireframe G. Bring this down here, period key to zoom in. And let's just add these here. Shift d x, d z. And I'll turn them a
bit, one or the other. So they aren't exactly alike. And then I'll select them
and I'm going to have to bring them in to this point. I think. So about like that. But now we need to
center them on here. I think. Let's do that. And then once again, we've got our 3D cursor at
the center of the grid. Period. Choose the 3D cursor. Shift D, Enter, Control M, the X key, and enter. Now we have them over there. So now we've got a few bolts there to
help hold everything on. Alright, we are coming along
33. Beginning the Rear View Mirrors: I think now I'd like to
come up to the front of the vehicle and work on
these rearview mirrors. You can see them here in the side view and
in the front view. And it looks like it's
just a triangle plate. And then it goes on, well, here it's on the top. Here, it's in the center. Here it's in the center. And here it's in the
center, or is this on top? So I don t know that we have a definitive answer on where these are
supposed to go, but we can certainly
begin creating this. I think what I'll do is
create this plate first. And maybe I'll just do that
right down on the grid. So I need to be able to
hide things up here. I'm going to right-click
on this again and choose duplicate area as
another window. And it's going to open this up. And we've got a
lot going on here. So I'm just going to
hit the Minus key on the numpad to
collapse all of that. And then these here are all of those items that we created
back for the latter, we could just select them all and put them in their
own group if we wanted. Like this, I'm grabbed
this one here. I think that's everything. And then let's just
press M new collection and we'll call this rear
ladder. There we go. And then all of this is I guess we could call all
of this the rear bumper. We could do that when we press M new collection rear bumper. And we should probably add these two that
collection, right? Let's do that. Here. M bumper, let's do that. Okay, So I think we have
all of those in there. Let's then take these two
collections and drag them into the truck collection here. Then when we hide that,
they're hidden there. Okay. So I will hide no, I'll hide the tires. There we go. Alright. So I'll close the outliner here. And for this, we could just
begin with a polygon plane. I think. I'll zoom in here. And actually maybe we could hide the reference images
because I want to view it from the top view here. And I think I'd like to
take these two points here and just merge them
together with the M key. I am at center. There we go. And then I want to take
all of these points and let's bevel these vertices. I'll press Control Shift B. And let's bevel these like this. And we kinda get a similar
thing as we're seeing in here. Maybe something like that. Let's try that.
And then let's add a solidify modifier,
even thickness. Maybe take it down a
little bit like that, maybe smooth it. Okay. Oh, we've got a little
bit of an issue there. I'm just going to
click and drag down here until that
smooths out. Okay? Now let's take this and
put it on the vehicle. So we want to take
this bring these back, I guess, take this
up or forward. And let's change back to median point with
the period key. There we go. I'll press RY 90. And let's just bring it
up and put it in place. Ci, right up in
here. Period key. So I will turn it. And let's hit the G key
and move it in here. So let's see now what we need
to do to get it on here. It looks like it's right. It needs to go right here and maybe turn it a bit,
something like this. And then it almost looks like
I could move it like this. And then maybe take these and
just move them like this. Let's see. Maybe I can
move it like that. Then grab these and move it like this. Alright, let's see. Well, it looks like I'm
going to have to angle it a bit like this. And then from the top view, probably press R and Z and
tilt it a bit like this. Alright, so I'm just
trying to fit it on here. Ry. Here we go. I'll change to local
transformation. To local transform. Yeah, we can kind of get
it right on here, I think. Something like that. Alright, now that
we've got that, let's begin on the actual
arm coming off of here. I'm going to move the cursor
to that with shift S2. And the couple of different
things happening here. Not sure this one I'm having
trouble seeing what that is. This I might be able to
surmise what that is. Maybe. This is just
kind of very vague. And this Isn't all that helpful either. So I think what I'll
do is I'm going to press Shift day and
create a cylinder here. And let's turn it
RY 90 like this. And I'm going to have this
be the beginning of it here. So maybe I'll turn it
in the y like this, and also turn it in. The x. Comes out like that. And I just want to grab this edge right here,
alt click this. And maybe I want this
to come in just a bit. So if I press E, z and pull out and then scale in some easy pull out and scale in some maybe that's where
it comes off of there. So I'll smooth that. And then do we just extrude
a cylinder out from there? Well, we can try it, I guess let's just let's just do that. See what happens. I'll press easy and
bring it out like that. Now, is that at all in line with what we're seeing
on the reference images. Let's hit the one key Shift Z. And no, that's not
very much in line. So I think what I'll do is add an edge with
Control R right here. And then I'll select this. And let's move
this up like this. And I think I want to turn
this a bit like this, so it's in line,
perpendicular with that. And then for this
edge down here, I think I'd like to
add a little beveled. So let's go to object
mode, control a. Apply the rotation and scale, select that edge Control B. Let's bring this out
just a bit like this. There's a bit of a curve there. Alright, and now for
the actual mirror, Let's take a look at that. We could take these
points up here, press Shift S to move
the cursor to it. And then we can go back to
object mode and create a cube and scale this up to
be a similar size. Maybe like this. Sx to scale out in the x axis. Okay? Then we could press S, scale that in like that and
move this forward some. I feel like these are a
little bit smaller in the images than we have it
in the reference image. And let's try that. And maybe I'll turn
it in the z-axis, r, z just a little
bit. There we go. So now we've got the
beginnings of the mirror here. I think what we need
to do is create this piece that's going to
connect it and hold it there. So in the next video, Let's continue with
the rearview mirrors
34. Finishing the Rearview Mirrors new: I do want to mention
that as I work on other projects and turn things on and off
here in blender, they sometimes come
through into this project. And if I haven't gone over this, this is just the statistics
over here on the left. You can just come over to the viewport display or the viewport overlays,
I should say. And turn on statistics here. So if I haven't mentioned that, I just wanted to go ahead and
say how you bring that up. Alright, let's now continue with our rearview mirror here. I'm in the 3D cursor
pivot points. I'm going to change
to median point here. And I hit the period key
on the numpad to zoom in. And I found this image in our photographs and
I kind of like this. This is kind of a little more interesting than something
just plain like this. So I think I want to do that. I'm going to, first of all press Control a and apply the scale. Then let's tab into edit mode, hit the three key for face mode, and then I'll press the
I key to inset this in. And this is just for
the mirror part. I'll hit E and
extrude in just a bit like that to get that part. Then back here, it might be interesting if
we took this and I'll hit, I, bring that in
and then extruded in E and push in just
a bit like this. And then maybe hit
the I key again, pull in like this. Press Sx, kind of scale in, in the X like that. Oh, I'm not in a local
transformation here. So let me press control Z, and let's come up here
to global and local. And now if we scale in the x Sx, it'll stay flat on
the back there. It was kind of
twisting because we were scaling and
the global axis. Alright, so now we've got that. And then let's just take this
and move it back like this. Maybe I'll move it forward some. In fact, you know what? I think this looks
kind of weird, angling back like that. I don't feel like these do that. Maybe I'll just bring
it forward like this. I kinda like it more like this. And I know it may not be exactly the way it's
supposed to be, but we can have a little
leeway with what we want, I think in a project like this. So I'm just going
to take this and move it forward like this. And let's see how that works. Yeah, I may want to look at
it from the top view and maybe press RZ and kind
of tilted like that. There we go. So from here, let's now do a little beveling. We've got some nice
curves on this. So let's maybe select this
edge here, alt click. So it goes all the
way back like that. And this one, and this one
with Alt Shift click here. Alright, so we've got that. Let's try and bevel it. I'll press Control B and
pull this out a bit, scroll the mouse wheel, and let's try and get something. Here we go. Let's
take a look. Okay. We probably need to
try and smooth it. So let's use shade auto smooth, and then I'll come down
here and click and drag, drag this up. So that kind of
smooths out a bit. Yeah, okay, and then in here, I think I want to select
these edges here like this. And let's bevel these
control B can pull these out till we get
a nice curve there. Now, if I go to the
front view here, Let's take a look. Yeah, I've got it here. Move it so it's kind of in
the center here of the pole. And then I need to make some
sort of connecting piece. And we've got this, which doesn't really
tell me a whole lot. Kind of looks like that
cylinder flattens here up at the top and then
something happens here, probably a bolt of some sort. Well, we do have bolts. That's for sure. Maybe we
could take these points here. Let me just grab these points. What I'm thinking is I
may want to flatten this. So to get that kind of
flattened thing there. So if I press Control R
and move this up to here, and maybe give us
one more in here. Let's see what happens
if we select these two and we try and flatten them. I'm just going to
scale them in the Y, S, Y, and let's just
try and flatten them. Yeah, they kind of skew a bit. But that's still not bad. That is, that gives us that
kind of flattened look there. Maybe I'll grab this
and move it a bit. Yeah, So that's interesting. I kind of like that. Then. Well, you know what let's do? Let's grab one of these
bolts here, Shift D, and move this over here, and then I'm in
global transform. So Rz 90o going the wrong way. So I'll hit the negative key. There we go and enter. And then let's go to
the front view, hit G. Let's move this up. So it kinda covers that. I actually want it to be
in the center of this. So I'll select it. Press Shift S to
move the cursor, take this thing and press Shift to snap it
right into the center. And then as I pull it out, now I know it's going to
be in the center there. And of course we've got it. It's a bit turned. We want to turn it matches
the rearview mirror there. Maybe I'll change
to local again. And then let's see
how this works. I'm going to take these
two, go to wireframe. And if I take this
and kind of get it right in the center
there, what happens? What do we think? Alright, so we need some sort
of connecting piece there. Maybe we could just
put a sphere there. I'm going to change
to global again, so they'll move in tandem. But maybe we could put a
sphere in there as if you could take that mirror and
adjusted on a ball joint. Maybe we can try it. Shift S to shift day,
mesh, UV sphere. I'll take this down to 18.12 for the segments and the rings. And then let's take
it down to 0.01. There we go. Let's move it out. Scale it up a bit. I'll smooth it. Let's
see what we think. Well, it's not terrible. Let me go to wireframe here. And I think I'm just
going to hit G and move it a bit like this.
Let's try this. See if it pokes out any no, that didn't really
poke out there. We also need to ground it to that plate or
ground the plate to the truck there and I feel like it's got rivets in there. Let me find an actual
photograph here. It looks like it
may have rivets. To take a look at this. Yeah. You've got rivets
there on the corners, so let's do that. I will press Shift day
mesh, UV sphere again. Oh, it's very tiny. Maybe I'll just take it to 0.1. Let's do that for
the time being. And then what I wanna do is go to the front view and I want
to cut half of it away, so I'll turn it in the
y-axis are wide 90. Then let's tab into edit mode, go to face mode and
Shift Z for wireframe. And I'm just going to drag
select half of this and get rid of these bases here. And then I just want to
take this edge right here, extrude it out in
the x like this. And scale that in
just a little bit. Alright, let's move
the cursor to it. Set the origin to the cursor. So it's right there
on the bottom. And let's see if maybe this
will work for our rivets. I'll smooth it here. And then let's go
to the side view. Let's move it up to
where we want it to be. Scale it down quite a bit. Maybe we wanted it to
be about like this. Maybe a little bit smaller. Let's try that. Alright,
so now we can bring it in. Hit the period key
on the numpad. Let's bring it out. We're in global,
so let's work with that for just a moment. I'll bring it out until
it's kinda halfway in. Now let's press R, z, kind of line it up like that. Let's go over here. Ry and kinda line
it up like that. And then let's go to local
transform and pull it out. And then we'll do our
fine adjusting here. So probably at really
doesn't look too bad. Maybe a little bit
in the x here, RX tilted just a
smidge like that. Okay, so now as we
duplicate these, we should be able to slide
them up to the corner. So I'll press Shift D
and enter and then take this little blue square
which turns off the z-axis. Click here and drag up to here. Shift D enter. Do that again, right over here. So now what Let's do is select all of this and mirror it
over to the other side. So all of this here, these things that, alright, shift S1 to move the cursor into the
center of the grid 0. At some point I turned
off the reference images. Let me turn those back on. Let's ensure we have it set
to global axis here and then hit the period key and
change this to 3D cursor. So now we're pivoting
around the 3D cursor, but we're going to be moving
in the global x axis. So Shift D, Enter, Control M, the X key, and enter. And there we go. Alright, we've got
the rearview mirrors. Now let's organize them a bit. Once again, open up a new
window for the outliner. And let's hover over this and hit the Minus
key on the numpad. And then all of these now
should be what we just created. So let's hit em. New collection. We'll call them
rear view mirrors. And click OK. And there we go. Now we can take this collection, drag it into the truck
collection, close that up. And there we go. Now we've got our rearview
mirrors in place.
35. Modeling the Front Hooks: Continuing with some of
these smaller details, let's, let's work on
these little front hooks. I think these are interesting. These just you can see them
here in the front view of the reference images here and
in the side view over here. Right? So let's see what we
can do to work on these. We've got our outliner
pretty well cleaned up, so I'm just going to
hide everything there. And let's begin. Well, let's just begin with
this central cylinder. Let's do that. Shift a mesh cylinder. And maybe we only need
16 sides for this. Let's try that. I will scale it down some. And let's scale it up in the z. So maybe we get something
about like this. I'm just looking at this area
in-between the hook here. So maybe we've got
something like that. And then I feel
like we should go ahead and work on
this curve here. And to do that, I think probably some sort of
a curve would be good. Let's press Shift
a and go to curve. And we've got a Bezier
curve and a path. Let's begin with a Bezier
curve and see how that works. Let's do that. So here it is. It's just basically align with two handles on either end
and you can select one, you can scale it. Oh, I'm scaling from
the 3D cursor here. Let me go to medium
point and every Go. And you can turn it like this. And you can see that as
we begin turning these, we can maybe get that kind of curve that
we're looking for. So let's turn this in
the y-axis, RY 90. And then how about
in the z-axis, r, z zero, and then
the negative key. There we go and enter. And let's go back to the front view with the
one key on the numpad. And then I'm going to, first of all take these and
flatten it in the z-axis. So S z zero. And that flattens that
this over here, S z zero. And that flattens that they're about the same size.
So that's good. Let's take these two and
I'll scale them in the z. Z. It's bringing them in like this. So they're kind of going
in on either side here. So really I think I want
it to be like this. I'm going to scale
these in a bit. Let me see what happens. Well, we need them to
be a little bit longer, but can we take these two and
add one in the center here? I'll right-click and
choose sub-divide. And then that allows us to take this one and pull it out,
something like that. Right? So that my thinking is, if we've got a nice curve here, we could extrude these
and push this forward. So let's see, let's just, I'm gonna hit E x and let's
see what happens here. I can drag these
back now like this. Let's try that. Okay, so maybe this might work. Let me take these points here and scale them
in the X. Like that. I will add some
geometry to that. We can come over here to the object data properties
tab right here. And let's just add some
geometry down here. Scroll this down
and click and drag in the depth field and we're going to bring that
out like that. Let's now create these
connecting pieces up on top. So I'm going to smooth
this auto smooth. And then I'm going to scale
this down a bit like this. And let's add cylinders
up on top here. So I'm going to
press Shift D and Z and bring this up
and scale this in the Z until it fits around that cylinder,
something like that. And then let's do
that down here, Shift D Z and bring
that down like that. Alright, so now
this can scale in a bit until it just
meets those like that. It could come in a
bit, just a little. So let's scale it in the
x and y, but not the z. So I'll press S, Shift Z, bring it in just a
little bit like that. Maybe we create another
cylinder for the bolts on top. Let's do that shift
day mesh cylinder. Let's take it down to six sides. And let's scale it down. Scale it in the Z,
bring it up here. Still a little big Maybe something like this. Okay, and then let's go
to the front view again, grab this and Shift D z and
put that on the bottom. I'll also turn this one RZ, just a little bit like that. All right, What's next? Well, how about this
panel back here? Let's do that.
Shift a mesh cube. Let's scale it down. Wanted about like this. I think. Let's scale it
in the x, like this. Take it back. Line
it up like that. Let's scale it out in the y. So not really sure how
wide it's going to be. It's hard to tell
from this angle, but I'll just kinda
go like that. Alright, And then, um, I feel like this could
be a little bit bigger now that I'm adding more things. So I'm going to
come back here to the depth field
and click and drag and hold the Shift key and bring that up just a little
bit like that. And then this, we've got this
little piece right here. Maybe we could, well, let's just use this
shift D enter, bring it forward,
turn it into y ry90, okay, scale it in a z, so it's a little bit thinner. Scale it in the why? What comes in a bit like this? And then we could
take this face right here and bring it in a
bit to about right there, and then scale that
in and the Y S, Y till it comes in like that. Something like that. Oh, let's take this and I want to move this forward here like
this. Let's do that. Yeah, that's nice. Okay. Then well, we kinda
need a couple of bolts here, I guess I'll just take
this shift Dui, RY 90. And let's go to the
side view with the three key on the numpad
and come down here, scale it down till it's
about the right size. Put this in place, and then shift DZ. Turn it a bit. Shift D y. Well, maybe let's bring them
in a little bit more like this. Yeah, like that. Okay. And then it kinda looks like this curve isn't
exactly straight, right? I'm going to press Control
and seven and take a look at it from the bottom
here and Shift Z. If we take a look at
all the curves there. So why don't we flatten
everything in the y-axis. Let's do that. S y is zero. And that straightens those up. Yeah, I think that's
going to work out. Okay. I mean, it's gonna be
a very small piece on the larger vehicle, but think that'll work. Let's take this face back here and move the 3D
cursor to hit Shift S two. And then we could just
delete it as well. Let's do that. Delete faces. Let's join all this together and see if we
can put it on the truck. So I'm just going to
select everything. I'm going to have this be the last thing selected because
it's already auto smooth. But actually now that
I think about it, if I tab into edit mode, we've still got a curve here. So let's convert it to
polygons by right-clicking, going convert to and
convert to a mesh. And now if we tab
into edit mode, we can see the polygons there. Alright, now let's go through and select
all of these things. And as I said, I want this smooth piece to be
the last thing that we select so that we're adding everything and smoothing it
with these settings here. Alright, so now
that I've got that, I'm going to press Control J. Now, if I use auto smooth here, that should help clean that up. Let's see. I may be able to take
this and drag it. Yeah, I just take it up and
drag it up just a little bit. And that helps. Like that. Yeah, so all I had to do is
just drag it up, just a hair. Alright, so that is
now all one piece. I'm going to move the origin of this
object to the 3D cursor. Think that'll help
us place this. So let's bring everything back. I'll just bring
it all back here. I'll call this front book. And let's bring it forward. Turn it in the z-axis, r, z non-zero, wrong directions. So hit the negative key and
then Enter. There we go. Let's go to the side view here. Scale it down, bring
it in to here. And I don't think I want
it that small there. Let's see. I'm just
going to tilt it a bit, move it in until it's about
where we think we want it. That will change too. Local transformation, pull
it out in that direction. And let's see, let's see about where it's supposed
to be. Right here. So I'll move it to there. And then is that about
the right size though? Let's zoom out here
and take a look. Like it may be just a
little bit big now I'm going to scale it
down just a bit. So now we could go
back to global. Ensure that the 3D cursor is in the center of the
grid with shift S1, change our pivot point to the 3D cursor with the
period key 3D cursor. Let's select this. There we go. Shift D, Enter, Control, Enter, and there we go. Now we've got our front hooks
36. Creating the Circular Hooks: While we're dealing with hooks, there's these little hooks right here, little circular ones. We can see those. Well here kind of
in the front view. We can see him in the side view here on the reference images. So let's work on that. Let's see if we can find
a better photo of this. I'll go to an image
editor and open and NR, reference images and photos. We've got this one open.
What about this one? Let's take a look at this. Well, that helps
us a little bit. It looks like there's a
circular base and then a stem, and then a circle there. Alright, so let's, let's
see what we can do. I'm going to take
these front hooks and once again drag them into the truck collection and then we'll hide
everything there. And for this kind of circle, it's probably best to
use a torus right here. Let's do that. How many sides and or
segments do we need? I'm going to take
this down to 24. So we're going to have
24.12, four segments. I'm also going to take this
minor radius which is going around like that and increase
that just a little bit. Maybe something like that. And then let's turn it in
the x-axis, RX non-zero. I'll go to the front view with
the one key on the numpad. And what I'd like is to have that stem emerging out of the mesh here on
the front hooks. I just kinda placed the
curve into a cylinder, but I think these are
probably molded together. So what we could do is
let's go around here and let's see if we could take
a couple of faces here, like these faces here. So that's eight faces. So we've got how many
sides going around 4812. Alright, so we're going to need to know that because we want to create a cylinder with 12
sides to fit in there. So now that we've got these, Let's go ahead and
delete these faces. And then continuing
here and edit mode, I'll go ahead and press Shift a and create a cylinder
in edit mode. So it's all part of
the same object. And I will change the
number of signs to 12. I will turn it in
the y-axis, RY 90. I'm going to move it over here. And I'm going to scale
it down and I want it to fit right onto here, like this. So let's see, maybe scale
it down a little bit more. There we go. Alright, now that we've
got this in place, I'm going to go to
Edge mode, alt, click this edge
and oh, you know, what we need to do is take
the faces out of here. Let me do that. I should have just removed the cap pills while I was
creating the cylinder. But I can just delete
these faces here because we don't want a face in here in the center of
our bridge edge loop. So I'm going to take
these edges here, alt click and then Alt
Shift click these. And now we can bridge
edge loops with control ie and
bridge edge loops. Now that's all one piece. We've merged them together. And I think I might want
to take these faces here, alt click between two faces and maybe scale it down
just a little bit. So it's a little bit more the width of
everything else here. And now that we have that, we could take this
edge right here. And let's work on this
circular base here. So maybe we could scale out, let's press E to extrude and
then S and scale out a bit. Then I'm going to press E X
and pull back and scale out. Let's try that. And then
maybe I will scale out again. So E, S and pull out like that. And then let's go back EX, like this and maybe scale
out a bit like that. Let's now try and smooth
it using auto smooth. And then we'll
click and drag down here in the angle
and drag this up. So that helps smooth that. We could do a couple
of things here. We could add a bevel to this, let's say right here. And we could also maybe add an edge right in here and pull
this back a bit like this. We get something more like that. So there's a couple
of things here. I'm not real happy with
this pieces length, so I'm going to
Alt click between these two faces to select
that entire face loop. And then I'm going
to press Control and the plus key on the numpad. Extend the selection to here so that I can
pull it up like that. One, it more like that I think. And then let's put the cursor
at this edge right here. I'll Alt click that edge. And then let's move the
cursor to hit Shift S two. And now let's in object mode, set the origin to 3D cursor. There we go. So now
we're going to scale and rotate around that
point there, right? Yeah. Okay. Let's bring
everything else back. Oh, let's change this to circular hook just so
we know what it is. And now let's bring everything
back into the scene. Let's try and put
this in place now. So I'll press rz90. There we go. I'll scale
this down quite a bit. Let's move it up and see
if we can get it in place. I'll press Shift Z
to go to wireframe. Let's move this
over to about right here and scale
this down until we get it about the same size
as the reference image. So maybe something like that. Okay, Then let's bring it
in. Move it out a bit. Let's see what we think here. So we're going to have to do a little bit of twisting here. So let me press R, z and kind of tilt
this like that. Then I guess I'll go back to local transformation and now we can pull it straight
out like that. Let's see how this works. It's not too bad. Let me press RY tilt that a bit, bring it out some and
let's see what we think. Yeah, actually
that's not too bad. I think that, that proportion is pretty good there. Alright? So of course, once again, we're going to want
to mirror this over. And we can always move the cursor shift S1 to
the center of the grid. We can change our transformation
orientation to global. And we can change our
pivot point to 3D cursor. And now we can press
Shift Enter to duplicate Control M and the X key and
enter, and there we go. Now it's over on the other side. Yeah. Now we've got those circular hooks
where they need to be
37. Beginning the Undercarriage: Well, I think we're now to the point where we
can maybe begin blocking in some of what's happening on the
bottom of the vehicle. And we don't have a whole lot
of information, honestly. We've got this up here, we've got this back here. And then even in these images, It's mainly in shadow and we don't really have
much to work with. So I think we're
going to have to use those scale model photos
that we have here. And it isn't really that exact, but it's something
that maybe we can work with in combination with a
few of the other things. So I'm going to open
up a couple of these. I've got three down here
that I think will be useful. And I will go ahead
and maybe grab these, move these into the
truck collection and then move this up some. And then I'll just create
one more window right here. Change to an image editor, and we'll open up
that third one. Right in here. We go. So we've got a little information
here that we can use. And honestly, the
bottom of the vehicle, I don't plan on really
ever seeing all that much, but I feel like we need to
get the silhouettes correct. So at least it
looks correct When we're just seeing part of it from any angle around
the truck here. I think first of all, I'd like to begin
with these struts. Just get these in
place because I think if we go to
the front view, I think that's what
we're seeing here. Or at least that's what
they're hinting at. I think these strengths here, the front and these are the
stretch in the back here, or at least we can
work it that way. That's how weaken,
that's how we can begin. So what I'm gonna do is, well, let's hide this. First. I'm going to
hide all of these except the reference images. Let me do that. And then I'm just going
to create a cube here. And let's scale it down. And kind of think about
how this might look here. I'm going to scale
this down like this. Maybe like this, and then I
will scale it out in the y. And I want to just put it
in place, maybe up here. And then back to the front view. And let me switch with the
period key to median point. And I'm just going to
bring this up and I think, so, I think these pieces here, this here is what they're doing here with these little
look like paperclips, but they're little copper wire. But this, I think
is a solid object in the real thing that I
think that's what these are. These are coming down
off of those struts. So let's say at least for now, here's the center of it. I'm going to scale
these N and the Y. Maybe it's looks like it's
about the width of a tire, maybe a little bit wider
or something like that. And I'm centering it,
trying to center it here on this tire. Alright, so we've got
something like that. The next thing I'd like to do
is give it a bit of a bend. So let's tab into edit mode, and I'm just going
to press Control R and scroll the mouse wheel and maybe add something
like 12 cuts. You can see down in
the bottom left-hand corner of the interface it
says number of cuts 12. So let's just hit Enter twice. We've got those cuts there. And then I think we should
take the points on the end. I'm going to press
Shift Z and press the one key so I can drag
select these points here. Then let's turn on the
proportional editing tool, turn-on connected only. And then I'm going
to press G and Z. And as I began to move, you can see they're
bending up and I can scroll the mouse wheel to
change the influence here. And I just want to get it
kind of like the image just bend a bit like
this, let's say. And then I could turn this off and move these
up on the ends. Like that. Maybe. Well, and it looks like maybe these could come up a bit too. So we've just got
something like that. Let's see how that looks. Okay, we can maybe
select it and smooth it. But there we go. So it looks like the
ones on the back or farther out than the
ones on the front, right. We've kind of seen that here. So maybe if I take this one and shift dx and move it like this, and then take it and move it. So it's kind of in the center of this wheel back here, like that. Alright. Now it
looks like we've got this steel frame structure going on the inside of the rear stretch and
then bending into The inside of the front, right. So let's try and get that. I'll press Shift a mesh cube, scale this down quite a bit. It looks like it's
pretty skinny in the x. And then I'm going to
scale it in a Y S, Y. Scale that up like this. And let's move it over. Sy, we're going to
have to bend it in. Of course, let me
scale it farther in the x because what
I'd like to do is, you can see here this
is kind of an I-bar. If we take some points, I'm going to give it
two edges here and then press S and scale up like this. And then let's apply the scale control
a, apply the scale. And I will select
these faces here. And let's extrude and scale-out in the y and
the x, but not the z. So let's press Shift Z, hold the Shift key down
and scale out just a bit. Well, it looks like we're not going to get
much from the x, so I'll just have
to do that directly Sx and pull out like
this. There we go. So we've got an I-bar and
then we need to bring it up. Let's bring it up here. Put it right about here. I think. Let's see if we can
even see that on the bottom of the car here. Well, not much. And we can't really see
it over here either. So I think I will bring
all of this down some. Let's do that because it
needs to be closer to the center of the
wheel here, like that. And then we could take this
and bring it down like that. Now we could maybe
flatten these out a bit. I'll press S Z and
flatten them out so they fit underneath the car there S C and bring them
down like that so they don't bend quite
as much. There we go. And then for this, let me scale in the Z, bring that in some like that. But it isn't quite as tall. Alright, so now let's
hide the truck again. And now I want to bend it in toward the front
struck there. So I'm going to press Control R. And maybe it bends. It looks like it begins
bending here, I think. And I will also add an
edge right in here, let's say like that. So then I could take these and bring them in like that
and maybe let's try that. And of course, very
little of this down here is going to be exact. We're just trying
to really fill in space so that it doesn't
draw attention to itself. That's really our main issue. I'm going to once again press Control a and apply the scale. And then I want to press
Control B, bevel this out, sum and add a few edges here, just so it curves a
little bit better. Let's do that over here too. Yeah, I like that. I also think I want to maybe get some of
these things in here. We've got a few
little extrusions. Maybe I could press Control
a and apply the scale here. Actually what Let's do is
let's take this edge and this edge all the way
around, Alt, click those. And then this, and this
all the way around. There we go. And then I'll press
Control B and pull out. I'll scroll the mouse wheel
to reduce the number of cuts. So we just have those there. And then let's extrude and scale-out in the z and
the x turning off the Y, E, S Shift Y. Pulled these out just
a bit like that. And it looks like maybe we need to scale these in the z as well. But if I try and
do it in a z as z, we're just going to get that. So let's try individual
origins up here. So it centers around
each selection and let's try s z and pull
those out like that. Yeah, Let's just try that. Yeah, that gives us just
a hint of that there. So we could, if we wanted
to move the cursor here, delete it, take this one, duplicate it, and
press Shift S eight. Then pop that over
there as well. Alright, so that's the beginning of the underside of the truck. In the next video,
we will continue on
38. Modeling the Front Axle: Continuing with the
under carriage, let's now just
take these pieces. And with the 3D cursor in
the center of the grid, I'll press the period key, change to the pivot
point of 3D cursor. Press shift D, Enter Control M, X and Enter, and we can mirror those over
to the other side. Alright, let's bring the
truck back and take a look. Okay, I think we're
doing alright. The next thing I'd like to
do is do this front axle. You can see here
we've got kind of a circular thing and bolts and we've got in the back a circular thing
and these ridges. So I'd like to try and
work on all of that. First of all, let's just begin
with this center cylinder. And then we've got
these cylinders coming out of it and we know how to do that
now because of that circular hook, right? So let's just create
a new cylinder here. And instead of an end gun here, I'm gonna change this to triangle fan because I think
I'm going to want to split it in half and use the mirror modifier so that
as we work on one side, the other side also
does the same thing. So let's turn this now. In the x-axis are X9 zero. And let's go to the front
view Shift Z for wireframe. And I am going to bring
this down, bring this up, and we're going to once again, scaling from the 3D cursor. I'll press the period key
and go to median point. I'm going to bring this down. So it's about like this. I know we've got this kind
of triangular shape here, but in these images
It's more circular. So I'm gonna go with
what we can see here. I just feel like we have
more information here. And then I'll bring it forward. Let me scale it in the y. And we're going to want to bring this right between the tires. So let's bring the tires back and bring them
right up here. And let's just see. Well, what we can do actually is we
could take this tire, press shift us to, then take this and
press Shift S eight. So it's right in line
with the center of those tires and then I'll
bring it back over like this. And then we could probably
scale it down a bit like that. Alright, so now I want to get these things
coming off the axle, coming off to the tires. So we're going to need
more geometry here. If I tab into edit mode, you can see we're going
to need more geometry. So I'm going to add
five cuts here. And now let's take a look. Let me turn off the
tires again and we go into the side view
and hit the three key. What I wanna do is select faces here so that we can insert
a cylinder into here. I think it needs to be taller. I think it needs to
be more like this. Alright, so let's
say we've got this. Alright, so we've got 4823456. So we've got 12,
we've got 20 sides. Alright, so we need to create a cylinder that has 20 sides. I'm going to press the
Delete key and delete faces. And here's where I was talking
about the mirror modifier. If we go to wireframe here
and in face select mode, I'm just going to
drag select this side here and delete
these faces here. Now, if I add a mirror
modifier to this here in the modifiers panel, add mirror. Now it's going to mirror around
the center of the object. I'm going to turn on
clippings so we can ensure that the center
points are clipped together, but you can see both
sides have that hole. Now, whatever we do over here is going to
happen over there as well. Alright, so let's move the cursor to the
center of the object, shift us to here. And then I'm going to
create a new cylinder. And what did we say 20 sides. I'll do that. And then let's type 0.1 and 0.2. We do not need any
cat fills on that. I'll press RY 90. Let's bring this out and we're gonna do a similar thing that we did with that circular hook. We're going to bring
this in actually, so I can see it better. I'm going to join these two, select them both and
then press Control J. And you can see it
mirrors over here now. So tab into edit mode, hit the one key. And let's scale this down until it's about
the right size. I'm thinking about like this. And now, if we take This edge and this edge. And let's bridge edge loops, control E and bridge edge loops. Alright, that connects
them together. We could go ahead and
smooth this and just see what happens if we
drag this up quite a bit. And then I'm gonna go ahead and apply the mirror
modifier to this. So we can adjust each one of these on either side
a little differently. But before I do actually, we're getting kind of
stretched polygons here. So maybe I'll press Control R and add a few edge
loops in here. Now what I'd like to do is, as I said, apply the
mirror modifier here. And then now that allows me to take this and
move it in a bit. So I'm going to select those
faces, expand the selection, and then move that in some
control and the minus key. And I'm just going to move these in a little bit each time, decreasing the selection until we get something like that. There we go. Let's see if we can do that. I'll bring up the smoothing
and bit from here. We could select
these edges here. And let's give these
a slight bevel. I'm going to apply the scale
and the rotation control, a rotation and scale. And then I'll Bevel these
just a little bit like this. Now I want to take
these and let's see, I'm going to take this
and bring this this way. And I'll take these and bring
this this way like this. Now this rounded piece, I will press Shift
day mesh, UV sphere. And for this I'll turn it in
the x-axis, our X non-zero. Let's scale it down and let's figure out what we
want out of this. So I think something like this. Maybe like this here. So maybe I'll take
these faces right here. Just Alt click between
two of the faces and hit X and delete faces. And now I can hover
over the back part, press the L key and it'll
select all of those for linked components and
delete those faces. We could smooth that. And then I could take these edges right
here, alt click those, scale these out, E S, extrude this out like that. Then maybe just take it straight back into there like that. Alright, Now when I smooth this, I kind of lost that
sharp edge there. Maybe I will alt
click this edge, and then let's press
Control E and we can tell blender
to keep it sharp. Let's choose mark
sharp, and then we go. So now that's going
to be a sharp edge. No matter what we
do. Let's press Control a and apply the
rotation and the scale. I'll take this edge
here and give it a little bit of a
bevel. There we go. Now, I wanna do a similar
thing on the back here, but it's got something
a little bit different. And I guess what
Let's do is go ahead and work on that
in the next video.
39. Adding Details to the Axle: Now for the back of this, I think I wanna do
a similar thing that we did for the front, but I'm going to turn this sphere in a
different direction. So let's press Shift
a mesh UV sphere, and I'm going to turn it
in the y-axis this time, RY 90, like that. And then let's cut it in half. I'll go to Edit mode. And let's take this here. Cut this in half like this. There we go. Then I'm
going to scale it down. And let's bring
it out like this. We want a bit of
a ridge on it as well here so we can
put bolts on it. Let's scale it down
a bit like that. For these ridges, I think
what I'm gonna do is just select a few
faces like this, this, this is like we do just
have three of them, huh? Alright, so let's press E
and just bring them out. We could scale them in
the z as z like that. And once again,
this is going to be way under here in the dark. We're not going to
see it a whole lot. But that might just help just to give it some interest in here. Okay, Let's now take
the smooth down. Let's see what it looks
like at 30 degrees. Yeah, that's kinda what we want. I think. Good. Then let's just take this edge once again, just like we did. And let's press S, scale it out. And then we'll press EY and
bring that in like that. Let's apply the rotation
and scale control a. And then maybe I will
take this edge now and give it a little bit of a
bevel as well. There we go. Alright, so now we've
got those basic shapes. Let's maybe add the
bolts on here now. And of course, as we've said, we've got plenty of bolts, so let's bring back the truck, grab one of our bolts over here, and let's just press shift
D y and move that up front. And then we want to move it out of the truck
container or collection. Let's press M and move it
to the scene collection. There we go. Now we can hide
our truck and it stays here. So let's press the period key RZ non-zero,
going the wrong way. So press the minus key, Enter. There we go. And let's see what we can
do to put these on here. Let me kind of take
this and bring it back. Here we go. And I'll bring
it forward some bring it up. It looks like we're
going to have to reduce the size to get it on here. So it'll fit within that rim. There. There we go. Alright, so now we've got our 3D cursor in the
center of this area. I think we can just once again duplicate and rotate
around the center. So let's change to 3D cursor. And how many do we want? Well, how many does it
look like we have here? Well, it looks like we have
at least 12, if not 16. Well, let's try 30 degrees. Let's see how that works. Let's press shift D are
30, and then Enter. So that's 30 degrees around. Now let's press Shift R again, and it'll just
repeat that process. There we go. So do
we need them on the back there too?
We probably do. I think my ridge here is smaller and let me see
if I can bring this out. So I'm going to Alt click
between these two faces, Control and plus
key on the numpad. And then I'm going to press S, Shift Y to scale these out. Oh, actually what I need to
do is not go quite as far. So Control plus two here, Let's do that and then press S, Shift Y and scale
this out like that. There we go. So we have a little
bit more room there. Let's see if one of
our bolts will in their shift T Y, will that fit? Not really, Not at
that point, will it? Let me spin this around RZ 1800. Once again, gotta switch from
3D cursor to median point. I'll hit the period
key median point. There we go, our z1 AT. And let's just bring
this out like this. And we're kind of
getting in the way of ourselves here with
that ridge there. But we could do that, I think. So from here once again, back to the 3D cursor. And then we could press RY 30, right? Let's try that again. So let's press shift dy30. Enter. Now we should be
able to press Shift R, and it'll go all the way
around. There we go. Now let's try and make these connecting
pieces right here. It looks like it's just
kind of a flat piece and two pieces going into here. Well, let's see what we can do. I will maybe take this and just move the 3D cursor to
here, Shift S two. And then I'm going to create a polygon plane, scale it down. And we will put it right
over the end of this, let me change to median point G. And I'm going to
move it right to here and move it down like this. And then I want to
kinda take this edge. It looks like it should
go in and it looks like it should scale
in as well like this. Sum. We can also
take this edge right here and extrude this
up in the z like that. Maybe bring this
forward a little bit. There we go. We could give it
a little bit of thickness. Let me press Control a and apply the scale at a solidify
modifier to it. Let me go maybe I'll scale it down just a bit and move it. Let's turn on even
thickness. There we go. Then let's also move the
cursor here and create a cube. I'll take it down to 0.01. That's very small, but we can take this and maybe make
these little pieces here. So first of all, I'm going to move this
forward here like this. And then I'm going
to duplicate it, shift dy, dx and just
put this back here. I want to get this little
piece on the front. So it looks to me
like once again, this is very hard to tell
and it's a scale model. It's not exactly
the original thing, but we can maybe do something
here and let's try it. I'm gonna get this little
piece in place right here. And then I want to take this. And let's try and scale this in the x to have it
connect like this. And I will take this face
and move it up a bit. Now, I want to take
this edge right here, or I could just select
these points here. And I want to drag
these up like this. So we're getting
something like that. I'll move this back
a bit and we go and then let's just take
this and Shift D Y, move it over here, like that. And then it looks like
there's a cylinder in there. Let's just do that. Shift day mesh cylinder. I'll take it down
to say 16 sides. Let's add then gun on the cap. Let's press RY 90 and
let's scale it way down. So it's about like this. Now, does it go all the way through? Let's go
ahead and do it. Let's take that base and
drag it back like that. Then we'll smooth it. And maybe we could
apply the scale. Maybe take this edge right here and give it a bevel, right? And maybe we could take this and move it into here like that, and then grab these
faces here and press E, S, Shift X and scale those
in just a bit like that. Just so we have some sort of bit of interests there
at the end of that. Alright, so now let's just apply the solidify modifier here. And then let's just join all
this together here, here, here, here, Control J. Alright? Now we should be
able to take this and duplicate it and put it over at the
other points as well. But before I do, I just want
to take these edges here. Bevel a man, just a bit, just to give a little
bit of a curve there. Smooth it. Alright,
so now what I'll do is just take these and
move them over here. Let's press shift D y and
move this right here. We go. Then we could take these here, change to our 3D cursor, Shift, Enter Control M, X, and over to the other side. I don't know how much anyone
is ever going to see that, but we know they're
there, right? Alright, in the next video, we will continue with the
under carriage of the truck
40. Continuing Work on the Axles: Continuing with the axles. I think maybe what Let's
do is take this and just duplicate it and spin
it around and put it in the back because I think
that's all we're seeing here. A similar thing
here in the back. So maybe let's take all the bolts and combine them
with the rest of the axle. And then I'm going
to Shift click this and press Control J. And then I want to take this and select this and press Control J. And then let's
come back here and go through and select
all of these bolts. And I'll Shift click
this, press Control J. And then we'll take this and
select this and Control J. So everything should
be now a part of this. I've lost some of our
sharpness on these edges because we've
joined it with this that has a greater
smoothing angle. So we could apply the auto smooth again and then we're just
going to lose that. So I think what I'll
do is once again, select this Shift-click here. And let's see what we can do. Let's press Control
E and mark sharp. What do we have here now? It's a little better. Let's go in and get these edges. As I said, once it can, probably nobody's ever going
to see underneath here, but might as well get it
done while we're here. I think I will select
these as well. Alright, let's try that. Yeah, that allows those
shapes to come through now. So now this is all
one object and we can press the period key
and go to median point. And so what let's do now is let's go to the
top view and let's press shift D Y and bring this back to where
we think about going to be. And then let's spin
this in the x. So our x 180 and spin
it around like that. So those two pieces are
facing each other there. Now we could work on the connecting pieces
that kinda come down around the axle here. So these things, these wires, do we want it to be
all one piece or do we want it to be
two different pieces? I'm not exactly sure
how it is on rail cars, but we're seeing a
solid piece here. So maybe I'll go ahead
and make it solid. So I'll take this and press Shift S to move
the cursor there. And then I will create
a cylinder like this. 16 sides is fine. I'll remove the cap fills here. Let's turn it into y ry90. And I'll bring it down and
we're just going to use half of this for that piece. So I'll scale it down, scale it in the extra bit. And I'll tab into edit mode. And let's just select these
faces up here and then Control and plus
on the numpad and expand them down to
their delete those. And these edges can now come up to connect with this piece here. So let's press E, Z and just pull
straight up into here. There we go. So let's
see if this is in place. It's pretty good. Let's do that. Let's say. And then let's
add a solidify modifier. Maybe I'll scale it down just a little bit more like this. And then let's add a
solidify even thickness. Bring it down a bit. Maybe it's about like that.
And we can smooth it. And we can apply the
solidify modifier. Alright, so That's
what we've got. I'm not exactly sure
how realistic that is, but it will work to
fill the space here. I'm going to press Shift dx and move it over here. There we go. Then I'm gonna take
these and take them back to the back as well. So Shift D, why
bring these back? Let's press the period
key and zoom in. Maybe something about like this. Let's see. Yeah, I think that works. And then we just got
to take them out to fit them underneath
these things. I'm going to press
Control one so I can bring it out and see
adhere like that. And this one to this
one right there. So now let's think about
this whole area here. Let me see what we can see here. Let me see if we can
bring back our truck. Now, the wheels and
tires, here we go. So I think what I'm gonna
do is begin with this, but have it be a separate piece. So I'm just going to
press shift D Enter and then I'm going to
scale it up a bit. I'll move it back a hair. So I'm just going to have
it begins like this. And then I'm going to press EX and pull out EX and out and
then scale in a bit. So we're getting
this here, right? And then ES in a little bit, I'm going to press EX
and pull out this, then ES and scale out. That looks a little bit bigger. E and X and pull
that in like that. Es scale in like that. And then let's come over
here. Where are we? Right here. Okay, so I will press x
and bring it like this. Then it looks like we've got
an even bigger cylinder. So ES out like that. X in like this. And then let's press ES in. Now, EX and in like this, and then scale in
some like that. Let's see how that works. So I haven't really
connected anything yet. I'm just still kinda playing and seeing what it is
we need to do here. I'm going to take this and split it off as its own object. I'll hover over it with the
L key just to select that. And then press the P key
and separate by selection. And now I can smooth it. And I can also take
this little edge right here and press E S and drag
that in to connect those. Alright? So I'm not sure exactly how
those fit together there. And if this is big enough, I feel like this
needs to be a little bit bigger on this side. So let's select those faces and control and plus
key on the numpad. And then I'm going to press
the Esc key and scale those up and move them over
just a bit like that. I just felt like that needed
to be a little bit bigger. We will have to figure
out how to connect those. At some point. I'm not seeing any hints
of that right yet. But we could take this and just mirror it over
to the other side. So shift S1 to move the
cursor to the center. Period 3D cursor, Shift D, Enter Control M, X. And there we go. So I
think I need to take this and move these in a bit. I'll change back
to median point. Let's bring this in like this. Well, I think we can add some more cylinders in
here and plates and things like that just to have a little bit more
interest in there, a little bit more detail. But generally speaking, I
think that's pretty good. I'm going to save my scene and then bring back
the truck as well. Yeah. I think we're getting there. I feel like that these pieces here could maybe
come back a bit. I could tab into edit
mode and just grab these points up front and then
drag them back just a bit, maybe to where those
connector pieces are. And let's do that. Yeah,
I think that helps. So this is a kind of
thing we're going to have to do just periodically. We're going to be placing stuff, rearranging stuff,
adding details, et cetera, just to
see what we can get. But I think that's a good start. And so in the next video, let's create a few more of these connecting
pieces between here. We can see something up in here. And let's just finish
that off for now.
41. Adding Details to the Undercarriage: Well, let's continue working
on the undercarriage. And there's a couple of
things I think we need to do. First of all, let me hide
the wheels and the truck, and let's just start
mirroring some of these over or at least moving
some of these back here. So I'm just going to
take these and let's just move these back. I'm going to press
the period key go-to median point and then Shift D y. And let's move these back to
where we think they should be and move them forward
here and like this. See how that works. Yeah, I think that'll work. And then we can press
the period key again, go to 3D cursor, Shift, Enter Control M and X, and that will pop those
over to the other side. And also I realized that
while I was making these, I forgot that this was
lying on its side. So these ridges should really be going
horizontally, shouldn't. We can probably fix that by
just going into edit mode. And we could move the 3D cursor into the center
of this. Let's try that. Let's press Alt and
click this face loop. And then let's move the
cursor there, Shift S two. And we're still in
3D cursor mode here. So if I just hover over
this and press the L key, and now let's press RY 90. Will it spin around evenly? Yeah, it looks like it
stayed pretty even there. Okay. And I'll just go and do
this one over here as well. Let's do that. Once again, I'll click between two of the faces, shift S2. Let's press the L key, hover over that and press
the L key and then RY 90. There we go. Okay, now what
else do we need to do? Well, let's take a look
at the rear wheels here. What did they have? Anything? Well, they've got these which I'm imagining or the breaks. We could add a
cylinder there just to fill out this space
here. Let's do that. So I will bring back
the wheels and tires. And I'm just going
to select this and hit the period key
on the numpad. And I'll tab into edit mode, select this loop of
edges and shift S2. Then we press Shift a mesh cylinder and we
don't need it that big. I'm going to do 24
sides, 0.1 and 0.2. To shrink that down, I'll spin it in the
y-axis, our y90. Let's scale it in the x. Maybe scale it up
quite a bit, right? It looks like it's almost
filling that wheel, so let's just scale
that up like that. And then it looks like it's got a ridge on it here
and it also goes in. So let's press Control
R. Add an edge loop. I will Alt click between two of the faces to select
that face loop. And then let's extrude
in the y and the z. So I'll press E, S Shift X, and let's
increase that sum there. Let's also just take this face right here and
just extruded in some, looks like we've got
an indentation there. I'll smooth it. Let's take a look. Yeah, that really may
be all we need there. So once again, let's go ahead and mirror this over Shift D, Enter or Control M. And Enter. There we go. Alright, I think we do need to grab or
create this right here. We can't really see it here. We can't really see it here. So this is our main
image, I think. And I think we can
see that right here. I'm thinking that's
what that is. So what I'll do is maybe go back to median point with the period key shift
a mesh cylinder. Let's turn it in the x or x90. And I think I just want to bring this up into
right about here, just so we get a sense of
something happening under here. It doesn't have to be perfect. It just kinda needs to
fill the space there. So let's now take this face here and I will tap
back into object mode. Let's apply the scale
control a applied to scale. And then let's hit the
I key. Go in a bit. I'm going to hit E, pull out. I go in. Pull out just a bit
if the E key again. So I'm just trying to
get this basic shape ES, bring it out like that. Maybe like that. E, e hit the S key to
scale in like that. Some ie hit the I key and just go in just
a little bit like that. There we go.
Something like that. Let's see how that looks. I'm gonna go ahead and
smooth it while we're here, and then let's bring
back the truck So kinda, that's all I really wanted to,
something like that. Now, it looks like this rear connection
angles up right there. So I think what I'll do is
just select this and this. Shift us to move the cursor
into the center between those two shifts,
a mesh cylinder. I'll change this to 16 sides
and take away the cap fills. Let's press our X9 zero, scale it down quite a bit. And I'm going to press Shift Z so we can
see through here. I think I just want to
press S and scale this out. Well, I feel like it needs
to be quite a bit thicker, so I'm going to do
this like that. And then I will just tilt this a bit and then change to
local mode and press S. Scale these and like this. Let's see how this works. I'll smooth it and so
something like that. Now we're kind of
off center here. Let's move this into
the center here and move this over like that. Okay. It looks like it comes
and connects with this, but I think I've made these even where maybe here one
is higher than the other. There is an angle down here. I'm not sure if that's what
they're trying to hint at. We could if we wanted, go ahead and take
this and try this, we could extrude this out
and then pull it down. So we could just try E, bring it out to here. And then I'm just going
to drag this down like that and see what happens. I'm not a huge fan of that. So let's go back. And I want to go
back to Edit Mode, and maybe I'll just take this
and go straight like this. Let's see where that takes
us and maybe I'll just take this and take it
straight into here. Once again, I know
this isn't correct. I'm just trying to
fill the space. Yeah. I feel like that's a
little bit better. Like we're not seeing
that angle underneath it. I don't mind seeing
this down here, but I feel like that angle
down distracts or takes away. And the last thing
I want any of this down here on the bottom
to do is distract. Alright, I feel like we need some sort of
connecting piece here. I don't mind these, these kind of blend in, but this looks a little sloppy. So let's go in and see
what we have here. It looks like kind
of a ball joint. So let me grab these
and pull this out. And then in here, I think I do want to create something that looks like this. So in the next video, Let's go ahead and just
work on this piece. And then I think we'll be done with the under
carriage of the truck
42. Finishing the Undercarriage: Alright, because I want to hide everything and just work
on this piece on its own. I need to clean up the
outliner just a bit. Let me right-click again
and choose duplicate area. Let's move this out. Make it a little bit bigger. I'll press the minus
key on the numpad here a couple of times
to collapse all of that. And then all of this it looks like is the
undercarriage, right? So I think we can just
take all of that and press the M key new collection and
just call it under carriage. And that will be our
collection for that. And we can then of
course take this, drag it into the truck. And we've got now a few collections here of
different parts of the truck. And of course we've
got just a lot of other things here too, that probably would be
good to begin cleaning up. But honestly, a good time
to do that is during the UV mapping and
materials process. I think we'll be doing more
of that at that stage. Alright, I'll close this. And now I can hide
everything here. And let's work on this. I can't tell if this is a
square or cylinder here. I think I'm gonna
go with a cylinder, shift a mesh cylinder. I will add an end gun
for the cat fill. Let's turn this in the
x-axis, our X non-zero. I will scale it in
the z just a bit. And then this thing here, this to me looks like a cube that's sitting
on top of there. And let's try that
shift day mesh cube. Take it down to 0.1. It looks like if I moved this about here and
then scale it in the x, maybe let's try that. I think I want to take this
face and move it down. And then I want to add
two edge loops here, control our scroll, the
mouse wheel to scale. And let's move
these up like this. And then we can take these two, extrude these out right
about here. Maybe. Let's then apply the
scale control a, apply the scale so
that we can come back and grab these edges here. And when we beveled, they will be cleaner
and more even so Control be pulled that out, scroll the mouse
wheel and we get a curved end like
that, like this. Okay, so I will smooth
that and I'll smooth this. Alright? It looks like we've
got bolts around there and maybe a cylinder
through the center. Let's shift a mesh
cylinder. Let's do that. Scale it down, then
let's move it out. Scale it in the z, like that. Maybe we could smooth that. Alright. And the bolts, so okay, we're going to need
to deal with that. I feel like there's kind of a
ridge here for some reason. Let me press Control R and
maybe create two edges here. Scale out in the local z. It looks like I'm still
in local transformation. Yeah, I'll switch
back to global. Then it looks like we could take these faces here and
extrude the men. So Shift Y since I'm in the global axis now
and bring that in just a bit. I feel like we could use
a bevel around in here, all the way around there. Let's add a bevel to that. Control. Be bevel
that just a bit. Maybe we could do
that same thing here. It looks like this does not
have uniform scale, right? Look how flat that bevel is. Let's press Control Z. Go back tab into object
mode control a, yeah, you can see the scale
is non-uniform here, so Control a and
apply the scale. Now let's try that again. Yeah, that looks a
whole lot better. Okay. Then a few bolts. Let's bring back our truck
real quick. Find a bolt. Here we go. Shift easy. Let's bring it out
of that collection, M into the scene
collection. There we go. Now we can hide the truck
again in this stays out. How many hit the seven key on the numpad and move
this over here. I will spin it in the z-axis. Since I'm in the top view, I can just press are non-zero. And there we go. Let's move this in. Take a look up, and we've got
to bring it down some here. Let's do that. There we go. Period key on the numpad. And let's put it. I don't know what do you think? Yeah, let's maybe
begin right here. And once again, we
can spin around this. If we select this shift
S to select this, press the period key, go to 3D cursor. Now here in the front
orthographic view, I don't have to define the axis because we're here
in this orthographic view, it knows automatically
that we want to rotate around the y-axis
because we're here. So let's do this. How many do we want to do? How about 60 degrees?
Let's try that. Shift D R6 zero. Let's try that and
then shift our There we go. Alright,
so we've got that. This doesn't have this
cylinder sticking out, but I like it. But even so I feel like we need to add something
here on top. Let me apply the scale
control a, apply the scale. And then I'm going to press Control R and I'm going to
give it for edge loops. And then I'm going to
scale in the z S, z 0. I'm scaling from the 3D cursor. I'll hit period and change that. So I want to scale
these out like this. And then I just want
to select these two here and scale these out as Z. And now this will be exactly
even on either side, since we've scaled
everything from the center. Alt, click between here, I'll Shift-click between here. Then let's extrude and scale
these n in the y and the x. So E S Shift Z and pull
that in a bit like that. And then this piece, it looks like we have a
better view of it here. So for this, I think
I will just move the cursor to this and
create another cylinder. And from that cylinder, I'll do a similar thing that
we did earlier on the axles. Let me take away the cat fills. What I wanna do is just
take away these faces here. So Control and
plus Ky like that. And delete those faces there. And then let's scale this down. And I'll just take these edges here and extrude these
forward with EY. To do that. Then let's add a solidify modifier,
solidify even thickness. And I'm going to
click and drag in the negative value
here to pull it out. Let's see. And actually I guess I
can grab these edges and move them forward just
a bit more like that. Alright, let's smooth that. Let's now apply the
scale with Control a. And then I'm just going to
take a couple of these edges and just bevel these a bit. And then Control B and pull this out so it
curves a bit like that. And then we just need a
cylinder coming out of here, shift day mesh cylinder. I'm not going to work
too hard on that. Let's just turn it in
the x-axis like this. Bring it down and pull
that out like this. Alright, so let's
combine everything here. Select everything and
I'll just combine it with the base plate
here, Control J. And there we go. Now let's take it in with
the truck and the wheels. And let's just see what it looks like if we put it on here. Control seven on the numpad
to go to the bottom view. And let's just move
this in like this. And then this thing
now just needs to be a little bit different
and that doesn't it. So I'm going to press the
Esc key and scale it down. Some, go back to local s, z. And I want to just pull this down and somehow connect these. I know it isn't exact. I know it isn't the
way it actually is, but let's give this a try. So I'm going to press
S, scale this in. Easy, pull it out and let's
just see what happens. I just want to see
how ugly that is. Alright, pretty ugly. So maybe I will take this and move it a
bit and take these. So I'm just kinda trying to
get a believable connection. That's all EIS, scale that in. So let's just see
how that works. Actually, it's not too bad. Surprisingly enough. That might actually work. I'm just going to bring
this down like this. Yeah, so let's see
how that works. That might just work for us. Alright, well good. I think we're
moving right along. And in the next section, what lists do is
start working on blocking out some of the
interior of the vehicle
43. Face Orientation and Fitting Pieces Together: Alright, well, let's now turn our attention to the
inside of the vehicle. We're going to need some
new reference images. And really all we have
for the inside of the vehicle are from
this scale model. So we could take a
look at this one. Here. We can look at that. Let's open another window here. Change to an image editor. And let's take a look in
our scale model here. There's another one here. That kinda gives us two
different angles there. We could maybe use these to try and at least block
something in here. And I only want something
in here just in case you kinda see
through the windows, I'm going to keep these clothes. But if you see through
the front windows, just to see that there's
something in there. And we don't need to go into
great detail by any means. But to do that, let's first take our tarp here
and let's just hide this. I'm going to hit the
H key to hide that. Oh, we've got this. What is this? This is
0, that piece there. Let's move that into the
under carriage collection. I'm going to press
M and under truck. Let's move it into
under carriage there. And also we've got
this thing here. Let me select this,
Shift-click this. I'm going to join
them with Control J. And then let's call
this roof vent. Maybe I'll press
the F2 key so we can change the name
here, roof vent. And let's go ahead and
hide this as well. I'll press the H key. Alright, so here we can see we've got the inside and
we've got some problems. Of course things are
kinda poking through. But also there's
another problem. And that is that polygons
have a front and a back. And if you're seeing the back of a polygon in a
real-time engine, like a game engine or
in substance painter, the back of a polygon
will be invisible. You won't be able to sit. In fact, you'll be able to
see straight through it. And so we don't want
wherever this is, whether it'd be in
Blender or in Unity or in Substance Painter
wherever we don't want anyone to be able to see through here and then see it through to the outside because the backside of a polygon is invisible. And you can tell which
is the front end, which is the back of a polygon. By coming up here
to the viewport, overlays menu and turning
on face orientation. And here we go. So now whatever is blue
is the front of polygons, and whatever he is, red is the back. You can see in here
we've got a lot of red. And what's interesting too, we've got some red
in here like these. And these where we
should have blue. And these kind of things happen because when you
extrude a certain way, you may be pulling through the back of the polygon
instead of the front. And I think that's probably
what happened here. And down here. I remember I duplicate
it an edge and probably that edge would
have been okay if we would have extruded,
say, this way. But we extruded that way, right? One or the other. So
we need to fix these, these and begin thinking
about how we're going to make the
insides here blue. So first of all,
I'll just take these two here and I can
tab into edit mode, hit the a key, and
then I can come up to the Mesh menu normals. And I can choose a
recalculate outside. And now those are blue,
that's what we want. We're flipping or re-calculating the front of the polygons to
the outside of the object. So we can come up here
and do the same thing. We can just select all of
these tab into edit mode, hit the a key, and then if you recall, the shortcut key is shift in, so I'll just press shift in. There we go. We've got
those now flipped. So how are we going
to flip these? Well, we're not, we're going to add new polygons and turn them inside or turn them inward so that we've got
blue on the inside as well. Alright, I'm gonna
go ahead and turn this face orientation display off because we don't
need that right now. One more thing I want
to do is kind of organize this area underneath, back here, underneath
the fenders. I want to get these
more in shapes. So maybe what I'll do is just open one more image window here. Let me do that. Image editor, image
open and in our photos, let's take a look at the
underside of these vendors. Let's see what we can see here. I'm going to hover over
this window and press Control and spacebar to see
it a little bit bigger. And you can see here
that the vendors go in flat here as opposed to having
anything poking through. And I think I want
to get that because that affects the inside as well. I'm going to press Control
and Space-bar again. Let's go to another
one real quick. How about this one here? Do we see anything in here? Not really, but
you can kinda see that those vendors are
flat on the inside. Whereas here, the
one I've got here, there's a ridge
there and we've got these things kind of poking
through and that's fine. We just began blocking this
in as best as we could and we knew that we'd have
to come back and fit these together a little bit
better at some point in time. And I think that time is now. So what I'm gonna
do is maybe go to the top view and Shift
Z tab into edit mode. And I'm going to select
these vertices here. And then shifts to go
back to Solid View. Let's now take these and
drag them in in the x. Actually, I'm going to
change from local to global. Here we go. I'm gonna
pull this in until we get to this connection
right there, right there. And that's kinda
the way we want it to look right in here. We've still got
something up in here, but now I need to take this part here and move these banks So
they fit into that vendor. And this is just sometimes
what you have to do. You've just got to
take some time to go back and fit these
things together. Because when you first began, you really don't know
how things are going to fit and how they're
going to work together. I'm going to select these here and pull these
back like this. So now we've got
those pulled back. So we've got that nice, clean, straight vendor there. And I need to come in
here and take a look. And you can see this is
why we're doing this now is because they're going
to come through, right? They're going to
come through here. And we're going to have
to adjust them in here. So I will take
these now and move these back about right here. In this one, maybe I
can move in like this. And maybe this one I can
move back like that. So for this one, let's take these
and begin moving these so they fit in
the fender as well. Actually let me take that vendor and I will tab into edit mode, go to vertex select and drag
select those vertices there. And now let's take these back until they're about where they need to
be like that, right? So if I take this part
and tab into edit mode, and let's select
these faces here. And let's move these back
in the fender like that. Yeah, kind of a nice
snug fit there. And then take this
and move it back. And it looks like it's a
little bit at an angle. So I'm going to turn
it in the x-axis. I'm just going to press RX, hold the Shift key down
and just turn it a bit until it lines up with that vendor a little bit
better and then drag it back until it disappears
into there we go. So now this base up here, if I just take it straight up, you can see there it is there. And if I take it back down, even when we have
it hidden away, it's still to wide there, right? So let's press S and scale that. And I'm going to
hold the shift key again so it moves slowly. And let's move that back in. So now those vendors
are nice and clean. Going in toward the main
body of the truck there. Alright, so in here now, actually this looks
pretty good here. It's just moved in a
little bit like this. Yeah, so that's pretty good. And the last thing I'd like
to do is maybe try and get the bottom of the truck
up above this frame here. Let's see if we can
do that real quick. So I'm going to tab
into edit mode, and I think I'm going to
need to add some edges here because I don't want this
to collapse in on itself. I'm going to press
Control R and add an edge out here
on the side there. So we have it on both sides. Recall that we do have
a mirror modifier here. And I want to add
one right up here. Because that's there and I
want to add one in the back that I may need to add
them along here as well. Let me see. Let me add
one right in here. There we go. So now if I go into face select and hit the C key
for the circle select tool, I'm going to click and
drag and try and select just the bases within
that border there. That, alright, so I've got a Oh, I don't have a border
along here or along here, so I need those. Let me press Control R. Drag that back to here. And I will do the
same thing here. Alright? And we are getting edges
coming up into here, but I don't think that's
gonna be a problem. It's still going to be pretty smooth there
and that's good. So now I'm going to hit the
C key and I'm going to try, well, first of all, hit the three key and
go back to Face Select. And then I'm gonna
hit the C key. And I want to select
everything in here inside those borders. Let's see if we have that now. Now what I wanna do is just extrude this up
above that chassis. So I'm going to
hit E and pull up. So it goes above that,
like they're okay. So now that we have that, you can see I've drawn that
up a little bit higher. And once again, that's
why I wanted to do that before we begin
creating the interior, just so we know where the
boundaries are inside here. Alright, so in the next video, we will begin creating the
insides of the vehicle
44. Modeling the Inner Walls: Alright, now for the interior, let's begin with the floor. I'm going to press
Shift a mesh plane. And then let's just bring
this up like this until it covers that floor there until we get something
like that. There we go. I will then scale in, in the global x axis as x. And then maybe I'll tab into edit mode and select this
edge and pull it back. So it's about like this. And then I'll take
this edge and move it back as well like that. Then let's split this in
half so we can mirror it. So we only have to
actually work on one side. I'll press Control R, and then I'm going
to hover over that and press the Enter
key two times, so it drops it right
in the center. I will select this face
here and delete it. And then let's add
a mirror modifier. And we'll turn on clipping. Okay? I guess I'll turn on
the cage here as well. Alright, so now let's
press Control R and create an edge right here. And I also want to take this
point and drag it over. So it's in line
with this as well. And then we can take this
edge and extrude it forward. Ey, pull it forward like that. I think I will scale it
in the x just a bit. There we go like that. And then I'm going to
extrude it forward, EY, pull it forward like that. But then I want to pull it
up some, scale it in the x. What comes in a bit like that? Then let's do that again. Let's hit E, z and
pull it straight up. And then maybe move it
back, something like that. Oh, I need to grab
that edge in there here and pull this back. There we go. Yeah. So we're just creating the floor there. And once again, if I go to that viewport overlay
and face orientation, you can see now the
floor there is blue because we're creating it
facing towards the inside. Alright, let's turn
that off again. And then I'll take
this edge here. And let's extrude this back EY. And I'll take that all
the way back to here. And then I will create an edge loop here and
extrude these out. So EX and bring these out. Now, we could, if
we wanted to take these edges right in here, and we can extrude these up so easy and pull that up like that. Maybe pull it out some. And then let's bring
these points in. So they kinda close this off. Let me do that directly
in the y-axis. There we go, and then take this one,
bring it back in the Y. Okay? And we can do that for
these easy, bring it up. And then scale it in the y as y. So it kind of fits in there. And this one, I'm just
going to drag back to here. Alright, so once again, face orientation
and we've pretty much got the floor
taken care of. That's good. But what
about these walls here? We're going to need to
do something with these. So for this, I think
what I wanna do is just duplicate them
and then flip them. So if we go to face mode, well we can do is just
hit the C key again and circle select these faces on
the side of the truck here. I'm just going to come
through here like this. All of these like this. Oh, it looks like we've got some poking through
there and that's fine. We will pick those up and
maybe I'll hide the tires. That might be a little
bit easier. There we go. I will select these. So what I'm gonna do, oh, it looks like bottom
is still selected. So, oh, that's from
the previous time. Let's once again hit the C
key and I'm going to middle mouse button click and drag down here to de-select
all of that. There we go. Then I just want to
take all of this, duplicate it and pull it
in just a little bit. So Shift D and the X key
hold the Shift key down and just move in ever
so slightly like that. Now I'm going to press the P key and separate by selection. There we go. Now we can
select this in object mode, tab back into edit mode. Let's go to face orientation. I'll hit the a key
to select those. And we can go up to Mesh
normals and flip. There we go. Now those are blue
on the inside. That's what we want. Now I may want to take these and scale them a bit
in the wireless. Do that s why hold
the Shift key, I'm just going to scale it
just the tiniest bit so it doesn't poke out
the back at all. There we go. Alright. Now, this other area
up here we could take, oh, well, we could just
do this area on its own. We could take these faces
here and on down into here. We could duplicate these
and pull these back. Let's switch to normal
transform orientation, and that'll give us an axis
that we can pull back in. So let's do that. Let's press shift
D and Z and hold the Shift key down and
pull in just a little bit. And then I'm gonna
hit the S key and scale it in just to smudge. Maybe move with the hair. Something like that. I'll go to Mesh
normals and flip. Let's take a look at it. We go yeah, that'll work. We probably don't need
any of this upfront because there's really no
way you're going to be able to see it through here. We might want to deal
with these frames here, but other than that, I don't think we're going
to need all of this, so I'm not going to worry
about all of that for now. Let's come back and turn
off face orientation. So that means we can begin
blocking some of this n. We could just create a cube, shift a mesh cube, and scale it down a bit, bring it up into here, and then move it forward. And this could kinda begin
to be this console area. Let's tab into edit mode. Select this edge here. Oh, I better go back to global, so Comma key, global. And I'll bring this up. It's kind of like that. It looks like it actually
comes out farther. Something like this maybe. Alright, there we go. So I think that's
a good beginning. In the next video, Let's start working on just blocking in some
of these pieces, the chairs, the gear shift, the steering wheel, and that
little dashboard there. Once again, probably
not going to see it, but it's kinda fun to put in, so we'll go ahead and do it
45. Modeling the Seats: Well, let's now work
on the inside here. How about the seats? Let's work on one of those. I'm going to right-click
and choose join areas and close up one of these image editors
just so we only have to now, there we go. So for one of these chairs here, I think I'm going to create a new collection
called interior. Let's do that. We've got this is well, I'll just call it floor. And this is the console.
I'll just do that. And let's select
these two and press M and choose new collection. And I'll call this interior. And I guess I'll just begin creating new objects from
the scene collection. I'll just select that up here. So let's just, let's just
hide everything here. And let's work on
one of these chairs. So I'm going to press
Shift S1 to move the cursor to the
center of the grid. For these chairs, I
think it just looks like it's two cubes, right? Shift day mesh cube. Let's do that first. I'll scale it in the z
and we'll take it down, maybe something like this. Let's try that first. It looks like it may be
a little bit longer. I'm going to press S Y and
move that out like that. Maybe, maybe not quite that
much, something like that. And then let's get
the back of the seat. I'll press shift D y
and move this back. Let's press R X non-zero. Then I'll hit the three key on the numpad and
move that up some. So maybe we're thinking
something like this. Now it looks like I
know it's hard to know. It looks kinda like this
sits on top of here maybe. So maybe we do need
to bring this out a little bit more like that. See how that looks like. That needs to be a
little wider now. Okay. And it looks like
it all kinda tilts back just a bit, doesn't it? So let's press R x and just
that whole thing back. Then. Maybe this could tilt back
a little bit. In addition. Let's try that. Okay, so that's just our
basic outline of it. For the back, I feel like we've got a little
bit of indentation here and a little
bit of a curve to. So I think maybe I'll just select this and
insert an edge up here and maybe pull
it in just a bit just to imitate that curve there. And then maybe I'll take these. And I liked this
back panel here. Maybe I'll just duplicate this shift D and pull this
out just a bit like this. And then maybe I'll extrude it e and pull that
out like that. So we have that back panel. Then it looks like down here, there's some sort of
something down there too. So maybe I'll press shift
D Y and pull out a bit. And then I'll just hit E and
pull this out like that. Something like that. Let's see what we think. And then, um, well, we could select this here, tab into edit mode
and just select these two edges and pull in a bit to get that curve
there like that. I feel like this needs to
be a little bit thicker. Maybe we could bring this
up and this as well, maybe bring this up like this. And I feel like even
that maybe has a little bit more of a rise to it there on the
front. Perhaps. Let's now block in
this bit back here. It kind of looks like that. This comes out a
little bit and then there's something
that comes down. I'm not really sure. Why don't we let see how
tall does this need to be? Maybe it's sitting up off of the floor of the vehicle
amount like this. So maybe if we created a cube and brought
this down like this, and maybe pressed S Y
and bring this out. So maybe there's something
that sits down there. I'm looking down here. Maybe there's something
that sits down there. So let me press Sx
and scale this N. Then we'll bring it
over here like this. There's something that
comes off the back here. Let's see what that is. I'm going to maybe select these points here and
take them in a bit. And then I'll create
a new cube here. And let's just begin
this here like this. And I'll tab into edit
mode and grab these. Well, I'll just take this
straight down for now. And then let's press Control R and bring
this in like this. And Control R down here. And maybe bring these in, this n and then
this out like this. It just looks like it has
a slight S curve there. So maybe something like this. And then we could take this
and add a few bevels onto it. So let's try that Maybe I could press
Control a and apply the scale and then
select this edge, this edge, this edge. We'll just do all of
these. Let's just try all of these control B. Scroll the mouse wheel here. We just have that
kind of turn to it. And once again, this is probably
never going to be seen, but it's kinda fun
to put in here. And then I guess we need
something up here now too. So let's press Control R
and bring this up here. And maybe just take
this straight up E and then kinda lean it
back a bit like this. And maybe I'll select all of these and widen
them out just a bit. And maybe for this as well, we could apply the scale, grab this edge right here, and maybe this edge down here. And we'll just give these a bit of a bevel as well. Here we go. Alright, so let's now come up here and work on the bevels. Think I'd like to begin
with this one here. Let's press Control a
and apply the scale. Bring that out like that. And then let's select
these over here and give them a bit like that. And we will smooth it. And then this up here, well, I think we're going to need a bevel up on top
here, like this. That I guess we gotta go ahead and do
that around here as well. Yeah, let's do that. Okay. Let's smooth that. And also, I want to
just go ahead and grab these as well and give
these a bevel to match. And then maybe we
could also play with the settings over
here to get more of a match with the
bevel on the cushion. It doesn't look bad. I just thought I'd try
and kind of go like that. There we go. Let's try that. And maybe, maybe let's
do a little bevel, both here and here.
Let's do that. See how that looks. There we go. Yeah, I think that'll work. Okay, so now that we've got
that, let's combine these. First of all, Control J. And then I'm going to
duplicate these over. I can just press shift D
and X and move these over. That's okay there. Let's now take this
and combine it all. So I'm gonna take this, this, this, and this. Let's press Control J. And then let's move the origin
to the center of the grid, set origin to 3D cursor. And then let's take this
and we'll call it seat one. Let's do that. Let's
bring everything back and let's see if we can
get it to fit in here. I'm going to scale
it down quite a bit. It looks like it could be wider. So I'm going to
press Sx here while we're here and do that. And let's bring it up
right in here until we kind of go in and
then I'll bring it back out just
a bit like that. Alright. And then feel like
it needs to scale down a bit. Let's move it over here.
Something like this. Let's see how that works
now that's pretty small. Let's scale that up some. Yeah, I think we're
getting there. So in the next video, Let's duplicate this
over and then begin working on the pieces
in-between the seats
46. Creating the Gear Shift and Parking Brake: Now that we have one seat done, let's just go to the top view and I'm just
going to duplicate this over shift dx and move it over about where I
think it should be. Just to see in terms of size and placement
how we're doing. Yeah, I think that's okay. Let's now work on this
part in the center, we've got a gear
shift and something. Is that a parking brake? Maybe. I'm not sure. I think I just want
to create this piece first, that square there. So I'm going to tab into
edit mode and maybe just select this point and move the cursor to it with Shift S2. And then when I bring in a cube, it'll at least be close to
where it should be, 0.1. There we go. And I think I will just, um, I'm gonna take the
bottom face off of this. We don't need that. And I will scale
it in the Z a bit. I'm just going to
scale it out to about where I think
it should be, maybe, maybe
something like that. Let's begin with that. And I will bring this down and maybe give an extrusion
for this piece here it looks like there's
kind of a rim on that. So I'm just going to
press S and scale out, then E and pull up like this. Maybe I better apply the scale. Control a, apply the scale. Okay. Then there's something
in the middle here. It looks like, well, not
quite in the middle. It looks like a
square inset there. So I'm just going to press
I and let's insert this in. Probably like this. And then I'll just move it
back, something like that. It looks like it's just
farther back there. And then let's extrude down and I can go down to
where the floor is, just about like that. And I guess what Let's do now
is just add a few bevels. I'm going to in edge mode, just select these
and press Control B. And let's add a few bevels here. And it looks like we could add a few in here as well inside here. It looks like it's got some
curved edges in there. Let's do that. Okay. Maybe I'll smooth it. There we go. Maybe
drag that up a bit and we go from here. I guess we just want to
create the gear shift. Now let's do that. I'm going to press Shift F2
to move the cursor here. Actually, let me
just select this and press Shift S to so it's
more in the center. Then let's just
create a cube here. I will once again take
away the bottom face. We don't need that. And for this, I think
what Let's do is begin with a subdivision
surface modifier because I kinda want
it to be curved. See how it's kind
of curved here. Or at least I think it is. It's hard to tell if cars let's add a subdivision
surface modifier, and I'll go ahead
and smooth it a bit. We could add another
level there. Yeah, something like that. So now if we take this and
bring it in like that, and with the 3D
cursor still there, Let's press Shift a
and create a cylinder. It looks like it's
just really big. So I'm going to take it down
to 16 sides, 0.1 and 0.2. And I will take away
the cap fills here. And let's scale this down and make this gear shift part here. So S, z and scale that up a bit. Maybe bring this up. It looks like it's
kinda tilted back. So maybe let's just press RX and tilt it some and then
bring that over like that. I can smooth that that it looks like it's a
little bit too big around. So what we can do is tab into edit mode and we can use
the shrink fat and tool, which is right over here. And this is kind of like scaling in the x and
the y, but not the Z. You can see that the
shortcut key is Alt S, so I'll just press Alt S and then you can see it
just kinda scales at, around the circumference
of the cylinder there. Let's try that. All right, Then,
how about up here? Let's grab these
points right up here. Best Shift S2. And here's where we can
create a UV sphere. Once again, it's huge. I will bring it down
to 0.1, let's say. And let's do let down. Yeah, that looks pretty good. Maybe it's a little too big. Let's bring that down
some and smooth it. Pretty basic. But I think
that's all we need. I do want to grab
these edges right here and give these a bevel. Let's do that. And then also we've got this
what I'm thinking, maybe an emergency brake
parking brake type thing. Let's take all of these
that we've created so far and drag those into the
interior collection. Let's hide everything here
and then work on this again. So I'm going to ensure that the 3D cursor is in the center
of the grid with shift S1. And then I think I'll
just create a cube. And let's just scale this up in the z quite
a bit like this. I'm going to bring this up
and sit it right about here. Let's scale it in the x. Something like that. I can remove this on
the bottom again, we don't need that. And for that handle, we could maybe just insert an edge loop where we
think it's supposed to be, maybe about like that. And then we could use that
shrink fat and tool again. So we could take
these faces here. I'll just Alt click
between two and that selects that whole face loop. And then let's hit E and Enter. And then I'm going
to press Alt S. And let's just pull that
out a bit like that. Now, it's not doing great probably because I
didn't apply the scale. Let's just test that. Let's just test the difference. I'm going to go back
to object mode and press Control a and
apply the scale. And then I just want
to try this again, E enter alt S. And now let's push out. And you can see how
it's a little bit more even as it pulls out there. Okay, now let's grab
these edges here all the way around and let's bevel
these in quite a bit. Yeah, something like that. And maybe on the top
two, Let's try that, select that edge and pebble
those just a bit like that. Yeah, So we've got that. Okay. And I will
auto smooth that. Then we kinda want to bend it. I think. Let's try that. Let's insert an edge loop here. And maybe, I don't know, maybe something like that. And then let's take these
up here and I'm just going to move them and
tilt them a bit. Then let's take
this edge and press Control B. Bevel these
out sound like this. So we get a curve there,
something like that. Then we need a
similar thing that we did at the base of
the gear shift. Let's just create a cube here. Remove the base on the bottom. And then let's just
scale this up. Add a subdivision
surface modifier. We go something like that. And also maybe I'll tilt
this just a bit RX, kind of like that. There we go. And maybe I'll add an extra
subdivision here. Smooth it. And maybe take this
face up here and kinda drag it in some like that. Alright, so now
I'm going to apply this subdivision surface and select this and join
these together Control J. Let's move the origin down
to the 3D cursor here. And then let's bring
everything back. I'm going to call
this I don't know. Parking brake. Bring these back and let's put this in place now. Bring it up, scale it down. And maybe put it
right about here. Little bit too big, 0. And I think I want to
spin it around on a. Let's try that. So RZ 180, something
like that. Yeah. I think that'll be just fine. We don't need once again, we don't need to
much more than that. All right, so in the next video, let's work on creating the steering wheel
and the dashboard
47. Modeling the Steering Wheel: Continuing with the interior, let's work on this
steering wheel. Let's zoom in over here
and see what we've got. Well, it's really
just a torus and then a cylinder and these extensions coming
out so we can do this, Let's take this
parking brake and drag it into the interior collection. And then let's just take
all of these and hide them. I'll choose the
Scene Collection. And let's, well, let's go to the top view with the
seven key on the numpad. And let's press Shift a
mesh and create a torus. And so really all we
need to do is figure out the proper proportions here. I think the minor radius
here will allow us to, I'm going to hold the shift key, will allow us to kind of get
this a little bit smaller. Kind of looks a little bit more like a steering wheel like this. I feel like this may be a
little bit too thick simply because it's a very
small scale model. So maybe, maybe
something like this, let's say for the
steering wheel. Okay. And then this centerpiece, let's press Shift
a mesh cylinder. I'll go to the top view once again and let's
hit the S key and scale this down to about
where we think it should be. Maybe about like that. Let's try that. And then I'll go to the front view with the
one key on the numpad. And let's bring this back. And I kinda feel like
it's back here like this. And then let's take this. I'm gonna hit the period key
and goto median point so that the move gizmo is
at this point here. And I'll bring
this up like this. And maybe that's all we
need for now right there. And then let's work on these
little extrusions here. So let me tab into object
mode and then press Control a and apply the scale just to make sure
it's all ones there. And then I'm going to
take this face here, Hit the I key, and let's insert
this in just a bit. So I'm working on
this right here. And then let's hit E
and pull it up sum. And then I'm going
to press I and inset in just a bit,
maybe like this. So we're at the
little curved part. I kinda feel like I want to
extrude this in like that. And then I'm going
to press Shift S to, to move the cursor
to that point. And then let's create a sphere. I'm going to press
Shift a and create a UV sphere here in edit mode. So it'll be all part
of the same object. And then I'm going
to scale this down and let's kinda fit
it right into here. Hit the period key on the
numpad again to zoom in. And at this point
let's just press S Z and kinda flatten
this like that. Let's see what we think here. Yeah, I think
something like that. So I do want to go
ahead and go in. I'm going to press
Shift Z and just get rid of these
faces on the bottom. But since I've created
it all as one object, I can just drag
select it because it'll select all the
other phases in there. So what I'm gonna do
is just hover over two faces and select an
edge loop like this. And then hit the X
key and delete faces. And then I can hover
over this and press the L key and that'll select
that and then delete that, right, so I can just get
that out of the way. And then maybe I'll
take this edge right here and just extrude
this straight down, easy, and pull that
down just a bit. All right, so we've got that. Before I do any smoothing or beveling or
anything like that, let's take care of
these four spokes around the wheel here. What I'll do is create
some edge loops here, maybe one here, and
maybe one down here. So we have these things
blocked out here. So if I select these faces here, these are the ones that's
going to come out of. Let's do that. I'm just
going around to each side here and selecting those faces and then we want to
extrude all of them out. And we could extrude and
scale in the x and the y, but not the z, like
we've done before. But I think for this, I want to extrude individually,
each one individually. So what we can do is instead
go-to individual origins. So I can pull this menu down. And instead of median
point or 3D cursor, which we've been using, let's use individual origins. So whatever we do Blender, we'll apply it to each one
of those individually, each one of these selections. So I'll hit E to extrude and then I'll
just pull out like this, get it to about
where we want it. And then I want to
take these down. I'm going to scale them down
a bit and you can see how they're scaling individually
at each selection. And now I'll take these
and just drag them up into the steering wheel like
this, kinda like that. So they kinda go in right there I think I'm going to take this
face down here, select it, maybe move it up a bit, move the cursor to
it with Shift S2, and then delete it because
we don't really need that. And I'm going to move the
origin of this object to the 3D cursor right there. And then let's start
adding a few bevels, maybe smooth it, et cetera. So let's see what we
can do with this. I'm going to tab into edit mode. I will click this edge
right here and press Control B and pull this out, give this a bit of a bevel here. There we go. Let's do
the same for this one. Maybe a smaller one, and we want one in here. Why not? Let's do
that. There we go. Oh, you know what
I think I would like is I think I'd like a few bevels out here on these
edges all the way around. Let's do that. Control
B and pull those out. We go. Now let's smooth it
and maybe drag this up. I think that's yeah, no, I think that's pretty good. Alright. Oh, and let's then take this and join it with this
already smooth part. Shift-click that control J. But we do need to apply
our smoothing again. Let's do that. Okay, there we go. Now we can take this object, let's call it steering wheel. And let's bring everything else back and try and bring it
up and put it into place. So I'll bring this up. Let's turn it. Go to wireframe with Shift Z. And I'm just going to
scale it down here, bring it in here, scale it down a bit and
just try and get it. So it's just kind of where
we think it should be. And maybe I'll
bring it over here. And let's see. Yeah, so we could maybe put it more in the center
here, perhaps, something like that and
maybe move this seat so it's in the center
here like that. We could now since
we've moved this chair, we can take this
one and delete it. Take this one, hit
the period key, go to 3D cursor, Shift D, Enter, Control M, the X key, and enter,
and there we go. Alright, so we've got
the steering wheel in. Like we could take this
edge right here on hit the period key and go
to median point again, kinda pull this out.
So I'm like that. And while we're here, it looks like it's got a rim on either side of the
console there. We could add that real quick. I'll just press Control R, scroll the mouse wheel once. And then let's press S and
scale this out like this. And then we take this
face and this face. And let's just extruded in E
and push it in just a bit. There we go. So now we've got those on there. Alright, so in the next video, but let's do it. Let's try and create this little dashboard and
fit it in there as well.
48. Modeling the Dash Board: For the dashboard or
the console here. Let's really began in
the same way we did. Let's take this steering
wheel and move it into the interior collection and
then let's hide everything. I'll move the cursor back to the center of the
grid with shift S1. And then I think just
to get this shape, let's just begin with
a polygon plane. I'll hit the seven key on the numpad to go
to the top view. And then let's press Shift a mesh plane and
tab into edit mode, go to vertex mode. And let's just maybe
take these points here. Let's move these
up to about here. Let's say I'm looking at
this part right here. Then let's just
extrude this down. I'll press EY and
move this like this. And then let's
scale it in the x. Now let's go ahead and add these dials or gauges here
and get them in place. So maybe I'll press Shift a mesh cylinder and
I'll scale it down. And let's just move it
down here to work on it. And it looks to me like, well, let's first of all go in
here and just take this, move it up, maybe like this, and then we can delete this. I think, delete that. And then while we're
here in object mode, I will apply the scale. Our scale is still uniform, but let's go ahead
and just press Control a and apply the scale. And then let's select this. And I want to extrude
in a bit or inset, I should say I'll
hit the I key and inset in kinda like that. Then it looks like it goes up. I'll hit E and pull up. And then maybe an inset and a bit and then E and push
down just a bit like that. So that's kinda the basic shape. And now let's tab
into edit mode, alt, click this edge here, and let's press Control B, bevel that a bit like that. And then in here, let's select this
and this control B and just pull in
just a little bit. I don't think we need that
many segments though. I'll reduce that
here maybe to three. Let's do that. Then let's smooth it. I'll just choose auto smooth
and see how we do. Yeah, I think that looks fine. So now what we can
do is take this and scale it down and let's
get it in place here. I'll move this up
here like this. All right. This maybe
maybe something like that for this one here. And then maybe we've
got two on either side. So shift dx, scale it down, Shift D X and I'll
move it over here. And then maybe we
could just take these and move them
down like this. Maybe like this. I
don't like that. And then it looks like the
others are not symmetrical. So I'll just take this one and Shift D and
move it over here. Let's shrink it down just a tad. And then it's got a
smaller thing here. So I'll just take this and scale that
down a bit like this. Alright, and then over here, I guess it's a
similar thing, right? Let's just press Shift dx and take this one over
here too, like this. Alright, so now let's
take them all and get them in line with this. So let's just begin
bringing these down. Maybe I'll bring this
one down to here. These down to here. These get these in place, and maybe these shift x0 get
these in here like that. So now let's finish
off this piece. It kinda looks like I could scale in the x just
a bit like this. Maybe pull it up just
a bit like that. Maybe scaling the y. I'm just trying to get that
general proportion there. And then I think there's a rim around this. Let's try that. I will press Control a
and apply the scale. I'll select all of these
faces and then just hit I and inset in
just a bit like that. And then maybe we
could just take this ridge and just hit
E and pull up a bit. So we get that ridge there. And then let's take this
edge down here like this. And is there a RIM? It looks like
there's a rim there. I'm gonna pull this
down like this. It ES and scale in just a bit. And then easy and
pull down like that. So we've got maybe
something like this. And now I'll just join
all these together. Maybe all of this
here, like this. Shift-click Control J. Oh, I lost my smoothing. Let's add that back
and then maybe give this a bit of a bevel
along these edges here. And maybe this here. We don't need this
one in here and let me de-select that one. Alright, and then let's just press Control B and
Bevel those out like that. Yeah, and maybe one
last thing I'm going to try and just bevel
this right here. Yeah, I think that's fine. S as we've said, No one will probably
ever see this, but you never know. You never know. I'm going to press Shift S to, to move the cursor
to this selection. And then let's move the
origin to 3D cursor here. Now we should be able to bring this up and add
it into the interior. Now I think I need to
spin it around, right? I think RZ 180 like that. And then let's press Shift
Z key, move this down, turn it just a bit, and let's move it
in here and see if we can kinda get it in place. Let's see how this looks. Well, it needs to move over. And I think it's
still a little big. Let's bring that down like
this. Let's try this. Yeah, that might work. Now, I probably need some sort
of a steering column here. Let's press Shift S2
and move the cursor to this point and then
shift a mesh cylinder. I'll take this down to 16 sides, 0.1 and 0.2, and I'll
remove any cat fills. And then let's just
scale this down. Some. Go to this side view
and turn it here. And then maybe we could
change to local transform, move this back a bit. And if we tab into edit mode and just select these points here, maybe we can just drag
this down like this. Let's see how far
that should go. Yeah, maybe it needs to go a little bit farther like that. Actually, probably what we
need to do is put a panel in here behind the dashboard so we can't see through to that. I'll smooth this. Yeah, there we go. We've got our dashboard. So I think in the next
video we'll Let's do is just clean this up
or finish this off. We can just put a panel in
here to close off this area. And then I think we'll be
done with the interior
49. Finishing the Interior: To finish off the interior, let's just put
something back here. We really can't see in
here very well at all. And that's really probably
the way it's going to be. I don't know that anyone's
ever going to see in here, but let's go ahead and just
create a polygon plane. And what I'm gonna
do is just bring it in and set it up back here. I think I'll just hit R and G and maybe move this,
something like this. Let's just see how this works. Just to kinda block it off
so we don't see in there. Yeah. Something like that. Let me press RX, maybe turn
it like that back a bit. I do think I'd like it to come up here behind
the dashboard. Well, let's see, maybe
we could just press Control R and create an edge right there
and maybe one up here. And maybe then I could just take this and bring it forward like this and drop it down
into here. Like that. It's looking a little
strange, that's true. But we can fix this. I just want to take
this and maybe move it down into here. Maybe something like that. Okay, so now I can kind of
take it and rearrange it. And in fact maybe
what I'll do is dropping edge right
down the center. And then I will Alt
click between two of the faces here and delete this side just so I can
mirror it over here. Mirror and I'll turn
on clipping here. Okay, so now if I grab
these points and edges, I can move them around
while this is mirrored. Alright, so I'm gonna
bring this down, maybe bring this forward. Because I can kinda
see something, something up in here coming to the bottom of the
window like this. Maybe, we can maybe
bring that up to here. Maybe I'll take
this edge again and move it back a little
bit like that. Let's grab this bottom edge
here and bring this back up. So it's up in here, like this. And maybe I'll grab this one. Bring this forward a bit. So I'm just trying to get a basic shape in
here. Nothing fancy. So maybe I'll take
this back like this. Maybe I'll take this
forward like this. So it kind of connects
with this piece here and then hit Easy and
bring this up like this, something like that.
Yeah, there we go. Okay. And then I can just
begin taking these in until we can't see
them anymore, right? Let's move this down and then
take this and move this in. And all of these as well. And maybe it looks like
there's one right out here. I'm going to take this one in and then bring
this whole edge up just a bit so we
just hide everything inside here so we don't
have it sticking out. Alright, so something like that. Let's go back up to our
viewport display here and turn on Face Orientation and just see what we have here. Yeah, I think that's
going to be fine. And I don't think
we're ever going to see this part back here. Well, there is a
possibility, I guess. So maybe I could just take these faces in here and just duplicate them
and move them in a bit. Let's do that. Shift dx, pull it in just a bit, and then flip them.
Mesh normals Flip. So we've got that. We go. And then if we're
peeking in here, we may accidentally see
this stuff in here. So what if we take this face loop here and press Control and the plus
key on the numpad. And let's move it to
about right here. I'll press Shift, Enter, scale-out, just a smudge, maybe move it back some, and then flip it as well here. So it's blue there. So just in case we
see through here, we're not seeing the
back of polygons. So, oh, and look over here. Now that we're thinking
about blue and red, I didn't put the
back on this one. So yeah, I have it there. So maybe I'll just take
this and delete this. And then let's take this, hit the period key, 3D cursor, Shift D, Enter Control M, X and enter. So we have this over here
now and it's all blue. That's good. Did we ever create
anything in the back here? I guess I thought we did. Well, let's go
ahead and do that. I guess. I'll hit the C key. And let's circle
select all of this, down to here and down to there. And then let's just duplicate
this and bring it in. I'll press the period
key go-to median point. Let's press shift D Y
and hold the Shift key. And I'm just going to bring
this in just a bit like this, scale it down just a smidge, and then go to Mesh,
normals and flip. So we have that turned in there. So generally speaking,
we've gotten more blue than red in here. I don't think we're ever
going to see up in here. I think that'll be fine. So yeah, I think
that's pretty good. Let's put the tarp on. I'll come back over here
to the outliner and search for our tarp and
bring this back. There we go. I'll turn off face orientation. So what do we think? Yeah, I think that's pretty
good. Actually. We can see in here that
there's a little bit of something in here,
right in there. We can see a steering
wheel and the seats. So I think that'll
work just fine. Once again, just in case
people see in there. And it looks like,
Oh look at this. It looks like I've
got an edge here. Let's take this edge right here. And I think I've got this sticking out just a
little bit too far. I'm going to bring that in until it goes in there
and hides in there. Yeah. Okay. I think that works. Alright, so I think the last thing I'd
like to do for this is the ties on the, on the tarp. Let's come over here and go to this these things here, right? I'd like to get these
things on the sides. Maybe this line here, maybe a line on the tires here. So there's just a couple
little things I'd like to do. In addition, we've got
this little footstep. Maybe we could add
some mud flaps. So let's take a little more time to add a few extra details. Maybe do a few fixes, see if everything's in place
and the way we like it. And then in the next
section after that, we will begin UV mapping
50. Creating the Tarp Hooks: To create these hooks
and ropes for the tarp, I think we really
need to figure out what these are and it's
kind of hard to see. Once again, it looks
like this one is just straight out and then
an angled down and I think this is the shadow. If I'm not mistaken, I don't know for sure. But I think that's
what I'm gonna do. I'm going to style it
after this right here and have it just be an
angled hook like this. So let's just work
on that real quick. I'm going to press
Shift a mesh cube and let's bring this out. And once again, I will get rid of back face that we don't need. So I'll just select
this and delete that. And then maybe let's
scale it in like this. Let's bring it in,
in the z, like that. Scale it in the y sum. We can tab into edit
mode and add an edge, maybe right along here, and then select this face and extrude this down like this. So I'm just looking at
this right here. Now. I'm not sure that that's
really the way it is, but I think that's what
I'm going to go with. So now that we've got this, I'm gonna go to the
side view Shift Z, and it looks like we've got some information here about
where these things are. It kinda looks
like they're here. And then the grommets
are a little bit back. So let's just scale this down some hit G and move this
over here like this. Now let's put it in place. Hit the period key on the
numpad and pull in like this. So maybe I'm thinking
there about like this. Maybe I should scale out
in the y a bit like that. Maybe I should scale in a pit. I'm thinking maybe
something like this. Now I think I'll
bring it down just a bit like this since these are a little bit farther down from the tarp
than I have it here. Let's then just use that one and duplicate
for these others. Shift D y two here. And just move these
on back like this. And then we've got one that's a little bit
different over here. It looks more like a boat cleat that you would tie a
boat up with at a dock. So let's see if we
can work on that. I'd like to get all of
these out of the way. It looks like this, this, and this is all part
of the interior. So let's just take those and move those up into
the interior here. And then I would
like to maybe create a whole new collection
called tarp. Let's do that. I'm going to select these, press the M key, go to new collection
and call this tarp. And then let's also take
the tarp right here, press M, and move that into
the tarp collection as well. Alright, so now we have that. Let's now hide all of this. Just click and drag up here. And let's see, we
can make this thing. We have a better
picture of it here. Not really, No. So let's maybe press Shift
a and create a cube here. And then I think what I
wanna do is just extrude out from the sides here
to get the ends here. So maybe what I'll do
is split it in half, Control R and add
an edge loop here. Let's then select these faces
over here and delete them. And then we will go ahead and add a mirror modifier to this. Now, it's going in the y axis, so I need to change
my axis here. I can turn off X
and turn on why? There we go. And then turn on clipping. And now let's select
this face here. And let's just extrude it
out and up to get this. Now, I think what I wanna do first of all is
applied to scale. I'm going to press Control
a and apply the scale. And that's because I
want to try and use the Control right-click
feature for extrude. So with this face selected, I'm going to move my
cursor here and control, and right-click and control and right-click,
Right-click, right-click. So I've just very quickly
created that basic shape there. However, these are way too big. It gets smaller as
it gets farther out. So let's turn on our proportional
editing tool and I'll just hit the S key and
maybe scale this out. And now let's just begin to
scale this in like this. And then I'll scroll the
mouse wheel and you can see it kind of brings
those in a bit. So maybe I want to
bring it in like this, and then I'm going
to scale it in the x as well, like this. Maybe I will turn off the
proportional editing tool, add an edge here and
then scale this out in the x just to bring that out
just a little bit like that Yeah, maybe something like that, hit G2 times and bring this out. I think what I will do is take this face here and delete this. And then I could take these points here and
just bring them up. So it's kinda flat like
that. Let's try that. Then we can smooth it. Let's do that. See if that helps any. Maybe I could scale it in
the x here a bit like that. And then maybe I'd
like something, some sort of a bolt
or something on top. Let's try that.
I'm going to press Shift day mesh, UV sphere. Let's take this
down quite a bit. I'm going to take it
down to say 16.12. And then I'll just
bring this up. And let's tab into edit mode. And just in wireframe, drag, select all of
this and delete it. And then we should be able
to just scale this down, maybe scaled in the Z bit, and just kinda put
this on top here. I just wanted something
here to make it look like it had been attached. Let me take this these two points and move
these down like this. Take this and move it down. Let's see how this looks now. Yeah, so something like that. I will smooth that. And maybe I'll scale in
the x here for this thing. Let's duplicate this
and move it over. There we go.
Something like that. Alright, I think that's
really all we need. So I'll just take this
and apply the mirror. Take these and add these two, this with Control J. And I think that's going
to be fine. Let's try it. I'm going to move my
cursor down here. I'm going to select these edges down here and press Shift S2, and then set the
origin to 3D cursor. And then let's bring
everything else back here and take this, see if we can put this in place. So I'll spin it in the z 90 degrees and I'll spin it in the y
90 degrees. There we go. Just scale it way down. Go over here to the side view. And let's bring this up and
put it in place in here. Something like this. I'll hit the period key. And let's move
this in like this. Let's see where we
think it needs to be. Well, I think it needs to
be above these hinges, so I'm going to move
them up like this. Maybe over a bit like this. I'm going to put mine
about right here, I think let's do that. I wonder if we want to add a subdivision surface modifier to this and just
see what happens. Let me try that. Yeah, that kind of makes it
a little bit more like this. I think. Let's smooth that again with auto smooth
and then drag these up and see what that will do. Yeah, that I think that's
a little bit better. Let's go with that. And I'll go ahead and apply
the subdivision surface. There we go. So I'll just call this cleat
so we know what that is. And I think that'll work. So in the next video, what Let's do is use
the path tool to create the rope that
holds the tarp down
51. Adding Ropes to the Tarp: To create the ropes, let's go ahead and
create a path. I'm going to move the 3D cursor into the center of the
grid with shift us one, and then press shift a
curve and path right here. Now let's bring this out. You can see that here. And I'll go ahead and
press RZ 90 to turn that. And let's bring it up a bit
and go to the side view here. And I'm going to scale
it down quite a bit. And then for this
piece right here, oh, you know what I ought
to do before I begin, this is create those grommets so that we know where
they're going to go. So to do that, I think I'll
hide these things here. I'll go ahead and hide
everything that's in here. And let's press
Shift a mesh torus. And then once again, let's see what we think about
how big this should be. So maybe I bring down the
minor radius just a bit, so we get something like that. And then let's tab
into edit mode, and let's remove the
bottom faces here. We won't need those. And also maybe Let's tab into edit mode and
select this edge here. And I'm just going
to hit E and Z and pull this down just
a little bit like that. And then in the center here, I think I will just
Alt click this edge right here in the center. And then let's just press the F key and fill
that with a face. And I think what that will
do for us is just allow us to put a black texture there. So it will kind of
hint that there's a whole without us
having to create a hole through the
tarp for each of the grommets because that could really take up a
lot of polygons. So let's smooth this. And then let's go back. I'll bring everything back. And let's turn this and
put it in place, RY 90. And let's just scale this way down and move it up
into place here. So it looks like we've got
one above the cleat here. So I'm going to
scale this down and maybe put that right
in here, let's say. And I'll scale it in. We need to move it way in here. Let's do that. And
to bring it out. And I don't want to cover the center part that
we just created, so I'll leave it
about like that. So that may be about the
right size, I think. Let's just take that and
move it over a bit here. And then I'll just
duplicate these. It looks like here. They're a little bit off of
the cleats or the hooks. Whereas here it looks like there are more closely aligned. I kinda like these here. So let me press shift D y and just move
these over like this, maybe something like that. Let's just try this to you. Why? And Shift D y like that. Okay, so now we've
got our grommets on. We should probably move
this tarp in a bit because it's kinda sticking
out a little bit too far. What we could do maybe
is just grab all of these here and just
bring them in. Kinda like this. Yeah. Let's do that. Kinda get
it a little bit closer. Yeah. Okay. And then we can
grab all of our grommets here and bring all of
these back right on there. Let's bring them out
just a little bit. I'll hold the Shift key down. And now let's go
back to the path and let's work on
creating the rope. So for this, I'm going to move it back behind
the cleat here. Go to the side view and
I'll tab into edit mode. And then we should be able
to just to take these and begin to move these
around to get it. So it looks like
it's going around that cleat and going up underneath the tarp
to this piece here. And hit G and move
this down like this. Something like this. Let's see. Yeah, we're getting
there and let me move this back a bit. And then let's go ahead and
add some geometry to it. Let's me join that together because I think we only need one image editor here. And then in the object
data properties, Let's scroll down and in
the Geometry under bevel, in the depth, Let's
click and drag on this and bring that out
a little bit like that. So it looks kind of
like a rope, right? Maybe a little bit more,
something like that. Let's see how that looks. Alright, so that's pretty good. Let's now create these here. I think we can maybe
create one and then just Duplicate it on back. Let's just take this and I'm going to duplicate
this shift D Y. And I will tab
into edit mode and let's see if we
can kinda make it. So it looks like it's coming
out of here and maybe going underneath here and
around this here. So let's just try this. Move this up here, like this. So you can see what I'm doing. I'm just trying to get these to kind of look like they're
going around here. Yeah. So I'm just going
to move this up a bit so it looks like
it's a little bit, a little bit tighter. And then let's take this
little guy right here. Let's try and extrude
this back in the x. So I'm going to press EX and
move it just a little bit. Actually, I'm gonna
need another one here. So e, x and pushing like that. There we go. So it just looks kind of like that's inserting
into there. Alright, so let's
give that a try. Now let's, with this one done, Let's just try and take this and duplicate it and
see if it'll work. So I'm going to press
Shift D and move this. Let's say I move it
to here and then grab these points over here like this and just move these into here like that. Yeah. Okay. And then let's
just do that again. Let's just keep on going down the line and get these in place, Shift D, maybe like that. And then we could
take these here. And moving back like
that. There we go. Then let's do that again. Shift D Y here. And then I'll take these
and move these like that. Shift D y. And I'll move these. And let's do that again. Shift D Y, move that to here. Move these. Then I think we're
going to need one more going around and kinda tuck it up in
there. So let's try that. Let's press shift D y. Move that over to here. And then if we tab
into edit mode, maybe we can kinda
get this arranged. So it looks like it's inserting into the back of the tarp here. Let's try it. Yeah, something like that. So we're going to need to
adjust the tarp a little bit and maybe even add a little bit of an edge on the inside here. Let's do that real quick. Let's tab into edit mode. And I will go over to
the modifiers panel, and I'm going to turn
on the cage right here. There we go. And then let's just select
this edge all the way around. Okay, let's change
to the 3D cursor. For the pivot point, I'll hit the period key
and change the 3D cursor. And now let's extrude and
scaling in the x and the y. So I'm going to hit Shift Z and pull in just
a little bit like this. And then I'm gonna
do that again. Oh, it looks like I could
probably move it in the y here. Alright, and then
let's do that again. E, S, Shift Z and bring it in just
a little bit more like that. So it just kinda curves
underneath there. And we can try and
smooth it again. Not bad, actually,
we just need to bring these out, I think. So maybe, I will select maybe this whole
corner here, like this. And let's see if we
can just drag this out just a little bit like that. And maybe on this one
here I may need to come in and select this. Alright, I think we've
got the ropes in there. All we're going to need to do is mirror them over
to the other side. But in the next video, let's take a look and see what else we need to add before we
finish up the modeling.
52. Adding More Details: Well, I've gone
ahead and mirrored those over to the other side. And now I'd like to work on
a couple of things here like this little ridge that's
going along the side here. Let's see if we have
an edge that could do that just above that hinge, but below the clique there, if I Alt click this edge, that goes all the way up here, I can't really move that. Maybe I'll just add a new edge
right in here and pull it up just so it's kind of in-between this
engine that cleat. And then I'll just
select these edges right along here, right here. And then let's bevel this
out and then extruded a bit. Let's just try that. Let's press Control B. And I'll hold the
Shift key and pull out a bit, something like that. And I've only got one segment. And then let's hit the three
key to go to face mode. And then I'll just hit E and
pull out just a little bit. I don't need to pull
out a whole lot here, Something like that. Now, it's pulled it out here. Do I want to continue
it around here? I don't think so. So maybe I will just take
this right here and take that back in so it's flat.
Yeah, let's do that. I'll hit the period key
go-to median point. Pull that in. Take this, pull that in, and
let's just see if we can get them
relatively flat here. Yeah. So it doesn't
poke out there. Just on the sides here. And that's all I
wanted just to kind of get that piece right there. And then we've got some
edges along the tires here. What if we, what if
we took one of these, hit the period key
and let's see, maybe we could select an edge like this and basically
do the same thing. Let's press Control B. Pull out just a
smudge like that. Hit the three key. And then just extrude
out just a little bit. Let's try that.
What do we think? Yes, so it gives it just a
little bit of an edge there. That's all. We could do that for
these as well here. Let's go ahead and do that here. So that was this edge
along here, right? Yeah, I think so. Right there. So let's do the same thing. Control, be, bevel
that just a bit, hit the three key, hit E and pull out
just a bit like this. Alright? Yeah, so there we've got
those edges on that now. I don't have them over here. Probably the easiest way
is just to delete those. Take these, go to 3D cursor
again with the period key, Shift D, Enter Control
M X, and enter there. We've got them on the
other side there. Yeah, I think that might help. Well, and right
here, remember this, we needed to take the centre out of this wheel
to get this right here. Let's go ahead and do that. What we can do maybe is just hit the C key and select
these faces here. I'll hit the period
key to zoom in, and then let's
just press Control and the plus key
on the numpad and expand our selection
out like this until, well, I think right here. Let's do that. And also, oh, let's
hit the L key and select these in here. The little bolts. Let's do that. And then let's just
delete these faces here. And it looks like there's kind of a drum or something
that's sticking out here. So maybe to get that, Let's select this edge here. I'll hit the period key and
go back to median point. I'll pull this end some. And then I think what we want is just to take this
edge right here, shift dx. And maybe I'll just expand
this out just a bit like this. Let's extrude this back e x and I'll bring
it back like this. I don't want it to go
into the truck there. And then once again, let's select this front edge and just hit the F key
and fill that face. So now we have kind
of a drum in there. You can see that here. From there I think we just
need to create this thing. So maybe I will press Shift S two to bring
the cursor there. Let's create a plane and
scale this way down. Pull this out so we
can see it a bit. And I will just try and get this in this shape right here. So maybe we take this
and bring it out Maybe we extrude up in the z. And then we could take
this edge right here. I'm going to apply
the scale control a, apply the scale so that I
can bevel this control B and drag that or scroll
the mouse wheel like that. So we get that little turn
there. I can smooth it. There we go. Let's add a solidify
modifier to it. Even thickness, maybe bring
it down just a bit like that. And we go. Now, we could apply that solidify tab
into edit mode. And let's press Control R
and add two edges in here. Maybe scale them in
a bit in the y as y. And then down here, we could probably just
grab that and extrude it straight down,
something like that. And then we could take
this edge and dissolve it. We could just hit
Delete and dissolve edges and that will give
us that angle there. Now let's just bring it back and bring it back up into here
and let's see how this works. So it looks like I just want
to bring it back like this. I think. Oh, let's get it more
in the center here. Let's do that. Bring it over. So it's about like that. Okay. And yeah, so there we go. We've got that
little piece there. Let me bring it in some it
isn't sticking through. That's good. Okay. So we've got that there. What else do we need? Well, let's see. How about I think we're
probably going to need to create this
foot rest down here. Let's see what that's all about. Let's go to the side view. We can see it here. So maybe we just create a
new cube. Let's do that. Let's begin with that. Scale it down quite a bit. Hit G and move it over here. And let's just
scale it in the y. And we'll scale it in the x0. That's tumble around. We should probably scale
it in the x as well. And let's bring it out. Do we see it on the side here? If we hit the one key and
we really don't see it. But I'll bring it out. It looks like it's just barely outside of the side here
and then kind of angles in. Let's try that. I
will press Control R and scroll the mouse wheel
and add two edge loops here. And then let's press S
Y and scale that out. And maybe let's take these, extrude them up and
then angle them back. And let's see what we get here. Okay, We've got
something that works. I think we could
maybe take these now on the bottom and
just drag them forward just a bit to get them in line with the other
part like that. Let's try that. And then do we want to
add a bevel to that? It does look like it's a
little more rounded than this. So let's press Control
a and apply the scale. I will first of all select
these edges on the outside. I guess these on the
inside as well here. And then Control B
and we'll pull out and Bevel those a bit like that. Then do we want to try and
get these on the front? Maybe since we've
already done that, we can't really get too much
without these overlapping. So let's just plan on
doing a little bit here. Control D, pull that out a bit. Yeah, we can't go too far, but maybe right about there. Let's try that. And then let's try
and smooth it. And yeah, maybe that'll work. Maybe I'll bring it
back in just a bit. Alright, and then let's once again duplicate it and mirror
it over to the other side. Period 3D cursor, Shift, Enter Control M, X and enter. And there we go. Now we have it over
on the other side. Alright, I think we're moving
along in the next video. Let's work on the
mud flaps here. And also we've got something
going on on the hood here. We've got hinges and
things happening. I'm going to take a look at the reference photos
and this image here and see if we can figure out what it is we need to do for this hood?
53. Creating the Mudflaps and Hood Cover: Well, before we
start work on say, the mud flaps, let's
do a little clean up. I think it's getting a little messy over here in the outliner, I'm going to right-click
and choose duplicate area. And now we can see this
a little bit better. And I'm going to hover
over this and hit the Minus key on the numpad
until it all collapses. And now we've got all of this. So what are we
gonna do with this? I've got this, so we've got a lot of the things
for the tarp and oh, we've got the foot rest
here are the steps. Let's take those
and drag those into the truck collection and
everything else here, the tarp. Oh, we've got this
thing. What is this? That so let's drag
that into the truck. And now let's take
a look at this. Select all this is all of this, the tarp now. Yes. So let's take all of this, drag it into the tarp
collection, and there we go. So now we've got it just
cleaned up a little bit so we can hide things
easily if we need to. Alright, so for these mud flaps, I think let's just create this little piece
right here and this, and then we can just
duplicate those. So maybe I will take this
edge right here, let's say. And it looks like
I need to change from 3D cursor to median points. So I'll just hit the period
key and median point. And let's press Shift S2
to move the cursor there. And then let's press
Shift a mesh cube. It's huge, 0.01. Now it's really small. Let's scale this up a bit
and maybe scale it in the y. I just want to get this
little piece right here. So maybe I could pull this out. And then scale it
in the x here, Sx. And let's pull this
out like this. And it looks like, well, I think I can maybe
bring it over like this. And can I bring it back
anymore or is it going to it's going to cut into there. So how high do I want this? Maybe I could bring it down like this and move it back like that. Let's see how that works. I think I'm going to
move it up to right about there and then put these little bolts
or rivets on there. Let me scale and the z
just a bit like that. And so for the rivets, do we have anything like that? Yeah, we've got these
things right over here. Let's take one of these
and maybe bring it out, shift dx or bring it out. I'm gonna get rid of
the rotation here, just type zero into
the rotation fields. And let me scale this up. Let's turn it in the
x-axis, are X9 zero. There we go. And then let's bring it and
put it right down in here. Like this. Maybe this is a little
too big, but that's okay. I just needed a little
bigger so I could see it as we place it on here. And maybe something like that. Maybe I'll scale it in the y SY. Here we go. Like that. Scale it down a bit. Then let's just press shift D x, move it over to here. And then we can press Shift R, Shift R and have those
move over like that. Then maybe I could
center them like that. There we go. And then this piece
right down here, now, I can just take this that and just press shift D Z and
move this down here. Make it a little bit
thinner, let's say. And then scale it
up in the Z, s, z. And let's just do that. Maybe scale it in the x, just a smudge to get
it to fit in there. And then let's see how
far down this should go. It looks to me
like it could come down to about right
here. Let's try that. And then it looks
like there's just a little curve right in here. So let's get that with, well, let me press Shift a and apply
the scale and then select this edge and this edge
over here, right there. And then let's just give it a bit of a bevel with Control B, scroll the mouse wheel, some, maybe something like that. Let's try that. Okay, so now let's just join it all together. I'll grab all of these and this, and this control J. Alright, and then
let's take this and duplicate it over
to the other side. I'm going to move the 3D cursor with shift S1 to the
center of the grid, change to the 3D cursor for our pivot point with
the period key Shift D to duplicate Control M and the X key to mirror
in the x-axis and enter. And there we go. Now we've got Some mud flaps. We could take one of
these and move it back. Let me do that. I'm gonna change my pivot point back
to the median point. And let's just press
shift D y and move this back here some it looks
like it needs to come down. Yeah. So I'm going to bring this down and
push it back a bit. Let's see how this works. Yeah, it doesn't really
fit exactly on here. What I could do is just take this edge right here
and pull it back. Maybe even pull it
up a bit like this, just so it kinda fits on there. Once again, I do
like to have things just kind of connect fit. So maybe we could try that. And then for this
piece right up here, it looks like, let me go back
to say this one right here. We haven't used this
one a whole lot, but it is a pretty
high resolution image. And you can see we've got
this piece right on top. And I feel like we
need to create that by just duplicating
faces off of here. So if I take these and this, and let's just duplicate
the Shift Enter. And I'm going to
pull them up just a bit, something like that. And then I'll press the P key
and separate by selection. And now if we tap
into object mode, we can select that piece and we can tab into edit mode again. And if we select
these edges here, can we just bring these up? So if I just hit G, I kinda bring it up. Not exactly in line
with the hood here, but if I hit G2 times, I can slide it along
these existing edges. I can't pull it out like that, but I can push it up in. So I'll hit G two
times and then I can slide these up like this. And that works pretty well. I think. Something like this, Let's say. Yeah, so let me zoom in and
see how we're doing here. Yeah, that worked pretty well. As I said, you can't hit G2
times and pull out, right? There's no existing edge
for it to slide along, but that G2 times thing really helps in moving along
the existing edges. Now, we do have this
edge right here. We don't really need that. Dewey, I'm going to just hit the delete key and
choose dissolve edges. And so now we've got
this piece here. I think we could probably take this edge up here
and slide that. Let's do that. Let me press Shift Z again, and I'll just hit G2 times
and slide this forward. So we come to this
point right in here. Let's say maybe I just
want to come to here and then take this point
right here, inside here. And let's try and slide this to G2 times and
slide it this way. Yeah, that worked out. Okay, there we go. So once again, the G2 times, it's really helpful to slide
things along existing edges. Alright, so now
that we have this, let's give it a
little thickness. I'll come over here and
add a solidify modifier. And we've got all ones in
our scale, so that's good. I will click and drag and hold the Shift key and maybe
I'll pull it up like this. So it comes up off
of the foot there. But I do need to
check to make sure I didn't just pull the polygons through the existing ones which would flip the polygons
and we don't want that. So with this now, given a little bit of thickness, Let's go ahead and apply
this solidify here. And then let's come up to our viewport overlays
and once again, turn on face orientation and that looks pretty
good actually, that didn't flip those. Oh, and look at this. I've
got red on the interior here. So if I ever was in like a game engine and
looked at it from here, we'd be able to see straight
through the tarp there. What I could do real
quick is just select that tarp and add a
solidify right here. And now we can't see
any red up in there. So that's nice. Let's go ahead and do that. I'll leave the modifier
on it for right now, we're probably going to
have to go through and apply all the modifiers
at some point, probably during the
UV mapping process. But for now I think that's fine. Let's pull this
viewport overlays down again and turn off
face orientation. Alright, so we've
got some mud flaps and the little piece on
top of the hood here. In the next video, let's work on these
hinges and whatever. These are, these
little clips here. So that's coming up next.
54. Modeling the Hood Hinges: Alright, let's work on these
hinges and the latches. We've got two of the hinges
here and one of the latches, but I think there's another
one supposed to be here, but it's broken off perhaps. But let's see what we
can do with these. I think first of
all, well, yeah, these are our mud flaps
and we have three of them. Oh, I didn't duplicate
and mirror this one over, so I'll hit the
period key 3D cursor. Make sure we're
in Global, Shift, Enter Control M and
the X key and enter. So we've got that
over there now. Alright, so those
are the mud flaps. Let's take these and drag them
into the truck collection. And now we can go
ahead and just hide all of these for now while
we work on these things. So these hinges here. Yeah. Why did we do here? Well, let's begin
with a cylinder and maybe I'll take this
down to say 16 sides, maybe 0.1 and 0.2. Let's spin this in
the y-axis, RY 90. Let me try that again. There we go. And I'll just scale
it out in the x. So let me hit the period key
and go back to median point, scale it out in the x. So we've got something for
this here, maybe like that. And then this, let's
just create a cube here. Let's scale it down. I'll take it down to 0.1. And let's just scale it
in the z and get it. So we think it's
kind of like this. So it looks like it begins
fairly wide. Like this. Maybe. Then maybe we can tab
into edit mode and select this face here and just
drag it up like that. And then we need to
kind of make it smaller with some curves so we could
scale on the x like this. We could tab back into object mode and press
Control and apply the scale. And then we could just
select these two edges here, give these to a bevel control, be pulled that out, scroll the mouse wheel a bit. And maybe we've got something
like that. Alright? This thing right there, whatever that is, it looks like a little indentation
that's holding it. So I'm gonna begin
that with a cube. I will scale this out
some, putting it down. And then let's just, well maybe let's
just inset this. I guess I'll take
away this face here. And then let's just press
Control a and apply the scale and then select this face up here and
let's insert it in. And then let's just
extrude straight down like this. Give that a try. Alright. And then I kinda feel like this needs
to be a little bit wider. Like this maybe. And well, I think
while we're here, let's take this, create a
couple of edge loops here, scale them out in the x, and then bevel
them with Control, be pulled out out
some like that. Take the segments down to one, switch to face select
with the three key. And then I'll just press E, S, Shift X to just scale
in the z and the y, and then push those
in some like that. Okay, then I think we could
bevel this thing here. Let's press Control a
and apply the scale. Let's select these edges
all the way around. And let's give these a bit of
a bevel as well like this. And then a couple
of these things on top are those bolts or rivets? It's a good question.
I can't tell. I guess what do we
want them to be? How about a bolt? I'll just select this
and press Shift S to move the cursor to that. Create a new cylinder. Let's take it down
to six sides here. Maybe get rid of the face on
the bottom here, like this. And then maybe we
could scale it down, scale it and the z,
scale it down some more. Maybe place it right
in there like that. Yeah, I think that's enough. That's all we really need. Shift DY and bring
that back some. There we go. Maybe turn that
into z a bit wherever we go. And feel like this could
be a little bit longer. Let me just take these points up here and just
drag them up some. And then I'll move
this a bit like this. Just seemed like it needs
to be a little bit longer. Okay, alright, now let's just, well, let's combine everything
and then smooth it. Let's just do that. I will press Control J. And then let's use our auto smooth and see what
we can do with that. Alright, and I think
one last thing I wanna do is take these edges here and just give these a little bit of a
bevel like that. Okay? So I think we've got something that maybe
we can work with. I will move the origin, let's say to the 3D cursor, I'll just move it to here, set origin, origin to 3D cursor. So now we can move it and rotate it and scale
it at that point. Alright, so let's
bring everything back and let's see if we can put this in place
and how it looks. So our z zero. Let's go to the top view
and let me bring it up here like this and
then go to the top view. Cheeky move it over and
let's scale it way down. And we want to get it on
this edge right here. So maybe let's try
and turn it here. So I'll grab this
and bring it down, and let's just bring
it down to here. And then let's change to locals since we've
turned it off axis. And then let's press R, x and turn it and
try and get it. So it sits on here. Our y like that, and our X, and
we'll just bring it down and sit it right in here. And I think we're gonna
have to then take this and turn it this little tube like thing we'll tab into
edit mode and hit the select it with the L key, and then I'll just press R x
and let's turn it like this. And maybe take it in a bit. Let's see maybe
our x again here. And let's just bring it in and see what happens like this. I think I will turn
it in the z or z, tilted a bit like that. And then let's just duplicate
that and move it over here. Let's see if this works. Shift dx, move it over here. And it went down in there. So we're going to have to
rotate this just a bit. Let's press R x and
bring this up a bit. There we go. And then once again, I'll just take this piece here. And let's press RX and
turn that a bit too. And maybe bring it out a bit. Alright, so now that
we've got those on there, Let's just take these and let's mirror them
over to the other side. So shift S1 to put the cursor
in the center of the grid, period to go to the
3D cursor comma, to go to Global, Shift D, Enter Control M, X and enter. And there we go. Now we've got those hinges. Alright, in the next video, let's work on these things here, this latch thing, I'm
not sure what it is, but we weren't sure
what these are either. So we can go ahead and
work on those now. That's coming up next
55. Finishing the Hood Clamps: Alright, for the
latches on the hood, let's once again take
these that we just created these hinges and drag them into the
truck collection. Let's hide everything. And then let's
work on this. Now. For these we have even
less information it seems so we're really going to
have to wing this one. I'm going to press Shift
a mesh and cylinder. And let's take this
backup to say 16. And I'm going to go to the
side view with the three key on the numpad and turn this
in the x-axis, are X9 zero. Maybe move it up a
bit here like this. Let's hit the period key, go back to median point. Let's scale this in the y. So we get something that looks
kinda like this area here. And then it looks
to me like it's got these two little extensions
coming off of this cylinder. So I think what we could do, let me press Control a
and apply the scale. Well, we could try
is we could take this and when we insert this in, it's going to give
us some extra faces. So if I hit the I key
and insert it in, you can see now we've
got these faces here. So with these, let's just try
and extrude these outlets, hit E and pull these
out like this. Alright, so now we've got
this thing right here. Let's take, it looks like there's a cylinder
through there. So actually I'm gonna
press Shift S to, to move the cursor
there and then create a new cylinder here. Turn it into y or y90. Let's scale this down. Move it. Let's scale it out in the x
and see what we can get here. So it looks like to me there's a cylinder
going through there. All right. Now, back here, it looks like there's
something back here. I'm not sure what it would be. I'm going to move the
cursor to the center of the grid and then create a cube. And I'm just going to
move this back here. And I really don't
know what in the world this thing is or what
it should be like. So I'm really just
kind of winging it in terms of just
trying to make it look like there's something of relative
importance there, right? And if you have more
information about this or no, these kinds of pieces any better than fantastic
more power to you. But I'm just going to
try and wing it here. And sometimes you
have to do this, sometimes you've
just got to wing it just to get
something in there. And usually our eyes, once we have a fair
amount of detail, kind of just accepts Oh, that's just a thing there. And that's okay. And then there's
something up here. Maybe I will take this and duplicate it and put it
up in here like this. To feel like there's
something up in here. Once again, I could be wrong and I feel like
something comes out. So we've got like a
cylinder here or no, it's more like a
tourist, isn't it? So let's press Shift a mesh torus and let's see
what we can do with this. I'm going to turn it RY 90. And let's just put this up here. Like it's kind of a
finger latch thing. Let me move this up here and put it right in here. Let's say. Then let's take something, Let's take this and
extrude something out here so we could
take this again, an inset this, and
then maybe just extrude it out to this year. Like it connects with that. Maybe that comes
down like this and this goes in like
that. Let's try that. And then this seems to
connect pretty well to this. And I'm going to tab into edit mode and press
Alt S for that, shrink that and tool and just kinda puff it
out a bit like that. Okay, The only thing I think I'd like to do is maybe
take this and move it back and then hit the I key and inset and then
extrude this out like that. Let's try that. So it connects a little
bit better to that. And I could take these and
delete these faces down here. We're not going to need those. And it looks like there's something kind of
in the center here. So I'm gonna take
these two here, insert two edge loops here. And then just take
these faces here and extrude and scale them
out in the z and the x, E, S Shift Y, scale them out like that. Let's try that. Maybe this thing could have a couple of
edge loops on it here. And I'm going to scale these out until they come into
about right here. Control B, bevel
those out a bit. Turn the segments down to one, and then extrude these m's. So E S Shift X to only scale in the y
and the z like that. And then this back
here, you're like, I kinda want these
to come out a bit. So let's just inset in like this And then hit ESX and scale these out just a
little bit like that. Yeah, just so we've got
something like that. Okay. Now, now what Let's do is let's just take all of this,
press Control J. Let's smooth it and then drag this up until we
get everything smooth, doubt. We go. And then I will just move the origin
to the center of the grid, origin to 3D cursor. And then let's try
and put this on and see if it works at all. Once again, it's just some
detail to give the hint that this is a thing that
is supposed to be there. We don't really know
exactly what it is. So I'll hit the seven key G. Move this over here. Let's scale it down a bit. And I will turn it at the R
key and turn it like this. Maybe scale it down
a little bit more. Maybe I will now go
to local transform. And let's see if we're
kind of in place. I don t think we are yet. Let's press R X and
turn this like that. Go to the front view. And now let's press
R z and turn it. This. Then let's bring it down. Alright, let's see. Looks like I could spin
it or turn it into why RY little bit more like this. Alright, so is that
about the right size? Well, it's hard to
know over here. Let's take this
and duplicate it. Shift D, Z. Oh, I should've pressed z. Let's do that. Let's bring it over
here. Like this. Yeah, that looks about right. Now we're going to have to
do a little adjusting here. So RZ, let's turn
it, bring it in. Oh, it's in front
of that, isn't it? So let me bring that
up here like that. Okay. Yeah, I think
that'll work. Let's just take these now. Once again, let's just mirror them over
to the other side. So Comma key, global, period key 3D cursor, shift S1 to get that cursor
in the center of the grid. And then let's just duplicate Control M X and enter
over here. There we go. So I think that's pretty good. At least it gives
us just some detail there without being
too specific. And I think with some texturing, those will be okay. Alright. We've got our
hood clamps and hinges in. I think it may be time
for us to move on to the next section and began
thinking about UV mapping, begin thinking about
materials and texturing. So yeah, I think
it's time for us to move on to the next stage.
56. Using Smart UV Project: Alright, I think we're now ready for the UV mapping
part of the process. And I'd like for this
vehicle to be used in either blender or a game engine. Basically keep the options open as to where it can be used. And to do that, I think
we really need to UV map and texture this
based on those uv maps. So what is UV mapping? Well, it is the process
of taking a 3D object and breaking it
apart and creating a view of it where it's in
a two-dimensional space. In other words,
we're going to break up the object in groups of polygons and lay them out flat so that we can
apply texture to them. But let's first of all, before we do anything, let's, I'm going to right-click
and join areas here. And let's just do a
little bit of clean up. These are our clamps here, so I'm just going
to drag these into the truck collection as well. And for now, we really don't
need the reference images, so I'm going to actually
turn them off here. I'm going to exclude them
from the view layer. And that is because if I say take all of this and hit
the H key to hide it. And then when I hit Alt H, it'll come back without
everything else, without all the reference
images and objects. Alright, so now that we've done that, done a
little cleanup, Let's come over to the
UV Editing tab up here, and let's go into here. And what we have here is
just the UV Editing View, where we can view our
uv maps and of course, our 3D model here. When we go into the
UV Editing tab, whatever was selected
automatically goes into edit mode. So I don't need that currently. And then I also like to create a new window here
by hovering over a corner until we have the cross and then
click and drag down, create a new window here. And then I'm going to change
it to a shader editor. Let's do that. And
then I'll press the Enter key to
close this panel. So we have the shader
editor here so we can view our materials and
apply our textures. And then we have the
UV Editing window here and our 3D view here. And also just take this and move this down here like that. Okay? So there are two kinds or two tools that I personally like to use for
UV mapping in Blender. And those are the
smart UV project tool and the unwrapped tool. To see those, we need to go
into edit mode on an object. Let's, let's just select
this object here. I'm gonna hit the End key
to see our scale over here, and hit the period
key to zoom in. And then if I hit the Tab
key to go into edit mode, I can press the U
key and we have the UV mapping menu here. So as I said, I like to use smart UV
project and unwrap. Now there are a
few other methods of unwrapping and these
are all very good. It's just, I think
when you're beginning, these two are really
the go-to ones to use. So smart UV project is
really an automated tool. Basically, when you
use this blender attempts to do the
best that it can. And UV unwrap the object
on its own automatically. And the unwrapped tool, basically it's
completely manual. You tell blender where you
want the seems to be placed, how it's going to be broken up, and it does what
you tell it to do. And I think these are
a great combination. What I generally like to do is to begin with the automated, see what blender can do. And then if it doesn't do
quite what I want it to, then I can go in with the unwrapped tool and make
a few changes and fixes. So let me show you
what I mean here. I've gone into edit mode
for this object and you do need to be in edit
mode to do UV mapping. And I'm gonna hit the a key
to select all the polygons. And you can see over here
in the UV map that it's taken all of these polygons
and place them in here, one on top of the other. So if I say selected this point right here and hit the
G key and moved it. You can see that there are other polygons
underneath here, right? They're kind of all jumbled together and placed one
on top of the other. And that's not
really what we want. In fact, we do not want any overlapping in our
uv maps at all. Within a material, all the UV maps need
to be non-overlapping. So to fix this, what we can do is once again, press that Yuki and use
our smart UV project. We click here and
then we click Okay. And now look at what's happened. It's taken all of
the polygons here, broken them apart, and
laid them out flat. So say for this one here, That's one of these on
the top or the bottom. These here are the
ones going across. And these right here are
the ones along the side. You can see how it's
broken up and you can see how these pieces
are proportionally, correct in terms of their
relative size proportionally, this is about the same size as this as it is on the 3D object. Now one thing I
didn't do here is Have any space between the UV islands and we
need that so we don't get any texture overflow from one UV map or gives me
one UV island to another. So let's redo our
smart UV project again with these still selected, I'll press U smart UV project. And let's create
an island margin. I will come into here and
let's just type 0.01 for now. And let's see how that works. And hit Enter and click. Okay, and you can see it's
created just a little bit of a gap between each of the UV islands and
that's what you need. You can of course change that
by running the tool again. And let's say, let's try
0.1 and let's click. Okay, there we go. So now it's spread
them out even more. But is it using that UV
space as efficiently? In other words,
this square here, we're going to
call the uv space. You can also call it
the zero to one space. But you really want
to have your textures using up as much of
this space as you can. So if we used instead of 0.10, 0.01, that uses up that space
a little bit better, right? So it's a balancing act. You want your UV islands
to be spread apart, but not so much that you
waste texture space. So let's find another
object to do this with. What about this object here? Or this one here? Let's work on this
cylinder for a moment. I'm going to hit the
period key and zoom in. And you can see here that
it has non-uniform scale. So let's see what happens
when we UV map this. I will tab into edit mode. It is all selected. That's great. I'm going to press U
and smart UV project. We still have an island
margin in there. That's good. Let's click Okay. And now what has happened here? This doesn't look quite
right to me, right? If we go like this and
this and this and this, you can see it's been
broken up into four pieces. And it really doesn't
appear that the width of the polygons is proportional to the length of the
polygons the way it is here. These should be a
lot closer together in comparison to
how long they are. So let's tap into object mode again and
let's try that again. But first let's press Control
a and apply the scale. So now we have all ones. And then let's tab
into edit mode again, press you smart UV project. And okay, now look at it. I'm using the islands
selection mode here. I can click on an island and hit the G key and move it out. Now, it's broken it
up into four pieces. But the width of
the polygons is in proportion to the length as
it is here in the 3D object. This looks a lot better. So just like many other
tools in blender, you really need to have
your scale applied, have your scale uniform for the tool to be
able to do its job. If you don't do this, then any textures you apply
to this object may look stretched or out of proportion and could
really be distracting. So we want to be sure
and apply that scale. Alright, so in the next video, Let's then talk about the other tool that
we're going to use. The unwrapped tool
57. Using the Unwrap Tool: Now the other way
of UV mapping is, as I said, that UV
unwrapped tool. So let's find something
else that we can use. How about this hinge? Let's do this. This is made
up of multiple pieces. So let's see how this works. Tab into edit mode. And before I do, let's ensure that our
scale is uniform. We've got a negative one here, which means we
mirrored this over. And in fact, let's take a
look at face orientation. When we apply the scale. Let me come up here. Turn
on face orientation again. And now with this selected, let's press Control a and apply the scale. And look
at what happened. Because we had a negative
one in that x field. When we applied the scale and flipped it to a positive one, it flipped the polygons. So in all the mirroring
that we've done, we need to keep an eye out for this as we apply our scale. So I'm just going to
tab into edit mode, hit the a key and
recall that we can go to Mesh normals and
recalculate outside. And the shortcut is shift in. So I can just select all
of these, press Shift N, and now I can go back up, turn off face orientation,
and there we go. Alright, so if we
tab into edit mode, we can see one, we've got overlapping UVs into, we have no idea if they're all proportional
to each other. So let's try smart UV project. I'm going to press U
and smart UV project. We've still got an island
margin here, 0.01. Let's click Okay. And there we go. Now,
that looks pretty good. But what if we wanted
to change something? Let's say this piece here. Let's look at this piece, this piece, this and this. These look to me like they are
this cylinder here, right? It looks like, just like that
tube from the last video. It split that cylinder up into four pieces and lay
those out flat. But what if we're going
to put a texture on here that might get broken up. Strangely, if we had seems here, if we cut this up this way, what if we wanted that
cylinder to be all one piece, all one UV map? Well, we can do that by
using the unwrapped tool. So what I'm gonna do with this is just come
back here actually, why don't we hide
the truck here. I will maybe take this piece and pull it
out of that collection. Let's try that. I'm going to tab into edit mode, press M, and bring it out into
the main scene collection. And then I come over to
the outliner and I hit the Minus key on the numpad,
that'll collapse everything. And I'll just hide everything
here. There we go. I think that's gonna
be easier to see. Now if we tab into edit mode, why don't we come around here
and I'm gonna put a seam. I'm just going to select
this edge right here. I'll press Shift Z so
we can see that edge. And I'm just going
to add a scene. So, uh, once again,
press that you key for the UV mapping menu, and let's click mark seam. There we go. So now you
can see that there is a seem a red line there
that says two blender. That is now a scene where
you're going to cut that object apart in
the UV mapping process. In addition, Let's Alt, click this edge, Alt Shift
click this edge here. And let's add a seem
to these as well. So I'll press U and
select mark seam here. Alright, so now what
Let's do is just hover over this and
press the L key. And then down here in the select linked settings panel,
Let's choose seem. So it only selects the
area within that seem. Now let's UV unwrap this. Let's press U and use UV unwrap. And now we have that piece or that portion of the object
as all one UV island. Okay, So if we hit the G
key and move it aside, we can see it over here. Now. Hit the a key to
select everything again, we can see all of the
other uv islands in here. So as I've said, what I did here is I used
smart UV project to get it 80, 90% of the way there. And then where I
wanted to tweak it, where I wanted to
adjust it or fix it. I then use that UV
unwrapped tool. And you can combine
these in that way. And I think it's a really
powerful combination. One thing we have to
do for UV mapping is to get everything
into this UV space. There are exceptions for
this, but generally speaking, the majority of
the time you want everything in this square. Now, I could, if I wanted to, I could take this and hit the S key and scale it
down and move it over here and scale it up and kinda fit it into
this area right here. But then would that
be proportionally the right size compared
to everything else? Well, it's hard to know. So what we can do is
allow blender to average the island scale of all of these UV islands.
So let's do that. Let's hit the a key. Come up here to the UV menu, and let's choose
average island scale. So that wasn't the right size. Okay, so that's
how it should be. So it's proportionally
the right size to all these other pieces. What we can do now is
we can hit the a key. And one more tool that
blender provides under the UV menu is pack islands. So we click this,
and there we go. Now we've got all the islands
in packed together nicely. And we can open
up this panel and we can change the
island margin here. We can uncheck,
rotate so you can see those can be turned
one way or the other. I'm gonna kinda
like that actually. There we go. So that is an example of using both smart UV project and the unwrapped tool to make your UV mapping a
little more efficient. Alright, so let's
bring everything else back and let's
just try that again. Something else here. So what if we worked on
one of these here, I'm gonna hit the period key. Let's once again
apply the scale. We're going to have a
problem with flipping our polygons because we can see we've got a negative here. So I'll press Control
a, apply the scale. And then I will tab
into edit mode, hit the a key and
press shift in, and that will flip
those polygons. Now, if I go over here, we have a subdivision
surface modifier on this. And we're not gonna be
able to keep that on here, but we can at least do the
UV mapping quick with it on. I'm going to tab into edit
mode, select everything, press U, and choose
Smart UV project. Click. Okay, and there we go. Now that doesn't look too bad. But let's say I
wanted to keep this together somehow these
pieces together, I could maybe choose these edges on the corners
here. Let's do that. Let's add a seam. I'll press U mark seams. And then I'll hover over
this and press the L key. And let's try this
again. Let's press U, and this time use the
unwrapped tool, unwrap. So now all of those pieces
are staying together, all in one UV map. Alright, so now let's hit the
a key to select everything. And we have a problem
over here again, so we've got overlapping and things are not
proportionally the right size. So once again, UV
average island scale, UV pack islands.
And there we go. Now we have everything UV mapped and packed into our UV space. Alright, so that is our process. That's what we're going
to be doing basically, again and again for
all of these objects. And as we go, we're going to be
cleaning things up. We're going to be applying
any modifiers here. I will just come over here and pull this down
and click Apply. And there we go. And we
will be going through checking our face orientation to make sure we don't have
any flipped polygons. All while we go
through the process of UV mapping the whole vehicle. So in the next video, we will get started on that
58. Using a UV Test Pattern: Alright, well let's start UV mapping with maybe
this main piece, this main part of the truck. Let's do that. I'll
hit the M key, move it out to the
main scene collection, hide everything else. And then let's just tab into
edit mode. Hit the a key. Oh, we better ensure that
the scale is all ones. And we better ensure that we
apply the mirror modifier. Because with the
mirror modifier we'd only be UV mapping
one side of it. So let's go ahead and pull
this down and click Apply. And as I said, we've got all ones here. That's good. Let's
tab into edit mode. And we can see that
this clearly isn't representing the
polygons we have here. So let's press U and smart
UV project and click Okay. Alright, well, I think
that's pretty good. It is so complex that I
don't think we need to worry about trying to clean this up anymore than
we already have here. I think this will probably work just fine in Substance Painter. So let's go ahead and
leave that as is. And the good thing is, is if we do find a problem in Substance
Painter with the UV map, we can come back to
Blender, make any fixes, and then import it back into that same substance
painter project without losing all our materials
and our textures so we can make fixes on the fly. Alright, so I will take that
and let's go ahead and save. Let's see what else we have. I'll bring everything
else back and well, let's drag that back
into the truck. Let's maybe do the tarp. Let's try that for this, I think we can just once
again apply the mirror. And notice I'm applying the modifiers here
from the top-down. Blender usually wants you
to do that to apply any of the modifiers in the modifier
stack from the top down. So I'm gonna pull this
down and click Apply, and then pull this
down and click Apply. Now let's just do this again. Once again, we've got
all ones in our scale. That's good. We'll tab into edit mode, hit the a key, press
you smart UV project. Click. Okay, and there we go. I think that'll be just fine. Let's keep on moving. Well, while we're
here, let's take this and we can apply
the mirror here. We can ensure that we have
all ones in the scale. Tab into edit mode. Hit the a key, you smart
UV project, and click OK. And there we go. Yeah, that looks good. Once again, what we
are looking for is to ensure that this is proportional
to what we have here, as well as not overlapping and feeling as much of
the UV space as we can. And I think this is pretty good. Now, if we're unsure, if we say, well, is this really okay? We can apply a test material to this just to get
a sense that yes, it's proportional
and importantly, there is no stretching
in the UV map. So to apply a material to this UV test material,
Let's select it. And then I'm gonna come up here. And let's just click New here. Now, this is the new
material button, and you can also get to that over here, under the materials. And click here. So either way, but let's click New here. And that will add a
material to this object. You can see it over here. And in this view, let's now add a new
texture to the material, will connect it to the base
color of the material. So I'm going to press Shift a, go to texture and image texture and drag it
up and drop it right here. Okay, Now we have
a new button here, and let's click this to
create a new texture. And in here we'll call
this UV test texture. And 1024 is fine. Let's then change this to a
generated type of a UV grid. Change that, and
we'll click Okay. Now in addition, I think
I'd like to change this name up here or over here. Either way, we're going to
call this UV test material. So we know what that is. Now that we've got
this texture in here, let's connect it up from
here to the base color. And what that will
do is when we go over to the material
preview over here. Now we can see that UV test
texture on our object. And what we're looking
for here is to make sure that none of the
UVs are stretched. So if I tap back
into edit mode here, and let's say I take
this point right here. Let me go to UV
select mode here. And Select this uv point
and hit the G key. Well, that's the
one on the bottom. Let me select this one here. Hit the G key. And now you can see
as I move this, that UV texture gets
stretched, right? We don't want this. The main thing we are
looking for when we apply this UV test texture is to test if we
have any stretching, we do not want any stretching. We want all of the squares
on this test pattern to be the same size and to be square and that stretched
or rectangular, we want them all
to be square and all relatively the same size. Now over here, when we
add this UV texture, we get this view of it in here. I'm not a big fan of that, so I tend to just click on
the X here to turn that off. It's still here. It just isn't being
seen in this view now. So when we tab into edit mode, you can see the UVs
a little easier. So that's how we test to ensure that our UVs
are not stretched. So let's try that again. Let's say we take that tarp
that we've already UV mapped, and let's pull this little menu down and choose
our material here. And now let's take
a look at that. Well, all of those are square
and they're not stretched. But take a look at this. One thing we can
see here is a seam. Now, if we wanted to put a
constant texture over this, maybe this seam might be visible and wouldn't
be what we want. However, I will tell you
that in Substance Painter, there is a way to
alleviate this problem, so we don't have to deal
with it here in Blender. Now just for argument's sake, if we did want to deal with
it here in Blender, Well, we could do is maybe select an edge all the way
around here, right? It looks like we've got
that all the way around. I'll press Shift Z just
to make sure. Right. And then let's add a scene here. You and Mark seem. There we go. So now we have that same
all the way around. Now, instead of
smart UV project, Let's use that
unwrapped because now we're manually selecting where
the seams are going to be. Let's hit you and unwrap. And now we've just
got two islands. And if you look at it, now, there is no seam going
along here or in the back. However, look at
what we've done. We've stretched that
a little bit, right? So now the squares up here are not quite the same size
of the squares back here. So once again, it's kind
of a balancing act. We can get all the
squares perfectly the same if we add more
seams and break it up. However, if we do not
want to break it up in certain areas to make sure that the texture goes
smoothly over this. Then maybe we have to accept a little bit
of stretching, right? So it's, as I said, it's a balance for this. I don t think it'll be
too much of a problem. We're not going to
see any text on here. It's just gonna be pretty much a solid color, if solid texture. But as I said, we can go back to here
and use what's called try planar projection in
Substance Painter to see if we can alleviate that. So I'll leave it as is. And we'll see now this, we can also add
our material tube. Let's do that UV
test material here. And let's take a look at that. And yeah, that
looks pretty good. Now we've got seam breaks
here at the corners. But I think that's
a natural thing. I think you would probably
have a seam break or a break in the material or
texture on the vehicle there. So I don't think
that's a problem. Yeah. Are looking pretty good. Now, just to point out, you don't need the squares
on different objects to have the same size squares
like we've got small ones here and big
ones here, and that's okay. But within the same object, Let's say we wouldn't
want to have small squares here and
big ones here, right? As long as you're on the same object with the
same material and texture, that's where you want uniform squares on
your UV test pattern. Alright, so we are
making progress. We will continue
in the next video.
59. UV Mapping the Grill and Doors: Alright, let's continue on here. How about this Grill?
Let's try this. We've got our scale as
all ones, That's good. We can go ahead and add our test material on this
and just see how it looks. Let's do that. Let's pull this down and add our test material
and look at that. That is a mess. We've got stretching and the
squares here are rectangles. And so that's just not
what we want at all. So let's now go into edit mode, hit the a key you, and let's try smart UV
project and click Okay, yeah, Now if we tap back
into object mode, that looks quite a bit better. Alright, How about
one of these vendors? Now, do we still have
a modifier on this? Let's go over and take a look. Oh, we have a few. So let's apply these. I'll pull this down
and apply the mirror, apply these, solidify
and the bevel. Let's do that. Then we can add our
UV test pattern. Let's do that. See how ugly that is. Well, that's pretty ugly. Yeah. And we've got our scale
is all ones. That's good. So I'll tab into edit mode, hit the a key, you
and smart UV project. Click Okay. Alright, I think that'll work. Okay, let's take a
look at these here. Well, once again, let's
do the same thing. Let's apply the mirror applied
to solidify and the bevel. Let's add our material
just so we can see it. Yeah. Then let's tab into edit mode. Hit the a key, you
and smart UV project. Alright. Now, these
particular uv maps seem like they can
have more in them. Let's, let's try something. Let's take these and
let's combine these. Let's combine these
and the rear vendors. I'm going to press Control J. Then let's tab into edit mode. So we see all of
this in one UV map. Then let's try this again. Let's press U and smart UV
project and click Okay, we've just got more in there now I think that
might be better. How about the doors? Let's try those. We don't have any modifiers
on this. That's good. Now, our scale is uniform, but it isn't all one. So let's go ahead and just press Control and apply the scale. And then tab into edit mode, hit the a key you
smart UV project. And okay, there we go. We've got a lot of
empty space over here. Maybe we can combine this
window piece with the door. I'm going to switch back to solid viewport shading here so we can see it a
little bit better. And maybe I'll take
all of this like this. And let's just
take all of these, all of this, all of this. Oh, we've got modifier here. I better apply this. Let's do that. But then
let's just take all of this here and the door. And what we can do, even without joining
them all together, like we did with the offenders. We can still tab into edit mode for all of
this and hit the a key. And we can UV map separate objects together
as one. Let's try it. Let's hit you and
smart UV project. And click OK. And there we go. So now we've got all of
those together as one. We've got a lot of little
tiny bolts in here. Those may be too small to really get very much material on them. So we'll have to take a look in Substance Painter and see if
this is going to be okay. Now, we can then add our
material to this. Let's do that. Our test material. Come back over here to
the material preview. Now we haven't added the
materials to these here. And one way we can do that is to select the objects that do
not have a material on them. And then hold the Shift
key and select an object that does have the material
on it, select it last, and then press
Control L and link the materials that will add the materials
to all of those. Now, one thing I want to
show you here is that if we take this and we
tab into edit mode, look how big this is in
comparison to everything else. So if we select everything
else again here, let me just do this again. We'll select everything else
and then tab into edit mode. Look how big this is in
comparison to everything else. That's a problem. Once again, I didn't apply the scale
to everything here. Look how small that is here, which makes it very
big in the UV map. So one thing we can do here
is we can just hit the a key and press Control a and apply the scale
for everything. Let's just do that.
Now if we select this, it's got all ones. If we select this,
well, we have that. Let's select this or this, or this, or this. It's all one. So we've
just taken care of the whole thing applying
the scale all at once. All right, so now what we can do is let's go back into here. Let's select all of
these things again. And let's just try
this once again. I'll tab into edit mode, hit the U key and
smart UV project click Okay. And now look at that. The doors now are in proper proportion with the
windows and everything else, all the other little
small pieces. So that's the kind of
thing that we want. Now one thing I
probably do need to do is adjust the smoothing here. If we go back to solid you yeah, it looks a little weird. So let's just turn on
auto smooth again. And that I think helps. Yeah, alright, so over here, we've got modifier here. And I think that's the
only modifier we have. So let's take all of these and combine these
together as well. Control J. And then let's use
auto smooth here. Let's also check our
face orientation. Sure enough, we need to
this tab into edit mode, hit the a key and press
shift in to flip that. And we have some
more here that we're going to need to do
and that's fine. Because recall, we applied
the scale for everything. And when we apply the scale, it flips that
mirrored object over. And once again, we can deal
with this all at once, just like we did with the scale. So let's hit the a key to select everything
tab into edit mode. Hit the a key again to select
everything in edit mode. And then let's press Shift N. And that just flips
everything to the outside. Now that didn't work
for these here. So there's still a
couple of things we're going to need to deal with. But we did the majority of it all at once, which
is pretty nice. Let's go back to here, turn off face orientation, and let's just quickly
do our UV map. For this, I'll tab into
edit mode, hit the a key. You smart UV project. Click Okay, and there
we go. Alright. So if we then go to our
material preview here, this is what we've done so far. We can see as we apply
the UV test texture, what we've done and
what we haven't done. So we've got some more to do. We'll keep going
in the next video.
60. Continuing the UV Mapping: Alright, continuing on
with our UV mapping, let's, let's select
one of these. I'll hit the period
key to zoom in. Let's go ahead and UV map this. It's all ones. That's good. So let's just hit the a
key you smart UV project. There we go. Let's do this one over here. Is this all one piece? Yeah, that's all one object. It's all ones in the scale. A new smart UV project. And there we go. We
can go ahead and add our UV test material to this. To this. Alright, well, we could try these. Let's take a look at these. This is all one
object, I believe. Yep, all one piece. The scale for this is all one. Let's press U and
smart UV project. And how about this here? This is all ones as well. So it's grabbed this frame. You're smart UV project. Alright. And you know, we could, if we wanted to combine these two together,
Let's try that. Let's press Control J. And then let's tab into
edit mode, hit the a key. Now we have some overlap
here, it looks like. So let's just once
again hit the a key. Go to the UV menu, average island scale and pack
island, and there we go. So now that's all in one UV map. Alright, let's try
that over here. Let's do the same thing. Let's take this in this, combine it together,
tab into edit mode. Let's hit you Smart UV project
and okay, there we go. Once again, we can take this. Well, instead of
pulling down the menu, we can select these two. Shift-click an object that
has the material on it. Press Control L, and once again, link the materials. There we go. So now we have those
little guys, these things. Let's try this tab
into edit mode. Press you smart UV
project and okay, good. Let's just do that
same thing over here. We've got all ones for
the scale, that's good. You smart UV project. And there we go.
Let's like these two. Shift-click something that
has the material on it, Control L and link materials. Alright, let's work on
these things, the hinges. These are all ones. Do we want to just put all
of these on one UV map? I wonder, Let's give that a try. Actually let me take a look real quick and
make sure that they're all the same material are all
the same kind of texture. Let's take a look
at the photos here. And yeah, it looks like
they're pretty much all the same paint and
texture. So that's fine. Let's go ahead and do that. Let's take all of these things
and all of these things. And let's just join these
together, Control J. And then let's tab
into edit mode. Hit the a key. You smart UV project and okay, Wow, look at that. That is a lot of
little tiny pieces. We will see how that works. I'm not sure if
that's going to work with all those tiny
little pieces. And you can see why we've got such little tiny things in here. But this may be the
way to do it with all one object or have
them be all on one UV map. I'll select them and shift select something with
the material on them, Control L link materials.
And there we go. How about these
things down here too? Let's take a look at these. Do any of these have
a modifier on them? No, they do not. Okay. So let's make sure that we're all ones
in this scale we are. Let's tab into edit mode. Hit the a key, you
and smart UV project. Alright, I think that
looks pretty good. Let's do that same
thing over here. A you smart UV project. That looks pretty good. We could take these,
select these, Shift-click an object with
the material on it and press Control L and
link materials. We can do that. What about
the headlights here? Let me go back to Solid View. Let's take a look at this. So it looks to me like
this is all one object. And we've got the scale
applied, That's good. So if we tab into edit
mode and hit the a key, and we are, Let's hit you smart UV project and click Okay. I think that will
probably be alright. Let's select the lens here
and do the same thing. Is this all ones? Yes, it is. You smart UV project. Now that worked okay. But it broke some of it out. I don't think we need
to break that out. Let's try that again, since it's just an object
with one side to it. Let's try that again with UV. Unwrap. You. And unwrap. Yeah, I see that holds
it all together. Sometimes you can use the
unwrapped tool for things that just have one side to them
like this again here, let's just take this, hit the a key you and unwrap. And I think that'll be fine. Alright, And this, Let's
tab into edit mode, select the a key. And for this, let's go ahead
and use smart UV project. That works pretty good. And what else? Let's, oh, let's assign our materials
to these things. So I'll select those two. And these two, Shift-click
something with the material Control
L and link materials. And there we go. So we've
got those now done. And maybe, Well, let's get
this thing right up here. This little Vint piece. Let's do that. That looks like it's
all one object. So I will zoom in with the
period key tab into edit mode. And yeah, I think we could just select this and
use smart UV project. And yeah, I think
that looks just fine. Let's Shift-click
the tarp Control L and link materials. There we go. How about back here? Oh, yeah, we've gotten more we
can do back here. Let's select the door and the door frame tab
into edit mode 0. And we have a mirror
modifier on here. Let's go ahead and apply that. That was the frame. So now with the door here, Let's also apply the
mirror modifier. Okay, so now we've got
the door and the frame. Let's join them together and
then tab into edit mode. And here we can press you smart UV project.
And there we go. Alright, let's apply or link and material to that
control L link materials. Good. For these. Let's just select all of these. I'll go ahead and join
them together for now. Tab into edit mode.
Select them all. Smart UV project. I'll link materials.
And there we go. Alright, we're coming along. In the next video. Let's keep going and see how much more we can get
done of our UV mapping.
61. Mapping the Exterior Body: Alright, let's keep going and maybe let's work on this here. The rearview mirror. I don't have a modifier here. I thought I had a solidify
on here at one point. Yeah, I did. So I'm gonna go ahead
and apply that here too. So I must have
applied this earlier, but Let's go ahead and select
all of these and this here, and then these pieces. And let's go ahead and
combine these Control J. And let's do that
same thing over here. I will select all
of these pieces. There we go. Then I'll join these together, and then I'll join these two
together here. Control J. There we go. Now I'll tab into edit mode, hit the a key you
smart UV project. And there we go. I think that'll work. Let's take this Shift-click that control L and link
those materials. And well, we could work
on the ladder back here. Why don't we do that? I think I'll take all of these pieces and
join them together. I think this is a
pretty logical thing to join together here. So all of these
pieces Control J, tab into edit mode, hit the a key, you and smart UV project. I think that works. Oh, let's add the material. Let's link our materials to that so we know
it's been done. We can take all of
this down here, I think, and maybe connect
or join all of this. Let's do that. Let's press Control J 0. And when we did look
at what happened, I lost this solidify here. Let's press Control Z and
let's go back. There we go. So what I need to do is
apply the modifiers here. And that's once again why
we're applying these is so we don't lose them when we join them together
with other objects. So I'll click apply
there and apply here. There's one there. And hear about these yet, we've got these to do. What about this? No, I don't have anything on that right now. That's good. Everything else looks fine. Okay, so let's take
all of these and let's join all of these
together for UV mapping control J tab into edit mode, hit the a key you
smart UV project. And okay, now we can click
on another part of the truck and press Control L and link
objects or link materials, I should say, excuse me. And then these, we've got, well, we've got a subdivision
modifier here, and let's take care of that. Oh, this is one I've
already done, right? Yeah. So we can just take this and do the same thing you
smart UV project. This one I just
did as an example. I'm going to switch this back to smart UV project like that. And then we take these
N-linked materials and we have our test
material on there now. And I use that test
material just to kinda see what I've UV mapped
and what I haven't. What about our mud flaps here? We can maybe combine
all of these together and UV map
these as a unit. Let's try that tab
into edit mode. Hit the J key, you
and smart UV project. And we go, oh, I need to
join these all together. Let's do that. Control J. There we go. Of course, we need to link
the materials control L. There we go. Now from here we
could probably go to the underside of the car here. Let's begin with this. How much do we
really want to join together and how much do
we want to keep apart? Well, we could join like pieces, I suppose like these here. Tab into edit mode, hit you and smart
UV projected these. We can take the chassis
here and combine these, I guess let's do that. Control J tab into edit mode and smart
UV project for those, we've got some extra space here. I wonder if we can maybe
combine all of these together. Let's do that. Control J tab into edit mode. Now we've got a whole lot here, but we could also maybe
take these as well. Let's do that. Let's kinda get these all
together as one unit. I think that would make sense
in terms of our uv maps. Let's grab all of these. Shift-click this control J There we go. So we've got all of that now. And then maybe we'll do the
axles individually from this. Yeah, okay, So let's
tab into edit mode. Hit the a key, you and smart
UV project. And there we go. So now we've gotten more
to fill up that space. Let's link our
materials, control L. And for these, I think we could probably combine
these together. This, and maybe these, and these and maybe these
little pieces here like that. Let's try it. Let's press
Control J. Here we go. Tab into edit mode, hit the a key EU and
smart UV project. Yeah, once again,
we've got a lot of small pieces there
because of all the bolts. But the good thing is, is this
going to be on the bottom? And we're not going to
see a whole lot of that. Alright, let's do that
with this as well. Take these pieces and
join these together. Control J tab into edit mode. Let's try this one, smart UV
project. And there we go. Now, let's get this
whole piece in here. Let's get this piece and this. And yeah, that's
all we've got here. Let's join these together. Then let's tab into edit
mode, smart UV project. Let's now shift select
another object. Control L link materials. Alright, let's try that. Oh, I didn't do that
with this. Now, did I? Link materials here? And link materials here just so we know what's been done
and what hasn't been done. We could do these here. Let's join these together. Control J tab into edit mode. And let's use smart
UV project on knees. And then link our materials. We go. What else? Well, we've got the tires
and we've got the interior. So should we do the
tires all on one UV map? It's going to have
to be a big UV map. But we could do it. I don't want to just do
one and then duplicate it. Because then the texture on each one will be
exactly the same and we want some dirt and
differentiation between them. Well, and maybe we
want them each to have their own
individual UV map. Let's try that. I'm going to tab into edit
mode and hit the U key because there's gonna be a
lot of small things on this. I'm going to hit you. And smart UV project, you see how it's
going to be broken up into a lot of little
small things. So maybe we keep one UV
map for each of these. Let's do that. And they're gonna be
very similar of course, because they're the same thing. But at least they'll be on
their own in terms of uv maps. Once again, we're
just going to have to see once we get it into
Substance Painter. And as I said, we can come back and
do fixes on this even after we've begun our
Substance Painter project. Alright, we're almost
done. In the next video. Let's work on the
interior and the wheels
62. Mapping and Face Orientation: Alright, for the wheels here, maybe we'll do a similar thing and do each one individually. Since we've got so many
small pieces on this, I think I will
combine these though, this and this control J. There we go. So now we've got those
and tab into edit mode, hit the a key to
select all of that. Yeah, and then let's press U and smart UV project and do that and look at
how tiny those are. We'll see if that's
going to work. I think it will.
We'll figure it out. I'm going to combine these two control J
tab into edit mode, hit the a key and let's
smart UV project these. And we'll just go through and do all of these in the same way. Control J and smart UV project
and UV map those. Okay? Alright, so we've got those now let's go ahead
and select them. Oh, I need to do the one
on the spare tire as well. So let's do that. I'll select this control L and link materials.
There we go. Then this thing here. We should probably, maybe
I'll take all of this. I think it's all the same. Yeah, that's pretty much
all the same material. And let's combine these
together, Control J. And once again, let's just do
this with smart UV project. Alright, Lincoln materials.
And there we go. Now, I think that takes care of the exterior of the truck. Let's now go inside and see
what we can do in here. I'm going to hide the
tarp with just the H key. And I'll hide this guy to h. And so we've got
these pieces in here. Let me go back to face orientation here
and see what we've got. We've still got a couple of things that need to be flipped. Now, don't we? Let's select everything tab into edit mode, hit the a key, and let's just press shift in to try and flip as much
as we can back. Psych I flipped these the
wrong way and doing that. All right, we can fix that
tab into edit mode l, and then let's just go up
to Mesh normals and flip. Here we go. Sometimes they don't all work
as you hoped they would. Let's hit the LK Mesh normals
and flip. Here we go. So we've got these in here. Let me turn off based
orientation for a moment. And if I recall, I've got I've got a piece in here That's the interior and is facing the correct way. But these are not. I'm going to tab
into edit mode here. This is still the same
object, whereas this isn't. These are their own
objects, which is fine. I'm going to press U
and smart UV project. And oh, we've got a
mirror modifier on here. So let's go ahead
and apply that. First, I have to be an
object mode to do that. And then let's tab
into edit mode. Hit the a key you and
smart UV project. So now we have two of them. We could probably flip these, right, let's press Shift N. And then we probably
need to turn on inside so they flip
toward the inside. Yeah, let's do that. This here. We could take this
piece right here. It's just a piece that was
duplicated off the back. We could flip this, press shift in and then
turn on inside here. There we go. And we can also separate this out and then put it
with these others. Why don't we do that? I'll hit the P key and separate
out by selection. And then if we select
this and this, Let me go back to here. Let me turn this off. So we could select the
interior part here, in the interior part here and combine these all
together. Control J. And then I'm going to tab into
edit mode and let's UV map all of this you
smart UV project. Okay, there we go. So now we've got the
interior is all one piece. I'll go back to Solid View, turn on face orientation. And there we go. We've got the interior
facing the correct way. Now, this piece
here for the floor, Let's just flip this. If the a key press shift in and then check inside and that'll flip that on towards the inside. We could select these in here. Now, these once again are still pieces of the outside part, so we could split those off from the outside and add those
to the inside pieces. Maybe I will go through, select these here,
and then let's press P and separate these
out as their own object. Okay, I'll tab back
into object mode and select just that
tab into edit mode. Again, hit the a
key and let's press shift in and turn those inside. There we go. This piece here, we
could do the same thing. We could select that and press Shift N and
turn this inside. Okay, Yeah, we're getting there. I think that's good. So now let's go back to our viewport overlays and
turn off face orientation. And now let's turn the
material preview back on. Now we can see what has been
UV mapped and what hasn't. So let's take this here and let's UV map this
with smart UV project. That seems a little odd, that doesn't really represent that whole thing
because sure enough, we've got a mirror
modifier on there. So let's try that again. Let's press U and
smart UV project. And now we see that whole
piece there. That's good. Let's add our material to it. There it is. Okay, let's come up here and work
on these pieces. Have this piece right here. Let's just do this. This too has a mirror
modifier on it. So once again, I have to be
an object mode to apply that. Click Apply you. And let's UV map that. Shift-click another
object and press Control L and linker
material to that. So we know it's been done. We can take this now
and tab into edit mode. You smart UV project. We go, Let's link our
materials here. All right. How about one of
these seats here? Let's take a look at this. Let's tab into edit mode
and select everything. And let's once again use our
smart UV project for that. Same thing over here. Let's do that. There we go. Alright, so
we have our chairs done. Let's go ahead and link
our materials for that. How about these things in
here we could do this. Let's use smart UV project for that and link our materials. Let's do this here. Why don't we take all of
these and combine these? We do have a modifier
here, and that's it. So let's go ahead and select
all of those and press Control J. I'll tab
into edit mode, and let's do the
same thing here. There we go. And then let's just link our
materials. Once again. We've got this here,
these pieces here. Why don't we work on this? Maybe we should combine
these altogether so we have the entire
steering wheel in one UV map. Let's do that. And then let's tab
into edit mode. Smart UV project. There we go. Then this here. Do we want to, is all of this
combined into one? Yeah, it is. So let's just
go ahead and UV map this. There we go. Then we can select these and link the
materials to that. Alright. Oh, there's
two little pieces right up here,
these little guys. Okay, That's right. I remember these. Let's Smart UV project these. And this. There we go. Oh, and let's get our
materials on there too. Link our materials. There we go. Alright. Is there anything? Oh, there is. There is these little cleats, the hooks and the lines, as well as the grommets. Let's bring back our tarp here. I want to press Alt H to bring that back and the vent here. But let's work on these. So in the next video, let's work on these. These are still paths, so we're going to have to
convert these from paths to polygons before
we can UV map these. So we'll work on
that coming up next.
63. Finishing the UV Mapping: Now as I mentioned, we're
going to need to convert these paths to polygons. Currently, if I tab
into edit mode, you can see the points
of the path still. So what we're going to need
to do is convert these. I will just right-click
choose convert to, and convert to a mesh. We can try and do
these all at once. Right-click convert to a mesh. And then if we
take one of these, you can see it's been
converted to a mesh. Now, one thing we should
maybe think about is the sheer amount
of polygons we're getting on these
little ropes here. I'm going to press Control
Z and go back a ways. Let's go back and think about how many polygons
we want on these. Before we actually begin
converting them to a mesh, we can see how many polygons
we're going to get when we convert it to a mesh
by just pressing Shift Z. And we can see now this is the amount of
polygons we're going to get. Do we need that
many polygons for these little tiny things that really isn't going to be
very big on the object. Well, let's go over to our object data properties
here for our curve. And we can begin
taking the resolution down for this
resolution preview. And also under Geometry,
this resolution here. So the 12 here or
this field here, adjust how many polygons are
going the length of this. So if I bring this down, you can see we get fewer
and fewer cross edges here. And I think that's a
little bit too few, right? We're getting kind of
blocky curves here. So I'm going to increase this
backup just a little bit. Something like that. Maybe six. That's still
looks pretty good. And it's half of the polygons
that we would have gotten. I'll press Shift Z again and let's go down and take
a look at this here. This resolution is at four. We could bring this down. Can we bring it down to
two or is that too much? Is that two to blocky? That's still looks pretty good
if we take it down to one, that may be a little
bit too much. Okay, two is pretty
good. Let's go with two. Let's, let's do that. Alright, now that we've gotten this one the way we want it, we need to do that same
thing for all of these. And the issue is here, they're each individual objects and we'd have to do
it for each one. But what we can do is go
ahead and select them all and join them together
into one object. Then just change the settings one time for all of
them. There we go. Let's try that. Let's press Control J. And then let's press Shift Z
to see the polygons in here. And now let's take these down. Let's take this resolution
previewed down to six, I think is what we had
for the other one. Right. And then the resolution
under the bevel, Let's take this down to two. Okay, and then I'll go ahead
and combine these Control J. Now we have all of these. Now we can just convert this whole thing into
polygons all at once. So let's take this right-click, convert to a mesh and
there's all our polygons. Alright, now that we know we've got that the way we want it, let's just take all of
these and remove them, delete them, and then duplicate and mirror that over
to the other side. Let's try that. I'll take all of
these, hit Delete. Let's take this right here. Let's make sure the cursor is in the center of the
grid was shifted S1. We need to be using 3D cursor. There we go. And now let's press shift D, Enter Control M X and Enter. There we go. Now we've got them over
on the other side. Alright. We could take this. And we could take this. And we could select any other object with
the material on them, Control L and link materials. Now we've got our UV
test material on here. I think we probably need to
go ahead and UV map them, even though they are
very, very small. Let's go ahead and just do that. You smart UV project, okay? Yeah, I think that'll be fine. Then let's do a similar
thing here with all of the cleats
and hooks here. All the way down. Let's
take all of these. We might as well join
them together with all of the grommets to
I'll go ahead and press Control J
for now for these. And then let's go through
and get each one of these. Alright, so I've got
all of those selected. I'm going go ahead
and select one of the hooks controlled j. So now they're all
joined together. Let's go ahead and
use auto smooth here. There we go. That looks a little bit better. And then let's just
tab into edit mode. Hit the a key and
smart UV project. Yeah, I think that looks good. So now that we have this, we should be able to
just delete all of these now and mirror them over, right? Just like we did with the rope. And once again, let's select these all the
grommets and hooks. Let's press shift D, Enter Control M, X and enter. And let's now add the material
control L link material. There we go. Let's do
that over here as well. Control L link
material. There we go. Alright, so now we have all
the hooks and the ropes. Yeah, I think we're pretty
well done with UV mapping. As I said, we're not
going to know exactly how any one material
is going to take a texture or a material
in Substance Painter. We're going to have
to play with that and see if there is a problem. We will then come back and
target individual objects or UV maps for any
alterations or fixes. We could spend a lot
of time in here during the UV mapping process trying to get everything
just perfect. But sometimes you really
just don't know what you need until you begin to
apply a texture to it. So in the next section, we will begin getting
this ready to export out of Blender and
take into Substance Painter
64. Preparing the Model for Export: Alright, well we've got
the vehicle UV mapped. Now we need to get it ready to export and take it into
Substance Painter. Now the thing about
Substance Painter is it sees the world a little differently
than blender does. Blenders sees things in terms of objects and polygons and
then materials are added on. Whereas in Substance Painter, it sees things in
terms of texture sets. The top of the hierarchy of
things is a texture set. And those texture sets will be based on the materials we
create here in Blender. So let me just, let me explain this way. I'm going to take this
here and actually let me go back to my UV
Editing layout here. Let's take this
piece right here, and let's hit the a key and
we have a nice UV map here. And of course, we talked
about how we can't have any of our UV
islands overlapping. Because what that would
do is if I zoom in here, let's say this UV island
was underneath this one. So when I put a texture on
this part of the UV map, the UV island underneath
would also get that texture, so we usually don't want that. Okay, this is good, right? However, this is how blender sees the world in
terms of objects. Substance painter
sees it in terms of texture sets or here
in Blender materials. So let's just say I added a material to
this, a new material. Let's go down to the
materials panel here. Let me move this up and let's get rid of the
UV test material. I'll just click on the
minus button here. And now let's create a
new material and let's call it truck main. We'll just do that. And let's give it a color,
some sort of a color. It doesn't really matter
what the color is. The colors are just
going to be to differentiate one material from another in Substance Painter. Alright, so let's do
that with this as well. So we've got this
object right the door. Let's take away
the test material and we can click on
new, but actually, we can also just pull this
down and choose truck main and that will add that
same material to that object. In addition, as
we've seen before, we can select an object. Say, well we want this, maybe these selected these
little window pieces here. And then Shift-click an object that already has
a material on it. Press Control L and
link materials. Okay? So we've got our material
on these things. We know that here
you can see all of these things are going to have the same kind of
material on them, right? The doors, the main part
of the truck, the windows, and each one of these has a UV map with no
overlapping UVs. However, let's take
a look at this. The way that substance
painter will see this. It won't see it in terms
of the individual objects. It will see it in
terms of this group. To see that we can come
up here to select, select linked and
choose material. Now, everything with this
material has been selected. Now let's tab into edit mode, hit the a key and look at this. We've got a lot of
overlapping UVs. And I think I
might've mentioned a couple of videos ago that within a material we cannot
have overlapping UVs. And this is why, because
substance painter sees this as all one thing. It doesn't matter how
many objects are, how many polygons are
in this material. It's gonna see it as
all one texture set. So what we're doing here really, we are adding materials, but we can think
of materials for this process in terms of groups. We're grouping together
polygons, objects, et cetera, into a group
called truck main. And within that group, we cannot have overlapping UVs. Okay. You say that's fine. Then why don't we just give
each one of these things, their own material
and be done with it. Well, that's one way to do it, but there's always a but
further down the line in the process when we're done doing our texturing
in substance painter. When we bring those texture
maps back here into Blender, we're going to have to
assign a collection of texture maps
to each material. So if we create 100 materials, we're going to have to
go through and assign textures to 100
different materials. And that can get really tedious. In addition, if you're going to say a game engine like Unity, you would need to create all
new materials for unity, because Unity has
its own materials. So you would need to create
all new materials that match the naming conventions over the materials
here in Blender And then apply all of
those texture sets, all those texture maps
to those new materials. So the more materials
we create here, the more work we're creating
for ourselves in the future. However, we also need to keep in mind that the more things
we put on a UV map, the smaller each individual
UV island is going to be. And we've got some pretty
tiny little things in here with these little, these little bolts here. So if we put a whole lot
of objects in one UV map, used pack islands to
pack them all in. Even if we're using a texture
size of four K or eight K, we can have those tiny
little pieces with no more than just a pixel or
two of texture information. So we have to keep that in mind. So what do we do? Well, there's really
no one way to do it. You've just gotta kinda
keep all of these things in mind as you're working and try and come up
with a balance of appropriately sized UV
islands in your textures. Minimal amount of
materials on your object, while still having enough to get the kind of texture resolution that we need for
it to look good. So having said all of
that, what do we do? Well, we just do our best and sometimes we have to come
back and redo things and try again because
it's really hard to know exactly how much can
be put in one texture, set, one material, one UV map, etc, until we try it. So we're just going to see
what we can come up with. So for me, I think what I'm
gonna do is once again, just take one of these
objects and click Select. Now we can also use Shift L
to select the link objects, but I'll choose material again. I'll tab into edit mode. Let's hit the a key. Let's come over here
and hit the a key. And let's see what
it looks like. If we pack islands
for all of this. Of course, I do need to
average island scale. And then let's come in
here and pack islands. Now we've got a margin of 0.01. Do we try say 0.001, like that? So that gives our big pieces
more of the texture map. Let's press Control and
Spacebar and zoom in here. And is that what we wanna do? There's a lot of very
tiny pieces here, but it might work. We really don't know. We, we really need to test it. And as I said, there
is a way to come back redo uv maps and then take your project back into substance painter without losing a lot of the work
that you've done. So we may use that process
here if we find any problems. Alright, so that is our truck main material
or texture set. What if we took,
say this and this, and maybe even
these little things here and maybe put all
of that on one UV map. Well, let's try. I'm just
going to select the grill. I'll take away the
UV test material. I'll create a new material, I'll call this grill and good. And then let's give
it a new color. And once again, the colors don't really mean anything
here at all. They're just
differentiating the groups or the texture sets
in Substance Painter. Alright, so let's
take this and Ds, Shift-click this Control
L and link materials. Alright, so now that
we've got that, we can now press Shift L, select those tab into edit mode, hit the a key. And here we go. We've got a lot of
overlapping things again, but once again, we can go to UV, average
island scale, UV pack islands. And here we go. Now we've still got our
island margin at zero-zero, 0.001, which is fine. I think that's going to
work pretty well there. Alright, so that's
our grilling hood. We could maybe put
our headlights and our rear view
mirror in one group. Let's try that. So I'll just select this, take this away, and let's
create headlights and mirrors. Alright, let's
give that a color. Once again, doesn't
really matter what it is, as long as it's different
from everything else. Let's take this, remove
the material here, and then pull this
down and choose the headlights and do the same thing over
here. Let's do that. Do we want these headlight
lenses in here as well? Well, that's a good question. Let's see how these look now
I'm going to select these. Press Shift L, choose material, tab into edit mode,
hit the a key. And let's select
everything over here. Choose average island scale, pack islands, and
let's take a look. Well, I kinda like those as is. So I may leave these on
their own at least for now. So I'll leave them
like that for now. We could put the hooks all
in one material, maybe this, this and these, and these. And maybe maybe this as well. Maybe we could do, since
it has a hook here, it's kind of in terms
of human logic, it kinda makes sense. Let's select this and remove our test material,
create a new one. Let's just call this hooks. We go, Let's give
it a new color. Once again, doesn't
matter what it is, as long as it's a different
color than anything else. And let's take all
of these and then this and Control L
and link materials. Now with all of these selected, Let's just tab into edit mode, hit the a key, and let's come over here,
select everything. Once again, average island scale and pack islands.
And there we go. So that's gonna be our process. We're going to try and figure
out what can go together. What makes sense to both our brain and to
substance painter as well. And what doesn't overload
the UV map with tiny, tiny things that won't
be big enough to accept a texture that won't
be just a pixel big. Alright, so in the next video, Let's continue on creating
our materials for export
65. Continuing the Material Set up: Continuing on with prepping
the vehicle for export. What about the fenders? These it looks like they're
currently all one object. Can we maybe put
these together with the mud flaps that at least in my mind kind of makes sense. Let's try that. I'm going to select the fenders and hit the minus button here, Create a new material and
we'll call this vendors. And let's give it a
material some new color. And let's then select
the mud flaps, Shift-click, vendor
Control, L, link materials. Now let's tab into edit mode
and select all of this. Come over here,
select everything. Average island scale
and pack islands. Alright, I think that'll work. How many materials
do we have so far? Let's pull this
down and see, well, we've got 12345 and
our UV test material, but we're not going to be taking that into Substance Painter. Alright, I'd love to try
and keep it to a dozen, but I don't think
we're going to be able to maybe keep it
below two dozen. Hopefully we can do that. That would be great. Alright, well, let's then
think about these wheels here. Let's go through and
select all of these. And let's just if we tab into edit mode and hit the a key, let me just see how they
look all on one UV map. I'm going to select all of these average island
scale and pack islands. That is a lot of tiny pieces. Well, we can give it a try. So I'm gonna go
ahead and select one and remove the test material. We'll call this wheels. And once again, we'll
give it a color. And then I'll just
take all of these. Shift-click this Control
L and link our materials. And then once again,
I'll just tab into edit mode just
to take a look at it. So yeah, that's, that's
gonna be our wheels. And if we've got our wheels, do we wanna do our tires
all-in-one as well? Well, let's give it a try. I'm going to take away
the test material. And let's call this tires. Give it a new material. Let's make it a
little bit different. There we go. Now let's select all of
these and link these for the material control l Materials tab into edit
mode, select everything. And let's give this a try. Islands. And here we go. Wow, that is a lot
of small things. Once again, we're just
going to have to test it. Alright, well, we
could maybe put all of these in one here, these two, let's
just call this roof. I'll remove the test material, create a new material roof. And let's also give
it a new color. Let's add that to the
vent thing on top, I'll just choose roof. Now we select these two
tab into edit mode. Hit the a key and let's
just average Ireland scale and pack islands. Alright. That gives us the roof there. Well, we ought to take a
look at the back here. Well, you know, what we
could do is we could do the ladder and the steps. Why don't we do that? I'll I'll select the ladder, get rid of that material. Ladder and steps. Give it a new color. Let's add the steps here. So I'll select those. Shift-click that control
L link Materials tab into edit mode. And let's select all of these average island
scale pack Islands. Okay, so we've got the
step and the ladder. I've got the back door
that I haven't done yet. And this has so many
very small pieces that I think I will
do it on its own. So I will select all of
these tab into edit mode. Select them all.
Yeah, let's do this. Average island
scale pack islands. Wondering if you could use that a little more efficiently. I'm gonna try 0.01 here. Well, used it a little bit more. Let's add a material. I'll take this one away. We'll call this rear door. Let's give it a
color. Select these, select that control L link
materials. And there we go. So how many do we have? Now actually what I'm gonna
do is come up here to the outliner and right-click
and choose duplicate area. And in the outliner we can
choose different views. So instead of our
view layer here, we can change it
to Blender file. And in here we can
see the materials. Alright, so here's
our materials. So far, we've got this UV test material that
we're not going to use, and we've got this one
that just always appears. So we've got 1-234-567-8910 Yeah, I'm not going to
get away with a dozen. That's for sure. But we can keep this
in mind as we go. Alright, I'm gonna close this for down here for the bottom. This is all going to be like a dark metal and
it's going to be in shadow and we're hopefully really not going to
see it much at all. So I'm gonna go ahead
and select all of this. And this is going to be all one object or
all one material. So let me add the material
first of all here, take that away and a new material I'm going
to call it under carriage, give it a new material here. And then let's take all
of this and this and this and add it to this
control L link material. Now let's tab into edit mode. Select everything, Look at that. Let's average island scale. Let's pack islands. And wow, that's a lot. So let's try 0.001. Alright, if you'd like,
that's a little bit better. As I said, this I think
is okay because we're just not going to see
this much at all. I'm not too worried about that. Let's take these now
and let's hide them. I'll just hit the H key to hide. And maybe we could take all
of the walls in here and make it one UV map or one
material. Let's try that. I'm going to remove this
material, create a new one. And let's call this
interior walls and will include the
floor in this as well. Alright, so we've got that. Let's take this. And we want this and this. Well, we've got these tiny
little things in here. I should probably go
ahead and grab those. Those aren't gonna be
seen very much at all. And then let's choose
the walls here. Control L link material. So that's all of
the interior walls. Let's select it all
with Shift L Material. Tab into edit mode. Alright, yeah, I think
that's everything. Come over here,
select everything. Average island
scale, pack islands. Alright, so now inside here, what do we think we can
group together here? Once again, because we're not really going to
see this very well. We could go ahead and put all
of these in one material. And then in Substance Painter, we can select individual parts, individual faces and pieces, and assign different
materials to those. That may be the way to do this because I feel like I'm already getting to the point
where I don't want to add to many more materials here. Let me just go back into my blender file
here and materials. Yeah, I don't really want
to add too many more here. So let's try this. Once again. It may not work
and we may have to come back and try it again. But I think what
I'll do is remove the test material
here and let's call this interior furniture,
something like that. And we're gonna put all of these in that material
in that group. So I will shift click this now, Control L and link materials. There we go. Let's
give it a color. Something a little
bit different, maybe something like that. Oh, I didn't really give
this a color and I did. I let me try that. All right. So now we've got everything assigned to a particular
group, a particular material. The last thing we need to do
is these little guys here. Let's take these and
call these lenses. I'll give this a new color. And let's do the same
thing over here, Control L link Materials. And then let's just take these. And one of the problems
here that we're going to have is when we
assign a texture, we're going to want this
particular UV mapped to take up the whole UV map to take
up the whole UV space. So what I'd like
to do is have each one of these one on top of
the other exactly the same. So to do that, what
I'm gonna do is take one and delete it. Let's take this one. Here's our UV map. I'm gonna go ahead and choose
unwrap again just to make sure I can change from
angle based to conformal. I think animal-based is
probably a little bit better. And then what I'm
gonna do is use the mirror modifier
to mirror this over. And to do that, I need to move the origin to the
center of the grid. I'm going to ensure that it's at the center of the
grid with shift S1. And then I'm going to move
this origin to 3D cursor, so it's in the
center of the grid. And then I'll come over here to the modifiers panel
at a mirror modifier. And then I'm just
going to click Apply. There we go. Now if we tab into edit mode, they both have the exact
same UV island here. So if I click this and hit G, you can see it's just one
right on top of the other. That's what we want. Okay, So now I'm just
going to take this, press the P key and
separate by selection. Now we've got two pieces here. Oh, and it looks
like it's a little bit out of alignment here. Let's fix that real quick. I'm going to press the period
key and go to median point. I'm going to move the origin to the geometry of the object. Then we need to get
it centered in here. So what Let's do is just take, say, an edge here, move the 3D cursor to that edge, and then take this
and move this to the 3D cursor with shift
us eight. There we go. Just move this out
a bit like that. Okay. There we go. So they were just
a little bit off. But no matter where
we move that, it's always going to have the same UV map as
this guy over here. And that's what we want. Alright, I'm gonna go
back to material preview. They have the same
material, which is good. We need that. And I think that finishes
up our materials. I want to press Alt H
to bring that back. Alright, I think this is
probably a good way to start. We will end the next video. Go ahead and export this out and take it into
Substance. Painter
66. Exporting to Substance Painter: Well, I realize there's one
more thing we need to do. There's always one more thing. And it's these guys right here, the cleats and the ropes. So I'm going to select
all of these and let's just take a look and see what
they look like altogether. I'm going to tab into edit mode, hit the a key, come over here, hit the a key, average, Ireland scale and pack Island. Actually that's not bad. I think that'll work just fine. So let's go ahead and put
these all in one group. I will select, say, the cleats and hooks here. I'll remove the
UV test material. Let's just call this
hooks and ropes. And let's give it
a new material. And then let's
take all of these. And all of these
and all of these, and then select these last and press Control
L link materials. Okay? And now we've got all of that. And as I said, we also have if I press
Shift L Material, tab into edit mode and
select everything, we also have our UVs here. Okay? Alright, I'm going
to save, and oh, I didn't save a new version, so I'm gonna go
ahead and do that. I'm going to press
Control Shift S. Click on the plus here. And now we have a new
version and save that. Alright, I think we are
ready to export this out. The last thing I want to do, let me come over here
to the Layout tab. And the last thing I wanna do is just check for face orientation. I'm going to come up
here, Base orientation. And let's just make sure
that everything is blue. And pointing the
right direction. I'm going to take these two and hide them real quick
with the H key. Let's take a look inside here. We do have some read along here, but as I've said, I don't think we're ever
going to see that. I think that's pretty good. The vast majority is
blue and that's what we want Alt H to bring back that. Okay? Now I'm going to take away the face
orientation overlay. And I think we're ready to
try and export this out. So with this being the
only thing in the scene, I don't have any cameras or
lights or any other objects. I've excluded the reference
images from the scene. So I only have the truck what we want to export in the scene. Then I'll hit the a key
to select all of it. Then let's come over here, go to File, Export
and Export an FBX. And I've created a
new folder in here. I've created an exports folder
in my project folder here. We're going to use that
for our FBX Export. Let's make sure we're only exporting the mesh object type. And let's limit it to just the selected
objects so we don't accidentally import
anything else in the scene. And let's give it a name. I'm just going to
call this truck 01 because from my experience, we're probably going
to have to come back and export this again, we can call it 0203, etcetera. And that's okay, that's
that's part of the process. We don t know everything
before we go to the next step. But let's go ahead
and now click Export. And now we can go over
to Substance Painter. Alright, here in
substance painter, I want to reset the
interface here just a bit. I kinda like this. If I go like this, I like it like that. Then at least for now, I'm going to change
this from two views, a 3D and 2D to 3D only here. So we only have one view here. Alright, now let's come over
here and go to File and New. And I already have the
blender template selected. It's got a lot of
templates in here for various systems and programs. I'm just going to
choose blender. I'm also going to take the document resolution up as
high as it'll go to 40 96. This is really just
more for viewing. We can set the resolution
of the texture maps separately when we do an export
out of Substance Painter. And down here we want to turn
off this auto unwrapped. We went through
all the trouble of doing our own uv
maps in Blender. We don't want Substance Painter
to try and do it again. So I want to ensure that
these are off here. And then let's select our FBX file is come up
here and choose select. And here is our FBX right here. Let's click Open and then
Okay, and here we go. Now, here in substance painter, the navigation is a
little bit different. You hold the Alt key and tumble, and pan, et cetera. And you can scroll
the mouse wheel as well to zoom in and out. You can also hold the
Shift key and hold the right mouse
and drag and move the lighting around in
the scene so you can see different parts
a little bit better. So maybe I'll bring
it over like this. And if we tumbled around, we can take a look at
our model and make sure that everything is
the way we want it to be. I don't see anything invisible
in here, so that's good. Now, before we begin adding our materials and textures
over here to the model, we need to bake our preliminary textures
so that substance painter Understands how to apply
these materials to the model. So to bake the
textures we need to come into here to this
little croissant, a baked good, right? For the baking panel,
let's click that. And then in here, we need to go through
each one of these panels from here to here to here, and make sure everything is
set up the way we want it. So these are all of the materials that we
created in blender. You can even see we have the UV test material here
in which we do not need. We can hide and disable that. I really should have deleted that before we brought it in. But if we need to
export this again, we will go ahead and do that. And then down here are all the different
texture maps that are gonna be created for each
one of these materials. So you can see we've got
1234567 texture maps. Now over here we can
adjust the output size. So I'm gonna pull this
down and I'm gonna go ahead and choose
40 96 here as well. This is the highest,
the eight K That may slow down our
computer a little bit, but I'm gonna go ahead and
choose 40 96 for k textures. But once again, this is still at the beginning
of the process. And when we do the
exports at the end, we can adjust the size
of those as well. We can make them 512 or 1024 or whatever we need
for our particular project. I will scroll down here and we want to add
some anti-aliasing, so I'll do that here. And in addition, we
want to come over to this ID map setting here. Click on this. And you can see here
that we're going to create an ID map for each of these texture sets based on the material color that
we created in Blender. Right? Now you can base the ID
map on other things here, but we created materials, so we want to ensure that
it's set to material color. Alright, I'm gonna go back
to the common settings. And now with all of this done, let's come over here and just choose Bake, selected textures. And here we go. Now it's going to bake
all of the textures, all seven of them for
each of the texture sets. So this could take
a few minutes. Alright, the process is done. Let's take a look at it. I think there's some problems in here that I can see in here. But let's choose returned to painting mode and
take a look at it. So yeah, it looks like
we've got an issue here. So we're going to have
to deal with this. And let's see if
there's any others. There's one here. I'm going to remove this
paint layer just so I don't get the paintbrush
as I tumble around. So now I just have a cursor. And where else do we
see anything else? That might be an issue? Well, it looks like I lost
my handles in the back here. Were they part of this oh, they were part of that
UV test materials. So we need to fix that. I need to make this a part
of the back door, I guess. And we need to delete
that UV test material. Alright, What else? Let's take a look inside. I'll bring this down
and hide the roof. And what do we see in here? Well, we've got issues in here. It looks like I
didn't go in and pack the islands for the
interior furniture, right? In fact, let's take
a look at this. If we choose our
interior furniture and we come over
here to 3D and 2D, you can see that
here's the UV map. So in my haste, I did not repack these. So we wouldn't have
overlaps and this is the issue that we can get
when we have overlaps. Now let me remove this
again. There we go. So you can see the
different materials or the different UVA islands
showing up in the bake here. And that's the way our
textures will look. If we try and put
a texture on this, it'll then also put it
on other pieces as well. And it just won't look
very good at all. So we have a couple
of things to fix. And as I said, this
is the way it works. We will always have things to fix in this kind of process. So in the next video, we'll go back into Blender, do some fixes, and then bring
it back and see how we did
67. Fixing UV Issues in Blender: All right, We're back
in Blender and I've made a list of what
we need to do here. Let's first of all, deal with that
interior furniture. Let's maybe take these pieces up here and hit the
H key to hide them. And I'll switch over to
the material preview here. Let's select one
of these and press Shift L and choose
the linked materials. And there they are. Now, let's go back over to
the UV Editing tab here. And with these selected, we can see that here are all of the overlapping UV islands, so we need to take these. First of all, I should
select them all. I'll hit the a key so we
select everything there. And then let's go to UV, average island scale,
UV pack islands. And there we go. Alright, So that took care of item number one on our list. Next, let me see
what I have here. We've got the UV test material. Oh, yeah. We need to
delete that out of here. So I'm just going to duplicate this outline or window again
and bring it out here. And then let's just switch from our view layer to Blender file. And under materials we can see all of our materials
and here it is. So now I can just
right-click on this, choose, delete, and remove that material
completely. Alright? Now that that's done, if we come back here, we can see that these no
longer have a material. So let's select these. Shift-click the back door, press Control L and
link materials. So now we've got all of that. Which means if we tab into
edit mode and hit the a key, we should have those as part of our UV map here now and we do, but once again,
everything's overlaps, so we need to average Ireland
scale and pack islands. And that's pretty good. 0.001. I think that'll be fine. Let's go with that. Alright, so we've
taken care of what? We've taken care of the
interior furniture, the UV test material,
and the rear handles. We've gone ahead and
taken care of those. Now, that front fender, those strange artifacts
on the front fender, let's take a look at that. I'm gonna go back
to the solid view. And the issue was that it was happening up in here, right? It was happening inside here. So one thing that tells me is it kind of looks like to me
an overlapping UVs issue, which is strange
because this was all one piece when
we UV mapped it. However, let me hide the fenders just so we can
see this a little bit better. Oh, we've got some
overlapping things in here. We could fix that
while we're here. But I think in here, we've got some strange
angles in here. We've got another
one in here as well. Something in here
is poking through. Alright, so we should
probably fix those. But what I think that issue
was with the artifacts, I think that's the UV map. Let's tab into edit mode. Have to hit the a key. And let me figure
out where these are. Just temporarily if I come
over here to this UV sinks selection and turn that
on and then select, say, a face here, it will show where it is while keeping the UV map
still visible. Whereas if I turn this off, That's the only thing
that will be visible. So I just want to
temporarily turn this on to see where we are here. So okay, here it is. Yep. Alright, so let
me turn this off now. Then I'm gonna come over here
and hit the a key so we can see everything and look here. I believe these are overlapping, so let me click on UV select, so we can just select
individual points. If I take this and hit the G key and move this out, look at that. Those were overlapping. And that's what we get
with overlapping UVs, that kind of strange
shadowed artifact. So what I'm gonna do is
press Control and Spacebar. And let's take a look at
this a little bit bigger. Yeah, let's go ahead
and go through and make sure that none of
these are overlapping. I'm just going to select
individual points here. I've got vertex select
mode chosen over here, so we can just select individual points and move
them around like this. Yeah. I think that's
probably what it was. Let's see if we can find
the other one of these. Here it is here. I'll hit the period key and yep, sure enough, let's hit
G and move these out. I think maybe because these
are such strange angles here, that blender was confused
and overlap them. So we just need to
sometimes come back and do these little
fixes. All right. I think that will probably
take care of those issues. Okay. Let's press
Control and Spacebar. And while I'm here, I will go ahead and
bring some of these n. Let's see if maybe I can take
this and bring it in a bit. I'll turn on my move
manipulator here. And let's just take this
and bring it in like this. So we don't see that there. Let's come around over here. Yeah, let me see it here. Let's maybe take
this point here. And let's bring this in. I like that. One more thing that
I think I'd like to do is maybe try and get the angles in here so
they aren't so sharp. Let me just select the truck
main here, that object. And I'm going to press Shift H to hide everything
but the selected. And I feel like that maybe these angles here are a
little bit too, too sharp. I'm going to select this. I'm gonna hit the period
key on the number pad to zoom in and then you see
how far this goes in. I'm thinking that that
might be a problem. So I'm going to bring
this out like this and maybe bring this out. I'll hit G and
bring this out like that so they aren't
quite so sharp in there. And I will pull this out and maybe pull one more out
like this just so we have, so it isn't quite as sharp of an edge
there that we've had. And then I think maybe
this particular face here, I feel like maybe we need to take an edge through here since this face right here is
a five-sided polygon, I feel like I need to maybe
take an edge on through here. So let's use the knife
tool with the K key. I'll just click here
and then click here, and then press Enter. Alright, so let's try that. I'm going to go around to the other side and
do the same thing. Let's just take these here. I'll hit the period key, go to the left side
with control three. And we go and just
hit the G key and move these down a bit like that. Maybe take this
and move this out. So it just seems like
not only were they overlapping in the UV map, but they were kind of
overlapping in here as well. Alright, I'll go ahead
and draw that edge. Let's press the K key. Click here and I'll bring
it right over to here. Let's give that a try. So in the next video, what we'll do is we
will take all of this. I'm going to press Alt H
to bring everything back. And then we will
take all of this, export it out again, and test it in substance painter
68. Using the Project Configuration Tool: Alright, are we ready
to try this again? Let's do it. Let's
hit the a key. I'm gonna go ahead and save
my file here with Control S. And then I'm gonna go
to File export FBX. And let's go to our
exports folder. Here. I will select it
and then click on the plus here to
go to version two. I'll select the mesh object type and selected objects here. And then let's
just click Export. Alright, let's go over
to Substance Painter. Here in substance painter,
Let's go to File and New. We will change our document
resolution to 40 96. And then let's click Select. We will choose our
version two here, click Open and Okay. Alright, so here
is our truck now. And let's click on
the button up here. And let's set this up
for baking once again, let's come over here
to our output size. Let's choose 40, 96. I'll choose anti-aliasing
four times. Let's choose the ID map here and ensure that we're using material color and
we are, that's good. Alright, I'm going to
zoom into this area here like that just to
see what we can see here while we're doing the bake. And then let's just click
big selected textures. Okay, The bake is done
and I think we got a much cleaner bake there once we took care of those
overlapping UVs, we reduce the amount of
angle on those edges, and we also added a new edge so we wouldn't
have an end gun right there. So you may not have an issue
in this particular place. You may have an issue
somewhere else on the vehicle and I may
still have others as well. But those are things to try. Take a look at your UVs, see if there's
anything overlapping. Also check the mesh for n guns or really oblique angles too. But as we go around here, let's just see how we're doing. It looks like we may have
overlapping UVs up here. I'm just going to
remove this for now. So that may be an issue
I've got to deal with. Let's go around here. And it looks like an
issue I also will need to deal with
is that recall, I put the UV maps
for the two lenses, one right on top of the other. And what it's doing is it's using the ambient occlusion
that's happening from this, that kind of shadow that's
happening from this. And it's putting
it on over here. So I may have to split
those up into two. But generally speaking, I
think we're doing pretty well. What we could do is we could maybe go back to
Blender and deal with the rear door here
because it does look like I've got some
overlapping UVs there. Let's just go back and see
what may be the issue. Before we do though, I'm
gonna go ahead and save this. I'm going to press Control S. And I will save this
in my textures folder. I've created a Textures
folder here and I'm just going to call
this truck 01, and I'm going to save it as a substance painter project
and just click Save. And so we have that
saved now on our drive. Alright, let's go take a look at Blender and see if we can figure out what the issue
for these could be. Alright, here in Blender, Let's just tumble around
and take a look at this. Well, I guess we should go
back to our UV Editing. Let's do that with
this selected. Oh, well, I haven't
included these yet, so these here need to
be a part of this. So let's go over to
our material preview, and let's select the hinges and the door tab into edit mode. Hit the a key. Yeah, we do have
some overlap here. So if we select the hinges
and the door and the handles, because these are all now
part of that same material. We tab into edit mode
and hit the a key. I'm not seeing a whole
lot of overlap here, but let's review V map
these, Let's hit you. And smart UV project. And oh, before we click Okay, Let's type an island
margin end of say, 0.001. Let's do that and click Okay. Alright, so now we
should have all of those pieces together
in one UV map. I press control space
here so we can see it. So we shouldn't have
any overlaps there. Alright, so now what
Let's do is let's take this and export this back into Substance Painter
and see how we did. I will go over to
the layout tab. I will select everything, go to File and Export
and export FBX. Let's create a new one, a third one by clicking the
plus here and click export. And let's see what happens now. Alright, here in
substance painter, Let's see if we can bring
that new one in and replace it with the door that
has the new UV map. So I'm gonna come up here to
Edit Project configuration. And let's click select and
let's choose this truck 03. So I'll click Open
and then Okay, and let's see what happens. It's going to have to
think for a minute. But then we come back
and it looks even worse. But that's okay because
that's a whole new UV map. We can now take this rear door and rebate just this piece. Let's come over here
to the big button. We've got 4,096.4
times sampling here. That's good. Let's now scroll down and find that rear door. Where is that? Here it is. It's already selected. Okay. So now with this selected, let's come down here
and pull this arrow down and choose just
to bake the rear door. Let's just do that. I'll click here. And here we go. Alright, that looks
quite a bit better. Let's click on Return
to painting mode. And let's take a look. Yeah, I think that's
a lot better. So that is what I was
talking about earlier. The tool or the process, we have to go back, fix a UV map, re-import it, and then just bake that individual part
with the new UV map. And that allows us to redo individual parts without losing the work that we've
already done. We didn't lose any of the baking on any
of the other parts. And likewise, if we had
materials and textures on this, we wouldn't have
lost those either. As much as I'd
like to think that everything is kinda go
perfectly from here on out. I know it won't. So we're probably going to have more opportunities to
use that going forward.
69. Beginning the Base Materials: Alright, well now that we have a pretty good bake here
in substance painter, Let's begin by just throwing on some base materials and see
what we can do with it. First of all, I'm
gonna come over here. I think I've got a
coated metal material right here that I
think might be good. Now I'm looking at the reference image here
of the scale model. I kinda like the colors on this. And the nice thing about Substance Painter
is you can sample colors with the eyedropper and windows outside of
the user interface. Whereas in blender, you
have to actually bring the image into the interface
and sample the color there. So I'll be coming
outside over here to my other screen and sampling
colors when we need. The first thing, maybe
let's just scroll down to our truck
main right here. And I've got an
empty paint layer. I'm just going to click on the trash can and
get rid of that. And then I'm just going to
take this coated metal. I think this is a
good beginning and drag and drop it
right over here. There we go. So it's not great, but it's a good
beginning. I think. What I'm gonna do
is come down here into the Properties
panel for this layer. Now we've got both
this tab here and this tab here for the different settings
in our properties. I think what I'm gonna do is, first of all increase the tiling to make this
a little bit smaller. So maybe I'll come down here to the tiling and just type in two. Let's try that. Now. Maybe go a little bit smaller. I'm just going to click
and drag on this slide are now and bring it down,
something like that. And then if we scroll
down some more, we come down here to the color, the flakes and the
flake intensity. I'm going to take that intensity
and drag it down some. So you can see if I
take it all the way down, they go away, but I'm going to bring
it back up till we just see it just a little bit. And once again, we
can press, Shift, right-click and drag to move the lights around so we can
see it a little bit better. And I think that's okay. Let's begin with that and then I think I'd like
to adjust the color. The color is pretty good, but if we see here, it's a little bit different. I mean, this has more variation and we're going to
get to that point. But I think what I'll do is
actually come down here to the color swatch and we can
open the color swatch here. And it has an eyedropper
to sample the colors here. There's also one out here too, but I'll just click here. And then I'm gonna
come over and find a greenish tone or whatever on that image
and click on that. And you can see it kinda
changed that just a bit. I'm going to try that again. See if I can find something
a little greener. Maybe like this. Yeah, that's better. And then I'm just going
to take this and begin dragging the value down a bit. I can move the color tone around a bit and make
it a little greener, make it a little redder. So it really depends on
just how you want it to be. And we can adjust this
as time goes on as well. So we're hardly ever boxed in or painted into a corner
or anything like that. We can change things almost
at any point in time. So let's just say for beginning, we've got this particular
base material. Alright, from here, let's add
a little bit of interests. Let's add some dirt,
maybe some rust, some edge where
things like that, just to see what we can get from this
particular material. So to do that, I'm going to
come up here and I'm going to create a black mask on this. And that allows us to add generators for edge
wear and dirt. That allows us to isolate
certain groups of polygons. It just allows us to do
a whole lot of things. So initially for
something like this, I like to add a black mask. And then let's add a generator. I'm going to come down
here at a generator. And for our type of generator, let's begin with metal
edge where right here, Let's just click on that
and see what we get. So now you can see
what we've got is the edge where is
using this color here. It's pulling that through there. What I'd like to do is have the main color B
where the white is, and the edge where B,
where the color is. So I want to invert it. So we can just come down here. And in our properties panel, we can just choose Invert. I'll do that. And now
you can see we've got the edge where
happening, where we want it. Now we can of course
come down here and drag like the ware level. We can increase
the grunge amount. So the grunge amount
spreads the love out around or away
from the edges. The where level here is kind of giving us the information
just around those edges, around the contact points. So I'm going to bring
the wear down for the contact points are
the edges and then bring the grunge amount up to
kinda spread it around Let's see what happens there. And then we just need to add
something to go in there, something instead of the white. So sometimes what I
like to do is actually use one of these materials, like a rust material here. And I'll click and drag
and drop this below here. And now that adds it in
there, in the edges. Now, it also added a lot of bumps or height information
in here as well, and that may not be
exactly what we want. So with this selected, I'm just going to
scroll down here, come down to the
technical parameters. And I believe it's this
height position here. If I click and drag this down, that takes that away
like that, right? So that's down to 0.01. I want it to be not
quite that much anyway. So I'm going to click
in here and type 0.001 and see how that works. And that takes it down quite a bit, but maybe that's too much. Let me try 0.005. Well, is there a happy
medium between the two? Let me see. How about 0.003? Let's try that. Yeah, I kinda like that. I just want it very subtle
at this point in time. Now over here, I'm using the materials and
if you click and drag and pull this out, if I pull this out, you
can see that there are these tabs appear on the top. Let me click the X here. So I'm currently in materials. We also have a
smart materials and masks and filters and
brushes all in here as well. But as I take this down, so it's smaller, they collapse into this
little pull-down menu. So if you're having
trouble finding things, they're probably in here. Alright, so that's not bad. I feel like I want to
come back to the edge. We're here and work with
this a little bit more. Maybe I will bring up the edge
smoothing. Let me do that. And that kind of spreads things
out a little bit as well. So I'll do that. We could take up
the grunge scale. Let me bring up the
grunge amount again. Once again, that kind of spreads it over the entire object. And then the grunge scale reduces or increases
the size of that. So we can play around
with that a bit. So yeah, To begin with, I think that's pretty good. Let's, let's go with that. And in terms of organization, I like to put these
things in a folder. So I'm gonna come over here and click Add Group right here, and then take these
and just drag these into the folder like that. And so I'll call
this metal main. And this will allow us to easily copy and paste this to
other parts of the vehicle. So let's say I wanted to
paste this to the fenders. I can just come down
here and right-click and choose copy or Control C. Go into the vendors
press control V. And here we are Now we've got
that same material in here, and we can now come in here
and adjust this how we want. So maybe I don't want the edge where to be
quite the same over here. Maybe I want to reduce
the wear level a bit, increase the grunge amount. Some, I can just do things a
little bit differently now, here in this view or with this particular texture set
and get it the way I want it. Maybe I would like that where
level to come up so we can drag it up like this and get
it really heavy if we want. And actually because
we're on the fender here, that might be good
to add a little bit more than we
have on the others. And of course, since
these offenders are all part of that
same texture set, they're getting the
information there as well. And let's say we want to
add it to the grill too. I'll just come over
here to the grill. Remove this paint layer, and I'll right-click
and choose Paste. And there we go. Now, you can see here that it's done a pretty good
job of adding things here. That's kinda nice. But look how much
it's done up here. And this is because
these are just so much smaller on the UV map
than these other parts. They're just getting a
whole lot of the rust. So in the next video, but let's do it. Let's talk about using that black mask to
isolate individual parts, actually individual objects
and pieces on the truck. So we can also work with them individually and give them
their own separate settings.
70. Polygon Fill and Triplanar Projection: Okay, So our task here, let me choose the
grill and the hood here is to allow us to adjust the settings for these clamps separately from
the grill and the hood. All the other things
in the texture set. Because the problem that we're running up against
is that we're all in the same texture set here and whatever we do to one
thing and the texture set, it happens to all the others. Since these clamps are
so small on the UV map, we're getting a different
look on them and we want to be able to adjust
those individually. So instead of going
back to Blender and splitting these up into
different materials, we can use our black mask
again to split these out. So first of all, what Let's do is let's
just duplicate this. I'm going to press the Alt key, click and drag, and that'll
just duplicate this. And this top one. I'll make this for
the grill and hood, just the ones that we
have currently here. And the bottom one will
be for these hood clamps. Okay, let's do that. What I will do now
is hide this here. So we aren't seeing
this currently. We're only seeing
our hood clamps. And I'm going to right-click and add a black mask to this. Now, what this will
do is allow us to choose which objects, which parts of this we want to include in this
particular group. So with this black
mask selected, I'm gonna come over
here to the left side and choose this polygon
fill right here. If we do that, we now have these
settings down here. We can now select objects
by their triangle there, polygon, or by the entire mesh. So I'm going to choose that. Now if we zoom in here, we can begin to
click on this and add these pieces to this group. Let me just go through here
and click on all of these. And that's going to allow
us to adjust the settings for everything in this group separately from the
original group. So I'll come around here and I will select all of these here, like that. Over here. Select all of these as well. Okay, so now we've done that. But what we're going to
need to do now is to take this and remove them
from this group here. So I'm going to add
a black mask here. And in doing so, everything has been removed from the group. Now we're going to
go back and add what we want to
put in it, right? So I'm just going to go
through once again with the mesh fill here and select the things that we do
want in this group. So I'm gonna come down here, select each one of
these and all of this. Now we're just splitting
up this texture set so that we can deal with these two
parts individually. And I'll come around here and click on all
of these as well. Alright, so now that
we've got all of that, let's now enable the
hood clamps here. And now we can adjust these
two things individually. So I'll go into my hood
clamps group, open that up. And I'll select this mask here so we can see
the edge where. And look at this, we can see the seams
of our uv maps. So remember when I said there is a tool in here
that can help us with that. Well, it's called try
planar projection. And the first thing
let's do is let's go up to the green material here. And let's scroll to the place where we
have our projection. We can change it from UV
projection to try planar there. Let's come down to
the rust and change this from UV projection
and try planar here. That helps. Now let's go
into that metal edge where generator and in here
Let's tell it to use try planar. And there we go. So now we've got these pieces
without those UV seams, which is pretty nice. And that's why we were
able to move so quickly in Blender and our UV mapping
just using smart UV project. Because we have this tool
in here where we don't have to worry too much
about where the seams are. This isn't always
going to work and we may have to go
back and a blender and use our UV unwrapped tool where we create
our own seams. But the majority of the time, this is going to work for us. Alright, So maybe I
do want to now in the edge where generator take
the where level down a bit So we're not seeing
that quite as much. I could take the
grunge amount down. Yeah. So we just aren't seeing it quite as much on those clamps. And then I can come up to
the grill and hood and maybe choose the mask and
the edge where generator. And now I can play
with this a bit. I can bring up the edge
where bring up the Grunge. So now I can play with this in a separate group than what
we have for the clamps. And as I said, that was all
done within one texture set. And within one texture set, you can create as
many groups as you want and split things
apart however you need. Alright, well, let's maybe
go back to the truck main here where we
have this group and I'll right-click
and I'll copy it. And then let's come back here. Shift and right-click
to move the lighting. And let's then add that
group to the rear door. Let's select the rear door here, remove this paint layer
and then paste that. Yeah, that actually
doesn't look too bad. If we want, we could
split out the hinges from the door using our
poly fill trick again, but I think that's okay. I'm not at least the first pass. That's okay. What about these
things down here? What did we call those? I think those were hooks. Let's do that. Let's grab this, delete that default paint
layer that comes in there, and let's click Paste. And what do we have here? Yeah, that's not bad. I feel like I'm not seeing as
much of the flakes in here. So we can maybe come in to here, click on the actual paint layer, and let's scroll down. We've got the
tiling it for maybe we could reduce
the tiling Simon. Yeah, once we do that, we begin to see that in
there a little bit better. That's kinda nice. So I'm
down to about 0.8 here. And we can also adjust the
edge where if we wanted, we could come down and maybe
reduce the wear a bit, but increase the
grunge amount to kinda spread it over
it just a little bit. Maybe where leveled down some more grungy mount up
a little bit more. Something like that. Well, maybe a little bit
more where let's do that. There we go. Okay. So that added that there. I think that also
added it up here. Let's take a look at what
it looks like up here. That's not too bad.
And up here as well. Okay. Yeah, I can live with that. Now let's also do the same
thing for the wheels here, let's scroll down,
select the wheels. I'll remove this and then paste
in that main metal there. And I think for this, I'd like a little bit
more than just the rust. This is pretty good. But I think what I'd
like to do is maybe take the where level down just a bit but
increase the dirt. And we can add another
generator in here for the dirt. So if I select that mask there and right-click and
choose add generator, we can now for this
generator instead of edge where we can choose
dirt. Let's do that. Now that adds quite
a bit of dirt there. And I think I'll actually
take the dirt and move it down below
the edge where. And then for the
edge where here, I want to change this
from normal to multiply. And now we should be able to see through that to the
layer below it. Alright, so now that
we've got that, let's go to the dirt layer, that generator and
let's see what we can do about adjusting the
settings for this. I'll move these up a bit. We can try inverting it. Let's do that. Let's
invert it there, and that's actually kinda nice. That's what I want there. Let's reduce the dirt
level just a bit so it's not quite as
prominent there. Let's increase the grunge amount so it spreads out over
that a little bit more. You can see it
spread out in here. And now I also want to
change how this looks. This is kind of the same
material and color as the rust. So I want to change
the properties of this here to make it look a
little bit more like dirt. Let's scroll all the way
down in the rust color. I think I'm going to take it and make it a little bit darker. Let's try that. Maybe something like this. So it's still got kind of
a brown red tint to it, but it's a little bit darker. Let's now come back up
and do a little more adjusting here we could
increase the tiling, see what that does. Okay. And also, I think I will go back to the dirt and increase
that dirt level just a bit. Yeah, there we go. And maybe I'll turn
up the edge masking. That might help
expand out a bit. So I just wanted to something
that's a little bit different than the rest
and grime on the truck. In addition, we can
actually just take the color of this and drag the value down to make it just a little bit darker
as well like that. And I think once again for our first pass, I think
that's pretty good. Alright, I'm going to save
the project with Control S. And in the next
video, we'll continue on
71. Tires, Roof, and Mirrors: Continuing on with the
texturing for the tires, I'd like to just kinda throw
something on right now. I'm gonna come up here
to the search field and type in rubber. And we've got a couple here. We've got a vulcanized raw
and a rubber seal fine grain. Now, I do want to point out that many of these you may not have in the default install
of Substance Painter. But what you can
do is come over to this button right here, and you can browse the marketplace and
Adobe's Creative Cloud. Now I'm gonna come down
here and click on surfaces. And now we can search here. I can type in rubber again here. Now we've got all kinds of different things
that we could try. Now, many of these have the treads already built
in and that's great. We could have done that too. I enjoy creating the
treads the way we did. But this is a possibility too. But since we have the
treads are ready, I really don't need
anything like this. I just need a plain rubber. But I think I have one
that I like here already. I'll just type rubber again. And I think this vulcanized
one is probably pretty good. So once again, I will
choose the tires, remove this layer here, grab this, drag it over, and drop it, and there we go. And frankly, that already
looks pretty good. Oh, and look at this. There is a problem right here and a problem right here and on each
one of the tires. Interesting. So each tire has a
little artifact in it that is a lot easier to see once we put a
material on there. So I think I'm
going to need to go back and figure
out what that is. My guess is it's overlapped UVs again and we will need
to go back and do that. But at least for the time being, let's continue on
with doing a little more texturing in this video. And then maybe in
the next one we'll go and take a look at
what the issue is there. So let me hit the X here. And another one
that I went out to the 3D content area
here is a tarp. I found a tarp on there
that I kinda liked. So what I'm gonna do is I'll select the roof
texture set here. Remove that default layer
and let's just try this. I'm going to drag this
and drop this in here. And what do we think? Well, it's not great, okay? But we may be able
to work with it. Maybe we can work with this. Let's see. I will come down to the Properties panel and let
me increase the tiling here. Maybe something like this. Maybe I'll just type
in three for that. Well, we're getting
some repeats there, so I don't really like that. Let me move it so we
don't really see repeats. Yeah. Let me put into I'll do that. Here we go. Yeah, that's a little bit better where we don't see the repeat. And then I don't want
it to be so prominent. I don't want those folds and
wrinkles to be so prominent. So we can usually find that either in the
normals or the height. So let's scroll down here. And if we troll down the
technical parameters, we've got height,
we've got normal. So let's see which one it is. I'm going to click and
drag the normal intensity. And sure enough
that's what it is. So we can just click and drag
and bring that up just a bit until we see something that we
kinda, kinda like here. I'm bringing it up
a little bit more. Yeah, we're just
beginning to get those folds back in there. And I kinda like that, right? So it's not so prominent, but at least we get a
little bit of that. Okay, well, now how
about the color? The color is wrong obviously. So let's come down
here to the color. And I'm going to
click this and then click on that eyedropper here. And then I'm just
going to sample a color off of the
tarp on that image, maybe something like this. Alright, well that
didn't quite do it. Let me bring the value down
quite a bit like that. Oh, and look at that
seem recall that we talked about the seam
here on the tarp. Yep, there it is. So once again, that tool that we can use for that is
called try planar projection. Let's come over here
to our projection. Pull this down,
choose triplanar. And yeah, that cleans
it up quite a bit. And it also makes
the folds there. That's kinda nice actually. Although we are getting
a bit of a repeat here, let me take this back down to one and see what happens. Okay? Yeah, actually, that's I think I like that a
little bit better. I may want to bring the
normal intensity down again, but actually that's,
that's kinda nice. Maybe we'll go
with that for now. But since we've put that
on the roof texture set, It's also come through to
this event here on top, and we need to isolate that. So once again, let's
create a group here. I'm just going to create a group for this and I'll
drag it into there. I'll call this our tarp. And then this one, I'm going to duplicate
Alt click drag. And we're going to call
this our event like that. So first of all, I'm going
to turn this one off. And I'll right-click,
add a black mask. And let's just select
this vent now here. And also right in here. There we go. Now
that we have that, I'm going to come
back to this one. Let's right-click
add a black mask. And for this one, let's
just choose our tarp here. Alright, now we can come in and make these a
little bit different. So for this, for our Vint, I'm going to remove
this right here. We don't need this.
And let's bring in, say our truck main. I'll select this. I'm going to grab the rust and the metal layers Control C, go back to the roof
and in the vent, and let's press Control
V and drop that in here. So now we've got something in here that's a little bit better. I think in fact, I
I kinda like it. I'm I'm, I'm okay with just
the way it is right there. Alright, let's do a
similar thing for our rear view mirrors
and headlights here. Where are those? Headlight and mirror? Let's do that. Remove this. I'll take the truck
main again here. I'm just going to copy the
entire group this time. Go back to our headlights and mirrors and
paste this in here. Let's see what we
think. Well, we're getting a little bit
too much along here. I think I think the
headlights are okay. Yeah, I think this long cylinder here is getting a
little bit too much probably because it's
pretty small and narrow in the UV map itself. Let's see if we can
play with this a bit and get that to come down some, I will take the grunge a
mountain down quite a bit. And let's take the
where level down. Yeah, That helped. So we take the where
level down quite a bit. Then the grunge a
mountain back up. What happens? Well, it's not bad. But once again, I'm not wild about what's
happening with the lights. I'd like a little
more control there. So once again, let's
split them up. Let's take this alt
click, drag that down. We'll call this the mirrors. And we'll call this
the headlights. So I'll turn off the
headlights for a moment and right-click and add a
black mask to the mirrors. And then let's go through
and choose all of these. I'll just go through and
select all of these pieces. And we'll get these
added to that. There we go, There's that. And these here. There we go. Okay. So we've got those now. There's one there I missed. Okay. Now we can turn this off. Come up here. And let's
add a black mask to this. And let's go through and
select the headlights. So this is all of these. Alright, so now that
we've got those selected, we have them in two
different groups that we can adjust individually. So if we bring this back here, now if we select
just the headlights here and go into our edge where we can play around
with the edge we're here. I can drag this up, give it quite a bit more
if I want grunge and mt, et cetera, play with that a bit. And now up here, we don't effect that. We can come in here
to the mirror's, select the edge where for that, and play around and see
what we can get with this. Alright, so in the next video, maybe let's go inside and begin adding some textures
and materials in there.
72. Texturing the Interior: Alright, let's go inside and
see what we can do here. I'm going to hide
the roof right here. And let's go in and take a look. So I think what I can
do is maybe just select the interior and copy and
paste the truck main again. Let's scroll down
to the truck main. Grab that group, copy it. Let's go to the interior texture set here, the interior walls. And I'll remove that
default paint layer and right-click and paste. There we go. So that's on the inside there. I think that'll be just fine. I can move the light
around and take a look, but I think that's once again, we're really not going to see much of this
interior at all, so I'm not too
worried about that. Let's do the same thing with
the interior furniture here. I'll just select these
and let's paste this in. Here. We go. Oh, and here's an
example of being able to see through a polygon, the back of a polygon. You can see through that
right down to the tires. But of course
underneath we're seeing the front of the polygons so
we can't see through there. I don't think there's
gonna be a problem, but we can always
duplicate and flip that as well as we did
on the other parts. But for these seats, this image here has
kind of a wood, something on the steering
wheel and seats, kind of a leather on the seats. And for the hand grips here, I might make these black instead
of the same as the seat. Let's see what we wanna
do here. For the seats. Let's go ahead and create
a new group for this. I'll just come over
here, create this group, Let's call this seats. And I will right-click, create a black mask. Let me turn off this for
now so we can see this. And I'm going to
bring in the seats. Let's find a leather
material here. Maybe. What do we want? Leather, soft grain
leather plane. I can like this. Maybe we'll use this and make it
a little bit lighter. So I'll drag this over
into the seats group. And I will select
the black mask and choose just the seat areas here. This, this, this, this here. Okay. So there we've got our seats. They look pretty good, but let's change
the color of that. I'll select the material
and scroll down. Let's go to our basic parameters and or is it under advanced? Maybe undermine there it is. Under advanced and main. Let's take this and bring
the value up a bit. Something like that. That's not exactly the
way it is in the image, but that's not bad. Maybe. I'll bring this so it's a
little bit more orange here. And then I'll scroll. Let's play with the tiling. Let me just increase
or decrease this. Yeah, I kinda like that. I'm gonna hit the F key to zoom out and frame everything up. And let's scroll down and see
what else we can do here. I feel like I want the folds intensity to be a
little bit different. So maybe I will bring this down some yeah, something like that. We can go down and
come down here into aging and see if we
can aged a bit. Okay. And we've got dirt. We could bring up
the dirt intensity, change the dirt color, maybe bring the
value down a bit. I'm not really seeing
much happened there. Oh, because I need to
turn on the dirt here. I need to click here
and make it active. There we go. That's
a little too much. So let's bring that back down. Yeah, let's bring
that down a bit like that and maybe bring
the value backups. And of course we could also
put blood splatter on there. Let's turn that on and
just see what happens. Here we go. Something terrible happened
in this ambulance, but no, I don t think that's
quite what I want here. I'm gonna go ahead and turn
that off. There we go. Okay, Now that we've got that, let's now turn
this back on here. And now we've got the
rest of the pieces there. Now, if I took the seats and
drag them down beneath here, we wouldn't be able to
see them except for like the height and the normal or
the roughness information. But with them on top, you can see through there
to the seats there. Alright, so let's do that with the steering wheel here it looks like for the
steering wheel, at least in this image
has a different color. Let's try that. I'm going to move the
light around like that. Then let's do this again. Let's create a new group We'll call it steering wheel. I'm going to hide all
of these for now. And let's come over here and type in wood and
see what we have. We've got a wood walnut here. We've got wood. What is this? American cherry? Well, maybe I'll use
that. Let's try that. I'm going to take this and drag it into the
steering wheel group. Now let's isolate it to
just this mesh here. So I'll right-click,
add a black mask. And with our mesh fill selected, I'll just select this,
and there we go. So now let's select
the actual texture. And it looks like we've got
some seams visible here. So let's try our try
planar projection again. Let's do that. Where is that? Oh, that's
up here under projection. Try planar. Yeah, I think that helped. Let's increase the tiling a bit. I don't like how deep
those grooves are. So maybe let's scroll
down and way down here. Under technical parameters. Let's try the normal intensity. Let's drag that down. Note for this one that isn't it, It's probably the
height position. Let's bring that down pretty
low and see how we do there. Yeah, that's a
little bit better. Let's go back up here
and increase the tiling again so we can see
some of the grain now. And then I will
change the rotation. So it maybe goes around
like this. Let's try that. And then I'll scroll down and bring that height
range down again. That was it, wasn't it? Oh, no, it was the height
position. Excuse me. Let's bring that down a
little bit more. There we go. Now let's turn on
the other groups here and here, and there we go. And lastly, let's work on
these little pieces down here. I'm gonna hit the F key again to frame everything up again. And then for these
pieces down here, Let's just put the same
thing on both of these. So once again, I'll
create a new group. We'll call this handles. Just do that. I'm going to hide
all the other groups so I can tell what's happening. And then let's type
in rubber here. And we had another one. Yeah, this fine grain,
I'm going to try that. I'm going to drag that
over here, drop it in. Let's right-click the
group, add black mask. And then with the
mesh fill selected, I'll choose this and this. Look at this now. This is all one piece, so it selected the whole thing. And I don't want the
whole thing selected, I just want this. So what do we do now? Well, we can switch to our polygon fill and just
choose individual polygons. But since we already have it on, what we can do is
remove the parts, we don't want to do that. We can just come over here
to this slider and go 1-0. And now when we choose individual polygons like
this, we can remove them. Let's tumble around and make sure we got everything
on the front. Yeah. Okay. I'm back up here and
choose the color on the group itself
so we can see that. And then I'll bring these other groups
back. And there we go. Now, ultimately, I
may want to put in little dials or gauges in here. But for now I think
this is just fine. Alright, we've got our
interior pretty well done. I'll bring back the roof. Let's scroll down
and here it is. There we go. Alright, in the next video, Let's begin working on the
underside of the vehicle
73. Texturing the Undercarriage and Ladder: Alright, let's tumble down here and work on the under carriage. And I think here let's
just go ahead and put that truck main on here
and see what we think. I'll take this, copy the group and go back
here and paste it. And let's see what we think. So that's not bad, but I think I'd like to just generally make it a
little bit darker. I'm going to take this and scroll down to
where the color is. Let's just take the value
down quite a bit here. Maybe something like that. And then I think
I'd like to take the color of the
rust down as well. I think that's a
little too bright for being underneath there. So let's select the rest. And let's bring
this one down too. Let's grab the value and
just drag that down. So we still have it there, but it's a little bit darker. Not quite as prominent maybe. I think also down here, I don't need so much shininess. Let's come back up to the color here and
increase the roughness. Let's just increase
the roughness of bits so we don't have quite
so much shine down here. I don't think we
need all of that. And ultimately,
we're going to make a pass on this with
just the dirt. We're going to actually use the painting features
with a pen and tablet and just spread some
dirt and grime around. Now for these things here, it looks to me like in the images and I'm going to click and drag and
bring this over. It looks to me like
these little footsteps are a little bit different
color than the rest. Like they're kind of a
silver or a metallic color. So 0 and look at
here, we zoom in. You can see that we've got
visible seam lines there. So that's one thing we
probably need to deal with. Well, let's see, let's
see how it takes a material and then we'll
see what we need to do. So for this is this
its own thing? Oh, it's part of the
ladder and the steps. Okay, That's right. So let's remove this and let's
just find a darker metals. So I'm going to search
over here for metal. We've got this steel paint, steel rust, steel
rough. That's not bad. We've also got an iron rod
here and an iron galvanized. Now, how about this steel rough? Let's try this. I'm just
going to take it and drag it over and drop it here. Now, we're going to have
the same problem in that. We're also going to
see it over here, right on the ladder. But once again,
we're going to use our groups and black
mass to deal with that. So we can still see a
bit of the seams here. Let's just see what happens
if we switch to try planar. I'll come over here and change the projection
to try planar. And that really didn't
do much at all. In fact, it kinda made it worse. Look at that. Alright, well, let's go
back to UV projection here. And this is one of those
things we're going to need to deal with
back in Blender. I've been making a list
because that's what I do. And I think this one, the steps are going
to need to be looked at so far I've got that we
need to deal with the tires, the overlapping UVs,
and the steps here. So we'll just keep a running list of things
that need to be done. Well, let's go down and reduce the color here or excuse
me, reduce the value. Let's bring this down some, so I can be something like that. I think maybe that's
a little too dark. Let's bring that
back just a bit. We go something like
that and then maybe bring the roughness up
just a bit like that. So it isn't quite as shiny. Alright, I think
that'll work for now. Let's go take a
look at the ladder and see what issues
we see with this. Well, look at that. That's got quite a few
seams on it as well. So there's something
that's wrong with the UV map for the ladder and the steps it
very well could be that for the size
of the UV islands, the margin between
the islands may be too small or that's
a possibility. But for this lids, I think we need to use that
truck main material for this. So I will take
this and add it to a group and I'll call it steps. And then I think at this
point in time I will go ahead and choose this. So I'll right-click
create a black mask. Let's come over here
to our polygon. Fill turn that on. Make sure we're
choosing the mesh. And let's select this and
select that one over there. Okay, so we have that
isolated. That's good. Let's come back here
now and you can see we don't have any materials on this yet because we've just isolated that to the steps. Let's go ahead and
create a new group here. We'll call this ladder. For this, Let's go
get that truck main. Let's do that Here it is. Copy
back to the ladder. And let's paste that
into that group. Alright, there we go. So we've got quite a bit
of rust on the tubes, but not on the steps. I'd like it to be the
other way around. Let's see if we can
come over here and with the metal edge where
let's see if we can invert this and see if
that does any good. Okay, So maybe we can now
bring the where level down. But since it's inverted, we should go up, right? So let's bring it
up. There we go. Maybe we can take the
grunge amount up as well. Let's see what we can do here. Yeah, so we bring
it up like this. You can kind of get the rust on the steps and not so
much on the tubes. Yeah, I think
that's pretty good. And let's take the
edge smoothness up and maybe the grunge scale. Let's play with that a bit. Maybe I'll take that
down just a little bit. There we go. So for now, I think
that's pretty good. We're going to probably
need to put dirt on that as if they'd been used
a little bit more. Alright, so now for the
ropes and the hooks, let's take a look at what
needs to be done here. Where are these? Here we go, hooks and ropes. Let's remove that
default paint layer. And one thing I need to do is isolate the ladder
from the steps. We've got that material
bleeding over. Let's go back to the ladder
and steps and oh, here we go. I didn't take this stuff
and move it into there. In fact, I guess what
I'll do is I'll just take this out, this empty group. Let's take that out. Let's take this,
call this ladder. Now, I can isolate this
with a black mask, but I think I could also just
take this and drag it down. And there we go. Yes, so since This has
those polygons selected, it's going to apply those
first in the stack. There we go, There's that. And then it'll apply this. So the order in the stack, just like Photoshop matters, and what's on top is going to
come through first, right? So, okay, let's take a look
at those books and ropes. So for this, we're going to need to
do quite a few things. Oh, and look at this. There's something
happening here as well. We need to deal with that. That almost looks like it's a grommet that we're
not seeing there. Let's go around to the other
side and see if it's there as well? It is not. So I'm not exactly sure
what happened there. Will have to do a little bit of investigating
on the tarp there. But just like for the rest, we're going to have to give it a material and then break it out into multiple groups and
select which objects we want. In which group do we have a rope material?
Let me just see. No, we don't have that. Let's go into our 3D assets online here in the Adobe Cloud. Click on surfaces
and let me just type rope in and
see what happens. Now we've got some
interesting things here. This almost looks
like it could work. I know it's a fishing net, but that might just work. Let me click on Send to
choose substance 3D painter. And that will send it here
into my materials panel. Alright, so in the next video, Let's begin working on this
74. Finishing the Base Materials: Well, I guess before we
work on the rope and hooks, we really ought to deal with this little thing right here. And I imagine that
that's just me tumbling around with a brush
on like this, right? There was probably
a brush on and I clicked before I held the Alt key and did
something there. That's that's my guess. I'm not sure but
we can fix this. I'm gonna go over to
the roof texture set. And in here in the tarp, let's create a paint layer. And what I think I can do is use the clone tool and
paint this out. So at least it isn't
quite so noticeable. So what I'll do
is come over here and I'll create a paint
layer right there. And I'm going to change this
from normal to pass through. I want it to be able
to pass through and use the material that's
down here below. You can see it change to
that as well right here. Now if I come over here
and go to the clone tool, I'll just click this. And then in here
you can see we have a square on the left and
a circle on the right. The circle is of
course, the paintbrush. And the square is where
it's going to clone from, where it's going to try and copy the paint information
and put it here. So we can change
where it's going to clone from by pressing the
V key and then clicking, and that moves that square
wherever we want it. So I'm going to press the V
key and maybe click here. And then I'm gonna come
over here and paint this. And there we go. So it just used that information up in the
square to paint over this. And I think that'll
be just fine. If we zoom out like this. We don't see a whole
lot and I'm gonna get rid of that paintbrush
real quick. Just click on this so I don't
accidentally do that again. Now let's go back to the
hooks and the ropes here. Let's find that rope. Where was that? Let me just search rope. There it is. Oh, it's called
fishing net. That's right. So I'm gonna take this and
click and drag this over here and let's just see
what this looks like. And I'm not worried about
this right now the cleat, I'm only worried about
the actual rope object. And once again, we can
see seems in there. We can try and fix that
with the triplanar. I'll come over here, changed from UV projection
to try planar. And that doesn't really help
a whole lot now, does it? Once again, we may
have a problem with the island margin
for these as well. But once again, we're going
to put it on our list. I'll just put ropes. You're on my list. And that is something for
us to take a look at. Alright, I'll go back
to UV projection here. And I think I want to
change the color of this, kind of make all of these a
little bit darker like that. Then maybe this, I want to
bring this down like this. And also this as well. Let's just make this a
little bit darker too. There we go. So I just want
something that's pretty dark. Still has kind of a
greenish tint to it. Let's see what it looks
like if I pull out here. Yeah, I don't think
I really liked that. So maybe that fishnet isn't
really the thing for us. Let me come back over
here and type in cotton and let's see
what we have here. I just want something that has a little bit of a texture to it. Let's try this. I'm gonna
click and drag over here. Remove this one. Let's see how this looks. Probably a little bit better. I think let's come down
here, change our color. I'll click on the eyedropper
and just click on the truck. And then let's bring
this down quite a bit. Let's take a look at this. That might be a
little bit better. Let me bring this up some. Maybe I'll sample
that tarp color. Let's do that. Then
drag that down some in the value and maybe move it toward
the green, just a hair. Yeah, so I think that
looks a little bit better. We could also take the
tiling here and drag this up and see if we
can get it a little bit smaller, Something like that. Yeah, I'm okay with that. Actually, that's not bad. Alright. So for the
cleats and the hooks, we probably just need the
truck material in here, right? It kind of looks that way, although it could be
another metal material. Well, let's use
the truck material and see how that works. So first of all, I'm going to take this, give it a new group, drag that in, Call this rope. And I think it's gonna
be easier to select the hooks and the cleat
than it is the ropes, although I'm going to need
to go in here as well. So maybe I should
select the ropes. Okay, I'll right-click,
add a black mask. And for the mask once again, let's turn on poly fill. Select this and I'm
just going to go through and select each one of these ropes so that when
we add the next material, it'll go onto all those
grommets a little easier. This is a little tedious, but I think it'll work. And I can click and
drag on this like that. Let's go round here. Shift right-click, and I'll just click and drag
on all of these here. And this one here. Okay,
That's not too bad. That wasn't too bad. So let's come back now. And let's work on the hooks. Once again, I will go
back to that truck main. Let's duplicate this or copy it. I should say. Go back
to the hooks and ropes. And let's paste this in here. Like that. Now, it looks like I
pasted it in the group. Let me pull that out. There we go. Now we can see that here, but I think that's
a little too much. We're going to need to reduce the rust and the grunge on that. Let's select our metal
edge where in here. And let's just take
the where level down. We'll take the
grunge amount down. Maybe increase the
edge smoothness. That could help a little bit. We can invert it and
see how that works. Now, that's not good. Maybe I'll take it down a
little bit more like this. So it's pretty low. So it looks like we have our
metal main coming through. If we hide the rope, you can see that material
is coming through here. And if I drag this down here, you can see it's still there. So what Let's do is let's
create a black mask here. And I guess what we'll need to do is use our poly
fill to add these in. So I will click and
drag on this and this, and I'll just go through
and get all these as well. Alright, there's those. And then I'll swing
around to the other side. And let's grab these. Alright, here we go. Let's select that
so we can see them. So yeah, so we've got
that rope material and the hooks there. Now, one last thing we could
do if we really wanted to, we could create a black material and put it right in there. So it looks like
there's a hole there. Well, do we wanna do that? Yeah. Why not? I'm gonna
go ahead and do that. I'll just call this hole. And in here let's just
find a very dark material. I think there's this
artificial leather just looking for a very dark
Material to throw in here. We can also paint it, I guess. Well here, how about this
plastic grain rubber seal, rubber vulcanized? Maybe I'll just use
this steel paint here and take away
the shininess. Let's try that. I'm going
to drop it in that group. Let's take the roughness
all the way up. Let's take this to
black. There we go. Okay, so now that'll
just be that black hole. So let's then right-click, add a black mask. Now let's switch over to
our polygon fill and just click and drag on those polygons
inside there like that. There we go. And then we're
just going to have to go do this for every single one. Which is a little tedious. But we can do it. Alright, I'll click and drag on that one. And then this one right here. There we go. Alright, what do we think? Well, I feel like it,
even though it's black, it's a little too bright, right? Let's come back here and
let's take this down a bit. So it's not quite as harsh. So let's go with that for now. That just gives a
sense that there's like a hole through there. So is that everything
that we needed to do? Oh, one thing I
would like to do as well is deal with the mud flaps. But maybe in the next video, what we should do is figure out what we wanna do
back in Blender. Go do that, and then import
a new FBX back in here. And I want to show you
how you can do that without ruining all the work
that we've already done. So maybe we'll begin
that coming up next.
75. Fixing UV Issues in Blender: Well, back here in Blender, I feel like I want to
try and do a couple of those fixes that I
have on the list here. One is those overlapping
UVs on the tires or at least what I think
is overlapping UVs. So I'm gonna go ahead
and select all of these because these are
separate objects. And let's tab into
edit mode. Here we go. This is pretty dense here. Let me press Control and
Spacebar and increase this. And I feel like if we
look at this right here, so we've got overlapping
UVs right here. I'm going to press
Alt and click. And I think all we need
to do is hit G and move these out so they
are not overlapping. So I think we need to do
that on five tires, right? We've got five tires
from what I can tell that it's only happening
once on each tire. So let me go through
and just do this. And sometimes you gotta do this. You know, the UV mapping
process isn't always perfect. And that's okay. We can come in here and manually fix the things
that need to be fixed. So let's give this a try here. G moved that was that, four of them, is that right? Okay, So where else
do we see them here? They've gotta be
in here somewhere. There's gotta be one more. There it is. Right here. Alt, click this edge G, and move that out like that. Alright, I think that's probably a pretty good
fix for our tires. Let's press Control
Spacebar and go back here. Alright, we can mark
this off the list, I will do that. And the next one, the steps and ladders. Let's take a look at these. We've got this, and
we've got this. Let's tab into edit mode, hit the a key, and let's
take a look at this. I'm going to press
Control and Spacebar. And what do we think the
problem could be here? He is it that these are
too close together? I mean, could that be
the issue or do we need to go ahead and just
spend a little time and use our seams and our
unwrapped tool to really control how we're
unwrapping these objects. And I think that maybe the thing to do This is what I mean by begin with smart UV, unwrap. See how it works. Take it into Substance. Painter, see how it works. And then if there are
problems with it, come back and do it manually. With these selected,
I'm going to press Shift H to hide everything
that is unselected. So we just have these. And then what I'm going to
do is go in and let's create our own UV seams
here I'm going to go to the back and let's
do our seams back here. I'll press Alt and
click, and here, and here, and here, and these along here. So we create seams along. They're kind of hiding
them away, right? Let's then press
U and mark seam. And these things up
here are hidden away. We don't really need these, so I'm going to
select these faces up here and just delete
all of these. We don't need these. Delete faces and these as well. Okay, Let's see
how this unwraps. Let's hit the L key to just
select this one piece. It, you unwrap. What do we think here? Now? Did I get rid of that
UV test material? Yeah, I did, didn't I? And that's fine. We can create a new one. I'll remove this material
temporarily here. And then let's create new. And I'll once again go
through the process of creating an image texture. Click on New, call this UV test, and we'll use a UV grid here. I should call this UV test
as well, the material. And let's connect those. Go to our material preview here. And let's take a look.
How does that look? Yeah, that looks pretty good. Like we've hidden
away this part. This part may be a little
bit stretched on the back, but I really don't think
that's gonna be an issue. We're not going to
see that much at all. Alright, so what I'm gonna
do is come over here, get the L key period, and I'll just do
the same thing over here as I did over there. Select all of these,
and delete them. And then on the back, we'll just select these
edges all the way around and give these
a seem as well. There we go. Now
let's just press U Mark scheme will hover
over this, hit the L key. You unwrap. Yep, that looks good. Okay, so let's go take a
look at this back here. If we select just this
piece and hover over this, we may have to deal with
this in a similar way. Let's go ahead and give
it that UV test pattern. And yeah, you can see
all the seams here. We just weren't able
to fix those with triplanar projection
and that's fine. I'll go back to Solid View
for a moment and I'm going to tab into edit mode and let's just create our own seams here. I will select this edge, you end mark seam. I will select this edge, you and Mark scene. And the edge is
back here as well. And we're probably going to need to add a seem to these
little guys down here too. So let's do that. I'll just select this
and mark cosine. And let's go through and do
this for each one of these. I don t think we need to change
our UV map of the steps. Those seem to be okay. And the cubes, it's these. So I'm just going to
hover over each of the cylinders and press the L key and ensure
that seam is turned off. If it is turned on, you can always just press the Shift key and click it
and that'll turn it off. Alright, so now that we've
got those cylinders selected, let's press U and unwrap. Well, that did not do what I was expecting it to do by any means. I'm not sure what this
piece is right here. So let's see what that is. We can, if we want, we can turn on this sink again. And I'll de-select all this. And then let's just
drag select this and see if we can
find what this is. Well, that is that oh, it looks like is that a face? Sure enough, there's a face on the top of each one of these, 0 and on the bottom. So we do need that. Alright, so what I'm gonna do
is just delete these faces. Let's press X and delete faces. And then down here, we are going to
need to have seams along here to break these out. So let's press U and
Mark seems here. Okay, so hopefully
that will alleviate this really long
UV island there. We don't need that. So once again, let's press
the L key and select all of these like this. And then let's press U
and unwrap. There we go. Oh, I will turn off the sink
here so we can see those. Yeah, that's looking
a little bit better. That's what we want. Maybe I will take the island
margin and take it down to 0.01 and move those out a bit. And then I think what Let's do is pack everything together. So I'll take these
and shift select these tab into edit
mode, select everything. Now over here, Let's select
everything with the a key average island
scale, pack islands. And let's see about
our island margin is 0.01, control and Spacebar. And let's take a look. Alright, I think this may
work a little bit better. We've gone to the trouble
now to hide our seams. So even if moving the
islands apart just a bit doesn't take care of
the visible seam problem. We've at least hidden them, so we're hiding the problem
away so people can't see it. Well. Alright, let's press
Control and Spacebar. Let's tab back into object mode. I'll press Alt H to
bring everything back. And in the next
video, I'd like to do one more thing here in Blender
before we take it back. One thing that I like on this image here that
I forgot to do, we're the rivets going along the grill here and
some down here. So I'd like to add
those as well. And I want to show you how you can add completely new geometry. Give it a material so that it's a part of the
same texture set. And take that back into
Substance Painter as well, without losing all the
work that we've done.
76. Updating Changes in Substance Painter: Well, since the last video, I went ahead and created all these rivets
along the grill. As I said, I like these here, that gives it a
little more detail. So I went ahead and added that. I did it just like
we've done before. Just like with these up here, I created a UV Sphere,
cut it in half, squish it, and then duplicated it and put them into
place along here. In addition, one thing I
did here is I selected this edge on either side and used with Control E, mark sharp. So we have a bit
of a crease there. I think that works pretty
well with the rivets. You can see that here. So that's what I did, but I did it so that we can
take a look at how to get it incorporated into
the existing UV map of the grill and
how to take this, as well as the steps and ladder back into
Substance Painter. So what Let's do is
select everything within this particular material. Once again, we can do that
by going up to Select, select linked and material, and that selected all of these. Now let's shift click
this right here. And I've just made all of the rivets all the way
around the same object, just so it's easier to select. Then let's tab into edit mode, hit the a key, and here we go. Now you can see this back here. That's all of the rebuts, one on top of the other. So that's not going to work. Now the UV map for the grill and the clamps and the hinges and stuff seemed to
work pretty well. So I will just
select those rivets first on their own and tab into edit mode and
hit the a key. And let's just unwrap
these lists, press U, and I think I'm going to use unwrapped for this
just like I did for the headlight because each one
of these has an open back. I don't think we need
to worry about this. Let me press Shift H. And if I tumble around, you can see that each of
these has an open back. So if I use smart UV project, it would try and break this up. Whereas with UV unwrap, it'll just unwrap each
of these individually. And I think that'll
probably be better. So here I'll press Alt H,
bring everything back. I'll select just the
rivets tab into edit mode, hit the a key you, and unwrap. And that's not bad, but they're kinda
stretched here. Let's go back. Look at this. Our scale is not uniform. So let's press Control
a, apply the scale. Now let's try it again. Tab into edit mode. You unwrap. That looks a lot better. So now let's get all
of this together. I'll select the grill,
select linked material. So that's all selected. And then I'll also
select the rivets. And then let's press tab the a key and then
we'll come over here, also press the achi so
we select everything. Uv, average island scale, UV pack islands,
and there we go. So that just incorporates all the rivets into the UV map with the grill
and the hood, et cetera. But we also need to add them
to the material, right? So let's come over here and go to the material
preview and we can see that they do not yet
have a material on them. So with those selected, I'll just Shift-click the grill. And then let's press Control
L and link the materials. There we go. So now
those are all part of the same material as well as
all part of the same UV map. Alright, so now that
we've got all of that, we've got our new uv maps for
the latter and the steps. And now we've got our new
additions to the grill, etc. So now let's take this back into Simpsons painter
and go over again how we can add these backend. Alright, so I'm gonna
go to the Layout tab, and I'll just hit the a
key to select everything. I'm gonna go ahead and save
the scene with Control S. And then I'll come over here
to file and export FBX. Let's go to our exports
folder, which is right here. We've got truck three. I'm going to click
on the plus here. Let's do truck for. I'm going to select
the mesh object type, selected objects. And let's click Export. There it goes. Alright, so let's go over
to Substance Painter. Alright, here in
Substance Painter. Now, instead of opening
directly that truck 04, Let's go in and open
our existing file. I'm gonna go to recents
and that truck 03. And we're going to use that
project configuration tool to bring things in again. And as I said, that
should keep all of our work in tact so we don't have to
do it all over again. So let's come over to Edit
Project configuration. We'll choose Select, and this time we will choose
our newest FBX 04. We'll click OK and then OK here. It will of course have
to think for a while. So you can see it's
brought in the mesh now. Alright, that's pretty good. But of course we're
going to need to rebate for the
grill up here. And For the ladder as well. But our steps over here, and the latter don't have any
materials on them at all. And let's scroll down
and see what's up here. Oh, we've got our ladder and steps are hidden and
we can't enable them. Let's go back to Blender
and see what happened. Well, here in Blender we can
see that I didn't change the materials back to what they needed to be there still
with this UV test pattern. So let's fix that. I need to just click this. And let's come over to
our materials panel. Pull this down and
choose Lateran steps. There we go. And for this one over here too, Let's grab this ladder in steps. Alright, so now we've got those. Let's try this again. I'm going to save my scene, hit the a key. I'm gonna go to
File export, FBX. Let's choose that truck 04
and click Export again. It's going to export
and overlay and overwrite the existing file. Let's go over to
Substance Painter. And let's try this again. So what I'll do is
just come back over to Edit Project configuration. Select, select 04 again. Let's try it once more. There we go. So now we've got
our material back onto the ladder and
the steps, of course, because we changed the UV maps, it looks a mess here, but we can fix
that by re baking. So let's go into the
baked panel here. We've still got 4,096.4 times sampling and our
anti-aliasing, that's good. Now let's just select
what we want to bake. So I'm just going to select
the grill and the hood here. And then I'm going
to pull this down and choose grilling
hood down here. And then click Bake. Alright, that looks
a little better. Let's tumble around back here and take a
look at the ladder. Let's now change this
to Lateran steps. And we'll come down here and click on bake, ladder and steps. And there it goes. Alright, let's now click on
Return to painting mode. And there we go. Now we've got all
our materials back onto the areas that
we re UV mapped. Now let's take a look at adding our materials to the rivets. Let's go to grill and hood. And if we go to our
3D and 2D here, we can see all of
those pieces in here that they haven't
been given a colour. And the reason why is that
we've gone through recall and used a black mask to
select individual pieces, individual parts that are
going to get the material. We haven't included these
yet in any of these pieces. So what I want is probably
the ghrelin hood, right? So I can select these, go over to our polygon
fill, click Nashville. And in here I can go in
and just basically drag, select each of these and add
a material to these as well. Let's tumble around over here. Oh, take a look at this. What did I do here? Well, that's a classic mistake that we've already talked about. I mirrored these over
but didn't flip them. So I'm going to need to go back, flip them, and export
this out yet again. But now we know, now we know that we can go back, make changes in Blender
to both the polygons and the UV maps and re-import
those without losing our work. Here in substance painter
77. Beginning to Paint the Dirt: Well, for this next part
of the texturing process, I'm gonna be using
a graphics tablet, a pen and tablet. I've got a little way come into OS Pro to medium-sized
pen and tablet. It isn't fancy by any means, but it's certainly, I think, easier to paint with a pen and tablet than
it is with a mouse. But for this particular process that we're going to go through, you can certainly use a mouse. If you don't have a graphics
tablet, don't worry. You can use a mouse. I just prefer the
pin feel a little bit more when I'm
painting on the model. So first of all, I think I'd like to begin with the actual truck main here. And so I'm gonna pull this down and let's find
that here we go. So I think what I
wanna do is just create a paint layer and
begin painting over this, just making some various
dirt patches and mud or something like
that just so it feels a little bit more
used than it is currently. I mean, it's got some rust and some little bumps
and things in it, but I feel like we need more. I feel like I like that scale model image that we have with all the
with all the dirt on it. In fact, let me
bring that up here. I feel like this is kind of a
good template to work from. I'm not going to go this far, but I just like the idea that
there's dirt and where and things on here from just use from just
being used over time. So I'm going to keep this on my other screen just
so I can see it. And really more be
inspired by it, then try and duplicate it. Alright, so one of the
things I like to do is work with multiple colors
and multiple layers when I'm painting it just for me makes things a
little quicker so I don't have to be so
careful when I'm painting. So what do I mean by that? Let me just create a group up here and I'm going
to call this dirt. And in here I'm going to
add a paint layer here. And I'm just going
to drag it and make sure it's up in there. Is it? Yep. Okay. And these are going to be the layers that we're
going to paint on. We're going to use a paintbrush. You can see that here. If I click and drag, you can see we can paint
directly on the model. I will undo that, but you can see all
we have to do is just create a new paint layer
and began painting. But I want to make a couple of layers here because
I want to make a couple of different colors
or values of the dirt. This may be this one
was gonna is gonna be the dark part of the dirt. And maybe this one here
can be the medium part, and this can be the light part. There we go. So in each one of these will have a
color that we can use. And the reason why I like
to split it out like that because then we
can come over here, adjust the opacity
for each one of those and change any blending
modes per color. For the dark dirt layer. Let's create a color
for our paint brush. For this, I'm going
to scroll down here until we come
to the base color. And I'm going to click
this and maybe I'll try and sample a color, a fairly dark color
like this maybe. Alright, and then I'll bring
the value down quite a bit, so it's pretty dark. And then I want to save this particular color down
here in the swatches. So I'm going to click here. And now that's been saved. So whenever I come down
here and use this layer, I'm always going
to open this and choose this swatch, right? So now let's go to the
medium layer here. And actually I don't
need to go to each of the layers to change
the swatch color. I just I'm just going through it for explanatory purposes here. But in the medium
paint layer here, I will maybe grab another color, maybe something like this, that seems to be a
little bit too light. So I'm going to bring it down
like that and click here. So we now have a
dark and a medium. And then maybe I'll grab
another color like this. And I feel like this is a
little too skin colored, so I'm gonna go back
toward the brown just a bit and bring this down. Just a hair like this. And let's add this swatch. So now I've got a dark
medium and light. I can come in and select these and make
adjustments, of course. But this is basically
just to keep organized. And so that I can adjust each
one of these individually. And just as a reminder, this is the way I do it. You can find a lot
of other techniques, processes, ideas for this kind of thing all over the Internet. And I encourage you
to look at all of them and try and figure
out what works for you. But I just want to
show kind of what I do my particular process here. Alright, so now that
I've got the setup, one thing I do want to do
is change the brush type. If I click and drag here, it's just going to be this Flat color here, and I
don't wanna do that. So what I wanna do is change the brush type so it
looks more like dirt. So I'm going to
open this up just a bit so we can see these icons. And over here are our
brushes right here. And we've got all kinds of different kinds of
brushes that we can use. But you can search up here, I'm just going to search
for dirt and we've got a couple of dirt's and we
can just use one of these. I'm going to select dirt one. There we go. And you can see
it here on the brush too. So I'm going to choose
the dark paint layer. I'm going to click on the base color change
to that dark color. Here we are. And then I'm going
to go ahead and leave my opacity and
my flow at 100%. Because once again, I can change that opacity
over here as well. So now I can just
begin drawing on here painting to get whatever
colors or however you want it. So I think I will reduce
the size of this, maybe undo this and
bring this down. Maybe to ten or so. Yeah, and then I'm
just gonna begin painting around the edges here of the various pieces. And I want to paint up
in here quite a bit because this is where all the dirt is
gonna be up in here. Of course. I want to get
that around in there. And we'll get this other
part when we do the fenders. And oh, and you know
what I should do, Let me undo this real quick. I'm just going to undo back to the beginning so that
I can come up here and turn on my symmetry so
that whatever happens on one side is also happening
over here on the other side. And the great thing about
a car like this is that you're never going to see
both sides at the same time. So no one will ever know
if you use symmetry. Alright, I'm just
going to go ahead and begin painting again here around these edges like this. And down in here. This make it really
pretty dirty down here. And then keep going on down. So I'm going to
come down here and give us some dirt down here. And once again, I
can always come over here and reduce this. And we'll use this
to kind of mix these different paint
layers together, right? And I'd probably
get some dirt and where and stuff down
under the tire. Right. And back in here
and around in here. So just go through and try and think about where
the dirt would be, where it would splash up
and things like that. I'm going to get down
in here and the wheel, well, it's gonna be nice
and dirty down there. And of course, we're going
to need some of that down in the front here. Let me get back behind the
tires to I want to do that. I haven't baked the tires yet to fix those overlapping UVs. I need to do that. Don't I? Come back in here? Let me get the front now. Now the front you
will see both sides. So what I'm gonna do is turn off symmetry here while
I paint the front. So it isn't quite the
same on either side. And I'll go ahead and down here, just increase the
size of the brush. And I'm just gonna give down here on the bottom a
lot of dirt, right? We're going to need dirt
and things down here. Alright, let's go around
to the back and see it. We've got back here. I'm going to press Shift
and right-click here. Some of my paint kinda
smeared from the bottom. That's okay. I'm just going to
paint over that. Like this. It'll cover that up. It'll just look like It's
splashed up there. That's okay. Okay. So now we've got some dirt along the bottom
here, along the edge. I'm gonna hit the F key
to frame everything up. So now what I'm
gonna do is go to the medium layer and do that all again with
the medium color. And the reason why I've put this all in a group
is because ultimately what we're gonna do is the next texture set
that we work on, say the grill and the hood or the rear doors or
something like that. We can just copy this whole group and paste
it in that texture set, and then continue on
with the same color. So everything is
pretty much the same. Alright, I'm gonna go to
the medium paint layer, change to my medium color. And let's start painting
in here as well. So I don t think I
want that medium to be in the real-world too much. But let me turn on
symmetry again. And we can begin. You can see that I can just
kinda overlay some of this. And you can kinda see
what it's doing is just overlaying that dark area. And we can use the multiply blending mode to
screen mode, normal. We can adjust the opacity
so we can kind of play around and get
various mixes from this. So I can come over here and just bring that down
some bring it up. Right? We're just trying to maintain control of it for as
long as possible. Alright, so in the next video, we will continue with the next
paint layer and then we'll go and begin doing this on
other texture sets as well.
78. Continuing Painting the Dirt Layers: Before I go any further, I think I'm going to
fix these tires here. Let's go ahead and rebuild our tires and see if that helps. I will pull this down, choose Bake tires
and click this. And let's see if
that helps some. Alright, the bake
is all, all done. Let's go back and yet
that sure enough, helped. So ensuring that we don't
have any overlapping UVs, bringing it back through
project configuration. And then rebasing
took care of that. So that's good. Alright, so let's go back to our truck main. We'll go to the
light paint layer and I'll switch colors
here to the light color. And maybe I'll switch
paint brushes too. Maybe I'll try this. Dirt Three. Let's see how this works. Let's zoom in a bit and
I'll just begin painting. So yeah, we're just
getting a few spots here. That's all. I've got. Symmetry turned on still. And I'll just come through and begin adding some
of these in here. Splash some up on
the door like that. Just give us a little bit of
a change from the others. That's all. I'll do that back here. Maybe I'll change the size
every once in awhile. Get that back here. Maybe there's some splashes
that go up in here. And let's go to the back. Do that up here as well. And just as an example here, we could take the dark layer
and try like multiply. And we could bring that up in the layer stack or maybe
put it right here. So you get a different
feel, right? So you can change the
order of the layers. You can change what
your blending mode is. You can just have a good
deal of options over here. Maybe I want to change
this one to multiply. Let's try that. Yeah, so you can all of a
sudden make that a bit darker. So I would suggest
playing around with blending modes and opacity
and things like that. See what you can come up
with, see what you like. This just gives you
some flexibility. That's all. Alright, so now that we've
done that for the truck main, Let's take this and copy that whole group and let's go to the fenders now since
we've got those connected, let's paste these
here up on top. And let's try this now. You may see some kind
of blending over because these were made with a different
collection of UVs. But generally
speaking, I find it doesn't really matter with dirt because dirt is
just dirt and random. And so it usually
doesn't matter. I'm gonna go back to the dark, change to the dark color. Maybe I'll change dirt
back to Dirt one here. And let's try this. So maybe I will reduce
the size of the brush. And let's start painting in here some and see
what we can do. So I do have the symmetry
turned on again. I'm just going to go through
and kind of go along the same edges that I did
with the others like this. And I think I also want it to be on the outside as well
as if it's coming up. Right. Because we want it to be
on the bottom down here. I'll right-click here and
change the brush size. I'm just going to
bring it up just a little bit like that. And so I want all
of this to have that dark dirt paint
down here on the fender. Oh, and it looks like we have did we have the
mudflats along here? All we did. So that's good. We'll go ahead and get the mud flaps as well
while we're here. Let's do that. And we can maybe
spin around and get the other side just to be sure and get plenty
of dirt on these. And let's get
underneath the vendor and have it kinda bleed up
over the edge here like this. So we can see that it's been splashing up on the
fender here like this. Yeah, there we go.
Alright, so now I'm going to switch to my medium. And for the medium
maybe I will change a brush type over here,
maybe dirt spots. Let's try this. See
what happens with this. Maybe I will increase
the size of the brush. See what happens here. Yeah, okay. I can
see some there now. And I'll come in and
get that in here. So this is just a
great opportunity to go through and play, figure out what you want. Play around with colors
and with textures. And once you get the paint
down, you can, as I said, come in and begin playing
with the opacity, the blending mode, et cetera. I'm alright, so maybe I
will come back to here, change to the light color
and what do I want here? Maybe little dots. Let's see how this works. I don't know. Well, not
bad, that's not bad. Look at that. So maybe we've
got some kinda splashed up things on here. Yeah. Okay. Yeah, so those little kinda
splashy dots are kind of fun. Let's get some of that back here to move the light around. We go. Yeah, that's pretty cool. Maybe one thing I
will do is take the medium and use multiply. Well that's interesting. Let me try that with the
truck main two, It's kind and that's kinda neat. Medium multiply here. And then I can take the
opacity down a bit. You can just play around
with the different colors, the different blending modes. It's kinda fun Actually just to see what you
can come up with. Alright, so maybe now
let's go to the grill. Let's see if we
can get something on the grill that
looks reasonable. I'll copy this dirt layer here. Choose the grill and hood. Let's go to the
top of the stack. Right-click paste. There we go. We're already getting
some on there. And that's good. Alright, so let's begin again. I'll change to the dark. Find another dirt brush, and then reduce the size
of the brush a bit. And then I'll just
begin painting on this. Maybe I will turn off
symmetry for this area. Here we go. Oh, I've turned the flow down. Let me bring that up a bit. I don't really like
that a whole lot. Let me try another one. Let me try Dirt. Three. Let's try that one. Now. I don't know that
I'm going to like that when I'm gonna
go back to Dirt one. When you find something
that you like. I will go through here and begin adding all
of this in here. So what I would say is go ahead and go through each
of your texture sets with this dirt group of layers here and see what you can
come up with. Kinda have fun. The cool thing is you can
always just remove it. You don't need to worry too much about overdoing
it or under doing it. You can adjust it at
any point in time. So I'm gonna go ahead
and go through all of my texture sets with
the three layers here. And then in the next video, let's add a little bit
more of the rust and maybe some mud that has some height information
in it as well.
79. Painting Height and Bump Information: Alright, I've gone through
and added some paint with our dirt layers on different
parts of the vehicle. There's still more to do. Of course, I've added some to the tires and I kinda
splash some underneath this tire as if it got hit with dirt down here but kept the
upper part fairly clean. And what I'd like to
do now as I said, is just add something
that has a little bit of bump or height
information to it. So what I'm gonna do is clear this search field here
and go back to materials. And I'll search for
a rust material. And for this, I will create
another paint layer. Just put that on top here for
now and I'll call it rust. And instead of using the base color here and
just changing the color, what I'm going do is
actually drag and material into this
material slot over here. So maybe I take this rust course and drag it
and drop it right in here. And then what I wanna
do is maybe take this rust color and I
want to turn it down. So maybe I'll use that
middle paint swatch or maybe the dark now, I'll use the middle. Let's try that. And so for this, it's got height,
rough information. And we can come
back over here to our brush, search for dirt. And now we can
combine a dirt brush with the rust material
and see what happens. Let's just see what
we can come up with. So I'm here in the truck main and maybe I'll go back
to that Dirt one. That's kinda good. I'll I'll try that. And let's just come
in here and see what happens when we paint down here. Maybe I'll reduce the brush size a bit and let's just paint down here and see what happens when
we do if we kinda zoom in. You can see that we're painting some height information
in here too. Let me bring this up some more. Paint it again, see how we're
getting that information, that bump information there. That's kinda what I wanted
is just something to add a little bit of
extra detail in there. Like it's kind of been all banged up in there to get some height
information in there. So let's just kinda go through and see what
we can add to this. Now to make things even
more interesting, well, we can do is come over here to our properties on the material. And let me see if
I can remember. It's in dynamic stroke
here, this random seed. If we change this from
single to random per stroke, it should change how it looks just a little bit
each time we do a stroke. So I'm just going to
drag that across here. And yeah, you can begin
to see that's kinda doing something a little bit
different each time. I'm just going to go through
and kinda put these around the edges or where things meet as if there's some rust happening and
kind of bubbling up where water would get in and cause a little bit of rust. So maybe maybe back
in here, let's say. And in here, back here
along the bottom of that, so you can just go around and see what you
can come up with. It's kinda fun to do. I'm going to bring
some out in here. Maybe you can of course, change the opacity,
bring it down, bring it up some, maybe I'll bring it down
quite a bit because the opacity doesn't
really change the height when you're
here in the base color. So let me show you what I mean. If I bring this backup. Well, maybe I'll take it down
to around 50, let's say. And if we change this from
base color to height, now you can see we're back up to 100 because we're only
dealing with the height. Now if I click and drag here, Let's see if we can reduce that. Yeah, I see. So we're reducing the height now
apart from the color. So this is the
kinda thing that's really cool with Substance
Painter is you can really play around with the
different baked textures that you get when
you do the bakes. So I'm gonna go ahead
and maybe just do that. And I'll also do
it up front here. Let me do this up
here too. Yeah. So I just want something a
little bit more in here as if this whole area is really
beginning to rust, right? I'll just get that in here. And I'll do that on
all the fenders. And as I said, I will then go back
and work on it at different points of
connection with like on the grill and
things like that. So let's do that real quick. Let's just choose the grill. And I will oh, I painted on an
existing paint layer for that other one
now, didn't I? So let's just create a
new paint layer here. And I'll call this rust. And let's do the same
thing here for the grill. I'll just come
into here and just begin coming around
the edges here, down here like this. And once again, we can take
the color down like this and leave some of that bump information in there
without the color. Maybe I'll bring
this down just a bit and do some of that along the edges here as
if it's beginning to rust along there,
something like that. So it just gives it a little
bit of an extra feel. They're a little
bit of extra detail in here and I'm going to bring
that color down like this. Alright, so I would suggest continuing on and playing around with these
different techniques. It's really a lot of fun and
you really can't go wrong. I mean, you can remove
layers, hide them. You can change the opacity,
the blending mode. You can delete them
completely and try again. So there's really
no harm and just playing around and seeing
what you can come up with. I think for the next video, what Let's do is
let's actually work on bringing some of
these decals in, like for the cross and
the star and the words. Let's bring some of that
in and get those in place.
80. Adding Decals to the Vehicle: Now let's work on adding some of the decals for the truck. First of all, let's deal
with that Red Cross. I'm going to bring my
decals folder over here. I've created this folder
inside the textures folder, so you can find these already created in the project files. But all we've gotta do, let me just first of all, come over here to our textures. This is our textures panel. And all I'm gonna do
is just take this and drag it and drop it into
the textures panel. Now what we need to do is tell Substance Painter how we
want to deal with this. Currently, it's undefined and we want it to come
in as a texture. And how do we want
it to be available? We want it to be available
to this project. We can have it be just
the current session or all the time in your library. But I'm just going
to have it come in for just this project. So I'll click that and
then I'll click Import. And now here it is in
our textures panel. Now all we have to
do is just hold the Alt key and drag it to
where we want it to go. So I wanted to go
right back here and that's on the truck
main texture set. So I'm gonna come over
here and select that. And then in this truck
main textures set, I'm just going to
come over here, alt, click, and drag it right
out here and drop it. Now once again, we
need to tell it how we want this to be used. And for this, I think just
a base color is fine. So I'm going to
click. There we go. Now, it's on our vehicle. On that surface. We can come up here to the move, rotate and scale tools. So I'll just click this. And now we can use these
handles to move it around. So maybe I will just
click on this and drag it around until we get
it about the way we want it. So I'm just taking a look at the reference image over
here on my other screen. And I think I'll scale it down. I'll come over here and
click the scale and click on the box in the center so it scales proportionately
or evenly. And you can change
the tools with the W, E, and R keys. So W for move E for
rotate, R for scale. I will take this and
move this around. I kinda want it fairly
centered over the, over the rear fender here. Alright, so there
we've got that one. Let's come over here
and just reduce the opacity a bit there. And then let's also
drag it down so it's underneath our dirt here. Let's take this and drag it down below this and see
what happens. Yes. So now the dirt is up on it. Let's see if we can drag
it down any farther. If we go down to here,
nothing happens. If we go down to here, it goes away because we're
beneath the material. So I will just bring it back up underneath the
dirt. There we go. So maybe if I take
it down a little bit more, something like that. So it just feels
like it's kind of warn and gotten dirt
splattered on it. Yeah, I can come up
here and turn off the manipulator. Here we go. Alright, I think
that's pretty good. Let me bring that
down a little bit. And we'll need to do that over
on the other side as well. But for now, let's
keep going for these other ones on this side. For our star. When it's bring this over, they can drag the star with
no circle and drag that in. Once again, we're going
to need to tell it, is it a texture? And for this particular project, let's say Import,
and there it is. Let's then Alt, click it here, drag it onto the door, the base color, and there it is. Now, you got to do a
little bit of work here. So let me turn on
the manipulator, go to the Rotate tool and
I'm just going to click and drag and rotate that a bit. Hit the W key and move
this around like this. E, rotate, w, Move. And I feel like it's
just a little too big. So I'll hit the R key. Scale this down as smudge. Let's see how that looks. Alright, once again, let's
drag it down below the dirt. There we go. And then I'll take it and drag the opacity
down quite a bit. Something like this. Alright, I'll turn
off the manipulator. Let's take a look. Yeah, something like that. Now there's another
one on top here. Let me bring this over and
you can see that here. So let's put that on top. That would be the
grill and hood, right. So let's go there. And let's bring that in, bring it over,
drag it into here. Let's tell it that we
want it to be a texture. And in this project,
and here it is. Here I will alt click this and drag it and
drop it right up here. Let's use the base color. And there we go. So it's a little bit off. Let me turn on the
move manipulator here, and let's just drag it around. Something like this. It needs to fit in between
the grill and the windows. So let's scale it. I'll hit the R key. Click and drag in the center here and scale this
down quite a bit. Let's change to the manipulator, the move manipulator
and move that a bit. So it looks like maybe
something like that. Let me try and get
it pretty centered. It's it's actually pretty
well centered as is. Yeah. Let's go with that. I will take that, drag it
down beneath the dirt. Take the opacity
down quite a bit. There we go. Now there are others. There's another one
on the grill here. This red cross logo
is also on the grill. So let's go ahead and do that. While we have that
texture sets selected, I'll click and
drag, drop it here. Use the base color. Turn on the manipulator,
go to scale. Let's scale that
down quite a bit. And then I'll hit the W
key to move it around. Let's try and get
it in the center. Maybe a little bit bigger. There we go. And then I'll turn off the
manipulator and once again, let's drag it down
beneath the dirt. Turn the opacity
way down. We go. Now we've also got some on the tarp here. Let
me bring this over. You can see we've got a
few on the tarp here, so let's work on that. We can switch to the
roof texture set. And then let's then Alt, click this, cross, bring
it into here, drop it. Base color. When it's
turned on the manipulator, hit the W key. And then the R key, scale it down quite a bit. W, bring this
forward and you can see how it's beginning
to cut through there. And that's okay. What we can do is just take
this z-axis and pull it up or down just a bit until
we get it where we want it. I'm going to bring
it this way sum. And we could also try
and tilt it a bit. Yeah, that helps sum if we
rotate it like that. Okay. Let's then drag it down beneath. Well, we can't put it
beneath that entire group. Can we bring it up into here? There we go. And then let's take the
opacity down quite a bit. So that's how you can
place your decals. I'm gonna go ahead and
before the next video, put another cross here. They've also got a few
in the back as well, so let me yeah, they've got one big one here. However, in our photos, we've got one here that
has 21 on each store. So you can really choose
how you want that to work. But I'm gonna go
ahead and go through the same process and put the
decals here on this side. And then in the next video, let's work on adding
the headlight textures
81. Texturing the Headlights: Well, since the last video, I went ahead and
added this number d Tau here you can see
I've dragged it in and then I just pressed Alt
and clicked and drag that in on the truck main
texture set there. So I've got it on
both sides here. One thing I do
want to point out, if I tumble around,
look inside here. You can see the stars poking through to the inside over here. And you might think, well, that's just going
through that polygon, but in fact, this door
has thickness to it. What's actually
happening is this, these decals can be pushed in or out and have a
thickness to them as well. So let me go back to
the truck main here. And I want to find the
particular star here it is. I want to find this one. And I want to show you, let me turn off the
roof so we can see inside here like this. And as I drag this out, watch this, see
how it fades away. It's those arrows. You see how these arrows
here have a thickness, these green arrows, that's how thick the De
Kao actually is. So if you pull the De Kao out to the end of the arrows,
it will disappear. But theoretically, it's
still should be here because the arrows are still poking through
just this polygon. Now if I click and drag out, so those arrows come
out of the polygon, you can see it goes away. So I just want to
bring them in just far enough so it's at
full strength here, but isn't yet pushing through to the other
side. So there we go. Let's choose this one now
and let's try and do that. Same thing. I'll just pull
these out until the arrows go out like that. And then this should
still be over here. Let's move the light around. And let's just make sure
we're at full opacity that we want where we want it
to be here, like that. So now we've got
them on the outside, but not on the inside. Alright, let me put
the roof back on. And what I'd like to do now is bring in these
headlight textures. So if I drag this over here, you can see in our decals folder we have this
headlight PNG, just going to click
and drag that over. And then we want to call this a texture and put it
in this project only. Import. If we Alt click this and drag it in
to this headlight. Now we need to change
our texture set two lenses and I'm gonna get rid of this
paint layer here. We don't need that. So now I can Alt click this, drag it over and
drop it right here. Let's choose base color. There we go. Alright, it's
a little ugly, right? So I think we need to
work on the size of this. I think that's
gonna be an issue. Let's turn on our
move manipulator. Let's go to our scale, and let's click
and drag on this. Now, we can, if we want, come down here and choose
3D prediction settings. And over here we've
got our scale. So we can turn on the lock. And now when we drag
this one slider, they all scale
proportionately with that. Let's click and drag. And if we go down, we can't really get down
far enough by dragging it. But if we type in 0.01,
Let's see what happens. Okay, So we've got it there. That's a little too small. Let's try 0.020,
0.03. Here we go. Let's try this. I'm going to take this
and move it a bit. And you know, this
might be easier if we actually looked at
it on the 2D UV map. So let's do that. Let's come up here
and go to 3D and 2D. Now here we have our UV
map with the image on it. But I think what I wanna do
is put it directly over here. So for now, I'm going
to delete this. And then I'm going to
Alt click this again and bring it over and
drop it directly on here, and choose the base color. And what that does
is it gives us these manipulators that
we can move and scale. And I think we can have a
little more control here. So let's try this. I'm going to hold the Shift
key and click and drag this so that it scales
up proportionally. Do that. Yeah, see, we just have a little
more control over here than here in the 3D view. Alright, so now I'm
just going to take these and drag
them individually. Until it fits our UV map here. Maybe like this. And like this, there we go. Now, it doesn't appear like it's facing the right
direction here. So let's hover over
this and turn it. And I'm going to turn
it until it looks good in the 3D view. Yeah, something like that. And then I'll move these around again to fit that a
little bit better. I'm just looking at
the words here to see if they're right-side up. So there's that side. You can see that
over here as well. It's in place and looks
like it's ready to go. It is flipped. You can see how the words are backwards, but
you know what? I can live with that. I'm not going to worry
too much about that because I'm going to
slap a whole bunch of dirt and grime on these because they
certainly wouldn't be this shiny and clean with
all this other dirt on here. So let's go back to
our 3D only view. And I'm just going to create
a new paint layer here. And we still got some
of our colors in here. I think this is the
darker dirt color yet. So let's now go over
to our panel here, clear this search field. Go back to the
brushes, type in dirt. And maybe I'll just grab
that Dirt one again. And let's throw some
dirt on here as well. I'm going to bring this down
and I'm not even going to use my pen and tablet for this. I'm just going to
click on the mouse and put some dirt
in here like that. And since the UVs are
one on top of the other, it pretty much does the same
thing on the other side. And then maybe I will switch
to a slightly lighter color. Maybe take the flow and
the stroke opacity down. So I'm just doing it
all on one layer here. It's going to bring that down. Throw some dirt on
there like that. Yeah, that's pretty
good. There we go. So that's all I wanted for those just something a little
bit dirty and messed up. Let me drag the opacity
down just a little bit. It's not completely
covering the lights. There we go. Something like that. Alright, so I think
we're pretty well done with the texturing. There is of course, more that we can do. And I may go in and
add some more dirt to the axles to the
underneath part of the truck, maybe add a little
dirt to the top. I don't know. But generally speaking,
I think we're pretty much done going over these techniques
that can be used here in substance painter
to do your texturing. So in the next video, what we'll begin doing is
exporting our textures out of Substance Painter
and taking them into Blender and applying
them to our model. There
82. Exporting Textures Maps from Substance Painter: Alright, I think
we're about ready to export our textures here. Of course there is
more that we can do. So much more that we can do with the tools and the
techniques that we've already gone over to
add more dirt and mud and rust and just we
could go to town on this, but I think for now
this is pretty good. Let's go ahead and use this to export our textures and
take those into Blender. There is one thing I
did want to do here. If I rotate the light with Shift and right-click
and drag here, you can see on the
tarp on the roof, It's kind of shiny when
we get up into here like that and I don't think that tarp would be quite that shiny. So I'd like to bring that down. So I'd like to not have
it be quite like that. So what we can do is we can
select the roof texture set. And we can choose, well, not the event. The tarp here. Scroll down to the material here and increase
the roughness here. However, if we do that and
then we move the light around, we can see it's
still pretty shiny. And even if we drag
this all the way up, it's still pretty
shiny in places. So what we can do is you
can use this pull down here and change what you're adjusting in the opacity
field over here. So if we say took this and let's see if we take
this and choose roughness. Can we then come over
here and drag this down? And sure enough, if you aren't finding a particular
property down here, sometimes you can come into
here and go directly to that property here and adjust the opacity in the layer itself. So I just wanted
to point that out. Alright, so that's I think
a little bit better. We still got some
shine on there. But it's not as
overpowering as it was. Yeah. Okay. Alright, so now let's talk about exporting all
of these textures. And what we wanna
do is just export these out as like a colormap, a normal map, a metallic,
and a roughness. And take those into Blender
and connect those up with the principal DSD F shader for each of the materials that
we created in Blender. Now, we can come up here to
File and Export textures. And in this window you can
see here that I already have the blender principled
BSD F templates selected. And if we go over to the
output templates tab and we select that, you can see here's all the
maps that it will output. It will output a color and
normal metallic roughness, emission alpha,
and displacement. And I don't know that
we need all of these. An emission map would be if
we had something glowing, an Alpha map would
be if we needed to, say, add a leaf to
a polygon plane and then have all the parts
around the leaf invisible. So it just looks like the shape of the leaf instead
of a polygon plane. And a displacement map is just another kind of height map, which is what a
normal map will do. So I don't know that
we need that either. So if we just wanted
to export out just these top
four texture maps, we could just create our own output template or
preset for our project here. So if we selected this blender
principled BST F template, and we'd choose Duplicate here. You can see it comes
in down here as a copy and we can
right-click choose Rename. And I'll call this
blender Blender basics. Let's do that. And in here, Let's then remove the
ones we don't want. So we don't need an emission, we don't need an alpha, and we don't need
a displacement. And so there you go. Now we have our
own template that we can use to export
our textures. Okay, so let's go back
over to the settings. Let's find a folder that
we want to put this in. So in my textures folder, I'm gonna create
a new folder and call this export textures. And so we will select
this folder for that. And so all of our textures, we'll go into that folder. I'm gonna go ahead and
use a PNG file type. I think those are pretty good. And for the size, if you recall, we chose at the very beginning, 40, 96 or four K textures. And I did that so
that in the viewport, we'd have a good amount
of detail as we tried to figure out how the
different materials we're going to look. But here we can choose what size we went to
export those out. And I think I'm going to
be exporting or rendering out at two k or
HD, 1920 by 1080. So our textures
really don't need to be any bigger than
two k as it is. I'm going to choose to k and Substance Painter
will do the work to convert everything from
four k to two k for us. Alright, I've got
all of our texture sets chosen over here. So it's going to export these four texture maps for each one of
these texture sets. And then we're going
to have to apply those four texture maps to each one of these
materials in Blender. Now before I do, I'm
gonna go ahead and choose Save Settings here. And then I'll come
back and go to export the textures and
everything should be still saved here
and ready to go. Alright, Are we ready? Let's do it. Let's click export. And there it goes. So for each
one of these texture sets, it's creating four of
our textures here. And here we go. It is all done. In the next video. Let's go into Blender and work on applying all these
textures to our model.
83. Applying the Textures in Blender: Well, here we are
back in Blender. Let's now bring in our textures that we just exported out
of substance painter. So I'm gonna come up here to
the shading tab right here. And in here, we're
going to bring in each of our texture
sets or each of our groups of texture maps and apply them to each of these
principles, BSD F shaders. Now, we should really
ensure that we've got an add-on called Node Wrangler installed first before
we begin doing this. And you can do that if you don't have this installed
here quite yet, you can come over here
to Edit and Preferences, and you can go to Add-ons
and search for node. Right here is the Node Wrangler. And all you gotta do is just
add a checkmark to this. And when you do that, this little tab here in the shading editor
right here will appear. And you can use
this to very easily add multiple textures
to a material. It's really this one right here, the add principled setup. And you can see that
the shortcut is Control Shift T. So let's try it. Let's first of all
select anything that has like the truck
main on it. Let's do that. One thing you do need
to do is ensure that the principled BSD F is
selected with a white outline. If it has that orange outline, like if I choose something else, you can see that it's
got this orange outline. That's not gonna do it. You want to select
that principle, BSD F, and get that
white outline. Now from here, all you
gotta do is come over and choose Add principled
setup or control shift T. That, and let's browse
to our Textures folder here and into the
export Textures folder. And in here now if
we sort by the name, we can come down and find that
truck main because you can see we have that truck
main materials selected. So let's scroll down and
down here we can find the four texture maps that make up that truck
main texture set. We can see these if
we want to come over here and click on
the thumbnail so we can see all the
different materials that substance painter
created for us here. But let's go in here. Select these four,
and click here. Now Blender just automatically
sets all of those up with the principal
BSD F. Now, a pet peeve of mine is that I don't like seeing this
blurred background. If we pull this down over here, you can see that
this is the HDRI that this is using
and that's fine. I just don't want to see it. So I'm going to click on the world opacity and drag
this all the way down. And now I think this is
just a better way to view our materials here
in the shading tab. Alright, so let's
try something else. Let's choose the roof here and that gives us the roof material. Let's click on the principle of BSD F Once again to get
that white outline, we can come over here, click Add principled setup. And so then let's just
scroll down to the roof. Here it is, these
four click here. And that adds that
they're very nice. Alright, so we're getting there. Let's keep going.
How about the grill? Grilling hood? Select that. Now, instead of clicking over here we call we can
press Control Shift, T, grill and hood. Bring those in. And there we go. Alright, let's keep going. So as you can see,
for every material, we're just going to have to
bring in those texture maps. Now, the Node Wrangler makes
it a lot easier here in Blender to do this in
other programs like Unity, you'd probably have to drag
these in one at a time. But let's keep going. Let's select our vendors. Click on this. So it's got a white
outline Control Shift T. And this is vendors. So let's grab these up
here, bring those in. And so this is all
we need to do. We just need to
select an object, see what material it is here. Click that. So it's a white outline. Control Shift T. And let's go down to
tires and bring those in. Alright, let's keep
going. Wheels. Control shift T by knows. How about this piece here
that's the Lateran steps, will select that
control shift T. Lateran steps. There we go. This is headlight and mirrors. Let's do that. It looks like we've got things in the back here we need to do. Let's select the rear
door control shift T, scroll down and bring these N 0 and the
hooks and the ropes. Let's do that. Hooks and ropes. Here we go. Oh, we've got the bottom
and the interior, so let's go ahead and do this. This is all the
undercarriage material. Let's find that. There we go. And for the inside, once again, let's just select these, hit the H key, get rid of that for awhile. Selecting here interior walls. Let's find these. Bring that in. And we've got what
interior furniture. Let's bring these into. Here we go. Let's bring the roof
back with Alt H. And here we have our materials. So let's go into
the layout view, go over to our material preview. And now we've got our
materials here in blender that we created
in substance painter
84. Setting up the Vehicle for Rigging: Alright, well now that we've got our vehicle modeled
and textured, Let's have a little fun and
see if we can rig the car and animate it through a
terrain, through an environment. So to do that, I'm going to use a free
add-on called rig a car. And this is from a guy whose website is called
digit creatures dotnet. And there's some really
good documentation here. He goes through how to install and set up the car
rig and everything. So there's a lot of
good information here. However, this is really mainly
for Blender 3.0 and below. He did come out with a
fix for Blender 3.1, but I'm using Blender 3.5 and
it doesn't work for that. However, someone else
created a blender 3.5 fix that you would
need to copy this, create a Python file, add it to the zip, etcetera,
etcetera, etcetera. So what I've done, I've gone ahead and gone through the whole
process and I've saved the updated add-on in the project files here
with this course. So if we go to that folder, you can see I've created a rigor car folder in
our project files, and I've dropped this zip
file into that folder. This is the add-on that
includes the fix for 3.5. So hopefully it's
for 3.5 and above, but currently that's
what we have. So to install the add-on, All you have to do is
come over here to Edit and Preferences and
click on Install. And when you do,
you just need to browse to that rigor car folder. Choose this zip file. And when you do, it will
install into your add-ons. You can then just
search for REG, find rigor car here, and add a checkmark
to it right here. And that will add it to
your install of Blender. Now, once you do that, when you press Shift
a and armature, you'll see that car rig here. However, before we actually
bring it into the scene, we need to set up our vehicle
to work with the add-on. And there's some
specific things we need to do and arrange on our vehicle so that the add-on will recognize
the different parts, the wheels, the body, etc. So the first thing we
need to do is just create the wheels and these need
to be all one piece. Let me come up here and
change to median point. And there we go. So
with the center of these objects or this
object in its center, in the exact center
of the wheel. We need to combine these two. So I'm going to select
these two press Control J. And you can see that origin
is exactly in the center. If I hit R x, it's going to rotate around
that point and that's good. So let's just hit F2 to change the name and we need
to set it up with exactly the same name or naming convention as he
shows on his website. So I'm going to call this, we'll dot front dot
L. There we go. Alright, let's do
that for over here. Select these two control J, F2. We'll dot f t for front dot R. And there we go. Alright, let's go over here. Let's join knees together. I'll select these
two. Control J. Hit F2, we'll dot back BK dot L. Enter. There we go. And for this one over here, select these two control J, F2, we'll dot vk
dot r. Here we go. So we need those named
in exactly that way. So the add-on can recognize
what they are and find them. Let's take all of these and bring them out
of this collection. I'm going to hit M
and bring it out to the scene collection
so we can see those here. Alright. Now we need to deal
with the body. And the issue with the body is that it wants to see
just one object. And we have many
objects in here, right? And if we took these objects
and combine them all together are various
Smoothing settings that we have here would change, would be thrown off. So if I say combine the tarp with the truck
main and press Control J, you can see that that smoothing there is
has been taken away. So if I tried to
smooth that again, and I dragged it up
to get this smooth, I'd lose some edges here. So I don't wanna do that. I don't want to keep
these separate pieces, but the add-on still wants a single piece, a single object. So what I am going
to do is create a new object that is just
the size of the vehicle. So I'm gonna go to the
side view here and press Shift a mesh cube. I'm gonna come over here
to the object properties, scroll down and
change my display from textured to wire
for that object there. Now we can take this
and move it up and get it in place here about
the size of our vehicle. I'll just kinda scale it out like this until it's
about like add. And maybe I want to
take the top part here. Let me press Shift Z. There we go, and select that. And then bring that
down like that. So it's really pretty close
to the size of the vehicle. Let's go to the front view now. And let's select all of these. And I will press JSX
and scale these out. I think I yeah, I need to grab these. I keep getting mixed
up that we aren't in wireframe when I'm seeing
a wireframe cube there, let me press Sx and bring
this out like this. Okay? So now we have this. I'm going to press Control a and apply the
rotation and scale. Then I want to move the
origin of this object to the point that we think
the pivot of gravity, the center of gravity
should be on this vehicle. And I'm thinking if we go to the side view and
tab into edit mode, I'm going to press Control R. And I'm going to take this
and move it maybe right about here and Control R
and bring this down. So maybe that point right there is where the center
of gravity is right there. So what we can do
now is basically take this point and
this point, right? And now we can move the
cursor to that point. Shifts. Alright? So now that's where our
center of gravity should be. So now we can
right-click Set Origin, origin to 3D cursor. And there is the object or the center of gravity
of that object. Now let's change
the name of that. Let's hit F2 and
just call it body. And also let's move this out into the main
scene collection. So there are the five objects
we need for the car rig, but we need to parent all of these other objects
to this right here. So what Let's do is
let's just select all of these over
here in the outliner. Then let's press Control I
to invert that selection. Now with all these
selected lists, press Shift and click the box. And let's parent all
of those objects to that control P,
parent to object. Now, if we take this
just the box and hit G, everything moves with the box. I'll hit r2 times and we
can spin that around. So that's what we want. Now, the rigor car add-on is just going to
look for these things. Alright, in the next video, we will rig the car
85. Car Rigging and Render Settings: Alright, so now we can
bring in the add-on. But first, we need to move this 3D cursor into the
center of the grid. Let's do that. Shift S1. And that's because the
add-on looks at where the 3D cursor is to try and
figure out where things are. So let's ensure that we've got the scale and the rotation applied for that
object and we do. Alright, so let's select
all of these objects, all five objects that the
add-on is going to want to see. And then let's press
Shift a armature and car. Alright, so what happened now? If we press Shift Z, we can see that it's
added a few bones here. Now we've got some settings over here that we
could work with. We could, for example, try and adjust things in the y. We can take the y
and click and drag and that would move this
piece forward or back. We can maybe move it so it
gets in line with this, but then that will move
our pivot point some, but we could try it. So I'll just move this back
maybe to negative 0.3. So the end of the bone kind of lines up a little bit better with the back of the vehicle. Alright, so once we've
done any adjusting here, we can then come over to the
rigor car tab right here. And we can click
Generate the rig. So if we click this,
this is what we have. So we could maybe come up here
and grab this handle here, hit G and move that around. You can see what it does. It's kinda cool. We can take one of these and hit G and move this up
and up and down. That's kinda cool. We
can take this and hit G and move this and
that turns our tires. So it looks like it's
working pretty well. I can maybe hit G and
move this around. So yeah, that's all
going the way we want. Good. So it looks like
it's working pretty well. There are a couple of things
here I'm going to clean up. First of all, I don't like
all the relationship line, so I'm gonna pull this
down and turn that off. And for the object
of the box here, I'd like to take
this and hide this in the viewport and hide
it in the render as well. So we don't want to see that
when we're doing a render. And now, even though
we can't see it, since everything is
parented to the box, it's moving the car
around just fine. Now, we can also test this. We've got a little checkbox here that is wheels on y-axis. So if I click that, I can then choose this route bone or
the root handle here, I'll click on our move tool. And if I drag this
in the y-axis, you can see the tires turn. And that's kinda cool. But this is just for testing purposes to see if
the tires are going to turn. Once we get this back in
place with Control Z, we can turn this off before
we do anything else. That's just for
testing purposes. Alright, so we can now maybe try and animate
this in an environment. But before we do, let's do a little cleanup. We can take this tarp and
drag it into the truck. We can take this interior
and drag it into the truck. This wheels and tires. We can take this and
drag it up in there. The reference. We can probably delete
this completely, right? Yeah, I don't think we
need these anymore, so I'm going to right-click
and choose Delete hierarchy. Alright? Now what Let's do is
bring in an environment. And before I do that, I'm going to switch back
to Solid View because the environment I've
created for this is pretty heavy in
terms of polygons. So I want to turn off
any material preview or render preview just but in
solid mode to bring this in. So I've created an
environment for us. Let's go get that. I'm gonna go to File and append. And if we go into
our project folder here we've got another
folder called environment. So I'm gonna go into that. And then here is this
environment, Assets, dot blend. And I'm going to open that up. And then in collections, there is this environment
assets collection. And I've just created a little outdoor scene for
the truck to drive through. I'm just going to click Append and weight. And here it is. Alright, I can deselect it right now because I'm
still in pose mode. Let me come out of pose mode
and go into object mode. And now I can deselect it. So what this is, it's just an environment with a couple of cliffs
and a ground plane. It also has a sunlight
and a camera. So if we hit the zero
key on the numpad, we can go to the camera view and see what it looks
like through the camera. You can also press the Tilde key and go to View camera
to see that too. So what we should do is just do a test render and just kinda
see what it looks like. But before I do, let's
make a couple of changes over here in
the render properties. First of all, I'm
going to change this from EV two cycles. And I'm going to change this
from CPU to GPU compute. And then I want to change
the viewport samples and the render samples to
something really low. So I'm going to change
these samples to four and the render samples
here to eight. Just so we can view
this a little quicker. Even though the render quality
isn't going to be great, It's still going to allow us to move and do things a
little bit quicker. Now that that's done, let's also scroll down here and
underperformance. We want to turn on
persistent data. And what that will do
is anything it needs to load into memory like image
files and things like that. To do the render, it
only has to do at once. It's going to take awhile
to do the first one. And then subsequent
renders will go a lot quicker because
it's going to hold all of those in memory. It's going to catch them. So this will help us render things out a
little quicker as well. Alright, so now that we
have these settings, Let's go ahead and just hit F2 and do a first kind
of test render. So I'll hit F2. Alright, so here is
our test render. Now, you can see it
took 30 s for this. If we hit F2 again, let's just see how long
it takes with that persistent data turned
on. I'll hit F2. And this time it took under 4 s. So that's going to help
a lot in future renders. Now, we can see our sunlight, but it's a little dark here. So I'm going to hit Escape. And I'm going to bring in an HDRI to live in the
environment in the background. So I'm gonna come over
here to the world tab. Click on color. Let's choose an
environment texture, and then let's click Open. And I've also provided in our project folders
a few HDRI images. So let's go into environment
into those HDRI. And these are from
poly haven.com. They have dozens,
if not hundreds, of free HDRI is to use for
any project that you like. I've downloaded a couple. A few of them are eight K. I'm gonna go with a four cages, so things will move a little quicker and I will
click Open Image. I know I'm probably
going to have to reduce the strength
on this quite a bit. I'm going to take it down
to 0.2. Let's try that. And now let's come in here and
hit F2. Yeah, there we go. So I might be able to bring the brightness
down for our HDRI, just down a little bit
more and let me try again. I'm going to try 0.1, see if
that makes any difference. Hit F2. Yeah, that brought it down
just a little bit more. Alright, so I think that's
a pretty good test render. In the next video, what lives do is
begin setting up the car to animate over
the rough terrain.
86. Animating the Vehicle: Alright, let's see if we can set up a little animation here. I'm going to select
the car rig and let's take that into
pose mode again. Select the route control there. And we've got 250 frames here. That's about 10 s because we've got our frames at 24 frames
per second over here. So I'm going to turn on
the move manipulator. And for frame one, Let's just take this and
drag it back and the y-axis, let me tumble around
and make sure we're not off of the land here. Yes, we are. So if I move this
forward, we're on land, but we're also intersecting
with these trees. Okay, let me switch to object mode and move this
out of the way. We don't want to be
driving over these trees. There we go. Alright, I'll select
the rig again, go back into pose mode. And I think this is a good
beginning point back here. I'll hit the zero key on the numpad again so
we can see that. Yeah, let's just begin it there. And now to set a
keyframe for that, Let's just press I
and choose location. There we go. So we have a keyframe here. Let's go to the end of
our frame range at 250. And let's move
this forward. Now. I'm going to press G, Y and move it forward. Let's just move it forward so
it comes out of frame here, like it just drives all
the way through the frame. Once again, I will hit I and select a location
keyframe there. Alright, so if we go
back to the beginning, click play, here it is. It's sliding through. We still need to deal with the turning of the
tires and everything. But that's not great because it's kind of eases
up to speed and then it slows down again
as it gets near the end of the keyframe
or the frame range there. So I don't really want that. I want it to be just a constant
speed through the frame. So to do that, I'm just
going to change this right here to a graph editor, temporarily, change
here to a graph editor. And I'm just going to hit the, a key to select all my
keyframes here in the graph. And I want to change this to
a linear interpolation mode. So all I did was
just right-click and choose interpolation
mode linear. Let's do that. Now you can see we've got just a constant speed from the beginning
keyframe to the end. Alright, good, So let's change
back to the timeline here. And I'm going to drag this down. So now let's click Play again. And yeah, that's a
little bit better. It travels at a constant speed. I think that's good. Okay. So let's deal with the
spinning tires here. We need to deal with that. I'm going to come back here. I'll hit the period
key to zoom in here. And what we wanna do is we
want to use our rigor car tab over here and we're
just going to bake the steering and
bake the rotation. There really isn't anything
happening in the steering, but I always like to go
ahead and bake it anyway. So with this selected, I'll just click here
and then click Okay. Then let's click on bake
wheels rotation and click. Okay. Now if we hit Play, we can see our tires
turn and that's good. That's what we want. Yeah, I think that
looks pretty good. So now what Let's do is try and adjust
these ground sensors so they ride along on
top of the surface here and give us a sense that it's kind of bumping
and rocking, etc, over the ground. First of all, let's
take this ground plane. Let me switch back
to object mode. And I'll take this
ground plane right here and let's give
it a better name. It's just, it's just a
bunch of garbage here. Let's just hit and change
the ground. There we go. Then I'm going to bring it out into the main scene collection, hit em scene collection. And there it is,
here. Alright, so now that we've got
all that done, let's go over to
the car rig again. Go into pose mode. And now if we twirl
this down here, you can see we've got
this ground sensors panel with all these fields. And what each one of these is, is the control of each of these little red objects in here you can see
like this one here, if I zoom in, it is called
ground center axle back. And that's right here, right? This one is ground
sensor back left, and that is right here. So we need to tell each one of these sensors what
the ground plane is. Okay, So here, let's come
up here to this eyedropper. Click here, click the ground and you can see it
kind of adjust. Click here, click the ground. The next one, click
here and the ground. This one here, and
the ground this here, and this one and there. Okay, so now we've got
all of those sensors recognizing the ground and all its nooks and crannies
and bumps, et cetera. So now if we go over to
our camera view again, let's come down here and
hit Play and look at that. Now we've got it going
over our terrain. And that's pretty
cool. You got to admit that's pretty
cool. All right. We've got our environment setup, we've got our animation setup. So in the next video, Let's configure
blender to render the animation with
all the lighting and the textures, et cetera.
87. Rendering the Animation: Okay, Now I think
it's time for us to try and render
out an animation. First of all, let's do another test render just
to see how it looks. I'm going to scroll
up here at around one-thirty on the
timeline hit F2. And let's just see how long
this is going to take. Mine is taking about
4 s, which is good. We really don't want it to take too much longer than that. I mean, if we were doing this
for an actual production, of course we would turn up
the render samples over here. But for our purposes here, I think this is going
to work just fine. Alright, let me go back
to the beginning of the timeline and let's
set up our Render Output. Recall that we're using
cycles for the render engine. I've switched over to
GPU compute to use the GPU of my system
rather than just the CPU. Now, I do have mindset, I think over here, under system to use both
the GPU and the CPU. That's fine too. But let's come over
here to the output tab. And I've currently got
just a two k image, full HD, 1920 by 1080. We are running at 24
frames per second. That's good. We've got a frame
range of one to 250. And down here, I'm going to
change the output directory. So I'm going to click here. And I've got a renders folder
here in the project files. And let's just use that. If I click Accept,
there's that path. Now there. I'm going to render out an
image sequence of PNGs. And then I also want to come back over here to the
render properties. I don't want to scroll down
here and turn on motion blur. Since we have something
moving through the frame, we really ought to turn
on motion blur just so we get a little bit
more realism from it. Alright, now that we've got
those settings all done, let's come up here, go to Render, Render
Animation or Control F 12. And here we go. Alright, so my frames are
rendering out at 3.63, 0.5, so almost 4 s per frame. So it's going to
take a little while. I'll go ahead and pause, and we'll come back and take
a look at what we think. Alright, the render is complete. We've done all 250 frames. I'm gonna go ahead and
close this window now. And what we can do to look at
the render is come up here to render and view animation. Let's click that. And now it's gonna kinda go through and try and
catch the frames. And then when it plays again, it should play back
a little smoother. And here we go. There is our animated
vehicle that's pretty cool. The tires come up a little bit. We could probably adjust those. But I think for
our project here, this is pretty cool.
88. Adjusting the Suspension and Animating the Camera: In looking at the
rendered animation, I feel like the suspension of
the vehicle is a little too tight and i'd I'd like to maybe loosen that
up a bit if we can. So with this selected or
with this in pose mode, I'm going to hit the
End key again and go to the rigor Card tab. And up here under animation rig, we've got this pitch factor and roll factor and these
are for the suspension. I think what I'd like to do is take these down quite a bit. I'm going to take
these down to say 0.1 for each of these. Let's try that. And I'm going to clear the baked animation
from the scene here. Just click here so it clears both the steering
and the wheels. Let's just test this. I'm going to click play
here and see how it looks. Yeah, I feel like that's a
little bit more interesting. It looks like it has more
give in the suspension. We can also turn on wheels on y-axis as we're testing as well. And you can see
them turning here. Feel like that just gives a little bit more play
to the suspension. You can come in here
and you can do, Let's try 0.01 and 0.01
and see what that does. I don't know. Let's just click
Play and see how that is. Well, that's kinda nice too, so it really kinda
depends on what you want. I think I'm gonna go ahead
and go with this, this 0.01, I'll turn off the
wheels on y-axis since that's just a
temporary thing for testing. And then I'll come over
here and I'll click Bake carb steering, okay? And bake wheels rotation. Okay, and then let's click on this again
and see how it looks. Well, it looks like the wheels are kinda
flopping back and forth. So let's take away all of
this baked animation again. And I'm just going to click
on bake wheel rotation. Let's do that. And I'll click OK and let's
see how that works. I'll click play here. Yeah, and that's holding
those wheels a little bit steadier going forward. Alright, let's try that. I think that's
looking pretty good. And in addition, Let's
say we want to animate the camera just a little bit during the length
of the animation. So if I tumble around here, Here's the camera right here, and I can't select it, or because I'm still
in pose mode up here. So let's switch over
to object mode, and now we can select it. And I'm gonna move it out here
into the scene collection. So let's press M and choose scene collection.
And here it is, here. Alright, so with the
cameras selected, let's on frame one,
add a keyframe. Let's just press
the I key and add keyframes for the
location and rotation. Alright, so we have
that keyframe here. Now let's go forward to maybe, I don't know,
something like this, maybe around frame 150. And let's move the
camera in just a bit. So to do that, I'm
going to switch from global to local transformation. And let's also add
a new window here. I'll just click and
drag up in the corner. And in this window I'll hit the zero key on the
numpad so we can see through the
camera Here at 01:50. Let's just take the z-axis in local transform and let's
just move this in like this. And maybe I'll rotate it
or move it down a bit. We can move it down
a bit, I guess, in the y and then I'll turn it our x in the x-axis and
maybe something like that. Let's try that. Okay, so now let's add
another keyframe for this. I'll press the I key and
location and rotation. Alright, so let's
see how this looks. I'm going to go and press
Control S just to save this. And then I'll go
back to frame one. And then let's click Play
and see what we think. So you've just got this
little camera move in here. I think I want it to go in
just a little bit farther than or maybe maybe move
a little bit longer. Well, let's see. I'm going to
move it to frame 170 here. And then I'm just
going to select this key frame and hit G
and move it up to 170. And let's see what happens now. I'll go back. I'll hit
Play and here we go. Yeah, that's not bad. Let's
see it go once again here. Yeah, I think I
want the camera to just begin here and not ease in. So I'll just use
this window here. I'll once again change
this to a Graph Editor. And we're moving in
the z-axis, aren't we? So let's just take
this z location and I'm going to
hit the Home key on the keyboard just so
we can see everything. And here's that z rotation here, I'm going to hide
everything else. Let's do that. I'll
just hide everything else then hit the Home
key. There we go. Now I can see that curve. And I just want to
take this right here. And let's change this one. I'll right-click and change
the handle type two vector. There we go. So now it's just a straight line coming out of that
initial frame. And then it's going to ease in when it comes to or excuse me, ease out when it
comes to a stop. Let's try that. I'm going
to zoom in just a bit. Then let's go back to frame one. And let's hit Play. Yeah, I think I kinda like that
a little bit better. So that camera movement
begins exactly on frame 11. More time here. Yeah, I think I like that. Okay. So let's plan
on doing that. I'm going to go
ahead and pause it, go back to frame one. I will save my scene Control S. So let's now go ahead
and render this out and see how it looks with both a softer suspension and that little bit of
a camera move there. Once again, I will come up here to render and render animation. Here it goes. Alright,
after that initial frame, it looks like we're going at just under 4 s
again, that's great. So in the next video, let's take a look at
the rendered animation. And then we'll also
go over how to export this image sequence as a
single video file, like an MP4
89. Rendering and Exporting a Video File: Alright, let's take
a look at this. I'm going to right-click
here and choose join area and collapse
that window down. And then I'll come
up here and go to Render and view animation. Once again, it'll
cache the frames. And once it's done with that, it will hopefully play
back a little smoother. Yeah, there we go. Now that's kinda nice. So we've just got this little camera
movement going forward. And then it kinda
ends right there and the truck goes on through.
Yeah, That's kinda nice. Okay. So I'll hit Escape here. And let's now export this
out to an MP4 video file. Currently, we've got
250 individual images that make up this animation. Let's get it down into
just one video file. To do that, let's come over
here and add a new tab. I'm going to click on the
plus here and let's go to video editing and video
editing right here. So we've got a new video
editing interface here. And then what Let's do is let's bring in that image sequence. So here in the timeline, I'm going to press
Shift a and let's go to image sequence. And let's find that renders, it was rendered to right? Let's find that. And I'll hit the a key. And let's click on
Add Image strip. Here we go. I'll hit the Spacebar and there it
goes, rambling on through. Now we're only running at about 20 frames per second here. And even if we come back
a second time through, it's still not going any faster, but we can of course take this now and export this out
as that single file. We can then bring
that single file back in and it will
play a lot quicker, but let's get that
single file rendered. Now, if we come over here, I'm going to bring
this down to them. And we've got this
output area over here. We've been outputting
this as a PNG. And so what I'm gonna do
is I'm going to browse to our project folder again, and let's find a place
to put this single file. I'll put it in the
renders folder outside of these renders 1.2. I'll just put it out here. I'll click Accept. And then let's change our PNG to an mpeg, this FFmpeg video. Let's choose that. And in doing that, Let's also change
the encoding on this to an MPEG-4 right here. Now, we can change our
output quality if we want, we can change it to
high-quality, medium quality. I'll just go ahead and
change it to high. We don't need any audio
for this. That's fine. So now once again, with all of that setup, Let's come up here to Render, Render Animation once again. Now it's going to
render through a lot quicker because it's just taking each one of
those frames and compiling into a
single video file. Alright, it looks like
that has been done. Now if we want, we
could take this. I'm going to take this image sequence
strip here and I'm just going to hit
delete and remove that. Now let's press Shift a
and bring in a movie. Let's do that. And in our project folders, in our renders, here's that
movie that we just created. Now we can of course
change the name of that, but let's just click add movie strip here,
and here it is. And then let's just
click the space bar. And now you can see
it's running at 24 frames per second, just fine. And there we go. There is our rendered animation. Now, if we want to
trim this a bit, we could take this clip
here and let's say we want it to end more
right about here. Let's say just as that
comes out of frame, Let's click on the
end of this clip, hit the G key and move that. So it trims that right there. Let's say we take it to 228. And at the beginning, maybe we could fade in. We could select this here and right-click and go to
fade and choose fade in. Now we've got a fade-in from black here at the
beginning of the clip. I'll hit the Spacebar.
And there we go. Now I say a fade from black, but take a look at it. All we're getting is
an Alpha channel here. So what do we do with this? Well, we can create
our own black. We can press Shift
a and go to Color. Click here, and we'll drop in a black clip and then we
can change that color. But really this is
what we want here. Now. It's on top, so it's gonna be seen before the
thing on the bottom. So we can take this clip
that we have here and press G Y and drag it up
above that black clip. And now we've got black. We can press the spacebar. And there we go. Now it fades up from black. We could do the same
thing back here. I could take this press shift D and duplicate it
and move it all the way over here like that. And then we take this
end and right-click, go to fade and choose fade out. And then when we get
to this at the end, it will fade to black. Alright, so I had a
little extra here. After the black. We could extend this if we want, select this and hit G and
move that out like this. If we wanted to do it that way. We can also change the number
of frames in the sequence. But currently we've
got it at 250. I think that's probably good. So what we could
do is take this, I'm gonna hit the
G key and move it. That whole clip there. Let's maybe move
it to about here. Then I want to take this
little piece and move this in so it covers
all of that fade in. So now we've got a
few frames of black, a fade-in, then our
clip and a fade out. So let's see how that looks. I'll hit the spacebar, fades in, goes through the clip, and then fades out. There we go. Yeah,
that's kinda nice. So what we can do now is
we can re-render this. I'll come up here and
in our output field, I'll just also type in truck. And if we turn off
this file extensions, we can maybe put Truck
dot mp4 right there. And now that's gonna be
the name of our file. So let's give that a try. I'll come up here,
Render, Render Animation. Now it's going pretty quick because we just
have that one file. Alright, I'm going
to hit Escape. And let's see how that worked. I'll go back to frame one. I will press Shift
a. Go to movie. There's our new MP4. I'll click add movie strip. There it is down
there on the bottom. So we could take these here, delete those, and now let's
play it and see what happens. Well, there it is. We've got a fade-in and our clip
and a fade out. Yeah, there we go. We've got our animation done. And it looks pretty good.
90. Conclusion: Well, thank you for joining
me on this journey to create and animate a vehicle in
Blender and Substance Painter. As I've said before, I really liked this
kind of project. It's an opportunity to pull together a lot of different
tools and techniques. And in the end, you
have something, an animation that you
can show the world. So I wish you all the best and I hope to see your
work out there very soon. Keep dreaming, keep creating, and keep sharing it
all with the world. Thank you again, and take care
 Darrin Lile, Blender Foundation Certified Instructor