Transcripts
1. 001 Introduction: Hi, I'm daring Lyle, and welcome to this course, but we will create
a Victorian room with Blender and
substance painter. In this course, you'll
learn how to create a detailed interior scene using tools and techniques that apply equally to both animation
and video games, would use blender to create the 3D models of the furniture, accessories, and the
structure of the room. And then we'll work
on UV mapping, all of the 3D objects, getting them ready for export, and taking them into Substance
Painter for texturing. You'll learn how to use layer masks and
Substance Painter to quickly create realistic
textures for your 3D objects. We'll set up a blender
export template and Substance Painter, and export our texture map
so that we can use blenders Node Wrangler to easily apply
the textures to our scene. Next, we'll work on
lighting the scene and rendering using blenders
Cycles Render Engine will animate the camera
and use blenders video sequence editor to edit our rendered
shots together. We'll even add some
music and then render it all out to a single
MP4 video file. If you're interested in creating environments for
animation or video games, then this course is for you. You'll learn how to create a realistic detailed scene from the first polygon
to the final render. So let's get started. Join me as we create a Victorian room with
and Substance Painter.
2. 002 Setting Up a Reference Figure: Before we begin any
of the modeling, let's first take a look at the reference images
and maybe set up a reference object in the
scene here so we can quickly see the relative scale or
proportions of our models. First of all, let's take a
look at our reference images. And these are just
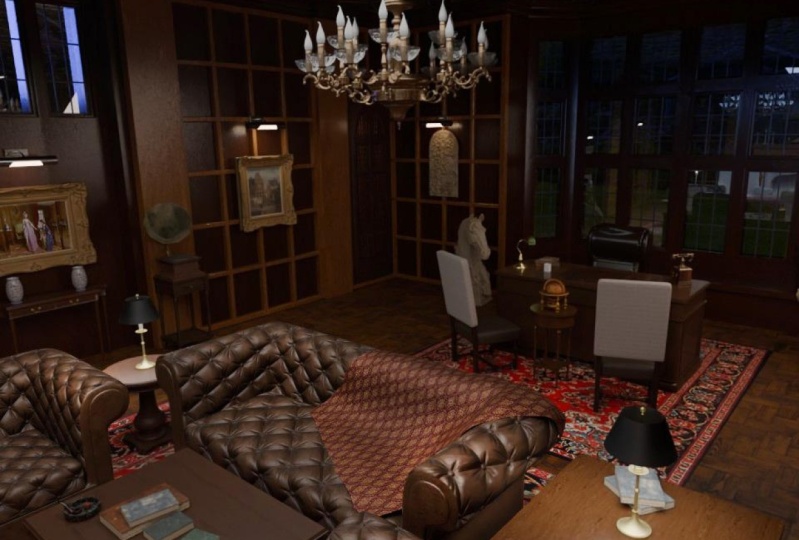
images I found online, taken pictures of just to get a general mood of sense of
what I'd like to create. Some of these we'll use as reference for specific objects. And some of them are just for a general mood that I'm going
for like this one here. I like this a lot. This is kind of what
I'm going for here. I don't want it to be
exactly like this, but this general feel, I think would be really nice. And we'll be coming back to
these images periodically. And also, feel free to go
out and find your own, find inspiration for the project
that you want to create. Feel free to follow along
as the project evolves, or add your own objects, add your own design
elements, furniture, etc. Feel free to make it
your own as we go. In addition, I'd like
to, as I mentioned, add a reference object here in the 3D view
that it'll give us a quick sense of how
big things should be. So I'm just going
to hit the a key and hit Delete and delete
everything in here. Then what I like
to do is go out to a website called Mixamo.com and grab a character
model from here to use as reference in
the scene as remodeling. Now these are
completely free models. You can go out and create a free account here and mix them o.com and download
characters and animations. Let me get rid of this
and then you can see all the characters you
can download for free. All the animations as well. So it's a free website that you can use in your own projects. But what I've done is
just gone to characters. And I've just typed
in Bot and hit enter. And we've got these y-bar
and x-bar mannequins here, and I kinda like this
guy here, the y-bar. What I want to do is
just show you how I download one of these models, set it up in my scene, and use it for reference. So with this one selected, I'm just going to
click on Download. I'll then come over here
and choose FBX 7.4, which is the most current
one as of recording here. And then I'll just
click Download. I'll put it in my reference
folder and save it. And now let's go back to
Blender and import it in. Let's come up here and
go to File Import FBX, browse to the reference folder. Here it is. Why Bot FBX, and I'll click
Import. And there he is. I'll hit the period key on
the number pad to zoom in. And what I like to
do here is just to change the pose
just a little bit. I'm gonna hit the one key
on the numpad and then select just the arbitrary,
just the bones. I'll switch to pose mode, and I'll select one
of the shoulders, hit the R key and
bring that down. Select the other shoulder, hit the R key and
bring that down. And you do not have to do
this if you would like to just use the model that's
in the project files, all you have to
do is just go and open up this blender file, this zeros 02, and it'll be
here ready to go for you. But now that I've moved
those arms down a bit, I'm going to switch
back to object mode. Now instead of having
the armature selected, I'm gonna select this part of the character, this
alphas surface. And I'll come over here
to the modifiers panel. And I'm just gonna come up
here and pull this down. Click Apply. Then I'm gonna select the
gray part of the model, all the joints in here,
the Alpha joints. And also click Apply over here. There we go. Now if we take the armature
and apply the scale, I'm going to hit the N key and
just come over here so you can see the scale
here. It's 0.01. What I'm gonna do is
just with this armature selected press Control
a to apply the scale. Click on Scale. And now I can just hit
Delete. And there it goes. Now to combine these
two objects together, I'm just going to
select the joints and then Shift-click
the surface object, press Control J to join those and then give
it a new name. I'm just going to call
this reference figure. There we go. Now we've got a character that
we can bring into our scene that's
1.8 meters tall, which is about five
feet, nine inches. And we can bring it
into our scene at anytime and compare
it to what we've created in C if the objects look correct compared
to this figure. Now, I do want to take
the materials here, go into the material properties, and I'm just going to click
the Minus button here just to remove these materials. That's all it is, is
just a gray figure. We can take this
and move it around, put it wherever we
want to get a sense of the size and proportions of the models that
we're creating. Now I'm gonna come over here to this collection that it's in. And I want to change the name
of that, call it reference. And then I can just hide this
by clicking on that icon. And I'm also going to
hide it in the renders. I don't want it to come
up in the renders. There we go. We can just bring this out
anytime when we're ready to compare our object to the size
of that reference figure. Alright, so in the next video, we'll actually begin
with our first model.
3. 003 Beginning the Coffee Table: All right, let's begin
on our first model. I'm gonna come up
here to the outliner and choose the scene collection. Because whatever
collection is selected up here is what any new
objects will come into. And speaking of new objects, Let's figure out
what we're going to actually create here. I'm going to bring
this up and to create a new window here that we can
put a reference image into. I'm just going to hover over this corner until the
cursor turns into a cross and then click and drag down to create a new window. And let's change this to
an image editor here. And let's click
Image open and let's go to the reference images. And I think right here, right up front, this is
what I want to create. It's not too difficult. We could maybe work on
something smaller like this, but I think there's a fair
bit of complexity to this. I think I want to begin with
something fairly simple, so I'm gonna work on
this coffee table. Let's bring this in. Here we go. Here is a reference image in
the image editor here. Let's make this a little bit bigger so we can
take a look at it. I'm going to press Control and the Space bar to make that screen that I
was hovering over, full screen, we
can always toggle back by pressing
control and Space-bar. Again, I'll hover over this control space and
let's zoom in here. So there's a bit of detail on this that I'm not really
interested in creating. I don't want to create all
these ridges all along here and I don't want to create the little
drawers either. However, I do like the
basic shape of it, the size of it. I like the legs and
this bottom shelf here. So let's at least get
this basic shape down. And we can of
course, think about the materials and textures as we get a little
closer to that. But let's work on the
modelling for this. I'll press Control
Spacebar again. And now let's just
begin with a cube. To add a new object,
you're going to always come up here to the Add menu. Or you can press Shift a
and bring up the same menu. So I'm going to go to Mesh cube. And here we go to scale this. We can come over here
to the scale tool and click on this and we
get a scale manipulator. And I can take this z-axis manipulator and click
and drag it like this. Another way to do it is
just to press the S key. So this is the z-axis, this blue axis here
is the z-axis. I can press S, z, and now we can scale in
the z-axis like this. I'll come back over
here to the Move tool, then click and drag on this blue arrow to move
it up in the z-axis. Now, I want to begin
with this top part. And if we zoom in here, you can see we've got kind
of this ridged pattern, but I think if we go over here, yeah, let's take a look
at it here you can see the outline of that pattern and that's kind of what I
wanted to get here. So I think what I want to
do is tab into edit mode. And in edit mode
you have access to the three components that
make up any polygon object, and that is vertices,
edges, and faces. We can change which ones
we're selecting here by pressing the 12 or
three key on the keyboard. So as you can see,
if you hit one, you go to vertex, select two edges and 34 faces. So I'm gonna go with
face mode and come under here and click this
face here to select it. Now I'm going to go over
and choose the move tool. And we can use that
move manipulator here in edit mode as well. Alright, so I wanted to
get this shape right here. I think I'll go to the same place that I am
here on the photograph. And with that face selected, let's just begin using
our Extrude tool. Now the extrude
tool is over here. You can see extrude region
and the shortcut is E. All I'm gonna do is
just hit the E key and pull down and then use that S key to scale
to get this basic shape. First of all, let's just
get this kind of curve. I want to push this out a bit. Let's hit the S key and just
scale out just a little bit. I can also hold the Shift key down and move a
little bit slower. So let's say I move this
out to about like this. Then I can take this z-axis
here and drag it up a bit. Or if I want to stay
over here and see this, I can press the G key to move, G for grab and move, and then hit the Z
key for the z-axis. So I can press G, z and move
up and down in the z-axis. So I'm going to hit
the Shift key once again and move up just
a little bit like this. Maybe scaling out
a little bit more. I think I'm right here. Now I'm going to hit
E, pull down just a bit because I've got
this face selected. Anytime I extrude here, it's going to go
perpendicular to the face, which is currently the z-axis. So that's why I don't
have to do anything. When I hit the E key, I can just pull
down in the z-axis. Now I want this
little piece here. I'm just going to
hit E, pull down, and then the S key and
pull out just a bit. And then E and pull down
just a bit like this. So now I'm here. Now what I want to do is pull into this place
right in here. To do that, I can use E and S, or I can use the inset tool. If we come up here
to the face menu, you can see that inset faces is the I key
on the keyboard. So what I'm gonna do
is just hit I and push in a bit and you can see
it scales it in like this. I don't want to go that far, maybe about right
here, Let's say. All right, Now I'm gonna pull
down a bit and pull down. There we go. Then let's keep going. Let's keep doing this. So this little area here, E, pull down, pull in just a bit. Maybe that's a
little bit too much. I'll hit G Z and
bring it up some. Hold the Shift key to
move a little bit slower. Hit the S key to bring
it out a little bit. And there we go. Now let's do that again. E pulse straight down, hit the S key, hold the Shift key
and pull out a bit. Let us do that a little
bit more like this. So we're here now. Let's hit E and bring us
down just a little bit. And now we've got this area. Now I'm just going to use extrusions to get
this basic shape. All we really need
to do is just hit E Once again and pull this down, hit S, scale out. Pull down maybe S scale out just a little
bit more like this. Hold the Shift key
down to move slower. Bring this down. Bring it in some, maybe I'll hit G Z
to bring this backup a little bit and hit the S
key and bring it out some. Here we go. One more time. Let's just hit E and then the S key and bring
that in like that. Now, we've just got
a little bit more. Let me get this little
ridge here so I'll hit E and pull down just
a smidge like this. Then I'll hit ES, pull out and pull down just
a bit. And there we go. There is that top
part of the table. Now if we zoom out a bit, you can see I didn't really get the thickness of it compared to the size of it and I did I. So there's a couple
of things we can do. We could just select this
whole thing with the a key and then press S and Z to
make that a bit thicker. Or we could scale in the x and the y without
scaling in the z. Let's also try that. Now there's a couple of
ways we can do that. We could come over to
the scale tool again. And then we could click and
drag on the blue scale, resize part of this manipulator. And what that will do is turn off the blue axis, the z-axis. So if we click and drag on that, you can see it scales in, in the x and y, but not the z. And that's pretty good there. Or let me show you another way. You could also
press the S key and then press Shift Z to
turn off the z-axis. Now once again, you're just
scaling in the x and the y. So we could do that. That's not bad. Let's take a look at the
general proportions of that. I think if I took this top face here and just brought
it down just a bit, let me just click and drag
on the z-axis and then hold the Shift key
down a little. Let's do that a little bit more. Maybe one more thing
I'd like to do here is bring these couple of edges out. If I hit the three key
to go to face mode, one thing we can do is press
the Alt key and click on an edge between two
faces right here. And it will select that entire face loop
all the way around. Now if I press Alt and Shift and click an edge
between two phases, it will also give me that other face loop
around there as well. Now let's scale this out
without scaling in the z so I can press the S
key and then Shift Z. Now I'm gonna hold the
Shift key and move out a little bit
slower like that. Just to bring that out, Just a bit like that. Now I'm gonna hit the
a key and I think also scale up in the z
just a little bit. Bring that up
something like this. There we go. Before we move on, let's go ahead and smooth it. So you can see we've got these
kind of sharp edges here. So what we can do
is select it in object mode and right-click
and choose Shade Smooth. And that helps smooth
out some of those edges, but it also gives us some
strange artifact in here. What Let's do is with
this still selected, let's come over to our
object data properties. Let me click on this and just
move it over here so we can see twirl this up and this up. And then in the normal section, let's turn on auto smooth. And that helps. There we go. Alright, so in the next video, Let's begin working
on this bottom shelf. And the legs.
4. 004 Continuing the Coffee Table: Now that we have the
top part of the table, maybe let's move it down a
little bit trying to figure out how tall it should be
at least approximately. And maybe adding this
bottom shelf could help. Let's press Shift a mesh cube and I'll hit the S key and just scale it down quite a
bit until it's about the same size here
of that top piece. And then press S and Z and
scale this down quite a bit. Something like that. Maybe. Let's see how that looks. To look at it directly from
the side or the front. We can hit the one key on the number pad for the
front orthographic view, the three key on the number pad for the
right orthographic view. So if I hit the one key, let's just say we want
this to be about here. And I'll bring this
down to about here. Let's say we're gonna continue to adjust and readjust
this as we go. Let me just scale
this down just a bit. All right, so now let's start working on the
legs of the table. Let's zoom in here and
see what we can see. It looks as if we can do pretty
much the same thing as we did with the top of the table
using extrude and scale, but beginning with a cylinder. And then right here
we're probably going to need to use a cube for this. But let's bring in a cylinder
and give that a try. I'm going to press Shift a
mesh and bring in a cylinder. And if I zoom out a bit, It's a little big, right? If I come over here to the
Add Cylinder settings, before we make any changes
to it in the 3D view, we can make some adjustments
to the settings here. Instead of 32 sides, I think let's just
take this down to 16. I can change the size of
the radius and the depth, maybe make the radius
0.1 and the depth 0.2. So that shrinks it
down quite a bit. And then for the cat fills
or the top and the bottom, I'll just leave this
as an end gone. We can change it if we want. So there isn't any
caps on the top or the bottom or make
it a triangle fan, I think I'm just
gonna make it one multi-sided polygon
here with the end gone. Alright, now let's
hit the period key on the number pad to zoom in
to that selected object. If we hit the one key
on the number pad, we can then hit the S key
and scale this down a bit. I'll hit the G key and
let's move it over here. Kind of place it
where we think it should be on this side. And then I'm gonna hit the
three key on the number pad. If you go to the side or the
right orthographic view. And I'll just grab this and move this over to here like this. Okay, so we now have
a cylinder here in the corner where we think
the leg is going to go. Let's select that and hit the Tab key to go
into edit mode, I'll hit the one key to go to the front orthographic view. I'll hit the period
key on the numpad to zoom into that
selected object. And in addition, I think
I want to be able to see through this as
we're doing this. So we can come up here
to this area and change our viewport shading to wireframe here so we
can see through it. Or if we go back
to our solid view, we can also turn on the
x-ray view right here. So it's just two
different ways to be able to see
through our object. Now also, instead
of clicking here, as you can see, the
shortcut is Alt Z. We could, in the 3D view press
Alt Z to see through this, we can hit the one
key on the keyboard to go to vertex select. Now if I just click out here to deselect and then
click and drag here, I can select these
points on the bottom. Hit the one key again. And now I can just bring this up and we can begin from here. So kind of looking at
this piece right here, I think what Let's do is
begin right about here. And let's just create a
ridge on the top here. So let's hit E and then
S, and I'll scale out. And then I'll hit
E and pull down. Then I'll hit E, S and scale
in just a bit like that. So we have that first
ridge up there. Now let's bring it down to here. I'll hit E and bring this down. And then let's hit the S key
and scale that in a bit. Alright, let me zoom out
to see how big this is. That may be a little
bit big to begin with. So I'm gonna hit the a key and just scale it
down with the S key. A little bit like that. There we go. Then maybe I'll just
bring it back up. Move it over the side a bit, and let's keep going here. I'll click and drag these again. And let's get this
little ridge here. So maybe I'll hit E S and bring this out,
bring it down a bit, maybe E and bring it down some and hit the S key
and scale out a bit more. And just keep going
on down to kind of get that curved ridge there. Bring this down and
bring that in like this. Okay, so now we have this. Let's work on this piece here. It still looks to
me like this is too big for the amount of
room we have here. Maybe I'll once again hit the a key and scale it down
just a bit again. Once again, just readjusting each time as we take
a new look at it. Now, just like we selected that face loop by
using the Alt key, we can also Alt click
on an edge here and select that whole
ring of vertices there. So let's do that. Now back to the front
orthographic view. Let's begin on this
part right here. I'll hit the E key
and drag down and then scale out just a
little bit with the S key. And then I'll hit E Once again, pull down, hit the S key, scale out just a bit. Pulled down again. Let's do that one more
time here like this. Then let's begin
bringing that in. And then bring that in
just a bit like this. And E and bring that in a
little bit more like this. So we're just getting
that basic shape is all. Alright now for these little
guys right down here, I think we can just
continue on with E. And then E again an
S and extrude down. Scale in again. And then let's get
this piece down here. Bring it down some more. Oh, and it looks like it
doesn't come back in. So let me press Control
Z to undo that. And maybe we can scale
it out a bit like this. And alt click this edge
and scale this one out. Let's try that. There we go. Maybe we can do that. Let's maybe take this
edge again, Alt, click this, bring it up
and I'll just do one more. An S like that just to
bring it in just a tad. There we go. Now here's where we
can add that cube. What I'd like to do is center
it right on this cylinder. If I created a new cube here, it would come in where
that 3D cursor is. But what if we move
that 3D cursor to the center of this
selection right here. To do that, we can
use the snap menu by pressing Shift S.
And here we go. Now we can bring
the cursor to the selected or the two key here, I can just click here, and that brings that
cursor to that point. Now let's tab back
into object mode. I'll press Alt Z to go
back to Solid View. And now let's create a cube. Let's press Shift a mesh cube. And it is of course huge. So let's come over here to
our Add Cube settings panel, and let's change it from two
meters down to about 0.2. Let's just do that.
That's still pretty big, but at least we can
see the whole of it. Now, let's bring this down
and move this down like this. Something like this. So it looks like it
sticks out just a little bit like that and I don't know that it's
perfectly square. I think maybe I'll scale it
in the z just a little bit. Kind of like that.
Let's try that. That of course means that we're going to have to
bring this up a bit. But once again, we're gonna be continuing to adjust
these as we go. I'll just bring this up
a little bit like this. I think that should be okay. I'm gonna hit the S key
again and just scale up a little bit and S and Z
and bring it back down. I'm going to scale
this down just a bit. So it's inside here. And it looks like, oh, I'm off here, aren't I? So let me select these two objects and object
mode and just pull them over like this so we get it more kind of centered
on that corner. There, there we go. Now, for this cube, you can see that the cube
has these beveled corners and we can replicate that
with our Bevel tool. Let's tab back into edit mode. And with all of these points
selected in vertex mode, we have vertex
select enabled here. With all of these selected, let's come up to
the vertex menu. Or of course we can press Control V for the
vertex menu as well. Let's choose Bevel vertices
or Shift Control B. Let's do that. Now if I move the mouse out, you can see it's beginning
to bevel those corners, just like in the image here. So maybe something like this. Let's try that. Then I'm going to
scale it down a bit. Move it back up. There we go. Let's try that. All right, we've got the
beginnings of one leg here. In the next video.
Let's continue on this ad the other legs. And then we'll go through and
do some final adjustments, scaling, adjusting
the proportions, etc. That's coming up next.
5. 005 Finishing the Coffee Table: Now once again, at
this stage you can see that we really need to probably use our scale trick to change the
proportions of this leg. It looks kind of thin in tiny compared to the reference
image over here. However, let me just select
this and hit the period key. Take a look at this. It looks like the origin of this object here is no
longer in the center. Because recall, I moved it to
get it here on the corner. But when I did, I
moved it in edit mode. I move the geometry but
didn't move the origin. You see the origin only moves when it moves
in object mode. Press control Z. When you tab into
edit mode and hit the a key and move this, that origin stays where it was. If I'm going to scale this, I really need that origin
back in the center. How to do that? Well, of course,
blender has a tool. We can come up here
to the Object menu and choose Set Origin and put the origin in the geometry here,
origin to geometry. And when we do that, it pops back into the center. Now we can go about scaling
this by pressing Shift Z, turning off the
z-axis and we can scale it up from the
center of the object. About like that. That looks a little bit better. Let's hit the period key on the numpad and come in here
and take a look at it here. I'm gonna move it back here. And back here in this time, I moved it in object mode. So the origin of the object
came along when I moved it. Now having done that, this is a bit off
center as well. What can we do about that? Well, we could take this, select this object, and move
the 3D cursor to that point. To do that, once
again, we can press Shift S cursor to selected. And then we could
take this object here and move it to the cursor. So let's press Shift S
selection to cursor. Now it's aligned
to the center of that object and I can
just pull it back down. And it's in the
center there again. All right, let's now work on that small piece
right down here. I'm gonna keep that cursor
there because that's where the new object will
pop into the 3D view. So let's press Shift
a mesh cylinder. Now let's hit the S
key, scale it down. And if we just then
drag it straight down, it'll stay in line with the
center of those objects. All right, I'll hit the
period key to zoom in. Let's hit the one key to go to the front orthographic view. And if we move this up a bit, maybe I'll scale it out
just a bit more like this. And then I'll tab
into edit mode, press Alt Z, click
outside of the object, and then click and drag the
bottom row of vertices here, and that selects everything
in the front and the back. Now let's move this up and we
can begin again from here. So it's kinda hard to tell what's happening up
on top of there. But let's maybe hit E and pull down and
hit S and scale in. And then we'll
begin writing here. So I'll scale in a
little bit more. Then let's hit and
again, and then S. I'm just going to bring this in like this for this little
ridge right there. And then let's get this
larger bottom piece here. So how about I'll
extrude down and scale out a bit and do
that again. And again. Maybe to about here, let's say. And then we can begin bringing
it back in like this. Another extrusion,
bring that in. And maybe that's maybe
that's all we need. Well, maybe I'll
do one more here. There we go.
Something like that. I'll press Alt Z to go
back to Solid View. And it looks like I can
press Alt and click an edge here and maybe move
this up just a bit and scale it in
just to kinda readjust. That's all. Maybe
something like this. The S key kind of like that. There we go. I'll press Alt a to
deselect everything, hit the Tab key to go
back to object mode. And how are we doing here? Well, not too bad. I feel like it could be a
little bit bigger though. Let's hit the S key and
just scale it up some, bring it down a bit. About that. Not bad. Let me zoom in a bit. I feel like now this
part right up here, I'll hit the three key. Alt click between
two of the faces. And now let's scale
that down a bit. Just feel like that
got a little too big. Let's go ahead and
smooth these objects. I'll select this and right-click
and choose Shade Smooth. And once again,
we've got some of that artifact and problems. So over in the object
data properties, Let's click on auto smooth
and that helps quite a bit. And now this, we
could try smoothing this and then click on
Auto Smooth. There we go. And then we could also do this one and click on
Auto Smooth here. And it looks like
we need to drag this little slider up
to clean up this area. This is the maximum angle
that will be smoothed. So if we drag this up a bit, click and drag in this field, we can smooth that
out a bit like this. So if I drag it
up to about 4344, that smooths out, that
looks pretty good. All right. So now how do we take these legs and put them
on the other corners? Well, first of all, I
think what I'll do is join these three objects together so we can mirror
this as one object. So I'll take this object, shift click this one, and then Shift click this
one here on the bottom. And to join objects, we can press Control
J or Control J. And now it's all
one object here. I'll go ahead and change it
in the outline or call it leg just for now so
we know what that is. When we mirror an object, we mirror it around the
origin of the object. And recall that that orange dot right in here is the
origin of the object. If we tried to
mirror this object, it would just mirror around
itself here in the center. We need to move this
to the center of the grid so that it will
mirror to each corner. So how do we do that? Well, we can move this 3D cursor back to the
center of the grid with Shift S and the one key or
cursor to world origin here. Now we can take this origin
and move it to the 3D cursor, come up here and
go to set origin, origin to 3D cursor. Now if we used our mirror modifier over here in the modifiers panel right here, we can choose Add Modifier
and the mirror modifier here. I better move this
over just a bit. There we go. And click here. Now we've got it mirrored
along the x-axis. You can see that here. And if we wanted
to add the y-axis, we could just click here. There we go. Now we've
got all four legs. All right, Let's now
see how it looks compared to the reference
figure we created earlier. So if I come up here and turn on the reference collection, here is our figure and
it's a little bit, or I should say the
table is a little small. So let's move this
guy over a bit. Now what I'd like
to do is scale from this 3D cursor at the
center of the grid. To do that, we can just change our transform pivot
point appear. So currently when
we scale anything, we're scaling around the
objects median point, so the origin of the object. However, if we change
this to 3D cursor, now look where that
move manipulator went. It went down to the 3D cursor. So we can now select all of these objects by
shift clicking them, and we can then scale
from that point. So I'll hit the S key. And if we scale up a bit, now we can begin to see
if we can get this a little bit better in
proportion to our figures. So I'll hit S again
and scale that up. Now what do we think? I feel like it may
be a little bit too wide and deep for
how tall it is. I feel like this is about
how tall it should be. Maybe just below the knee there. But that may be a
little bit too big. So let's try our trick with
turning off the z-axis. Let's press Shift Z, and let's scale in
this. Let's try that. I would like to try and make the legs a
little bit thicker. I'm gonna tab into edit mode, hit the a key, and I'm gonna change my pivot point to
median point again. And now I'm gonna
press S Shift Z and try and move these out just
a little bit like this. You can see that because
they're all mirrored, they're all scaling
out at the same time. Maybe if I did that, and then I'm going to
have to move these in the x just a bit and
in the y just a bit. But the good thing
is, as I said, because they're all mirrored, we only have to move that one. Now we can combine this
all into one object. To do that, we're going to
need to apply the mirror. Let's come over here to the modifiers panel and
apply this mirror modifier. A, pull this down
and click Apply. And now that creates three
more permanent objects. Each one of these now
is its own object. And then let's shift
click the top of the table and the bottom shelf. And then once again,
let's press Control J. There we go. Now
it's all one object, but it looks a
little weird, right? Let's come back over here. Turn on our auto smooth,
and there we go. Now that we've got that, we can move that origin to the 3D cursor in the
center of the grid. Object, set origin,
origin to 3D cursor. And now wherever we
move this it will move and scale from that
point on the floor. I'll press Control Z to move
that back into the center. There. There we go. Let's call this coffee table. And let's also create a
new collection for it. To add it to a new collection, we can select it here in
the outliner and then press the M key for the move
to collection menu. Click New Collection. And let's call this
one furniture. Okay, there we go. That creates a new collection and puts that object in there. All right, In the next video, we'll begin on a new object.
6. 006 Modeling the Round End Table: All right, Let's see
what else we can make. I'm going to hide the reference, hide the furniture, select
the scene collection. So anything new
that we bring into the 3D view comes in outside
of the hidden collections. I'll click on Image
and open and let's see what we want to do
for our next object. I think something like this. Is there anything else? Well, this here,
let's look at this. Let's work on this one
as our next object. I feel like I've
seen that in here. Let me just open this and
then I'm going to press Control Spacebar and
zoom in and yeah, this kind of thing right here. So let's, let's work on the
small roundtables here. I'll go back to image open and let's come down
here, select that. I'll move this over here. Let's click Open Image. Alright, now here's
our reference image. And it looks like we could begin with the
cylinder here up on top, and probably another
cylinder for the legs. And then this piece right here, this is an interesting piece. We'll have to see what
we can do with this. So let's begin on the
top with a cylinder. I'll come over here
to the 3D view. Press Shift a mesh
cylinder for this, Let's go ahead and
leave it at 32 sides. But this time instead
of an end gun, just a single large face
on the top and the bottom. Let's change this
to a triangle fan. What that will do if
we tab into edit mode, you can see that we've got
these triangles on the top of the cylinder instead of just one large face on
the top and the bottom. All right, so now
that we've got that, let's maybe scale it down a bit. And then let's scale
it in the z, S, z, and I'll bring it
way down like this. Let's bring it up. Is that about the
right thickness there? Yeah, that's not bad. We could go ahead
and go with that. Now for the extrusion, if we come down here, we don't just have
one face that we can select an extrude down. We need to select all
of these and going through and clicking on each and everyone can be kind of a pain. So we can use our circle
select tool over here. If we click and hold on
the tweak menu item, we can come down here and
choose select circle. Now we've got this
little circle brush on our cursor and we can click and drag in face mode
to select these faces. Now, once we're done, we have to actually switch to another tool, if anything else. But we can get to this again fairly quickly if we just hit the C key and then click and drag over the remaining phases. Now we've already
chosen another tool. So the way you get out of it, if you've hit the C key is just to click the
right mouse button. So I'll do that. All right, Now that we have
those faces selected, Let's inset these faces a bit. So we get this kind of
overhang on the table there. So I'll hit the I key on the keyboard and let's push
in just a bit like this. Let's say something like that. Then let's extrude back down. Let's hit E, and we'll just pull down the z-axis. Here we go. Alright, so we have this so far. We just need this little
curved piece right here. To do that. I'm gonna hit the one
key on the number pad to go to the front
orthographic view. And from here, let's hit E and pull down and then the
S key and pull out a bit. And maybe I'll pull
out just a little bit, hit the S key and then
hold the Shift key down to slow the movement
a bit and then hit E, pull down E, Again, hit the S key, hold the Shift key down. And maybe I need
one more here, e. There we go. Let's try that. Alright, so now
we've got that kind of curve at the bottom there. I think that's okay. Let's go ahead and smooth it. I'll hit the Tab key
to go to object mode and then let's right-click
and choose Shade Smooth. Now it looks pretty ugly. We should come over here to
our Object Data Properties. And under the normal section, Let's just click Auto Smooth. And that worked pretty well. Except There's this
edge right here. It's kind of a sharp edge before that curve begins and we aren't
really getting that here. If I click and drag
this down below 30, below 20, there's that edge, there's that sharp edge there. You can see it right there as we dropped below
three degrees. But the problem is you can see all the other polygons in there, so we don't want that. Let me click and drag
this back up to 30 or so. If we've got an object
that we're using smoothing on and we want
an edge to be sharp, we can use the mark sharp tool. So if I tab into edit mode, hit the two key to
go to Edge mode, and then I'm going to Alt
click this edge right here. Now if we come up
to the edges menu, we can choose mark sharp here, or to bring up the edges menu. We can also press Control E and choose mark shop from this. So let's do that. And now we have that kind
of blue-green line there. If we tap back into object mode, you can see we've got a
nice sharp edge there now. That's what we want. Let's zoom back out here and maybe I'll try and
bring this up to about, about the height that
we think it may be. Maybe something about like this. Okay, so now let's come in
here and work on the legs. So for this, I'll press
Shift a mesh cylinder. And I think we could go
with fewer sides here. So instead of 32, let's take this down to 16. And then I'll take
the radius down to 0.1 and the depth down to 0.2. Let's do that. Alright, and then
I'll hit the G key, and let's move it up here. I'll hit the period key on
the number pad to zoom in. And let's just scale
this down quite a bit and try and begin this
little area right there, that little part right there. So maybe something about
this size, like this. I'll scale it down just
a little bit more. Let's begin like that. I'll tab into edit mode, hit Alt Z to go to x-ray mode. And then let's just
click and drag these and look what happened. We've got our circle
selects still on. If we come up here, we can change this from
select circle to select box. And now we have
that click and drag functionality back
that we had before. All right, so let's now
switch to the move tool. Back up to here. Then let's begin this
part right here. If I hit E S, that'll bring this in some, maybe bring it down
just a smidge. Then let's get this
part right here. This kind of fluted part, I'll hit E and pull down e again and then scale
out with the S key. Maybe something like that. Now we need this
little bit right here. So how about E, S and pull out a bit and S. And then I'll scale in
just a bit like this. Maybe one more to bring
it The ran like this. Let's do that. So that's this piece right here. Now these, we could, well, we could bring these
down a little bit more in scale in like this. And then hit E and bring
that straight down. And now let's just hit E S
and bring it straight out. And then ES and bring it back in just to get that piece there. I know that's curved, but
this is such a small piece. I don't think we need to
curve that right there. Let's bring this down and again
and scale that out a bit. Maybe once more. There we go. And then from here we just need to bring it all the way down. I don't think I'm gonna
try and curve it at all. I think I'll just bring
them straight down. Let's just hit E and bring
it straight down like this. Then right around here, let's hit the S key
and scale it in. Right about there. I'll hit Alt Z to go
back to Solid mode. Yeah, that's pretty good. I think we could perhaps make
it a little bit thicker. So let's hit the S
key and then Shift Z, just like we've done before, and make this maybe a
little bit thicker. Like that. We can now try and smooth this. We could right-click
and shade smooth. That's not bad. All right, In the next video, I think what Let's
do is let's work on this part of
the leg down here, as well as this piece
here in the center.
7. 007 Completing the Round End Table: Now having smooth this leg, you can see we've got some artifacts here
from the smoothing so we can just come over to our auto smooth and turn that on. But even when we do that, take a look at this
if we zoom way in. I don't know if you can see
that, but there's still some edges here that we
can see of the faces, even though we've
smoothed that object. What's going on there? Well, if we tab into edit mode, we can see that the
polygons here are just really long and
stretched and oblong. They are really far
away from being square. The further you
stretch a polygon, the harder things
like smoothing and other tools in Blender have
to work to do their job. It really wants to see
polygons that are more square. So if we say inserted
a few edge loops here, each individual
polygon wouldn't be so stretched and we might be
able to alleviate that. If we come over here
we can see we've got loop cut or the
shortcut is Control R. I'm just going to hover
over an edge and press Control R and then
click and click again. Now in our loop cut
and slides settings, we can increase the
number of cuts here. So I can just click the arrow. And let's increase it to
three and see how that works. If we tap back into object mode now let's
zoom in and take a look. Yeah, that looks pretty good. We've really clean
that up quite a bit. As you smooth things, keep that in mind that really long stretched polygons can cause some problems
for Blender and smoothing. All right, Let's tab back into
edit mode and I'm going to press Alt Z and de-select
things with Alt. And I'm just going
to drag select these vertices down here. For these little round pieces here at the bottom of the legs, we could extrude and scale and create these just like we've
done with other things. But I think what I'd
like to do is actually bring in a sphere and then
connect it up to this. I'm gonna select this point
right here in the center. And I'm going to press Shift S and select cursor to select it or the two key to bring
that cursor to that point. Now when we create a new object, it'll pop in there. And also what I'm gonna
do is I'm gonna stay in edit mode to
create the object. When we create an
object with Shift a while still in edit mode, the new mesh that comes in will be apart of the existing object. So if we come down here to
UV sphere and click here. Well, first of all,
it's very big. Why don't we deal with that. First. Let me take this and type
0.1 into the radius there. Then we've got 16 sides.
Isn't that correct? When we created the
cylinder for the leg, let's change from 32
segments to 16 here. Now we have the same number
of edges as that leg. So I'm gonna pull
this down below here. Let's zoom in with
the period key. Hit the one key on the numpad. And maybe I'll scale
it down a bit. Try and get it about this size. And before I bring it up
and we try and connect it, I think I'd like to get rid
of the top and the bottom. So let's hit the three
key to go to face mode. And I'll press Alt
a to deselect. And then I'm just
gonna click and drag this area right here. And I'll hit Delete and
choose to delete faces. And now, if we select this
here and bring it up to here, we can connect it
up with the legs. So let me hit the S key
to scale it down a bit. Oh, and before we do, what we also need to do is get rid of these faces up here. You do not want to have faces in the middle of an extrusion here or in the
middle of an object. In fact, let's just take a look at what
happens when you do. That's a good thing
to take a look at. Let's Alt click this edge
and alt click this edge. And let's connect these
up in the edges menu. Recall that's controlled E. We have this bridge edge loops selection. So
let's click that. Now. If I press Alt Z,
you can see that these phases are still in there. So if I tab back into object mode and let's
smooth this, look at that. No matter how much we
try and smooth that, we will always have
a hard edge there. And if we tried to
use any modifiers, there are quite a few blender
modifiers that will not in joy having faces in the
center of an object there. I'm going to press Control Z and let's come back out of that. So to avoid all those problems, Let's hit the three key, the C key and
circle select that. And now let's hit Delete
and delete faces. Now let's select
this and move it up. And I do want to mention that one of the reasons
why I keep going to x-ray mode is because if I clicked and dragged
on this right here, then we tumble
around, take a look. It didn't select the backside. So in solid mode, when you drag select a
box around an object, it won't select the
backside, however. Here in x-ray mode, you can see it does. But let's say we're
in solid mode here. I'll press Alt Z and we want
to select this whole piece. To do that, we can
hover over it here in edit mode and just
hit the L key. And that will select linked components of the part of the object that we
just hovered over. Now currently we've got a
delimiter for seem here. I don't want that. We don't have any seams
currently on our object, but if we did, it wouldn't
go over those seams. So I'm just going to
press Shift and click that to remove that delimiter. Alright, now I'm going
to scale it down a bit. And then let's move it up
to say right about here. Now we can hit the two
key to select this edge with Alt click and this
edge with Alt Shift click. And then once again, let's go to Control E and bridge edge loops. Now our smoothing and modifiers would work
just fine with that. We may actually want to keep
a hard edge there actually, but if we did want to
smooth it, that would work. Now, let's remove
some faces down here, so I'll press Alt Z, hit the three key
to go to face mode. And let's just get rid
of these right here. I'll hit Delete
and choose faces, and then back to Edge
mode with the two key, Let's select this edge. I'll hit E. And now that we do not have a face on
the bottom here, when we hit E, it can
go in any direction. So I'm going to have to hit the Z key to lock it
to the z-axis here. And I think I'll just scale this in a
little bit like this. Then let's get this
bottom part here. Once again, you can see
there is no face there, so I'll hit E, Z, bring this down, maybe let's
take it all the way down to the bottom there and then let's hit S and
scale it in like that. All right, let's see how we did. I'll press Alt Z, ALT a
tab back into object mode. And I want to move
this cursor to, let's move it back into the
center of the grid with Shift S. And that pops it into
the center of the grid. All right? Yeah, I think the proportions are actually pretty good there. Let's select it and
right-click and smooth it. Yeah, that edge stayed
sharp there, That's good. However, if I clicked
and drag this up, you can see it would smooth if we went up higher,
but we don't want that. We want to bring it
down to about 30. So we have some edges there. All right, so now
we've got one leg. That's good. I think maybe I'll bring it in just a little bit like this. Let's try that. Then let's create the
other three legs here. We're going to need
to move the origin into the center of the grid, I believe to create
the other four, we can use that mirror
modifier again, but let me show you yet
another way to do this. Let's select this and move that origin to the
3D cursor here. And that puts the origin of this object in the
center of the grid. Now what we can do
is we can duplicate this object with Shift D
and then I'll press Enter. And then let's rotate that new object
around the center of the grid 90 degrees with
this still selected list, press R, z, 90. And there it is. There's one. Let's do that again. Shift D, enter our
z 90. There it is. And one more time, Shift, Enter RZ 90. We've got forelegs. Alright, let's see
if we can finish up this centerpiece here. I think for that, we can just use a
plain a polygon plane. Let's press Shift a mesh plane. And then let's rotate
this 45 degrees. Let's press once
again our z and then type in 45 and hit enter. And then let's bring it up to about where we
think it's going to be. And then let's hit the S
key and scale in a bit. Something like this. Now, recall that we use the bevel vertex tool when we created that small cube on
the leg of the coffee table. Well, we can do
that here as well. But before we do that, let's add a couple
of edge loops. I'm going to press Control R and add an edge loop right here, hover over an edge
and click twice. And I'll do the
same thing. Here. We go. Now let's take these
four vertices out here. And let's bevel these. Recall if we go up
to the vertex menu, bevel vertices is
Shift Control B. So let's do that. Shift Control B. And I'll
pull out with the mouse and you can scroll the mouse
wheel and add more edges. So maybe I'll scroll the
mouse wheel and add that. So it turns out
it's four segments, increase or decrease these. But I think that's fine. Now let's do the same thing
with these four points here. Let's do that same thing. First of all, I'm going
to scale in and you can see we're beginning
to get that shape there. Now let's bevel V's Shift
Control B and pull out. And now we've got a
curve in there as well. There we go. Alright,
so let's hit the a key, select everything, and
then I'm gonna press the Esc key and
scale in just a bit. There we've got that
basic shape now, the last thing we need to do
is just add some thickness. So let's go over here to
the modifiers panel and let's use the solidify modifier
to add some thickness. I'll come over here
to Add Modifier, choose solidify and you can see it's just added a little
bit of thickness there. I'm gonna click and drag in the thickness field and
bring that down just a bit. Maybe like this. I'll choose even thickness. Yeah, I think that'll work. Let's go ahead and apply that. I'll click here and click Apply. And now let's just
select it and smooth it. Let's come over here to
our object data properties and click on Auto Smooth. And then maybe we can drag
this up a little bit higher, maybe like 3538,
something like that. There we go. Let's combine all of these
and see how it looks. So let's select all of these. Select the top,
select the legend, the center, and then to join objects together
is Control J. So let's do that. Control J. There we go. Let's then take the origin and take it down to the
center of the grid. So I'll come up here
to object set origin, origin to 3D cursor. Then if we bring
our furniture back, oh, I didn't hide
them with this. I hid them with the
exclude from view. And that's okay. We
can do it either there or here with the eye icon. That's fine. Now let's take this very large in table and
let's scale it down and get it to be about the right size for
our character here. If this guy is walking
into a room and there's an int table via couch or chair. Is that about the right size? Yeah, I think so. I think
that's pretty good. There we go. Now we've got our
round in table. In the next video,
we'll continue on with more of the furniture.
8. 008 Starting the Arm Chair: Let's try and work
on something a little different
this time I'm gonna hide the reference collection
and hide the furniture, select the Scene Collection. And let's go into our
reference images and see if there's
something else that's a little bit different
than what we're doing. How about this? A chair? I've got a few chairs in here. And of course, you can find your own images and use
whatever reference you like. But this is just kind of
the things I've found that are inspirational and I believe
would be good reference. And I'm kind of drawn to this currently this one right here. Because if we go back to
that original image here, I feel like these chairs here, I don't think I want the
full winds on the side here, but I feel like that
chair that we have, the image would be good
for this kind of thing. So let's go back and
I'll grab that chair. Here we go. Let's do this. Make this a little bigger with control space and let's
take a look at it. Well, it's got a lot
of rivets and I'm not real enthusiastic about creating all of these little rivets. I think that would
be time-consuming and also use up a
lot of polygons. I'm not specifically
trying to make a really low poly seen, although I would like to
try and manage the polygon. So if I ever wanted to take this into a game engine
or something like that, I could, I think what I'll do is work on a chair
basically of this shape. Maybe work on these
little trim pieces here. And what we could also do
is instead of using rivets, we could maybe use this trim
that's along the edge here. We could maybe put
that right in here. So let's see what we
can do with this. I'll press Control Spacebar. And to begin with, I think we just want
to begin with a cube. I think I'd like to begin with
this area right down here and then extrude up for the arms and the
back of the chair. So let's begin with that. I'll press Shift a and
go to Mesh and cube. And let's scale it down
a bit, it in the z. And let's bring it up about
where we think it should be. Maybe it's about this
high off the ground. I'm looking at this down here. Not the cushion currently. Maybe it's about this
high off the ground. Maybe if I press S and X
and scale it out a bit. That's about how wide, and of course we're
gonna be continuing to adjust this as we go. Maybe S and Y and bring
that out like this, maybe something like that. Let's see if we can
begin with that. Now, the chair is pretty
much completely symmetrical, so let's go ahead and
split it down the center, delete one side and then
add a mirror modifier. So anything we do on one side will automatically
happen on the other. Let's tab into edit mode
and I'm going to press Control R to enable
the loop cut tool. And I'll hover over an edge. And when you do
hover over an edge, it will try and place that
edge right down the center. And if I click the mouse
here to drop that edge, I might accidentally move the mouse and move it
out of the center. So what I'm gonna do is just
hit the Enter key two times. So I don't accidentally
move that edge. Now I'll hit the
three key to go to face mode and then Alt Z. And let's just
click and drag and select all of these faces here. Hit Delete and choose
to delete faces. Now if we tap back into
object mode and press Alt Z, we see we've just got 1.5. Let's now come over to the
modifiers panel and choose Add Modifier and the
mirror modifier. And there we go. Now
we've got two sides. If we tab into edit mode
and maybe hit the one key on the keyboard to
go to vertex select. You can see that we don't have the vertices on
the mirrored side. We can come over here and
turn this on, on cage. And now we can see the
components on the other side. In addition, if we take
one of these points and move it, it'll split apart. What we want is we want
them to clip together. If I turn on clipping
now and take this point and drag it
back into the center. Now if I try it again,
I can't move it. That just helps us keep that center line together when we're working
on the modeling. Alright, so now that
we've got that in place, let's create the faces that we're going to use to extrude
up the arm and the back. So let's maybe come over here to one side and move
this over to here. That's where we'll
extrude the arms up. And then it ends right here. So maybe we press Control R and put an edge right
about here, let's say. And also we want
one for the back. Control are maybe come back here and add one
right here for the back. Now all we want if we
hit the three key to go to face mode is we want
this, this and this. We went these faces to extrude up for the arm and the back. So let's just hit E and it'll automatically pull
it up in the z-axis. And let's go up to, it's kinda hard to tell that. Cushion kind of makes it difficult to get a sense of
how deep this should be. But let's say it should
be about like this, right here from here up to here. Now let's continue
with the back. So let's take this
and this and we continue on up for the
back of the chair. Let's go to the
side view with the three key on the numpad. I feel like I just need to
take this and move it back some kind of angles. Then from here, let's
go ahead and hit E, and I'll just pull
up in the z-axis and then let's take this and
move it back like this. All right, so maybe
we could grab this edge and this
edge in the side view, maybe bring that in like that. I'll press Alt Z,
hit the one key, and now we can click and drag these and maybe
move these forward. Just trying to get
the basic shape here. Alright, How we doing? It looks like the top
isn't tall enough. So let's do that. Let's take these. I just press Alt Z to go to x-ray and then click
and drag these. Let's drag these up. Then I feel like it's
not wide enough. I'm just going to tab back into object mode
and I'm gonna hit S and X and pull out
just a bit like this. I think we're doing okay, let's now come up here
to the top again. And I feel like this is just
a little bit too short. Let's take a look. I pulled it up, I need
to pull it back some. And then I feel
like the bottom is not quite thick enough. Now, as I said, a lot of 3D modeling is just
going back and readjusting, taking another look at the whole thing and
seeing what you can do to improve the
proportions and the scale. So now I can probably take this and move this
back up a little bit. Let's do that. Then let's also take some
of these edges here. I think I want to expand the arms out
just to fit like this. Because I feel like
they flare out a bit. And we're gonna be working on
the curl here pretty soon. I feel like we can adjust
this top a little bit. I feel like if I pulled this up that center edge and I'm doing this when it's fairly low poly. So it's easier to do now. Then when we've already
added more polygons to it, It's just gonna be easier to
adjust with fewer polygons. I'm gonna move this
down a bit and then move it to
it's inline there. Let's see how we're doing here. All right, so now let's
add that cushion. We could of course
just press Shift a and create a new cube and bring
that up here and shape it. But another thing we could do is just select these faces here. And since it already
has that basic shape, we could just
duplicate these faces. Shift D, and then hit the Z key and move them
straight up in the z-axis. Then we can just
extrude this to give it a thickness and pull up. There we go. Now we've got the beginnings of that cushion. And now that that's there, maybe I'll add an edge
right in here, I think. And just pull this back
in right up front, this edge right here. Just pull that
back in like that. Alright, so in the next video, what list do is let's actually add a subdivision
surface modifier to this and begin refining the shape and also
add the legs as well.
9. 009 Refining the Shape of the Arm Chair: Now let's see if we can refine the shape of the chair
just a little bit more. I feel like this area right up here could be a
little bit thinner. You can see how
it kind of angles back to maybe we just
need to take this edge, are these edges
and just pull them back just a little
bit like that. I think now's a good time to add that subdivision
surface modifier and begin refining the
shape with that on the subdivision
surface modifier attempts to smooth or curve every
edge between points. If we come over
here and go to Add Modifier and choose
subdivision surface. Now you can see it's really
ugly and that's okay. But what it's doing is at every point if we tab
into edit mode here, you can see the original edges here and it's just trying to, between each of the edges, It's trying to give
us a smoother curve, is trying to smooth
that transition. We can use this to
our advantage to get some of these
curves on the chair. I think what I'm
gonna do is turn on the cage for this
modifier as well. And that will then take
all the edges and kind of lay them down on the
sub-divided mesh. That external cage
is still there. If we select one
of these points, you can see how far out the manipulator is
from the point. And that's because That's
where the point actually is. So from here, we need to
figure out how to really sharpen some of these edges because not everything
on this is all curves. First of all, I'm going
to right-click on the object in object mode
and choose Shade Smooth. And that helps smooth
things out a little bit. But now we can do things
like adding edge loops to tighten up the corners because the closer edges
are to each other, the sharper the corners. If I press Control R here
and click and pull this up, you can see how that
kind of sharpens up that corner or that
edge on the top there. But I don't want
to go all the way. I want to give it a little
bit of breathing room. There we go. Then press Control R here. And once again, I don't
want to go all the way, bring it down just a little
bit so we get a sharper edge, but still have a bit
of a curve to it. Now we could also come over to our object data properties
and turn on auto smooth. And that can help
a little bit here. And then we can click and
drag and bring these up. Let's bring it up
to about 70 or so. There we go. Now let's maybe
add an edge right here, Control R and click
and I want to pull forward and you can see how that's sharpening
up that edge there. But once again, I don't
want to go all the way. Pull it back just a bit there. Okay. We could do a similar
thing back here with Control R and kind of
bring this back like this. You can see how
we're just beginning to get that shape now. We could add an edge loop
through here and bring this down to kind
of tighten this up. We go up here to, we should probably add an edge loop right here
and bring this up. There we go. Now what else? Well, this cushion here, let's add an edge loop
to this right here. Bring that up like that. And one down in the
bottom like this. Not quite all the way. And then we go back
here to let's do that. Control are bringing that
back and forward a bit. And now let's also add
one right in here. That looks pretty good there. It looks like we need one
in here because this is kind of a little too rounded. So let's press Control
R and add one here. Right now let's think
about this arm here, this kind of scrolled arm. I'm not going to do
a scroll like that. I'm just kind of add some geometry to give
it that basic shape. I don't want to add
too much to this. So what I'm gonna do is just maybe select these faces here. And let's just hit Extrude. Let's just hit E
and pull this out. Maybe pull it down a
bit so you can see already we're beginning
to get that curve there. Then back here, I'd like
to maybe take this edge, move it forward and
move it in some. I've pressed Alt and click that edge to select
that whole edge loop. And then if I select Delete, I can choose to dissolve edges. And let's just see
what happens here. Yeah, that made this
a little smoother, but I don't really like
what it did there. I'm going to add it back, but maybe not pull it back
quite so far. Let's try that. All right, so now
let's take this edge here and let's pull
it up some like that. So we get that kind of
scrolling underneath. And then maybe we grab
these edges here, bring them up and
bring them out a bit. We're just trying to
duplicate that general shape. As you can see, I'm doing this
in a fairly low poly way. I'm going to take this
point and hit G2 times, which means we can slide
that point along an edge. Taken, slide it down a bit like this to make this so it's
a little bit more even. Also, I think I'd like to add
some edge loops back here. This is kind of curved
a little too much. I think. Maybe let's press Control R and let's try adding one
edge loop in here. And I'm gonna bring it back
toward the back just a bit to make that edge a
little sharper there. Then let's try and add another edge loop right
here and see what happens. Is that too much of an
edge there on the front? Well, it's not bad. I think maybe we could
take these edges here, pull them forward just a bit. Let's try that. Maybe to curve that
out just a bit. And we could do that
same kind of thing here with the pillow
on the bottom. We could maybe bring these up to make it a little
more rounded on top. Let's try that just
so it feels a little cushy or it didn't look
real comfortable there. I guess now that we've
done that for those, we probably ought to
bring this up a bit too. I feel like this is still
a little bit too thin here and it's kind of up
above this bottom part. So let's press the
L key and press S. Scale that up and
bring it down a bit so it fits on there
a little bit better. There we go. Yeah, I think that looks a
little bit more comfortable. Now it seems to me this whole
area could come down a bit. So once again, here's our time where we're readjusting things. I want to grab all of these points down
here and bring them down a bit because I feel like this cushion is a
little bit too high, but I don't want to
select that cushion. So what I'm gonna do is I'm
gonna hover over it and press the L key, and
then I'm gonna hide it. I'll hit the H key. Now if we press Alt Z
to go to x-ray mode, hit that one key to
go to vertex select. I'm going to grab
all of these and just pull them down
just a bit like this. Now let's try and
bring that back. If I tap back into object mode, you can see here it is. But if we tab into edit mode, it still isn't here. To bring that back, instead of pressing
the H key to hide, we'll press Alt H to unhide. Now I can just take this and bring this down a bit like this. Now let's take a look
at how that looks. Yeah, I think that's
a little bit better. It gives the arms a
little more room there. Then once again, I
feel like I need to expand this out
in the x, S and X. Bring it out just a bit. Let's see how we're doing. Yeah, I think we're
getting there. But I've since I've
pulled this down, I'm going to move this backup a little bit to give
room for the legs. And I think that's pretty good. That's a pretty
good shape there. It is a little blocky here. We can try and increase
the angle here in the auto smooth and that helps a
little bit to smooth that up. In addition, we can come back to our subdivision surface
modifier and we could increase the subdivision
levels from one to two. That cleans that up quite a bit. However, that's going to
add a lot of polygons. If we hit the Z key
and go to wireframe, you can see the basic
wireframe of the object. However, we're seeing an
optimal display here you can see in the subdivision surface
we have this turned on. If we turn this off, we see the actual number
of polygons that would be created if we apply this
subdivision surface modifier, is that what we want? This is Five Thousand Faces. If I take the viewport
level down to one, you can see that 1320. So it's a balancing act. It's what you want
out of your scene. Do you want it to be a
little bit more low poly? Or do you want it to be a little more detailed and
have a higher poly count. So it depends on what
you're looking for. But for now, I'm gonna leave
it at viewport level one. In the next video, Let's go ahead and
work on the legs. And then we'll also start on the trim here for the cushion.
10. 010 Creating the Legs of the Chair: Before we start on the legs, there's just one or two
more things I'd like to do. Like I want to add an
edge loop right in here and drop this down a bit so
we get a tighter turn there. And then maybe I'll grab
an edge or a face right in here and pull that back
just a little bit like that. Let's try that. Then also, I'm
thinking that this is a little bit too thin the back. So maybe I could go
to face mode and hit the C key and select
these faces here. And just pull this
straight back. Just pull that back like that. Just give it a little bit
more thickness there. I think. Let's now work on the legs here. These legs on the front are a little bit
different than the back. These on the front
are very similar to the legs we've already
created on the two tables. So let's begin with that. Let's begin with one of these. I'll press Shift a mesh and
let's create a cylinder. Let's take the
vertices down to 16. I'll take the
radius down to 0.1, and then this down to 0.2. We'll keep our in guns on
the top and the bottom. And then I'll just hit G
and move this over here. And let's begin with this. So how big should this be? Let's begin with it
about like this. Maybe like that. Let me hit the
three key to go to the side view and I'll
bring this forward. It's a little more
in front like this. Now with this selected, let's hit E and pull down and
hit S and scale in a bit. Then let's do that again. Now I'm here, so let's just go straight down with
the E key and then E, and pull down and S and
begin creating this curve. It looks like it goes
out about as far, maybe a little bit farther
than the top part. Let's go ahead and do that. I'm going to begin
bringing it back in now. Something like that. Then like that. Then let's bring this
down to about right here. Now we need to create
this little piece. And instead of bringing
in a UV sphere again, I'm just gonna do it
manually here with E and S. We go something about like that. Let's try and get it
back to where it was. I feel like I need to
adjust these a bit now. I'll just press Alt
click to select that whole edge and then
maybe scale it in a bit. There we go. Then we just need that final
piece down here. So let's just select that, hit E and bring it down. And then maybe I'll just scale
it in just a little bit. I know it looks straight, but I wanted to kind of angled. So let's try that. I'll press Alt Z and
see how that is. Alright, I think
that's pretty good. Well, now that I've done that, it looks like it really
ought to be straight, so I'll press Control Z
to go back like that. Yeah, it should be
like that. Okay. So now let's try and
get it in place. I'll move it over here. Move it forward a bit. So let's go ahead and smooth
it with Shade Smooth. And do we need to add any edges
to it? I feel like we do. I feel like we need
an edge up here on the top, maybe right here. So let's press Control
E and mark sharp there. Then I think down here, Let's try this control E, mark sharp, just
so we have those. And they really won't
show up until we turn on auto smooth over here and
now you can really see them. And then let's just click and
drag up a bit. Here we go. Now let's mirror this leg
over to the other side. And just like before we need to move that origin to the
center of the grid. So I'll come up here
to object set origin, origin to 3D cursor. And instead of using the
mirror modifier this time, let's use the mirror tool. If we come up here to
object and mirror, you can see the interactive
mirror tool is Control M. With this selected,
let's first of all duplicate it with
Shift D and enter. And then let's press
Control M and let's choose what axis we
want to mirror in. I'll hit the X key
and then hit Enter. And there we go. Now we've got our
two front legs. Let's now take a look
at the back leg. It looks like it's
a lot simpler. I think we could get
away with just using a cube and kind of angle
it. Let's do that. Let's press Shift a mesh cube and let's scale
down quite a bit. I'll hit the three key, and let's hit G and just
move this over back to here. I'll get it. About the right width and
maybe about like this. And then I'm going to remove the top and the bottom of this. Hit the period key on the
number pad to zoom in. And I'll hit the three key here and select these two faces. And I'll hit Delete
and delete faces. Now let's go to the front view. And let's bring it over here to the corner, the side view. And let's just take
this top edge. I'll hit the one key
for vertex mode, alt Z and drag select these and I'll just hit G
and move these up like this. I'll hit the a key, select everything and just
move it back a bit. So that's kind of what we want, but it's not quite right, is it? What Let's do is take these
points up here and let's just press SY and let's
expand those just a bit. And then maybe I'll
bring it in some, let's maybe curve it
just a little bit. It just feels like there's
a bit of a curve there. So I'm going to press
Control R and add an edge here and then just
bring it in, control R. And then just bring it in just a little one here and
do the same here. So there's just this
tiniest little hint of a curve there. It looks like it's
narrower from the front. So let's press Sx and
scale in like this. And maybe that top expands a little bit in the
x-axis as well. Maybe I'll press Sx
and scale out here. Alt, click this edge, sx, alt click this S and the X key and just scale
out just a little bit. We don't need a whole lot
there, something like that. Now it looks like
it's kind of turned. So let's turn it
in the z-axis, RZ. Turn it just a smidge. Maybe let's move it out
to the corner here. I think we had to turn it a
little bit more than that. Let's try that. Let's see how that works. Now I feel like it's
not wide enough. And if I scaled in
the x-axis here, it would skew it a bit
since it's turned. So we can come up here to the
transform orientation menu and change from global to local. And now that x-axis or all of the axes match the
rotation of the object. Now if we hit S and X, it will scale it out properly
in that local x-axis. Let's now smooth it. I'll right-click
and shade smooth and we've got some issues there. Let me click on auto smooth. Yeah, that works a
little bit better. And let's mirror that leg over in the same
way we did these. So let's move the origin
to the 3D cursor. Then let's duplicate it. Shift D Enter, and
we better change our transform orientation
from local to global here. And then let's press Control M, hit the X key and hit Enter, and let's take a look
at it. How do we do? Yeah, that looks pretty good. What Let's do in
the next video is actually work on the
trim here let's use the path tool to create some trim all the way around on
the top and the bottom. And also see if we
can do one right in here. That's coming up next.
11. 011 Using the Path Tool: To begin on the trim
for this cushion, lets first split this cushion
off as its own object. So I'll select the chair and
then tab into edit mode. And oh, it looks like we've
still got the back selected. So I'm going to press Alt
aided, de-select that. And then let's come
in here and hover over this cushion
and hit the L key. And let's make sure that that's
the only thing selected. Now let's split it out
as its own object. And we can come up here to
the Mesh menu and separate, and then separate by selection
or of course the P key. But I'll click that. There we go. And
now let's tap back into object mode and just select that cushion to hide everything except
the selected object. We can come up here and
go to Object, Show, Hide and hide unselected or Shift H. So I'll
just press Shift H. Now we just have
that one object. Now what we're gonna do is
create a path and then use the shrink wrap modifier to lay that path along the
top of the cushion. And then we'll just duplicate that and bring it
down to the bottom. However, when we use our
modifiers in Blender, we need to keep
in mind that they actually use the scale and the rotation settings here to give predictable,
consistent results. I think first of all, I'm
going to apply the scale. The scale currently
is non-uniform, so let's press
Control a to bring up the apply menu and
then I'll click on Scale. There we go. Now the scale is all
uniform, all ones. Alright, so now let's
create a path with shift, a curve and path.
And there it is. If we tab into edit mode and see that it's just five points. If we turn on the Move
tool and move this out, you can see that these points
are defining a curve here. As we move these points around, we changed the
shape of the curve. I'm going to press Control Z. Let's take this
whole path here and let's move it up and then
move it forward to here. And then I'm going
to hit the S key and scale it in just
a bit like this. Now, as I extrude this around the exterior
of the cushion, I want it to happen on
the other side too. So of course we can add a
mirror modifier to that. So I'm gonna select
these two points and hit Delete and
delete vertices. And then I'll tab
back into object mode and let's add a mirror modifier. And there we go. We have it on the other side. Now, with that done, let's now add that
shrink wrap modifier. So if I come up here
to add modifier, click on shrink wrap, and then let me twirl this
up so we can see this. Let's click on the
eyedropper and then select the cushion here. Now we have that
object in the target. If we tab into edit mode, we can see that we've got that path shrink
wrapped to the object. Alright, I'm gonna
turn on the apply on spine here just so
we can see that. And then I'm gonna hit the
seven key on the number pad. Now we can just begin
extruding this around until this path is all the
way around the object. So let's select this point here. Hit the E key and I'm
gonna move to hear an e and then keep
going on around them doing three
points per curve here. Then let's go around this curve and I'm just
hitting the E key each time. Here. I'll do three points at this curve and then
let's come back here. Hit E and then it looks like we don't have
clipping turned on yet. So let's come into the mirror
modifier, turn on clipping. Now if we just take
this and drag it in, it'll clip into the center
of the mirrored object. All right, so let's tap
back into object mode. Now we need to make
this object a tube, kind of like this trim here. To do that, we want
to come down here to our object data
properties right here. And I'm gonna take
this and just move it over so we can see a
little bit better. And under the geometry
section right here, we need to scroll
down and click and drag on the depth field
here under bevel. So I'm gonna click and
drag and as you can see, if I do it expands out. However, it doesn't look
real good, does it? It doesn't look like a tube. It just gets flattened, smushed. Let's go back to the
modifiers panel. And we need to ensure that apply on spine is on and it is. But now I'm just going to
take this modifier and drag it up above the mirror
modifier and then drop it. And now we can see that tube. We just had to get the
shrink wrap effect up on top of the mirror to be
able to see that tube. All right, let's go back to
our object data properties. And let's just click and
drag in the depth field. Maybe I'll hold the
Shift key down. And let's say we wanted
about like that. Let's try that. Now we can of course, come in and hit the
Tab key and move points around to try and modify the location
of this if we want, we could maybe pull
these back a bit. We could maybe take all three of these and hit the G
key and slide them. So you can come in and just do some rearranging
if you want, where the points
are on the mesh. But ultimately we're
going to need to apply this modifier and then do
our final adjustments. Once we've done that, what
I will do here is take this object and
let's go ahead and apply the shrink
wrap modifier here. When we do this, we usually
want to modify her to be at the top of the
stack when we apply it. So I'm gonna pull this down and click Apply.
And there we go. Now, if we take this a
and tab into edit mode, if we move this out, it no longer sticks
to the object, but we've got the general
shape that we want. Now, if we have the trim going into the cushion just
a little bit too much, we could take these and we can actually just bring
them out a bit. Now we can do a little
bit of adjusting. I'm going to select everything
and hit the period key on the number pad to
center that up. And then we could do a little adjusting
here if we wanted, we could move that out a bit. So if you're seeing
any gaps in here, say in here like this, you could take these and you
can move them down a bit. You can move a point over
like that to close that up. Alright, now let's duplicate this top trim and bring
it down for the bottom. So with this selected, let's hit Shift D and Z and
pull this down like this. Let me go. Now let's go through and do a little bit of adjusting here. So it at least
looks good upfront. We don't really need to
care about the back here. But upfront, I think
it'd be nice to have a little bit better
fit for this path. So let's go through
and just kind of pull these up to get them so they just barely intersect
with the cushion. All right, so we've got
that trim on there. Let's now bring the rest of
the chair back with Alt H. There we go. Alright, I think that
looks pretty good. I think the next thing
we need to do is use that same process to create some trim on
the front of the arms. We also maybe need
a little panel. You can see that this
is just a panel sewn on and then held
on by the rivets. You can see that here. So maybe we'll create
a panel like that and then use the trim to kind
of outline it as well. So we'll work on
that coming up next.
12. 012 Creating the Front Panels of the Arm Chair: Now for the panels on
the front of the arms, let's this time hide everything
except the main chair. So let's select the chair
and then press Shift H, and that will hide everything. And then let's hit
the one key on the numpad and tab
into edit mode. And I think I'd like to maybe just grab these
faces here like this. And let's duplicate
these shift D. Then I'm gonna pull it
forward just a bit. I think I'd like to split this out as its own object as well. So with this selected, I'll hit the P key and choose
to separate by selection. All right, so now we've
got this piece right here. Couple of things I want to do. First of all, I'm going
to turn off the mirror. I'm going to just
hit the X here. I'll also turn off the
subdivision surface. I don't want that right now. So let's try and get
this into shape. We don't have a whole
lot of geometry here, but I think if we just select
these in the front view, I've hit the one key
on the number pad. Now let's just take these
and begin to kind of move these around to get something kind
of like that panel there on the front of the arm. Maybe something like this. Looks like we're gonna
need more geometry here. So let me just move
these up like this. Then I'll press Control R and
add an edge loop in here. And that gives us a few
more points to work with. And then maybe it needs to
be a little bit smaller. Let's try that. I'll hit the a key and the G key and move it
down a bit like this. And then let's add a subdivision surface modifier to this. Better, move this
down here again. Then let's go here,
subdivision surface. And I'll turn on
the edit cage here. And let's see what
that looks like. Maybe add an edge loop here, maybe add another one in here. We just have a
little bit more room to move points around here. Then I think I'll take this
whole thing and move it back. So it's kind of inside there. And then let's extrude
this out in the y-axis. Let's just hit E and
pull out like this. Then I'm gonna shrink
this in just a bit. I'll hit the S key and shrink
it in just a little bit. And maybe S and Z and
shrink it in like that. We just have a little
bit of a bump there, kind of like this, how
it's curved out there. Let's pull this out
just a little bit. Then on the back of this, I think we need to
remove the faces. I've just extruded these out. And when we did, it
left faces on the back. So if I go to face mode and
just select these faces here, Let's hit Delete
and delete faces. There we go. Now that kind of gives
us something that we can pull back into here, I'll just hit the a key and
edit mode and pull this back. Now that we have that, let's create a new
path around that. So the trim will be
kind of going around the outline of this kind of like the rivets are doing here. Let's now create a new path, shift a curve path. Let's bring it out here. I think alternate in the y-axis, RY 90, like that. Let's scale it down. I'll hit the S key. Let's bring it up and over
into place along here. I'll hit the period key to
zoom in and frame it up, and then I'll hit the one key. Let's shrink it down a bit more. Now, I want to shrink wrap
it to this curve here. Before I do, I'm gonna come in and press Alt Z and
select a couple of these. I just wanted to shape
this just a bit. We go yeah, something like that. Now I'm going to
turn this a bit, get it in line with this object. And then let's take this, let's go to Add
Modifier shrink wrap. And I'll click the eyedropper
and then click this pad. Here we go. So now let's tab into edit mode. Select all of these points, and let's move this down so
it's on the outside here. I want that black line on the outside of it,
kinda like this. There we go. Then I'll hit the one
key on the number pad. Let's select a point. And then let's just
begin hitting E and extruding this all the
way around like this. The same way that we
did for the cushion. There we go. Now we've got
that all the way around there. Maybe I'll hit the a key and
slide it back just a bit. And there we go. Now let's give it some depth. I'll come over here to the
object data properties and better click on
it. There we go. We have it selected. Let me move this. Let's go down to the depth field and
let's click and drag. And once again it's just smashed flat along
the surface there. So let's go back to the modifiers panel and we don't have a mirror modifier on this, but we can turn on
apply on spline. And that helps quite a bit. So let's see, we
can get these out. So they're a little bit more on the outside
of this object. It doesn't really look
like we can do that while we're using the
shrink wrap modifier. So let me go to the
object data properties. And let's maybe bring
this down just a bit. I don't think it needs
to be that thick. And also let's press Alt H to bring back that cushion
so we can kind of get a sense if we're
doing the same thing or the appropriate size here, it looks like maybe I could
bring it down a little bit, something like that. Now we do have a bit
of overlap here. I'm not going to deal
with that until we get this trim in place. Let me select the trim. Let's go back to
the modifier panel. And I'll pull the menu
down and click Apply. Now I'll go in and
select that path. There it is. Let's
begin moving these out. They're not hidden behind here. All right, that
looks pretty good. The only thing I can say
is that we may need to move this here and this. Maybe we could take
this whole thing and move it forward
just a smidge. And then we might be able to adjust these
a little bit better. Maybe we could actually
take some of these edges in here or even faces and just grab these and
move them in a bit. I guess I could take
this and delete faces and then grab these. And let's just move these
back just like this. Let's try that. Yeah, that looks pretty good. Let's try that now. We just need to
mirror these over. So first of all, I'll take this one here. It looks like the origin of the object is pretty
much in the center, but I'm gonna move it
down to that 3D cursor. I'll go up here to
object set origin, origin to 3D cursor. Then I'll duplicate it, shift D, Enter and mirror it, Control M, hit the
X key and enter. And then let's do that
for the trim as well. Let's move that
origin to 3D cursor. Shift, Enter, Control M, X, and enter, and there we go. Now the last thing is to
convert all of these paths to geometry so that we can combine them with the rest
of the object. We will work on that
in the next video.
13. 013 Finishing the Arm Chair: Now ultimately I'd
like to combine all of the different
objects we have here into a single chair
object that we can move, duplicate, UV, map, texture, etc, all as one single object. But the problem we face is that the different objects on this
chair are different types. The main part of the chair, the legs, the cushion, or a polygon objects, but the different pieces
of the trim curves. What I'd like to do is convert the curves to polygon
mesh objects. So to do that, let's first select a path
and let's figure out once again how many polygons it's going to have
once we convert it. We looked at a
similar thing with the subdivision
surface modifier. And for this we
just hit the Z key and go to wireframe once again. And you can see all the little
polygons that are gonna be created if we converted
this at this resolution. So let's go over to our
object data properties. And we've got a resolution for the bevel at four and
resolution preview at 12. Let's take the preview down. If I just click here and
reduce it one by one, you can see how it's reducing the amount of
polygons each time. And it looks like if we
go down below three, it gets a little blocky. So let's leave it at three. And then if we come
down to the bevel, Let's take the resolution for
this down to two and that reduces the resolution around the circumference of the tube. All right, so that
looks pretty good. We've got two here and three
up here for our resolution. Let's hit the Z key again
and go to Solid View. Let's go ahead and convert it. Currently, if we
hit the Tab key, you can see we've got all
the points of the path. But if we right-click and choose Convert to and
convert to a mesh. Now if we tab into edit mode, you can see we've
got the polygons. That's good. Let's go through and do that
for this one down here. Let's change our resolution
preview to three. Down here under bevel, we put that at two. Oops, that's one. Let's put it at two. And then I'll convert
it to a mesh. And it's also do these here. Let's type in three here to down here and convert
this one over here. And convert that also. Now that we've got all
these has a polygon mesh. We can take them all and
we can combine them. Let's take a look at what kind of modifiers
we have on these, because we can only really
combine objects that have the same kind of modifiers
for this and this. We've got a subdivision. For this, we've got a
subdivision and a mirror. We've got a subdivision and
a mirror for the cushion. And we don't have anything
for the paths or the legs. Let's first of all
select the chair. And let's apply that
mirror modifier as well as our subdivisions. And if we want more
resolution here, we can always in the future
come back and just add another subdivision
surface modifier and that'll add more resolution. But for now let's leave
it fairly low poly. I'm gonna select these panels and apply the
subdivision for these. Then for this, let's
apply the mirror for the cushion and then the
subdivision modifier as well. Alright, so now we should have everything without any
modifiers on them at all. All right, that's good. So now let's take it all and
let's combine it together. Let's see if we can
just hit the a key to select everything and
then press Control J. We go. Now we have a few issues here. We don't have any edges
on the back legs. But if we come over
here and turn on auto smooth and then
click and drag up, we may be able to
alleviate some of that. Yeah, If we take
it up to about 75, that cleans quite
a bit of that up. Alright, so let's
select our chair, give it a name in the outliner. Let's turn on our furniture
and the reference figure, I'll drag this into the furniture and
then let's just scale this down and try and get
it to be proper size. Let's put it next
to the guy here. Maybe we can even
take our table here. Alright, there we go. We've got our chair. I feel like for the size it is, It's a little too wide and tall. But I'm gonna wait to
do any adjustments on this until we get other
things in the scene. I feel like we're gonna need
to make this a little bit narrower and bring the top
of the chair down a bit. But as I said for now, we're going to leave it as is. It's pretty close and we'll
be able to get it a little better once we can do it in relation to other
pieces of furniture. And speaking of other
pieces of furniture. In the next video, we will
begin on something else.
14. 014 Starting the Dining Chair: Let's work on something
a little different now. Maybe maybe another chair. But if I right, Yeah, This one right here, this has a little bit
more flair to it. I think we've also got this one, but let's give this one a try. Press Control Spacebar
and zoom in here. This has some interesting
challenges to it. The backside is a little
more curved here. We've got some interesting
arms and this back here with the padded cushion
is kind of interesting. We've got similar legs to the previous chair on the
front and on the back. But I think this
might be kind of fun. And again, I'm not
gonna go through and deal with all of these
little rivets and stitches. We're not going
to get quite that detailed in our modeling here, but let's begin work on this. I'll go ahead and hide the furniture and the
reference collections. I'll click on the
Scene Collection, so that'll drop in there. And I think first of all, let's begin with this base
would piece right here. Let's just begin with a cube. Shift a mesh cube and I'll scale it down
with the S key a bit. Maybe bring it up
and scale it in the z-axis with S and Z. And maybe get mad about
that thick. Let's see. Maybe we wanted about this high. I'm just kind of getting
very rough proportions here. Let's just say it's
something like that. All right, now, before
we do anything here, I think I will split this
down the middle and add a mirror modifier
so we're sure to have things happen
on both sides. So I'll tab into edit
mode and press Control R. And then with this edge
right down the center, I'm gonna hit Enter two times. Now one thing I don't
think I've mentioned is that I tend to
like to model and to set up the objects on modeling with the
x-axis to the right. So the positive x-axis
is going to the right. You can see that up here, the y is going back and z is up. So I just generally gravitate toward this orientation
whenever I begin modeling. I'm not saying that
this is necessary. I'm just saying
this is what I do and I just wanted
to point that out. If you are interested in
doing it a different way, that is just fine. I do like to try and
keep my models that I'm working on situated in the center of the
grid because frankly, it's just easier to
do things like this. Actually add a
mirror modifier and to scale and move in
the global axes, etc. With this modifier on, I'm gonna go ahead and
turn on clipping here. And now how do we get this
rounded part in the back? Well, I think I'm going to use a bevel on these
back corners here. So I'll just hit the two
key to go to Edge mode and select these back corners. I currently don't have
the cage turned on, so I can't see that it's
selected over here. I'll go ahead and click
here to turn that on. And now we can see that. All right, so with
that selected, let's just press Control B and pull that out about as
far as we think it should be. And then maybe I'll
scroll the mouse wheel and add a few more
segments in there, maybe something like this. Now with this bevel panel, we can adjust this a little more so I could come down here
and maybe the width, maybe we want to increase the
width just a bit like that. You can, of course
add segments here. But I think that
looks pretty good. Maybe something like this. Let's begin with that. And then let's, let's create these little
pieces right here, this little cube and this. And notice that they have a little bevel on the
corners there again. So let's press Shift a mesh cube and let's scale
this one down quite a bit. I'll hit the one key on the number pad to go
to the front view. And let's just
maybe scale this in the z-axis and then
hit G and move this up here like this. Let's try this. Hit the three key
and move it up some. I just wanted to kind of hanging off the edge a bit like this. I think it's kind of just a
little bit from the corner. And let's pull it up. Maybe something like that. Yeah. Alright, so now let's tab into edit mode and
let's hit the one key. And let's select these
four vertices here. And let's add a bevel to these. But instead of Control D, Recall it's Control Shift B. So let's press that, move the mouse out. Now I've got quite a
bit of edges here. I'm gonna scroll the mouse
until it's just one. Like that. Let's try that. I could click and drag
for the width here. Let me bring the width down
just a little bit like that. There we go. So it's something like that. Now we could of course, mirror this over
to the other side. To do that, we just need to move this origin into the
center of the grid. If your cursor isn't in
the center of the grid, you can always press Shift S1. And that will ensure that the cursor is in the
center of the grid. And then let's just
move the origin, go to Object Set Origin
and origin to 3D cursor. Now we can mirror this over
and recall to do that, we just need to duplicate
it first shift D and enter, and then to mirror it, we press Control
M and then the X key to mirror in the
x-axis and then hit Enter. And there we go. All right, so we've got those pieces in. I feel like now we
probably need to move these up just a
little bit like this. Let's try that. Once again, I'm always readjusting
and working on the proportions
as a modeling. All right, now
this cushion here, this seat cushion, let's, let's begin with another cube. I'm going to just press Shift a mesh cube and let's scale
it down and I'm gonna bring it up and I want it to be just a little bit
bigger than this is. I'm going to scale it out
just a bit like this. Maybe move it up a little bit. Then let's scale it in the z. And I'll just bring
it down like this. Yeah, there we go. Let me bring this down. And then I think what
I'd like to do is add a subdivision surface modifier to get some of these curves. However, let's go
ahead once again and add a mirror
modifier to this. Press Alt Z and hit the three key and select this side again, delete and delete faces. And now let's add
that mirror again. Turn on clipping. And this time I'll keep the
cage off for just a minute because I'm going to add a
subdivision surface modifier. Now let's tab into edit
mode and take a look at it. Well, actually what I
wanted to do is leave the cage off of the
subdivision surface. Let's go ahead and turn
it on on the mirror. There we go. That's
a little better. Now I think I'll increase
the viewport levels on the subdivision surface modifier just so we can see that
a little bit better. Then let's press Control R
and bring this down. Here. We get a little bit tighter of an edge on the bottom there. And maybe we should smooth
it to Let's tab into object mode and right-click
and click shade smooth. And yeah, that's a
little bit better. Now for the front, it
looks like it's a little bit tighter on the front
and it may be on the back. So let's bring
this up like this. This I think is a little bit
more rounded on the back. Let's tap into object mode
and see about how that looks. That's actually not bad. I'm going to bring it down some and maybe move
it forward a bit. Maybe scale it out just a bit, just hit the S key and bring it out just a little bit more. Maybe I will bring this edge up just a little
bit more like this. There we go. And then bring it forward
just a bit. Maybe. I just want to bring it
over and drop it down. Just a smidge like that. Yeah, I think that
looks pretty good. There. We've got the seat and
the base of the chair. In the next video, let's work on the legs and maybe
begin on the back.
15. 015 Creating the Legs of the Dining Chair: Well, for the legs, we've done this thing before, haven't we? So let's begin with a cylinder
shift a mesh cylinder. And for this I'm going to take the number of sides down to 16 and I'll leave an end gun
on the top and the bottom. Let's go to the front
view with numpad one. And I'll scale this
down quite a bit, a G and move it up. Hit the period key
on the numpad. And let's kind of get this
about the right size. It looks to me like there's
a little part right here. That is going to
be where we begin, right around in here. Now let's hit the three key on the numpad and go
to this side view. And let's bring this
forward like that. And then back to the front view. Let's tab into edit mode. Press Alt Z, hit the one
key, and here we go. If we bring this up like this, I think we can see that
that's right there. So I'll just hit E and
S and scale out a bit. Then E and bring this down. Then let's hit E and S. Maybe not that much. So I'm writing here now. Let's extrude that down a bit. And for this, I think I'm
just going to extrude this and scale rather than
bringing in a cylinder, Let's just hit E and S. E and S. Do that again and maybe
begin bringing it in now. Something like that. Then this area right here, let's just go straight down. We've got these
little ridges here. I don't really know how
detailed we need to be here, but I'll just add a
couple like this. Here we go. And then let's go ahead and
hit E and scale out a bit. Maybe I'll bring it down a smidge and I'm just going to get this right here like that. And then let's bring
it in a bit like this. Then we can pretty
much go straight down to the feet right there. So how far should that be? I'll hit E and come
down to about here, let's say, and scale in. Then. Let's take a look at this. So similar process, I think we just need to hit E and S again. And let's just
create this piece. Bring this down like this. Then maybe this, I'll hit E
and S and bring this down. Something like this. Let's try that. Let me grab this edge
right here and bring that. In fact, maybe I don't
even need that edge. Let's hit Delete and
dissolve that edge. And then maybe we can
just bring this one out at the S key like this. Yeah. Alright, so
let's press Alt Z. Let's tab back into object
mode and let's take a look. Is that about right
in terms of scale, if feels like the proportion of it is a little bit
off now, doesn't it? I'm going to go back to
the front view here and just select these and bring
them up a bit like this. Trying to get a similar
proportion to what we have in the image here. Then let's tab into edit mode, and I'll just select
everything and let's bring it all the way down like this. Let's try that. All right. Yeah. Let's go with that. I think that's pretty good. Of course we can continue to adjust the proportions
at any point in time. I'm gonna right-click on this in object mode and
choose Shade Smooth. And then I'll come over to
our object data properties. Turn on auto smooth. Yeah, that's pretty nice. Let's drag this up some and
see what else we can get. Yeah, I kinda like it
right around here. Like around 47. That's
kind of nice. All right. Let's take this
leg and let's move the origin to the
3D cursor list. Press shift D, Enter Control M and the X key and hit Enter. And there we go. Now for the back legs, these are very similar
to the previous chair. And I think they should
be fairly simple. But let's go ahead and
smooth this real quick. Let's do that and then
turn on auto smooth. And that cleans that
up really nicely. All right, so let's press Shift a mesh cube and let's
bring this down. I'll hit the three key on the numpad to go
to the side view. And let's press S
and scale this down. And I'll hit G and move this maybe over to about
here. Let's say. Now, what I want to do is
just grab these points here, hit the G key and move them up. So maybe they're
about right here, and maybe these
can go back a bit. I'll hit the S key and
scale them in some. For these up here, we should
probably scale these out. It looks like it's just
a little thicker here on the top than it
is on the bottom. Now let's take a look at it from the front with numpad one. And I think this could
probably come in a bit Sx. It's pretty thin here. Even up here, it could probably
come in a bit like this. Alright, let's try that. Now that we've got that, I'll take this whole
thing and move it over. It over to here. Then from the side view, Let's see if we can
give it a little bit of that bend there. Let's press Control R and add an edge loop
here in the center. Then I'm gonna pull
it in just a bit. Control R, do the same thing here and pull it
in just a smidge. Maybe hold the Shift key
down and then I'll press Control R and one down here. And let's do the same with this. I'll move that in just a bit, just so we get a little
bit of a curve here. Just a slight curve. We go, alright. I think I'd like to move the origin to the
top of this object. So to do that, Let's select
this face on top and then press Shift S to move
the cursor to that point. And then we'll tap into
object mode and come up here to object
and set origin, origin to 3D cursor. Now we can turn this
if we press R and Z here in this axis like that. So hopefully that will help us as we began to
try and place this. Because I can see
it's turned a bit. Let's maybe move this in here and then press RZ and turn it. Then I'll click and drag on this little blue square right there to kind of get
it inside like that. How does that? Well,
I think that may be a little bit too far forward. Let's click on that blue square again and move it this
way. Let's try that. There we go. I'll move that cursor back to the center of the
grid with shift S1. I realized that this
little area on the bottom, I kind of want to
have this pushed up. Not that we will ever actually see the
bottom of this chair, but I wanted to do it. Let me select this face here. To inset this face, I'm going to press the I key. And as I move in you
can see it's giving me two faces because
it's been mirrored. Now if you look up at the top
of the screen here now I'm going to have to get out
of this. I'll hit Escape. But when I hit the I key again, look up here at the top of
the screen and you can see that there's a thing
for shortcut key B. So I'll hit the I key
again and push in. And now look up at the top, it says B for boundary
and that is on. So currently we have a boundary between the two sides
of the mirrored object. But if we hit the B
key and turn that off, now those come together. And that looks a
little bit better. So I just want a little
bit of an inset here. And then I'm going to extrude and push it up just a
little bit like that. That's it. That's all I wanted. Just a little bit like that. Now that I've done that, I want this to come up here too. Let's tab into edit mode, and let's just take that
face there and let's just pull it up until it
intersects with that. I know, as I said, No one's ever going to
see this under here, but I wanted to do that. All right, so now
we have that leg there. Let's select it. Let's move the object
origin to the 3D cursor. And then let's press
shift D, Enter, Control M and the X key, and then Enter, and that duplicates and
mirrors that over. Alright, so now we've
got the legs here. In the next video. Let's work on the back.
16. 016 Modeling the Back of the Dining Chair: Now let's turn our attention
to the back of the chair. And this object is a little bit more complex than
we've done so far. But for something like
this, personally, I think it's easier to get this kind of a shape
first in two-dimensions, in other words, with
just a polygon plane. And then once we get the
shape the way we want it, then to give it thickness. I think it's very difficult
sometimes to deal with three-dimensions
while you're trying to get a complex shape. Let's begin with a polygon plane and see what we can do to get something
that looks like this. Alright, so let's press
Shift a mesh plane and let's turn it in
the x-axis, our x 90. So turning at 90 degrees
in the x-axis there, then I'm gonna bring it up here. Kind of get it in place and try and get a sense of
how big it should be. I'll scale it in the x-axis. Let's scale it in
the z with S and Z. Then let's bring it up a bit. I'm just trying to get a sense
of how big this should be. Let me bring it in back to here. Let's see. What do you think Is
that about, right? It may tilt back a bit, but I don't want to deal
with that until we've got it pretty much in place,
pretty much completed. So I think that looks like a pretty good height at
least to begin for now. Once again, let's tab
into edit mode and press Control R. And let's put an
edge right down the center. I'll hit Enter two times, go to face mode
with the three key. Let's select that face and
hit delete and delete faces. Okay, now let's go back to the modifiers panel and
add a mirror modifier. Let's turn on clipping. And so from here I
think we just need to insert some edge loops to try and get this basic shape. So I'm going to tab into edit
mode and press Control R. And let's first of all get
this piece right here. Let's say that that's
about right here. That's where the arms
will go. Right there. Then up here, Let's say maybe this piece right
here is around here. I'm gonna hit the one key
to go to vertex select, and I'll take this
and move it out. Because it looks like
this is a little bit farther out than this piece here is press Control
R. Add an edge in here. And I'm just going to bring
this down right about, let's say to here, select this point
and move this in. I just kind of beginning to
get that curve in like that. Now it seems like it curves
a little bit on top. So let's do that. Alright, so that's a very
rough outline of that shape. I'm going to Alt click this
down here and I'll turn on the cage so we can see
it on the other side. Maybe bring this up a bit. There is that basic shape. Now what Let's do is let's add a subdivision surface modifier. So we get those curves
a little bit smoother. Right here. Now let's start adding some edge just to hold those corners. So right in here, Control R. Let's bring this down. Here. I think we need
probably one in here. Probably one right
in here as well. Notice once again, as
I mentioned before, I'm keeping everything
in the global axis. I'm not tilting it yet. I'm keeping it all aligned to the global axis so
it's easier to move things and get the
shape that we want. Maybe I'll bring this
in a little bit more. Maybe we need one right in here. Let's try that. All right, We're getting there. And do we need an
edge vertically here? Let's try this. Let me do that. Alright, so as for
just the basic shape, I think that's pretty good. Now Let's do is try
and bend it a bit. So instead of taking these outer edges and
pulling him forward, I'm going to Alt click
this center edge. I think I'm gonna pull it back a bit using the proportional
editing tool. So if we select this
and if I hit G and y, gy, you can see this area
of influence that this has. We can use this to pull that center edge
back proportionally. So I'm gonna hit the seven key on the number pad to
go to the top view. And let's hit G and Y. Then I'm just going to
pull this back a bit. And you can see how we
can change the shape of the curve by changing
the influence, the sphere of influence here. Maybe I'll bring this out
like that, like this. And then I'm gonna take
this edge right here and go back to the top
view, press G and y. And I want to kind
of bring this. Back just a bit. And then let's select this edge and do the same here with GY. Maybe pull it forward just
a bit, just a little. Then I think I'm gonna
turn this in the z, r, z, kinda turn it like that, just see what we
can do with that. Let's try that. All
right. Not bad. Feel like there's a
couple of problems here. I'm going to turn the
proportional editing tool off and bring some things in
just a bit here and here. Then let's smooth it off, tap back into object
mode selected, and right-click
and shade smooth. I think I'll also increase
the viewport level over here. Alright, so we've got a
pretty good shape there. Now I'm gonna take
this and just move it back forward just a bit. So it kind of curves around
that seat cushion a bit. I feel like maybe we could
bring it in in the x-axis. I'm gonna press Sx and scale
it in just a little bit. What Let's do now is let's add
a solidify modifier to it. To do that, we can select it, come over here to the
Add Modifier panel, and let's add a
solidify right here. Now once we do that,
you can see it kind of adds a little
bit of thickness. And let's choose even thickness. Then click and drag and
the thickness field. And you can see as we do it, pulls it out like that. So we wanted
something like this. However, we also want to try different arrangements
for the modifier stack. So what if I took
this and drag it up above the subdivision
and then dropped it, well, that means the
solidify happens first in the stack and
then the subdivisions. So we really can choose
which way we want it to go. I think I want it like this. So this solidify happens first. Let's then go into this
solidify and maybe add a little bit more a
thickness to it, like this. There we go. Now that we've got this, I think what I
wanted to do is I'm going to duplicate this and then hide it away because
I'm going to apply all of these modifiers. And if there's something wrong, I want to be able
to go back to this. I'm just going to press
Shift D and enter. And then I'll come into the outliner here
and just hide this. There we go. We just have that
hidden away in case anything goes horribly wrong. I'm going to apply the
mirror modifier here. Then I'm gonna
apply the solidify. And with the subdivision
surface still on. I'll tab into edit mode and let's add a couple of
edges right in here. I'm just going to scroll the mouse wheel and
add two like that. There we go. From here, what Let's do is duplicate this to
get that cushion. I'm going to turn
on the cage here. And then I'm just going
to hit the three key. And let's hit the C
key and then just select all of these
phases in here. Like that. Now I'm just going
to press we've got one selected there and
make sure we're okay. Yeah, I think that's okay. And then let's press
shift D and Enter. Then I'm going to
press the P key and separate by selection. Now it's its own object. If we tap back into object mode and just
select that one piece. Now I'm going to scale that in a bit and maybe
scale it in the z, so it's a little bit taller. Scale it in the x,
something like that. Just come through here and
get these points so it kind of matches the
back of the chair. So I'm gonna hit G2
times to slide this up. Then I'll press Sx
and scale out a bit. Now let's select
that whole thing. And I'll just extrude this out. So E and pull out like this. Now here's a fun trick. What I'm gonna do is just
select all of these. All of these in here. Let's make sure we have
them all selected. Need one here. I don't need these
two down here, but I'm gonna select
all of these now on the front and delete them. Delete and delete faces. And then I'm gonna select
all of this and spin it around a 180 degrees RZ 180. There we go. Now we've
got a bit of a cushion, a bit of padding there. So to flatten it up just a bit, I'll press SY and let's
bring this in like this. And then bring it back. And then we can do a little
bit of adjusting here. Listen now go in and just begin pulling some
of these back a bit. We could also take that
whole piece there, that whole edge, and
we could flatten it. We could press S Y 0 and
that will flatten that up. Then we could bring
it back like this. Then we could bring
these individual pieces back into the back of
the chair if we wanted. So just to kind of a
little roundabout way of getting these in
there fairly quickly. I'm just going to
select these now. Pull them back. We go. Maybe I'll grab this
edge right here, deselect these two points, and pull these back
just a bit like that. You see what I'm doing?
I'm just trying to get this to feel more
like a cushion. Maybe I'll select this and
control-click this point. And that'll select everything in-between those two points. Maybe like that actually, maybe I'll grab these two or
these three, I should say. All right, we've got the
back of the chair in. There may be a little bit
more adjusting we can do, but in the next video, Let's start on the
arms of the chair.
17. 017 Completing the Dining Chair: Now for the arms of the chair, it looks to me like we
could maybe begin with a cube right here
and then extrude up, then extrude back around to the back of the chair.
Let's try that. I think I'm gonna start on
this side just since we have it more visible here. So I'll press Shift a mesh cube and let's
scale down quite a bit. I'll go to the front view with numpad one and hit the G key. And let's move
this up into here. And I'll scale on
the x just a bit. I'll scale in the y SY. And let's move it forward. And it looks like it's
just a little bit behind the leg right
in here maybe. Looks like it goes
down to there. Then it looks like this
just comes up to here. Since it's got this
little thing right here, what Let's do is let's just
take this and bring it back. Don't let me take this face here and bring it
back like this. And then let's put an
edge loop control are where we think that
little ridge would be. Then let's select this face
here and extrude it out. Let's get this whole thing so
it's a little bit narrower. Sy, there we go. Let's select this now and
just hit E and pull this out. This is what we're
going to extrude up. So we've just got this hint of this little edge there, right? So then from here, let's take this and
extrude this up to here. Bring that up to here. Then it looks like it
kind of curves a bit. We're not going to really
do an actual curve. It'll be a couple of extrusion. So let's go to the front
view and let's just hit E and pull up and then just pull out like
this just a bit. And then let's
extrude up to here. And bring it up to say right
about right about here. Let's say it looks to me like it gets narrower here
in the y-axis as well. So let's do that. Let's press SY. Maybe this
one down here does too. Let's do that SY
just a little bit. Then if we take a look at
it from the front again, it looks like it comes out
and gets a little thicker. So what Let's do is
let's hit E and pull up. And I feel like we need to
add an edge loop in here. And then take this face
and extrude it out. So let's hit E and do that. And then if I take this
and pull it up like this, so I'm just trying to get
that basic shape there. Let's take a look at that. Let's just take a look at
that and see what we think. Well, in terms of the size, I feel like it's just
not quite big enough. So I'm just going
to hit the S key and scale it up a little bit. Also, I feel like it's not quite big enough
in the y-axis now, it looks like I went a
little bit too far there. So let me bring this out. This. Alright, so now
that we have this, let's begin extruding back toward the back
part of the chair. So I'll take these
two faces here and it just feels like I need to come up a little
bit higher here. It also feels like that
kind of bends a bit. So maybe I'll tilt it
just a bit like this. And maybe take this edge and bring it out just
a bit like this. Alright, so now let's try that. Let's take these two faces here. And let's hit the seven
key on the numpad. And let's just extrude this
straight back like this. And then let's hit the
S key and scale it in. Then let's bring it
back here a bit. And in like this, It's just kind of
in the back there. Then let's do a little
bit of work to kind of curve that because these kind of looked
like they curve out. To do that, I'm
just going to press Control R and add
an edge loop again. And once again kind
of pull it out Control R. Pull this
out, Control R here. So it just kind of bends
out a bit like that. All right, then let's add a subdivision surface
modifier and see if we can get these
more rounded curves. I feel like it's a
little bit thicker here. Let me tab back into Edit mode. Lets just grab
this edge here and see if we can just
pull this out. Will that work? Let me just grab this
and pull this out. Yeah, that might just work. Let's see how it
looks once we get a subdivision surface on there. Alright, let's select it and add modifier
subdivision surface. Now of course, it looks terrible and that's
to be expected. I'm going to smooth it. Then let's begin
adding edge loops here to kind of tighten
up the corners. So let me turn this
off the cage off so we can see it a little bit better where the
actual edges are. And let's just begin
maybe right up here. Let's begin here and
bring this forward. We get a tighter edge there. And then about here,
Let's do that. Yeah, that looks a
little bit better. Let's come down here and get
this one right down here. That's not bad there. Feel like we could
have something a little bit tighter in here. This yes. Could I think move
out a little bit again? I had done that once before, but maybe I'll do it
like this once again. Then up here, Let's add an edge loop right
here and bring this in. Let's add an edge loop
in the back here. Tighten that up a little bit. It feels like we could
use an edge or have this edge up here
come up just a bit. So what I'm gonna do is
select this edge right here, and then Control click
this edge right here. And that'll select the
entire edge between them. And let's just pull it
up just a little bit, give us a bit of that curve. Maybe moving out a
bit and there we go. All right, I think that
looks pretty good. Let's now take this and mirror
it over to the other side. So I'll just move that origin
over here to the 3D cursor. And then I'm going to use the
mirror modifier on this one just so I can do a little
adjusting if needed. So I'll come over here and
add a mirror modifier. There we go. All right, let's
begin cleaning this up and adding
everything together. Let's see what kind of
modifiers we have on these. So for the legs, we don't have
anything that's good. Okay, what about the base here? We've got a mirror, so let's apply that
for the seat cushion. We've got a mirror
and a subdivision, so let's add the mirror or
apply it, I should say. Let's also apply this. Let me turn off
optimal, hit the Z key, go to wireframe and that's
what it's going to look like. I think that's pretty good. Let's go ahead and apply this. Click apply there,
and that makes that permanent, that
polygon structure. Let's take a look
at this seat back. Let's go ahead and apply that. If I take this down, Yeah, it gets a little blocky, so I'm gonna go
ahead and apply that for the seat back
here, the wood part. Let's go ahead and apply that. And for the arms, we've got subdivision
and a mirror modifier. Let's take the mirror
up on top first, and let's apply that. Then. Let's apply the
subdivisions as well. Alright, so now let's select, I'll just select a
leg and then hit the, a key to select everything else. And you can see how many
pieces we have over here. Let's then combine this or join this all into one
object with Control J. And now let's give it a name. I'll call this dining chair. Let's call it that. We go and then we can bring back the
rest of the furniture. We can drag this into the
furniture Collection. And let's just take this coffee table and
move it to the side. Let's take this
chair and scale it down and get it about
the right height. Let's see what we think. There we go. We've got our dining chair. So I think for the next
piece of furniture, Let's begin on that Chesterfield
couch and chair set. That's coming up next.
18. 018 Beginning the Chesterfield Sofa: Now let's start working on
that Chesterfield Sofa. Let's go to Image open over
here and this one right here. Let's open this up. I'm going to press
Control Spacebar. And I'm gonna say right up front that we are not
going to go through and model every one of these little indented buttons here on the Chesterfield Sofa. We're going to let textures
in Substance Painter do this. I happen to know they've got some very nice
Chesterfield textures. So we're just going to use that. Which means here in Blender, we really only need to
get this basic shape. We don't need to worry about all the little details of the wrinkles and
the buttons, etc. So if we just press Control Spacebar and get that back to its
proper size here, let's go ahead and
hide these all o. And we don't think we need this plane zeros
01 anymore because that was the back of that dining chair just in
case I messed up there. But let's just hit Delete. We don't need that. Aldehyde, the reference object and the furniture collection. And I'll choose the scene
collection up there. And now let's create this bottom cube here and then extrude up for
the arms and the back. So let's just press Shift a
mesh cube and then I'll bring it up and press S and Z
and scale that down a bit. Let's hit the one key on
the numpad and bring this down to about where we think
it is, something like that. And I'll press S and
X and scale out. Let's just say it
begins like this. That seems to be about right. Maybe I'll hit the S key
and scale out just a bit. Yeah, so let's begin with this. Now as before, I will tab
into edit mode and press Control R and lit drop an
edge right down the center. I'll hit Enter two times, and then I'll press
Alt Z, the three key, and let's just click and drag
these faces on this side, hit Delete and delete faces. Then we can now come over to our Add Modifier drop-down
menu and click mirror. Let's go ahead and turn on clipping and turn on cage here. Alright, so now that
we've done that, here we are in edit
mode and now we can just press Control R and add an edge loop back here where the back of
the sofa will be. Let's press Control R
and add an edge over here where we think
the arms will be. I've left the back a
little bit thicker than the arms because I
think it leans back a bit. So let me show you what I mean. If we hit the three key and
select these faces here, I'm going to hit the
one key and let's go ahead and extrude these up. I'll hit E and pull these up. And the difficulty once again is we don't have
the cushion in yet. So it's hard to know exactly
how tall this should be. It's kinda hard to tell, but we're looking at
it from right here, the top of that cube
before the cushion begins. That may be about right. Let's go with that. Let's say then what we can do is these edges right up here. We can just push these back
just a little bit like this to get that kind
of leaning back there. Now to help us get
a better sense of how tall this should be, maybe we should go
ahead and just select this face here and duplicate it. Shift D Enter. And then I'm gonna hit the E key and just
extrude up like that. Now, this is a separate object. So if we just hover over this, say hover over this edge
and press the L key. Now we can see that that's a completely separate piece
of the object, I should say. Yeah. Alright, so is
that about right? Is that like that may be
a little bit too tall. Let me bring it down a bit. Once again, we can readjust
at any point in time. All right, so we've
got that now. Let's see if we can
get this kind of scrolled arm and I'm gonna do it in the same way we did
before just with extrusions. I'm going to press Control R and bring this up to
about here, let's say. Then I'll hit the three key
and select these faces here, and let's extrude these out. So I'm just going to hit the E key here and
then hit Enter. And then I'm gonna press
S and X and scale out in the extra two a little
bit to get these out. And then I'm going to
deselect these Shift-click. And now I'm going
to bring these out. So let's say it comes
out about like that. And now I've got these
pulled out so they're easier to select and I'm gonna
bring these out like that. All right, let's see
how we did there. That's pretty good. I think these can come out a
little bit more like that. Maybe. It's hard to know how far
out the back should be, but let's go ahead and just
pull that out like that. Alright, so we've got
that basic shape now. At this point, I think we
should go ahead and add a subdivision surface modifier. Right here. And of course it is extremely
ugly and that's fine. We expect that now. Let's press Control R and let's
add an edge loop in here. Kind of tighten that up a bit. Let's also add an
edge loop right here and bring this forward. Tighten that up. Now on the bottom, we could press Control
R and bring this down. I don't want it to
go all the way, but just kind of like that. We could add an
edge loop right in here and kind of
bring this up a bit. Tighten that up just a little
bit down here as well. I think we could probably
put one right in here. That's in the cushion. Well, that's fine. We'll need one there, but I wanted to do it out here. Here we go like that. Alright, so let's
go ahead and do that with a cushion too. Let's add some edge loops
to the cushion as well. So something like that. I already have one
on the bottom. Let's add one here, up here on top. Let's tab into object mode
and see how we're doing here. All right, I think
we're getting there. We've still got some work to do. I feel like these edges down here could maybe
come down a bit. Give us more of
that scroll there. Be like these edges up
here in the top could come up a bit to give us
more of that rounded top. I forgot one right here. We go. Let's do this. Maybe a little bit more of
a rounded top like that. Let's smooth it.
I'll right-click and choose Shade Smooth. Maybe there's a
little more we could do with the cushion here. Feel like we could add
one right in here, Let's say like this one in here and pull
it forward like that. Maybe pull this up like this. Maybe we need another one
in here so we can take these edges and kind of pull these up a little bit like that. That we could also maybe take this and take
it back a little bit. I just Alt clicked that
edge loop to move it back some and maybe take
this one down. It isn't quite so sharp
on the front there. Maybe we could take these
and bring these up. So this is a time and just
kinda go through and try and find ways to get it a little bit more
the way you want it. Maybe I'll select this whole
thing with the L key and press S and Z and scale
it up just a bit. We go something like that. Move it down a bit. Now I'll go ahead and
turn on the cage for the subdivision surface modifier and that helps just
a little bit there. I think we could maybe take
an edge or add an edge writing here and
tighten that up a bit. Let's add another level
to our subdivisions. See how that works. Yeah, I feel like that cleans
it up a little bit better. That's kind of nice. Now that we've done that, I feel like I want to work
on this a little bit more. Take this edge up a
little bit, I guess. Just try this curves
that just a bit more. You can take different
edges here and move them in or out to try
and get that curve. Now one thing I would
like to do is I happen to know that we're
going to UV map this at some point
and it looks like there's a scene that goes
up along this corner. So I'm wondering if I can take
an edge here and move this in so it's a little bit
tighter in this corner. Notice that there's
an edge here. If I Alt Shift click, there's an edge here. But they do not connect. And I think I'm gonna want
that seam going right along there diagonally at some
point when we UV map this for our texturing, what we can do is
use the knife tool. We can try that and see
if we can connect this. I'm going to hit
the one key so we can see the vertices here. Now, the knife
tool is over here, right in this toolbar, and you can see that the shortcut key is k. So
let's just come over here, press the K key and our
cursor changes to a knife. And let's just click here. Click here, pull that out, hit the Enter key, and that
adds an edge that face there. And these are now triangles. And triangles aren't
usually the greatest when we're using a subdivision
surface modifier. It usually wants to see
quads, four-sided polygons. But if we tap back
into object mode, it doesn't really tear it up. It actually, I think looks okay. What that allows us to
do is if we Alt click an edge right here
and Alt Shift click, you can see that edge goes
all the way around there. And that's, I think
what we're going to want when we UV map this. Alright, so we've got the basic shape now
in the next video, but let's do is create
these panels upfront. And once again, I'm not going
to create all the rivets. We're not gonna do that, but we're going to
create this panel. And the panel on the
front here at the bottom. And the feet that's
coming up next.
19. 019 Finishing the Chesterfield Sofa: Now let's work on these panels in the same way we
did with the chair. Let's just take
these faces here, maybe beginning here and
just go on up like this. And let's just duplicate
these off and use these. I'll press Shift D and Enter. And then let's just
bring these out some. And then let's split it
off as its own object. Just because I think it'll
be easier to work with. I hit the P key and
separate by selection. Then if we tap into object
mode and select it, we can now get rid of
the mirror modifier. Let's do that. I will also turn off the
subdivision surface view, the view port here just while we're getting it into shape, Let's hit the one key on the numpad and tab
into edit mode. And now we can just kind
of get this into shape. I don't know that we
need all of these edges. So maybe if we take
this and we could press Delete and dissolve edges, except there's one here. And I guess we can keep that. We could keep these around. Let's just see how that works. Then I'll select
everything and hit the S key and scale down, press S and X and make
it a little bit thinner. So I'm working on
this part right here. I feel like we could make it like this a little bit
thinner like that. And then I'll hit the one
key to go to vertex mode. And I'll just drag select
these and let's bring them up. Let's move these into place. So I'll hit the G key like this. Let's move these around and kinda get them so
they're a little bit more where we
think they should be. Maybe like that, Let's say. Once we've done that, let's
turn the subdivision surface view back on here and
let's take a look at it. Alright, now let's
grab some points and try and move these around. Maybe we need another
edge in here. Let's just press Control R
and add one right in there. Just so we get this turn
a little bit sharper. Maybe something like that. Then let's take this
edge right down here. I'll hit the two key and select that edge
and we can bring it down and tighten
that up just a bit. All right, let's take a look
at it. See what we think. How does that look? I
think that's about what I was hoping for,
something like that. Alright, with that done, then let's go back to Edge
mode with the two key and alt, click and Alt Shift
click all the way around here to select an edge
all the way around. And then let's just hit E and y and pull it back
just a bit like this. We could then take this and
move it back into the sofa. Let's do that. I'll
tab into edit mode, hit the a key, and
let's just pull it back into here like that. What do we think here? Yeah, that's okay. I feel like I want an edge
and therefore to be a little bit sharper,
Let's do that. Press Control R. Let's just add an edge right in
here, right there. Let's say. It's just
a little bit sharper. Alright, so we've got that. Now, what about
this front panel? Let's get that too. I guess we can mirror this over. Let's add a mirror modifier and just see how it looks there. Yeah, I think that's kinda
what I'm hoping for. And then for that
panel on the front, on the bottom, Let's just
select this face and this face. Let's then duplicate it. Shift D, move it out in
the y-axis just a bit. Let's separate it as its
own object with the P key. And then let's
select that object, just that new panel there. Let's turn off the views
of the subdivision. Let's do that and then let's
just get it into place. It looks like it's a
little bit higher here. Maybe I'll scale in the Z a bit, bring that up some
scale in the y. So it comes out to here. I'll hold the shift key down
so it moves a little slower. There we go. Then let's tab into edit mode. Select the edge all
the way around. And once again,
let's just hit EY and push that back in like that. Hit the a key and bring it
back into the sofa there. Maybe about like that. Now it's ugly. It's true. We could come over
here and turn on the subdivision view again. Do we need to? I think we need to do a
little bit of work here. So let's take this
edge right here. Let's just pull it over
to this side like this. And that really stretches
that out a little too much. I'm going to press Alt
Z and hit the one key. And let's bring this
back in like this. There we go. Then let's add some
edges in here. There we go. That's
what we need. I'm just going to add this. Now. I'm doing this with the subdivisions just because
I want kind of an edge, kind of a curved edge on this. And subdivisions are a
great way to do that. Maybe I will scale this in
the z just a little bit. S and Z, bring that out so
it's right on the bottom. Yeah, I kinda like
that actually. Ok. Then the last thing
we need to do, let me bring this up just a
little bit more like that. There we go. All right, So now what
Let's do is, well, let's add the little
feet here and it's really hard to know exactly what these are
supposed to look like, but it just looks like a
squished sphere to me. So let's just do that. Let's just squish a sphere. I'll press Shift a
mesh and UV sphere. And let's type in 16 for the segments and maybe
12 for the rings. Let's bring it out. Bring it up here so we
can kind of see it. If I hit the period key
on the numpad to zoom in, Let's tab into edit
mode and press Alt Z and go to face mode. And then I think what I'd
like to do is just grab these up here and shift and click and grab these
down here like this. Let me press Control
and deselect those. There we go. So just select
those faces on the top and the bottom and hit
Delete and delete faces. And then let's scale
it down quite a bit. Then let's bring it down. We'll just squish it. Maybe. I think the couch is a
little bit too tall. Bring that whole thing
down just a bit. I'm going to select
it over here. The cube, cube one, cube two, that's
all the couch here. So I'm going to
bring it down a bit. Then let's select that foot. I'm going to scale it in
just a little bit more. And then let's squish
it in the z-axis. Smc, bring that down like that. Let's say, let's try
that. How's that? Look, let's smooth it. Let's get it from
the side view here. Let's move it back a bit
like that. Move it up a bit. Maybe it could be squished
a little bit more. Yeah, just get that
in place there. Let's see how that works. Now let's move that back. Let's duplicate it. I'll hit the three key on the numpad to go
to the side view, I feel like we need to bring this down just a
little bit more. There we go. Then I'll select
that foot shift D, and let's move it in the back. Now I'm just assuming that's
the way it is in the back. We can't really see it. So we'll just have
to assume that. Then we can take these and move them over to
the other side. Shift dy, dx. And there we go and
move it over here. All right. There we have the basic
shape of the couch. Now for the chair, the
Chesterfield chair, if we go to Image and open
over here in the image editor, let me go to this view again. Control Spacebar. We've got these chairs, which is really pretty much
the same thing, just smaller. In the next video, what Let's do is let's
take this couch. We may need to combine
some pieces here. But before we finalize it, Let's use this couch, duplicate it, and create
one of those chairs.
20. 020 Creating the Chesterfield Chair: Well, as I mentioned, my
thought is that we take this couch and we use
it to create the chair. But I think we're
going to have to combine a few things
before we do that. So first of all, let's make sure we've got similar modifiers on
each of the objects. So to combine objects, we really need the modifier
stack to be similar. Here we've got a mirror
and a subdivision. Here we've got a
subdivision and a mirror. I'm just going to drag
that mirror up on top. So we have that for the
main part of the couch, we've got a mirror
and a subdivision. So it looks like the
three main pieces of the couch here have
similar modifiers. So I think we can then take
these and combine them. So I'm gonna select the panels, this front panel and the couch. And let's press Control J. And it looks like it
did it pretty well. There aren't any
really major problems here, so that's good. And this means that we can tab into edit mode and everything here is all in edit mode since it's
part of the same object. Now let me just take this
and change the name to sofa. And then let's duplicate this. I'll press Shift D and Enter. And now this sofa
001 is the chair. Alright, so now I'm gonna hide the four feet and the sofa. And here we have just the chair. Now if we tab into edit mode, go to the top view. Press Alt Z for X-ray. And I'm just going
to click and drag these edges right here
and move them in. Let's do that. Let's just move these in. You can see I'm just
beginning to make the chair. There's a love seat.
But you know what, I think we can probably
get rid of this edge here. Let's Alt click this. And I think this
is going to be too tight as it moves
into the center. Let's press Delete and
dissolve edges for that one. And then let's go back to the top view and
let's try this again. I'll grab this. Let's move these in. Let's see how we're doing here. What do you think Is
that about, right? Like it may still be a
little bit too wide, but I think maybe we
need to take a look at it in relation to the couch. So let's bring that back here. And maybe I'll take the sofa, couch and move it here. And that actually
looks pretty good. I feel like it's still just
a little bit too wide. So let's tab into edit mode.
21. 021 Beginning the Desk: Alright, let's think about
what else we can make here. I'm gonna come over
here to Image open, and let's take a look at
our reference images. And there's all kinds of
things we could do here. But I'm looking for
another big kind of sizable piece of furniture. We've done. How about something
like this, like the desk? There isn't I mean, we've got chairs and
there's this table here and a coffee table here. That looks like really the
only other kind of big, sizable piece of furniture. So let's work on this. Now this is an
interesting thing. Let's press Control Spacebar
and take a look at it. So the good thing is, is it's mirrored both in
the x-axis and in the y. So we may not mirrored on the y, but things on this side are probably going
to happen here. We don't really know what
the back looks like. It isn't gonna have
drawers, of course, but I guess it's going to
have panels like this. These handles here. I don't think I really
wanted to go into great detail with
these things here. Let's maybe just
create one of these. And then we can
duplicate them for this and for the handles for
the drawers down here. I don't want to
deal with the key. I don't care about that. It also looks like
there's a kind of a panel on the back here. This certainly looks doable. I mean, it is a
symmetrical object and we're gonna be doing
a lot of extrusion. Insets will create the top and the bottom here in very
much the same way that we created the legs
on the chairs. Yeah, I think this
is this is good. Let's work on this one. I guess we don't need our
furniture arrangement here. Let's go ahead and
hide all of this. Once again, I liked
that x-axis over here on the right
side to begin with, just so I know which
way I'm facing. So to begin with, I think what I'm gonna do is
begin with this top cube. We've got a rectangle here. We've got just this
top piece right here. Then we'll mirror that cube and then extrude down
here for the drawers. So let's do that. I will press Shift a mesh cube. Let's bring this up. Let's scale it in the z here. Then let's scale
it out in the x. Let me press sx. Let's move this out
about like this. And maybe bring it
up about like that. Once again, will be
adjusting this as we go. But I'm just trying to get that basic shape
there if you'd like, maybe it's a little bit longer. Tumble around. I feel like it's a little
bit wider in the y here, something like that, Let's say. Then I'll tab into
edit mode and press Control R and drop an edge
right down the center here, I'll hit the Enter key twice. I'll press Alt Z and the
three key to go to face mode. And let's delete 1.5
here, delete faces. And then we can add our
mirror modifier here. Let's turn on clipping. I'll go ahead and turn
on the cage here. Now, let's add an edge to define where this drawer section is going to be extruded down. So let's press
Control R and maybe, maybe about like that. Then let's just hit the
three key, select that face. And then let's just hit
E and pull this down. And I'm not going to pull
it all the way down. I'm gonna give it some room. So we have a little bit of
room to do this right here. So maybe something
like about here, let's say, alright, I think let's go ahead
and begin with the top. I'll select these
two and I just want to get this right here. I'm not so concerned about
this piece right here that'll come but
this right up here. Now I'll just hit E and S and let's scale out
a bit like this. It looks pretty even
here, That's good. That may be a little
bit too much. Let me scale in just
a bit more like that. All right, Then let's
get this little, I'm not gonna do all
the little curves here, but let's just hit E and pull
up and get this right here. Then let's inset into this. So I'll hit I and let's pull in some and is that even it's
really not even there, is it. So I think we may have
an issue with our scale. Let's press Control
Z and go back. What I'm gonna do
is tab back into object mode and take a look
at the scale over here. You can see because we pulled that original cube
in the x and y, we've got non-uniform
values in the scale. So to help our insects be
a little more uniform, Let's apply the scale here. In object mode,
I'm going to press Control a and apply the scale. When we do that, we get all 1s, which means this now is the
default scale of this object. I'm going to tab back into edit mode and then
let's try that again. Let's hit I and NSAID
in and now look how even the borders are and that's good,
that's what we want. But look in the center there, we have a border in the center. And if you look up at the top, you can see border
or the B key is on. So we want to turn that off. I'll hit the B key there. And now that closes off
that border in the center. And let's maybe get
this about right here, Let's say, alright, and then I'm just going to extrude
up one or two times. I'll hit E and pull
up just a little. Then let's instead
again, pull that in. Then let's hit E and pull up
just a bit again like that. All right. Let's take a look at that. Yeah, I think
that's pretty good. That's kinda what I wanted. Now. I'm not going to get, or I'm not going
to do these curves here on the corner until we have just about
everything in. Because I went to preserve
quads throughout this or four-sided polygons
throughout this entire object to make sure that we can insert edge loops all the way around. And sometimes when we bevel an object or
an edge or corner, we can get in guns or polygons
with more than four sides. And sometimes that can be
a problem that really only affects the top and
bottom of the edge. But just in case I'm
gonna wait on that, I'm gonna wait on those
devils until near the end to get It's
curves on the corners. All right, so now let's think
about the drawers here. We've got this ridge
right along here. Let's see if we can add
something for that. I'll tab into edit
mode and press Control R. And let's just add an
edge right along in here, something like in there. And then let's go to face mode, alt click between two of the faces and let's
extrude this out. I'm just going to hit E and S, and let's just scale this
out just a bit like that. How did we do? On all sides? It looks like it came
out in a uniform way. That's good. We've got
that now that piece there. How about down here?
Let's work on the bottom. Let's zoom in here. And let's work on this. If we tab into edit
mode and hit that three key and select that
face on the bottom. Let's go to the
front view and let's just kind of rough in this. Let's get this ridge right here. I'll hit ES and let's scale out. And then E and pull down. Then ENS, and let's
scale in just a bit. There we go. Now let's come down and
kind of at an angle here, pull straight down and then
let's scale out just a bit. It looks like I shouldn't
go down a little bit farther like that, right? Let's try that. Then. We've got this ridge here. It looks like there's a small
one and then a big one. So let's go ahead and try
and get those in here. Es bringing it out some
and then extrude down. And then let's do that again. E and S and bring it out. I think I'm going to pull
it down just a smidge. Scale it out a
little more maybe. And then let's just bring
this straight down. I know there are curves there, but I'm not going to
get that detailed with this at the bottom
of the desk here. I'll hit E S, and let's scale in a bit. Then let's just pull this
straight down like that. All right. So we've got the
bottom of the desk there. I feel like it could feel like this whole piece
could come up just a bit. So let's go to
x-ray view with Alt Z. I'll hit the one key and let's just drag
these straight up. Let me just move
these up like this. There we go. We've got the basic
shape of the desk now, in the next video, Let's begin working on the drawers and the
panels here on the side.
22. 022 Adding the Drawers to the Desk: Now let's work on the
drawers of this desk. It looks like we could insert an edge loop up
here near the top. The drawers, it looks
like come right down to this ridge right there. So that's It's fine. All right. Let's go ahead and
add an edge loop up there. Maybe right about in here, Let's say maybe about like that. Then let's take a look
at the sides here. So it looks like it's
fairly close to the inside. But on the outside
we're going to need to leave some room for that rounded part
there for the bevel. Let's go ahead and add an
edge loop right in here, pretty close to the side. And then let's also
add one out here. That's going to give
it some breathing room on that curve there,
something like that. Now in addition, we need
these three drawers. So these three drawers are
really bounded by six edges, aren't they got 123456. So we can add six edges here. We could press Control R
and scroll the mouse wheel. And if we look way down on the very bottom of the
Blender interface, you can see number
of cuts there. And let's take it to six by scrolling the mouse wheel and
then hit Enter two times. Then what I'll do is
I'll scale them into Z sc and I want to pull them back so that top edge and the bottom edge or in
about the right place. So maybe let's take
him to about here. I'm looking at this part and this part in relation
to here and here. Okay, So now what we need to do is take these
edges here and here, and here and here, and scale them into z. So there the appropriate
width between the drawers. The problem is, is if
we scaled in the z currently they would all
just collapse together. And now we do have a pivot point option here
called individual origins. And if we choose that
and try S and Z, we really don't get anything. Blender is just trying to scale each individual edge and
it isn't getting very far. With individual
origins selected, what we could do
is hit the three key to go to face mode and Alt click between two
faces here and then Alt Shift click
between two there. Now, even though the center
of this selection is here, since we have individual
origins selected, it will scale each one
of these individually. If we press S and Z, we begin scaling that
down and you can see those go down together. And the nice thing about it is they're exactly
the same size. If we take it down
to say about here. Now we've got drawers
pretty much the same size. All right, so now for the actual drawers,
What do we have here? It looks like we've
got extrusions out and then n sets in. So we could do a couple of DES. But because of the individual
origins item here, we don't have to do
them one at a time. We can do them all at once. So let's just select everything
that should be a drawer. All of these analysts just then begin extruding
in just a bit and then come back out and try
and get something that looks kind of like this trim
around each of the drawers. First of all, let's
actually extrude in to get this little
edge all the way around. So let's just hit E and push
in just the tiniest bit. Then let's inset this
by pressing the I key, and then let's insert this, but look at the center
drawer Once again, we've got that border on, so let's hit the B key
to close that off. Now I'm going to
bring it back out, something about what
it really tiny. So I'm gonna hold the Shift key down and go to
about right there. So I really made it
pretty, pretty small. Now I'm going to
extrude back out. I'll hit E and pull out. I'm gonna hold that
shift key down. I'm gonna pull it out
just a bit like that. It's coming out from the
main desk just a bit. Now let's begin getting
this stuff in here. And I don't know
that we need to do every single little groove, but we can kind of hint at it. We can hit the I key and go
in just a bit like this. And then let's hit
E and push in. And then we can press I
and bring it in a little bit more and then
press E and go in. And maybe let's do one
more I in just a bit. Then let's press E and push
in just the tiniest amount. There we go. All right, so we've got the basic outline of the drawers there
now that's pretty good. Let's do that same thing for the side panels and for what I imagined or
the back panels too. We don't really know for sure, but I imagine that we've got something similar to
this on the back. So let's do that. Let's. A tab into edit mode again, and we should first of all add edge loops to reserve space for that bevel
on the corners. So I'll press Control
R and let's bring this up about right here. Then back here we've
got an edge right here. So let's do one fairly
similar to this right here like that. Now we've got that kind
of blocked off here. These are a little
bit different. We're probably going
to have to do all of them and then de-select everything but these
side panels to get this little extra piece here. So let's first select this face and then
we'll select, well, it looks like we
should go ahead and select all of this right down, all the way down to
the bottom here. And then this one
and all of these. Then we should probably
select this as well. Let's just try and
do this all at once using that individual origins, which is going to allow
every single one of these to extrude an NSAID
in the same way. Now, let's first of all inset in just a tiny bit and then we'll come back out. So I'm gonna hit the I key. Come in just a little
bit like this. And we doing on
the boundary here. Yeah, that's good. Okay,
that's still closed up. Now let's bring it out. I'll hit E and bring it out
a bit, something like that. Let's get a couple
of ridges here. So let's hit, I, bring it in. Ie, go in. I said in just a little bit. Push that in a bit. Let's try that. I feel like we
could use one more. Let's try it. I'm gonna hit I and go in
just a tiny little bit again. And then E and push
in just a bit there. Okay, so let's see
how we're doing here. Alright, I think
that's pretty good. It's kind of hard to see with this particular shading
in the viewport. So at least for now, what
Let's do is come up here and pull this viewport
shading menu down. And let's turn on cavity. That just gives us a little bit of information along the edges. Well, let's see what
else we can do here. Let's try turning
on shadow as well. Helps a little bit just
so we can see those edges just a little bit better
as we're doing this. So I think those are okay
for now. For the top. For the bottom, I'd like to add that extra panel and
I think that's gonna happen for these
back here as well. Question mark. Not sure. Should we add this back
here as well as here? Sure. Why not? Let's go
ahead and do it. How is anyone gonna
prove us wrong? We can't see the back of it. So let's select all of these. Then while it's do
from here is hit, I am inset in quite
a bit like this. We can't go too far, can we? Because we're going to
cross that line there. So instead of doing this, I'm going to press Control Z. Then perhaps list, insert
two edge loops here. Then if we scan out in the y, we can see we can't
really do much because we've got individual
origins still on. Let's go back to median point. And I'll hit S and Y. And let's scale these
out to about here. I'm just doing it
so they're pretty much even with this here. Then let's also do that here.
What's that going to do? That's going to insert two edge loops
through the drawers. That shouldn't be a problem. I don't think Let's go
ahead and try that. Or if we don't want to, we don't have to write. I just said no one
can prove us wrong. So let's just do that
on the side here. Let's just do it on the sides
and then we won't get into any trouble by trying to add any more edge loops
through the drawers here. With this, now, I'm
going to hit the I key and bring this in and we don't get into that
problem until we go away and like that.
So that's good. So maybe right
about in like this. And then I'll hit
the I key again and let's take it in just a
little bit like this. Then what I'll do is Alt click between two of these
faces here to select. Then let's just
extrude this out. Let's just hit E and pull that
out just a bit like that. Now what Let's do is let's work on the bevels
on each corner. We've pretty much got
all of the detail in. Now it's time for this here. I will tab into edit
mode and let's go to edge mode and alt click
this edge right here. We'll Alt Shift click
this edge here. Now let's bevel this. Let's press Control
B and pull out. Let's scroll the
mouse wheel a bit, add some edges to that. And let's click and
see how that works. Oh, we better turn
off cavity here. Let's turn this off. There we go. Then let's smooth it
and see how it looks. I will select it and
right-click and shade smooth. And of course that looks awful. Let's turn on auto smooth and that looks
quite a bit better. Now, we've got sent to oh, that's because of the
shadow is turn off. Shadow. There. There we go. Alright, so now we've got
the basics of the desk. In the next video, what lists do is work on the drawer poles. And then also this
panel on the back here.
23. 023 Finishing the Desk: Let's now close off the back. We've got this piece right here. I think it's just,
I think we can just put a cube basically
in the back here. Let's press Shift a mesh cube and then I'll go
to the back view. So instead of one for the
front view list press Control one for the back
orthographic view here. And I'm just going to pull this up and get it the right size. Maybe I will tab into edit mode, press Alt Z and hit the one key. And I'll drag select these here. Bring them up about like that. At the a key scale out in
the x-axis with S and X. Maybe bring this
up a little bit. Just get that in place there and then we can
scale it in the y. Bring that in a
little bit like this. And then let's bring it out. Maybe about like that. Let's see what that looks like. Yeah, maybe it's
something like that. And then we could take that and duplicate it
and create these pieces. So I'm going to first move this origin back into the
center of the geometry. Come up here to object set
origin, origin to geometry. Then let's press shift
D. Pull this out a bit. Let's scale it in the x. And then we can just maybe move it straight over
here to the side. I'm gonna hit the period key
on the numpad to zoom in. And we just need to pull
it back a little bit. On this side. Let's see. Maybe right
about there like that. Then we can just take this
move that origin to 3D cursor. And then we could duplicate
it by pressing Shift D, inter Control M, the
X key, and enter. Now we've got those pieces
in for the drawer poles. As I said, I think
I'm just going to create one of these and then duplicate it for
all of the others. I'm not going to worry about
this kind of thing here. Let's just hide everything. First of all, let's begin with a cylinder shift
day mesh cylinder. I'll take the number of
vertices or sides down to 16. I'll go ahead and leave in guns on the top and the bottom. Hit the one key, and
I'll scale down a bit. Let's bring this up. And what I'm gonna do
is just kind of go from there back forward. So begin back here and then try and get something
that looks kind of like that. It's really not possible to know exactly how that looks
back behind there, but we can kind
of give it a try. I'll hit the I key and
scale in just a bit. Then let's do that again. I'll hit E and bring that up. And then I come in
a little bit more. I'll hit E and
come up like that. Then let's get this part here. Let's say we press E
and then S like that, and then E and S out like this. Then let's just go straight up. Maybe a couple of
ridges in here. We could press E and
then S, then he, s and E. Maybe let's
do one more like this. So now that we've done that, now that we've
added these edges, what we could do is just
add a few other edges, like maybe one right in here. And then we could just scale
that in kind of like that. And that gives us that
edge like this here we could take in like
this and then scale. And that gives us that. Maybe we want two more in here. Let me put two more here. Maybe I'll take this one
and scale it out like this. Then let's take this one
and maybe just bring it up. And then just scale
it in like this. So we get a couple
of edges there. Now we could give a little bit of an
edge right here if we press Control B and just kind of expand
that in like that. Now that we've got that,
it looks like this is a little bit too long, so I'll press Alt Z to go to x-ray mode and kind of bring that down just a bit like that. Alright, so we've got that now. Let's move that origin
into the 3D cursor there. Set origin, origin to 3D cursor. Then let's bring
everything else back. I'll just turn on the
eye icons over here. Now let's begin to
get this in place. So if we pull this out, maybe turn it in the x-axis, our x 90, and hit Enter. And then let's go
to the front view. For this, I'll just press the
Z key and go to wireframe. And then let's bring this up. Kind of get it in the
center here and scale it down until we think it's
about the right size. Let me zoom out over here
and just kind of get a sense of how this should look. I'll press Z and go
to Solid mode again. And then let's take this and just drag it
straight into here, the period key on the
numpad to zoom in. And let's just bring it
right into here now. Is that about right? All right. I think that's pretty good. Malleolus do is
try and get these in the center of
each of the drawers. And to do that, we can use our 3D cursor. So for this one here, Let's hit the three key. Go to face mode and
select this face here. And our move manipulator is right there so we
can snap the cursor, the 3D cursor to that point
by pressing Shift S2. Now that that cursor is there, I can tap back into object
mode, select that object, and then we can
press Shift S and the eight key and
snap that object, that selection to the 3D cursor. Now that's right in
the center there. Let's do that again. Let's select this face
over here, shift S2. Then let's select this, duplicate it and snap
it over to here. But first I think
I'm going to smooth it before we begin
duplicating it. Let's smooth it. I'll go to the object
data properties. Turn on auto smooth. If we drag this up a bit. That's kind of nice there, but I feel like I want those edges to be a
little bit stronger. A little bit more
prominent there. What if we just
grabbed these edges? Alt click here and
Alt Shift click here. And let's make these sharp. To do that, we can go
to our edges menu here, or of course we can
press Control E. We can come down here
and choose mark sharp. And when we do that
just says to Blender for these edges,
ignore any smoothing. And what that does
is it just gives us a little bit more definition
on those drawer poles there. Let's try that. All right, so now
that we've done that, got it the way we want it, Let's begin duplicating
it for the others. So for this, let's
press Shift and Enter. And then let's press
Shift S and choose selection to cursor or the
eight key. There we go. Now we can do that again. We can take this face
here, press Shift S2, grab this Shift and Enter, and then Shift S
and the eight key. Alright, so let's do that again. Here. Shift S2,
select this shift D, Enter Shift S eight. There we go. Select this shift S2, tab back into object mode. Select this shift D, Enter Shift S eight. And there we go. Shift S1 to put that cursor back in the
center of the grid. And there we go. Now we've got our drawer
pulls on one side and recall that the desk object has
a mirror modifier on it. So if we selected all of these and added these
objects to the desk, object shift select the desk. Now if we press Control J, they get mirrored over to the other side. And there we go. Now to get this all
into one piece, Let's go ahead and apply
that mirror modifier here. Pull down over here
and click Apply. Now we can take
these three pieces, this, this and this. We can add it to the desk, select the desk Control J. And there we go. Now, let's take this and move the origin to 3D cursor in
the center of the grid. This then change the name
here in the outliner. Then let's bring back everything else and see how
we're doing here. Well, once again,
a little too big, of course, that's fine. So now what let's do this, Let's scale it down till
it's about the right size. It's kind of hard to tell. What let's do here. I'm going to take this
and I'm gonna spin it around with RZ 1 eighth 0. Then I'll take one of these
chairs just as a test, just press shift D and
let's move it over here. And then I'll press R9 0. Whoop, wrong way. Hit the Minus key
and it'll spin back the other way and
then press enter. Now let's see what we have here. I'm gonna move it over a bit. Let's see, Is this
about the right size? Now it feels like the
desk is just a little bit too big here for the chair. Let's scale it down a bit. Well, that slide under yeah, that will scale it down
a little bit more. There you go. Now let's bring the
character overrule it, see how big he is here. What do you think
there's that about how tall a desk would be? Yeah, that's pretty
good, I think. Alright. Let me hide that
character again. So here is our collection
of furniture so far. Well, let me drag the desk into the collection for
the furniture. Yeah, we're getting there. I don't think I like this
particular chair for the desk. So in the next video, Let's start working on an
office chair for the desk.
24. 024 Beginning the Desk Chair: Now let's work on the office
chair or the desk chair. And I've got one I've
got a couple here. I've got this one. I've got this one. Since we've already
done or going to have some sort of a Chesterfield
pattern on the chair. And so far Let's work
on this one here. Open that up and
let's take a look at it Control Spacebar. And one of the things that I realized is that
this is just gonna be pushed up to the
desk for really not going to see the
front of the chair. It's really going to
be more the top and the back that will
see the sides, I guess, but the front really isn't going to be that visible. So I don't know that
I'm gonna work too hard to get this kind of
scrolled feature here. But I think we can begin in
a similar way with a cube on the bottom and then extrude
up for the arms and the back. But I think in
addition to putting a cushion here on the seat, I'd like to put a cushion
here and even one up here. Let's give this a try
Control Spacebar again. Let's hide our furniture. I'll spin around so the
x-axis is on the right. Once again, just what I do. You don't have to, but
that's just what I do. I'm going to press Shift
a and go to Mesh cube. Let's maybe scale it down
a bit, scaling the Z. And I want to get this
bottom piece right here, this kind of thin
part right there. So let me hit the one key on the numpad and maybe
bring it down. Once again, we'll be continuing
to adjust this as we go. But let's just begin with
something like this. Maybe it should be
a little bit wider like that to give room
for the arms here. Maybe a little bit deeper
for the back of the chair. And let's give it a little
bit of room for that. Now let's go ahead and add an edge down the
center with Control R. And I'll hit the Enter
key two times to make sure it's straight
down the center. I'll press Alt Z
and hit the three key to go to face mode. And I'll click and
drag, delete this side, delete faces, and then let's
add a mirror modifier to it. Turn on clipping, and let's
turn on our cage here. Alright, z. Here we go. First of all, let's add an edge to define the arms of the chair. And they're actually
pretty thin. And then it kind of
scrolls out like this. So maybe something like that. Then the back of the chair, I'll press Control R and
let's put one back here. It's actually looks a
little bit thicker, but it's part of that is that cushion there that's
kind of at an angle. Alright, so let's go
with this and let's hit the three key and
select these faces here. Let's hit E and pull up. So maybe that's about the
height of the seat cushion. And then we go up a little
bit more than that. And then there we go, maybe something like that. Now once again, I'm looking at this and I feel like it needs
to be a little bit wider. So I'll do that. And then let's extend on up. For the back of the chair, I'll hit the three key
to go to the side view, hit E. Let's pull this up. And we want it to be
difficult to say yet, but let's begin right here and then I'll pull this
back like this. And then I will go to
x-ray view and kind of pull these back as
well, something like that. And these as well, Let's pull these bank just to
get things kind of inline. Actually, instead of
pulling these back, why don't we take this
and move these forward? There we go. That gives
us a nice line there. I think that's
looking pretty good. I feel like the top still needs to be a
little bit taller. I'll hit the G key and move this up just a little bit more. Let's take a look. Yeah, I
think that's getting there. Okay, so then let's take
this face right here. And once again, let's
press shift D and Z, and I'll bring it up just a bit. And then let's extrude it, hit E and pull up to get that basic shape
for the cushion. And then let's just begin
adding some edge loops here. I think we will
need one right in here for that scroll work here. And I think it looks like it
doesn't go all the way back. So I'll just use
this face here to extrude out in the x-axis,
something like that. In addition, we've got this
little curve right here along the side on
the top right here. Maybe let's add an
edge loop in here. And then let's take this edge right here or
this face, I should say. And let's just extrude
this out like this. And then I will just grab some edges here that's
like an edge on the top. Just go to the side view, hit the G key and
move this down. And let's grab
this edge as well. Hit the G key and maybe move this up just a bit like that. We're just beginning
that general shape there on the sides. And we'll then add a pillow
there here pretty soon. All right. I think before we add a
subdivision surface modifier, I'll just bring this down
just a little bit like this. I think let's go ahead and add that subdivision
surface modifier and see how ugly
it's going to get. Come over here, modifier,
subdivision surface. I'm going to turn on the cage. I'm gonna keep it
at one for now. Let's see if we can do this
with subdivision level one. I will smooth it. Let's begin just adding
some edge loops here. Let's bring this
forward here like this. Now I want to try and remember that this kind of goes in here, but I don't think I want
to do that quite yet. Let's add an edge loop back here to kind
of tighten this up. We can add one in here. We can add one vertically here. So I'm just trying to add
all the edges to get this to tighten up a
little bit more here. We can add an edge down here. And one down here. We could maybe add one
right in here. We go. Up in here. It looks like these things could stand to have at least
one edge through them. Let's try that like this. All right, I think that helps. Then while we're here, we could take this
edge maybe and just pull it up a little bit to start that roundedness
of the arm there. So maybe I'll grab these three edges to and
pull these up a bit. Maybe take these three, I'll select one and press
Control and click to select everything in
between there and maybe bring that down a bit. See, yeah, we could
maybe bring that there. And these three here, just go to the
front view and hit the G key and find where we can get that a little
bit more rounded there. And then let's take an edge and bring this up
into here like that. Alright, so we're just getting
that basic shape there. Feel like we could bring this one of these up
a little bit more. Or actually maybe we could take these three bases and pull up a bit like
that. Let's try that. Then of course our pillow, we need to do a little
bit of work on that. Let's add some edges here. Maybe one back here, that we could take
it with the L key. We could hover over it and press the L key and press S and T, scale it up a bit. We could maybe even
take this whole thing, kind of pull it out like this. We could scale it in the y SY, bring it out like that. Just so we're getting a
little bit more volume to that cushion there. Feel like maybe we should bring these out just a
little bit more. We go. Let's also add an edge
back in here like this to kind of give
it a little bit more of a corner
here on the back, maybe something like this. Alright, so now what we
can do is begin using some faces on this to
bring out these cushions. So first of all, I'll just maybe
select these faces in here and maybe
around here like this. And let's duplicate
these shift D Enter. And maybe I'll hit the S key and scale them up just a
little bit like that. Move them forward to smudge. And then let's split this out as its own object just so we can work with it a
little bit easier. I'll hit the P key and
separate by selection. Tab back into object mode. And let's select that and
tap back into edit mode. Alright, so now we
take this edge. You could begin kind of
moving this back like this. And maybe this edge here, we could begin moving it back. So we're just getting some edges in here to kind of
create this shape. Let's add an edge
loop writing here. Maybe bring that out as smudge, and let's bring this one up. It looks like it ends right
about here, right in here. Now that we've got that, maybe I should add one
more edge in here. Let's try this just so we have a little bit
more to work with. All right, So there we go. Now, let's take
this whole thing. And instead of adding thickness
using the extrude tool, Let's add some thickness
with the solidify modifier. So over here in the
modifiers panel, we can click this
and choose solidify. Now I'm gonna take
this and drag it up above the subdivisions
currently like that. Then if we click and drag in
the thickness field here, let me move this over here. We can click and drag and that thickness field
and we're going in now let's bring it
back out like this and we can kind of
bring it out like that. Now we can also click
even thickness here, but that really doesn't give us the kind of even thickness
we'd want on this. And I think the
problem is the scale. Let's tab back into object mode and take a look at the scale, and sure enough it
is non-uniform. So to apply the scale, Let's press Control a
and apply the scale. Now it's all ones. And now that thickness is
a whole lot better there. Yeah, that's, that's the
kind of thing we want here. Now let's tap back
into edit mode. We can bring this whole
thing down a bit. We can bring the thickness
in just a bit if we want something like that, maybe I'll move this it forward. Now we've got a bit of
thickness here that we can use to shape that cushion
a little bit better. I'm going to scale
this in the y SY to kind of flatten
it up just a bit. We go maybe move it
back a little bit. Now before we begin trying
to move edges around, we're going to need to apply
the solidify modifier. But there are a couple of considerations that
we need to deal with. One is this mirror modifier
on the top of the stack. In the next video, we will talk about that
and what we need to do before we apply the
modifier underneath it.
25. 025 Creating the Cushions of the Desk Chair: Now we've talked a bit about
the modifier stack and how the order of modifiers can change the effect
that they have. So if I took this solidify and drag
it up above the mirror, you can see something happening
here and we come in here. What's happening is there
is a face right in here. There is a face being created
right in the middle here. I don't know if you can
see that. You can see the little dots right here. And if I take that
solidifying and drag it down, it goes away. So we really don't want faces on the interior of
our models like that. So how do we avoid doing that? Because if I just applied
this solidify here, it would create
that interior face because it's below
the mirror modifier. What we really need
to do is apply the mirror before we
apply the solidify. So let's go ahead and do that. Keeping in mind that if we
want the mirror back on it, we're gonna have to delete
half and then reapply it. Alright, so let's come
over here and click Apply. And we can't do this because we're in edit mode as
the error says here, Let's Come over here, tab into object mode. And now let's come over
here and apply the mirror. There we go. Now if we tap back into
edit mode and go to Alt Z, we can see we do not have those interior faces
and that's good. Now we can apply our solidify, but once again, I need
to be in object mode. So let's come over here and
apply the solidify modifier. Now, this is all one object. This is all polygons. Now, we can come
in here and begin selecting edges and adjusting
this as we need to. Now if we feel like
we need to be able to modify one side and have
the other side mirrored over. We can do that. However, we still need to
delete 1.5 delete faces, and then add a mirror here. And there we go. We can turn on our cage here. And we probably need to
move this mirror up to the top of the stack because it's mirroring our subdivisions. You can see that here, how the dots are doubled up. Let's move the mirror
up to the top. And there we go. Now
that cleaned it up. Just another reminder to keep
an eye on what is happening to your mesh regarding the order of modifiers
in the modifier stack. Alright, so let's go back now. We can of course select one side and the other
side comes along. So I could select, say, a face here and do a little bit of adjusting and
maybe here as well. So you can see now we
can go through and begin getting the
shape that we want. I think back here, I will take these faces here and kind of
move these in a bit. Then take these edges here and move these
in a bit like this. Just so it kind of goes into
the back of little smoother. I think I would like to
take these edges and move them back,
something like that. There we go. Yeah. Just so it kind of
curls around like that. Maybe I'll take this and
scale it out in the x Sx, bring it out just a bit. There we go. Now we've got that top part for the
middle cushion here. Let's pretty much
do the same thing. Let's go in and
let's select faces, then give it a
solidify modifier, do some adjusting, etc. So let's press shift D
and Y and I'll pull it out some list then split
it off as its own object, the P key and separate by selection tab into object mode and just select that new object. Now let's move these edges around till we get it
about the way we went. I'm going to hit G2 times
and that will slide that edge along the
other edges there. Alt click here and G2
times and slide that edge. Let's see what we got here. Yeah, that looks pretty good. Now for this, I could just
hit Extrude and pull it out. The reason why I use
the solidify modifier for this on top was
because it was curved. And trying to extrude that in all directions can
be a little tricky. I just used the solidify
so that it would expand inline or conform
to the existing shape. For this, I can
just hit Extrude. Let's just do that, hit E and pull out like that. Now we can select
the whole thing. Let's tilt it a bit in the x, r x like that. And let's bring it back
in some like that. Now, we can do a
little work here, kind of making this
look more like we want. So let's take, say these edges here and I'll
pull them out just a bit. Maybe I'll take this and hit
G2 times and slide it down. It like that. Maybe I'll do that here G2 times
and slide it up. Then these two, Let's
just bring out like that kinda tightened
the sides a bit. Let's take a look at it. Yeah, I think we're
getting there. Let me bring it
back a little bit. Maybe bring it down some. Alright, so I think
I want to try and pull these in
just a little bit. Let's see if we can
make this work. I'm not sure that we can. I will take these faces and
maybe these faces here. And let's see if we can
just drag them back. Let's try this. Something like that. Okay, Then if I added another edge maybe down
here and pull that up. Let's see what we think here. Getting a little tight
in there, isn't it? Let's undo this and
try one right in here. Alright. Then we could maybe take these edges here and
pull them back a bit, pull them down some,
maybe like this. Let's see what that does to it. Let's take these
faces all the way around and I'm just going
to bring them up like that. That might actually
work if we put a little panel right in here like we've done before with
these kinds of things here. That might work. Alright? Once again, it's going to
be pushed up to the desk, so I'm not even sure
that we need that. But I think what Let's
do is in the next video, let's work on the legs of
the chair where we're gonna have some fun with our
individual origins and 3D cursor pivot point here as we extrude these
out from a center post. So let's work on
that. Coming up next.
26. 026 Modeling the Legs of the Desk Chair: All right, Let's start working
on the legs of the chair. Now, I'm not gonna do all of the little mechanisms
underneath here that I don't think
is really necessary. All I'm gonna do is just
this center post here. And then let's also extrude
out to get the legs. So what let's do first is
just begin with a cylinder. Shift, a mesh cylinder. For the number of sides, I would usually default
to something like 16. However, this has five legs. What we should
really probably do is make the number of sides
here divisible by five. I'm gonna change
this from 16 to 15. Then I'm also going to
take away the cat fills. So I'm gonna choose
nothing for the cat fills, so we have no polygons on
the top or the bottom. All right, so I think
that's pretty good. Let's take that and scale
it down quite a bit. I'm gonna hit the one key
on the numpad to go to the front view and then
I'll scale in the z. Let's bring this up and get it where we think
it needs to be. So let's just say that's
about what we want. I think maybe I wanted a
little bit thicker than that. To do that I'll press the S
key and then press Shift Z, turn off the z-axis and then scale out just a
little bit like that. Alright, let's go
with that for now. And then what I'm
gonna do is press Control R and add an edge loop in here
and maybe something about like that and this piece right here that the
legs are coming out of, That's what I want to get. So what I'll do is
I'll press Alt, click between two of the faces, and then press
Shift D and enter. Then once again we can press Shift Z and scale out
just a bit like that. Maybe I'll pull it
up a smidge and then let's split it
out as its own object. I'll press the P key and
separate by selection, tab back into object mode. And there it is. Now, I also want to add a little bit of a
top and a bottom here. So I'm just going
to select these two edges and I'm going
to extrude them in S, Shift Z. And now extrude them
in like that just to get some sort of closure
there between the two. All right, with this, now, let's use this to
extrude these legs out. So since we've got five legs, Let's choose two faces, each around here with
one face in between. And that should give us even. Yeah, there we go. So we've got five selections with one
face in-between each. So that's going to work good. Okay, The next thing I need
to do is move this 3D cursor. Because what we're gonna
do is we're going to extrude out using
individual origins. And then we're going to
scale down for this curve and up for this curve
using 3D cursor. And recall that if we
hit the period key, we can get to this menu. Now, I'll be going
back and forth between period and the two key
individual origins. And then period. And the six key or 3D cursor will be going back
and forth between these two. So first of all, I'm going to select this
edge on the bottom. And let's bring the 3D cursor
to their width shift S2. Now we've got it lined up
exactly on the bottom edge. Then let's go back and re-select our faces now that we know we have them the
way we need them. So let's do that. We've
got five selections, five individual groupings
with one face in-between. So let's under our pivot menu switch to individual origins. So let's hit the period
key and then the two key. Now we're going to
extrude out. I'll hit E. And notice that it's going
in each of those directions. And if I move the mouse
out a bit like this, Let's come out to
about right here. Let's say I'm going right
to that point right there. Then let's hit E again
and pull out a bit. Then this time I want
to scale down to get this kind of a curve here. So to scale down, I want to switch to scaling
from the 3D cursor, period and the six key. Now I can press S and
scale down like this. Okay, there we go now. And look at what I did. I didn't switch back
to individual origins, so let's hit escape and
then Control Z to go back. Now let's go back to our
individual origins period. And the two key now, E. And let's push out like this. I want to bring it up now, so I hit period. And the six key, we bring it up. Period. The two key for individual
origins hit Extrude. Pull out a bit. This time I just want to curve
it down just a little bit. Because I don't want
to bring it out too much farther than that. Once again, period, 3D
cursor or the six key. And let's bring it down
like this. There we go. That's what I mean by using both the individual origins and the 3D cursor to create that. Now I feel like the
whole thing is a little bit too low here, so maybe I'll select the chair. Well, what we can
do is we can press Alt Z and then I'm going to drag select
everything down here, and then press Control I
to invert the selection. You can come over here
and see that here, control I under the Select menu. And let's just bring it up
a little bit like this. We go and maybe I'll actually bring these up a tad as well. There we go. Alright, let's
take a look at it now. Yeah, we're getting there. Okay. Now what Let's do is I'm
gonna take this and I'll smooth it. That looks fine. Now let's take this
and I'm going to use the subdivision surface modifier to get these smoother curve. So let's come over here, add modifier,
subdivision surface. I'll turn on the cage and
right-click and smooth. Okay, so now we've
got some work to do to make it look a little
bit more like this. First of all, let's
add an edge right down here on the bottom
and take this down. Now, notice that it conforms to the edge that
we're bringing it down toward. If we bring it up here, it conforms to the
shape of that edge. And as we bring it down, it begins to conform to the
flat edge on the bottom, but it never really
fully gets flat. What we can do is we can turn on even the even tool and flip it back and forth
between curved and flat. And if you look up at the top left-hand corner
of the user interface, you can see once again, we've got a tool called
even or E, and it's off. If I hit the E key. Now it will turn on
the even function. And then we've got the F key that we can flip it on or off. I'm just hitting the F key. So I'm going to flip it so it's flat and bring it down here, around right there,
so we get more of a flat edge on the bottom there. Now also, I'm gonna
do that on the top. But this time I
wanted to keep that curved or keep that shape there, so something like that. Then I could also, if
we really needed to add edges in each one of these here. Let's see what happens. If I go like this. That gives it a little bit
more of an edge there. What we could also
try instead of that, let me press Control Z here. We could also try to bevel
this center edge into two. If I hit the two key and press Alt and click that center edge. Now we could press Control
B, bevel that out. That becomes our edges to hold the corners
there like that. Yeah, that looks pretty good. So let's just do that. Let's select the edge Control
B and move these out. And in fact, what we could
do is we could do them all at the same time so that we pull them out in the same amount for each of the legs.
So let's do that. Let's press Alt Shift,
click, Alt Shift, click this, and this, and this. And then let's just do
them all at the same time. Control B, pull out and let's bring them out
to about right there. So now they're all uniform
in the way we've done that. Feel like I'd like to pull
these down a little bit. So let's go through and
select each one of these. Then once again, let's
switch to the 3D cursor. It looks like it's
already there, but let's hit period. Yep, it is. It's already at 3D cursor. Now we can just
hit the S key and the Z key and pull down and get a little bit more
of a curve there. Once again, all of them
with the same amount. We go. Let's try that. Yes. So you can go back in and add a little bit
more if you wanted to, maybe increase the
amount that these go up, however you want to do that. I could pull these
up a bit like that. Yeah, I think that
looks pretty good. Let's go with that. Lastly, I think
what I'll do is add an edge in here for
each one of these. Just push in just a little bit. Just to kind of tighten this up. There we go. I think that
cleans that up a little bit. Alright, now in the next video, let's work on these
little casters here. And then I think we'll
finish up the chair.
27. 027 Finishing the Desk Chair: Alright, let's take a look at these little wheels or casters. They're just, well, it looks like we could probably
get away with a sphere and then duplicate a piece off of that
sphere to put it on top. And then a cylinder.
There is more to it. You can see little
bolts in there, but you know what, that's going to be such a small
piece of the scene. I don't know that we need to
go into that much detail. So why don't we just
begin with a sphere. I'm going to press Shift S to move that cursor back to
the center of the grid. Then I'll press Shift
a mesh and UV sphere. Now we certainly don't need
this mini polygons in there. Let's change this to 1212. And maybe I'll even take
the radius down to say, 0.1 here to get it a
little bit smaller. All right, So we've got that. Let's zoom in sum and let's smooth it just to
see how it looks. Yeah, I think that's
going to look just fine for something this small. So let's scale this down. I'll hit the G key. I'm gonna move it right over
here and let's try and get it figured out how big
we want this to be. O, I've still got 3D cursor
selected for the pivot point. I tried to scale it, and it scales from that point. So let's come back up here. Or we could hit the
period key and change our pivot point to median point or the
eight key. There we go. Now we're back into the
center of the object. Let's scale it up just
a bit and move it. Oh, maybe right about here. Let's see how big that is
in comparison to these. Yeah, that's not bad. I think we could probably go with that. I'm gonna go to the
bottom view here. Recall that the top view is
the seven key on the numpad. So the bottom view is
Control seven. There we go. Now we can take a look at
this and put it in place. I'm gonna press Alt Z, hit the G key and
maybe we put it about, I'm going to bring it
right out to about here. Because ultimately
we are going to have a little cylinder that's
gonna go right in here. So let's do that. Now. Let's take a look, see
how big that needs to be. I think that's okay. Let's go with that. Now for that kind of
top In part right here, Let's just select some
faces on the top. I'm gonna hit the one
key on the numpad. Oh, we better bring that
down to the grid here. There we go. Then I'll press
Alt Z and the three key. And then let's just
click and drag and select some faces up on the top. I'll press Shift D and enter. I'll then take that z
and move it up just a bit in Z and maybe I'll hit
the S key and scale it out, something like that.
Let's try that. And now let's split it off as its own object just so
it's easier to work with. For now I'll hit the P key
and separate by selection. All right, let's go back to object mode and select
that new piece. We could maybe pull some points up just a bit or
we could turn it just a bit. I think what I'm gonna do
is I'm going to turn it, I'm going to press RX and I'm gonna turn
it a bit like this, but it's kind of angled a bit. Now if we take two points, say here and here, and drag them up, Let's hit G2 times and drag
them up a bit like that. Alright, and then
I'm gonna take these two and hit G two times
and drag them up. But not quite as much like that. We get just a little
bit of that curve. They're just kind
of a hint of it. All right, now for the next bit, LET create a cylinder. What I'll do is I'll
bring the cursor to this point here, Shift S, G2. Then let's press Shift
a mesh and cylinder. This is of course a way too
big and too many signs. So let's take this and
take it down to 12. For the radius, maybe
let's take it down to 0.1, the depth point to. And for our cap fills,
Let's choose nothing. And then let's scale this down. And maybe I'll bring it up. Let's bring it straight up here, and then I'm gonna move
it into this area here. Let's scale it down. So I'm again, maybe
I'll press Shift Z to turn off the z-axis and
scale it in like that. Let me move it so it's
kind of in the center. Let's try this. I'm gonna move that here and
then I'm gonna press Shift Z and bring it out a
little bit more like that. So now we've got that. Let's take these two and
bring them in like this. And then I just clicked and
dragged on that blue plane, which is really the same as G Shift Z to turn
off the z-axis. Then I want to take
this guy right here and turn it was press RZ and turn it so it's facing
away from the cylinder. I feel like that's
the way it is here. I'm going to move the cursor back to the center of the grid. I'll press Shift S1. And if we zoom out, the size looks pretty good. I feel like I want them all to come out a
little bit more. I'm going to press Control. Seven on the numpad. And then I'm gonna
go to wireframe z and choose wireframe. And then I just want to move that cylinder out
just a bit like this. Try this x0 and solid, and then we do in here. Not bad. I feel like that cylinder is still
a little bit too big. S Shift Z scale in just a bit. Now let's combine
all of these pieces. Click the cylinder
and this, and this. Press Control J. And then once again, I'll right-click and shade
smooth, and there we go. Now, the next task
is to get this on all of the other
legs as well. So I think what I'm
gonna need to do is move the pivot point for this to
the center of this cylinder. Let's tab into
edit mode or press Alt Z so we can see this edge and I'll
Alt click this edge. And then to move this
cursor to it, shift S2. Now let's do tab back into object mode and move the
origin to that cursor. Set origin, origin to 3D cursor. Now, our origin of this
object is at that point. All right, Now let's
move the cursor back to the center of
the grid, shift S1. Then let's change our
pivot point to 3D cursor. So I'll press the
period key and choose the six key and change
it to 3D cursor. Now when we rotate, we're going to rotate
around that point. So now let's go to the bottom view with
control numpad seven. Let's go to wireframe
z and wireframe. And now we can
duplicate this and rotate it around to the proper points on
each of the legs. So let's give it a try. I'm going to press Shift D R and move that new and
around to about right here, I'm gonna press the Shift key so it moves a
little bit slower. And there we go. Shift
D R to do this one. Here. Shift D are we just move this around
to each of the legs. Shift DR. here we go. Now let's go and see how we did. I'll press Z and solid. Let's then tumble around
and see how we did. Not too bad. Each of these seem to
be pretty well-placed. This May 1 be could
move a little bit more to my left here. So let's press RZ and I'll hold the Shift key down and
just move it just a tad. Alright, so we have our casters. And to finish this all off, I think what we need to
do is combine everything. We have a whole lot
of objects here in our outliner that
make up this chair. I talked about putting caps
on the end of this and even we could have put
trim at the end of this. And if you would like
to do that, please do. I think I'm just going to leave it as is because as I said, I'm gonna push it
up to the desk and I don't think anyone's
going to see it. What Let's do is begin figuring out what kind of
modifiers are on this. For the cashiers, we
don't have anything. For the legs. We have a subdivision
surface for this. We don't have anything. I think we're going
to need to apply our subdivision
surface modifier here. We're only at Viewport one, so I think that's good. Let's pull this down
and click Apply. If we tab into object
mode, this is what we see. That's not a terrible
amount of polygons there. Alright, so now we could
take all of these. These all have no modifiers on them and we could join all of this together, Control J. And there we go. Just for now to get that done. Now let's deal with these
other three objects. This cube two is
the back cushion. This has both a mirror and
a subdivision surface. So I'm going to ensure
that clipping is turned on for the mirror and I'll
go ahead and apply this. Then we've got a level of one for the subdivision modifier. So I will go ahead and apply
that. That's what we have. That's kind of nice. Cubed zeros. 01 is
the cushion up top. Let's turn on clipping for that. Let's apply that mirror. And then once again, Ron view port level one
for the subdivisions. Let's go ahead and click
Apply tab into edit mode, and that's pretty good there. And lastly for the chair itself, Let's pull this down, ensure clipping is turned on. Let's click Apply. Once again. Subdivision at level
one. There we go. That's pretty good there too. All right, so now let's take
this, the two cushions, Then we'll select the chair
Control J. And there we go. I'm gonna go ahead and smooth
it again just to make sure we apply that evenly
over all the pieces. And then let's come down
here to auto smooth. Turn on auto smooth. And let's drag that
up until we get it to a place that
we kinda like it. I'm gonna say, we've still got a little
bit of an edge here. Drag that up for me
at around 82 or 83, it really smoothed
up pretty nicely. All right. Let's move the pivot point
into the center of the grid. And it kind of looks like it is, our move manipulator is there, but that's because we're using 3D cursor for
our pivot point. So let's change that
to median point. And then we can see a
little bit easier that the origin is not yet in the
center of the grid here. So let's do that. Object set origin,
origin to 3D cursor. Let's give this a new name, call it desk chair
and the outliner. Let's bring back our furniture
and the reference figure. And let's remove this chair. We don't need this anymore. And I'll just bring this back, scale it down, and let's
see how we do here. Yeah, I kinda like that now. Alright. So there we've
got our desk chair. I'm gonna go ahead
and hide the figure. There is what we have so
far for our Victorian room. I think I want to do just a
few more pieces of furniture. And then I think Let's
begin creating the walls, the floors, the ceiling, etc. And work on the basic
layout of the room. And then we'll begin going in and noodling on the details, creating little knick-knacks, putting things on the walls, etc, to begin to fill it out. So it feels more like
a lived in space.
28. 028 Beginning the Wall Table: Well, I've been looking
through the reference images and I'm thinking maybe we could make this to put between these two chairs
up against a wall. What this room is
going to look like is still evolving in my mind. But that's the fun thing about Blender is you can
just kinda begin creating and working with the layout and let it
evolve a little as you go. You won't be able to do
this with every project, but since this is just
our little project, we can do it our way. So I'm going to begin on this now let's hide
the furniture. Once again, I'm gonna
put that positive x on the right side just because
that's what I like to do. And I'll press
Shift a mesh cube. Let's scale it down
in the z here. And what I'm gonna
do is begin with this top part right here. I think this curve right here, this is gonna be a bevel. But this bevel, I think it's gonna be easiest
to do once we get all of the little ridges up on top here and this
ridge on the bottom. I think that curve
is going to be easier to do once
we get those in. So let's do that first
before we do this curve. Alright, so I'm going
to scale this down. Let's scaled in the
y with x and y. Let's try and get this generally the size that
we think it should be. I'll press Sx and move this out some and then I think maybe a little bit
narrower here, maybe something like that. Let's see how that works. All right, Now from here, I think I want to go
ahead and extrude down. Let's do that first. Actually before I do anything, let's split it and mirror
it to the other side. So I'll press Control R and
drop an edge right down the center and hit Enter two times to ensure
it's in the center. Hit the three key
and Alt Z and delete one side, delete faces. And then let's add a
mirror modifier over here, turn on clipping and
turn on the cage. Alright, now that
we've done that, let's go ahead and
extrude down here. I think what we probably need
to do is applied to scale. But let's see if this will
inset in a uniform way. Let's press the I key
and bring that in and then hit the B key to
turn off the boundary. And then, yeah, it
isn't really in setting in a uniform way here. And that's okay. We can just scaling the
y SY here like this. And then let's extrude down. Let's hit E and pull this
down to about right here. Let's say if you like, it may need to be a
little bit longer. Let me go to the front view with the one key on the
numpad and I'll go to x-ray and just click and drag these and pull
them out just a bit. Let's try that. Then also, let's
just bring it up. It's too low, isn't it? Let's bring it up and maybe, maybe about this high. Let's see how that
works just for now. Alright, so now let's work on these little ridges here on the top and this one
ridge on the bottom. Let's go ahead and tab into
edit mode and I'll press Control R. And it looks
to me like these are, there are four ridges here, 1234 and then this
little thing up top. I think we should probably
insert eight edges. I'll press Control R and
then scroll the mouse wheel. And then on the bottom left-hand
corner of the interface, you can see we've got number of cuts and I'm gonna put eight. Then I'll just hit
the Enter key. All right, so now that we've
got that, let's select them. I'm going to select
every other one I think so maybe
alt click this one, Shift Alt click this,
this, and this. Now let's pull these out, Let's just scale these out. And since we had a little bit of problem with the
scaling the bottom, Let's tab into object mode and apply the scale and
see if that helps any. It may not honestly, but let's press Control a and apply the scale and see
if it'll help just a bit. All right, from here
I'm just going to hit the S key and scale out. But I should also press Shift
Z to turn off the z-axis. And then let's just scale
this out like this. Let us go to the top view
with the seven key and see if it scaled out in a uniform way. It almost did, but it still looks like even though
I applied the scale, I'm going to need to
scale out in the y. So SY, hold the Shift
key and let's pull that out just a bit so we get a uniform thing all
the way around there. I'll hit the period
key to zoom in again. Now that we have these edges, Let's use our Bevel tool
to round these out. I'll press Control B
and pull out just a bit and then I'll
scroll the mouse wheel. And maybe you can also see here on the bottom of the
user interface kind of a quarter of the way from the
left-hand side you can see the number of segments as
I turn the mouse wheel. So I'm just going to
go with three here. Now, let's try that. Yeah, that looks pretty good. So let's now go to the top. What I'm gonna do is, I think bring this down. First of all, I'm gonna
press G and Z and hold the Shift key and
bring this down some. And then I'm gonna scale
in just a little bit. I'll hit the S key and
scale in just a little. Hold the Shift key down. Is it doing that uniformly? Let's take a look. I'll hit the seven
key and zoom in. No, it isn't really
doing it uniformly. So I'll press SY and bring
that in just a bit like that. And then I'm just
going to extrude up is to get this
little ridge on top. Just hit E and pull
straight up like that. Just a little tiny thing there. That's all I want. Alright, so we've got that, That
looks pretty good. Let's go ahead and smooth it. And then let's come over here to the object data properties
turn on auto smooth. Yeah, that's looking
pretty good. The next thing let's do is this little guy right
down here, this edge. I think for this, what we can do is do the
same thing we just did. Let's press Control R and
add an edge right down here. And then let's add an edge right in the center
here like this. And then we can scale out, hit the S key, scale out a bit. And once again, we're probably
going to have to scale in the Y2 SY. Let's go ahead and do that. Then, just like we
did up on top here, Let's just bevel this
in the same way, Control B, Let's pull out. We've got still the same
number of segments. There. There we go. So now we've got the ridges on the top and the ridge
on the bottom there. Alright, now that
we've done this, let's go ahead and work on that bevel there before
we work on the drawers, just so we know where
they're going to be. Let's tab back into edit mode, into key for Edge mode
and alt click this edge. And we don't need
this edge here. We just need this one. This is the only one
we're going to do. And hopefully that'll
give us that curve there. Let's press Control B. And if we pull out, we get something like this
and that's not quite right. I'm going to give it
a few more segments. I'm gonna go ahead and
give it eight or so. We can of course change
it here if we need to. But what we need to do now is
change the shape and we can click and drag in
the shape field and take it down towards 0. If we take it to 0, it just becomes a
90 degree turn. But if we bring
this back out some, we can get ourselves a
nice curve like that. We can increase the width. It looks like it needs to
be a little bit bigger. So let's increase the width
field and we can do that. We can get something
that's about like this. Let's take a look at
it. What do we think? I feel like it's
a little too big. So let's take the
width down some. And one thing we can do. One thing I can do is it now looks that this part
is thinner than this part. So we can hit the
three key here. Press Alt Z, hit the one key. And now we can just grab these and bring them
straight back like that, or bring them forward,
I should say. Right. Let's try that. How does that look?
Yeah, that looks a little closer to what
we're going for here. All right, we've got
the top part now. In the next video, let's work on the
drawers and the legs. And then ultimately
we're going to need to begin working on these handles
because I think I do want a handle similar to this, since there's only two. Maybe we can give this a
shot that's coming up next.
29. 029 Creating the Drawers and Legs of the Wall Table: Now let's take a look
at the drawers here. I think. I think we can just
use inset here, but with boundary on
to create the drawers. One thing I do want
to point out is that since we've beveled this, this polygon here
is an end gone, a polygon with more than
four sides so that if we try to insert an edge
loop control R here, it wouldn't go through. It would only go
up to that point. That's something to keep in mind when you're creating
bevels on an object. Is there once you do, at least on this top part, if you insert an edge, it won't go all the way through. But we're not going to insert edge loops to define
the drawer here. We're just going to
use the offset tool. So if we select this face here, and let's just hit the I key. And now boundary
is currently off, so let's hit the B key
again, and there we go. Now we can pull these out and see one of the
problems we have is that the right side is a bigger border
then the left side. So I think what we're
gonna need to do is bring this like this. Because you can see
here that this side here is wider than what
we have between the two. What we can do is
we could now with this selected press Sx and we could scale in just
a little bit here. And we could also take this edge and just drag it this way. We can just pull
it until we get it about where we think
we want it like this. Maybe something like that. Once again, that's the beauty of modeling your objects here
in the center of the grid aligned to the global axis
is you can just take this in the global transform orientation and move these edges around. Alright, so now
that we have that, let's take this phase
one more time and let's start getting these
little details here. So I think for the
edge around here, we can do what we just did. We hit the I key and
let's instead in a bit. And then I'm going to Alt click
between these two phases. To select these two. I'm going to extrude these out just a smidge and
then I'm going to add an edge and bevel it
again to get that curve. So let's press Control R
and add an edge right here. Let's pull it straight
out again like that. Then let's do our bevels. So I'm going to press Control
B and pull out a bit. And now it's gonna
be weird because we still have the settings
from the last time. Let's first of all take the segments may
be down to three. Let's take the shape
backup to 0.5. So it curves out a bit. And I think that's
pretty good right there. I don't think we need to many more edges
besides just three. Let's tab back into object
mode and take a look. Yeah, that looks pretty good. Now let's get this
little piece right here. I think all that really
needs is just an NSSet. Once again, let's bring this in. And then what I'll do is just
bring it out just a bit. I'll hit E and pull out. And that should be
plenty for that. All right, so now
that we've got those, we can work on the legs. Now, since we've got these in, it feels to me like
it's too long. Again, I'm gonna go to the
front view with the one key on the numpad tab
into edit mode. Let's go to vertex mode with
the one key and press Alt Z. And I'm just going to take this, this side and just
bring it a little bit. That's all. Let me try this. Yeah, that's that's
all I wanted there. I just felt like the drawers
were a little bit too elongated compared to
what we're seeing here. Alright, now let's work
on one of the legs. And it looks like it
begins with a cube, kind of like we've done before. Let's go ahead and press
Shift a mesh cube here. Let's scale this
down quite a bit. I'll bring it up and let's
put it in place here. Bring this over. We probably don't need that
edge or that face on the top. Now, do we let select that face, hit Delete and delete faces. And then let's, I'm gonna go to this side
view with three key. Hit G, bring this over here. Let's go to the front view. Okay, That's looking
pretty good. And then let's just hit S and Z and scale that down a bit. Now, is that about the
size that we want? That too small? No, that looks about right. Actually, I think
it just needs to be maybe even a little smaller
and pull it over so it, it fits within this space
here. So let's do that. Then. What we can do is
bevel those corners, those vertices on the corners. So let's tab into edit
mode, hit the one key, and let's select these
individual vertices. And then, whereas Control
B is two bevel in Edge, Control Shift B is vertex bevel. So let's press Control Shift B. Let's pull out just a bit and we've got a lot
of points here. So I'm gonna scroll
the mouse wheel until we just have that
one segment there. And maybe something like this. Let's try that. All right, Now let's move our 3D cursor to this
point with shift S2. And then when we
create a new cylinder, it will pop in there. So shift a mesh cylinder. Let's take our number
of vertices down to 16. And also I'm gonna
change this to 0.1.2. We shrink that down a bit. And I'll go ahead and
leave the end gun on the bottom just so it's
easier to extrude down. We could, if we wanted to
take this top one here, we can select that and
delete faces there. And then let's bring this up. Scale it down a bit, fits in their scale it
out just a bit there. Then I'll take this face right here and let's bring it up. I think let's just begin
with this right here. At this point, I
think we can maybe scale out a bit like that. Then maybe let's extrude
down, just a hair. Extrude down again. And let's scale n
and m right here. So let's didn't hit E
and pull down a bit. Now let's kind of slump
that out like this. Then create an edge
right there, maybe E, S and scale out E
and bring it down. Something like that. Es and come in again like that. Now from here, I think we can just extrude
straight down to, well to this area here. So let's just hit E and
pull straight down. And maybe right in here, let's scale it quite a bit. With the S key, which hit the period key
on the numpad to zoom in. And we just need these
little guys right down here. So let's hit G s, pull that out and pull that in. And yes, it is curved
quite a bit there, but these are very small, so I'm not going to
do the curves here. I'm not going to Use
the extra polygons to do the curves.
Let's hit E and S. And then again here maybe
I'll scale in just a bit and then E and then scale
out just a bit just to give it that hourglass shape. And then let's do it again. Es pull out something like this. And then we pull it
straight down again. It looks like yeah,
just go straight down. Then it looks like
there's something just right at the very bottom here. Let's just hit ENS, pull in and then E and pull
it straight down like that. All right, let's see how we did. I'm going to press
Shift S1 to move the cursor back to the
center of the grid. Let's take a look at
the height of it. What do we think I feel like
it's a little bit too low, so let's move this up some. And then I'll take this and this and
move it up like this. Then let's take this down here and move these down. Alt Z. Click and drag, and
let's just drag these straight down
here like this. All right. Let's see
how that worked. Yeah, I think that's a
pretty good proportion. Let's go with that for now. And then for these little
pieces right in here, Let's see what we
can do with this. How many do we want to do here? It looks like it begins a little bit farther
down from the top. So let's put an
edge right up here. And then it also looks like it goes not quite all the way
down to the bottom here. Let's add an edge right here. Now let's select some faces. How do we do this? Do we just do one base and then every other
one or every two? Well, let's try every other one. Let's just see what happens, how it looks when we do that. I'm gonna hit the
period key to zoom in. Tumble around this a little
bit more easily here, and let's do one here. Okay, so we've got these. Now. What Let's do is let's hit
E and then the S key E, S scale in just a bit. Then I'm going to hit E and then scale in
without the z-axis. Let's try that. So Shift Z, pull in just a bit like
that. Let's try that. Now let's smooth it
and see what we get. We get that. Let's turn on auto smooth. Now what Let's do is let's duplicate it
and put it back here. So I'm going to take
these two items here are go to the top
view, press Alt Z, and let's press Shift D, and then move this over to
maybe right about here. Let's say, let's
see how that looks. That looks pretty good. Then let's mirror them over. I'll select this and this. Let's change our pivot
point to 3D cursor. So we can pull this down
and change to 3D cursor. Now it's going to be
mirroring from this point. List, press shift D and Enter Control M for
the Mirror tool. Let's hit the X key and
enter and look what I did. I didn't select these guys
on the top now, did I? So let's try that again. Let's select this and this. Then let's press shift D, Enter Control M and enter. We go. Alright, we've got
the basics of that table. The next video, let's work on these little drawer poles and see what we
can do with those.
30. 030 Finishing the Wall Table: Alright, now let's
work on these handles. And I think what we're
gonna do is maybe use a path for the handhold here. And then we can create
a sphere and then use a circle and do some extrusions
to get displayed here. And of course, we'll use the mirror modifier to
mirror everything over. So let's first of all, just click and drag on the
icons to hide everything here. I'll go to the front view with
the one key on the numpad. And let's just press Shift
a and go to curve and path. And then let's tab
into edit mode. And I'll just select these two vertices and hit
Delete and delete those. Then let's add a mirror
modifier to this here. Then we can begin extruding
this out to get this shape. Maybe let's take
this and let's hit E and kind of come up like this. Hit E again. Maybe around here like this. And let's begin going
in and get this here. So let's hit E, and I'm gonna hit E a
couple of times here to get that curve and
then go straight out. Like this. I think I want to
go right to here. Okay. That's not bad. I think
it's a little too wide. Let me drag select all
of these and bring them in, something like that. And then maybe we could grab these and bring them down a bit. You can just go through and grab the vertices you think you need and just move
them into shape. I think I'm going to go
with this right here, maybe move it in just a
smidge more. There we go. All right, so now
what Let's do is let's give it some depth. Come down here to the
object data properties. And in here, recall that we can click and drag on the
depth field under bevel, click and drag and
bring that out. So we get kind of a tube there. And maybe something like this. It looks like there's a
little bit more depth here that we can get by
extruding or excuse me, scaling once we convert
this to polygons. And to do that recall, we really wanted to take
the resolution down to two and the resolution preview. Let's try this at three. And when we do that,
That's not bad actually, that, that curve is pretty nice. All right, let's
go with that now. Then what Let's do is
tab into edit mode. And let's move the 3D
cursor to this point right here to begin working
on one of these plates. So I'll press Shift S2 to
move the cursor there. And then let's create a sphere. Let's press Shift a
mesh, a UV sphere. Let's take the segments
down quite a bit to 1212. And then let's hit the S
key and scale that down. So probably something
about like that, maybe a little smaller. Then let's smooth it. Let's take a look here. Yeah, so something like
that I think is fine. Now we want to get
this right here, this plate right here. And for that, what Let's do
is let's create a circle. I'll just keep that
3D cursor there. And let's press
Shift a mesh circle. And let's take it down to, well, let's take it
down to 16 sides. And let's add a fill to it. Let's choose N gun here. Just so it's easier
to extrude again. I'll turn it in the x-axis. Let's press RX and I'm gonna turn it this way and then
hold the control key down. And that will snap it
every five degrees. And if you look up in the
upper left-hand corner, you can see the rotation
in, in-degrees there, and I'm gonna take it up to
90 degrees and click that. Let's move it back a bit. I'll go to the front
view and let's scale it down to about the size we want. Then we can begin extruding
out to get these ridges. And it's really
kinda hard to tell what we need to do there, what is going on, but let's go ahead
and give it a try. I'll go to face mode
and select that face. And then let's hit E and pull
out and hit S and scale in. I'll hit E, S to scale
in just a bit more. Then let's hit E and
push in scale in some. Then let's do this again. I can hit the I key to inset, which is pretty much
the same as E and S. Then let's say E
and pull out again. I pull in, I'll scale in some, I guess I don't need to
pull it in that far. Let's keep it out a
little bit farther. So there's those two. It looks like we
can do one more. I think let's, let's hit
E and pull out some. Let's hit S scale in a bit. Maybe like this. And then let's hit E and
then scale in like this. See what happens if we do this. Maybe something like that. I'll hit the a key to select everything and push
it forward a bit. Let's try that. All right, I think
that's pretty good. I feel like this is now
still a little too big. We could hit the S key
and scale it in a bit. And then take these two and
hit G and bring them down. Some like this. Let's take these two and
join them with Control J. And then let's mirror that over. So let's move the cursor into the center of the grid shift S1. Then let's change to our 3D
cursor for the pivot point by pressing the period key
and choosing 3D cursor. Now if we press shift D and
enter to duplicate and then Control M and the X key that will mirror that
over to the other side. And then I'll hit Enter. And now let's go ahead and
convert this to polygons. If I hit the Z key
and go to wireframe, you can see what it'll do, what kind of polygons
it'll create there. If we go down to two. Let's see how this looks. That's not bad actually. I mean, it's gonna be
pretty small in the scene. So actually let's go
ahead and go down to two. And then I'll right-click choose convert to and
convert to a mesh. So there we go, We tab into edit mode and there
are the polygons. Let's now take this
edge right here, and let's scale this up. And let's do it in the z and
the y-axis and not the x. But if we just hit Shift
X to turn off the x-axis, we're just going to get that. We need to use our
proportional editing tool up here to give that graduated, that smooth shape here
that we have here. Let's turn on the
proportional editing tool. We can click here. And then if we just press
the S key and go like this, let me hit the S key and scroll out so we get that
a little bit bigger. You can see how the
edges push out in the x. So we really need to turn off that x-axis as we
just did before. Let's press Shift X. And now we can scroll the
mouse wheel to change the influence and
pull out like this. Now if I go out like
that, That's too much. If I go in, that's not enough. So let's bring it
out about like this. That's actually kind
of nice. Let's click. Let's take a look at it. Yeah, I think
that's pretty good. Let's go with that. Now we just need to
combine everything. I'm gonna hit the a key
and press Control J. And then let's smooth it. And let's go ahead and
turn on auto smooth. And that helps us
see those edges. That's nice. Yeah, let's do that now
if I tab into edit mode, we've got one more edge
right here and right here, I wonder if I could
make that sharp. You can kind of see
that edge right there. Let's press Control E
and choose mark sharp. And now let's see
how that looks. Yeah, that just added that
one edge right there. But we're going to have
to raise smooth it. And then drag this up here, or drag the auto smooth up quite a bit to smooth those out. I think that's what I want, so, well, we still got
this edge right here. Let me drag up
until we don't have those edges right in
here. Let's try that. All right, Now let's get
it back on the table. So before I do that, I'm going to delete
these faces here. Delete faces, so we
don't need those. I'm going to select
this edge and this edge with Alt and Alt Shift click OK.
Let me try that again. Alt click this one, and Alt Shift click this one. Then let's change
back to median point. We're still at 3D cursor here. So I'm gonna hit the period
key, the median point, and that puts that manipulator right there in the center
between those two selections. And that's where I want
the origin of this object. I'm going to move
the cursor there. First shift S2. Then if we tap back
into object mode, we can move that object
origin to 3D cursor. There we go. Now we're going to
scale from that point. Alright, let's bring
everything back. Here it is. Well, I don't want the
rest of the furniture, so let's hide that again. Okay. Now, I'm going to move the cursor to the center
of the grid again, shift S1, so that's
out of the way. Let's bring this forward, Let's scale it down. And let's see if we
can put it in place. I'll go to the front
view with numpad, hit the Z key and
go to wireframe. And let's see if we can
place this where we want it. I'm gonna come over here. Let's scale this down.
Something like that. So those little round
parts fit in there. These almost don't. You can see that there. But I want mine to fit in there. Maybe something like this. It's just almost hanging
over that bottom ridge. I think I'll do that like that. Now let's hit the Z key
and go back to Solid. I'll hit the period key on
the numpad and let's bring it back until it just intersects
with that right there. Now what I want to do is make
sure it's in the center. What Let's do is it's tab into edit mode and
let's just hit the three key and
select that face there. You can see there's
the center of that face and we're a
little bit off there. So I'll move the cursor
to it with Shift S2. And then I'll take this and
move this to that cursor Shift S and the eight key
or selection to cursor. There we go. Now that's right in the
center of that drawer. I'll move the cursor
back with shift S1. Let's change to 3D cursor,
period, 3D cursor. And I'll select this and let's mirror it over
to the other side. Now let's press shift D, Enter Control M and the X key. And there we go. Now let's combine
this altogether. Let's come back over to our modifiers panel
and make sure we don't have any
modifiers on here. What we do here, we need
to apply the mirror here. Let's do that. I'll apply that there. Then let's go through and
just select everything. Actually, i'll, I'll just
hit the a key and select everything and then
press Control J. There we go. Now let's make sure auto smooth
is turned on it is okay. Let's move the origin
of this object to the 3D cursor in the
center of the grid. Set origin, origin to 3D cursor. There we go. Let's
give it a name. Let's call it Wall table. And let's bring our
furniture back. And let's slide it over here
between these two chairs, I'll press RZ 90. Oh, I'm still using
the 3D cursor. Let's hit Escape.
Now let's press period change to median
point. There we go. Now if we press RZ 90, it'll turn the wrong way. Let's hit the Minus key, Enter and then scale it down. And let's see if we can get
it about the right size. I'll bring it forward here. And let's just scale it
down till it's about yeah, tell us about like that. There we go. There's our wall table. Alright, let's take this and
move it into the furniture. In the next video, we'll
begin on another one.
31. 031 Beginning the Side Chair: As I looked through the
reference images again, I've found this chair. Let's press Control
Spacebar and zoom in. I think I'd like to do this. I kind of like what's going on with the scroll work
on the legs here. I think it'd be a
nice chair to just put in front of the desk. So let's work on this one. I will press Control
Spacebar again, and let's hide the
furniture here. Let's just begin once again
with the seat of the chair. Let's block in the seat and the back cushion
and these back legs first and then
we'll begin working on those more intricate
pieces for the legs. So let's take this
and scale it down in the z-axis and feel like it's a little
bit wider than it is. Deep. Maybe. I'll shrink this down a bit and
let's kinda put it. What do you think,
something like that? Maybe I'm just trying
to get a sense of how tall those legs should be. Now for the back legs, I think what I want to do
is just create a new cube, shift a mesh cube, and then let's scale it down. And at least while
I'm trying to get the proportions in place, I'm going to adjust, kind of pull this up. So let me zoom in
and get it right on the grid floor here
on the green axis. Then I will take this face
right here and let's just pull it up to about midway
where the cushion is. I think right in here. Maybe that can come back a bit. It's right in there
and then let's just kind of angle it back. So I'm just going to hit E
and enter and then I'll hit the G key and kind of pull
it up and angle it back. How big should that be? Something like that, maybe. Then let's use the mirror
modifier for this one, I'll move the origin
to the 3D cursor. And then let's just
use this mirror here to mirror that over. And that's because if we need
to make any adjustments, we can just tab into edit
mode and hit the a key. And then we can just move
it around like that. That just gives us a
little more flexibility as we're trying to figure
out the proportions. All right, now let's work on
this cushion on the back. For that once again, I'll
just press Shift a mesh cube. Let's scale it in the y. And I'll hit the three key
to go to the side view. Let's take this up like this. Maybe scale it in the z. Then I'll tilt it, turn it with the R
key here and hit G and move this down like this. Let's kind of get it in line with the back of
the chair there. Yeah. So symptom like this, Let's scale it down
in the x again. I think I'd like to scale it out in what would be the Z here, so it's a little bit longer. So if I scaled it in the z, since it's angled, it
would kind of skew it. So let's change from
global to local. And that will then allow us to scale it in the
angle of the object. So let's hit S. Pull that out. And now we can slide it
down in that axis as well. Maybe, maybe
something like that. Alright, so now what Let's do is let's work on
these little guys. And I think what
I'd like to do is just create one of these, one of these little barrel
type cylinder things and then use the array modifier to duplicate it again and again. So let's first go to
the front view here. And what I'll do
here is just press Shift a mesh cylinder. I'll take this down to 12 sides. Then let's type in 0.1.2 here to bring it
down quite a bit. I'm going to leave in guns
for the cat fills for now. I'll turn it in
the y-axis, RY 90. I could change back
from local to global. And let's use the
comma key to do that. Recall that these two menus can also be accessed with the
comma and period keys. So I'll hit comma and then
I'll hit F4 to go to global. Alright, now, let's split this down the middle
so we can mirror it. I will go to face mode and x-ray and select these
and delete faces. And then let's add a
mirror modifier to it, and we don't see it. We don't see the mirror here. If we hit the N key and
tap back into object mode, we can see that we've got a
90 degree turn in the y-axis, of course, because
that's just what we did. We'd have to turn on the z to get it to mirror and we don't
really want to do that. Let's just apply the rotation. And that should help lift press Control a, apply the rotation. And there we go. So now let's turn on clipping. Turn on the cage
tab into edit mode. Let's hit the one key. I'm just going to
try and make one of these little things here. Let's just begin
here and hit E and pull out and then the S
key and go in like that. We could Alt click
on this edge and maybe scale it up
just a little bit. So it gives it a kind
of a rounded look. And then let's get these
little things on the ends. So maybe if we just hit
E and then E and S, then E, then it needs to
come down quite a bit. I'll just hit the I key to inset and bring it down to
about right here. And then I'm going to extrude
it out just a little bit. So these two will connect up when we use the
array modifier. Alright, so let's go back
to solid with Alt Z. I will hit the period
key to zoom in. And if we tab into edit mode, Let's select this face here and delete it.
We don't need this. I'll delete faces and let's
go ahead and smooth it. Yeah, and I think
that's probably going to work just fine. Let's go with that. We can come down here
and turn on auto smooth and drag that up. That helps clean that up a bit. Now we need 123456
of these going across their little bits at the end that I'm not going
to worry too much about. But what we can do is
set up these cubes here. These little cubes, you
can see two on the front, one in the back to right here. So we can set those up and then use this to
connect them together. So let's do that. Let's press Shift a mesh cube, will scale it down quite a bit. I'll just scale it
down to it's about the same size as this and maybe scale it up in the z
just a little bit. It looks like they're
just a little taller. Now let's bring this over. I need to scale it
down just a bit. It's about the same size as the back leg and then I'm
gonna bring it up to here. So that's this one here. So I guess it needs to come
down some right there. And then let's press
shift D Z and bring this up to about right
in the middle here. That's that. We can then take these
two and press Shift dx and take them over here. We could have mirrored
them as well. Now let's take all
of these here. Go to the side
view and pull them up to where the
legs are gonna be. About right here, I'd say. Let's start working
on this right now. So it looks like this
goes between these two. And it looks like it's got an extra cube coming out of it. So let's take this one. I'm going to press
shift D, enter. Pull this way and let's
scale it down quite a bit. There we go. We
could of course just hit Shift D and X and pull
that over here like that. Now let's take this and
let's apply the mirror. Apply here. Then I'm just going to hit
the G key and move it over. So it's kind of just barely
connecting with this here. I'm going to scale this down. I think I want to move that pivot point to
this side over here. Let's do that. Let's Alt click this,
press Shift S2, and then move the origin to
this point right over here, origin to 3D cursor. All right, Now let's see
what we can do with this. I'm going to zoom in here. Let's move this in like this. Alright, now we're ready to begin using our array modifier. But what Let's do is wait on
that until the next video.
32. 032 Working on the Legs of the Side Chair: Alright, now let's
duplicate or use the array modifier to extend this on over
to the other side. Let's select this object here. I'll move that cursor
back to the center of the grid just so
it's out of the way. Then let's come over here, click Add Modifier
and choose array. Now see how it just
duplicated that. That's exactly what we want, but we want more than two. We've got six here. Let's increase our count up
to six and see what we get. That's six of them, but it
doesn't quite stretch across. Now, granted, we don't have
these little n pieces, but still, there are a couple
of things we could do. One thing is you can
click and drag on the X factor here and
spread them out like that. But that's not what we want. Let's type one back into there. So really what we can do is just scale this original piece. If we tab into edit mode, you can see there it is. We could just hit the S
key and scale out like this until we hit the
other side like that. Now those are a little
bit too big around. What we could also do is scale this and turn off the x-axis. So let's press the S
key and then Shift X. And now we can bring
them down like this. There are a little
more elongated than we have in the image,
but that's okay. Let's take a look at that. Yeah, Actually that's
really not bad. For our next one. We need one across here. Let's pretty much
do that same thing. Let's take all of these
pieces right here, and let's just
duplicate this and move it down into the
center. Let's press shift D. Move it down here like this. Then I feel like I want to
reduce the size of these here. Like this. Let's press S, scale
them down like that. Then we want these on the side. So can we just take these right here and duplicate them and put them in here?
Well, let's see. I think we're not
gonna be able to have the same number there,
but we can try it. So let's press shift
D and I'll hit Enter. Then I'm going to pull
it back in the y-axis. Let rotated in the z, r, z, 90. Enter. Then let's
get the three key. Let's bring this down like this. Yeah, we're not gonna
be able to do it quite the way we have it going across. Maybe what we should do
is with this selected, whereas our original
one there it is. With this one selected. Let's reduce our count. And then let's take this
and move it out like this. Yeah, that works. Now we could also move this piece so it gets
right in the center there. Why don't we do that? Kind of cheat a little bit,
but that's okay. Let me move this
into the center. And I'll grab all of these. I'm just going to move
this over like this, so it's right in
the center there. Now we could take all of
these and move these over. Hit the one key to try and
get it in the center there. And it looks like I do need
to move this over a bit. We go. Yeah, It's not looking too bad. Okay. Then let's
grab all of these. We don't need that
when we need this. This and this. Then I'm gonna go to the
bottom view control seven, hit the Z key and
go to wireframe. So I can see this a little
bit better and press Shift dx and bring
this over here. Like this. We go z and solid. There we've got the front and
the side and the crossbar. Now let's work on
the upright one. So I'm gonna take this
original one here. It looks as if there's
a square here. I think I will go ahead and duplicate this shift D z and take it up
into here like this. We may not want it that tall. I'm going to bring
it down like this. There we go. Then let's take this
original one here. And I'll press shift D
y just to bring it out. And let's now turn it into
y-axis, RY 90. Enter. Now let's take it and
bring it up here. Like this. Go to the side view with the three key and
bring that into here. Now it looks like we could
take this one here and move it up to make it
fit in the center here. Or well, we should probably adjust
this now, shouldn't we? Let's do that. I'll select this and let's reduce the count. Then should we scale it down? Well, let's try just
hitting the S key and scale it down a
little bit like this. Let's try that. That's not bad. It kind of goes in
the center here. We could maybe move
this down a bit. So I'm just trying to rearrange these so
they're kind of aligned with each other without
doing a whole lot of really nitpicky work
here and you hand, you may be thinking too late, it's already very nitpicky
and you may be right, but I'm just going
to take these here. And I will move these up. They fit this one just
a little bit better. Like that. There we go. And then I will
take this and this, this and this, these two here. Let's duplicate these
and move them over, shift dx over to here. There we go.
33. 033 Finishing the Side Chair: Let's now just finish off with this little
thing right down here. One thing we could do with
that is select one of these. That original one is up here. We could just duplicate this shift easy
and bring it down. Then we could turn off or delete the array modifier off of
this one at the x here. And now we just have this. Alright, so now what we can
do is tab into edit mode, go to x-ray at the three key. And we could just remove
this here to delete faces. And then we could take this and just scale it in
just a little bit like this. Maybe take these two and bring
them down a bit like this. There we go. So let's try that. Yeah, we just have that there. That's good. Let me go back to the
front view and I'll just duplicate this
and move it over here. There we go. Now we've got those
pieces of the chair. I feel like this
is too big here. I think I will scale this down. I'll just scale this
down over here, so they're not exactly the
same here and that's okay. This is a handmade
piece of furniture. So now let's take this and let's split it and add a subdivision surface
modifier to it. So I'll delete 1.5. First of all, and
add a mirror here. Then I will maybe scale it
up in the z quite a bit. Looks like it's a
little bit thicker. And then when we add the
subdivision surface modifier, it's going to kind
of collapse there. Well, I better turn on clipping
the cage for the mirror. And then I'll tab
into edit mode. And let's add a few
edge loops here too. Hold this the way we want it. This. Maybe move that one back. Maybe move that forward a bit. So you can see we're kind
of getting that curved top. Kind of look there. I will scale it up a bit
and move it forward some because we needed to
cover up the front here. Scale it up just a bit. And then let's take
these top edges. I'll turn on the cage
for the subdivision, and let's take these and let's
just pull them up a bit. So it's a little
bit more curved. It looks a little more,
a little more cushy. And I will smooth it. All right, there we go. Then this up here, Let's do the same thing. Let's split it down the middle. Let's delete one side. And let's add a mirror
modifier to it. Turn on clipping and the cage. Let's then add a subdivision
surface modifier. Here. I'll tab into edit mode and it's looking pretty thin here. We could go ahead
and add edge loops, one down here, one up here, maybe one on the
side here like this. Then we want one
in the back here, or I should say along the side and push it
towards the back like that. We go. Now let's just scale that
up just a little bit. Maybe I will change to local transformation
orientation and scale in the y a bit and
then push that forward some. All right, let's see
how we're doing here. All right, We're getting there. Let's scale out in
the x just a little bit. Let's smooth it. Let's see how we're doing. I feel like this bottom edge could come down a
little bit more. I'll slide this edge along
the mesh with G2 times. Bring that down quite a bit
like that. Yeah, there we go. Then lastly, I think I'd like to bevel these edges right here. So this edge right
here, and this one. Let's bevel those. I'll press Control B and pull out and we don't want
them to overlap. But if we bring it out to here, scroll the mouse a
couple of times, maybe something like that. We can get just the
tiniest of curves there. That's all we really need. I feel like I'd like to scale in the y and then pull it back
a little bit like that. Alright, so now we just need
to go through and apply all of our modifiers here. So let's do that. I'll apply the mirror and the
subdivision at level one. Same up here, the mirror
and the subdivision. Let's apply the
mirror for this one. And let's go through and apply the array modifier
for all of these. They become permanent like that. And maybe this one
here and apply. Okay, now let's just select, Well let's just hit the a key
and then press Control J. We had one more thing in here. Let's press Control Z. This guy, we had one more array. We go. Anything else? Well, let's see. I'll hit the J key.
Press Control J. There we go. Now let's smooth
at One more time. Come down here, turn
on auto smooth, and then we need to drag this up to clean up
some of those edges. Maybe like that. That's not bad. I'm up to
about 50 degrees on that. Then let's move the origin to the 3D cursor in the
center of the grid. Let's bring our furniture back. Let's scale it down and we'll try and put
it in front of the, in front of the desk here. Let's take these guys and
move them back a bit up. You can't do that. We're in local transform, so we need to change to global. And then we'll be
able to move them both at the same time there. Let's turn this
around our z 180. And I'll go to the
side view here. Let's bring this in and
maybe scale it down a bit. We go and then let us
go to the top view. How does that look? It really doesn't look too bad. I think. Maybe just a
little bit smaller. Let's scale it down
just a little bit more. All right, Now let's take this. The seven key. I'm going to duplicate it. And then I'll just maybe
turn it just a bit so it it isn't perfect. Here we go. Here's our chairs in front of the desk.
Yeah, there we go. All right. We're
making progress.
34. 034 Starting the End Table: I feel like I'd like
one more piece of furniture before we begin
building out the walls. Let's work on this
little n table. I'd like to put it right here. Then what I plan on doing
is building out the walls, the floors, the ceiling, kind of get a sense
of how we want the room to be,
any windows, etc. Then once we do that, we may need to add a couple
of more accessories, maybe another wall table or
a sofa table behind there. There may be other things that
we need to add after this, but let's just go ahead and get this one in place and then we'll begin working
on the room itself. It looks to me like I
need to name these. Let's call these. Well, we've already called
the other one, a desk chair. Let's call the side chairs SlideShare 01 and
we'll call this, I'll just press control C, control V and side chair two. Then we'll just take
these and drag them into the furniture collection. Now let's hide it all and
begin on this once again, I'll spin around so I
know where my x is, x axis that is. Then let's begin
working on this. I'm going to press
Shift a mesh cube, and let's hit the S key
and scale that down. And I'll press S z and let's scale this down to
about right here. I think I will go ahead
and keep it square. I'm going to scale
it down a little bit more because I think part of that that I'm seeing is gonna come from this top part here. Let's now split it in half
before we do anything else, Control R and I'll hit
the Enter key twice, Alt Z, the three key. And let's drag select this and hit Delete and delete faces. And then let's add a
mirror modifier here. Turn on clipping and
turn on the cage. All right, We've got that. Now let's work on this top
part in it looks to me like it's got this curve or bevel
on all of the corners, but it's both on this cube
piece here and on the top. So we're going to need to do that once we get
these pieces in. But first of all, let's just work on
this top piece here. Maybe let's just hit E and
S and scale out a bit. Let's take a look
at the top and see. Yeah, it looks like we
should scale out in the x, press the Esc key and the X
key and scale out like that. Let's get it. Maybe I'll bring
it out like that and then scale it
in the y a little bit as well just to bring
it out a little bit more. And why? So let's get it about like that because we're
going to need to put these pieces onto
and they're going to take up some room
under there as well. We can always bring it
back in if we need to. I'll hit the E key
and bring that up. And let's get it maybe
right about here. Now that we have that, Let's work on these
little pieces here that connect with the legs. I'm going to hit the
one key on the numpad. You go to the front view. And I feel like this is
a little too high now. Maybe something like this. And once again,
we're going to be adjusting this at every
stage in the process. From here, list press
Shift a mesh cube, and I'll take this
down to maybe 0.1. Let's do that. Maybe scale it up a bit. Now, hit the G key and I'm
gonna move it up into here. Let's put it right into here. Let's say hit the period key. And we need to pull
this out in the y-axis. Now, let's get it about
where we think it should be. Maybe I'm gonna bring it out
like this and like this. And it's up pretty
good right up in here. Let's tab into edit mode and
take this face and let's drag it down just below here. Now let's take a look at that. Yeah, I think that
looks pretty good. All right. Let's take it and duplicate
it here in the back. I press the three key
to go to the side view. And then let's press Shift D Y and bring this back like this. Let's take a look here. That looks okay, I think then what we can
do is take these two here and join them
with this main object. And when we do that, they will automatically mirror over to the other side because this
has a mirror modifier on it. So let's select those to
select this control J. And there we go. All right, now let's zoom in here. These have little bevels
here on the corners. But I'm a little afraid of what's going to
happen if I try and Bevel the corners
on the bottom and then try and Bevel the
edge on the outside here. I don't think that'll
work real well. So what I'm gonna do is go
ahead and Bevel the outside. And then we'll deal
with the little pebbles in here by just
extruding and scaling. So a little bit different
than we've done before. I'm gonna tab into edit mode. Let's select this edge and
this edge and this and this. And let's then bevel this here. Let's press Control
B and pull out. I'll scroll the
mouse wheel a bit. And let's get ourselves a nice curve here that
we think will work. Maybe something like this. I will go ahead and smooth
it here in object mode, and that looks
absolutely terrible. So let's go over to our object data properties
and turn on auto smooth. And that cleans it
up pretty well. All right, now let's think about a couple of these
bevels right in here. I think what I
want to do is just select this face
here and this face. And let's turn on
individual origins. So I'm gonna hit
the period key and come down here to
individual origins. So what we do happens
independently to each one. To get this little
indentation bevel, whatever you want
to call it there. I'm just going to
hit the E key and scale down just a bit. Then I'm gonna hit the
S key and scale in. We have just something
kind of like this. Let's see how this works. Yeah, that's just kind of all I wanted to just that little bit. It gives us since that
those corners are beveled, but it's not quite the same. I know, but I think
it works pretty well. All right. How about up here? I feel like we've got a couple of bevels up here
that we could do. Let's hit the two key and press Alt click and Alt
Shift click these two. And then let's press Control B and let's see what we can do. We don't need as
many edges here. Let me scroll out. Oh, and look how
it's kind of flat. I think we need to
apply our scale here. Let's hit Escape and
tab into object mode, and let's hit the N key. With this object selected, I'll press Control a
and apply the scale. And now they're all
ones over here. That's good. Let's tab back into edit mode. And with these edges still
selected list press Control B. See how this works. Yeah, they're coming out
a little bit better now. A little more uniform. I don't need a whole lot here. Maybe I'll just go like this. There we go in when I did
this, look at this here, we've got kind of an
artifact there on that face. Let's hit the three key
and select that face. And I'm wondering if a little
inset will help with that. Let's see. I'm gonna hit the I key
and instead in just a bit, Let's hit the B key
to turn off border. We can't go in too far
because of that bevel there. But if we go to
about right there. Yeah, that really clean that up. That's pretty nice. Now let's work on
the drawer here. If we select our object and
tab back into edit mode, Let's select this face here. And let's inset this in just
a little bit like this. Let's hit the I key and
inset in just a little bit. And we can see on the top and bottom It's coming in
but not on the sides and that's okay because
we can just go ahead and then hit
S and X and scale in from the sides here and bring those in just
a little bit like that. Let's do that. And now let's bring them out. Let's hit E and
bring this out some. And then I'll scale
in or inset in, I should say, Let's hit, I bring this in
just a little bit. And maybe what I'll
do is pull this out. I'm gonna pull this out
just a little bit so we get just an angle
there, right there. Then let's insert. And again, I bring this in
like about like this. Maybe. Let's do that. And then
let's do that again. Let's hit E this
time, pull out some, and then let's hit S and
scale in just a little bit. And maybe I'll scale
specifically in the z. Here we go. And maybe the x, Sx, bring that in just a little bit. There. We've got the drawer,
so that's pretty good. Maybe I'll take this face and take it back in
just a little bit. I feel like it may be a little
bit too far. There we go. Alright, in the
next video, well, Let's do is work on the
legs, this shelf here. And also we can go
cannibalize that drawer, pull that we created
for the wall table. We can go duplicate that and bring it over
and put it in here. And I don't think
anyone would ever notice that's coming up next.
35. 035 Completing the End Table: Taking another look at this, I feel like this is
a little bit too thin compared to
how tall this is. So I'm just going to go
to the front view with the one key on the numpad
and tab into edit mode. And then I'll hit the
one key on the keyboard. And let's go to x-ray
mode with Alt Z. And I'm just going to
drag select this area and pull it down just a
little bit like this. I feel like it's just a
little bit thicker there. Let's try that. Yeah. Okay. I think that helps. Now let's work on one
of these legs here. I'll go to the front
view and let's begin with a cylinder. Shift a mesh cylinder. I'll take it down to 16
sides and I'll just type in 0.1.2 for the radius
and the depth. We can scale it down. So I can also take away this face on the
top to lead faces. Then let's just hit the G
key here in the front view. And I'm going to zoom
in and scale down Sam and I'm just looking
for let me go over here. Here we go. I'm just looking at this right here that little
bit right there. Maybe it's about this
big, something like that. And then if we tab into
edit mode and go to x-ray and grab
these points here. Maybe I'll just bring
them up like this. And we can start
creating this area here. First of all, let's
just hit E key and S, and let's just begin
continuing to do this to get these various pieces. Maybe something like this. And then I'll begin scaling
in some, something like that. Maybe feel like they could
go out a little bit more. Let me grab these and
hit the S key and Shift Z and kind of pull
them out just a little bit. So you can of course
readjust as you go. As we always do. There we go. Something like that. Maybe from here I'm going
to go straight down, I think just hit E and pulled down and then let's get
this larger one here. So once again, E and S. Then I'll come down
a bit like this. Then come out again
with that larger piece. I'm just once again
hitting E and S. Then coming back and readjusting
wherever you need to. Maybe something like this. Let's say maybe I'll
grab these two with Alt Shift click and
move them up a bit. And maybe scale out
just a bit there. There we go, I think
something like that. And then we could maybe
come straight down like this and get this piece here. These out like this. I don't think it needs to go
out as far as the others. Maybe something about like this. Let's try that. Now. What we could do is just take this pretty
much straight down. There's a slight curve, but I don't know that we
really need to deal with that. Now looking at this, I feel like it's
a little too big. So I'm just going to select the whole thing and scale it
down some and bring it in. Let's see how that looks. Still to me, it looks
a little too big. So what I'm gonna do is
press S and Shift Z, keeping the height while
bringing this in some like that. Let's bring it forward. That would probably be
a good thing to do. Bring it into here. All right, Let's begin again here. And let's hit E and just bring this straight down to about where we
think it might be. And I'm gonna hit the
S key and scale in. We go and it looks like
there's one piece here before we get to that shelf. So I'll do that ES and hold down some kind of like this. I'll get maybe one of
those in there like that. Then that's where that
little panels gonna go. Then I think I'll
just go ahead and pull it straight down
and do that one. So let's hit E and
pull down to here. Then let's just do
another one here. Something like this. Then we could just
pull straight down. I think I'm going to take
this and move it up a bit. Then I'll just hit E, pull down and then
scale in a bit. Let's see how this worked. I think proportionally
That's not bad. I still feel like that top part isn't quite big enough here. I'm not sure exactly
what I can do about it. Let me take this and maybe de-select this with Alt Shift and click and then
scale this back up. Move it up a bit.
Something like this. Let us select that
whole thing and bring it down like this. Alright, let's try that. Yeah, okay. Then what I'll do is duplicate it and bring it
back to the backside here. So Shift D y and let's
put that right back here. I think from here we
could just take these two and add it to this piece. And since it's mirrored
over in the first place, these will mirror over as well. So let's select this one, press Control J,
and there we go. Let's smooth everything. Actually I have to
select it first and then hit Smooth.
There we go. Then I feel like it's
a little bit too low, but with everything
now altogether, we can tab into edit mode and play with the
size and scale of it. So maybe I take all of this
and move it up just a bit. We could try that and maybe take these and move
these up, just a smudge. Now let's put a shelf there. I may have dragged that up
too much, but let's see. I'll press Shift a mesh cube. Let's go to the front view. I'll bring it up. I'll scale it down
in the Z until we get it about the
way we want it. And then let's scale it
out in the x and the y. So I'll press Shift Z
so we don't scale in the z and I'll bring this
out to about right here. Let's bring it down a bit. Now. Is that too thick? Kind of feel like it is. I'll select this press S and Z, and let's scale it down here. We could move this
up a bit there. Alright, I think that's
overall looking pretty good. So now what Let's do is give these corners here a bit
of a curve with a bevel. We've got our scale here is quite a bit off
or non-uniform. So let's deal with this. I'll select this piece, press Control a and
apply to scale. So now they're all ones. And then if we tab
into edit mode, and I'm gonna go ahead and
select all of these since we don't have a mirror
on this currently, I'm gonna go ahead
and select all four. I'll press Control B. And let's pull out to about here and I'll scroll the mouse wheel. Let's try symptom like this. See how that works. All right, I'll smooth it. Turn on auto smooth, that does pretty well. It's also bevel these
edges here, this and this. And let's press Control
B and pull these out. We don't need as many edges, so I'll scroll the
mouse wheel a bit. And let's go with
that. Let's try that. Yeah, I think
that's pretty good. Then as I mentioned, what we can also do is
cannibalize our drawer, pull from another
piece of furniture. So let's bring back
the furniture here. Let's go over to
this wall table. I'll hit the period key
on the numpad to zoom in. And let's tab into edit mode. And what I wanna do is
just press the L key and select all the pieces
of this drawer pull. And then I'm going to
press shift D Enter, and I'm going to drag
it out in the x-axis. And then I'm gonna
hit the P key and separate by selection.
There we go. Now we've got this piece that
we can use on our table. Now, let's pull it out of
the furniture collection. So when we hide the furniture, we don't hide it. With this selected. We can move this
from one collection to another by just
pressing the M key. And now we can move this to
any one of our collections. So I'm gonna move it to the
main scene collection here, and now it pops out here. And let's just call this drawer
pull for the time being. Then when we hide the
furniture again, there it is. All right, so let's move our origin to the
geometry of this. I'll go to Object Set Origin, origin to geometry
in there it is. Now, let's bring it over. We're going to need to turn it. Let me scale it up quite a
bit here so we can see it. And then I'll turn it in the
z-axis here in the top view. But if you aren't,
you can always press RZ 90 and that'll
turn that there. Let's go to the front
view, z and wireframe. And I'll hit the G key and
move this kind of into here. Now I feel like I want to center this a
little bit better, although it's not bad, I'm really close to
that center line. And I think all I need to do is just 0 out the x axis here. I can click and drag and
you can see I can move it. But if I click in there
and press 0 and hit Enter, now it's in the
center of the grid. Let's press Z and
then go to solid. And let's drag this back
and put it on here. I hit the period key. Let's drag this back just a bit. And let's see where
we want it to be. Maybe I'll scale it
down just a bit, pull it down a little
bit like that. Maybe scale it up
just a little bit. Alright, let's try that. So what let's do now
is combine everything, but we need to take a look at the modifiers to see
what we can do here. So I'm gonna select
this piece here, and this has a mirror modifier. So let's go ahead
and apply that. Then it looks like this
does not and this does not. So let's select everything here. Let's press Control J
and combine everything. Then with the cursor in
the middle of the grid. Let's go ahead and
move the origin of the object to their
origin to 3D cursor. Now we can scale
from that point. Now the way I combined it, the drawer pull was the
last thing I selected. So that's the name we got. I'm gonna change
this to interval. Then let's put it in place. Let's bring it over here. Maybe I'll hit the seven
key to go to the top view. Let's bring it over
here and scale it down. Maybe in here like
this. Let's try this. That's a little too big and I
think I wanted to draw your facing out either in the
back or to the side. Either way is fine. I'm going to press R z 90 and
just spin it around there. Maybe it needs to be a
little bit smaller here. Let's try that. Let's, let's bring back our
character reference objects. So I'll bring him in, select them and bring them
over here. What do we think? Maybe just a little bit
smaller, Something like that. Alright, let me hide
him again. There we go. I think that's pretty
good little piece to have as we populate
this room. Yes. So there we go.
We've got our table, I'll drag it into the
furniture collection, and there we go. So in the next section, we'll begin working on building the room around the
furniture that we have.
36. 036 Using Walk Navigation: Well, let's I've mentioned
I think we're to the point where we can begin blocking out the room and then kind of see what
else we might need. So let's just begin
with the floor. Let's just press
Shift a match cube. Let's just scale this
in the Z, s and z. One thing about
creating walls and floors is I think it's really better to have some
thickness to them instead of just using
a polygon plane. Because once you begin
putting the lights in and begin
rendering the scene, you can find that there's
light leaks and problems with shadows if you're
just using polygon planes. So that's why I'm creating the floors and the walls
here with some thickness. Alright, so I'm gonna go
to the top view with the seven key on the numpad
and on press Sx. And let's just start trying to figure out how big
this room should be. So I'm going to go out
like that. Yes. And why? Maybe come out like this? What about something like this? Yeah, that's not bad. Maybe a little bit
wider like this. I don't know that we need
it to be quite this deep. I'm going to tab into edit
mode and select this. It's down here. Just kind of pull it in a bit. This is just kind of
blocking in the scene, blocking in where we
think things might be. Now from here actually, these don't need to be
quite as close together. Now we could select all of these and just
move them out like this, give it some
breathing room here. I think something like this. Maybe let me grab these
and move these in. This is how I get a sense of
what the scene is gonna be, what the structure of
the room may be here. Yeah, I think
that's pretty good. One thing we could do is
actually come in here. We could use a blenders
walk navigation to kind of walk around the scene and see how it looks or
see how it feels. But there's a couple of
things we need to do before we can begin walking around. And one is to come up
here to Edit Preferences. And if we go to navigation, you can see you've got this
fly and walk navigation. And what I like to do is
turn on gravity here. I've changed the view
height to 1.7 meters. I think it's usually 1.6 meters. So I've changed that here. The reason why is, let me close this and I'll bring back that reference figure. And let me zoom in here. And if I hit the N key, you can see that he's 1.8 meters tall and the eyes are about 1.7. And that's what that
walk navigation that field here under gravity is saying that
this is exactly how high above the ground floor or above the object
you're walking on, the camera is going to be. Now that we've done that,
I'm gonna close that. We can also come over here to the View tab here in this panel. And if we go to view, we can see that the focal
length of our Viewport here is 50 millimeters
and that's just a good standard view. But to walk around, it's a little bit better to
have a wider point of view. So I'm just going to change
this at least temporarily to Thirty-five millimeters here and you can see it got
a little wider. Alright, so now if I hit the
N key to close that panel, and if I come up here to View, and come down here
to navigation, and we can choose
walk navigation, then move the mouse a bit and we dropped down to the
floor underneath us. Now we can move around using the WASD keys on the keyboard, just like we were
in a video game. So I can hit the W key
and move around here. And you can see in
my keyboard display the endless line of w's
there, but that's okay. We can walk around and just take a look at the furniture
in our scene, how far apart they are, etc. By just walking around, kind of like it
was a video game. So this can be really
helpful just to get a sense of the proportion and
the size of the room here. Now once you're done,
you can just hit Escape. There we go. One thing I will say
is that if you're off here away from an object and you go to View Navigation
and walk navigation, you just drop right down and once again you can
hit the escape key. Now the shortcut for this walk navigation is
Shift and the tilde key. The tilde key is the
key above the Tab key. And next to the one key. If I press Shift tilde
and move the mouse, I'll drop down to
the floor and then I can move around once again. Alright, I'll hit
the escape key. Now let's add a wall or two, I think for the back here, let me open up one of our
reference images here. If we look at this one here, you can see that it's got
this indentation here, and I think there's
this window seat in front of these
windows as well. So I'd like to get
something like this. What I will do, Let's first
of all create another cube, shift a mesh cube, and I'll bring it back here. I'll hit the three
key on the numpad. I'll hit G and move it up. It's sitting on the grid there. And then what I'll do
is I'll just press S and scale it in the y-axis. We get a little bit
of thickness there. Then let's scale out in the x
to come out here like this. I'll tab into edit mode and hit the three key and
then pull that up. I'm not really sure how
tall this should be yet, but this ceiling is
actually pretty tall. From here. What I'm
gonna do is just insert an edge loop down the center
and hit Enter two times. And then just like
we've done before, hit the three key, press Alt Z and then select
one side and delete faces, and then add a mirror modifier. I'll turn on clipping
and turn on the cage. Then what Let's do is let's add edge loops to kind of
delineate this area. So if I press Control R, maybe we could add
an edge loop here. And let's press Control R again and maybe add
an edge loop here. Then let's take all
of these faces here. I'll press the three
key and Alt click between two of these faces here, and then let's just pull this back and see what happens here. Yeah, so something like that. I'm going to press Sx and
scale out just a bit. I'm just trying to
get a sense of what we'd need for this area in here. I feel like they come out
some here from the windows. So maybe if we tapped into
edit mode and selected this face and hit E
and pulled out some. We could get this area
right here. Let's try that. All right, and then we
could of course just take this floor tab into
edit mode and pull this back just to cover
that on the floor. Then, well, let's just
create another cube here. Shift a mesh cube and we'll just bring this back like this. This is gonna be just blocking
in that window seat there. Let me just take this and move it down a bit and then scale in the x and pull this
out like this. You can see we're kind of
getting a window seat here. Maybe pull this forward. Pull it down a bit. Let's take our reference figure and pull them out over here. Let's turn them
around our z 180. And it feels like that's a
little bit too tall now. So I'll bring this
down a bit like that. Yes. So we've just got kind
of a window seat there. It's kind of too deep. I think. I'm just going to Alt click
between two faces to select that whole face loop there and then bring it
forward just a bit like that. I'm just using these
basic shapes to block out what I think
might work for me here. Yeah, once again, I'll press
Shift tilde, move the mouse, and then hit the W key and kind of walk over here and
just take a look at this. Is this about the height? I would think that a window seat would
be yeah, I think so. Turn around here. Hit Escape. Yeah. I think that's okay. I feel like now that these pieces are a
little bit too big, I'm just going to
hit the S key and scale it down just a little bit. Then I also think I'm
gonna take one of these and scale it down. Just hit the S key and scale
it down just a little bit. Hit the delete key
there to get rid of that one and then shift dx, move it over RZ, put that back there. I'm just still even now
working out the proportions. All right. So I think we've got a good
beginning to our room here. In the next video, we'll
continue putting up the walls.
37. 037 Blocking In the Walls and Panels: The next thing let's do is add some walls here just to
see what it looks like. Before I do, maybe let's
change the name of this. We'll just call it floor
so we know what that is. I'm just going to change
the name of this cube here, call it window seat, just so I know what things are. As we move forward. This may change and we may
add or subtract objects, but just to kind of get a sense of what
things are currently. So this one I'll just
call window wall. And then let's create another
cube and move it over. And let's begin working
on this as a wall here. I'll just scale it in the X a bit and hit the G key and move it up and
put it right in here. Kind of get it on
that red line there, and then I'll scale
it out in the y. Bring it out about like this. And then I'll just
begin grabbing faces and bring
it out like this. Maybe bring it up
about like that. So once again, this is
all pretty rough just to see how it's going
to fit in here. Alright, let's go with
that and let's also just take it and duplicate it. I'll hit the seven key on the numpad to go
to the top view. And let's just press Shift dx and move
it over here a bit. And let's take a look at it now. How does this feel?
I'll press Shift tilde, move the mouse will
drop down and I'll just walk around here. Kind of take a look around. I think this is
beginning to feel okay. I feel like it's a
little bit too thin, like the walls are a
little bit too close. I'll hit Escape and let me
move these out just a bit. See if this helps any like this. I'll take this and
scale it out in the x. And once again, this
is just me trying to figure out what the
room's going to be like. That's all. Maybe I'll grab
this and move this over here. All right, then let
me take these here, select these faces and just
move them out as well. All right, let's go back in. I will press Shift tilde, move the mouse we dropped down. Let's move around here. Yeah, I feel like it needed a little bit more width to it if I move back here,
what do we think? Yeah, I think
that's pretty good. Let's take these real quick and just move these
back towards the wall. All right, so let's
go with that. Once again, these can be
moved at any point in time. That's the nice
part about keeping all the walls and the
floors fairly module. You can move them
around as needed. Now, there's these pillars here, these things right
here in the walls. And it looks like they'd
go around the room. And I think I'd
like to put some on either side of the room here. I'd like to try and get
them evenly spaced. And do you recall when we were creating the side share
with the ornate legs, how we clicked and dragged in the array modifier in the x field and spread
those little barrels apart. But we can use that same
functionality here of the array modifier to place these columns evenly
along the wall. Let's first of all just
create another cube. And let's scale it
down quite a bit. And maybe I'll scale on the x. And let's just see about
putting this in here. Hit the period key again. And let's move this over to a wall like this
and move this over. And I just want to try and get something that looks kind
of like this right there. Maybe I'll pull it in a bit. Maybe it's not quite that
wide, something like that. I'll just take this
down to the floor here and then tab into edit mode and select this face and just take
it all the way up. Once again, I'm having it be a separate piece just to keep it modular so I can
move things around. Now let's take
this and let's add an array modifier to it here. Notice that if I add these
and click and drag in the x-axis and this x field
here it goes this way. What Let's do is let 0 this
out here and type one. In the y field and now
it goes in the y-axis. And then we can click on this white field and
spread them apart. Now you can see we can get
them fairly evenly spaced. And let me scale in
the y just a bit so they are a little bit farther
out or a little bit wider. I'll pull them back in some. Once again, just trying to get the basic structure of this. What do you think about that
that's pretty evenly spaced. I would think. And I'm thinking about maybe
putting a window here. You can see that here. But maybe just with curtains, you can see there
are curtains here. I'm wondering if I could
just put curtains here. And over here as if there are windows there and only
have this wall here, have actual windows
with light coming in. Well, now that we've got these, I guess we could
go ahead and just duplicate these and take
them over to the other side. I'm going to hit the Z
key and go to wireframe. And then I'll press Shift dx
and take these over here. Like that. All right,
let's take a look. Alright, so what I'm gonna do
once again is come in here, pressed if tilde, move the mouse dropped
down to the floor. And I'll walk around
and take a look here. I feel like these may be too far out sticking too far
out from the wall. Well, although that's not bad. Yeah, actually, I think
that's pretty good. I will walk around here and just take a look from
this angle here. Yeah, okay. I'm gonna hit the Escape key. And then I'll grab these
and let's just move these over d inside here. Then also we want to
think about how we're going to get this panel here, these lines, the
squares on the wall. I think what I'd
like to do is use a polygon plane and fit that
in here and give it a try. So let's just press
Shift a mesh plane, and I'm gonna give this a try. Let's see how it works. Ry and I'll press control
and hold the Control key down as I spin and I'm
gonna rotate it 90 degrees. Then I'm going to go
to the side view with the three key and hit the
Z key and go to wireframe. And I'm going to
bring this in here. I want to fit it inside here just to see if this
is gonna work. I'm gonna move this
out like this. I'll tab into edit mode and grab these points and move
them down to here. Then what I'd like to do, let me move this over. Go back to Solid View and it looks like there
are four panels here. So I'm going to put four or three cuts to
make four sections here. Then I'll put horizontal cuts
until they're about square. Well, there are a
little bit taller than they are wide, aren't they? So maybe something like this. Now what I'll do
is go to edge mode and I'm going to hit the a
key and then I'm going to press Alt Shift and deselect the edges all the
way around the outside. I don't think they'd
bevel anyway, but I just want to make sure then I'm gonna hit the
N key and object mode. And under item here, I'm going to ensure that
the scale is all ones. It's not quite. So I'm going to press Control
a and apply the scale here. Then with these edges selected, I'm going to press Control B
and beveled these out some. So now you can see we're
getting the borders around those panels here,
something like this. Then it looks like I'm gonna need a border all the
way around as well. So I think what I should
do is scale it down a bit. Let me tab back into object mode and get it back
over here where it was. I'm just going to
scale it down just enough to add a border
around the outside. So I'll hit the S key
and I'm going to scale it down like this. Then I'm going to add
a border around it. If I tap back into edit mode and select each of these
edges all the way around. Now I'll hit E, S, and let's scale these out. This. Then like this with
the y-axis like that. Alright. Now, now we should have something
that we can extrude out. So I'll select these faces here. I'm pressing Alt and Shift and clicking between two faces. So I got to click here and
click again, and click again. Now let's just
extrude these out. I'll hit E and pull out. There you go. Maybe a little
bit farther like that. Then I'm gonna go through
and select each one of these and delete them because
we don't need them. And they might just get in the
way at some point in time. So I'll delete
these, delete faces. And then we could also
select these again. All right, so we've just got
the front faces selected. I'm now going to
just inset these. And before I do, I want
to make sure that I've got individual origins selected. I'll hit the I key and inset
these just a little bit. And then I'm gonna
pull them forward. Just a tad. Maybe I'll just hit
G and X and then hold the Shift key and
pull out like this. So we get a bit of a ridge. There. We go. Let's try that.
Let's try and put it in place here and
see what we think. See if this will actually work
for the rest of the room. Spin it around. Let's move this into the wall. Yes. So we're just beginning
to get this kind of pattern on the wall. That's kind of nice. Actually let me
press shift D y and move it over here
and just see if we can fit these in here. Alright, so I think
that'll probably work. That'll probably be
our strategy going forward for creating
these kinds of panels. All right, in the next video, I'd like to maybe
work on this wall. And I think what I want is we've got one of these in
here with a fireplace. Let me take a look at this. Yeah, right here. I'd like to try and build
a fireplace like this. On the wall opposite
the windows there. A fireplace and a doorway here. Let's work on that
coming up next.
38. 038 Modeling Mantel of the Fireplace: To start working
on this fireplace, I think I want to
hide everything here, but I also want to do a little
bit of organizing first. Never fear we will get back to working on these panels here, but I'd like to get the
room pretty much set up before I begin inserting
these all the way around. This was just a prototype to see if it's going to work
and I think it will. But I'd like to go ahead
and move on to this piece now to hide everything or I
guess to organize things. Let's first of all hide the furniture and the
reference figure. And then let's just select everything in the
scene with the a key. Then what I'm gonna
do is use the M key, M for move to collection and
create a new collection. And let's just call this room. And I'll click OK. And there we go. Now we've got this new
collection over here with everything that we've
created for the room in it. And I'll just twirl that up and I'll just hide
it here like that. We haven't gone through and named everything
in that collection yet because I'm not quite sure what we're going to
keep and what we aren't. But I just wanted to
get it organized a little bit better while
we work on the fireplace. Alright, so for this, I think what I'm
gonna do is begin with this mantle piece. And this is a pretty big, pretty sizable
piece in the room. You can tell by this
here I'm going to press Control Space bar. You can tell by this suit of armor over here in the corner that the height of a person
is right about here. So this is actually pretty tall, a pretty big piece
that's gonna be kind of central
interest in the room. Let's just going to get
this in place here. And as I said, let's begin
with this mantle piece. I'll just press Shift a mesh cube and I'll hit
the one on the numpad. And let's just bring this up. Let's scale in the z. Let's just try and get
this bottom part right here before all the little
decorative pieces on top here. Let's bring this up. Maybe I'll scale it
in the x just a bit. Maybe a little more. I'm just trying to
get the proportion of how tall to how wide. Fairly close here. And of course it's going to
be up kind of like this. Let's go with this. Let's say this is about
what we want here. All right, I will hit the N key and take a look at the scale o. And also we need to bring
it in on this side as well. Let me press SY and scale
that and we don't really know yet how far out from
the wall we want it, but I think this will
be fine right here. Then let's go ahead
and apply our scale. So we have all ones
in the scale fields. I'll press Control a
and apply the scale. Then from here, let's begin working on these
little pieces here. Now it's really hard to tell what it is we're
trying to create here. So we're going to have to
be fairly imaginative. I think. I'm going to tab
into edit mode and just select this one face. I could split it down the
middle and mirror this, but I don't think we need to
if we're just gonna be doing extrusions and scales
and insects, etc. To begin with, let's just
hit D S and scale out a bit. And let's see how the scale, even though we
apply in our scale, it's still not
scaling out in the y simply because it's
so long and thin. So let's pull that out
in the y just a bit. Then let's hit E and
extrude that up. And then it looks like we're
going to need another one. So E, S, and let's
scale this out. Once again hit SY and scale out in the y to try and
get it fairly uniform. There we go. Let's hit E and pull
up a little more here. Then this top piece, it seems to me it just
kind of angles out. So let's just hit E and S, and let's scale out here
to try and get it uniform. And I'm going to scale it
out quite a bit like this. And hit S and Y and scale it up to try and get it to be
about the right size there. Then I'm just going
to pull it up. Pull it up like
this. There we go. Now that may be a
little bit too much. I'll hit the S key
and scale in a bit. And maybe I'll scale out in the y just a
little bit like that. All right. Let's take a look at that. Yes. So I think
that's pretty good. They're also on the top. I'll just extrude this up just a little
bit here like this. We go. And then what else do
we want to do here? I think I'd like to add something along this
top angled part. It seems to me like there's
something going on there. So we could add a few ridges to this so we could
press Control R. And maybe let's scroll the
mouse wheel and let's add. For cuts like that. Then what I'll do is I'll
actually bevel these. I'll press Control B and
pull these out like this. They're fairly even
apart like that. And then what I can do is select every other
one like this. And then scale in,
hit the S key. Scale in a bit like this. There we go. Let's take a look at this. Yeah, it looks like we
need a little more here. Sy, hold the Shift key down. I'm just trying to get them so they're kind of straight
up and down here. Like that. Maybe we could also take this edge here
all the way around. Let me select this over here. Then. Let's bevel this. I'll press Control B. Scroll the mouse wheel a bit, hold the Shift key. Let's bring that like that. We have just a little bit of
something going on there. And then do we want to do
that with either of these? Well, I think maybe
not right now, maybe let's wait on that. Now one thing you
may be thinking is, is why is all this on
the back when it's just gonna be right up against the wall and we aren't
going to see it. Well, that's true. I mean, we could just
push this into the wall, have an intersect the wall, and no one would ever see this. But either way, what I like to do is leave it till the end. And I think it's a
whole lot easier because all you have to do now, I'll tab into edit mode
and I'll hit the one key. And then we can press Alt
Z to go to x-ray mode, or we could press Shift
Z to go to wireframe. So either way works. We've been using alt Z, but Shift Z works just as well. What I'm gonna do is just
select all of these here in the back and then hit
Delete and delete faces. Now that's just empty. And what we can do back in the side view with the
three key on the numpad. We can select these all again and scale them in the
y so they're flat. So if I press SY and I begin pushing the mouse
and you can see that this is beginning
to flatten that up. And if you look in the upper left-hand corner
of the interface, you can see that the
scale is one and then 0.8.7 and it's moving toward 0. Well, what we can do
is we can just go straight to 0 by
typing in zeros. So we hit 0 and it's flat, and then we hit the Enter
key, and there we go. Now if I press Shift Z
to come out of that, we've got that flattened there. You can move this
however far in or out that you need it once you
get it up against the wall. All right, so there is the mantle piece
for our fireplace. In the next video, let's work on these pillars on either
side of the fireplace.
39. 039 Continuing the Fireplace: Well, if we had to use
our imaginations a bit for the mantle, it looks like we're really
going to have to use our imagination for these
pedestals on either side. We just don't have any images of what they look
like on the bottom. On the bottom, I'm
just going to try and make them look
similar to the top. Maybe we can throw in our own personal flare the
hair, I don't know. But let's work on this now. I'm gonna go to the front
view with numpad one. And once again, let's
begin with a cube. I'll scale this down and
let's get it up here. And I think I want
to just begin with this piece right here and
work my way down there. So I'll scale out just a bit. Maybe something like that. I'll tab into edit mode,
I'll press Shift Z. And let's bring
this up from here. Let's just begin extruding down. So it looks to me like there's an angle here. Question mark. It's kind of hard to see, but I'll go ahead and press
S and scale in a bit. Maybe I'll bring
this whole thing up a little bit more like that and drag these
down just a bit. And then I'll get
this piece here. So it looks like to me, and of course, whatever you
want to do here is fine, but I think I'm going to
press S and scale out a bit here and then bring it straight
down for this right here. I'm gonna go like this. Then let's hit I to n set. Then E to pull down. Then I'm going to I think hit again and pull down and then
scale in like this here. And then E again to
get this little piece. Now I'm gonna have to hit E
and S and scale out a bit. Looks like quite
a bit like this. Then let's begin
bringing these down. I think I'm going to
scale them in a bit. Then maybe hit E and S
and bring it straight down and I bring that in a bit. So really as I said, we're gonna have to be just
a little creative here. Maybe add our own
flair here and there. All right, from here
I think I'm going to just extrude and
pull straight down. Then I'll kind of
angle it in semi. It looks to me like
it's kind of angled in. It's hard to tell. So I'm just going to hit E
and pull down like this. And then I'm going to scale this in just a little
bit like that. I feel like they look like
they kind of angle in a bit. And then down here,
let's add some sort of base to this down here that's somewhat reminiscent of the top. So I'm just going
to hit ES and pull out an e and just make some things here that
might work like this. Maybe I'll inset in just a bit and pull down
again like this. Maybe one more time actually, that isn't too bad. Then I'm gonna hit E and
S and scale out this. Have it be substantial
there at the bottom. Maybe one more ES, pull out an e and bring that all the way
down, something like that. I'm going to press Shift Z there and let's see about this. All right, a couple of
things jump out at me. First of all, I don't
think this is high enough. I think this needs
to come up more. Which to me says that this
needs to then come up more. So maybe this and I'm gonna hit the S key and scale
that out just a bit. Bring it up. Then let's see here. And then I'm gonna hit the
a key and bring it in. There just may be
some modifications you need to do for this. I feel like this whole
part right here for me on mine should be
a little bit taller, so I'm going to just scale
it in the z and then pull it down and
put it back there. Shift Z to go back
to Solid mode. So you can kind of see where
we're going with that. Let's now go to the side view. And I'll bring
this up like this, kind of get these so they
connect a little bit better. All right, let's
take a look here. So I think that's pretty good. However, I feel like
now that this piece up top isn't tall enough, so I'm going to
scale in the z here, pull that up some. As we've said before, there's always room to adjust to proportions and scale on your objects as
you're creating them. Once again, I think I will take this and delete
those on the back, just like we did up front
here or up on the mantle. So I'll go to the side view and then press Shift Z
tab into edit mode. And in vertex mode,
I think I will just. Take all of these, press S, Y 0, that flattens everything. Then I'm gonna hit
Delete and delete faces. And there we go.
So now we've got this area flat like the top, so we can then adjust
this however we need to once we
get the walls in, once we get it set up
against the wall there. Alright. It's not exactly
the way it is here, but I think it's pretty good. I think it's got a good weight and is fairly substantial there. So let's go ahead and
mirror this over. Move the origin of this
object to the center of the grid by going to
Object Set Origin, origin to 3D cursor. And then let's go ahead
and mirror this over. Here. I'll turn on the cage. And I'm using the
mirror modifier in case there are things I wanted to change here as we move forward. If I just use Control
M, the mirror tool, then I'd have to
delete and duplicate and mirror over again every
time I made a change. Now let's get this piece
right in the middle here. I think that's
just another cube. Here. Let's press the one key. I'll press Shift Z again, and let's bring this up. Maybe scale it in the
z, scale it in the X. And let's now see how far
we want to put it in. I'll scale it in the why. How far end do we think that is? I'm thinking
something like this. Maybe a little bit more, maybe a little bit farther back. It's hard to tell, but I can go ahead and
put that in there. Now we don't need
the back face here. I'll delete that. I could also just take that edge and bring it
in something like this. I wanted just to clean
that up in the back, although known as ever
going to see that there. Now let's get this edge. It looks like there's
a frame or something around this right here. So I think what I'll
do is first of all, select this face on top here. Let's get this here, and I'll bring it down. So it's fairly close
to that right there. Then let's tab into edit mode
and select that face there. Let's hit the I key, and let's insert this in a bit, something like this,
and then I'll press S to bring this in. It looks like it goes
to about right there. Then I think I just want to
bevel that and pull it out. Let's see, I'll
scale that in a bit. So now I'll hit the two key. So we're just selecting
those edges and let's press Control B. Bevel that out. Oh, and it's not beveling
on the top because I bet we tap into object mode. Yeah, our scale is
pretty far off, so let's undo this real quick. Before we do that bevel, Let's tab into object
mode and press Control a and apply the scale. And then let's see if that
helps our bevel a little bit. Let's press Control B again, then pull out and
it helps a little, you know, what I'll do is just grab that edge here and
that edge here and press S. Scale that up a bit. However, look at where I am at individual origins
instead of median points. So let's try that again. There we go. Now with median point networks
a little bit better. Then what I'll do is
Alt click between two faces to select
that whole face loop. And let's just hit E and
pull out a bit like that. And I feel like it's
rounded just a bit. And that's way too far out. So let me pull that back. Then what I'll do is
insert an edge loop in there like this. Let's pull that
edge loop out just a bit like we've done before. And then let's press Control B. Pull that out, scroll
the mouse wheel, some endless, just add a
little bit of a curve to that. There we go. That's probably something
that no one will ever see, but I'll know it's there. Alright, and then we
could maybe extrude some in for these
panels on the pillars. So do we want panels? We could do that here and here. Do we also wanted on the inside? Can't really tell here, but we could do it,
we could try it. What I'll do is I'll tab
into object mode and apply the scale here just in
case that might help. Then I think we're
probably going to have to do these individually, because even with
individual origins, It's gonna see these three
faces as all one unit. So let's select the front first. And I'll hit the I key and
inset in just a bit like that. If we want to be precise, maybe we could type in
0.04 for the thickness. And then we can take
these two over here. Hit I said in and then also
type in 0.04 over here. So they're fairly precise. Then we can take
these faces here. And if I hit the period key and go to individual
origins, now, if we extrude these
n with the E key, they will all push
in or pull out. There we go, push
in the same way. And I don't want to go too
far because if we go too far, they're going to
overlap each other. I'll just go into the tag
just a little tiny bit. There we go. Yeah, there we go. We've got just those
kind of panels there. Now there are more
intricate designs here. Maybe we'll add
something up here, but I don't think I'll go into all this detail on the
front of the pillars. But in the next video, what Let's do is
let's actually work on the fireplace itself
with the hearth. And also the bottom
here that will connect with the floor that's
coming up next.
40. 040-Using the Boolean Modifier: Now for the actual fireplace
part of this right in here, I think what I'd like to
do is just create a cube and then create an
object to cut this hole, this shape of a hole
into that object. I think it's gonna be
easier than actually building the whole
thing around it. So let's begin with a cube. And I will go to the front
view with numpad one. And let's just bring this up. Kind of fit it in here, I'll scale it in the x, so it kind of covers that. And then it looks like it's just behind that across
panel right there. So if I maybe bring it back
so it's just behind there. Like that. Maybe let's see. A little bit too far
back, maybe like this. Let's try that. Yeah. So it's just behind there. I think that'll be fine. I think I think there would
be some sort of a base to this marble base on the bottom here that
connects it to the floor. So let me just create
a new cube here. And let's press, well this
time I'll press Alt Z and let's press Z and
let's bring this down. And I'm gonna put it right in here and make it about
like this maybe, and then scale it out. All right, let's see z. I'll slide that back in. So where would that be? I wonder if he felt
like that maybe this is just me imagining
how it it could be. I really don't know, I can't see down there. So we're just going
to have to kind of make a guess and do what
we think looks right? Alright, so now
that I've got that, let me bring this piece back up. This time I'll press
Shift Z and I'll just bring this up to about
right here like that. Now that we have this, we need to create that
hole in the fireplace. So to do that, I'm
going to create yet a whole other object that we can use to
cut that whole. Let's once again create
yet another cube and I will bring
it forward here. Let's press Shift Z, and I'm going to bring it up. Let's see if we can
get this in place. I'm going to drag
select these up top. I'm looking at this area here. Maybe this is down like this. How wide should this be? That's a good question. Maybe something like this. And I think also
I want it to kind of come up in the
middle just a bit. So I'm gonna press Control R and drop an edge right
down the center. And I'll drag, select
these two points here and then pull them
up a bit like that. Yeah, so something like that. However, I feel like that we've got these
things right here. You'd see these little
ridges are extrusions or something going on across and
up and down on either side. What that tells me
is I'm gonna need to insert edge loops
on this right here. And insert edge loops. You need quads, you need
polygons with four signs. And once I cut, once I use this as a cutter
to cut that hole in there, the remaining polygons
on the front will be in guns or there'll be polygons with more
than four sides. So if I'm going to insert edge loops into
this to get these, I need to do it now
before I do the cut. So with that in mind, let me change the name of this just temporarily
so we know what it is. I'll just call it cutter. Then I'm gonna hide
it. There we go. Now what I want
to do is let's go back to that front view Shift Z. I'm going to
select that cube. Oh, I can't do it while
I'm in wireframe. There we go. With this. Now, I'll tab into
edit mode and press Control R and drop an edge
right down the center. And let's then split this here, select these faces,
delete faces, and let's give this
a mirror modifier. Turn on clipping, turned on the cage so we can
see that there now. Now let's add some
edge loops that we can use to create these ridges. So I'm going to press Shift Z. I'm going to turn
the cutter back on. Now I can see where that
fireplace hole is going to be. So now if I press Control R, I can pull these out on
either side of that. And then I can press
Control R and pull that up just above where that's
gonna be. There we go. I've used that cut
or shape just to try and figure out where these
edges are supposed to be. Now what lists do
is select these. I'll press Alt and Shift and click these as well, and lists. Bevel these, so we have
faces to extrude out. So I'll press Control
B and pull out a bit. And I'll hold the Shift
key down and maybe we don't need anything any
thicker than that, let's say. Now I want to select these
faces and extrude them out. But look at this, all of these phases
are selected as well. What Let's do is let's
hit the three key. I'll hit the one key
to go to vertex mode, and then I'll just press
Control and click and drag to de-select
all those others. Then if we hit the three key, only these faces
will be selected. Now, we can extrude
these out just a bit, hit E and pull them
out just a little bit like that, let's say. All right, so we've gotten now those little ridges in there. While those polygons,
we're still four-sided. Now let's think about
the cutter here. For this, I think I
want a little bit of a rounded edge here. So let's go back to
the front view here. Well, actually it's tab
into edit mode and let's select these edges
here like this. And then if we go back to the
front view and wireframe, we can press Control
B and pull these out. And then I'll scroll the
mouse wheel and lifts, add edges to this. And I'm going to add, well, let's do this. I've got six edges or
segments on there now, I'm going to increase
that to eight to make that fairly smooth. And maybe I'll click and drag on the width
to bring that down. Some, maybe something like this. Let's go with that. That kind of has that same feel. Alright, so I'll hit the one key and I just want to drag these down just a little bit
below the base there. Alright, so now we have our
cutter in the right shape. We have our object that
we're going to cut into. So what I'd like to do is for the cutter object view
that in wireframe. To do that here in object mode, what we can do is just come over here to the object properties. And down in the
viewport display, we can then change from
display as textured two wire. And now we can see through that. All right, so that's,
so that as we do this, we'll be able to see the
effect of it in real-time. Now let's select this cube
here for the fireplace. Let's go back to our modifiers and let's apply the mirror here. I think we better
apply our mirror before we do the Boolean, it might be just a
little bit easier. So let's go ahead and pull
this down and click Apply. Then let's add a
Boolean modifier here. Now we need to put the cutter object into
the object field. And one way to do that
is just to click on the eyedropper and then hover over the object we wanted
to be the cutter and just click there and
that adds it into there. Now, if we select this object and then drag it
in, look at what happens. We can see in real-time the cut happening into
the object there, and that's what we want. Now we can kind of
get a sense of how far we need to push this back. How deep is a fireplace? I don't know. It's a pretty big one.
Should we go back about like there and
you can see that we haven't gone back further than the back of the
cube and that's good. We don't want to do that. But how does that look? Should we maybe move
it back to about here? Let's say let's hide the cutter just so
we can see it now. Yeah, That doesn't look too bad. It looks about like how
far a fireplace would be. I think at least
something this big. All so what let's do now is let's just apply that Boolean. Go ahead and come over
here, click Apply. Let's smooth it. Let's go to Object
Data Properties and turn on auto smooth. And that clean that
up pretty nicely. One more thing that we
could do maybe is we've got these kind of roles
on the edge of this. And I don't know that
we're going to want to go in and do all of that. But one thing we can do maybe is just select this edge here, alt, click this edge, Alt Shift, click this edge. And then we're gonna
have to shift click to deselect these and these. Let me press Shift Z and see if we have anything
else selected. Now, that looks pretty good. So with this selected, let's just bevel this
and see how it looks. I'll press Control B and
let's pull this out. Some got quite a few bevels there and we're having a bit of a problem look in the
center, there aren't we? So let me hit the escape key and let's think about why
that might be happening. First of all, let's
hit the N key and let's apply the scale Control
a and apply the scale. Then let's take a look
at our face orientation, which way the
polygons are facing. So if we come up here
to this menu here, the viewport overlays, we have this little guy
face orientation. And if we click that, we
see blue and we see on the backside we see red and
blue is good and red is bad. So it doesn't look like the problem here is
face orientation. We could select this and go back into edit mode and try
and do this again, Control B and pull out. And it looks like it was the
scale now, so that's good. I'll scroll that, click there. Tab back into object
mode and then let's turn off face orientation. We're going to want to use
this tool to examine all of our other objects
to make sure that all the polygons
are facing outward, that we don't have any red on the outside and we'll be
doing that coming up soon, but I'm gonna go ahead
and turn this off. And so we'd go there. We've got our fireplace or hearth are mantle
and our pillars. That's pretty good. Let's bring our
reference figure in. Let's unhide him. There he is. Bring him out here
and see what we think about the size of this. Now, recall that that
night was about, went up to about here. So it appears that this
is all a little too big. What I'll do is I'm
just gonna select this guy and to easily then
select everything else. I'm going to press Control I, to invert the selection. I can just select all
of that fairly easily. Then I want to scale
from the 3D cursor here. So let's hit the period
key change to 3D cursor. And then I'm going
to scale down. Let's get it. So it's about
the right height here. So his head kind of maybe goes right in the
center of this panel. Let's try that. Kind of feel like
that's about right. Alright, so I think we've got our fireplace there
in the next video. Let's put this in the
scene and begin thinking about how we're going to create this back wall and doorway.
41. 041 Placing the Fireplace in the Room: Alright, let's now put this fireplace in the room
and see how it looks. Now, for many of
the other things, I've applied the modifiers
and joined it all together. But if we want to make
any adjustments to this, we really need to
keep it separate. So how do we select it and move it
throughout the scene in a reasonable way
without having to go through and select each and
everything before we do. Well, we can take this and we can create a
collection of it, and then we can just select
objects from that collection. So first of all, let me hide the figure and then let's just hit the a key and
select everything. And then once again, let's
hit M and we'll create a new collection and we can just call it fireplace for now. Let's do that. Now whenever we
want to select it, all we have to do is
just come over here and right-click and choose,
Select objects. And now everything in that
collection has been selected. So let's now bring
back the furniture, the room, and the figure. And let's get this in place so you can see what I
mean by if we had to go through and select each individual part of this
to try and move it around. It could get old. So let's just
right-click on this, choose, Select objects
in there we go. Now let's move it over here
and let's spin it around. Oh, I'm still using
the 3D cursor. You can see that here. So I'll just hit the period key change to median
point. And there we go. Now we can spin this around, we can press are 180 and
spin it around here. And we can put it right Here. Let's see how that looks. Let's take our character
and slide him over here. He's spun around 360 degrees
and the z-axis here, we could just type in 180
and each spin around. And let's place them right here next to the fireplace
and see what we think. Feel like it's a little
big for the room. But before we make
any final decisions, Let's take one of these walls
and duplicate it. Shift DY. And I will move the origin into the
center of this object, set origin, origin to geometry. Then let's turn it once again. We can just type in 90 degrees here in the
z field if we wanted. Then I'll go to the
top view and let's just hit G and
move it over here. And if we wanted to get
it exactly in the center, we could come up
here to the x-axis and type in 0 and enter. Let's scale it in the x, so we bring it in like that. All right, Now let's take a look at this and see what we think. As I mentioned, I
think I'm going to add a doorway and kind of a hallway that we can barely
see out here, right here. But for now, let's just see what we think about
the size of this. I'm going to press Shift tilde, move the mouse and drop down to the floor
and then we'll hit our WASD keys to move around the scene
and see what we think. And I feel like
it's a little big, even though it looks really
big here in the image. I feel like within our room, maybe I'll room isn't
quite as big as this room is just
not quite right. I feel like it should be a
little bit smaller or at least a little bit lower down. What Let's do is
let's take these. And once again, this is why
we kept everything separate here so we can move
these around as we need. I'm going to press Shift Z, grab these and just
move these down a bit. Maybe something like that. Maybe that's a little too much, maybe right about there. And then let's take these two
objects and move them down. Like this. Let's see how that works. Yeah, actually that's not bad. I feel like that has a better
sense of scale in the room. Then the way it was. So let's make sure
everything's in place here. I want to bring
this down so they connect or at least intersect. There we go. And then let me move the wall or I want to move
let me move the fireplace. Once again, I'll right-click on that collection and choose, Select Objects and then I'm
gonna move it back till it just begins to intersect with the wall here. There we go. Then of course
we're gonna need to get rid of this area here. I just want to see
how we're doing. I think that's about
what I want there. Once again, we can continue to adjust this as we move forward, I think I will leave these individual objects here in this collection
until the very end, until we're pretty much
done with the modeling. And before we move on
to the UV mapping, I'll keep them separate objects. All right, so let's go
ahead and cut the hole out here so we can see
inside the fireplace. I'll just select
this wall and let's tab into edit mode and
I'll press Control R. Let's scroll the mouse
wheel and click here. Let's bring these in. Let me hit the two key. I just want to select these
edges and these edges here. Press Sx and scale in a bit. So it comes in like that. And then I want to press
Control R here and drag down to about right here
just so we can get this area blocked out. Alright, so now what
we'll do is in edit mode, Let's hit the three
key and select this face here and hit
Delete and delete faces. And then let's select this face, delete, delete faces,
and there we go. So now we can see
inside our fireplace, we've just created a hole here. It looks like we could also maybe get rid of
this one down here. I'll press Alt Z
tab into edit mode. And yeah, we could just delete
this face as well. We go. Alright, so we have
our fireplace in. I think that's pretty good. What I'd like to do
now is try and get a sense of how big this
door is going to be. Let's move this
guy over here and kind of figuring out how
big the door's gonna be. To do this, I want to get
rid of the furniture. Let's hide these. If I hide the room, it will hide the fireplace
wall and the floor. And I want those to get a sense of how big
the door should be. So let's take this
wall and this floor, and let's hit the M
key and let's move these two are seen
collection right there, and that brings these out
from those collections. Let's change the name of this to fireplace wall so we
know what this is. Alright, and then we
can go in and hide the room and just have these
objects still in the scene. All right, so now
let's figure out how big we think this
door should be. One of the problems
I have here is I can't just go out and Google the standard height of a
door that would be okay for a contemporary setting, but for something
like this house or a room built in the
late 1600s or so. There really weren't
standard door sizes, especially for luxury
homes like this. So we're gonna have to
kind of eyeball it. I will press Shift a mesh cube and let's try and figure
out how big this should be. I'm going to hit the one
key and press Shift Z. And so let's bring this up. I'll put it right in
here, right about here. Let's say, let's
bring this over. Scale it in the x. How big of a door
should this be? I'll tab into edit
mode and let's just select this face here. And let's bring this up. The door is higher
than the mantle piece, so I think we should
at least do that. Maybe something like this. It looks pretty big, but I think that's the
way they made them then. All right, so let's
just see how that is. I'll press Shift Z and
let's just take this back. Oh, not the floor. This here. Just take this back and
kinda get a sense to set, feel like how big
that door should be. Bring back the room
and the furniture. What do we think to
set feel about right? And like we shouldn't
move it over a minute. Yeah, I think
that's pretty good. Actually. I feel like it
might need to be a little bit thinner and something like that. Alright, so now that
we have our door in, we need to create the opening. Whereas I use the
Boolean modifier to create the opening here. I think because of
inserting edge loops, I'm going to want to
keep this wall object, quads, four-sided polygons, so that I can insert
edge loops as I need to. If I need to, I'm not
really sure if I will, but I don't want to paint
myself into a corner as it were by not being able to add edge loops
if I need them. In the next video, well, let's do is let's block
out the opening of this door and create the
trim around the door. And we'll even block
in the door as well. That's coming up next.
42. 042 Creating the Door Opening and Hallway: As opposed to the way I did the fireplace here
using a Boolean. I think for the door, I better insert edge loops. And let's, let me show you
a real quick while tab into edit mode here and maybe
select this face right here. And you can see that
when I did that Boolean, it created a face here
of quite a few sides. So if we come down here to
the bottom of the screen, and if you don't see
these numbers down here, you can always just
right-click and choose what information you want to see down here on the status bar. But if we look at the faces, you can see we have
one face that we have 15 vertices, 15 sides. If I select this face here, we've got one face
and four sides. When you do that Boolean, you can get some strange faces. Now, I've contained
the issue by adding edge loops around that Boolean
because we had these here. And I could do that over here. I could insert edge loops into, let me tab into object
mode and then edit mode. Here we go. I could insert edge
loops here and contain that Boolean so it
wouldn't extend the end guns to the
rest of the object. But if I'm going to create
edge loops here anyway, why not just use them
to create the whole let me hide the furniture, the room. There we go. And then let me hit the one key and I'll press
Shift Z to go to wireframe. Now I can just take these edge loops here
and just put them on either side of the door and then we'll just delete
the faces on the inside. So I'll press Control R and let's bring this down like this. Alright, so there we've got
the outline of the door. I can hit the three
key and we can select these faces here. So I'll select all
of these like that. And then hit Delete
and delete faces. Now, what Let's do is let's take this and I'll call
this door for now, because we can use
this for the door. And I'll hide that. Here we have our
doorway opening. And from this, if we want, we can also create
the door frame, the wood part that goes around
the outside of the door. You can't really
see it here because just everything's would, but you can kind of
see that right here, that door frame door
jam kind of area there. So what we can do for this is we can tab
into edit mode and we can select edges here
all the way around. Actually, I can just press
Alt click and that'll select that edge
all the way around. And then I want to deselect this edge and
de-select this edge. Now we can bridge these. We can press Control E, or of course come up to
the edge menu up here. But we're going to use
bridge edge loops. And when we do that, it'll just fill the faces
in-between those edges. All right, so now
that we've got that, I actually want this to
be a separate object now. To do that as we know, we can just hit the P key and separate those faces
as its own object. So let's choose two
separate by selection. Let's tab back into object
mode and select that. And there we go. So now this is the beginning of
that door frame. Let's move the origin of this new object to
the center of it. I'll come up here and go
to Object Set Origin, origin to geometry. Now we can just
scale in the y SY, pull that out just a little bit. Just a little bit.
That's all we need. Maybe something like that. Then we need to
give it thickness. And to do that we can use our solidify modifier saw come over here to the
modifiers panel, add modifier and solidify. Now if we choose even thickness, Let's see if it actually is even and it isn't even currently. So let's try and
apply our scale. I'll hit the N key
and sure enough our scale isn't one,
so let's do that. Let's press Control a
and apply the scale. And now that thickness is
even all the way around. Okay, so now that
we've done that, let's see how big we want or how much thickness we
want to add to this. Let's just click and drag in the thickness field and I'll
hold the Shift key down to maybe let's say we want
it to be about like this. Let's say something like that. All right, then what
we can also do is add just a little bit of
interest around the edge here. And to do that, we're
going to need to apply the solidify modifier because I'd like to just add an edge all the way around here. So let's go ahead
and apply this. Pull that down and click Apply. Now when we tab into edit mode, we can see the polygons and
let's just press Control R. And let's add something
right about here. Then I want to just
select those faces. So I'll hit the
three key and Alt click between two of the faces. But the problem is, it goes all the way around
and I don't want that. So I'll press Alt Z. Hit the three key, and then let's just
press Control and click and drag and de-select
all of those on the back. There we go. Now I just want to extrude these forward
just a little bit and pull forward in the y-axis like that.
Something like that. Granted, that may be a little bit more arts and
crafts then Victorian, but I think that'll
work just fine. Alright, now let's add
a door jam in here too. I think I want the
door to swing in. I think I want it to be in here. Let me scroll the
mouse wheel here and click and I want to move
it back some like that. Then maybe I'll just
scale in the y SY, scale them in just a bit. This. Then once again, I want to select these
faces right here. And I just want to extrude
these out just a little bit. So I'm gonna hit ESX and scale
in MDX just a little bit. Then I want to come
up here and grab that face right there
and pull it down. So it's similar to
the rest. Here we go. Let's now bring back that door. Here. I think we need to
scale it in the y. Let me bring it out here, so that's not bad actually in
terms of a width of a door. And I just wanted to come back. It's just not quite hitting
that door jam there. Now. That's going to be our door. And I think all we're
gonna do is just maybe move this origin of
this object real quick. I'm going to press Shift S2
to move the cursor there. Then I'm going to tab into object mode and go to
Object Set Origin, origin to 3D cursor
because I can now hit our z and we can open the
door from that point there. So that's kind of what I
want right there like that. Let's bring back the fireplace, the room, the furniture,
our character. I think I will probably have
the door open like that. We can see out into the hallway as if there's more
going on out there. We can of course, just take this floor here and just extend
this out like that. Then also maybe take this and
extend this out like that. And for the wall back here, we can just grab one of
these press shift D, move this back,
spin it 90 degrees, and we can bring it back
and kind of put it in here. That as you're
looking out the door, you don't see just empty space. You see, we can see here
you've got a wall with wallpaper and wanes coating
and it's got an angle there. We could do all of that as well. And we'll need to add a
wall here around that. But we could, just, for now, we could take this and just
insert an edge loop here, grab that face and
extrude this out. And then we've got that kind of indentation on the wall here, kinda like we have in here. So we can just begin arranging the world outside of
the room as well. If we close the door, I feel like it's gonna feel too claustrophobic and like
we're trying to hide something I like to at least
have in a scene kind of an opening out into other
parts of the world. In the next video,
Let's go ahead and take a look at that door. I'm going to go to
Image open here, and I do have a door right here that we can take
a look at to kind of give us a little
inspiration on how we should create the panels
for this door as well.
43. 043 Modeling the Door Panels: Now for the door, Let's go ahead and hide
some of these things. Let's hide the fireplace and
I'll just hide everything. Actually, I'll just
go ahead and hide everything except the door. Let's put it back in line
with the global axes. So I'll hit the N key
and come over here to the z-axis and just
type 0 in here. Now, let's work on these panels. Feel like it could be
a little bit thicker. Let me do that. Then let's just go
to the front view. I'll hit the one key. And it turns out that
it spins around, we're kind of facing. But that's actually the correct side of the door, isn't it? Because we're gonna
be opening it. So we do want it on this side. Okay, That's good. Let's hit
the one key on the numpad. Before we do anything, let's apply our scale. It is non-uniform, so
let's press Control a and apply the scale that will
help with our insects, bevels scale, things like that. So let's take a look at this. It looks like I'm going to press Control Spacebar and
zoom in here and just, let's think about this
for just a second. It looks like there's this kind of frame around the outside. So that'd be one inset. It looks like there's a frame
around all of these panels. And would that be
another inset or well, we do want to extrude that in. Yeah, it looks like
we could then insert 12345678 edges and then
two down the middle. All right, so let's try this. Let's see what we can do. First of all is tab into edit mode and I'll
select this face. And let's just inset this
with the I key to get that initial border or frame
around the door right there. And then Let's go ahead
and extrude that in. Let's hit E and push
in just a little bit. We don't need a whole lot
there, something like that. Alright, then it
looks like we need, as I said, it looks like
we need eight edges. So I'm going to press Control
R. Scroll the mouse wheel and number of cuts in the bottom left-hand
corner is eight, so I'll hit Enter
twice, and there we go. We probably need
to take this edge and move it down to
where we want it to be. I'll just move it
down to about there. And let's take this edge
and move this one up. I'm just doing this right here. And then we want these 123
crossbars to be the same size. So we can do a similar
thing that we did before. Let's go to face mode and
Alt click between two faces, Alt Shift click and
Alt Shift click here. Now we can switch to
individual origins with that period key,
individual origins. And with this, if we
then scale in the Z, they will scale uniformly
equally for each crossbar. So let's hit S, z. And now we can scale
this down until we get it about the
way we want it. So how do we want it? I feel like though, that those top ones need
to be a little bit smaller because these appear to be a little bit
taller than these. So what let's do now that we
have these the same width. Let's take this
one and this one. And let's move
these up and down. But if I scale them,
they'll change sizes. Even if I go to median point, there's still going
to change sizes. So I think what I need
to do is just move them. So I'm going to just select this one and move
it up until I get a panel about what
I'm seeing here. And same with this one, alt Shift click and I'll
just move this down until I get a panel
about that same size. Maybe something like that. Then I feel like we need
edges here as well. So I'm going to create two and then did I change
to median point? Yes, I did. Okay, So sx and let's
scale these out like that. All right, now we need
to down the center. Let's do that. Scale them in until
they're about the same width as the crossbars. There we go. Now, we
can begin extruding, I think, in setting, etc. So do we want to, Let's select these faces here, these and knees and then
all of these down here. Before we do that, I
think I'm going to grab these and move them
up just a bit. There we go.
Something like this. Then let's extrude in, hit the E key and extrude
ingest a little bit like that. And then I think I'm going
to scale in individually. So let's switch to the
individual origins. And I'm just going to scale
in just a tad like this. So it's kind of angled. They're kind of angling in. Then let's inset for
these panels here. Once again with individual
origins still on, I'll hit I and inset
these like this. And then I think we could
go ahead and extrude these out and pull these out just
a little bit like this. There we go. Alright,
let's take a look. Yeah, I feel like
those came out a little bit too much though. Let me pull these back just
a little bit like that. There we go. We didn't need
him quite that far out. Yeah. And then we could also
maybe bevel those edges. So they're not quite as sharp. To do that though, we're going to have to go
through and select them all. That's gonna be a pain,
but we can do it. I'm just going to Alt Shift
click all of these and just select everything around
each one of these panels. It's going to take a
minute or two. All right. I've selected all of those edges around the outside
and the inside of that panel there. I'm just going to try
and bevel these edges. Let's press Control B and
pull out just a little bit. Then I'll scroll the mouse
wheel and give it just maybe, I don't know, let's
see, two segments. Three seems a little excessive. I'll try to let's try that. Yeah, I think that helps just a bit and then let's
go ahead and smooth it. Let's come down here to the object data properties
and turn on auto smooth. And yeah, that gives us an
interesting look on that. I'm gonna click and drag up. Just see what we can get here. Maybe something like that. I've come down to
around 17 or so. Yeah, that's kind of nice. All right. So let's bring everything back. Let's see what we think. First of all, open the door. I'll press R z and
spin it open there. And what do we think? Let me press Shift S1
to move that cursor. Yeah, let's press Shift tilde and move the mouse and
drop down to the floor. And then let's just kind
of walk around and take a look at it from
different angles. How does it look in comparison
to everything else? Actually, yeah, that's cannon. Nice. I don't mind that. That's pretty good. We will have to, of course, create a door knob for this and maybe a little metal
panel for the door latch, but I think that's pretty good. All right. So there we have our door. In the next video, we'll
continue with the room here, but I think we're coming
along pretty well.
44. 044 Working on the Wall Details: The next thing I'd like
to work on is there's a panel or something in
the wall over on one side. Let me open up this image again
here and right over here. Let me press Control Spacebar
right over here There's this indentation with
an arch right there. And that's kinda nice. They've got a wall table
there and a painting. I think that's kind
of nice there. So what Let's do
is work on this. And it's on the right side. If you're facing away
from the windows, the windows here would be there. So I'm going to work
on it right in here, this part right here. Let me zoom in a little. And then it also has these
three windows up top, which I think are
kind of nice as well. What Let's do is let's use
a Boolean again for this. Because we're gonna do that. I think I'd like to
block out the area with edge loops so we don't have in guns across the
whole wall here. So I'll tab into edit mode
and I'll press Control R. And let's scroll
the mouse wheel here. And it looks like I'm still
on individual origins, so I'll press the period
key and go to median point, press S and Y, and
let's scale in. And I'm not exactly
centered here, but that's okay for now. I'm gonna go ahead and just
center it between these two. Something like that. And it looks like though from the pillar there's this
kind of extra space here. Do I want that? I think maybe I do. Let's bring that in like this. And then we've got an indentation here and
then the hole in the wall. Now let's think about
how tall this should be. Let's bring our friendly neighborhood reference
figure over. Let's just drag him over here. And let me just see about how big we
think this should be. Let me tab into edit
mode with the wall. So it looks like a person would probably be about
halfway up there. So I'm going to press Control R and kind of bring this up. Maybe about like
this. Let's try that. Let's see how that works. Let me grab these again. I think I'm going to
bring them out some. Actually, this is
a pretty good time to talk about a theory I have that I think can help sometimes in
situations like this. Now, we could, if we want this indentation here before the hole in the
wall with the arch, we could of course, create another cube and
make it taller than the wall and actually cut
in a boolean on this one. We could do that pretty easily. But also, I've seen people try and do things like
you take something like this and hit E and push in and try and get an NSAID in like that or an indentation
in like that. And the problem you have
with this is you've got these extra faces at
the top and the bottom. So let me press Control Z
here to come out of that. One of the things
I'd like to tell people is that it's sometimes easier to extrude
out than to cut in. Because cutting in
involves those kinds of extra faces that you've
then got to deal with and then connect
things back up. And sometimes it's
just easier to take faces like this
and just extrude them out and push out and then take this whole
thing and move it back in. And now you have that
NSSet without those faces on the top and the bottom
that you've got to try and delete and clean up, etc. Once again, my point
is it is sometimes, and I would say often, easier to re-frame the
way you think about things and think about extruding out rather than cutting in, in situations like this. Alright? However, now, since we've got an inset or a hole in
the wall with an arch, we are going to have to
use our Boolean modifier. Let's take a look at doing that. We're going to want it
to be right in here. So what I'll do is
I'll go ahead and press Shift a and create a cube. And let's get this
inline here or setup. It's inside this kind
of framing here. To do that, I think
what we should do is rearrange our outliner sum. So let's take our floor and we've got something called
fireplace wall here, 001. Yeah. That's the door frame. Let's rename that door frame. Let's take the door the door
frame, the fireplace wall, and the floor, and let's put them all in the
room collection. We've got this
here that's cubed, that's gonna be our cutter. We could probably delete
this other cutter. Why don't we just do that. Let's delete this and we'll
call this one the cutter now, just so we have that. And then I think I want to take this wall and these
pillars here. And let's bring these out
of our room collection by pressing the M key and
going to Scene Collection, and that brings them out here. Then we can go ahead
and hide everything. So I'll just hide
everything here. There we go. Oh, I'll bring back that figure
just for a moment there. Alright, so now let's
take this and let's hit the three key on the numpad. And I will press Shift
Z to go to wireframe. And let's bring
this and center it up here and I'll
scale it in the y, kind of like this. We will get it about
the right height here. So it's kinda hard to see, of course, because we don't have an image of the bottom of this, but I think Let's tab
into edit mode and just take this up pretty
far about this. And maybe I'll even
scale it out in the y just a little
bit more like that. Alright, so now that
we have that there, I'm going to press Control R and drop an edge right
down the center. I'll go back to vertex
mode and I'll drag, select these two
points here up on top. Back to the three key. Here we go. And I'll bring this up. You can see we're just beginning to get that that archway
there, here at the top. All right, so now
what we can do is we can use our Bevel tool
to create this arch. Let's press Shift Z to
go back to Solid mode. And then with this
edge selected, I'm just going to press two and select just that
edge right there. Let's press Control B
and bring this out. You know what, we should
probably check our scale. It's tab into object
mode and hit the N key. And our scale isn't bad, but let's press Control Z and undo that and then come
back to object mode. And let's press Control
a and apply our scale. That'll just help that bevel, be a little more uniform. Let's press Control B
again and bring that out. Scroll the mouse wheel a bit. Let's take a look at it here. That's not bad actually. Maybe I'll add
another segment or two and actually pull
the width out just a little bit because
it's pretty flat there. Alright, now that
we've done that, let's select these
edges on either side, and let's do this again. Let's press Control B
and bevel these out. I'll bring them out to about
here and let's take a look. I feel like they're a little
bit shallower than that. So I'll click in the width and bring that back,
something like that. And I don't know that we need
all six of those, do we? That's not bad. Yeah. Let's go with that. That's pretty good. I'm gonna go ahead
and smooth it. Come over here to the
Object Data Properties. Click on auto smooth and that
cleans that up pretty well. Now what Let's do
is let's come back over to the object
properties here. Change from textured to wire. Then if we select that wall, Let's go to our
modifiers panel and let's add a Boolean
modifier here. Now remember we just
have to click on the eyedropper and then
click on our cutter. And that adds that cutter
into the object field there. Then if we take this
and drag it in, we should get a little
bit of a Boolean. Yeah, it's beginning
to cut into there and now we can go
all the way through. But we don't want to do that. I think I just want to go in a little bit about like this. That's really all I want. That really may be
all we need now. Granted, we could make this wall a little
wider if we needed to, we could tab into edit mode and then hit the three key and select a few faces here and pull that back
just a little bit. In fact, we could do, which might be even better, is just to take this one
face and hit the E key and extrude it back just a bit
like that. Now let's try that. If we come back to our cutter, we can then push back a
little bit farther like that. Let's go back to
about right there. If I hit Alt Z, we
can kind of see where it is in that
extrusion there. Notice I've taken the
Boolean cutter down below the bottom
of the wall just so we'd cut away
that area as well. All right. Let's see how that looks. I'm gonna go ahead and hide it and we can take a look at it. Now we've got some kind
of artifact in here. Let's select that wall and let's press right-click
Shade Smooth. And then let's come down to our object data properties
and turn on our auto smooth. And that cleans that up
pretty well. That's nice. Alright, so we've got
that indentation there. Is it now to a place
where we think we can go ahead and
apply the modifier. But we can keep it
like that in case we need to make any
modifications to it. We can go ahead and keep
it as a modifier for now. Alright, so in the next video, Let's continue working
on this wall here.
45. 045 Adding the High Windows: For the windows here, we don't have a whole
lot of information, but we can kind of get it to
look something like this. I'll tab into edit mode. And I think from
here I will go ahead and insert a few edge loops
and let's press Control R. And I'll insert six cuts here. I think let's do that. And then I'll start taking these here and
moving them out in. Notice since we haven't
applied that Boolean modifier, the cuts are still
going through this area even though there's a
Boolean happening here. So we need to keep
an eye on whether or not these edges are going
to affect that Boolean. But let's see what
we can do here. I'm going to bring this out
like this about to here. Let's say I'll tab into edit
mode and let's take a look. It doesn't look like it's really affecting
it, which is good. I will then take these
two areas right here. Let's once again go to our
individual origins here. And let's scale
these in the y SY, so they scale
individually like that. There we go. Then
let's get two edges here for the top and the
bottom of the windows. So S, z, and I'm still
on individual origins. I'll hit the period key, go to median point s, z. And let's bring
these up like this. There we go. Now we've got these three faces and it looks like they're
not quite even are they? It looks like that
center one's a little bit smaller
than the other, so we should probably
deal with that. I'm gonna bring it
over just a little bit and select this one and bring
it over just a little bit, see if I can get them. They look pretty good here. Let's now with
individual origins. Inset these. Here like this. It looks like our scale is off. Let's take a look. Yeah, we need to apply our
scale for the wall itself. So I'll press Control
Z and go back to here. Then let's press Control
a and applying our scale. Now let's take these and hit the I key and NSSet
these in just a bit. And I feel like I wanted to just bring them in a little bit. Like this just a little bit. So there's kind of
an angle there. Then let's begin
extruding in like this. And then we'll end
set again just a bit. Then we'll extrude and again E. Then in the window itself, the window has a frame
in and of itself. So we could go ahead and hit I and bring that in
just a little bit. Then E and push in just a bit like that
for the window itself. And we're gonna have to
deal with the window in the glass and the
little crossbars, etc. But for now I think that's
gonna be just fine. All right, let's
take a look at it. I'll tab into edit mode and you can see once
again that we're not getting that arch there
when we tab into edit mode. And that's fine. Because now we could do
something like this. We could bring that cutter back. And let's say we
wanted that arch to go up to the bottom of the
windows a little bit more. So we could select this
tab into edit mode. And we can select
all this up on top. And we could then just
bring this up like this. We can bring that up a
little higher if we want. I don't want it to
go all the way up. I wanted to just go
a little bit higher. And now let's hide
that. There we go. Alright, let's bring everything back and see how we're doing. I'll bring back the fireplace, the room, the furniture, and we're going to need to
adjust the floor a bit here. So let's tab into edit mode
and grab that face here. And let's pull that
out so it covers or goes out as far
as that extrusion. Alright, I'm gonna
press Shift tilde and take a look at
it. Let's do that. Shift tilde, move the mouse, and let's hit the W key and come over here
and take a look. Just want to swing around. Take a look at our
character, that indentation. Yeah, I think that'll
work just fine. All right, so let's now take this wall table here and let's just duplicate it and move it over there and just see
how it's going to work. I will come over here
and type in 0 in the z-axis up looks like we need 90 degrees in
the z-axis there. And we can push this in a bit. That may be a little
small for that, we may need a
bigger table there. Kind of more substantial
to go in there. And that's one of the things
that we're going to do when we begin doing our
final adjustments, seeing what else needs
to be in the room. But what Let's do now is take those panels that we've
got here and let's move them around
and see if we can place them in the other
parts of the room. Let's press shift D and
move these over here. Then let's take one of
these panels and just move it over to the other side and
see how it works over here. Let's press Shift
dx, bring it over. Let's spin it around in the Z, I'll type in 180. And then let's bring it
back and put it in here. See how we're doing. Maybe something like that. Then let's bring it over here, shift TY, put it
in here for now. Let's see how that's working. All right, Let's just
get a sense once again now of how it's feelings. Shift tilde, move the mouse, and let's just kind
of walk around. And yeah, that's
not bad actually. I think that'll
work pretty well. So what we do need to do though, is put them in
this area as well. If I press shift D y and
then turn it in the z-axis, RZ 90, and then hit the negative key and that'll
spin it around there. Do we have at about the
right size for this? And if we don't, what do we want to do about it? Let's bring that and
put it right in here. That's not bad. We could move this into
the very edge there. And then you see we have a
little bit of a gap here. And here's where keeping the walls modular
can really help. I can now take all
of these and move them in just a little
bit so we clean that up. Let's see about this
side over here. Let's press shift D and
move this down here. Our z 180. And let's put that down in here. Period key to zoom in. Let's see what we
think. It looks like. This wall down here isn't
quite as tall as the other, so you just begin
to get a sense of what needs to be done once you begin moving
things around, putting them in place, etc. All right, so we've got
that and that's not bad. What I'll do is just
move this wall here. Then what we're going
to need to do is create new panels for these spaces that are slightly
different size. I'm also going to turn
on the cutter here and add this to the selection. Then let's move everything
in just a little bit, see if we can get it a little
bit closer in like this. Something like that. Alright, I'll hide
the cut or again, maybe move this back out. Now we've got that wall in line there so the fit is
just a little bit better. All right, what Let's do
in the next video is Let's begin creating the panels for these other parts that
are a different size. And also we're going
to need to begin working on the windows here.
46. 046 Finishing the Wood Panels: All right, well, let's
place our panels here are wood panels on some
other walls here. So maybe I'll just take this one and duplicate it
and move it over in the x. And let's see if we
can put this one right over here on the edge. Now it looks like we could
move these in this wall here, just like we did over here. So let's do that.
Let's just select the wall and the pillars. And then we'll have to
go through and select each one of these panels. And while we're
here, I'll select this collection of furniture. Then let's just go to the
top view press Shift Z, and I'll press G, x. And let's just move
this over like this. We go, Alright, let's
see how that looks. Yeah, I think that helps. That closes that in just a bit. In addition, I want to take this panel and put it over here. So I guess we'll just take this one and duplicate
it and move it over. And to get the hole
in the doorway here, we could use our door frame as a boolean and then remove
the part in the middle. So let's try that. Let's select this. I'll press Shift D y. Let's move that over here. Let's spin it
around, are the 180. Then let's move it into place, right in here like that. Then we can use the door
frame here as a Boolean. So I'm just going to
select that and move it out so it intersects
with that completely. Then let's select the panel. Let's add a Boolean modifier. Let's click on the eyedropper
and then on the door frame. Now I'm going to select
that door frame. We're getting some
artifacts here, so I'm gonna pull it out to
about here and see how we do. And then what I'll do is select that panel and let's apply it. I'll just click here
and click Apply. And then if we take the
panel and let's just move it all the way back here and
I'll hit the period key. Now you can see we've cut
the door out of that. Let's tab into edit mode. I'll just hover
over this and press the L key to select just
these linked faces here. And then hit Delete
and delete faces. And there we go. Now we've got that panel
with the door cut out of it. Let's bring it back and see if we can
get it in place now. I will bring this in
just a little bit. Then let's bring the door
frame back some two. I wanted to stick
out just a little bit farther from the panels. There. There we go. Yeah. So it looks like I can maybe move the door out as well. Just a bit. There we go. So now we've got the
panels around the door. In addition, I want
something here on either side of the fireplace. So let's put a couple of these columns on
either side there. If I select one of these,
Let's duplicate it. Shift dx. Let's hit the X on the array
modifier to remove that. Then actually, I don't really
need this face back here. I'll just delete that face. And then let's turn it
into z-axis r, z 90. There we go. And let's click
and drag and move this over. Try and get it in place here. So if we moved it, it just came close
to this right here. We go. What do we think? Yeah, actually, that's not bad. Let me take this and
move it over there. Hit the period key and
let's put this in place. Maybe I'll press gx and move
this out about like this. Hold the Shift key down. And there we go. We've got those pillars on
either side of the fireplace. That looks pretty good actually. Do I need those panels up here? I don't think I do. I think
I kind of liked that. It's a little bit different. And I'm planning on putting a big painting or some
sort of picture up here, framed picture up there. It kind of works for me not
to have the panels there. All right. How about over here now, these I think need panels. As I said over here, I'm gonna put curtains as
if there are windows there, they're gonna be closed. But over here I feel like
I do need something. So let's grab one of these and duplicate it in the
y-axis and bringing it over. About like this. Let's see if I can
get these kind of matched up here,
something like that. Then now we need to
make a decision. Do I want this area right here to have
three panels or four? With three panels,
there'll be a little bit wider with four panels, there'll be actually
quite a bit thinner. I think I'll go with three
panels. Let's do that. Either way, we need
to move the origin of this object so we can
scale from this side. So let's tab into edit mode, press Alt Z and
hit the three key. And let's find a face over here on the
outside of the object. And let's move the
cursor to shift S2. All right, Now, if we
change our pivot point with the period key to the 3D cursor will be
scaling from this point. Now if I press SY, I can scale these out until
maybe about right there. There's three in there
instead of four. Well, let me try for I don't think I'll want to do
it, but let me try it. It's really not bad, but I think I do
like three better. So I'm just going to
undo this to three. And then what Let's do is let's just move it back like this. I'll change back to
median point here. Hit the period key, and let's delete
these right here. So let's press Shift Z tab into edit mode and then
I'll just click and drag these right here. Hit Delete and delete faces. All right, let's go
back to object mode, and let's bring this
back and put it in here. Let's see how it looks. Yeah, that looks okay. It looks like that's going
to fit in there pretty well. All right. What about this other side? So let's take this
and press shift D x, and let's move it over r z 180. And let's put this in
place. I'll press Shift Z. I push the seven
key on the numpad, and let's just hit G and move
this kind of right in here. Like that. Let's
see how that works. I'll move it down a bit. Shift Z. And it's a
little bit too far. I'll move it this way
that Let's try that. Now we've got those panels in. Let's think about the
windows over here. How are we going to do those? Well, I think I want
to do them similar to the way I did the
windows over here. For that, we're going to need to insert quite a few edge loops and do a bit of extruding
and in setting, etc. So why don't we work on
that in the next video. And we'll also talk about how
we're gonna get a whole in these where light can
actually come into the room that's coming up next.
47. 047 Finishing the Window Frames: Now let's work on the windows
here behind the desk. To do that, I think
we're gonna need to insert some edge loops first, and I think maybe 123456. Let's do that. I'll
tab into edit mode, press Control R, and scroll the mouse wheel until
we get six cuts. Then let's take this
edge and move it up. Because I want it to
get to this right here. We're going to put in a crown molding kind of
thing all the way around. That'll be later in the game
when we do the ceiling, but I need to leave a
bit of room for that. If I come up like this, I think that'll leave some
room for that molding there. Down here. We want to take this one
and leave some room above the little window seat here
as well, something like this. Now let's get these two
sections evenly spaced, the horizontal sections here. So once again, let's
do our trick where we Alt click between
two faces here, change to individual origins. And now if we scale in the Z, they will scale uniformly. And let's scale these in
just a bit like this. Maybe something like that. Let's bring these up a bit. I think I want this
one to be up here. This one to be in a
similar place and then have longer windows or
taller windows down here. Now, it looks like we need
four edges going this way. Let's try that. Then let's scale them out
Sx and let's scale them. Once again, I have to switch to median point and then let's press S and X and let's
scale these out like this. We go and then let's
scale these in as well. Sx and bring these in like this. It's about the same
width is what we have in the center here we want to
try and make those similar. Then over here let's
do two like this, and I'm gonna have to just
grab each one of these and slide it by
pressing the G key two times. So let's do that. Slide it in here. Then let's take this and hit
G2 times and slide this out. About like that. We want to get those about
a similar width, I think. Now we need to do our extrusions like we did
with the other windows. So let's go through
and select these here. And now let's once again switch back to individual origins. And let's try and see if we can create these windows here. I think I'll begin by
extruding in just a bit, hit E and push in
just a little bit. Hit, I am come in
just a little bit. I think we better
apply our scale. Look how they're uneven here. Let's press Control Z and go back and let's reselect that. Okay, Now let's tap
back into object mode. Let's hit the N key
and take a look. Yeah, the scale is
quite off here, so let's press Control
a and apply the scale. Now we have all ones here. Let's hit the N key again. And now let's begin
this one more time. Let's extrude in. We go, Let's hit
the I key to NSSet. Yeah, that looks a
whole lot better. Let's then extrude that in. That looks like there's
another one. Here. I'm gonna hit the I key and
push in just a little bit. Hold the Shift key
down to move slower. The E key again. Let's push in a ways like so. And then I'm going to
inset in just a little bit again and then extrude
back in like this. And there we go. So that's the windows there. Alright, let's smooth it. And let's come down
here to object data properties and
turn on auto smooth. And yeah, that looks
a whole lot better. We'll go ahead and leave the
mirror modifier on for now. In addition, just real quick, I see right here, I could maybe add an
edge right here and add a little bit of a lip to
this window seat here. Let me just select
this face right here and just hit E and
pull out just a bit. Just as if there's an
alleged there something. Yeah. Okay. Now you may be wondering, well, how are we going to be
able to see in or have light come in from the outside
through these windows. We've got a wall in back here and we've got a
solid window here. Well, the way we're
gonna do that is actually use the bridge
edge loops tool. We're gonna need to actually make the windows to put in here. But what we can do is go
ahead and do the opening. So let me show you
one way to do this. There are of course many ways to do any one thing in Blender, but you can take the
inside face here. Then select the outside face. Here I'll press Alt Z so we
can see those two faces. Then we can press Control E
and choose bridge edge loops. And when we do that, we're going to add, it gives us an opening out
to the outside. And actually it's not a
bad way to do this for an older house like this where the walls are thicker
than a modern house. Let's grab these two now press Control E
bridge edge loops. We can do this and this
control E bridge edge loops. And there we go. So that's a quick
way that we can go through and just
create the openings. Now as I said, we are
going to need to create the actual windows and
then duplicate them. We're really going to create
probably one window for the tall ones and one
window for the short ones, and just duplicate them
all the way through. Four over here. Let's take a look at this. If we select one face
here and then spin around and select this face Control
E bridge edge loops. There we go. We can go through and
do that for each one of these this one and this one. Go. Then we go through and do them all the way
through here as well. Alright, so there we have those. Now, for these over here, they're gonna be a little bit different because
we're at an angle. You can see that if we take these two faces here and press Control E
and bridge edge loops, it's really very much at an angle here and
that won't work. So let's press
Control Z for that. What we can do is we could insert another
edge loop in here. So let me press Alt Z. We could insert an edge loop to match where the window is. So we could say Control R and
move it about right here. Let's say, let's try that. Z. So now we've got two faces here and then two faces here. Let's see what happens
when we do this. Control E bridge edge loops. Yeah, that's not bad. It's just that this right here is kind of
getting in the way. So we could kind
of fudge it a bit. We can take this
whole edge here. Let me grab this whole
edge right here. This one right here. We don't need this. What do we have down here? Do we have anything
selected down here? Yeah, we don't need this. We could take this whole edge here and just basically slide it around until we get it to a place where
we think it'll work. We could take this and
move it back like this. Kind of like that. There we go. Let's try that. Then from inside. Because that's all we
really care about. Yeah, that looks pretty good. Let's do that with these others. Now. Let's take these
two faces right here. And these two control
E bridge edge loops. And now these, and these and bridge edge
loops here. There we go. I think that's gonna be
just fine from the inside. Yeah. Alright. So there we've got
our rooms so far. Now I did mention that we're
gonna put curtains here and we will get to
those at a later date. But I think we've got
enough of the room in to begin UV mapping
and texturing it. Because so often it's
really difficult to know what more you need in the room until you begin to
get your textures on. As I said, I know I'm
gonna want curtains here. I'm gonna want some
area rugs here, some of those Persian
rugs in the room. We're gonna want things
on the mantle piece. We're going to want
pictures on the walls. We're going to need
more wall tables. We know all of that. But I think it's gonna
be good for us to get the textures in for
the things that we have. And then we'll be able to
see what more we need. In the next section. Then we will begin UV
mapping the furniture, the tables, the chairs, the desks, etc.. And then we'll move onto UV mapping
the room after that. Then once we get our uv maps on, we can then of course
began applying textures. So that is all coming up next.
48. 048 The Basic Tools of UV Mapping: Now let's begin working on the UV mapping for the
furniture in the room. Let's do a little
bit of organizing. First, of course, we've got
these cube objects here. Let's just select
all of these and drag them into the
room collection. Then let's begin with
this coffee table. I'll hit the period key. Yeah, let's just begin
by UV mapping this. So to do that, or I should say to
hide everything else. Let's go ahead and pull this out of the collection that's in. Let's hit the M key. Bring it out to the
scene collection. Here it is. Now we can just
hide all of these. In fact, we could take
this cut her object, we can bring that back and
select it and delete it. We don't need that. Here we have our coffee table. I'm wondering if we
can do something about the shading here. Let's make sure that
shading is applied. And then I'll go
over here and we do have auto smooth turned on. Let's click and drag here
and see what we can do. So it looks to me like we've got just an area because I don't want to smooth
these too much, but it looks like
right in here we could maybe make this edge sharp. So let's do that real
quick while we're here. I'll just select that. Press Control E and mark sharp. And let's see how that did. Yeah, I think that helps that. I'll just do these for
the other ones as well. We might as well go
ahead and do that. Mark sharp, okay, So that helps, I think, define that edge
a little bit better. All right, Let's now go over to the UV Editing tab right here. We will begin UV mapping. Now when we come into
the UV Editing Tab, it automatically changes
our object to edit mode so we can just hit the
a key to select everything and the
period key to zoom in. When we select everything, all the faces on our object,
this is what we get. It's just a bunch of polygons, a bunch of UV islands, one on top of the other,
all bunched together. And our task for UV
mapping is going to be to break this up
in such a way that we can lay our uv
maps out flat in a uniform way with no overlapping and with
minimal stretching. You can think of UV mapping as like cutting the edges of a box. Say we have a cardboard box
and we want to actually lay the box out flat on the floor so we can
draw or paint on it. We would need to maybe
strategically cut a few edges to open it
up and lay it out flat. Then we could paint or draw
on the box however we wanted. And when we then
collected the box up and rearranged it so it's a
three-dimensional object again, maybe using some tape
to seal the edges up. Then all of our designs
will be all around the box. And that's kind of what
we're doing with UV mapping. We're trying to figure out a
way to open the object up, lay it out flat so that we can apply
two-dimensional images, two-dimensional textures to it. Having said that, let's try
one of these pieces here. Let's work on the top part. For this top part, I'm gonna go into edge mode. And we need to define
where we want to cut this or where we
want blend or two. There are really
two good options, I think for UV mapping. If we hit the U key
on the keyboard, we get the UV mapping menu. Even though we've got quite
a few selections here, these projections and
project, the two main, I think the two most
important tools we have are the unwrapped tool and
the smart UV project tool. As I mentioned about the
box here in Blender, we also have to make a decision where we're
gonna cut the corners, where we're gonna place the
seems to open the object up. Now we can make that decision
as to where the seams are. Or we can allow
blender to do it. If we want to allow
blender to do it, we can use this smart
UV project option. If we want to define where
the seams are gonna go, we can use this unwrap function. We can place the seams using
these menu items here. Mark seam and clear seem. So those are the four
items we're gonna be using the most
here in this menu. So let's try something. Let's hover over the top of
this coffee table and let's press the L key and that
selects that whole top. Now notice the UV map is in a cross pattern here. Let
me show you something. If we go back to object mode, and I'll move the cursor back to the center of the
grid with shift S1. If we create a cube, shift a mesh cube. And then tab into edit mode. Look at this. We get a UV map automatically and it's
in that cross pattern. So that cross pattern is
the UV map for a cube. However, I'll just delete that. This top of the coffee table
is no longer a perfect cube. And yet the UV map
still looks the same. When we edit or modify or
extrude with an object, the UV map doesn't change, it stays the same and
that's the problem. We need it to better
represent what we see here. With this selected list. Just try smart UV project. Let's press you
smart UV project. Then here we can click
Okay, and there we go. That's what it's done, That's how it is broken it up. It looks okay. But I don't think that's
quite representative of the object as it is. If we tap back into object
mode and press the N key, we can see that
our scale is off. And just like the Bevel
tool, the solidify tool, etc, UV mapping looks at the scale to try and figure
out how to run the tool. And when the scale
isn't uniform, it kinda has a hard time. So let's press Control a
and apply the scale here. Now let's tap back
into edit mode. And with this still selected, let's press U and smart UV
project again, click Okay. And let me this. Now we're getting
something that's a little bit more
representative of this object. Because if we come in here and hover over this
and press the L key, and now if we hit G,
we can move this out. You can see that this
better represents some of these ridges along the
side of the tabletop. But it's still
splitting them up. It's still, if I
select this one, even this one is a little bit better
representation of these ridges. But can we do even better? If we wanted to do it ourselves? We could select
these edges here. I'll press Alt and click. Then we could press the U
key and click mark seam. And now you can see we've got this red line on that edge signifying that
we have a seam there. Let's go around here and do
that to each one of these, I'll press the U key
and mark scheme, and we'll come around here. You mark seam. This last one here, u and Mark seen. Now in addition, we ought
to split out the top. We could go to face mode, select that one face
there on the top, press U and mark seam, and that will then place a seam on the edge
around that face. Same thing down here. We could press U and mark
scheme, and there we go. Now let's give this a try again. I'm going to press the L
key and notice what it did. I hit the L key, but it didn't select the whole piece there. If we come down here
to select linked, you can see we've
got a delimiter, and currently we're limiting
our selection by the scene. I'm going to press Shift and
click that to turn it off. And now it selects
the whole thing. Alright, let's try it again with the unwrapped tool,
you and unwrap. And looking at this,
that actually looks quite a bit better because
if we hit the L key, we can see that this is all together representing
this piece here. However, if you look at them, they aren't as long
is this piece here. We still don't have the
correct proportions. We still have our
scale at one here. But let's try this again. Let's hit you and unwrap. Then let's come down
here and change it from angle based to conformal. Now you can see that these are much more representative
of these pieces. Now they are the same size
as the top and the bottom. That's just a quick rundown
of the basics of UV mapping. These are the tools
we're gonna be using. We're going to go through
the processes and techniques of UV mapping these objects and getting them into this 0 to one space here, this box here in the UV editor. In the next video, we'll continue using these
tools to finish UV mapping. The coffee table.
49. 049 UV Mapping the Coffee Table: All right, we've got the
top of our table UV mapped. Let's work on this shelf here. I will go ahead and deselect
everything with Alt a, and then I'll select this piece right here with the L key. And once again, we have
that cross pattern here, but this is no longer a cube, so that won't quite do with
this whole thing selected. Let's just press U and mark seam and that will play seems
on every single edge. Now let's just press U and
unwrap. And there we go. We've got the top and the
bottom and the sides. Now we could try changing from
conformal to angle based. Not quite as good because these don't match up to the length
of the top and the bottom. So let's go back to conformal. I think that's pretty good. Now if we hit the,
a key over here, it would once again
just be a collection of jumbled up uv maps
and that's okay. We have tools to rearrange
and organize them so we don't have to do
that until the end. Now, for the legs here, these are exactly the same. So we could really
just UV map one leg, then duplicate and mirror them
over to the other corners. Why don't we do
that? Why don't we take this and this object. I'm just pressing the L key with the delimiter turned off. And then I'm gonna hide
these with the H key. Just press H, and there we go. Then I'm going to
delete three of these. Let's press Shift Z, and I'll click and drag
this shift click and drag and Shift click and
drag these three here. Hit Delete and delete faces. All right, now Shift
Z. I'll select that, hit the period key,
and here we are. Now, I know that out
here is the outside. Let's take that same and let's put it on the inside in here. Like this. Sometimes a break in the texture add a
siem can be visible. So we want to try and hide
the seams as best we can. I'll select that edge and
press U and mark seam. And I'll do that same
thing over here. Alt click, you, mark seam. And then what we could do is we could get rid
of the faces on the top and the bottom because no one's ever
going to see these. And they're only going to get in our way here as we
try and UV map. Maybe I'll take this
one here and delete it. I can look down here
and select this one. That's that face there. We don't want to do that. Did we already delete
a face out of here? I'm gonna press the L
key to select this, and then I'm gonna hide
it by pressing the H key. And let's take a
look. Now. We do still have a face there. Let's go ahead and select it. Delete, delete faces. Well, now that we have
these here like this, Let's go ahead and UV map this. I'll just hit the a key and
let's hit you and unwrap. Now, conformal work too well for those straight
angled pieces. But it isn't doing very well
for these curved pieces. So let's change that from conformal to angle
based and look at that. That looks a whole lot better. Now in addition, you can see that these are right up
close to each other. We can change the margin
of our uv maps here, the area between them
by maybe we could type in 0.01 and hit Enter, and that moves that out a bit. But we don't really
have to deal with that until the very end when we pack all of our UV islands
into this square here. Alright, let's bring
things back over here. I'll press Alt H to
bring things back. We should probably go ahead
and work on this guy here. So to do that, I'm going to press the L key and then I'd like to
hide everything else. There are two ways to do that. One you could press
Control I and then the H key and that will hide everything that's selected. Or you could also press Shift H and hide everything
that's unselected. I'll, I'll do that here. Shift H. There we go. And recall to bring everything
else back is Alt H, right? So let's take this right
here, press Shift H, and then let's go around
inside and make sure we put our seams on the inside
where they aren't as visible. I'll hit the two key, and I'll select this edge
and this edge and this edge. And let's hit you.
And Mark seem. Then up here I'll just select
this face and this face. And then let's press
U and mark seam here. Now we've got those
seams Marked List, hit the a key, press U, and unwrap. That looks pretty good. All right, so now let's bring
everything else back with Alt H. Here we go. So we've got our table
with just one leg. If we hit the a key and select everything, this is what we get. It's still kind of a jumble. Things have been UV mapped, but they're kind
of overlapping and some things are too big
compared to other things. So two tools that we can use
to help us with this here. They're both under
the UV menu here. One is average island scale, and one is pack islands. Average island scale. We'll take all of
the selected islands here and resize them so they're the same proportions
in relation to each other as they are
over here in the 3D view. So let's see if we go to
UV, average island scale. Look at that now the legs are a proper size and
appropriate size compared to the edges of the top part of the table
or to the shelf, etc. Now the last thing we'll
need to do is go up here to UV and pack islands. That will, if we click here, pack everything into
this 0 to one space. Now I need to just
mention why I'm calling this the 0 to one space. If I hit the N key and
come over here to View, you can see that the location of the 2D cursor here in this
view over here to 3D cursor, the location of the 2D
cursor is currently at 00. This XY graph here. But if we move the cursors, say from 00 to 01, it moves over here. We move it to 11. It
moved right here. And we move it to 10,
moves right here. This is really a space
that is from 0 up to one, 0 to one space. So you'll be hearing me
call it that quite a bit. All right. Now we've
got our UV map here. It looks pretty good. We can come down
here and we can turn it by unchecking the
Rotate box here. We can also increase or
decrease the margin. This actually looks
pretty good I think. But the last thing we need
to deal with is this leg. We only have one
leg on our table. So let's go ahead and
mirror this over. To do that, we
need to first move the 3D cursor to
this origin here. Let's tab into object mode. And then we can move it
to this point. Shift S2. There it is. Then with that 3D cursor
there at that origin, we need to be sure we're going to mirror based on
that 3D cursor. So let's hit the period
key and go to 3D cursor. We go. Now if we select this, I'll hit the L key. And then we can press shift D, Enter Control M and Y, and Enter. There we go. Now let's also take
these two here. This Let's duplicate and mirror these two in the
x shift D Enter, Control M, X Enter. And there we go.
But look at this. Even if we select multiple legs, we still only have
one UV island. That's because when we
duplicated and mirror these uv maps just got the stacked one
on top of the other. If I hit the L key
over here and hit G, you can see that it
just stack them up. Hit the L key and G again. Now what Let's do is let's select this whole
thing with the a key. I'll select everything
over here with the a key. Let's go to UV, right here. Average island scale,
UV pack islands. And there we go. There is our
UV map of the coffee table. Now, did we do a very
good job? How do we tell? Well, in the next video, we'll create a UV test
pattern to see how we did.
50. 050 Testing and Organizing the UV Map: All right, We've got our UV map. It looks pretty good, but how do we know? How do we know if
it's really any good? Well, we want to
check a few things. One, we want to check our seams. Make sure that they're in a
place that isn't gonna be distracting or is
a logical break. And the texture. Number two, we want
to avoid stretching. We want to make sure
that when we put our textures down
on this UV map, the UV islands as they are, won't stretch those textures
to make them look strange. And thirdly, is it organized in such a way that we can understand what it is? Or if we're working in
a studio environment, will someone else be able
to open up this UV map and understand what the pieces are and how it's organized. Well, luckily, blender has
a few tools that we can use to make sure
our UV map is okay. One of those is a UV test pattern and
that's just basically a checkerboard pattern
that we can put onto the object temporarily to see if the textures
are stretched. What Let's do is
come over here to the materials panel right here. And currently we have no
material on this object. We can add a material
by just coming over here and clicking on New. And there we go. We've got a material. Now, if we come over here
to the material preview, let me move this over a bit. We come up here to
the material preview. Here's our material. It's really nothing special, just a plain white. But here in this base color, we can add a new image texture. So let's just click on the
little yellow dot here on the bass texture and come over
and choose Image Texture. Once we do that, the material changes here. But what we want is we
want that UV test pattern, that black and
white checkerboard pattern that's going to help us see if we have
any stretching. Let's come over here and click on New under the base color. Here, we can give our
new texture a name. We can call it UV test texture. Then under generated type, let's change it from
blank to UV grid. Then click Okay.
And there it is. Now while we're
here, let's go ahead and change the name of the material as well
as call this UV test. Material, will be able to use this material and
texture combination again and again on our
different objects. So what does this tell
us? How did we do? Well, it actually tells us quite a lot and
I think we did. All right, first of all, the seams down in here, the ones that could
look kind of strange. Let me tab into edit
mode and grab this with the L key and I'll
hit the period key and then I'll go
back to material. You can see here, let me zoom out a bit. This is our UV test texture
over here in the UV editor. But you can see the scene
that we created here. When the texture comes
around to that scene, you can see there's
a break in it. And that's gonna be
kind of distracting, I think, or at
least it could be. That's why I hit it away
on this side of the leg. Now, the texture breaks
up here, I think. The top right here you
can see that there's a break in the texture here. The checker pattern does not go continuously around there. I think that break
and the texture is fairly logical and motivated. I don't think that'll
be a problem. And also on the corners, this is a break between
two pieces of wood. So I think that's gonna
be fine there as well. So you just kinda have to see, are the texture breaks
consistent or the logical, or they motivated, or
are they distracting? And if they're gonna
be distracting, we should probably hide
those away if we can. Now the next thing is
the texture stretched? Well, the way to see
if it's stretched is, are the squares, the black and white squares, pretty much the same size all
the way around the object. And if we take a look, even though there
are a few breaks on, seems the size of the squares are pretty much
the same all the way around. That's what that average
islands scale did for us. That's what that tool did. Is it made all the UVA
Island's pretty much the same so that this
checker pattern, this texture would be the same size all
across the object. Lastly, is it organized? Well, Let's tab into
edit mode and let's hit the a key so we can
see UV islands again. I'm gonna go ahead
and click the X here on this UV test
texture right there. We can see those a
little bit better. The question is,
is this organized? Well, I know I want to put
a wood texture on this. And a wood texture is
going to have a grain. That grain, assuming
he's either gonna be going this way or this way. I'm gonna say I want the green
to be going up and down. And if the grain is going
to be going up and down, is that logical for
these pieces here, like Let's say for these side pieces on a piece of furniture
like this wood, the wood grain be
going up and down or would it be going along
the length of this panel? I think it would be going
along the length of the panel. So if our wood texture is going to have the
grand going up and down, then these pieces are pretty
well aligned to that grain. I think these are okay. Now what about these
here, these pieces here? What are these? How do we
figure out what these are? If I just hover over this
and press the L key, I can't really tell which
one of these pieces. This is. What we can do is we
can come over here to this little button right here, this UV sinks selection. So whatever we choose over here, whatever we highlight will
be highlighted over here. Now, this isn't something
you want to keep on when you're moving UV islands around because that can
really mess things up. But just to test this, we can turn this on. And let's press Alt
aided de-select. And then I'm gonna
hover over this, press the L key. Now we can see, Here's
that one selected piece. That's what that is. All right, so what
if we wanted to make sure that this row of faces
right here was on the top. We could Alt click
between two of those faces and look at that. This is actually turns sideways in relation
to the way it is here. If we had wood grain on this, would it be more logical for the wood grain to go up
and down or side to side. I think it would be
better to go up and down. Which means that if the wood
grain's going this way, this would be going
from side-to-side. So we need to turn all of
these pieces 90 degrees. Alright, so let's now turn
this little tool off. Let's come over here and hit the a key so we can
see things again. Now let's figure out how
to get these things. I want to press the L key, hit the G key. I still have that
piece selected. Let me press the
right mouse button to escape out of that. And then I'll press Alt a, and then I'll come over
here and hit the L key. I'll hit G. And
this one down here. I'll also select this
and move this up here, so we have them altogether. These are those four pieces at the very bottom of each leg. And as I said, I think we
need to turn them 90 degrees. So I'm just gonna take
these and press R9 0. There we go. Now we've got them turned in the orientation that I
think we need. All right. What about these guys here? What are these things? These things I think
are the squares. To test that, let's once again
turn on the UV sink here. Press Alt, and then I'm gonna hover over one and
press the L key. Well, there it is, right there. I'll hit the period key. For this. If I selected an edge, I'll hit the two key and
select an edge here. Look at this, that's
the top of this piece. So once again, I think these need to be
turned 90 degrees. Let's do that. I'm gonna click and drag here. Oh, I got some of these on here, but in fact that's okay. I need to get out of this here. I need to turn the UV Sync off. And then let's hit the a key. Now we can come over here, maybe drag select these, or hit the L key. Either way. I should mention that if we accidentally selected
some of this here, we can hover over it and press
Shift L and de-select it. All right, so for these
I'm going to press R and control and turn them this way until they're
90 degrees like that. Hit the G key and move those up. Maybe I'll turn them
just a little bit. There we go. Now I know that these two collections of UV islands are
properly oriented. If I'm going to have that
wood texture go up and down. All right, what else
can we do here? Well, what about
these guys here? What about the legs? Let's turn on the UV sink again. Hit Alt a, and this time
I'll come over here, hit the three key and Alt click between two of the faces here. And whereas this
right down here. So these are upside down in relation to the way they
are here in the 3D view. But they're properly oriented. I mean, if the wood
grain is going this way, it's still gonna be
going up and down. So it's not terribly important
that they're upside down, but it'd be nice. So what I'll do here is I will just turn the UV Sync off
again. Hit the a key. I'll take these three here, spin them 180 degrees are 180. Here we go. I'll
move these up here. And maybe I'll take this one
and spin it are 180, we go. So now we've got these
ALT a and then L. We can move these
into place over here. So I can maybe take
these shift L, move this over here, the L key, and move
this one over here. All right, so I've got those
oriented the way I want. What about these things here? I'll drag select those and
then hover over this and press Shift L to de-select this
panel or that UV island. Then let's just take these, hit G, move them over here. These, I don't think
it'll be too problematic. I can click and drag these. Move these up here. And maybe I'll
just take this one and move it here like this. So we've got the legs
here, the cubes, the feet, the tops and
bottoms of the cubes, the sides of the top piece. These I think are the sides of the bottom
piece, the shelf. But we've got one
of those over here. So let's just hit
the L key and hit G and move that over
here like this. So now we've got them
pretty much arranged in such a way that we can kind of figure out
what they are. This kind of thing can be important if you're
working with other people. And it can also be important if you're gonna be taking it into an actual paint program
like Photoshop or Krita, where you need to know which UVA island you're
actually painting on. We're gonna be using
Substance Painter. So it's not as important because we'll be
selecting the pieces by the 3D view rather than
the two-dimensional UV map. That's how I would organize a UV map for
something like this. If I'm working with
other people or working with a 2D paint program. And so now we have our
UV map with proper seems and no stretching and organized here in the UV editor.
51. 051 UV Mapping the Round Table: All right, well, let's
take a look at it. Another piece of furniture
to see if we can UV map, bring back the furniture. And we can always come over here to the material preview
and turn that on. And then we'll be able
to see which ones have been UV mapped and
which ones haven't. I'll go back to solid and let's work on this little
roundtable here. I'll bring it out from
the furniture collection, press M Chu, scene
collection, and here it is. Let's take that coffee table and drag it into the
furniture collection, and then let's hide that one. And there we go. Let's go back to
the UV Editing Tab. And if we zoom out, we
can see there it is. Once again, it's been
changed to edit mode, so we can just hit the a key, period key and zoom in. And here we are. I will go back to
Solid mode here. Alright, let's see what
we can do with this. I think I could go ahead and
add seems here and here. And maybe here and let's do one on the very bottom as well. I'll press U and mark seam. And then we're probably
going to need to select an edge along here so that these pieces are broken up at the
CME and laid out flat. I'll go ahead and press
Control and click here so we get those
edges as well. Now with that selected, let's hit you and
Mark seem then, well, It's just
give this a test. Let's see, I'm going to
tab into object mode and hit the N key just
to see about our scale. It's uniform, but it isn't
one's really not a problem, but I'll just go ahead and press Control a and apply
the scale there. Now let's tap back
into edit mode. Hover over that,
press the L key, and let's see how this looks. You unwrap. Yeah, not too bad. How about we switch
to conformal? See what happens?
Not too bad either. Yeah, there's really very little difference
between the two, so I don't think
it matters there. Let's now work on
this piece down here. Let's Alt click and Alt Shift click some of
these edges along here, all the way around. We got here, here we go. Let's get these these yeah, it looks like we got those. Let's press U and
Mark seem let's do the same thing all the
way around on the bottom. Alright, I think we've
got all of that. Let's now press U and mark seam. And then just like up here, we're gonna need an edge
along the side to split this so that this part
lays flat as a strip. So let's do that
in the same place where this seam is right here. Let's do that. Let's press U and Mark seem. All right, Let's try that. Let's hit the L key. There it is. Let's press U and unwrap. Let's try angle based. Not doing very well. So what do you think
the problem is here? It looks like it's being
held together right here. So I'm thinking
there's a collection of edges that I didn't mark
as seen for let's see. Is there here it is
right here. Yep. Because I didn't get these those edges were
still locked together. So I'll press U and Mark seen. Okay, now let's try that again. I'll hit the L key. So as I said, these edges here, we're still glued together. All right, let's try it again. You unwrap. There we go. That broke them apart. And as I mentioned, there's
that strip here, right here. And since we split it at
this edge right here, it was able to lay down
as one flat strip. All right, so now let's think
about one of these legs. Let me just select this. I'll hit the L key
and let's press Shift H to hide everything
except the leg. Let's see if it has
a bottom and a top. There aren't any
faces on the bottom, but looks like there's
someone a tap, so I'll hit the three key. And then I'm going
to press the C key to turn on the circle, select tool, click and
drag here to select those. And then right-click to
get out of that tool. Then I'll hit Delete
and delete faces. And there we go. Now the inside should be where that object
origin is here. So I'm gonna spin
around to there. And let's then select an edge
right in here, like that. And this will be our scene. Let's hit you and
Mark seem okay, So now let's press Alt H
to bring everything back. And yet we've got that seem
facing toward the center. That's good. We can go ahead and take these, these three and we
can delete these. Let's do that. Just to mention, we
could go through and UV map each one of those. Or we can delete them UV map one and then
duplicate them back. Either way is fine. All right, so let's just select
the leg here. And let's give this a try. Let's press you unwrap. Yeah, that looks pretty good. Let's try conformal. It looks like it's squeezing
the what is that? The top. Not sure. Let's go back to angle based. That looks a little better. All right, so if we select
everything with the a key, here's all our UV islands. Let's now once again use our tools here
under the UV menu. Let's hit the a key
to select everything. Go to UV and average
island scale. There we go, That changes the relative size or proportions
of each one of those. That's good. And now let's
go to UV and pack islands. And there we go. Now, I didn't duplicate
all the legs, so we don't have all
the legs in there. Let's go ahead and do that. I will hit the L key here. And if I tap back
into object mode, I think I'll go to median pointless hit the period
key and median point. And then I'm going to turn
on the move manipulator. And that kind of allows me to see which axis I
need to use here. While we're here,
let's go ahead and move that 3D cursor there too. So I'll press Shift S G2, and that moves it to the
origin of the object. This then tab into edit mode. Let's switch to our
3D cursor here. Now if we press shift D
Enter Control M and X, it will mirror around
that 3D cursor. And I'll hit Enter. We have those. If I press the L key there
and select that one. Now, we could do is we
could just duplicate these, Shift Enter and then
spin them or turn them 90 degrees in
the z-axis, r, z 90. There we go. Now we've got our legs back. If we select everything
with the a key, the other legs are here. Recall. And if you want them
there, that's fine. You can keep them one
on top of the other. What's going to happen is
when we put our texture on, each leg will have the
exact same texture. For some situations,
that may be just fine. But for our purposes
here I think I like it a little more detail and
differentiation on the legs. So I want them all to have their own part of
the texture map. So I'll select the, a key over here. And let's once
again pack islands. And that will then pull all of those legs apart and lay
them out individually. Now we can click the Rotate checkbox to
see what that does. But I think that's pretty good. The only thing I personally
would want to do is just select these and hit G
and move them over here. And then just select this and move this to
kind of join them. So they're kind of
all in the same area. I might take this and
move it over here. Maybe here, let's
say I could take these two and move
them over here. Now we're not using quite
a bit of space over here. Maybe we should re-evaluate how we're using our texture space. If I took these over here and hit G and move them
over to this area. Then maybe took these here and move these in a little
bit closer like this. Let's see what we
can do with this. I'm going to grab
these and move them out and then take these
and scale them up. Let's see if I can scale them up to use more of
the texture space. Then we can take these, kind of put these along here. Maybe if we wanted to, we may be able to take
something like this, split it so it isn't so big. If it isn't so big, we
might be able to increase the size for everything else to use more of the
texture space here. So this piece, Let's
see what this is. I'm going to click on
UV sank, select this. And that's this right
here on the top. What we could do,
I'll turn that off, is maybe come around to this
side and select this edge, hit you and Mark seem. And now this will be
split into two pieces. If I go to face mode, press Alt, click between here,
press U, and unwrap. Now it's two pieces. You can see here. Alright, so we have these now. Let's put them in
with everything else. I'll hit the a key. And if we selected everything, we could then come
up here to UV, average island
scale. Look at this. Now there are quite
a bit smaller. Then we could take all
of these and scale them up so they fit in here, like this. There we go. Now we can find a place
for these things. We can take these, put them like this, maybe turn them
if we press R9 0, they can turn like that
and then hit Enter, press G and move these up here. Now we've got
everything taking up a little bit more space
within the 0 to one space, a little bit more
of the texture. And that too should also be
a consideration, I think, because you want to use as much of the texture
space as possible.
52. 052 Beginning the UV Map for the End Table: Now before we move on to
another piece of furniture, Let's go ahead and test this. Let's tab into object mode and go to our material preview. And we haven't put a material
on this yet halfway. So let's come over here
to the material panel, pull this down and just bring in that UV test material
that we've already created. Let's do that. Alright, so how does that look? That doesn't look too bad, but there's one thing I
want to mention here. There are a couple
of things I think maybe I did wrong over here. One of those is that I took
everything except these. I'm gonna press Control I
to invert the selection. I took all of these and I scaled them up and move them
into the 0 to one space. But I didn't scale these up proportionally along
with everything else. So if I hit the a key
and I come up here to UV and average island scale, you can see that they
get a little bigger. Now they still fit. Okay? And actually if I come over
here and press Control Z, you can see the checker
pattern change. If I come back up
here to Edit and redo or Shift Control Z, Shift Control Z, you can
see that move again. So when scaling
one of these here, say this one, and
I hit the S key, you can see how the
checker patterns gets smaller and bigger as we
scale this up and down. Now that we've got all of these, the right scale, the right
size proportionally. One last thing is
that I have these turned perpendicular
to everything else. If the wood grain is
gonna go up and down, then these aren't
aligned properly. What Let's do is let's
select these and move them over a bit and
then move these into here. Now, what I've been doing
to select things so far is just hitting the
L key and that's good. But we can also come up here
to this UV selection mode. And then anytime you actually
click on a UV island, it will highlight
the whole thing. I'm just going to
select this and hit G and move this over. Do the same thing here. And then let's take these two. Let's turn them. 90 degrees are 90, Enter and hit G. And let's
just move these down here. Now these should be aligned properly with the wood
grain of everything else. All right, so there we go. Let's tap back into object mode. Let's go back to the Layout tab and I'll
bring back the furniture. If we go to the
material preview, we can see which ones
we've UV mapped so far. Alright, so what
should we do next? Well, in keeping with
the theme of tables, Let's select this one. Let's work on the
end table here. With this selected,
I'll hit the M key, move it out into the scene
collection area here. I'll take that Roundtable
and move it back into the furniture collection. Let's hide the furniture, and here we are. Now let's go back to UV Editing. I'll zoom out a bit. Here it is. I'll
hit the period key. And let's take a look at this
now I'm going to go back to Solid View just to
work on the seams. I feel like it's just a
little easier to see. This seems in solid mode. It looks like I've got the
pivot point on the 3D cursor, I'll hit period and change
to median point for now. Here we go. Let's see
what we can do with this. Let's go ahead and
tab into edit mode. Let's work on this top part. I'm just going to hit
the L key here for this. Unless press Shift H and
hide everything else. Alright, so how are
we going to do this? I feel like we want to split
this top part out a bit. Let's select these edges up here all the way
around and we go, oh, do we have a mirror
modifier still on this? No, we do not. So that's fine. Okay. I'll press
U and Mark seem. Let's select these edges on the bottom all
the way around. And let's add a seem to those. We should probably
go ahead and just split them here at the corner. Keep it simple here. Let's press U and
Mark seem okay. Now for this top part, I could select this, but I feel like we need more surface area on the top
before we go to the side. So maybe if I select this, Let's see how that looks. How about the one just
above that right there? Let's select that one and
hit you and Mark seem. And then for down here, we can go ahead and just select this one because we're really
not going to see that. Let's go ahead and
markets seen there. And then where do we
want to split it? Since this is a
horizontal piece, this strip, we need
a place to split it. If we want to split it here on the front where the handle is, probably not because people are probably going to be
seeing it from that angle. In addition, we've learned if we just split it in one place, it may just be really
long and not allow us to use all of the texture
space in our UV map. Let's split things up in
four places. Let's do that. I'm going to zoom in here and select this and
Control click that. And then Control click this. We've got this seam here, I'll hit you and Mark scene. And let's also do that again
over here on the back here. And control-click this. Let's de-select that
and then select these. And I'll mark this
seem just because hopefully people aren't gonna be seeing it from the
back a whole lot. But we still have
this very long piece all the way around. So let's maybe do it here. Let's add a scene here. I'll select these
edges and mark seam. And then let's also do that. Around here like this. I'll hit the period
key and zoom in. Perhaps control to
connect up those, and then control to
connect up those. Let's hit you and
Mark seem all right, so that's going to
split those out there. Now, do we also want to
just split out the drawer? If I recall, we just
extruded this out. We should be able to select
this edge all the way around. We go. I'm going
to press Shift Z just so we can see that. Yeah. Let's just mark as
seen here as well. Alright, so we've got
that taken care of. Let's go back and take a look at our scale tab back
into object mode. Hit the N key. Once again, our
scale is uniform, but let's just go ahead
and press Control a and apply the scale so
it's all ones there. And then if we tap
back into edit mode, Let's go ahead and
hit the a key. Now. Then let's press U and unwrap, and let's see what happens here. All right, That's not bad. Let's try conformal. That actually helps
with the drawer here. If we switch back
to angle based, you can see how
the drawer is kind of stretched out in
the center there. And if we use conformal, It's a little more straight. So I think at least for this top part can
foremost the way to go. Alright, let's see
about the rest of it. Unless press Alt H to bring
everything else back. For the bottom shelf. I'm not as concerned with where the edges are here going around. So let's just go to face mode, select that face and
then select this face. And let's just press
U and mark seam here. So we've got those seams around. Let's now mark, this
seems kind of similar to where we did on the
top around here. So maybe alt click, I'll switch to edge mode. Alt click this edge. Let's mark a seam there. Let's do them in the back here. And mark scheme, and
then let's do one. It over here, alt click
you and Mark seem okay, So let's just try that. I'll select that you and unwrap. That's on conformal
is triangle based. Yeah, that's a
little bit skewed. So let's go back to
conformal there. I like that. That
works pretty well. All right. So we still need to deal with the legs and the handle here, the little drawer pull. So in the next video, let's work on those pieces.
53. 053 Finishing the End Table: Now for the legs
of this in table, let's go through
and select these. They're just really in
two parts for each one, the top block and then
the bottom cylinder. So let's go through and
just select those and then press Shift H to hide
everything else. Then I think we can get rid
of the faces on the top here. We don't really need
those delete faces. This time I'm gonna go
ahead and UV map all of the legs instead of just
doing one and duplicating, as I said, you can
do it either way. It just depends on
how you want to work, the particular object that
you're working on, etc. I'm just going to go through and delete the faces on the
top and the bottom here, because we don't need those. Then for the top blocks, Let's just select these
inner edges right in here. And let's press U and
Mark seem for those. And then I think we need to keep these faces on the bottom. So let's go through and select all of these by pressing
Alt Shift and click those. And let's add a seem
to all of that. Then for each of these lifts then add a seam along
the inside edge, just like we did for the block. So let's do that. Mark this scene and I'll spin around and let's go to this. Each one here facing the inside to try
and hide the seams. Alright, so we have
all of that now. Let's just hit the a key. Press you unwrap and
see what happens. Now we're still on conformal. And because these are more
organic curved shapes, they don't really work
as well with conformal. So let's switch back to
angle based for these. And yeah, that
really helps that. I just want to point
out as you can see, you don't need to use the same unwrapped method
for the entire object. I'm gonna press Alt H here. You can go through and
select individual parts of the object and use angle
based or conformal as needed. Okay, and lastly, now let's
take a look at this drawer. Pull this handle. I'm going to Use the L key
to select all of these. And then I'll press Shift
H to hide everything else. Let's zoom in and let's see what we want
to do about this. Now I purposely made
these without a back, so we could easily just select these and hit you and
unwrap. And there we go. There. This piece here,
this handled part, we could spin
around to the back. We can select this edge
here all the way along it. Create a seam mark scene. Then if we just hit the
L key to select it, we can press U and unwrap. We've got angle based in formal. I think angle based, even though it's tilted a bit, it's still a little straighter. And we can always if we want, just hit R and turn
it just a bit. I think that works pretty well. Now, the spheres, these
little guys here, I'm gonna hit the
L key for these two and hit the H
key to hide them. So we just have these
now, for these guys, we may not need to do really
anything because recall from our discussion about the
cube and that cross UV map, we see that any polygon
Primitive here that we create automatically
comes with a UV map. Really the only time
we need to change that UV map is if we've
changed the object, and in fact, we haven't really changed these spheres at all. So the UV map that
comes along with it is really just fine. We don't have to do
anything for these spheres. Alright, so let's press Alt
H, bring everything back. Let's then hit the a key
to select everything. Let's come over here, hit
the a key for all of this. Let's go to UV,
average island scale. Uv pack islands. There we go. That actually looks pretty good. It seems to me that all
of the things that need wood grain are going in
the proper direction here. Let's now go to our
materials panel here, and let's pull this
down and choose that UV test material
that we've created. Let's shrink this side a bit. Maybe I'll come up here
and scroll the mouse wheel and bring this over so we can click on the
material preview. Let's take a look at
it. How did we do? Well, the squares all look
pretty much the same size. I'm not seeing any
glaring seems problems. Of course, we've
got the seams on the inside that are
gonna be very ugly. But that's to be expected and that's why we hit
them on the inside. Let's go back to our
layout tab here. Let's bring
everything else back, bring the furniture back, and we can see we've got our three objects that
we've UV mapped so far. Now for our next object, Let's just go ahead and do this side table here,
this wall table. It too has these handles. We know how to do
that pretty easily. Now, Let's go back
to Solid View. Let's see if it has
any modifiers on it. It does not. So now that we know what
we're doing with tables, let's go ahead and UV map this. I'll bring this out of
the furniture group. I'll press M, bring it out
to the scene collection. Let's go to the
table and drag it back into the
furniture collection. Let's hide all the
furniture. And here we go. Let's go back to
our UV Editing tab. I'll hit the a key, the period key. Here we are. What Let's do is
in our next video, let's begin UV mapping
the wall table.
54. 054 UV Mapping the Wall Table: For this piece, let's go
ahead and split out the top, just like we've done
with the other tables. I'll select maybe
this edge right here. Let me go back to Solid
mode, and there we go. Let's press U and mark seam. And let's also, oh, it didn't go all the way around. Let's Alt Shift click
and you mark seam. There we go. Let's do this one here. Alt, click, shift,
click, get that one. It looks like that went
all the way around. So let's mark that same. I'll press Shift Z
just to make sure we've got those all
the way around. Then let's get the corners. Think we ought to
just go ahead and get all of these corners here. Let's press Alt and
Alt Shift click here, mark that seem and
we'll just go around and do each of these
others as well. For this one here, once again, we probably need to do
Alt Shift click yeah, and this year you
and Mark seem okay. So now if we press Shift Z, this is what we have so far. Let's work on the bottom now. I'll just Alt click this, Alt Shift click this. You and Mark seems
so we've got that. All right, so we have all of
that pretty much split out. How about these drawers? Let's take a look at this. I'll select this. And we can get that. And let's press Alt
and click here. We can get that. And I think what I want to do is split this
center went out. I wonder if we want kind of a different piece of
the wood grain on this, then we have the frame here. So let's do that. Let's go to
face mode and select those. And then let's just
mark seam for though. Was there we go. I think that's probably pretty
good for that top part. Let's tab into edit
mode and make sure we've got our scale
uniform it is, but let's go ahead and apply the scale and make it all ones, just to be sure. And then I'm going to
press the L key and I'll Shift click the seam
here to turn that off. We select everything
for that piece. Let's press Shift H to
hide everything else. And then let's just
give it a try. Let's press U and
unwrap. And there we go. We've got a couple of strange little pieces
here and here. Let's switch to conformal
and see if that helps any. That does help these. But then it makes these strange. And I think this is
this right here. So we can either try and fix the drawers or we can try
and fix this curve here. Let's try and fix
this curve here. And I think what I'll do
is just UV map this area individually and UV
map it as angle based. And I think that'll then
straighten these up. So let's give that a try. I will press the L key
here and turn on seam. So we just get that piece. And I'll do the same
thing over here. Alright, so let's
now unwrap these. And then once we do,
we'll switch over to angle based and
see how we do. Let's press you unwrap. Switch from conformal
to angle based, and that's looking
a little better. I think that's at
least more straight. So now if we hit the a key and just temporarily we're
going to have to do this again with everything. But let me just average island scale and
pack islands here. And now you can see we've got these a little
bit better there, a little bit straighter. So we'll see how that
works once we put the UV test texture on there. But before we do that, let's go ahead and work
on the legs of the table. So I'll press Alt H
to bring those back. I think for these, these are just complex enough. I'm think I'm going to
just UV map one and delete the others and then I'll duplicate and mirror
them over again. So let's just select all
of these real quick. I'm just hitting the L key and delete these, delete faces. And then I will press the
L key to select these, and then Shift H to hide
all the unselected parts. Inside here is gonna
be the center. So let's mark our
seams along here. Maybe I will get one in here, Let's say Alt Shift. And then on down here. Let's go ahead and mark the seam and we can see
that a little clearer now. Alt click that. Let's
mark that seem. All right, so there we've
got it all the way up. For this here. We should probably
select this face here and mark the edges for
seams around that face. And then let's just take
this edge and this edge. Let's hit you and Mark seam
here just to have one there. To kind of open it up. All right, I think
that should be good. Let's hit the a key. Let's hit you and unwrap. That's angle based. What about conformal
triangle based? Again, kinda hard to tell. This here though. Oh see, I didn't delete this
face right here. We need to select this and
delete and delete faces. All right, So now I think that'll open up a
little bit better. You can see that kind
of held it together. Let's hit you and unwrap again. And what do we think? Yeah, actually not too bad. Let's try conformal. No, not a fan. And in fact, what
we can do is we can take these points here. I'll switch from UV select mode two vertices select
or UV select. Maybe I'll hit the R key and turn it just a bit
and hit G and move it up just so it's kind of in
line with that piece there. And this piece here. Let's take a look at this. I'm wondering if this needs to be a little
bit straighter. This is curved. Well, let's go ahead and put
the UV test texture on this. I'll pull this down over here in the material panels and let's
choose UV test material. Let's then come over here to the material preview
and let's take a look. Yeah, these aren't bad, but they're kind of angled. Must take this and let's hit our kind of spin them over
like this. Let's try that. Yeah, see, they're
kind of going at an angle here everywhere else. So that's not exactly
what I'd want. We could take these and
straighten them out. We can get the two key to go to Edge mode and alt
click this edge. And then we could
straighten this out by scaling it in the y-axis. We could press SYN 0, and that will flatten that up. I'll hit G and move
that up a bit. And then we could take this
one here. Let's try this. I'm going to bring it
down SY 0. There we go. Let's bring this backup. Now for all of these things, I'm wondering if we should. I'm an edge mode here. Let's go to vertex select, so I can just select
one of these. I'm wondering if we need
to take these and let's press 0 to get them flattened, let's press G to bring
them down a bit. Now you can see
we're getting this. I'm going to press sx2,
bring these in just a bit. Then I'm going to hit G
and bring these down some. And now you can see over here, as I bring this down, it kind of brings them
out to be more square. Maybe something like this. Let's spin around. That's not bad. That's kind of angle there. It's not great. I grant you. We would need to do a
little bit more work on it, but I don't think
it's really going to be that noticeable here. So I think that'll
work just fine. All right, so now
what we need to do, Let's press Alt H. I'll
go back to solid mode. Let's select this and this. We want to move the 3D
cursor to the origin of the objects so we can
mirror around that 3D cursor. What Let's do is tab
back into object mode, and now our selection
point is here. So let's press Shift S2 to
move the 3D cursor there. Tab back into edit mode. And now let's change
to 3D cursor. Let's press the period key. Change to 3D cursor
for our pivot point. Let's then duplicate the
object shift D, enter, mirror it, Control
M, Y, and enter. And there we go. Alright,
so we've got that now. Let's put one in
the backend place. I'll press the L
key for this again, Let's go to the top view. I'll press Shift Z
to go to wireframe. And then let's just press shift D and move this right up here. There we go. Now we can duplicate and
mirror this one as well. So Shift, Enter,
Control MY Enter. And there we go. Now that we've got all of that, we just need to do the handles. So let's work on
those real quick. I'm just going to hit
the L key and select all of these pieces here like this. Then let's press Shift
H to hide everything. Now we know how to do these
little circular pieces. Those were pretty easy the last time we just hit you and unwrap. And there we go. For those handles, we just need to add a seam on the back here, I'll press Alt, click
you and Mark seem. Let's do that over here as well. Mark scheme. Now we just
take these two and hit the L key and press
U and unwrap. Now the little spheres
here we call those. We really don't
need to do anything because the UV map is just fine. Alright, let's press Alt
H. There's everything. Let's hit the a key to select
everything in the 3D view. Let's come over here
to the UV editor. Hit the a key to select
all the UV Islands. Let's average island scale. Then let's pack it
all into the 0 to one space, pack island. And there we go.
Looks pretty good. Everything seems to be going pretty much in the
right direction. Let's come up here and turn
on our UV test texture. There we go. All right, Let's bring
everything else back. And there is our wall table.
55. 055 UV Mapping the Dining Chair: All right, well maybe
now it's time for us to graduate from tables and
maybe work on a chair. How about one of these? Let's do that. I'll pull this out of the
furniture collection. I'll hit the M key and then
choose Scene collection. And then let's take
this wall table, drag it back into
that furniture or collection. Let's hide that. And here we go. Now let's
go over to UV Editing. And let's select our chair. Let's take a look at it. I guess I should go back
to Solid mode here. And while we're here, let's
make sure that we don't have any modifiers
and we do not. That's good. Tab back into object mode
and just check the scale. They are uniform,
but let's just go ahead and press Control
a and apply the scale. Alright, so I think what
I should do here is allow blender to try his hand at UV mapping these
higher density, these higher poly pieces like the two arms and the wood
back of the chair here, these are pretty high
poly and it would get really footsie to try and go in and assign seems
in among all these edges. So let's just select these and see what smart UV
project can do. I'll press U, Smart UV project. Let's change the island
margin from 0 to 0.01. Let's do that. And then let's click. Okay. All right, well that's
actually not bad. Everything seems
to be going mainly in one direction
except these things. We've got these kind of L
shapes here for the arms. I'm not sure how those
are going to come out with these pieces
being perpendicular. We really won't know until
we get a texture on it. My guess is it might
be problematic, but let's wait to put the work in until we actually
know for sure. I want to leave it like this until we get our
textures on there. Continuing with the
back of the chair, Let's select this back cushion of a press Shift H
that'll hide everything. And we created this
without a back here. So I think all we really need
to do is just unwrap this. We can just press U and
unwrap. And there we go. Let's change it from
ankle based to conformal. That's pretty good. I like that better. Let's go to UV select mode. Click it and I'll hit
the R key and spin it around so it's straight
up and down there. Yeah, I think that
looks pretty good. So let's press Alt H. What else now? Well, continuing
down along the back here, let's go ahead and work
on these back legs. So I'll press the L
key to select them. Press Shift H. And for these it looks like we have faces on top
that we don't need. I'll go ahead and delete those. Then on the bottom, we could delete these, but I do want to mention
that if you've got a scene in which you may see
the bottom of the furniture. You may not want
to delete these. Say if you're creating this
scene for a video game and the character is
going to kick over the furniture or
something like that. You may want to keep these. And if that's the case,
all you really need to do is just select them
and then hit you. And Mark seems so you
just create a seam around there and break it out
from the rest of the leg. Alright, so with that selected, let's go ahead and I was
going to choose that one, but let's choose
edges on the inside. Let's do that. Let's get those selected
and press U and mark seam. Now let's hit the a key. Press U and unwrap. That looks pretty good. Let's try instead of conformal, Let's try angle based. It looks like there's almost
no difference whatsoever, so either one is
just fine for those. Alright, I'll press Alt H. And what else do we
want to do here? How about this piece right here, the wood part under the seed, I'll just press the L key, Shift H. And let's
take a look at this. Now. Here are two faces here
that I'm not sure we need. Are we even going to see these? Let me tab into object
mode and take a look. No, it really doesn't
look like we see those at all, even underneath. Let's go ahead and just delete these delete faces and that just makes our
life a little easier. I think the less we have
to UV map, the better. I'm gonna select these two edges here and give them seems. And then I guess let's just create a seam all the way
around here like that. Let's try that. Since this is once again the underside of the
piece of furniture, I don't know that
we need to be too concerned about what's
going on there, but I'll go ahead and
give that a seam there. Then let's just hit and you
unwrap. That's conformal. We can try angle based. Know kind of like conformal
a little bit better. Alright, So there we go. We've got that. Let's press Alt H. How
about these legs here? I'll go ahead and do
these individually. Shift H. And for these, once again, we want to put the
seams on the inside. So I'll just select
an edge here, maybe an edge here. And let's give this
a siem mark seam. And down here we've
got faces once again, so let's just select them. It you and Mark seem just like
we did for the back legs. And then up here well, we've got faces up here
that I don't think are ever going to be seen
so we can delete these. And what about, oh, we've got faces in here at
the top of those cylinders, so let's delete those. Now. I think we could select this face right
here and this one, give these a seam all
the way around there. Then what we can do is
let's add a scene to this edged in line with
this, you mark seam. And what I did the last time for one of these cubes is
just selected this edge. But what I'm thinking
is if we went around and selected each
one of these edges, I think it would open
up a little bit better. Let's test that. Let's press U and Mark seem, let's do the same
thing over here. I'll take this and this. Let's go around. Markets seem for each
of these as well. Here we go. So now if we hit the a key and press U and
unwrap, what do we think? Look at that. Yeah, I think
that came out a lot better. Let's try angle based. Kind of like conformal, a little bit better on these. We can take these and
just turn them a little bit so they're
straight up and down. We can do that. So is that everything? Let's take a look Alt H. Let's hit the a key and then come over here
and hit the a key. Go to UV and average
island scale. Then UV and pack island. What do we think now we can try unchecking the Rotate box here, see if that helps any. It does, although
the problem is, is that it turns
these the wrong way. So I think we need to
keep it like this. That looks pretty good, but
I think I forgot one thing. I think I forgot
this right here. Yeah, I forgot to UV map this. So let's do this. Shift H under here. Let's go ahead and
create a seem to break the bottom part out
from the rest of it. And then I feel like we're
gonna need to open up the corners a little bit so it doesn't curve
down like this. Let's, let's try it back here. I'm going to Alt click here, and Alt Click Here. We go. Then maybe I'll just
deselect these. So we just have
these edges here. You and Mark scene. Let's try this. I'm going
to press L. You unwrap. All right, Let's
try angle based. Pretty much the same. What I'm thinking that this may need to be broken out
on the corners as well. Let's go to material preview. Oh, and we need to add
that material here. Let's do that. Let's
take a look at it. This is what I was
worried about. I don't mind some curving here, but I think that's too much. That's why I think we need
to break out a scene here. Let's try that. I will go back to Solid mode. I can hit Z and
go to solid here. And let's just take
these edges right here. Marketing team here, and then do that same thing over
here, I believe. Yeah, right here. Let's do that. And then
once we mark that same, Let's hit the a key again, press U and unwrap and
see what we think. Yes, see that, split that
out on the corners as well. So we can tab into object mode and we've still got a bit
of a curve there, but not as much as there was. I don't think this particular
chair I think is gonna be interesting because we're
not going to really know everything until we
get a texture on it. So I'll tap back into edit mode. Let's press Alt H. Let's hit the a key over here to make sure
everything is selected. And then let's go to UV average island scale
and UV pack islands. All right. Does it help to
rotate this at all? Not really. And in fact, what I'd like
to do is maybe spin these. I'm gonna take this
and press are 180. And I'll take this and do
the same thing are 180. And let's make sure we're
not overlapping any. I don't think we are. Let's take this and
hit R and move this. This. And we could turn
this if we wanted, we could press are
180 like that. And how about this one here? Same thing. Let's turn this one, R1, 180, just so I can get a sense of
what these are doing here. Let's see if we can
turn this one R9. Is that going to fit? Well, it's a little bit
outside the bounds here. We need to get that in, but let me spin this one. Get it in place, and then maybe move it
over just a little bit. Now we can select this and
move this over just a bit. Like that. There we go. That's looking pretty good. I think everything's pretty much aligned the way we want it. And the last problem I see is these little guys right
here, these squares. Think I want the wood
grain to be going up and down on these and currently
they'd be going horizontal. So let's take these
and move them up here and turn them 90
degrees with R9 0. And let's just put
those right here. Alright, we have our chair. Let's go ahead and take this. Go back to the layout, unhide the furniture
collection. And there we go.
56. 056 UV Mapping the High Back Chair: All right, let's work
on another chair here. How about one of these? Let's do that. Let's
take this out of the furniture collection within them and Scene Collection. And then let's drag the dining chair into the
furniture collection. Hide that. Here we go. I think before we do anything, we ought to put it back
on the world axis. It's currently kind of angled. Well, Let's do is first of all, hit the period key
and change from 3D cursor to median point here. Then let's hit the N
key and we can take this Z rotation back to 0 by just clicking in here
and hitting 0 and Enter. There we go. So now it's
more on the global axis. Let's go to UV Editing here. I'll hit the a key, hit the period key,
and here it is. Now, I was looking at
this a little earlier and I see that there are a
couple of problems with this. I was moving a little quick and forgot to do a couple of things. One, this kind of
thing right here. And actually, this is the kind
of thing I do quite often. I get to modeling something and just forget to
put things in place. But the good thing is UV mapping is just a different
kind of thing, a different way of
looking at your model. And in doing so, you kind of see the problems. You pick up some of these issues that maybe would slip by
if you weren't UV mapping. So in a sense, UV mapping can be kind of a second check on what you've done in
the modeling stage. I think what I'll
do is just move this up just a little bit
here, something like this. Let me take this and
move this down here. There's another issue as well. If I went to edge mode and pressed Alt and click,
take a look at this. This edge does not extend all
the way across this object. I think I know what did that. I think when I use
the array modifier, There's one little
checkbox I did not click. So why don't we go back and just take a look at that so we
know what that's all about. I'm gonna hit Delete and
delete faces for these, and I'm gonna take this and split it out into a new object. So with this selected,
I'll just press the P key and separate
by selection. All right, so now this is a new object here
in object mode. Let's go ahead and add a
new array modifier to this. And it's here in the x-axis. So that's good and
I'll just increase the count so it extends
all the way across again. Now, blood I forgot to check is this right here merge vertices. And when we do that, then apply the array modifier. What we then get is an object that's connected
all the way across. Now when we Alt click that edge, it goes all the way. So that was an
oversight on my part. But as I said, UV mapping is the time when some of these kinds
of things can get fixed before moving on into the other parts
of the project. While I'm here,
I'm gonna go ahead and mark a seam along this edge. Then what I can do is tab
into edit mode for the chair here and hit the L key and select all of these
delete faces. Tab back into object mode. And now we can just press shift D and Z and
move this down. Go to the side view. Press Shift Z. I'll tab into edit
mode and let me just grab this and move
it right over here. Kind of center it on this
right here. Like that. Now, if I press Shift Z again, here are our two
new pieces here. And this one, since
it's a duplicate, already has the seam on it. All right, so I think
we probably need to do this to the other
pieces as well. Let me just do this
side piece here. Once again, I'll press the L
key and just select these. And then let's hit
Delete and delete faces. Select this with the L key, split it out from that object, and now that it's in
object mode on its own, Let's go ahead and add an array. This time it's going in the x, of course the way it was before. But now let's
change it to the y. I'll type in 0 in the x, one in the y. And there it is. Now I can just increase the count until it extends
all the way across. Once again, select Merge, and apply the array. There we go. Now if we
spin back around in here and select this edge, it goes all the way across. So I'll go ahead and
mark a seam there. I think what I'll do is select this over here with
the L key again, each one of these And delete them. We go and now if we
go back to this, I'll go ahead and tab into edit mode because
I want to see it. I want to be able
to press Shift dx and move it over here. But then I want to spin it to
put the seam on the inside. So let me just press
Shift Z here and get it centered on this
thing right here. Then we need to spin
it in the y-axis. So let's press R Y 180, that spins that around. So the seam is on the inside. We've got those four pieces now. Let's go ahead and
do one more and then we'll continue working
on the chair here. I will just take these four and I don't think I
need to do this one now. Let me press Shift
L because that's not part of this piece, is it? It doesn't extend
all the way down. That's good. Let's just
delete these three here. Then let's take this right here, split it out into
its own object, tab back into object
mode and select it. And now if we go to
the array modifier, once again, it's
going in the x-axis. Let's type 0 in the
x and one in the z, and it's going up
instead of down. So we just type in
negative one in the z. Now we can increase our
count down to here. And once again, turn on Merge. Apply. And now if we
select these over here, like this, we can delete these. Take these tab into edit mode and find an appropriate
place to put the SIM. Why don't we just put
the seam right back here behind so we don't have to
spin it when we move it over. Let's just do that. And we can select everything. Go to the front view
and press Shift DX. And let's just move this
over a bit about like that. All right, so now we've
fixed all of that. Let's go ahead and
select all of these now. And then we'll press Shift and click the rest of the chair and press Control J to join
all those objects together. Now when we tab into edit
mode, they're all there. We have our seams. Oh, well, there is one
here that I didn't get. Let's add this one
with Control J. There we go. Now if we
tab into edit mode, we can see all of those, the seams are already on them. And while we're here, let's go ahead and select all of the little squares or cubes, I should say, these little
cubes right in here. And let's just use smart UV project to unwrap
all of these because there's really no reason for
us to go through and apply seems for each one
of these tiny little things, I think it'll be just fine. If we let blender do
the work on this one. Let me get this right
here. There we go. Now that we have all of
those selected list, if you click Smart UV project, Let's add an island
margin of say, 0.01. And let's click OK. Now they look a little
stretched here, don't they? So let's tap back into object
mode and press the N key. And sure enough, our scale is not uniform and I think that's what's
causing the problem. Let's press Control a
and apply the scale. Then let's tap back
into edit mode. Let's try this again. You smart UV project. Click. Okay, yeah,
that looks better. All right, so I'll
just hit the a key and I'm going to
press G and just move these out of the 0
to one space for now, just move them out so
they don't clutter up this here while we're
doing other things. Now, I'll just go through
and grab all of these, everything that we've
applied a seem to. Now, let's use UV. Unwrap here. And there we go. Now we can try it
with angle based. Yeah, I don't think I like that. Those are a little too curved. So let's go back to conformal. The ends kind of curve a bit, but everything else
is pretty straight. All right, so we've
got part of the chair done in the next video. Let's go ahead and finish it up.
57. 057 Finishing the High Back Chair: To continue with the chair, Let's working on the seat now. Let's just hover over
this and press the L key. And I'll press Shift H to hide everything else. Under here. Let's just Alt click. Well, let's alt click
this edge right in here. Just going to grab this collection of
edges right in here. And then I'll press
U and mark seams. And from here I think
we can just press Alt and click the corners. Now, alt Shift click and just go up to that
corner right there. Let's try that. Let's
hit you. And Mark scene. Alright. Now let's
hit the a key, press U, and unwrap. Let's take a look at
it with animal-based. I feel like it's a little closer to the real thing
with conformal. Once again, I've got
the margin at 0.01, just giving us a little tiny
bit between the islands. Now let's press Alt H to
bring everything else back. And let's work on the back of the chair
here I'll hit the L key, Shift H, I'll hit the
period key to zoom in. For this as well. I think we just need to select this edge all the way around. It looks like it goes
right down here. And all the way right here. Yeah, let's go with
this. Let's try this. You mark scheme. And then once again, let's add these corners
here all the way around. Like this. And like this. There we go. Now, once again, let's add seems there. Press a you and unwrap. Yeah, I think that
looks pretty good. If we switch to angle based. Doesn't look quite
as clean to me. I mean, it's really kind of 601.5 dozen of the other here. The differences are
pretty minimal, so let's press Alt H
to bring that back. And now let's take a look
at the back legs here. Let's hit the L key
for these shift H. I don't think we need
these faces on the top. And how do we? I don't think so. Let me tab into object mode. Yeah, that's completely
covered there. And for the bottom, once again, we can just select
these and hit you. And Mark seem to
break those out. Then to add seems to this. Do we want them on the
very back or do we want on the inside? Let's go ahead and
try on the inside here I'll press
Alt and click, oh, let me switch to edge
mode with two key alt. Click here. Then you mark seam and the same thing over
here. And mark seen. Now let's hit the a key and
try these you and unwrap. That is conformal. Angle based, that cleans
it up a little bit better. I think angle based makes
them a little bit straighter. So let's go with that. Alt H. What else do we need to do here? Well, I think we need these
little pieces right in here. It looks like I've already deleted the bottom
face of these. So let's just then
select this edge, u and mark seam and this edge. Same thing here. Alright. Then let's just
press the L key for each of these you and unwrap. Let's try conformal. Know I like angle based till
little more uniform there. Okay, so we have
all of that now. We've got the legs. These pieces. Yeah, I think that's everything. So now let's hit the a
key to select it all. And then over here, recall we have all these
small pieces as well. Let's hit the a key
for all of this. And what we can do here is use our average island
scale and pack islands. However, I'm thinking
that what we can do is keep these
the way they are. Just scale them down as needed. Because what it's gonna
do is it's going to apply or disperse these throughout
the 0 to one space. It's just going to do it randomly wherever
it can find room. That could be okay, But let me just show you
what you can do if you want. We can select these only here. Then go to UV average
island scale, UV pack islands. Here we go. Now if we want to, we can then take these and
just put them anywhere. They'll fit. It can hit the S key and scale him down and
bring them up here. And maybe just put them
in here where they could maybe fit like this and
make them as big as we can, but still, so they
don't overlap like that and they stay in
that 0 to one space. That just allows us
to keep Blender from taking all of these small pieces and randomly putting
them all over the place. It's not a big deal. I just wanted to show
you that you can make decisions and just choose
to average island scale and pack Islands for a
certain collection of UVA islands while manually
placing the others. All right, so let's take a look at our material preview and oh, we need to add a material. Let's do that. Let's pull this down and that, and let's take a look
at what we have here. You can see that the squares
for these little cubes, these little pieces here
are slightly different than the rest may
be slightly bigger because we had to scale
them down a little smaller. But I don't think that
will really be a problem. I think these are separate
enough pieces on the chair that having the wood grain slightly different
than the rest, I don't think is going
to really hurt it. So you just have to consider
what you want if you want them all to be exactly
the same size and grain, then maybe you do want to select everything average island scale, and then let blender pack it
all in, totally up to you. All right, let's go
back to the layout tab. Go to material preview. Let's bring
everything else back. Here we go. We could take this chair
and just delete that. We can take this and press
RZ 180 and spin it around. Then we can press Shift T
and X and duplicate this. So we have those
same thing here. We could delete that
and duplicate this. And of course the
wall tables as well, we can delete that
so that any others we use will be
duplicated off of this. Alright, in the next video, let's work on another chair.
58. 058 UV Mapping the Arm Chair: All right. I think we're
on a roll with chairs. Let's keep going here. Let's maybe get this
one the armchair. Let's first of all bring it out, hit the M key, bringing out
in the scene collection. And then let's take
these two chairs that we were just working on and move those into the
furniture collection is high. The furniture, and
let's spin this around. So it's in the world axes here. Let's take this z-axis
and type zeros, so it's aligned with
the global axis. Let's also go ahead while
we're here and apply to scale. I'll press Control a
and apply the scale. And let's go over
the UV Editing tab. Hit the a key, hit
the period key. Here it is. Let's switch to shaded mode. What are we gonna
do with this now? Well, let's begin easy. I think we can just
take these right here. If I recall. These don't have a back to them. Let's press Shift H and C. Yeah, they don't have a back to them, so I think we can just
hit you and unwrap. There we go. That
looks just fine. We could test conformal, maybe a little better. Sure why not? Let's go ahead and go with that. Press Alt H and see
what else we could do. What else is easy here. How about the back legs? Let's select those
and hit Shift H. And let's take a look at these. They do not seem to have any faces on the
top or the bottom. Let's just put seams
right here on the inside. You and Mark scene, and let's select it all
hit you and unwrap. And there we go. We can try angle based
and hand conformal. Not much of a difference at all. So I think I'll
just go with that. Let's press Alt H
and see what else. How about the other legs? Let's hit the L key
for these Alt H. And for these it
looks like there are faces on the top and
on the bottom here. So let's go ahead
and select those and delete those faces. Let's do that. And I'll grab this one here. That will just make our
lives a little easier. Then let's go on
the inside here. And let's just
select an edge here. And we'll select an edge here. Mark seams for that. Let's unwrap it. That does not look very good. So let's try angle based. Oh yeah, that's much better. Let's go with that. Alt H and let's see what
else we want to do. How about this cushion? Select the L key
for that shift H, and let's see what we
want to do for this. Well, we're probably going to want to split off the bottom. Let's go ahead and do that. I'll select these edges all the way around
the bottom here. Here. Let's do that. Let's place a seam along there. I think we should get the
edges back here as well. We're not going to see
these, I don't think so. We can get all of those. We're going to need
something to split up here. I wonder if we could just
place an edge right in here. I'm going to press Control and click there to connect those up. And market scene for that. This down here control-click
you and Mark scene for that. Let's see if that'll work. If we can just put
a seam there and it'll just open up like that. There's a chance, there's a
chance that that might work. Let's hit the L key, you and unwrap.
Let's take a look. Yeah, it looks like we've got the split open without overlap, although no, there
isn't overlap there. I was thinking that maybe this
and this were overlapped, but I don't think they are for either side, so that's good. Let's give that a try. Actually, let me test the
other method I'll unwrap again and let's try conformal and just see
what happens here. For this, it looks like there may be a little overlap here. You can see that we
don't want that. So let's go back to ankle based. I think that'll work. Okay. Alright, let's press Alt H and we're gonna need to
think about this trim here. Why don't we do that? Let's just hover over these
and press the L key here. Unless press Shift H and
take a look at this. Now, what do we want
to do with this? We could just hit the a key and use smart UV project
and see what happens. I'll give it an island margin of 0.01 here and click Okay. Alright, that's possible, although that's gonna
take up a lot of room, it isn't gonna put anything
in the center of these. If we use pack island, that's going to
take up some room. Can we split these
up in a better way? Well, we could try, you
know, what we could do? We could try, first of all to just put seams
along the bottom here. Let's do that. So we know we've got them
split out down here. Let's do the same thing on
the back of these here. Alt click and market scene here. And over here as well. All right, so we know
we've done that. Let's let me select them
and press U and unwrap. Well, that gives us a very
long one right there. I'm not sure what that is there. Maybe we could find some
edges right along in here, like we did for the cushion
and hide these away in here. We could maybe do the same thing on the back corner like we
did with the cushion. We're just kind of mirroring or replicating what we
did for the cushion here. Let's just try this and see maybe this corner
and this corner. Let's try that. And then
of course over here, we want to get these.
Let's try this. Let's select all of this, hit you and unwrap. And let's take a look. We've still got this
very long piece. Let me turn on UV
sink over here and just select this
piece right here. And let's see what it is. That piece, it
didn't seem to go. It looks like this
UV or this edge right here didn't get CME
is all the way around. So for some reason this particular seam isn't
breaking up the UVs there. So what I'm gonna do is remove this seam you
and clear scene, and then Alt click
the next seam here. Let's just try this. You and Mark seen. Now what I can do
is hit the L key. There we go in with
siem turned on. You can see that
that's split it up. All right, Let's try over
here. I'll hit the L key. Yeah, that works. Oh, look at this. It looks like these aren't
merged together here. They're not. I don't think that's
going to be a problem, but maybe something like this was happening over on that edge. Alright, Well, let's
give it a try again. Let's hit a and U and
unwrap. And there we go. Now, that makes them a
little bit smaller there. Alright, so it's
sometimes good to have little problem to see
how we can solve that. For the next piece, let's work on this. I'll press Shift H. For this. I think I want to select
these edges right in here, all the way around. Let's do that. You mark seam. And then let's of course
do the ones on the bottom. Let's do that.
Take these all the way around you and Mark scene. Let's get the ones on the back, maybe right here. Let's try this. All the way up here and
around down to there. You and Mark seem oh, I forgot this one right here. So I'll press U and
Mark scene. Then. I think we're gonna need to
break this out right here. The front part. Let's get this. And this area right here to kind of split out
that front part of the arm. And also I think
we're gonna need to split this out right here. Let's bring this
all the way down. This here. Let's do all the way
around like this. We go, we've got several
kind of areas here. Let's hit the L key to make
sure that they're gonna hold. Yeah, they're holding
better than that trim did. That's good. I'm just going through
and hitting the L key. Let's give this a try. Let's see how this works. So I'll hit the a
key you and unwrap. That's good except for
this area right here, I feel like that's pulling
a little too much. So let's see if we
can just add an edge. Well, we're either
going to have to come out like this or down like this. I'll go ahead and give
it a try like this. And here I'll mark a seam. Here we go. Now let's give it another try. A you unwrap. Yeah, that looks pretty
good. All right. Let's bring everything back. Let's go to material preview. I had the test material
and we need to go through and average island
scale for all of these. So let's tab into edit mode. Make sure we've selected
everything over here. When we do, you can see that all the squares are a lot more uniform now we've
still got a few that are pulled here
because of this. And we may want to deal with
this a little bit better. Would it help if we
added a seam here? I wonder. Let's try that. Back here. Let's try again. You unwrap. That helped a little,
maybe let's see. Yeah, I think that
helped a little. Let's go ahead and
try it over here again with average island
scale and pack islands. There we go. We've got some seems here that may not work when we
put our textures on. But I think there
are some tools in substance painter that will help us smooth out those seams.
59. 059 UV Mapping the Desk Chair: Well, let's go back and
work on that desk chair. It's pretty similar to this. I think let's bring
everything back. And what I'll do is just take this and spin it in the z-axis, RZ 1 eighth 0. Let's delete this
one and then just duplicate this and move
it over like that. Then let's take this
and move it out into the scene collection
and take our armchairs back in to the
furniture collection. All right, now, this is similar but it
has some differences. Let's go back over
to the UV tab. Let's hit the a key and
the period key on also hit Z and goto solid mode. And while we're here, let's select it and hit the N key and we better
apply our scale. Control a, apply the scale. All right, now, I guess let's just begin with
the seat cushion. First. Let's hit the L key and
then press Shift H. And I think we can just maybe select these edges
right along here, like this. And marker seems there. And then we can select these edges along
the corners as well. Let's try this. There we go. Then let's just hit the a key EU and unwrap
and see what happens. Well, there's angle based. There's conformal. Maybe I'll go with conformal. In fact, what we could
do is we can hit the Z key and go to
material preview. Go ahead and add our
checker pattern. And then we can kind
of see the difference. So if I switch from
conformal to angle face, you can see the checker
pattern move just a little bit because
it's changing shape over here and it
looks to me like conformal is a better unwrapped
for our texture here. Alright, so I'll press Alt H. And with the checker
pattern applied, you can see it's all
smeared and stretched. And that's why we're going
through and doing this. That's why we're UV mapping
is so any texture we put on here will look good and won't be stretched
or distorted. I'll hit the L key here, shift H, and let's try this one. Looks like just a
similar process. Let's just find some
edges all the way around here,
something like this. And then we'll grab these seams are these edges as well and add seems to these. Then I think we can just hit a U and unwrap and
see how we do. Once again, we can
take a look at our checker pattern
here and see if it changes when we go
to angle based and it looks like it skews
it just a little bit. Yeah, I'm gonna go
with conformal again. Alright, let's go
ahead and press Alt H, and let's work on
this one right here. Same thing. And I think this one maybe we only need one edge. Question mark. Let's see. What if we just go along
this edge right here. Mark a seam and then we don't
do any of the corner edges. Let's try this. You and unwrap. Yeah, that's actually
not too bad. Let's go with that. All right, Alt H. Now let's
think about this down here. I think this is going to be a good candidate for smart
UV project, these legs here. So I think what I'll
do first of all is just select this with the
L key and press Shift H. Then this was the
front, wasn't it? I think it was. What Let's do is let's just mark as seen
here in the front. Because if you recall, the chair's gonna be
pushed up to the desk. So we really aren't gonna be seeing the front of the chair. I think this will be a
good place to put a scene. Let's hit a U and
unwrap. And there we go. Oh, and it looks like I've
got UV sinks still turned on. I'm gonna go ahead
and turn that off. That would only be a
problem if I tried to move the UVs around manually. Alright, so let's
press Alt H again. Now let's grab this. I think all I'm gonna
do for this is just, as I said, use smart UV
project, just press U. And smart UV project. I'll put an island margin
of 0.01 and click Okay. Yeah, I think that'll
work just fine. These are all going in
the right direction or in the same direction. This down here is
the bottom of these. So I'm really not too
concerned about those. So I think that'll be just fine. Let's go with that. For these down here, these spheres, the checker
pattern isn't square. So it is kind of squished. But I mean, it's the
kind of thing where we could press SY and go like this. They would be square. But I don't think we
really need to do that. These are going to be
so small and they're really just going to
be one plain color. I don't think that's
gonna be a problem. These, however, right here, we could go through and just UV, unwrap these right
here. Let's do that. And one more here. Let's just take these and since they're open
on the bottom, Let's see it you and
just click unwrap. And there we go. I
think that'll be fine. Now for these little guys. I think I wanted to do
what I did with this and just add a seam
on the inside. Let's just select each one
of these with the L key, this shift H. And then
all I want to do is just go through and add CME for each one of these
kind of tedious. I have to admit, but I
think it'll be okay. Then there's this one here. Let's just add a
seem right there. All right, so we've
got all of those. Let's just select them
all hit you and unwrap. And there they are. That's fine. Alt H. Now let's look at
this right here. Shift H for this. Well, let me hit the Z key and go-to salad so it's a
little easier to see. I think I'd like to just I'll just grab these
edges right along here. But then I think I want
to shift click this, then control-click this,
then de-select these here. Then add a seam around there. I think I'd like to add a
seam going up here like this. I'll hit you and
Mark seem there. Then I'll just Alt Shift, click on around here like this. And on down. And let's do the same
thing over here. So I'm going to select all
of these all the way around. Instead of going here, I want it to go this way
to connect with this. So let's mark a seam there. I want to mark as siem
all the way around the bottom here, right here. Let's do that. So it connects with those
seams there, like this. Then I want to
connect these here. For the back. They all
connect up like this. What else? Well, we should probably
do a similar thing that we did for the last one, maybe underneath
here and then over the top and down into here. Let's do that. Maybe like this. On down around underneath
the arm there. Is that enough? Is that going to do it? I feel like we're
probably going to need one along here or here. Or maybe underneath these
cushions on the back. Maybe we could split this out. And no one would see
that. Let's try that. All right, so let's
hit a U and unwrap. Conformal is not doing great. Let's try angle based. That's a little more uniform, but it's still looking
kinda odd, isn't it? There's something that's
not quite even about this. It could be that since we have that piece over the top here, we might be able to just take this edge right here
and give it a seam. And maybe that'll help. Let's try this. I'm going to add a seam here. And on round down to here. I didn't do it here in today. Let me go back and get that. Let's give this a try again. Let's try a U and unwrap. And that's a little better. Actually, these L-shaped pieces
may not be the greatest. We may not want to do that. Let's see what it
looks like when we go to material preview. Let's take a look here. Well, I think we've done a
pretty good job of hiding seems underneath these cushions. It doesn't look
too bad actually. These checker patterns
here are kind of angled. But I don't know that that's really going to be a problem. Let's take it all, and let's press Alt H here. And then let's take it
all and come over here to the UV editor and
hit the a key as well. Let's go to UV average island
scale, UV pack islands. Let's see how it did. Tab back into object mode. And let's take a look.
Actually, that's not too bad. I think that may actually work better
than the last chair. But as I said, there are a couple of
tools that will help us hide seems when we get
to Substance Painter, That's always a
possibility there. All right, let's go
back to our layout tab. Bring back the rest
of the furniture. For the next video. How about we work on the desk? Let's give that a try.
60. 060 UV Mapping the Desk: So to start working on the desk, Let's hide the furniture. We ought to bring it
out from the furniture. Let's take that press M and bring it out into
the scene collection. And then we can take
the desk chair, drag it in to the furniture
collection and hide that. Alright, so now let's go
over to our UV Editing. I'm going to hit a period key. And let's just see how blender handles this
with smart UV project. Let me press the Z key
and go to solid view. Because I think this
is just complex enough to just see what
blender can do with it. I get the feeling that we're gonna have to do
quite a bit of work. But let's see what
blender can do. Let's hit you smart UV project. Let's add an island
margin of 0.01. And let's click Okay. And wow, that's just
way too many pieces. That's not gonna work. Now we can play with
the angle limit here. And basically the
higher you put it say up to 89 degrees because
that's his high as it goes. It will try and break up
things or add seems to edges that are no
less than 89 degrees. You can also take it down
to 0 degrees if you want. Breaks out almost everything. That's not really going
to work for us is it? We're gonna have to try and be clever and see what
we can do with this. First of all, I think
just right up front, I probably want to just
break out the top. Let's just press Alt, click on this edge, and let's just press U. And markets seem they're
just all the way around. In addition, Let's do
that to this trim here. Let's add a seam here, you mark seam, and
let's try that. Now. If we just selected this
up here with the L key, would select everything
until we came down here and selected seem. Then we could UV map that, but I think we probably
should tab into object mode, hit the End key, and let's go
ahead and apply our scale. So it's all ones. Let's do that. Then. Here in edit mode, I'll
just hit you and unwrap. And there's that now we
can change it from angle based to conformal
and maybe clean up those edges a
bit. That's not bad. Let's do that just to keep things from getting
all jumbled in here, I'm gonna hit the G
key and move this out outside the 0 to
one space for now. Then this trim, if we
tried to UV map this, now it'd just be a rectangle. And I don't think
we want to do that. I think we're gonna need to
add a couple of edges here. Let's add an edge
right along here. Well, we don't want to
press Alt and click because that'll select
that whole thing. We could click here on
this edge, let's say, and then come down around
here and Control click this. And then hit you and Mark scene. And let's do that
over here as well. So I'll select this and I'll hit the period key and zoom in. Select this, control-click this. And let's add a seam here. I'm just trying to
add seems to break up this really long strip
all the way around. Well, let's just do
that here as well. I guess on the side,
here and here. Then let's go around
to the other side and do that as well. I'll click here,
control-click here, add a seam, and there we go. So now what Let's do is let's
just hit the L key for each of these parts right along here. And let's see how
these come out. You unwrap. That's pretty good. Let's take a look
at angle based. I kind of like conformal
a little better. The main parts are straight. The little curves are
having some problems, but I think that's okay. Let's now work on
the drawers here. Why don't we mark seams around each of the
drawers and then UV map these on their own. Let's do that. I'm just pressing Alt and Shift
and clicking around here. You and Mark seem. Let's do this up here. And let's also get all of
these drawers as well. You and Mark Scheme. And now that we've
got all those lists, then go to face mode and just press the L key
for each of these. Like this. Look how much it was broken
up with smart UV project. All right, let's go
ahead and press U and unwrap. There we go. Now, this is looking
a little pulled. Let's try angle based
and that's even more so. Let's go back to conformal. I like this. What we can do with this here is just press Alt and
click that and we could just scale it in SY and pull it in just
a little bit like that. See if that helps. Of course, to see if that
helps, we're gonna have to. In our UV test materials. So what I'll do is come
over here and grab that, and then press Z and
go-to material preview. Alright, so we can
see them there. Yeah, that's actually
pretty good. I think that'll work just fine. Z and back to Solid View. So now let's work
on these over here. Actually, before I do that, let me just grab all of these again and I
want to move them out of the 0 to one
space over here, kind of like we did before. I'm just move them up. Here. We go. We could also take these if
we wanted and move these out. I'm just trying to stay organized here in G
and move these out. This is a complicated
enough piece that I'm really trying to stay organized so I can understand what we've
done and what we have. And so if I hit the a key, you can see that
these are the things we've done out
here and these are the things that we haven't just trying to stay
organized as all. Let me move these over here. And I'll move these down here. I think this may help
us as we go just to be able to see what's been
done and what hasn't. Let's work on this
up on top here. Let's take this,
Let's see Alt Shift. Yeah, let's, let's take
this edge right along here. And mark is seen for this, it's kind of hidden
underneath this little ridge. I think that'll be a good
place for that seem. Let's go ahead and do that. I'm going to keep
coming around here. This then all the way around until we get back to where
we started right here. Let's see at you. And Mark
seems so there we go. We've got that piece on top, broken out from
everything on the bottom. Now what Let's do is
break these out like this. There we go. So I'm just trying to
get that seem all the way up that trim there. And let's do that
back here as well. There at this seam or
this edge as well. Alright, so if we press Shift Z, this is what we have so far. I did notice that while
I was adding the scene, we have faces down
here and as I said, I don't plan to kick
over the furniture. So I think I'm gonna go
ahead and get rid of d's. And what I can do is hit the
C key for circle select. And then I can just drag, click and drag and paint
this selection here. And then right-click
Delete and delete faces. Let's do that again. I'll hit the C key and then
paint this selection here. Delete and delete faces. There we go. So we don't need to deal
with those down there. Alright, let's see
where we are Now. I'm gonna go ahead
and press the L key. And the problem is I haven't
gone through and put seams around these little panels here and I feel like
I should do that. I'm gonna go ahead and do that. Hit you and Mark seam here. Now I've got a panel
inside a panel. What do I want to do with this? I think I'll go ahead and mark the seam on the outside and let that inner panel just
kind of live in there. And then let's go get
these panels here. I'm just marking the seam on the very outside of
them. That's all. We got those in, pretty
much the same way that we did the drawers. We can come through here now and select each of these
and go ahead and UV map these and see
if we want to do them with conformal
or ankle based. And that's one of the
main reasons, again, why I'm breaking these up into pieces and UV mapping
them individually is because I'm able to choose conformal or angle based
depending on what is needed. If you just UV map the
entire thing all at once, then you only have one
option for the whole thing, either conformal
or animal-based. I'm just trying to keep
my options open here. Alright, you and unwrap. We can try angle based. Now, let's do conformal. There we go for these and we'll go ahead and select
these and hit G and move these out of here. Now when we hit the a key, we can see what we've UV mapped. We can also see what
we haven't yet. So if I de-select
everything over here, turned on UV sink and then
clicked and drag these. You can see that this is
what we still have to do. All right, I'll turn UV
Sync off for a minute. In the next video,
we'll continue on with the rest of the desk.
61. 061 Finishing the Desk: All right, To continue
with the desk, let's go ahead and just
hit the a key so we can take a look at all of this. Once again, I'll turn on UV sink and I'll just click and
drag what still in here. And this gives us a sense of
what still needs to be done. So, well, let's do now is
UV map this area in here. So if I hit the L
key right here, you can see it just travels
all the way over here. Let's just add a
seam up in here, right here, right here. Then let's see if it goes out
too far on the other side. No, I think that's good. Let's go ahead and press U. And Mark seems there. Then we could go
ahead and press L. Over here. I'll turn
off UV sink for now. Once again, you can see how many pieces that
blender broke it up into. Let's hit you and unwrap. And there we go. That's a little bit better. Once again, I'll take these, let's just hit G and move them out at the a key over here. And now we can see them all. I'll move this over
here like this. So we're just getting them
all lined up out here, ready to be packed into the 0 to one space when
we're all done. Right, so now what
about this area? Let me just hit the L key here. Let's see what happens if we
try and UV unwrapped these. I think what's going to
happen is we're going to need to add an edge along in here to split
up this long piece here. But let's give it a try. Let's hit you and unwrapped. It's not terrible and actually
let me triangle base. No, that's not as good. So all of this, it looks to me like if we
press R9 0 and then negative, there we go and hit Enter. It looks to me like
this isn't bad. There's gonna be
some times in which we're going to begin
applying our textures. And it isn't going to go
the way we hope it would. And that's fine. That's just part of the process. But for now, let's go
ahead and go with this. And I'll put this
out here again. Then what else do we need to do? Well, let's once again hit the a key turn on
UV sink over here. Drag select this, and we've got this top part
still to go up here. And we've got all of
the drawer poles. This back panel here. Let's take a look at that
panel on the back real quick. I'll just go to face mode, hit the L key. And let's take a look at it. Here it is here. I wonder if we could just use
smart UV project for that. Let me turn off UV sink. You smart UV project. We've got it at 66 degrees
0.01 island margin and yeah, that looks just fine. Why don't we just go with that. I'll hit G, move that out. Let's hit the a key
over here so we can see everything and I'll
just move that over here. All right, Once again,
what do we have? Let's turn on UV, sink, drag, select these, and we've got that top part and
all the handles. And these little
guys right in here, we can take care of
those real quick. We can just hit L
for each of those. Turn off UV sync. We can do the same thing. We can just hit smart UV project on this, and there we go. Fine. That'll work. All right, so now once again, I'll take this, move
these over here. So we are getting there. Now. We've got this top piece here. Let's hit the L key for that. It looks like it's
just in pieces now because we created seems here. So let's go through, select each one of these pieces. This, then let's see what
we can do with this. You unwrap. There we go. Let's try angle based. Not really. How about
conformal again? Sure, let's do that. I'll get these and
I'll move them out of the 0 to one space. Hit the a key. Here it is. Move it over here just
so we keep organized. Now it looks to me like all of these are just
those drawer pulls. Look at how many pieces
it broke it up into. That's crazy. Let's just drag select that
and yet that's all that is. Or just the little drawer poles, so we don't want it
to look like that. That's a little too much. What Let's do is let's
just take these and we could go through and UV map each and
every one of these. But I think what
I'm gonna do again is just delete all but one. We go. I hit delete and delete faces and then just
unwrap one of them. Then once that's done, duplicate it for all the others. I think that's gonna be
easier than going through and trying to UV map
each and every one. So let's press Shift
H and zoom in here. What do we want to do with this? I think first of all,
I'm just going to take this and create a
seam right here. So this will break
out on its own. If I hit the L key
and you and unwrap, it'll just be like that. That's good. I think I can create
a seam right here. Let's do that. Alright, and then if
we hit the L key here, we can see that split. If we Alt click this, we can add one here. And then I think on the bottom, I'll add a seem to this. Then what that
should do is if we take that and just
hit you and unwrap, it'll just lay it
out flat in a strip. We could also just
do this one as well. See what this looks like. Yeah, that'd be fine. For these. Let's add an edge here. Or a seam, I should say. Oh, let's get rid of this. We don't need that. There we go. Let's add a seem right
down here as well. So that if we select this, it'll look something like that. And if we select this, it'll look something like that. Alright, so we could now
just select all of this, hit you and unwrap and
just see it altogether. And that'll be fine. Now that we've done that, let's prepare it
to be duplicated. For that, I think I want to move the 3D cursor here, Shift S two. Then let's take this
whole thing right here and split it out
as its own object. Recall to do that, you just hit the P key and choose
separate by selection. There we go. Now if we tab back into object mode, select that. We just need to move the object
origin to the 3D cursor. So let's come up here to object, set origin, origin to 3D cursor. Now we just go through
the process of duplicating and snapping this
to each one of the drawers, just like we did when we
originally created this. Let's tab into edit mode
and sense it was hidden. We need to press Alt
H to bring it back. And then what Let's do is just with the three
key, select a face. And let's move that 3D
cursor to here, shift S2. Now we tap back
into object mode, select that, duplicate it
with Shift D, and Enter. Then move this to the 3D cursor, Shift S and the eight key
or selection to cursor. There we go. Now we just do that for
all of the drawer handles on this side and then we'll just mirror them
over to the other. So let's select this, select this face shift S2
to move the cursor there. Select this object. Now
in object mode, Shift, Enter, Shift S
eight. There we go. Alright, one more time. Let's select this shift S2. Grab this one and duplicate it, and then shift SA2,
the 3D cursor, and the last one on this side, Let's just select this face, shift S2, grab a drawer handle, Shift, Enter, Shift S8. There we go. Now, let's
take this 3D cursor and move it into the center
of the object where the object origin is
with shift S2 again. Then we can take all of these, select each one of these, change our pivot point
to the 3D cursor with period 3D cursor. And now we can mirror these
over to the other side. Shift D, Enter Control
M and the X key, and then Enter, and there we go. Now we take all of these, select the desk and join them
together with Control J. Now, if we tap back
into edit mode, we've got everything here. If we hit a, here's
everything now. Let's hit the a key over here. Come up here to UV, average island scale,
UV pack islands. And let's take a look at it. What do we think? Well,
maybe not too bad. Let's come over here, hit the Z key and
material preview. If we tap into object mode, Let's take a look at it. Well, it looks pretty good in terms of all the squares
being about the same size. And I'm not seeing any
horrible stretching. The real test is
going to be whether we have all of the UVA Islands going
the correct direction. Do we want all of the wood
grain going this way? And frankly, this
is gonna be hard to figure out without
having a texture on it. We're really going to have
to put that wood texture on, figure out which
way the grain is going on all the drawers
and individual panels. And then we may need to turn a few of these UV islands to get them going in the
direction that we want. But that at least for now
is the UV map for our desk. Let's go back to the
Layout tab and let's bring everything back or all the
furniture back. Here we go. We've just got a couple
of things to go. On our couch and our chairs will begin
those in the next video.
62. 062 UV Mapping the Sofa: All right, well now we've got
the couch in these chairs, so let's bring the
couch out first. I'll just hit the M key and bring it out to
the scene collection. Drop the desk in
here, hide that away. Let's go over to
our UV Editing tab. Hit the a key, the period key. I'll also hit Z and
go to Solid View. And so here we are. Now, it looks to me
like we've still got a subdivision surface
modifier on this. So let's come over here to the modifiers panel
and sure enough, and we have a mirror. I think we're going to need
to apply that in mirror. First of all, we've
got clipping enabled. So let's just tap
into object mode, pull this down and click Apply. And there we go. We've applied the mirror. Now, the next thing we should do is deal with
the subdivisions. I really don't want to keep the subdivision surface
modifier on here, mainly because we're
taking these into Substance Painter to
do the texturing and blender modifiers
or modifiers from any program really don't
transfer from one to another. So things like
modifiers, materials, things like that, don't really transfer well from one
3D program to another. It's just the nature
of the beast. Each program has its
own set of materials, has its own modifiers,
things like that. So we really need to apply them here to see what it's going to look like when we apply this modifier list tab
back into object mode. Let's hit the Z key
and go to wireframe. Then let's turn off
this optimal display. Right there is
what it's going to look like if we apply to the subdivision surface
modifier at viewport level two, that's fairly high poly. Let's bring this down to here. And there's viewport level one. And if we applied the modifier
like this, That's not bad. But let's go back to solid
and see how it looks. It's a little bit blockier. If we bring it up to two, it's a lot smoother. But do we want all those polys? It's really up to you. It's up to you and what you're doing with your
particular project. The good thing is, is if
you're doing a video game in Unreal five now the
newest Unreal Engine, you can begin to use more polys. The future is bright for, for not having to worry about how many
polygons you're using. But for now we're
still going to go ahead and have it be a concern. So I'm gonna I'm gonna
take this down to one. And you can certainly keep
it at two if you like. But one thing I've
noticed though, is that these down here, let me, let me show you what
I mean down here. If we hit the Z key
and go to wireframe, look how many polygons
just viewport level one is going to do. If I turn off the
real-time display, you can see there's
what they actually are. There's how many
polygons it'll have with just viewport level
one up to two. It's way too much. One thing I think I'd like to do first is split these off, split the feet off from the rest of the object before I apply the subdivision surface
modifier because I don't need that many polys
in these feet. Let's tab into edit
mode and just hit the L key and select
each one of these. And then I'm gonna hit
the P key and separate those out as their own objects. So here we go. We can see them over here. Right here. I'll just
call these feet for now. Now with the sofa. Let's go ahead and apply this subdivision
surface modifier. I'll pull the menu
down. Click Apply. And there we go. Now when we tab into edit mode, that's what we get and
that's not too bad. Down here though, if
we choose those feet, we still have that
subdivision surface modifier. So let's just hit the X and delete it so we don't need that. We were gonna keep this amount
of polygons on those feet. Now that we've done that, let's add them back to the
sofa object, Control J. There we go. So now everything is back. We've applied the
subdivision surface modifier without overdoing the
polygons on the feet there. Alright, so what
should we do first? How about these
things right here? Let's just hit the L key. For these panels up-front, I'll press Shift H and let's tumble around
and take a look. Yeah. They don't have
anything on the back, so we should just be able to unwrap these without a problem. I see currently that I'm in 3D cursor pivot
point over here, I'm just going to change
that back to median. While I'm here, I'll
just move that cursor back to the center of
the grid with shift S1. And there we go. Now, before we do
anything recall, we should probably take
a look at the scale. Let's tab into object mode. Hit the End key.
And sure enough, these are completely
non-uniform. So let's press Control
a and apply to scale. Those are all ones. Things should work
a little better. Now, let's tap back
into edit mode. Let's hit you and unwrap. And there we go. We've got conformal and
we've got angle based. I'm thinking conformal.
That's pretty good. And I'm gonna do a similar
thing that I did before. I'm going to hit the
a key and the G key and move these out of
the 0 to one space. Just temporarily
while we're working. I'll press Alt H and let's
see what else can we do here? How about this cushion, the L key Shift H? And then let's just select this whole edge loop all the
way around on the bottom. And let's add a seam there. Then I'll just go through
each of the corners here. Select these, and then
hit you and Mark seem. All right, so now let's
hit a, you unwrap. Well, there's
conformal angle based. Really doesn't matter a whole
lot I kind of like this. Once again, I'll hit the
a key, hit the G key. Let's press Alt H to
bring everything back. And now I can just grab these
and move them over a bit. I'll just drag, select
these here, like that. There we go. Alright, so now we've got the
panels and the cushion. Why don't we do the legs now
or the feet, I should say. Let's grab these
shift H for these, I think I'm just going to go
into the center right here. Here's the object origin. Then just Alt click, Alt click, vertical edge. There we go. You and Mark seem
and go through each one of these inside here with a seam and break these
up on the inside so we don't see this
one right here. Let's do that. There we go. You and Mark seem okay. Now we've got those. Let's hit the a key
you and unwrap. There is conformal, but
because it's curved, that doesn't really
work very well. So let's try angle based and
that is a whole lot better. So g, Alt H, and then let's just
move these down here. What's next? Well, I guess the only thing left is
the main part of the sofa. So let's hit the O key
and Shift H for that. And let's just begin
on the bottom like we usually have and just go through and select this whole edge loop all the way around
on the bottom, you and Mark scene. Let's maybe come through here. I think maybe this whole thing all the way
around like this. Let's try that. You markets seem there. Let's go through here and break out this part
and it comes through, it comes out just a
little bit too far. I just want it to connect to that existing
seem right there. Now let's you and
Mark seemed there. We could come up these
corners right here. And maybe Alt Shift click. In fact two there like that. Let's see. Yeah, That
goes all the way back down to the seam on the bottom. Do we want to seem here? Well, yeah, let's go ahead and do it
and see how it looks. And let's mark a seam there. And then also let's market seen underneath here like
we've done before. And once again, this one
comes a little bit too far. So let's de-select these here. And mark that seem What else? Well, I think that
looks pretty good. Let's give this a try. Let's hit the a key and
then you and unwrap. And what do we think?
Well, about conformal? I kind of like informal, but what is this right here? There's this long strip. Let's see if we can
figure out what that is. I'm going to click UV sink. Then let's just hover over
this and hit the L key. And I'm going to press Shift Z and hit the period
key to zoom into it. And it's just that little
strip right down there. Well, that's interesting. What did we do wrong there? It looks to me like
when I selected this, this went all the way through. Okay, so we just need to
de-select all of this. Let's do that. I selected vantage down there on that end and I'm going to
Control click this edge. And that'll connect all that up, select all of that in-between. And let's hit you
and clear seam. There we go. Let's try that. All right, once
again then let's hit a U and unwrap. And there we go. Let's try angle based. Back to conformal. Not a lot of difference there is there. Let's give it a try. Let's press Alt H, and let's hit the a key
to select everything. That looks like everything's
selected over here. Let's now come up to UV,
average island scale, UV pack islands with the period key to zoom in.
And let's take a look at it. What do we think? Well, it's not bad actually. In fact, I think
that'll work there. Just a couple of things
I'm gonna do here. I want to turn on UVC. Oh no, this is Face Select. So what we need to do is
turn off UV sink here. There we go. Then I've got UV select
mode enabled here. So I'm just going to
click these and I'm gonna move these over here like this. They're altogether over here. And then what we can do is give a little more
room to these guys. I'm going to bring
this up and maybe turn it so it's more
straight up and down. And this I will hit the R key in turn and have this a little more straight up
and down. There we go. That's all I wanted to do
is just get those in line. So now we can come
over here and hit the Z key and go to
material preview. Looks like we need
to add a material. Let's do that. Let's come
over to the material panel, pull this down, select the UV test material.
Let's take a look at it. This a little bit bigger. And everything looks
pretty much the same size. That's good. We've got these seams along the back here and I'm
not sure about those. We'll see how the texture
flows along there. But everything else
looks pretty good. Let's take it back into the layout and bringing the furniture back,
and there we go. So in the next video,
I think we can basically use what we just did, what we just learned
for the sofa and apply that to the chair.
63. 063 UV Mapping the Chesterfield Chair: Alright, for the chair, Let's well selected, I guess, and hit the M key
and bring it out, just like we've done before. And let's take that couch into
the furniture collection. And here we are. Let's come
back to the UV Editing tab. Hit the a key, the period key, and let's go back to Solid
View with the Z key. And let's see what
we can do with this using what we've
learned from the sofa. So I think first off, let's hit the End key
and apply the scale. And let's do that. We know we're going
to need to do that. Let's take the feet here. And well, I was going to say we should split them
off as their own object. But first let's deal with
the mirror modifier. Let's do that. Come over here and make sure
that we've got clipping turned on and just
apply that mirror. Now we can tab into edit mode. And with these selected, let's go ahead and hit the
P key and separate these out so that we can just
select that chair again. Take it down to
viewport level one, and let's apply the
subdivisions here. Now we've got that. Let's take these
and join them back in with the chair with
Control J. There we go. Alright, so let's
now begin again. We know that we can take
these things here, right? And UV map those. We did that. And we know that we can take
these press Shift H. And let's go ahead and add seems along the
inside edges for these, just like we've done before. There we go. Let's get that one and now
we've got those all marked. Let's hit the a key
you and unwrap. Once again, we don't
need conformal, we need animal-based for these. Let's move these out of the way. Press Alt H and O. We've got some overlapping UVs here, so we don't want that. I'm going to use my
UV selection tool and just click these three and
move them out of the way. And let's grab these and
move these out of the way. There we go. All right, let's work on that cushion, just like we did before, the L key and Shift H. And for this, once again, I'll just grab the
bottom edge loop. Let's do that. And the corners. This. And hit the a
key and unwrap this. There's angle base, there's
conformal angle based. Don't really see a whole
lot of difference. I'll go ahead and go with
angle based on that one. Hit the a key, the G key, Alt H. And then let's
move this down here. For the chair. Let's press the L key, shift h. Alright, so let's now go
through and mark all of these. So once again, I'll grab all of these edges all the
way around the bottom. And then up here, I selected this, didn't I? Yeah. All the way around.
And when I did that, it went all the way
around down here. So let's de-select all
of these down here. An easy way to do that is with the circle select tools so
we can hit the C key and then middle mouse
button click and drag to de-select
those edges there, and then right-click you. Denmark seem okay. I think I selected these
in here, didn't I? Alt Shift click here. And then you had
de-select these here. Mark scene, and
then these corners. Let's select these
mark seam here. All the way around. There we go. So
now I think we've avoided this little strip here. Let's try this a U and unwrap. And I don't recall if
we did conformal or angle based for the last one, but they both look pretty good. So I'm not too
worried about that. Let's go ahead and put
the material on them. Let's come over here to
the material panel and drop this down and apply
our UV test material. I'll hit Z and go-to
material preview. And let's take a look. Well, we haven't yet added
to the scale now, have we? So let's do that. Let's go back into edit mode. And let's come over here
and select everything. Oh, we need to bring
everything back here. Alt H. There we go. With everything
selected in a 3D view. We can now see everything
over here in the UV editor. Let's hit the a key. Then let's come up here to
UV, average island scale. And now you can see over here, all those squares
are the same size. All the squares the same
size over here means that everything is proportionally
the proper size. So let's tab back
into edit mode. And over here, let's make
sure and select everything. And now let's pack islands. Alright, let's
take a look at it. What do we think? Well, once again, these
little items here are not quite in the places
I'd want them to be. So let's take these guys
and let's spin them around and put one here. And I'll put one here kind of a little more
straight up and down. And we can always take these and get these
out here like this. Arrange those so we can
see those pretty well. Alright? So I think that's pretty good. Once again, we aren't
going to really know for sure until we get
our material on it, but let's give that a try. So if we then go back to the Layout tab and bring
back all the furniture, we've got just about
everything done. This one here, we can just
delete it and then go to the top view with the
seven key on the numpad. Let's duplicate this and move
it in the x and then just press R 180 and spin it around. There we go. Now we've got all the furniture that we have so far, UV mapped. And what I think I'd like
to do in the next section is go through and begin applying
some materials to these. So what that'll mean is we're
going to need to take each individual one of these
into Substance Painter. But before we do, there's one more thing we're
going to need to do that is to establish
a color ID map. And we're going to take
each of these objects. Let's just select one of these. We're going to take
each of these objects into Substance Painter
with just one material. The problem is, is
we're going to have multiple pieces that require different kinds of materials. So for this chair, we're going to need a wood
texture or material for all of these pieces here, right? But we're going to need a
different kind of material, a leather material
for these pieces. And if we're going to just take these objects in
with one material, how are we going to tell
Substance Painter that this part should be wood and
that part should be leather. What we're gonna do it
with vertex colors. And we're going to set
up these colors as we take them into Substance
Painter because sometimes they need
to be adjusted or corrected depending on how they look in Substance Painter. So I generally like
to do that as part of the export process to get
it into Substance Painter. And we'll talk a little
bit more about why we want just one material on our objects when we take them into
Substance Painter. But in the next video, we will first export an object
without any vertex colors, will take it into
Substance Painter. And we'll take a look at a few
common issues that you can have when you're moving from blender to
Substance Painter.
64. 064 Possible Issues When Exporting: Well, even though we've gotten more UV mapping to
do with the room, the walls, the floors, etc. I think it would be beneficial
to begin the texturing, at least some of
the texturing here with the furniture that we have. Because it's going to
help us keep in mind certain issues that we may come across as we continue on with our UV mapping and
even more 3D modeling. So just like we began with the coffee table for the
modeling and the UV mapping. Let's now work on the coffee
table in terms of texturing. And for this project we're gonna be using Substance Painter. I'm just going to
switch over to adhere. So we're going to bring
each object in, use, substance painters
precreated materials to add textures to our objects. So what I wanna do in this
first couple of videos is just go over the process
of exporting and importing, as well as many of the
issues that we may come across as we work
on other objects. So first of all, let's add a material to this
and get it ready for export. To do that, let's
first of all take these chairs in the outliner and drag them into the
furniture collection. And then I'll just take
the coffee table out to the scene collection
as we've done before, and just hide the
furniture there. Alright, so we first need to
get a new material on this. I'm going to right-click on this border over
here and choose join areas to get rid of that one
image editor window there. And then let's go over
to the materials panel. And recall that we've got this
UV test material on here. I'm just going to hit the X
right here to remove that. And then let's click New. Let's just create a new
material called coffee table. We go. Now we're not gonna do
anything to this material. All of the look, the color, the
texture, the sheen, the reflectivity,
etc, is all going to come from the materials that we create in Substance Painter. So I could go ahead and just
turn on the solid view here. And we can now take this
and export it out as an FBX file so that we can use that file to bring
into Substance Painter. So with this selected, let's come up here
to File export FBX. And in this view here, I'm going to make a
couple of changes here. I'm going to just choose the
mesh under object types. And I want to only bring
in the selected object. I don't want to bring
in anything else. I don't want to
bring in any cameras or lights or other objects, just what we've
selected right here. I also want to put it
in a particular place. I want to put it in
my textures folder. I've created a folder in my
project here called Textures. And I'm going to create
a new folder here. And I'm going to call
this coffee table. And inside here, I will call this FBX that
we're exporting. Call it coffee table as well. So it's coffee table FBX. So we've selected mesh, selected objects, put it in
the folder that we want, given it a name. And now let's click export
FBX, and there it goes. Now let's go over to
Substance Painter and see if there are any issues. So here in Substance Painter, we want to bring in that FBX. So let's come up
here to File New. And under File, we want
to choose, Select. There are templates
here that we can use, but frankly, we don't need to. This is an option. We do need to bring in a file, an object to work on. So let's click Select here. And in our textures
coffee table folder, we have that coffee table f dx. So let's click Open. Now, I have turned off import
cameras and auto unwrapped. There is a feature here in
Adobe Substance Painter that it will try and unwrapped
your 3D object for you. And it is very similar to
blenders smart UV project tool. It tries very hard and each new version
improves upon the tool, but It's still can't do
quite what we can do and make those
important decisions while we're UV mapping. So I'd like to turn
these off here. Other than that, we can
go ahead and click Okay, here is our object. Now the navigation is a little different here in
substance painter. Instead of your main
tool for navigation being the middle mouse
button, as in Blender. The main tool of navigation
here is the Alt key. You press Alt and click
to tumble around. Alt and middle mouse button to pan and Alt and
right-click to zoom. And of course you can always
scroll the mouse wheel. But as we're tumbling around
here with the Alt key, we can see there's something
a little odd here. Look at this, look.
If we look at this particular leg
on the coffee table, it's like we can see through one side to the other, right? The outside is invisible, but the inside is visible. And we have that same
issue over here. So what is causing that? Well, it appears that our polygons are
flipped in Blender. Instead of the polygons
facing outward, they seem to be facing inward
for these particular legs. So let's go back to Blender
and see if we can solve this. Well back here in Blender, everything seems to be okay, but we need to figure out what the problem is with those legs. And I think the way to do that, the way to see which
direction or polygons are facing is with the face
orientation setting. And that can be found
right up here in the Viewport overlays
menu right here. And if we turn this on,
take a look at this. We've got two legs that are red. I'm gonna hit the
period key to zoom in. So what we need to do now is flip these polygons so
they're facing outward. If we tab into edit mode, we can come over here. And if we just select, say, this foot here, we can come up to the Mesh menu, normals and flip.
And now that's blue. Alright, that works pretty well. Let's select this leg here. And let's come up to
the Mesh menu normals. And this time we could also do recalculate outside or Shift N. So let's try that. Let's press
Shift N, and there we go. Now we've got those polygons
turned out so it's blue. So what we could do is just
with everything in edit mode, Let's just hit the a key, select everything, then press
shift in to recalculate, so they're all facing outside. And then we go, alright, so let's tap back
into object mode. Go back to our viewport, overlays, turn off
face orientation. And now we're ready to
export this out once again. So in the next video, we're gonna do this one
more time and see if there are any other issues that
we might need to fix.
65. 065 Possible Issues when Baking: Alright, well we've fixed the flipped polygons or
the flipped normals. And you may be wondering
what is a normal. Because when we
selected all of these, we went up to the Mesh
menu and normals. So what is a normal? Well, if here in edit mode, I'm going to hit
the three key to make sure we're in face mode. And I'm just going to pull
down this viewport overlays. And when we're in edit mode, we get more options and
way down here is normals. And we can take a look
at the vertex normals, the vertex per face, and the face normals. And if we click this right here, there they are, those
are the normals. So let me press Shift Z and
you can kinda see them. So these are coming up
out of the legs here. But all these are
our imaginary lines extending from the front of the polygon perpendicular
to the polygon. That's all they are.
And to be able to see a texture on a polygon in a
real-time engine like Unity, Unreal, Substance Painter,
you need to be putting the texture on the front of the polygon with the
normals facing out. So that's all they are, is
just an imaginary line. Let's come back over
here and turn that off. Now, let's export this out again and give it a try and Substance
Painter one more time. So with this selected, let's go up to File export FBX. We already have a
coffee table to FBX. Let's do coffee table
to FBX. Let's do that. And then we can click Export. Once again, I've got
the mesh object type selected and selected
objects here enabled. We'll click Export. Now let's go over to
Substance Painter. Here we go. This is one we
don't really want. So if we go up to File New, choose the Select button again, choose our coffee table two. Now, if we click Okay, it'll ask us if we
want to save it. We say we want to discard it. And here's the new one. Now if we tumble around, we don't see through any
of the legs of the table. Okay, that's good. So let's go to the next step in the process here
in Substance Painter. And let's bake our textures. Now. To do that, you
come over here to the texture set settings here and come over to this
tab right here, mesh maps. So we click that,
and here they are. So when we click the
big mesh maps button, we're going to create
all of these maps. And all of these are going to help Substance
Painter understand and know how to apply the materials that we're
then going to put on it. So let's go ahead and
click Bake mesh maps. And we get this window,
the baking window. And let's change our
output size to 2048. It's a two k image. Let's adjust our
anti-aliasing to give it just a little bit
two-by-two here. And then let's just click big
coffee table. Here we go. And now it's going through and creating all of these maps. And here we go, Now we're done. So how did it do? How do we know?
Well, if we zoom in, take a look at the
top of the legs here, you can see we've got
some artifacts there. And we've got some down here on these little cubes as well, and maybe even some down here. But I don't know that
we're really going to care way down here, but maybe on these cubes you can see just along
the edges there. Let me take the size of the brush way down
here just so I can kinda point these out right
along here, right in here. And I'm really seeing them up here along the top of the leg. So what can we do about this? Well, there's a
couple of reasons that this may be happening. May 1 be the size
of our baked maps. When we bake these maps, we chose to K. And
usually that's enough, but these items are
probably so small on the UV map that
that may not have been big enough to
get a clean bake. Here, let me show
you if I come up here and pull this down. We're currently in the 3D view. Let's choose the 3D and 2D here. So here's our UV map with
this material applied to it. And if we zoom way in here, you can see that
the artifacts are here on the UV map as well. And it looks to me like this. These may just be too small. We can try and increase the size of the baked texture
maps by just redoing it. We can come over here to
the big mesh maps button. Click that and let's increase
this from 2048 to 4096. And let's see what happens. I'll click Bake. And
here we go again. It's going to take a little
bit longer this time because the maps
are twice as big. And there we go. Let's see how it did. Well, I'm still seeing some. I click the Alt key, let me press Shift and lock
that to an axis again. So I need to press Alt and middle mouse button to
do that. Here we go. This got cleaned up pretty well. I think actually,
let's zoom in here. You can still see some
right in here, right? The little cubes are pretty
good and they're over here. But there's still, I
think, more that we can do to clean this up. The other thing that can
affect this is our UV map. Notice here in the UV map, how most of the object is
aligned to the x-y axis, right? It's either going up and down vertically or left and
right horizontally. And when that happens, the pixels are in a row and there are a lot
cleaner than if you have a curve like this or
if you have a diagonal. So what we could do
is we could actually straighten these up in Blender
and see if that helps any. So let's try that. I'll come back here. I'll go to the 3D view again. And let's go back to Blender. Here in Blender, Let's go
to the UV Editing tab. I'll hit the a key,
the period key. And let's now zoom
into the legs here. And in fact, what I'll do is press Control Spacebar
to expand this view. And let's zoom in
here quite a bit. So we can see all of these. And now we can do
is go through and try and make all
of these straight. To do that, I can just
go to Edge mode here. Alt click this, Alt Shift-click, Shift-click all of these. Then press S Y 0, Enter, and just do that
all the way across. Boring thing to do, but it can be helpful. And this is why I would
say you shouldn't try and get every single UV
perfectly aligned to the x, y axes when you're
actually UV mapping because you don't
really know yet which ones may need to be straight and which
ones don't apply? 0, Enter. There we go. Now we could do this if
we wanted to as well. Just to see the last one here, I'll just select all of these. Yes, Why 0, Enter.
And there we go. So now we've got all of these perfectly straight
along the y-axis. Alright, now let's go
take a look at it. I will press control
and spacebar. Let's tap back into object mode. I'm gonna go ahead and save
the scene with Control S. And then let's export
this out yet again. File export FBX. Let's call this
coffee table three. And I'll export again. Now let's go back to
Substance Painter. Here in substance painter, Let's bring it in again. Let's go File New. Select coffee table three, Open and Okay, and we'll
discard the previous one. Here we go. Now, let's zoom in here and then we'll try
to bake the maps again. So over here in the
texture set settings, Let's go to bake mesh maps. Let's go back down to 2048
just to see how it does. We'll take the
anti-aliasing to two-by-two again and beg the coffee table. Alright, How do we do? We did better look at the top and these now,
that's a lot better. The cubes, I think, could use some work. They still have some
artifacts on them, but I want to deal with
those in just a bit. What I wanna do now is apply a texture to this here
in Substance Painter. So we can take a look at the next collection of issues
that you may come across.
66. 066 Aligning the Wood Grain of the Coffee Table: Now let's add a texture to
the coffee table and see if there are any issues with the direction of the wood grain. So I'm gonna come back over
here to the Layout tab, and I'm just going to
delete this default layer here. We don't need that. And over here in our
materials panel, Let's go up to the
search here and let's search for any wood
materials that we have. And here's one right here, this wood, walnut, this is kinda nice and you can
use any one you like. And we'll be
downloading more from the substance online library. But for now, let's just
use this wood walnut. I'm just going to take this, drag it over into the
Layers window and drop it. There it is. Now, that
doesn't look real good. One thing we can do is turn the direction of the wood grain. So here on the side
it's going up and down. Let's turn it 90 degrees
and see how it looks. Over here in our
properties panel, we can come down to the rotation
and instead of 0 type in 90 degrees and hit
Enter and that will turn that wood grain so it's going horizontally along here. Now, that turns the wood grain vertical along the legs
and I kinda like that. But I think it's
a little too big. I think it's a little too much. So let's come over
here to the scale. And the more we
increase the scale, the smaller the texture gets. If we click and drag on this slider here you
can see as it goes up, the texture gets smaller. So let's just maybe plug in five here and see
how that looks. Actually, that
doesn't look too bad. You can change the light source here by pressing Shift and right-clicking and
dragging here just to move that light source around, maybe I'll move it
right over here just to get a look at it there. And I like the
direction of it here. I like the direction of it
along here and on the legs, but I'm not sure about the direction for
these little cubes. I feel like they should
maybe be going horizontally. It probably doesn't
matter too much. But we could turn those
and see how it looks. And the only other thing I
can see is maybe we want the texture on the top to go in the same direction as the
texture on the shelf. So maybe we want to
turn the wood grain on the shelf 90 degrees as well. Alright, well, to do all that, we're going to need
to go back to Blender and adjust that UV
map one more time. So here in Blender, Let's tab into edit mode. And in the UV map, we need to turn some
of these things. First of all, I wanted to turn the little cubes that are
part of the legs down here. So I'm just going to take
all of these right here. And I'll ensure that median point is
turned on right here. And I'm just going to turn
these with R9 0 and hit Enter. And there we go. Now, if we get really
close in here, we can see that these aren't exactly vertical and horizontal. So if we took, let me hit the two key and
go to edge select here. And I'll press Alt click, and I'm going to go through
and select all of these. But now that I've turned them, I need to go back to
individual origin right here. And even if I selected individual origin
and selected say, this and this edge, if I hit sx 0, it would still
collapse because it's seeing that as all one thing. But if we select this one, this, this, and this, and with individual
origins selected, we could press sx 0 and it aligns each one of
them individually. So I'll do this. Alt Shift, Alt Shift,
click, Alt Shift, click sx, 0. There we go. Now, we should probably
aligned these as well. So I'm just going to go
through here and type S Y 0 for each of these to get these aligned to the
horizontal axis as well. Just going to press
Alt, Alt Shift click, and each one of
these here, S, Y 0. You see how those
straightened out? So let's grab these. I guess I don't need to
press Alt since this is just a single edge. S, y is 0. Here we go. This one, this one, this one, and this one. Okay, so now we have these
aligned to the x-y axis. But also we need to
figure out which UV is this bottom shelf. So to do that, I'm
going to click over to the UV sink selection, go to face mode and select
that one face there. And here it is right here. So we could just take
this and turn it. I'm going to turn
off UV selection. First. Select this in face mode. I'll go ahead and select all
of this so we can see it. And I'll press R 90 and
turn that in the UV map. Okay, so now we've got the little cubes turned and
aligned to the x and the y. And I've got the
shelf turned as well. So let's go back and
see how it looks. I'm going to once again
tab into object mode, select our coffee table
and let's export it again. File Export FBX. We want to choose the mesh object type and
selected objects only. I want to go into that Textures folder and
into the coffee table. And this time let's make
it coffee table for, I promise as we go on, we're not going to export the
same thing again and again. I just wanted to show you
the most common issues that you may run into before we go on to all
the other objects. So I'll click Export here. And now we go back to
Substance Painter. Here in substance painter,
Let's try this one more time. I'm gonna go to File
New and select. I'll select that coffee
table for right here. Let's click okay,
discard the current one. Here's the new one. And let's give this another try. So let's go over to
our texture set tab, to the mesh maps tab. And here let's click
on bake mesh maps. This time I'm going
to choose 2048. I'm going to choose a
anti-aliasing of two-by-two. And let's click Bake. And there it goes. Now with that done, let's come back over to the Layers tab. I will delete this layer and let's drag in the wood again. Right here. Let's type 90 degrees
and the rotation. And let's take our scale. What do we have this
at five, I think. Let's try that. Alright, so now let's take
a look at all of this. If we look at the
little cubes down here, they're actually
looking pretty good there looking better
than they were. I think. I'm okay with that amount of tiny
little artifacts there. We could, of course,
clear that up by baking the textures at 4096. If we want to try
that, we can do that. We can come back
here, click on bake, and let's change this
to 4096 and bake that. Once again, it's going
to take a little bit longer because these
are twice as big. And just because we're baking the texture maps here at four K, That doesn't mean we have
to export them out at, for k. We can export
them out at two k, one, k 512 to 56, whatever we want. But if we want to
view it and see it fairly clean here
in our viewport, we can bake the textures
at a higher resolution. Alright, so here we go. We've got our table, I think pretty well
taken care of now. At least for me, all the
wood grain is going in the right direction and the artifacts are
pretty well cleaned up. So in the next video, what Let's do is work on exporting these textures
out of Substance Painter. And we'll bring them into Blender and apply
them to our object.
67. 067 Exporting Texture Maps from Substance Painter: Well, our first order
of business here is to export these textures out. Recall that we dragged in the wood texture here
into the layers panel. We adjusted the
scale and rotation. And now I think we're
ready to export this out. And what we're gonna do is
just export out texture maps. We need a colormap, a metallic roughness,
a normal map. Those are our basic texture
maps that we're going to need to take
back into Blender. So, well, Let's do is
come up here and go to File export textures. And here in this
panel we need to first decide where we're going
to put these new textures. And I think I want
to put them in that coffee table folder
that we created earlier. So I'll browse to
my project folder, open up textures, open
up the coffee table, and select this folder. Now in terms of how we
want to output this, we want to create an
output template so that each time we come back here
and export our textures, we're doing it in the
same way every time. And I want to create a template
specifically for Blender. So let's come over here
to the output templates. And here we've got all kinds presets or
templates that we can use. But we don't have one
specifically for Blender. And the one that I
think is the closest to Blender is this PBR
metallic roughness. So I'll select this. And you can see here it's got a base color texture
map and roughness, metallic, normal
height and emissive. And we're really not
going to need a height or emissive texture map for the
majority of our objects. So we probably don't need those, but we do need these other four. What does do is let's
just copy this, call it Blender and modify
the template for our needs. So with this one selected, I'm just going to come
up here and click copy. And here it is at the bottom. Let's then right-click Rename, and I'll call this blender
export. There we go. So now with this one selected, Let's just remove
these two texture maps on the bottom here, Let's click on the X to
remove the emissive map, and let's remove the height. We don't need those. And another thing
we need to do is change this normal map. It's currently using
Direct X for this output. And blender seems to work a
little better with OpenGL. So what I'm gonna do is
just take OpenGL here, click and drag and drop it
right here on that RGB, and then choose RGB channels. And that changes the color. You can see two, purple OpenGL. And I think that's going
to work a little bit better once we get these
textures into Blender. Alright, having done that, now, let's come back to
our Settings tab. And we can now adjust
this output template. We can click here and
scroll down until we find our blender export here. And then we can also change
our output template. But I don't think
we need to because this particular
output template is exporting all PNG
files and that's fine. That's what we want. So we
can just leave this as based on the output Template for
the size of the texture maps. Recall that we baked
our textures at 4096 to kinda clean up
some of those artifacts. Well, here's where we
can change that to any size we want for the
actual exported texture maps. So you never want to increase it because then that will add
blur and artifacts to it. You don't want to do that, but you can choose anything under what you
bake the map says. So we baked the maps is 4096. So we could choose 4096 or anything under I'm gonna
go ahead and choose 2048. I think that'll be
fine for our needs. And then I'm just
going to click Export. And here we go.
Alright, there are our four texture maps
successfully exported. Let's now go back
to Blender and see about applying those to
our blender material. Alright, back here in Blender, we need to apply the color
map and the metallic, and the roughness and the
normal to our material here. But I think that's going
to be easier to do if we come over to the shading tab. So let's do that. Here in this shading tab, I'll select that and
just hit the period key on the numpad to zoom in. And here's our table. We're currently in material
preview, which is good. I'm gonna bring this up a bit. And here is the material that
we were looking at just a moment ago in the UV
editing panel right here. So what we need to do
is bring those textures in and assign them to each
of the appropriate sockets. However, there is a way to do that where we can
allow blender to do it for us so we
don't have to drag each one in and then connect
each one up to the socket. We can use the Node Wrangler. To turn on the Node Wrangler, or you can come up here to the Edit menu, go
to Preferences. And here under Add-ons, we can type in node. And here is the Node Wrangler. We just click on it right here
to put a checkmark there. And that automatically
enables it. It comes with Blender. It just isn't
enabled by default. So we just need to come
in here and enable it. And then if we come down
here to our shader window, press the N key. We can see right
down here we have a tab called Node Wrangler. And what we wanna do is
create a principled setup. So I'm going to select this
principled be SDF shader, and I'm going to click
add a principled setup. So when we do that, we get a browser window
that we can then browse to that Textures folder and to
the coffee table folder. And here are those texture
maps that we just exported. So I will go ahead and select
all of these and click the principal
textured Setup button here and look at that. Now, we've just taken all of those texture maps and hook them up to the principled
be SDF shader. And here is our texture on our object and it
actually looks pretty good. So let's just take a look at
what it actually did here. It took the coffee
table base colormap, connected it up with
the base color socket on the shader here, using the sRGB color space
because it is a color map. It also took this coffee
table metallic map, hooked it up to the
metallic socket and used a non-color color space because
it is a gray scale map. It took the roughness map, fed it into the
roughness socket, used a non-color color space, and the normal map as
well is non-color. It automatically set up a normal map node and fed
that into the normal socket. If we zoom in here really tight, we can see that the texture
here is a fairly smooth. We could come in here
to the normal map and maybe increase the strength of bit and see how that looks. We could type in,
let's say three. And you can see that added a
little bit of texture there, a little bit of detail. We could maybe take this up to five and see how that looks. That looks pretty good. Just adds that little bit of
bump information in there. Yeah, that looks kinda nice. Alright, so let's go
back to the layout tab. Turn on material preview. And here is our texture
on our coffee table. We can bring back
together furniture. There it is in the room. Alright. So we've now got
a texture on an object. We've gone through several
of the possible issues that you can come across when
going through this process. But we didn't actually create multiple materials with
our vertex color tool here in Blender yet. So in the next video, well, Let's do is work on an object that has
multiple materials. And we'll see how to use the vertex paint tools here in Blender to prepare
that for export.
68. 068 Using Blender's Vertex Paint Tool: For the next object that
we're going to texture, Let's choose one that has
more than one material on it. Like maybe one of these
chairs over here, let me hit the period
key and tumble around. And if we take a look at the reference image for this particular
object, Let's do that. Let's click here and drag
down to create a new window. Let's create an image
editor in here. Let's click Open and in the reference images
right down here, where is that? There
it is, right here. Let's open this up and
take a look at this. Now. This looks like it's got three
different materials on it. I'll press Control,
Spacebar and zoom in a bit. Yeah, so I think we
could put some sort of a fabric material here, some sort of a leather
material here. And then would down here. But as I said, we're going to be using just one material to take
it into Substance Painter. So we just have that
one texture set. So therefore we just have that one collection
of texture maps. So Control Spacebar. Let's go ahead and
set this up with our vertex paint tools
so that we can work on those different textures individually in
Substance Painter. Alright, so first of all,
let's bring this out. I'll hit the M key and
choose Scene Collection. I'll take that coffee
table and drag it into the furniture collection
and I'll hide that. Let's now give this a new material in the
material properties panel, I will just hit the X here
to remove that click New. And what are we calling
this side chair? Let's just do that. I'll hit the Z key
go-to solid view. And now let's go over to our vertex paint
tools right up here. If we click on object mode
here and pull this menu down, we can choose a vertex
paint right here. So here's where we can
paint colors by vertex. For me, I like to turn
on Face Selection here. Then if we press Alt a, we can see the wires on the
object here in vertex paint. So I can hover over this and press the L key
and select that. Now it's being split out by seems so I can hit the L key here and select that as well. And the interesting thing
about it is you can't turn off seems for selection
here in vertex paint. Like if I tabbed into edit mode and then
hit the L key here, and then turned off
seem with Shift-click. And then we tap back
into vertex paint. We still can only select
within the seams. So that's one thing
to keep in mind. So I'm going to hover over
this and press the L key. Now, let's add a vertex
paint color to this so that this will be a part of substance painters color ID map. So to do that, let's
now come over to the active tool
settings right here. We currently have the dry brush. There are few others. That's fine. We don't really need
to change that. I can spin that up. Now we want to choose a color. I'm just going to take this and drag it over here
and choose a green. It really doesn't matter
what colors we choose, as long as they're
different from each other, for each texture that we want to differentiate with this green, I may want to come
back to it later, so we need to save this, I think in our color palette, I'm going to twirl this down, and I'm going to click New down here to create a
new color palette. You can give this a name, you can call it
anything I'm just going to call it protects colors. And then I'm gonna
click the plus. And now that color is here
in the color palette. So no matter how many colors
we choose here or down here, we can always come back
to that green if we want. So it's the exact same
color and that's the point. If there's a
difference in color, it's going to see it as
a different texture. So with this done, I can come up here and I can
click and I can drag and I can draw where the
faces are selected. I can't paint down here
because we've selected paint mask to only be able to paint the faces that
we've selected. Now, painting all of this
is going to be a pain, even with it turned up to
strength at a 100% here. So what we can do
instead is we can come up to the paint
menu and you can choose set vertex colors or Shift K. So if
I press Shift K, now it fills that whole object, all of that selection
with the vertex paint. Alright, so that's the back. That's good. Let's press Alt a. And now I can hover over this
and press the L key here, and the L key here. And now we need a
different vertex color to differentiate the
seat from the back. So let's come over here, drag this over, I'll
just grab a blue. Let's add it to our
color palette here. And then with this selected, I'll press Shift K,
and there's our blue. Alright. Now, what
about everything else? We can go through
here and select each thing that could be
a little painful there. What we could do is we could
just tab into edit mode. And then I could press the
L key here and the L key here with seemed turned off
and it selects everything. And then I can invert
the selection by coming up here and going
to select and invert. Or I could press Control I. And now we've got
everything else selected. So if I tap back
into vertex paint, they are now selected
here as well. So sometimes it's easier just
to make your selections in edit mode and then tap back into vertex paint
to set the color. Alright, I'm gonna take this
and drag it down to a red, let's say, and
then hit the plus. And then let's
come over here and press Shift K. There we go. I can turn off the
paint mask here, and there are our vertex colors. So with this now we are ready to export it out to
Substance Painter. I'll go back to object mode. I'll select it, and
let's export it out. I'll go up here to
File export FBX. Let's put it in the
textures folder. Let's create a new folder here. We'll call it side chair. Let's call the FBX the
same thing, sides share. Let's put it in that folder. And let's only choose the
mesh for our object type. Choose selected objects and export the FBX.
And there it goes. Alright, so in the next video we will take it into
Substance Painter and see how those vertex colors work when creating
a color ID map.
69. 069 Adding Textures Based on the Color ID Map: Alright, here in
substance painter, Let's go to File and New. Let's click on select. And let's go into that
side chair folder and choose the side chair FBX. Let's click Open. And Okay, here we are. So now what Let's
do is let's bake our textures and see how we can incorporate the vertex paint
that we added to the object. Let's come over here to
the texture sets settings. Go to the mesh maps tab. We'll click on bake
mesh maps will choose an output size of 2048 again
and to aliasing two-by-two. But this time, we want to make sure that
we're gonna be creating an ID map here from
those vertex colors. So let's come over to
the Id tab right here. And instead of material color, Let's for our color source, choose vertex
color. There we go. Now we can choose big side chair or big selected
textures, either one, since we only have
one texture set here, I'll click Bake,
and here it goes. Alright, so now you can see
we've created an ID map here, and it's using that red, green, and blue that we
created in Blender. We can come up here to
this pull down right here, scroll down a bit. And we can choose ID from the mesh maps and see
those colors here as well. Alright, so we know they've come over from blender, That's good. Let's go back to
the layers tablets, delete that default layer. And let's see if we can
find some sort of fabric that would go on the
back of the chair there. I'll just type in fabric. And we've got a couple
of things we could use. We could use this fabric bamboo. Well, I don't know. It's
kinda like that, isn't it? We could try this
fabric, knitted sweater. Now, how about
this fabric rough? That's a possibility. Let's try this fabric bamboo
and see how that looks. You never know it might work. So let's just take
this and drag it over into the Layers
window and drop it. There we go. Well, that's not exactly
what we wanted, is it? We want it to only
be on this top part. And we can take the scale
and drag it up some, just so it's a little bit closer to what we had in
our image there. We could do that. But how do we get
it off all of this? Well, the way we're
gonna do that is use a paint mask based on
what color we select. And to do that, we're
going to need to split each of these out into their own folder
to have its own group. So let's come over here and create a new group right here. And I'll call this fabric here. And then I'll take this and just drag it straight in
there and drop it. So now it's in this
group, right here. Now, for this group, we can add a paint mask. We can right-click choose Add Mask with color
selection right here. Then if we choose pick color, you see how it's brought
in that ID mask here. So if we choose pick color, we can choose what color from that ID mask we want to
use for this fabric. So let's choose, pick color
and then click on the green. And there it is.
There's our new fabric. Alright, let's try that. I'm going to press Shift
and right-click and drag the light source around a bit and maybe
like that. There we go. Alright, well let's do the
same thing for the seat now. Well, let's see what kind of
material we have over here. I'll click the X and
type in leather. And what do we have here? We've got artificial leather. Now, it's possible,
I don't know. How about leather
medium leather, rough leather bag?
Kinda like that. Let's try that. It's a little bit different, but let's, let's give it a shot. So I'm gonna take
this and drag it and drop it right in here. And now it goes over all of
this and we don't want that. I'll bring this scale
up a bit like this, just so it's a little smaller. Maybe we could turn
off the height. Right. Here is our height map. If I click this, that smooths it out, so that's a little bit better. So now let's bring that scale back down so it isn't
quite so small. Yeah, Something like that. Let's try that. And then it needs to be
a little bit shinier, I think so maybe if we adjust the roughness
right down here, so let's drag this up. No, that's increasing
the roughness. So let's bring it down. There we go. So that's a little
bit too shiny. Let's bring it back. Maybe something about like
that. Let's try that. Maybe a little bit shiny
or since people have been sitting on it for a
100 years. Let's try that. Yeah, let's do that. Okay. And now let's split it out
so that it's its own group. So let's come up here
and add a group. Let's take this and drag
it into that group. Let's call the group leather. And then let's right-click on it and mask with
color selection. Click on Pick Color, and select the blue.
And there we go. Alright, I feel like this
is a little bit too big. Let's come back up
into the fabric group. I'll open it up here. Select that fabric and let's see if we can scroll
up here and increase the scale just a
little bit like let me try typing it in and
I'll type in five. No. How about six? Yeah, that might work. What about the
color is the color? Alright, I've opened up a picture of this
underneath this window. Let me click here,
minimize this, and here's that image
that actually isn't bad, that color isn't bad. But if we wanted to, well, what we could do is
we could scroll down over here and this color here. We can click that. And then if we click and
hold on the eyedropper, come over here and
you can see it changing color from white and brown and brown
and get into here. Maybe kind of right
down in here. Let's try this. Like that. Feel like it should be
a little bit darker. So I'll take this value slider and move it down just a bit. I don't know, something
like that. Let's try it. I'll close the color picker and then let's work on the legs. I'm going to close this
group and this group. And then I'm going to
select one of the groups, create a new group. And let's call this. Would. We go Now let's come
over here and see what we can find for the wood. And while we don't have a
whole lot here, do we got, I guess for now, let's
just go ahead and use this wood walnut again. I'll click and drag and drop
that onto the wood group. There it is. And we've
got the same problem. So let's select the group and right-click Add Mask
with color selection. Pick color, and choose the red. There we go. Now, we've got some work to
do here with this. Let's choose the wood
walnut material right here. And then let's scroll up here. And let's take the scale up. Maybe let's type in three. And we also need to turn it. So let's type in 90
degrees in the rotation. Yeah, that's pretty good. And let's take the
scale up to five. Let's try that. Yeah, let's do that. Okay. And the color now let's
take a look at that. If we come over here and
we'll click on this color, I will click here too, so we can see that
in the background. I'll click the eyedropper
and let's hover over this and see if we can find a nice
dark color for the wood. Something like this.
Let's do that. And then let's here
in the color picker. Let's take this down a bit, a little bit darker, and I'm also drag it
down into the red, a little bit like this, so it's a little bit
more red like that. There we go. Let's see how
that works. That's not bad. I think. What about the color of the seat and let me see
what we can do with that. Should I try and adjust
that with the color picker? Let's do that. Let's open up the leather group and then we can just click
on the color picker here. Drag and let's find a nice
color for this as well. It's pretty similar to
what I had, isn't it? Yeah. About like that, but let's just click on the
color and drag it down a bit in the value. I like that. Alright, there we go. Now we've got our
chair all textured. So in the next video
we'll export all this out and see how
it looks in Blender.
70. 070 Setting Vertex Colors for the Dining Chair: Okay, now let's export
these textures out. And actually before we do, I should mention one more thing. I have been going to File
and Save, or Save As. And I've been saving
these in the folders, in the texture
folders where we're keeping the FBX and
the texture maps. So I've been saving the substance painter project
files in there as well. I'd just like to keep
everything all in one place so I know where all the files are for each individual object. Alright, let's go
ahead and export this. I'll come up here to File
and Export textures. Let's browse to place
our texture maps in that side chair folder. I'll select that folder. We've got blender export
chosen here already. If you don't have it, go ahead and scroll
down and choose that. The output file type is
based on our template. And our template recall
specifies a PNG files, so that'll be fine to leave it, as is our texture map size. We baked those textures for
our texture set at 2048. So it's going to go ahead and export those out at
that setting as well. So this should be fine. So with all of that setup, Let's just click Export.
And there it goes. Alright, now let's go back into Blender and apply
those to our object. Here in Blender, Let's go
over to the shading tab, and I'll hit the period key. We better select it and
hit the period key. There we go. And for me personally, I'm not a big fan of having the blurred out HDR image in the background here I
think it's distracting, but the good thing
is, is Blender has a lot of ways that
we can adjust that. So you can come over here
to this shading pull-down menu and you can see if we take the blur all the way down, you can see that there
is the HDR image. It's just a little
wooded path seen here. But for me, I like
to take the world opacity all the way down. So you can't see that at all. Now, all the lighting
and the reflections from that HDR image is still being
used here in the scene. It's just, we're not seeing
it in the background, which as I said, I think
is kind of distracting. Let's now come down
here and choose the principal BSD F. And in our Node Wrangler tab
that we enabled when we enabled the Node Wrangler
tool in preferences. We can now come over here
to add principled setup, browse to our side chair folder in the textures and here
are our texture maps. So let's just select those. Click here and bring them
in and there they are. So that actually
looks pretty good. I think let's come back
to the layout tab. I'll hit Z and material preview. It's tumble around. And yeah, I think that'll work just fine. So let's bring all the
other furniture back here, enabled the collection. And then we could just take
this chair, hit Delete, and then just grab this one and duplicate it and hit X and
move it over in the x-axis. So now we have two chairs there. Let's take a look at
texturing another object. We've got two of them done. How about another chair? How about this one over here? Let's just press the
period key to zoom in. And for this one, I think all we have is a
leather material and wood. Let's click Image open
and let's go find this. Here it is right here. Let's open that up. I'll press Control and Spacebar. And yeah, it looks
like we've just got two materials that
we need to worry about, the leather and the wood. So let's go ahead and create vertex paint
colors for that. I'll pull it up out of the furniture collection
right here with the M key. I'll take these two
chairs and drag those back into the
furniture collection and then hide everything. Let's come down here to
the material properties. I'll select this one. So we have our UV
test material here. I will click the
X to remove that, and let's click New. And what do we call
this dining chair? Let's do that. And then I'm going to hit Z
and go back to Solid mode so that we can then
come up here to object and vertex paint. Now we can begin adding
our vertex pink colors. I'll go ahead and turn on the paint mask face selection so that we can just hover over, say, the back of the chair here and here and
press the L key. It looks like we need to do
it right down here as well. So I'll press the L key here. There we go. So now let's come over
here to the active tool. And we still got the colors in our color palette.
That's good. We can choose any of them
or create any new ones, but I'll just select the green. And let's just
press Shift K. Now, recall that's the shortcut
for set vertex colors. Then let's press Control I
to invert the selection. Let's maybe choose
blue here and press Shift K to add the
vertex color to that. Alright, I'll turn off
face selection here. And there are our vertex colors. I think that looks good. So now let's export this out. I'll go back to object mode. And then let's go to File
and Export export FBX. Here in our export window, let's find a folder that
we want to put that in. Let's go into the
textures folder, and here I'll create
a new folder. Let's call this dining chair. And then in that folder, or FBX should also be
called dining chair. And will ensure that we're
only going to export the mesh and the selected
object that we've chosen there. Alright, I'll click
Export, and there it goes. Now before we move on, I should also mention that I
have been saving these with the external data enabled this automatically pack
resources enabled here. And what that's doing is
that packing all the images associated with this
particular blender file all into that dot
blend scene file. And that just ensures
that when you download the project files and open
up a particular blend file, all of the images are there and available to that
file so you don't have to try and hunt and
search and reconnect the blender file to the
appropriate image files. It just makes things
easier for people opening up the blender scene files
from the project files. However, you can
also do this too, because as I said, since it packs all of the
images into the blend file, then if you take that file to another computer or if another person say on
a team opens it up, all the images and textures
are there without having to re-link to various image
files from the blend file. So I just wanted you
to know that I'm doing that when I save these files, if I click File Save, It's packing those
images in there. And I just wanted to
suggest that it's something you might
want to do as well. Alright, in the next video, we'll go into Substance Painter, and we'll see how our textures
look on the dining chair.
71. 071 Texuring the Dining Chair: Here in substance painter, Let's bring in that new file. Let's come up here
to File and New. Click on Select. And in that dining chair
folder here is the FBX. Let's go ahead and select
it and click Open. And Okay, and I'm gonna save this file here that's
currently open, so I'll click Save. And here is that chair. Alright. Now that I look at this, I see a problem that
we've had before. We've got the legs
here on this side. We have them flipped or we have an inside out. Now, don't we? So I think we're
going to need to go back to Blender and fix this. And I'll also show you a way to fix it for the entire scene. So let's go back to Blender real quick and take care of that. Here in Blender. Let's just come up
here and click on the overlays menu and
choose face orientation. And when we do that, we can see very clearly that we've got a problem with flipped polygons
here, flipped normals. And it appears that
every time we've duplicated and mirrored a
part of the object over, not only does it mirror it from one position to the other, but it also mirrors the direction
of the polygons, right? So it flips those
polygons inside out. Alright, let's bring back
everything else here, all the furniture and
take a look at these. And sure enough, look at this. Everything we have
mirrored over is red. We'll look at this down here. And here's one here. So what we need to do is come through and see if we can
fix all of this at once. And there is a way to do that. What we can do is we can select everything in
object mode here. We can hit the a key, and then we can hit the Tab key, and everything goes into
edit mode all at once. Now we can hit the
a key to choose every single face
in the scene here. And then recall if we
go to Mesh and normals recalculate outside is shift in with everything
selected here, Let's just press Shift N, and that should take care of
it for all of the objects. So let's take a look. Yeah, it looks like
everything is now blue. There we go. Now we shouldn't have to
worry about this anymore. Well, at least until
we create new objects. But for all of these, I think we've taken care of it. So I'll hide the rest
of the furniture. I'll turn off face orientation. Let's now take this
and I'm going to save this file now
with Control S. And since we've
changed the object, we've flipped the direction
of some of the polygons. We're going to need
to re-export this as an FBX and use the new
file in Substance Painter. So let's come over here
to File export FBX. Here's the old dining
chair FBX file. So let's just select
that and right over it, we've got our proper
selections over here. And let's click Export. All right, Now back
to Substance Painter. Here in substance painter, Let's just bring
in that new file. I'll click File New select. Here's the new dining
chair. Click Open. And Okay, in this
particular scene we do not want to keep, so I'll click discard. And here's the new chair with the legs in the
proper direction. There we go. Alright. Our first order of business here is to bake the texture maps. So let's come over
here. Click on bake. I'll change this to 2048,
anti aliasing two-by-two. And also we need to come
over here to the ID section. Click there and change from
material to vertex color. And click Bake.
Alright, let's click. Okay. We've created our ID map here. That's good with
the blue and green. Let's go back to the
layers panel here. Delete that default layer, and let's find that
leather material that we were using before. Let's search over here. And I think it's
this one right here. Let's just click and drag
that over into the layers. And first of all, we need to get it just on the seat and the
back of the chair. So let's create a new group. I'll change the name to leather. Let's click and drag
that into the group. And then we can
right-click on the group, Add Mask with color selection. Color, and choose the green. Alright, so let's rotate
light around a bit, maybe something like that. And now we've got
some work to do here to get the leather
to look the way we want. Let's take a look at the
reference image and see what we're trying to get. So we need it to be quite a bit smoother and more shiny here. Alright, so let's choose
the leather material here. And first of all, let's take the scale
up about three. Let's type in three. Is that pretty good? But we've got too much
bump information there. Let's scroll down. And in the previous one, we just turned off the height. We could twirl down the technical parameters and
drag the height position down like this and see
if that helps it off. But if we go way down to 0.01, you can see there's just a
little bit of a change there. So let's, let's, let's try that, see if that works. It may not, but that's okay. Let's give it a try
while we're here. Let's take the
roughness down as well, so it's a little shinier. Let's do that,
something like that. And then maybe I'll scroll back up and take the
scale up to five. Yeah, I'm not real wild about that height
on there at all. So I think I'm just
gonna go ahead and turn it off for this as well. I want it to be pretty smooth. You can see here
it's pretty smooth. And then we want it to be
more of a red material. So actually I'm
going to click here and then I'll move this over. And then I want to undo the
parameters, change the color. I'm just going to use
the color picker. I'm just going to click and hold and drag over here
and see if I can find a fairly good
representation of that. Yeah, that looks pretty good
there. Kinda like that. I'm going to click on the color swatch and maybe drag the value down just a bit, so it's a little bit
darker, like that. Alright, That's not too bad. Let's now take a crack
at the wood here. I will close this
group, I'll select it. Create a new group. Let's call this wood. And let's find that wood
texture that we had earlier, this wood walnut, I'll click
and I'll drop that in. Let's now right-click on this, Add Mask with color selection, color and choose that blue. Now for this, let's
choose the wood material. And in our properties
here, Let's scroll up. Maybe I'll take the
scale up to five. Let's try that.
And the rotation, I'll type in 90 degrees. And let's take a look
at our image now. So I think it needs
to be a little bit shinier and maybe the grain
could be even smaller. So let's type in seven
for the scale maybe. And then let's also
scroll down and bring the roughness down to make that a little bit shinier here. Let's try this. I'll press Shift and right-click to move the light around. And let's take a look at this. It's not bad. I feel like there could
be a little bit darker. Let's grab this and bring the value down
just a bit like that. And yeah, I think that's looking actually pretty good. Let's see. We take a look at
our reference image. That's not bad. I think that'll work. Alright, so in the next video, we'll export this out and
apply it to our object.
72. 072 Using Materials Instead of Vertex Colors: Alright, let's export this out. Let's just go up here to
File and Export textures. And then of course
we've got to put it in a place that makes some
sense for us, right? So let's go over to our Textures folder in the dining
chair folder. And let's select that. Our output template should
be that blender export. And everything else
we can leave as is because it's either based on the output template or the texture set size
that we set up earlier. So now with all
of this in place, let's just click export. And here we go. Now let's go over to Blender. Here in Blender, Let's
go to the shading tab. And here let's select our
principled BSD F shader. And actually instead of
clicking Add principled setup, let's use the shortcut Shift Control T. So I'll
press Shift Control T. Let's go to that
Textures folder, the dining chair, and here
are our texture maps. Let's click here,
and there we go. So there is our chair. Let's go back to the layout tab, material preview,
and here we go. So that is our dining chair. Let's bring
everything else back. Let's delete this one here. And now we can just take this shift D y and
move that over here. There we go. Now we've got our
two chairs there. Alright, well, what
should we work on next? Maybe this wall table here.
Let's take a look at this. If I hit the period key and recall that it's got
these handles here, right? Let's go to the UV editor. And I'll hit the a key
and the period key. And let's take a look at where
the handles are in here. They are here, here. Here. I'm just hovering over
each of these and pressing the L key and there
they are on the texture map. And not only are they not quite
aligned to the x, y axis, now the seam is in the back, so it may not really matter, but one thing I'm concerned
about is just how small this is in our UV map. And I think we're
gonna get a little bit of pixelization on these because they're so small and we're
really only going to use a 2048 texture map here. We can, of course, bake it at a higher resolution, but let's take a look
at a way to kind of alleviate the problem
of pixelization. When we've got really small
things on our UV map, what we can do is use
Blender materials to split up the UV map between
the table and the handles. And therefore the handles
get their own UV map where they can fill the texture
space more efficiently. So let's just say let's first of all tab back into
object mode and let's undo or remove that
UV test material from the object will
create a new material. And let's call this wall table. I'll call it Wall table
main for the whole thing. And then if we zoom in here and just select these handles, Let's also create a new
material slot here. Click New. And let's call these wall table
handles right there. Then with these faces
selected, let's click Assign. Here we go. So if we hit the a key here, we can see them all on
the UV map here, right? But if we come over here and select the wall table
main and choose, Select, we see everything
but the handles. Now if we de-select
that and just select the handles material
and choose Select, we see only the handles. So what we can do now
with the Handle selected, Let's just press U and
unwrap and look at that. Now we can change
from angle based conformal and see
if that helps any. Now I kinda like angle based. But what we can do is
come through here and select these and maybe
move them around a bit. Let's take this and
move this down here. So we've got these. Then let's take
these and let's just move this out at the archae. Same thing here. So I'm just trying to move
these out into this area here. I think I will just shrink
these down just a little bit so they don't go
over the edges there. Alright, so now we've got
the UVs for our handles, taking up a lot more space within the 0 to
one space, right? So these are gonna be
able to use more of that texture space, and
that's a good thing. So now what let's do this. Let's go back over
to the layout tab. And I'll go ahead and bring this out from the
furniture collection. I'll press the key and
choose scene collection. Then I'll take these
two and drag them in Heidi furniture. And here we go. So now we've got just the table. Let's go to Solid View will
now this would be the part in the process where we would
add our vertex colors before we export it
to Substance Painter. However, I want to show you how materials work in
substance painter as well. So let's go ahead and select this and let's export
this out as an FBX. Export FBX will choose the mesh object type
and selected object. Let's go into our
Textures folder and let's create a
new folder here. We'll call it Wall table. And in that folder
we'll put our FBX. We'll also call that wall table. And then let's click Export. Now let's go into
Substance Painter. And I just want to show
you the difference between vertex colors
and using materials. Here in substance painter. Let's go to File and New. We'll choose, Select. We'll browse to our
wall table folder. And here it is. Let's go
ahead and click Open. And Okay, so the
main difference that we see here is that there
are two texture sets. And as I said earlier, blender materials are seen by substance painter
as a texture set. So it's going to split these out into individual texture sets. So let's come over here and
choose wall table main. And under the texture
sets settings, we'll click on the
mesh maps tab, and let's click on
bake mesh maps. And then we can come over
here to our output size 2048. We can go down to
our anti-aliasing. And if we were using
vertex colors, we could come over here to id and change this to
protects color. However, we don't have
any colors at all, we just have materials. And because of that, our baking process can be split up into two
different sections. Now, we could set this at 2048 and choose baked
selected textures. And it would bake all the
texture maps in wall table main and all the texture maps in wall table handles 14 of them. Seven maps for
each, all at 2048. However, if we just clicked here and only bake
wall table main, we can bake this at 2048 and then the handles at
a different resolution. So let me just show
you how that works. I'm going to click Bake
wall table main here. Alright, and click Okay. Now you can see all
of these texture maps here are based on the
UV map of the table. However, if we come over
here to the handles, we don't have any maps yet. Which means now we
can click Bake, change this to say
five-twelfths. Let's say if we
need this or want this to be a smaller
texture size, we can keep our anti-aliasing
the same there. And now we come down here and click Bake wall table handles. And there we go. Now you can see these are based on the UV
map of just the handles. So you can use your
different materials to create different
textures sets. And for each texture set, you can set up a
different texture map resolution for the exports. Alright, so in the
next video we will take a look at what
that means for our texturing in
the Layers window for each of the texture sets.
73. 073 Using Paint Layers in Substance Painter: Now let's do some
texturing on this. Let's remove this
paint layer for now. I'm just going to click that. And also I'm gonna
come over here to the wall table main and
remove this one as well. I just like to clean that up. We're going to actually probably need to add a new paint layer. But for now, let's just remove
those and have that ready to go for a wood texture. So let's come up here
to search and type in wood and see
what we have here. Now, I've got this
would American cherry, which is kinda nice. Let's work with this one. I'll click and drag and
drop that over here. And we've got a couple
of things that I think could be worked on here. One, we've got this bump or
height information again, so I'm just going to come down here and turn off
the height channel, just so that smooths that out. Then let's work on changing the direction
of the wood grains. So let's come over here to the rotation type in 90
degrees and we'll turn that. Yeah, I think
that's pretty good. Now, also, I think it's too big. So let's come over here to the scale and I'm just
going to type in three. See how that looks. I'm going to press Shift
and right-click and kinda move the light around, something like that.
Let's try that. I think that's closer, but let's try five. Let's just see what happens
if we try five now. How about for yeah, for me actually,
that's pretty good. Let's try for I
also think I'd like it to be a little
bit shinier here. So let's scroll down until we get to the wood roughness
and let's bring that down. And the more we bring
down the roughness, the more it brings the
reflectivity or the shine to it. Let's do that. I'm going to also come
over here and click on random seed and see if I can change the pattern
a little bit here. It just feels like this leg is a little bit too dark
compared to these others. So I'm just going to click on the random seed and it
will begin to rearrange some of the wood grain here until we find something
that we kind of like, that's not bad, That's
a little bit better, although that's still
fairly dark over there. I think it's just
because it's in a different location
on the UV map. Here we go. Now that gets all
the others to be about the same value there. Yeah, I think that's
a little bit better. I like that. Then I think I'm gonna make
it a little bit darker. I'll click on the color
swatch here and I'll bring the value down just
a little bit like that. Just feel like in the room
that we're going to have this, it needs to be a
little bit darker. I could increase the
saturation a bit if I wanted. Let's try that. Yeah. Okay. I'm gonna go with that.
You of course can go with whatever combination of
these settings you like. So now let's switch over to
the handles here, right here. And let's work on these. So for these, I think I
want a brass material, so I'm gonna click the X
and I'll type in brass. It looks like I've only got one so that it looks
like all we've got. Ultimately, we'll be
adding more by browsing to the 3D assets in
the marketplace. But for now I'm just going
to take this click and drag, drop this over here. There we go. Now, one mistake I made and I
want to show you this, is, I forgot to include these little spheres in
the handle material. So when we were creating
materials in Blender, I selected these parts, but I forgot to select these little spheres to apply those to the
handle material. If I wanted these
to be brass now, I would have to go
back into Blender, assign these to the
handle material, and then bring that FBX back here into Substance Painter
and re-apply the materials. But there is another way, and that's what I meant
by we're going to use one of those
paint layers here. And so far we've been applying the textures
in this way by just dragging them over
or putting them into groups here in the
Layers window, in the layers panel. But we can also paint
directly on our 3D objects. So what let's do it? Let's go back to the table main, and let's create a
new paint layer. Right here we have paint layers, fill layers, and groups here, and I want a paint layer, I'm just going to click here. Now currently these are the
settings for our paintbrush. And if we just came over here
and clicked and dragged, that's what we'd get. So I'm going to press Control Z. We don't really want that. So a couple of things
I'm going to take the size down quite a bit. It's pretty small. Maybe down to like
one or something. Yeah, something like that. So I've got it at 0.5. And keep in mind, these
spheres have the wall table main material on them because I didn't change them or
assign them to the handles. So we can click on
this and you can see that we can paint on these. So what we really need to do is change our paint properties here to be similar to the brass that we
have on the handle. So how to do that? Well, we can come over
here and just click on the color picker next to
the base color and click and hold and come
over here and find a nice brass kind of color
here, something like this. Now I think we will also need to increase the metallic here. I'm just going to take this
and drag it all the way up. And now you can see it's
becoming a little bit more similar to
what we have here. I can bring the roughness down and make it
a little shinier. I can bring it
back up like this. So I'm just kinda
maybe something about like this that looks
similar to this. So now if we click
and paint here, you can see we can
make a similar kind of material to what we have
on the rest of the handle. So I'm just going to
continue painting here. Go round here like this. And I can't paint on the
handle because it isn't a part of this material, right? I can only paint what is
currently in the table main. So I can paint out here. I don't really want to do that, but I could then I
can come in here and paint this like this. So let me just click
and drag here, tumbled around, see
what we can find here. I think that's when
I press control Z. And there we go. That
looks pretty good. Let's come over here. Click this, paint, this sum. There we go. Alright. There we go. So now we've got all our
materials on our wall table.
74. 074 Finishing the Wall Table: Well, now that the wall
table is textured, let's work on exporting
our texture maps. Now there's a couple of things
I want to point out here. First of all, if we go
into the texture sets Settings here and go
under general properties, we see that the size is 2048. That makes sense, right? We set 2048 when we begged
our mesh maps, right? But if we go over to handles, look at this, it also says 2048. I thought we set that to
512 when we baked the maps. Well, those are two
different things and I just wanted
to point this out. First of all, let
me just go over to mesh maps here and click
on bake for just a moment. And you can see here our
output size was 512, right? But as we said, if we go back to the
properties, is 2048. So the general properties here sets the size
of the output. So when we're in the
export textures window, and it says that the size is being based on
our texture set. This is what that means. So if we want it to
output five-twelfths, just like we said when we baked, We need to come over here
and change it to 512. Okay, so we've got the
handles at five-twelfths, the main at 2048. Let's now go over to our
files export textures window. And let's begin setting
this up so we want to change our output to
the wall table folder. We have that here.
Under textures. That's good. We've got our
blender export template here. We set up our file type in
that blender export template. So our output template is
what's dictating that. But here under size, where it says based on
the texture set size, that this property, in
general properties. Now we can change
that of course. But since we've got two materials with
two different sizes, we want to keep it like this because if we change it,
it'll override those. And also I'd like to point out, look down here, it
says eight textures, and that's because
we've got four for each of the texture sets. Alright, so let's click
Export here and see what happens. Here we go. We've got our wall table
handles at 512, right? That we set up in the
general properties. And we've got our wall
table main at 2048. And you can see all of the texture maps that were successfully exported
here as well. Alright, so now let's go back to Blender
and set these up. Alright, we're back
in Blender here in the shading tab to bring
those new texture maps. And let's go ahead and click
on our principal, BSD F. But which one is this? This is the wall table handles. Let's come over here to our material
properties panel here. And let's begin with
wall table main. I'll select that here. Let's select our
principled VSD F shader. Recall that the ad principles
setup is control shift T. So I'll press that. And then in our Textures
folder under wall table, and here we can
see I've switched to vertical list view as opposed to the Tile view
because it's hard to see what the name is
here in Tile view. So here in the list view, we can see that if
we've chosen main here, we need to select the
main texture maps here. So let's click texture
setup. And there we go. Now we've got the wood on there. That's good. Let's now
select the handles. Select the principled be SDF, press Control Shift T. And this time we'll choose
the handles texture maps. Right? So there we go. Let's go
back to the layout tab. I'll hit Z and go-to
material preview. Here we go. It looks pretty good actually. But the interesting
thing is if we go to our UV Editing tab, and I'll also go to
material preview here. We can see that if we choose handles for the material
and click Select. Here are those handles, but without the little
spheres, right? If we then click on
the main and choose, Select, Here's our UV map, but here are those spheres. And those are right. I think they're right in here. I think that's them right there. So that's why we had to do the little painting trick
in Substance Painter. But it also shows
that you don't have to just go with blocks of vertex colors or materials
in blender that translate to texture sets in Substance Painter and just
drag and drop things on there. You can also, as you saw, paint directly on the 3D model. Alright, well let's go
back to the layout tab. Let's bring back the
rest of the furniture. Here we go. Yeah, that's
looking pretty good. So in the next video, what I'd like to do is begin working on this office chair. This is going to give us
a few more opportunities to work with materials and
vertex colors, et cetera. So let's go ahead and
bring this out of the furniture collection and put the wall table back in
and hide everything. And let's give it a new material here in the Materials panel. I'll get rid of that
UV test material and let's call this desk chair. I'll go to solid view. And in the next
video we'll let's begin doing is go through, set up our vertex colors and export this out so we can take
it into Substance Painter.
75. 075 Texturing the Desk Chair: Alright, we've got a
material on our desk chair. Let's go ahead and go over
here to vertex paint. Right here, will turn
on the paint mask. And then let's come over
here to the act of tool. And we've got a couple
of colors here. So let's begin with the green. I think what I'll do is tab into edit mode
to do the selecting. So I'm just going
to hit the Tab key and then hover over this
and press the L key. Ensure that seam is turned off. And then let's just go
through and grab all of this. And then we'll tab back
into vertex paint. And with green selected,
we'll press Shift K. Alright, tab back
into edit mode. And let's just select
this right here. Tab back into vertex paint, select the blue, shift K. Back into edit mode. We will select the legs Here, tab back into vertex paint, select the red and Shift K. And then let's go down here and these
guys right down here, let's take a look at
this reference image just to make sure I'm
correct about this. I was just kinda doing this from memory flying by the
seat of my pants here. So let's bring this in and
let's take a look at it. Control Spacebar. And yeah, it looks like we've got the leather of the chair, the black of that stem now, this has got black here
in between the legs, but I think I'm just going
to make the whole thing would all the way through. And then we've got these little metal pieces we
could call these bras maybe. And then more plastic down here. So we've got a light
black plastic up here and a dark
black plastic here. Alright, so that's 12345. Alright. Now, let's continue with
this. So what do I have? If I tab back to vertex paint, I've got 123 and then
four or five down here. Okay? I think I was on
the right track here. So let's now hit the L key
and select these here. Right along here,
all the way around. Then we'll tab back
into vertex paint. We're going to need
another color here. So let's just maybe swirl over two and
oranges color right here. Click the Plus in
the color palette. And now we have orange. Let's press Shift K out
here in the 3D view. And there we go. Now if we
tap back into edit mode, these little tiny
spheres here on the bottom tab back
into vertex paint, we're going to need
yet another colorless just maybe go over
to a purple here. And then we'll press Shift K. And I'm just keeping
all of these colors here in case I need
to change anything, in case I need to redo anything. So I have the exact
colors because as I said, if there even a slightly off, it's going to see it as
a different material. Alright, let's
come back up here. Turn off the paint mask. We've got 12345 colors. That's good. Now let's
go back to object mode. Let's select the object, and let's go to File export FBX. Let's ensure that we've chosen the mesh object type
and selected objects. Let's put it in our
Textures folder, and it looks like we're going
to need a new folder here. We'll call this desk chair, and we go in here. The FBX should also be called
desk chair. There we go. Alright, Export. Now we go to Substance Painter. Here in substance
painter, Let's once again go to File New. And let's select that FBX right? Here. We go, open that up. Let's click Okay,
here it is. Alright. So from here, we of course need to bake our textures here
in the mesh maps tab. We'll click Bake.
I'm gonna go ahead and change to 2048 for this. And I want to mention about
the output size here. This, even though it says
Output size is really dealing with how the materials
go onto the map. Here in Substance Painter, It's actually more of the input. Whereas over here,
let me press Cancel. Under our general properties, this is really the output. You can kind of
think of this area here as what the materials
are interacting with. So I'm gonna go to
2048, two-by-two. And recall that we've
got our ID map here. So we'll change this
to vertex color. Alright, let's go ahead
and bake our textures. Here they all are. That's good. So from here, let's go
ahead and delete this. And let's first of all see what kind of leather
we have over here. Let's type in leather. We don't have a whole lot here. We've got this leather bag. And I don't think there's
much here that I want to use. So what I'm gonna do
is click on this, browse 3D assets in
the marketplace. And I'm going to click here. This brings up the
Creative Cloud Desktop, a window and I'm going to
click on Materials here. And then in the
search field here, I'll type in leather. Let's see what they have. And they have quite a bit. So it's going to take awhile
to scroll through here. Actually, this
doesn't look too bad. If I click on this, we
can see it a little bit closer here, a
little bit bigger. And that's actually not bad. That's kind of what I'm
looking for right there. I think it's going to need
to be a little darker. We can click here and drag down just to see what it
would look like. A little bit darker like this. I kinda like that,
something like that. So alright, let's go
ahead and get this. And instead of clicking
here to download, because that'll just take it directly into a folder
on my hard drive. But I'm gonna do is come
over here and click here. And this is sin two, and this will allow you to send it to the open application. So I'm just going to click here. And it'll think a bit. There it is right here. So an interesting
thing that it does is it changes the way
it searches here. So if you remember this little base material,
square wasn't here, and if we hit the exon, this, it will just give us
every single asset or resource we have
in Substance Painter. And that's a little too much, which you can do is click here
to filter say by material. Or if you take this and pull it open just a bit, there we go. Now you can see all of those things that were in
that filter pull down. You can see them all here. So I just tend to have
mine pushed in like this. But if you pull it
out a bit like this, you can see all those icons. So I have the material
selected here. But now that I've done that, I've lost that material
I just downloaded. So let's type in leather. Here it is. Let's grab it, drag it over and drop it. There it is. Wow. That is a particular
kind of ugly, isn't it? Let's, first of all, let's drag the scale up a bit. See what we think about
something like this. And also let's just turn off the height. See how that works. Yeah, I think that already begins to look a
little bit better. We can, of course, scroll down here and maybe take the value down quite
a bit darker here. We can maybe move it
over to here sum. So I think we're getting
something like that. I will close this. Let's scroll down a
little more and we can come down here to the
patina and leather filter. And this patina color too. We can maybe take this down
a little bit darker as well, and maybe something like
that. Let's try that. And of course we don't want
it on everything else, so we want it only on the
leather parts of the chair. So let's create a new group
here, call it leather. And let's drag our
material into that. And then we can right-click Add Mask with color selection, click on Pick Color
and choose that green. And there we go. So it isolates it
to just that area. All right. How about the wood?
Let's look at this. For the wood, I
think we could use that cherry that we used before. I'll just type in wood here. This right here. Let
me close this down. Let's go ahead and
create a new group. I'll select this one,
create a new group. Let's call this wood. And right-click color selection, pick color, choose the red. Let's grab the wood, drag it over and drop it
on the wood group. And there we go. Now, let's
do a little work here. This is pretty ugly. So let's go back up to
the properties here. Let's turn it 90 degrees here. Let's increase the
scale quite a bit. Maybe seven. Let's try that and then
let's turn off the height. Make it a little bit smoother. I think I need to make
it a little bit darker. That would be under the
advanced parameters here. So let's click there. Take the value down a bit. Something like that. I think there we go. I might even take that scale up, but just a little bit more. Well, let's try eight. I'll
just type in eight there. And I feel like, Let's try this random
seed and see if we can get a little bit
better grain on here. Yeah, wow. Yeah, I
kinda like that. Has a little more
definition to it. And lastly, let's make it
a little bit glossier. Let's come down to the
wood roughness and bring that down until it
gets a little bit shiny. Or here, I'll press Shift
and right-click and move the light around
and we can kinda see it as we do that. Yeah, I think that'll work. Alright, so how about
that plastic piece? Let's create a new group. We'll call this plastic. And let's see what we have in
terms of plastic over here. Well, we've got this
plastic diamond, now. Plastic grainy, plastic
mat, plastic glossy. Let's actually use this and
then take the gloss down. We're of course going to
have to change the color to. But let's right-click and
choose color selection. And let's pick that
blue right there. And then let's take that
glossy and drop it in there. Now of course it's way too
blue and way too glossy. So let's change our color. First of all, I'll just
grab here and take it into the black gray and also lifts, take the roughness up, which will reduce
the glossiness. So I'm thinking
something like that. Let's try that. Maybe. Yeah. Okay. Then let's work on these
little metal pieces. What are these going to be? I'm going to create
a new group here. And let's call this brass. And I will right-click
and choose color selection and pick
color, select that orange. And let's see what
we have in terms of brass here. That's it. Alright, well, I think let's
click on the 3D assets here. I'll click on Materials again. Let's type in brass
and see what we get. We got polished, sand,
blasted, battered, greasy. We've got all kinds of stuff. I'm going to try
this one right here. I'll click Send to
Substance Painter. And here it is over here. So I'll take this drag and
drop it right on the brass. There we go. Yeah. I mean, that's not bad actually. I, I kinda like that. Alright, so now
let's do one more. Let's do those wheels. I'll create a new
folder column wheels. Once again, we do it by color selection and
I'll choose that pink. For this. I also need a plastic, so let's do that. Once again, I'm just going
to use this plastic gloss. I think this works pretty well because we have some
leeway with it. We can take it down
to black and then we could increase the roughness a bit so it isn't
quite as shiny. I don't want it to be
quite the same as this. I want it to be a
little bit different. In fact, maybe I will go back
to that plastic stem there. Click on that. And I think I want to make this a little bit lighter like that. So there's just a
bit of a difference. Alright, so if we grab a reference image of
this and drag it over, Let's see what we can see here. Now, the thing I see is, well, the colors are a
little different and really I don't have
a problem with that. But I kind of liked
these creases, these little wrinkles and folds and creases here on this
pillow and on this pillow. And I think I might want
to try and replicate that. And to do that, I think we
need to go back into Blender. Use the Sculpt tools to get these kind of folds increases, bake out a normal map, and then bring that normal
map right in to here. That will allow us to have those wrinkles on the cushions. Alright, Well, let's
give that a try. In the next video.
76. 076 Blender's Two Sculpting Methods: Well, that's I mentioned. I'd like to try and add
some of this detail. The little wrinkles
around the cushions here, maybe for this one
and maybe this here. Now, these do have this piping on them that
we added to another chair, but I'm not gonna do
that for this right now. My main concern is just to show you that we can add
a little bit of detail to this using
blenders, Sculpt tools. So let's first come over
here to the sculpting tab. And I'll just hit
the period key on the numpad and zoom
in here to the chair. Now the interface is
slightly different than the layout or
the modeling tab. You've got a lot of
very specific tools over here to sculpting. And you can hover over each
of them and see what they do. Or you can put your
mouse right here, drag out, make it wider, and then you can actually see
the names of what these do. And I think that's
really helpful if you're just beginning
with sculpting, because there are just
so many tools here, it's good to have the
names in front of you. I think as you can see
in the active tool tab, we have our brush settings here, but you also have many of these tools right
up here as well. This slider changes
the size of the brush. This slider changes
the strength, but you can use
shortcut keys for that. You can press the F key
and then move the mouse or the pen tool out and n to
increase or decrease the size. You can press Shift F and move the mouse to adjust the
strength of the brush. And of course, you can try out all of these different tools. But really all we're
going to use is the dry brush and probably
the smooth brush. So if we come over to the chair now and just click and drag, we don't really see
anything happening. What we need to do
is turn on one of the two different methods of
sculpting here in Blender. One is called Dine topo here. And if you turn that on, it will add triangles to the object to get the
sculpting strokes. However, it's a permanent thing. It is a destructive process. In fact, if we come up here
and try and turn it on, it will say, Hey, this process will not preserve
things like vertex colors, UVs, and other data. So if we used the Dine topo method of sculpting here in
blender on this chair, we would lose our uv maps
and our vertex colors. So we don't want to do that. This method is really great for beginning the
modeling with sculpting. Maybe you're creating
a fantasy character or an octopus or
something like that. That is very organic
and you're going to begin from scratch, sculpting, and carving and
pulling and pushing to create the character
or creature or whatever. However, since we've already
done modeling UV mapping, assigning vertex
colors, et cetera. We don't want to
blow all that away. So there's another
method of sculpting that uses the multi-resolution
modifier. We can come over here
to the modifiers panel, click Add Modifier, and come down here to
multi-resolution. If we add one of
those to our object, we can then increase the subdivision
levels that we're going to use for our sculpting. So I'm just going to click on sub-divide and again and again. And maybe I'll take it
up to scope level four. I'll just click on sub-divide
until I get to level four. Now, how high you can go
with this and still move around in the viewport is really dependent on the
speed of your computer. So if you can only go up to two or three and be
able to move around. Okay, that's fine. Now that we've done this, if we click and
drag on her object, you can see we can drag a scope stroke all
across our object here. And that's great and all, but that's not
exactly what we want. What I wanted to
show with this is, since this is all one object, our scope stroke can go from one area of the
object to another. And we may not want that. In fact, let's create a
new window over here. And let's bring in, let's create an image editor, and let's bring in that
reference image here. Here it is right here. So we just want
these wrinkles on this pillow here in the center and the
headrest up on top. We don't want it on all
of these other parts. So I'm going to press Control Z and get rid of
that Skulpt there. So I want to isolate the sculpting just on
these two pillows. And actually I want to do
them just one at a time. A good way to do that with either of these sculpting tools is just with hiding selected
faces in edit mode. So we can tab into edit
mode and then hover over, say, this pillow here, hit the L key. Let me make sure
seamless turned off. It is okay. Now, if
I press Shift and H, it will hide everything
except that selected object. I'll hit the Tab key. And now that's the only thing we have here in our sculpt mode. So now we could begin sculpting. I can click and drag like this and began sculpting
these wrinkles. However, I'm just using
a mouse currently. It's really a whole
lot easier to do this with a pen and tablet. And I've got a little way
come in two O's Pro tablet, a pen and tablet
that I'm going to use to do this little
bit of sculpting. If you do not have a pen
and tablet, that is fine. You can use a mouse. It can be a little frustrating sometimes because you
don't have the control. But in the next video, I'll begin using this
pen and tablet to create some of these
creases on our pillows.
77. 077 Sculpting the Wrinkles of the Desk Chair: Alright, let's see if we can do a little sculpting on this. I'm just going to zoom in a
little bit here and it looks like the wrinkles on the sides kind of
angle upward a bit. So I'll try and get
something like that. Currently, my brush
size is 25 pixels here. If I click and drag, that's what I get. That's not bad. And the strength,
if I press Shift F, I can change the strength here. It's about 4.5. Let's just
go with that around 0.5. Let's try that. And so what I'm gonna
do is just begin here and I'm going
to add a stroke. And then right next to it, I'm going to press
the Control key and add a stroke and
that will cut in. So if I do one stroke,
it will pull out. And if I press Control and
another stroke, it'll cut in. So if you hold the control key, it'll cut into the mesh
instead of pulling out. So I'll just begin going
pulling out and then N out in, kind of alternating
here between those two. Just to see what I
can get in terms of something that looks kind of like wrinkles on a pillow here. So let's go up here. I don't really have
any particular method that I'm doing this with. I'm just kind of
putting strokes down, seeing what I can get. And then if we come over here, let's do it over here so
that we can get like This. Pretty much the same thing, just stroke and control. And it'll just go on up
the sides here as well. Something like that.
Let's see how that works. I feel like maybe I could
use one more in here. And then let's work
on the bottom. It looks like those
go straight up. So I'll try that. Control. So stroke and then
control stroke. Just to kind of alternate
between the two. Tumble around here just to
get a better view of it. Alright, that looks pretty good. This area right in here, I'm not real pleased with. Let me just try and
add one right in here. Something like that. Yeah. Okay. Maybe that'll work. Now. I don't see any on the
top here, so that's fine. And then what we can do if it's a little bit
too much and I feel like mine is I hunkered down
a little bit too much on it. Let's come over here
to the smooth tool. And I will hit the F key and increase the size of
the brush just a bit. And then I'll press
Shift F and reduce the strength some
maybe down to three or four or 0.3 or four. And then I'm just going
to try and smooth some of this back
just a little bit. So it isn't quite so prominent
all the way around here. Yeah. Something a little
bit like that. So it isn't as I said, so it isn't quite so much. Alright, let's now tap back into edit mode and then press Alt H to bring everything
else on the chair back. And then let's just hover over
here and press the L key. We'll make sure that
seam is turned off. And then let's press Shift H. Here we go. I'll hit the period
key to zoom in, and then let's hit
the Tab key to go into sculpt mode.
And here we go. We can work on this
top cushion now. And it looks like the creases are pretty much
straight up and down. They're kind of angled
at the corners. Maybe. I think it's fairly similar
to what we just did. Go back to the dry brush here. Let's take the brush
size down once again, pretty small like that. I'll press Shift F and bring the strength to
around 0.5 or so. Then let's try and get
these on the bottom. So maybe if I just kinda goes
like this and Control N, If you get these little
creases here in your mesh, that's usually just
a display issue. Oftentimes you can just
come over here and turn the level view port up
one and then back down, and it usually goes away. So that's oftentimes
just a display issue and isn't actually on your mesh. Alright, so let's keep going. And there it is again, so it's really isn't an issue. I mean, I could just turn this
on and see if it helps it. There we go. Alright,
so we've got that. Now I'm going to come up along the sides just a
little bit like this. Just a couple in
here, like that. Alright, so now once again, I'm going to smooth
it back just a bit. I'll hit the F key and
increase the brush size. Hit Shift F and
increase the strength. Maybe, or maybe decrease the strength and maybe
I'll take it down 2.3. Let me do that. Then
let's kinda smooth this out salmon and make it so it isn't
quite so prominent. And then what we could
do just to check it, is we could tab back into
edit mode and press Alt H. And then let's tap back into sculpt mode
and take a look at the whole thing and just see if they're about the same
and they're not bad. I'm going to smooth this
out just a bit on the top. And maybe down here
as well just so they're kind of
the same strength. So that's all I really wanted is just something from a distance, you get a sense that there's some wrinkles and
some texture there. Alright, if we go back over
to our layout tab here, we don't really see our
sculpt information here. And that's because we haven't turned up the level viewport and that's what I was
playing with just to remove some of those
display errors. But if we just increase this up to four to match the
sculpt and the render, then we can see it there. But to bake out our textures, to bake a normal map
of these wrinkles, we're going to need to
actually take this down to 0. Again. We need to take
the level viewport setting to 0 here in the
multi raise modifier, and then we'll be able to
bake out our normal map. So in the next video, we'll go ahead and use
blender to bake a normal map. And then I'll show you a couple of different ways
that we can use that we can take that normal map into Substance
Painter and use it. Or we can bring the substance
painter textures into Blender and then use the normal map here
in Blender as well. So either way you want to do it, but we'll work on that next.
78. 078 Baking a Normal Map in Blender: Now let's use blender to
bake out that normal map of the wrinkles that
we just sculpted to get a better view of
that when it's happening, Let's go over here to
the UV Editing tab. And what I'm gonna do, let me just hit the a key over here and press
the period key. There we go. And I
will also change to Solid View tab back
into object mode. And what I wanna do is create
a new window over here. So I'm just gonna, I'm just gonna come up here, click and drag down to
create a new window. And this one too, It's
gonna be a shader editor, so we'll select that, hit the End key to
close that panel. And so here we have the shader nodes of this
desk chair material. So for blender to
bake a normal map, it needs an image
like a PNG file already created that then puts the normal map information onto. So we need to create an image. And one way to do that is
just to come over here to this UV editing
panel and click on New. And this will
create a new image. And let's, let's call
this desk chair wrinkles. And I'll just put underscore
NOR for normal map. And we want to keep it as
blank because that'll just create a black image
and that's all we want. And then I'm going
to click Okay, so there it is, there's
the black image. Now, we need to put
that image appear in the shader editor with the
desk chair principled BSD F. So I'm going to press Shift a, go to texture, image texture. And then I will just come over here and pull this menu down and choose that new desk chair wrinkles
image right there. Okay, so now we have it
here in the shader editor. We don't even need to hook it up to the principled be SDF. We just need it here in the
shader editor somewhere. Alright, now let's adjust the render engine that
we're using for this. Let's come over here to
the render properties. And currently we're using
the EV render engine. And if you look down here, there isn't a baked tool or section here in the EV renderer. So we need to change
this to cycles. And then when we do that, we get back here. Now, I've got the
device selected as CPU. I've got a pretty good
GPU in my computer, so I'm going to
switch it to that. That'll just help things
move a little quicker. In addition, while we're here
and we'll talk about this again when we get to the
rendering of the scene. But I wanted to mention here
that in Edit preferences, if you go to system, you can see what kind of processor and graphics
card you have. And depending on what you have, you may want to choose
a different setting. Blenders pretty good
at figuring out what you have and using
the proper settings here. But I've done a little
googling and I know that the g-force 30 Eighty works
well with this optics. So this tends to be
what I have it set for. But everybody's computer
is a little different. So you may want to just check out which you want to use here. So just wanted to
point that out. Let me close this now. So we've chosen cycles. We can come down here now to the big section and
here under bake, let's change the
type from combined to normal because we want
to bake out a normal map. And here's where we can
say that we want to bake the sculpt information
that we used in the multi-rate modifier. So we want to have that checked. And keep in mind, you need to have this viewport level at 0
to be able to do this. Alright, I'm gonna go back
to the render properties. We've selected normals, chosen baked from
multi-rate is we've got our image created and here in the shader editor with the
material of the object. So now I can select
the object and clickbait. There we go. There it is. So there's our normal map of that wrinkle information that
we sculpt it. There we go. Now one last thing
we need to do here is make sure it's saved
to our hard drive. And you see this
tiny little asterix here next to the word image. And what that means is it hasn't yet been saved
to your hard drive. And if you don't save
it to the hard drive, if you close out a blender and then come back,
this could be gone. And even if you come
up here and say File, Save still has an asterix here, we haven't saved it to
the hard drive yet. There is a difference
for some reason between saving a blenders
scene and saving an image that's been created
in that blender scene. So we need to come over
here to image and save. And we're going to put it in the textures folder
and in there, in the desk chair folder. And here we go. So we're
going to click Save as image. And now that asterix is gone, meaning this has
actually been saved to our hard drive and won't go away when we close
our blender scene. Alright, now that we've got the normal map in
the next video, Let's go into Substance Painter and add it to our textures.
79. 079 Using the Baked Normal Map in Substance Painter: Now back in Substance Painter, we have our chair here. What we want to do
next is come over here to our texture
sets settings. And here we have all
our baked mesh maps. And here's the normal map. What I'd like to do is take
the normal map that we just baked out in Blender and
bring that into here. So if I click here, you
can see these are the maps that we currently have
access to from this slot. We need to bring that
normal map that we just baked into the project
so we have access to it. So what we can do
is come over here to the textures
library and we can bring that normal map into here so that we can put
it in the normal slot. So to do that, let's
come over here to this plus this import resources. We'll click here and let's
click on Add Resource. And now we just need to
browse to our Textures folder into the desk chair. And here is that normal
map that we just baked. So I'll select that click Open and now we have to tell it what it is and
where it should go. So this is going
to be a texture. So it'll go into the texture
is library over here. And we want to import this
to just this project. I don't need it in all of my projects that I'll ever open. I'm just going to bring it
into the chest chair project. So let's click here and
then we'll click Import. And here it is. Now all we
have to do is just click, drag and drop. And there it is. Now you can see the
wrinkle information there on our chair. Alright, so that's
one way to do it. So let's go ahead and
export these textures out. We'll take them into Blender
and then I'll show you just another way to do
it there in Blender. Alright, so we'll come over
here to File and Export. We'll browse to the desk
chair folder right here. Select that folder. We'll choose our blender
export template. And we'll go ahead
and export these out based on the texture set and the template
that we've chosen. Alright, now let's click export. And there they go. Now
let's go back to Blender. Alright, here in Blender,
Let's go over to the shading tab.
Here's our chair. I'll go ahead and frame that up. I'm going to take this
and just move it over. We don't need this in here
at this point in time. And so now I'm going to select
that principled be SDF. Recall that the ad
principled setup for the Node Wrangler is control shift T and end
the desk chair folder. We can see our textures here. So here's the one we
baked out of Blender. Let's use these that came
out of Substance Painter. First. Let's select those
principles, texture setup. And there we go. Now you can see the
wrinkles on the chair. So what we've done
is we've created a normal map here in Blender. We've then taken
it into Substance. Painter used it to them, bake out textures and
yet another normal maps. So what we could do
instead is we can substitute this normal
map for this one. They're pretty much the same. So let's just say we take this
and drag it down to here. We take this and drag
it up into here. Now, it looks really weird. Here's the normal map over here. But now the chair looks
really strange, right? The problem is, is that you can see we've got the color space as non-color for the normal map that came out of
Substance Painter. And we have that also for the
roughness and the metallic. And all we really need to do is take the one we've
just added and change this from sRGB to non-color and that
should help there. And it's pretty much
the same thing is true, but keep in mind if you are exporting
textures out for say, Unreal Engine or unity or another program
that isn't blender. You would then want to take your normal map into
Substance Painter and then export it from there
as that template or as those presets for
that particular program, say unity or unreal. But since we're coming
directly back into Blender, I can swap these out
and do it either way. So I could have exported the textures out of
Substance Painter. If we go back to
Substance Painter, I could have exported the textures out of
Substance Painter. If I click here, I could uncheck the normal map, only export the other three, and then use the normal map
that we created in Blender. So my point is that
you have options. And if you are using
other programs, exporting out to other programs, you would probably want to
use those templates here, say you're exporting to unreal, you'd want to go
ahead and export the normal map out with
the others from here. So they're all
properly configured. Alright, so back in Blender, we can go over to
our layout tab. We can go to the
material preview, and we can bring back the
other furniture here. We can see that we've got
another piece textured. Alright, in the next video, Let's maybe work on the desk to finish off this
area over here.
80. 080 Using a Custom UV Test Pattern: So to work on this desk, I realized now that I look at
this even a little closer, I'm going to press
Control and spacebar. The direction of the
wood grain is really a little bit more complex
than I had first seen. Because we've got
wood grain going up and down this
way and this way. But on the drawers, they're
going horizontally. And even down here along this,
it's going horizontally. It looks to me like the
grain is going this way on the top and then it's also going horizontal along the
edges around here. So I feel like I'm
going to need to do a little bit more planning before I take this into
Substance Painter. So I'll press Control
and Spacebar again. And what I wanna do is use a different kind of
test pattern for this. So let's take the desk
chair and let's hit M and move it back into
the furniture group. And then I'm going
to take the desk, I'll hit M and move it out
into the scene collection. Now let's turn off the
visibility for the furniture. And let's go over to
our UV Editing tab. And over here, recall that
we've got this material, this UV test material. We've got this UV
test texture here. Now if we come down here, we can pull this
down and scroll down through all of our textures
that we've used so far. Select the UV test texture and you can see what
that looks like here. What I've done is I've created another test texture That's just stripes instead of checks. So let's bring that in. I'm going to come up here and
click Open Image on this. And in our Textures folder here, I've got this JPEG
image called stripes. So I'm going to bring
that into here. And then let's open it up here. I'm just going to pull this menu down and choose stripes here. This is it. It's just a bunch of black and gray stripes that
I created in Photoshop. Now some of the stripes
aren't exactly evenly spaced, but that doesn't really matter. I just needed something pointing all in the same
direction that I can use to figure out which way each individual UV
island is oriented. So let's come over here
to the material preview. And we can kinda see that here. Now I think I'd like
these stripes to be a little bit narrower. So what we can do is we can use our Node Wrangler add-on to
add a little texture setup. If we hit the End key and
go down to Node Wrangler, recall that add
principled set up here is Shift Control T
will add texture. Setup is just Control T. So if I hit the N key there,
select this image, hit Control T. Now it adds a mapping node and a texture coordinate node hooked
up from the UV socket. So now what I can do
is I can just take the scale of this and maybe
increase it to three. I just clicked and
dragged on all of those fields and then
hit three and Enter. Yeah, something like that. That's kinda what I need. So as we said, it seems to me like the top
here should be going this way and the drawers should
be going horizontal as well. And down here, right, we've got these
going vertically, but down here, I
think these should be going horizontal as well. So in different situations, you can actually go out and create your own test pattern in Photoshop or Krita or really any paint or drawing program. You can even take a picture
of something if you want, and then bring that
here into Blender, hook it up to the material and use it to organize your UV map. So let's go ahead
and begin that. I'm going to hit the X here to get rid of that
image in that view. And then let's tab into edit
mode and hit the a key. And alright, here we go. So let me bring this up here. Zoom in sum. Okay? So first of all, we want to deal
with the top here, and that looks to me
like that's this. So I'm going to press
Alt a over here. Make sure I'm on UV
select right here, and I'll just click on it, hit the G key, move it out. And you can see in
the 3D view that yep, that's the UV island
that we want. And then I'm just going
to hit our 90 and enter. So now that is oriented properly to have the wood grain
going from left to right. Alright, so that's good. Now, this area right here, let me press Alt a over here and then hit the L
key and the L key. And get all of these in here. And we want these to
be turned as well. So let me hit the a key and
I'm going to come up to our pivot point and change to median point here and
hit are non-zero. And there we go. So now let's move this out. Come over here, hit the a key. Now we can see these a
little bit better and I'll move these down here like this, kind of out of the way. Here we go. We've got the top there now, I think we need the drawers. So it looks to me like the wood grain is going
horizontally for the drawers. So let's come through and with the L key and seemed
turned on here. Let's come through and
select all of these. And then over here we hit
the a key are non-zero, enter, move it out. Hit the a key over here. And then we'll start
moving these down as well. Just get these out
of the way and kind of group together just so
I can keep track of them. Over here. Move to this, maybe over here we go. And as I said, this
is really for me to keep organized as
I'm working here. Alright, it looks like
these as well here. And these on the back should
probably be horizontal. So with these selected, I'll hit a over here. Are 90, Enter,
moving to the side, hit the a key, alt a. And let's bring these
down here as well. Just to keep organized. Alright. What else? Well, I think these right here should
probably be going up and down since we've got these
vertically on the sides, I feel like these panels
should be as well. So over here, let's
turn these are 90, and then move these over here. Hit the a key and the 3D view. And let's just take these
and move them down here. Okay? Alright, What else? I think these down here, right here, up see, now I need to actually create new seems here and
UV map this on its own because I
can't currently split this out from the
rest of the UV islands, so I need to add a scene.
Let's go ahead and do that. Let's right-click here and
Alt Shift click along here. And we're going to need to
go all the way around here. This it looks like we got that whole thing
all the way around. That's good. You and Mark seem. And then down here as well, we'll do this alt
click, Alt Shift-click. I'll hit the period
key to zoom in. And we'll continue our
way all the way around. You and Mark seem alright, so now let's hit the
L key here and here, and on around like that. Now these may be a
little bit too long. Let's see, Let's
press U and unwrap. And yeah, we're getting
kind of an angle on those. Let's try conformal. And that doesn't
really help much. So I think what I'm gonna do, it looks like there is a seam break here on
the actual things. So I'll just pretend like
I want it to be that way. And I will add a
seem right in here. Let me hit the Z and go to
solid view so we can see that. Let's go ahead and add one here. And right here as well. I'll go round on the other
side and do the same thing. And right here, you
and mark scheme. Okay, now let's try this again. Let's hit the L key
and select each one of these all the way around. Now let's UV map this. Let's hit you unwrap. Yeah, that looks
quite a bit better. Let's triangle based. It's not really too big of
a difference, honestly. The only thing I can see is that these things don't
curve quite as much, maybe with angled base. So let's, let's go with that. Hit the a key and hit G, and then come over here
and hit the a key. And now we can just take
these and move them down. Alright, what else
do we need to do? Let's hit the Z key and go
back to material preview. Oh, well, now that
I've UV map these, I need to turn them donor. So let's come back over here with these selected
hit are non-zero. And there we go. Okay,
Now we've got that. So I think everything else
is pretty well in place. I can't really see
here this panel, which way that panel is if it's going this way
to match these, or if it's going horizontally to match the
drawers and the panels up here. Since we don't really know, we just kinda get to
say what we want it to be and I think I just
want it to be that way. Alright. Now let's go back
into edit mode. And here in the UV editor, Let's hit the a key, and let's go up to UV once again and average island scale. And we go, and now we
want to pack islands. And when we do this, some of these are going
to turn and we may have to rotate them back. So let's see, let's
go to UV pack Island. Sure enough. Some of them turns. So let's come down here
to this window here. And let's uncheck
this. There we go. So now they stay in the
orientation that we put them. There we go. Yeah. So now we've got our UV map organized in such a way that we should be able to get the wood grain of our texture going into proper directions. Alright, so in the next video, we will export the
desk out of Blender, taken into Substance
Painter and see how we did.
81. 081 Texturing the Desk in Substance Painter: Alright, let's get
this ready for export. Let's take away the
UV test material here and let's create
a new material and we'll just call it desk. Now that we've got
that new material, let's come back over
to the layout tab and let's think about creating
our vertex colors. So it looks like
all we have is just to the wood and maybe
a brass material here. So let's come over
to our vertex paint. Turn on our paint mask, and let's begin selecting this. So really, what we could do here is just select everything
we could hit the a key. And then if we come over to
our active tool panel here, let me bring this up a bit. We could just go to
green maybe and just add that green to
everything, Shift K. Now we can go back
into edit mode here. And let's just select the
handles now with the L key, we've turned off seam
here, so that's good. Let's go through select
each of these handles. And now if we tap back
into vertex paint, Let's choose another color, maybe the blue shift K. And now we have those. Alright, so there are our
vertex colors for the desk. That's good. Let's go back to object
mode, will select it. And now let's go to File
Export, export FBX. Let's go into our
Textures folder. And here we should probably
create a new folder. Let's just call it desk. And in here we want to
create a new FBX file. We'll call it desk as well. And we want to be sure and just export the mesh object type
and the selected object. And then we can click export. And there it goes.
Alright, let's go over to Substance Painter. Here in substance painter,
Let's go over to File New. And this time I'm going to have the document resolution at 4096. I think because this
particular object has so many nooks and
crannies in it. So many edges, I think I want a higher resolution to work with here in the substance
painter viewport. So I'm gonna go ahead
and go with 4096. And remember, we can export out at anything we
want and we can export out at 4096 or 1024
or 512 or whatever. But this is really so we get the best resolution we
can hear in the 3D view. So I'm going to
click Select and go to that FBX that
we just exported. I'll click Open and Okay,
Alright, here we go. Here's our desk. Let's go ahead and
bake the textures. We can come over
here to the texture set settings and click on bake. Now once again, I want to
change the size to 4096 here. And also for the anti-aliasing, I've been using two-by-two, but I think for
this because I want a little more resolution for it, I'm going to choose
the four-by-four here. And since we've
created vertex colors, I'm gonna go to the
ID section and change from material color
to vertex color. Alright, I think now we are ready to click Bake right
here. There it goes. Now it's going to take a
little longer this time because we're at 4096,
but that's okay. It shouldn't take too long. Alright, the bake is finished. Let's click Okay. And here are all the mesh maps. Alright, let's go back
to the Layers tab. I'm going to delete
the default layer and let's just find a wood
material over here. I feel like this would walnut
is worked out pretty well. So I'm gonna go
ahead and try this. I'm going to click
and drag and drop. And let's see how
we're doing here. So it looks like at least for the direction
of the wood grain, we're doing pretty well now. That's about what I wanted. We've got the texture
going up and down here. We've got them
going horizontal on the drawers and these
upper panels here, right on the back as well. Here. We've also got them going horizontally down
here on the base. So I think this is okay. I think we've got it organized in a way that I was hoping N o on the top here we've got the wood grain going from
left to right here as well. Alright, so let's go
ahead and isolate this. Now I'm going to
create a new group. Let's call this would I'll drag the wood walnut
into that group. And then we can right-click,
choose color, selection, pick color, and pick that green, and that isolates it there. Now that we've done that, let's play with the properties a bit. I'll select the wood walnut over here in the Layers panel. And let's take the scale up. Let's try three. It's not bad. Let's try five. I don't know. I kinda
like three actually. Let's try that for now. We don't need to change
the rotation because now we've arranged the UV maps
the way we want them. And I think I'd like
to go down here to the color and maybe make this a little bit redder and
maybe a little bit darker, maybe something like that. Yeah, Let's see how that works. And also I think I need to reduce the roughness,
just a hair. Let's bring that back just
a little bit and I'll Shift and right-click and move the light around just
to see what we think. Yeah, I think
that's pretty good. Alright, now let's
work on the handles. So let's create a
new group here. And I'll call this brass because I think that's what we're
going to use for this. Let's go ahead and pick
that blue color right here. And let's search for brass. Let's see what we have. So I think maybe the brass battered would
be a little too much. Let's try this brass pure. Drop that on there. Yeah, that looks pretty good. And then let's just take this and maybe move
the value down some. It isn't quite so bright.
Something like that. Yeah, that's pretty good
and it's just amazing to me how once you get the UVs
arranged in Blender, how quickly the texturing can go in Substance Painter with
something like this. Alright, so now that
we've got this, let's go ahead and
export our textures. I'll come up here
to File and Export. And once again, let's browse
to our Textures folder. And in that Textures folder, Let's go into the desk
folder and select that. Let's change to our
blender export template. And for the file
type, once again, we're going to
keep it with P and G so we can keep it like this. But for the texture set size, I think this time I'm going
to reduce it a bit from 4096 to 2048 just to
see how that works. And now we can
just click export. And there we go. So let's now go back to
Blender and see how it looks. Here in Blender. Let's go to the shading tab. I'll select the principled
be SDF, the desk material. And let's once again create
a principle to set up control shift T into the
textures folder, into the desk. And let's select
all of our textures here and click there,
and there we go. Now we've got our desk all
set up with our textures. Let's go over to the layout
tab to material preview. Bring back our
furniture. Here we go. Yeah, that actually
looks kinda nice with the chairs there and the wood. I kinda like that. Alright, now we can start working on these
other pieces over here. Notice that we've got our striped UV test texture
on these and that's fine. So in the next video, let's work on maybe one of
these chairs here.
82. 082 Texturing the Arm Chair: Alright, let's work
on this armchair. Let's press M and move it to the scene collection
and then we can take the desk object and drag
it back into the furniture. Let's hide the furniture.
And here we go. Let's first of all change the material over here
in the Materials panel. Let's get rid of this
UV test material. Let's create a new one and
we'll just call it armchair. And then let's start working
on our vertex colors. Let's come over here. Change to vertex paint, will turn on the paint mask. And for now let's just hit the a key and select everything. Come over here to our
active tool panel. I'll change the color to green. And let's just press Shift
K So that does everything. Now we can go in and just select each individual leg
on the chair now. So if we press Alt a and then hover over
these and press the L key, we can just select each
one of these individually. Now let's choose the blue
color and press Shift K. And there we go. That I think is really
all we need for this. It's just really two colors or two materials, I should say. Let's now go back
to object mode. And now we can go to File
and Export, export FBX. Let's browse to our
Textures folder. And in here we'll go ahead
and create a new folder. We'll call it armchair. And in the armchair, of course, we want to put the
arm chair, FBX. Alright, Let's just
choose the mesh, selected object and
export. There we go. Now we go over to
Substance Painter. Here in substance painter,
Let's go to File and New. I'm gonna go ahead
and leave it at 2048. For this one, let's
click Select. Once again, go into
our Textures folder. And here is the
armchair right here. Let's open that up and click. Okay, Here we go. So now let's bake
out our textures right over here and
the texture sets settings click on bake. I will choose 2048 for this. And just anti-aliasing
two-by-two. Let's change our material
color to vertex color. And click Bake. Alright, now back in the
layers panel, it's removed. This create a new group. We will call this fabric. And I'll just go ahead and add a mask with
color selection, choose, pick color and
select that green. Then I can just create
a brand new one. Let's do that. Let's create another group called it would. Once again use that
color selection, pick color, and choose the blue. Now we can just drag what we want directly into these groups. So first, the fabric, Let's search for that. And we've already
tried this bamboo one. How about fabric rough? Let's try this. I'll take it, I'll
drag it and drop it in the fabric group.
And here we go. I think we need to change
the colors and the scale. So for the scale, Let's try three, let's do that. That's not bad. Let's come down here and let's
try and adjust our color. I want a different I don't know. I don't think I want a blue. Let me I'm going to drag
down into the yellow here. And I think I want
more of kind of a very light tan or beige
or something like that. I'll close that. And then for the wood, I think once again
that would that we've been using has
been pretty good. Let's just drag this right
over into the wood group. And there we go. Now down here, I think we do need to increase
the scale quite a bit. So let's try five. How about seven? Let's try that. Yeah, I kinda like that. Let's tumble around back here. Yeah, I like it to be a
smaller grain on these. However, I do want this to be
a little bit lighter color. Let's scroll down to
the color for the wood. And I think I'll just bring the value for that
up just a bit. And I don't think I
want it quite as red, so I'm going to drag
it up out of the red toward the yellow
just a little bit. Something kind of like that, maybe to try that. That's kinda what I
wanted out of this chair. Let me try and make that fabric just a
little bit smaller. I'll choose the fabric
here and scroll up. And let's try and make
the scale for this. For Let's try that. Is that too much? Do you like that might be
a little bit too small. Alright, I'll get a little
bit more detailed here. Let's try 3.5. Yeah, I think that's pretty
good. Let's go with that. So to export this out, let's of course go up to file
and export our textures, will browse to the
appropriate folder, which is going to be our
Textures folder and armchair. And select that. Let's change to our
blender export template. And everything else should
be pretty much the same. So let's click export,
and there it goes. Alright, let's go
back to Blender. Here in Blender, Let's come
over to the shading tab. And I don't think we
need this over here. Let me close out our
normal map from this view. Let's do that. These can move over a bit and let's choose
the principle of BSD F. And once again, let's create a
principled setup with control shift T will browse to our Textures folder
and go into the armchair. And here are those four texture
maps that we baked down. Let's click here,
bring those in. And yeah, I think
that's pretty good. Let's go back to the Layout tab and I'll click on
material preview. Bring back the rest
of the furniture. And we could take this
chair and delete it, take this one, press Shift
dx and move it over there. We've got our two chairs. Yeah, I think that'll
work just fine. As I said, I wanted it
a little bit more of a yellow beige than what we see here in the reference image. And that's fine to go ahead and change it
the way you want it. Feel free to customize and personalize this
however you like. Alright, We're moving right
along in the next video. Let's work on this table here.
83. 083 Texturing the End Table: Now for this end table, let's go ahead and
bring it out of the furniture collection by pressing M and choosing
Scene Collection. Here it is. Let's grab those
armchairs and drag them back and then hide
the furniture. Alright, it looks like some
of these textures are some of the orientation of
the UV islands with these stripes seem to be
going in the wrong direction. So let's come back over
here to the UV Editing tab. I'll hit the a key and the
period key to zoom in. Let's hit Z and go-to
material preview. Let's bring back,
or let's go and find that reference
image for the end table. And I'll press
Control and Spacebar. And it looks to me like
the wood grain is going horizontally on the drawer
up here on these edges, it's going left to right
on the shelf down here, which means it's probably going
left to right on the top. It's going vertically. The wood grain is
going vertically on the legs and on the panels here, on the side and on the back, it's really hard to
tell this image isn't a good enough resolution to really be able to tell
which way it's going. But I'm going to
say it should go horizontally with
the drawer here. Alright, with that in mind, let's press Control and
Spacebar to go back to here. And it looks to me
like the majority of what we just
talked about is off, like the drawer is
going up and down here when it should be
going horizontally, the shelf is going
the wrong way, right? The legs here are
going the wrong way, the side panels and these
edges are going the wrong way. So it's almost as if
we could just turn this whole thing and then have to deal with
fewer of the objects. So let's try that. Let's just come over
here and hit our 90. Let's just turn
that whole thing. Now, it looks to me like the only things we
really need to do or the top of the legs
and the top here. So yeah, that may have
saved us a bit of work. Let's try. Let's hit the L key here
with scene turned on. And then let's press are
90 over in the UV editor. There we go. Yeah, that gets it going
that way, That's good. And then for these pieces, we just need to turn these
and I think that'll be it are non-zero.
And there we go. Let's hit the a key and let's take a look at
what we have here. Yeah, I think according
to our stripes, everything is the
way we want it. Alright, so, well that
wasn't too hard, right? Hit the a key. Now over here, we do need to repack our UV islands into
the 0 to one space. So let's come up here
to UV and pack islands. Now it turned everything. So let's just uncheck
the Rotate box here. And yeah, it looks like now everything is
the way we want. It is oriented the way we want. Good. Alright, so let's go
back to the Layout tab and we don't need our UV
test material anymore. So let's come over here
to the material panel and get rid of this
UV test material, will then click New, and let's call this in table. Now let's deal with
our vertex colors, and let's bring back that image that we had
in here, right here. And it looks like we
only have two materials, the wood and the brass again. So that's good. Let's come over here to our
vertex paint right here. Let's turn on the paint mask. And if I hit the a key
to select everything. Now let's go to our active tool. I'll choose the green, and let's just press Shift K, and that gets everything. So now we have to do
is just come in here. And with the L key, select just these parts in here, being sure to get those
spheres now for the handle. And then let's come over
here and choose blue. Press Shift K. And there we go. Now we've got a vertex colors. Alright, let's switch
back to object mode. I'll go ahead and
save the scene. And now let's export
this out and I'll go to File and Export FBX. Here we'll browse to
our Textures folder. Let's go ahead and create a new folder and
call it n table. And in that folder we'll call
our FBX in table as well. Alright, we will choose
the mesh object type, selected objects,
and click Export. Alright, let's head over
to Substance Painter. Here in Substance Painter,
we'll go to File and New, and we'll choose, Select, and then our Textures folder. Let's go to n table, grab that entailed
FBX, and click Okay. Alright, here we go. So now we can bake our
textures over here in the texture set tab, bake mesh. We'll change this to 2048
and our anti-aliasing to two-by-two will be sure and switch from material
to vertex color. And we'll click Bake. Alright, now over here
in the layers panel, I'll get rid of this and I'll
just create two new groups. We'll call this one would
just like we did before, and we'll create another one. And we'll call it brass. Now we'll go to each
one of these and right-click Add Mask with
color selection. Pick color. And for the wood, I'll choose the
green vertex color. And for the brass, Let's choose that
blue right there. Now we just need to
find a couple of appropriate textures so
we can search for wood. And that would walnut has
worked out pretty good. So let's drag that over
here. That's not bad. Let's change the scale to
three and see how that looks. Yeah, that's pretty good. I think it needs a
little more gloss or a little less roughness. So let's bring the
roughness down a bit. If we go all the way down, we get a very
reflective surface. So I'm just going to bring
it down to about right here. And then for the brass, recall that we have that
brass material in here. Here it is. Brass pure. Let's drag that
over, drop that in. And for this, I think I want that brass to be
a little bit darker. So let's take the value down quite a bit as if
it's a little older. Like that maybe. Okay. Yeah. I think that's pretty good. Let's give that a try. I'll go ahead and save this with Control S and N are
in table folder. Let's create this table
Substance Painter project. I'll click Save. And now let's export this out. Let's go to File Export. Textures will browse
to our Textures folder in table and
select that folder. We will choose our
blender export, output Template, and everything
else should be fine. So let's just click Export. And there it goes. Alright, let's go
back to Blender. Here in Blender, Let's go
over to the shading tab, and let's take our nodes
and move them over here, I'll select that
principled BSD F, and let's press Control Shift
T for our Node Wrangler. And in our Textures folder
and in table folder. Here are all of
our texture maps. Let's select them. Click
here. There we go. If we go back to the layout tab, let's switch to our
material preview. Bring back the rest
of the furniture. And there we go. Now
we've got our n table.
84. 084 Preparing the Sofa for Export: Well, let's now turn our
attention to this sofa. And I think it presents a couple of interesting
challenges. First of all, I
realized the way I put the seams in here
may not really work. It really seems like that Chesterfield
texture should kind of go all the way around all-in-one without a
break in the seams. So we may want to
take the seams out. But if we do, we're
going to have to rearrange the UV Island. I think there's also
this scene here, but I think we may
be able to manage minimizing this seem a
bit in substance painter. So let's first of all take
a look at the UV map. Let's go over to UV Editing. And if I hit the a key, now we can see all
of this over here. And it looks pretty good. But as I said, I
think I want to take out these seams right here. Let me press Alt and click here. And then I'll press
Control and click here to select that seem from there
all the way around to here. And let's press U
and clear seam. And then let's also do that over here on the other side as well. Right in here. Alt click and then
Control click here. You clear seen, okay, now that we've done that, let's hover over this and press the L key and width
seem turned on. It'll just select
that area in there. Let's then press U and
unwrap and see what happens. Alright, let me hover over
this and press the L key, and I'm going to
turn it 90 degrees. And now let's take a look
at the stripes here. And you can see that the stripes don't turn with the
arm of the sofa. They continue on going this way. And I think what we
want is we really want for that chest. Your field pattern too. Follow fairly
smoothly around here. We're going to need the
stripes to continue and turn at like a 90 degree angle here instead of heading
off diagonally. So to do that, we're going to have to work
a bit with the UV map here. So I think what I'll do is try the proportional
editing tool with this, just to take these edges or these bent sides and kind of straighten them
out so they're in line with the
center part here. To do that, let's go
to UV select here, and I'm just going to
select one uv point. And I'll press Shift S to, to bring that cursor
to that point. Now, I want to be sure and
rotate around the cursor. So I'll choose 2D cursor
here under the pivot menu. And let's then select
this edge right here. And we're going to
try and just turn this and rotate
it at this point. So let's turn on the
proportional editing tool here. And I'm also going to
turn on connected only. I think we'll be fine because no other uv islands are
showing at this point in time. But I just want to go ahead
and do that just in case. Now, when I hit the R key, you can see, if I scroll in, you can see that
circle there that the influence of the
proportional editing. So let me just scroll
in a little bit more here and I'm going to hit
our scroll in just a bit. And then I'm gonna begin
to turn this a bit. Then scroll out a bit, turn it a little more,
scroll out some. And if you watch
over in the 3D view, you can see those
stripes turning in line with the rest
of the UV island. So maybe, maybe something
about like that. I'll click there and
then maybe I want to move these up too,
so I'll press G. And why? I'm going to move these up
just a little bit like this. They're kind of in
line there with this. So what has happened over here? You can see the stripes
have come around like this horizontally instead
of over here you can see these are still
going diagonally. Alright, so let's
try that again. Let's come over here. Let's choose this
point on this side. Let's move to 3D cursor to it. Let's select this row of UVs. And then once again,
let's press R. And we'll begin to
turn these just a little at a time and
then scroll out some. Roll out a little bit more. Maybe not that much. There we go a little
bit like that. And then I want to move
them up just a bit with GY and I'm going to move
them up just a little bit. I'll scroll in just
a little bit there. Okay, Now, how does that look? Let's tap into object mode. And I've curved these around
here just a little bit, but I don't think that's gonna
be too much of a problem. I just wanted to make
sure that these turned here and kept in
line with the rest. Alright, so let's tap back into edit mode and
hit the a key. And we're going to have
to repack these now. Soiled hit the a key over
here in the UV editor. Uv. I'm gonna go ahead and average
island scale just in case. And then I'll pack islands. Now we can, if we want, uncheck the Rotate box
and this is what we get, but it really doesn't use the 0 to one space as
efficiently there. So I'll go ahead and
turn that back on. There we go. Now we've got that whole
area as all one UV island. Alright, let's go back
to the layout tab. Let's go to our materials panel and let's get rid of
this UV test material. Let's create a new material. We'll call it a sofa. And then let's work
on our vertex paint. So it looks like we've got three different
materials here, right? I mean, I know we've
got the wood on the feet of the sofa, but really the
Chesterfield pattern is a separate thing than
the rest of the leather. So I think those are two
different materials. So we're going to need three
vertex colors for this. Alright, let's go to
our vertex paint here. I'll turn on our paint mask. And let's just hit the a key
here and select everything. And then in our active tools, I'll select the green
and let's press Shift K. Let's tab back
into edit mode. And I think I just want
to select this and this. And I think down here, we need a little bit more. Here we go. I'll hit L right
here. That selects those. And then I'm just going
to press Control I to invert the
selection like that. Now if we tap back
into vertex paint, Let's select the blue shift K. And there we go. Then down
here for the feet of the sofa. Let's go around
and select those. And let's give those the red
color, shift K, Alright. Paint mask. Turn that off. Now, it looks to me like we
may have a little issue here. Let's tab back into edit mode. And sure enough, it looks like these are a little bit off, like the green has bled
out beyond the seam there. So let's try and fix that. I'll just hit the L key here. And then we'll tab back
into vertex paint. Turn on the paint mask and yeah, you can see how the
green kinda bled over. We don't want that. Let's
select the blue and Shift K and get that
all taken care of. Okay. Now, let's take a look. Yeah, that's pretty good
except look at this over here. I just feel like the green
went a little too far. Here's that line of
basis by the same. And if we tap back
into vertex paint, you can see there are green
when they should be blue. So let's select those and
also let's just come around. I'll press Control and click, and then Control and click to
get that whole thing there. So I'll turn on the paint
mask, press Shift K. And there we go. Now we've
got that blue as well. So yeah, we just had
a little bleed over there with the green and
that sometimes happens. Let's go back to object mode and then we can
export this out. I'll go ahead and press
Control S to save File, Export, export, FBX. Let's take it into
our Textures folder. We'll create a new folder, call it Chesterfield Sofa. And down in here we'll
do the same thing. Will then select the mesh
object type selected objects, and let's hit Export. All right, In the next video, we'll go over to
Substance Painter and begin adding our textures.
85. 085 Texturing the Chesterfield Sofa: Here in substance
painter, Let's go to File New and we'll just go
ahead and keep it at 2048. I'll choose Select, and
in our Textures folder, we'll choose the Chesterfield
Sofa FBX. And we'll click. Okay, and here we go. Alright, so our first
order of business is to bake the mesh maps. So we'll come over here
and click on bake 20480. I'll give it two-by-two
anti-aliasing and the ID will change to vertex
color and click Bake. Alright, so now we have
our mesh maps all baked. Let's go back over
to the Layers panel. And here let's just create our three different groups
that we're going to need. We'll call this
one Chesterfield. And then maybe one
we'll call leather. And one we'll call
wood. Alright. So let's go ahead and
right-click on the Chesterfield, Add Mask with color selection. Pick color and we'll
choose that green. Now, I've got a Chesterfield
texture over here that I've downloaded already from
the 3D asset marketplace. And let's just take
that and drag it over and drop it on the
Chesterfield group. Alright, so we've got a
little work to do here. Well, let's first of all go
to our scale right here, and let's, let's try three. And that's not bad. And then let's change
it to a brown leather. Let's see, right
here under Presets, we can pull this down and change it to a dark brown leather. Let's do that. Now. The issue I'm going to
have here, I think, is that if I try and bring yet another leather in
here and let me find one. Let's say I find
a leather plane. Let me right-click and go to Add Mask with
color selection, pick color and I'll
select the blue. And then I'll take
this leather plane and drag it onto that group. Now, we've got to leathers here, but they're very different
colors and textures. And to try and change the
color and the texture to match each other is
gonna be a challenge. So one of the things
that we can do is we can actually take this texture here and drag it
out of the group. Put it above the
Chesterfield group. It will apply all
of the color and texture information to the
Chesterfield group as well. So here let's take this, drag it up out of the
group right here and bam. So now it's a whole
lot easier to match the Chesterfield part
with the rest of the sofa. So actually we can just take this group here and hit
Delete and get rid of it. Now let's work a little
bit on this leather here. So I'll take this selected. And if we come down here, this leather plain material
is kinda cool in that it has a lot of different
settings in here. It's got the main properties, but it's also got
some aging dirt. It's cut, blood splatter. It's got all kinds of
things in here that you can play with to get it
just the way you want it. But first of all, I'm going
to go into the main here. And for our color, think I don't want it
to be quite so dark, so I'm going to pull it
back a bit like this and maybe increase the redness
just a bit as well. I don't think I want
it quite so brownish, maybe a little more red. And then what I can do is increase the scale just a
bit on this one as well. So hit three and kind
of increase that a bit. Now we've got these folds here. And that's down in these
advanced parameters, I believe the folds intensity, but also the fold scale. So we could increase the
scale to say a 100%. And that helps
smooth that up some. And then we could take the
folds intensity down a bit. So it isn't quite so prominent. But also, I'm not a big fan of all these little
tiny things here. Let's see if we can
reduce some of that. If we come into the
basic parameters, maybe we can take the height
range down just a bit so it isn't quite so
prominent, right? That's smooth, that
out just a bit there. And we want it that shiny. It's not bad. But while we're here,
let's take the roughness up a bit so it isn't
quite so shiny. Alright, that looks pretty good. It's got the pattern here going kind of evenly
all the way around. And that's kinda what
I wanted back here. It is a bit stretched. Right. But I think I'm going
to go ahead and go with that for now
and see what I can do. See how it looks in the room. But these edges right in here, this transition from
the Chesterfield to the leather is
really pretty gnarly. I don't think we want
it quite like that. One way we may be
able to clean this up is over here in our
texture set settings. If we scroll back
up and then maybe down some to this UV padding. Sometimes if you've take
this and change from 3D space to UV space like this, that'll clean that
up quite a bit. Yeah, that really helped. Okay, that's pretty good. Another thing we could
do is also adjust how much that Chesterfield
pattern is affecting that. So if we go back to
the layers here, if we come into this
Chesterfield group, we've got this color
selection right here, and that's the ID mask. And if we take this output value and drag it down a bit and see if we can take the influence of the Chesterfield all
the way away if we wanted, because we've still got this leather playing
over the top, right. If we take that output
value and bring it back, bring it back until maybe that transition here between those two isn't
quite as prominent. Maybe just type in 0.5. Here we go. Now, it's still there,
of course, yes. But I don't think it's quite
as prominent as it was. I think that's
actually pretty good. Now, if you've got some of these Chesterfield buttons
right here on the edge, kind of being halfway cutoff, which you can do
is come over here to the Chesterfield material. And on the offsets here, we can maybe click and drag on the offset and
you can see you can pull them forward and pull
them back a little bit. So if you have one that's
kinda cut off like that, just come over here to the
offset and see if you can find a place that works
pretty well for you. Now, I do need to deal with
the wood here on the feet. So let's do that. Let's take the wood and add mask with color selection
and pick that red color. And in here, I'll go to wood. And let's use that wood
walnut one more time. And I will take the
scale up to three. And the roughness I'll
take down a bit so it's a little bit shiny or
something like that. Alright, there we go. Now we've got our
Chesterfield Sofa. The next thing we'll
need to do is export these textures out and
take them into Blender. But we'll do that
in the next video. In addition to
adjusting the UV of our Chesterfield chair and
getting it ready for export.
86. 086 Painting Out Problem Areas in the Normal Map: Well, since the last video, I've made a few adjustments
for the leather material. I've selected this
and I've gone down into the advanced parameters. I've changed the color just a bit and the roughness in
the main section here, I've also gone into the
aging and turned this on and the dirt and turn this on and adjusted these
settings a bit. Now I didn't think
we needed to go in and add any blood splatter here, but that's kind of what
you'd get if you do. But I don't think
that's quite what I'm going for in this
particular project. But I just wanted to
let you know that I had gone in and made
a few adjustments. Alright, so now let's go
ahead and export this out. Let's come over here
to File Export. And we'll put it in
our Textures folder, our Chesterfield Sofa folder. And we've got
blender export here. We've got PNG, or based on
the output template here, I've chosen 2048 and the size. And from here we can
just click Export. There it goes. Alright,
let's go over to Blender. Here in Blender, I've gone
over to the shading tab, and let's down here. I'm just gonna hit the Home key on the keyboard and that will bring the material nodes
into the center there. And then I'll select these, hit G and move them over a bit. Let's select the
principled be SDF. Let's press Control Shift T. And we'll go into the textures
folder, Chesterfield Sofa. And here are our texture maps. Let's go ahead and grab
those and bring those in. And yeah, that's kinda what
I was hoping for there. That's pretty good. Let's turn on the
material preview. Here. There we go. And yeah, I, I kinda like that. Let's go back to
the furniture here, bring everything else back. And I kinda like that. We've got a similar
color to the wood. I think that's kinda nice. Now, one thing I will point out, if we zoom in here,
look at this. Those little jagged
edges are back. And you might think,
I thought we got rid of those back in
Substance Painter. Well, we did for the color. But oftentimes for
something like this, it's actually the normal map that causes these
kind of problems. So let's go in and
take a look at that. Let me hide the furniture. And to work on this, let's go into the texture
paint tab right here. Now you can see it's
automatically brought in this base color texture map. If we zoom in here, Let's switch over to
the material preview now we can see that
if we zoom in here, how are we going to go about fixing these
jagged edges here? Now as I said, my first
instinct would be to come in here and to try and paint
it out in the colormap. I'll hit the F key
and bring this down, bring the radius of
the brush down a bit. I mean, paint mode here, I'll click on the color swatch, click on the Eye dropper, select one of these to get a brown color and then
if I paint on it, so if I just click and drag and there isn't
really anything happening, I could let me
press control Z and let's just choose a black so we can really see
what's happening. If I click and drag
on this, like this. You can see that it's
filling that in. But the jaggedness is
still there, right? So we're not really
fixing the problem here. And let me select a brown again and click and
drag along here. And you can see it made
it a little bit darker, but it really isn't
doing anything. So as I said, I think the problem
is the normal map. So what Let's do is pull this down and instead
of the base color, Let's choose the normal map that was exported out
of Substance Painter. Now, it's a little
easier to do this when you can see the
wireframes here. If you can't, you
can come up here to View and check display, texture, paint,
UVs, and then you should be able to
see the wireframes. Alright, so let's go in here and what we
wanna do, you see, you can see how we've
got these edges, these little jagged edges
going into the UV map there. And I think that's
where our problem lies. So if we tried to
do this, again, if we came up here
to the color swatch, clicked on the eyedropper, clicked on the bluish
part of the normal map, and then we click and drag along here and
look what happens. It kind of works there, right? It's cleaning up
the jagged edges, but it's the wrong color. So what we need to do
is just find a neutral, flat color to paint
on the normal map. And the middle default
color for a normal map in Blender is 0.5.51 in the RGB. So here for the red, I'll type in 0.5, green, 0.5, and blue one. So that color is what a normal map is when
it's completely flat. Anything brighter than that
will seem to push things out, and anything darker than that will seem to
push things in. So if we come over here to
say the Chesterfield pattern, you can see how the
parts that push in or a little darker than the parts that
seemingly push out. But if we take our flat
normal map color and come in here and just click and drag right
along that edge. Let's see what happens. There we go. And look how clean that is. That's pretty good. Yeah, so that really helps
clean up those edges. Let's come around here and see if we can see
anything over here. No, that looks pretty
good on that side. What about over here? Well, we can try it on this side as well. Yeah, That's pretty ugly. So let's come down here. And it looks like right in
here, that's the problem. So let's just click and drag and put that color
right down there. That helped. So that's how you can
clean up a normal map. It's good to know
that here in Blender, 0.50.51 is the default
neutral normal map color. Now you're not going
to need this often, but put it in your back pocket so you can pull it
out if you need to. It's really good
for being able to paint out problem areas
like we've had here. Alright, in the next video, we will work on the
Chesterfield chairs.
87. 087 Using Smart Materials in Substance Painter: Now let's see if we
can do a similar thing with one of these
Chesterfield chairs. I'll go ahead and hit
the M key and bring it out into the main
scene collection. Looks like we still
have the sofa out here, so I'll select that, press the M key and take it into the furniture collection. Now we'll hide the furniture. And now let's work on this. We just really
need to go through the same process that
we did with the sofa. Basically figuring out what
edges we need to remove. And in addition,
take a look at this. Let me hit the Z key
and go to Solid mode. It doesn't look like I added a seam along the
bottom of the arm here to split where the Chesterfield pattern
is and the plane leather. So let's just select this
edge all the way across. And I'll de-select these two and let's just put a seam here. I'll hit you and
Mark seem alright, so that's there, that's good. What about these? Let's select these again, just like we did before. Control-click that to
connect the selection. And let's hit you
and clear seam. And we'll do the same
thing over here. Control-click you
and clear seam. Alright, so now we've got that as all one UV island there, I'll press the L
key seam is turned on so you can see we have that selected all
the way around. Alright, so once again, let's hit you and unwrap. And now let's come over here and select that point we did before. Let's press Shift S2 to
move the cursor to it. I'll press Alt, click
for that edge there. And then with our pivot point at 2D cursor and are proportional
editing turned on? Let's press R and
begin to turn this. I'll expand the selection a bit. Maybe, maybe even bring it in. Let's see. Now I think
bringing out a bit better. There we go. Let's do that. And then let's do
the same thing here. Let's select that point, shift this to Alt, click that edge, and let's
hit R and begin turning this. Kind of expanding it out
just a bit as we go. And maybe something like that. Alright, let's try that. I'm going to hit the L key. Oh, I was going to turn it, but let's first of all
change to median point and turn off the
proportional editing before I try and turn it. So I'll press R nine to 0. There we go. And now this, Let's bring back
the material preview here, just so we can see
those stripes. And yeah, now those
stripes kind of curve around horizontally where the Chesterfield
pattern should go. So I think that's what we want, but we do need to
select everything here, hit the a key and the UV editor. Let's go ahead and
average island scale. And then we'll pack islands. We can turn the
rotation off here. And now we have those pretty
much the way we want them. I think that's good. Alright, so let's go
over to the layout tab. And over here let's go to
the material's property. Take away that UV test material and we'll call this
Chesterfield chair. Now we just need to
add our vertex colors. So let's come over here, go to vertex paint, turn on our paint mask. And then let's tab
into edit mode. And let's press the L key here, here, and even up under here, I believe we need it. Yeah, right in here, I'll press the L key. So those we need, Let's tab into edit mode, go to our active tool
and I will select the green again for
this shift K. And I'm using the same colors
because I want to show you a trick in Substance
Painter using smart materials to put the exact same texture on
this that we did the sofa. Alright, so I'll tab
back into edit mode, and I'm just going to
select all of this here, and here, and here and here. So let's do that. I'll tab back into vertex paint. I'll select the blue Shift K. And then if we go
back into edit mode, we can press the L key to select all the feet back
into vertex paint. And let's make this red shift K. There we go. Alright, so let's turn off our paint mask and
take a look at it. Now, it looks like we
missed a piece in here. What is this? Let's press the L key here and turn on
our paint mask out. It looks like I missed
an area right in there. So that is what blue. Let's select that shift K. And let's try that. I'll turn the paint
mask off again. Alright, now we've got
our vertex colors. Let's go back to object mode, and now we can export this. I will go ahead and save
the scene with Control S. Let's go to File export FBX. And in our Textures folder, I will create a new folder
called Chesterfield chair. And in that folder we just need an FBX with that name as well. Alright, I'll choose mesh
and selected objects. And let's click Export. Now we can go to
Substance Painter, urine Substance Painter. I'm still in the
Chesterfield Sofa project because I want to show
you something that we can do with these materials. So if we come over here, we've got something
called Smart materials. And these are groups
of textures and materials that
have been pre-made for us by the good people
at Substance Painter. And if we take a look at one, let me grab this bronze here. I'm gonna click and drag and drag it right
up on top here. And it will of course apply to everything because it's on top. But what I want to show
you is if we open this up, It's just got a lot
of materials and textures and maps that you
can go through and adjust, just like we have
with the ones we've created to get it to look
just the way you want. But my point here is
that It's just a group. I'll go ahead and delete that. But if it's just a group, if all of these are, when we drag them over
here, is just a group. Can we take a group
that we've created and make a smart material?
Well, yes, we can. And that is what I'd like
to do so that we can use these exact same
materials for our chair. I do want to change
the names here before we create
a smart material just so we can find them
easier here in this panel. So I will come in here and I'll just call this
Chesterfield wood. And down here I'll call
this Chesterfield main just so we have them all named Chesterfield
so we can find them. But what we can do
is we can just go to this group and right-click and choose Create
smart material. And when we do that, look at this, there it is. And if we come down here,
we can do the same thing. Right-click on this group, create smart material,
and here it is. Here those two,
this one, however, if we select just that
material and right-click, we do not have the option
to create a smart material. So all we really need to
do is just create a group. I'll just click here. And this will be
Chesterfield leather. There we go. And then we'll just take
this, drag it into it. And now we can take this group and right-click
and create a smart material. Alright, now we've
got these over here. Let's close this
file close and save. And now let's go to File New. And bringing that chair. Here it is here. Click Open. And Okay, and now we need
to bake our textures. Let's come over here to the
texture sets, settings. Fake mesh maps, 2048, two-by-two for anti-aliasing
and vertex color. Now let's click Bake. Now that that is done, if we go over to
our Layers panel, we can take one of
these smart materials, have out the Chesterfield main, Let's take this, grab it, drag it over here,
and look at that. Since we used the
same vertex colors for the chair as
we did the Sofa, it knows just where to put it. So now let's take the wood
here and drag it over. And I'm going to put
it up on top here. There it is on the feet. Now let's take the
Chesterfield leather and let's drag it and put it
right in between these two. So it's on top of the main. There we go. Now we've got
our chair all textured. Now there are of
course some issues. Recall that we had issues here. And once again, we
should be able just to go over to the texture set tab under UV padding
and change to UV space. And there we go. Now we
can export our textures out to our Textures folder into the
Chesterfield chair folder. We'll use our blender export. And everything else is good. So let's click Export. Now back in Blender, let's just choose our
principal, BSD F, press Control Shift T, browse to our textures
for the chair, bring them in and there we go. Alright, so now we
have our chair. We can bring back the
rest of the furniture. Let's take this and delete it. Let's press shift D and
X and move it over. Then we'll press our z1 AT. And there we have our
two Chesterfield chairs.
88. 088 Texturing the Small Round Table: Well, the last little bit of
texturing we need to do for this grouping of furniture is
this little guy right here, that small round table. So let's bring it out into the scene collection and then let's take whatever
we have in here. It looks like two
chairs and drag those into the furniture
collection and hide that. Alright, so for this, let's go into the
UV Editing tab. I'll hit the a key and
press the period key. And here what Let's
do is let's figure out which way our UV
texture should be facing. Let's go grab that
reference image for this particular object, it looks like it's right here. And for this, I think we want the stripes to go
horizontally along here, and along that edge, vertically along the legs, and horizontally
along this edge here. So it really looks
like we could just basically turn the whole thing and we'd be pretty much done. So let's just hit the a key
here, select everything. And then over here
in the UV editor, let's just press
R 90 and turn it. Now let's take a look at it. And yeah, we've got our stripes going in the correct
direction here. Our stripes going vertically
here and horizontally here. I think. I think that's
all we need. Yeah. So now we just need
to take all of this, hit G and move it into the UV
space a little bit better. Maybe like that just so
we don't have anything hanging outside of
this 0 to one space. And now I think
we can export it. Let's go back to object mode. I'll come over here
to the Layout tab. And if we go to the
Materials panel, Let's get rid of that material and let's create one
for the round table. And now let's just
go ahead and export. I'll hit Control S and save it. File export, FBX. Let's go into the
textures folder and let's create a new folder here
and call it Roundtable. I'll press Control a and
then control C to copy that, and then hit enter, go in there. And now I can press control
V and paste that here. We'll choose mesh,
selected objects, export. And now we go to
Substance Painter. Here in Substance
Painter, we'll go to File New and select. In our Textures
folder will open up the roundtable folder,
grab that FBX. Okay? And then let's just come over here and bake the mesh maps. Let's then select
2048 for output, two-by-two for the
anti-aliasing and under ID. We don't need to change this. We didn't create any
vertex colors in blenders, so we can just leave
that as material. And now we can click Bake. Okay, now let's come over to the Layers tab and let's
just find our wood material. I'll just continue to
use this one here. Drop that in, and
that's pretty good. We could, if we wanted
to change the scale, maybe I'll put three to make the wood grain a
little bit smaller. But other than that,
That's really all we need. I'll press Control S. And let's save this in
our Textures folder, the roundtable folder,
we'll call it Roundtable. And now we can
export our textures. Let's go to File Export. And for the output directory, let's browse to our Textures
folder, Roundtable folder. And let's choose blender
export here, and then Export. Now back in Blender, we can choose the principle of BSD f of the
roundtable material, press Control Shift T and
N are Textures folder. We can open up the roundtable. Here are the texture maps. Let's bring them in.
And there we go. Now if we go back
to the layout tab, we can turn on material preview. Bring back the
furniture. There we go. We've got the furniture
in the scene textured. Now, for the next
section of the course, we're going to bring back
the room and the fireplace. And we're gonna go
through the same process to try and put our textures on the room
to get it ready as well. Once we do that, we will then begin looking at what other pieces we can add. What are the things we
can model and texture. To add a little more interests
in life to the room.
89. 089 Beginning to UV Map the Room new: Now that we have the furniture
UV mapped and textured, I'd like to begin
working on the room. And this of course, needs to
be UV mapped and textured. But I think I'm going to
try and do it all at once. I'm going to go through
and UV map all the pieces. And then we're going
to take the whole room in as a single unit
into Substance Painter. And the reason why
I wanted to do that is because I want to be able to see all the
textures on the walls, and the pillars, and the floor, and the fireplace, etc., all in relation to each other. The furniture that
wasn't that important. But I think for this, we're going to
want to see all of the materials on all the
objects of the room. Before we say, Yeah, that's good, and we began
exploiting our textures. So let's first of all
begin by UV mapping. Let's go up here to UV Editing. And I will change over
to solid view here. And let's begin by UV
mapping the floor. I'm going to click over
here and just drag this cursor out of the
way and then switch back. Let's tab into edit mode and hit the a key and take a look
at what we have here. And really my only
concern is the top plane. I don't really care
about everything else. But I'm gonna go ahead
and UV map them anyway, just because it's easy to do by pressing U and
smart UV project. Oh, and let's add an
island margin here. I'll try 0.001. Let's try
that. And then let's click. Okay. Alright, now, this doesn't look quite
right now, does it? It doesn't have any long, thin parts, like we
see on the 3D model. And as we've learned
what that means is we've gotten
non-uniform scale here. And in fact, we've probably got non-uniform scale for just
about everything here. So what Let's do is just
hit the a key to select everything and press Control
a and apply the scale. Now if we come in and select
all the different objects, you can see that we now have a uniform scale for
everything. So that was easy. Now, let's try this again. Let's tab back into edit
mode. Let's hit you. And smart UV project. And okay, here we go. Now we're getting
better proportion for our UV islands in relation
to the 3D object. But which thing is which? If I just select this face here, we can see that that's the
one we actually care about. So with this selected over here, I'll just hit the a key in the UV editor and let's
just pack islands. Now we're giving that one face as much of the 0 to
one space is we can. Now if we press
Control I over here in the 3D view and select
all these other things. We can hit the a key, G and move these out. Now if we hit the a
key for everything, we can take these now and
just begin scaling them down like this and kinda hide
them away right in here. Because no one will ever see the other faces
of this object. And we can just hide
them away there. We could keep them outside
the uv space as well, but I'm going to go ahead
and put them in here. Now one last thing, I do want to add a few
edges in here because sometimes adding a texture to a single face can
be problematic. So I'm going to
right-click and choose sub-divide and then
maybe give this to cuts. So we have a few edges on this. We also added them in here, but once again, that
doesn't matter. Alright, now we've got that, let's give it that material. In fact, you know what? Yeah, that material
isn't here anymore because I gave all
of the objects a new material and
it was sitting out there unassociated
with any object. It wasn't connected or
applied to any object. And therefore, when I close Blender and reopened
it, it went away. So any material
that isn't applied or isn't associated with an
object will just go away. It will just assume that
you never wanted it. So let's create a new material. We'll call this
UV test material. And over here, I will
press Shift a texture, image texture, and let's create a new UV
test pattern here. And I'll choose
UV grid and click Okay and connect it
with the base color. And now if we switched over to material preview, we
would see it there. Now if I wanted to keep this material even
though it isn't associated to any object and
make sure it sticks around. Even when I close Blender, I can come over here
and create a fake user. And really a fake user
is a fake object. A fake object that's
using that material. So you can just click here, create that fake user, and it'll stay in your
project even though it has no object that
it's associated with. Alright, what else should we do? Well, let's work on the
easy things first here. How about how about
the window seat here? Let's just work on that. Alright, let's press Shift
H and let the period key. Now for this, we probably don't
need the faces back here, I don't believe because no
one's ever going to see them. So let's just delete
and delete faces. And this one too, let's do that. Then we can just select
everything and hit you and smart UV project. And there we go. We've got a very small
island margin there. We could maybe take that
a little bit higher, 0.01 and spread it out
just a little bit more. That's probably good. Alright, let's go ahead
and go with that. I'll press Alt H to bring
everything else back. And then what else? What else do we think is easy? Well, maybe all
these pillars here. And actually now that
I think about it, I'm going to want just one
material on all of these. And if we recall, a UV map is really intricately
related to the material. We kind of split a UV map into by giving an
object to materials. If you recall that
we really need, if we're going to have objects, have the same material, they really all need to
be on the same UV map. So since they're on
the same UV map, maybe we should just make
them all one object as well. But if I recall, we have an array modifier
on a couple of these. Now, don't link. Let's come over here. Yes, we do. So we
really need to apply the array modifier before we
try and join these together. So let's come over
here and apply that. And let's apply this.
What about this? These are just independent. Okay, so now that
we've got those, now let's try and
join them together. Control J, there we go. That worked. Now if we hide everything
else with Shift H, Let's take a look. Well, we don't really need the
things in the back, do we? I mean, we don't need
these faces back here. It looks like
they've already been removed from these over here. We don't need these faces because no one's ever
going to see them. And do we even need the
tops and the bottoms? Well, probably not. Let's go ahead and
get rid of those. I'm going to go
through and select all of these and delete these. Alright, I've got all
of those selected. I'm gonna delete those. And then let's just
select everything. And let's press you
smart UV project. I've got 0.01 for
the eyelid margin. Let's click OK. And there we go. I think that'll work just fine. And now let's press Alt H.
And what else can we do here? Well, we can do a couple of
the walls. Let's do that. Let's begin with
this wall back here. Or actually let's
begin with this. Well, this one looks even
easier than that one. I'd like to begin with the
simple things first and kinda warm up before I deal with
the more difficult things, Let's press Shift H to
hide everything else. Let's tab into edit mode. And let's just hit the a
key you smart UV project. And let's see how
we're doing here now, I was going to say
we should select this face and make it as big as possible within
the 0 to one space. But it already is the
biggest possible. So I think we're good. We can just leave that as is. Alright, Let's tab back into
object mode and press Alt H. And let's take a look at
this wall here. Shift H. Let's zoom in. Let's
tap into edit mode. I'm just going to Alt. Click these edges
all the way around. Something like this. And down here too, they came around
the back like that, but that should be okay. Let's press U and
Mark seems there. And then let's just
see what we think. Let's hit a U and click unwrap. And so here is the
part that we want. If we hover over this and press the L key and then turn on seam, this is the part
that we want, right? That's the only part
that's gonna be seen. So let's just hit the a
key here and come up. Click on UV and pack Island. And if we wanted to turn it, we could, There we go. So then that means if
we select everything, we could just turn on UVs, select click here, and
just move this out. I don't even need
to really turn it, but I guess I will and
then I'll just scale it down and put it up here
and out of the way. Alright, there we've got
that one, Alt H now. And let's then go into
material preview. Let's add that UV test material to the things we've
already uv maps. So for this, let's go
ahead and type in UV. And what else did we do? We did this wall. So I'll shift click
the floor and press Control L and link material and that will add
that material to that wall. Let's do the same
thing over here. I'll select this
then Shift-click the floor control
L link material. And we go, oh, and we've done the
pillars to Haven't, we let select those, Shift-click the floor control
L and link materials. Alright, so that's what
we've done so far, I think in the next video, we will continue UV
mapping the room.
90. 090 UV Mapping the Fireplace new: Let's now work on
the fireplace here. I'll zoom in with the period key and let's
select all these parts. The pillars, the fireplace, the base, et cetera. And then I'll press Shift H. And here we go. I'll go back to Solid mode. And let's just begin with the mantle here I'll
tab into edit mode. And I think all we
really need to do is just add seems to the
corners here, like this. And then also we
should probably add seems to the very top. And I would think
the bottom as well. I'd like to isolate the
mantle a little further. And since we've
already used Alt H to hide everything
else except this, I'm just going to use the
division key on the numpad, which is kind of like a local mode for the
selected object. So I'll hit that division
key and there we go. Now it's just in local mode. You can see that here. So now if I tab into edit mode, I can see this a
little bit better. So I'll just select these now down here and add the seam here. And it looks like
we removed the back faces of this when
we were modeling it. So that's good.
Let's hit the a key, Let's hit you and unwrap. We could try conformal, see if that's a
little bit better. I think it is because now these
are more similar in size. So I think that's pretty good. I may want to turn
this one here, so it's in line with
the rest of these. I'll press R 90 and let's
just move that out. I can move that out
here like that. Now the wood grain
should be going in this direction for all
of the UV islands. Alright, Let's tab
back into object mode. Let's hit the division key
to come out of local mode. And let's try this
little piece right here, that fireplace trim there. I will press the division key and let's tab into edit mode. For this, we know what we could do to make
our lives a little easier. I can just select these four faces here and
then press U and Mark seen. And that will mark a siem all around this in
addition to back here. But it doesn't really
matter because there is no face back there. So let's hit the a key, you and unwrap. And there we go. That seems to be pretty good. However, I think these
little guys should probably turn because I'm going to want the wood grain
to go this way. However, it may be a moot
point because let's see, Let's hit the division key. Yeah, you can't see those
anyway, so that's fine. Alright. How about the fireplace?
Let's take a look at that. I'll hit the division key. It's tab into edit mode. And where should we
put our seams here? Well, I think I want
a seam along here. Let's do that. And maybe all
the way around like this. And down here, let's
mark seams here. Now, we don't really
care about all this, but I don t think I'll
delete it because it could help with
avoiding light leaks. Once we begin adding lights, I want to keep that
thickness there. But let's add, well, let's add edges along here, like this, or seems
I should say. And let's add a scene back here. I don't want this
edge to have a same. Let me de-select that. And there we go.
You and Mark seem. And then I think I may need to add seems along
here, right along here. But I think instead of
going through that, I'll just select these faces. And once again, I'm
fine with having an extra seam there
and that's no problem. I mean, we really only
need these three, but I went ahead and added
that to o and look at this. I should probably
add this as well. There we go. And let's get this face and mark
those seams. This one. Here we go. Alright, so if we hover over this
and press the L key, there is that now it's split because this
was mirrored over IC. If we want to split
that out now, we just hit you and
unwrap and there we go. Okay, so let's now come
in here and hover over these and press the L key
and then hit U and unwrap. Okay, how about this
here we can do that, unwrap that, then all this other stuff we don't really
care about, right? So let's just hover over
these and select those. I'll select these with the a key and the UV editor and then go up to UV pack islands. Or actually I should maybe
average island scale first. Yeah, there we go. And then pack island. There we go. And then maybe I'll turn
this one right here. Let's press R1 AT just to get it turned in
relation to the others. And then I'll press G
x and slide this over. These edges here seem to be a little bit off compared
to everything else. I mean, I could take
these and just hit G and move them over a bit and
move them down like this. Just to get that a
little bit straighter. And you can do that. You can just grab points and move them around until they
are the way you want them. And now in the press Control, I to select everything else. And then this right here, go to UV select, I'm going to scale it way
down and move it out. And then I'll hit
the a key over here. Then we can just take this
and plop it in there. Once again, we don't
really care about it. Alright, let's hit
the division key to bring the rest of
the fireplace back. We could begin adding the
UV material to these. I'll hit the Z key and
go-to material preview. And maybe this one we could add that UV test material to that. And this is, well, it's just searched for UV
Enter. And there we go. Now I'm seeing a little
bit of strangeness here, kind of stretching and it's probably not going to
matter since we're going to put a marble texture on
there. But you know what? I want to try one thing. I want to come in
here and I'm going to select just that piece again. And what I'm gonna do is go to an orthographic view and hit the one key to see where we are. Okay? Now I'm going to press
Control one to go to the back orthographic and now we're looking
at it directly on. I'm gonna UV map it by pressing U and coming down here
to project from view. If I do that, now look at it. It's been projected
perpendicular to the object here from
the orthographic view. So now lets do is just
hit the a key again. I'm going to take this
guy and move it out, grab all of these once more. Let's average island scale. Let's pack Islands. And I will turn on rotate and let's spin this
guy one more time. R18 0 g x, and I'll slide it
over. There we go. Then I'll bring this back in. So I just wanted to
clean that up by projecting this from
an orthographic view. That can be helpful with this
kind of thing sometimes. Alright, How about the base? Let's take a look at that. I'll press Shift H or
go back to Solid View. And for this, we really
don't need much more than just this face and this
face not doing well. Let's go ahead and
just select all hit you and smart UV project. And then let's select
this face and this face. Then grab all of these, go to UV and tack islands. Now if we come over to the
3D view and press Control, I, here's the rest of it. We'll just take these, shrink them way down. And let's see where
we want to put them. Well, we can just
put them right here. There we go. Alright,
so let's give that the UV material
material preview. There we go. Now let's hit the division key. And one last thing, Let's do these pillars here. Now, if I recall, yeah, this has a
mirror modifier on it. Let's just UV map one side and then apply a
mirror to it after that. So let's hit the X key here. Let's get the division key
to isolate this object. And now let's just
go through and add some edges right
along the corners here. Like this. You end mark seam. And then let's
split these out in a couple of different
places. Maybe. Maybe right here. And then maybe
let's do one here, u and mark seam. And maybe one here too. Let's do one right here. Mark seam, there we go. Now, that's our seams. We don't have
anything on the back. Oh, the top. Well, let's just add
seems around here. Let's just select that
face and mark those seams because we may
see something of that. The bottom though, we're never gonna see
anything on this. So let's just delete
that face there. That might make our
lives a little easier. Let's now hit you and unwrap. We can switch from
conformal to angle based. Yeah, that looks okay. Let's try that. And then let's try and get these oriented in a similar way. I'll press R 90 and let's press R1 80 and get these kind
of in the same line there. And it looks like these here
could also turn our 90. There we go. And you know, before
we pack these, before we pack them into
the 0 to one space, Let's mirror this first. Let's do that. Let's come up here and let's click
Add Modifier mirror. And then let's apply this, pull this down and click Apply. Then if we tab into edit mode, we see that all of these UV islands or one right
on top of the other, right? So now we can do is we can
just pack all of these. I'll hit the a key UV pack
islands and there we go. It looks like everything's
in the same alignment. I mean, these are upside down, but that doesn't really matter
in terms of wood grain. So I think that'll be good. Let's tab into object mode. Let's hit the division key. Let's go into material preview, and let's see if we can
add a material to this. There we go. Now we've got our
fireplace UV mapped. Let's bring everything else
back with Alt H. And alright, so in the next video, we'll continue with
the room here.
91. 091 UV Mapping the Walls new: Alright, What else
should we UV map here? Well, let's take a look
at this wall right here. I'll press Shift H. Let's switch over to solid and let's take
a look at this now. I think once again, we want to just isolate
this front part because it's really the
only thing we care about. So I'll grab the
edges on the top, around the sides and on
the bottom here too. Let's do that all the
way through here. And let's give this a seam. And then kind of feel
like I want to do these here and these here. Okay? In addition, we're
going to need to split out the window frames in here. So let's select
edges all the way around these windows like this. And let's give these seams
here and this one as well. Then we should go back and
do the same thing here. Let's give these seams all
the way around the windows. So we're breaking those inside, those interior
parts out on their own so we can lay those
down flat as well. Grab these. And then let's split out the window frames on the
edges here I'll just Alt, click and shift click
on the insides here, like this and this. So we've got these and
then these here as well. Okay, now we've got those. So what Let's do is let's
see how this works. I'll just hit the a key. Let's hit you and unwrap. So let's try conformal. That might be a
little bit better. This part right here, that's gonna be the
backside, isn't it? Let's hit G and
let's move that out. And then let's take all of
these and let's pack islands. And let's see in what way
are they oriented here? It looks like this, and this are these pieces here. Let me turn on UVC
just so we can see. I'll turn on base modes. So this and this, yeah, that's that area there. So it looks like this
is turned 90 degrees. We need to turn this. So I'll turn u v sync
off, hit the a key. And now let's grab
this right here. That, and we need to turn this. Let's press R9 0 and
turn it like that. Now to test it, we could change the
test texture on our UV material to that lines
image that we used before. Let's see if we, is it
in here or stripes, I should say right there
it is right there. Let's grab that. And then let's press Z
and material preview. Alright, that tells
us that all of those lines are going
in the right direction, but these are not, these are not okay. So this is good that
we did this, right? So these here, I think
these need to turn. Let's press are 90, Let's hit Enter and hit
G and move these up. So now those are better,
That's good, Right? Those are going in
the proper direction. Now, these over here, this and this, and this. So all of these I
think are problematic. They're going in the
wrong direction. So here they are, here. Let's select these are non-zero. Let's see how that looks. Yeah, I think that's
going in a better oh, I missed one right here. Let's grab this one. There it is. Our 90. Okay. And it looks like these
up here on the top and the bottom should also go
in a different direction, shouldn't they should
flow around the frame. So let's hit our 90
over here as well. Okay, Now I think that's better. Let's select everything. Let's select all of this here. And then let's pack
ions right here. Now I'm going to
turn rotate off. There we go. Let's see
how we're doing here. Yeah, it looks like now the window frames
are flowing around. That's good. And all of this area
is going up and down. And of course back here, we just don't care, Right? So, okay, that's good. Let's switch over to the UV test pattern just
to see how that looks. Yeah, I think that
looks pretty good. Let's bring everything
else back with Alt H. And then does that. That's all our walls
except for this one. This one's gonna
be a little more difficult because
of all the windows. Maybe let's go work on
this wall over here. And actually this wall is a
little bit different as well. So let's take a look at this. In fact, I think what I want to do for this is while we're here, I want to add just an
extrusion along here. Let me take a look at our reference images
here I'm going to create an image editor and I'm
going to click Image open. And let's go to our
reference images. And I want to look for that one image that had the
fireplace in it. Here it is. Let me press Control
and Spacebar. Right out here, right
outside the door. We've got a wall with kind of a woodwind
scouting here, I think. And then we've got wallpaper. So not only do I want
a UV map that wall, I want to add that
little extrusion for this wood part here. Alright, control spacebar. Let's take this,
let's press Shift H. Now. Where do we
want it in here? Actually, I probably need
the rest of the room just to tell me where that extrusion
is supposed to be. So let's I'm going to press Control R and
let's bring this down. And I'm looking at the reference image and looking at the rest
of the room here. And I'm thinking
maybe something about like this right about there. And then I'm going
to split this. I'm going to press Control
B and Bevel that like that. That's a little bit
bigger like that. Okay, Actually I think I want to take this edge and just hit G2 times and move it up and the Z-axis just a bit like that. Alright, now I want
to extrude this. I'm going to take
this, this, and this. Let's come back out here. Now is maybe the time where
I should isolate this. So I'll tap back into object
mode and press Shift. Okay, now I want
to extrude this. I'll press E y, and let's just pull this out to vary a little bit like that. And then I need to pull this
face out here like this. Alright, so that's gonna
be our little bit of wanes coating there
on that wall. Alright, now that
we've done that, we need to UV map it. So what I think I
want to do is take these faces here and these, and maybe I'll take these faces
on either side like this. And I'm going to add seems you
and Mark scene, and we go. So now we've got seams
all the way around except we don't have
them right here. Probably going to
need them right here. I'm going to press Alt and
click you and Mark scene. And back here as well. Okay, so now we've got seems
breaking all of that up. Let's then hit the a key, press U and unwrap. So I'm thinking that this is gonna be the backside, right? Because it's all kind of wonky. And this here, Let's
select just that area. And let's pack islands. Now. That's okay. And we do have an island
margin there, that's good. But the problem I'm seeing is things aren't
going the right way. Things aren't going the way that we'd want them to go
in terms of alignment. So let's take this face, this face, and this face. And it looks to me like
this one right here, just needs to turn to
go along like that. Now, I also want them to
be the proper direction or all the tops be on top and all the bottoms
be on the bottom. So let's just take these real quick and
let's turn them are 90. Now let's move this outside
of the 0 to one space. I'm just going to move
it over here into the work area and
hit the period key. And I'm going to
turn on UV select, and I'm just going to select
this edge right up here. And look at here. That's the one on top. That's good. What
about this edge? That's on top? What about this edge that's on top as well? So the way these are aligned is actually
good because all of the top edges are on the top
of the 3D object over here. Because if I put patterned wallpaper on this and one of them say is flipped, then on that area, the patterned wallpaper
will be upside down. So I just need to
make sure that all of these are in the
proper alignment. Okay? Now, let's go back and let's
select everything again. I'll turn off UVs. Select. Here we go. So now I think it's these that
I'm interested in, right? What are these? So let's hit the three key and let's take
a look at these. So all of these need to be
going in a better direction. Don't think. So. Let's take
this and let's turn it. And let's move it. So let's gonna be like, so this is the long
one here like that. And then this one is going to need to be more up and down. So let's press R9 0. And that's going to
be like that, right? So ultimately they
are in the 3D view. Kind of like that. Alright, Now what about these right here? Are these aligned properly? No, they are not. So let's do that. Let's press R9 0 energy. And this one too, we should turn that one. Okay, so we've got those. Now let's hit the a key and let's take a
look at all of this. What about, What's this here? Oh, these are the
edges, I would think. Well, let's see what these are. Let's go to UV select and
we'll drag select these. And what are these? Those
are those pieces there. And these pieces here. So it looks like these are fine. But these two should
turn as well like that. Alright, I'll turn
off UV select. Let's hit the a key again. And so now, what about these? What are these? Let's take a look. Oh, those are those, so we need to turn those. Okay. Good. Anything else? I
think everything else is in the proper alignment. So let's hit the a key. Turn off UV, select. Let's just select these
and let's pack islands. We go I think if we
come over here yep. Rotate as unselected,
that's good. So all of those should now be
in the proper orientation. In fact, let's add
that UV test material. Let's switch it to the stripes and let's see how
that how that looks. What do we think? It looks like everything is going in the proper direction back here. Once again, we don't care, but it looks like everything is going in the proper
direction here. Good. Alright. Go back
to our UV test pattern. We can press Alt H. So in the next video, we will continue with our UV mapping.
92. 092 Finishing the Room UV Maps new: Well, in the same
way that we combined all the pillars together
and then UV map them. I think we're probably
going to have to do that with these trellises. I know they're not a trellis, but it's the only thing
I can really think of, those little trellises that you put in a garden
with vines on it. That's the only thing I can
think to call these things. But let's see if we can get all these together
in one object. And then all in the same UV map. I'm going to take the walls here behind them and hide those. Let me grab this. Here we go. Let me hide these. Now these are easier
to select here. I'll just go through
and grab all of this. And these. Alright, and then I'll press Shift H to hide
everything else. Okay? So now let's take all of these and combine them into one
object with Control J. And then let's tab
into edit mode, select everything,
and let's press U. And smart UV project. You've got an island
margin of 0.01. We'll see how that goes. And we'll click
okay, and that's, that's not quite right. Okay, Let's try 0.001. That's a little bit better. Yeah, that's probably
a little bit better. I'm going to press
Control Spacebar and take a look at this. It's pretty dense. It's true, but I think
this might just work. I may use a fork, a resolution for this 4096, but I think that might
just work actually. Let me press Control
Spacebar again, and let's just add the
material, UV test material. Alright, yeah, I think that's probably all we need for those. Let's press Alt H. And now
let's head out the door. Let's take the door
and the door frame. Yeah, let's press
Shift H for that. Now, I haven't yet
created a door knob here. We will. It's just
gonna be one of those accessories
that we're going to add near the end, I think. But for this, Let's
tab into edit mode. And I think all we
need to do is just select this edge all the
way around and mark a seam. We maybe want to select this edge all the
way around on the back. I'll press Alt Z so I can
see that and grab that edge. And let's do this. And then I think
I'll just grab this. And this. And this. I'm just breaking these out. Alt Z. And there we go. Let's mark seams there
as well. Here we go. So now with those selected, let's press you unwrap. Let's try angle based. Now let's try conformal. Yeah, that's quite a bit better. I'm going to try a
margin of 0.01 for this. There we go. And yeah, I think that'll work just fine. Let's add that UV test
material to that. See how it looks. Yeah, now, these are going this way. I
think that'll be fine. We want the wood
grain to go up and down here, so that's okay. Then for the door frame, I'm going to hit the division
key again to isolate this. Let's take a look at this. Well, we don't need
faces down here. We know that because
these are never gonna be seen down here as well. Delete those. And then I think we can
just select this edge, this edge, this
edge, and this edge. And let's mark seams here. And then let's just get these corners up
in here like this. And like this, you
and Mark seem. And then if we select
everything, you and unwrap. So let's try angle based. Yeah, that's pretty good. Let's just take this and turn it and drop it right in here, just to make sure they're all going in the same direction. For the wood grain. I'll
hit the division key. Give this that UV material. And then let's press Alt H and see where
else we need to go. It looks like the last thing
we need to do is this wall. And I've put it off until the end because I had a feeling
it may be kind of a pain. So let's give it a try Shift
H I'll go back to solid. And this, if I recall, is also using a mirror modifier. And that's good because that
means we really only have to assign this seems to one side of this and the other
one will come along. It's got so much we
need to do here. That's a good thing to
have that mirror on. So I'm going to grab all of these edges all the way
around on the bottom. And the top. Grab
this edge, this edge. And then we're going to need
to go in and do the windows. So you mark cosine. And now the Windows very similar to the
way we did before. We're just going to need to grab these edges all the way around
for each of the windows. Kind of a pain. But if we tried to do this
with smart UV project, I don t think we'd
ever get it clean enough for it to look good. Let's get this one down here. And this one here. I think. Yeah. And then these are
automatically being applied on the other side because we have that
mirror modifier. This one. Okay, so we've got
all of that now. Let's swing around to the back and we gotta
get all of these too. This is not the most fun part of creating a scene like this, but it's gotta be
done by computers. Still can't really
do what we can do in terms of figuring
out where seems should go. It's getting close though. It's getting real close. Alright, we've got those now. We've got the outside or the front and the back
for each of the windows. Now we need to go through and do the edges or the corners, I should say, of each of
the windows like this. Alright, now that
we've got those seams, let's press a to select
everything you unwrap. And this thing here, that is the back
that can move out. And then we can take all
of this UV pack islands. And now let's add a
material type in UV. And I'll press Z and go
to material preview. But let's grab that one with
the stripes. Let's do that. See how that works now, I kinda want them all to
be going up and down. So let's hit our 90 and
turn the whole thing. Now let's take a look. Well, we've got up and
down here, That's good. We've got problems
in a few of these. So if we just come through
here and press the L key for the ones that
we think are going in the wrong direction. You can see those there. But we don't really
need to do that quite yet because
we should probably apply the mirror modifier before we go through the process
of packing islands. So let's tap back
into object mode. Go to our materials panel, and let's apply the
mirror. There we go. Now if we tap back
into edit mode, hit the a key. Let's press U and unwrap. Alright, so we know that these, we don't want these, right? We probably don't want
this area right in here. So that's that Let's
bring this out. Okay. We don't want that, we don't want that and we
don't want that. Alright, so those are outside the 0 to one space out here. That's good. So now if we select everything, grab all of this, this is what we want. Let's pack islands. Let's take a look
at the rotate here. That doesn't do us a
whole lot of good. So let's press are non-zero, turn it all like that. Now let's go through and figure out what
we want to do here. Got, once again, all of these which ones are going in the wrong direction
while these are now going into a pretty
good direction. It looks like all of them
are in the right direction. They're not going
forward and back. They're flowing around
the window frames. That's nice. Yeah, I think we've got
everything in place here. So we just need to get these back into the
0 to one space. Now we could hit G
and move them in, but let's try pack islands. Once again, Let's do that. Pack island and turn
off the rotate. And there we go. Yeah,
I think that did it. Alright, we'll switch back
to the UV test pattern. We'll press Alt H to
bring everything back. Here we go. We now have
the whole room UV mapped. So in the next video, we'll begin assigning materials and vertex colors where needed. Before we take it into
Substance Painter.
93. 093 Exporting and Baking the Room : Well, since we're gonna be
taking all of these objects in as one FBX into
Substance Painter, we're going to split them out or differentiate them by material. Now, there is one object. I think this wall is
probably going to need vertex cover because we've
got wood on the bottom here. And we're going to want
wallpaper on the top. So we're going to want
a vertex cover there. But for everything else, I think we just are going
to want to materials. So if I select the floor and come over here to
the materials panel, let's remove the
UV test material, create a new material and
we'll call this floor. How about this wall here? Let's remove that and call it what we want to have all the walls
together in the list. So let's call this
wall fireplace. And over here, we
can call this wall. Well, how about just wall? There really isn't
a feature that would differentiate it
from anything else. How about this here? This has the window seat here. So let's take this wall, remove that material
and we'll call this wall window seat. This wall over here, we'll call this windows. I mean, I know this
one has windows too, but we'll just call
this one Windows. We'll call it Wall
windows. Alright. How about the fireplace? Let's take a look at this. For the fireplace we
probably want well, I'll call this fireplace
mantle. Let's do that. And then here we can call this. How about fireplace trim? These we can remove the
UV test material and call this fireplace pillars. This is the actual fireplace. And this can be what
fireplace base. Let's do that. Alright. We can call this door over here. And each one of these is
going to be available to us as a texture set
in Substance Painter. I'll get rid of this and
call this door frame. Let's do the pillars here. Pillars. We go. Trellis. Let's do that. New material. Trellis. And oh, we've got the
window seat here. Call that window seat. And for this out
here we can call this wall hallway. There we go. Alright, so we've
got our materials on there now, as I said, this one though, we probably need vertex colors
for it as well. So let's go to solid view. I'll press Shift H. Let's zoom in with the
period key and then Let's come over here and
go to our vertex paint. We can tab into edit mode. And let's select this face, this face, and this face. And this will be our wallpaper. So let's tap back
into vertex paint, turn on our paint mask. And then over here
in our act of tools, we can choose the green
in our color palette, let's say, and press Shift K. There we go. And then
for everything else, Let's just press Control I. And we can just give
it the blue and we can press Shift K and that'll
just be the wood. So the wood will extend
on into the back as well. That really doesn't matter. So that's all we need for that. And then we press
Alt H and we go. Now, I'll go over to
the layout tab here. Now that we have everything
with a material on it, some vertex paint,
all UV mapped. I think we are ready
to export this out. I'm gonna go ahead and save
the scene and hit the a key. And then what Let's do is just
go to File and export FBX. Let's go into our
Textures folder. Let's create a new
folder in here, and let's call it room. And then in here we will
call this FBX room as well. Now let's just select the mesh selected objects because we've selected
everything here in the scene. Let's now come over
here and click Export. There it goes. Alright, let's
go to Substance Painter. Here in substance painter,
Let's go to File and New. I'll click Select. And let's go to our Textures folder into the
room and room FBX. We'll click Open and then, Okay, and here is our room. Alright, so now what
Let's do is let's go about baking our textures
for all our objects. I'm going to press Shift
and right-click and move the light around
just a bit like that. You can see all of our
texture sets here. And basically it's just all of the materials that
we've created. So let's now come over here
to the texture set settings. Go over to the mesh maps
and bake mesh maps. Now, if we go over here
to the selection tab, we can see all of
our texture sets. Now, I don't want all of
these to be exactly the same. The things like the door
and the door frame, the fireplace, et cetera. Those could all have a texture, say of 2048 and they'd be fine. But for something
like the floor, I think that needs to be
baked at a higher resolution. And also maybe the
trellis and the pillars. Since we have so much
on those uv maps, we probably need to bake those out at a higher
resolution as well. I think for the
trellis, the pillars, and the floor, I'm going to
want to bake those at 4096. In addition, that wall in the
hallway has vertex colors, but nothing else does. So that's gonna be a little
bit different as well. So we've got those
four texture sets that are gonna be a
little bit different. So for now what I'm going to
do is just turn these off the wall in the hallway,
trellis pillars floor. Right now. For everything else, we
don't need an ID that because all we have is just one color on
there, one material. We don't need to
deal with an ID map for any of those things. So for all of these, let's go back to the common tab. And here now let's change
this to 20484 anti-aliasing. We can probably just
put it at two-by-two. I think that'll be fine. Then for these 72 texture maps, we want to go ahead
and hit bake. All right, those are all done. Let's click OK. And you can see back
here it looks terrible, mainly because the uv maps are all wonky back
here and that's okay as long as they
look okay upfront. Now let's go back to the bake mesh maps window and let's take care
of these other ones. Let's go to this selection tab. And let's just deal
with the wall. I'm going to press Alt and click the wall hallway just
to select that one. And for this we need to turn
on the ID, click on it, and then go over to
the wall hallway. Over here. There it is. And switch to vertex color. So we've got the wall hallway, the ID map with
the vertex color. We can keep this at
2048 and two-by-two, I think that'll be fine. So now let's just click
big selected textures. There we go. So now it's
doing that wall back there. Alright, so that's done. Let's now go back to the
big mesh maps window. Let's come over
here to selection, and let's turn that off. And let's deal with the trellis, the pillars, and the floor. And for this, we don't
need an ID map at all. I'll turn that off. And as I mentioned, I want to increase the resolution
for each of these here. I'm going to bake these at 4096. So for these three
no ID map 4096. And you know what, I may
want to increase this to four-by-four just
because of the floor. We might be able to use
that for the floor. So now we can click
Bake selected textures. Alright, it looks like
they are all done. We come down here
and take a look. I can press shift
and right-click and move the light around here. There we go. So now we've got our mesh maps
baked for the whole room. In the next video, we'll begin adding our materials
to each of the objects.
94. 094 Texturing the Room: Alright, well where
should we begin? We can begin just about
anywhere we want. I guess, since we're facing
toward the fireplace, that's begin with that. So if we go back
to our Layers tab, currently we've got the
door texture set selected, so that's what we'll be applying materials to if we drag
them in currently. So let's switch over
to the wall fireplace. So we have that selected. Let's get rid of this. And I will just search for wood. And I've added a few
things here from the 3D assets website. We've still got our wood walnut. I think I'm gonna go
ahead and try that. Let's just see what
happens if we do that. Well, okay, it's not too bad. Let's turn it 90 degrees here. And I'll press Shift and right mouse button and
move the light around. And I think the grain
is a little too big. Let's take the tiling up to three and that
reduces the grain. They're just a bit, so I
think that's not too bad. Let's try that. We could do the same thing with just any of these
other pieces here. How about we could
do the pillars, Let's just drag that in and
we can get rid of this. Let's turn this Ninety
degrees. There we go. And also let's take the tiling down to
three as well on these. So you can see we're
just beginning to get the basic materials
for the room here. Now, if we wanted to, we could begin
adjusting one of these. Let's say we want the wall fireplace to have a
little bit more red in it. So if we scroll down here and we open up our color swatch, Let's say we want to maybe
move this toward the red, just a little bit like this. Alright, Let's say
we wanted that. So what we can do is just take this and right-click and copy. And then if we go back
to our pillars here, we can get rid of this and
right-click and paste. And now we have that
same material in here. So if we find a
setting that we like, we can then just copy and
paste for the others. So how about the trellis? We can then select this, get rid of that, and
right-click and paste. And you can do that. Then we can go through
and maybe just do these other walls as well. So this one, I kinda
got out of sync here. I'm going to hit the F key. There we go to frame
that up again. And for this wall, maybe this is just wall, right? I think that's
what we called it. I'll just paste that in and
then turn it 90 degrees. Oh, it looks like I just have
to type in 0 here to turn that one back around the wall, the window seat wall. Let's take a look
at that right here. Let's paste this. And what direction
is that going? That's going in the
wrong direction. So let's hit 0 and put
that there, right. What about this one over here? This is the wall windows. Let's just do that. Paste that in here, turn it 90 degrees
by typing in zeros. And then we go there. We've got the walls in the room. I'm just move the light
around a bit and there we go. Alright, so how about the door? Let's do the same
thing with the door. I'll scroll up. Let's try that. Same material. It's paste that. And we doing here.
Yeah, there we go. Now, if you wanted, you could take these panels here and turn them
into UV map and have, say, the horizontal panels going horizontally and vertical
panels going vertically. That's one thing
that you could do. Even these top pieces here, like this piece right here,
could go horizontally. So that's something
that can be done. Here's the door frame. Let's paste this. That looks pretty good. Alright, so we've got
those basic elements in, I guess we should take a look at the fireplace now
to let's do that. So if we take a look
the fireplace mantle, I'll go ahead and paste that in. That looks okay, but
I actually think the wood grain might be
better if we took it to two. Yeah, let's do that. And then the pillars,
Let's paste this. And maybe I'll take this
down to two as well. This fireplace trim.
Let's do that. Let's paste that in here. And I'll take that to two
as well. There we go. Alright, the fireplace. Let's take a look at this. I have downloaded
a marble material. Let's take a look at this. It's a little bit more yellow than the one in the
reference image here. Let me bring that
reference image over. You can see this is
a little bit wider. So I'd like to adjust
the color a bit. When we put this
on, Let's get rid of that layer and let's
take this and drag it over. So that's okay. I think let's try three. Yeah, I like that a
little bit better. And then as I said,
the color for me, I want it to be a
little bit wider, so I'm just going to drag this
into the white just a bit. I don't think it's bad to have a little bit of yellow in there, but that's a little
closer to what I want. And maybe let's take
the tiling up to five and now we begin to
see it repeating there. So I don't want that. I think three is probably good. Okay, and the base now, we should probably just
copy this switch to the base and then paste
that in there. There we go. Now this, we can see
the repeats here. So let's take this
one down to one. Let's do that. Yeah, that's that's pretty good. Alright. So we have our fireplace
and the walls. Is there anything else? Oh, this window seat here. Let's take a look at that. Let's just basically give
it the same wood materials. So let's say I'm grabbed
this wall windows here. Let's copy it. Go to the window seat and paste. And then let's zoom in and
see where we are with this. So it looks like yes. So for me I would have preferred
that the wood grain go this way on top and up and
down on the bottom part. So for me, I think I have
this UV map turned here. So that's something I
should keep in mind. There could be a bit of that. But it's really a
pretty easy fix because all we have to do is
go back to Blender, Select this one object, turn that UV island
and then bring just this one object back into Substance Painter and
add a material to it. So that's really a
pretty easy fix. Alright, How about the floor
that the F key it all up. And let's take a look
at the floor here. I have gone out and
downloaded a couple of wood materials here
that I thought might work. I think this one, even though it looks really
rough and aged here, might just work for this. So I'll just take this and
drag it over into the floor. Now, of course, we
have some work to do. Let's first of all turn it 90 degrees because I think I
want things to go this way. Second of all, it's
increased the tiling here, so I'll take that to five. Let's see about that. Maybe six or seven, Let's see. Let's let's go
with that for now. And then there's a lot of this stuff in here
that I don't want. So we could try turning
off the height. But when we do that,
we lose the planks, so that is needed. But if we come down into, say, the technical parameters here, this height range
in height position. Let's take the height
position down a bit, and then let's take the
height range down a bit. That begins to shrink the
edges between the planks. And as you can see,
if we go all the way to 0, they disappear. So if we just take
them to maybe 0.05, maybe let's try that. And for the range, Let's
just do the same thing with 0.05 to keep it at that amount. And then what Let's do is work
on some of the damage here so we could decrease the dirt decrease the
dirt scratched intensity. Let's reduce the
wood roughness here. So we get more of a shine. And we've still got these little bitty
pockmarks in there. That would be probably
the worm hole. Let's take these
down quite a bit. There we go. That helps. And then we can begin
adjusting our color. And I think I'd like
to take the value down here and in here as well. So it's a little bit darker. And maybe even move this into the red just a little
bit like that. Alright, that's
looking pretty good. It may be a little
bit too shiny. We can move that up like
that, but the F key. So yeah, I think
we're getting there. We can begin to see some
repeats here when we zoom out. But keep in mind, we're
going to have furniture and area rugs and all
kinds of things in here. So I'm not very concerned
about the repeats. The last thing we can do, I think for this, is to adjust the plank x
and the plank y. And if we take the x and
maybe take this down, that increases the
length of them, we go. But if we take the y down, that increases the
width or decrease it. So I'm going to take
the y up just a bit to make them a little bit
narrower. There we go. And maybe a little
bit more red in here. And for testing we
can always just export out one texture set, take it into Blender
and see how it looks. In the next video, we'll
work on this wall back here and doing any fixes that
we think need to be done.
95. 095 Applying Textures to the Room: To work on this back wall here, let's hide a few things first. Let's so this is
the wall hallway. So let's just hide everything here except this wall hallway. And let's select it here. Let's get rid of this layer. And let's create a new
group here, right? Because we're gonna be
using vertex colors. So for one of the groups, let's just call it wood. And for the other group, let's call it wallpaper. For the wallpaper, I'll
right-click, choose, Add Mask with color selection, pick color and we'll
choose that green. And then let's go
find that wallpaper. I, as I said, I downloaded some
materials here. This is the one I
like the pattern, but we're going to need
to change the color. I think. Let's take this and drag it into here
and drop it there. Now it's way too big. So let's go to our tiling. Let's type in five. How does that look? Not bad. Let's try a little bit smaller. I'll try seven. Let's do that. Alright, let's see what kinda
presets we have for this. If I scroll down here, we've got presets here. Blue, natural urban. How about natural flower
wallpaper? Let's try that. Oh, that's interesting. I think now that I have this, this is a little bit too small, so let's change this to five. Alright, okay. I like it. I don't like all the
shiny stuff. Let's see. We've got detailed metallic. Let's see what happens if
we take the I there we go. That's kinda what I wanted
to do is take that down just a little bit so it
isn't quite so shiny. I don't want it to attract that much attention out in
the out in the hallway there. We've got the height position, maybe I'll take that
height down so it isn't bulging out quite so much. Yeah, That makes it a
little bit flatter. That's nice. And
this right here, I think I'd make a
little bit more green. Let me take it up. Like this. Yeah. Least for me, I
kind of like that. Alright, so we'll call
that our wallpaper here. You can see, once again, if we zoom out, you
can see the repeat. But I don't think it's gonna be an issue in that hallway because we aren't going to see a whole
lot of it and maybe I'll put a picture on the
wall to break it up. So let's turn our
attention to the wood now. For the wood, I will once again Add Mask with color selection
and I'll pick color, I'll pick that blue. And let's take one of these walls and copy
and paste it into here. So maybe I'll just take
wall and right-click Copy. Go back to the wall hallway and then paste it into
this would group here. Paste. Alright,
let's take a look. Well, I think I need to turn it. Let's do that. One thing I see here and kind
of like on the window seat, I feel like the wood
grain should be going this way up and
down on the bottom, but it should be
going horizontally along this would railing. I think that would probably
be a better way to do it. Now, granted, it's gonna
be way out in the hallway. People probably aren't going
to really see it much, but I know it's there, so I think I'd like
to change that. As I mentioned with
the window seat isn't too much of a problem, but we need to prepare some things here
before we do that. The main thing is to prepare
our smart materials. So when we bring these
individual objects back in, we have those materials already pre-made that we can just
drag on them and go. So for this, we need to make a hallway would and
hallway wallpaper. Let's change the names here. So now we have
specific names that we can find in our smart materials. When we come back. Here are smart materials here. Let's take this group and
create a smart material. And there it is. Let's take this group and create a smart material
for this as well. Here we go. Now we also needed one for that
window seat, didn't we? Let's select that. I'll unhide it just so we
can see it here it is. And for this, remember, I want to turn that top
of the window seat. And we only have a layer here. We don't have a group,
so let's create a group. And let's call this window seat. And let's drag this in. Now we don't need
to create a mask for it because we don't have
any vertex colors on here. So with this now, I can take this group
and right-click and create a smart material.
And here it is. So we have our hallway materials and our window seat materials. So when we come back, we're gonna be
able to use those. Alright, so we can bring everything back if
we wanted to. Here. Here's a couple of things. Here. I'll hit the F key. So now let's go back to Blender and work on the window
seat in the hallway. Here in Blender, Let's go
to the UV Editing tab, and I will select
the window seat. I'll press Shift H, hit the period key to tab into edit mode,
select everything. And so it is this
part right here, this, and this that I
feel I need to turn. This was okay down here. So I will select
all of these here. Are 90. Enter. Now let's select
everything in the 3D view. It a over here. And let's pack islands. Uncheck, rotate. And there we go. So now they should be arranged
the way we need him. Alright, let's now go
over to the hallway. I'll press Alt H. And here is that
hallway Shift H period. For this, Let's tab
into edit mode. Hit the a key. So what do we wanna do? We want to turn
these here, right? This and this, and this. We want to turn these. So over here, these are
the ones we want are 90. Let's take them out
of the UV space here. And then with these terms,
I'll select everything. I'll hit the a key. I'll press Control
Spacebar so we can see it. And then let's just take these
and move them into here. Like this. Move this into here. We could also, if we
wanted to take this and shrink it down and get
it in here if we wanted. It's just kind of
hanging out there in no man's land where we
can put it right here. Once again, not
really necessary, but I kinda like to do it. Alright? Oh, do we
need these up here? We should probably get
these along here, right? And we should probably
turn these along here. I forgot about those. Let's do that. Let's take
all of these and turn knees. And let's get these back into
the 0 to one space as well. Let's take this
one or these two, I should say, Let's
move these down here. And let's take all of these
and just move them into here. And let's just get this guy
out of the way. There we go. Alright. Now I think we've turned all the UV islands that
needed to be turned. And in the next video, we'll take these two
objects back into Substance Painter and reapply
those smart materials.
96. 096 Exporting the Room Textures: Now we need to re-export the
objects that we've adjusted. However, I think there's one
more thing I want to do. Let me just zoom in to
this window seat here. And I don't think that
I turned this one here. I turned to this and this. But this one right here is still going this way and I
feel like that needs to be going along the same
path as these up here. So let me just before
we do anything, let me turn this with R9 0
and I'm just going to move it up just out of
the UV space here. Then select everything. And now I'm gonna grab
this and just move it back in, maybe right there. So now all of these, this, this, and this are all going to
be going horizontally here. I think that's more
the way I want it. Alright. So now that we have that, what Let's do is take
these and export them out again so we can take
them into Substance Painter. And I think I can take
them in at the same time, we can just select this one
and shift click this one. And then we can come up
here to File export FBX. And let's put this in
our Textures folder. And I will create a new folder. And we can just call
this window seat and hallway because
that's what it is. And then we can do
that same thing down here for the FBX file. And then we select mesh and selected objects
because those are the only two we want to take
in and we click Export. Now let's go over to
Substance Painter. Here in substance painter,
Let's go to File and New. And let's click select. And then we go into our Textures folder window
seat in hallway here it is. And click Open. And Okay, now we can just rebate these and drop our smart
materials on them. So first of all, let's say for the window seat, Let's go over here
to the texture set settings and to
the mesh maps tab. Big mesh maps. I'll do once again 2048. I do not need the ID map created for this because it's
just one material on there. Let's change the
anti-aliasing to two-by-two. And then let's click
big window seat here. And that'll bake that. So here are all of the
textures for the window seat. And then we can go
over to the hallway. We still need to bake these, so let's click here. We still got 2048,
we've got two-by-two, but this time we need
to turn ID on and switch it from material
color to vertex color. And then we can click on big
wall hallway right here. And then we go. So now what we can
do is go back to the Layers panel and we can remove this layer here
and in the window seat, I'll remove that one. Now let's come over to the
smart materials here and I'll type in window to search for
that window seat material. There it is. Let's click
and drag and drop. And there it is, there. Now, if we zoom in a bit, we should be able to see that that one little area that we turned here is now going horizontally and
that's what we wanted. Yeah, I think I like that
a little bit better. Okay, so now the wall over here, we need to drop our
smart material on this. If I take the wall hallway
here and let's come over to the smart materials
and search for hallway. I think that's what
I called it yet. And so here we have
the wallpaper. I'll just click and drag
and drop. And there it is. Here we have the wood, drag it over, drop it
in and there we go. And as we were hoping,
the extruded part, the railing type area here is going horizontally and
that's what we wanted. Alright, so now what we can do is begin exporting our textures. So I'll begin here in this file. Why not? We can
come over here to File and Export textures. We've got both the wall hallway and the window seat selected. Let's take it into
that Textures folder, window seat and hallway here. And then we'll
select that folder. We want our blender
export template here will export the size that we
get from the texture set. And we'll just click Export. All right, now
let's go ahead and save this and I'll put it in that window seat
and hallway folder. And I'll go ahead and call that window seat
in a hallway here. I'll just select
the FBX and then take FBX off at the end. There we go. Alright, so let's open
up that other file. I'll go to the recent and
select the room. Here we go. So now we need to export
everything out of here, but we don't need to do the
wall or the window seat. So let's come up here to File and Export
textures and we can take away the wall hallway and the window seat so we
don't need to do those. We can find a folder
to put them in. I'll put them in the
textures folder. And under room we can
just put them all here. Select Folder, blender, export. And now for the size here, Let's take a look at each
of the texture set size. Let me cancel this for just a minute and
let's go back and take a look at what did we use
large resolutions for? I think the floor, the trellis, and maybe the
pillars, I think, right. Let's take a look at the texture set settings for each of these. Let's come back over here to
the general properties tab. And here we've got the size. If we change this to 4096. Now let's take a look at the fireplace trim
that's still at 2048. So each of these we can come
through and choose 4096, whereas these others
will stay at 2048. Now we can just use the texture set settings
for each of these. In other words, if we go back
to export textures here, we can use this based on
each texture set size. Now let's de-select window, seat and hallway again. And now we should be able to export these out
and they will be at the proper resolutions for
each of the texture sets. So let's click Export. Here we go. So if we scroll
down to the floor, you can see it's at 4096, so are the pillars and the trellis and everything
else is at 2048. So we just have to ensure in the texture set settings what
the output is going to be. And then it will pick that up
here in the Export window. Alright, in the next video, we will go back into Blender
and use the Node Wrangler to quickly add all of these textures to the
objects in the room.
97. 097 Applying the Room Textures in Blender: Back here in Blender,
Let's begin assigning those textures to
the various objects. So I'm here in material preview. Let's just select, Well, I've got the floor selected. Let's select the principle be
SDF of that floor material. Press Control Shift T
and N are textures. And in our room folder, let's see if we can find
the floor here it is for base color and metallic,
normal and roughness. And we click principled
set up, and there we go. There's our floor. Let's do that hallway.
Let's try that. I'll select the material here, that principled BSD F Control
Shift T. And in here we need to go back up to that
window seat in hallway, right? And here's that wall hallway. These four are what we need. The color metallic,
normal and roughness. Click here. There's that. Let's do. While we're there, Let's do the window seat. Let's select that
control shift T, select the window seat, textures and click principled
setup. And there we go. Now we can just go
through the room and begin setting each
one of these up. So maybe let's choose
the fireplace here. Select that control shift
T. Let's go back to that room folder and we can find the fireplace
textures right down here. Let's see. Here they are
right here, fireplace. These four. There it is. How about the base? We can do that control shift T, fireplace base right here. And we can begin doing the fireplace mantle,
the pillars, trim. And this is also why you want to be sure and
give everything a good name so you know
what it is pretty quickly. Let's do the pillars. Control shift T
here, the pillars. And we can do the trellis. Let's do that. Select
the principled scroll down here, here it is. These four right here. We can do the wall
of the fireplace. Let's do that control shift T, go down to the walls and
choose fireplace here. These four. While we're here, let's get the door
frame. That's here. And of course the door. We want to get that
color metallic, normal and roughness for that. This wall over here is just
plain wall, I think, right? That's all we named it. Let's Control Shift T and
scroll down to the walls. That's gonna be down
here on the bottom. We go. This is the window seat wall. So let's scroll down and find that window seat
wall, window seat here. We come over here, this wall, this is the Windows,
right wall Windows, Control Shift T wall
windows here. There we go. And what else do we need? Well, I think that's about it. Let's bring our furniture back into the scene
and see what we think. And click here, bring those
back and let's go out to the Layout tab z
and material preview. And here we go. Let's
press Shift till D, move the mouse and dropped down. And let's move around here
and see what we think. Now one thing I'm seeing is some issues on the pillars here. So this pillar looks fairly good until we get
down to the bottom here. This one does not
look good at all. So we've got some problems here. We need to figure that out
with the pillars selected. I'm gonna come back over
to the shading tab. And if I scroll in
here and look at this, I've chosen the
wrong textures here. I've chosen the pillars
for the fireplace, Not the pillars for the wall. So let's redo that. Let's come back here. And what I'll do is just drag select all of
this and hit Delete. Then let's re-select
that principle, the SDF and press Control
Shift T again and this time, instead of fireplace,
let's come down here to room pillars right here. That might help a little bit. Let's click principled
set up. There we go. Okay, now let's go back
to the layout tab. Let's come in here,
press Shift tilde D, and let's walk over to these pillars again
and take a look. Yeah, sure enough. The problem was I just
chose the pillars for the fireplace instead of
the pillars for the wall. That's easy to do. Once again, it
probably would've been better had I given it a more specific name rather than two different things
using the word pillars. So keep that in mind
and always try and give each thing its
own very unique name. Alright, well, we've got our textures into
most of the room. We've got the room layout
the way we want it. I've got the furniture placed. I think now it's all
about adding the details, adding accessories and
things on the wall, and vases, and knick-knacks
and things like that. Now, I don't think
I'm going to have each and every one of
those things be on camera. I'll select things
that I think might introduce new topics are tools, but I think I'd like to go ahead and fill in the room so we can get to adding our lighting
and doing our rendering. So in the next section, I'll pick out a couple
of details with the accessories that I think might add some good information. But then after that section, we'll move into the
lighting and the rendering.
98. 098 Creating the Rugs: Well, as I mentioned
throughout this section, I'll be adding a few
more pieces as we go off camera and then coming back and going over any new topics or techniques that I
happened to come across. And you can see over
here I've created a scene collection
called accessories. And we've got candle
holders and we've got floor lamp and got
a little lockbox here. Let me hit the period
key and zoom into that. So I created this little kind of a decorative box or
something like that. I've also created a
Victrola turntable with a record on it. And all this is pretty low poly. I'm keeping it fairly low poly. I've also created just the
logs of the fireplace. And all of this is just
using the same tools and techniques that we've
done with everything else. I've just done the 3D modeling and UV mapping here in Blender, added vertex colors
when necessary, and then taking them into Substance Painter
to do the texturing. That is it. But one thing I did want
to go over are the rugs and I'd like to
put area rugs kind of maybe here where this collection of furniture is and maybe over
here for the desk is. So that involves just a
slightly different process. So let's just go over
that real quick. I'm going to press Shift a
and bring in a polygon plane, and I'll bring it up just a
smidge until we can see it. Pit the seven key. And I just want to
place this right around or under this
collection of furniture here, maybe something like that. Maybe SY and make it a little
bit longer than it is wide. Maybe something like this. Okay, so I just want a
basic shape for that rug. And then what I want
to do is first of all, tab into edit mode. And I'll select this edge
all the way around here. With all of these
edges selected, I'm going to extrude
straight down. So I'll press E and Z and
pull down just a bit. Oh, it didn't lock
to the z-axis, so I'll hit Z again. Here we go. Now it's only going
along the z-axis here, so I'll pull it down until it
comes into the floor there. And then I want to take all of these edges all the
way around here. So I'll just go round
and select these. And I'm going to add
a bevel to these, so just these here. Oh, and you know
what we should do? We should tap into
object mode and press Control a and apply the scale. That'll help with
the bevel of course. And then let's press Control B and pull this out
just a bit like this. And then let's add
a few segments to give it more of a
rounded edge there. And then we could tap into object mode and smooth it there. Alright, so now we've got
the basic shape of the rug. Let's go ahead and
press Control a and apply the scale
one more time. And then I'm going to, from the top view
here, UV map it. So let's come over
here to UV editing. I'll hit the seven key, and I think I should
probably add a subdivision. I'll just subdivide
it once there. Then from here,
let's just hit a u. And let's project
from view here. Now we'll do is add a
material and then go find a texture that we can
put on this to make it look like an old
antique area rug. So let's come over here, add a new material on call this rug main because I think I do want another one
over here under the desk. And then let's come over here. And let's add a
new texture here. And the shader editor, I'll
press Shift a texture, image, texture, and we
can hook it up here. And once we do that, we can come up here
and go to Open. And in the textures folder, I've gone ahead and added
a folder called rugs. And these are just a
couple of rugs that actually I found
quite some time ago. You are welcome to use
whichever ones you want. But I'll choose this one
here. I'll click Open. And now we can see it here in the 3D view with
material preview on. Let's come over to this
view and pull this menu down and choose this so we can see it here
in the UV editor. Then what we need
to do is adjust the UV map so it fits the image. So I'll press a to select everything and then
I'm just going to hit the S key and scale up a bit like this and you can see it
change here in the 3D view. I'll press G and Y in the UV editor and kinda
move this up a bit. Then let's scale out in
the x-axis like this. And then maybe move it
in the x-axis, g and x. So you can see I'm just
trying to get the UV map generally in the same
shape as the rug here. Now, you may need to drag, select a couple of
edges here like this. Keep in mind, we've
got several edges here because we beveled
all the way around. So you wanna be sure
and get all of those. So I'm going to drag
select all of that. And then you can just grab this and move it in
and out until you can find a place that
looks pretty good there, something like that,
maybe, maybe right there. And you may need to add some
edges to pull in or out. So if I press Control
R and added one here, and Control R and say
added an edge right here. Then I would have these points
here to move in and out. So if we hit the a key, now I can take, say, this point right here. Are these several points because remember there are a few
edges there and I can begin kinda pulling this
out just a bit to kind of adjust that border there. And same thing over here. I can grab these and
move these in and out. They can kind of adjust
that as you need it. And I realize, I think
I've turned this, so if I hit the a
key and press 90, I may want to start
going back like this. So it's yeah, So
it's more like this. So I have it in the
right orientation for the rug in the 3D view here. Yeah, So maybe I shouldn't
be doing that way. Let's do that. I think that's going to come
out a little bit better now. Yeah, that looks
quite a bit better. And then over the edges here, you can see it isn't
quite in the right place. So if my select
this and let's see if it's this side, this side. So if I hold the Shift key
down and move it a bit, I can kind of get it
in place like that. Yeah, that looks
pretty good there. What about over here?
That's not bad. Here we go. Let's do this side. Let's grab these. And you can see there's
some white here. So I just grab this, hold the Shift key down
and move it in and out. Kind of like that. Let's try that. What about over here, anything
over here, any problems? It looks like I could
add an edge here and I'll go ahead and add one
on the other side as well. And then we can
maybe come in here. And maybe right in here, we could pull in or out. You can see that there. There we go. So once again, you can
just go through began kinda pulling these in or out to get it the way
you want it to look. Alright, now if you want
to adjust the color a bit, you can come in here to the
shader editor and you can add an RGB curves node and play with the contrast
or the brightness. So you can press Shift
a and search for RGB and bring in an RGB
curve and dropped out here. And then what you
can do with just add a node here and add a node here and then begin pulling
them into an S curve. And you can see, as
you move these around, you can make it a
little bit darker, a little bit lighter. You can add a bit of, a bit of contrast to it here by just giving it a little
bit of an S curve like that. And you're not going to really be able to see how it's going to look until we get the
final lighting in. But I just wanted to go over how it's going to
be making the rugs. And I will do this
exact same process over here with that
other texture. So feel free to add your own rugs of
whatever type you like.
99. 099 Modeling the Crown Molding: Now something I'd like
to add to the room itself is a crown molding along the top of the walls that then connects
with the ceiling. And I'd like it to look
kind of like this. Now, I want it to be wood in the same way
that the walls are. But for the general design, I think I want to kind
of like this kind of sharp edges on top and then a more rounded
part in the bottom. So let's see what we
can do to create that. First of all, let me
hide the accessories and I'll hide the furniture
in the fireplace. Um, I'll also hide the floor. I'll just select it
and hit H, this wall. We should hit H here and then the door and
the door frame. I think that's just about everything we need
to hide for this. And then I'm just going
to take everything here and move it out into
the scene collection. So I'll press M and move
this out to here so I can hide and enable
this as I need to. I'll hide that and there we go. So now we need to first just create the design
of the crown molding. So to do that, I'll hide all this. And then let's begin with
just a polygon plane, shift day mesh plane. And I will maybe turn this, let me see which
way we're facing. So let me turn it in the y-axis RY and I'll
hold the control key down. And you can see up in the
upper left-hand corner that the rotation is now being snapped in five
degree increments. And I'll just bring this back
to 90 degrees. There we go. Now, I'll tab into
edit mode and press Control R and add an
edge right there. And then I'll take that
edge and just pull it out. I can also switch back
to Solid mode as well. Alright, so now that
we've got this edge, what I'm gonna do
is bevel this edge. But then there's
a custom part of the Bevel settings
screen that we can use to create
this crown molding. But before we do that,
let me just tab into edit mode and press Control
a and apply the scale. It should be pretty good, but I just wanted to
do that just in case. So now I'll press Control
B and pull this out. And I think I'm going to
pull it out until there. It's almost to the top and
the bottom here like that. Alright, Now, if
we come down here to profile type
and choose Custom, we can begin to draw out
the shape that we want, but we need to add a
few segments here. So I'm going to add, let's just begin with ten here and
see how that works. And then as I click
here and drag this out and see it changes
the shape of our bevel. So we can use this to get that kind of shape that
we've been wanting here. So maybe something like this. So it looks like now that the curved part
here is on the top. So I'm going to have to
work upside down here. Alright, I can do that. Then what I'll do
is begin up here. Kind of take these moving
in and out like this. And I made need more edges here. So I will come up to the segments and add
a few more here. And then maybe I'll take
this and bring it down. And then maybe bring this
out a bit like this. Let's see how that works. Something like that. Well,
that's not too bad actually. That if I tab into object mode, I can maybe go to
the front view here. I'll hit Z and go to
wireframe so I can see it. And then I can just hit the
R key and kinda turn it like this until it's about
where I want it to be, something. Maybe like that. Let's try that. So now if I tab into edit mode, and I could take this
bottom edge here and hit G and just move this down so it goes
straight down like that. And then maybe this one up here, I can hit G and move this
so it goes straight up. And then we take these two, and let's just hit E and pull
them back in the x-axis. I'll hit X. There we go. There we have the outline
of our crown molding. Now we could take it and
right-click Shade Smooth. We can come over here to the object data properties
and turn on auto smooth. And there we go. We've got
a fairly nice curve there. Alright, so let's bring
back our room here, everything that's outside
of these other collections. Let's take this and put it somewhere and begin
extruding it out. So how about we begin?
Let's begin over here. Let's begin over here. I will press R z 180
to spin it around. And let's move this over, bring it up, scale
it down quite a bit, and let's get it in place. So I'm thinking that
it's going to sit right about let me
see. Move it over. I think it's going to sit
right about up here like this. Maybe a little bit higher,
something like that. Let me see. Is that too big? I feel like that's
a little too big. Then we scale it down a bit
and then bring it down. And let's get it in place. Alright, How about that? Let's take a look. Let's kind of look at
it from down here. Yeah, I think that
would probably work. I think that's a pretty
good scale there. Alright, so now how do we
get it all the way around? Well, it's going to
take a little work, especially because we
have these pillars and this window area
and everything. So we're going to have to make a few turns as we
extrude it out. So what I'll do here
is first of all, go to wireframe and
select these points. And then I'm gonna
go to the top view. And I will take this and
take them all the way down to where we have a pillar. You can see that pillar here. By tumble around. You can see that pillar here. Alright, so I just want to go around the pillar,
but to do that, I'm going to have to
turn this edge right here while maintaining the
width of the crown molding. So if I hit the R key, you can see it kind of
collapses like that. So just your standard
rotation isn't gonna do it. Well we can use is
this shear tool. And if we click that
with this edge selected, we can click and drag on, say, this manipulator right here
and drag and you can see how it turns it
while maintaining the width of the crown molding. And if you look up in the
upper left-hand corner again, you can see the units as we move the shear tool
here and what we want, if I press the Control key, it will snap to tenths
for its increment and we want to bring it
out to shear negative 1. And there we go. Now we can take this and move it to just this
corner right here, so it's overlapping
the pillar here. Now we can extrude this. We can get e x and
pull it out to just that corner there, right there. Then we can hit E y and pull
it down to this corner. But we're going to have
to spend it again. So let's go to the
shear tool, grab this, drag it the Control key, and this time we'll take
it to 2, right there. Alright, now let's drag it down. So it's right in
the corner there. And now we can hit
E x. There it is. Then we can bring it and hit E y again to bring it to
this other pillar here, E y, bring it down like that. Now we use the shear
tool again right here. And I'll drag it this way, hold the Control key, and we go to negative two and bring it right
here to this corner, EX, like this, y, like this. And let's do that again. Let's take the shear, drag it, hold the control key
down to 0 right there. Bring it over here,
put it in that corner. Ex. Here. We go, EY here. So let's just take a look and
see what we're doing here. Well, tab back into object mode. So you can see that's
what we're doing. That's how we're getting
that crown molding to go around each of those pillars. And we'll also do this to
go around the corners, all the way around to
this area over here. Now, we're gonna go
on each side of this, and then we'll bridge the two on either side of
the windows here. Alright, so let's
continue on over here. I'll hit the Z key. Go to wireframe, select
these seven key. Let's go to the shear tool. Now let's drag this, hold the control key down, take it to negative 2, and let's bring it into the
corner now, right here. Then we can extrude in
the x axis to here. We can take our shear and this time using this gizmo here we can click and drag and take
this to negative 2 there. Get it in this corner. You why? X, shear tool, etc. So this is how we're going to do the crown molding
all the way around. Now that we're back to the
other side of the wall, we're going to use
this gizmo again. Click and drag hold the control, go to negative 2 and put
this one in place like that. And then EX, Yeah, I think I want to bring this back just a little
bit more like this. Yeah, here we go. Ex EY. There we go. Now, I'm gonna go ahead and finish this up all
the way around. And in the next
video we will UV map it and take it in to
Substance Painter.
100. 100 UV Mapping the Crown Molding: Well, I've continued to
use the extrude and shear tools to get the crown
molding to this point. And we could, if we really
wanted to come up here to the top view and use the Rotate tool to
turn this a bit. The shear tool isn't really is useful once you get off axis, once you get off of
the global axis, yes, you can use this and
it can sometimes work, but for this
particular instance, the shear tool kind
of breaks down once you get it off the global axis. But what we can
do is we can just take this edge here
and this edge here. And we can bridge them together. We can just press Control
E and bridge edge loops. And there we go. Alright, so now that we've got the crown molding all
the way around the room. Let's take a look and see if it's pointing the
right direction. Let's come up here
to the viewport, overlays and turn on
face orientation. And the red is on the back, the blue is on the
frontier. That's good. So we now know that it's at least oriented in
the correct direction, and we don't have to flip
normals, That's good. So now I think I will take this, let's call it crown
molding here. And I'll take all of
these other things, the rest of the
room and drag them back into the room collections. So we just have the
crown molding here. And let's go to
the UV Editing tab and we can get rid of
this image here now, we don't need that there. And here is the UVs currently
of our crown molding. And you can see that it's
really not even close. So let's go ahead and create
a new material for this. I'll click New and the
materials panel and let's call this
also crown molding. Now for UV mapping, we could try and just use our smart UV project
and see what happens. Let's give it a shot. I will first of all press Control a and apply the
scale here in object mode. And then let's tab
into edit mode. Hit the a key, you and smart UV project. And then Okay. And yeah, that's not really what
we're looking for, is it? That's not going to
give us a good flow for the wood grain along
that crown moldings. So I don't think
that's going to work. Alright, well let's
try something else. Let's actually see what it takes to mark seams for this so we
can use our unwrapped tool. So if we go to Edge
mode with two key, I can click and drag this and it will select an edge
which is pretty handy. Blender didn't use to do this. When you try to select an
edge and edge mode like this, it used to select all of
these and all of these. So this is pretty good. If we can just go through
and go like this, four edges and mark seams, That would be great. And we can go ahead
and get these. You and Mark seem we might have a little trouble in
here, but we can try. I'm going to press U
and mark seam here. In here. We're going to have some
trouble selecting these. It's going to want to
select those in-between. So I think we will have to
use our alt click and all Shift-click for these
turns around the pillars, but that shouldn't be
too much of a problem. We can Alt click, Alt Shift click here because
you and Mark seem there. And then we'll
continue on down here. And on around. This one on the corner, we can probably just drag select that. That works out pretty well. But these, once again, they're a little bit too close
to each other to do that. So we'll just use
our alt click here, here, and on through
these as well. Then we can go ahead and maybe grab these two while we're here. You mark scheme. Yeah, that worked
out pretty well. And here we can drag, select this one. And here we go. We've got them all
marked with seems there. I think that's pretty good. Let's hit the a key. Press U, and we'll
choose unwrap. See how it goes. Alright,
let's take a look at this. I'm going to press
Control and Spacebar. And this actually
looks pretty good. It looks like I missed
some edges here. And also we need to add
an island margin to this. So let's go back and
see what I missed here. To figure that out,
I'm gonna have to select everything and then come over here and
turn on UV sink. And then in here I will
select this and this, and let's see where this is. I'll hit the period key. So for some reason
these edges aren't accepting the seams
and there can be a couple of reasons for that. One could be that I accidentally have an
extra extrusion in here. Let's take these points and
let's combine them together. We can come up here to mesh, cleanup and merged by distance. So if we do that, we can see here we've
removed 88 vertices, which tells me I had some
extra extrusions in there. So let's try this again. In fact, what I'll do is hit the a key and let's do
this for the whole thing. Clean up, Merge by distance. Now I've got 0, okay, So that I think may help here. Let's try it again. I'll hit the a key
you and unwrap. That helped split that up. So what happened,
I think is that I had some extra extrusions. And so when I was
selecting these seams, I wasn't selecting the
hidden extrusion in there. Alright, let's press
Control and Spacebar. And I'll turn off UV
sink for a moment. And we still need to
add an island margin. But we'll do that when we pack islands because I think
we're going to need to select all of these and turn these so they're in line
with everything else. So I'll press are non-zero
and turn them like that. We can select these here
and just get these turned. So they're going more in line with the rest
of the pieces. Our 90. I'll grab these here
and turn these as well. There we go. So now we should be
able to hit the a key, come up here to UV
and pack islands. And then we can add
an island margin. Let's try 0.001. Okay? And then let's also turn off the rotate tool and that
gets them all in alignment, alright, control and Spacebar. And I think that's pretty good. I think that's really about
all we want out of that. Alright, so in the next video, let's take this into Substance Painter and see if we can add our wood textures to it.
101. 101 Texturing the Crown Molding: Now that we've UV mapped
our crown molding, let's go ahead and
export it out. Let's go to File export FBX. We will browse to our Textures folder and let's create a new
folder in here. We'll call it crown molding. And I'll go ahead and select
it and press Control C, so that we can then paste that same thing to
the name of the FBX. Let's choose the
mesh object type, selected objects,
and export FBX. Alright, let's go over
to Substance Painter. Here in Substance Painter,
we'll go to File and New. And I think I'm going to choose 4096 for this because there's so many pieces and it's such
a big piece in the scene. I think I'm going to use a
larger texture for this. And I'll click Select. Let's then go into our textures. Here's the crown molding. Let's open that and click. Okay. Alright, now if
we tumble around, we can see through
the back of it. And that's okay. That just means that's the back
of the polygons, which is what we want. But here is our front. I'll move the light a little
bit here so we can see it. Then let's go ahead
and bake our textures. Let's come over here
to the texture set settings and the mesh maps tab. I'll click Bake mesh maps
and let's go with 4096. I'll do two-by-two. We don't need an ID map. And let's just click Bake. Alright, let's click Okay, and our maps look
pretty good here. Let's go back to the Layers panel and we'll
get rid of that layer. And then, you know
what let's do? Let's go over to the
smart materials here. And there was a wood
material in that hallway. Let me search for hallway. And we've got hallway
would right here. So if I click and drag and
drop that right in there, we don't see anything
because it was assigned to a
particular color mask. But if we just take this
material and pull it out of that group that
we assign that mask to. There we go. Now
we can just take this group and delete it. And there it goes. Now, how is the size of
the wood grain there? I feel like it maybe needs
to be a little bit smaller. I'm going to take it up
to four. Let's try that. Maybe five. Let's try that. Yeah, I think that may be, although we can kind of see
a repeat here in the center. But that's really not too bad. Let me click and drag in here and just see if I can
move things around a bit. Yeah, something like that
is pretty good. Alright. So I think that'll be just fine. Once again, it's going to be way up near the ceiling here, so I don't think it'll
be real prominent. But with that,
then I think we're ready to just export this out. Before I do, I'm going
to go ahead and press Control S and save this. And let's put it in our
Textures folder, crown molding. And I'll just put
crown molding here, take away the FBX,
and hit Enter there. So now we've got this
saved his crown molding. Alright, now we can go
to File Export textures. We're going to want to put it in that crown molding folder. So let's go into our
textures crown molding. Select that folder. We want our blender export
and everything else. I think it'll be fine. So let's just click
export, and there it goes. Now we can go back to Blender. Here in Blender under
our shading tab, I will select the principle
be SDF for the material. And let's press Control Shift T. And let's go to our
Textures folder. And here are our texture maps. So let's just select each of these click Setup.
And there we go. Alright, let's go over
to the layout tab and we can now go to
material preview. And let's bring everything else back and see what we think. For the wall back
here and the floor, I think I need to press Alt H because I press H to hide them. So there we go. Alright, so now let's drop
down here with shift tilde D. And I'll move the mouse
and dropped down. And then let's walk around
and see what we think. So look up here
from this position. It looks pretty good. I think this is this is the kind of thing
I was hoping for. Just a nice finish to that
top area by the ceiling. I think that'll be nice. And I think I would also
like to make a ceiling with those kind of
antique ceiling tiles. So we'll have to work
on that as well. Well, alright, I think
we're coming along. We will continue adding our accessories and
trim to the scene. In the next few videos.
102. 102 Using Krita to Texture the Paintings: Well, as you can see, I've
been working on some of the paintings in the
room here and I thought I'd just go over how I'm doing
this because I'm actually using a program that we haven't
used yet in this course. And that's Krita.
It's a paint program like Adobe Photoshop, but it's open-source and free to use very much like Blender. So what Let's do is let's come over here and work on this one. Right here, this painting. And I'll go over how I'm
using created to do this. So first of all, let's come
over to the UV Editing tab. And here is the UV
map of the painting. I've already applied some
seams and UV mapped it. It's got two parts. It's got this part here, which is just a polygon plane. You can see that here. And then it's got this part, which is the frame, right? So it's got two parts
combined into one object. So if we hit the a key
and select everything and come over here and hit the a key and select everything as well. We can now export this UV
map out as say, a PNG file. And then we can take
the image file of the UV map and open it
up in Krita and place our image textures over the UVs so we know they're going to fit and be
in the right place. So to export the UV map out, Let's come up here to UV
and go to export UV layout. And here let's go into
our Textures folder. I've created a folder
called paintings, and here is painting 09. That's the name of the
object and the material. This is the image we're going
to put onto the painting. But let's call this painting 09. And I'm going to
add underscore UVs. So we know what that is. And we should do is
change the size. I think for this, I've been using 2048
for each of these. So let's do that. And this fill opacity, I'm going to keep
at 0.25 and I'll show you what I mean when
we opened it up in Krita. It's a pretty good opacity that you can tell
where the UVs are, but still be able to
see through them. So I'll go ahead and
click export UV. Alright, now let's
go over to Krita. Here in Krita, I'll
go to File and Open. And in our Textures folder, I'll go into paintings, painting 09, and
here are our UVs, so I'll click Open. There they are. Now you can
see what I mean by that. Fill opacity just gives us
a nice kind of shading. We're still able
to see through it, but we can tell
where the UVs are. So instead of this layer
being called background, Let's change this to UVs. And we go, and I'm also going to lock the layer so I don't
accidentally change it because we want these to be exactly where we created
them in Blender. Now, let's open up the other things we're going
to use for this texture map. Let's go to File and Open, and let's open up this
painting image here. Let's do that. And let's also go to File Open. And if we go back
into the paintings, we've got this folder
called frames. And I'll open this up. And I think I want to use
this gilded frames 01, I think I'm going to
turn it 90 degrees, but I think this is the
one I'm going to use. So I'm going to click Open here. Alright, so we have
those two images. Now let's go to
our painting here, and I'm going to press Control a to select everything
and Control C. And then I'll go back
over to this UVs tab. And I'm going to press
control V and paste that in. Now I'm gonna come over
here to our Transform tool. And I will hover over a corner, press the Shift key,
click and drag. And let's reduce
the size quite a bit and grab it and
move it up here. I'll put it right on
that corner right there. And then I'll just
grab this and move it. And I kinda stretch it
around a bit and pull it out so it fits
into that UV Island. Hit the Enter key and
then I can scroll the mouse wheel and
then hold it and pan. So let's just make sure we
got it inside the UVs now, I think I need to move
it out just a bit here. So I'm gonna click again. Just take this and pull it out just a little bit like that. Enter now, I can't see
the UVs through this, so I'm just going to take
this and drag it below the UVs so I can
kind of see the UVs through it and make sure that it's at least
encompassing those UVs. Yeah, I think that's good. Let's change this
name to painting. We go, oh, I was
going to pan it. But in blender, pen is
middle mouse button shift. But here, middle mouse button
shift, rotate the canvas. This happens to me all the time. So Pan in create a is just
the middle mouse button. But how to get this back
realigned up and down. All you have to do
is hit the five key. And there you go. This happens to me
all the time because the key navigations are so
similar between the two. Alright, let's go over
to the frame and let's press Control a
and Control C. Go back to the painting
tab control V. And I'm going to hover
over this click and drag, hold the Shift key
and it will snap. There we go. So that's 90 degrees. Now let's drag this down and put it over one corner and maybe I'll drop it right over this corner here
and let's zoom in. It looks like I may
need to turn it just a bit without snapping
something like this. Let's try that. And then I'm
gonna put it in this corner. Now I'm going to
move it out like this and just try and get it. So it goes over that. And let's get this
one down here. Okay. I'm going to scroll
down here and let's just grab one of these
corners and move it around. And let's see how we're
doing on the other corners. That seems to work. That seems to work. I think that'll be okay there. Alright, so we've got that. I'll just hit the Enter key. And then for the rest of it, I think I'll just give
it a plain color. So let's first of all change the name of this
one, call it frame. And then let's add
a new layer here. And I'll drag it down
underneath everything and I'll just call this background. Let's do that. There we go. Now, I'll just go to
the eyedropper tool. Select a color from
this frame somewhere, maybe something like this. And it seems to be a little
bit too dark about that. Yeah, that's not bad. Then I'll go to my
fill tool here. Make sure the background
layer is selected and click anywhere in the
frame. And then we go. So that just gives that gold color to
everything else in there. Alright, so let's
export out a colormap. Now I will turn the UVs off here and then let's go to File. And you know what, I
should save this first, let's go to Save As. And I want to change
it from a PNG to accretive file
accreted document. And I want to change
this from UVs and just call it painting 09 dot
k IRA. So there we go. There's that. And then I want to export, I want to go to File Export. And this time I do want
to export a PNG here. And I also want to
give this a new name. I want to call it
underscore C, O, L for my colormap and hit Enter. And okay, alright, so
now we've got that. The next thing I want
is a normal map and we can generate that right
out of Krita here. So what I'll do is first of
all take this frame and I'll right-click and duplicate
the layer and we'll call this normal map. And then I'm gonna
hide these Reg here. So basically all we have
is just the normal map. Now I'm gonna come up here
to filter edge detection, height to normal map. And now we've got a normal map. Let's create one more layer here and drag it below that
normal map layer. I'll call this normal
background. Here. Let's use our color sampler
to grab this color, our fill tool, and click there. So now we have a normal map. Let's now export
this file, export. And I'll call this
painting underscore NOR. And there we go. Alright,
let's go back to Blender. Here in Blender, Let's go
over to the shading tab. And here let's add
our image textures. So just like we've done before, we select that
principled be SDF. But instead of adding
a principled setup, we're going to first create an image texture and then
add a texture setup. So let's press Shift a
texture image texture, and then let's press Control T. And that adds our
textures setup here. Alright, so now that
we've done that, let's click Open
and we'll go find our textures in the paintings
folder, painting nine. And here is our Colormap. So let's grab that. And we can take this
and drag it into here. There we have it. Let's zoom in a bit. All right, he's looking
sufficiently Victorian. That's good. Now let's duplicate
this image texture and use it for the normal map. So I'll take this and
instead of pressing Shift T, I'll press Control Shift
D. And when I do that, that duplicates it but keeps it hooked up to
the mapping node. Now if you recall, when
we did this before, the Node Wrangler automatically set the color space
to non-color. So we're going to
need to do that. But first of all, I'll hit the X here. Then I'll click Open
back to the textures, paintings 09, and
here's the normal map. Let's click Okay, and then
change this to non-color. Now we need to create a
normal map node here. So I'll press Shift A Search normal and choose normal map. And then we can take this
and connect the color to the color and the
normal to the normal. And that gives us
a little bit of bump information on that frame. Now we could increase it, we can take it up to say five, maybe a little bit
too much there. Let's maybe take it down to two. Yeah, I think that'll
work. There we go. That's how I'm creating the
paintings here in our room. I will keep plugging away
on this and I'll come back and highlight any other topics that I think might
be interesting.
103. 103 Creating the Bookshelves: Well, I was thinking
about putting a few books here on
the coffee table, maybe some old books, some antique kind of things. And so I went into
Substance Painter and let me just
switch over to that. And I searched in the
marketplace in this 3D assets and I found not only
book covers here, which are pretty cool. We've got antique book covers and a page's material,
which is pretty cool. I also found this Victorian
bookshelf material here. And I thought, how
could we use that? And I remembered that I
had said earlier that we might put curtains or drapes
along here on either side. And I thought, well,
what if we use that Victorian material to put like those little caged
bookshelves over here, all with just a material. That's kinda what I'd
like to try and do here, see if we can maybe
get that to work. So I've been thinking
about it and what I'd like to try
is to take one of these trellises and move it over and just use the top part of it and then put a cubed down here on the bottom
part of this area, then map that Victorian bookcase
material onto that cube. So here let me show
you what I mean. That's tab into edit mode. And then I'm just going to hit
the L key to select all of this and I'm going to press
Shift and deselect seem. So we've got that whole
thing selected now. So let me press
shift D Y and we'll move this over here
a bit, like so. And I think look at that, it's going to fit pretty
well with three of them right there like that.
That's pretty good. So I think what I wanna do, let me hit Z and wireframe. I really want to keep, I'm going to de-select
this with the C key for circle select and then middle mouse button click and drag. And I'm going to deselect these. I believe these are the ones
I want to keep right there. Oh, and these here. Let's keep these. So I want to keep those. But I think I also want to
keep the frame around this. So we have the cube
inside a frame here. So let me press the C key
again and just de-select. I'm just middle mouse button clicking and
dragging and just de-selecting these
along here like this. There we go. So now I think I just want
to delete all of this. Hit Delete and delete faces. Now let's go back to solid
tab back into object mode. And yes, so we just have this
kind of frame around here. Okay, So now what Let's do is let's create a cube
and put it in here. So let me hide
this ceiling here. I'll just hit H. So we can see in here, shift a mesh cube. And then I'm gonna
go to wireframe. And I'll take this and move
it over here like this. And let's get the one
now the three key. Let's see if we can
put this in here. I'm just going to
hit G and move it in, scale it in the y. And I just want
to fit it between those two pieces on either side, they're scaling the z and get it so it fits in between
here as well. And then let's go back to solid. And so kinda like that. So let's scale in the
x quite a bit here. Something like that. So fits in to that frame
just like that. Alright. So I don't know that we need
do we need anything else? I mean, we're not seeing
any of the sides of it, So maybe we just need
that one face here. I'll press Control I and
let's delete everything else. So we just have that
one base there. Alright, so now I think it's
just a matter of taking this UV mapping it and then taking it into
Substance Painter. But before I do any of this, let's apply the scale. Let's press Control a
and apply the scale. Then let's go back
into edit mode, and let's unwrap
it you and unwrap. There we go. Okay, so now let's
go to File export. Fbx will choose mesh,
selected objects. We will go into our
Textures folder, and let's create a new folder
and call it bookshelf. We go inside here, of course, we want it to be
called Bookshelf, the FBX. And there it goes. Alright, in substance painter, Let's go to File
New select object. We'll go into our Textures
folder, bookshelf. Let's select that FBX. And open that. And then let's tumble
around. There it is. Let's see which way
our UVs are aligned. Oh good. They're going up and
down. That's good. Alright. And then let's go
ahead and bake. Our textures are our mesh maps. I'll use 2048. Two-by-two. We don't need an ID map, and let's just click
Bake bookshelf. And now let's just go
back to the layers panel. Grab this Victorian bookshelf, drag it over and let's
see what we did. Okay, not too bad. Let's go to 3D only here. And what Let's do is let's start moving
this around a bit. So I think I can take
the offset here and move it so it fits onto
there a little bit better. Now the only thing
I don't like is this little area right
here on either side. So let's see if we can make the tiling a little bit
bigger. I'll put 1.1. No, that's the wrong way. So let's try 0.9 and move that offset just a
little bit like this. Yeah. Okay. The only thing I don't like is the cutoff
on the top and the bottom. We could unlock this
and for this one, take it back to one. So that brings that back
for the top and the bottom. We can also try and move this up and down
a bit like this. Let me try 1.1 and
then move this a bit. So I'm just trying
to get it to fit in here a little bit better. Let's try 1.05. Yeah, that's looking a little better, something like that. Then we need to deal with the color or the
material of the woods. So let's scroll down
here and let's find, well, we can try black walnut. That's pretty good. This though. We could change this
to black walnut too. And that'll get all of that. Yeah, So that might be good. The wood roughness we should probably take down a bit so it has a little bit more
of a shine to it. The book colors, I don't
mind at all. That's fine. And the gilding, I think let's change this to
gold to match the brass. Have other things in the room. Yeah, so that actually looks pretty good
and we can adjust the color a bit in Blender once we take it in. Let's
give this a try. Let me save this. And in the textures, Let's go into Bookshelf
and I'll save this Substance Painter
project in there. And then let's export it out. This two we can put in
textures bookshelf. We can use our blender export. And then I think we can just
hit Export. And here we go. Alright, let's go
back to Blender. So here in Blender, Let's go to our shading tab. And down here we can
select our principle be SDF press Control Shift T for the Node Wrangler in
our textures bookshelf. Let's grab these and we
can select principled. I think that's placed
and sized pretty well. We just need to deal
with the color now. So to do that, we can grab these and maybe
move these over just a bit. And let's add an RGB curve here. Shift A Search RGB, and let's choose RGB
curves and drop that in. Now what we can do is just
click here and put a note in and then maybe
pull it down just a little bit to make it
a little bit darker. Alright, then let's go to the red curve here and let's do the same thing and
maybe bring it down. Now, let's bring
it up a little bit to give it a little
bit more red. So yeah, begins to
blend in with that. Yeah, that actually
works pretty well. Alright, so I will duplicate this and put
it on the other side, but I think that's
gonna be kinda cool. So if we're going to have
bookshelves in here, as I said, we're probably going to want a few antique books out
here on the coffee table. So in the next video,
we'll work on that.
104. 104 Creating Antique Books: Well, now that we have
some bookshelves, let's add some books here. I'm going to take this
coffee table first of all, and just move it out of
the scene collection. I'll hit M and move
it here out of that room scene collection into the main collection there. And then let's hide
everything else like that. And I'll switch
over to solid view. And in fact, we could
go ahead and hide that coffee table while we're actually
creating the books. I just wanted it
there to be able to put the books on once
we've done that. So I think what I
wanna do is just press Shift a mesh cube,
create a cube. And I'm going to
scale this down a bit and try and get it in the
shape of a book here. Something like that. Maybe let's see. Yeah, maybe let's just
bring it down like that. And then what Let's do is begin adding a
little more detail. So I think for the pages, I'd like to select
these faces here. Press E, s, z, and scale down just
a bit like this to create the
covers of the book. And then I want to take an edge here and
move it out a bit. And an edge over here. That's the wrong one.
Let me press Control Z. I don't want that
one. I want that one. There we go. Just to pull
those out a little bit. And then I went to
extrude the men. So let me select
these faces here. I'll press E, S, Y, and let's bring those in
just a bit there like that. And then grab this and bring
those in a bit like that. So we have the pages
of the book there. And then these old books have these little
ridges along the spine. So let's see if we
can duplicate that. I'm going to press Control R. And I'm going to put
several edge loops in here and hit Enter. And instead of nine cuts, I'm gonna go up to ten so that we can have five
of those ridges. And then if we press the three
key for face mode and Alt, select and I'll shift
click these five regions. Now if we go to
individual origins with the period key right here, when we scale on the Y, they
will scale individually. So let's press S Y and
bring those in like that. So now we've got a place for those ridges to go
on the base there. And I think I'd want another
edge in each one of these. So let me just put
one in there here. For each of these,
I could have done this as I was creating them, but I didn't think of it. That happens all the time. Now that we've got that, I kinda want these edges
here to be more rounded. So let's just select this
and then Control click that, and then Shift-click this, and then Control click this. So we've just got those
edges on the back selected. Before I devil these, I should tap into object mode and press Control a
and apply the scale. All right, Let's tab back. And then I'll press Control B and pull
out here like this. I'll add a few more segments there just to give
it a rounded look. Let's try that. Okay?
And then for these, I'm going to select, I'm going to hit
Control three to come into the side view here, the left orthographic and look at it from the side
of the spine and then press Control click to
select that shift Control. Shift Control just selecting
the center edges here so that I can take these and I'm going to pull
these out in the x-axis, just pull them out like this. There we go. And then
I'll Bevel these. So Control D bevel these
out to about like that. Let's try that. Yeah. So there we've got
those ridges on the spine and then let's
go ahead and smooth it. Come over here to Object
Data Properties turn on auto smooth getting there. But I think I want to drag this auto smooth degree up
just a bit to kinda like that, to get this a little
bit more rounded. And then for the edges
here on either side, I think I'd like to get the, so let me press
Control three again. And I believe I
want this to here. I'm going to go through and
select all of these as well. And for these, I'm going
to make them sharp. So I'll press Control E sharp. And there we go. That just defines those a
little bit better. Alright, I think
that's really all I wanted to do for the book. Let's go to the UV
Editing tab and let's try and UV map this. So I guess what I should do is just mark seams
here. Let's do that. I'll press Alt click here. See what we selected. Yeah, and then I'll Alt
Shift click down here. And we want to go
around right here. And over here, right here. Let's mark the seams. And then we're probably going to need to break these out here. I would imagine, so
that they can open up. We ought to put seems here, here and right here. Alright, let's try that. So now let's hit the a key
and unwrap. And there we go. I think I want to turn it. Let's hit a R9 0. And then we can put it back in or we can
just pack islands here. Let's do that. And then uncheck the Rotate setting here and
that'll put them there. We have a margin. That's good. Alright, so I think
that's our UV map. The next thing we need
is vertex colors, right? So let's go back to the
Layout tab and let's do that. Let's come up here
to vertex color. I'll turn on the
mask right here. And then I'll tab into
edit mode and let's select this all the pages. And then I'll come over
to the act of tools. Let's choose green Shift K, Control I to invert
the selection, select the blue shift
K. There we go. Now we've got our vertex colors. Okay, so I'm gonna go
back to object mode. I'm going to see
how big this is. Yeah, that could be a
little bit smaller. I'm going to shrink
it down like that, maybe about like
that. And then we go. And then I'm going to bring it up to the x-axis right here. And then we want to move that origin to 3D cursor
that's on the grid there, set origin, origin to 3D cursor. There we go. Alright, so
now we've got our book. Let's call it. Instead of QB two, Let's hit the F key
and call it book one. And then let's go over
to the materials panel. Click New. And this new materials should
be called book one as well. Alright, so now what Let's do is take this and let's
create three others. Because recall we have four book cover materials
in Substance Painter. So let's press shift
D x. Move this over. Maybe I'll scale it down a bit. Yeah, that's pretty good there. And we'll call this
book to F2 book too. For the material, we now have the same material on
two different objects. We want to split that
out and duplicate it. So let's click here. Now we can change this
one to book two. Alright. Now let's take this
press Shift X and let's maybe I'll make this
smaller but fatter, so S, z and I'll kinda make it a little
bit bigger like that. Okay, so now we press
F2, book three. And over here in the
materials, I'll click here, and we'll call this
book three as well. And then one more.
Let's press Shift dx. I'm going to take it
down just a smidge. And then I'm going to make
it a lot thinner this time. So S z, take it way
down like that. This will be booked for. And the material click here
will also be booked for. Alright, there we
have our four books. Let's take all of them here. I'm going to go ahead
and save the file. Then I'll go to File export FBX. Let's put these in
the textures folder. Let's create a new folder. Call it books, and we'll
call the FBX books as well. And we'll click Export. Alright, let's go over
to Substance Painter. Here in Substance Painter,
I'll go to File New. Select. Let's select
the books, FBX. Click Okay. And here we go. Now we want to bake
our mesh maps. So we'll go over here
to the texture sets settings will choose 2048. Two-by-two will keep Id on and we'll change
it to vertex color. But keep in mind, we have to do it for
each and every one. We could go through each one and change it to vertex color, or we could just
click apply to all. And now if we choose
one of the others, you can see it's vertex color. Now, all our selections
are checked. So we could either
choose Bake book one because that's selected and go through and do each
individual one. Or we can click big
selected textures and get all of them together. So let's do that. Alright, now we can go
back to the Layers tab. And here let's
create a new group, we'll call it cover. And we'll also create
a group called pages. And for the cover
we can right-click Add Mask with color selection
and choose that blue. And for the pages we
do the same thing, but we choose that green there. Now for book one, let's take our old book here, drag it onto the cover, and then let's take
our pages here, drag it over, drop
it on the pages, and we can see, now we have them there now we could maybe increased
the tiling a little bit. Yeah, there we go. That looks a little bit
better like that, I think. Okay. And now what we can do is we could just do the
same thing for each one, since each one has the
same vertex colors. So let's take the pages first. Let me press Control C. Go to book to press Control V. And there it is. Three. Control V. We've got the pages there, or Control V, and there we go. And that's working
because once again, we duplicate it off
of that main book and have the same
vertex colors for each. Now if we go back to book two, we could actually grab
the cover from book one, I'll just right-click and choose Copy and then go to book two. And we can paste that
here. And there we go. Now, what we can do
is we can take this and delete this material
out of here like that. And then we can take
that control C, put it into book three, and also put it into
book for like that. So now we have our cover here and we can drag this into here. There's book two. We
go to book three. Drag this one into
book three, cover. There's book for, drag this
one into book for cover. And then we have all our books. So now we gotta do
is export them out. Let's go to File and Export. Go into textures and books. We want our blender
export template, and then we can just click
Export. There they go. Now back in Blender, we can come over to
the shading tab and we can choose each one
and apply our textures. So if I select this book
and principled BSD f, control shift T into
the books folder. Here is book one. Here it is. Same
thing for book three. And we do it again one more
time for book, for now, all we have to do is just arrange them on
our coffee table. But that is how we can create books using our Substance
Painter materials.
105. 105 Using Blender's Physics to Place a Blanket: Well, I've continued to
work on the room here. I've taken those
books and put them here on the coffee table. And then I've kinda scattered
them around the room here just to add a couple of
little items of interest. Looks like in local mode
here I'll switch to Global. Also, what I've done
is over at the desk, I've created a desk lamp
and a desk blotter or set. It looks like I probably need to create some papers
and pins in here. But I just wanted to get
something on the desk. And what I'm thinking about
now is adding a blanket, kinda throw blanket that's kinda been tossed over the
back of the couch is if someone has been
here and they've just kind of thrown that
down and walked out. So I've created this polygon
plane called it blanket. Let me bring it out here. And then I've taken it into Substance Painter and just
added a tartan pled to it. What I'm thinking about
doing is using blenders, physics engine to
drop this down onto the couch and have
it just kind of fold and drape over
the couch on its own. So let's see if we can do that. I'm going to hide
everything else except just the
couch and the floor. I may not need the floor. Let me just hide that for now. And currently, this is just a single face on
that polygon plane. And to allow the physics
engine to bend and fold this, we're going to need to give
it a lot more resolution, a lot more edges. So I'm going to right-click
on this, choose sub-divide. And down here, Let's
increase the number of cuts. How many did we think we need? Well, maybe we've got ten there. Let me just type in 12. I'm going to do that. Yeah, let's let's go
with 12. Let's try that. And now I'm just going to
take this and kinda turn it. I'll press RY and kinda
turn it like this. And I want to put it over
the back of the couch here, something like this, RZ, maybe kinda have it like this. Let's try this. And of course you can readjust
this however you want. But what I'm trying
to do is just drop it straight down and have gravity kind of collapse it and fold
it over the couch. But to do that,
we're going to need to turn on the physics engine. So with this blanket selected, I'm gonna come over here
to the physics properties. And I'm gonna give this
a cloth physics system. So I'm going to click that. And then you can see here, here all the cloth settings. Now, here are the presets and these are pretty
handy to begin with. We're going to
begin with cotton. And that's pretty much
what we have here. But before we drop it, we need to tell blender what
it's going to collide with. So we've given this cloth. If I select this couch here, now we can come over
here and tell it that we need this to
be a collision object. I'm going to click
here, and there we go. So now the couch is a collision object and the
blanket is a cloth object. We should be able to
now come down here, click Play, and it dropped. So after about 80
frames, I hit stop. And this is what we get so far. So what do we think here? Not bad. If you see here, I had already added a
collision object to the floor. Here, if we select the floor, you can see I've added a
collision object to the floor, so it's kind of draping
up onto the floor there, which is kinda nice. Let's try this again. I'm not completely
satisfied with this. Let's go back to the beginning of the timeline here
and there it is. And now I think I'm going to shrink this down just a
little bit like this. So it isn't quite as big. Something like that. I'm going to press Control
a and apply the scale. Then I want to move this
forward just a little bit so it doesn't drape to the back
of the couch quite as much. So let's come down here and once again hit Play and
see what happens. That moved a little bit too
far to the front, didn't it? So I think what I
wanna do is go back to the beginning of the timeline
again and I'm going to move it back just a little
bit like that. So this is the process. I'm just going to try and
figure out at what point here and what angle gives me the
best drop onto the couch. So I'll hit play again. And I stopped at
this time around 36. And that's not quite
what I want either. So I'm gonna have
to keep trying. I think what I'm gonna do is
tilted just a bit like this. There we go. Let's give it another try. Wu, I kinda like that one. That's kinda nice. So I
think I may go with this. And what we can do now is come over to the modifiers panel. And let's add a subdivision
surface modifier here. And let's also smooth it. Okay, now what do we think here? It's hovering up above
the couch a little bit, I know that and
that's not a problem. You can just pull that down. But I think that's okay. I think I kind of like that. So now what we can do is we can take this and we can apply the cloth modifier here in the same way that we would
apply any other modifier. So if I pull this
down and click Apply. Now I can take the timeline back to 0 and it
stays where it is. Now. I'm also going to take the object origin and
move it to the geometry. Now if we take this
and move it down a bit, Let's see what we can do. Maybe I also want to
move it forward some. Now it's going to
intersect a bit. And I'm just going to basically grab some points
and pull them out. So I'll select that
tab into edit mode. And we can just begin
pulling points like this. And we can also come in and turn on the proportional
editing tool. Let me turn on cage here. And as I said, we can also use that proportional
editing tool if we want. We can hit G and Z and pull up a bit like
that or pull down. So now it's just a
matter of going through and trying to get this
to a place that we like. I'm gonna hit the O key and turn off proportional editing. And I want to grab this
one here and pull it up. Maybe out like this. And we may want to move
some of these into. I'll turn on the proportional editing tool and hit G and y and see if we can bring
some of these in. Without going too far. I'll hit the O key and
bring that out again. You just may need to go
through and figure out what needs to go
where which points. Or you can just
redo the physics. You can just drop it again and see if you can
get a better drop. That'll work too. Alright, I kinda
like that the way it's draping over
the corner there. Let's see how it looks
with the rest of the room. I'm going to go
back to Solid View. And then I'll bring
everything back. And then I'll switch back
over to material preview. And let's see what
it looks like. Yeah, I think that'll
work. That's kind of nice. It just gives it a feeling
that somebody lives there, that somebody just
through that down and walked out of the
room or something. Alright, We're getting close. I think there are
just a couple more things to do before we begin working on
lighting the scene.
106. 106 Modeling the Leaded Glass Windows: Well, let's take a
look at the windows now how we might create those. I think let me zoom in here. And I think what we're going to need to do
is basically create three panels of the leaded
frames for the glass. And then we'll duplicate
those for all of these. And then we're going
to have to have an object for the glass as well that we can apply
a separate material too. So let's go back to Solid mode. And I'm going to take this
wall here, this window wall, and hit the End key and move it out into the
scene collection. And then I'll hide
everything else. Then let's find one of these windows that we
want to begin with. So maybe this one here. I'll just Alt click between
two faces to select that. And that's where that
window is gonna go down. Press Shift S to, to move the cursor there. And then let's press
Shift a mesh plane. Let's turn this. Let's try RX 90. And let's just make
sure that that's pointing the correct direction. I'll come over here and turn on face orientation and yeah, that's the blue
side, that's good. And then we just need to
scale it down to fit. So I'll go to wireframe here, and I'll just scale it down until we get it
about the right width, about like that,
just so it's inside that little frame there and
then scale it in the z. And there we go. So there's that first one. Let's now create the other ones. So for this one, I'm going to do the same thing and then duplicate and move it. So let's just Alt click
here Shift S two. And then I'm going to take
this one Shift D to duplicate, and then I'm going to press Shift to snap it to the cursor. And then we can take
this and scale it down in the z and get it
inside this frame here. So same thing over
here one more time. And we're going to
have to be doing this quite a lot for all of these. But let's grab this shift
us to select this one, Shift D Enter, and then Shift S eight to snap it
to the 3D cursor. And then let's scale this one down just a
little bit like that. There we go. Okay,
so now we've got our three main window
panes in for all of this. Now what I wanna do is
create those frames for those interior frames or
panels, I should say. So what I'll do first of all, to keep this, I'm going to
press Shift D and Enter. And I will give this a name. So I'm going to call
this window one glass. And I will call this one. This one is window,
one frame, right? So we have two here. I'm going to hide the glass. And then for the frame,
I'm going to tab into edit mode and
press Control R. Put two cuts here, and then I'll put two cuts here. And then with these edges here, I can select them and
we can bevel them. Now, of course, I
need to tab into edit mode or press Control
and apply the scale. But then I can press Control
B and move this out a bit. And click and let's try, let's see, Let's try 0.01. I feel like that's a
little bit too much. Let me try 0.008. Yeah, let's try that. So 0.008 looks
pretty good to me. And then what I'm gonna do is deselect this one and
extrude this out. So I'm going to hit
E, pull them out. So they are about to
that point right there. Maybe come out to the edge, just almost to the edge
there, something like that. Then I want to go through
and delete all of these like this.
And delete faces. Okay, So now I've got the frame and here
is the glass, right? And I could take that
glass if I wanted, and I can move it up just a
bit, something like that. So it intersects
with those. There. We've got the window frame and the window glass altogether. Now, ultimately, I
think I want to take this and combine it together. But before I joined
them together, I'm gonna go ahead and give them their individual materials. I'm going to give this a
material of window glass and give this a material of
window frame like that. And then when we combine
the two control J, we've got two
materials here. Right? Now, that's all one piece. We can duplicate
that and move it around here to each
of the others. So let me tab into edit
mode here, shift S2. And then I can take
this and press shift D, Enter Shift S eight. There we go. So now we can just duplicate and add those
to each of the others. So if we take this one, Let's just take a look
at this one real quick. Let's give this a name. I'll call it window to, and we want to call this, let's call this window to frame. And then let's duplicate
this shift D Enter. And this one will be
called window to glass. Right? Let's go to the frame. I'll hide the glass. Press Control Arne
add two edges. Like that. Let's select those edges now. I need to apply the scale
right in object mode. Then press Control,
be pulled out. And then we typed in, what do we type in 0.008 here? I think so. Now we can take this and
extrude this out just a bit. So it comes out to just
before goes over that edge. And we want to get rid of
all of these like that. And now if we bring back
our glass and there we go. Now we can just assign
the materials to this. So with this, we want it to be window glass or window
frame, I should say. And we go for the glass, we want it to be window glass. There we go. Now we can take
these to join them together. And they have are two
materials there, right? And from here we can begin
duplicating all of these. I just need to go and
do this one as well. And then duplicate. And also I need to
actually come over here and create one here
and duplicate those. So we just need a frame and a window
glass within the object. And we need the two
materials here. And we'll set up
those materials for the glass in the lighting
stage of our project. And actually that is coming
up in the next section, we will work on setting up our lights, our
final materials. And also we're going to
need to set up something to be seen outside
of the windows. In the next section, we
will begin working on that.
107. 107 Render Settings and Emissive Materials: Alright, I finished up
putting the windows in. So now let's turn our attention to the lighting in the scene. And for this project, I want to use the
Cycles Render Engine. And I've got it set
to use the GPU, the graphics card in my
computer to do the rendering. Now if you come over here
to Edit and Preferences, you can see that I've got my system Cycles
Render settings set to use optics for my NVIDIA
RTX 3D graphics card. Now, you could also use cuda, which is an Nvidia
rendering API. But I don't believe this is
actually for the RTX cards. So if you have a
different NVIDIA card, you can use this. Now, if you have a completely
other brand of card, you may not see
these options here. You may have other options because blender is
going to take a look at your graphics card and see what's available for that card. Now, I've personally just done some rendering tests
with the scene. I've come in here and turned
on optics and done a render. And then I turn this
off and turned on cuda and did a render with that. And I've found that
personally for my system, the optics just runs quicker. So that's what I'm choosing. Once again, depending
on your card, you're going to have
different options here. And you may need to do
a little googling to see which you should be using. And also, you may need to do a few tests to see which
one is going to be quicker. Now I've also found
that adding in my CPU, this Intel CPU really doesn't
give me any benefit at all. So I'm just turning that off. So this is my
particular settings. Yours may differ. Alright, I'm gonna come
back and close this now. So we've got cycles, I've got GPU compute. Let's now take a
look at what we can see with the rendered
viewport shading turned on. So I'll click this. And there we go. We've got black myth. Now if I zoom out, you can see the
outside of the room. Mainly because in the
world properties here, we've got a gray color
and the strength is one. If we take this down to 0, you can see we just
have blackout here. But if I take it back to one, we can see a little
bit out here. But if we zoom back
into the room here, it's all black
because the walls and the ceiling and the floor
are blocking all the lights. Now we could add a light, it'll come into
where the cursor is. We can press Shift S1 to ensure that it's in the
center of the grid. And then we can press
Shift a, go to light, and let's just drop in a
point light temporarily. Alright, so if we bring
this up in the z-axis, we can see at least
something right in there. We can come over here
to the light properties and turn up the power currently
it's only at ten watts. So we could turn this
up to say, 60 watts. And that gives us a
little bit more light. So we can begin to see
what's going on in here. And you can see that
we're getting shadows, were getting reflections,
which is kinda nice. We're getting some
nice ambient light bounces around the room. You can grab this point light
and drag it around and just take a look at the
different areas of the scene if you want. But I think what I'd
like to do first here, go ahead and add the
practical lights. All the lights that
we're going to see in this scene, the lamps, these wall lights
over the paintings, the desk lamp, those
kind of things. I'd like to get those
in first and kinda get those set before
we add anything else. And just so when we switch to the rendered viewport shading, we can at least see
something in the room. Alright, so I'm gonna go
back to Solid mode here. And let's go to, well, I've got the desk
lamps selected. Let's hit the period
key and go into here. And what I've done is just
added a cylinder in here. I'll tab into edit mode
and I'll hit the L key. So I've just added this to be
the bulb in the desk lamp. And what we can do is we can use an emissive material to
simulate a light bulb in here. So let's first create a new
material slot over here. And then let's create
a new material. And we'll call this, well, we'll call this desk lamp light. And then let's click Assign. And we go. And now we want
to come down here to the emission
settings down here. So what we just need to do is increase the Emission Strength
and change the color. So to do this, let's first of all switch
back to the rendered preview. I'm going to tab
back to object mode, go to the rendered
viewport shading. We can't really see
a whole lot here, but what I'm gonna do is change the emission color from black and I'll just drag
it up to white here. And then let's change the
emission strength from Wanda. Well, let's try ten. And now you can begin
to see that it's giving us some light. They're coming out of the desk slam and that's kinda nice. We could try 20, see if that is too much. That may be a little
bit too much. Let's just split the
difference and try 15 there. Now you can see it's giving
us little speckles here. And that often happens when
you've got reflections. What we can do for
that is come back up to the render
properties and we can turn on D noise for both
the viewport and the render. And that'll clean
that up quite a bit. Alright, so we've got an emissive material on
that for the desk lamp. Let's also come up here to the wall lamps and I'll hit
the period key to zoom in. Let me switch back to solid
and I'll tab into edit mode. And just this cylinder
right in here, I'll hit the L key. And once again, let's come
over here and add a material. I'll add a material slot. Let's create a new material. Let's call it wall lamp light. And down here in the emission, let's once again take
the emission color too, plain white, at least for now. Then let's take the
strength up to 15 here, and we'll come up
with this selected. Let's click Assign. So we've assigned those
to that material. Alright, so now
let's zoom out and let's turn on the rendered viewport shading
and see what we think. Yeah, so now we've
got a light there. I feel like that's a little
bit too bright for that. So for the wall lamp, I'm gonna take this
back down to ten. So it isn't quite
so bright there. So now I can go through
each one of these on hit the period key tab
into edit mode. Let's hit the L key
and select that bulb. And now we can come up
and add a material slot, search for that wall lamp light at that, and
then click Assign. And there we go. So now
we can go through and add that emissive material to each of the lamps
over the paintings. So I'll just do one more here. Let's the zoom into that tab, into edit mode, hit the L key. Let's give it a
new material slot. Find that wall lamp
light, and click Assign. There we go. So I'll need to go
through and add that to each of the
other wall lamps. And then in the next video, let's work on adding
some light bulbs to the lamps over here
in the scene as well.
108. 108 Practical Lights and Camera Settings: Well, I've gone ahead and
added that emission material, that wall lamp light to
each of the wall light. So we're getting some light from those and that's kind of nice. But I'd also like to add some lights to each
of these lamps. And I think I need light
going both down and up. So let's begin with
this one here. And I'm just going to hit
the period key and zoom in. And what I'll do
while I'm working is just switch over
to solid view. And then I'm going to
tab into edit mode and think I'm going to select
these faces right here, just Alt click between
two of the faces. And then I'm going
to press Shift S to bring the cursor there. Now, let's press Shift a light and let's bring
in a spotlight here. And the spotlights
automatically point down. And that's a pretty good way
for it to be for this one. So let's come over here to the object data properties
for that light. And I'm going to take the
spot size and increase it. I don't want it to
go. So it's kind of just under that lamp shade, something like that. Let's say. Then in addition, I
want one going up. I think what I'll do
is just duplicate this shift D Enter and then rotated 180 degrees
in either the x or the y. I'll just press RX1 0, and that will turn that upward. Now I think I need to
just take the size of the angle down just a bit so it stays within the
lamp shade there. Alright, so let's switch back to our rendered viewport shading and just see how that looks. Alright, so we're
getting some light down on the table
that's not bad. And we're getting some
going up as well. Is that enough for the room? Let me take this point light and I'm just going
to hide it here. So okay, that's pretty good, but I feel like I want it to
be a little bit brighter. And ultimately we're going to add a couple of lights around that aren't the
practical lights aren't the ones you're going to
be seeing in the scene, but are the lights
that are going to light the scene
for the cameras, so there'll be out of view. But for this, let's first take that spot that's
pointing down. And let's increase it. Let's take it up to 60 watts. Let's try that. And then let's also
grab that one that's going up and let's take
that up to 60 watts. Is that too much? Well, it feels a little too
bright down on the table. I'll bring it down to
40 here on the bottom, and then keep it
at 60 on the top. Alright, so now that
we've got that, let's go back to Solid
View and let's take these, duplicate them and
move them over here. So I'll select this one. And we will once again select these faces here on that
poll and press shift us to, to get the cursor to that point. Then let's go over here
and grab these like that, and let's duplicate these. But before I do, I think
I want to change these. Let's call this table lamp and down 0.001 because that's
what Blender will call it. And I will take this
and copy it and call this table lamp up 0.001. Okay, so now when
we duplicate these, Let's select them both. And let's press Shift Enter. We get 002002. So blender increments the
name there as we duplicate. Now we can take these
since they're still selected and move them
over here to 3D cursor. So let's press
Shift S and choose selection to cursor or
eight, right there. Okay, so now we've got those. Let's see how they
look in rendered view. Alright, I think we're
getting there, yes. So that gives us
a little pool of light along either
side of the couch. Now let's take a look
at this lamp here. I'll go back to solid and let's now zoom in with the period
key tab into edit mode. And I will select
these faces right in here and press Shift
S to move the cursor. Then let's take these
two again here and here. Duplicate them, Shift Enter. Now these are zeros 03. And then let's press shift us to move those
to that 3D cursor. Now it looks to me
like these can be spread out a little bit
more, maybe like that. This one looks okay here. And then let's see what we think about the power of those, the intensity of those. Let's go to rendered preview. And there we go. We've got those lamps. I feel like for this one, that top one here is
a little too bright, so I'm going to take
that down to 40. And I don't mind the
bottom when they're kinda bleeding over onto
the chair like that. Uh, kinda like that actually. And I kinda wish these
would do that as well. Let me see if I can. Here is the bottom of this one. It really doesn't look
like I can take that out too much farther
now, does it? Although maybe I can
take it out like that. Let's see how that looks. Yeah, that does bleed over onto the couch
just a little bit more. So that's 1 12th. I'm going to copy that. And then come over to 001 down. And let's paste that
into this spot size. Here. There we go. Alright, so I think that's
pretty good at least for now, to get those pools
of light in there. Now, before I go any further, what Let's do is let's bring a camera into the scene
because ultimately we're always only going to be seeing what's within
the camera frame. And I want to bring a camera in before I begin setting
up the windows, the other lights, and what's
going on outside the window. So let's bring in a
camera here first. To do that, I think
first of all, going to move that 3D cursor into the center of the scene. Again, shift us one. And then I'll press Shift
a and bring in a camera. Here it is. Now if we pull
it up, There's our camera. And we can view what the
cameras sees by just pressing the 0 key on the numpad and there is
what the camera sees. So if I tumble around, we then come out of
the camera view. Maybe I'll hide this
roof for a minute. While we do this, I'll just hit the H key to get the
camera in position. I like to create a
couple of extra windows here so I can put the camera
view in one of the windows. And one of the things
I like to do is just come over here and grab this and move this over and
create a kind of a thinner horizontal
window here. And then create another
window in here. So you've got two windows
over here and one here. This is just the way
I like to do it. How you wanna do it is
completely up to you, but I like to kind of
get this arrangement. And then what I can do is change this to say
a shader editor. And then I can deal
with the materials of both the objects and the world here as I
work on the lighting. And then up here, I want to
change to the camera view. I'll hit the 0 key here. We've got a lot of things
in the frame here. It isn't bad over here
in the larger 3D view, but over here I think
it can get in the way. So if I just middle
mouse button, click and drag and move
this top bar over, I can turn this off the show gizmos and
that turns those off. And then I can turn
the show overlays off. And then finally,
I can get rid of these by just
pressing the t key. So now we've got a very
clean interface over here. Another thing we can do is make this frame around the camera
view a little bit darker. So with the cameras selected, we can come over to the
object data properties. And down here under
view-port display, we can adjust this
particular setting. And I'm going to attempt
to pronounce it. Passe par to. That is probably a horrendous
pronunciation of it. But you can take this and click and drag
up and you can see it makes that area around the
camera frame a little darker. I think that's kinda nice to concentrate on the camera view. Now, there's a couple
of ways we can get this camera view to
where we want it to be. I could come down here and put this view down here where
I want it to be, right. And then I can press
Control Alt numpad 0, and it will bring the camera
to approximately that view. Now if I tumble in this view, it'll tumble out of
the camera view. But what I can do is lock the camera view and the
view port view together. And I can do that in
just one of these views. I don't have to do
it in all of them. So over here in
this smaller view, I'm going to press the N key. Go to View. And I'm going to choose to
lock the camera to the view. Here. I hit the End key. You can see over here,
if I tumble around, I can tumble around
outside of the camera, but in here, I can only tumble
around with the camera. I think this really helps place the camera where
you want it to be. In addition, I don't
want the camera to be a 50 millimeter lens. That's kind of a normal view. I think I want it a little
bit wider than that. So maybe I'll type in Thirty-five millimeters here and let's see how that looks. That's not bad. Although maybe a little bit wider. I'm going to type in 30. Let's see how that works. Yeah, I kinda like that
for our view over here. Alright, so now that we
have our viewport here, our shader editor down here, I think in the next video, let's work on creating the glass material and what's
outside the room as well.
109. 109 Creating the Window Glass Material: Alright, now let's work on
the glass, on the windows. And one thing that you kinda have to remember about
glass will actually, I guess two things you have
to remember about glass is. One, it's always good
to have something to reflect when you're
creating a glass material. And it's also good to have
something that you can see through the glass on
the other side as well. So let's create that
thing on the other side. And I think I'm
just going to use a backdrop with an image on it. And that's gonna be
it because I like the pools of light that we're getting here with the
lighting as it is. And I think to
continue to get that, we're really going to need
this to be a nighttime scene, so we're not going to
see a whole lot outside. It's gonna be kinda dark. But I do feel like we
need something out there. So to do that, I'm going to press Shift a
mesh and create a cylinder. And I will take away the cap fills here.
I'll choose nothing. And then let's take this
and bring it out over here. Let's remove half of it. So here in the right
orthographic view, I will take this and just select one side like this
and delete faces. And then now I think
I just want to maybe, well, first of all, I'll
scale it up quite a bit. And then I may take it out in
the x axis a bit like this. And then I don't know that we
need it quite that curved. Maybe I can scale it in the y just a little
bit like that. Okay, so that is going to
be our backdrop back there. So now we just need to
put an image on it. And to do that, let's go over to first of all, our UV Editing tab. Let's do that. And then I'll
switch over to solid view. And let's choose this
thing right over here. And maybe I will hide
everything else. So let me twirl the windows up. And so this is our backdrop. I'll go ahead and call
it that backdrop, 0.001 because we're going to
have another one over here. And we should probably do something with these
practical lights. I did change the floor
lamp to floor lamp, and the others are
still table lamp. Let's select them and
let's move them into a new collection or press the M key and choose new collection. Let's call these
practical lights. There we go. Okay, so
we control that up. Here's the backdrop. Let's hide everything else. We also have the
camera out here. I guess we don't need
the camera immediately, so I'm going to
hide all of that. And then let's smooth this. And then let's also press
Control a and apply the scale right now until we see exactly where the image
is gonna go on it. And then let's create
a new material. I'll come up here, click New. And let's call this, well, once again, backdrop zeros 01. And for this, I think we're going to
need an image texture. So shift a texture,
image, texture. There we go. And then let's also press Control T and add the mapping and
texture coordinate nodes. And then let's bring
in that image. I'll click open. And what I've done is found an image of a Victorian garden and put it in the
textures folder here under garden
and here it is. I can click here
so we can see it. So it's just kind of a
nice Victorian garden. I'll click Open Image. And then if we connect our
color up to the base color, switch over to material preview. There it is. Now, we've got a problem, right? Let's tab into edit mode. Hit the a key. And the problem is
that it's split because we deleted
half of the cylinder. Let's now get the UK and unwrap. And then we could take this
and press are non-zero. And that looks terrible, right? So I think we could
maybe pack Islands. I'll come over here to
UV and pack islands. And I'll uncheck rotate. And we've still got
some problems here. So what we should do is
bring the image into here so we can arrange
the UVs on the image. So let's pull this
down and I think it's called Garden, Victorian garden. Here it is. Let's select that. And so there's our
UV map on the image. So let's click UVs, drag something like these. And then we'll just drag this up until it covers the whole image. And there we go. Now let's see if that's actually the
size we want it to be. Let's bring
everything else back. Now I think I wanna go back
to the layout tab here. And let's take a look through
this view right here. I'm going to position
the camera so it's looking out the windows a
little bit more like that. And I'm going to save it. And then I'm going to
switch to rendered preview. And now let's work on the
materials for the glass here. So I'm going to come
into this window, maybe select one of
these and zoom in. Now if we go to the
material panel, we can see we've got window
glass and window frames. So we want to select
window glass. And I'm going to bring in
a glass shader, Shift a. And I'm going to
search for glass, and here's a glass
BSD F right here. So now that we have
this glass BSD f, you can see that it's
got a green socket here just like this. And I don't really want
to use this one for the glass because I want
to be able to control the reflections a
little more precisely. So if I just delete
this and then take this and drag it over
to the surface there. Now look, we can see through there now a problem
that we may have. And actually I'm gonna
take this camera here. Let me switch to wire view. I'm going to take
this camera and move it over here closer to the window so we can kind of see
through them like this. And then I'll switch back
to the rendered view. Now, we've currently got an IOR, which is an index of refraction. And we've got it at 1.45, which is a similar one to, I think ice and glass. And an IOR is
something that you can just search on Google for and see a whole list of the
IOR of different materials like glass and water and ice and a diamond
and things like that. But I think I'm going to take
this and try one, just 1. And you can see what it did. It actually pushed the
image away, right? If I type 1.45 in here again, it actually magnifies it just a little bit and
I don't want that, I just want it to be seen
out the window as it is. Alright, so we've
got a glass shader. We can see through it, but we don't have
any reflections. So what Let's do is
let's press Shift a and search for a
glossy, the SDF. So we have a glass and a glossy. And then let's combine
them with a mix shader, shift a search mix, and let's use a mix shader. So now we can take two shaders
and mix them together. Now we're getting
kind of a hazy, fuzzy thing there and
that might be good. Maybe it's old
windows or something, but we can take the roughness of the glossy down all the way. And then if we take the factor
here on the mix shader, we can go one way
and it's all glass. We can drag it the other side, and it's all reflections. So you can see now
the reflections of the room in the Windows. And here let me bring
back that ceiling. I'll type over here and search for ceiling and then
unhide this right there. There we go. So we cover that. So now I want to combine a mix between the glass
being able to see through the glass
reflecting what's inside. So I'm just going to
drag this until I get something I like here and keep in mind it is going to
be a nighttime scene, so it's okay that
it's dark out there. So it looks to me
like something like 0.6 looks pretty good
at this point in time. Now, one of the issues we're
going to have is as we put other lights in the scene to illuminate the scene
for the camera. We're going to have to fight with where we're
going to put them. So they're not reflected
in the glass here. If you wanted, you
can come over here to the world properties and increase the strength
of the world. So we can take the
strength up to say three. And it's all of a sudden
a lot brighter out there. We can take it down to two. Let's say. I kind of
liked it at one though. I think that's
gonna be kinda nice with a little more
light in here. I think it's gonna be kind of nice to have that
a little darker. But also another thing that
we could do while we're here is just add a
little bit of color. So if we click on the
color swatch here and just maybe move this into the blue just a
little bit like this. Maybe even bring it up
just a little here. Move it a little
more into the blue, kinda like there's blue
moonlight out there. That might work. We're going to have
to adjust this as we go because I'm think I'm going to make these lights in here, these incandescent lights,
a little bit more orange. So we have that kind
of classic Orange and Teal that you see in
the movies a lot. But at least for now, I
think that's pretty good. Then what we could
do is just take this here and duplicate it, shift dx and then turn it
in the z-axis, r, z, 90. And right up here, I'm gonna see if I can
bring it right over here and bring it up just a little bit so we just see the top of the trees in here. You know, I'm
looking up in here. Let me turn the
strength up to three. So yeah, just so we can kinda
see the tops of the trees. Right out here. Maybe right there,
right in there. Yeah. Alright, so we
have our two backdrops in and we may need to move these just a bit when we move
the camera around. But I think that'll work
pretty well for now. I'll take this down to two. And in the next video, let's work on adding the other lights to eliminate
the scene for the camera.
110. 110 Adding Lights to the Scene: Alright, now let's
start adding a little more light
into the scene. I'm going to overhear
in the 3D view, go to the wireframe view, and let's start
adding a lighter too. I think first of all, I will of course go over to the rendered
viewport shading here. And then let's begin. Well, I've got a
point light in here. Let me just turn this
on and that's good. But look at that. This is what I meant
by we gotta watch out for reflections in
the windows here. And there is a, well, a fairly complex way of removing some reflections like this out of reflective surfaces. But it involves
render layers and the compositor and really could be a course
in and of itself. And I don't think we
went to delve into that much complexity at
this point in the process, at this point in the course. So what I'm gonna do is try
and be a little creative, a little strategic with
where we put the light. So I'm going to first of all just delete this point light. I don't want that in there. And actually, now
that I look at it, I may want to to add a gray
to this window frame here. Let me I don't
think we did that. Let's go to the material panel
and choose a window frame. Then I'll just use the
base color over here. Let me go to material preview. And I think I just want to take this color and just
bring it down to a gray. I don't think we need to do
too much more than that. Maybe something like that. And you can see here that
we're getting a reflection from the HDRI
that's in the scene here in the material preview that isn't going to come through in our Cycles render.
So that's fine. Let me go back to wireframe now. And let's add a light. Me. I'm gonna go to the
top view with the seven key on the
numpad and press Shift a and go to light and area light right
here and there we go. Now if we take that and we
just drag it straight up, you can see it begin to
illuminate the scene. And of course you can also see it in the reflection
in the windows. So what I'm gonna
do is move it up a bit and move it over. At least for this camera
angle you can see I can move it around and move it out of the reflections
and the window there. And then I will maybe
turn it in the y-axis RY and kinda tilted
toward coffee table. I think I just want to illuminate this
area right in here, pointing down toward the, toward the coffee table. Let me move the camera back a bit here and I'm
kinda putting it through the doorway
right in there. Okay. So if I maybe go up a bit, maybe I will select that coffee table and zoom
in with the period key. So the camera's tumbling
around the coffee table. And we go something like this. Alright, so now that
area light here, let's take the intensity
or the power up. Let's take it up to 100
and see what happens. Alright, well that's not bad, That's a little too much. I'm not getting the pools of
light that I wanted there, but you can see that we're getting some nice
illumination there. Maybe I'll take this back
down to 60 watts here. And I like the amount
of light we're getting in the area over the
coffee table here. The thing I don't
like is this kind of blackness here at
the back of the chair. So let's do is let's add a
light to take care of that. So I'll press Shift a
light and for this one, yeah, I'll use an area light
again for this as well. So let's slide that back here. And I'm just going to move it
up into this doorway here. Maybe move it in a bit and press RX and tilt it
up some so you can see we're already getting a
good bit of light back there and I don't want it to
outshine the main interests. I still want it to
be fairly dark. Our Z and I'm going to tilt it around like this. There we go. That's not bad. I may actually
take it down to say five. Let's see how that looks. Well, maybe split the
difference at eight. I kinda like that. Now I feel like this area back here is a little bit too dark. I'm going to save the
scene with Control S. And then let's
come over here. And I feel like this light
here should be casting more light on the desk area. And I don't want to just
increase the light of the lamp That'll just glare out and be too much
and be too harsh. I want a more soft light. So I think what I wanna
do is put a spotlight here and kind of just
eliminate this area. So let's create a
new light here. Let's create a spotlight
and drop it in right there. And then I'm going
to bring it up, hit the three key on the numpad, and I'm just going to
move it maybe over these chairs and then hit the R key and kind
of angle it so. Points toward the desk
and that main chair. And then what Let's do is
let's increase the power. We're at ten watts here. I'm going to take
it up to a 100. Let's see how that works. Yeah, so you can see
the chair a little bit better now I'm gonna go
ahead and save the scene. And let's try 120. Yeah, That's kinda nice. That illuminates that area with the desk a
little bit better. But the area behind it with the window seat
is still pretty dark. And what we could do for
that is actually add a light outside the
room shining in. We could add a blue light, like blue moonlight
coming in and maybe adding an edge light
to this area back here. So let's give that a try. I'll press Shift a light and create another spotlight
and let's move that back. And I will just move it right, maybe right into here. Hit the R key and
rotate that in. And then let's change the color. I'm gonna give it
a bluish color. And then let's
increase the power. I'm going to take
this up to like 500 and see what happens here. Well, we're not
seeing much there. Let me give it just
a little more blue. And let's take it up
to 1 thousand watts. Do we see anything yet? Not yet. I'm going to
try 2 thousand here. And then I'm going to
check where it's placed. Maybe I haven't placed
in the wrong place here. So let me take this
over and then I'm going to increase it again. Alright. So it's really more
the placement I think in anything. Yeah. Now you can see it. Okay. So now it's really where I
was putting it. I think. Let me turn it just a bit
like this. Yeah. Okay. Now that's too much now that we have it in place,
that's too much. Let's take it down
to 2 thousand. Now we're going to have
to keep going down until we Find the right amount. Yeah. So now we're getting
a little bit of that blue on that window seat. And I think maybe we want
it as well up in here too. So I'm going to
take that spotlight and I will duplicate it
and bring it over here. So I'm going to hit Shift D, enter G. Bring that over here. I think I want it to
point in this way. Let's see, I'm going
to hit the one key and maybe move this up a bit. Something like this. Beginning to get
some blue over here. It's really a very subtle thing, but I just wanted some
kind of color in there. Alright, so we've got
the basic lighting in. I think in the next
video what we need to do is do some render tests. I think I want to adjust the
placement of the backdrop. I don't think I quite like
where it is right now. But I think we're
getting there, we're getting those pools of light. We may need to illuminate some of the corners a
little bit better. But that's really
the process is to begin coming in
and adding lights to get a sense of
what is going to look like through the
frame of the camera.
111. 111 Creating Voumetric Lighting: Alright, to adjust
that backdrop, I think I'm gonna go back
The world properties and maybe take the strength up to three just so I can see out
there a little bit better. And then I just
wanted to take this. I'm gonna move it back some
like it's a little too close. We're not seeing the bottom. I want to I want to see more
of the ground here like this, something like that. Let me take it over here. Now I kinda like it
over on this side. I'm going to move it
back just a little bit more and move it over like that. So yeah. So it just looks like
it's kind of a little bit farther out in the
distance there. Actually, I think
I'm going to move it over here to this side, this corner like this. Pull it up a bit. Yeah, something like that. Okay. So I think that'll
work pretty well. I'm going to take
this back down two, so it's a little bit
darker out there. Actually, I could
take it down to one. Yeah, So I think it's gonna
be something like that. So it's just a hint
of things out there. Now let's just work on a few render tests and
see what we think. I'm going to switch back to Solid mode over here
because trying to render an image while this is in rendered preview is a little
bit taxing on my computer. But if we want to
render an image, we can of course go up here to the render menu and choose
render image or F2. And if we want to
render an animation, we can always go here
or press Control F2. So I think what I'm gonna
do is just press F2. And here goes the render. Now it's currently
rendering at 1920 by 1080, which is what I also have the screen setup
here for recording. And you can see up
here the elapsed time, the estimated time remaining, although that's moving quickly. And you can see the
number of samples here as it works
through the render. Alright, so the render is done. It's taken a little
bit less than a minute to render this image, which frankly isn't bad with
everything we have in here. And I can see that blue light
here on the window seat. I can see that
blue line up here. And I'm able to see into the
corners a little bit better with the bookcases in there, but it's still pretty dark
and we can take care of that. But before we do, I
think what I'd like to do is try and add a little
atmosphere to this currently, it's very crisp and I
think I'd like to add a little kind of haze or
just atmosphere to it. So we get a little bit
more of a sense of depth. And to do that, we can
use volumetric lighting. And really all that is is just putting the entire
scene in a box, in a volume and then adjusting the settings
of that volume. So if you wanted to
save this image, you could always come up
here to Image, Save As, and save it as a JPEG or a PNG. But I think what
I'm gonna do is go ahead and just close it. And I want to set up a volume
box around this scene. So what I'm gonna do
is just create a cube. And I'll come here to
the side view first. I'm just going to hit S and
scale it up pretty big. And I'll bring it
right into here. And then I'm going to
press S and scale it out. So it encompasses everything. So it encompasses everything
outside the room and inside. I go to the seven key. And here as well, I want to scale this out. I want to scale it out to
this backdrop as well. So maybe something like this. We go and I just want to
see how it's going to look with everything
encased in it. We may not need to do that. We may be able to just to
set it up for the room, but I think I want to see
how it's going to look. There we go. So now I've got this volume box encompassing the whole scene. And let's come over here and
let's call this just volume. So we know what that is. And then we need to
give it a material. So I'll come over here
and I'll click New. I'll call this volume. And over here, instead
of a principled BSD F, Let's press Shift a
and search for volume. And we've got this principled
volume right here. So let's add that. And then I'm going to delete the principled BSD F and take this and move it
over here like that. Now, let's turn
the rendered view on and see if it
made any difference. I'm gonna go ahead
and save the scene. Alright, So currently we can't see outside the
room here, right? Let's come down to our
principled volume and let's change the density to 0
and see what happens. Since nothing happens, I think there's something wrong here. Yes. So I've plugged the volume into the surface rather
than the volume. So let me take this, drop it into the volume,
and there we go. So now we can see outside as if that volume box isn't there. So now let's work
on increasing this. Let me take it back
up to one just so you can see what it does. That's at density one. So it's like there's this
very thick fog in our scene. So let's take it down to
0.1 and see what happens. Okay, well, we've got a little bit less
fog and you can see how the lights kinda
become these cones here. I don't know if
you can see that. This is also the way you would
create volumetric lighting to get rays of light
coming through blinds or through the
trees of a forest. This is how you would
do that as well. But I'm not so much
using it for that, as much as just getting an
atmosphere in the room. So I'm gonna take
this down to 0.01. Let's try that. Okay, so now we're
getting somewhere now I think this is
a little bit better. Feel like there's
still a little bit too much back here from that spotlight that
we've got on the desk. I'm going to take this down to 0.001 and just see
what happens here. Alright, there's
not a lot there. So let's try 0.005 and began
bringing that back up. Yeah, there's just a little
bit there that we can see. Let me do a render and
let's see how this looks. I'll hit F2. And I'm going to shrink
this down again like this. And one thing I could do to
make these go a little bit quicker is reduce the
resolution of this. So we get a half size render. Why don't I do that? Let me close this. And then over here in
the output settings, let's change this from
100% at 1920 by 1082, 50%. Let's do that. So I'll come over here and
switch this back to solid. And then let's try
a render again. I'll hit F2. Alright, we can see a little bit of that
atmosphere in it, but I feel like we can
see it a little bit too much from this spotlight. So I think what I'm
gonna do to try and kill two birds with
one stone, as it were. I'm going to try and change that spotlight to an area light, which will give us a 180
degree range of light, which might light
up the corners a bit and maybe won't give us such a strong volumetric area up here where the light begins. So let me exit out of this. I'm going to take
that spotlight. Where is it? No, that's not it. Here it is. That's the one. I'm going to take this spotlight and I'm gonna change
it to an area light. So if we come over here
to the light properties, you can see it's
currently a spot, so I'm just going
to change it here to an area and
it's pretty small. We can drag the size up
just a bit like that. And I'm going to save the
scene and then switch over to the rendered
viewport shading again. Okay, well that's
quite a lot of light. We don't want that
and we can see it in the reflection
of the window. So that's not working quite
the way we'd want it. Let me take this
down to maybe 25. And we're still
getting a good bit of that atmosphere in there. I don't think we can
raise it up any higher to get it out of the window
now, we really can't. So I may try and
just move it over to the same side of
the room that that other area light
is on like that. Yeah. We're getting a little too
much light over here now. So that didn't quite work. Let me change it back to a spot. There we go. And this time I will
from the top view at the R key and move it over toward the desk a bit like that. Alright, I've brought it up
to 300 and I'm going to take the size of the spot
down a bit as well. Right into there like that. Let's see how that works. Alright, let's try
another render and see what it looks like. I'm going to switch this
back to solid, then hit F12. And let's see what we think. Now you can see the
little fireflies that are being created within the volume
under the lights. But it's the D noise settings
that's cleaning that up. Yeah. And you know what, I kind of
like this this gives kind of a kind of a hazy mood to it. It gives a little bit
more of a depth, I think. So. Yeah, let's go
with that for now. I will close this and also I want to go back to
the world settings. And now that we've got
that volume out there, I feel like we can
see outside a little bit more and I don't
really want to do that. I want to have it be
fairly dark out there. So maybe I'll take
the strength down to say 0.5 out there. And we could also take that
blue down a little bit, so it's a little bit darker. Alright, I'll try
it one more time. I'll switch back to solid
there and hit F2 here. Let's take a look. There we go. Yeah, I think we're
getting there. We've got some nice
reflections in the windows. I've maybe made the outside
just a tad too dark. I may want to bring that up
just a little bit again. But we've got some blue
moonlight coming in here. And sum up here, I think I will change the
color of the lights here on the wall and in the lamps to
be a little bit more orange. So I will do that. And then in the next video
we'll see if we can't put on some finishing touches and set up the scene to
animate the camera.
112. 112 Render Settings and Light Properties: Well, since the last video, I've added a couple
of lights over here. So back in the hallway, I've added a point light here and a point light
right over here. And these are set
to about ten watts. Yeah, Each of them
are ten watts. And that just allows us to have a little bit of light out
there in the hallway. But before I click on the
render viewport shading here, Let's take a look in
the render properties. And over here, under sampling, I've kept these at pretty much the default
throughout the project so far. But frankly, they may
be a little high. With these de-noise
settings turned on. We probably don't need as many samples on
either of these. The de-noised system here in Blender 3 and up is
really pretty amazing. And unless you're really doing some high-quality
rendered images, you don't probably need
this many samples. So I'm gonna take these
down quite a bit. I'm going to take the viewport
samples down to say 64. And I'm going to take
the renderer max samples down to say 128. And that should allow us to move around in the
rendered view a little bit quicker and also render images out a
little quicker as well. And also over here in
the output settings, I'm going to change
just as we do tests. I'm going to change the
resolution from 100% to 50%. So we'll just do half of this
1920 by 1080 resolution. Once again, that'll just help speed things up
as we're testing. And also for the frame rate, I'm gonna change
this to 24 frames because as we render out an
animation of the camera, because I'd like the camera to move around the scene a bit. It's just fewer frames to
have to render per second. And it can add up over
a long render time. Alright, so now that
we've got these setup, I'm gonna come back over here to the render Viewport Shading, and I'll just click here. And here you can see how the point lights are affecting
the hallway out there. It's just a little bit of
light to give us a sense that there is something
outside beyond the room. I might be able to bring those
up a little bit brighter, but I think for now that's fine. And I think I'd
mentioned before that I'd like the pools of light, the incandescent lights in here to be a little more orange. Incandescent lights are usually around 3200 degrees Kelvin, which to our eyes
looks a bit orange. So I think I'd like
to change those. So if we come in here, Let's just grab one of the spotlights here and
I'll hit the period key. And let's change to
Solid View here. And I've got the light settings. If we come over here to the light properties
set at 40 watts, that's probably not bad. This is at 60 watts. We probably don't need that different on top than
we do on the bottom. So what I'll do is I'll just
change this color here. Let's just change it to
an orange-ish color. Not too much, but
just a little bit. So you can see we've got
a bit of a difference between this one
and this one here. In fact, what I'll do is
I'll just select that one and zoom in with the period key. Okay? So maybe, let's
select that again, and maybe it doesn't need
to be quite that orange. Now that we're zoomed in, it looks a little bit too much. I'll back it off
just a little bit. So we've got a bit
of orange in there. And then what we can do
is we can select all of these other lights and link them so that when we change one,
we change all of them. So I'm just going to then
select this light and this, this, and then the two spotlights that we have
in the lamp there. And then the last one, select it, I'll choose
the one I just altered. Now we can press Control L
and we can link object data. We go now all of these have a
bit of that orange to them. And actually they're all
probably 40 watts now, aren't they? Yeah, that's fine. So now I could come in
here and maybe change this color a little
bit more like this. Swing it toward the
red just a bit. Yeah. So we're getting just a
little more orange in those. And I'd like to do that as
well for these wall lights, for the ones above
the paintings. And for that, let's go over
to the material panel because the light coming out of these is because of the actual material, the emission setting of
the material itself. So we've got this
emission color here. Let's just take
that and drag that down into the orange
just a bit as well. Yeah, you can begin to
see that orange there. And I feel like that's
just a little more cozy than having
pure white light. But now that I've done that, something that
sticks out to me is this floor lamp hit the
period key over here. Because I feel like. It should be kind of glowing, have a beige orange glow to it because the light should
be coming through it a bit. Whereas these here are
actual opaque lampshades. The light only comes out
in the bottom and the top. This one here, I think, should have a little bit
more of a glow to it. So let's work on that. Let's come up here. And for the object we
only have one material. Let's add a new
material slot and create a new material in here. And let's call it a
floor lamp shade. And then we need to assign
these faces to that material. So let's tab into edit mode and hit the L key to select
that whole thing. And I will Shift-click seem
to turn off seems here. Let's make sure that
whole thing is selected. Okay? Now what Let's do is assign that material to
those faces right here. And then let's come down to the emission settings
on this one as well. And let's change the color. Let's bring that up, right? And you can kinda
see it happening over here in the rendered view. If we bring it up to pure white. And that's what we get and
that's a little too much. Okay, so let's bring that
down a bit and let's also take it into the beige, maybe toward the yellow a bit, a little bit like this, as if it's kind of a
linen material that, that is shining through. Maybe I'll bring the
Emission Strength down about like this, or the emission color, I should say the value here
of the emission color. And then maybe
let's change this. They'll swing it into a yellow. That's a little too much. So I'm just trying
to find a good color that I think might work. So maybe something like that. Let's do mountain to
what we think here. Yeah, that gives us sense that
it's just kinda glowing a little bit better that some of the light is passing
through there. Alright, And lastly, we probably need this table lamp here, or the desk lamp, I should say, Let's hit the period key
and zoom into there. I'll do the same
thing over here. And for this, once again, we have well, we have
two materials, right? We've got the desk lamp light. That's the one we want. And let's change
the color of that. So down here under the
emission settings, Let's change that color
and let's pull it into the orange as well
just a little bit. Yeah, there we go.
Alright. So let's see how it looks now. Yeah, I feel like the
room just feels a little more cozy with
those orange lights. Let me select the camera here. Let's change the
camera properties to, well, we've got it at
a 30 millimeter lens. Let's try 25, just to open
that up just a little bit. Yes. We can see a little
more of the room. Yeah. Okay. That's not bad. You know
what, let's do this. Let's do a render test. I'm going to press Control
S and save the scene. And then with the camera here, and the render
settings currently at 128 for the Mac samples
and D noises on. Let's now just press F2
and see what happens. Now as we do this,
you can see it says updating images, loading window, room, pillars, et cetera, loading all of those images
from the texture maps. And that can take awhile. And I'll show you how
we can avoid that when we're rendering many
frames over an animation. But okay, here's the render. And it looks, I
think, pretty good. I'm just looking
at the color now. I may want to increase the general ambient light
from those area lights, but at least for the
practical lights that we can see in the frame here, I think those colors
look pretty good. So as for those images, let me close this. If we come down here to performance and we
twirl this down, Here's this little thing
called persistent data. And what that will do. Well, as you can see here, it says keep
rendered data around for faster re-renders
and animation. And then it says, at the cost
of increased memory usage. But this is usually
preferable than waiting around to load all of those images, every
single frame. So I'm going to turn this on and then I'll save the
scene. Press F2. And you can see it's
updating images here. But this should be the only
time it needs to do that. So now that we've got
this done in 13 seconds, let me close this and
let's do it again. I'm going to press Control S. I'll hit F12. And let's see what
happens. Now look at this. It didn't update
the images at all and now we're down to
just under four seconds. So that's not bad. Alright, in the next video, since we have a fireplace here, it may not be bad to try and add a little fire in there to make the scene kind of warm and cozy. So we'll work on that next.
113. 113 Creating a Quick Fire Simulation: Alright, well the next thing I'd like to do is maybe try and put a little fire
in the fireplace. But before we do that, let's do some clean up here
in the outliner. I realize I've got
some things hanging out here and it's
mainly the light. So I'm gonna go through
and press Control and click the various lights
we have in the scene here. And then I'm going to press
M and new collection. I'll call these lights
and we'll click OK. And there we go. So now
we've got these in here. We've got the camera and the volume hanging out
there, That's fine. So to create a fire
in the fireplace, let's maybe select
those logs there. Here's the material
for the logs, and I'm just going to hit the period key and zoom in here. And then we'll also
zoom in down here. And I actually think
I want to change this to the material
preview here. And over here I think I'll
switch to solid view. I'll hit the Z key
and go to solid view. And so here's our camera here. And what I'll do is first
move the cursor to this. I'll press Shift S two, and then I'm going
to create a sphere, shift a mesh UV sphere. And then I'll hit the S key and shrink it down quite a bit. Maybe something like that. And I'm gonna bring
it up in here, into the wood here, maybe kinda like this so you can see it just a
little bit there and I just want it inside there
because that's where the flames are gonna be
coming from in there. And we'll be able to hide that So we won't see
it in the render. But with that selected here, let me change this
name to fire sphere, just so we know what it is. And then with this selected, we're going to go to the
very complicated process of going to object, quick effects, and
click on quick smoke. There we go. Now, we can
come down here and change the smoke style from smoke to fire. And there we have a fire. Now notice it created something extra here called
a smoke domain. And you can see that
here just kind of a cube that is created
around that object. And that's just the area that the flame and the smoke
is going to go up in. So if we come down here, actually before I do,
I'm going to press Control S and save it. Just because since I'm
running video recording this, it can really bogged
down my computer if I play it with everything
recording and going here. So just to be sure, I'll press Control S, and then I'll hit the
play button here. And you can see the fire here. It's not really going
through over here, so I'll switch over to solid view here so we can
kinda see it in there too. But you can see what it's doing. It's just giving us
a fire simulation. It's a little big, right for the fireplace here. So let's go ahead and pause it. Go back to frame one. And just like the physics
simulation for the blanket, this to also needs a couple of frames at the
beginning to get going. So we need to keep that in mind when we go to render the scene. But here in the smoke
domain material, you can see that here we have different properties that we
can use to change the color, the emission color, the black body tent,
and the temperature. But for now I'm just
going to leave it as is and just try
and reduce the size. So with our smoke
domain selected, let's come over here to the
physics properties tab. And in here, we can
come down to this, this gas section and ended the buoyancy
density and the heat. We can turn these
down quite a bit. So maybe let's take these
2.1.1. Let's do that. And then let's take
it back to frame one and hit play and see
how we're doing here. Yeah, so that's quite
a bit better. I think. That's not as big. Now we have some smoke kinda
drifting up into the room, but I don't know that
that's really going to be a problem in our rendered scene. I don't know that
we're gonna be able to see it that well because you can really only see smoke once you shine a light on it. Alright, so let's actually take a look at it in
the rendered view. I'm going to press
Control S again, and then go over here to
the rendered preview. Now let's make sure in
our render settings, I've got the Mac samples
down to 64 for the viewport. Let's hit Play and
see what happens. Yeah, see, that's kinda nice. There we go. Let's try that. That'll give us something
to work with in the render. If we want to render
without this, all we have to do is
just come over here to the smoke domain and hide it there and also
hide it in the render. And then it won't come up. If we come back to
frame one and hit Play, you can see that we can't
see it there at all. So we have some fire
in the fireplace now. So in the next video, we'll begin creating keyframes
to animate our camera. And we'll talk about how to render out an animated sequence.
114. 114 Setting Up the Scene for Rendering: Now I think we're ready
to attempt an animation. And what I mean by animation, I just want to
animate the camera. I want to move the camera
through the room slowly. And I'd like to build a
couple of these shots, kind of slow moving
camera moves that we can cut together and kind of give a sense of the whole room. I'm thinking half a dozen shots, maybe some close-up,
some wide shots, and then edit those together
here in blender to make a final finished
single MP4 video file. So to begin with, I've set the camera back over here on this
side of the room. I've got in the
output settings here, the percent at 50% still I'm going to take
this back up to 100s, so we get a two k
image, 1920 by 1080. I've got 24 frames per second set here for
our frame rate, I'm really only going
to do 250 frames here, which is about ten seconds. And I'm going to output
a series of image files, 24 images per second, that will then convert to
a video file like an MP4. And you may be wondering
why would we create so many PNG files when we can
just create one MP4 file? Well, it depends on how
trustworthy you are. So if you're rendering out, say your ten seconds shot
at Five seconds per frame, and it's going to take a
couple hours to render. If your computer has a problem, if your program crashes, if you lose power, whatever, you won't be able just to
pick up where you left off. If you're rendering out an MP4, a single video file, you're going to
have to begin from the beginning and
start all over again. Whereas if there's a
problem when you're rendering out
single image files, if say at frame 140,
your computer dies, you can reboot, bring it back, and start the render again
with a frame start of say 141. Now you can just
keep going without having to go back and redo everything you've
already rendered. So as I said, it just depends
on how trusting you're willing to be of your computer
and your circumstances. I personally am
not very trusting. So I have had computers
crash on me way too many times to render
directly to a video file. And that's why I
always render to single images, usually PNGs. And as we're doing that, we need to send it to a particular place
on our hard drive. So here in the output, it's currently going to the
Temp folder on my C drive. I'm going to change this. I'm going to click
here. And I'm going to go into my Project folder here. And I've created a
folder called renders. And in here I've created different folders
for different shots. I've just created shot 1234
and I can create more. But currently, the
one we're gonna be working on is
shot number one. So I'm just going to
select that folder. Click Accept, and
then except again, and that will put
that path here. So any frames that we render, we'll go into this folder. So that's good for
our output settings. Let's go over to the
render properties here. Now recall, we've taken
this down to 128 samples. I think that's what I'm
going to try to begin with, rendering out at 128, but with de-noise on because
really you can't really render at that low of samples
without de-noising it. If we didn't have the noise, we'd have to be up like
four K or something, but with de-noise on, we might be able to
get away with it. And in getting away
with it, I mean, having a lot quicker
render time. In other words,
rendering a single frame in three seconds as
opposed to three minutes. So this could help a lot. And also recall we turned on persistent data
underperformance. So this is going to help in that we're only
going to have to load all of those image textures one time at the
beginning of the render, and then every subsequent
frame will go a lot quicker. So I'm thinking right now to
begin with the camera here and then move it to the left
just a bit very slowly, just to get a sense of kinda
moving through the room. So if we want to create a
keyframe here for the camera, we need to first
select the camera. So let's come over here
and choose camera. Oh, and also, since we're pointing away from
the fireplace, I've put the fire sphere and the smoke domain in
this fire collection. I'm just going to exclude
this entire collection. So Blender doesn't
try and render that for this particular shot. But if we choose
the camera here, we can then press the I key and get the Insert
Keyframe Menu. And I think what I'm
gonna do is just add the location and rotation
for this keyframe. I'll click there
and look down here. We now have a keyframe
in our timeline. I can then drag this
all the way over or click here to go to the end
of the timeline here at 250. And I can now move this
camera over a bit. Let me just kinda slide it over. And let's say we kinda. Move it over to say right here. So just a very slow
simple move there. Once again, I'll press the I key and click location
and rotation. So now we've got two keyframes, one here and one here. And if I click and drag this, you can see the
camera move there in the view from here to here. And if we play it, if we go
to frame one and hit Play, you can see it begins kinda slow and then speeds
up just a little bit. And then as it gets
towards the end, it's going to slow down
a bit there as well. Now, if we wanted to keep
it that way, that's fine. The interpolation is
ease in and ease out. But what we can also
do is maybe select that key frame and then
right-click oh, here. Let me move this out
of the way over here. And right-click this
and we can change our interpolation to linear.
I'll just click here. And now if we go back, let's see if that worked. If we go back to frame
one and I click Play, it's really hard to tell
if it's changed or not. One way we can check is to actually take a look
at the graph editor. So I'm gonna come
over here and change from the shading editor
to the graph editor. Here we go. Now we can actually see
the curves happening. And it looks like it's
pretty straight here, right? We could press Control
Z and undo this. And now you can see I'm going to press the Control key and middle mouse button click
and drag to zoom in on this. You can see that curve that's
happening here, right? If I come over here and
right-click and change to linear. Now it's a straight line, meaning that the rate of
change will be constant. It won't ease in and ease out. So if we hit play now, you can see it just moves
at a constant speed. Alright, I think that's pretty
good for the first one. Let's try this. So I'm going to press Control S. And before I begin rendering, one of the things I like to
do is kinda take a look at the performance information
of the computer and to see where it's being rendered
to what I've done here. Let me just grab the edge of this and I'm gonna
move this over. This is what I like to do
here when I'm rendering. I do over two screens, so I have two monitors, so I'll put these windows
over in the second monitor. But here you can see this
is our task manager or Windows Task Manager using
the Performance tab here. And since I've got my render properties
here set to GPU compute, it's gonna be using
the GPU to render. I've also selected that
shot one folder down here, so that as each of those
individual frames are created, I can see them pop in
here and I can kinda see if there's any
problems happening. And if there is, I
can stop the render, do a fix, and then kick it off again from
where we left off. In the next video,
what we'll do is we'll go ahead and begin a render, and we'll take a look
at our settings here, the images going
into the folder, and we'll see how long this is going to take for each frame.
115. 115 Rendering an Animation: Alright, let's give this a
try and see if it works. I have found that because I'm running video,
I'm recording this. What I did is I came in here
back to Edit Preferences, and I am going to turn on
the Intel Core CPU as well. I've got cuda turned off for the graphics
card for the GPU, but when you turn on the CPU, it turns it on for both. So I still have optics, but I've got both
of these turned on. Alright, let's now go
back over here and we can see the different parts of the computer here we can
take a look at the CPU, the memory, and the GPU. And we'll keep an eye
on this as we go. Because sometimes if
there's a problem, this can tell us where
that problem is. And also recall that we're
going to see our images come into this shot one folder
under the renders folder. Alright, so let's
give this a try. I'm going to come
back over here. I'm gonna go ahead and
save my scene with Control S. And then to kick
off the animation, I'll just press Control F2. And let's see how we do. Now. It's probably going to begin with loading a bunch
of images here. Yeah, here we go. But with that persistent data setting on that we looked at
in the last video, that should help it go a little quicker in subsequent frames. So we've got about 30 seconds
for that first frame. Let's see how long it takes
for the second one here, it looks like we've
got 16 seconds now, so it's a little bit less. That's good. I'm going to
shrink this down some. So we can see the
other windows here. And it really looks like
to me I need to increase the world brightness
outside the window, so I'll do that. But for now, let's
let this keep going. So we can see this happening. Here are the frames
that are being rendered and you can
see them pop into here. Now you can come in
and just open one of these up and take a look at it. I bring it over here. You can see there it is. So you can kind of monitor the frames as
they're being rendered. I'll close this out. And then over here
you can see we've got a GPU that's going up
pretty high in here, but we don't see it here. And that's because
if we click on here and go to cuda right here. Now we can see what's happening
with the graphics card. And that's simply because
the API, the cuda, the optics, the Nvidia API
wasn't being shown there. And if we select kudo,
we can see it going. Now, this assumes that you have the same kind of card I do. You may see different things depending on your graphics card, but just keep in mind, you can pull this down and change what you're
viewing on your GPU. In addition, we can
come over here to the CPU and take a look at this. And we are getting a
lot of CPU activity, a 100% at times look at that. So hopefully that
won't be a problem. But if it does, we'll have to deal with that. And we can see the memory here. This is the RAM of the computer. So this is how much is being used in the rendering process. So currently we've got
about 16 seconds per frame, which really isn't bad
for a Cycles Render. It's only that fast because
we have the sampling so low. I'll switch back over to the
GPU here and I'll let it go. So I'll go ahead and do a
couple of these renders. Move the camera around, keyframe the in and out
of each camera moves. So when I'm done with this, I'll need to come down
into the timeline, delete those keyframes, and
move to another position, and then insert new keyframes to get that new camera movement. So in the next video, we'll begin building
up our final video. We'll use blenders, video editing tools to
edit these shots together.
116. 116 Using Blender's Video Sequence Editor: Well, I've been doing
some rendering. I've rendered six or seven shots so far by just drag
this over here, we can see them here. So like shot six, here are the various images. I've got this going. Let me open one of these
and bring it over. Here it is. So I've been rendering
these kinds of images, just slow moving shots
throughout the scene. And what I've been doing
is selecting the camera, hitting the a key to
select the beginning and end keyframes and
then deleting them. And then moving the camera to a new position
using the I key to set new start and end keyframes for the
camera movement and then rendering again, once again with Control F2. So I've done that
seven times now. And now I think I'm ready
to bring these into Blender as video clips or as imaged sequences first
to see how they look. So to do that, I'd
like to bring up a video editing
screen layout here. And I don't have a tab
for video editing here, but you can come up
here to this plus sign right here and click there. And it's gotten video editing. And we can come over here and click on video editing here. And now we have a new
video editing tab with a video editing
screen layout. We just maybe move
this down to here. And now what I wanna do is bring in these image sequences
and see how they look. So first of all, let's bring in that image sequence that I just did this shot zeros seven. To do that, I'm
going to hover over the timeline or sequence are down here and press Shift a and then go
to Image Sequence. Then here in my renders folder, I will browse to that
shot seven folder that I've created and here are all of the rendered images. Let me switch over to
the thumbnail view here. Now what I need to do
is just select them all and bring them in
as an image sequence. So I'm just going
to hit the a key. And then I'll choose
Add Image strip. Now you can see it's placed
here on Channel one, beginning wherever
that cursor was. Currently, my cursor
is at frame one. And now if I hit
the Spacebar key, Let's see what happens. There it goes. It's
beginning to play, but you can see
it's pretty slow. It's only at about 15
frames per second. Now once it caches
all those frames, it may play a
little bit quicker. So when it begins again, Yeah, we can see it's now up
to 2425 frames a second. So here's that shot. Now, I'm not sure that
this is going to play as smoothly once we get
other shots in here. So let's try that. Let's say I want to bring in
another shot right about, right about here, right
about here, Let's say. So what I can do is press
Shift a image sequence. Let's go back and
choose maybe shot six. Let's try that. Here
are the frames. I'll hit the a key,
click Add Image, Strip. And there it is. So now you've got this one here. So let's just see if I hit play. It's moving pretty slow. So the more we get in here, the more I'm afraid we're not
going to really be able to see it play at a
real-time speed. So what I'm gonna
do is delete these. I'm just going to select these. And then I'm going
to convert each of these image sequences
into an MP4 video, bring those in and
do my editing. So let's try that. First of all, I'll press
Shift a image sequence, and this time I'm
gonna go to shot 07. Here. I'm going to hit the a key and I'll
click Add Image strip. Now, notice that my
cursor was way over here, and therefore it was
put in at that point. So I can select it, hit the G key and move it back to frame one right
here, and then click. Now, the display at the top is showing the seconds
and the frames. If you do not want that, you can go to View and
turn off show seconds, and then it will only
show the frame number. So however you want
to use that I tend to like at least until
I get everything in. I like to just see the frames. And then once they get
everything in and I want to see how long the total video is, then I can switch back
and view the seconds. Alright, so to convert this from an image sequence to a video, what I'm going to do
is come over here to the output properties
window and scroll down and here is our
output settings. And what I'm gonna do
is change this from a PNG format here
to an FFmpeg video. There we go. Now down
here under encoding, I want to change the
container to an MPEG-4. And the video codec
automatically switches to H.264. So this is just the
standard video template that I like to use. Now I want to tell it to
go to a certain folder. I've already created a
folder here for the videos, and you can see that
I've already converted the first six image
sequences into MPEG-4 video. So I'm going to put number
seven in here as well. So I'll click accept. And now we have
that path in here. Then what we can do is go
back to frame one here. And then I'll press Control F2, and it will render the
image sequence as a video. So let's do that Control F2. And there it goes. Now
I can take this window and make it so it isn't
full screen here. There we go. But you can see it moves almost
at real time. It's pretty fast when we're just converting from image
sequence to a video. So once we've done that, let's close this window. And I'm gonna go ahead and delete this image sequence here. Now I think I'll change my
frames from one to 180. Let's say we want it
to be 30 seconds. We can here put 24
times 30 and hit enter. And it will then give us the proper frame
amount, which is 720. Come down here,
hit the home key. And here is our
frame range here. Alright, let's start
bringing these in. I'm going to press Shift a. And this time I'm gonna go to movie instead of image sequence. And then let's go into the
renders, into the videos. And here I'm going to change
the name of this one. I'll right-click and let's
change the name to shot 07. There we go. Then I'm going to try just grabbing
all of these, pressing the shift key
and add movie strip. Alright, we have
them all in here, but there are of course
too long and I'm gonna begin to edit these down a bit. But if I hit the space bar, you can see it plays at normal speed right
out of the gate. Alright, so now that I've
got all the videos in here, I can select one, hit the G key and move them around and rearrange
them the way I want. So let's say I wanted to begin with this
one. Let's try this. I'm just going to hit
the G key and move this over here to frame one. And I'll press the G
key and move this one. Then I'm just going to find
a nice In and Out point. I don't think I want to
begin it that close. I want to begin at
right around in here. So now I'm going to select
this end right here, and then press the G key, and it will then trim that end. Now if you only want to
move the clip you select in the center and then press G and move that back to
say to frame one. Let's try that. I'm going to move it
back to frame one. Hit play. We've got that. Okay. So maybe I go to here, select this and hit G and
move it in like that. Which one do I want? Well, maybe this one's kinda
nice here to go after that. Let's try it G here. Select it in the center G and move it over here like this. So you can see, we
can just begin to rearrange our shots here to get them in the
order that we want. So I'm gonna go
ahead and do this. And then in the next video, we'll take a look at how to fade a shot in, fade to black, dissolve from one
shot to another, and then render out
the whole edited video to a single MP4.
117. 117 Animating the Rotating Record Player: Well, I realized after the
last video that I hadn't gone through how I animated the
turning record player here. So for this particular shot, I animated the camera,
moving back away. And at the same time I also
animated the turntable or just the record actually
rotating at its center point. So I just wanted to go over
real quick how I did that. Really all it is, It's two
keyframes and a modifier. So I'm just going to bring
this over a bit like this, and I'll hit the End key. And you can see over here
you've got add modifiers. And this modifier
is called cycles. So you can grab this
and pull this down. You can go to the Modifiers tab, pull this down and
choose cycles. And all I've got is
just repeat motion. And for the count, you can see here that 0 equals infinity. So that's really all it is. Let's just delete
these keyframes and I'll just repeat it
and show you how I did it. So I'm gonna hit
the a key and press Delete to remove
these keyframes. And then I'm going
to come in here and just insert a
keyframe for rotation. I'll hit the I key
and go to rotation. Then I'm going to move
it up, say 30 frames. I played with it a bit. And once you get
the keyframe here, you can move it back and forth to slow down or
increase the speed. I'm going to set a keyframe to rotate it in the
z-axis 360 degrees. So first of all, I'll rotate
it our z 360 and enter. And then I'll insert
a keyframe for that i and choose rotation. And there we go. Now as we've seen before, when we insert a keyframe here, it's automatically giving us these curved or ease
in and out keyframes. And most of the
time that's fine, but it's going to begin
slowly and then speed up and then slow down before
it hits this keyframe. So I want to hit the a key
to select everything in here and right-click and choose
the linear interpolation. There we go. So now it's straight. Now what I wanna do
is use the modifiers and just select this one
keyframe right here at the end. Go over to the Modifiers tab, add, modifier, turn onto cycles. And there we go. Now it just repeats throughout
infinity there. So if we go back to
frame one and hit Play, we can see it's just going to turn while that
camera moves back. And that's all I
did to create that turning turntable there,
that turning record. Now, I do see that the reflections on the
image here spin around. Whereas in actuality the
reflections wouldn't spin. They'd be in one place
while the record turns. But for our purposes here, I think that's going
to be just fine. Alright, so in the next video, we will finish up our editing and render
out a final video.
118. 118 Adding Transitions and Rendering: To finish up outputting
our final video, what I'm gonna do is
add a few fade in, fade out, dissolves and things like that to our edited videos. So this is what I've done in terms of rearranging the shots. I'm beginning with shot
three and then 25, etc. So let's just take a look at
this and see how it looks. So we begin with the turntable because I think I'll
be playing music. Then we go to the little
lockbox and the fireplace. So I'm just kinda moving the cameras slowly
around the scene, kinda building up an
impression of the scene before we kinda get
this wider view. And then the final view here. So let's begin with the fade in. What I'm gonna do is go
back to this clip here, and you can select
it in the center or in the front here on the edge. And what I'm gonna do is
just come up here to add, or you can press Shift a. And I'm going to add
a fade, fade in. Now, once we do that, take a look at
what happens here. It actually fades to
the Alpha channel to where the video channel
is just invisible. So we need some black
underneath this, so we fade in from black. So I'm gonna go back
to the first frame by pressing Shift and
the left arrow key. And then I'll press
Shift a choose color. And that drops that color
strip right in here. And you have control over what color you want
it to be over here, but it just comes in black
and I think that's just fine. Though if I hit play. Now. Now you can see it
fades in from black. Alright, so the next
thing we need to do is deal with our
transitions here. And what we wanna
do is be able to select these two and
then add a crossfade. You can press Shift a and come down here to
transition and cross. But the problem is there isn't
anything for it to cross. We need to actually
overlap these. So there's something for blender to cross-fade from and to. So since our frame rate is 24, frames per second,
half of that is 12. And if I want a 1
second crossfade, what I'm going to
need to do is extend these two shots by 12 frames. Now, I could do a 2.5th
and then that only be six frames per shot extending
forward and back here. Why don't we try that when
we try a 2.5th cross-fade? Let's do that with this
edge selected here. What I'm gonna do is
press G x negative six, and it's going to move back horizontally six frames, right? So I'm going to do it
again for this edge here, I'm going to press G x six, and it moves it forward
and then press Enter. So now we have a twelv
frame overlap here. If I wanted a 1 second overlap, I would do GX
negative 12 and g x2. So I'd get a 24 frame overlap. But let's try it like this. I'm going to select
this shot and Shift-click this shot here. And then I'm going to press
Shift a transition cross. And there it is
there. So now that's a twelv frame crossfade
between these two shots. So let's see how that looks. I'm going to press Shift and left arrow to go back
to the beginning. I'll hit the spacebar. We've got the fading from black and the transition
there, That's not bad. Yeah, I think that's probably all we need
is just a 2.5th. Let's try it and
see how it works. I'm going to press Control
S and save the scene. And then I'll select this one. Press G x six enter, and select this one, g x negative six enter. Now I'll select this
and this, shift, a transition and
cross. Let's try that. Yeah, that's pretty good.
However, I kinda feel like, alright, I'm gonna try 1
second. Cross fades here. I'm going to delete these and I'll take it back another
six frames, right? Gx, negative six and x six. Let's just see what happens with a 1 second crossfade
shift a transition cross. Then I'm gonna do
the same thing here. G X6 and GX negative six. Let's try this. And
then these two shifts, a transition cross. Let's try this shift
left arrow and Spacebar. Yeah, my computer's having
trouble keeping up, but I think that's a little
bit smoother and nicer. I'm gonna go with
that. Alright, so now what we need to do is
press GX negative 12. And G x 12. So we get that 1
second cross-fade. Alright, shift a
transition cross. There we go. G x 12, GX negative 12. Here we go. This one, this one shift
a transition cross. And we'll keep doing this
for the others here, g x 12 and g x and negative 12. Alright, so now we've got
transitions for these. I guess we do need it
here. Don't leave. So let's do that real
quick. Grab this one. Negative 12, and let's add that cross fade shift,
a transition cross. And for this one, we need to fade it out. So let's press Shift a fade and fade out, and
let's try that. But recall we're
going to need one of these black strips to
put underneath there. So let's just take this and press shift D and move it
over and drop it right there. And let's see how that works. Yeah, we're going to need
to extend it to the end of the sequence here to frame
720. Let's try that. Okay, let's take a look
at the whole thing. I'm going to press
Control S and save it. Shift and left arrow to
go to the beginning. And I'll hit the space
bar and here we go. So my computer may have a
little trouble keeping up, but let's see what
we can do here. Yeah, So that's kind of a nice timed know that something
happened there. Let's see what happened there. So it looks like my crossfade isn't really
cross fading, right? It's popping in here a
little bit too soon. So let me delete that and
let's see what happens here. Alright, let's try that again. I'm going to select
this one and this one, shift a transition and cross. Let's see how that works. Yeah, that's a little
bit better. Okay. Let's try this one here. Good. This one. All right. This one now let me
see about this again. Yeah, that looks good. And then let's see how
it fades to black here. Good. Okay, so now we've got
our transitions in. I'm going to press Control S
and save the scene quickly. I just wanted to
show you how you can adjust the color and
brightness of this. So to me, this seems a little bit too dark
compared to this one. And this one, this one just
seems a little bit too dark. Which you can do
is come back over here to the Modifiers tab. And I'm going to click
Add strip modifier, and I'm going to select curves. We've got color balance and
bright contrast in hue. But for me, the curves
just works pretty well. I'm gonna move this over here. And all I want to do is
just add an S curve. Again, I'm going to take this, I'm going to add a point
here and add a point here. And I'm going to drag
this one down just a bit. And this one up just a bit. And you can see we can
make it just a little bit brighter while still
maintaining that contrast. That's the key. If we went into the brightness and just turned up
the brightness, it'd be hard to
keep that contrast. So I'm just going to maybe
move it up like this and then let's see how we look here. Yeah, that's a
little bit better. I feel like it's just a little bit closer to the others here. And then this one, we can add one here and a
curved here and then take this and this and then maybe
take this down just a bit. Right? So you can
just kinda play with this and see what you feel you need to do
to get them to look a little bit more
similar to each other. Alright, so now I think we're to the point where we
can export this out. So to do that, we've still got our FFmpeg
video here. That's good. And our container is MPEG-4. I want to put this in my videos, but I want it to have a
different kind of names. So what I'm gonna do is actually turn off file extensions here. And then I'm going to come
up into this and call this final Video dot np. For. Now it's going to give
it this name and add this extension without trying
to do it automatically. Alright, I'll press Enter
and let's give this a try. I will go back to the beginning with
Shift and left arrow, and then I'll press Control
F2. And here we go. It's moving pretty quick. And that's a good thing. There we are. All right, let's take a
look at the actual video. And here is that final
video in our videos folder. And if I bring this over here, Let's take a look at this. And here it is. Yeah, so those dissolves. I think that 1 second dissolve
for those is pretty good. The cross fades
between the clips. So there we go. We've
got our final video.
119. 119 Adding Music: Well, I'd mentioned there'd
be some audio on this, so let's go ahead and add that. I'm going to hit the a key
to select everything here. I'm going to press the
GY and move it up. Oh, I don't know a
couple of tracks here and click just to
move all that up. I personally like to have
the audio on the bottom. That's just a
personal preference. So let's go back
to frame one now. Let's bring in some music. I'm going to press
Shift a go to sound. And in the music folder here, I've got several selections, but I think this one
here I'm going to use, I'll click add sound
and there it is. Now if we zoom out, we
can see it's a little bit too long for
what I have here, but it kind of fades
out at the end. So to be able to
see the waveform, you just need to
come over here to strip and click
Display waveform. Now, this is a panel that opens up when you
press the N key here. So alright, Let's just come down here and click
Play and see what happens. Here we go. Alright, I think that's
a little too loud. Let's bring that down
a bit like this. See how that sounds. I'll click Play again. And here we go. Alright? Alright, so I think
what I'd like to do is begin it a
little bit early or begin to music a little
bit earlier than the video and extend the video out just
a little bit for this tail. So I think what I'll do
is change the output. Let's scroll back up here
from 720 to maybe 800 frames. Let's do that. And then if I click
and drag this, I can hit G and move
this back just a bit. Maybe 12 or 13 frames,
something like that. Then if we go back to the
beginning and hit play. So it begins, so the music begins just a little
before the visuals. And then for back here. So maybe I want it to go to
let's try 88 Twenty-five, give it another
second there and then I'll grab this and just
move it back like that. Alright, so there's a couple of issues I'm gonna deal with. One is the speed at which
this shot fades in. I feel like it's a
little bit quick. And also we've got that Alpha
channel here, right here. So we need to bring
the black back a bit G and move that
back to frame one. And then this one, feel like we need to
extend that fade in. So what I'm gonna do is just
come down here and grab this and bring this up just
a little bit like this. And you can see the
timeline once we do. And then I'll pull
this up a little bit. And so if we select a shot, like say here, you can see the keyframes
for the fate end. So if I click here, you can see this is 13
frames begins right here. And then it ends right here. And you can see we come over here and put our cursor
on that keyframe. The opacity is at 0 and
there's a keyframe here. We drag it forward. Right here, it goes up to one. So the opacity, if you watch that you can see it over
there on the right-hand side, goes up and down when we move between these
two keyframes. So those are the
keyframes or that fade. So I should be able just to take this G and move it back a bit, say to frame 50 here. And now that fade will
be a little bit longer. Yeah. That's kinda what I wanted. It maybe moves a little bit
more in time with the others. Then I think I need to
take this and just move this black back so
it ensures that, that is covered by black. So let's try that again. Yeah. Alright, so now I'm gonna go back here and let's
fade this out. So if we select this
one right here, I'll hit the Home key again. We can see, let me scroll out a bit here until
we get to the end. There we go. So if I take this and then press
Shift a fade, fade out, here are the
keyframes for the fade out. So I can take this and move
it back a bit, maybe to 750. So let's see how that works. Yeah, that's nice. That
kind of fades it out. We do need to take this black and move it
all the way back to eight Twenty-five as well. Yeah, that's nice. I think that'll that'll work. So let's go ahead and
save our scene and let's press Shift
and left arrow, and then let's see how it goes. Alright, so now if
we want to export this out with the audio, we can come back over to
our output settings and scroll down below the
videos section to audio. And we just need to add AAC. And this will automatically
combined this audio with the MPEG-4 video
here into one file. So all we have to do now is just press Control F2
and export our video.
120. 120 Thank You: Well, thank you for joining
me on this journey to create a Victorian room using Blender
and Substance Painter. As I mentioned early on, I really enjoy this
kind of project. I hope it's been
helpful for you and maybe even a bit
inspirational to continue on and create your own scenes for whatever
projects you have in mind. Please check out my other blender courses if you'd
like to learn more about creating characters
and vehicles and animations. There are lots of
courses to choose from. And thanks again for
checking out this course. I really appreciate it. I hope to see you
soon and take care.
 Darrin Lile, Blender Foundation Certified Instructor