Transcripts
1. Introduction: In this class I'll
be helping one of my students redesign
her workspace. I'll be showing you my
entire thinking process, starting with understanding
what the problem is all the way to the
final 3D concept. I'll also be sharing three possible solutions
to her challenge, and I'll be explaining
what the pros and cons of each of
the solutions are. Hi, my name is Ana Marcu and
I'm a licensed architect. I've worked for over a decade, as an in-house architect
and I'm currently running my own little design studio in the beautiful city
of Vienna, Austria. My architectural design
practice focuses on home design and home
well-being and in my classes, I'm sharing everything I
know to help you create an environment that will
help you become happier, healthier, and more creative. The idea of this class starting with a class
project shared by a student in my class how to measure a space for
the right furniture. The student's name
is Muriah Umuriah, I'm not sure how to
pronounce her name and I'm going to butcher it
through this entire class. I'm very sorry. So Muriah has a
room of about 14.11 square meters or
151.87 square feet, including the wardrobe, and she would like to turn
this into a home office space and a studio space
for her painting. In trying to solve
a space problem, an architectural project
goes through three phases, which I would like to share
with you in this class. Number 1 is understanding
what the challenge truly is by analyzing the
information you have received, but also by asking
relevant questions. Number 2 is making a few
sketches where you try to understand the challenges and opportunities that
the space presents. Number 3 is catching
in 3D a couple of solutions and looking at the pros and cons
of the solutions. What opportunities
do they bring? What are the technical and financial challenges
that they will pose? Are these challenges worth it? These and many more ideas I'll be sharing with
you in this class. Also in order to
explain my ideas, I'll be using two softwares
that a lot of you are familiar with,
Procreate and SketchUp. This class is, however, not meant to teach
you how to use the software and I won't be showing you any buttons to push, but I'm happy to
leave some links in the class description if this is the first time
you run into them. What I do wish to show you in this class is what I do best, which is how to think
about your space so that when you will be facing
your own space challenges, you will have a better idea of how to go about arranging it. If you're interested
in more classes on the topic of
whole office design, I have two more classes
that might interest you. Home office interior
design work from home like a boss and home office interior design for
more creativity, these three classes
are going to give you a comprehensive overview of how to arrange your home
office or a studio space. I often give class ideas from the questions and comments
my followers leave on my monthly announcements
and if you want to have your question
answered in a lesson, or perhaps an entire
class like this one, make sure to press
the Follow button at the top side of the
screen, right here. I hope you are excited
to take this class. Are you ready? Let's
start the class.
2. The Assignment: Welcome to the first lesson. I want to start this
class by giving you an overview on what the
problem actually is. Mariah posted to the
class project in my class how to measure your space for the
right furniture, asking advice about how to
arrange her home office space. Let's have a look together
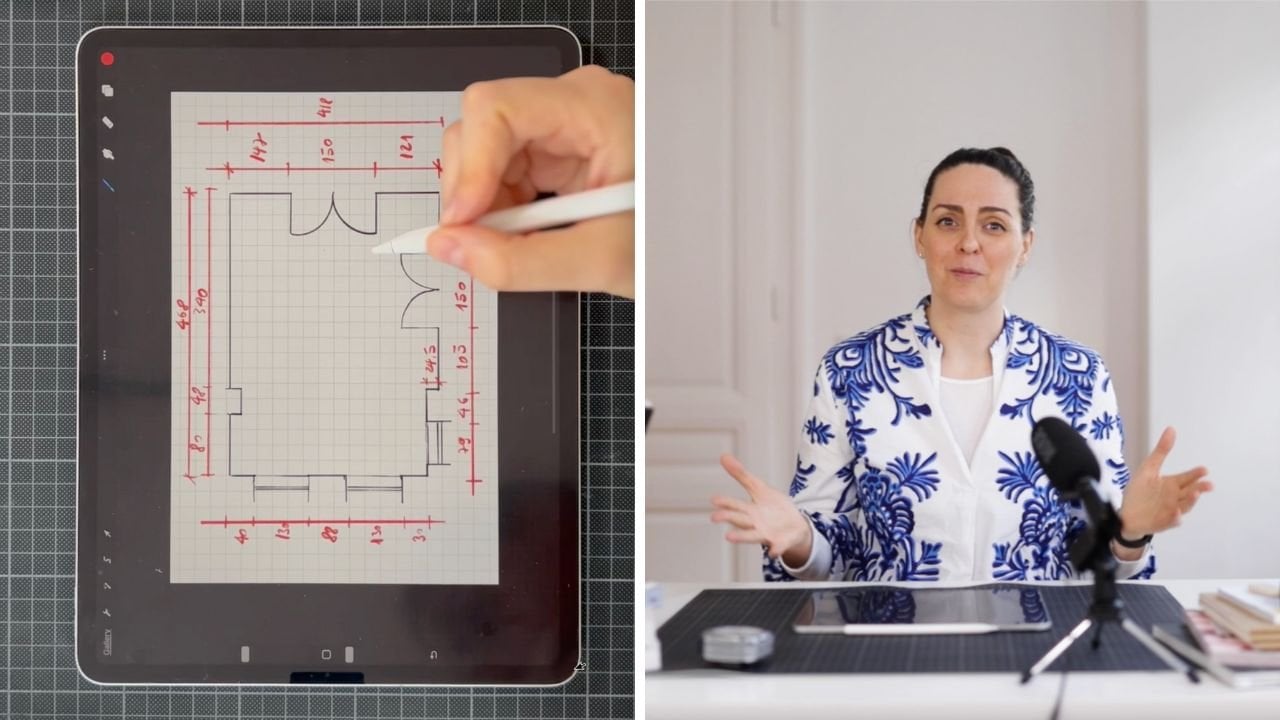
at what she shared. Mariah drew her floor plan
on the ruled piece of paper, and decided that two squares
on her page equal one foot. For the rest of the
world watching, wondering what on
Earth is a foot, one foot equals
30.48 centimeters. I know it would be
wonderful if it was 30 centimeters but it's not. It's 30.48. One square on her page
is 15.24 centimeters. I'm not going to go too deep
into the dimensions here. I just want to give you an idea of how big the room is, roughly. Her room is 10.5 feet, which is 320.04
centimeters by 12.5 feet, which is exactly
381 centimeters. On top of that, she
has a wardrobe to the left with two massive doors. She marked the sockets
on the wall with the x and the light
switches with a semicircle. She has the light switch on the left side of the
door and three sockets, one here, one here,
and one here. She also has a heat vent
right next to the window, which must remain unblocked. Now, let's have a
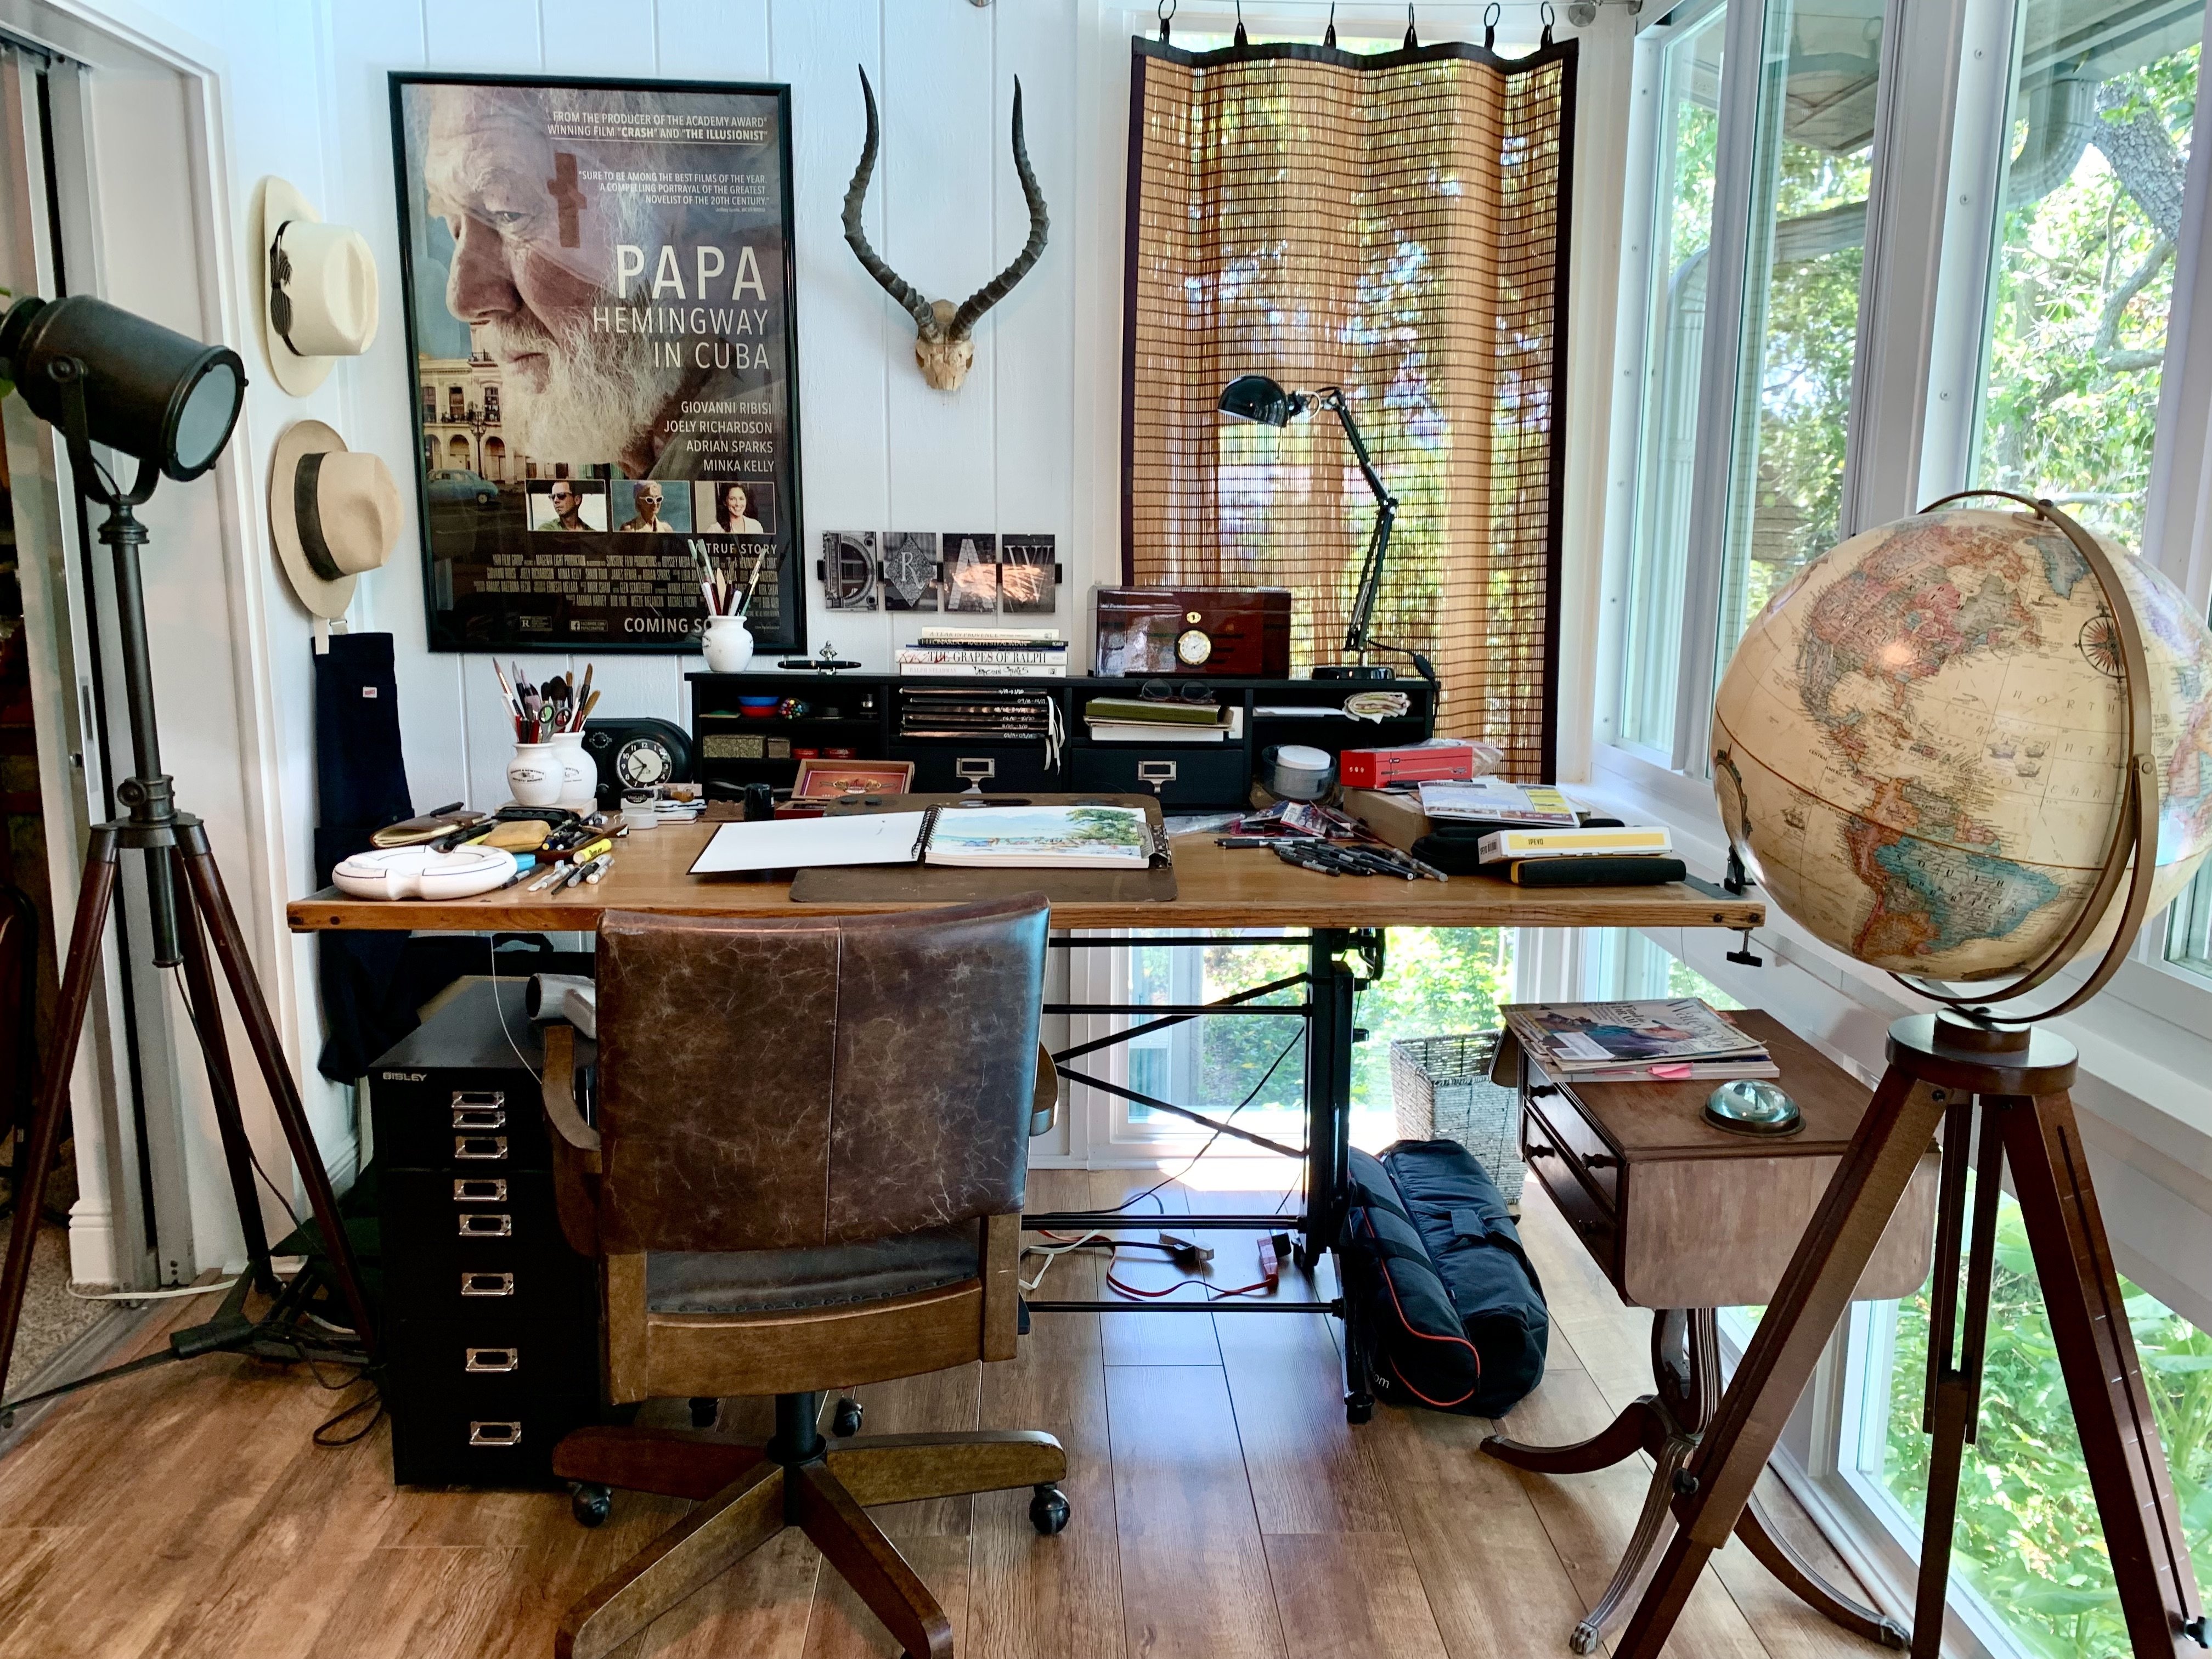
look at the photos. The first one is a photo from the door
towards the window. Mariah says, "Here's
my office now, my plants love the window, but the sun shines in my face here and need to move
my computer desk." We can see that she has
two desks in this image, one by the window
and one central. What her comment tells
me is that the location of the table right next to
the window is not ideal. The room has plenty of light, but sitting close to the
window is uncomfortable. The second one is the wall opposite to the
window and she says, "This patch looks nice as it's what people see
in my Zoom calls. Very heavy piece of furniture, and since it's low to the floor, it can't go under the window as you would block the
heat vent on the floor. I have a very long wall that you see in the room,
but it's empty." She refers to this wall here. If you look at the
plan, she has placed this piece of
furniture right here, and the wall to the right
remains very empty. The next photo, "A
double closet is great, but it pretty much rules out anything going on that wall." If you look at the plan, she's talking about
these doors here. In order to understand
better the problem, I asked Mariah to answer a couple of
additional questions. The first question I had is how many people
work in this room? She answered, "Just me. I've never had space beyond
the bedroom for activities, so I'm excited to make
the most of things." The second question I ask is, why does she have two
desks and one table? Why not just one table
or just one desk? As you may have seen, there are quite a few tables in this room and I was
confused about why. She replies, "This is just
furniture that is left over from around the house
that has ended up here, but doesn't need to be
here if I don't want to. Currently, I just use one
computer desk for work. The other desk is in
the closet and I just put things on to store
items out of sight. A larger table I do art on." What she means is that she works on this table on the computer, and on the central table, she does art and that she has a third table
here in the closet. Number 3, because she
mentioned the sun shining on her face and
it being uncomfortable, I also wanted to know about the solar orientation
of the room. She says, "The window
is facing south and I find it too sunny to face
when I'm on my computer. But I do like looking
out the window though." In order to make better decisions about
what to advice her, I also asked Mariah about the type of work that
she does in this room. I wanted to know if
she only works in the computer or is all the art, what things that she does? Mariah answers, "I
work at my desk at my full time job and
need both monitors, keyboard, a mouse, a room for
an agenda, and a notebook. Really everything
else is just extra. At outside of work, I like to paint and I do
collages and print making. Almost all my art supplies are neatly organized in
the red dresser. I'm standing up doing this art, I thought I'd move
around the table, but I normally just stand
on one side so far. I also like to keep plants in
this room as it is sunny." Normally here, I
would want to know more about why she
stands when she paints, and what setup would she need in order to not put so much
strain on her back. Would a lower reclined
table be more useful for her or
perhaps a taller one? Finally, I wanted to know
what other activities she hopes to do in this room
and does she have hobbies. Mariah mentions that
her other hobbies are really yoga and photography, but don't really need
space in this room. Normally, when I start
working with the client, I asked a lot more questions, really trying to
get to the core of what they are trying
to achieve and why. I look this all her public
work just to understand that other type of work that she does and what might
be useful to her. I see some beautiful
acrylic paintings of flowers and making have
a look at her table here and see that she works with a lot of tools spread
out on the table. So I'm gathering that she
needs a lot of table space. She also has some beautiful
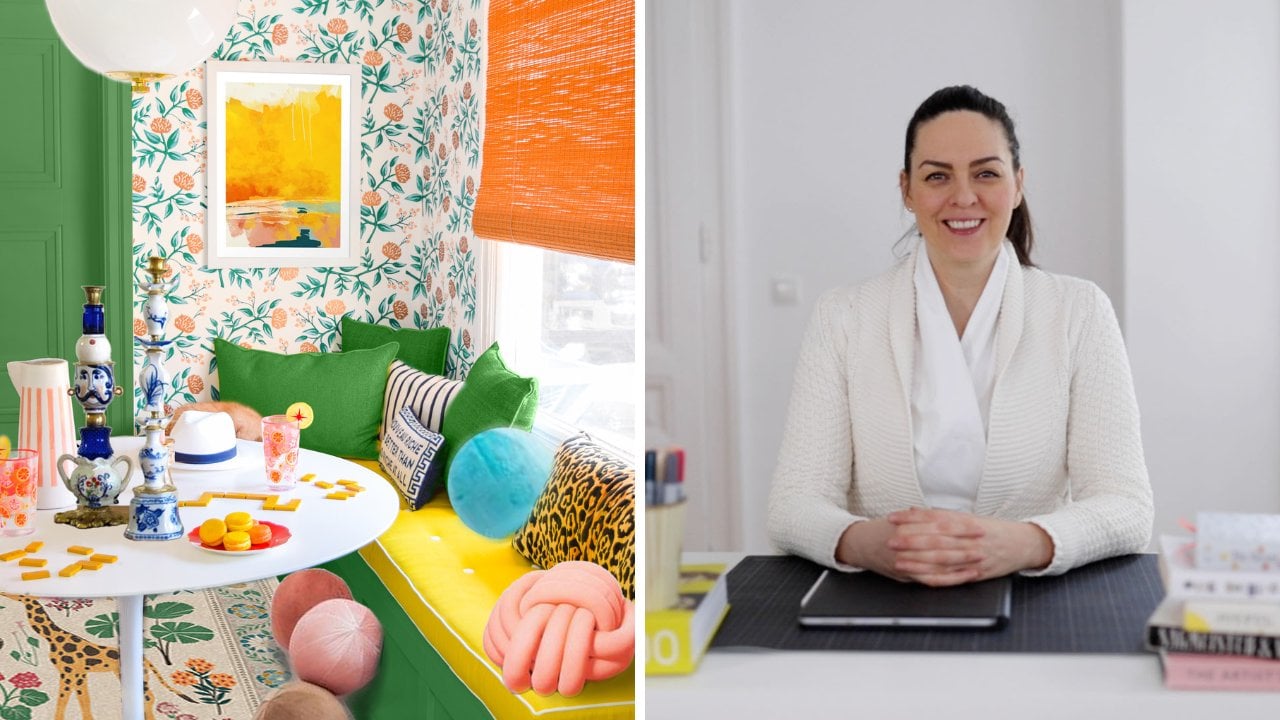
landscape paintings. In other class of line, decorating with plants, Mariah also shares
the project about her many plants which she loves. I can see from the Pinterest
board that she shared the environment she's
going for in this space. She seems to really live within furniture combined with plants. Here's what I understand
about Mariah so far. One, she has a small room that she can change into a workspace that is exclusively
aerospace and not the bedroom
at the same time. The room is facing south, which means she has plenty
of life all day long, but she doesn't feel
comfortable facing that window. She has a day job
that she does at her desk and an additional
hobby for painting, but she also enjoys
reading and photography. If she had the space, she would also like
to do some yoga. She works on her
paintings standing. I don't know if this is
temporary or easier, she really loves her plants and would love to
have them around. How do you arrange
these creative space? In the next lesson, we're going to look at a
couple of diagrams she did trying to figure
out how to arrange it. I think it's important to
look at them to rule out some design decisions that she already went through
and found insufficient. I would love to know how you
would design this space. If you have any
ideas for Mariah, you can share them in the
class discussion section. Also, if you have a space that
is equally hard to design, you can leave that in
the class project, and maybe you'll see a class
about it in the future.
3. First Diagrams: In this lesson, I want
to show you some of the ideas Mariah has had so far, and I think they're
worth mentioning, because this might be
the thinking process you might be going through. More so, I wish to congratulate you Mariah for taking the time in making these diagrams and
really analyze on paper, what would be the best
solution for your space. A lot of people don't do that, so really well done. Let's have a look at what
Mariah has tried so far. She has looked at four
ways to arrange her space. The first one is what
she currently has with the desk on the right
side of the window, the table in the middle, and a desk in the closet. In the second one, she
has two desks arranged along the wall and the
table at the window. The problem she says
is that a corner is awkward and it
looks very crowded. For the third option, she puts the dresser
in the wardrobe and spreads out the three
tables in the room. Here, she says that the view behind the desk is
not that great. I'll also add that there isn't much use for the table
next to the door. Finally, she puts the
big table in the middle and her office desk
next to the door, but the problem here, she says is that she feels
like it's too cluttered. So what I understand
from these diagrams? Number 1, you tried every
possible permutation where the furniture that you have and all of them
proved insufficient. Placing a table in the
middle of the room will give you a cluttered
look when you enter, having a table by the widow and one on the wall creates
an awkward corner, which is difficult to manage. You feel that sitting with your back towards your wardrobe, isn't that nice and a
couple of time I've seen your comment that things look rather crowded.
Here's why I think. The way I see it,
you have looked at every possible arrangement with the furniture you already have and found it
larking in some way, and I get that you want
to use the furniture, you have an invest as little as possible to arrange
this rule, so would I. Normally, I do not
encourage people to buy new things unless
I know they need it, but in this case, I really don't see a great
solution that would fit your requirements
with the furniture that you already have, and neither do you, so let me show you
how I would do it.
4. Floorplan Drawing: The first thing that I
want to do when facing this problem is to sketch
in scale for myself. I don't yet fully know
what all these heat mean because I generally
work in the metric system. Before I start drawing, I will take all dimensions from Ryan's plan and turn
them into centimeters. Then I want to start making a sketch in the metric system. Now, why do I do that? After working so long
in the industry, I have a better
understanding of what certain dimensions
mean in this space. I have a roster of standard
dimensions in my head. For example a table is between 60-80 centimeters wide by
120-160 centimeters long. A one-person bed is 90
centimeters by 200 centimeters, which are almost the dimensions
of an entryway door, which here in Austria
is 90 centimeters wide by 210 centimeters tall. If it's a room door, then it can be 80
centimeters wide. I have this list of
dimensions in my head, and I also know what
they look like in the space without
having to do a 3D, because I've seen that
time and time again. This is why I need to make a
sketch in the metric system. For my drawing, I decide that 20 centimeters is one square. I'll take all my
centimeter dimensions and divide them by
20 and identify how many squares each of
these dimensions will take on my piece of paper or
on my Procreate drawing. You will see all the numbers
showing up on the screen. I'm going to quickly
draw this in Procreate. You want to start
a new canvas size. Any canvas size will do. I have mine the
size of my screen, which is 2,732 by 2,048 pixels. By going to the range on
the upper left corner you can also select Drawing
Guides and 2D grid, which will allow you to overlay
a grid over your Canvas. I have my grid
size at 86 pixels, but you can make it however
large or small you want. The most important
thing is that you have enough squares on your
page to fit your room. You can essentially
select any pen you want. But after a bit of testing, I select a black gel pen brush. I'm going to start
with the longest wall which is 12.5 feet. I count 19 squares on
the length of my page. Then I turn my page around
and draw the window wall, which is 10.5 feet
or 16 squares. Then I draw the wardrobe, which is 8.5 feet long, or almost 13 squares. Finally, I'm drawing
the last wall, which is eight feet
or 12.19 squares. I'm also going to finish the wardrobe
separation wall here. In the following part, I'm going to draw the room door, which from Ryan's
drawing appears it might be at a 45-degree angle. But luckily I have a
dimension that helps me, which is 3.5 feet
or 5.33 squares. I just draw the dimension
on a separate line and then I rotate the line until I miss the adjacent
wardrobe wall. I don't know how
big Ryan's door is, but as I mentioned
before, in general, a room door is about
80 centimeters wide. So I'm going to make a door four squares wide and place it in
the middle of the wall. I'm also going to make
a copy of my door and create a double
door for my wardrobe and then delete the wall bit
that crosses the room door. With a thinner double line, I'm also going to
mark my window.
5. Idea Sketching: Once the sketch is finished, there are a couple of
things that I notice. One is that we have
a small room here with some massive
wardrobe doors, which take away from this space. This could be an advantage
or a disadvantage. The second thing
that I see is that the room is divided
into two parts. A very well lit
area here with sun shining all day and
a dark area here. If I want to think about
where to place my table, I'm definitely not going to
place it in the dark area. I'm going to place it as close
to the light as possible. The area here is
actually designed for furniture pieces that
don't need so much light. This might be storage
or perhaps a bed. The third thing
that I see is that my floor plan is
divided in three areas. One is created by the door
here so this is one area, here and then my wardrobe
here is also one area. It's actually a room that
has three zones,1, 2, 3. Now I've heard me say multiple
times that the room feels crowded and I would say that's because you have three
tables in this room. That is the problem a lot
of small spaces have. The more things you bring in it, the more crowded
it actually looks. My first suggestion for
you is to get rid of the three tables
and just have one. But where should we
place this one table? If we place our
table in the middle, like you already tried, then it's the first thing
you see when you come into the room so all the objects
that are on the table, all the paints and brushes, they're the first thing you see and just like you
remarked already, the space looks crowded and untidy so that's not an
option we want to have. We want to keep this
space in the middle free. We want to place our
table against the wall. This wall doesn't work
because it has some doors. This wall doesn't
work because it's far too dark in comparison
to the rest of the room. Putting a table
next to the window, you said it's uncomfortable because the sun
shines on your face. The only possible solution
here remains this wall. It has plenty of
light from the sun but without it bothering
you when you work. Now, you have so many
tables because you actually do need them from
four different types of work. You need one for your day job and you need one for your art. But placing them one next
to each other against the wall didn't
satisfy you either. Actually, it still looked very crowded to you so
my suggestion is to get rid of the two tables
and just get a bigger one, possibly 70 centimeters wide, which starts at the
edge of the window, so that you get as
much light as possible on your art and then
stop somewhere here. Also add a chair. That way I leave the
space here free. I get plenty of light
from the window, but it's not the first
thing I'd see in the room. My art utilities
and my paints are further away from the door. The other thing that I
notice is that you have a wardrobe that stays empty and a dresser that you
placed here. I wonder why. My suggestion is to add
some hanging shelves in the wardrobe and turn it
into a kind of art pantry where you fill it with boxes
and jars of objects and art suppliers so that way you can get rid of
the dresser here. We got rid of the tables and
we got rid of the dresser. We have plenty of space
now in this room. But what should we
do with the plant? For the plants, you can add
some hanging shelves here. Over the table I would like
to add my plants both over my table here and
my painting shop. I'm not very good
at hand drawing, but something like that. Then you can also leave some
plants here on the floor. With the help of the wardrobe, this would free up plenty
of room in this space. Now, work also require some
rest so I would also suggest, is perhaps in this area to have some day bed or a couch or
perhaps a bigger armchair. Now I have some more ideas, but we're going to
explore those in 3D. If you follow me in
the next lesson, we are going to look at how
to solve this problem in 3D.
6. 3D Sketching: In this lesson, I want
to talk a little bit about the various
locations of the table in the room and what benefits or challenges each of these
situations might bring you. What I have found as an
architect over time is that there's never just one
solution to a space problem. There are many
possible solutions, and each of them is going
to give you some benefits, and it's going to come with
some specific challenges. Therefore, it's
important to look at all these options and
weigh in for each of them. If this is something
that would make a massive improvement
to your life or not. As I am going
through this lesson, I'm also going to erase the difficulty of
realization of these ideas. Meaning that I will start
with the simplest and possibly the least
costly solution and slowly raise both the technical and
financial challenges of the realization. But on the other side of these challenges lie
some wonderful benefits. It's up to you to decide if it's something worth doing right now or you want to keep
it as a strategy and implement it in phases
at a later date. I'm going to explain these
ideas with the help of my 3D modeling software
called, SketchUp. But no worries, you
do not have to know SketchUp in order to understand
what I'm explaining here. This lesson is about how
to arrange your space, not about how to
use the software. I'm now going to talk about what buttons to push
or anything like that. If you want to know how
to use the software, you can go to Sketchup.com. They have some wonderful
free tutorials, and the software is also
for the most Part 3. Let's have a look at the screen. I have here a 3D
model of my room, so I can use my entryway
door in a strange angle. Next to the door, I
have my new niche. Here I have the long empty
wall Mariah was talking about. This is the wall
with the window, and here I have the double
doors with my wardrobe. I'm just going to
turn off the wall to my window so we can have a better look
at this problem. We ended the last lesson with the location of the table here. I think it's a pretty
good solution. It leaves plenty of
free space here, and you have a wide
table on which to work both on your
computer and your art. I also think you have plenty
of space in this wardrobe, so why not add some shelves? I am just going to turn off the wardrobe wall and
show you the shelves. An extra cost, yes. But I'm looking at all the space where you can add
your paints and art supplies and all
of the things you do not want to see when
you're working on your art. I think this would
be totally worth it. Now, this could be possibly the easiest
solution to implement, but Mariah did say that the wardrobe doors don't
look so good on Zoom calls. What are the options
that she have? Well, another option could be to remove the last two shelves at the bottom of the wardrobe and
replace them with a table. You could create here a
so-called clock face, a table for your office
work in the closet. This is what it could look like. You can put your
computer in there and additionally have some storage
space for your supplies. You can add your art
on the opposite wall, and when you have a Zoom call, people who can look at your art. You can have conversations about your art and who knows what
else might come out of this. Now you can choose
if you want to keep the doors and close the
wardrobe at the end of the day. Or if you add more light to
come into the wardrobe area and also have more
space into the room. You can remove the
doors entirely. It's very easy to remove doors. You just unhinged them and store them somewhere else in
case you change your mind. Now, it can move
to this art table where all your art supplies
are waiting for you, ready to begin a new project. This solution separates
your workspace physically by giving
you two tables, one for the office and the
other one for the art. Because you said you are slouching all the time
when you're painting. I also think it's less likely higher and narrower table on
this area would also work. I was talking to an artist
friend of mine Alisa Burke, who is also an online teacher. She told me that part
of the fact that she can practice her
art every day and have an art ritual
is that she has a table specifically
for her art, where all her art supplies are around her or are
already laid out on the table that takes
absolutely zero effort to start. This might be a solution
for your art practice. Now, let's raise the
challenge even higher. Personally, I find
this room very small. As I have spoken in
many other classes of mine, like Home Office, Interior Design for
more creativity. Creativity needs space. If I had this room
and it would be used exclusively for work. I would take down
the wardrobe wall just to have a bigger room, but also to create
more space in an area closer to the window that would
possibly have more light. In this case, the higher
table is in the closet area and you have a normal table opposite to it for office work. Because the art table is taller and you do not
sit in front of it, you can add plenty of
storage underneath. I added some drawers
and some paper and marker holders to create a colorful line
underneath the table. I don't exactly know
what tools Mariah uses. Normally, I asked a lot more questions before I start designing a home office. I didn't speak to her, so I took the liberty
to fill in the blanks. The important thing
is that she can have a taller table with some
storage underneath. I also made the storage area narrower than the table so that her toes can fit
underneath the table and her body can lean
against the tabletop. It's a subtle detail, but for anyone who has tried
to paint over a dresser, it makes all the difference. I've made the table as wide as the wardrobe wall left after you take down the
wall in front of it. The height of the table is 100 centimeters or 39.37 inches. I don't know how tall you are, but since you are considering making a custom-made workspace, then decide for
yourself how tall this table should be so that you can work comfortably over it. Now, Mariah also
mentioned that she has other hobbies like reading, yoga, and collage. I think for yoga, she has plenty of space in the
middle of the room and all the additional shelves give her plenty of
space for her books, as well as plenty of table
space for her collage. These are the three ways
in which I will structure, this room in terms of
where to place the table, the oversized table is also
going to give the room of focus point and all
the other elements will structure
around this table. The overall look of
the room will be cleaner and easier
to understand. Now, besides some
financial challenges, these solutions will also pose
some technical challenges. I'd like to address them
in the next lesson.
7. Technical Challenges: How do you attach a table to the wall and what wall you need? These are some challenges
you might run into, trying to implement
these solutions, and I would like to give you some ideas of how to solve them. The first challenge
is that none of my tables in my examples
are standard tables, they are above-average
long and some of the widths are hard to find
in a conventional store too. The first table is 60 by 250 cm. Also, as you can
see, I have left some space for the
curtains to pass through because I like it
when curtains go from one side to the
other of the room, they give the room a
bit of a softer look. Make sure you dimension
your tables in such a way that they
start with the edge of the wardrobe and stop just a little before the curtains. I left about 10 cm or a third of a foot in front of the wall
for the curtains to pass. Now, the next technical question that you might be asking is, why don't my tables
have any legs? Personally, I'm not a
big fan of table legs. I think they're annoying and
they should be abolished, so how do you achieve
a table with no legs? The answer is that you mount it on the wall, a bit of an effort, yes, will make your space look so much cleaner and amazing. Absolutely. Additionally,
your feet will move freely underneath
without popping your knees or your
toes into anything, so it will feel amazing as well. Now, how do you mount
your table on the wall? I've seen this done in two ways, either you use
heavy-duty brackets or you create a wooden
structure underneath. Another question you
might be asking is, what wall can support
a table this heavy? One possible answer is a
structural concrete wall. This wall will always hold
your tables and shelves. You see structural walls have the function of holding
the house together, they hold the weight
of the whole, and they make sure
that the house is stable while partition walls, all these separate
one room from the other and have no
structural purposes, you can take them down and a structure of the
home will not change. If you deal with
partition walls, you need to find out what
partition wall you have. Usually, partition walls are made of one or two layers of plasterboard attached to wooden or steel studs on two sides. Now, in America wooden studs are quite common in
residential spaces, which is great because then all you need to do is find where the wooden studs are and attach your brackets or
structure to them. If however, you live
in Europe and you live in a house made
in the past 70 years, then the studs are very
likely made of steel, is not a rule, but that's a general tendency. In any case, you have to
find out what wall you have and what is the
structure of that wall, if your wall has steel studs. You can't attach anything
to the studs themselves, but if your wall has a double
layer of plasterboard, then you can attach
your table to the plasterboard
with toggle bolts, I would encourage you
to seek out the help of a carpenter or a local handyman to guide you around this topic. A carpenter might also help
you design the table with additional drawers
and some holes for the cables in
the table board. This is why I asked Mariah if she rents or owns the apartment, you're much more likely to invest time and money in details like this if you
know you intend to spend a long time in that space, and you have the rights to ship that space
anywhere you want. If she had said that
she rents the space, then I would have skipped this
part entirely and went to the next part where I would recommend some
under-table support. You can use any
combination of idea, Alex roll container
and table legs. For hanging shelves, I recommend floating shelves where you do not
see the brackets. Again, a little bit more
complicated to make because you need threaded rods and more
advanced carpentry tools, but the shelves look so
amazing without the brackets. Mariah wrote multiple times that the clutter
bothers her so much, so I want to give her a design
that looks uncluttered. The spatial anyway be filled
with tools and canvases, books, and plants, but the furniture elements should not add to the clutter, they should not
attract attention, they should sit quietly in the background showcasing yard. The final challenge
that you will have is bringing electricity
in the closet. You've marked the sockets
and your light switches, but I do not see
any in the closet, I would recommend you to talk to an electrician and
whether you just want to have storage in the
closet or storage in a table, or take down the
wardrobe entirely. You should absolutely be able to see the items in that area, and possibly be able to have some sockets to
charge some devices, perhaps a printer or a camera
you need from time to time. Finally, this is not a
technical challenge, but I felt I needed to say this. The wall color influences
how you see the color of your art and if you wish to
see those colors correctly, then I would encourage you
to paint your walls white. I just want to demonstrate this with the red
chair that I have. When I shine the
flashlight on it, it irradiates a red
light on the wall, so do your current walls, they irradiate the wall color
all over your canvases. Painting your walls
white not only will allow you to see your
art correctly but will be more
supportive in bringing natural light all the way
to the back of the room. You can of course control the intensity of the
light with curtains, the curtains should also be
wide or very light in color. I think these are all
the challenges so far, I want to give you tips
that you can actually implement and not have
to scratch your head, wondering, how do I do this? If you are not particularly
skilled with DIY, I do encourage you to
ask the support of a local handyman,
carpenter, and electrician. The details are
totally worth it. It's time for the final review. In the following lesson, I'm going to show
you three ways in which you could
solve this problem. There are of course
plenty more solutions, but I just thought the three.
8. Final Reveal: We are at the final reveal and I proposed three
solutions to Muriah, each with a different difficulty
level of realization, but also with different
opportunities. In order to make
these solutions more approachable and
easy to understand, I have populated the scene with various items like Muriah's art. I have taken a few of her
art pieces that she shared publicly in her class projects
and put them in frames. All the art you see on the
walls is actually from her. I have added plants because
she has showed me that she has plenty of plants and she wants to be surrounded by them, and books because she mentioned
that she loves to read. Going through each
of these options, I'll be sharing what the
main characteristics are, what are the pros and cons, a couple of unique
details that I have decided to add specifically
to those options, as well as why I thought those
details to be necessary. Pay careful attention
to the why. This is going to
help you understand what you might have to
do in your situation. Let's go to Version 1. In Version 1 on the left
side we have a long table. On the right side
in the wardrobe, I have added shelves from top to bottom for plenty
of storage space. If Muriah decides to ask her
electrician to help her get some sockets in she could charge a printer or
her camera in there. But the storage space is
grand and she can put in there all sorts of
things like art supplies, canvases, or devices, close the door and she never
has to look at them again. Muriah's work space
will be both of her office work and her art. But at 2.5 meters or 8.2 feet, she has plenty of
table space for both. The table is supported by a heavy-duty brackets
and a container. The table is also surrounded
by open floating shelves and on them she can find her art books and
of course, plants. The look I'm going for here is the Pinterest
board she shared with me in another class project in my class decorating with
plants for beginners. Next to the table, I initially sketched a one-person bed, and if she still wants
to do as she can. But for this example, I have used the
recamiere which is a long armchair where
you can not only sit, but also lounge on
it a little bit. I've mentioned in
one of my classes called the Home Office
Interior Design for More Creativity that
the lounge position has been found to be very
supportive of creative work. I've added one of
these sitting elements in this version to allow
her to rest a little bit. The back wall is covered
with Muriah's art. I think it would look great as a gallery wall to showcase
her amazing work. That way if she takes
video calls sitting there or decides to record
herself for whatever reason, her art will always show
up in the background. What are the pros and
cons of this version? In this version, she has a
lot of storage space behind closed doors that she doesn't
have to look at every day. She takes advantage of the
closet that is already there. She has space to work, but also to rest [inaudible], and there is plenty of space for her yoga exercises in
the middle of the room. The cons are that she only has one table and it is a
table to sit at and she's probably going to have back problems trying to
paint on her normal table. The other con is that she has these doors behind
her during course, which she mentioned
that she does not like. Personally, I don't
find it to be that bad, but she has to decide
it for herself. Welcome to Version 2. Here the main characteristic
is that I have separated the office
table from the art table. I have placed the office
table in the closet area, and I have removed the
closet doors entirely, giving Muriah more surface in the room that she
can actively use. I have kept some of
the upper shelves of the closet so that she can still store some
things in there. But below, she has
an office table. This will allow her to have her art table behind her during her Zoom calls displaying
her art books and plants, because the art table
is a little higher, people won't be able to
see directly what's on it, but keeping it moderately
tidy would not hurt. The art table as is mentioned, placed a little higher
than a normal table. I have placed it at the
height of one meter which is approximately
3.28 feet. But since it's custom-made, Muriah should place
it at a height that feels most comfortable to her. Because the table
is a little higher, I don't want to see the
heavy-duty brackets underneath. So I imagined the table being supported by a wooden structure
with drawers underneath, which is why the table's
a little thicker. I believe this would also be nicer to look at
during Zoom calls. Due to structural reasons. I have also made this
table another narrower. It's only 50 centimeters wide, which is 19.68 inch. But she has plenty of
space on this table, which is dedicated
entirely for her art. So I think this would be fine. I've placed the bar stool
in front of it so she can still sit while
painting at her table. In this version, I'm really
concentrating on finding ways to prevent Muriah from
slouching over the table. Instead of a recamiere I have added a painting easel because I really worry about
her back and her overall well-being
when painting. Additionally, I have kept the art gallery
wall at the back. I think it looks amazing. I have also added
a yoga basket for all her yoga mats
so she can always pull out the math and
do a few exercises. The pros of this version
is that she can have more active surface
at her disposal as well as more table
surface overall. Additionally, she will
not suffer from long term back injuries due to the
bending over the table. Those doors are also taking
away from the room surface, as well as creating
a lot more shadows. So removing the wardrobe
doors is going to give her more space and more
light throughout the day. Because there should
be working in a closet eight hours
a day at most, her chair is outside the closet and with the doors
out of the way, she can still look out
the window to her right. But she will have to make it
a nice closet to look at, perhaps add some nice
colors or wallpaper, as well as some sockets
and a table lamp or two. The art table is custom-made, which will require her
to talk to a carpenter. It's not something you can
buy in most furniture stores. Welcome to Version 3. The main characteristic here is that I have taken down
the wardrobe wall, giving Muriah more
workspace overall. I did not take down the wall next to the door because
I've seen that she has placed her
light switch on it so there's some electrical
wiring going on. I have left that wall standing but in the resulting niche, I have placed a higher table where Muriah can
work on her art. I've decided not
to add a bar stool here and metalwork standing, but with the additional benefit that underneath this table, I have added some storage. The table top is 86.2 by 250 centimeters or
33.93 by 98.42 inch, but the storage
underneath is slightly pulled back to make
space for her toes. There is a floating shelf
for some plants and books and plenty of
table space for her art. Opposite to it, I have kept
the table from Version 1, but this time is just
for her office work. In this version her
tables for art in office are separated
like in Version 2, but with the added
benefit that there is more space and
light in the room. At the back I have
kept her gallery wall, but underneath I
have given Muriah some storage space for
canvases and paper. I have made this storage
element as high as the table so that the work surface feels
continuous throughout the room. She could also use
the top surface of the storage element to
place art to draw it, or plants or perhaps books. The pros of this
version are more space, more light, and
more work surface. I feel like separating the art from the office work
is a good thing. But since she mentioned
that she does not need that much space
for her office work, I feel like her art will spread out on this table area too. Cons. I don't see any cons here. It is by far my favorite option. Maybe the con here is that all of the elements
in the room are custom-made and she will need the support of a
carpenter for that. She will additionally need to hire an electrician to bring light and sockets in the closet area where
she has her art table. The custom-made design
is the kind that will be the most
supportive for her work. I think it's worth it. One interesting
thing you see about this solution is that for
each side of the room, there is an oversized element that gives weight and stability to this area and that creates a very clear
zone around it. These elements
emphasize horizontality because they are
wider than taller, but also because I have removed the vertical elements
where I could, this makes the space very
clean and easy to understand. Even if I have a lot
of small items around, like books, plants, and tools, my space still looks
very clear and simple to understand because of these big furniture
elements in the room. All right, I have a couple
more thoughts to share with you as well as give
you the class projects. See you in the next lesson.
9. Class Project: As you can see, solving a
problem can happen in many ways and each way offers some opportunities
and some challenges. These are not the only ways
to solve this problem. I have no doubt that Muriah will add her own creative
ideas to this. But what I hope to achieve with this class is to show
you that there's more to your space than shuffling three tables around and that you first start with
your needs and then create an environment
that supports them. You do not adapt your needs to the
environment that you have. Let me repeat that for
the people at the back. You first start with your needs and create an environment
that supports them. You do not adapt your needs to the
environment that you have. You command the
space around you. The space does not command you. Before you go, I want to
give you your homework. What I need is your
class project. I want you to take
Muriah's example and share a space problem that
you have in your home. Also share the diagrams, photos, and your efforts in
trying to solve this problem. I'll be happy to give you
advice and who knows? Maybe you'll see your challenge
in the following class. If you want to download the Procreate and
SketchUp models I have made during this class, I have left a link for you
in the class description. All you have to do is sign up
to my newsletter for free. If you liked this class, I would appreciate the review. It tells Skillshare that
you liked my work and it encourages other people
to discover my class. We are at the end. See you in the next class.
 Ana Marcu, Home Wellbeing, Licensed architect