Transcripts
1. Intro: Hey, I'm Maya Faber
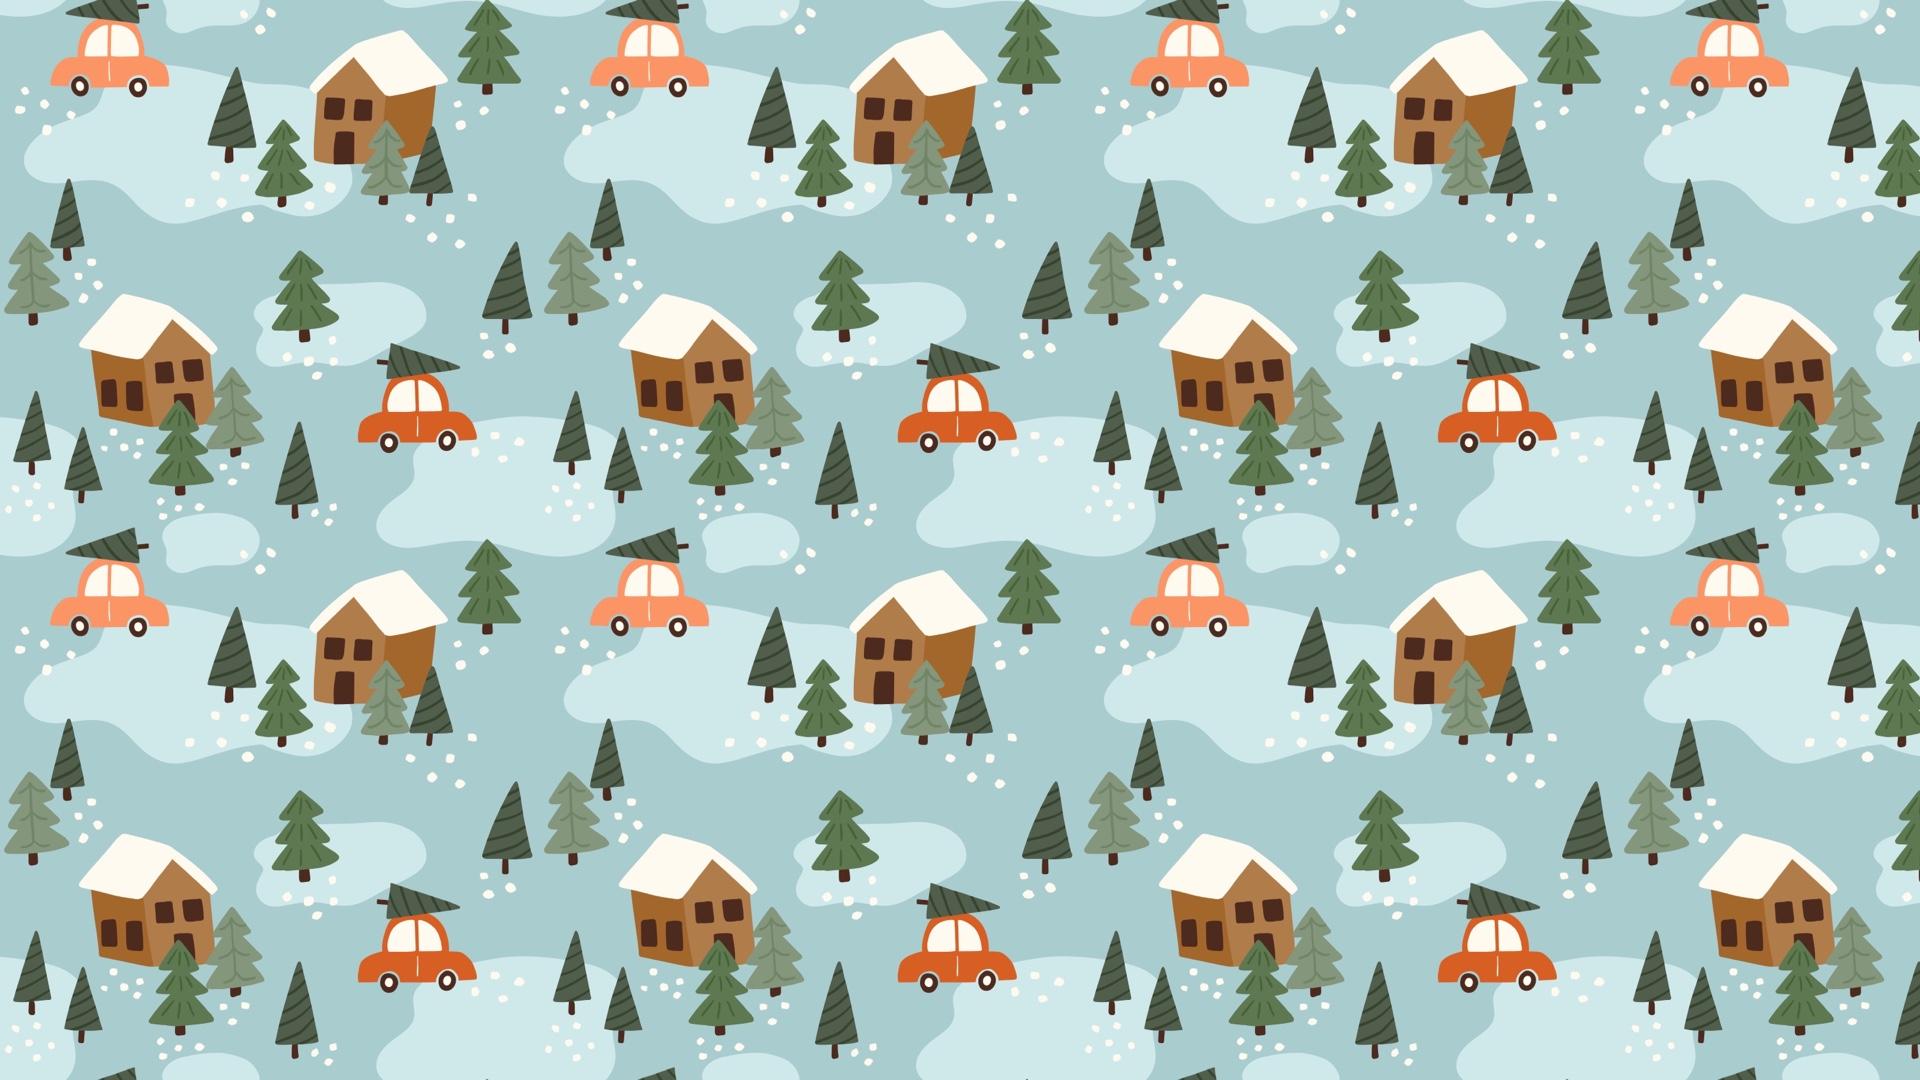
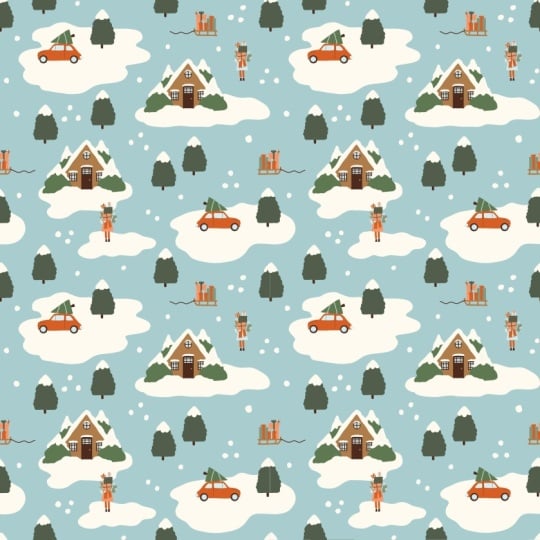
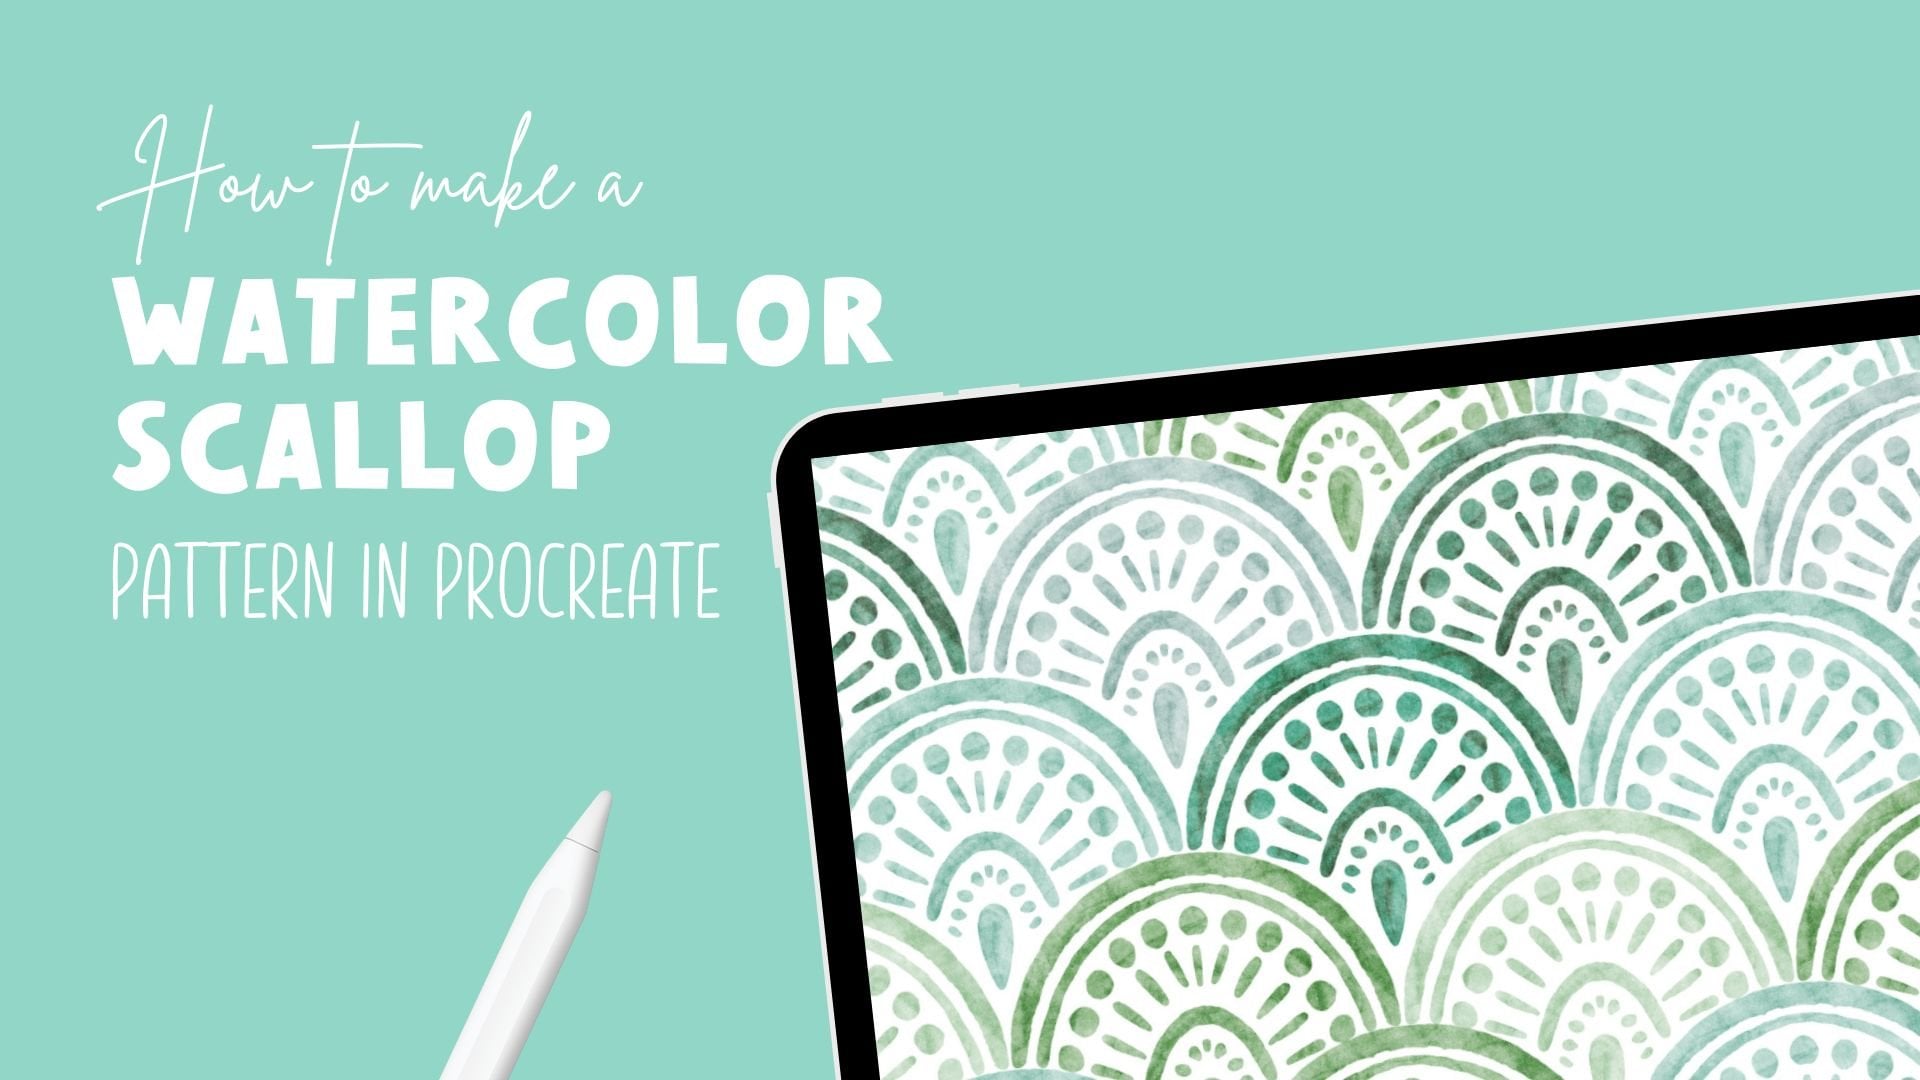
and in this class, you will learn how to create this cute winter wonderland Christmas scene
pattern in procreate. You will learn how to
incorporate a story into your patterns to make them more engaging
and interesting. We will also focus on
creating a balanced flow in our scenes so that our eyes move smoothly
through the pattern. Additionally, we
will be working with colors to create a natural flow, and we will practice on using filler elements to create
interest and a good balance. This class, you will
get free resources, including two procreate brushes and one procreate color palette. Join me for a fun and
interesting class where you will learn how to create this fun Christmas
scene pattern in Procreate.
2. Your Project: Project in this
class is to create your own Christmas scene
pattern in procreate. You're welcome to experiment
with the story, composition, colors, or filler elements to make the design
feel uniquely yours. You can follow along
with me closely, or you can give it your
own creative twist to tell a different story. When you're finished, share your pattern in the
project gallery. I can wait to see your take
on the Christmas scene theme.
3. Finding Inspiration & Bulding the Story : So let's start this class with finding some inspiration
for our patterns. So we are building a
Christmas scene pattern. And I'm going to head
over to Pinterest and search for
Christmasy things. So first, let's just search for Christmas and see what comes up. It doesn't need to be more
complicated than that. So I get a lot of illustrations as that is what is
showing in my feed. But you might get some photos. It doesn't matter if you find inspiration from
illustrations or photos at this
point because it's the story that we're building. So we won't copy any
other illustrations. We might just find an object
or something interesting. For example, for me now, I really like this car with a little
Christmas tree on it, and that's a pretty common
illustration, I think. So I really like that one. I will actually save
this to my cameras. I will tap the three little
dots and tap download image. And then you can just continue. I really like this one,
so I'm going to save it to my Christmas
moodboard, as well. So you can just scroll on
and see what you find. Maybe you really
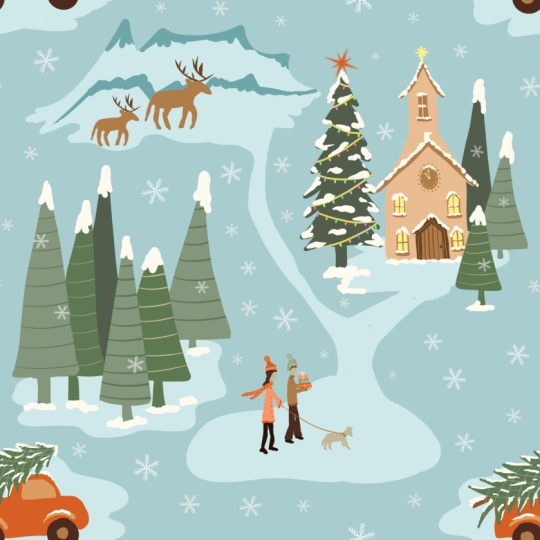
like these animals, like, here we have
another Christmas tree, but maybe we like the deer here or maybe you want to build a story around Santa Claus,
something like that. I think for Christmas patterns, people really, really
enjoy traditional motifs. So you can kind of mix it up a little bit and do something
more modern if you want to. But for Christmas, generally, people really enjoy,
like, traditional colors, traditional motifs, and you can draw them a little bit
more modern if you want to. So there we had some different
objects that could be fun. And here we actually
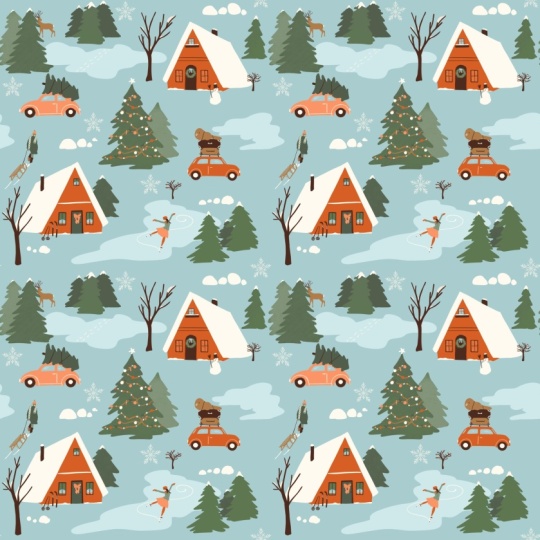
have a story pattern. So let's just have
a look at that. So this is a little
story about some houses, woods, and there's some animals. So this could definitely be an idea, I will
download that. And when we are looking at other people's patterns
and illustrations, just as I mentioned,
it's not about copying their style or
copying their exact story. It's just about
finding inspiration. You can, of course, also find inspiration from your fantasy, just thinking up a
Christmas story, or you can find
inspiration from photos. Anything you want to. But let's just start with illustrations. So here we have some skiers. That might be a fun pattern. I'm not going to draw that right now because it's a little
bit complicated to draw people and characters
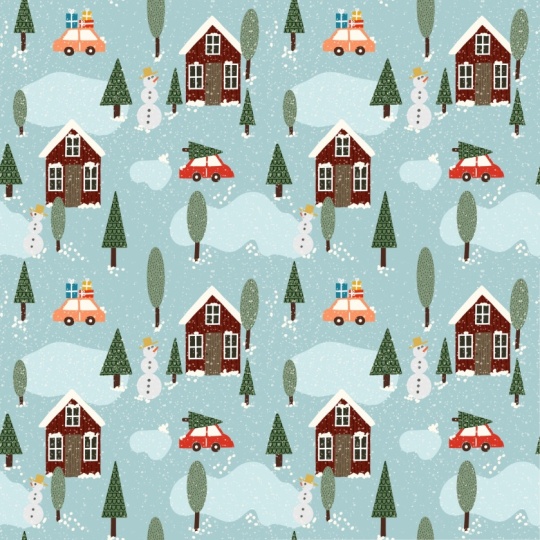
like that in this class. So here we have more
like houses and trees. And I really like this, like the houses, the trees, and the snow and to build a little bit
of a story around that. So let's tap this one and
download this one as well. I think that my
story is building now in my head around houses, woods, snow, and something else. Maybe that car
with a tree on it. Here we have another
car with a tree. I think that's a
really nice story about someone going
out to the woods, getting a tree,
and driving home. That might be my story. So now I have a few different illustrations
that I'm inspired by. You could also be inspired
by like gingerbread houses. Here's a really fun
pattern with penguins. So that could also be a story, like an animal pattern. Somehow, I'm not going to
download this because I'm not gonna create animal
pattern in this class. But let's just search for
Christmas and photos instead. So then we get some
other inspiration, and this might suit you better to find
inspiration in photos. So you could have like
decorating tree, maybe, like people who are
decorating a tree or there we got some
more illustrations, maybe baking
gingerbread cookies. That might be something that you can build a story around. So then you might find a lot of inspiration in one
image, for example, this one, and you can use that to build
your story around. So let's just see
what we are finding. Here's someone
decorating a tree. So this image alone could be the background to the
story of your pattern. Like people decorating
a tree, there's snow, there's hats and winter clothes, or maybe like Christmas gifts, people been out shopping for Christmas gifts or
opening Christmas gifts. You know, things like that.
So see what you find. Here's this like the real
life Christmas tree in a car. I really like that.
I'm going to download it because I really
want to draw, I think, a car with a tree on top. And here's another one. Super fun. Okay? So I have
downloaded a few images now, and that is the
start of my story. And now I'm going to
head into Procreate. And I'm just going to open
up a screen sized Canvas. I'm going to tap the plus over here and just tap screen size. So we're just building
a mood board here and figuring out our
story for the pattern. Then I'm going to tap
the three little dots up in the middle and split view, and I'm going to tap
my photos library. And here I have a few photos. So I just have six photos,
and that's fine for me. But you might have ten
or 15 or whatever. It really depends on
how much inspiration you find in each photo. So now we have all of
these photos in procreate, and I just swipe
away the photos up. And now I'm just
going to place them. So I'm going to tap the
transform tool when I'm on one of the image layers and just make it a little bit smaller by tapping and dragging
in the blue little notes. I think these two are
kind of the same, but let's just place
them there for now. And then we have this one. I really like that one,
but I don't need the top, so I'm just going
to drag it up and place it and drag it
down and place it. So I don't really need the
bottom and top of that, I just need the image. So I just cut that
off in a quick way. So we have a little bit of
winter wonderland there. And here we have another image that was the scenes pattern. I don't need this whole scenes. I'm just going to
drag it down and tap the transform tool and
that has cut off the pattern. And then I have
this Oh, this one. That one was fun with
a lot of objects. I'm going to place it there,
and then we have this one. Okay, so let's see
what we can do. I am going to delete that image because I think
that those two are the same, deleting that one
and just placing this one maybe on top here. Yeah, I'm going to
place it over here. Okay, I'm mostly interesting in this part of that illustration, so I'm going to tap
the transform tool and just drag it
up to cut it off, and then I have a
new image over here. Okay, so this is great for me. I'm starting to build
my image in my mind. I'm just going to swipe
all of these together, and you don't need to be
detailed about this at all because we're just building
the story behind the pattern. You don't need to show this
to anyone at any time, so it can be as messy
as you want to. So the first thing that
I'm going to do is just to tap the transform tool on that layer and just bring down the size a little
bit because I'm going to write a little bit
on the sides of this. And then I am just going
to choose a color. I'm choosing the brown from the Christmas scene
color palette. And let's just use
the bold pencil, and we can just write a few
words that we want to use. So for me, I really want to use this car with the tree on it, and I think that I will
base my story around that. So the car with a tree, Christmas tree, on car. I think driving home
after the woods, picking up the Christmas tree. And I really like the
houses and the trees. And also here, I think that I'm going to
have some houses, driving home to the house and the house will be kind
of in the woods as well. So house and wood or
I mean forest forest. And I definitely want to
have snow in my scenes. I'm going to write plus snow. And something that
I really like about this is this little ice pond. So I think that I'm going
to incorporate some kind of maybe a texture or
something like that. So plus pond. Is that
what you call it? Like ice pond. Yeah,
you know what I mean? Were you can skate, like a
little lake that is frozen. I have Christmas tree on car driving home to the
house in the forest, there's snow and
there's ice ponds. That might be enough. I don't need more than that. Now I've built this story
of a car that's driving home with the Christmas
tree to the house. And there's forests, and there's maybe snow and some ice pond. We're going to create a
sketch in the next lesson, but now I have an idea of the story that I want
to build in my pattern. When you figure out your story, it doesn't need to be finished. You just need a little bit of an idea of the story before
we start with the sketching. Then you can continue
with the next lesson.
4. Sketching: So before we start to
sketch our pattern, I will just save this as
a JPEG to my camera roll. If I want to have a
look at it later on, so I will tap the actions panel, share and JPEG and
just save the image, and that will save it
to my camera roll. That way, I can have
a look at it later on if I need to and I'm
sketching for the pattern. Next, we will tap gallery, and for this pattern, we will use the pattern
perfect template, which means that you don't need to create
the pattern action. If you want to learn how to
create the pattern action, you can check out the pattern perfect template
lesson here in this class, where there will also be a mini class about how to create your own
templates like this. And in that lesson, you will also find
a link to download the template so that you can use it with
me here in class. So tap into the pattern
perfect template, and then I will just hide the visibility of
that guide layer and tap to add a new layer. I will drag out my color
palette to the canvas, and let's just use this
brown color for sketching. That is from the Christmas
scene color palette. So that is a really
nice color palette for a vintage kind of feel
for Christmas pattern. So you can use this for all future Christmas patterns or any type of patterns
as you want to. So let's move on,
and I will sketch with the pattern elements, perfect pencil brush, which
you also can download. Check out the free download
section here in class. There's a link to the
pattern elements brush set. So, we use the perfect pencil
to sketch our pattern. So basically, I will show you the simplest way of
creating a scene like this. So this scene will be
with a car driving home with a Christmas tree on top to a house that
is in the forest, and there will be some kind
of ice ponds and some snow. So that is the story
that I'm after. And we can have a look at our
mood board. If you need to. Oops. When you're moving through your pattern
and sketching, if you need to find inspiration
for either the motifs, but I wouldn't suggest that you copy other
Illustrator's motifs, but just to get a feel for
what you want to draw. But I have pretty clear in
my head what I want to draw. So I'm going to head
back to Procreate, and here I will start
to draw my motifs. So basically, my tip here
is to keep it simple, at least for your
first scene pattern. And I want to keep mine
a little bit airy, so I'm not going to fill all
of the space on the canvas. So that also makes it
harder because when we have a little bit of air
in between our elements, it's often easier to see
where the patent tile is. So this is my tip for creating this type
of scenes pattern, and that is that I'm just going to make sure
that I'm on a new layer. Yeah. And that is
that on over here, I'm going to place
some kind of motif, and that is going to
be the same over here. Then I'm going to place
another kind of motif here. And another one here. Then we have some
filler elements. We're going to have
some background elements and things like that. But if I do like this, I will get a natural
flow in the pattern and your eyes will move
through the diagonals. You can make it as
complicated as you wish, but this is my recommendation to start with these
scene patterns. Moving on. We have one type of motif there,
which is the same there. You can draw it differently,
but it's the same, and then we have
one here and one there. So let's move on. I will just delete that
layer and add a new layer. The first thing that I
want to draw is the car. So I wanted to have a car, and I'm going to place
my car over here. We can always move it later on. So I'm just going to draw
like a simple shape of a car. I want it to be a
little bit maybe, like, round and at the top and something maybe like that. Not sure how I want
a car to look yet. And then maybe
something like that. And then I want the same
type of car over here. So I'm actually just going to duplicate that one and
place it over there. I'm not super happy with
how that car looks, but we might redo the sketch. This is the rough
sketch to start with. So now I'm going to tap
the layer and merge down so that I have
everything on one layer. The next thing that
I want to do is to draw the motifs
that will be here. So I'm going to draw a house, and I'm keeping it simple here. So just like a house. But I want maybe I
want the front of the house and also a little
bit going back like this. I'm not going to do
something super realistic, but just to keep it a little
bit fun and interesting. I like it to be a little bit, like, imperfect with angons. I think that gives
it a nice Look, and I'm just drawing
some windows and a door. It's a little bit big the house. I might want to select it
with the selection tool, tap the gray dot, and
tap the transform tool. And then I can also use the free form if I want it to be a little
bit more narrow. So when we're sketching, it doesn't matter if you change the size of your sketches
because we de a sketch. So now we are copying that. So I am selecting with a selection tool and
free hand selected, tapping at the gray dot
when I selected a house, and then I tap copy and paste and move the
house over there, and then I will actually
flip it horizontal. It looks a little bit wonky, but that's completely fine. And then I'm going to
place it up there. So how does this look? I think that it looks good. I might want to I'm going to merge these
two together first. So tap the layer tap merge down. And then I might want to select the car at the bottom and
just drag it up a little bit. To give it a better
flow in the pattern and maybe drag down this
house a little bit. So I'm selecting that house and dragging that one down.
Now it's not perfect. One is at the corner there,
one is at the corner there, one is there, one
is there, but it's a little bit more
flow in the pattern. The next thing that we will do is to draw some trees here. And let's just see where
we want those to be. First, we're going to
do a tree on the car. And on this car, I'm just drawing the
triangles there now. And then I want some trees in
front of the house, maybe. So maybe I want the same
type of tree like there, and then I can overlap. So I can do another
type of tree. Maybe over there.
That might look good. No, I don't like the
look of that, actually. So I'm just going to draw maybe there and maybe just the top
of the tree overlapping. Like that. I think
the dells good. And then a tree over here maybe to kind of get
the direction of that. I haven't decided
yet how many types of Christmas trees
I'm going to draw. Et's just see might
be two or three to make it a little bit
more fun in the pattern. I think that I want one more
of the triangular ones. So I'm kind of trying
to balance out the different types
of trees and one like that and maybe another
one like that. And that looks good to me. Maybe we need something
over here as well, because it will probably
be a little bit empty, and then you can also feel
that this foresty things goes up there because this
pattern will be repeated. So this part will be over here. So then we might want to
place something over there. So I think that that looks good. And I also want to add
the pond that I said. So let's just try, I'm going to do this loose, maybe not so big. I'm thinking that I will add pond like objects
in the background. Here and there, just to add some color in the
background, probably. I didn't like that
one over there, maybe just a smaller one. And that car can also be driving and that could actually be going
over here somewhere, and a little one
over there maybe. These pond things we definitely
need to fix later on. But let's create a
pattern of this sketch now and continue with
it in the next lesson.
5. Make the Pattern Sketch: Moving on, let's make a
pattern of the sketch to see where we need
to add more elements. So I will tap the guy layer and tap the plus
to add a new layer on top. And here I will just fill
this layer with a color. So I'm using you can use the cream white from the Christmas scene
color palette, actually. And then we will
swipe to the right on both of these
layers and group them. Then I will tap the group tap the selection
tool, save and load, selection eight, tap
the Transform tool, flip vertical, and
flip horizontal, tap the selection tool again. To deselect and then tap
the selections tool again, save and load selection seven, the transform tool, flip
vertical and flip horizontal, tap the selections
tool to deselect, and then tap the
selection tool again, save and load selection
six, the transform tool, flip vertical and
flip horizontal, tap the selection tool to deselect and tap
the selection tool. Once again, save and
load selection five, tap the Transform tool, flip vertical, and
flip horizontal. Next, I will just tap the transform tool
and rotate my motif, four to five degrees four times so that I get it
in the right direction. So now we need to add some more elements
here to this sketch. I will tap the layer
with the sketch. Let's just rename
this to rough sketch. And I'm using the brown again on the sketch and the same brush,
the perfect pencil. And now we will continue
to add elements here. So let's see what we can do I definitely want to
continue this pond, at least, so that would be something that goes
maybe like that. And then I want to add I think that we should
add something here, but maybe it's just a tree. Let's see. Maybe it's
a tree like this. Somewhere that's not
exactly beneath that one. But it would look good
to have it there. Maybe I will change
where this one is. So I will actually just erase. I can erase with the
pattern elements, monoline brush, tap
the eraser tool, and tap pattern
elements and monoline. Or you can erase with any
brush that you want to. I'm just going to erase
this little tree over here because I felt that it would be a good position to place
a tree right beneath it, and I don't want that
line in my pattern. So then I'm going to place a tree maybe over
here somewhere. Like that. And I could place that tree that I had
maybe over there instead. That might look nice, actually. So I just move that one and then probably a
little ice pond somehow. If I move up that tree, I will tap the selection tool, select around that tree. I can have free form selected and make it
a little bit more narrow and move it
up a little bit, and then I can draw
a pond like that. I'm just trying to
get a good, like, vibe with the shapes
of these ice ponds. And here I might need
another type of tree. So let's just place one of
these triangular trees here. Now we will see how that looks. And in this position over there, it looks a little bit empty. We probably need
something there. I'm not sure what it is. It's probably some kind of pond. Maybe we can drag down. We have, like, a
pond over there. Maybe we can drag
it down like that. And we can add some
trees over there, maybe. And they can continue
over here, maybe. I'm thinking that
this will look good. Let's see. We definitely need to adjust this pattern a lot when we are creating
the final pattern, but this is a start. So now we will just see how
this pattern is repeating. So I will swipe down with
three fingers, tap, copy all, swipe down with three fingers, tap paste, and I will first try it out in
my pattern tester. So tap Safari, split view the three little
dots, tap safari, and the link to the
pattern tester is in the downloads and resources
lesson here in class. So you can tap and drag
your flattened image, and I'll just swipe
away procreate. And here I can see how
my pattern is repeated. I think it has a good flow. There's one car going that
way, one going that way. Both are going to their houses. It might be a little bit
empty above this house, but I'm not sure yet. It's hard to see when it's just black and
white like this. But I'm thinking
that it looks good. Let's see if we need to adjust some things when we
create the final pattern. The other way you can try out your pattern is by swiping to the right on your
flattened image four times and duplicating it. And then tap the
transform tool and I will tap in the top
left corner node. I make sure that I have the little blue chain
symbol tapped in, and I type in 1,500 pixels, and then I tap the next image, tap in the top
right corner node, and type in 1,500 pixels, tap the transform
tool to place it, tap the next image, tap the bottom left corner
node, 1,500 pixels. Then I can tap the next layer, tap in the bottom
left corner node, bottom right corner node, and type in 1,500 pixels. Here you can also see how
your pattern is repeated. It might be that we need to
adjust some things here. I can see that this pond
is a little bit empty. It's not moving to that one. Maybe we should fix
that before we move on. So maybe this one should go
like that maybe or something. That will probably look good. So let's just try that
out before we continue. I will actually
erase all of these, delete them, and I can see that it's here
that we have the problems. I will repeat this
pattern again, tap the group, tap
the selection tool, save a lo selection eight, tap the transform tool, flip vertical, flip horizontal, tap the selection tool
again to deselect, tap the transform tool, tap the selection tool, tap flip vertical,
and flip horizontal, tap the selection
tool to deselect, tap Save and load in the
selection tool again, tap the transform tool, flay vertical, and flat horizontal, tap the selection tool to deselect and the selection
tool again to select. The selection five in save a load and transform tool
flipwardGFlip horizontal. Then I will tap the transform tool and
rotate the image four times, and I can see that this is
where I have the problem area. So I will tap my sketch, and I will just continue. I think that this is going
a little bit too far now, so I will just delete that and I'm thinking that we might just drag this
one out a little bit. Maybe like that or something. I think that we will
definitely need to try out the shapes of these ponds when we are creating
the full pattern, but now I really
like how this looks. And we're back to
our original sketch with the cars there
and the houses there. So let's move on to the next lesson where we will start to draw the actual motive.
6. Draw the Motifs: So now we have finished
our pattern sketch, and it's time to continue
with drawing the motifs. Let's start by tapping the N on the sketch layer and
drag down the O past. I think that I will keep
mine on around 20%. The first thing that
we will do is to add a background color here because I know that
in my pattern, I want the windows or no, the roofs and probably some
snow details to be white. If I look at my mood board, I can see that I don't want this look where I have a white background
and colored houses, but I want the snow to
be on top of the houses. So I will in procreate,
tap the background, and I will move out my
color palette so I will tap the color
palette and drag it out in the little line there and choose the
darker of the blue colors, tap and drag to fill the layer. The next thing that
I would do is to add a layer on top of
the background, so I am going to draw beneath
the rough sketch so that I still can see the sketch
through my motifs that I draw, and I will draw on top
of the background. I'm thinking that we should
start with the car here. So let's tap the red
orange burnt color there, and I will use the
solid irregular brush from the Christmas
scene brush set. I am using around
7% in brush size, and I'm just going to
trace my sketch here. Doesn't need to be
exactly like the sketch, but kind of kind of
like the sketch, a little bit more
detail than the sketch. As this is a solid brush, I can tap and fill the colors. I would just tap and fill. If you feel that when
you tap and fill, you will end up with
a little white line here between the
stroke and the fill. I suggest that tap and fill
and then move the threshold. You move to the left and to the right until that
line disappears. Usually, with these
solid brushes, you won't see that,
but if you do move up the threshold
in percentage. I have my threshold
to around 75% here. So now we have the car, and let's turn off
the visibility of the rough sketch so that
we can see the car. I see that my car is
tilting a little bit. I could draw it in, but I could also turn it around. So let's just turn
it a little bit, so that is a little
bit more straight. And what I will do then is that I will tap the transform tool. And here, you need
to make sure that your interpolation is set to
bicubic because this way, your movements with your motifs, your rotations and when
you move your motifs will create as little loss of
resolution as possible, which means that you won't get as much blurriness
as possible. It is said that in Procreate, as soon as you move something or rotate something,
you lose resolution. But if you just do
that a little bit, you won't lose so
much resolution, and it won't show
when you print it. But if you move around
a lot, it will show. And if you have
nearest neighbor here, it will show instantly
when you move something. Let me just show you what
I mean if you have nearest neighbor and we move
this and place it. If we scroll in,
you can see that the edge of your motif is
blurry, really blurry. It's always a little
bit because when we zoom in that much, it
will become blurry. And especially if we would rotate with the
nearest neighbor, and you zoom in, you
can see that you get this little uneven edge here. So let's just undo that. And this is because it shows more when you're using solid brushes
with straight edges. If you use texture brushes, you won't see it as much
and it won't even show in print because the edge of your
brush is already textured. But now we have a solid brush and actually always,
but especially now, it's really important
that you have bicubic set to the interpolation when you tap the transform tool. Now I can zoom out a bit
and I can just rotate my motif just a little bit until I think that
it's straight there, and then I'm happy
with how it looks. Then I can just fill it in. So that I have a more straight
line at the edge there. So when you zoom in like this, you will always get
a little bit of blurry edge because
you're zooming in. I don't know how I
would explain this. You're zooming in larger
than the actual canvas is. So the car isn't this big
if you would print it, and that is why it will look
blurry when you zoom in. That's at least
how I explain it. Okay, moving on, let's add
some details to the car, so we will add the wheels. So tap to add a new layer, and I will tap the
brown color here, the darker brown
and add two wheels. And I also want to add some
details with the windows. I will tap to add a new layer, and I'm keeping all colors separated on different layers so that I can change the color of all of
the layers later on. So that is my best tip
for being able to recolor your patterns without
losing quality. So now I'm just drawing
the windows here. Tap a fill and another window. So I think that looks
like a cute car. I think that I will add
a thin line here as the car door simplifying the look of this car,
but something like that. That looks good. And then I want to add the
Christmas trees. I will tap to add a new layer, and I'm going to use this darker green
color for this one, and drawing a triangle. Something like that. Tap
and fill to fill that in. Okay. So that looks good. A little bit strange on the
edge. That looks better. And then I'm going
to add a new layer and draw the part of the
tree that is the brown stem. But I am actually I
think I'm going to use the brown layer
here to save layers. So if you need to save layers, keep your colors
on the same layer. Then I'm going to draw a
brown little stem there. So let's just turn
off the sketch, and now we draw on
the tree there. I think that it looks
good, but it looks like the car is moving
in that direction, and the tree is a little
bit too much in the front. So I will just tap
the tree there. Also, again, make sure that
it's set to bicubic in interpolation and then
just drag it a little bit to the back
maybe, like that. And I also need to
fetch the stem there. What is it called on a
tree and drag it out. Okay, so that looks fine. Maybe I want it to be a
little bit tilted, even. Let's try that. A
little bit tilted down. Yeah, that looks much better. Okay, so now we are happy
with how that look. And now we can turn
on the sketch, and I will actually copy
this car to this position. So I will swipe to
the right on all of these and just tap group, swipe to right on the
group, duplicate, and then drag it down, and I will flip horizontal. Then I can just
rotate it a little bit and place it in the
position of that car. So if you're just doing these
small changes and you have the bicubic set here when you are rotating and
moving your objects, you shouldn't see that
much loss in resolution or the loss in resolution
that you actually get shouldn't be shown in print. You can, of course,
always test print, but this is my
experience with my iPad. If you feel that any
movement that you create makes a loss
in resolution, that is a huge deal
for your print, then you need to draw
each object separately. But for me, this
has worked fine. As long as I'm not moving around the objects forever and ever, then I will lose too
much resolution. Okay, so this car, I think that I want to do pink or this pinkish
orange peach color. So I will tap and drag
to fill that one there, and then I will turn off the sketch to see
how that looks. And I think that
that looks good. So now we have the two cars and we can turn on
the sketch again. I will keep my layers like this. If you end up with your
layer limits reached, which means that you
can't add more layers, then you can select the layers
that you need to merge. For example, I could merge
these two white layers, and then I would just group them and tap the group
and tap flatten. And then I would need to drag
that one above everything. So now I have both of those
white areas on one layer. We could do this with
the cars just for now because I want to show you how to do it if you
reach the layer limit. For me, I usually don't
reach my layer limit as I have a two terabyte
storage on my iPad. But let me just show
you how to do it. So you group the two layers
that are in the same color, and then you tap flatten, and then you group
the next two layers, then you tap flatten. And these two are
different colors, so we won't flatten those ones. And here you have the car. I will just drag
it in the group. So there we have the cars. So you might want to flat then or merge layers together that are in the same color
later on as well. But let's just rename
the group to cars, and then we can continue
to draw our automotives. But that is how you merge the
layers together if you need to if you reach the layer
limit while we are drawing. So I will tap to
add a new layer, and here I want to
draw the house. So I'm using the
lighter brown color, the solid irregular brush, and I'm going to
draw this house. Just quickly drawing the house. Something like that. Make
sure that all your shapes are closed so that we
can fill them in. So I will tap and fill, and then I can tap, continue filling and just fill
in that shape as well. And tap the little check mark to not be able to fill anymore. Okay, so now I will turn off the sketch and see how that looks. That looks good. So now I will add
the white roof, so I will add a new layer, tap the white color. I will just drag up a line there so I can see
where I want it to be and drag down a line
there, and out there. And let me just make this
a little bit thicker. Like there's actually
snow on the roof, dragging it down and
meting it up over there. And tap and fill to fill
that layer with the color. And then you can adjust
this now or later on. However you want it to look. Then I will add a
door and windows. I will tap the layer
with the brown house and tap to add a new layer on top and use the
darker brown color. I will just add a
quick door here. You can use clipping
mask if you want to, if you want to draw outside like this and just add clipping mask. Or you don't need to do
that if you don't want to, especially if you want to merge your brown
layers together, maybe you don't want
to use clipping mask. So I won't do it here. I will just draw a little door and just match it
up with edge there. And then I will add two windows. I think that looks good. And now we're finished
with that house. So I will swipe to the right
on these three layers. Tap group, swipe to the right on the group
to duplicate it, tap and drag to drag it up to the other house
and flip horizontal, and then make sure that you have bicubic in the
interpolation again, and I will just turn it a little bit so that it's in
a good position. It a little bit
and then place it. I will turn off my sketch and see how that looks. I
think that looks good. I will add some details
in the next lesson, but for now, I think
that this looks good. The next step is that you could merge these
layers together. Let's just continue to do that so that we
are saving layers. I will swipe the right on
the brown house layer. Tap group and tap the
group and tap flatten, swipe to the right on the door layers and
the window, tap group, and tap flatten, swipe to the right on both
of the roof layers, tap group and tap flatten. Then we can see
there is the house, house houses, and this group, I think we can just delete
because there's nothing in it. Now we have the cars
and the houses. And we should add
some more objects. Let's add a new layer on top and turn on
the sketch again. And now I want to add the trees, but I will add them
with different colors. So let's start with
the triangular trees. I think that I want them in
this color, the darker color. So I will go for the same brush, solid irregular, and this is a pretty simple
shape of the trees. I will just make
triangles like that, tap and drag to feel a color. And you could actually,
if you want to save time, you could just draw the
outlines like that, make sure that you
close the gap, and do that for all of
those triangular trees. And then we will fill
them with the color fill. In a little while, here we have one more. So I'm drawing all the
trees that are inside of the edge of the canvas that aren't falling
off the canvas. Because those ones
we need to draw when we have repeated
the pattern. And here we have one more. I am not going to be 100% sure that the
placement of all of these trees are perfect because it was a little bit hard
to see that on the sketch. But for now, we will just draw them and we can
move them or erase them and redraw them in
different positions later on if we feel that our
patterns are imbalanced. So then I will tap and drag
to fill one and tap continue filling over there and
just tap these trees. Next, I will let's
just rename this to triangle trees or dark green
and tap to add a new layer, and I will add another tree, another type of trees, I
will use the medium green. Use the solid irregular again. And for this one, I will draw these
shapes of the trees. Just make sure that you
have closed shapes there and see maybe that one
should be like that or not. But one of these
should be definitely. So I'm thinking that I will draw these types of trees
in two different colors. So we only had two of those, then I will tap and fill
and tap continue filling. And then I want to add
let's just rename that two. What should we name
it? Medium trees. It doesn't really matter
what you name them two. You can name them two
whatever you want. It's just so that you know which of the trees are
on the different layers. So next we will add the
third type of trees. I will tap to add a new layer, and I will tap this
lighter green color and draw a tree over there. I'm just going to fill that in instantly because I want
to see how it looks. Okay, so that looks fine. And then the swan And there we have drawn
all of the trees. So I will name it to Light tree, like the lightest green color. Then I will add a new layer and drag it beneath
all of the trees. And I will just rename
this to brown maybe. So I'm just naming
the layers so that we can see where the
different motifs are. It doesn't really matter
what the layers are named. And here I will just add
these little brown parts of the trees on all of the trees
because all of the trees will have the same
color on those parts. Oops too big. Okay, great. So now we
have all of those trees. And I think that
we will try to add some of the ice ponds
as well when we have the pattern
in this position, and then we might need to
add some more later on. So I will just swipe
through right on those layers and just
name these trees. And let's add or actually,
before we continue, I think that I want to
add something more to this house so that it difference a little
bit from that house. So open up the houses, and on the brown layer, I will just add probably
like two windows here. To make this house a little bit different
from the other house. Maybe the windows should
be a little bit bigger, so you can't really
see if they're on the lower part of the house or the second floor. Oops, didn't like that one. Okay. So I think that's fine. And then I will move
on to ice ponds. I will close the group
with the houses, tap the trees group, and tap to add a new layer. And here I want to use
this lighter blue color, and I'm going to just
swipe around a little bit to add these ice pond like that. This one will need
to be continued, but I can just
start it and we can see how it will
continue over there. And then I will tap to fill, continue fill, and
fill those two. And I will actually drag
this beneath all of the other objects and then turn off the sketch layer just
to see how it looks. So I really like that
one and that one, but I'm not really fond
of the shape of this one. So let's just select this
one and I will redo it. So tap the selection tool, select around that ice
pond and just drag it out. And then I can just do
it maybe by free hand, like based on where the car is. Maybe like that? No,
not exactly like that. Okay, so I like that. I'm
not sure exactly why, but I like when the pond
is coming a little bit, half of the size of the car. I think that looks nice. Okay, so moving on. Now we need to repeat this so that we will
create the pattern. So I will repeat everything. Everything is in the
group, so I can just tap the group and tap
the selection tool, tap Save and load, selection eight, transform tool, flip vertical, flip horizontal. Tap the selection tool again to deselect and tap the
selection tool saving load, selection seven,
the transform tool, flipward to column
flip horizontal, tap the selection
tool to deselect, and the selection tool again, selection six, Transform tool, flip word to Column
flip horizontal, selection tool to deselect, and the selection tool
again, selection five, the Transform tool and flip word to colon flip horizontal. Now we can just turn this
around and we can turn our sketch on to see what
our thoughts were here. And we will just
add some trees now. So I will open up the tree, and I can choose. I think that I want to
add some medium tree. So I would choose the
medium green color. And with the solid
regular on that layer, I will add a little
tree over there. So I'm choosing the medium green because I have the lighter
green over there already. Then, maybe the
same medium green. Over there. Oops.
Tap to fill it. It was a little bit
too thick, I think. Okay. And maybe we
should do, like, a lighter green over there so that I'm
mixing it up a bit. So like that, and just fixing it a little
bit at the bottom. And then the triangle trees and the dark green color and just adding one of those
trees over here. I'm filling it in. And
then I'm going to choose the brown layer and just draw a little part of
a tree over there, over there on all
of the new trees. I'm going to turn off the
sketch to see how it looks. I think it looks good,
but I'm thinking that this tree might
need to go down a little bit to make it
a bit more balanced. Let's try that
out. I will select that tree, select the layer, tap the selection tool, select around a tree
with free hand, and just drag it down. I think that here
would look better. It will make a better balance
with the trees over there. So I will also tap the brown
layer and select that part. That was part of that tree can zoom in and just place it over. There so that looks good to me. And now I want to add some ice puns here so I
can turn on my sketch, and I can see that I wanted
something here in the middle. And I definitely agree on that. So I can just try to
add one over there, and then I want to
continue on this one. Maybe like that, and I need to turn off the sketch to be
able to see how it looks. Okay, so I'm really starting
to like the look of this pattern now with the
houses and the trees. And yeah, I think that it
looks really, really nice. So now let's move on
to the next lesson where we will add
some details to this
7. Add Details: So let's add some
details to this pattern. As I mentioned before, if you're reaching
your lay limit, make sure that you are merging the layers
that have the same colors. So you could, for example, merge the brown layer here
with the brown car layer. I forgot to name those
layers, but it's this one. So for me, it's not necessarily to merge the layers with the
different colors. So I prefer to keep them in groups like this to
make it easier to find. But if you feel the
need to save layers, then merge the ones that
have the same colors. And merge means just put all the layers together
that has the same color. Okay, so moving on, let's continue to
add some details. First, let's start
with the houses. I want to add some
kind of shading on the part of the houses
that are moving backwards. And I'm going to do this
in a very simple ways. So we will add a layer on
top of the house layer, tap the plus, add a layer. And here I want to
use the same brush, the solid irregular, but we want to use,
like a gray color. So a light gray color
somewhere around there. And then we will draw with the clipping mask
selected on that layer, I will draw somewhere over here and just tap and
drag oops, fill that in. And tap and drag to fill
that part of the house. So now I made it gray, but we are going to
use a blend mode, so tap the N on that layer
and drag up to colour buurn. And here you can see that
you've added some shadow to the house without
using the brown color. So we're doing this
because it will be easier. If we want to recolor
our pattern later on, then we could only
recolor the house. Let's say that we want to
recolor the house to red, for example, and the shadow will be recolored automatically. If you feel that you get
a too dark color here, you can always bring down
the opacity of the layer, or you can tap the layer and tap a darker gray color and tap and drag to fill the layer
with a darker gray color. So the darker you go
on the gray here, the darker the shadow will be. But I'm pretty happy
with how that looked. But now I don't remember which gray color I had,
so I need to fetch that, so I will drag down
to normal again, and I will fetch my
gray color here, and I will just save it in my color palette so that
I have it over there. And then I will drag down
to color buurn again, and I will do the same
on the other house. Hoops. I need to
do a square here, and then I can just fill it in. So that looks fun. I have a little bit more
depth in the pattern now. So now I want to add
some more details. Let's see what I want to do. I think that on the cars, I want to erase a little bit on the cars above the wheels. I think that that will make
it look a little bit nicer. I will use the eraser, the solid regular and on the red car layer
and the eraser, I will just oops too big. Let's go down to around
eight or 7% and just erase a little bit of the
part of the car there. That goes underneath the wheel and then go to the
pink car layer, you can erase a little
bit there as well. Okay, so that looks
better, I think. And then let's see
what we want to do. We definitely want to add
something to the trees. And let's see what
we want to do. We could add a layer on
top here in the trees, and we can use the same that we use color
burn on that layer. The gray color, let's
try the same gray color. And now I want to
add some texture. So we have a bold pencil in
the brush set that I will use and just add a little
bit of details on the trees. Let's try out 4%. And on these trees, the triangular ones, I might want to add something
that goes like this. Oh, but now I see
that we need to have one above each layer. If we want to do,
like, a clipping mosq. If you have enough layers, drag that part above
the triangle trees, tap the layer and
tap clipping mosk. If you don't have enough layers, I would just have one
layer with texture, and then I would just
tap, for example, the triangle trees, tap select, tap invert, and then
I would just erase the part that are falling
off the leaves the trees. So that is how I would
do it if I don't have enough layers so
that I could have one texture layer above
each of the trees. But you could also
do a clipping mask. So as I have enough layers, I will do a clipping mask
because that's just easier. So tap the layer,
tap clipping mask, and then I will do
one texture layer above each of the trees. Oops, I want it to be a little bit larger around 8% maybe. Something like that, and
just adding some texture to the trees quickly like that. And to this one, and also the one on
the on the cars, but we will do those
later on because those are on a separate layer. So something like that, now
we have all of those ones, and I will add a
new layer on top of the medium trees, tap the N, tap Caliburn, tap
the gray color, and that was the medium green. We could do like a
maybe like line. Oops. Where am I? Medium green. Oh, it was the
light green that I was thinking of light green, a line in the center, and then some wavy lines
that go down like that. And maybe not that line
in the center there. So I could use erase that part. That looks kind of fun, let's do that on all of the
lighter green trees. Like. And like that, and then we'll do
the medium trees, tap to add a new layer, drag up to calibur,
tap clipping mask. And then on these ones, I maybe just want some lines
that goes down like this. So I use some ***** So I
use different textures on the different trees to add some interest
to the pattern. And one left or there. Okay, great. So now we added some depth and texture
to the pattern. And what else? We need to do the
trees on the cars. We definitely need to do that. And we also want to add some, I think, some snow. So let's add snow first. I will just tap the background, the little ice layer there, have to add a new layer, and
I will use the white color. And with the bold pencil,
I can try that out. I would just add some dots. Let's see how large
brush I want to have. I want to create
kind of round dots, not perfectly round, but something like
that. That looks fun. A few dots here and there, so that it will be like the trees and everything are kind of placed
on the ground. You get that feeling
when you place the little snowy dots
like this and also to add some elements
like filler elements to make the pattern a
little bit more fun. So I'm not sure how many of these thoughts there should
be in each position. So I'm just kind of
adding them now, and we might need to
change it later on. It's like snow on the ground, I would say,
something like that. And on the car on the ice there. That looks kind of fun,
maybe more over here. And I probably want
something around there. So I'm just trying to make it balanced with
these filler elements. And how you know is
just that you look at the pattern to see if you have
a lot of dots to the left, you put some more to the right. So it's just a matter of
preference, actually. Maybe some more
here by the house. Maybe something
there by the house. No. I didn't like that. Okay, so now we have
the details here, and we need to flip the pattern around to be able to create the details on that
tree, at least. But I'm going to start with this tree before
we flip it around. So here we have that tree
layer and I'm going to add a layer on top and
drag to Caliburn, tap clipping mask and
tap that gray layer. And I will add with around
8% some lines there. As I mentioned, if you reach your lay limit when we're
adding all of these textures, then place them on the same
layer at the top here. The textures on the
trees is what I mean. Place them on the same layer, and then do the part where
you select the object, invert it and erase
what's outside. I showed you that earlier
on in this lesson. But I'm not reaching
my layer limit, so I'm just going to continue and we are going
to flip the pattern around. So tap the group, tap the
selection tool, save and load, selection eight, tap the
transform tool, flip vertical, flip horizontal, tap
the selection tool again and tap the
selection tool, save and load, selection seven. Oops, flip vertical,
flip horizontal, tap the selection tool
again, selection six, the transform tool, flip
vertical flip horizontal, save and load, selection five, Transform tool, flip vertical
and flip horizontal. And now we can flip the
pattern around like this, and now we need to add
some texture to that part. So on the cars in
the cars group, on that texture layer, I will add some
texture on that tree. Okay, so this looks
good for me now, and it's time to try
out the pattern and see if we need to
adjust some details.
8. Test the Pattern: So now it's time to
test our pattern. So swipe down with three
fingers, tap, copy all, and I will just tap on top of all layers and swipe down
with three fingers and paste. And that will give me a
flattened image at the very top. I will tap the
three little dots, split view, tap Safari, and I have my pattern tester, which is linked to
in the downloads and resources lesson
here in class, and I will tap and drag my
pattern to the patent tester. And then I can scroll
down and see how it looks in a smaller scale and
in a larger scale. And this is like a
simple scene pattern. And my story is that it's these cars that
have been in the woods, got a tree, Christmas tree, and are going to their houses. Simple story, but that's
all there is to it. And it's cold. There's
a little bit of ice. There's some snow on the ground. And yeah, that is how it looks. I think that it
looks super good. I will also show you how to try your pattern out in
Adobe Illustrator. So swipe to the right on the duplicated image until
you have four copies of it, tap the transform tool, tap in the top left corner
node, 1,500 pixels, tap the next layer, tap in the top
right corner node, and type in 1,500 pixels. Make sure you have the chain
symbol tapped in there. And tap the next image, tap in the top left corner node, 1,500 pixels, and
on the next image, bottom right corner
node, 1,500 pixels. So that is how our pattern look, and I think that it
looks super good. So now let's see
how you would add some details or make changes to the pattern if
you would like to.
9. Make changes & Test Final Pattern: So now I will show
you how to add some details or make some
changes to the pattern. If you would like to do
that, I would just swipe to right on all of these
images and delete them. And then I would just go into the layer where I
want to make changes. So for example,
maybe I want to add some white dots if
I felt that it was a little bit strange looking with the white dots
and the placement of them. So let's just add, I don't know, a
little bit larger. Add some white dots there, and maybe I want to add, I don't know where O. I want to erase this one and
add one over there. And then I might want to change something at
the edges of the pattern. So if I want to change
something in the center here, you can just make your
changes to those layers. And if you want to make
some changes that are in the edges where your
motifs are cut off, then we need to repeat
the pattern again. So we will tap the group
tap the selections two, save and load, selection eight, flip vertical, flip horizontal
with the transform two, selection tool again,
selection seven, the transform two,
flip vertical, and flip horizontal,
selection two, selection six, flip vertical and flip horizontal with
the transform tool, and selection tool
selection five, tap the transform to, flip
vertical, and flip horizontal. Then I would just
rotate my pattern, and I can make changes to
the edge of the pattern. So that is how you make
changes to the pattern. And when you're happy
with how it looks, we will swipe down with
three fingers again, tap, copy all, tap at the top
group, and tap paste. And now I will just check it
out in the pattern tester. So this is our final pattern, and I'm super happy
with how it looks. I think it will look amazing as, for example, gift
wrapping paper. So now I will show you how to try out the pattern
and procreate again, so swipe to the right to
duplicate the flattened image, tap the transform tool, tap in the top left corner node, 1,500 pixels, tap in the top right corner
node on the next layer. And type in 1,500 pixels
and choose the third layer, tap the transform tool and
the bottom left corner node, and type in 1,500 pixels, and tap the fourth layer and the bottom right corner node
and type in 1,500 pixels. And now we can
merge these layers together by swiping
them together. And here you have your
repeated pattern. Let's just shut off
the color panel, the repeated pattern, and
this is your pattern.
10. Recoloring: Let's have a look
at how to recolor the pattern if you want
to do that in the future. And as we have
created this pattern in color separated layers,
I will be really easy. So let's just give it a try and recolor the houses, for example. So just turn off the visibility
of the flattened images, and I will tap the house layers. And here I can actually
tap the layer and tap Afook and then I can choose a color that I
want to recolor with. Let's recolor the houses to What color should
the houses be? Maybe pink, and then I will tap that
layer and tap the layer. You could also tap and drag, so let me show you
that on the cars. On the car layer here, you could tap and drag. So let's just recolor
the car to yellow, for example, or purple. I like purple. Tap and drag, and there you have recolored
your car to purple. So this is a very simple way
of recoloring your artwork. As I mentioned
previously in class, when you have these brushes with solid brushes
with sharp edges, you can do the tap
and drag coloring. If you have a really
textured brush, it's safest to do the
Alpha lock and color. So let's just color that back. So Aphaoc on the layer, and then tap the
layer and tap flayer. So that is how we
recolor our patterns. I will just redo because I
want it in my original colors. And let's move on
to the next lesson where we will export
our patterns.
11. Export: So to export this pattern
to shared in class, I'm going to start
with the pattern tile, and I'm going to tap
the actions panel, share JPEG, and just
save the image. And then you can export your repeated pattern,
which is this one. So just turn on the
visibility of that one, tap the actions panel,
share and JPEG. And save image. And that is how you export your file to be able to share it in class and also
to be able to upload it to, for example, print on Mn
site and things like that. So now we have created the
full Christmas scene pattern. I hope that you enjoyed it, and be sure to share your artwork here in
class in the next lesson.
12. Next Step: Grab Your Free Starter Pack: Before we end this class, I want to give you
something extra. If you enjoy this
class and want to keep building your
pattern design skills, I put together a free Pattern Rebels starter
pack just for you. Inside, you will find two mini classes,
procreate brushes, a playful color palette, time saving templates, and
even a procreate mockup. All designed to help you create beautiful patterns with more confidence and
less overwhelm. It's a real taste of the classes tools and
resources that you find inside the Pattern
Rebels membership without the commitment. No credit card, no
deadline, no catch. Everything is yours
to keep forever. You can grab it
right now through the link I've shared
here in class. Just click Sign up and you will get instant
access to everything. It's completely free. I can't wait to see what
you create with it. The link is in the
description about this class. And if you're excited
to dive even deeper, check out Pattern Rebos
my membership program. Inside, you will get
monthly classes, resources like brushes,
palettes, mock gaps, and pattern layout templates, plus design challenges, feedback sessions,
and Q&As with me. You can learn more at
pattern rebels.com. Finally, thank you so
much for watching. If you like this class, you
can hit the follow button by my name so you don't
miss my future classes. You can also tap my name to see all of my classes
here on Skillshare. If you have any questions, drop them in the Discussions tab and feel free to leave a view
if you enjoy this class. I would love to
hear your thoughts. Don't forget to upload your
project here in the gallery, and if you share
it on Instagram, tag me with Maya Faber. I would love to see
what you create. Thanks again for joining me, and I hope that you
enjoy this class.
 Maja Faber, Surface Pattern Designer