Transcripts
1. Introduction: Hey, I'm Maja Faber. I'm a surface pattern
designer and online teacher. In this class, I'm going to teach
you how to create a mini-pattern collection with a Christmas theme in Procreate. We will practice on finding inspiration for a
specific theme, and how to work with colors in your mini collection to
make it look cohesive. Where we have created
our collections, I will show you how to export your files so that
you can upload your patterns to
print-on-demand shops such as Society6 and Spoonflower. I will share my
uploading process and how to work with things like scale and keywords when you add your artwork to your
print-on-demand shop. As a bonus in this class, I've included one free premium Procreate
brush from me and my husband's brand
name company and one Procreate color
palette so that you can use the same colors
as me if you wish. This is a fun and creative class for you
who want to work with a Christmas design project
or for you who want to learn how to create a
mini-pattern collection for print-on-demand sites. You need some basic
understanding of how to use Procreate
to take this class, and you probably have created one or two patterns in this app before you
watch this class. If you've never created
a pattern in Procreate, I recommend that you watch one of my other classes,
for example, how to create an
editable pattern in Procreate with
color variations, or three ways to create
half-drop patterns in Procreate before
you watch this class. Are you ready to create
some Christmas patterns? Let's get started.
2. Your Project: Your project in this
class is to create a mini pattern collection with a Christmas theme in Procreate. That is the full project. If you want to, you can also use my
examples on how to prepare your files for
print-on-demand and upload them, and upload your files to your
own print-on-demand shops, such as Spoonflower
and Society6. But the project that you
can present here in class is a mini pattern collection
with a Christmas theme. Be sure to share your project on the project's
page here in class. I can't wait to see
what you create.
3. Downloads: I've included some fun
freebies in this class, you will get two free
Procreate brushes from me and my husband's
brand Faber Company, is the crunchy crayon, which I think has a really
nice texture to it, and then it's the
snowflake stamp, which is a fun stamp that you can use in your
patterns or artwork. Both of these brushes
are free to use for both personal
and commercial use and so is this color palette that I've included for free
in this class as well. To download these freebies, you can tap the link on the PDF, which is the one that you
see on my screen here, or you can go to the URL
that you see on screen now. When we tap this link, you will come to a
page on my website where you will write in your
name and email address, which will also add
you to my email list so that you will get all of
the latest news from me. Then I will tap "Unlock". That will take you
to a Dropbox folder where you can
download your files. To download the files, I will tap the brush
set and tap "Download", wherever you can find the
download button on your screen. I'm using Safari here, so if you also use Safari, it will probably look
the same for you. Then I will tap back to
fetch the other file and tap "Download" that file as
well, and download, again. It's one brush set
with the brushes and one color palettes. To install these
files in Procreate, all we need to do is to
tap the color palette, and tap the brush set file, and that will add the brush set at the top in
your brush library and the color palette
to your palettes. That's all you need to do to download the freebies
in this class. Now, we're ready to get started.
4. Choosing a Theme: The very first thing
that we want to do is to choose a theme for our
Christmas collection. We already have chosen the
main theme, Christmas, but now we want to
narrow it down even more so that our theme is
smaller, more narrow, that way it will be easier
for us to find inspiration. It will be easier for
us to move forward when we create our mini
collection, and also, we are creating a
mini collection with a set of three patterns. If we have a narrow theme, it will be easier to figure out the motifs that we will
include in our collection. The first thing that
you can try out to figure out a theme for
your Christmas collection is just to scroll
through Pinterest. I have a board that
I called Christmas. I can link this here in class. You can check out my
Christmas inspiration board, but you can also create your
own board with inspiration. The very first thing that
I do to choose my theme is to look at other
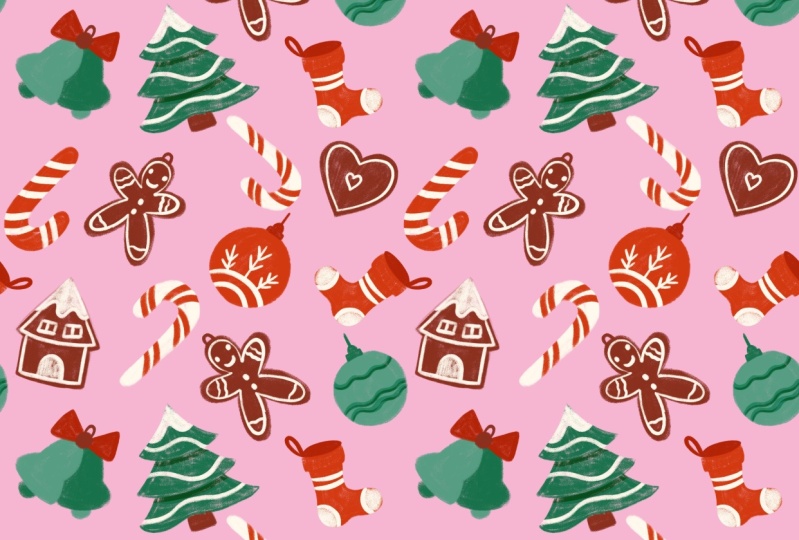
illustrations and patterns and see what's common. Because when we are creating these types of seasonal designs, and especially I
would say Christmas, people tend to like the
traditional things. They tend to like the same
things so it's ornaments, Christmas trees, Santas,
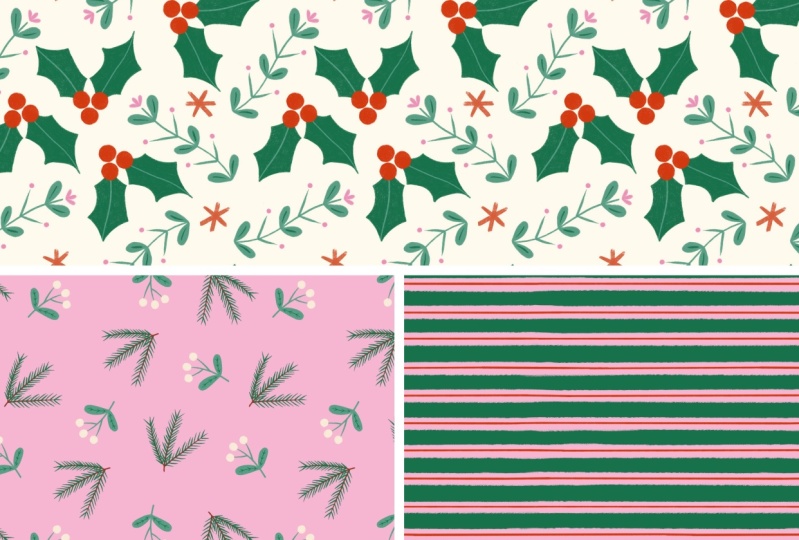
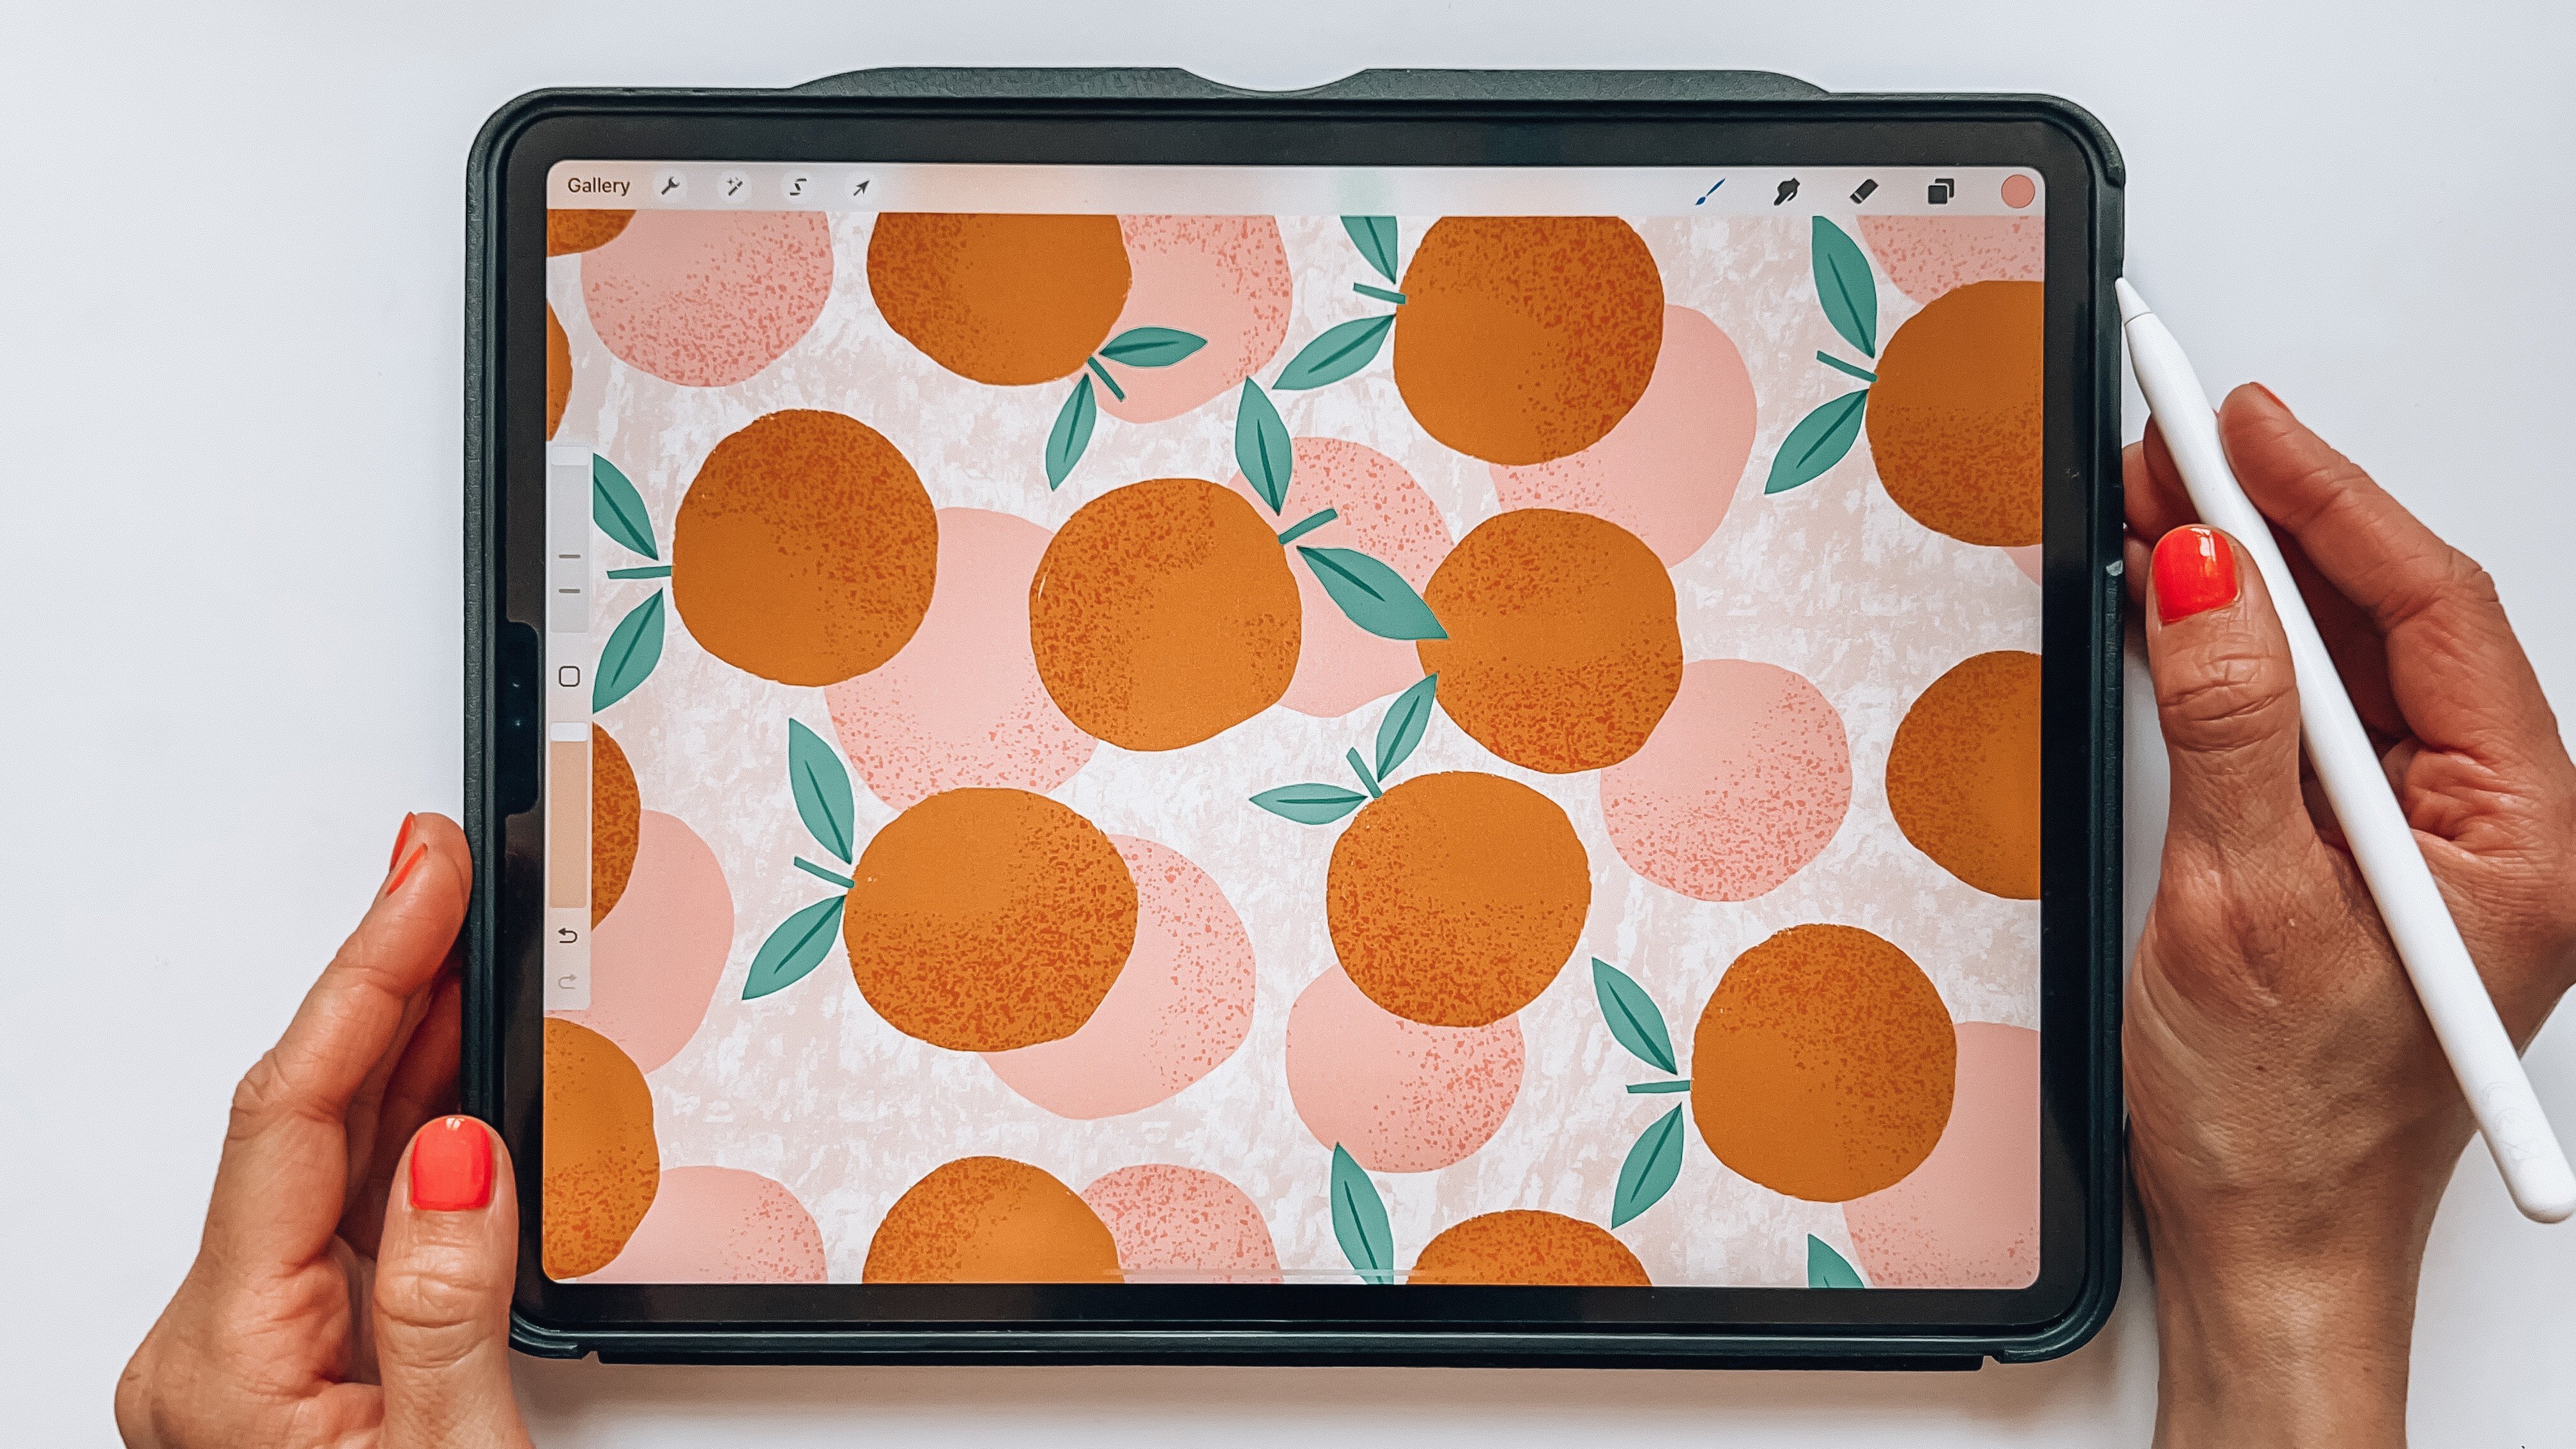
gingerbread houses. Sometimes you can find something that is a little
bit more daring, let's say for example these
Christmas illustrations. It has really bright colors, it still has the traditional red and green though, and white, but it also has a really
bright blue and a pink and the motifs are
these little animals. Here's a little bunny. There is a Santa and
a Christmas tree, but this whole illustration
is a little bit more modern and not that traditional so
you can go in that direction. But I would say that
to sell your artwork on the print and mount sites, the safe road is to go with
traditional Christmas motifs, because people tend
to want those motifs, especially for Christmas. This is the very first step
of finding inspiration. Scroll through what others have drawn both
illustrations and patterns and see what
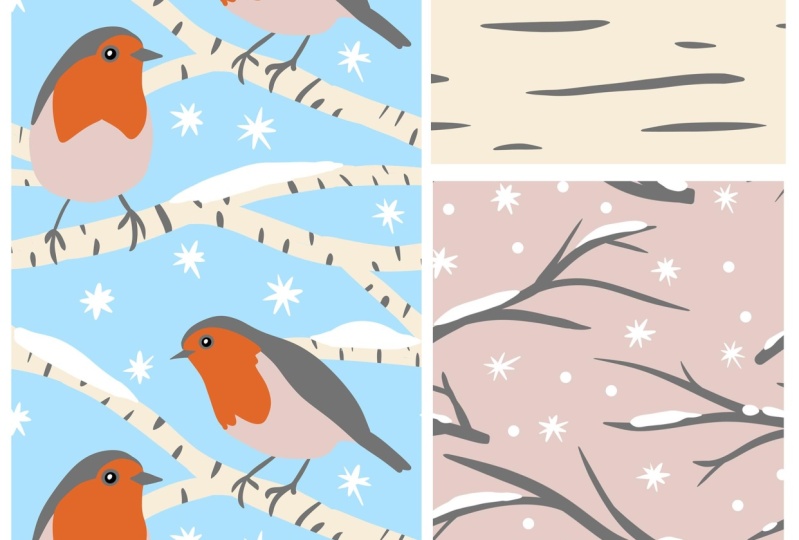
typically is Christmas. Of course, there's
Santas and reindeers. There's also some snowman and snowflakes and
things like that. I'm not saying to you
that you need to create the traditional Christmas-themed
pattern collection with only Santas and
gingerbread houses and Christmas trees, but I'm just saying that
for these seasonal events, especially Christmas, people tend to like the
traditional motifs, and also most of the time
the traditional colors. If you want to sell your artwork on print
and mount sites, which I will show you how to
upload later on in class, it's typically good for
these seasonal collections to keep it more or
less traditional. That is the first step. The next step is to
go to Spoonflower because in this class, we
will upload our designs to both Spoonflower
and Society 6. I found that Society 6 doesn't
have as good search engine when it comes to keywords
and popular designs, but on Spoonflower, I know that these two sites don't have
the same target group, but I will go for the
Spoonflower search results. Then I will hope that
that will work out on Society 6 as well. What I do ask Spoonflower
is that I tap Fabric, By Category, Holiday, Christmas. Here I have some really
popular keywords. You can always check this out. It's Holly, Reindeer,
Santa, Sleigh, Snowman, Christmas tree, Pine cones,
Retro, Sled, Snow, Stocking. It's really good to create
patterns with these motifs, but if you don't want
to do that instantly, that you know that
you want to create the Santa pattern
then just do that. But if you want to check
out what is popular, tap All Christmas. Here you will get all fabrics
with a Christmas theme. You can tap best selling, which is really
good, and trending. Those are the two that we
want to have a look at. Trending is really good because
those are up and coming. You can check out
here the motifs. I see some Christmas candy, dogs with Santa hats,
Christmas trees, and this general wintery
theme with stockings, pine cones, hot cocoa. Also inside of the
Christmas tree. That's really nice theme. You can have ornaments
and candy canes and whatever you can hang
in your Christmas tree. That can be a theme. It could also be this
Christmas animals, could be a theme,
that's really fun. Also, like gingerbread, that's also a part
of Christmas candy, more traditional trees. You can just scroll by here
and see what you find. Based on this quick
look at Spoonflower, I can see that Christmas candy seems to be really popular. Then I take the decision. Is Christmas candy something
that I want to draw? Because I don't
typically only create what's trending and what's
popular at this time. I also go with my feeling
of what I want to draw when I create patterns
for print and mount. But of course, it's really
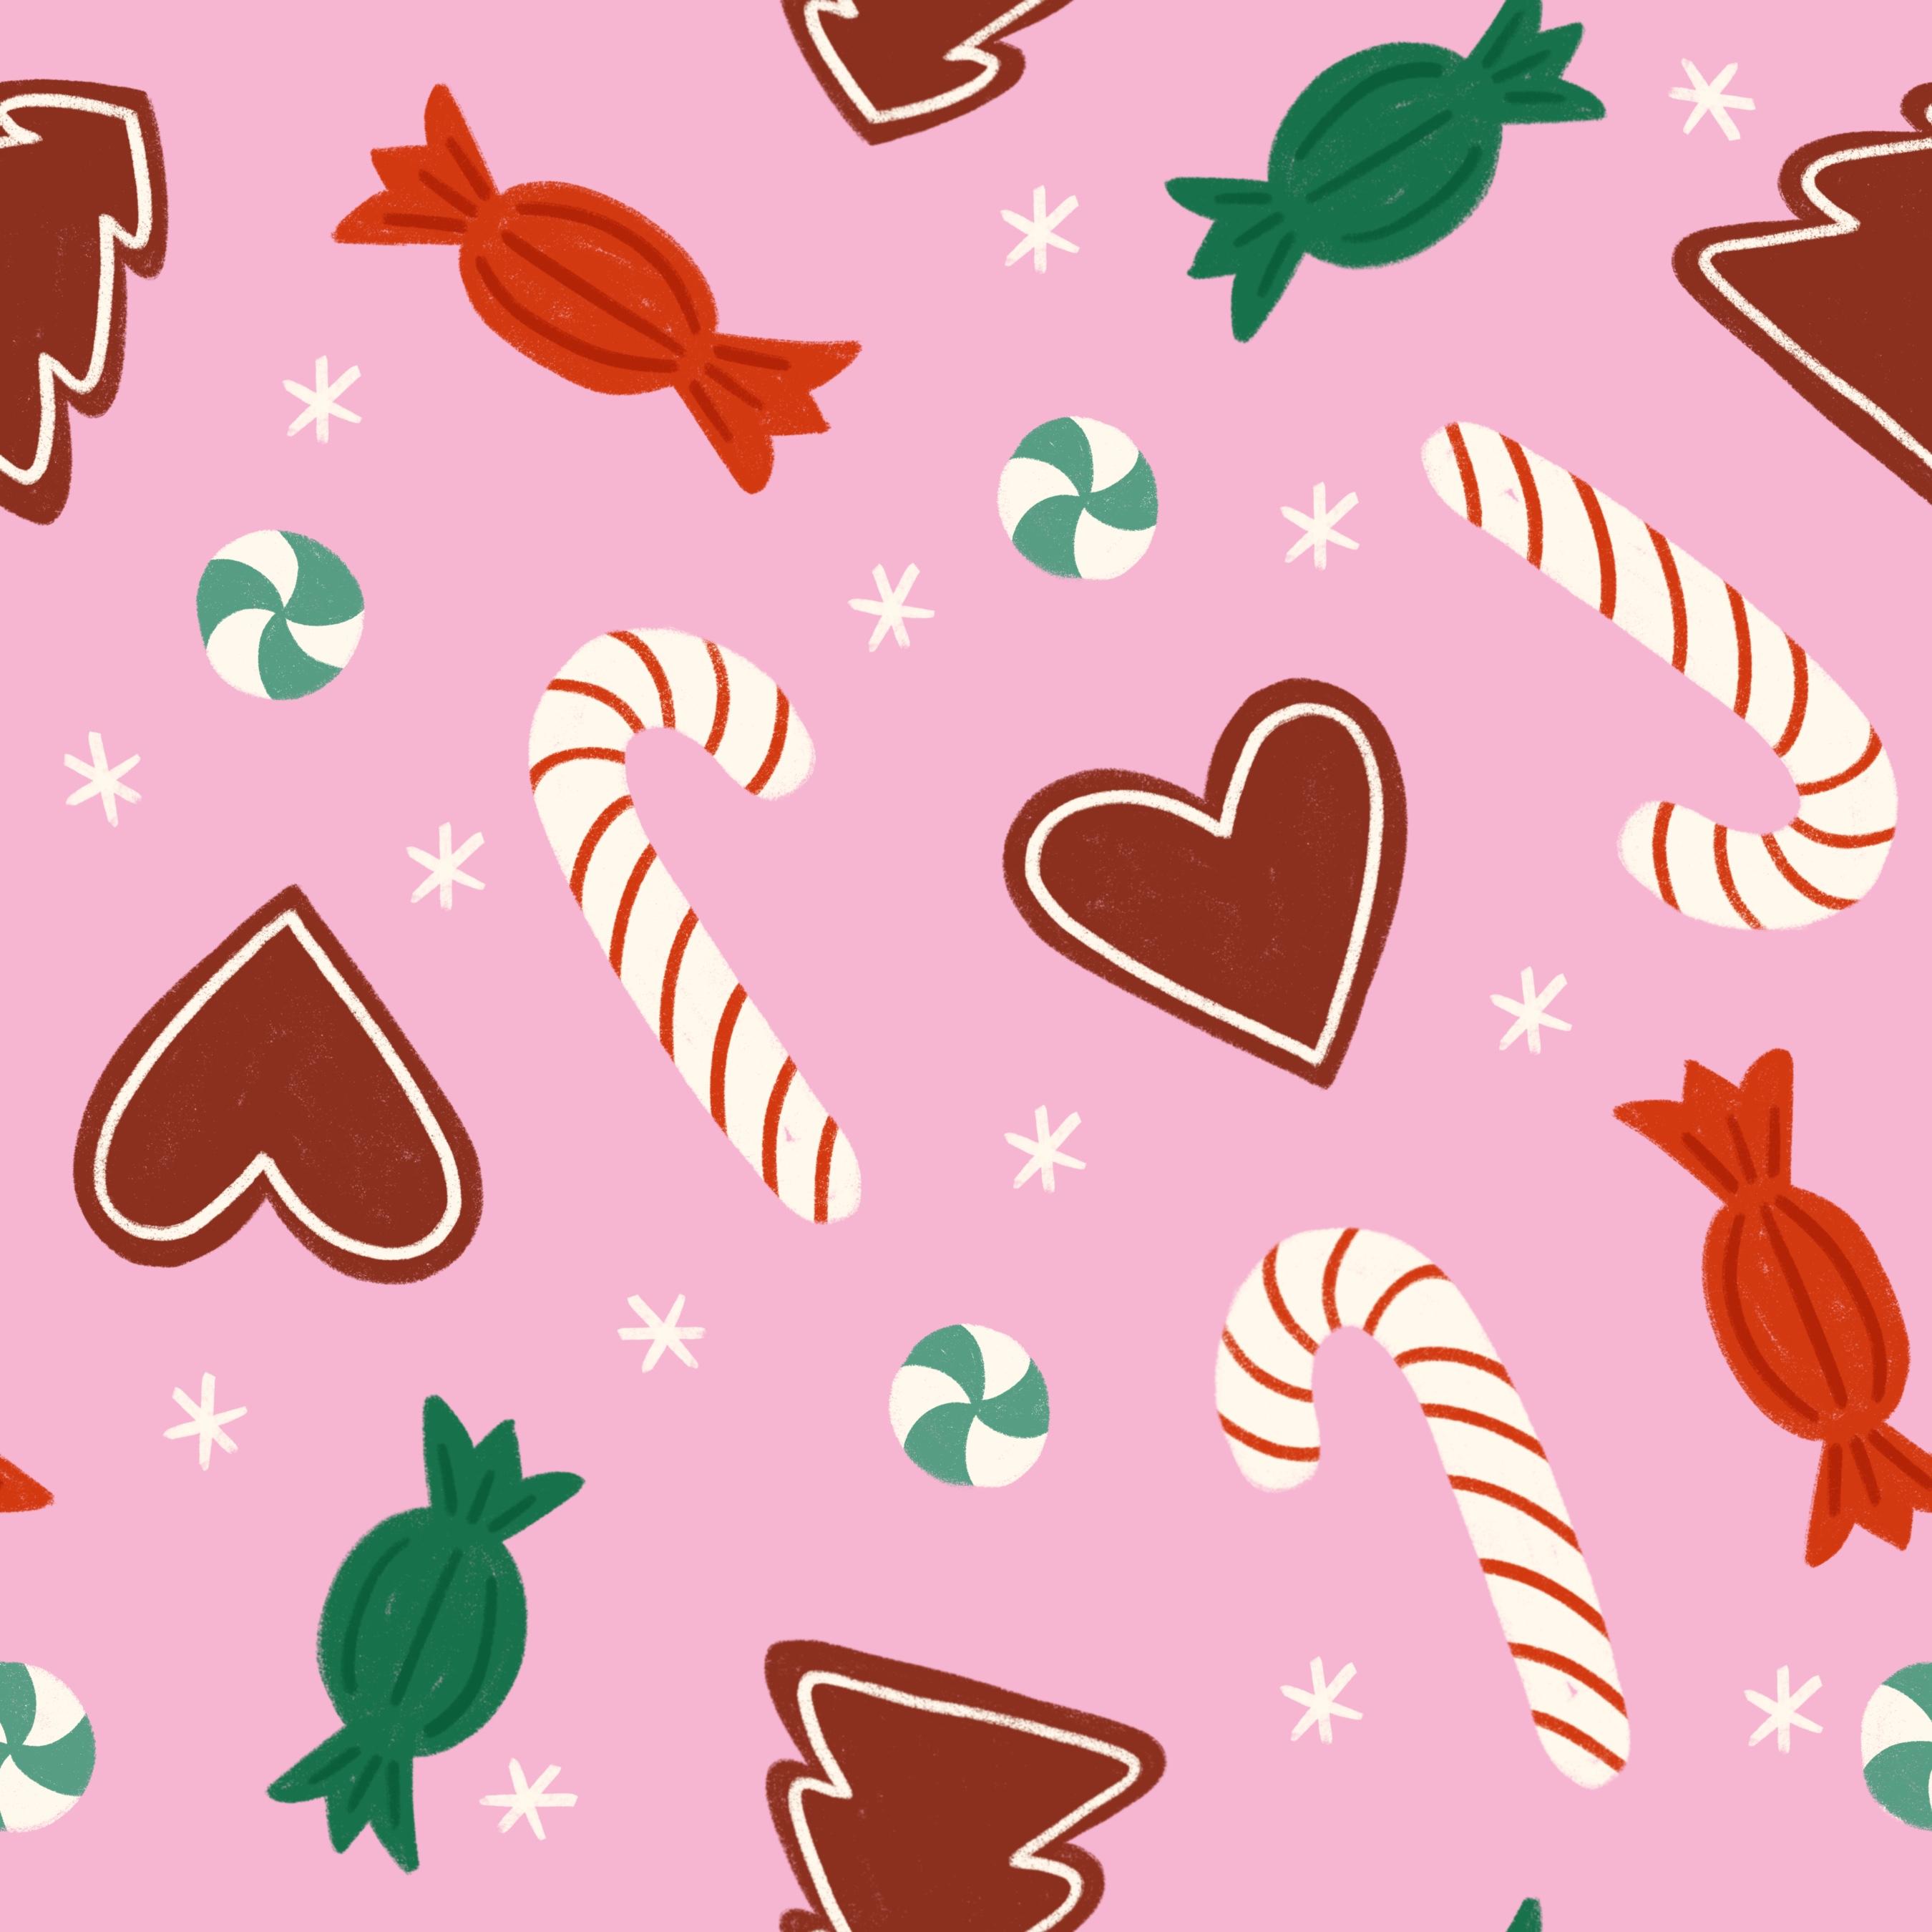
good to see what's popular. But I'm really excited about
this Christmas candy theme. Let's choose Christmas candy. I'm going to choose Christmas
candy for this class, for my mini collection. If you want to choose
another Christmas theme, feel free to do so. Then we can head over
to the next lesson where we will find inspiration
for our mini collection.
5. Finding Inspiration: Now it's time to find the
inspiration on what to draw. I already find inspiration here on the Spoonflower search, that now I want to
find inspiration that I can actually use to
create my pattern. Because these are
other designers who have created these patterns, so I don't want to be inspired
by the actual patterns. I will head over to Pinterest. Here instead of
being inspired only by other illustrations
and patterns, you can also get inspired by
other designers, of course. But it's always good to find some other
inspiration as well, so that you make
sure that you don't copy other artists' work. I will head over to the
search on Pinterest, and I will search
for Christmas candy. Just like that. Here we will get photos instead of
illustrations and patterns. I think that this is
a good way of finding your own inspiration
from photos of, in this case, Christmas candy, instead of looking at
other artists artwork, because it's really easy to copy other artists work if
you look at it too much. Of course, if you are going to create a pattern with
only candy canes, then you might not
even need to look up a photo of a candy cane because you already
might know how it looks, and can draw it from
your imagination. But here I want some
different Christmas candy, and I want to just
scroll through all of these candies and see which ones I want to
include in my pattern. I think that I definitely
want to have candy canes, and maybe cookies. These little fudge Christmas
trees are really cute. Fans send the cookie. You can just scroll through
here and see what you find. Peppermint is also something that's popular during Christmas. This is one way of
finding inspiration on what to draw in your
Christmas themed patterns. Let's move on to
the next lesson, where we will start to
sketch up our patterns.
6. Sketching: Now it's time to start
with the sketching. What I will do is
to create a Canvas, where we can lay out our whole pattern collection and see what type of motifs
we want to draw, and also later on what colors we want to
use and things like that. So I will just
create a new Canvas, and I will use a screen size, but I've found that the P3 color mode isn't
quite the same as the sRGB, and I usually use this sRGB. So I have a screen
size Canvas with sRGB, which is 2,732
times 2,048 pixels. But this size that you use for this sketching phase
really doesn't matter. But I would just use screen size here with the sRGB color mode. Now it's time to start
to sketch our motifs. What I want to do is to have
a look at the inspiration, so I will just tap at the top here in the
three little dots. Split view and choose Pinterest. Here I will drag my Pinterest
window to the left, and do my sketching
on the right, because that's just
how I like it. Then let's increase the size of the Pinterest so that we know
which images to start with. So I think that I want to create a Christmas candy like a mixed Christmas candy
[inaudible] pattern. So let's just scroll here and see what we want to include. I will definitely
include candy canes, and I think that I also want to include gingerbread cookies, because that feels really
traditional Christmassy. So I will just make the
Pinterest window a little bit smaller and have my
sketching over here. Choose black as the color
and then a sketching pen. You can of course use a
sketching pencil if you want to, but I'm just going to use the crunchy crayon brush that is included in this
class, to sketch with, and have a small
size of the brush, and start to sketch my patterns. So first, I will just sketch up some squares here
because for me it's easier to see the
whole collection if I just have the squares all ready. So 1, 2, and 3, those
were a little bit big, I will just tap the
transform tool, make them smaller, and then
draw the third square. You can of course also copy
the squares if you want to. It really doesn't matter
how large they are, or if they're perfectly squared or little bit
wonky like mine here. This is just a sketch. In this mini collection we will create three patterns
that match each other. The first one I want to have, as I said like a mixed
Christmas candy pattern. Let's just sketch out
some Christmas candy, a candy cane over here,
and gingerbread cookies. I don't think that I want
the little guys over here. I probably want like
hearts and things, so let's just search
for gingerbread. Here we have some really
fun gingerbread cookies. So lets just tap one of these, maybe a heart would be nice
like a gingerbread hearts. So I'll sketch that up, and I probably want something, a little white thing
around the edge. Maybe I want it bubbly, or maybe I want it
just to be like this. Let's try and see later
on, and what else? Maybe a gingerbread
Christmas tree. We have some over here. We also had some
nice ones over here. Like a Christmas tree, I'll just keep it simple. Well, a fat Christmas tree, something like that. This is just a
really rough sketch that we can fix later on. What else? I'm not sure yet. I think that I don't want
everything to be gingerbread. I think that I want this to be a traditional candy cane white and red and
gingerbread cookies, maybe I want some
like wrapped candy. These ones are really nice. Let's get inspired by those, and draw something like that. At this phase, I'm really just brainstorming to see what I want to include
in the pattern. Maybe we want to have like
stripes in this direction, or maybe just like that. That might be a simple stripe. I think that I will just make this one a
little bit smaller, so I will select that one
and just place it over here. So maybe we want one
more type of candy, like wrapped candy,
maybe a rounder one. My style is typically
simplified and stylistic, but you can draw as detailed motifs as you want
in your style, of course. What else? This little
thing makes me think about those small peppermint. Maybe I can draw one a those just the regular simple
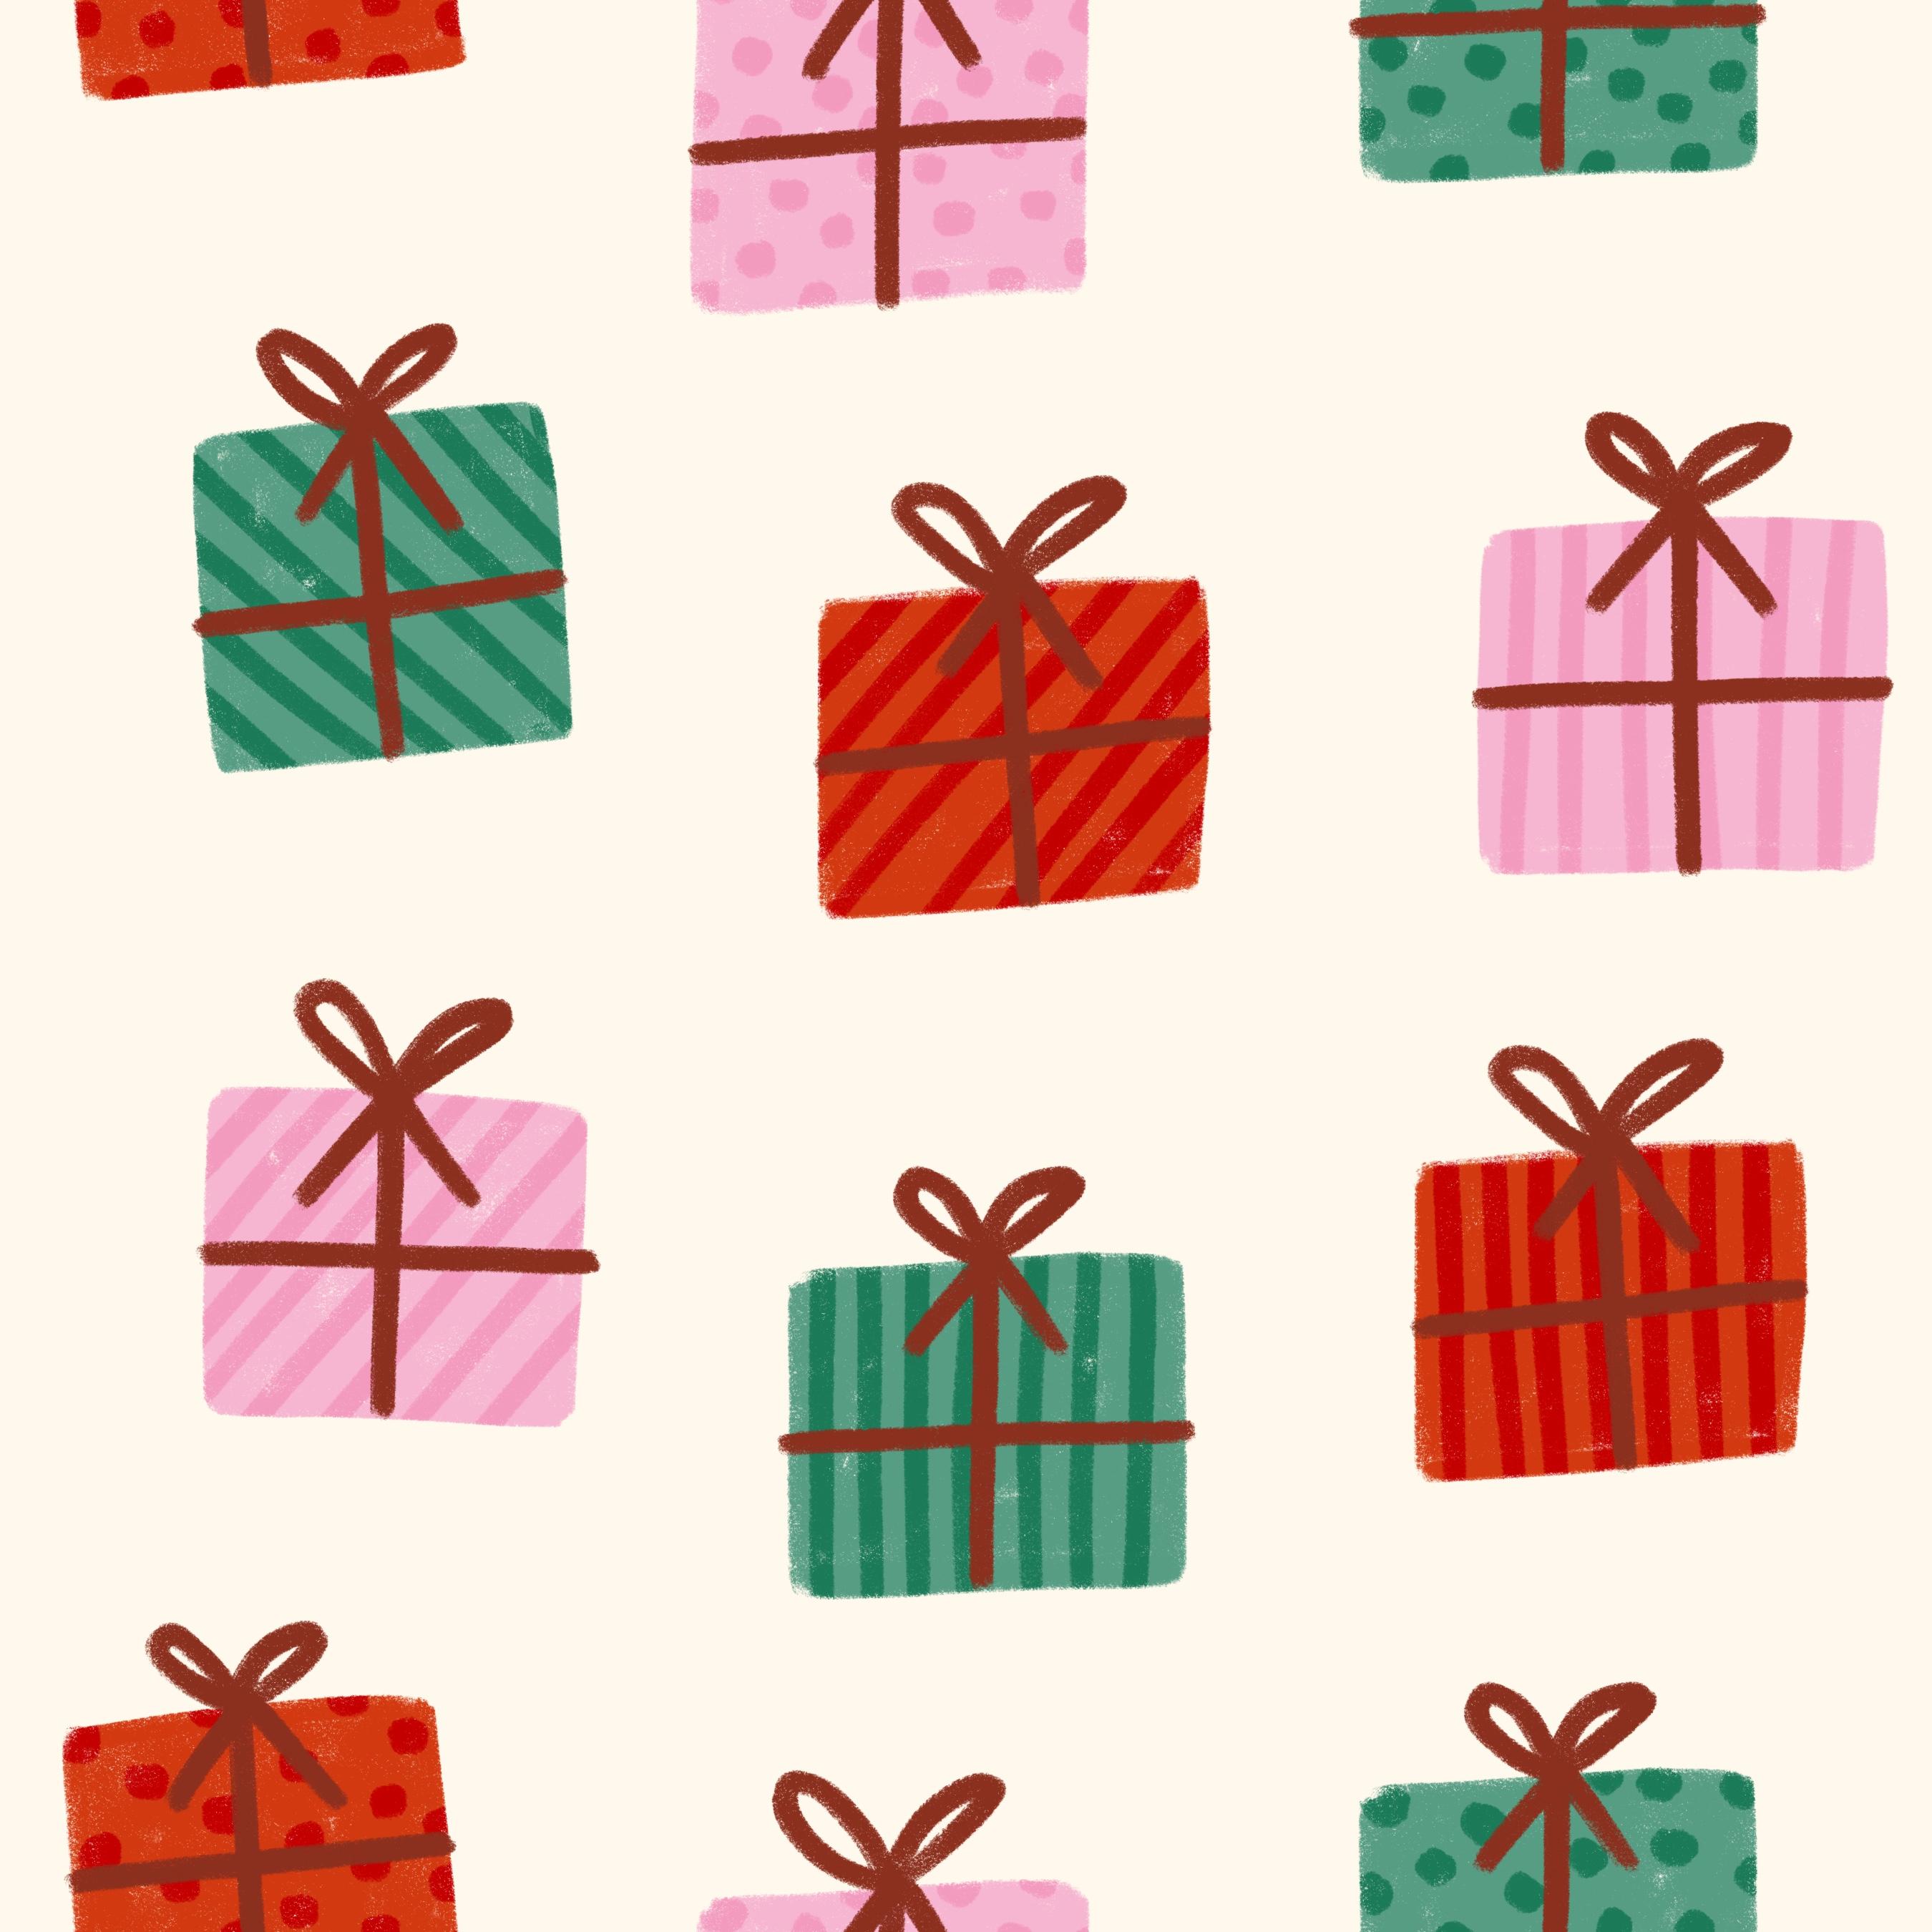
round peppermint, something like that, and also, I think now that I'm
looking at this, that it will be nice to have
one pattern with gifts. Even though that the
[inaudible] pattern, we'll be like Christmas candy. I think the gifts can also
be part of this collection, like gifts and candy. That feels like a
good theme for me. Let's just be finished with these candies and I will
just select all of those, and drag them to my
pattern over here, and just place them there. I think that I wanted to create some gifts for this
secondary prints. I like to keep it simple. I can just draw it
straight in this just like square gifts like this, I'm not sure about
the placement yet, but this is just the idea face. I want like a bow on them. Let's try to add
a bow in the top, maybe in the center. Now, I think that I will
keep all of my bows in the top to keep it simple, something like that,
and I probably want to create something to make this pattern a little
bit more interesting. So maybe some of these
have lines and some of them have dots like
a wrapping paper, like keeping it simple as
it's a secondary print, but still make it a little
bit more interesting. So let's just do a diagonal
lines on that one. So now I know my idea
of that pattern, and here maybe I
just want to try out to duplicate the motifs. First, let's just move
that one so that is not just beside that one. Maybe over here. Did I draw them on the
same layer? I did. You can draw the squares on the separate
layers so that you easily can change where your motifs are
placed on this layer, but this is a really
rough sketch, and I don't mind that much, that is not perfect from here. I will just duplicate
the motifs a little bit to see
how it will look. I think it will look good. Let's just copy this.
I'm on the wrong layer. Now, select the first layer, then swipe those two
layers together. Select the first layer and maybe I just want to
duplicate this heart, so select the heart
to copy and paste, drag it up there, that looks pretty good, and then swipe those layers
together to merge them, maybe just select
the peppermint, copy and paste, and just add the
peppermint over here. That looks like a
good pattern for me, like a mixed Christmas
candy pattern, and here we have our
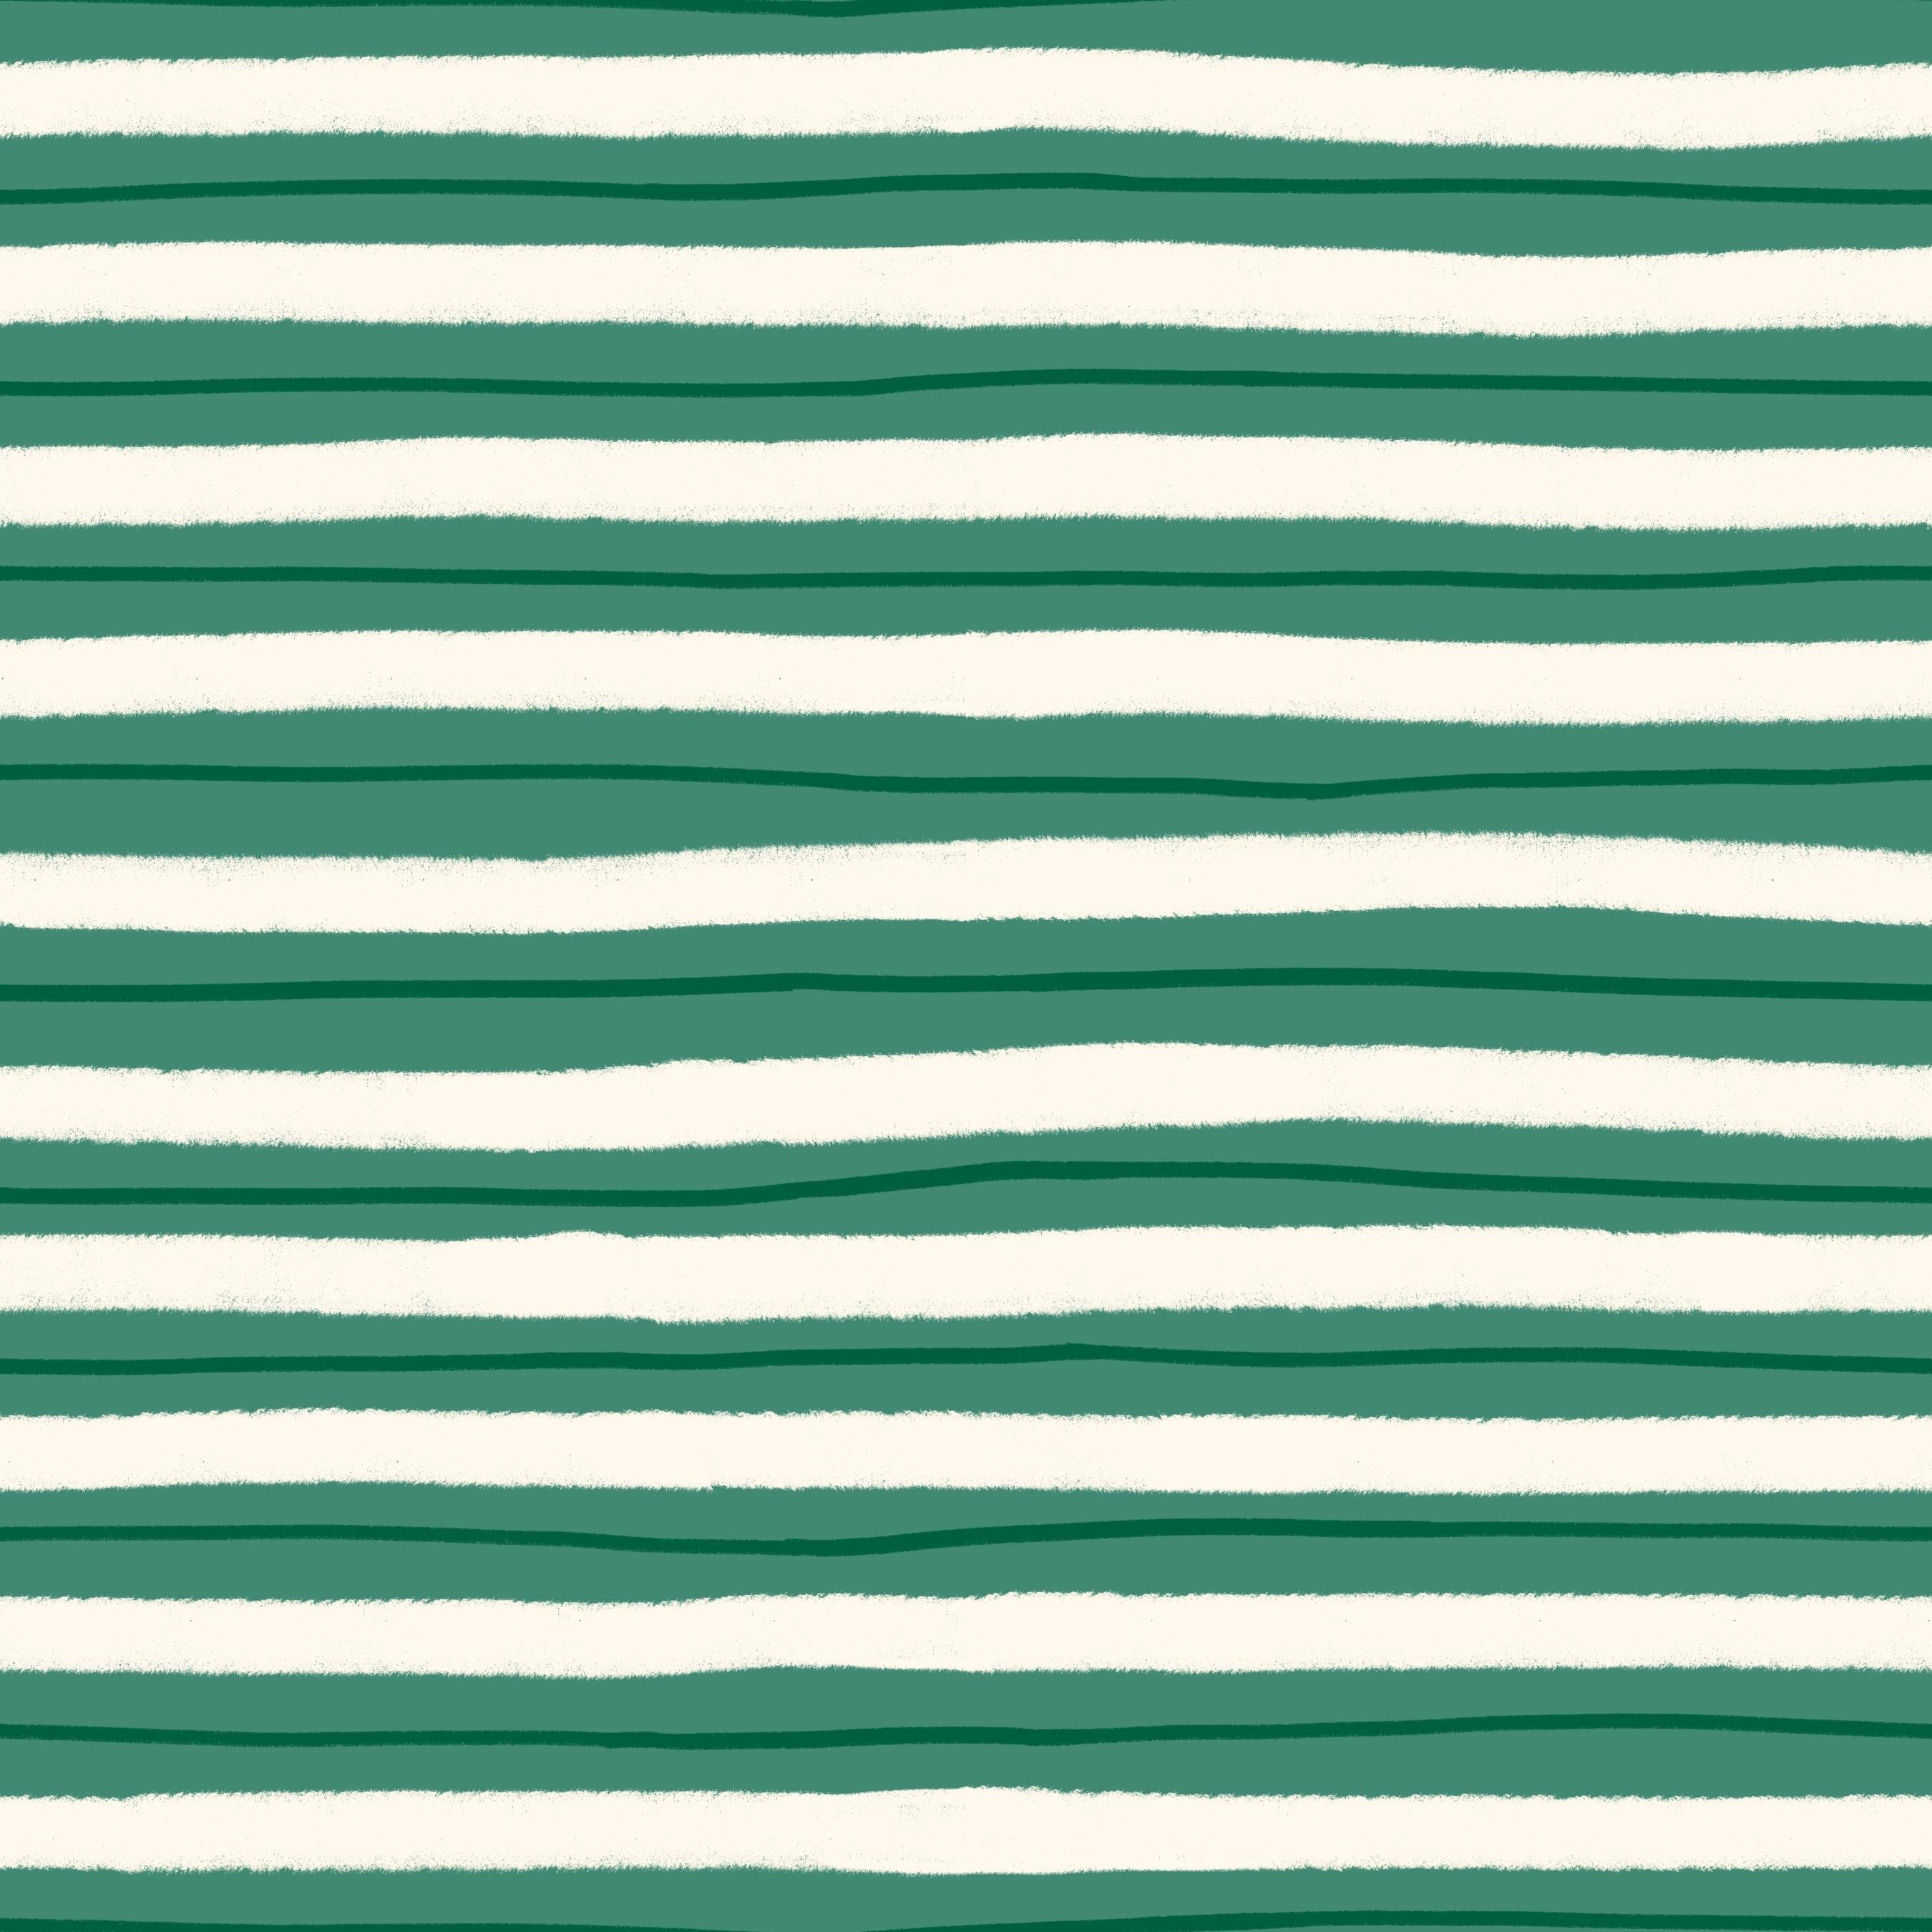
Christmas gifts pattern. Now, I think that I want to
create something really, really simple, maybe just
like a stripes pattern. It can be like a gift
wrap for the gifts, and also reminding us of the
stripes in the candy cane. To just remind myself that I want to create
the stripes pattern. I can just draw the stripes
on this little square. Maybe I want larger and smaller, thinner and thicker stripes. I'm not sure exactly how yet, but some stripes
pattern will look good with these like
a blender print. So now we have our
sketch for this pattern. Of course, you might spend
some more time on this. But to be able to
create this class, I already created
these patterns before, so I know what I wanted to draw. But this is to show
you my process, and when I do this in real time, it can take a bit
longer to figure out what kind of motifs that I want
to include in my patterns.
7. Color Blocking: Now it's time to choose the colors of our
mini collection. When I create patterns, I do this in a few
different ways. Sometimes I will draw a pattern and spontaneously choose
the colors as I go. Typically, I have an idea of
which colors I want to use and then I try them out as I draw the motifs
and draw the pattern. But when we are
creating a collection and we know that we will create
a collection from start, it's always easier and the
workflow will go smoother if we have a color
palette to start with, and then we can always add
colors if we need to later on. In this class, I've
included a color palette as a free download. It's called Holly Jolly, and it's filled with some
nice Christmas colors. I've chosen this
palette by looking at my Christmas mood
board on Pinterest and seeing what colors are
traditionally Christmasy. I don't want to go too far from the traditional
Christmas colors, so I know that I want some green and some red and
I also love pink, so I want to have some pink. Many Christmas illustrations and patterns have
some light blue or even dusty blue like this, that's more of a vintage feel, but I don't think that
I will want to use a blue color in this
mini collection. To choose colors, you can either use
pre-made color palettes or a color palette that
you created before or you can have a look
at other Christmas inspired designs and see which
colors that inspire you. I'm really inspired by
this look, for example, like a lot of pink
and greens and red. But as we have a color palette that is included in this class, we will block the
colors in the pattern that are from this
color palette. I did a little mistake
there first that I draw the squares not on
one separate layer, but everything in the
sketch on one layer. But I don't want to
redo it right now, and this is just a sketch, so I will instead just
tap to add a new layer and drag that beneath
the sketch layer, and here I will start
to color block. I will use the Crunchy Crayon that is included in this class and I can tap and drag my
color palette to my canvas so that I have it over here or over here or
wherever you want. Let's start. With the crunchy Crayon, I think that I want to have one really bright pink
color in the background, and I think it's also good because I know that I want
my candy canes to be white so then I know that
I can't have a white or cream white background because they won't show. The contrast won't be enough. I can choose to have
a green background or a red background, but I want to have a pink
background on my candy pattern. Let's just try one of
these pink colors out. For this, I will
just create a square and fill it with a color. Then let's see which color I
want for the second pattern. You can start with the
backgrounds if you want to, because then you can see that your pattern collection
will be cohesive so you don't only have
like pink backgrounds or green backgrounds
or white backgrounds, but that you have
a little bit of variation in your collection. As I am drawing
Christmas gifts here and I want my Christmas gifts to be in a few different colors, I think that I will use a
white background for this. Maybe this is a little
bit of cream white. Let's try that out. We can even try this cream white that is a little
bit more beige. I've included a few
different colors here. You can choose yourself which of these that
you want to use. If we have one pink, one white, then I probably want a green, maybe a red but I think
that I want a green. Let's try out the red first. That can look really good but I'm liking this
combination more. Already here, I have decided the background of my patterns. I can change my mind later on if I feel that it doesn't work but this is the idea
that I will base my color selections on when I create the patterns
later on in this class. Then we want to add the motifs. You can choose to just
draw on the same layer but as I might want to change the color of the
background if I need to, I will just add a new layer. Here, you can draw
beneath the sketch or above the sketch. I will just draw
above the sketch so that I really can see how the colors are
matching each other and contrasting each other. I will firstly tap
the sketch layer and drag down the opacity a bit so that I don't see that
black sketch as sharp. Then on a new layer, I will select the
white because I know that I want my candy
canes to be white. I will just fill those in. Maybe that was a little
bit too big of a brush. Something like that
and I can fill it in. This is just color blocking and this is not drawing
the final motifs. I'm just trying out the colors and how they work
with each other. If I have white candy canes, I know that I want some
brownish gingerbread cookies. Let's try out one of
the brown colors. It looks a little bit
too sharp for me, but let's just try it out and see how that looks when
I've colored everything. Let's add a new layer on top
where I will just draw in this white little lines
on the gingerbread. White little lines. Choose the white color
and draw in the lines. As you can see here, I'm doing this really
quickly just to see how the colors will
look together. Here I have a lot of brown and now I want to bring
in something red. I will bring red to the
wrapped candy over here and maybe I want to have
some green candy as well. That looks a little bit bright, but let's just try that out. I just realized that
I'm on the layer with the white mark on
the gingerbread, but it really doesn't
matter at this stage, we're just color blocking. Just make sure that you can recolor your color block motifs, so that you put them on
separate layers if you need to. All that I care about here
is that the white line of the gingerbread cookies are on top of the brown gingerbread. That green color of that wrapped candy looked a
little bit too sharp. Let's try the darker
green out instead. Then for the peppermint, I want them to be white, but I want to have some
colored layer on top. I will just add the white
at the bottom layer here and draw that in, and the other one and
then on the top layer, let's just try out this
light green color over here. That looked a little
bit strange, like that. This is really rough. We are just trying
out the colors and the next thing is to add
the lines on the candy canes. Let's try the red. Maybe I want that red or
maybe I want the darker red. No, I think that I want
the light red for this. I will just add some more color there to see how it looks. That looks pretty good. Let's try to add some
lines on the candy and maybe darker
green on that one. I will just select the green and choose a little
bit of darker green and add some lines on
top of that candy. If we zoom out, I think that this looks good, but I want to try out to
choose a lighter color for the gingerbread cookies because I think that those were a
little bit too dark brown, and now we can try out
the background color. I had chosen the lighter pink, so let's try out
the darker pink. No, that doesn't look good. This looks good. Let's move on to
the Christmas gifts and we can just add a new layer so that we know where
we are drawing. Here I will start to
just draw the gifts. Let's just add a green gift and a green gift
over here as well, and maybe a red gift. If this one is red, and this one can be pink. Pink, and red. That looks pretty good. Let's try out the
darker pink color. No, I didn't like that one. This might be actually
good from the start. On top I will add a new layer, and I will use this
darker brown color to add some contrast and draw these little bows and string on top of the gifts. That looks really good, I think with the colors, and now I want to
add in just a few details of the wrapping paper that we had on the
sketch layer over here. To do that, I can just
add a layer on top here, and I will choose the
blending mode color burn, and I will use a gray color
to just draw in some details. The lighter gray I have here, so we are using blending
modes on this layer, which means that when
we draw with gray, it will be a darker version
of the color that is beneath. If I will choose a darker gray, the color will be darker. I will go up here somewhere and then just draw in some light details of
the wrapping paper. This way I don't need to choose a darker color for
all of the colors. It will be that automatically. That looks pretty good. I don't need to do that
on all of the motifs as I already feel
that that looks good. Then for this lines pattern, we can just turn off
the sketch because I know that I want
to draw lines here. We'll just add a new
layer on top as well, and I will choose
the white color because I think that that
will make a good contrast. I would just draw a few
lines here with the white, and that looks a
little bit plain. We can just try out to use the blending mode color
burn here as well, and with a grayish color
somewhere over here, maybe we can draw in some
thinner lines in-between. Maybe I want those to
be a little bit darker, not that dark. Something like that. Now we have color
blocked our patterns, and I think that it looks good. We might want to change the colors of some
motifs later on. But let's just try out
how this will work. When I have all of my patterns
like this color blocked, I will just do one small
change to see the difference. I will change the gingerbread
again to the darker brown because that way they will
match the gifts' pattern. Now I think the dull
looks actually better. Let's just be satisfied
with this at this point, and then we can move
on to the next lesson, where we will start to
actually create the patterns.
8. Hero Pattern - Draw the Motifs: Then I will head back to the
gallery and I will create new canvas where we will
start with our hero pattern. So tap the plus sign and you
can tap "New canvas" and you can choose any dimension
you want to, of course. I wouldn't go lower than 3,000 pixels square
when I create patterns that I use for
print-on-demand sites and also that I might not know where I want to use
them for the future, so the high resolution and the largest size
that you can create your pattern in, the better. When I create patterns
specifically for Spoonflower, I use 3,600 pixels as a standard and I
will just show you why. Spoonflower has this size guide that you can see the pixel calculation
for common measurements. Here, you can see
that if you have 150 DPI on your patterns, we have 300 because
that's large resolution. As I don't know where I want to use my patterns
in the future, I always create my
patterns with 300 DPI. But if I would have 150 DPI, 3,600 pixels would be 24 inch. I think that it's good to have whole inch measurements when I create specifically
for Spoonflower, it just makes everything
so much easier. But you can choose
for yourself and if you also create
patterns for Spoonflower, you can use this size guide. But my standard size
is 3,600 pixels with 300 DPI and that will bring me 47
layers to work with. As a color profile, I use the first sRGB. I found that the Display P3 have a little bit
of difference in the colors, and typically,
sRGB works really good for me. Tap "Create" and now we have our first canvas where we
will create the hero pattern. What you can do
now is to start to sketch the hero
pattern once again, but as I've already, created a sketch, I
will just use that one, so tap "Actions", "Add", and I will add this photo of my
sketch and color block. So we will create this
Christmas candy pattern, and I will just drag up the
size of my sketch so that it fits my canvas and then tap the transform tool and that will make everything else disappear and I only
have this sketch. So now you can choose if you
want to refine your sketch. But this pattern that I'm
creating, and in this style, is a bit simplified, so I will just use this
sketch and draw on top of it. If you want to, you can just erase the square here so
that it won't be confusing. Then I will just
bring my sketch to the middle and drag down the
opacity of the sketch layer. Next, I will add a
background layer, so I tap to add a
new layer and I will choose the pink color from the color palette,
and tap and drag to add that pink color
to the background. I won't mind that it looks
a little bit strange here, because the reason is just that the sketch layer
has a white background, but that's fine because I already made the color
blocking so I know how the other colors look on
this pink background color. So tap to add a new layer on top and now, I will start
to draw my motifs. So when I create patterns, I make sure that I don't mix the colors up in the layers, so what I mean
with that is that, if I'm using whites, I will draw everything that
is supposed to be white on one layer and then everything that is supposed
to be red on one layer. Sometimes I have
several layers with white, and several layers with green and red,
and things like that. But the important thing
is that I don't mix it so that I don't put the
green and white on one layer. If you know that you never
want to recolor this pattern, you can, of course, put
everything on one layer. But I always want to
make sure that I always can re-color my pattern without difficulties later
on, and that is why I separate the
colors with layers. Moving on, I will choose
the crunchy crayon that is included in this class and
start to draw the candy canes. Here, you can choose if
you want to just draw one of the candy canes
and duplicate it, or if you want to draw more so that they aren't identical. But let's just start. I will use a brush size
that is about 20 percent. Then I will draw from my
sketch and this time, instead of tapping and dragging a color
to fill the motif, I will draw in the motif
with the crunchy crayon, that way I'll get this really nice
crunchy texture, which I think adds a bit of
interest in this pattern. That looks a little bit fat, so let's turn off
the sketch layer. I'm not really happy
with the shape of that, so let's just try
that once again. Maybe something like that.
I will choose to use the same candy cane several
times in this pattern, so I will just draw
one candy cane, and then I will move on to the next layer and I will add a clipping mask
on this layer. I will show you why in a minute, so I would choose the red
color and with the crayon, I can draw in these lines. But as you can see, the lines are going
outside of my motif, so if I tap the layer, tap "Clipping Mask", it will hide everything that
is outside of my motif. So let's just draw in those lines and see how we
want that candy cane to look. So now that looks pretty good. Let's move on to the next motif. I will tap to add a
new layer on top. Let's continue with the white. So I will draw the peppermint. As I know that I want the peppermint to
be white and green, I will add a separate layer for this motif, the
white peppermint. Otherwise, I would
mix the white and red here, on top of this layer, and that will just
make it confusing. So on the new layer, I
will draw the peppermint. Here, I can draw some different
peppermints if I want to, to make it a little
bit more interesting. So something like that. Then, I will add a new layer on top, tap "Clipping Mask",
and here I want to use the lighter green color and
a smaller size of the brush, maybe like seven
percent to draw in this swirly peppermint
thing here. The same here, I will just
draw in the shapes so that I keep this yummy
crunchy texture, and I'm doing the same with the other two peppermint shapes. So next, to remember
what colors I chose, tap, access panel and reference, and I will just import
that image with the color blocking, and have it over here so that
I remember my colors. I don't need it
that big actually, I can just make it
smaller, like that. Then moving on, I
will add a new layer, and here I will draw the brown gingerbread
cookies with a larger brush. So I'm drawing the
tree and the heart, the gingerbread cookies, and I'm just drawing in the shapes with this brown color and the crunchy cream brush. Now, I want to add the white decorations on
the gingerbread cookies. So I will add a new layer on top of the gingerbread cookies, and let's try out about
seven percent in brush, maybe a little bit
higher, eight percent. I think that I want a little
bit more, maybe 10 percent. Something like that and
on the heart as well. Next, I will draw one of
these wrapped candies, so I will start with the one at the top in this red color. It's that one over there. Then I will just
draw in the shape. I like to use a larger
brush here because I like the rough look of this brush. It looks a little
bit more rough in the edges when I
use a larger size. Then I will draw in the
wrapping over there. So something like that. Then I will add a
new layer on top. Here, I will try to use
this dark red color. That looks good. So just drawing some lines here. Maybe I want some smaller lines, or not smaller, on the edges. So let's just try
that out to have a few of those lines on
the edges as well. Then we're moving on
to the last motif, that green wrapped
candy over here. I make sure that I'm on
a new layer and I have about 20 in brush size and I draw this little wrapped candy. Like that. Then I will add
a new layer on top and just drag down to a darker
green and add some lines, just like on the
other wrapped candy. So now we have drawn
all of our motifs and it's time to create
the repeated pattern.
9. Hero Pattern - Make the Repeat: So now it's time to create
the actual repeated pattern. The first thing
that I will do is just to turn off
my sketch layer. I can drag that to
the very bottom. Then I will, for now, just shut down the
reference Window and have a look at my motifs. So this will be a
fairly simple pattern, where we will just
duplicate these motifs and place them in
the pattern tile. So first, let's just arrange the motifs in the
center of this square. What I do to move the
motifs is that I will select the layers that I
want to move a motif from, let's say this gingerbread, and swipe to the right
on both of those layers. Then I will tap the selection tool and just
move around my motifs. So you can just really
try things out here. We will do a tossed pattern, which means that all of the motifs are tossed in
different directions. In the end, you can use this pattern or the
printed product, for example, the fabric that we will sell on Spoonflower. You can use it in any direction. That is what a
tossed pattern is. So just move around your motifs. If you want to move
around all motifs, we can just group all
of the motifs together. Swipe right on all of those
layers and tap Group. Then we can select
that group and select the motifs that we want to
move and move them around. So here, maybe we want a
duplicate of the candy cane. So in this case, I will just
swipe to the right on both of those layers and group that within the group
and then Duplicate. Now I have a copy of the
candy cane that I can move around and twist and turn to place it
balanced in my pattern. So what I want to make sure
here is that I don't place any motifs at the edges of my canvas because then
they will be cut off. So we will place all of the motifs in the
center at first and then we will start to build
the tile at the edges. Just twist and turn a
little bit here and place your motifs in a way that
feels balanced to you. We can change this
later on as well. But let's just have
something to start with. So maybe like this. What I do with this
pattern is that I tried to make a balanced whitespace
between all the motifs. This is the basic way
of creating a pattern. The motifs are placed balanced
throughout the pattern. So now we will continue. Here, I will show you
a little trick to see how your pattern
tile will be repeated. So turn on the Access Panel, turn on Reference and tap "Canvas" and drag up
your reference Window. You can move it around
on your canvas. You can just drag it up and increase the size of your image within that reference Window. Then I will increase the
size of my canvas and I will match the edges from the reference window with my
canvas that I'm drawing on. So this is not a
perfect technique, but it's working like a pattern
preview that we have in, for example, Photoshop
and Illustrator, we have the pattern
preview option. We have the pattern preview
in Photoshop and we have the pattern
tool in Illustrator. But here, it works the same, but we don't see
the full repeat. So we can only see
that the repeat is repeating to the left. But we can get a glance at how it will be
repeated and where we can place the motifs, so that they aren't repeated in a way
that doesn't look balanced. So let's just select
the group again, and now we can start to move around our motifs when we see how the
pattern is repeated. So for example, I can see that
this won't look that good, that the candy canes
are in a line. So to do something about that, I will just start to move my motifs based on what I see here in
the reference Window, how the pattern is repeated. So maybe if I drag
up this candy cane a little bit and I can
move the gingerbread. So this is really detailed work, but what we do is just
move around the motifs, and at the same
time, we look at how the pattern will be
repeated, and we can make sure that our
pattern is balanced and that the motifs
are placed in a way so that it looks dynamic. So that looks pretty
good if we would have one more candy cane. So let's just duplicate
the candy cane and drag it maybe
somewhere around here. Let's try that out. That might look good. We need to select the
whole group when we want to move the objects around. So let's duplicate the
gingerbread as well. So to do that, I will select the layer with the
cookie, the brown cookie, and drag around the
heart, copypaste, and then I will do the
same with the layer with the white line
on it, copypaste. Here we have our
gingerbread cookie, the heart, so we can
move that around. Maybe it will look good
with a heart over here. That might look good
if we just change the position of the
wrapped green candy. Then we go over
our whole pattern, and add our motifs so that they are balanced
throughout the pattern. I also want a copy of
the wrapped candy, so I will group the two red
wrapped candy together. I don't think that
I want to place it over here because
then we will have a wrapped red candy down there and one that is
repeated just beneath it. Maybe over here will look good and then
we need to change the position of this. So it is a little
bit tricky to place your motifs to make
them balanced, but it's also part of the
fun to create the pattern. But I will just work with
this a little bit more. I think that I want a copy of the tree as well the
gingerbread tree. So I will just select
that layer and copy with the cookie and then
copy the layer with the white decoration and select both and let's
see where we can place them so that
it will be dynamic. It probably will be good
maybe somewhere around here, or maybe actually here
at the very edge. I think that will look the best. We will just keep that in
mind that we want the tree to be in the edge there. So I will turn off the visibility of those
layers and I will just drag those on top of the group because we will need those when we create the repeat later on. I will group that wrapped candy because I know that
I wanted the tree to be around there somewhere and I also wanted it to
go around here. So then I want to
move that candy cane. So find that candy cane in
the layers panel and then we can just move it around
and see where it fits. You can also try to flip it and see if it looks
better when it's flipped. I save my tier because
we need to create the actual repeat before we
know how this will look. The way that we will create
the repeat here is by using selections and
flipping them around. If you watched my other classes about how to create
patterns in Procreate, you probably have seen me
using this technique before. It's a really great
technique when you have a bunch of layers and maybe you will reach the
layer limit if you just duplicate the motifs
and move them around. So follow my lead here, and I will show you
how to do this. So just choose a color and add a new layer on top of
all of the layers. Tap and drag to fill that layer. We can just turn off the
reference window here, so just tap "Actions"
and turn off. Then we will duplicate
this layer four times or three times so
that we have four copies. Tap the selections too. Tap in one of the
corner blue nodes. I'm tapping in the top
right corner blue node, and I want to make sure that
I have the chain symbol blue here and tap in the half of this size so half
of 3,600 is 1,800. That will make this
square half of its size and align it perfectly
to the top right corner. Then I will tap the next square, tap in the bottom right
corner and do the same. Tap the next layer, tap in the bottom left
corner, 1,800 pixels. Tap the Transform tool, and
tap in the top left corner, type in 1,800, and tap
the Transform tool. So now we have four
squares like this. Then I will select
each of these squares. So to tap the Layer, tap "Select", "Save and Load", and the plus sign
and selections. Then tap the
"Selection" tool again, choose the Layer beneath. Tap the Layer, Select, Save and Load, tap the plus sign
and Selections. Now we do the same with
all of these four squares. We need to select the Layer, Save and Load, tap Selections, and then select the last layer, Save and Load, and Selections. So now we have four selections based on these four squares. Now we can just delete those
because we don't need those anymore and we make sure that
we have the group selected. Now, we want to also
make sure that we place this background box in your group so you can tap it and drag it
within your group. So I messed it up a bit
there, but as long as you have your background
books in your group, then we're good to go. Then we select our group. Something happened
with the Clipping Mask so tap that Layer and tap
"Clipping Mask" again. Then we make sure that
we have the group selected, and we
tap "Selections", "Save and Load"
selection Number 1. Tap the Transform
tool, flip vertical, flip horizontal, and then Save and Load
selections Number 2. Flip vertical, flip horizontal. Save and Load
selections Number 3, flip vertical and
flip horizontal. Save and Load
selections Number 4, flip vertical and
flip horizontal. Now we have turned
around our pattern tile so that what was on the
edges are in the center. Now we want to fill this space. We do that by, for example, using our gingerbread tree
that we saved from before. So I will just add that to the place where I thought that it would look good. I think it was down here somewhere, and it was
maybe in this direction. So now to see how this looks, I will turn on the
Reference window again, and match the edges like this. It don't need to be perfect. You just need to have
a general overall look of how your pattern is repeated. Then we will just
move our motifs around until we get a look
that is looking good. So I will select the candy
cane and I will move it around until I find a
spot that looks good, that looks balanced, so maybe around here. Then I want to move
around the other motifs. I can move in these two layers with the gingerbread tree
within the group again. Now I can start to select motifs within that
group and move them around. I forgot that I have the
background box within the group. Just move out the background
box again from the group, tap the group and now I can select motifs and
move them around. If you want to
duplicate a motif, you select that layer. So I will select the layer with the peppermint candy and I
want to duplicate this one. So I select the
white part of that, tap Copy and Paste, and then I select
the green part of that layer and tap
Copy and Paste. Then I will just
drag those beneath the other peppermint
candy and tap "Clipping Mask" on the
green layer, and now I have a duplicate here that I
can group and move around. So I can fill out the spaces
with peppermint candy as I feel that it's a little
bit empty in some places. I can also move around
the motifs if I need to. Maybe I want to move around
this candy cane a bit more. I can also choose to duplicate motifs and place them where I think they will
look good in the pattern. So maybe I want the
green wrapped candy over there and I want to remove the peppermint
so let me just see. Where was that layer? I just select those two
move the peppermint. Do I even want this peppermint? Maybe not so I will
just remove that. Now I can move my motifs around. I will just speed
up this process. So I think that this looks good. What I want to do is
to access this space. So I tap selections and I tap the Transform tool
and flip vertical. Then I do the same with
all of the selections. Flip vertical. Save and load,
selections Number 3, flip vertical, and selections
Number 4, flip vertical. So now I can access this
heart that was on the edge. So I will just move that
around a bit because I saw that it wasn't
perfectly balanced. So maybe something like
that and instantly I can see that it
looks so much better.
10. Hero Pattern - Test the Pattern: That looks really good to me. It's time to try out our
pattern and see how it repeats. We will do this
firstly, Procreate, and then I will show
you another way to try out your pattern. We can just remove the
reference window first, swipe down with three fingers, copy all, and swipe down
with three fingers to paste. Then I will just duplicate
this so that I have one original and four squares. Then I will tap one
of the squares. You can tap the little node in the top right corner and
right in half of the size. You can also turn on
snapping and magnetics and just tap and drag
until you reach 1,800. But if you feel that
it's hard to match, the quickest way to
make sure that you have the right
dimensions is to tap the corner nodes and right in half of the size of
your original Canvas. This is our pattern repeated, and for me, this
looks really good. Now we will try it out
in a different way. I have my original pattern here, and I will tap split view, tap Safari and on my website, you can find a pattern tester on the resources
and pattern tester. Here you can tap your image in Procreate and drag it in
the repeat pattern tester. If we make a full view here, you can see how your
pattern tile repeats in small scale and
in large scale. This is a really nice tool
to quickly be able to try out how your
patterns are repeated. Now, I think that this
looks really good actually, but let's just try to
add some more details to the pattern and see
if we like it better. Because I've added a
snowflake stamp brush for you in this class that you can play around with
and see if you want to use to add some details. In the group with the motifs, I will add a new layer and
with the white as a color. I can play around with the size. Let's try six
percent in the size. I can just tap to add some snowflake stamps
in this pattern. I think that this pattern was really good balanced as it is. But if you feel that
you have a lot of spaces in your pattern
that aren't that balanced. This is a good tip to
fill out the space and trick the eye
that your pattern is better balanced
than it actually is. With the snowflakes, we will swipe down with
three fingers again, tap Copy All, and tap above
the group and tap Paste. Now, we have this image
as a layer, split view. Back to my website. Tap and drag the pattern with the snowflakes and here you can see how the pattern is
repeated with the snowflakes. That looks pretty good to me. I can see just one
problem area with the snowflakes and
it's, where did it go? It's these two over here that
are in the same position. Just head back to the pattern, and where is that? It's probably this
one and this one. I can just erase one of those
on the snowflake layer. Erase and maybe I
want to add one, I don't know, over here instead. Then you can try out
the pattern again. You can do this for
as many times as you wish until you're happy
with the pattern. You actually don't need to
try out the pattern inside of Procreate if you
don't want to or if you have reached
your layer limit, for example, you can try it out on my website in
the pattern tester. That looks really good and
I'm happy with this pattern. Now we can move on
to the next pattern.
11. Secondary Pattern - Draw the Motifs: Moving on to the secondary
pattern, the gifts pattern. I will just stack
these two together. Select those and tap "Stack". Then I will hint into my stack. Now to keep it efficient, I want to use the same pattern actions
with the selections as we used in the
Christmas candy pattern. I will select that one
and duplicate it that way I don't need to create the pattern actions once again. Then I will tap
into one of those. I will just select
all of the layers, delete them, and also
delete the sketch. I can still have the
background color layer. Then I will add the
photo of my gifts. Then I will just drag up the size and tap the transform tool and
here I have my sketch. Then I can just go in and erase this part if I
don't want the line. It looks a little bit
sketchy, but that's okay. Then I will drag down the opacity just as we did
in the previous lesson. Then I will tap to
add a new layer and the background
layer of this one. Let's just tap Canvas
and reference so that we will use the
image once again. I wanted the cream color
of the background. I will just tap the
cream color and tap and drag to feel the bottom layer with
the cream color. On the new layer on top
of the sketch layer, I will start to draw my motifs. This is a fairly simple pattern
with simple motifs it's just squares that are
gifts and some colors, some patterns on top of the
gifts as wrapping paper. Let's just start with
drawing some of the gifts. I actually don't
think that I need this reference as
it's pretty simple. I want to use the green and the pink and the red
and then the brown. With the Canvas, full size, I will start
to draw the gifts. As usual, I use the crunchy
crayon and I make sure that I draw all of the
gifts that are in the same color on
the same layer. Let's start with this one
and bring up the size. I will just lower the
opacity even more. Then with about 20 in size, I will just draw the squares. I think it looks good if they
are a little bit imperfect. I will fill in that square
with the pink color so that I get this
crunchy texture that this brush gives you. Something like that.
Then we can continue. If we have a pink here, let's say that we want
a pink over here. We can move this
around later on, but I will draw a few gifts with the same color so that
they don't look exactly the same and also so that I
can draw different patterns like stripes and dots
on the different gifts. When I've drawn two pink gifts, I will tap to add a new layer, and I will use the
green color and draw, let's say this one. I'll fill it in. Then this one. It doesn't matter at this
point where you place the different gifts that are different colors because we
can move them around later. I think that I will draw
so that I have two pink, two green, and two red. Make sure that you
add a new layer before you draw the red ones. Now we draw on the flat motifs. Let's look in our layer panel. Oh no, know red motifs ended up in the same
layer as the green ones. But this is really easy to fix. Drag to select both dose, and then swipe down, tap, cut and paste and that will bring your red motifs
on a separate layer. This is a quick fix if you
end up with different colors on one layer because we want
all of the colors separated, just as I mentioned before. Tap to add a new layer, and now I want to draw the bows. I would use the brown color. Maybe 20 is a good
size for this. I will just draw in all
of these on one layer. Now we're finished with those and we want to add
the pattern on top. I will just turn off
my sketch layer. Now what I want to do is
to just draw in some dots and stripes on these
different gifts. I start with the pink. I add a new layer on top of
the pink layer and I will tap clipping mask to
make sure that I can draw only within that layer. Now I will show you a
little technique on how to add a texture or something
on top of a layer. It will be really easy
to change the colors of the objects later on
if we would like that. I will tap the blending mode
and turn on Color Burn. Now I want to choose
a grayish color, so somewhere around there. With my crunchy crayon, I can draw in some
diagonal stripes and maybe some dots
on another one. As you can see, with the
Color Burn blend mode, you will get a color that is
darker than the base color. It will just be a darker pink. I want to save this gray color now because if I would loose it, I want to make sure that
it's really easy for me to add in the same colors. I will just tap in the color
palette to save that color. I want to show you
how it will look if we would just
use a darker gray. That way, it will look like this and it will be a darker pink color that
will be added on top. But let's use that
light gray and add some dots on top of that one. For me that looks good. But I actually might
want to try to add a little bit more
saturation in that color. I will swipe to the
right with two fingers or you can tap the layer
and tap Alpha Lock. Then I will choose just a
little bit darker gray. Tap the layer again
and tap fill layer. There you can see that the
pink is darker on that layer. Now I want to save this gray color to make sure
that I don't lose that one. I will just tap in the color
palette to save that color. Then I do the same in the green. I tapped add a new layer
on top of the green, tap clipping mask and hear I want to add maybe some lines. I need it to be color burn. As you can see the green, the color turned out really
dark with this gray so I will actually just go
back to the lighter gray. I'll swipe to the right
with two fingers, tap the lighter gray
color and tap fill layer. That looks better. Then I will do the same with
the pink layer like that. Then I will swipe right with two fingers
again to turn off Alpha lock and I will continue to draw with a light gray color. On this one, I might want to add some diagonal lines as well, maybe from the other
side like this. That looks good. Then I
will tap the red layer, tap to add a new layer on top, clipping mask on that layer, turn on color burn. Here I want to add some dots and let's add some stripes.
12. Secondary Pattern - Make the Repeat: So now, it's time to
make the repeats. But first, I just want
to show you what will happen if we would
change the color here. Let's say that we want to change the color of the green layer. We would swipe right
with two fingers on that one to turn
on Alpha Lock. Then let's change the color to this beige color for example. Tap the layer, tap fill layer. What happens there is that
because we used color burn and the gray color on the texture layer with the
patterns on the gifts, they will change automatically
to the new color. This way, it's really easy
to recolor your pattern. You don't need to re-color all of the layers
with the textures. They will just follow
along when you re-color the other layers. This actually looks really good. But let's head back to the green color because
I like that one too. Now, it's time to create
the actual pattern. I will do exactly the
same here as I did with the previous pattern,
the hero pattern. I will turn on the reference and tap canvas and increase the
size to as large as I can. Then I will just
increase the size of the pattern tile
to something that looks good and then
match up the edges. If you feel that this is
a little bit hard to see, you can turn on the
light interfaces there. You can tap Preferences
and Light Interface. As you can see, it's a little bit easier
to match up the edges of your pattern tile here with the reference
window when you don't have all of that black. As I mentioned before, this isn't a perfect
pattern preview, but it helps us a lot. Until that day, that
Procreate can create a real pattern
preview tool for us. Please do that Procreate
because we really want it. But until that day, I think
that this works okay. It's a little bit
detailed to work it out, but I think it works fine. Then tap Actions
panel and I like the black interface at the
moment so I will just turn on the black interface again and then I can start to
move around my motifs. The first thing that I
will do is to just swipe to the right on all of the
motifs layer and group them. Now I can just tap the group and start to
move around my motifs. I will select my different
motifs and move them around. I don't want them magnetics
and snapping turned on. Here you can see how
much easier it is to place our motifs when we can
see how they are repeated. At least we can see how they are repeated
in one direction. As you show, this is like
a parcel and we will just have some fun with
placing our motifs here. I don't want them to be
placed in perfect lines. I want them to be a little bit more imperfectly placed
in this pattern. Now I want to duplicate the motifs instead
of redrawing them. I can just draw some more
motifs if I want to, but I want to duplicate
mine to save some time. I will select the green layer, tap with the selections
to select that and tap copy and paste and then I will do the same with
the pattern layer. I can just drag that layer
underneath and turn off clipping mask so that
I have those over there and turn on clipping
mask on the texture layer. Then I also want
the little bow so I will just swipe down there, tap copy paste, and
here I have that one. Now I know that I have
this one over here. I can tap and drag it. We'll just make sure
that the clipping mask aren't turned on with that layer and I also
want to make sure that I have color burn
selected on that layer. What I could do now
is that I could use another type of texture
here if I would like to. Maybe I wanted some
dots, for example, I can just delete that layer or erase what's on it.
I could do that too. We can just select it, tap and drag it
outside of our canvas. On that layer with the light gray color and
the crayon selected, I will draw some dots
on this little gift, something like that. Now, maybe
I want another pink gift. If I don't want to go
in and copy everything, I can just draw a new gift
so I could do that here. This all depends
on if you want to draw your motifs first and then place them or if you want to
draw your pattern as you go, you can choose however
you want here. Something like that,
it's a little bit large. Let's select it, drag
down the size a bit, and then on the layer
with the takes theorem, I will make sure that I don't have Alpha Lock on
that layer and use the crunchy crayon
and here we can draw some stripes like that. Then we will add
the little bow on that layer like that. Now we have a bunch of
different gifts here. First, let's just
move them around so that they look balanced. I probably would like to
have another red one as well so I can just go in
and duplicate one of these, copy-paste on the flat layer, copy-paste on the texture layer, and copy-paste on the
layer with the bow. Then I will drag all of
these beneath the red layer. Make sure the clipping mask
aren't on the flat layer. Turn on the color burn, turn on the clipping
mask, and then tap and drag and make sure that the clipping mask
aren't on that one. Then I will select all
of those and I can move that one around and
place it down here. Maybe I want diagonal
stripes on that one so I can just drag out the
texture from that layer, make sure that I have
the light gray color, and then I will draw in some
diagonal lines on this gift. Something like that. Now we
have the start of our pattern and it's time to
create the repeat. Just like we did before, we want to make
sure that we have the background layer
within the group. I will just tap
and drag to place it within the group
then tap the group, tap selections, save and
load selection Number 1, flip vertical, flip
horizontal, save and load. Selection Number
2, flip vertical, flip horizontal, save and load. Selection Number 3, flip vertical, flip
horizontal save and load. Selection Number 4, flip vertical and
flip horizontal. Then I want to twist my
pattern around so I will tap, rotate four times. We didn't do this in the
hero print because that was a tossed pattern so you can use it from
any direction. But this pattern is a
one-direction pattern. So then we want to twist
it around so that we have it in the same direction
as we draw the patterning. Now we can start to move
around our objects, but we want to make sure once again that we place the
background box outside of our group again and then we can choose our motifs and change
the position of them. It looks here like we don't
need to add more motifs. We can just spread
them out a bit here. For me, it looks like the last thing that
we need to do is to move these motifs at the
edge more to the center. What I do is that
I select the group again and I tap save and load. Now we want to twist
the outsides inside. With selection Number 1, I will tap the transform tool
and just flip horizontal. That way, I will be able to
move around the objects that are on the vertical
edge of the pattern. Selection Number 2,
flip horizontal, selection Number 3, flip horizontal, selection
Number 4, flip horizontal. I forgot that we didn't
have the background box. Undo again, if you followed me, I'm sorry about this and
then we need to place the background box within
our group otherwise, we won't move the whole box. Place the background
box within the group. Tap the group selections
and let's do it once again. Save and load
selections Number 1. Tap, flip horizontal, save and load Selection
2, horizontal, save and load Selections 3, flip horizontal, save and load Selections 4,
and flip horizontal. Now, we can see that we want
to move around these objects. So I will actually move
out the background box again because I feel that
that's the easiest way. Then select these objects, drag them a little bit
down for the red one, and a little bit up
for the green one. As I can see here, it looks like my pattern is balanced
in a nice way and I think that I'm happy with this pattern as it is now. But let's try it out. I will turn off the
reference window. I also want to mention
that we flipped everything horizontal. So if you feel that your motifs
look a little bit wonky, you can always flip
everything horizontal. So select the group, select the background box, and then the transform tool, and flip horizontal
and there you have your motifs as you draw
them from the start. So now we can swipe down with three fingers, tap copy all. Swipe down with three
fingers again, tap paste, and here we have our
image and I will just instantly try it out
in my pattern tester. So tap and drag the image
to the pattern tester and I will increase the size and decrease the size and see
how my pattern is repeated. I think that this pattern
is really fun and cute, but still really simple. I think it will look perfect
on gift-wrapping paper. We're finished with
the secondary print. Let's head over to
the blender pattern.
13. Blender Pattern: So we're back in Procreate
and I'll tap Gallery and just like before I want
to use the same actions. I will just select
the gifts pattern, tap Duplicate and then
tap into the copy. Then I will delete everything
so I'll just tap Delete, delete the sketch, and here,
I can add my reference image. I think that I know what I wanted there but let's just see. So I wanted a green
stripes pattern, white stripes and
darker green stripes. So I don't really need
the reference for this, so I will just turn that off because it's such
a simple pattern. I don't need a sketch
either because I will create stripes, so I want the background to be green so I will tap the
background box and tap and drag the green color, and then I will tap
to add a new layer. Now I will turn on my drawing guides, and
I will make sure that my drawing guides are
evenly spread on my canvas. So we had a canvas size
that was 3600 pixels, so if I tap 360, it's
a tenth of the canvas. So I always want to divide
everything with two, so 180, and maybe I want this size or I can go down
to half of 180, which is 90. So whatever you choose here, I will use 90 for now,
and then tap Done. Then here we have some guidelines to create
our stripes pattern. I have a whole class
about how to create stripes and lines
patterns in Procreate. So If you want to create
diagonal stripes, or wonky stripes, or
picture stripes, check out that class. I will just go through this
really quickly in this class. So I will tap the white color
and the crown sheet crayon, and then I want to see how
large size of the brush I want, maybe up here about 40
percent, and then I want to make sure that I match
up the edges of my stripes. If you want to create a
perfectly straight stripe you can tap and drag to
create a line, and if you tap once again you
will move the line so that it's always straight but I don't want a
perfectly straight line. So what I do is that I switch my canvas around because
I think it's easier to draw in this direction, and then I will just start
to draw the stripes. So I'll start up here. Maybe I want an even
bigger brush so that my line will be in the center of those guidelines so about
50 percent of the brush, 56 percent and then I
will draw a stripe. As I have my guidelines, I can see that I'm not
like this because I want to match my edges so that the stripe matches
up in the same guidelines. Doesn't need to be perfect
as we will fix this later on but it's good to be
as close as possible. So moving on, I will
just go two squares down and draw these lines. So I think that that
will look okay, and then I will add
in some other lines. So I will tap to add
a new layer and on this layer let's try to
use the color burn again, and the same gray color,
and the crayon that I will bring down the size to about 12 percent or
something like that. Then I will just draw these really thin lines
in-between the white lines. I make sure that they meet the same
guideline at the edge. Again, it doesn't need to
be perfect at this stage but just so you don't
do it like this, because then, it won't work. So something like
that. Now I will turn off the drawing
guide and we want to turn our pattern
around so with all of these three layers selected, I will tap this selection tool, save and load
selection number 1, and I only want to
flip it horizontal, so flip horizontal, save and load
selection number 2. Flip horizontal, number 3, flipping horizontal,
and number 4, flipping horizontal. So now we've met the edges of our stripes here
in the middle. Now we can start by
fixing the edges. So as you can see we have
some things to fix here so I will tap the white
layer and with the crunchy crayon
sometimes I might be able to just go in and
draw in a little bit to make sure that
the edges meet up perfectly and sometimes
I might need to do more than that if
they are really wonky and don't match up at all. So just go over your lines and see so that the edges
matches up perfectly. So this line looks
a little bit wonky, and what I would
do then is to just erase a little bit of
the line and redraw it. I know that I had about
56 percent in size. Then I will start to
draw over here and try to meet up that
line down there. So something like that, and
the same with these two, they don't look so
matching in the edges. I will just erase a little bit, and go in and draw in the lines. Maybe even over here. So if you end up with a really wonky looking
lines like I did here, you can erase quite a big part of the line and then redraw it. So let's go over to the
next layer and we will use the gray color as it
has the color burn, and here, I think it's
easier to actually erase everything in the center, as they don't meet
up that well at all. Then redraw all of
the lines here. I don't remember
which size we had. Was it around 12 percent? Yes. So drawing in
the lines again, try to meet them in the center. Here's a little tip, if you feel that you will be
able to see that you drawn in every line,
you can actually erase some of the lines in different parts so that not
all lines will be drawn in the center because that might make your piece a little
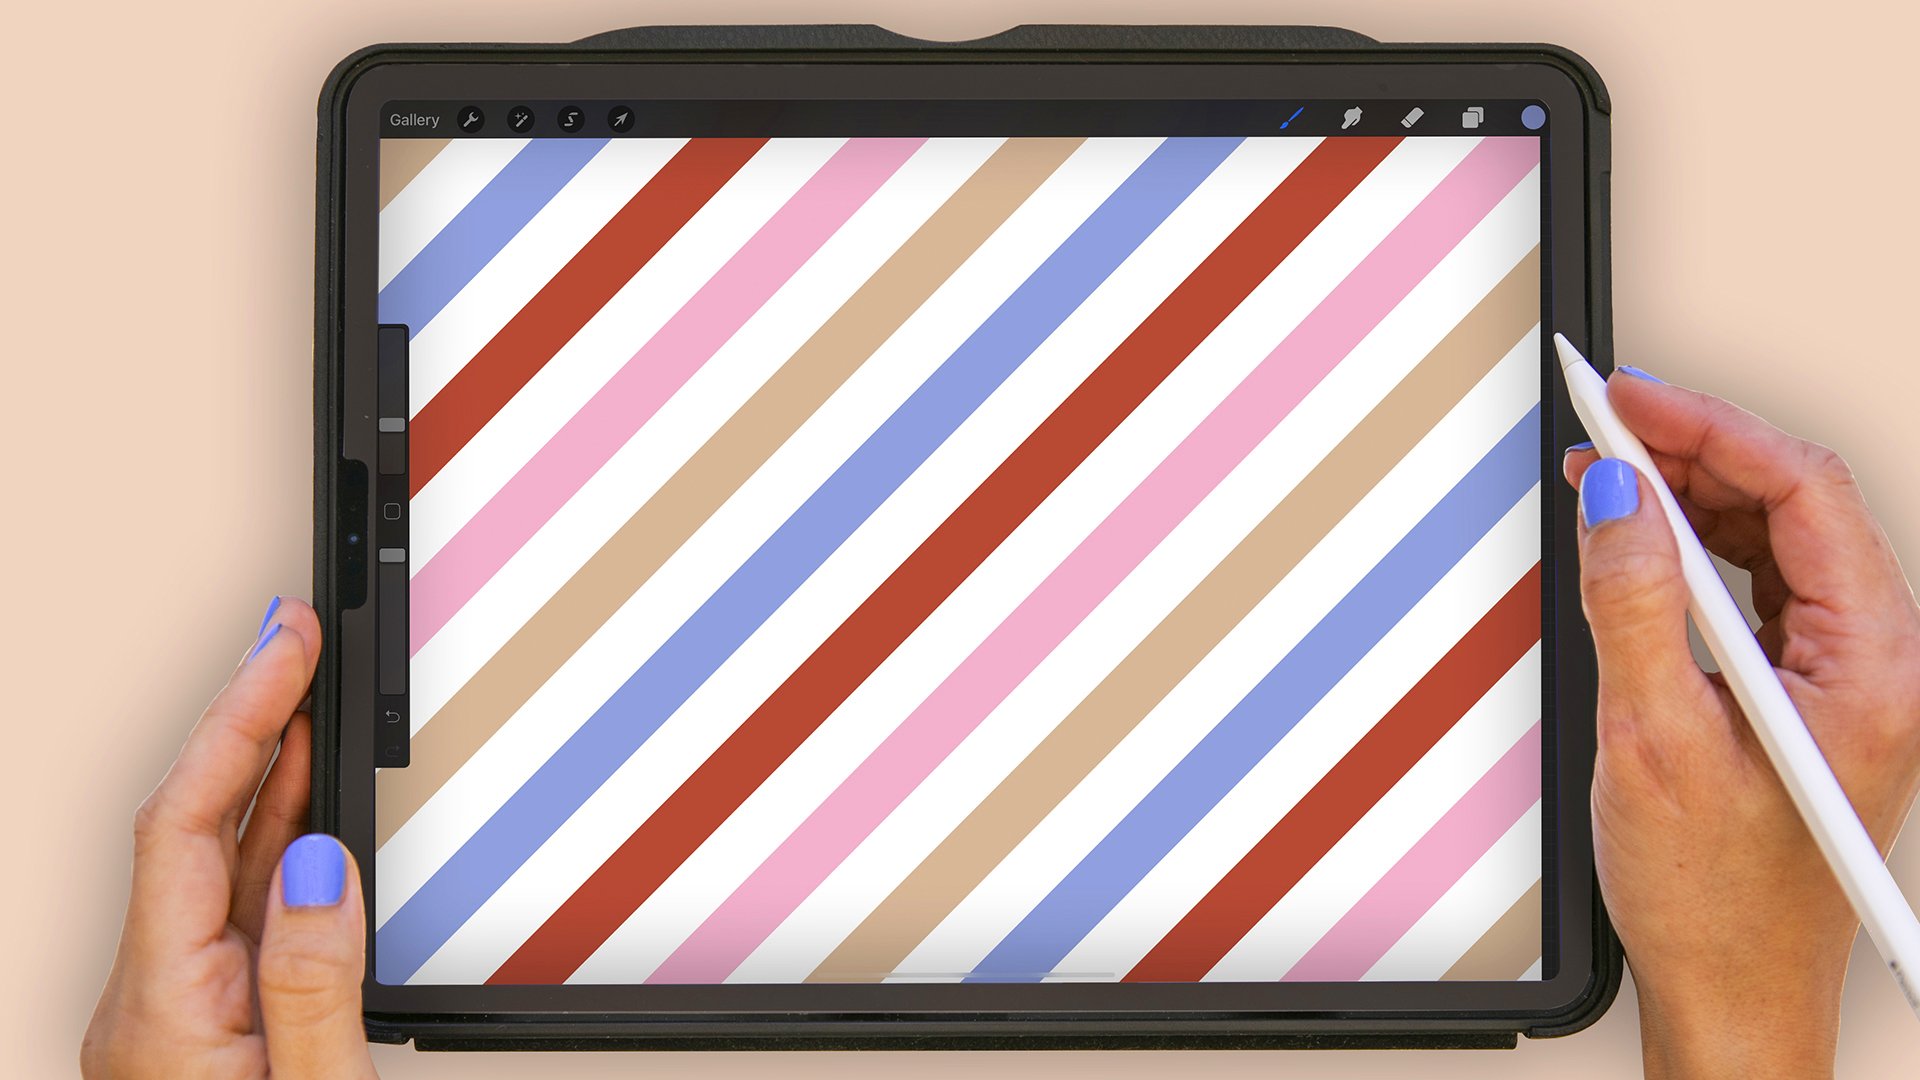
bit more visible. So now we have our finished
pattern. Let's try it out. Swipe down with three
fingers, tap Copy All, swipe down with three fingers to paste, and then
split screen back to the pattern tester and drag that image inside of
the pattern tester. So when we're trying out
this pattern we can see that it looks a little bit
funky in the edge here and that probably is because we haven't turned
the pattern around so we didn't see that this line looks
a little bit strange. So I will go back
to Procreate and I will delete the first
image over there, and swipe to the right
and all of those layers, save and load
selection number 1, and now we will
flip it vertical. Here you can see where
it looks a little bit funky so it's in
the center here. Then what I can do
to easily fix this is to select the line layers. I will select the
white lines layer. Here, I will actually
just go in and select this white line, and
make sure that I have magnetics turned on and
then I will just drag it a little bit below. I want to make sure that I
don't go above or beyond the edge so make sure
that I'm perfectly on the edge and then I will
tap the transform tool. Then I will do the same with
the green line over there. So If you accidentally
move your line, zoom in to see that the line is going all the way
out to the edge. If you're like me,
accidentally here, placed it a little bit inside or outside,
you can just draw in that. So that looks better, I think. Maybe we also want to try
to flip this line around. I will tap the layer
with the white line, select that white line, and then the transform
tool and flip vertical. Then I will flip horizontal
and see if that looks better. So now we will try out
our pattern again. I can see now that
maybe I want to move that green line as well. So I will select that one and
just move it a little bit. Zoom in to the edge, make sure that place
the dashed line on the edge, and tap
the Transform tool. So this looks better to me. Now I can swipe down with
three fingers, copy all, swipe down with three fingers, paste, and let's try
out the pattern again. Split screen, go to
the pattern tester, tap and drag, and that
looks much better. So now we have created our last pattern in this minical exam,
the blender print.
14. Naming Your Patterns: We have finished with
the designing of our mini-pattern
Christmas collection. Now it's time to
move on and prepare these files to upload on
print-on-demand sites. In this class, I'm showing
you how to upload them to Society6 and Spoonflower, which are the
print-on-demand sites that I'm using myself. Let's start with
naming our files. You can name them directly on
the print-on-demand sites, but to keep your
workflow smooth, and especially if
you're creating lots of designs and upload designs to print-on-demand
sites all the time, we want to keep our workflow as smooth and efficient
as possible. The very first thing
that I will do is just to name these designs. Here's a little tip when naming your artwork for uploading
on print-on-demand sites. Generally, what you
want to do with all of the text that you
add to your artwork, and that includes things
like description, keywords, the name of your
artwork is to be searchable. There's really no
idea of coming up with some imaginative name that isn't what you
see on the pattern because no one will search
for that strange name. Name your patterns
to what they are. That is always what I do. This one, for example, I will name Christmas Candy, which I feel is a good
name for this pattern. If I would create it in several different
color variations, I would name it pink. Because maybe I will have
one with a green background, one with a pink background
or something like that. I will just name it
Christmas Candy-Pink because if I would like to add more colorways to
this pattern in the future is good to
separate it from the start. Next pattern, I will
name Christmas Gifts. Here you can choose if you
want to name your pattern to like all the colors that are
included in the pattern. In this case, it will
be green, red, pink, and white because then you
will have more search results. It all depends on if this is your only Christmas
gift pattern or if you will have several
different ones with many different
colors in them. I will probably name mine green, red, pink on cream white. As I know that I probably want to create several
different colorways of this pattern and maybe a lot of different
colors on the gifts, so then that would be
a good way to separate the different colorways on
the print-on-demand sites. The last pattern I will name, Textured Holiday Stripes, because in my shop I already have a lot
of stripes patterns. I want to separate
them from each other. But if you only have one
type of stripe pattern, you can just name
it textured stripe, for example, but I have a bunch, so I will just name them
Textured Holiday Stripes and White on Green background
or just white on green. Something like that. I know that these names seem really long, but the thing is that the name affects the search
results so you want to include words in the
name that people can search for your
patterns on these sites.
15. Scaling Your Patterns - Part 1: Now we have named our patterns and it's time to
think about the scale that we want to upload
our patterns in, so let's just head
over to Safari and I will show you what I mean. On Society6, we
don't need to think about the scale that
we upload our filing, we need to think
about the file size and I will show you
that in the next lesson where we will prepare
our files for print. On Society6, you generally need just one or two or
three files to upload and I will show you how to
do that in the next lesson. But on Spoonflower, it's
good to think about the scale of your design and that is why
I've picked up this sizing your design into
Spoonflower help center for you. I will give a link to this in the description of the class, but you can also just Google
size guide Spoonflower and you will get this. Then you just tap pixel calculations for
common measurements and here you can see
the different sizes. We have created our
pattern in 3,600 pixels, which means that
it is 24 inches. This is just a guide
to help you figure out which size that you want to
scale down your pattern in. It's always good to
have a look at that. But now let me show
you how we will check which scales that we
want for our pattern. I'm on Spoonflower now and
I will upload my patterns to show you how I decide the
scale on those patterns. When on Spoonflower,
tap ''Upload Design'', I have one link over
here and I also have one under my little menu up
here, upload design. We will actually upload the
designs and add the keywords and do all of that in a lesson
later on in this class. But this is how to
know which scales that you want to
upload your design in. If this seems confusing, just follow along and I
will show you what I mean. First, we need to export
our files as JPEGs. Select these, we know that
they are 3,600 pixels, share, export as JPEGs, and I will export
them to my files. Save the files. It's important that you
don't save them to images because then you will
lose the file name. I always save to files. This is also to
keep your workflow smoother and more efficient. I have on my iPad a folder
where I save the files. Then I head over to Spoonflower and here I will just
do a split view with my files folder
and select the files. You can also tap Choose
Files and look them up, but this is quicker. Tap ''Select'' and
tap ''Your Files''. If you don't select
all files and just tap and drag
one file at a time, you won't upload all files. Tap ''Select'', select
all three files, and then drag them over and now we can see that it
says three files over there. Then I own the rights and
I have the permission to use this artwork as
I've created it myself and then I tap ''Upload''. Now, this might take
a little while, so I will just fast-forward here until our files are uploaded. Now our files are uploaded and I will show you
later on in this class all about all of
these settings here. What I want to do now is to
tap into each of these designs and I find it a
little bit harder when there's small
thumbnails over there, so I will just tap this
three-column view instead or this full view, it
really doesn't matter. Then I will tap on the
images and that will take me to the patterns page like that. Then I will head over to
each of these designs. As you can see, you
already named the file, so the file name is already
set on your pattern. You can, of course, change that name later
on if you want to. But right now, what
we want to do is to check the scale
of our patterns. I want to start with this
Christmas candy pattern. I can see here that
it's 24 inches and if I tap this
smaller button, you can see that it
is smaller in size. I can only go as large
as my file size is here. As you can see, we created
this pattern in 300 DPI, but Spoonflower automatically
changes it to 150 pixels. That probably is to get as
large scale as possible. You can change the
DPI if you want to. We can change ours to 300 as
we created the pattern in 300 and that would bring
us a 12-inch pattern. But as it's enough to print
with 150 DPI on Spoonflower, I'll just keep 150 DPI and that will bring me a
24-inch pattern tile. It can be a little bit
hard to see how this looks on products or even as fabric when you just have
this little square. Sometimes I find that it's
helpful to tap the wallpaper because here you can really see how it will look in a
scene, so that's good. But I will tap fabric again and what I typically do here to check which scale I
want this pattern in is to tap View all Products. If I tap it with two fingers, it will go in a new tab instead of just
changing this tab. Here, I have our products
and I can scroll down. If you want to also
see it as a wallpaper, you can just tap one
of the wallpapers with two fingers on the
title, and otherwise, you can just scroll down
to see the products. Let's see what we're
thinking about this pattern. If you think that people would
like to create duvet covers or buy pre-made duvet covers from Spoonflower
off this pattern, it all depends on what type of pattern you are creating and what you imagine your
pattern to be used for, then you might want this large scale for
one of your designs. If you think that
they will use it as curtains, for example, let's just head over
to the curtains and see that mock-up, then maybe you would
like that large-scale. But for me, in this pattern, if we go over to
the products again, I think that it's a
little bit too big. I wanted it to be smaller. Generally, I upload a few different
scales to Spoonflower because people might want
to use it differently. I could choose to
keep it at 24 inches, but I can also choose to have the largest scale a
little bit smaller. Let's just try that out. I will tap ''Smaller'' and
let's try out 18 inches and then tap ''Save Changes''. We want to see how this
size looks on the products, but it can take a little while until the product
page is refreshed. If you tap the Refresh button
on the view product page, you can see if it's finished with viewing the
new scale or not, and it's not, then I
would just head over to the next pattern and I have three
patterns to work with, so I don't need to sit around
and wait for the scale. Then we can tap New Products
on the gifts pattern and see how the
scale looks here. I also want to
check the wallpaper even though I don't
think that this would be a really common wallpaper
as it's so seasonal. But you never know. This looks a little
bit big to me and checking out
the other products, it looks really, really big and this wasn't what I imagined for the scale of this pattern. I know that I want to
change it in size. We'll head back to that and let's try 18 inch
for that as well. Then we can head over
to the stripes pattern, view all products,
and scrolling down. I think that this
pattern can look good in a really large scale and
also in smaller scales. I think that I will keep this at the standard file
size, so 3,600 pixels. Then I will do a few others, maybe two others that
are a lower file size. Then I know that I want this one to be the same size as it is.
16. Scaling Your Patterns - Part 2: If you now feel that it gets
a little bit confusing, to remember all of
these file sizes. We can just head over
to procreate again. We can either tap
into our sketch here. Let's just do that. Then we can write which
different file sizes we want on these patterns. I will just use any pen. Let's just add a new layer so that we have that
on a new layer. I want to use the 3,600 for
this as a large file size. I want to go down in
scale on these two. Let's head over again. This is a little bit of work, but it will end
up really good on Spoonflower with the
different scales later on. I also feel that when you have uploaded a
bunch of designs, you may be know which scales
your designs work on, and especially if you are aimed to the kids and
baby market for example, then you might know that you want to have smaller scales, and you usually upload your
patterns in the same scales. The same pixel size. Let's check out the
product page for the Christmas candy
pattern and see if it has changed in scale. You can either just tap
"View All Products" again. I already had a
product page there. Then let's scroll down, and it looks to me as it
has changed in scale. Sometimes I find
that this process of this page to refresh
takes a lot of time. If you find that it
is the same for you, one little trick is to tap the pillow because
somehow it seems that some products changed quicker
than others in the scale. You can tap the pillow. Most of the times, that is one of the
products that have changed the scale quicker than the
others, at least for me. I think that this
scale looks good and it's on all of the products. I think that this is the
largest scale for this pattern. I will keep it at 18 inches. Then I will head over
to my sizing again, and see how much is
18 inches in pixels, and it's 2,700 pixels. Then I will head
over to procreate, and I will write 2,700
pixels in the large size. Let's check out the
gifts pattern as well. There. The gifts pattern
is also in 18 inches now. I will tap "View All
Products" again. I already had it there,
but let's tap it again. Give it some time to
refresh, and scroll down. Sometimes I find it easier
to tap into product. I usually use a pillow, because I think that
it's easy for me to imagine the pillow size. This might be a good
largest size as well. If someone wants to
create some type of large fabric project, and it also might look really nice as duvet way for Christmas. That's also 18 inches, and that is 2,700 pixels
in the large, as well. I usually name my
patterns large, medium, and small when I
have three different scales. You can also, of course, if you want to name them 18 inches and whatever that was, 24 inches and like that. But I just named them
large, medium, and small. Heading over again to the
textured holiday stripes. Something is happening
with the image view, so I can't see the image. How strange is that?
There it goes. We have the 24 image
as the largest file. Then I will just tap. Maybe we want to just tap
two times for a medium size, so 18 inches. Save that change. I think that they
will look good, but I would just
want to check out the product page
for that as well. Eighteen inches for that one, and let's tap into
the gifts pattern. We had 18 inches, maybe nine inches would
be nice for that one, so 18 inches and nine inches, that's half of the size. Tap "Save" on that one. Then where are we? On the Christmas candy, and I will do the same
with the Christmas candy, nine inches for that. Then I will save the changes. We will check if these
changes are good. While this is saving, I will head over to
the textured stripes. Which now is 18 inches, and I have this
product page here, so I can just refresh it and see if something has changed. It looks to me as
it has changed. Yeah, it has changed. Tap into the pillow, for example, and
see how that looks. I think that that was a really nice scale for this pattern. Then I've decided that I want 18 inches for that pattern
as the medium size. I know that 18 inches
was 2,700 pixels. So 2,700 as the medium. As you can see, when
you upload a bunch of patterns to
Spoonflower like this, it's a little bit of work
to decide on the scales. But as I mentioned, when you created
a lot of patterns for Spoonflower and
it's in your style, you probably will know which
scales works the best. Then you can just
create those file sizes from the start with the
scale and upload them. But I'm showing you the process to decide on the scale here, so that you know which
scale to choose from. The textured stripes
was finished, let's head over to
the Christmas candy. Do we have a product page here? Yes. Tap "Refresh". It probably haven't changed, because we wanted a nine inches. I will tap the pillow, and it hasn't changed. Then it takes a
little bit longer. This is the problem with trying out the
different scales, because it takes
quite some time, sometimes to make these changes. But I think it has changed
on the tea towels. Then you can tap into the
different products and see which ones have changed
because this is the 18 inches. Then you can see on the
new tea towel that it's a smaller scale and
that looks really nice. Then I will decide nine
inches for that one, I will head over to
resize this guide again. I have eight inches here
and 10 inches there. Basically, what you
can do here is to divide 18 inches the 2,700 pixels with two which will bring you
the nine inches. Or if you don't mind just
going down one inch, you can just create
1,200 pixels file. But let's just divide
2,700 with two and if I'm not completely
wrong, it's 1,350 pixels. I will just write that
1,350 pixels medium. Then I will head over to the Christmas candy
pattern again. This is a lot of back and forth, but that's just how it goes. The Christmas candy pattern, let's tap your all
products over there. We had the nine inches, so let's tap into the pillow. Let's also tap into the tea
towel to see those new sizes. On the tea towel it has changed
and I think that this was a really nice scale for the tea towel with this pattern so I will
keep it like that as well. It's the same as
the gifts patterns, so I will just use
1,350 pixels as medium. Then we have one last because I usually
upload three scales. We will need one more scale, so let's head back to the
stripes pattern again. I know that this is a
little bit of work, but it will look really
good once we have uploaded the right scales
of the patterns, so just follow along. Let's tap into the
Christmas candy pattern. I think that I want to
go really small here. Maybe I will try 4.2 inches, is here because I
know that I had a pixel dimension
for four inches, so that's about the same. I won't mind that 0.2. I will tap into that
and I will save the four inches and then head over to the
Christmas gifts pattern. I also want to do
the four inches on that one and then
the stripes pattern. Maybe I want to go not
as much as four inches. Maybe I want to go nine inches
on that one or six, maybe. Let's do nine and save changes. Then once again, head over to the Christmas candy
pattern that has changed. Then we can tap
into the products. Oh, it was probably this one
and it already had changed. That was a quick one. This looks really small, but let's have a
look, four inches. This one hasn't changed no, but the pillow has changed. This is a really small size, but I think that it
will look really good if you want to use
it for example, like on some bow ties or some dog scarves or things like that that
are really small, so I will keep it like that. Then I will head back to the
Christmas gifts pattern. View all products. Or I just tap into that now. Back, view all products with
two fingers on the link. Let's see, the Christmas gifts
and that also has changed. I will tap into the tea towel and it hadn't
changed on that image, so I will tap into the pillow. It's the same here,
that this looks really small on these
types of products. But I think if we
would create like really small products for babies or dogs or
something like that, it might look good with this small scale.
I'm happy with that. Then the texture stripes. Have it changed? It has changed. I
think that this also looks like a good scale, It has changed on the tea towel. Shutting down these
products windows so that I only have my patterns which are over there and now I know that I want
about four inches. I will do four
inches actually not 4.2 and the Christmas gifts
and the Christmas candy. That is four inches
or 600 pixels. Then I will just write
600 pixels as the small. On the textile
stripes, nine inches. Nine inches was
half of the 2,700, so it's the same as 1,350. The handwriting is bad, but that really doesn't
matter as I only want to remember which size I want
to scale these patterns in.
17. Prepare Files for Spoonflower: Now it's time to actually
prepare the files that we will upload to
Society6 and Spoonflower. Now we'll start with the Spoonflower file sizes and then we will create some files to upload
to Society6 as well, but let's start
with Spoonflower. So we have the original
file sizes here, and I want to keep
these original sizes. I will just duplicate those
so that I know that I have my original
files down here. I will separate
the original files with the other files
that we will create. I will never touch these files because I always want them to have all the layers and
I always want them to be in the largest size
that they can be. When we rescale our patterns, we will create
different file sizes, which means that we will create, for this pattern, we will create one that is 2,700 pixels, one that is 1,350, and one that is 600 pixels. You can never scale up. You can go higher than
3,600 pixels now. So let me show you how
to resize the patterns. First, we wanted this
first tile to be 3,600, so I won't change that, I will only write large
in the description here. I know that that one
is the large one. This one, we wanted to
change to 2,700 pixels, we can see a preview here, 2,700 on both of these. We first can write
large on these two and this one as well, large and then I will head into the Christmas
gifts pattern, tap the Actions panel
under canvas crop and preview settings
and here you want to make sure that you have
your chain symbol checked in re-sample canvas and
then we can write in 2,700 pixels and tap "Done". Now we have resized this
pattern to 2,700 pixels. Then we can do the same with
the Christmas candy pattern, Crop and Resize settings. Make sure you tap in re-sample
canvas and type in 2,700. There we have our 2,700. Now we want to go
with the medium ones, so that is 1,350 for those
and 2,700 for that one. I will just duplicate
all of these. For me, it looks a
little bit easier if the large are next to each other and the medium are next
to each other, I get a bit confused, otherwise, I will select those once
and just drag them over there and then I
will write medium, medium, and medium. Now we want to re-scale them. The first one, this
drives are supposed to be 2,700 so tap into that. That actions panel, canvas, Crop and Resize settings, re-sample canvas and
2,700 tap "Done", and then it has
resized the file. The next one is
supposed to be 1,350. Tap into gifts pattern, Crop and Resize settings,
re-sample canvas 1,350. That one is done, and also this one is supposed
to be 1,350 as well. Tap "Done", and that
one is resized. Now we have the medial ones so let's select the medial ones, duplicate and I will drag those
up here because I will be confused otherwise and write small on these and now let's see which
size we want those in. This is supposed to be 1,350
and the other one's 600. Tap into the stripes
pattern Canvas, Crop and Resize settings, Resample Canvas,
1,350, tap "Done". Now we're finished
with that one. The gifts pattern, we
want that to be 600, tap "Done" and the next, the Christmas candy pattern
Crop and Resize settings, re-sample Canvas and 600. If you see that your patterns look a
little bit blurry now, they aren't really blurry. It's just that when you
have them this large, they are larger
than the file size, so they will look
blurry on the screen, but they aren't blurry in the correct file size. I
hope that makes sense.
18. Prepare Files for Society6: Now we have the files ready for Spoonflower to
be uploaded there. What we want to do now is to create the files for Society6. You can check on
Society6 help center which dimensions you want
to create your files in, you could create all
sorts of different files. But to keep this
process as smooth as possible with an
efficient workflow, I create one file that
is the pattern tile that can be used on
for example wallpaper, and one that is a
large file size. As my parents are square, I create a square for those two, and I will show you how
in just a little while. Then it depends on what
type of iPad you have, and how large file sizes you
can create in Procreate. That depends on what
type of iPad you have. You can actually
Google that too, or you can just try it out. You want to do one file that
is the largest possible, and it won't fit to all
products on Society6, but this is the largest file that you can create
in Procreate. If you want to use
another app on your iPad, or to bring your file
to your computer to create the largest file
as possible you can do that. But if you create this large
file that I will create now, it works for many products. If you don't mind that it
doesn't work for all products, then you can just
follow along with me. Otherwise, I recommend
that you create these files on your computer in. For example Photoshop, if you want like a
example large file size. If you don't have the
newest type of iPad, which probably will
make you able to create much larger
file sizes than I can. Moving on, let's head
over to Procreate. In Society6, I will use
the original tiles, which are these ones. Then I want to create the
largest file size that I can. I can tap into new canvas. I want 300 in DPI and I want
to color profile to be sRGB. The dimensions is
that I can try out. Let' say that I want
to go to 10,000. I already know how large file
sizes I can do on my iPad, but this is how we
can just try it out. If you don't want to Google. I can't go 10,000 squares. Can I go 9,000? No, I can't. Can I go 8,000? Yeah, I can. That will bring me six layers. I think that I can do something
a little bit above 8,000, but I will just
keep it simple here and do 8,000 pixels square. I could even try
like can I go 8,500? No, I can't. I will just go 8,000 and
then I will tap Create. This is the largest file size that I can create in Procreate, or about the largest file size. I can do a little bit more, a few pixels more, but I will satisfy
with 8,000 pixels. What I do now is that
I make sure that I have saved my file somewhere. If you haven't done the
Spoonflower process, you can just tap your files
and share them and save them on the camera roll
and then save image. Then I will tap into my
Canvas and insert a photo. Also, you can insert the files if you've saved them somewhere. Then I will tap the
Christmas candy file, make sure that I have snapping
and magnetics turned on. I will tap and drag that
one to the top left corner. You can zoom in to make sure that you have placed
it perfectly. You can see that is
placed perfectly when you have these yellow
guidelines showing. Then I tap the Transform tool. Now I can't scale this
pattern app like this, because then I will
lose resolution. I will need to repeat it. I will swipe to the right
to duplicate the layer, and then I will tap and drag and place it next to
the other pattern, zoom in to make sure that
it's placed correctly and then tap the Transform
tool to place it. Then I will do once
again tap, duplicate, tap and drag until it snaps, zoom in to make sure that
it's placed correctly and then I will place that one. Now what I can do is swipe
these layers together, duplicate that layer, tap the Transform tool
and move it down. That is repeated down. You can just see so that it
looks good with the repeats. Tap the Transform tool
again to place it. Then I'll swipe to the right
to duplicate that layer, drag down and place it in the
edge of your pattern tile. Now we have filled our
Canvas with our pattern, and I think that
that looks good. I will just tap gallery. Now I can just add the name, so I will tap into my
Christmas candy pattern in the name and tap copy. Then I will paste that name. Then I will just call this
repeat or repeat pattern or whatever you wish here is just to separate
these two files. Then I can just
duplicate that File. I can add the name of
the gifts patterns. I will copy that name and
paste it over here and just name it Repeat
pattern, tap. Then I want to place
my gifts pattern here. Swipe to the right to clear. Then I will add my photo
of my gifts pattern. I will zoom out a bit and tap and drag to the very top left. Zoom in to make
sure that you are perfectly aligned in the edge
and tap the Transform tool. Then I will swipe to
the right to duplicate it and drag it to the side. Make sure that it's
placed correctly, and then tap the Transform tool. Oops, I deleted it. I meant to copy it,
duplicate it again, the layer tap and
drag to the side and make sure that it's
repeated perfectly. Zoom in. Looks good. Merge these two layers together
by swiping them together. Duplicate that layer,
tap and drag to place your pattern tiles
beneath the first ones. Then I will duplicate
that layer again, tap and drag to place it
perfectly on the tile edge. That looks good. Now I have these perfectly
repeated here too. Then I will tap gallery. I will do the same with
the stripes pattern. Duplicate your eighth. Duplicate that file again. I will select the name of
this pattern, copy it. Tap the name paste it, and write repeat pattern. Tap into that one. Clear the layer, add the
photo of the pattern, and do the process. Once again, make sure
it's perfectly placed. I think you get it by now, but this is how we create this larger file sizes
of the pattern tiles that we can upload to Society6. I duplicate the
layer, tap and drag. Once again, tap and drag. Swipe the layers together. Tap and drag and duplicate
that layer again, and tap and drag and
swipe them together. Now we can just zoom in
because there was a little bit not that through and
I did the placements. Just zoom in to see that
everything looks good and that you don't
have any white lines. That looks good to me. Now we have our original
pattern tiles over here. We have our Society6 tiles. I will just tap and drag
those to the bottom. We have our Spoonflower
files here, our original files and
our Society6 files. Sometimes I also want a
rotated file on Society6. If you do want that the Christmas candy
pattern is already tossed, so I don't need to rotate that. But for example products
like towels and yoga mats, it can be nice to have
a rotated pattern if you have a One
Direction pattern. In that case, I will just
tap these two files. Maybe I want to rotate
of the stripes as well. Let's say that I do,
I duplicate those. I tap into the pattern. I rotate it, tap out that a pattern. There you can see how easy
it is to rotate the file. The gifts pattern, I
will rotate to the left so that they are
pointing to the right with the top of the gifts. You can write rotate on
that file if you want to. Repeat pattern rotated. On this one, repeat
pattern, whoops, rotated. Now we have all of the files and they are ready
to be uploaded on Spoonflower and Society6.
19. Export the Files: Now, all we need to do is to
export our files to a folder. I export my files to
a folder on my iPad, you can also export
them to your Dropbox, or you can save it
to your camera roll. But I don't recommend to save
them to your camera roll, because if you save them
to a folder on your iPad, you will keep the file name. That will save you time
in the workflow later on. I already have saved
this original patterns, and now I want to save the
files that goes to Society6. I also want to save the
files for Spoonflower. I named them differently so I know what they are
supposed to go to, and I tap "Share", as JPEG, and then I save them to
a folder on my iPad. I tap "Save to Files", and here I have my folder
and I just tap "Save". That is all you need to do. Now you have all of
your files ready to be uploaded on Society6
and Spoonflower.
20. Upload to Spoonflower: Now it's time to
upload our files. Let's start with Spoonflower. I will just head
over to Spoonflower. Here I already have my files, but I don't know which
size they were in, so I will just delete them
and we will start again. Maybe this is a little
bit of extra work, but I want to keep
everything organized. I will tap "Add Design" once again and then I will go to
Split View with my folder. Here, I can upload
eight files at a time and I actually
have nine files. I will just start by
selecting the large files. Those are the ones
that are called, Large and then medium. That is six files and then two other small and
that is eight files. Then I will tap and drag those on the right
and tap "Upload". This might take a little while, so I will just wait
until that's finished. Now the files are uploaded
and I will add the last file, so tap "Add Design"
and I will add the last small one
and tap "Upload" and wait again until that
file is uploaded as well. Now all of the Spoonflower
files are uploaded and I will just swipe to the right here to make it full screen with
the Safari browser. Then what I do to keep this efficient is that I
tap my Design Library instead of having
all of the files separate and then I
tap the list view. Here, we will do some things. First of all, we can
create a collection. I always think that
it's good to gather your designs in collections
when you have collections. Let's tap "Add Collection" first so that we will add a collection and I will make
it visible to the public. You can name your collection whatever you want, of course. I will just name it Holly Jolly for now and
then I will tap "Create", and now I have created
a collection so that I can add all of these
designs to that collection. What I do then is that I
select all of the designs. This is to keep your
workflow smooth and quick instead of tapping
into the separate designs. Then I scroll up and I tap
this little window up here. I scroll down to the
collection that was called Holly Jolly and I tap to add all of those
files to that collection. Then I can select again, I usually use the
Swatch thumbnail, but you can try which
thumbnails you want to use. But if you know
that you're using the same thumbnails for
all of your designs, you can just select
all of designs and change all of those
thumbnails there as well. Then as a description, I have a description that I
use for all of my designs. I think it can be good to write a description for your
separate patterns, but I have so many patterns, so I don't take time to do so. I will just copy the
description that I have for all of
these patterns and then edit description
up here and paste that description
and update. Then I will add that description to all of those designs as well. The next thing that's important
to do is to add tags, which is keywords and
these keywords will help your designs to be
found on Spoonflower. We have three different designs, so we can use the same keywords for the designs
that are the same, that are just different scales. Generally, instead of just
typing in all the tags here, I go just to my notes app and I just write in the
different keywords. Let's say, for example, for the gifts pattern, I want gifts, gift, present, Christmas, holidays, holiday, pink, I will add the
colors, green, red. You can use 13 tags, so use them well. I have 1, 2, 3, 4, 5, 6, 7, 8, 9. Then I usually add my own name, so Maja Faber and that's 10. Then I usually add
kids and baby because I'm aimed for that market
so then we have 1, 2, 3, 4, 5, 6, 7, 8, 9, 10, 11, 12. Then let's use, for example, Xmas. Now we have that tags for the gifts pattern
and now we want the tags for the stripes pattern so I write stripe, stripes, line, lines, texture, textured, whites, green, Christmas, holidays. 1, 2, 3, 4, 5. That was a dot
instead of a comma. If you put commas
after every word, they will be added as
separate keywords. 1, 2, 3, 4, 5, 6, 7, 8, 9, 10. I add my name, that's 11, and kids and baby, that's 12, 13. The next pattern,
the Christmas candy, Christmas, holidays, candy, gingerbread, pink, red, green, Maja Faber, kids, baby. 1, 2, 3, 4, 5, 6, 7, 8, 9, 10. Then we have candy canes and we have a peppermint. 1, 2, 3, 4, 5, 6, 7, 8, 9, 10, 11, 12. Peppermint, and what else
do we have in the pattern? We have candy canes, wrapped candies, gingerbread. Let's just write Xmas as well. Now we have a bunch of
keywords and then we will head over to split view. Here I will just select my keywords and
select all of those, like that, copy. This was for the gifts pattern. Then I will tap
into checkboxes for the Christmas patterns,
tap "Edit Tags". It's really small now, but you probably
understand what I'm doing. Gift and then just tap "Update." Then I will wait for that
to be uploaded as tags. As you can see, we have all of these tags here
in those windows. Then I will just copy the
stripes pattern tags, tap in the stripes patterns, tap "Edit Tags", paste the tags,
and tap "Update". Then I will do the same with the last pattern,
the candy pattern. Copy the tags, choose the candy patterns,
tap "Edit Tags". I can actually make this larger now so that you can
see what I'm doing. I'm tapping Edit Tags and then I paste the tags and
I tap "Update". Now we have everything
set for our patterns. We have the name of
the pattern which you can change if you tap
the names over here, but I already named my files, so I won't change them. Then you have the description, which you can if you want to, choose a description
for each pattern. I have chosen my thumbnail view, I've added them to the
collection and I've added tags. Now, the next thing
that we can do is when we have ordered proofs
of the designs, you can make them for sale. Then you can select all of them and you can
make them for sale. That is how you upload
your patterns to Spoonflower in an
efficient workflow.
21. Upload to Society6: Now it's time to upload
our designs on Society6. I have logged into my
account, the Society6. I will tap sell to go
to my artist's studio. Here I will tap "Add design", and I will do a split
view with my files folder so that I can just tap
and drag my files. I want to add my Christmas
candy original file here. Let's start with the
Christmas candy, the original file, and then I want to add
the repeat patterns. I had two files
for this pattern. I will just swipe away
the files folder. I forgot to add the name so I can copy the name
from the files folder. Tap your design, tap
rename, copy the name, and then you can paste that
name and if you want to, you can remove these
underlines from that name. If you think that
that looks better, then I will swipe to the right. Here I can choose
which of these designs that I want to have featured, which means the one that will be placed automatically
on the products. I will tap feature on
the repeated pattern, and then I tap continue. I represent this artwork and I tap "No" they're
doing mature content. When the file is uploaded, I want to add my tags. I tap split view and my notes. I will copy that
Christmas candy tags and tap in the tags box
and paste the text. Here, I can actually
add 20 tags, so I can add some
tags if I want to. Let's just type in minimalism. What else may be modern? Scandinavian is a word
that I usually use as my designs are in
a Scandinavian style. Now we have 16 tags, and then we can add some more. Let's add three as
it's a Christmas tree and we can add heart and
maybe wrapped candy. Now we have 1, 2, 3, 4,
5, 6, 7, 8 9,10, 11, 12, 13, 14, 15, 16, 17, 18, 19,
and I will add pattern. Now we have 20 tags and I will select which
category this is. I will tap category
and tap drawing. As it's drawing. I will tap, save details down here. Then it's time to check
the scale of our products. Generally, I usually
select all products and then I can deselect the
ones that I don't want to use. But most of the
time I want to use as many products as possible. Probably my Internet connection is a little bit slow right now, but let's try it out
and see if it works. Tap, "Select All"
and then tap enable. There you can see how all
products are enabled. Now, I don't want all
products, but for me, it's quicker to
de-select products than to select all of them. I will just de-select the ones
that I don't want to use, that will just tap them. My Internet connection is
really slow right now, so bear with me. But I am deselecting
all of the art prints. As I don't feel that this pattern looks that
good on art prints. I can't imagine
that anyone would buy a poster with this design. Maybe someone would,
but in my mind, it's not suited
for this pattern. The wall art, the wood
wall art might be nice, that looks pretty good, and the wall hanging looks good. If I scroll down here
and I see products that I think that the scale
already looks good on. I will just leave it like that. Let's have a look at this. The floor pillow looks good. The rectangular
pillow looks good, and the wall clock
looks good as well. When I reach wallpaper, I will tap into that product. Because here I want to change to my pattern tile instead
of the repeated patterns. I will just tap the 3,600, which is my pattern tile, make sure that I
have 100 percent, and then save and enable. Here you can choose to enable more products with this design. But for now, I will
just skip this step. This might be a quick way
of enabling a bunch of product if you know that
they will look good with the same design file size. Scrolling down and see how my pattern looks
on different products. Hopefully, you don't have as much problems as I have with my Internet
connection right now. It takes a little while
for me to see the product. But I really like how this
looks on actually all products, and that's the perk of
using a toast pattern that it will look really
good on a lot of products. Generally, I'm just
scrolling down to see which products I want to change, either the scale or
the file itself. Or maybe I want to turn off
one product, for example, the puzzle, because
I don't think that this pattern will be
really good as a puzzle. But otherwise, this is
looking really good. I think everything
is looking good. The Apple watch
doesn't look that good so I will just
turn that one off. Otherwise, I'm happy with
the scale and everything. You can tap into each
of these products, of course, and change the scale. Usually I don't use
the apparel that much because I tend to
upload patterns and they work best
with illustrations, with transparent backgrounds, so we'll just turn off
all of the payrolls. On the tote bag maybe
I want to scale it up so I can tap two
fingers to add a new tab with the tote bag and then
I can just continue to turn off the other clothing because I don't want
that with my pattern. Then continuing with the
carrier pouch, that looks good. Everything here looks
really, really good. Then I will just turn off
the, the kids' joggers, the kids' pull over
and the kids' t-shirt, and the kids' crew neck, and the kids' hoodie. If you want to use this signs
on these type of products, it's better to
have illustrations and with transparent backgrounds because it looks really
strange with just the square with a pattern printed
at least I think so. Now we'll head into my tote bag and I think that I
wanted to scale up the pattern a little bit. I will just scale it up and
maybe that looks better. I can tap generate preview with my slow
Internet connection. I have no idea how
long this will take before I can view the preview, but they're recounts
and that looks better. Then I would just save
and enable that product. Now we'll skip the
step where I can enable a bunch of products
at the same time. Now, I've uploaded this file, I've looked through all
of the different products and I'm happy with
the scale of them. When I'm ready, I will
check the little box that I represent this artwork and then I will tap
"Publish artwork". That is how we upload
files to Society6 and I just want to show
you a little detail about uploading patterns that
are in one direction. Let me just show you how to do with the gifts
pattern as well. I will tap "Add new design", split view, and my files folder. Tap "Done" and I will fit
the gifts pattern there and also the repeated pattern, and here I also have
the rotated pattern. I will add all of
those three files in the upload section here. Then I want to add it a name, so I will just tap the name, tap rename, and copy it. Then I will paste
that name over there. Now I'm finished with that. I might as well,
when I'm on the go, just continue with
copying the tags. I split view with the notes and then I just copy
that to the clipboard. I have the tags and now I
can just focus on my upload. Here. I will just remove
the underlines here, like that and then I will select which one I want to be featured. I will select the
repeated pattern that is in the
original direction and then tap "Continue". I represent the art work and it doesn't contain
mature content and then tap continue. Then I will tap tags and I will paste in
all of those tags. I can also add more tags
here if I wanted to. I will just tap "Save
details" over there. Now I just want to
show you what to do when you have this pattern
that is in one direction. What I would do first is just to select all and enable them. For this example, I
just wanted to show you what to do when you have
this one-direction pattern. If I scroll down
and find a product that is in another
direction, for example, this hand and bath towel
that are supposed to hang with the short
edge at the top. Then I will just tap
with two fingers on that product and I
tap into the new tab, and here I have the
different files that I can choose from. Then I easily can just
tap the rotated file and here you can see that
now the pattern is in the right direction
on this product. Then I will just tap, "Save and Enable", skip this step, and then I would
do the same thing with the products
that needs a file that is rotated in
another direction. Now you know how to upload
your files to Society6. If we tap, view my shop, maybe my pattern has
uploaded already and it has, so I can see this pattern
on the throat pillows. Then if I scroll down, I can see it on different
products as well. It takes a little while before Society6 uploads the
preview of all products. But once it's finished, you can check all
of your products. This one is still uploading, I guess it looks a
little bit funky and your designs are for sale. Once you hit the
publish button on Society6 compared
to Spoonflower, where you need to order proofs in order to sell your designs.
22. Thank You: That's all for this class. Thank you so much for watching. I hope that you enjoyed to
create this mini Christmas, pattern collection in
Procreate with me in this class and that
you found it useful to learn how I upload my files to Spoonflower
and Society6. If you liked this class, hit the "Follow" button
by my name to make sure that you don't miss
out on my future classes. You can also tap
my name to go to my profile page
here on Skillshare, where you'll find all my
classes available to watch. If you enjoy our
Procreate brushes, you can find all of our
favorite company brush sets available to buy in my
webshop, myfavorite.com/shop. If you have any questions
at all about this class, please ask them on the
discussions page here in class and feel free to
leave a review to let me know if you
enjoyed this class. I would love to
hear your thoughts. Make sure you share your
project here in class. If you post it on Instagram, feel free to tag me
with @maja_faber Thanks again for watching.
 Maja Faber, Surface Pattern Designer