Transcripts
1. Introduction: You ever wanted to design massive event stage or
professional exhibition booth, but didn't know where to start? Exhibition design is
a unique scale that combine architecture,
branding, and lightning. In this course, I'm going
to walk you through the entire workflow in Blender three D. We won't just
talk about theory. We are going to get
hands on and build several distinct
projects together. You will learn how to interpret floor plans, create
realistic materials, and set up dramatic lights
for everything from a small corner stall to a
large cooperative stage. Whether you are
new to Blender or looking to expand
your TD skill set, this class breaks down complex structure
into simple steps. I'm Karan a TD designer, and I can't wait to see
what you create next. I will see you in
the first lesson.
2. Understand the branding and client needs for stage design: Before we start into
our first project, let's understand
what we are going to create in this first project. This is the first project
we are going to look into. First of all, let's understand
what this image all about. Let me tell you I have
changed the branding to current three D Blender
course because I won't be able to show you the actual
branding because of the company policy for
the confidential purpose, I have changed the branding
to some other graphic. But this is the image that
has been clicked from a mobile from the event
manager that was on the field. Only the branding
has be changed, but the image is real and this
event is already happened. First of all, you
can see here is the branding and this
one is the podium. This is the side panel,
the left side panel, and the right side panel, and
this one is the LED screen. And below this,
this is the riser. Now let's look into
the second image. This one is the second image. This is the same setup, but the angle is different. The podium, this is the
stage and this is the LED. We will talk about the sizes later on while we are creating this exact same setup
in the three D within the Blender and
we will look into the sizes as we are
going to create them. All these sizes that
had been given from the operations manager
that was on the field and it took the sizes of
the hole or we can say the ball and the size
has been shared with me. This is the size
that is eight width in height and four
feet in width. The width is about
14 feet of width. And the size of the total stage, the stage is about 1.5 in width, and the total wall room
is about ten to 12 feet. Let's move to the third image. The branding has been
changed here also, but the image had been clicked event that
already happened. Here is the standing. Here is the branding
of the table, and here is the branding
of the registration table. Behind this, this is the
registration desk where people will come and register
their name here. The size of this specific banner or registration panel
is eight by eight, that is eight feet into
width and eight into height. This one is three by six, that is three into six. The table, it is about
2.5 feet into the height, and this is about
six feet in table. As you can see, there is some space that has
been left here. It is about six feet. This is the event
that has happened. All this image that has
been created this using Google Gemini Nano Banana Pro. So it is just a glitch here, so you just have to
ignore this one. As you can see, here
is the standing, here is the standing,
and this is the stage that we have already. Look, this is the
closer of the stage and this is the stage
will look like in the ballroom once you
enter into the hole. Don't mind the change in the branding because it has been generated using nano banana. Now let's create this same
exact stage into the Blender.
3. Dimention Change from meter to feet: Let's open your Blender and I believe that you already
know about the Blender. The basics of the
Blender, I hope you know. Even if you don't know,
you simply have to follow exactly my step and you will understand how
everything will work. This is the new project that has been opened
within the Blender. You simply have to go to SN units and select
imperial and select feet. There is important step
here that you have to take. We have changed the length or the dimension of everything here into the feet, not meter. How you can check it out, you simply have to click X
and select for the scale and you can see it's
calculating in feet. This. Once I middle click, you can see left
click, right click, anything I press, you
will see on your screen. It is really convenient
for you what I am.
4. Using illustrator understand basic 2D structure before 3D design: Once you open Illustrator, even if you don't have
Illustrator, don't worry, I will be sharing the file that we are going
to create here. Throughout the course
that going to create, I will be sharing with you. You don't have to worry
about the Illustrator part. It is for the extra information that you will learn
in this course. With the Blender, you
will learn a little bit of Illustrator how a
paint file can be done and how we are going to
create actual this setup. How we can do that,
let's get started. First of all, the size
had been given to us. Right now we are
going to use inches, not the feet part here. Why? Because we can actually
scale it out later on. It's up to us.
Now, first of all, let's create design here, that is, this is the part. Let's understand
you are going to create eight inch or seven inch. And you are going to
create a eight inch. Let's say you are going to create a rectangle here that is once you click it and it
will show you the width. The width is you can say it's eight and the height is
going to be seven or six. Let's take six right now, and this is the size. Now, let's change the
color to dark one. And again, let's
select this one and click eight with four
and height eight. This is the height and press
all and drag this here. And here, let's again, select with the height is 1 ". Oh, no, let's take it two
inch and let's make it eight. Now you can see,
select this one. Now you can see a basic
layout has been created this. Now let's change the
color to different ones so that you don't get confused
what I am doing here. So this is the basic
setup has been created. Now let's drag this one, press shift and drag
the height, yes. Now they have increased into
size as proportionally. Now, what we are going to do, we are going to create
exact setup like this. How we are going to
do this in Blender. First of all, let's
create this one. Once you click here, the settings will
pop up here and you can actually change
the dimension of this one. Right now, the dimension is the dimension is
once you click it, you can see here is the
dimension or you can press Z, doesn't matter at
all eight and six.
5. Stage Design using Blender 3D: So let's create this
into width is eight, and height is six. Done. And the thickness
or you can say the depth, let's make it 0.2. Yes. Now, let's select press
Shift and middle click. Now you can simply
select this one, select this and drag it up. Yes. Now, simply click this one, press shaped D and right
click and bring it here and change the dimension
to four and eight. Magnetic on. Yes, now
done and make it down. Yes, done. It's up
to you if you want to snap it or don't snap
it. It's up to you. Press Sift D, right click, and it will simply go to its initial part and you simply have to drag
this one here. That's all. Or you can
press X and you can see there has been
perfectly aligned. Now, as you can see, there is a little bit of gap. Let's move it further
if it works or not. No. Let's snap it out and press, click here and ang. Now it's done. Now, you simply have
to add a cube here. Press or you can simply
click this precit D, right click, it's lose it. Now it's get to its
original space, simply drag it here
and make it too. Let's see if it's work or not. Yes, it's working
perfectly fine. This is the same thing that we have created in Illustrator. For our reference,
it's perfectly fine. Now let's select all
this one and bring it above the Horizon. Now let's save this one. Please don't forget to save
your project every time. Now let's understand. One more thing, it is not six. As you can see, this
is the seven and this one is the 1 ft.
Let's change it a little bit further if client
want to change it because it's totally
depend on the client. Got it. Right now
the height is six, let's make it seven
and bring it down. Yes. Now it's perfectly
looking the same. As our image or as our real project that
I have already done. Now, let's create a stage
here. How we can do that? The stage will be the same
width as they are the height, you can say it is
about six feet. Let's make it. Shift
D, right click, bring it into the front
and let's make it. Right now it's 84 plus four. Eight plus eight is 16. Now, as you can see, this is
same the width as they are. Now let's change
the rotation to Y, that is 90 degree and
bring it into the front. Yes, bring it down and
the size of the stage. Let's make it 1 ft
above the ground and let's make it Yes, done perfectly align into the Yaxs yes, it's
perfectly fine. Yes. Yes, a little bit of edge. Let's make it move a little
bit to the right hand side. Yes. Now our stage is done. Now let's select all these and bring it above the horizon, so you might not get confused. The basic layout
has been created.
6. Create Podium in stage design: One more thing. A little
bit of information that has been left
is our podium. Let's bring it further. Shift the right click and let's
bring it further here and let's make it 1 ft or you can
say let's make it 1.5 feet. The height of the podium is
usually four or six feet. So let's make it
two to four feet, two width for height. So you will get the
room for a person, usually about five to six feet. Usually, the person height or the speaker height is about
four to six feet, right? Four to five feet. So four feet of height is standard
for the podium. It's totally depend
on the client if they want other type of podium, it's totally depend on them. Now let's bring it
down and save it. Now you can see
here is the podium. And press. Once you click it, press tab and you will
go into the edit mode, once you click this one, and let's select this. You can say, this is the edge, this is the verses,
and this is the pace. Once you press G and Z, you can see you can
move up and down. Let's bring it down
a little bit here. Now our podium is ready, as you can see, here
is the inclined. Now, let's press tab and
into the object mode. Once again, now we have to work on the branding and
into the background.
7. Install Plugin for easy texture: Once you go to material, you will see and you will select this one and let's
bring it down. You are going to see that everything has a color change
and we don't want this. Let's control that or undo it. First of all, let's
change the height to one. Feet 1 ft, enter, and let's bring it down here. Now, let's delete this material because we have only
copied the exact material. The material property
and all the properties has been copied also. Let's remove this
material here and add a new material attached to this specific element and
let's now bring it down. Here. Now, one more thing, let's make it a little
bit of rough, yes, yes. Now let's name it double
click and name it riser. You won't confused if
you are going to change the color of this specific
element as per the client. Now let's go to this one
no, let's go to this one. This is the stage and
about the polygon. If you don't know
what is polygon, let's move to the website, how we can install polygon. Plug in because it's going to
save a lot of time for us. How we can do that,
let's move it. Once you go to polygon, blender, plug in, you will see please
don't mind my spelling. It will redirect you
to the same page. You simply have to click the first link and download
the blender add on. Once you download it, you
simply have to install that. You simply have to install
this. How you can do it. Once you go to edit preferences into the add ons
once you click here, Install from disk, you have to locate the path
where you have installed. This is where you
have downloaded. Here is the downloaded version, and you simply have to drag hit here and
install from disk. That's all you have to do
once you go to Install and yes, now it's installed. How you can verify it, you simply have to
click on the polygon, or you can see. Here is the polygon that
has been installed. After that, once you verify it, you simply have to
restart your blender. That's all you have to
do, press Control S, save, and restart
your theory software. Yes. He is our project. Once you open it, you
can see the polygon, you can see here, the polygon has been installed perfectly. Now, let's select this
one into the material, let's delete this material, new material, select
this and name it stage. Now, Click polygon
and select for free. Now you can see here are the free material
you can actually use. Now it's totally depend
on you which type of material you are going to use or the texture you
are going to use. Let's move it further here. Yes, right now, I'm
going to use this one. Let's apply this tecture. Yes, it's working fine.
8. Change texture and podium branding: Change the branding
of our podium. Let's change the branding to
black, a little bit dark. First of all, let's
delete this one and new. Once you click it, double
click and type podium, now you can change it to dark mode and make it
metallic and roughness, increase the roughness and let's once more click
here and press new. Double click. Podium front, we are
going to use podium front and let's go to tab, once you go to Edit
mode by selecting this specific podium and slack
the faces now click here. Once you click it,
you can see here, podium go 01 that we
have already created a new texture material and
you have to simply assign it. Once you assign it, you can specifically change this
specific area here. Once you click it, you can
change it to anything. Let's press tab and you can see you can change
it to anything. Now, let's press tab, and here is the area
that has been selected. Now, once you go to shading
and in the shading, you simply have to add
a specific area here. How we can do that,
we are going to use Illustrator for it. Let's slack this one, this one, and into an inch, let's width two and height, why we have selected this one
because press tab and let's see this is the size that we already taken
to width and Z, that is four height. Now let's make it press
shift and this T. Now, this is the
size that has been already taken and now or you can say file new because we are
working into the feet, let's take feet here so it will exactly match our size
into the Blender. Select w two, height, four, and create it. Once you create it, you can see this is the artboard
that has been generated, and now we are going to create an artboard here.
How we can do that? Let's add here that is cur three D, Blender course and
increase the size of it. I believe that you know
the basics of Illustrator. If you don't know,
you can use Canva. You don't have to
worry about that. Let's press Enter, change the size further and
change the font, yes it looks better, and this is the font
that I'm going to use, and let's make it a background. Let's make a little bit
of creative background. How we can do that. Let's go
to free pick or you can say, let's delete this one
and use technology. Now let's select any
of the image here. I like this one. Let's
download this image. JP and download here. Let's download. I will
share everything with you so you don't have to worry
about the material here. Let's bring it down
into the Illustrator, increase the size of it. And right click arrange it
to send to back. That's all. Now, size of the text, let's make it white or green. No, I like white one with
this one, it looks odd. Let's give it a round rectangle as a background as a base, and with this one, yes. Right click arrange,
send backward, select this one and
change the color to blue. It has now match our theme. Now let's select this one, export, export for screen, it's up to you how you
want to export it. Let's artboard and the Rd boat. Let's name it podium where you want to export it, you want to export it here into the actual folder
for Blender that we are using for everything,
let's export it. Now, refresh. Once you double colic,
you can see here is the version that
has been created. Now let's bring it No, once you select this
one, let's bring it into the Blender and slack this
color into the base color. You can see the changes here. Now, we have to arrange as per our UV editing into the UV
editing, how you can do that. Once you wheel heel down, you can change it too. Simply press Vertex. Now, select this one. Press G for shortcut, and you can see it's
totally working. Fine. Let's select this one. All the vertices here, press R for the
rotation and you can see once you rotate it, press shift, control, yes, no, not working at all. Yes. Now, slack this one
and press G and move this vertices to oh
specifically here. Press G and move it here, press G and move it here. Shaped and drag it press, you have to align it perfectly. I will look perfectly
into the image. Now you can go to
your render view. Once you go to a render view, you can see because there is no lightning or the
lightning is dim, so we are going to
cover it up later on. Let's go to your
material preview and now let's go to our layout. In this layout section, you can see the changes
has been appeared here. It's working perfectly awesome. You can see here is a
line that we don't want. Once you click it
into the UV section, you can see and now
you can fix it here, press G by selecting here
because it's going to exactly match our settings
here and press G. Yes. Now let's go to layout, and you can see, it's
perfectly fine here. Now let's move it
here, yes, yes, yes.
9. Create Side panel in illustrator for stage design: Now you can see it's
perfectly fine. Now let's move to the further
part that is left and right panel and into
our LED screen. For the left and right panel, we are going to
create another file in the Illustrator again, how we can do that
into press file new. Again, right now, let's select width four
and height eight. This is the standard dimension
that we have took before. And now let's create
a site panel here. How we can do that, let's
go to free pick again. Yes, I like this one. Let's download this one, bring it down in our computer
and bank, drag it here. That's all, and let's move it. Yes. Yes. The text that we have used here, let's copy and paste it here. Cool. Simply, you can brand it out with exact or
innovation or anything, you can just type it down
anything. Right now. Let's select this artboard
and file export for screen, select the artboard
and name it side. Panel export the artboard. Now your image has
been exported and you just have to check the image. Yes, it's exporting. Now you can see the
image here and it is about 40 MB of image.
It is too much. Let's again export for screen. Let's not make it two X and Export, Let's see. Yes, now it's TLMB and
it's perfectly fine because 40 MB is too much to handle for the software
to actually process it. Your blender might get hanged once you use 40 or
it might get slow. It's happened with me. I believe it might happen with you also.
10. Add texture in side panel: Again, the process is same here. Let's as this one new. And again, let's
make it side panel, and again, press here new
and press it side panel one. Again, the process is simple, go to Edit mode, or you can simply tab and
select the phase here. Now, panel one, assign it. In the assign, let's go to
shading and bring it here. That's solve. The
process is perfect. Now, go to UVting. There is another way
to make it a little bit easier before we have
actually moved all the six. Right now, you can simply select the face and
right click and split by selexonOce
we split it and you can see by pressing
G, you can split it out. Once you drag it here, you can see on the
right hand side, you can see
everything is moving. Now, let's press R move it 90 degree and now let's
what is and press G. This one. This one and this one. Now you can see it's
perfectly fine. One more thing, let's not
use the same process here. Let's delete with this
one and press shift the right click and in
the layout section, you simply have to
bring it out here. That's all you have to do and
it will save a lot of time. Now, our stage has been
created perfectly fine.
11. Add ball room to get our stage size right: Press shape A, mesh cube. Once you click it and
just scale it out. You don't have to scale it
out, you simply have to go to go to item, and let's make it ten feet. About 30 feet this side. And 15 feet left to right. Let's make it 25 feet according
to the ballroom that has been given and let's
make it around 12 feet. Now the box has been
created and now let's move it further. Yes, it's good. Let's make it here, this one, delete this one. I don't know what it is that. Yes. Into the ballroom. Now
let's zoom in. Yes. Now you can see here
it is in the room. Now let's move a
little backward so that we have some room
behind the stage. And now let's go to tap
tap into the edit mode, select this phase, slack phase, flash, press X, and lead phase. Now you can see
here is the room. Press tab By selecting
tab now you can simply texture this wall and
this press tape this wall, go to polygon and texture the wall polygon, select for the free
asset here, free. And you can see there are
textures available here. Let's apply it. Yes, and assign it. Control that because we
have to assign this one, press select this
one, new floor. So it might not cover all the elements or
all the walls here. Let's assign it and apply it. Now it will appear
only on the floor. Now for the wall, let's select this one and
New and select backwall. Now let's select another element
from the polygon itself. For the background,
let's make it Yes, now you can see a lot
more resources in one go. Let's try to make this one. Download started. Apply. And you can see the size of the wall or the
texture is very large. Let's make it a
little bit small. Go to shading and
in the shading, you can scale it out. Here, let's scale it out. Yes. Now you can see
the changes here. The changes has been
applied automatically. Yes. Now it look better. Now let's one more thing. You can simply select
this phase and delete the phases because we
don't want its pass.
12. Add light Source for stage design: Or you can scale it out, Let's press tab
and scale it out. Because we don't want to
show the actual structure, we only want to show
this structure only. Let's move this into a layout
section, let's move it. Upward and a little bit
of forward near the wall. Yes. Now let's save this
one and go to render mode, and you can see, we need
to add the light here. How we can do that. Let's move backward and try to
add a sun temperature, and let's make it 100 No,
it's not working at all. Let's make it thousand. Nope controls that. Yes. Strength, make it ten. Now you can see the sun is
perfectly working fine here.
13. How to render and add camera view: And let's try to press DeFel what we are seeing
in the interview, we are seeing this
and it looks awesome. But right now let's
simply glt this one and one more thing
here is our camera. There is a light that
has been applied, but there is another
way to apply a light. We will talk about it in
the upcoming next project, so you don't have to
worry about that. And for the camera, there are two ways to
handle the camera, once you press zero
in the num lock. In the num lock,
once you press zero, it will automatically show
what camera is watching. You simply go to
item and you have to change the position
of the camera, like you have to
make it zero degree or 90 degree or make it 90 degree and size, you can simply to the size, yes, no it's working fine. And you can see our
stage is levitating. Let's make it a
little bit downward. The This one, let's make
it upward a little bit. B. That's all. Now let's press F 12. Now you can see,
He is our stage. Now, one more thing we have
to show is our screen. You can either change the color of the
screen, it's up to you. Let's make it a little bit dark. Or you can apply any graphic on it like
you have applied on it. That's all you have to do.
It is just a small task. I want you to add
a small graphic on this specific screen just like you have applied
on these three. That's all you have
to do and you have to share it with me. And I'm really excited to see
what you will apply on it. This is a small project for you. You can share with me anywhere. You can find Instagram link, you can share in
the project section anywhere you want to show me, you can simply share with me.
14. Add second camera using short cut key: So here is the camera view, that is this one
and we want to show a second camera view
from this side. How we can do that, let me
show you how we can do that. Once you have to
duplicate this camera, press Shift plus D, you can see this is the
camera and right click. You simply have to
right click and it will go at it original place. Now, you have to select this one or this
one it's up to you. I prefer this one because
it's already been adjusted into the exact moment or exact frame that we wanted, and you have to simply
select this one, zoom in look into the view
this you want it, this one. You simply have to press
Control Alt num lock zero. That's all you have
to do and you can see the camera has
been adjusted. This is the camera and
this one is the camera. The angle of this
camera has been automatically
adjusted to the view that we have already selected, as you can see, and there
is a minor adjustment you have to make it
make it far away. Or let me show you
how it work again. Yes. Now press F 12 and you can see the second
view of our camera. Let me show you we want
to see this side also. Okay. Let's make it. Select this one, press Shift D, and duplicate it, right
click, leave it at it, select the area and press Control plus
all plus numb zero, and you can see the
camera has been adjusted automatically where we are
looking at into the view pot. Now let's press F 12 and you can see here is our
third view of the camera.
15. Add human figure to give size idea of stage: Now let's add another
detail here. What is that? Let's add for the
reference man in the suit. This is the man that
has been downloaded and you can find it
in the resource axon. You simply have to
drag this model here. That's all and import. Now you can see the
model has been important and I don't know where it's
looking at towards the wall. There is no punishment has
been given to this model. Let's move it award, the height of this person, let's make it a little bit
downward like the size. Let's make it lock lock lock. Now let's downward. If it's working or not. No it's not working. Press S and scale it
down to five feet. Yes, 51, as you can see, the size of this person has been changed to five feet only and you can see it's not levitating here and let's
move upward a little bit. Yes, and rotate to the Z axis. Select Euler form. Now, let's bring this person here and press X and move it. Yes. Four feet, five
feet around. Okay. A so this person has the area that has already been control
press Control plus J, so it will simply Control J. I will join all the element that
has been separated from it. Oh, Control Z and select G. Whoa. I look like anything. Now, don't worry, press Z. Control Z. Let's move it. Yes, everything has been adjusted
now press F 12. This is the third frame
that we have selected. And if you want to see the
first frame from the front, you can do that also by going to view local camera and select
the camera, press F 12. By selecting the
camera press F 12, you can see the third view, but the view has been
adjusted a little bit. Let's make it a little
bit, press zero. Yes, now simply have
two. Yes, adjust it. Now F 12, everything has
been perfectly fine. Now, you can see it is a little bit fade
in the random view. Let's make it a little bit contrast so that
it might appeal. To the client while we share, let's select for the
renerview In the nerview, select for the cycle
or it's up to you, color management and
look, make it contrast. Middle contrast,
let's make it middle contrast or base contrast. You can see the changes
has been here cycles yes, CPU ender, you have
to select GPU Render if you have a GU and select
for It takes some time. But let me tell you a time limit for the
random view in the cycles. Once you click F 12, it will take about ten
or five minute onto the system specification that you have right now will
take a lot of time. Blender or specific. You can see how
much time taking. But let me show
you a simple treat how we can change
the details here. Once you click it, Crossx and you simply select
the time limit. Let me share a three second
time limit and select for Dnis it will save
you a lot of time. For Max sample, it
doesn't matter. Let's select for App 12. Now you can see it will render in some time
within 3 seconds, the render has been done. Now go to images, Save as, where do
you want to save? You simply have to
save this image. That's all you have to do. Save. Now you can see our image has been rendered
perfectly fine. Yes, it looks cool. Now one more thing, let me up. Select output properties and
in the output properties, you have to select
color management, follow the skin or you
can simply override it. You simply have to add a
medium or high contrast here. If you want to add,
let's make it a medium contrast and
for the standards, let's make it standard. We are not following
the scene right now, let's press F 12 and it will
follow the scene for us. Right now, let's select the second view if you
select the second view, press F 12, and it will
end the second view for. O Image, save as, press I two, Image two, and here is the image. Once you click it. Now, press F, Controls and save it. Select the third
view if you want to show, it's up to you. Now, simply select camera one. Everything has been
completely fine. Our first project
has been completed. We are going to look at our sack in project
for this course. Give a review to this course, and if there is an
improvement you want to see in the upcoming
lecture, please do that. I will update that also.
Thank you for watching.
16. Understand Backwall Booth: Hello, welcome back. In
this particular module, we are going to learn
how to create this. This is a backwall booth and
once you search on Google, you will find so many examples
and according to example, you will get to see according to the client what they want and
what you have to deliver. They want me to build a
three meter wall here once you click here and you
can see the dimension here. Right now, there is no
imperial setting has been edited and you can actually
calculate it in the scene. You can actually
calculate it in metric. And now they are simple
element that has been adjusted in this
particular scenario, first, a backwall with the
height 2.4 meter, and this is the
graphic that has been delivered to This is
the actual graphic. This is the company that
I have worked for and they have asked me to create
a demo booth for them. They want high table, toolbar, and a branding table with two chairs and a stand
for the browsers, not comics, here they want a
32 inch LED for a display. For the floor, it is
just a simple floor. You can actually increase
or decrease the height. It's depend on the client need. We are going to create all
these from the scratch
17. Create Basic Structure of Backwall booth: What you have to do, you
simply have to go to new and create from general
and you will get to see. This is just like similar
one that we have created and this one is our
back wall booth. Right now, for this one, let's go to as usual, go to items in the
transform section, let's create this
into three width and 2.4 height for
the thickness, let's make it a little bit 0.34. It's enough 0.4. Now, let's change the
position with this, a shift D, right click and
rotate it at 90 degree. Once again, I think
that thickness is I think I have to reduce
the thickness to 0.1, and let's make it 0.1 40. Now, let's drag this down
and adjust as for the floor. Done. Height. These
both are same, equal height and width.
18. Add texture to backwall: And once you click
it, press tab, select this phase by selecting
phase, select this phase. Now again, now in
the materials axon, I added the material. A material is already died, you simply have to add another material by
clicking it and press new and write back wall
and assign this one, select this one and assign. Now it has been
assigned to this. Now it's time for you to add this particular graphic that
has been delivered to me. Now you will find it in the resource Saxon,
don't worry about that. In the UV editing, and in the shading panel, go to this and drag this one
here and just adjust this. Now you have to adjust this one. Right click or Alt
Sexenw as you can see, it has been separated. Now it scroll down here and now you can see
what is happening here. As you can see, now
we have to change it, select rotate and
rotate -90, I think, and select this
one, select this, select this and now you can
adjust it easily dragon down, easily dragon drop or
you can select this one, press G, and drag it here. Select this press G. This one is a shortcut to
move the point and done. You can see it has
been adjusted. Now, select this one. Press Controls, save
your file here. Four course, three meter wall Project two,
Slack this one. Done. Now, as you can see, it has been adjusted. Now go to Layout, go to your material
preview and you can see it's perfectly fine. Once you click here,
go to polygon, as we have already discussed, how to install polygon, and I think select this one. No logout, no, we have to
search for the free one. Search for free, and let's see
which one I like the most. Let's use this one,
apply this one. Yes, it's perfectly fine. Now we have to add
extra material here. How we can do that?
Actually, I have downloaded all these material from
the free website that is
19. Add extra materials in the scene: Catch fab. Search for the browser tend. Here is a browser tend and simply once you
click Browser Stand, you can find it here and you simply have to
download it from here. Once you click
download it will ask you to log in first
and after that, you can download it. That's all. Once you download
it, you simply have to drag it into
your composition. How we can do that?
Let's download this one, download the model. AVX, it's up to you ABX GITF. I recommend AVS for now and
you have to save it here, save browser stand. Extract all here. Simple stab you have to take on. Now, audit Bowser stand. Here is the ABX file and you
simply have to drag it here. That's all. Right now
it's not working. Why? Because it is a zip file. We have to extract
this again here. After extraction, you have
to drag it here import. Once you import it,
press S and scale up. Now you can see
the stand is here. One example for a
particular object, you will find all these type of object. These are the object. You can find it in
Internet on this website. For this purpose, you
can find this exact file ready made file in
the resources section so you don't have to
worry about the object. You simply have to copy and paste it into your project
that's all and rearrange them. Now, as you can see, this is how you have
to rearrange them or one more thing you can do. You can also import
it directly from the. This is how you can import it. This is one way. Let's
import it again. Click this one, copy, and paste it into here. One more thing how you
can open two projects. This is important how you
can open two projects. You simply have to first, you have to create
a new project. After that, you
have to open file, this particular file,
this particular file, you have to open this one, Barracuda three model, or
any file you will find, you have to open the second file that has already been created. It will automatically
open in a new window. It's really simple
to do that and yes now our plasma is
ready and adjusted, this is how you can
adjust the rotation, select this one,
Control S, and save. Again, let's select this one and what is the
name of this one? This is Slander one
and slander two. Let me tell you how you can
actually import this one. First of all, you
have to understand what this project name, Theory Bagua three
meter vol drop, this is the project and
you have to simply drag this project here and it
will ask you to open. So you have to go to objects, all the objects
information are here and you will find the
Slender one and two, like this one here,
Slender zero and one. And once you go to
this in the object, you will find Sander 01 and 02. Once you select this one, you can simply append it. Once you append them, you can find it here. It's very simple to do that. A This is a second method. You can actually
append them here. Yes. That's SOL. Now, actually, this is the exact size you will
get you have here, you don't have to worry
about the size once you drag it here and also
for the ones like this one, you will have to sign the cube 008 and drag this one here, append object cube zero, search for the cube C. If we can find it or not, cube camera one, zero, one, I want it. I want this one also slender
I have already append them. Now let's append. Here is our both the camera and this is the cube
that I don't want it. Just drag it here. This is the cube that I wanted. Yes, I have right now, this one. Also, this is the camera that
I have already appended, this one is a camera we
have four cameras here. Let's delete this one, delete this one, press zero, and you will see this
is how it will look like and simply have to
drag it, select this one. Now select this one here and select this and
select one -90 degrees. Now, press zero. And you will see this is
how it will look like. You have to adjust the camera. Or you can actually
select this one, select this and adjust it
according to the camera. Why we have done this because
we have another camera. To reduce our workload, we have actually adjusted the main character
not our camera. S zero and see if
we find it or not. This is the camera that we have and press zero this one
is the third camera. Fifth camera we have here. This is the second camera. Yes, as you can see, this is the second camera, so we don't have to
adjust the camera. Here. A little bit,
we can do that? Yes. And also, you
have to adjust the size or rotation of
this particular table. Now we have done it
correctly and make it here and done it. Adjust the position
of the chair also. Yes, adjust rotation
of this one. Yes, we have created it. It's easy, but this is the skill that client want us to show them
in a presentation. This is what they want. It
is really simple to create. Also, they have a high bar. Let's see Cylinder 002, or we can copy and
paste it here. That's all. Done.
It's simple and easy. Let's change the adjustment
here and also one more thing. You can adjust it here, move this plasma forward and
press zero or press F 12. This is how it will look like. But we have something
important to adjust. That is, select this one, select sun and select
this material. And for this one, let's make it five
or let's make it ten and move it F 12. Yes, it's perfectly fine. You can see. It's I love this. It depends on you how
much you charge or how much client can give you
for this particular setup.
20. Use Gemini Nano Banana for presentation: So in the gemini upload
this image and ask, so the three D into real environment for client
presentation in ballroom. Generate image I have asked for. This is the image that has been generated and you can see how beautifully it has adjusted into the scene and you can
share it with the client. Let me tell you one thing,
client will go to love this. You will find all the information
in the resources panel, the objects, you will find it in the resources panel, and
also one more thing. Also there is additional
one more thing, Barracuda. This is the company
information and you can actually slack
this phase and this is the same exact method I have used to adjust
the Barracuda, like we have done this
for the back wall. With the Barracuda, once
you click UV editor, you will find the company logo and the background is white. The size of this table is
three feet and 2.5 feet. According to that, we have created this graphic
in the illustrator, like we have already learned
in our first project. Easy PC and after that,
thank you for watching. We are going to learn more
about in our third module. S in that module, thank
you for watching.
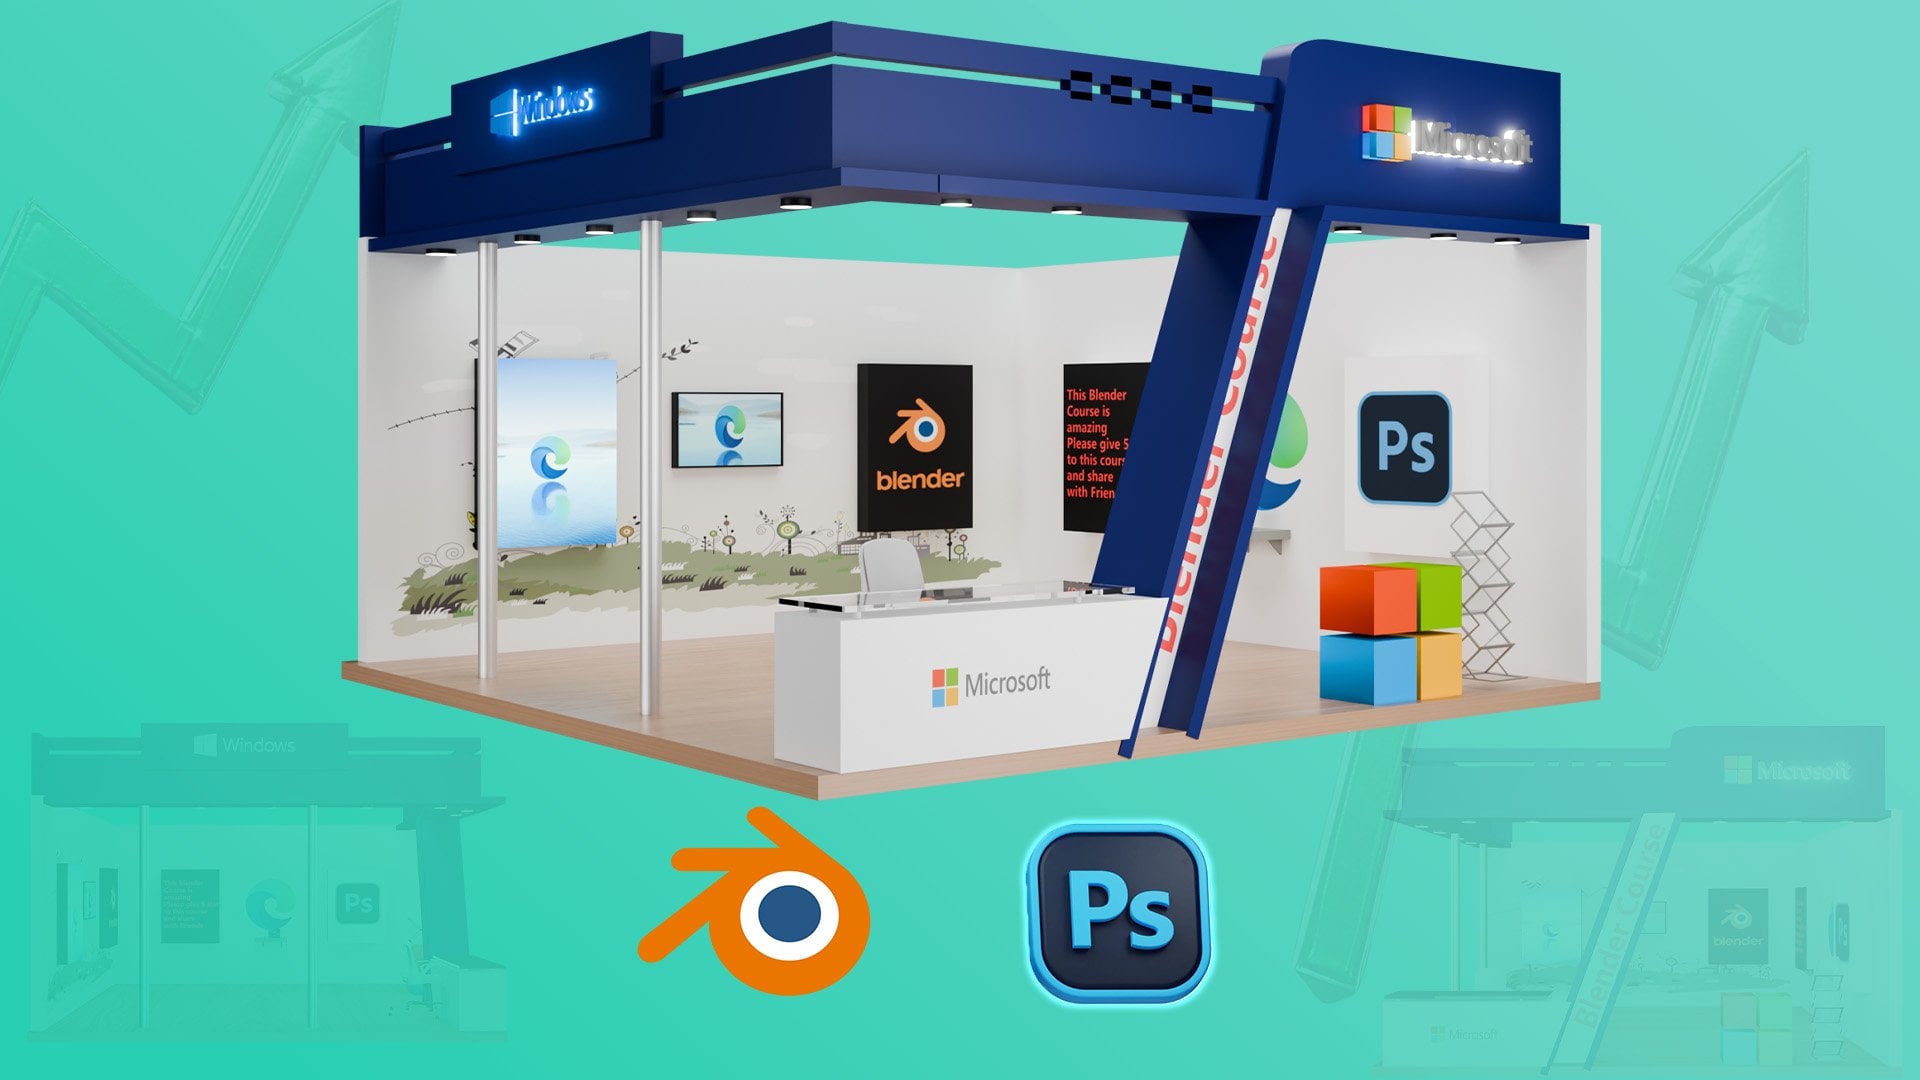
21. Understand 3 wall booth : In this module, we are
going to create this. This is a three wall booth. The demand of this booth is really high in
network marketing. If you are in event
management company, three booth is one of
the widely used booth in network marketing or in exhibition booth or
in any trade fair. As a graphic designer, it will help you a
lot in your job. Are you ready to level up
your skills to next level? Let's jump to the module.
Let's get started.
22. Create 3 Walls booth with texture: So we are going to
create three all booth, and with that, I simply open a new project
within the Blender, and right now, I'm going to
scene unit and Imperial, and I've selected and to feed. That's all. The client
has given me the details that I have to create ten X, that is ten width
and eight height. This is the wall I have to
create and for the depth, let's make it 0.3. That's all. With this shift D, right click, move to this side and rotate into Zadaxis
that is 90 degrees. This one is the difficult part, but I will share a tip with you a professional
tip, dip, right click. Yes. The wall has been created, but I want you to edit this wall alone and we will copy
this wall later on. While we are doing this, we will explain you later,
delete, delete. Now let's add a
backwall wall paper. Here is our three wall
paper that has been created by me and all
these information, images are given by the client. We have to simply go with the branding color
and we have to create the backwall using
the branding color and the logo that
they have shared. I've replaced the logo
with a brand logo. Right now, let's right now like always go to press
Tab, Indi Edit mode, slatwas this and in
the materials action, press, plus and new
backwall and assign it. Once you assign
it, you have to go to shading again
and in the shading, you simply have to here, drag it here and boom. Once you drag it here, you simply have to edit
it in the UV settings. Once you go into UV editor,
you have to select this one. Yes, this is selected like pace, right click, split
selection Y, that's sold. Now, you can see it
has been deselected. Now, what you have to do, you simply have to rotate and you have to check in
the rotation section. Yes. Anti clockwise 90
degree and the vertices. Now, slack this one.
Move, move it here. Slack this one. Slack, slate. Move it here, this one. Here. Now you can see the
wall has been created. Now what we have to do now, go to layout in the layout, go to material preview. Now, you have to duplicate
it now, right click, duplicate it, move it here, rotate into 90
degree, like this. No 90 degree. Let's
make it two -90 degree. Yes. And shipped D, right click, make it 90 degree.
23. Texture shortcut to add texture to other walls: We have three wall here. What you have to do
like this one with this lacti in the material,
make it duplicate. As you can see, the material
has been changed and you go to shading, change the image. Here, open it and you can
see it has been changed. Just like this,
you have to select this one in the
material property, duplicate, and now you have to select a
new material here. As you can see, a small tick and it will
save a lot of time. We do not have to
change anything. We only have to adjust it
the one wall, after that, another one, we have
to duplicate it and everything has been
automatically updated. Three wall booth has
been not completed, but 80% it's completed. Now, what you have to do, you have to add a platform here.
24. Add platform to the booth: How you can do this.
Shift D, right click, leave it here and now
move it further with this -90 degrees and bring
it down here as you can see, we have to increase it further. Let's make it ten
and bring it here. With this selected, again, we have to click this one
automatically created, and now you have to simply
adjust a new material here. In this shading section, you have to select a new material, what material we
are going to use. Now, you have to select this one and while
selecting this, let's select this one, open it. Now we have a floor here. This is the image that I
have downloaded from Google. You will find it in the resource section,
everything here. How I have created this,
this is a simple thing. I have created this just
like in the Illustrator, I have created it
in the oral row, as you can see, the size ten, eight, just like that, we have discussed the width
is ten and height is eight, and I simply created
it in the Coral row. This is a new software
where you can create a print file
just like Illustrator, it is very popular software in the print media and it's
widely used in print media.
25. Create fascia of booth: We have to add a facia here. But is facia, you will
get to know in some time. Now by selecting this, shift the right click, now, move it forward and
by selecting this. Let's make it with 1
ft and move upward. By selecting this, now, duplicate it by selecting this, you can add a specific color or you can remove it and
select a color here. I'm simply adding a color here. Now as you can see, we
have to add a table here, like we have discussed
how we can add a table
26. Creat table using simple method: Simply duplicate
it, right click, ship D, duplicate it, right click and move it
forward like this here, and you have to change
the dimension here. Three, 2.5 and 1.5. This is the dimension
for the table and you can see it has been automatically adjusted here or you can change anything here. It's up to you. You can change. Let's move it to X axis. Now, move it to Y axis. Into the booth and now
it had been adjusted. Now you can change by
using the same step, slack this one and you
can change image here. Anything you can
add, it's up to you. For this, you have
to create a image here with the width ten
feet and the height 1 ft. This is a simple task
for you to create. You have to add a chair
here, just like that, you have to find a simple
chair from the Internet and put it here just
like we did before. Also one more thing we can
add here, also, plasma.
27. Add plasma to the booth and laptop tray: To create a plasma here, your client may ask you to
create a plasma of 42 inch, 32 inch or 52 inch depending on their requirement
and the budget they have. You have to find the exact
dimension for the plasma. That is, 42 inch plasma
dimension in feet. Let's find it. You will
get the plasma size here, just like diagonal measurement, 3.5 inch, 42 inch. The range is 3.3 and 2.3. This is the idle size for the width and height
of the plasma. You can create just like that. By selecting this, right
click Shift D. Again, you have to copy this
one and move it forward. By selecting this one, you have to change the
dimension just like that, 3.3 and 2.3. So a small television screen has been created just like that. Very easy and you have to
make it here and there is a protep here that
you have to adjust all the content around the
plasma according to the brand. You have to keep in mind
that no logo has been hidden or cut out within the
plasma or just like that. As you can see, the logo has been cut it out
behind the plasma, you have to keep that in mind. Everything, the branding
and the spacing, you have to keep that in mind. After that, there might
be a second plasma. You can also change the
image here, it's up to you. Simply double click No, double click, simply click the duplicate and that's
all you have to do. After that, you can change
a new material here. It's up to you. It's totally
depend on your choice. I want you to share
exact copy with me with the new material so
that I can review that and give a review on that. Let's save this
one. Yes, save it. Now, what you have to do, client ask me to add tray
herir so that they can put their laptop or the demo purpose for
the demo purpose, they can add the laptop
here, press ship A, mash, cube, just like that, you have to bring it
forward and make it 1.2, 0.2, not 0.2 0.2 here, no. Let's make it 0.2 here, yes, width and yes, not 0.2, it's my thicker point. Let's make it 0.1, yes. It's enough. 1 ft. Let's make it two feet yes, no, I look way bigger. Let's make it 1.5, yes. Let's move it a little bit here. Again, you have to find a laptop from the
Internet and put it here. That's all you have to do. Here is a laptop has been added, a plasma has been added, the wall has been created, and the fascia has been created.
28. Emission to table and common light issue: The UV editor select fascia, the size of the wall is not
according to the fascia, so you have to create a new
fascia or a new graphic according to the dimension of the fascia and connect
it here, just like that. That's all you have
to do and you have to adjust in the UV section. It's really simple
to do that just like this it is just like that. That's all you have to do.
You have to add a chair. Now, everything has been done. Control S, save it
by selecting camera, press zero in num lock, as you can see,
this is the camera. What camera is looking at, let's make it here and
press Control Zero. Now, select here, press
Control zero and camera, this is the camera
is looking at. Now you have to change
the location of the camera a little
bit further, yes, yes. And one more thing you have to I think I don't
like this one. Again, in this sing section, let's remove this one, yes. I like the simple one,
or you can add a logo. In the camera with
this one, press a 12. As you can see, this
is the Rando view. We have to add a light here. B selecting sun, once
you select the sun, right click deletes,
click Shift A, light, again, add a sun, move it upward, and
in the rando view, you can see the stand, make it five or make
it 50, make it 500. Press F 12, not look
that much good. Let's bring the sun forward
and press F 12. Yes. This is the shadow once
you bring it here. At 12. Make it into cycle to cycle, make it GPU and let's see
what it will look like. Okay. Let the light
make it 100, no. Make it ten, at 12. It looks better. Let's make it. I have changed the
material property here a little bit
with the metallic. Let's make it a little bit down. Okay. And now with the render, let's make it to time limit, three second again,
and press F 12. Now it will not take so
much time for the render. Yes, it look better. Now, yes. You have to actually render two to three view for
this one so that you can actually show
the client what left and right wall look like
and the backwall look like. Now let's go here with this, select this one, shift D, right click and move forward
here by selecting this, you have to simply
select the view here and select the sun
part here and make it 20. By selecting this, let's check for the material
property here, the roughness, if
we have or not. I look dull image. No emission is not
working at all. Now let's select this one here, you can add a emission here. Now let's bring it forward
by slapping this one. Yes, now it's good. I have added the image
with the emission, it has its own
light or strength. Once you remove the light here, as you can see, once you
remove the light here, let's make it zero and you can see it has
its own emission part.
29. Area light and render view: Do not want this one right now. Let's press F 12. Save this image, saves, front view, save image. Also one more thing,
I believe that there might be some issue with the
material here, right now, let's remove this
material and add a new material here new and
with this one selecting, go to edit mode
in the edit mode, select the face, selecting
material, assign, and make it literally blue
with this one selected, press tab, select this light, right click, remove
this light in the layout, press Shift A, light area, I'm
using another light, make it forward, here. Increase the size or you can
press S by selecting this and press R and z, not Y, yes. Now, move it, scale it out
backward, increase, increase. Now, you have to
change the power here. Let's make it 2000
not 2000 too much. Me it 1,000 or make it 5,000.
That's all you have to do. Now you can see the light has been adjusted here and
also select this one as it has its own emission and the light has added
the emission here, it has its own emission. Extra light has adaptee
brightness of the emission, so we have to go to shading, remove the emission back to base with this emission
zero now layout, press F 12, you can see
it look a little bit dry. With this dryness, we have to
go to render in the render, go to Color management
with the selecting look, make it low contrast. That's all. Medium low
or medium high contrast. Now it's look
better, perceptual. No, not looking good. In the output section, make it color management,
follow scene. Now it's better. Let's check it out. It looks way better
with the camera and
30. Enhance the look of scene : Make it a little
bit backward and upward and back. Yes, B. Now let's press Af 12. Et's see what it will look like. Yes, the problem
has been resolved. Now let's add a
background here and you can see it looks uneven. So in the X axis, let's make it above the ground and now
let's again have 12. Now you can see all the small
things has been adjusted. Now let's cut it out again. With this one, now let's try to make it black because it looks actually
similar to this. We have to give it
in a shading mode. Let's make it a little bit darker so that we can now spot it out
that this is a plasma. Now the plasma has been updated. Now let's change this one. No, it looks better. Now for the second camera, let's make it camera one, press zero, what our
camera is looking at. Yes, we have to change the F 12. You can see this
is the side view. But I want it. It's just looking like a box. Let's beautify this scene, add shift A, mesh,
cube, S, scale. Now with this one,
press tab, sx phase, X, remove phase, yes, now tab tab yes, move it a little bit above
and with this one in the renerview let's make it E so that we can
easily edit out, press X and move upward. Yes, press Y, Z or X
xs, we have to move it. Into this ad. Yes. Now, you can
see it looks better. Let's make it a little
bit award again. Yes. For this, let's
move a little bit into, move it a little bit forward. That's all. Now press up 12. Yes, now it looks way better. Also, let's add
background press tab like this in the
materials section, new assign this one. Let's remember this
first material works on everything
and second material, you can assign it
to specific area. That's you have to
remember every time. So it's like this one. Now
after selecting this one, you have to add a
new, go to polygon, like always, use a polygon
and let's make it go to free. In the pre section, let's
see what we have right now. Let's try to apply
this one and go to shading in this shading, let's tap and scale
it down. Yes. Now it looks better and about the flooring tab like this one
in the material selection, let's try to add a polygon here, New polygon texture,
a Let's try this one. Now it has been applied
about the scaling, first of all, press
tab and you can see, and you have to scale it down. Yes, now fresh F 12, but before that, go to layout. Yes. F 12. Yes, looks way better. And about this view, view camera one F 12. Yes, it looks now better. About the third view, it's like this one, yes. Before that, shift D, right click duplicate
the camera, go to the camera view
and by selecting that camera, control all zero. Now camera has been selected. Now you have to adjust
the little dimension with the camera so that what
our camera is looking at, we can render it out further. Now let's press. You can see the render
view is amazing. Right. But before that,
let me tell you one thing. As you can see, the material
is not actually good. Let's click on the material
and make it a little darker. Let's see what it
will look like. It has been dark
from everywhere, make a little
metallic Roughness. Now press 12. We can simply add a
color of our choice. Let's make it a
little bit darker. So that it adjust with
the branding color. Now let's press F 12. It looks very eye catchy. You have to save it
save as side view. Now in this F 12, this
is the second view. Image, save as side to save
and about the front F 12. Front camera has been adjusted, let's adjust it a
little bit further and press simply zero. Who camera is looking at, you simply have to move it to the lab a little bit further. Okay. Yes. This is the branding
that we want to show to the client and move it little bit above 12. This is what our
client will look at. Now press Image saves front. That's all.
31. Complete Workflow for corporate client Create a basic layout and branding: Today I got a work that is of three D and
I have to create a three D setup and they have shed the booth should be ten
feet, eight feet height, and five feet depth and
it should have two plasma of 42 inch and one long
table into the Blender. Let's open this Blender. I have opened the Blender. Let's delete this
one. Always let's create amazing booth
for our company. I know you have already
mastered the booth. Right now, how we can actually
create the booth here. This is a simple booth
that has been created, but right now we are going to change the dimension of this. This is a simple booth
that has been created, as you can see, like always, I have created this box, you have already
learned how to create this box and using polygon, how you can texture it out. This is a simple booth
with backdrop and plasma. Is not a hard thing to do. I have simply change it to black color and for
this dimension, it is very important and it is crucial how you can manage
the dimension here. Right now, how we can create this dimension and
you can see this is 3.05 feet and 1.72 feet. How we can change
the dimension as we have already discussed
in the scene setting, you have to change
it to imperial and within the imperial, you have to change it to length. Feet. Now let's go to feet 42 inch plasma
dimension in feet. This is the dimension
that is 3.3 to 2.4 and width and height will be
I am using 3.4 and 2.2. This is the feet
and 3.3 that I have to change and 2.2.
This I have to change. So this is the plasma screen
I am using right now, and I have to change
this dimension to specific dimension
that has been given. That is the wid should
be in ten fit and eight, the wid should be
in ten and 81085, ten feet, eight height, and according to platform, it should be around
same ten feet in width, and it should be around
five feet in depth, and it has to be
taken down to here. Let's bring it down here. Okay. So this is the dimension
that has been given, and we are going
to use two plasma, one long table, and let's
bring it down to left. Let's bring it down to let and let's bring it here in
the wide direction, bring it backward,
for the chair, let's bring it down and X wise in the X direction
minus not plus X diaxon, let's bring it here and
in the wide direction, yes, it's perfectly done. Now we have to add
two plasma here. This is the plasma,
let's bring it here. Ship D, right click. I will go to its original place simply, but it's duplicated, bring it here in
the X direction, you can see in the left
hand side and right hands. The length, the area
and separation length should be same. Now, as you can see,
it's perfectly fine. And for the platform, let's go to polygon
in the polygon, search for the free element. Let's add a black texture. Let's apply it. It's fine. Now for this one, I have a branding that
I have already created. This is the image that this is the setup that already
I have created. I have to use this
branding here. For the table, I have
this brand we have to check for the area that has been left for the walking area. It should be a
walking area here. I think I have to change the dimension of this
a little bit here. Let's try to make
it two feet and, 2.5 feet and let's make it
1.5 feet, for this, yes. For this one, let's bring
it here or we can say, let's bring it to the front of this area. It
should be around there. Yes, a little bit forward. Now let's try to
add branding here. For this purpose, I have
to change this branding to new branding that is in feet and it will be approximately with two feet that is
two feet in width. Actually, I have
accidentally pressed Enter and I think
I have to change the dimension here also and
2.5 feet here, 2.5 feet. Yes, perfectly fine let's
copy and paste it here. Let's make it to change and 2.5. Yes. Yes, t. Now, ship control G. Let's change it above.
Let's bring it above. Simply, I have changes to
0.1, it will pressing. I'm simply pressing page up
page down button, that's all. Or you can simply
drag it down here and this is how you can
arrange it to the middle. Now let's select this one, press Control plus E, E for elephant and in
this specific area, let's save this one, press table, branding,
let's name it. I have to at this specific
dimension here that is 2.5 feet width and height. This is the universal that
for the first number, it will be considered at width
and for the second number, it will considered at height. Let's export this one as JPEC and reduce the size
of it a little bit. Done. It has been exported here. Let's see if we got it or let's see where
we have saved it. I think we have saved
it in somewhere else, I believe might copy, JPEG, export 20 years. I think we have somehow
saved somewhere else and I forgot to see
where I have saved it. Let's change the dimension
of these two us five. Let's copy and in here
in shading panel, like always, let's select
this one, select select. As you can see, it always
been created for this one, we have to generate we
have to create a backdrop here because a backdrop that has been created now
has been changed. This is the older. This one is the basic layout
that I have created and right now we are creating
an advanced version. That is ten feet off. So let's create a backdrop here with which one is this
one is the final version. We have to check this one, this one, and this
one, this one. Okay. So we have to check
for this one right now. This is the one backdrop backup, and I think this is the final version
that we have created, and let's open this up. Let's copy this one in our You will get
all these files for your practice so
you don't have to worry about the logo or video. Now again, table branding
is done and we are about to create the making of
the description panel. Let's delete this one. There is no pack up I needed. There are two standard
that have been created. I have already been created and I'm going to create
a booth here. For booth A for booth B, how many booth will be there? There is only one booth and
I have to create booth. Right now, let's create image by using this
specific booth. Let's try to change the
dimension of this booth to specific of ten d and it height. For this purpose, I'm
using 0.5 extra. Why? Because it will be on flax. For the flax purpose or
for the booth purpose, there should be an extra
margin of three inch in both side by calculating
three inch plus three inch, it should I feet 0.53 inch this side,
three inch this side. Plus three plus three, it should be 0.5 in feet. You can calculate in Google, already been creating
this thing for so long, so I know exactly let's
create a backdrop of ten feet a tight with
three inch bled each side. This would be the name
you have to put lets. Okay to create these
both options for them. Client has asked me to
create a both option. Let's edit this one. For this one, let's all cut, finish and this is the power
inside, Power clip inside. This is the oral row. I'm just sharing you the option, how you can actually
create the Power clip here and in the object panel, Power clip create
ampityPower clip that you have to select. This is the step
that had been taken, so I'm not, actually, you can see it is disabled so I have to change
the dimension here. Lock is on, let's
bring it here 10.5. It should be 10.5 according to the canvas and for this purple, let's double click this
one and paste it here. Now you can see this is the exact dimension that has
been created and I have to. First, I have to actually the
dimension of ten and eight, and I have to bring it here
so that I can add the margin. This is the margin so that I can separate the margin from the actual
view of the canvas. So that during the
print process, our main object should not cut. Let's delete this one. Yes, the film that
I have created, and let's bring it here. With this one, let's
bring it here and here. Okay. And with this one, I have to 0.1, I have simply selected
this nudge distance, but what we call nudge
distance, let's yes. Now you can see, yes, and now let's finish this one. No. But one more thing
we have to adjust here, we have to check the
This is important. We have to check
because the client has asked me that we have to check if 42 inch these both plasma should not cut
the area of the image, so I have to adjust the
image according to that.
32. Create plasma design change as per client description: So let's see this says the
three point A and 2.2. Let's create 3.3. In two D night now I'm
checking in through in two D. Lets 3.3 No, it's not working, there might be some problem. Yes, I have to select this
one and let's 3.3 and 2.2. Let's change the
color to light gray. Let's bring it here
in the middle. Now let's see if it
will work or not, ship D to shift copy and paste. Control C and Control V, that's all I have done. I think it should not
cut the image here. This is the same dimension. Let's see. Yes, it's
actually not working file. We have to change the dimension
of this a little bit. Let's decrease the size of it. Finish. Let's decrease the
size of it a little bit again, add it and Yes. Let's finish this one, yes. And I believe there
might be some problem. Let's bring it left to the left and to the
right a little bit. We have to check the
dimension or the area. Yes, I think both are similar. Let's see if it's
working or not. Let's make it white. Yes, this is the same area and I think I think it should
be in the middle. Yes, cool. Let's make it a little bit
towards left towards left. Yes, let's delete this one and let's bring it a
little bit forward. Yes, finish it. Now, let's see if it
will work or not. Now I have to share
both the options here. Let's duplicate this one, duplicate page with
the content here, and I have to create same step I have to
take for this one. Let's copy and paste
it here and add it. Let's delete this one paste it here and I have to
extract the content from it. This is the shortcut,
let's extract the content. Now delete this one. Simply control ship plus click. You have to take and cut this is the thing
that I don't want. Let's finish it,
add it and paste. Let's group this one. Control plus G group. Now let's bring it back and simple click this one and
select this to the black. This is the thing that
I don't want right now. And let's see if
it's working or not. We have to adjust
the image here also. For this one, let's
select the area of this and select edit. We have to keep this is the separation and
so we have to keep the image of this
one to the yes. Yes. This one is perfect, a little bit to the right, right click, ungroup it. Sorry, right click, ungroup it, and click this one to the left. Yes. Now let's finish. Now you can see this is the
image that has been created. Now edit and let's move to
the upward, finish it, cool. Now the image that is like
this one, with this one. Now, it's looking better. For this purpose,
let's save this one Let's save this one here. I have to hide both of these in the object in the window docker
and find the object data. This is the object. I have
to hide both of these, and I have to hide
both of these here. Ind, yes, here, I have to hide. It's done. Now let's export this
one, like we always do, Control E is a
shortcut and export, I have to reduce the
dimension to 20% or 10%, make it 10% and press
for this one, select, control E, and export, I think the same name. Let's press two here and
let's make it to that. Ten, done. Now, both of these
are exported here. As you can see, 466 MB. Now let's for this one, in this adding mode, let's
select the image here. First of all, like this
one, as you can see, it's already been
created but we have to adjust the
dimension of this one, let's adjust to the upper area towards upper side and here's
the tray in the middle. Here's the tray in the middle. For this one, this is the
perfect one and for this one, for this one, let's change it to press tab, select this area, and for the polygon
in the free section, let's make it a little bit. Apply. Yes. Let's see if it's
working or not. Yes, it perfectly fine. In this shading mode,
let's go to cycle. Yes. For this one, yes, everything has been computed and for this one, press F 12. Let's see if it's
working or not. Yes, it's working fine, but we have to change
the area of this one, press tab, select this one, press zero, and bring it here. Let's press F 12. Yes, it's fine, but
I think I have to check for the output data. It should be AGX should
be I think standard. Yes, high contrast, very high, no, very low, no, medium high. Okay. And exposure. Gamma. Wide balance. Nope. Remove this wide balance. Let's press F 12 if
it's working or not. Let's save this one. One, save images
and cut this one. This is what we got. Cool. This is the booth
that we have created, and this is the booth that our client has asked to create. All this file you will get
in your project section. This specific thing
you have to go to shading and in the
shading like this one, by selecting this one, you
don't have to do anything. You simply have to drag
it the image here. Let's drag this image here
and simply replace this. Now you can see it
only been replace updated file and now
you can press F 12. Now, this is the
thing that you can do right now and now
that's what you can do. You don't have to do anything. That's all you have
to do. Everything is done. S in the next lecture.
33. Project: For class project, I
want you to create these three designs
that we have created. First, the stage design, second, the backwall booth design, and third, the three
wall booth design. You simply have to follow all the steps that has
been shown in the class. Once you create,
you simply have to render the image and share
it in the project gallery. I would love to see
what you have created. Same the next class.
Thank you for
 Karan Rathore, Creative Technologist: Video Editing, AI, and 3D