Transcripts
1. Introduction: What to Expect From This Class: You are about to cook
the best poached eggs. If you're here, you're
trying to accomplish one of the most sensitive
cooking techniques in the history of cooking and that is only a slight exaggeration. This course experiments with popular techniques
and explores when and why they may or may not work and you'll decide
which one works for you. But we don't just cook
eggs in water here. We'll also cover some of the most classic egg
dishes where eggs are softly cooked or covered in sauces and spices
and even wines. I'm also including eggs
en cocotte in this class, because the end result
is the same even though technically poached eggs means the eggs are cooked
directly in the water. You don't have to finish the entire course to
start experimenting with poached eggs and
you don't have to consume the class in a
specific order either. Also, I cut some corners and I make suggestions
for making some recipes more
approachable so you're more likely to
actually cook them. I am actively around so
you can ask questions, make suggestions
and observations, and just otherwise engage over this weird shared
obsession with eggs. To get the most
out of this class, it's helpful to have
some cooking experience. But only just to know how
to change the heat level on your stove and to own a few
pots and pans and utensils. The goal of this
class is to give you the confidence to cook an
egg in any liquid or sauce. So you can experiment with whatever you have on hand
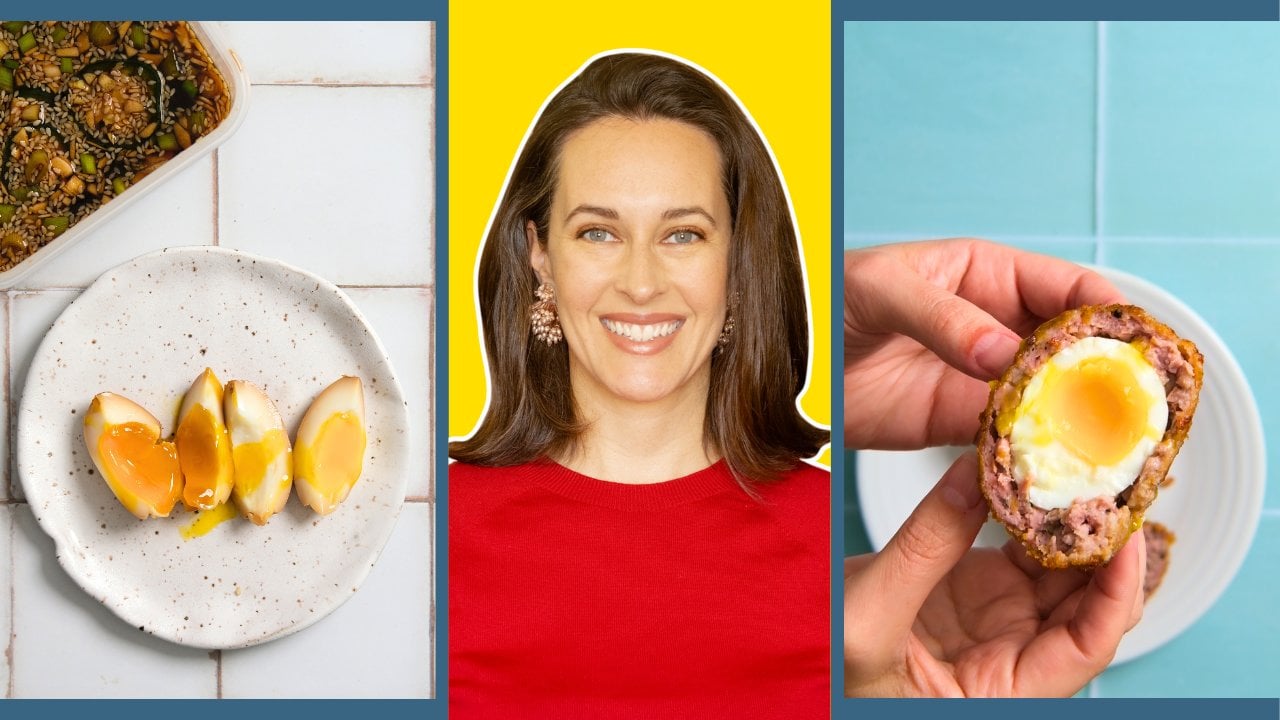
and always have a cheap, nutritious meal ready to go. My name is Jenna
Edwards and I produce a cooking YouTube channel,
Cooking Companion TV. I think everyone can
enjoy cooking at home. My goal is to introduce
you to new foods, flavors, and techniques, especially when it connects us across cultures. I'm not professionally
trained so my teaching style is from
one home cook to another. This is part of a larger
series about cooking eggs. I eat everything I cook. It takes me some time to
cook all of these recipes and not get tired
of eating eggs. But I will regularly
update this class with new recipes as I become aware of them so keep
an eye out for that. With that, let's
get right to it.
2. Project Introduction: Your project for this class
is to poach some eggs. Go figure. You don't
have to wait till you're finished with the
class to start cooking. You don't have to consume the class in a particular order. I've arranged it in the
most logical order to me, and I may mention a technique that's featured in
another recipe, but you can skip
around as you like. To get the most
out of this skill, I recommend starting with
a basic poached egg. Choose one of the techniques for getting smooth
whites and try it. Try all of them. Get a feel for which pan
you're most comfortable with. Do you like the
vinegar addition? Because you happen to like
the taste of vinegar. Do you not care about
smooth whites at all? Then try something new. Rummage through your pantry, see what you can pull
together with what you already have and go from there. I expect to see a lot of shakers because since you can throw
literally anything in there, you just basically
need can of tomatoes. Then upload a photo to
the project discussion so we can see what you did and take note of
how you made yours, any substitutions or
additions you made and what you do
differently next time. Now for some advice, expect to get it wrong at first. Even I can research recipes. I think it's a piece of cake. I'll get this on the first
try and then mess it up, I have to try a couple
of times to get it, and that's the purpose
of the class project. It's one thing to know a recipe, it's another to
build the actionable muscle memory for it. Hopefully, I've made the
food looks so delicious that you can't wait
to make every recipe, so jump in and start poaching.
3. Classic Poached Egg: Let's cover the
three ways to poach an egg. Let's get
down to business. We want fully cooked
whites and runny yolks, or at least soft jammy yolks. Getting this delicate balance is the art of poaching
an egg properly, along with the smooth egg whites without all those
wispy flyaways. Here, I've plated them over some leftover cauliflower rice, because the leftovers are my favorite way to carry
a perfectly poached egg. The first note for
eliminating or producing the flyaways is to use fresh eggs as fresh
as you can get them. Fresh eggs have
tighter egg whites. When you crack an egg, you can see two textures of whites. The ones that stay close to the yolk and hold their shape, and the ones that run away. We see this most easily
when we fry an egg. Well, this also
matters when poaching. As an egg ages, the
whites will loosen, so older eggs will have
more looser whites and younger eggs will
have more tighter whites. We have three techniques for
taming the loose whites. Let me just point out that these techniques are strictly
for aesthetic purposes. Loose whites are still
perfectly edible. They may be a bit of a
hassle and certainly aren't as pretty the
plate as a solid shape, but they're still good. It doesn't mean the egg
is bad, or spoiled. I'll start with my preference. Straining away the loose whites. Crack an egg into a fine
mesh strainer or sieve, and let those loose
whites drip into a glass or a bowl
underneath the strainer. It only takes a minute or so
to fully strain them off. What you have left is the whites that will hold their
shape when cooked. Those are the tighter
whites I'm talking about. Transfer the strained
egg to a small bowl, or a ramekin to drop
them into the water. Otherwise, you'll cook
the egg into the strainer and it's more difficult
to clean the strainer. When it's ready to
come out you'll notice very few flyaways
floating in the water. We have in nearly perfectly shaped white
surrounding the yolk. For the next experiment, I'm going to use the same
water since it's already hot. Another popular suggestion
is the swirl method. No straining, just
crack the egg into a bowl and when the water
reaches temperature, you make a small
vortex in the pot, or pan and drop the egg into
the center of the vortex. The movement of the water
should keep the whites from roaming around the
pot and in theory, they'll cook together
into one solid shape. Well, you can tell me
what it looks like, but technically, the
whites held together. They are still a few flyaways
floating in the pot, but they aren't like
those ghost in trails, they're floating off of the egg. Now I may keep experimenting with this one because it feels convenient to not have
to strain the egg first, but it also only works
for one egg at a time. If you're cooking
more than one egg, you have to cook
them separately, or use another method. The third popular suggestion is to add vinegar to the water. Now, some feel like it
adds flavor to the eggs, which may not bother you if you'd like the flavor of
vinegar and other say you need a fair amount of
vinegar to affect the flavor and you don't need that
much to tame the whites. I added just under a tablespoon of apple cider
vinegar to the water, cracked my egg in a bowl, and slid the egg into the water. It worked and it didn't. The flyaways cook together, so that I could at least scoop them all out
together with the egg, but they definitely tried
to do their own thing. So I ended up with
more egg to eat, but it's not nearly as
pretty as the others. You do have to use a light
colored vinegar for this, so no red wine, or sherry, or balsamic vinegar,
just distilled white, or white wine, or even
apple cider vinegar. You can see for yourself the pros and cons
of each method. I'm sure there will be detailed circumstances
that warrant the use of one technique
over the others. But at least now you have a visual of how each
technique works. Let's talk about the actual
cooking directions that apply to all in any
of these methods, you need a pot, or a
skillet either one is fine, but it really depends
on how many eggs you're going to
cook at one time. The water should be
2-3 inches deep. If you look up the
directions online, you'll find that the
water temperature should be around 180-190 Fahrenheit, which is 82-88 degrees Celsius. Use a bowl, or a ram akin to slide the egg in rather than cracking it directly from the
shell into the hot water. This helps keep the egg together so it cooks together
more uniformly. If you've ever noticed how the whites behave when
you crack open an egg, they like to drip, or simmer in their own time. We're trying to get
everything to cook together. Don't crack it directly
from the shell. The general consensus is to let the eggs cook
for 3-4 minutes. I'm just going to use the
same water here since it's already hot and I let
this cook for four minutes. The yolk is overcooked
truth be told, I wasn't timing it and
I lost track of time, maybe three minutes would
have been just right. These are my two eggs I cooked at the recommended
water temperature. One was dropped in straight from the egg and cooked
the swirl method. The other was strained
and put in with a bowl, although it's overcooked, I'll demo my favorite way to
snack on a poached egg. It's with super good olive oil, a little salt and pepper and then you to put up with
some toasted bread. Now for my personal method of cooking based on
more visual cues, because I remember that
better than technical cues. I bring water to a boil and
then reduce it to a simmer. How I remember it as the
water should be just active enough to keep the egg from floating straight to the bottom, or I should say
stinky straight to the bottom and just
sitting there but not so active and bubbly
that the egg gets tossed around like a
plastic bag in the wind. Honestly it sinks to the
bottom anyway because the egg immediately cools the
water when you add it, but that's just how I remember the visual cue of what the water
should look like. That almost always gets me
pretty close to perfect. I use a spoon to gently flip my eggs as soon as
they're in the water because I have had them
cook to the bottom of the pan and then they break
when I tried to remove them. I always very gently just try to flick it away from
the bottom just a few times so the whites can start to set without attaching it
to the bottom of the pan. Then I let it sit there for
a little over a minute, but not quite two minutes. I just watch it
dance around and I study the whites to see when
they're looking opaque. It's not something
to walk away from. Sometimes I gently
lift it to check on the whites and if it's
close but not quite ready, I turn off the heat
and I let it sit in the hot water until I
think the whites are ready. Like I said, this took just
under two minutes to cook. The water is hotter than
the technical directions, more around 200 degrees so
the eggs cook more quickly, and that may produce a more
firm egg white that way. In general, I'm okay with that because what I really
want is that runny yolk. We've gone over three
major recommendations for getting smooth egg whites. Straining, swirling,
and adding vinegar. We've seen to cooking methods a technical approach
and my visual approach. Now do a little test to see
what's comfortable for you. It only works if it's
something you can remember and can consistently
replicate. Go poach some eggs.
4. Poaching Multiple Eggs, In Advance, & Reheating: Let's poach a whole
bunch of eggs. This video was a
lot of fun for me and I learned so much. Let's get to it. If you want to poach
more than one egg, whether that's for guests or just a prep your
meals for the week, you're somewhat limited
in your options to get those smooth whites. Or are you? First I tried my preferred
method of straining for eggs and I did it
in a medium strainer, rather than watching one
egg at a time drip out. Eggs won't mix together, they will stay separate,
so this is fine, except the whites attached
to the mesh and yokes pulled away when I went to
separate them into ramekins. That was weird. We'll get back to that, I filled a skillet with
water almost to the top, about one-and-a-half inches deep and I brought it to a simmer. Hindsight, I think the water
could have been hotter and this is where you
can see the yolks trying to wander away
from there whites. Now, I'm trying a
new method I read about on food52.com, where at this point you turn off the heat and cover the pan and let them sit for
at least 10 minutes while they slowly cook. For some people, this is
going to work out gloriously, for me it failed spectacularly. The whites are very
soaky and I guess I could have turned
the heat back on but I had already moved
on to another technique that is much more intriguing. Right before I
started filming this, I ran across another video by epicurious.com
about poaching eggs and I decided to add it in. Let me just say how
defeating it feels to think I've been super
thorough with techniques and recipes for this class, only to find some new
tidbit of information, nearly every time
I'm on the Internet. There is that much
information out there and we still cannot come up with a foolproof way for everyone
to poach an egg perfectly. Bygones, I'll move on. This next technique is fairly
close and it's science. We will take a one-to-one
ratio of water and vinegar, distilled white is fine
and what I'm using here and crack the eggs
directly into the mixture. Here, I'm using one cup of
water and one cup of vinegar. Let it sit for 10 minutes but no longer than 10 minutes and the acid will start to coagulate the proteins
and the whites, keeping them together
for the cooking process. The video I watched recommended swirling the ball every now and then to keep the vinegar distributed evenly
around the eggs. Now, this is the first
time I have ever heard anything like this but for the comments section
of that YouTube video, it seems to be a
very old technique that's been more of an
oral tradition passed down rather than a common
place culinary tradition and I find this
stuff fascinating. After 10 minutes, you should see the
eggs looking a little opaque and you can see the clearly defined
lines of the eggs, this is so cool. Our water should be
at a simmer again, more active than
what you see here. I rushed in because
my eggs had been in the vinegar mixture
for over 10 minutes but you should
have small bubbles coming to the top of the water
and you should see steam. Also, this chefs
suggested making the water 3-4 inches
deep in a pot, and they cook for three minutes. I remove two of
them at two minutes because I wanted to demonstrate how to reheat them later on. Part of that process means slightly under
cooking them first, they get removed and covered in ice cold water to stop
the cooking process. My remaining egg is the
most perfect I've ever made and it's wild how
the strainer isn't printing the pattern
onto the whites. Now, let's inspect. The whites are cooked through and the yolk seems to
still be molten and soft. Oddly, the bottom and the
sides are a bit stiff, there's an edge. Let's cut it open. I mean, that is some
gold right there. There's a tiny bit of
watery white that came out, which means the whites
hadn't fully cooked but they had mostly cooked. I'm going to take
this one as a win. Let's check out one
of the other eggs. It also has a stiff
bottom and edge and I can see the whites look
overcooked on the bottom, even though they only
cooked for two minutes. So I suspect this is part of
that vinegar coagulation. Maybe it's because
I left them in a couple of minutes too long or I didn't stir the vinegar
and water together enough. It's fine, I'm just being
curious here at this point. Now that I've tried
this a few times, here are my observations. First, the eggs don't absorb any vinegar flavor
with this technique. Surprising. Second, start heating
your water a few minutes before you soak the eggs. If your water isn't ready
at the 10-minute mark, the eggs have nowhere to go and they have to stay
in the vinegar mixture and that's, I think when you'll
get that over coagulation. Third, try a little
to remove the eggs from the vinegar solution, they are still raw eggs and can still run
through the slots and a slotted spoon or strainer. Forth, this works with
just one egg too. I tried it with one
egg in a ramekin. I use two tablespoons of vinegar and two tablespoons of water. It is still difficult to remove
the egg from the mixture so it can go into cooking water but you could just pour
everything in the pot. There's nothing wrong with that. Fifth, try to use something with a flat bottom so the eggs can spread out a
bit more than mine. You may not need as much water and vinegar that way either. Not only is this technique
scientifically interesting, using an acid to cook
fish for ceviche but you can use it for cooking multiple eggs at
one time easily. At first, I thought
the 10-minute wait was a bit of a hassle but you have to
wait for the water to come to temperature anyway, so it really doesn't add
time to the overall process. I cannot wait to hear what you
guys think about this one. Briefly, when you want to
reheat a pre poached egg, you have a couple of options. I like to bring water to a
near boil or run the water from the faucet at its hottest
setting, which of course, depends on your settings
and cover the eggs in the hot water for a
few minutes after they'd been removed
from the cold water. This method is just hot
enough to warm them up but not to cook them more
than they should be. It took me 5-8 minutes or you can just keep trying
to stick your finger in there to test the temperature. Another option is
to bring water in a pan to a pre-simmer
just when the water is moving around and there's
steam but no bubbles and add in the eggs and let them sit there for a
couple of minutes. It's that easy. Let's keep going and I'll
see you in the next lesson.
5. Eggs Benedict-ish & Eggs Florentine: Eggs Benedict-ish,
and eggs Florentine, classic brunch dishes that are impressive mostly
because of the sauce, and well, and it's
a poached egg. The interest of keeping
this approachable, I'm making some alterations
to the classic recipe. Instead of a Hollandaise sauce, I'm demonstrating
a Mornay sauce. Do you not know the difference? Good. That's the point
most people don't. Also, there's more to do with leftover Mornay sauce than Hollandaise, so
better all-round. The best strategy for all the moving parts here
is to start with the bacon. Actually, this is
another shortcut. I'm doing sliced deli here, but I'm also being gluttonous by pan-frying it in a
tablespoon of butter, which was decadent and
unnecessary but delicious. I use medium-high heat to get
it brown in a few places, and I should have
used a wider scale, and I do this all the time. I just didn't feel like
the extra cleanup though. Once that's done,
let's make the sauce. Melt two tablespoons of
unsalted butter over medium heat and add one
tablespoons of flour. I added two here,
but if you want a thinner sauce, just do one. Two tablespoons, or even up to three
tablespoons is great if you want a thick sauce to
replace ricotta in lasagna, which is a delicious decision. Let this cook together for
two minutes to turn golden, minus brown already, because I used the same
pan I cooked the Hamon, and it's picking up some
of those brown bits. That was deliberative me. Now we slowly pour in
milk, or half-and-half. I'm using whole milk. You need fat for the sauce, so don't even try skimmed milk. We'll use two-and-a-half
cups of milk. Bring it to a simmer,
and keep whisking regularly for about 10
minutes so it can thicken. If you cook it too much
and it over thickens, you can use more milk or
water to thin it out. After 10 minutes,
remove it from the heat and stir in one cup of
grated Parmesan cheese. This should have been sifted. It's making my sauce lumpy. Also give it some seasoning, like a pinch of nutmeg
and a pinch of cayenne, obviously salt and pepper, and for an extra
bonus, lemon juice. That's right. Lemon juice and milk, ladies and gentlemen, it
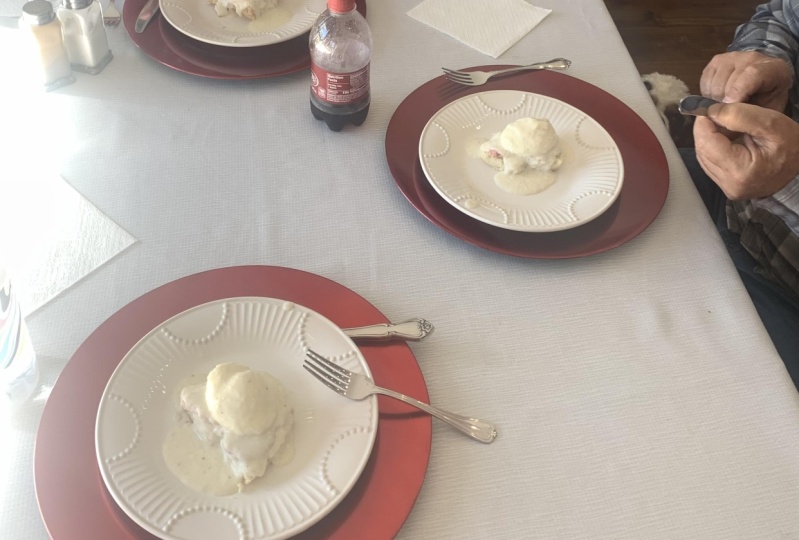
works, and it's delicious. Now, we can cook the eggs or reheat them as
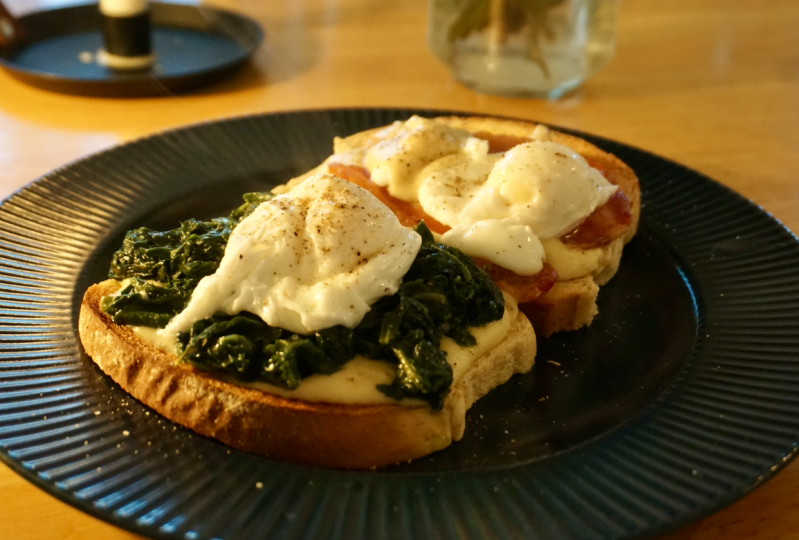
was the case for me. Let's stack our dish. I've toasted some bread, layered on my ham,
got my beautiful egg, and we pour the sauce until we can't see
any of it anymore. If you had chives or parsley, that would be lovely,
but why wait? Let's see that egg. It is gorgeous and delicious. This is one that I
precooked and reheated. For eggs Florentine, we'll use the same sauce. For two eggs, I'm using three
ounces of frozen spinach that's been thawed. I need to squeeze
out the extra water. Basically down to a
quarter a cup of spinach. I've got half a tablespoon
of ghee in the pan on medium heat to
warm up the spinach. You can add in shallots,
or garlic, or mushrooms, or whatever, to get you
to like your spinach. But stir in about a quarter
cup of the Mornay sauce, and heat it all up, and then cook or reheat
your egg, and let's stack. Toasted bread, creamy spinach, perfect egg, and more Mornay. With all that extra
Mornay sauce, you can use it in lasagna, or toast it with some pasta, or pour it over salmon
or other vegetables like broccoli or
roasted cabbage. It's good for a few days, so make the most of
it while you have it. This is why I chose it over Hollandaise for
this demonstration. It's easier to make, it's
more stable as a sauce, and there's so much more
you can do with it. That's it for eggs Benedict-ish,
and eggs Florentine. I'll see you in the next lesson.
6. Eggs en Beaujolais: This is eggs en Beaujolais
by Paul Bocuse, the father of nouvelle
cuisine cooking style. It's a solid example
of poaching eggs in something other than water. The first thing I'll
note is that the recipe is posted on foodnetwork.com and it has disclaimer
that this recipe has not been tested
for home use. That tells me that
there's going to be some nuanced techniques that obviously chefs in high
places know to do naturally but they probably glossed over when they wrote it
for the website. Just keep that in mind. We start with a beurre manie, which is equal parts softened butter and all-purpose flour. Here we're doing it with
two tablespoons of each. You just rub them together
between your fingers until it's smooth and broken
into pea sized pieces. I've also seen this
technique used in a buff bourguignon and
it thickens the sauce. Melting other two tablespoons
of butter in a pot over medium heat and
add 12 baby onions. These are actual baby onions and I don't think the recipe
is referring to pearl onions, otherwise, they would have
specified pearl onions. They do need to be peeled
before they're cooked. Now the recipe just
says cooked to color, so I'm cooking on
medium heat for a few minutes on each side
to get that nice browning. By the end of this, they've
also softened enough that I can cut them in
half with my wood spatula. Now you don't have to do that. I'm not saying you should. It's just a reference as to how well the onions are cooked. Pour in one entire bottle
of Beaujolais wine and add a bouquet garni, which here is one celery stalk, one sprig of thyme, the white part of one leek, a quarter of a bay leaf, and one crush clove of garlic. Now when I buy celery, I pre-slice the entire bunch of freeze everything like this, so you don't have
to slice yours, I'm just explaining
why mine is sliced. It can be just one entire rib, and the same thing
with the leek, it doesn't need to
be sliced because we're just building
aromatics here. Increase the heat to
bring this to a boil, and then lower the
heat to a simmer for 20 minutes uncovered. After 20 minutes,
remove the onions and the bouquet garni and strain
the liquid through sieve. Return the wine to the pot, and return it to a simmer
over medium-low heat and add the eggs one at
a time or altogether, if you've got that
technique down. I strained each of them
for cleaner aesthetic, although somehow I broke a couple of yokes
in that process. Also this is the
experience that taught me to transfer the
strained eggs to a small bowl rather than dipping the strainer into
the poaching liquid. They will poach for no more than four minutes in the wine. The full recipe calls
for eight eggs, but you'll need to
poach them four at a time in two batches if
you're doing a full recipe. It suggests placing
the cooked eggs on a plate and covering them with aluminum foil while the other batch cooks
to keep them warm. Once the eggs are removed, add the buerre
manie to the sauce and bring it all to a boil
and whisk constantly. Season with salt and
pepper, of course. The buerre manie will
thicken the sauce and it'll give the
sauce some body. It should cook in smoothly, which is why you have to
whisk the whole time. Now if you want a thinner sauce, you don't have to
add this to it. It doesn't do
anything for flavor. You can strain the
sauce in case there are any egg pieces
floating around too. For your toast, we
will rub a piece of raw garlic on the bread before
placing the egg on top. They are a bit ugly
poached in wine, and there is an
aesthetic case for poaching the eggs in
water instead of wine, but then they don't share that
same flavor as the sauce. For me the sauce is a bit thick and I think I would skip
the buerre manie next time. Maybe I also simmer
the wine a little too aggressively and
reduced it to much. Regardless, the flavor was fine. It really didn't blow my mind,
like I was hoping it would. Maybe that was the
wine that I used. But once you start reading about eggs cooked in red wines sauces, you'll learn about a
couple of different dishes and how they vary from
region to region in France, even when they go
by the same name, including just like
a city version versus a country version. With this dish, I hear that in the country versions
they tend to like their sauce much thinner. Like soupy, like you eat
it with the spoons is probably not as buerre
manie if any at all. This just gives us all
a wonderful excuse to go travel around France and trying all their different
eggs in wine sauces. That's it for eggs
en Beaujolais. We'll see you in
the next lesson.
7. Eggs en Meurette: Ouefs en meurette, poached eggs and a bourguignon style sauce. There's a lot of steps to this, so it's something you do well in advance of whenever
you want to eat it. It's a feasible sauce, so you can separate it into smaller serving
sizes for later use, which justifies all
the effort it takes. If you've had both
bourguignon before, this will quite have the same
richness, but we'll try. We need bacon cut into half inch strips or slab
bacon cut into lardon. Bacon straight from the
freezer is the easiest to cut. Add them to a pot over
medium-high heat to render the fat and crisp up
and season with black pepper. It won't need salt
at this point. While that cooks,
let's dice mushrooms. These are large mushrooms, so I'm cutting them in
half before dicing them. Normally you'd want your
vegetable pieces to be the same shape so
they cook evenly. In a sauce like this, I prefer some pieces to disintegrate and only a
few to hold their shape, so I'm deliberately
cutting them unevenly. We also need to dice an onion, half an onion actually. I did a full one here and it was way too much onion. It was a large onion. So maybe if you want
to do a full onion, just do a small one. I've got some fat in
the bottom of the pan, and the bacon is currently
up on the edges. They are mostly lightly brown, so I'll remove them from the
pot and leaving their fat. Add the mushrooms to
the pot and the fat. Stir on medium-high heat or take it down to medium if your mushroom
pieces are smaller, stir them around to get them coated in the fat
and then let them sit in the pan for 8-10
minutes as they brown as well. If the pan starts to
look a little dry, add a little more fat in there
like oil or lard or butter, and maybe about a tablespoon. The mushrooms will
release their own water and we want to cook that out before we add the
other vegetables. They take longer to cook
than the other vegetables. While those cook down,
let's dice a carrot. This is a large carrot and I didn't need
all of it either. For yo, u try one medium carrot or three-fourths
of a large carrot. Also, I'm not dicing it
evenly because I want some of it to soften more
quickly than the other pieces. After the mushrooms
water has evaporated, add the onions and carrots. Again, this is a
full large onion and now you can
see it's too much, stir it all around to coat
everything in the fat. Now before you get
too far into cooking, mince three cloves of
garlic and stir them in. We'll continue building flavor by letting the onions and
carrots cook down for another 8-10 minutes watching the bottom of the pan for
browning and not burning. This looks good to me, so I'll add the wine
to deglaze the pan, an entire bottle of it. Now, don't use anything fancy because we'll cook out
any of the goods stuff that makes it
enjoyable to drink. But also don't use
something cheap because then it's mostly sugar. The general recommendation is to use something like a
California Pinot Noir to bridge that gap of
affordable to cook with but not pure sugar. Bring it to a boil and
reduce it by half, which will take 20-25 minutes. This here is the line
where I started, so I'd say this is half. Now add two cups of
a gelatinous broth. This is a thin chicken
broth, which is fine, but you'd be better
with a beef broth and something that's
so gelatinous that it's like jelly
at room temperature. If you have access
to powdered gelatin, consider a teaspoon of that. Add the bacon back in and some
aromatics like a bay leaf, a sprig of thyme
and this is fresh dried thyme from our own
garden, and salt and pepper. Bring this to a boil
and reduce by a third which should be
about 10 minutes. Let's continue in the theme of excessive and unnecessary and cut our bread and to
pretty little forms like a perfect circle. Those edges that we're
tearing off will be very helpful for tasting your
sauce throughout the way. Then take a small clove of
garlic and cut it in half to rub on the bread for a
little extra garlic essence. Now closer to serving, you're going to toast it in the toaster for a little crisp. Now we make a buerre manie, which is a combination
of flour and softened butter mashed together
in a one-to-one ratio, one tablespoon of flour to
one tablespoon of butter. The butter will coat the flower so it doesn't clump up when
we add it to the hot liquid. This gets added to the sauce and a few nuggets at a
time to thicken the sauce. Here you can see
how it's already changing the color of the sauce. Add in a few nuggets,
whisk it in, add a little more,
whisk that in, and then simmer it for
another 10 minutes until the sauce coats the
back of a spoon or utensil. This is a little
thinner than I wanted, but I don't want
to add more fat. I'm going to try a slurry of
flour whisked with water. If my stock had been
more gelatinous, I don't think I'd
have to add this. Now, I don't want it as thick
as the beaujolais sauce, but I really wanted
it thicker than this. But also I am really hungry and by tasting the sauce with
those extra bread pieces, I know this tastes
quite good as it is, so I'm moving on. To plate, we have our
toasted bread circles, our perfectly poached eggs. These are from a vinegar soak, and now the sauce. You worked hard on
this so be generous because there's
always more bread. As you can see, this takes
at least an hour to come together and it will get
tastier the longer it sits. Now for two eggs, I estimate you could use about one-third of a cup
of sauce with bread, or about the size
of a muffin tin. The recipe makes about
four cups each I think, so you have a lot of servings
to freeze for later. I also mentioned that beef
stock will be better than chicken stock because it has
a deeper, richer flavor. I miss that using the
chicken stock here, but I know to miss it
because I will make a full boeuf bourguignon
every winter and I now just freeze leftover
sauce just for the eggs. While I try to mimic that flavor and texture with this recipe, it will never
actually be the same because it's not cooked
as long as the full dish, but the beef stock will
go a pretty long way. That's it for the
oeufs en meurette. Oeufs is the French plural
for eggs, by the way. We'll see you in
the next lesson.
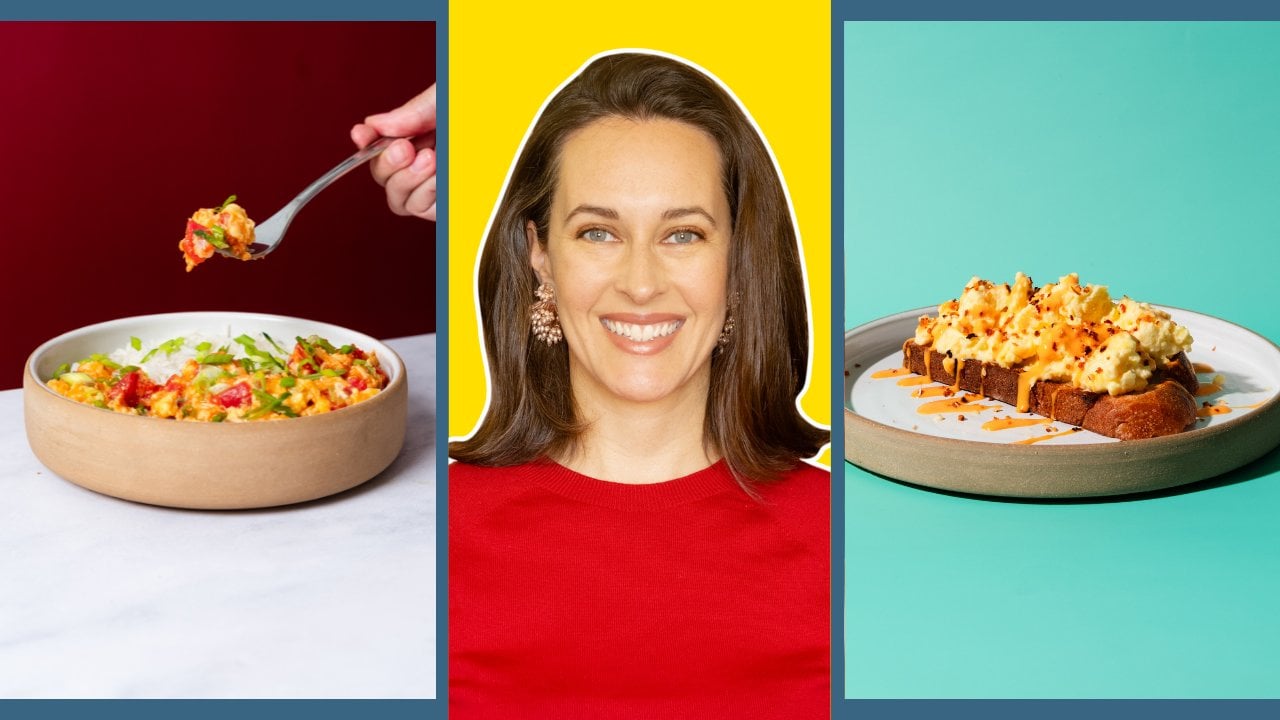
8. Shakshuka: Shakshuka this is
a loose guide for a cooking technique and
stages of adding ingredients. With shakshuka, you
have a lot of leeway in how you slice it and what
else you add to the mix, like other vegetables
or cheese or herbs. We start with dicing an onion, I'm making half a recipe, so I'll use half an onion
here and a bell pepper. Traditionally you'd
use a red bell pepper, but they give me heartburn so I'm going to go
with the yellow one. For both of these,
you can dice them as coarsely or as
finally as you like, it just depends on the texture you want
your sauce to have. I like when
everything cooks down together so I make a fine dice. Add a tablespoon of oil
over medium high heat, and watch for the
ripples in the oil. Add bell pepper and
onion and sizzle with a little salt
and cook these down until they're soft and round. Now the heat is pretty
high for cooking, it's medium high so
keep an eye at first to make sure they aren't burning but browning in the
pan is a good thing. We're building font and
font builds flavor. As we stir the onions, they'll continue to
pick up the brown bits and add flavor and when
we add the tomatoes that will also pick up
more of the brown bits and we'll have even more flavor. After a good eight minutes
and only a couple of stirs, we'll add in too close
of minced garlic, this is another place
you can customize with lots more garlic
or garlic cloves or even garlic powder if you absolutely don't have
access to fresh cloves, they only need to
cook for a minute or so before adding the ******. The best way to remember
what ****** to use, for me at least is to start with all the ones
that begin with a C, half a teaspoon each of
cumin and coriander, about a quarter
teaspoon of cinnamon and a pinch of
cardamom and clove, and half a teaspoon of paprika. If you like heat, you
should add cayenne too, and of course, salt and pepper. Stir all your ****** together
and let them open up for about 30 seconds before
adding the tomatoes. We'll use a 14 ounce can
of whole peeled tomatoes and about a cup of water
or half a can of water. I've learned that whole peeled
tomatoes are better for applications like this than
diced canned tomatoes, those contain ascorbic acid which helps the diced
pieces maintain their shape so they
won't cook down as well as the whole versions, and that's the goal here to cook down the tomatoes into
the standing sauce. As body from the tomato meat and the juices cook into
something thick and scoopable, we'll stab around
the whole tomatoes as the simmers to
break them down. Alternatively, you can use a pastry cutter to break
them down in the pan or squeeze them down
with your hands before adding them to the pan. You can also use fresh whole
tomatoes by dicing them and throwing them straight into the pan with their juice
and their skins too. We're still on medium
heat now because we don't want to
scorch the tomatoes, but we do want to cook them
down and reduce the liquid. I gave it a quick taste and decided I wanted more cumin and more spicy so I scooped in
half a teaspoon of harissa. After a few more minutes, I stirred to look
at the texture. I test the consistency
of the sauce by how well it can hold
a divot for jag, if it fills in quickly,
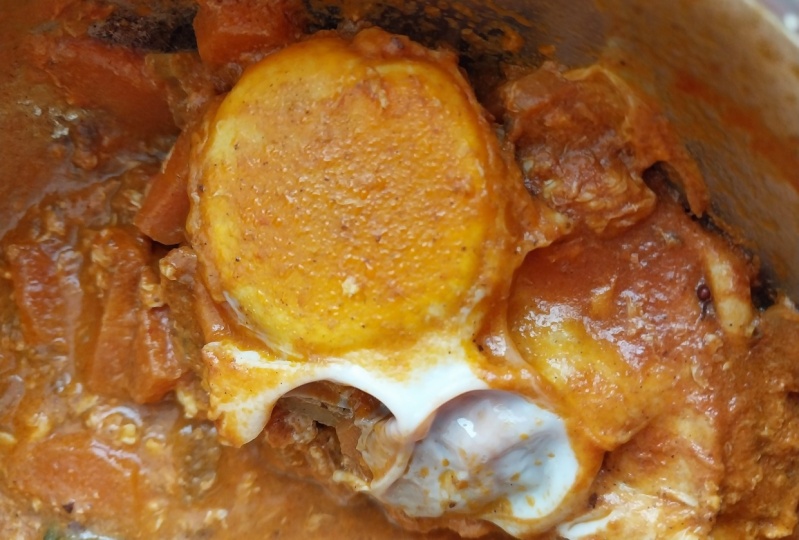
it's too liquidy and I let it cook longer, if it can hold the shape, then it's time for the eggs. Slide in an egg that's
been cracked into a bowl so you can quickly
contain the whites. I like to cover the
whites with the sauce so they can cook more evenly and just leave the yolk exposed. Yes, having to clean an extra
bowl is a tad annoying, but it's much better
than trying to fish out pieces of eggshell
from molten tomatoes if you crack it directly from
the shell and to your sauce. Add a little pepper on
top before we cover it and let it cook for
just a few minutes. The tomato sauce super-duper hot and it's still releasing, steam and by covering the pan, you're directing the
steam to cook the eggs on top and it speeds up
the cooking process. After about three
minutes I checked and they're still very uncooked, so the cover will go back
on for another 2-3 minutes. I still have the heat on low but you can turn the
heat off and let it sit. The tomato sauce
holds a lot of heat and it will continue
cooking the eggs even after the pot is off the
stove so keep that in mind if you aren't serving
it immediately, you'd want to remove
the pot from the stove while there's still
a little undercooked and just let the residual heat
continue solidifying the whites. But once it's ready,
dig in carefully. With shakshuka, you can finally chop fresh parsley to sprinkle
on top or add in feta or a goat cheese while the eggs cook or drizzle a savory
yogurt over at all. It really depends on what
you have in your pantry. I'm using a hearty bowl bread, but fresh a pizza is the obvious
choice or a fresh baguette and if you think you'll
want this regularly, double or triple
batch the sauce and separate it out before
you add the eggs so you can freeze the sauce in your preferred serving size and then most of the work is already done the
next time you want it. Then you can keep
cooking what you want to eat right now
in a smaller pan. Remember you have
a lot of leeway with the vegetables you use, if you have any bits
of leftover vegetables like zucchini or carrot
or spinach, throw it in. That's what this dish is for, the main things you need are
tomatoes, onions, and eggs. Maybe keeps some canned
tomatoes in the pantry or free some extra sauce so you're
always ready to go. That's it for shakshuka.
9. Green Shakshuka: It's green shakshuka, where we use leafy
greens instead of tomatoes as the poaching
bed for our beautiful eggs. Like classic shakshuka, you have plenty of
options for customizing this recipe or using
whatever you have on hand. Now I will say the most
convenient option for this is to use a bag of frozen
greens for the recipe. Although if it's the season
for fresh greens, go for it. Starting with an onion. It's optional, but I do find
that they give extra flavor. Maybe in this kind of
recipe, use a red onion because it's got so much flavor and it is totally underrated. For this demo, I've cleaned and coarsely chopped one
bunch of Swiss chard. One thing you'll have to
mitigate when cooking greens is the oxalic acid. If you've ever had chard or
spinach or another thin green like beet greens and you felt a weird
film in your mouth, that's the oxalic acid. Too much of it can
prevent your body from absorbing the calcium
in the greens but using plenty
of fat or seeds, creams or whatnot, can help offset that
weird feeling in the mouth and it helps your
body absorb what it needs. With that in mind, I used
ghee as the cooking fat. Frankly, I should
have used more. This is about a teaspoon of ghee and I really
should have been using were like a tablespoon. Over medium heat, heat your oil or fat
and add the onion. Toss it around in the
fat and let it cook until it softens and
begins to brown. After 3, 4, 5 minutes later, I added a couple of chopped
cloves of garlic. I tossed that around for about a minute and
added my spices. I used ras el hanout, which is a Moroccan
spice mix that roughly translates to head of the
shop or top of the shelf. Now, each spice store has
its own version of the spice because it's a mixture of
lots of different spices. The ratios can vary, but it usually includes
at least cinnamon, cumin, coriander, all spice, black pepper and ginger. Mine has some star
anise in it too, and I mostly use it in
loose sediment when I bake, just for some extra depth. But for you, refer back to the shakshuka recipe for a
place to start with spices; all the C's and then
branch out from there. Overall, I used about
a tablespoon of spice. Once you've stirred
in the spices, add in the greens. Fresh greens are going
to be super fluffy, but they will cook down
into virtually nothing. With fresh greens, I
make the effort to still scoop up the onions on the bottom and turn
them to the top so the so the greens have a
chance at direct heat. I still have some water on
the greens from washing them but you can also add
water or broth to the pan to help create some steam and cook
it to all down, and we will eventually definitely do that
later on in the recipe. After five minutes,
this is what I've got. Browning is mostly
from the onions, and the greens have lost
most of their volume. Now this is where I'll add broth to the pan
to help cook down the greens further
and pick up that Browning to add flavor
to the whole dish. How much? I don't know. Start with enough to stir around and scrape
up the brown bits. This is one bunch of chards, so maybe a third of a cup here, and then add more as you decide how much water
the greens have released and how
far long they have to go before they're
completely softened. You don't want a
dry pan. That's it. You can always cook
off the liquid. You just don't want a dry pan. How you cook your
greens matters because thicker greens like
kale collards, Brussels sprouts, they're thicker and they need
more time to cook down. Thinner leaves like
chard and spinach, those cooked down
pretty quickly, but I cut this chard
pretty coarsely so it's bigger pieces and
I included the stems. If I want this all softened, I need to cook it
down some more. I added another
third of a cup of broth so I could
basically braise it all. You also have the option of
partially blending or finely chopping the greens
into something more like a saag
paneer consistency, and you'll still need to monitor how much liquid to
use to keep that from overcooking into some burnt, unappetizing thick paste. For my toppings, I'm doing spiced yogurt and
the Tahini sauce. While that braces, I'll grate
a small garlic clove into a paste over half a cup of yogurt and about a
tablespoon of lemon juice, and about a quarter to half a teaspoon of cumin
and a little pinch of salt, stir it together,
and then taste it, then add more of something
until you like it. I added more cumin. This is a Greek yogurt and I
want to make it drizzlable, so I need to add water. You can do this or use regular unrestrained yogurt
that's a little thinner. I added a little water at a time until I could drizzle it. It's been 5-8 minutes simmering
the greens and broth. My greens are soft
and I still have a little broth at the
bottom, which is good. This is where we want to be because we don't want our
eggs to sit in a dry pan. I'll add the eggs now. By the way, you can have two to three eggs in the
bowl at the same time. Those tight whites right
around the yolk won't mix in with the other eggs and they'll naturally
stay separated. Once they're in place, cover and steam on low
heat for 2 minutes. This was at 3 minutes, my first time around and
they're firmer than I want. I did later on test
with 2 minutes and another egg and the
remainder greens and it was just right. Keep the heat low
and slow and gently, for creamier or egg
whites and molten yolks. To top it all, I'll drizzle on my yogurt sauce and
some Tahini sauce I had laying around and
dig in with some bread. This is another
place to add feta or goat cheese or
cream or cream fresh. Anything creamy and tart will pair really well
with the greens. Remember, you have lots of choices about the types
of green you use, and the thickness of those
leaves will determine how long they cook for and even how
you chop them for cooking. Again, the most
convenient method would be to use frozen spinach. That is it for green shakshuka. We will see you in
the next lesson.
10. Eggs in Purgatory: Eggs in purgatory. While it's quite
similar to shakshuka, its roots are in Southern
Italy versus North Africa. But with them being so
close geographically, they will share a
lot of similarities. This demo, we'll
use fresh tomatoes instead of canned ones, so you can see how
that process goes. The recipes I
consulted used extras like chopped anchovies
or pancetta, which definitely gives
an Italian flavor. If you're using them, cook them with the garlic
for just a minute, before adding the tomatoes. For canned tomatoes, you
need a 14-ounce can. In shakshuka, it can
be whole or diced. I used 20 ounces
of fresh tomatoes, both chopped Roma, and a few whole cherry tomatoes. I'm slicing three
cloves of garlic, but you can use as
little as one glove. You can mince it, or grade it, we really don't need
to be too fussy here. Heat about one tablespoon
of oil in the skillet, no bigger than an eight-inch
skillet, over medium heat. Also, I'm using a well
seasoned cast iron pan here. Generally, you want
to avoid tomatoes and cast iron since the acid in the tomatoes could
damage the iron, and it makes your food
taste a little funny. But if you're confident
in your seasoning, the seasoned coating of the pan, that should protect the pan. Apparently, I'm pretty
confident here. Then add in the tomatoes
and sprinkle in a healthy pinch of salt and
pepper, and stir it all up. For the purgatory
part of the recipe, we'll add some heat, like a quarter teaspoon
of dried chili flakes, or half a teaspoon of the solid
bits from some chili oil, just enough to make you suffer from the heat like in purgatory. After a few minutes, my tomato chunks
are falling apart, which is what I want, except for those cherry
tomatoes haven't burst yet, so I'll help them along with
a careful little pierce. Additionally, I'll lower the
heat, and cover the pan, so the cherry tomatoes can
get a little more oozy. We want a lot of liquids, so you could add some
water to the pan too. A reminder, if you're
using canned tomatoes, you won't have to deal with
all these extra steps. Essentially, when your tomato
mixture gets to the thick, saucy consistency,
you'll add in your eggs. Make a little divot
in the tomato sauce, so the egg knows where to sit. Another feature of
eggs in purgatory is the addition of Parmesan
cheese, sprinkle as much or as little shredded
Parmesan that you'd like just over
the whites of the eggs. Cover the pan again to
help steam the top of the eggs for just three
minutes, maybe two-and-a-half. Serve this with a slice
of toasted bread, so you can sup up all that
delicious spicy tomato sauce. If you happen to have
a lemon lying around, rub it on the bread for
a little lemon essence, it's delicious, and a beautiful
detail for any recipe, but especially here. Sprinkle on more
cheese or extra spice. All in all, this should
take about 30 minutes max, and it's another one that comes together with very
few ingredients. That's it for eggs in purgatory, we'll see you in
the next lesson.
11. Eggs All'Amatriciana: Eggs All'Amatriciana,
another Italian tomato-based dish based
on a pasta sauce. Out of the tomato-based dishes, this is my favorite. Also, this video
demonstrates using can diced tomatoes
instead of fresh or whole canned tomatoes, like in the other tomato
base dishes in this class. We start by slicing four ounces of bacon
into half-inch strips, which will be four
strips of regular bacon. Pancetta or guanciale is ideal, but regular bacon
works quite well too. Start cooking it over
medium-high heat in a skillet while we prep
the other ingredients. The pasta sauce version doesn't
usually include onions, but some of the egg versions do. I like onions,
specifically red onions. I'm dicing a full
medium-sized red onion while keeping a close watch on the bacon and stirring
it occasionally. By the time I'm finished
with the onions, the bacon has cooked
out some of the fat, and I'll add the
onions to the pan, give it a good stir to coat the onions in that bacon flavor, and let the onion softened about 5-8 minutes by that time, you'll have even more brown
bits collected in the pan. We'll use a quarter
cup of red wine. I'm sure white wine
is fine as well, to deglaze the pan. Not every recipe uses wine, so you could use water
with a little bit of lemon juice or a bone
broth of your choice. Look how easily this picks
up those brown bits though. That'll cook down
pretty quickly because it's such a small amount and you can move right
into adding the tomatoes. However, I had extra broth sitting around from
another recipe, about half a cup. I added that you
may need anywhere between a quarter to half
a cup of extra liquid to thin out the tomatoes
anyway as you simmer it, and that can be water or broth. Now I took a minute
to simmer that down, still on medium-high heat and I see in the sauce
with black pepper. I don't add much salt
when I cook with bacon because it generally carries
enough salt for the dish. For this serving size, we need 14 ounces of tomatoes, 28 ounce cans, however, can save a little bit of money, and if you're only using half, you can freeze the other
half of the Canvas, something else down the road and now it's just a
little more convenient. Or just double the rest of
this recipe to use it all and then just have
extra delicious sauce for more eggs or even
just a pasta sauce. Also of interest. This is a can of diced tomatoes, which I've talked about
why you'd want to use whole tomatoes over
something like this, but sometimes you
have no choice. At least you get to see
the cooking difference. I've reduced the heat to a
medium-low at this point. Now once I have stirred
it in with the broth and everything else, and it simmers for a few
minutes you'll start testing the consistency of
the sauce to add the eggs. Like the other tomato sauces, we want it thick enough
to hold the egg, but thin enough that it doesn't burn through the
final cooking stage. Right before I added the eggs, I lowered the heat
as low as I could. I've cracked two eggs into a room akin to
expedite this process. Once they're in the sauce, you can try to cover the
whites with the sauce. In theory, this should help
the whites cook quicker. Ideally, we want the eggs
already opened and ready to go so they get added at
roughly the same time so they cook evenly. Last, we'll do the best we can, and once they're all added, we'll add some cheese. Your best parmesan
or pecorino graded or shredded as much or
as little as you want. I'm covering the egg whites with the cheese before
I cover the pan and let it cook on
super-low heat. I wanted to keep an
eye on those whites. On drastically low heat, I let them sit for 10 minutes and checked every
three-ish minutes. This top one is a little firm. It's overcooked. It was the first one in and this area is the
hottest part of my cooktop. Everything up there
always overcooks. Now the second one
is a little better, not a runny yolk, but
not a fully cooked. The whites are still
soft, which is good. The bottom one is soft
everywhere, also good. The one on the left
has a firm yolk but a soft white oddly, I'm still acclimating to my
cooktop with this type of dish and exactly what works for me and you will have
this experience too. The best thing for you
to do is to take notes, write down what you do and how it turned out so
the next time you try, you know what to do differently. Like for me, I should
put the egg up top in last since
it cooks quicker. That is it for Eggs
All'Amatriciana I will see you in
the next lesson.
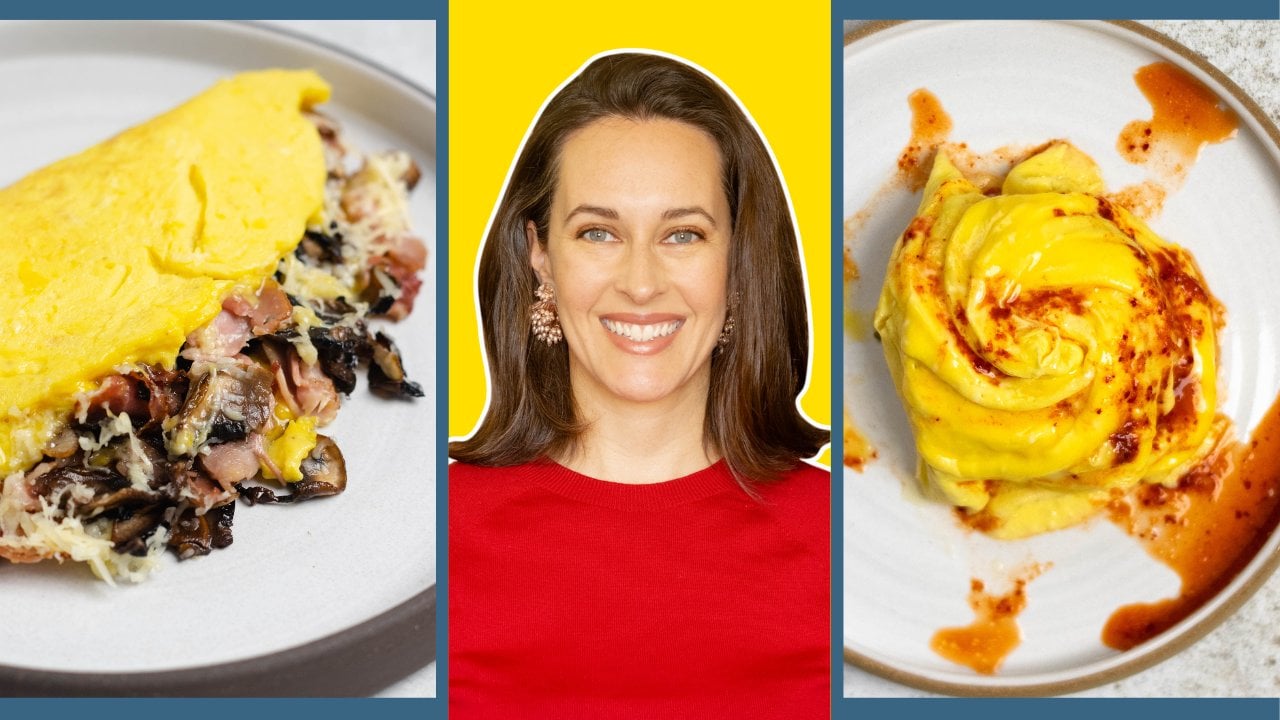
12. Eggs en Cocotte: Eggs en cocotte, it's poached eggs
that technically not because poached eggs
are supposed to be directly in the cooking liquid. Since these are
cooked in a vessel, this being a ramekin set
in the cooking water, it's technically
its own category. But for the purposes of this
whole class and the series, I'm classifying it
as poached esque, because the end result
should be the same as a poached egg just in a dish instead of floating around
in the cooking liquid. The standard en cocotte is slightly larger than a ramekin, you could fit two eggs in it. The traditional recipe is mostly cream and cheese and
sometimes it's baked. But this is a specialty item and I don't expect a lot
of people to have this, so I'm using remekins. Firing up the oven for just a few eggs seems like
a lot of energy to use, so I'm demoing a
stovetop method. First, the fun part, making your flavor combinations. Pull out every condiment and sauce you have
or can think of, and start creating concoctions. You can make many versions of any of the other
dishes we've covered in the class or use leftover pasta sauce or
curry's leftover vegetables, add cheese, meat, ******. This is really fun
to play around with. I'm going to demo a few options to give you some inspiration. Every ramekin needs to
be oiled with olive oil, butter, sesame oil, ghee, lard, schmaltz, it
needs something. For my first combo, I'm using olive oil
and leftover yogurt that's spiced with
cumin and garlic. I'm covering the bottom of
the ramekin with the yogurt, adding the egg and adding more yogurt on top and
garnishing with a few capers or more than a few capers
and grated bottarga which is salted cured fish roe. The next one gets olive
oil, mozzarella cheese, leftover sauteed mushrooms, egg, more mushrooms, and
more mozzarella. My third combo starts
with sesame oil, then a loose mixture
of gochujang, soy sauce, and a tad
more sesame oil, which really should
have been toasted sesame oil and other
drizzle of sesame oil. The fourth combo
starts with bacon fat, then leftover mushrooms, half a slice of deli
ham torn into bits and scattered around
then the egg. I'm trying something new here, since we always struggle with cooking the
whites long enough, but then overcooking the yolks. I'm just adding the egg whites and I'll add the yolks later
in the cooking process. Then a little more ham
and some parmesan cheese. My fifth combo is lard, again, because it's already
on the pastry brush, and then leftover caramelized
onions from a pasta dish. I'm doing the separated
egg white thing again. Hopefully, by now your
imagination is going crazy with the combinations you can come up with for this, for the cooking
technique we'll bring about half an inch of
water to a light simmer. You'll need a pot or pan with straight sides since
we'll cover it and you'll want enough
clearance over the ramekins to keep the steam
contained in the lid. I always place a ramekin
in the pan while pouring the water to make
sure I don't overfill it. The water levels will rise
as more ramekins get added, and it shouldn't go higher
than halfway up the ramekin. Bring the water to
the same heat level as with any other poached egg, where you see steam and you have little bubbles
breaking to the top. We'll cover the pot
and let the water cook from below and the steam
cook from the top. You will actually probably hear your ramekins
chattering in the pan. If you do separate the
yolk from the white, add it in after
just 2-3 minutes, and add more toppings if
you want and recover. This was pretty low heat and it took nine minutes before I felt like the
whites were cooked enough. But depending on your heat level and what's going
on in your setup, check every two minutes and just like with everything else, stop when it looks almost
done but not quite. This is where I decided to stop. I'm really glad I
did, It was perfect. Once one egg was firm, I knew that all of them
would be right behind it. Remember, they'll keep cooking just a little bit more even after you remove
them from the pot. You'll need tongs or oven mitts to help get
them out of the water. They will be very hot. The tongs were scary for me because it's not a solid grip, so I just use oven mitts. The goal is the same, cooked whites and molten yolk. Let's see how we did. Digging into the yogurt
and caper combo. It is perfect, creamy
whites and molten yolks. To eat, you can
dip bread into it or spoon it out and
spread it on the bread. Now my gochujang overcooked. it was at the top of the
pan which always gets more heat than other
parts of the cooktop. Next, the mushrooms
and mozzarella. This one was watery and I can't tell if it's
an uncooked egg white or just extra water from
the lid or the cheese. I'm pretty sure it's
water and not egg whites simply because all the
others were cooked through. Although there is a possibility
that the cheese was somehow thick enough to
insulate the egg from cooking. I guess keep that in mind that if you do want to use a cheese like a finer shredded cheese probably better for this. Next, in the corner, the caramelized onion
and parmesan combo. This is absolutely perfect. This is one where
I added the yolk a couple of minutes into
the cooking process. If you're comfortable with that, the whole process of separating
the yolk from the whites and then remembering
to add the yolks, I say it's a winner and yes, try this with all of the
thicker sauce recipes too. Of course, the ham and mushroom
also ends up being perfect because it too had
its yolk added later. Now, assuming you
don't have to cook anything to add to the ramekins, this comes together
really quickly. Since you can use just a
little bit of a lot of things, you can cook a lot of
variety at one time. You can technically cook
this in the oven too. It's really better for
much larger servings. You still cook in water bath, so you'd fill a roasting
pan with boiling water. You have to pre-boil water and fill it halfway
up the ramekins, and then roast at 375 degrees
for about 10-12 minutes. If you do that, I recommend
carefully adding the yolks a few minutes into
the cooking process because in the oven it's much harder to pull
it out and test and see. But again, this seems too
fuzzy for a small serving if you have a large
enough pan or pot. I cannot wait to see what
you guys come up with, and I'll see you in
the next lesson.
13. Closing & Thank You!: [MUSIC] We've cooked a lot of eggs and covered a wide
variety of techniques. The question is, do you know yet which one you'll try first
if you haven't already? Now, I expect to continue to uncover more dishes that
utilize poached eggs, so I'll continue
updating the class. So far my favorites are eggs all'Amatriciana,
and oeufs en meurette. I had a delight discovering
that I can marinate raw eggs in a vinegar and
water mixture to set the whites for a
perfectly poached egg. After testing all
of these recipes, I have finally concluded that I cannot rely on my memory
to cook a perfect egg. A timer is absolutely necessary
and always saves the day. I'm around and
active in the class. Share what you've learned, ask for clarification
or other questions. I appreciate you
being here so much. Engagement with the class is super important for
us instructors, so leaving a comment
or asking a question allows me to meaningfully engage with you on
your learning process. This isn't all you're
going to get from me. I have several other
courses in the works for all of the other ways
you can cook an egg, and I'll even go into chicken recipes in a
whole separate series. If you enjoy my approach, you can find me at Cooking
Companion TV on YouTube, and JennaGEdwardsTV on
both Instagram and TikTok. Thank you again, and I'll see you in another
class. [MUSIC]