Transcripts
1. Omelets, Frittatas, and Quiche - OH MY!: You're about to cook
the best omelets, frittatas, and quiche. From hearty meals for
just one person to elegant additions to any
lunch or brunch bread, you'll learn how to make them
beautifully, and simply, and dramatically and
of course, tasty. I know it's easy to think
that omelets are so simple, why have a whole
course about it? Just throw some eggs in the
pan and swirl them around. I thought the same
thing until I took a deep dive into this world. It gets specific. We'll start with basic omelets, the kind you'd whip up when you haven't eaten anything yet. Then we'll add more ingredients to make things a
little more hearty, and we'll focus on common,
easily accessible ingredients. Then we'll get fussy with multi-step and
technical omelets. We'll get into frittatas, which are mostly
open faced omelets, but a lot more fun and filling. Finally, we'll cover
a couple of quiche. The goal of this class is to give you the
confidence to cook up whatever you have on hand with some eggs and always
have a cheap, nutritious meal ready to go. If you're a foodie,
who delights in beautiful food as well
as delicious food. We'll have a lot
of fun together. To get the most
out of this class, it's helpful to have
some experience cooking, but only just to know how
to change the heat level on your stove and to own a
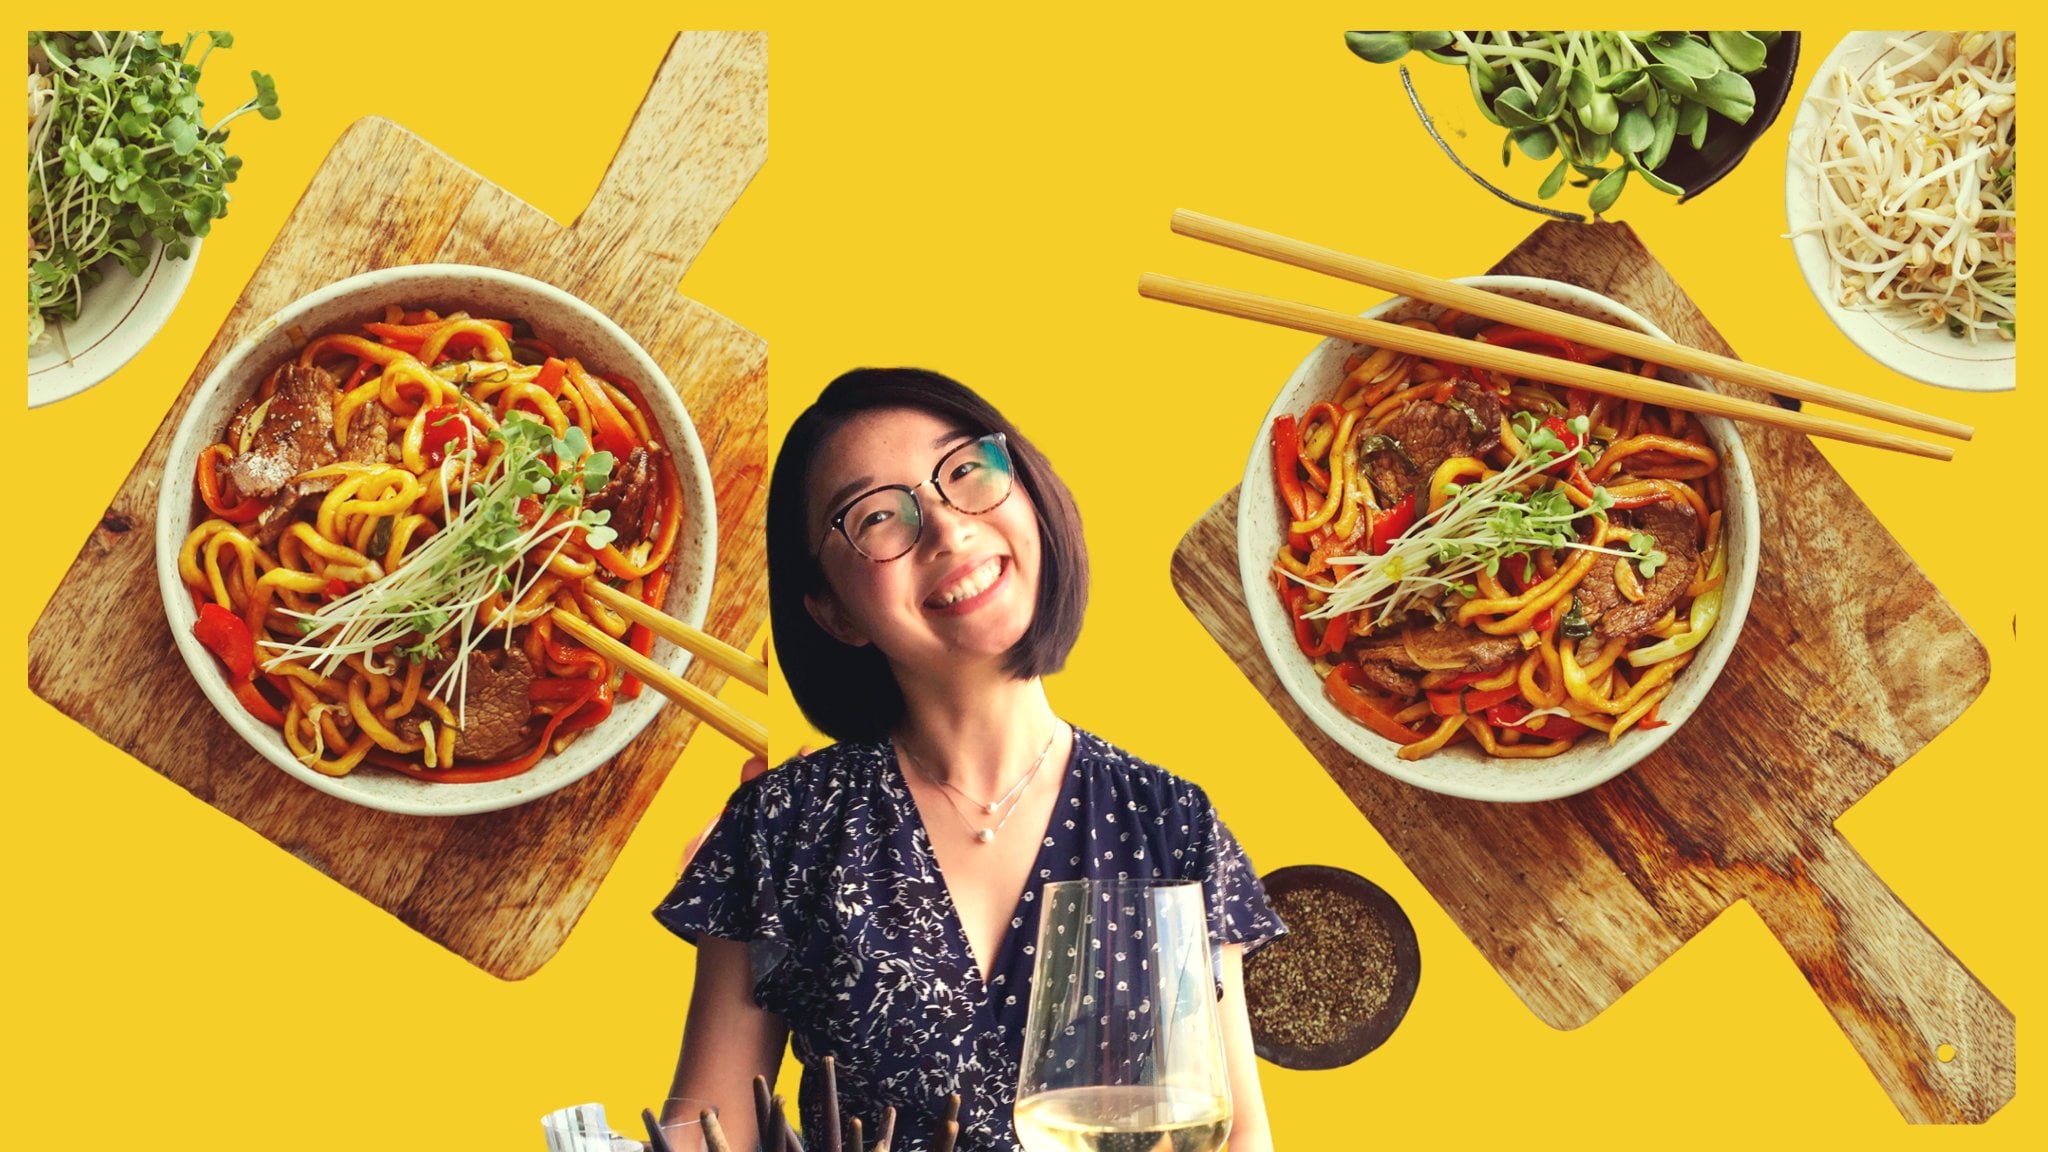
few pots, pans, and utensils. My name is Jenna
Edwards and I produce a cooking YouTube channel,
Cooking Companion TV. I think everyone can
enjoy cooking at home. My goal is to introduce
you to new foods, flavors, and techniques, especially when it connects us across cultures. I am not professionally trained, so my teaching style is from
one home cook to another. I will always be honest about a recipe or with suggestions to make the
process easier for you. With that, let's
get right to it.
2. Practicing Your Technique: Your project for this class
is to cook an omelet. There's actually a
couple of experiments you can try to be more specific. You'll learn about
adding extra liquid to your eggs to make them
fluffier, possibly. You can choose one and try it. You'll learn about straining your eggs to make them silkier. It may be interesting to you to see if and how that
makes a difference. Do you like that difference? You don't have to
wait until you're finished with the class
to start cooking, and you don't have to consume the class in a
particular order either. I have loosely arranged it from most simple
to least simple, but you can skip around. Also, be forewarned, even the most simple recipes
can be the most technical, which is a polite
word for frustrating. Let me know in the
discussion section, if you understand which
one I'm talking about. Then upload a photo to the project discussion so
we can see what it did. It is especially exciting
for me to see someone cooking something I taught
or that I suggested, it really would make my day to see what all you come up with. Now for some advice, expect
to get it wrong at first. Even I can research recipes, think it's a piece of cake, it's obvious, I'll get this on the first try and I mess it up. I have to try a couple
times to get it. That's the purpose
of a class project. It's one thing to know, a recipe and it's another to build actionable
muscle memory for it. Now hopefully,
I've made the food looks so delicious that you can't wait to make
every single recipe. Jump in and start cooking.
3. Omelet FAQs: As basic as an omelet is, there are a hundreds of
variations and dozens of techniques that all claim
to make the perfect omelet. Even the spelling has some
variations like is it omelet or omelet, so
let's break it down. How many eggs fit
in what size pan? For an eight-inch pan, 2-3. For a 10-inch, at least
three and up to five. Can you fit more in both pans? Absolutely, but you'll affect the cooking
time and technique. In this course, I'll mostly demo using three eggs in the
eight-inch skillet. To add water or cream. There is a thorough
Reddit thread of what types of
liquid people add and whether or not it makes omelets fluffier or softer,
or more diluted. Water is generally recommended
because it creates steam pockets in the eggs which render a more
tender texture. In this class, I don't add any additional liquid
to any of the omelets. If you want to try the water
or even a cream trick, for the water, it's one
teaspoon for every egg you use. A three-egg omelet will have three teaspoons or one
tablespoon of water. In fact, make this your
project for the class. Try it and report back. Best fat, best heat
level, best type of pan. The best fat is better because the foam tells you if
the heat is right, but you can use oils all day long if that
floats your boat. For most omelets and specifically for a
country-style omelet, you'll use medium-high heat. For French omelets or any of us that like really
custardy textures, you'll use medium,
low, or even low heat. A non-stick is obviously
best for most home cooks. I initially tried to use my stainless steel and it
works for a basic omelet but by the time I tried to add fillings or role of French
omelet, it was a disaster. Carbon steel is mostly
used in restaurants and if you're comfortable
with that, go for it. A well-seasoned cast
iron is also an option. It just needs to
be well-seasoned. Styles. Yes, there are
styles of omelets which basically have to
do with heat level and what type of
skin it develops. French style develops
a super thin, almost non-existent skin. Technically it shouldn't
have any folds in it either, but we aren't in culinary school so let's just temper
those expectations. Soft style is my
own definition and it's basically a
failed French style, meaning I tried to keep
it soft and custardy, but it developed a slight
skin but it didn't brown, but the skin is still there. Then there's diner
style like from IHOP. It's sturdy yet fluffy
and you just need to add a little dry pancake mix to your eggs and whisk until
the lumps are gone. Finally, there's a
country-style omelet with big curds and a slightly
crispy brown exterior. When to add salt. Add it when you whisk the eggs. The salt keeps the proteins from binding so you'll get a
softer and more tender cook. Whisking. Whisk
the bejesus out of your eggs to fully incorporate the whites
with the yolks, and this will ensure
an intense egg flavor. It also incorporates air into the mixture for a
fluffier texture, whisk until the color lightens. I usually go for a full
minute or even 90 seconds. You can also use a blender, especially if you have
a lot of eggs to whisk. For one step further, you can strain your whisked eggs for an extra silky effect. That's about all you really need to know for omelet basics. Let's cook. [MUSIC]
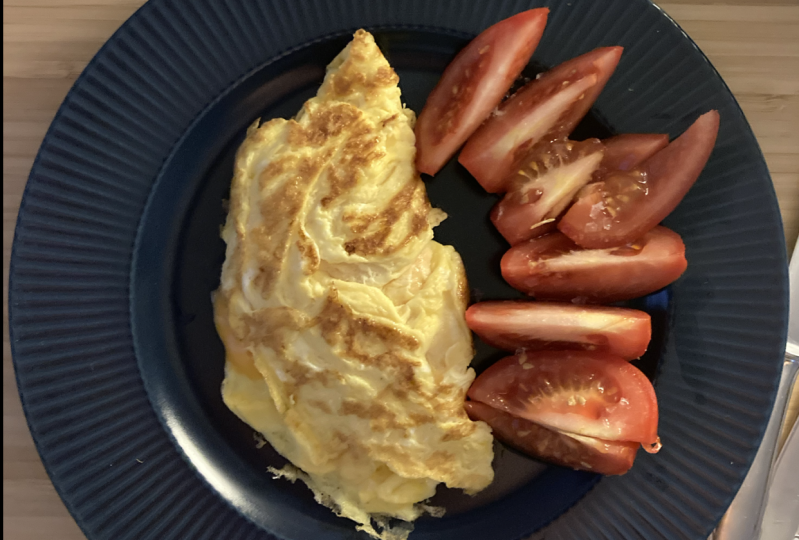
4. Basic Omelets & Fillings: [MUSIC] Omelets. Basically, once you master the basic technique, you can really go to town
with fillings and flavors. This video, we'll start with the basic omelet and
then demo with fillings. There are timestamps here if you want to jump ahead to
a particular point. This is how I use
to make an omelet, which turns out to be
a soft country style. I would add the eggs to a pan on medium-low heat and
let them sit there for 30 seconds or so and then push the eggs towards the middle
into large curds and folds. I do this a couple
of times until the running egg had cooked down and spreading out the
running egg as needed without breaking up my curds, and then I'd add cheese
and try to flip it over in the pan and
awkwardly maneuver it out. Here's country style
on medium-high heat, so will make big folds. Move the liquid egg around
one way or the other, and exit and flip, and then there's the skin that differentiates the style
of omelet from the others. Here's how I do it now. Whisk the eggs with a
pinch of salt and pepper. Heat the pan over
medium-high heat at half a tablespoon
of butter and melt it, it will foam, letting you
know the heat is ready, add the eggs and
immediately begin stirring. You can also shake the
pan while you stirred to create more homogenous curds
and really small curves, which give the omelet
its body and thickness. Once you can stir no more, and all the runny eggs
stops filling in the gaps. Let it sit for half a minute, give the pan a
shape to make sure the omelet isn't sticking. If it is, it just
means you'll need to figure out how to plan for how you'll get the omelet
out of the pan if you're adding
cheese now is when you sprinkle that in and
it will melt and the residual heat so it doesn't
need to sit there long, and now we plate, just let it slide out on whichever side you've placed
the cheese or the fillings, and then use the tip of
the pan to flip the top over once it's on the
plate, that's the basics. For the fillings,
you'll need to cook them before you cook the eggs, and that goes for
most everything. The egg cooks too quickly to
cook any fillings or to even heat them through if you put them in once
you've added the eggs. We cook feelings first and add it to the
omelet at the end. To demonstrate, I'll
start with a ham cheese, and mushroom omelet that is sometimes known as
a Parisian omelet. Although you won't really find this as a
standard in Paris. We start by cooking
the mushrooms. I've sliced three to four
medium-sized white mushrooms, and I'm cooking them without oil over medium-high heat mushrooms will release their water so we don't want them
absorbing any oil yet, and it was about a cup
of sliced mushrooms. While they cook, I'll prep
the other ingredients. I'm tearing humble and Royale, which is a type of ham, Delhi ham sold at
our whole foods. But whatever ham you can
get is great though. I'm tearing it three slices
and you can also just cut it. Now I'm storing my mushrooms for the first time at
about five minutes. We've let them get a nice
brown and going on and they have shrunk down considerably and the water has
evaporated out. Now, I like to cook my ham, but you certainly
do not have to. I add it to the mushrooms along with half a tablespoon
of butter and cook for a few more
minutes until the ham starts to show
some cooked edges. I'm adding butter to
protect the pan from the heat and to start adding
flavor to the mushrooms. After another five minutes, the ham is looking
mighty tasty and I'll remove everything to
start cooking the eggs. But first, another
dab of butter. We've got some nice
look and foam. I did lower the heat a tad
from medium-high to medium. Now add the eggs and to get a smaller occurred and therefore more custody filling will stir the spatula and shake the
pan at the same time, keeping the eggs constantly
moving so they cook, but not in a particular shape. This method is also used
in the French omelet, but I use a fork there. But let's not jump
ahead of ourselves. As the ready yolks run to
fill in any gaps or holes will eventually
run out of eggs to cook and it'll be timed
to add the fillings. I've got the mushrooms and ham, which I am being
very generous with because I want a heavy
hardy omelet right now. If you've noticed, we've loaded only one side of the omelet, and I'll talk with shredded
grew our cheese or something creamy like
emmental or even comte. You can add the
cheese first so it has extra time to
melt in the eggs, this is nearly a quarter of a cup of cheese.
Now let's plate. My fillings made this
pretty heavy and therefore more difficult to simply
slide out of the pan. I have to urge it along a lot and then finally
flip over the top, and once it's on the plate, I pull the top back a little because it's really
pretty to have the fillings peeking out
between the egg layers, and there we are, ham, mushrooms, and cheese omelet. The Denver omelet in Diner or IHOP style using the addition of pancake mix to make
the omelet much fluffier, we start cooking the fillings, which is first diced ham
or pancetta as shown here. While that cooks all
dice a little bit of red bell pepper and
half a small onion. The ham can be anything. If it's Delhi ham, it can be the last thing
you cook and you just need some type oil to
cook the pepper and the onion. I'm using the pancetta fat
to cook my veggies in, and they will cook
over medium heat until they have
softened to my liking, which is a good bit. I'll prep the eggs. This is
actually three jumbo eggs, one of which is a double yoke, and for the Diner-style demo, I'll add in a few
tablespoons of pancake mix. Now apparently this is how IHOP, gets their omelets to be so
fluffy and a little stiff. I'm using about
three tablespoons. If you don't have a
box of pancake mix, you can make your own, and that info is on the recipe card. It's actually what I did here. You just whisk it in until
there are no more lumps. Then you can add a couple of tablespoons of milk
to thin it out. I've got a small nub
of butter in the pan, and it's time to add the eggs. We'll make big thick folds and curves for the
style of omelets. I'll let some eggs cook and then I'll push
it into the middle, letting the runny eggs
find its way into the pan, and repeat this until
there's no more runny eggs. That's Diner/IHOP style. Now it's time for the fillings. Just drop it into one side and make sure the omelet isn't
sticking to the pan. Now we plate and this is so stiff that it
cracked on my fault. But we do have some
slight browning and it's definitely fluffy. As I started eating this, I realized I used too
much pancake mix because the inside of the omelet
feels like uncooked batter. The ratio I recommend you use
is just two tablespoons of camp pancake mix for three eggs and one to
two tablespoons of milk. The pancake batter makes
the omelet a little sweet, so manage that with the
fillings you choose. I think it works well with the salty ham and
the spicy pepper. That's a dual demo of both
Denver style omelet using the ham bell pepper
and onion and the Diner style with
the added pancake mix. As the class grows and
I include more demos, I'll keep updating this lesson with more filling combinations, but until then, I'll see you
in the next lesson. [MUSIC]
5. French Omelette and Omelette aux Herbes: [MUSIC] This is a French
omelet cooking technique demoed as an omelet aux herbs. The technique is
what you'd use for a classic French omelet and the addition of
herbs makes it a classic omelet aux
herbs rather than demo the same omelets technique
twice I'm consolidating. The end goal of a
technical French omelet is a custody insight and virtually
no skin on the outside. It's a masterclass in handling heat and it's pretty easy
to get really close. To get it perfect it
requires doing it an awful lot and playing around
with the nuances of heat, and time and movement. I have given up
on trying to make that happen on this
induction top, but maybe I can master
it on my gas stove. An herbs omelet typically
uses parsley chives, tarragon, and chervil, which is related to parsley
in relatively even amounts, but one-and-a-half
tablespoons for three eggs should be enough. Snip your fresh
herbs as large or small as you like
now, as a side note, I'm measuring out fresh, dried herbs which are
way more potent and flavor than fresh
or dried herbs. I use the dehydrate or
function on my hairdryer to dehydrate fresh parsley
and I am obsessed now. Whisk your eggs thoroughly with the herbs and a little salt and pepper melt half a tablespoon of butter in a pan
over medium heat, if your pan is a little older or it's showing signs
that it's losing its non-stick quality double the amount of butter as
soon as it's melted, add the eggs and start shaking. For this technique, I'm using the curved back of a fork
to whisk the eggs while shaking the pan to create super small curves for an
extra custody texture. Because we're using
the backside, it shouldn't damage
the non-stick, but I simply cannot bring
myself to do this with a metal fork so I have started saving my plastic forks
just for this purpose. Now from the time I added the eggs until I started
rolling this omelet, it was less than two minutes. This goes very quickly. After about 30 seconds, things have firmed up considerably we're starting
to get some gaps in the eggs. Now the downside
to using a fork is the extra difficulty
in wiping down the sides of the pan
from all the shaking. The fork just isn't
made for that and it doesn't make sense
to try to switch in a spatula just for that so I recommend getting comfortable with just one or the other. At this point, it's pretty
nicely set in the middle, so I'll start prepping to roll. To do that, we vigorously
shake or knock the eggs to move the omelet to the
opposite side of the pan. Ideally you have
a fat little roll nestled into the curved
edge of the pan, but that also gives
you a nice start for the first flip over and rolling, it is pretty easy until
you get to the last bit. It probably won't fold over for you to seal
the scene easily. It will just change
our grip on the pan so we can literally flip this
out of the pan upside down. The French style is to serve the omelet with
the same side down so you only see the silky
mound of custody egg. I love how springy it is. Technically this is a skin, so in a professional kitchen, this wouldn't pass, but it's
pretty good for a home cook. Its best served with a baguette
to help you shuffle it onto the fork into sop up
all of that earthy goodness. To summit up use
herbs or don't but this is the specific technique
to make a French omelet. I loosely use this technique for all my omelets now
and you can do, I'll see you in the next lesson.
6. Souffle (Puffy) Omelet: Let's take a look at
the souffle omelet, also known as a puffy omelet. We whip egg whites into stiff peaks before
storing in the yolks, creating a pillowy texture. And an impressive presentation. I mostly followed sir
Sat.com and they say it's a pretty good precursor to an actual souffle which
I haven't tried yet. But after this omelet, I am much more keen to we first separate the
whites from the yolks, and in something
like this, the yolks can have a little white in them. So I'm just scooping
them out of the whites with a spoon
surprisingly easily. Now we whip the whites
into stiff peaks. And you can technically
do this by hand, but it is significantly easier to drag out a hand
or stand mixer. And here's what stiff
peaks looks like. You can over beat egg whites. So stop once they
look like this. And it only takes a few minutes, like 34, 5 minutes. The peak should hold its shape. We beat the yolks with some salt and pepper
in a large bowl, because we will
add the whites to the yolks slowly
incorporating them together. Doing it this way
helps keep the whites from being overs stirred
and losing their volume. But this is where you also
fold in cheese and or herbs, and if you end up
adding the yolks to the whites, it's still fine. I had done it that way too. For this overall recipe, again, from Cereus Eats.com it calls for about 2 ounces
of shredded cheese. I didn't measure how many
tablespoons that was, but I sprinkled a
little bit into this overall mixture
as I was folding it. And then once I spread
it out into the pan, I sprinkled a little
more for the middle. So heat a tablespoonl
butter over medium high heat until it
foams and lower the heat. Gently spread the
eggs into the pan so they're evenly distributed but you don't need to push down. That defeats the whole purpose of whipping the egg whites. We want it to be really
tall and fluffy. Just gently spread
it out evenly, and we'll cook over medium heat, maybe even medium low, until the edges are set. It also helps significantly
to cover the pan so the egg whites fully cook without overcooking the
bottom and the edges. Some people do this in the oven, but I don't see the point
and turning on the oven and heating up all
of that space when I can just put a lid on top of the pan and get the same
effect after a few minutes. Check the top middle. If it's set, meaning
you touch it with your finger and nothing comes off on your finger,
then it's done. If it's loose and
still kind of liquid. When you touch your
finger and you have a little residue on your finger, check the bottom in the
edges for their status. Hopefully, you can keep cooking until you don't get
anything on your finger. When you touch the
middle, the last thing we want is like raw egg whites
in the middle of our omelet. And when you are ready, loosen the bottom and edges with a spatula and slide
it onto a plate, flipping the top over into
that traditional omelet fold. And voila, I did love
the texture of this, even though it was a
lot of moving pieces. But it was delicious and
I even refrigerated it overnight so I could
eat it the next day and it held its
texture in flavor, which was also impressive. I cannot imagine a scenario
where I would make this over a basic omelet if
I'm just looking to eat. So maybe to impress someone, except you can only
make one at a time, so I don't know how you
would do multiple serving. So maybe you would do
this just to practice. And if you do,
it's fun for sure. And you'll feel quite proud of yourself once you've done
it, 'cause I sure did. So let me know once you've tried and share your results
with all of us here. That's it for this recipe
demo of souffle omelet. I'll see you in the next lesson.
7. Korean Tornado Omelette: [MUSIC] The Korean
tornado omelet seems like it's more of
a scrambled egg dish, but it's described as an omelet
so that's why we're here. If you're new to this,
the tornado uses a delicate balance of heat and time and chopstick technique to create a beautiful swirl
or flower texture that's plated over a small amount of
a flavored or spiced rice. It's a super silky and custody dish with lots
of room for variations. For this demo, I've chopped
kimchi into the rice and I've topped my tornado with
the leftover kimchi juice. One of the optional steps for an extra silky egg is to
strain the whisked egg, not necessary, but
I really loved the consistency of the eggs
after I strain them for this. Today I'm using two eggs. The pan is heated
over medium heat. I waited a solid two
minutes after I added a teaspoon of ghee
before adding the eggs, and you can use any oil. First, I practice holding
the chopsticks so I'm comfortable with
keeping them separated. This is a different
hold from how you might normally hold
chopsticks when you eat. I started with my final
position and what was comfortable to hold
while turning the pan. Notice how my bottom fingers are holding that one chopstick. I made sure that's
how my bottom fingers also started holding
that one chopstick, so I didn't have to readjust. Add the eggs and watch for big bubbles in the
middle of the pan. I waited 12-15 seconds. If your heat is too low and this takes too long,
it'll be rubbery. If it's too high, you won't have the
flexibility to turn the eggs. Drag your chopsticks from the outside edge
into the middle, keeping them separated
by about an inch. This is why your holding
position is so important. As you see the egg
folding or wrinkling, you'll start to turn the pan while holding the chopsticks in place so the folds run against the direction
you're turning. If you feel the
opposition of the eggs, they're probably about to tear and you either
took too long to start the turning or
you're turning too slow, or the heat is too high. This works because
you're pulling up the cooked egg and
the uncooked egg is running into the pan and you turn just slowly
enough that it has time to cook before it gets
pulled into the swirl. You want it to stay a little wet when you pull
it off the heat, the residual heat will
thicken off that last bit. Guide your tornado so it drapes
over your mount of rice. I think it helps to
leave your chopsticks in the middle so they can guide
the eggs on where to land. I could use more
practice on that part, but I am just
delighted to be here. It took me six
tries, back-to-back, to get to this point,
I went through a dozen eggs trying
to get this right. Also, while you want to drag the chopsticks against the pan, you don't want to apply
too much pressure, pushing them down into the pan. You will get more
cooperation from the eggs if they're only
lightly touching the pan. This is what mine
look like when I was really pushing the
chopsticks into the pan. It's hard to describe, but I think you understand
what I mean when you feel it. For my rice mount, I brushed a couple
of ramekins with toasted sesame oil
first and flavor, and then packed my
kimchi rice into the ramekins and then I turned it upside
down on the plate. The oil helps the rice release from the ramekin while
maintaining its shape. I really love this texture
and the egg flavor here. It was more delicate than
any of the other omelets. That's it for Korean
tornado omelet. I'll see you in the
next lesson. [MUSIC]
8. Flipping Frittatas: [MUSIC] With every frittata
recipe you'll have to decide if you're flipping
it or boiling the top. I'm tackling that in this video so we don't have
to do it in every recipe. Now, usually I cook
my frittata in a giant cast iron pan and I don't even bother
with flipping the pan. That's an accident
waiting to happen. I just boil the top
for a few minutes in the oven to set everything
and call it a day. That is definitely
an option for you as long as your pan
is up and safe. For how long and at what
boil level is up to you and your oven and how done
you like your frittata. If you're using a
lighter or smaller pan, flipping may be doable. The key to flipping is to make sure that your
plate fits the pan, meaning there's not too much of a gap between the
pan and the plate. So any liquid doesn't fly
out and that you've got a good grip on both
the pan and the plate. Remember, it's going to be hot. Make sure your hands start in a position that
will eventually be comfortable and secure
when you end the flips. You may need to invert them, so your thumbs are on the bottom and your fingers
are on the top so as you flip and when you're done flipping the thumbs
end up on the top, and the fingers around
the bottom of the plate. Also when you flip rather than flipping
directly away from yourself which is slightly
awkward and not a stable, try doing it at a
slight diagonal so at least one arm can tuck into your side for some extra
support and make it quick. What else can I say? Other than losing your
grip and it all flies out, there are two other things
that can go wrong here. Number 1, the frittata
sticks to the bottom of the pan and you end up with a rich frittata when you pull the pan away
from the plate. It's not great,
but it is fixable. Two the uncooked bottom is so uncooked that when
you go to slide the frittata back into the pan, your frittata smears onto the plate and it
doesn't make it back into the pan or it does so unevenly and that is much
more difficult to fix. The best way to head off these
problems is to use a long, wide spatula to slide under the frittata before making
the flip to make sure that it's unattached and poke at the center
of your frittata before flipping it to test
how liquidy or how set it is. It should be custody so it stays together during the flip, yet also does not overcook
and become rubbery. It's a nuance but you are after all watching a
class about cooking frittata, so let's just
entertain that nuance. Now onto the recipes and I'll see you [MUSIC]
in the next lesson.
9. Basic Frittata: It's a classic, simple fratata. When I think of fratata, this is the first vision
that comes to mind. Just herbs, tomatoes and cheese, maybe some light greens. It has an Italian flavor, but fratata is
Italian for omelet. So it makes sense that
the foundation of all fratatas would be Italian. I'm using three eggs for a small portion that can feed
two to four people lightly, depending on what else
you're serving alongside it. So the ratio here is
pretty straightforward. Three eggs seasoned
with salt and pepper with three tablespoons
of milk or cream, three tablespoons of
mazzarella cheese, and three tablespoons of parmesan whisking
between each addition. Yes, just one type
of cheese is fine, but two contrasting cheeses will elevate the final product. So much more like mazzarella
is creamy and mild, and parmesan is salty and umami. Now as you get
comfortable with this, you can experiment with
more or less cheese and cream to get the thickness
and consistency you like. I chopped two medium tomatoes and added them to
the whisked eggs. I'm using basil as the herb, but use parsley or
oregano or tarragon. Fresh is ideal since it plays such a big
role in the dish. It's going to be a better
texture than dried. To get pretty ribbons
in your basil, just layer up your leaves, roll them along the length, and then slice and add
them to the eggs too. Stir it all up to make sure the fillings are
evenly distributed. At this point, I decided
I wanted more tomatoes, so I added a half
of a large tomato. And this might have made the
fratata a little watery, because my tomatoes are way
over ripe and very watery. In a ten inch pan, heat a tablespoonul butter over
medium heat until it foams up, Then reduce the
heat to medium low. And add the eggs. I took a minute to even out
the vegetables with the tomatoes to keep the
edges firm but not brown. Use the lower heat to set
the edges and the bottom. This took about
ten to 12 minutes. On my induction top, I've got some bubbles
working on the edges, and I shake the pan to test
how done the bottom is. See how the outer edge doesn't move when I shake the
pan, that's good. We're going to pop this
in the broiler for just a few minutes to get the
top and the middle to cook. The amount of time
depends on your oven, so keep a close watch and stand ready to check in every
couple of minutes. This goes fast. We don't
necessarily want browning, we just want to get the top
and middle fully cooked, so we don't have to flip it. Here it is, right
out of the oven. And as I slide it
onto the plate, you can see how delicate it is. I decided it wasn't
fully cooked. There was a lot of water
from the tomatoes, and I think it kept
the eggs from binding, so I decided to put it back into the broiler a
few more minutes. And here's the second plating, and this one has
more body to it, but you can see the water
left in the pan there. And voila, there's my
beautiful fratata full of cheesy, creamy fresh flavor. There's lots of
room for variation here with cheese
and the vegetables, and the herbs, and even
meats that you can throw in. The main thing to consider when adding whatever you want is to be aware of the extra water
and fat you may be adding. Because that may prevent
the eggs from binding. And you'll get a fratata
that falls apart. Still tasty, but maybe just not the texture
that you want. But it's not the worst
thing in the world. And while it may not be
a structured fratata, it will still taste good. So I encourage you
to experiment with fillings and be brave
enough to try new things. That's it for this lesson
on a basic fratata, and I'll see you in
the next lesson.
10. Spanish Tortilla - Potato & Onion Frittata: [MUSIC] This is loosely
Spanish tortilla in that it's a potato
and onion for Tada. I hesitate to say it's an authentic spinach tortilla because this is a
traditional dish that will vary from family
to family and everyone will have their own way which
is obviously the right way. But here you get the most perfect flavor
combination in the whole world. Out of all the egg dishes, this one should definitely become a mainstay
in your repertoire. I'm using six eggs and rather than muscle through
whisking them all by hand, I'll use an immersion blender. Is it quicker to
pull out the blender and then plug it in and
then when I'm done, wash it and put it back up than it is to just whisk by hand? I don't know, but it makes the
eggs a perfect texture for cooking and you'll see me use
it throughout this series. My next gadget for making this a more graceful
process is a mandolin. I've settled into
slicing potatoes and onions in thin flat
slices for this recipe, mostly because the mandolin
makes it that much easier than dicing
five or six potatoes. The slices cook more quickly
too because they're thin. Using a mandolin
keeps the onions and potatoes in even thickness. All the pieces will
cook at the same rate. The potatoes and onions don't get cooked
at the same time, so we will keep them
separate for now. I'm going for a 16th
of an inch or just a tad thicker than a quarter
and same for the onions. I used one-and-a-half pounds of potatoes and one gigantic onion. This is a 10-inch skillet, which is why I chose six eggs. If you use anything larger, you'll need closer
to eight eggs. We'll start with about five
tablespoons of olive oil, the really good stuff. If you can use something
fruity from Spain, since that is the
home of this dish. Heat over medium, add
the slice potatoes. I've spread them in by hand
so I can separate the slices. The biggest challenge
with sliced potatoes is separating them during
this cooking process so they cook evenly, so that's hard to do the
special while they're hot. I'm trying to head
that off here. You want all the slices to
touch the oil at some point and to touch the pan and
brown a little at some point. This will be a short series
of stirring and flipping and spreading and then
letting them sit for a few minutes before
doing it all over again. Until you start to
see the browning on most or nearly
all of your slices. At that point, carefully
remove them from the pan with a strainer so you can leave some oil in the pan. Add another tablespoon if you need and add the onions.
Same thing here. Toss them around and the
oil first, spread them out, let them wilt in the heat, and start to lightly caramelize. We aren't looking to brown them, but they will pick up brown
bits from the potatoes if any of that stayed in the pan which is
great, it's flavor. You can cook the onions to
your preferred texture. Also, the type of onion
will dictate the flavor. This is a Spanish onion, coincidentally and it
gives a very onion flavor. Now a yellow onion will be
sweeter when cooked like this. Now I didn't time how
long has happened, I think it was about 10 minutes. The onions will get added to the potatoes and you'll
mix them together, breaking up those wads of
onions and any clumps of potatoes season with
a healthy pinch of salt and a few
grinds of pepper, and pour in the eggs. You'll give it all and
other goods stair and I'll add it to the pan with another tablespoon
or two of olive oil. Give the pan a few shakes to get things to
settle in and even out the top so that is flat but you don't need
to push things down. Now we'd let it bubble and
cook over medium-low heat. If you use higher heat, you'll cook the outside first, creating a thick,
rubbery texture. We want things to stay
delicate and fluffy. Now I have two thoughts on using more oil when you add
everything back to the pan. On one hand, the original
recipe I've used says to use another tablespoon or two and this brand new
non-stick pan, it seems to be too
much because it's pulling on the size
of the Furtado. On the other hand, olive oil is a major ingredient in this dish. It's not just a cooking
lubricant in this time, that's why quality and flavor of the olive
oil matters here. It also helps to keep things
delicate while cooking. With that in mind, don't panic if it seems
to be too much. I think that's the point. Now we just keep an
eye on the process. You'll see the eggs start
to set on the edges. If you can, carefully and gently try to lift
it away from the edge of the pan and check to make sure it releases
from the bottom and that your middle is custody
and not running anymore. I'm going to flip this puppy. I actually had a successful flip and it goes back
into the pan easily. Now this is so lucky I should
go buy a lottery ticket. Now, it cooks for another fiveish minutes just
to set that new bottom, our previous top, we really shouldn't need to
cook the middle anymore. The brown skin you see
here isn't rubbery, it's still pretty
soft and I think the olive oil is
to thank for that. Now we slide it back
onto the plate. I'm poking at it to show how soft and springy it's still is. This is a pretty great texture. As you see the inside, I think this is too much filling for a
traditional tortilla. It's fine for an
American style for Tada. But the one tortilla I had in
Spain wasn't near as full. It also had cod so maybe that's why I
didn't seem as full. But the egg was
gloriously delicate. Now, despite the overfill, it's still springy, and the
potatoes are fully cooked. It's lovely for breakfast
or lunch or dinner or snack and it's perfect with
a hearty greens salad. It's great for groups
because you can cut it into bite-size pieces or into
meals sized slices. This will ask me and my husband, just the two of us
a couple of days. We just leave it out and
just nibble on it all day. Let me know what you're thinking
in the discussion area. Until then, I'll see you in
the next lesson [MUSIC].
11. Kuku Sabzi - Persian Herb Frittata: This beautiful piece is kuku sabzi or
Persian herb omelet. I originally wasn't sure what to think about
all the herbs, but it really is and
truly beautiful. I have served it with
garlic yogurt and you can decorate it with pomegranate seeds or
even add walnuts. But let's get into this version. First, I'm using my favorite
tiny spring form pan because I wanted to
make a smaller recipe. I highly recommend having tiny pans on your kitchen
for things like this. It's about four inches. To clean herbs or
any greens really do it like you are hand
washing your laundry. Get a big bowl of water
and swish it all around. You'll get it cleaner than just holding it
under running water. For this recipe,
I'm using parsley, cilantro, dill,
and green onions. Leeks would also be amazing. You can use any combination
of fresh herbs that you want. I took the time to pick off
the leaves from the stems. But since we blend
it all up anyway, you can just go for the
tender stems and leaves, like maybe not the thick stems, but the little ones. The green onions can be
coarsely chopped too. For the four-inch pan, I need two cups of packed herbs. I'll add two tablespoons of olive oil and start to
blend it all together. The immersion blender was
a poor choice for this, a food processor is much better. You'll add a couple
of eggs to get it all going because you need
the liquid to help, and then add the rest of the eggs once the
herbs are blended up. On the full version,
you'll use six eggs. I also add baking
soda, salt and pepper, and a mix of cumin, cardamom, and cinnamon,
and even turmeric. We need enough olive oil to
coat the bottom of the pan, and to brush it up the sides. Add your vibrant mixture
to the pan and bake for 20-25 minutes at 375 degrees. Or do all of this in a pan and cook it on medium
heat for 8-10 minutes, and finish the top in a
boiler for 1-2 minutes. Here it is, like our other
frittatas we'll remove it from the oven while the middle
is still slightly soft. Let it cool at least 20 minutes before removing it from the pan. It looks a bit drab, but once you cut it open. This tiny little pan is a
nice little snack size. I noticed the middle
actually isn't done yet. I needed about five more minutes and that's because my version filled more of the pan than a full-size version would
so it was just thicker, and I didn't account for
that in my bake time. You should be fine.
If you use leeks, you'll need to cook
them a few minutes before blending them up
with everything else. Also, you don't have
to blend your herbs. You can just finely chop them. It's a different texture, but it can also
be done that way. Most of this was based on
the Milk Street cookbook, but it seemed pretty similar
to other versions that were cooked in a pan or used a different variety
of herbs and ******. Send me your questions in
the discussion section, and I look forward to hearing
how this works out for you. I'll see you in the next lesson.
12. Trouchia - French Chard and Cheese Frittata: This is Trouchia frittata, stuffed with Swiss chard greens, onions, and cheese. The recipe author
attributes this to the French region of Provence, but my husband is from there and he's never heard of this. It does have a French essence, even though it may not be a traditional dish
from the area. Regardless, it is delicious, and eggs plus greens are a ridiculously
healthy combination. We start by quartering
and slicing an onion. A red onion is preferred, but you can use any type. Slices should be about an
eighth of an inch thin. You'll use the entire
onion for a full recipe. In attendance skillet,
add two tablespoons of olive oil over low heat and cook the onions
until they're soft, but not browned,
about 15 minutes. I did brown mine slightly and it added a bitter
taste to the dish. As they slowly softened, will prep the leaves
of one bunch of sharp. Here's how I cut my leaves
for small bits of greens. Run a knife down the
size of the stock to separate the leaf
from the stock. Then fold the leaf
on top of itself and cut long strips
about an inch wide, then stack those on top of themselves and chop them
into even smaller bits. Add the greens to the onions and continue cooking on low heat for another 15 minutes or
so until the greens are also softened and the
moisture has cooked off. At this point season
with salt and pepper. As that cooks, whisk together 6-8 eggs and grate
in one garlic clove. I use a microplane plane this, but you can use a
mortar and pestle or just finely mince it. We want it to be a paste
so it incorporates fully. We need two tablespoons
of parsley and basil. I'm using fresh dried
herbs which are more potent than
just fresh herbs. I'm using only teaspoons and since I don't have basil,
I'm substituting oregano. We also need two teaspoons of time whisk or blend
together the eggs, and herbs and toss them
with the greens and onions. Then stir in one cup of grated Greer or another
creamy Swiss cheese and one tablespoon of
the grated Parmesan will use both the stovetop
and boiler for this recipe. Preheat your boiler. I'd start a low first if
you have that option, add another tablespoon
of olive oil to the skillet over
medium-high heat, then add the egg
and greens mixture, cook for just a minute and
lower the heat too low, and cook until the eggs are set, but still a little moist on
top, about 10-15 minutes. See how my sides are set, but the middle still
jiggles when I shake the pan.
That's about right. Now I'll sprinkle the
remaining tablespoon of grated Parmesan on top and boil until the top is browned, staying 4-6 inches away
from the heat source. My top is brown and the cheese is crusted
under the boiler, but it's also still a
little springy under there. To serve you can
flip the frittata or just slide it out of the pan. Regardless, it is full
of savory flavor. My only points for this
recipe are to be careful cooking the onions
in the beginning because if they brown at all, they can give the entire
dish a bitter undertone. My husband thought the
bitterness came from the shard and while
I agree that shard can have a sharp,
what do they call it? Oxalic acid-ish, flavor feeling, I really think the bitterness we got was from
overcooked onions. That is it for this
recipe of Trouchia, I'll see you in the next lesson.
13. Quiche Lorraine: [MUSIC] Quiche
Lorraine is one of the most classic of all quiche, and it can be incredibly easy if you use a
ready-made pie crust, preferably deep dish, but we can make a regular cross work too. We start with a blind bake, which is where we use a fork to poke some holes in the crust, and then line our pie
crusts with parchment paper and weigh it down with pie
weights or dried beans. This keeps the cross from bubbling up in
this initial bake. The initial bake, what
we call the blind bake, keeps it from getting soggy
once we add the filling. This bakes at 400
degrees for 10 min. In the meantime, we cook four
ounces of some type of ham, usually pancetta or ham steak, but bacon is also common. I'm using pre-diced pancetta. We want to brown it and get
some fat to release so I used medium-high heat for
a few minutes until the pancetta was
cooked but not burnt. It was enough time to dice an entire onion and
stalling only once, just about halfway
through the onion. Once the onion and ham are done, we removed the
pancetta and all but one tablespoon of fat in
the pan to cook the onions. That's right, we'll cook
the onion in the pork fat. Toss them around to get coded in the fat
and let them cook until they're transparent or
golden, about 5-8 minutes. I'll continue prepping
while those cook. We need two cups
of milk and cream. How much milk versus how
much cream is up to you. I'm using the rest of my milk which is about
a cup and a half, and then just another
half a cup of cream. I gave my onions a stir and it looks
like they're browning. I'll turn the heat down a touch and I'll shred some grayer, about a cup of a thick shred. Some recipes have
you cube the cheese, but I did not care
for digging through large chunks of rich cheese in each bite when I tried that. I wanted the cheese to melt
throughout the whole thing. You want to creamy
cheese like grayer, or emmental, or even comte. We're using four eggs for this recipe that need to
be seasoned with salt, pepper, a quarter
teaspoon of nutmeg, and a dash of cayenne
or even tabasco sauce. The spice will help
cut the cream and the nutmeg gives the
cream some depths. Of course, whisk
it all together. Your pie crust should be
out and cooled by now. Some recipes say
to brush a little egg white on the
crust before adding the filling to help it
stay crispy but then you have to contend with an
extra yolk and the white, you could use a little of
the white from the eggs you already have out before you whisk in the ****** and
the milks and the cream. Now we layer, add the cooked onions and
spread them around, sprinkling and shadow or vegan. Now cover that with the cheese
and note that you probably won't use all of your fillings even if you use a deep dish pan. If you're using a regular
pie dish like me, you'll only use a cup and half of your egg
and cream mixture, which is about two-thirds
of the total mixture and I have a note about how to
address this later on. I tried making a
costless quiche and they could cut with the
leftover ingredients, and it didn't exactly work out. Anyhow, you will carefully move you're very full
quiche to the oven. You have two options for baking. You could do 375
degrees for 50 minutes, or you can do 325
degrees for 85 min. I did the lower, slower heat, because the idea
is that lower and slower produces a
more custody texture, whereas the higher heat basically scrambles
the eggs and you get a more dense chewy quiche. But the recipe I
based this one on is from the New York Times
and the comments on the recipe indicate
a higher heat produced a delightful outcome. So I don't think you can
go wrong either way. You want to remove it
from the oven when the middle is ever
so slightly jingly, it will continue to cook
and solidify as it cools. It needs 20-30 minutes, if not an hour, to cool before it's ready
to cut and serve. Room temperature quiche
is the best quiche, and you also need
to give it time to soak up the water that
the ham releases. The crust ends up
soft but not soggy. For extra filling, I tried to make this
cross-list version and a [inaudible] but
since there wasn't any crust to just soak up the extra water released
by the pancetta, there was just a pool of
salty liquid at the bottom. It wasn't that appetizing. If you only have a
regular pie crust, I recommend reducing the filling ingredients
by 30 percent. That is laid out in the recipe
card for your reference. But all in all, it's a pretty straightforward
and easy dish. That's it for Quiche Lorraine. I'll see you in the
next lesson. [MUSIC]
14. Salmon and Leek Quiche: This salmon and leak
quiche is my own recipe, taken from various inspirations, but most notably from ermine
on Great British bake off. And you can use either fresh or smoked salmon
in this recipe. And the ratio of
eggs to liquid is about the same as the
Quiche Lorraine and I have done this deliberately to
make it easier for you to get comfortable making your own
combinations and recipes. So, three eggs with
12 a cup of cream, or in this case F. You
could also use yogurt, but maybe not sour cream
since it curdles in heat. And this is mine's influence. One vegetable bull cube, which I'll now put in literally
everything season with salt and pepper and only use salt if you're
using fresh salmon. Smoked salmon won't
need any more salt. And then 34 a cup of milk, which will be enough for
a regular dish and will be slightly too much for
a more shallow tart pan, which is what I end up using. Whisk this together, the cream fresh may still be
a little lumpy, but definitely make sure you
break up that Bouillon cube, set aside the custard and slice two large leaks if you like leaks and if you don't,
what's wrong with you? Sorry, I meant to say
use two small leaks, then finally dice
one small shallot. To do that, we make thin cuts
perpendicular to the roots, leaving the roots intact. We make slices
parallel to the roots, making a mostly even dice, heat a tablespoon of oil over medium heat and add the
leaks and shallots. Toss them around to get
coated in that oil. We'll cook them until they've lightly
browned and softened. So, I don't know,
five, 6 minutes. I added them to the custard, but I think it's better if
you keep them separate. Now, chop 175 to 200
grams of salmon, which I estimate
to be about a cup. You can use either smoked
salmon or fresh cooked salmon. I have seen a few recipes
which cubed raw salmon and it gets cooked while the entire
Quiche cooks in the oven. In this situation, I
had a fillet of salmon that needed to be cooked and
that's what I chopped here. Smoked salmon will ultimately
be a milder flavor, but if you know you like
an intense salmon flavor, go with Wildcot Farm raised salmon would
also be fairly mild. I also have about a four cup of sliced Swiss cheese because I didn't have shredded cheese, but you should use
a shredded gru air and that would be even better. You will have pre
baked or blind baked your crust and we'll brush on two tablespoons
of dijon mustard, then cover the bottom of the crust with
your chopped salmon, and then layer the
shredded cheese. In theory, you would
then layer the leaks in shallots as I'm pouring in my custard that has
all of this incorporated, I'm realizing they
should be separate. I'm spreading out
my leaks before adding more of that
custard liquid. This is a very shallow tart pan and I'm not sure how much
my crust can handle. I definitely make a
miscalculation here because I have to spoon
out some of the custard. My crust fell over
during the blind bake, and now the custard
is trying to run out. I baked this at 03:50
for 40 minutes. Technically, my oven runs hot, so I baked at 03:45
for 40 minutes. I always turn it down
five degrees and bake for ten to 15 minutes
longer for everything. If you know you're
at an accurate 350, you might be fine
at 30, 35 minutes. I'd start watching it at around
25 minutes and we're just going until the middle
doesn't jiggle anymore. It doesn't need to be
completely cooked, but it doesn't need to look like liquid in the middle either. And y'all, it is so perfect. I am really proud
of myself here. The custard leaked out a touch, but it didn't leak
through the bottom, so it was easy to
remove from the pan. That's usually the
biggest concern if your custard leaks through. But look at that bottom crust, y'all, and look at all
the fillings in the kish. It's good. Once
it's cooled down, it's better the next day. It's irresistible. Three to four days later have
so much fun with this and I hope you serve it to lots of people and they
beg you for more. That's it for
salmon and leakish. And they'll see you
in the next lesson.
15. Homemade Crust Recipe: Okay, let's make a
crust from scratch. This is a Jacques Pepin recipe, and I use this crust for
sweet and savory recipes. It is delicate and also strong enough for
apple pie and quiche. We need very cold butter
and very cold water. One, a two cups of
cubed cold butter and two cup of ice cold water. I will stick both of
these in the freezer once I decide I'm making this
and prep everything else. So they've been in
the freezer for 15 to 20 minutes before
I start using them. Now you can do this by hand, but a food processor is much quicker Measure 24
cups of flour or 330 grams. Add your nearly
frozen butter chopped into four inch cubes
with a teaspoon of salt. You can also add a
teaspoon of sugar, but it's not necessary
unless you want a sweeter crust
pulse eight times, about 1 second each, then run it for ten
straight seconds. It should have the
texture of sand. What we're doing is covering the flour with butter to
prevent gluten formation. This helps get a flaky crust. Now we run the processor
and drizzle in the ice, cold water until it
comes together in large bits and you may
not use all of the water. Then we gently fold
it all together. Again, not looking to
knead the dough because we don't want gluten
formation folding. It makes even more layers and encourages flaky
layers to do that. Just fold down or up to down, and then side to side alternating until you fold
it about eight times. This recipe makes two
crusts, by the way, and you can freeze the
one you're not using, bring it together into a ball, wrap it in plastic, and let
it rest for at least an hour. Then separate the dough evenly into two balls and roll
out what you need. This is pretty thin because
I'm using a ten inch pan, but basically you'd roll it out one to 2 " wider than your pan, and that's to cover the sides. This isn't too sticky, so I'd like to fold it in half, then fold it in half again to transfer it to the pie dish. This keeps it from
breaking or cracking, and I can just gently push it
into the corner of the dish again without stretching it and compromising the strength
and integrity of the corner. I'm cutting the edges about half an inch or maybe
a third of an inch bigger, because I want to pinch it over and just try to
create a stronger, almost double layered crust
around that top edge. But most of the time I roll the rolling pin
over the edge of the dish that cuts the
crust evenly on top. We'll pre bake this before
adding any filling. Use a fork to make
holes in the bottom and weigh it down with
dried beans or pie weights. And this keeps it
from bubbling up. Now it will shrink because of all the water content and the butter that we used. If you want, you can substitute about a third of the butter
with vegetable shortening, and that will reduce the amount that it shrinks when it bakes. Regardless, I blind bake at 400 degrees for
15 to 20 minutes, or at 375 for 25 to 30 minutes. We just want it fully cooked
before adding the filling. Try one or the other,
depending on what else you're doing with
your oven that day. Then check it every
10 minutes or so. Mine still bubbled in this
one area and up on the side, and then the side fell over, but it ended up being a thin and strong crust that didn't get soggy with
the salmon and leek filling. And it really highlighted the elegance of the
filling itself. If you like to bake, I recommend getting comfortable with
this one because it is so versatile and easy to come together and such
a pleasure to handle. That's it for this
bonus lesson on homemade crust and I'll see
you in the next lesson.
16. Closing and Thank You!: That was some work, which one was your favorite? I personally loved the
Persian herb frittata and basic cheese omlet. I have several
more variations on my list of publishers so keep an eye out for
those announcements. If you've got anything
helpful out of this class, please leave a review
which lets you select pre-populated options that
reflect your experience. Me and Bejesus. This isn't Bejesus, this one is, we would be grateful
for that and I made this little guy from
another Skill-share class. If you have a request, use the Discussion tab to point me in the right direction. That's also the best place to
share your experience with a particular recipe
like if your family has its own variation
that you'd like to share. This may be the whole reason
I created the course, to get the family recipes. You can find all non egg recipes on my YouTube channel,
Cooking Companion TV. I look forward to
seeing your creations and sharing our
weird egg obsession. Thanks for watching the class and I'll see you in
the next one. [MUSIC]
 Jenna Edwards, 'Cook The Best' series