Transcripts
1. Introduction: Welcome to this class. This is a continuation of styling with pen drawings
in five easy steps. This is an extra, this is an addition to it on different techniques
because there's more techniques you
can do with a pen. In a previous class we've
discussed how to sketch, how to do hatching, crosshatching, and how
to do some scouting. In this class, we want to
take those techniques, create a beautiful
autumn drawing with some new techniques to it. We're gonna do some come to
and cross contour shading. We're adding that
to the techniques. Hatching and crosshatching
is great for shadow, scumbling is great to add some
details to show any issue. Really great technique to add some form and shape
to certain objects. I want to show you on
which object to use it, which objects how to use it. And we're going to take
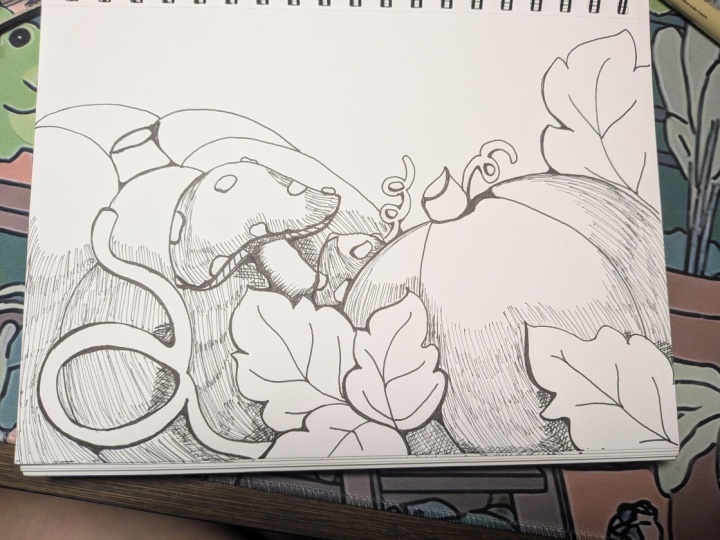
you through that process. The way I will do that, create beautiful autumn drawing, pumpkin, some pine cones, so acorns, chestnuts,
some good in it. And I'm going to show you
which part you would use which technique
on to get a nice, great looking, pretty awesome. And we're gonna
do that together. Class. Now the drawing,
we're going to create a class we can also
use as a base. In the next class I'm going
to do about alcohol markers. Let's start with this class.
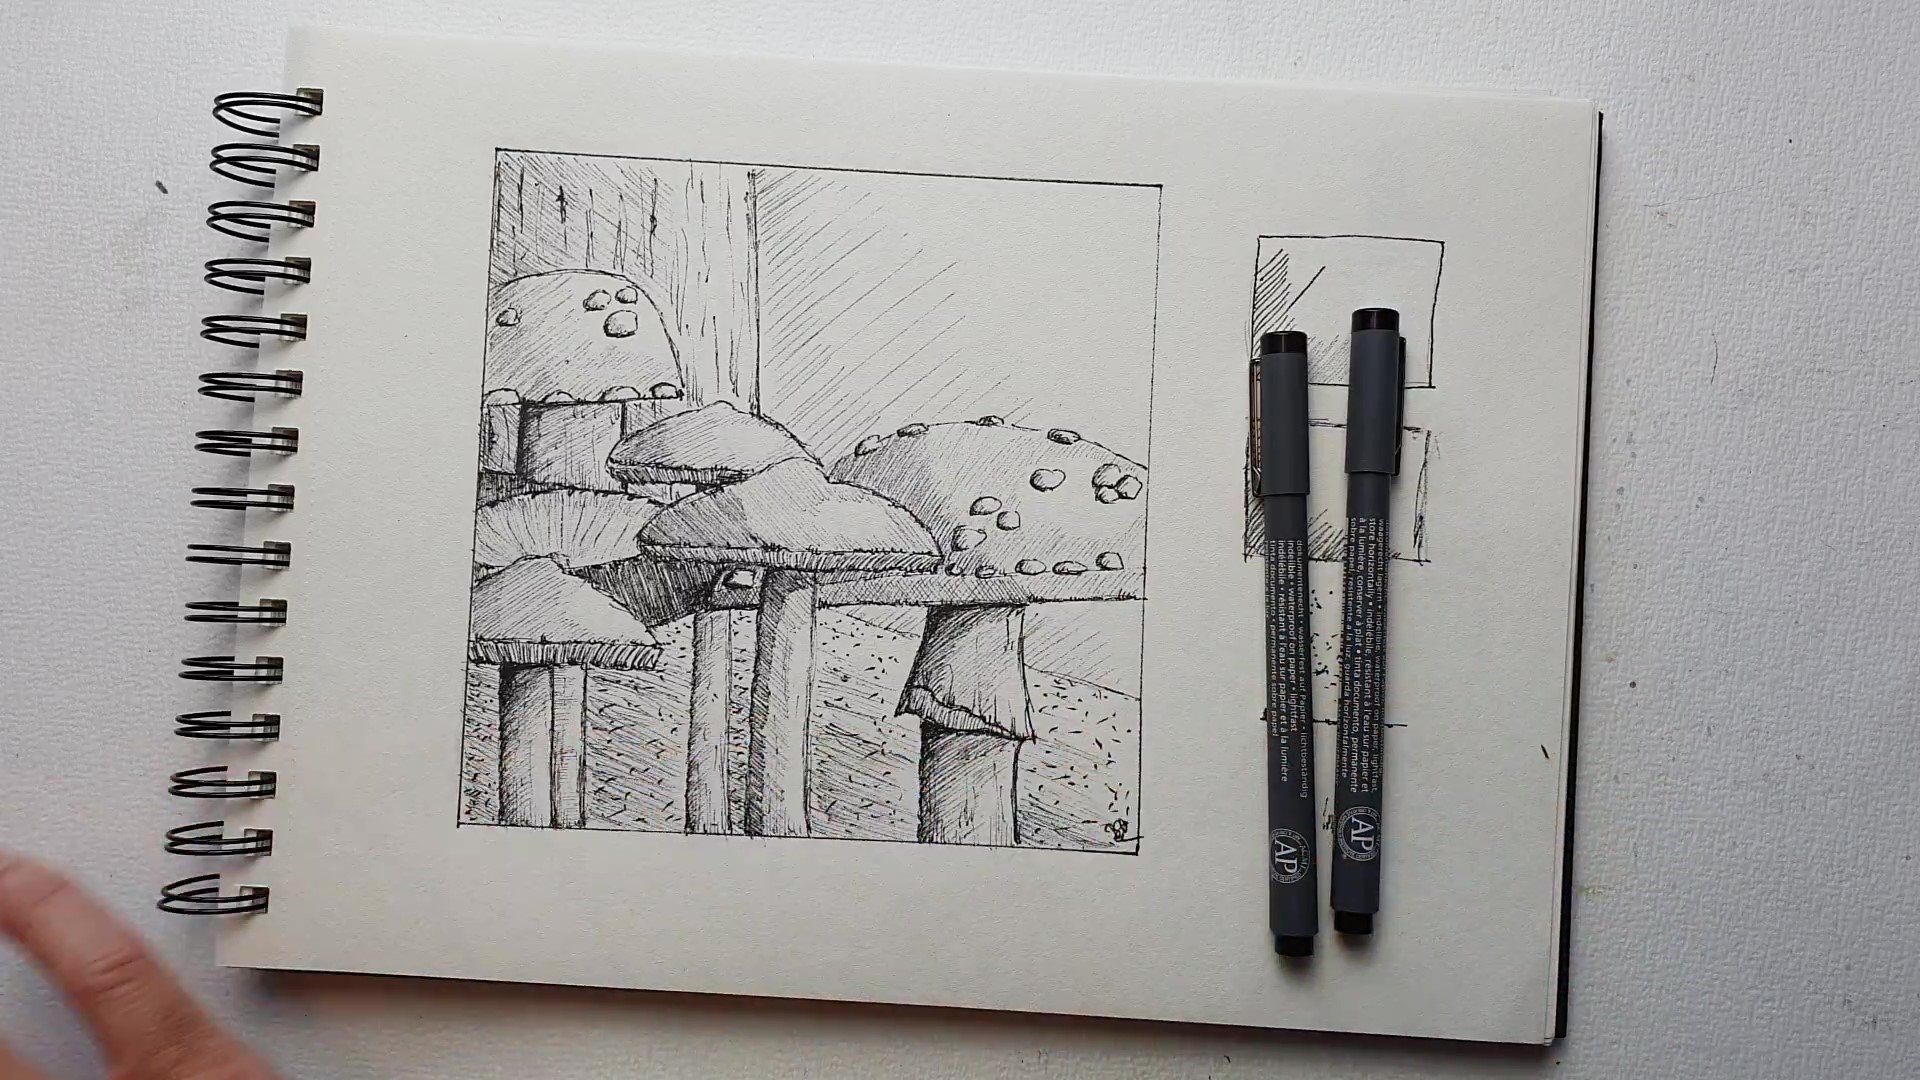
2. What do you need for this Class?: Let's talk about the materials
before we start drawing. Now the first thing
you're going to need are some finite and I'm going to work with
fine lines on these. And I'm going to use waterproof, plead proof fine liners. Because in the next class, I want to actually color
this with alcohol markers. I want to make sure
these don't bleed. Bleed, bleed proof,
archival, fine liners. And I'm using a range
of 0.50 point 3.0, 0.1. She has a range of
0.80, 0.50, 0.3. We only use 0.30
point, 2.0, 0.1. That's okay too. But
if you have the same, Then I would say use the same. Marcus. Next thing I'm going to show
you on the other camera. The next thing,
what do you need? What I'm actually going
to work on is this paper. It's by spectrum nowhere. It's a premium market pet. But what this is, this is
just regular Bristol paper. You could use
something like this. Bristol taken block,
storage, drawing block, or even a mixed media
multi technique paper, just as long as
it's 250 g or over, just a nice thick paper so
that we can work nicely on it. But if you have Bristol paper, not the film won, but that's smooth one. Yes, please use that. Or this is called a
market portfolio. It really thick paper. You could use the thin marker tattooed, I would work fine. The next thing you need
is this drawing I made. Or if you want to make
your own composition with the photographs that
are supplied in the book that comes
with this class, right? Then, please do so. But you need to transfer this to the paper you're
going to work on. Now, I used a light pad. If you don't have a light pad, you could hold it up
against a window and then put your paper over it
and then start tracing it. But I didn't trace it
completely. I did it. I'm gonna get the thing. There you go. I created a sketch of it, so like we've done in
the previous class. But if you want to
use continuous lines like this, that's fine too. And that's all you need. Nothing else. The paper, preferrable
thick Bristol paper. The same markets, but you're going to need the fine lines and you're going to
need that prints. Once you've cut these materials, you need to transfer the drawing to what
you're going to work on. Make a sketch, or use continuous lines or create
your own composition. That's fine. Once you've done that, once it's on the paper we're
going to work on, then move to the next class. What we're going to
start actually shading.
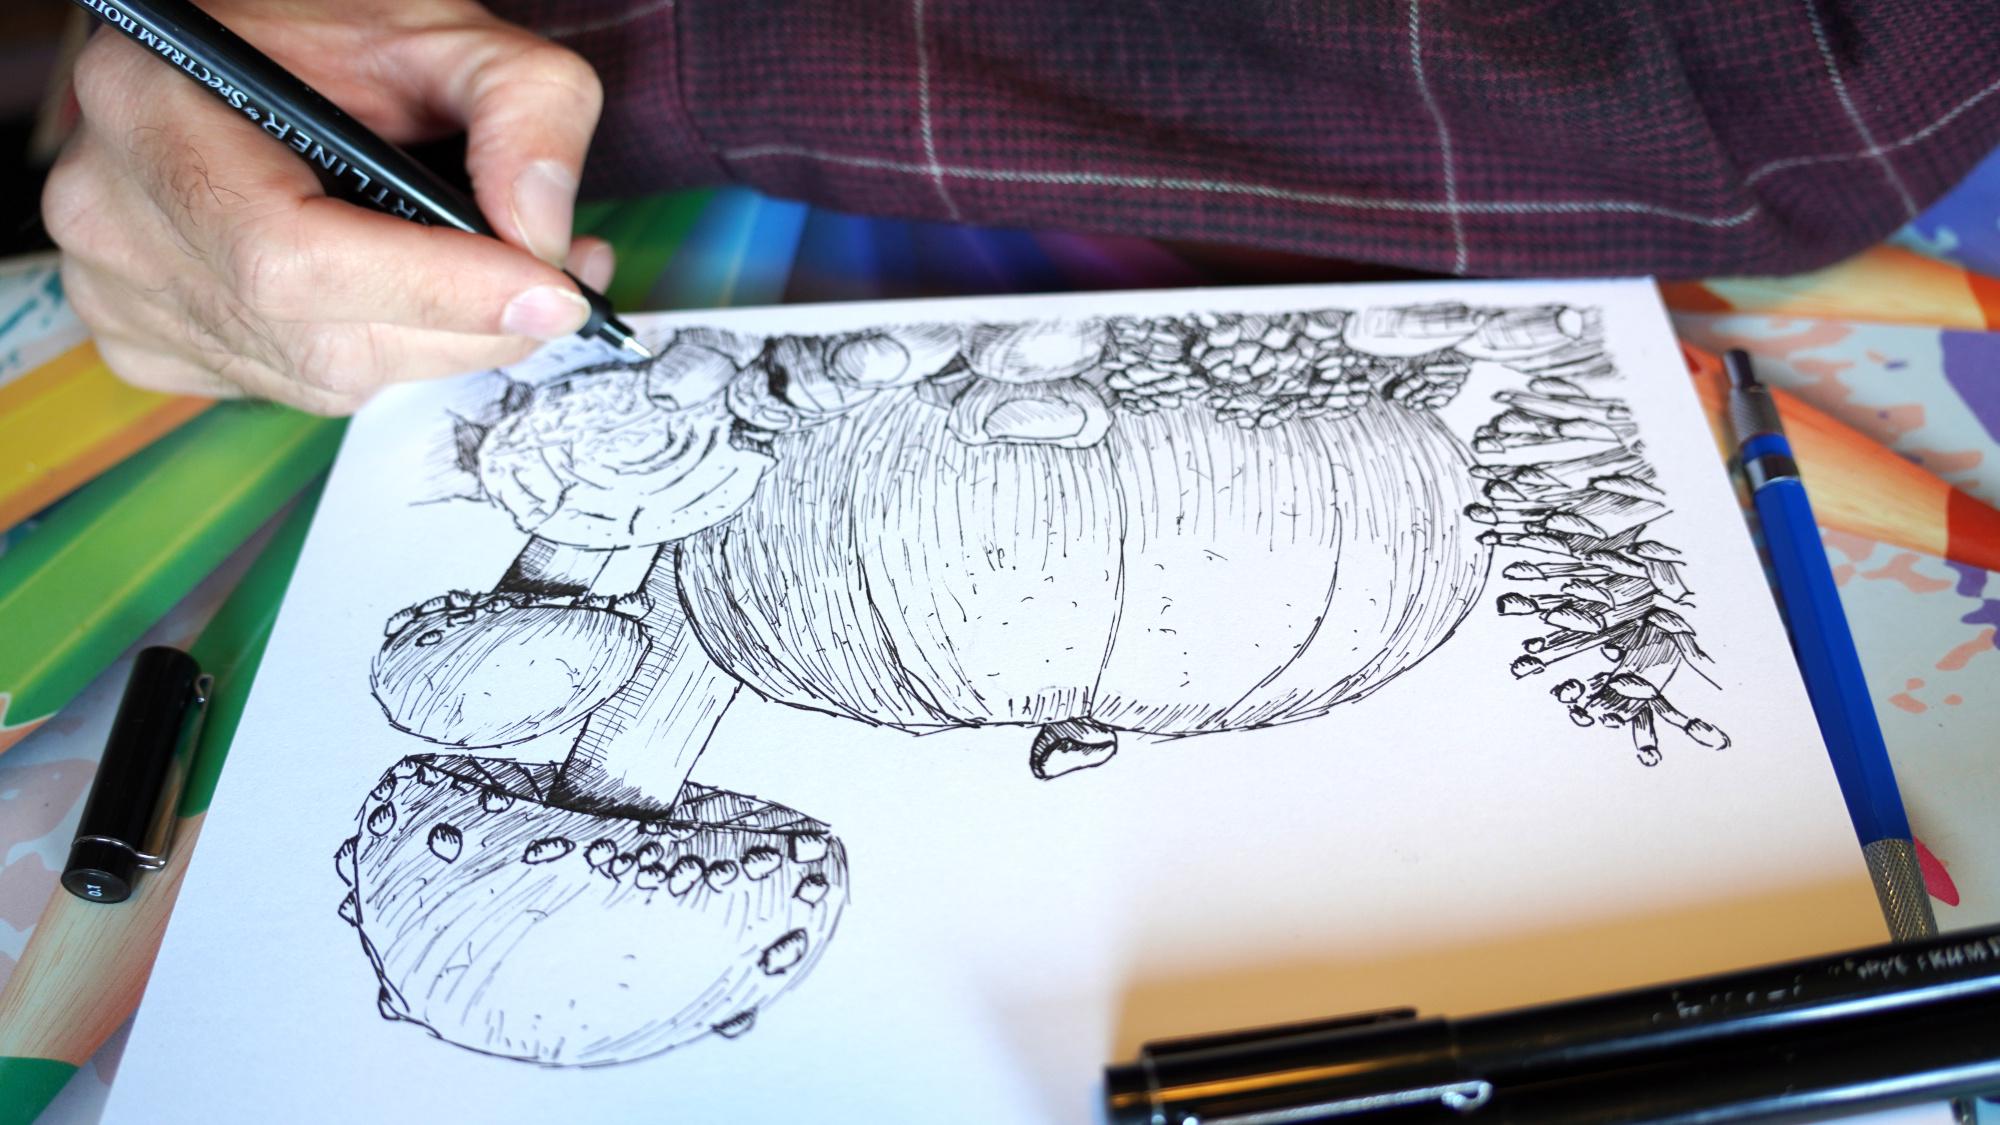
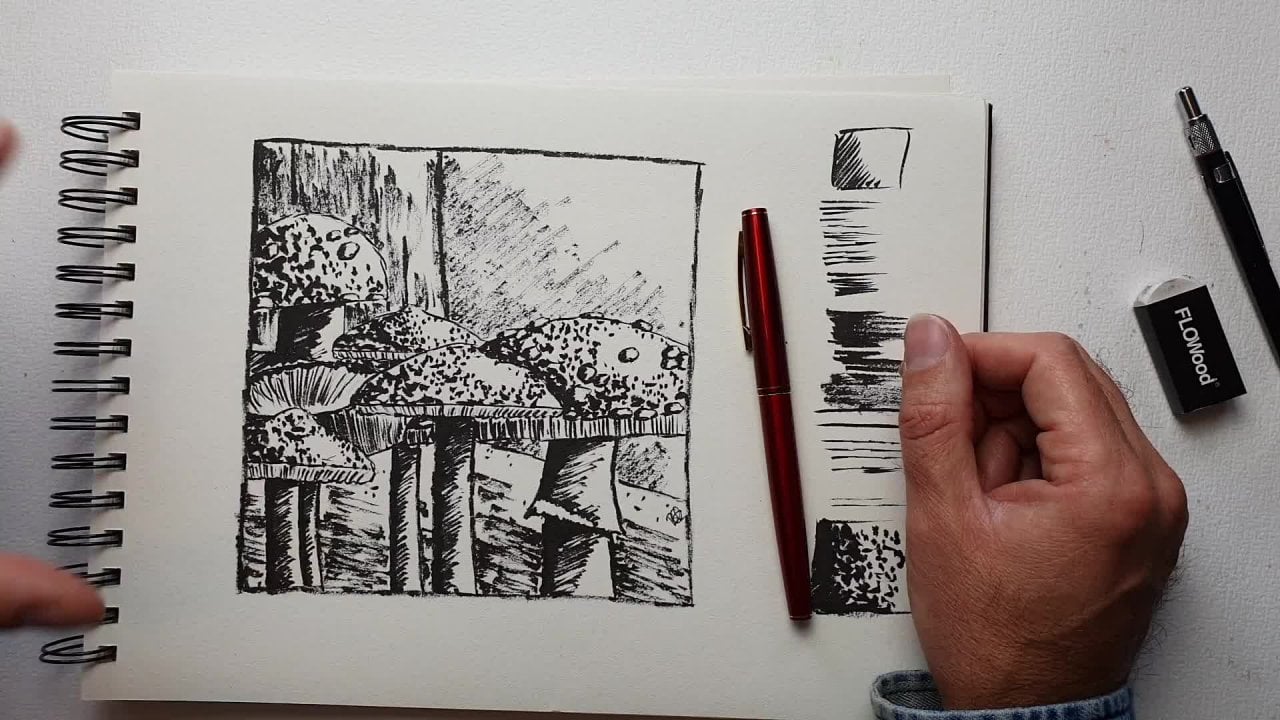
3. Step 1 Shadow Lines: We could do this drawing exactly the same
as we've done in the previous class with
those techniques with the scumbling and the
hatching and crosshatching. But we're not gonna do that. We're going to use some of
those techniques again. Yes, of course we do, but we're going to add a
little bit more to it. We just don't want
to use those only. But I'm going to show you
some new techniques to, we're gonna do some
contour shading which is slightly different
than the hatching. First, want to just walk
you through that drawing. And while I'm doing that and
then filling in those parts, I want to show you
the new techniques combined, the old ones. All right, let's start. I've drawn the drawing
with the thickest one, that was the 0.5.
There was this one. So I'm gonna put that one aside. Don't need that anymore. I
now need the 0.3 and 0.1. The first step we're gonna do is just actually the same
as what we've done. Some of the areas I want to check and see where I can use. Some just regular hatching, the regular hedging we've used, and some of the darker parts. So let's see what
would we do that. We're going to think that over. The first part, which I'm going to hatch just regularly
is down here. There's two parts,
so I'm going to go one way and I'm going
to go dy other way. Yes, that we have the first one, the next bit, which would I do? I'm going to hatch just
under here the shadows. And we need to
determine, of course, where light comes from. We can go from this side, this side, Let's go this side, I would say m. But let's fill up those dark parts first where there's actually
no sun at all. So what I'm gonna do
here is I'm going to hatch nice and thick. I think I want to hedge
a little bit there. This part. I do
want to hedge now. This part, if you have that, I'm not sure if I
made a mistake, but that's really thick. I'm going to hedge
this part here too. Right now. I'm just adding a few
parts here and there had sheen already makes
a nice difference. Hedge that too good. And I might leave that for now. Now let's do some here too. They go good. Now we're
done some hatching. The next one, what are we
going to do if this same pen, we're gonna do the first
different technique. We're gonna do
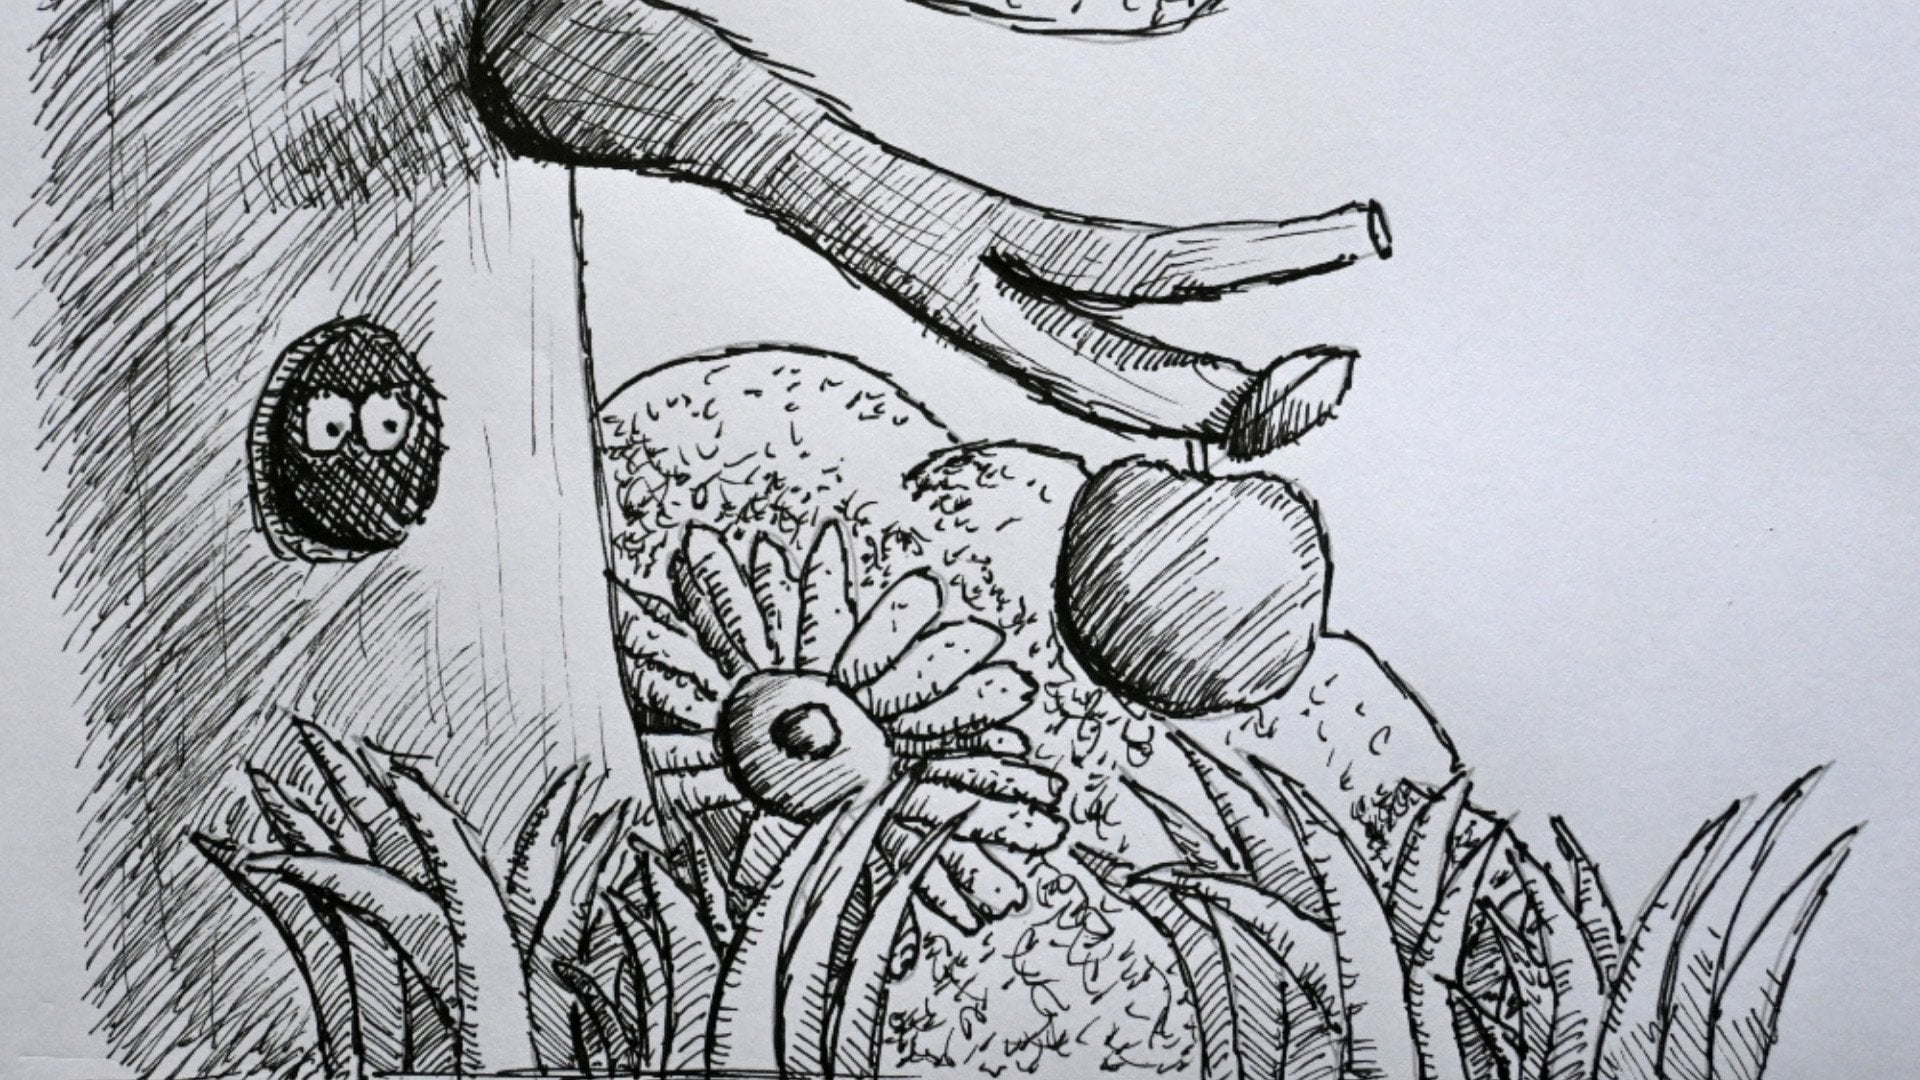
some shadow lines. And what do I mean
with shadow lines? Shadow lines are simply lines where the shadow
would be really strong just to give it a little bit of an extra
detail accents, e.g. if I wanted to shadow line, I'm going to definitely do that on scales of this mushroom. Yes, these are called the spots, you call actually caught
scales on a mushroom. Down there. I'm just adding a little
bit of an extra line. Devo, little detail. It will excellent scene that gives you the sense of
depth right away here too. All right, so now under here, definitely do that.
They go, right. I'm going to leave
that to dry for now. I'm gonna go to this side now
if my light comes from here somewhere, then right there. These little details
there right away on the HER2 away from the light, I'm just going to add
an extra shadow line and see this gives
you some depth right away. There you go. No. Did I have all of them? Probably. Let's see around here. A little bit there, here too. On the back here. Now,
these all of them. I'm just gonna do it under them. Where the shadow
would be here too. Good. Alright, good. Heroin we want to
do down there too. Okay. Let's see around here. Definitely here, around
this site. Over the line. Here too, with a line. Now here are the acorn is. And here's the acorn
gonna do that here too. Now let's see the move here. I don't think I want it
too much yet about that. Let's see here. Distribution of
food. Let's stand out a little bit better. Okay, I think I've
got some here. Let's put a line here to write. This line doesn't
seem to go anywhere. Let me get the print. We seem to have missed
something here. Let's see this one add as
a line going right here. There you go. Now
it's complete again. Alright, let's do the
shadow line on the HER2, even at the back, right there. And let's do these thicker to
the gills of the mushroom. What actually is a Dodge Tool? And on the here we do
it with did it there, but we can do it right here to give that a
little bit of extra. Okay, That's the shadow line. Alright, so that's
the shadow line. We're just adding a little
bit of an extra line, a thicker line to just
bring out some details. Create a little bit extra. Check the drawing again and do a little bit more
hatching at some spots. Alright, little
bit more hatching. Let's see. I missed
something here. I want to do some
more points hashing. Let's see it down here. This one. I definitely do want to hedge. I do want to have some shadow under here, also some hatching. But I'm going to go with
the thinner pen for that. Goods. This, on this side, I'm going actually
the other way. Good. Looks good. Let's see. We want
to add some shadow there and we're gonna
do that later on. The hair may want to add a little bit of shadow
here with the thin pen. There you go. I don't wanna do that here too. Then get that thicker pen. I'm going to put the
0.5 away and I'll do at the top there. Alright, that looks good. Let's see what will
happen to thick pen. Add some shadow down
here to there you go. And the rest were gonna leave for now we can do it
on this one here. Little bit rough, and
then get the thin pen. Do an extra one. Now let's do this one too
then with the fin pen. Just some strokes here
to alright, good. I'm not gonna do
much more there. Let's see, on the acorn, we're going to do
differently. On this one. We're going to do it differently
and I think we're fine. Let's do it here too.
We've to thin pen. At some hatching. There, there we
go. Alright, good. Now we've got a lot
of small parts here. We're going to do
hedge those two. And let's see wave
from the light. So light shines from here. So I'm going to do some
shadow at the bottom. But this, I want to
shade all the way. This do this only at the bottom. At the bottom, one
at the bottom. This one want to shade all
the way here to this one, I want to shade all
the way at the bottom. Here at the bottom,
Let's see this one here, this one all the way again. So a bit from an
angle, as you can see, I'm not drawing every
shadow in with my pencil. I'm just going in right away. Dimensioning the light
comes from here. So I'm creating actually lines. This one you can see
good, just like that. So did you get a little bit of play between light and shadow? And some of the parts like
this one, I'm doing thicker. And there's actually
probably not really afford behind it. These are just the parts
that are under it. So I'm just putting them
with a complete shadow so that you can see that those
are the deeper parts. Well, that's the Ford
behind it there now. These all at the bottom. Not this one all the way. This one all the way. This one all the way here too. Nice and thick. But this
one only at the bottom, this one only at the bottom. This I missed. Let's see here I missed one. Here. Going the opposite way. I can do everything. Here to there you go. Some dark lot parts,
some lighter parts. Not I think bit at
the bottom there. These pine cones are
pretty much done. So that works good
with the hatching. Let's see. Here I'm not sure yet. Here what I'm gonna do. These these parts I'm going
to share shade differently, but the top part, these, I might as well hedge as
with the previous ones. The one I'm doing all the way. See, I have get all of them. Now. Here's one. I think. No, it hits do
want, and they want to. Alright, so I'm
good with debts now with these spots to scale. So I'm gonna do the same. I might do that with
the smaller one. Gets some finer detail. Yeah, that's better. There we go. Oh, here's some more. There you go. These two. And let's not do them. Let's do this one, we do this, but let's go the opposite way. These are good. Alright, good. I think we might
have pretty much it. This part. Just a little bit at the
bottom. There you go. Now, as you can see, I'm
alternating a little bit different between the
thicker and thinner pen, the really small parts and doing with different than other
parts of it are thick. But later on we're going to
add some more power of free. We're going to work
with that a little bit, but not as much as in
the previous ones. Okay, I think I'm done
with this hatching. In the next lesson, we're
gonna do some contour shading. But if you haven't done this, then I would say,
do these paths, fill them in with shading? And then I'll see you
in the next lesson.
4. Step 2 Contour Shading: We're gonna do a little bit of different shading than what
we've done before so far. We've done hatching in the previous lesson,
we had some scumbling. Now we're going to look
at that contour, shading. Shading, like it says, it follows the contour
and then there's cross contour that goes
across against the contour. Perhaps that makes total sense. Or perhaps now you're
looking at me and thinking, what are you talking about? I'm going to show you that. For that, I'm going to
take a blank piece of paper and I want to use
a pencil for this one. First, I'm going to just
draw, let me draw the box. The famous box. Yes, I'm just going
to draw simply a box. Let me get just a
single sheet of paper. There we go. If I draw a box simply like
this and I want to shade it, I'm going to keep the light. Why they're normally,
if we go patching, we go like this. If you go contour shading, you actually follow the contour and the contour of the box will be this line or this
line. You have a choice. I'm going to follow these lines. If I'm going to
come to shade this, don't wanna do that with
the thick one, but 0.3, then what I will do is shaded like that and you
get the same effect really. And then if I take
my finished pen, then the next layer
would be around here. And there you go. And that is contour shading. So instead of going this way, I'm following the contour. Now with a box, probably
won't see much different. But if you're going
to draw a circle, I'm going to draw,
draw two of them. So here's one. Here's number two. What would happen if you
shade this one regularly? Then of course we know
what we're gonna do is add that shading like this so we could do a little bit of cross hatching right there. Now, that gives some
sense of depth and a nice shading for
light and dark. But it doesn't give
me a sense that this is actually, could be a bull. Imagine this is a bowl. If this is a bowl, we need to add shading a different way. What we can do with that
is let me move this ball. If I add this line here, now you get an idea
that this is a ball. This will be the contour. Now, if I'm going to
add a second line, let's say like this one, the cross contour line. Now you definitely get the
idea that you're looking at a bow instead of a flat
object. This is all flat. If I would add some
contour shading here, I will go like that. But around here, I would
follow the contour more here. Where at some point they meet and I get just
a straight line, a little bit like that. And if I go with the contour, cross contour here, I
would go like this. And I will follow
the contour there. Around. There wouldn't be a straight line where they meet. And now you get the idea that
we're talking about a ball. Now, let's imagine here again. I'm not allowed to
touch that bit. I'm going to get the
0.3 and I'm going to just shade that in. And I'm following the contour. I'm imagining how the contour
of this ball would go. And the same here. I'm starting at this
point where the two meet, you get actually
a straight line. And if I will do it at around HER2 bit round here too. But around here I'm
following this contour again until the
two contours meet. And there you go, you would get an whole
different kind of shading. Now if I want to add
some extra shadow now, I did it with the wrong pen, I think, Oh God is good, 0.1. Then I could just add, as usual, the extra shading at the bottom, but the bottom I
would go this way. And there you go. And that is contour shading,
slightly different. So what best thing you could do. Perhaps find something
that is round. I've got something
here, nice bottle. And you just trace
it with your pencil. There. That is a nice round. Now I want to have
some contour on this. So I could go this
way. I have a choice. I can do this. There you go. And I could do this depending
on where my point of view. So now my point of view
comes from the point higher than if I
were to shade this, I would go with that contour. But here I gotta
follow this contour. And up here I'm
following the contour. And there you go. Now around here, I'm
following this contour. Let's say I'm going
to shade this part. But around here, I'm
following this contour. And you just have
to imagine where these two contours
probably somewhere that would meet
something like that. Then you get some
shading like this. There's different,
but now you really get the idea that
this is a bowl. So this is a flat object. These are bowls. And so you could take
that object and just, I would say do a few. You can do, of course,
with your pen too, if you want to draw couples, get something small that
is nice to work with. And then add some. Now, this one I've
done like this, let me go with this one
the other way around. Then. Let's still do that to see you and now
you get a different view. And with this one,
Let's do the same. Let's go down to the ego. And depending on where you
put these first lines, that terms also a little bit
and look, but that's okay. We don't need to match. So if I will shade this one, I would go follow
the contour top. Now I'm going to follow
the contour right there. At some point, these
two must meet this. I'm following, this
is my main line. So the main contour would be on this side a little bit where
the round points to it. That's my main site
and the other side, I'm gonna just come to shade
exactly the opposite way. Now here it's pointing down. So I'm going to follow
the shading like that. And this one is
pointing this way. So I'm going to follow
the shading like that. And if I'm want to shade this extra site and we'll
just start on the bottom. And then let these
two meet again. And here too, if I want to shade these top a little bit extra, that's a bit sloppy
here these two meet. And there you go. And I'm not shading that part. And you do the same with a pen. Alright, that may
take a little bit of practice getting the idea.
I'm going to show you. Let's do a cylinder
that's probably easy to do some
contour shading on. Let me do that, right? Let's do a cylinder. Let me draw a cylinder. Now. Cylinder would have a top, would have straight part. There you go. And look like this. Now, if we do the hatching, we would go like this.
We're not gonna do that. We're going to use the contour. So let's say my light comes
from steel from here. So this part will be shading. I'm going to put them in. But what I'm going to do to
turn my paper a little bit, I'm following the contour
with the shading. So I'm putting in that contour. Instead of going straight, I'm following the contour
now the cross contour on the cylinder is easy
because you would just go, let's say I want this
some extra shading. I will go simply
straight with Dead Sea. And now you get that
idea and in here, you could put them
round like that. Not here because you're
looking in to the cylinder. So following that top contour, basically, there you go. Alright, and that's how
you use contour shading. Let me demonstrate one more. Yeah, let's do one more. Alright, one more. We've got some, let's
do, let's say a bottle. Now, if we do a bottle, we got the top part. And then this goes out. And then you have
the bottom part. There you go. That's a
nice puddle, isn't it? Now, if I want to shade this, what I'm gonna do is I'm
going to say same light. We're going to keep
the line there. I'm going to now make
free areas. There you go. If I want to shade this, I'm going to just
follow that contour. Now around here. There you go. And I want to keep it around. If I want to add some extra, I'm just gonna still imagine
this part going round. If I want the really dark part, I would go cross contour
for that bottom parts. You know, you get a
nice shaded bottle. Now in here I will do the
same as the cylinder. Do that round. And there you go. If you want to make
it really complete. Bit like that. A little bit of
shadow down here. Then at the bottom, put a shadow line. And that is how that would look. Alright. That's come to shading. Now, the objects we have
in a drawing won't be too complicated and you want to show you those
in the next lesson. So practice this a little bit. I won't share a little
bit familiar with it. Then I'll see you
in the next lesson.
5. Back to the drawing: Let's finish our drawing. We're going to make
use of course, of this contour shading, doing it in a little
bit of various ways. And I'm just going
to talk you through this process. Well, let's go. Alright, let me move this aside. I'm going to put my
pencil aside for now. Let's see. I'm gonna do that
right away with my pen. Now if you want to do
it with the pencil first and please do so. Contour shading. Now,
we're going to start with the pumpkin, 0.3. The pumpkin is really
obvious the contour, because most of
these lines are in and we're going to
follow these lines. So if I want to
shade the pumpkin, let's say I'm going
to use the pencil. Now here let's see. We want to have let's see where we want to do that
on the mushroom to yeah, let's add in some spots. I don't want to touch this. And on the pumpkin, I want to go something
like this roughly. Yeah, not, not science
here on this one. I want to have the
two and the rest. I don't think I care about. I'm just going to
leave that like it is. Let's start on the pumpkin. What we're gonna
do on the pumpkin, I'm just going to
follow, of course, the contour line now I want the lights more or less there. Most of the lights there. So I'm going to just start
then hatching. This. I'm not going to use
many lines to hedge, but I'm following the contour. Diego, that's the first part here to following the contour. And up here, I need to go
there and around here. Now here's the tricky part. This would pretty much
almost be straight. Let's give it a little bit
of a curve. There you go. And up here, definitely, I want to follow the
contour going away. This line will be my guideline. And there you go. Now, here we're going to have the tricky part
where the two meet. So we're going to start with
this one, do a couple here. Let's say we're going to put our straight shadow or shading, shading line right there. And the rest we're
going to just meet. And this one goes there and now we need
to go the other way. If you want to turn
your paper around, make it yourself easy. Just please do so. I'm going to start at this one. I can follow this contour. And we don't want to touch
that middle part, then you go. And this one are easy again, just follow the contour here. As you can see, these
are not doing in one go, but I'm making some
interesting, nice lines. There you go. Now by adding quite some
shadow shading on here, this will get a little
bit of the attention. Now next thing I'm gonna
do, I'm gonna say, alright, if I have the extra shading, I think I want to go here. I want to go there.
I want to go there. And with this one the same, I wanna go there, get the 0.1. And this one I'm just going
to follow that contour to add that extra shading
in On the day. Alright, Good, Let me
do some extra there. And what I wanna do
here on the bottom, I definitely want to do some extra contour shading
only at the bottom here. Let's do this just a little bit. Alright, Good. Now let's see. That looks quite
nice, doesn't it? Now you could have done
this with hatching, but now you get this sense. This is round instead of flat. If we've done this
with hatching, this would've looked very flat. We're going to do the same
around here on this chestnut. Want to follow the contour
now, move to chestnut. We're gonna do come
to n cross contour. Let's see, this is
our contour. Here. They go. And with
the cross contour, I'm gonna go this way. So I'm going to
follow these lines. Do that with the zero-point. Start out with zero point. What does it? 0.3. Got right one. Yeah. I'm not touching the middle
part and here we need to get these two to meet this. I'm gonna keep on shading and I'm going to do
some cross contour. Let's see around here. And around here too, that you go and
let's add up to 0.1. Let's add some extra
shading around. There you go. And later on, we'll
remove these lines. Now with this one, I'm just going to
follow the contour. And around here, I'm actually having the
thin pen. I realized that. So let's keep on going
with the fin pen, adding some extra at the bottom. Now, this part here
we need to shade. But I'm gonna go with
hatching on this part again. There you go. A little bit of a nice contrast. This one, Let's go
back to the 0.3. Now, that one would get a lot of light here, but not there. This one, we will just I will
hatch that is way easier. And with this one around here, I would do just a little bit of contour shading
and around here. Also a little bit. See, now you get that
idea right away. This is rounded and at the
bottom a little bit extra. And here you might actually
do some crosshatching. Here a little bit.
At the bottom. See, now we're getting forms and shapes and
that's what we want. When does really
complicated shapes, you may want to
alternate a little bit between hatching and
then come to shading. But if there's
obvious, round shapes, definitely go with
the contour shading and the cross contour. Let's take a look
at this part here. We've done this with
the regular hashing. This we're going to
follow the contour and the contour would be then
following this path. Now this would be lighted. And I'm having to 0.10,
0.10120, 0.3 first. Alright? And following
the contour, there is to come to the, come to, there is
to come to in here. Right there. Right there. Come to the, come to here. This is the contour. And whatever way they're going, we're following the
contour right here. This part, I just want
to go dark completely. Here's the contour, that
one I don't want to touch. Here's some contour. This one, some contour here
to here they go. This one, follow the
contour a little bit. This one down there. This contour goes differently. Here you go. This has a different contour and we're adding some shading right there. This is an open part. We don't want to do that. Next thing is we're gonna
get our little thin one. And just, let's
see at the bottom. Add some extra, this
one we haven't done. Here. We should get
some shading, the ego. This one at the bottom. Do that one. Here too. That's the open part. We're not touching
that bit extra. Then you go here, down here, we haven't done
anything. Let's do that. Let's see here. I'm okay with that. Okay, that looks pretty nice. Let's see. Only I think this
part now that is open to not we're
okay with that. Okay. Let's do slightly a little bit. At the bottom, little
bit of shading. Let's see, we've got
these acorns now. A corn, the top part
wouldn't be lighted on the, on the parts would be lighted. Let's go back to
the thicker pen. Yeah, 0.3. We're gonna do, we're gonna make it
ourselves slightly easy. Only do some at the bottom. This one to the ego
that would still give, because it's a cylinder. There are some, the idea
of that is a bit rounded. Now this isn't a corner. Two, Let's do that. One. Hey go and then the back there
is the book for the water. I'm not going to
think about yet. And we're going to finish the
acorns with the thin pen. And where there's some
shadow going on that you go. And this one. Let's do a little bit of
cross contour on this one. To still give it the
idea it is rounded. Or we could do that on this
one too. There you go. And now you get the idea. It's rounded, just pretty rough. Let's see, You can do
that here too little bit. There you go. I want
some more down there. Really get that dark. Alright, we'll leave it for now. We're gonna go to this one. Now, what we're gonna
do with this one, you could do this shade, this rounded, and I'm
having a thin pen for that. Yes, and I want to keep the
thin pen for that at the end. I want to shade a
little bit here. But I'm just going
to keep it flat. Then you go. And here I'm going to
do actually the same. Now what I'm gonna do next is add some straight lines here. And you're getting the secretly the illusion
by the straight lines. This is rounded. Even though I didn't follow the contour, could
have done that. I'm going to leave
that like this. Alright? This one here. I'm going to start back here. Take zero-point free again. Yep. And I'm going to just
follow a little bit. Imagine the contour a
little bit like this. Not on the spots place. Alright, if I want
to shade this, I need to go the other way. Here. I need to go
and around here, I think would be where
the two meet each other. Don't. And in too many
lines here, There you go. On there some HER2,
same on this one. Following this point here. Making them round here to
making this round going around, I would say, let's put the
straight line right there. And now go the other
way with the shading. There you go. I'm not going to do more there. Take that small pen
and around the bottom, I'm going to shade this one. Going in the direction
of the contour. They go. And the same here. Bit tricky. Only at the
bottom I want this. And then back here where I
said there's a lot of shading. I will add that indeed. Don't want to do too much. I'm okay with the
bottom here too. I think I put the pencil
line right there. So I'm going to add
just a little bit of extra shading and
I'm okay with this. Alright? Now, what we're
gonna do with the woods, I think I'm just going to take the thin pen, which
I already have. Unscramble this a little
bit. Now not here. This, I want really
dark this part in here. I want some really
dark parts to, let's see around this. Adding just some
lines here and there. Alright? Um, this could be shaded, this could be shaded, stronger. There you go. This, I'm leaving open. Alright, And what I'm
gonna do next is I know the shadow around here. So I'm just going
to use scumbling here to add that shading. And around here, I'm
on at quite a lot. And I'm not doing two pens on purpose because I don't want this to get all the attention. And I'm gonna do the same here. And a little bit of shading. There you go. Good. Alright, It's not the pumpkin. What I'm gonna do is I'm
going to add some scumbling, just random, just to give it a little bit of
hint of texture. And even on here where
there's no shading, I still want some
little bit of spots. And we're gonna do actually the same a little bit
on the toad stool. Let's do a little bit here too. Just some spots, not
too many. Not too many. And this, we want to do this definitely a little bit stronger to create
sends off difference. Now this has become more part of the a
con, but that's okay. Alright, good. Cross
hatch this part here. And hedge on the here. And I'm gonna cross hatch this
bar two and around there. I want some cross
hatching to okay. I think we're okay, right. Good. I need my eraser.
Find it there it is. Only erase this stuff. Wherever I've drawn. Want to remove it? I think I am. Okay. Let's see at a brush with it. And there you go. There is our autumn scene. Alright, now we've used all
the techniques together. Some, let's find them hatching around here, some
crosshatching there. We've done some scumbling like we've done in
the previous one. And we've done the new
techniques going contour and cross contour on these two, just get that sense of depth and that looks
nice, doesn't it? One thing I don't like it. Let's go for the 0.1. I forgot this. There you go. I want some more on there. And that is it. I'm going to leave it like that. You could do some scumbling
on this and here too, but I'm okay with that. Now we've got nice
some different parts. The boot gets different
kind of texture. Then the acorns and the pine cones get
a different kind of texture than the
pumpkin them together, you get a great drawing. It's one thing, one little
thing I want to change. One thing isn't clear that
the skills are under here. So what I want, basically, I want this to be a
bit more clearer. Then you go see a
nice fix shadow. I'm gonna do that here too. Right? I like that better. Now we're getting
the idea that is, this is the shadow
here is a skill. Okay, Now I am really done. That concludes this
lesson and that also concludes the class
basically projects. We'll talk about that
in the next lesson. For now, just do this. I'm going to, let's
talk about the project.
6. The Project: The last thing, the project. Now for the project, the easy part of courses. Once you've created it, will lead all of the seed
and don't forget to post it. In the next Class. I'm going to add color to
this with alcohol markers. So if you want to keep this one, what you could do is create a second one on
the Bristol paper, or create the second
one on different paper. Whatever doesn't matter. If you have done this
one on Bristol paper, then keep it and
create a new one, shaded again as you like it, and keep debt one
shaded and then use the Bristol one
for the next class. Now photos of course
will do the trick too, is made a photo of this. And then you have a memory
for fopen If you want to keep the actual drawing and next time you want to use it
for the alcohol markers. If you want to join
that class too, I would say create a second
one so that you have one for next class and this one to keep its old risk
for the project. Thanks for being with
me in this class. I really enjoyed the small
classes here on Skillshare. You can also visit my website. There's some classes there too. And just I would say
keep on drawing.
 Benjamin A, Art Teacher, illustrator Art by Benjamin