Transcripts
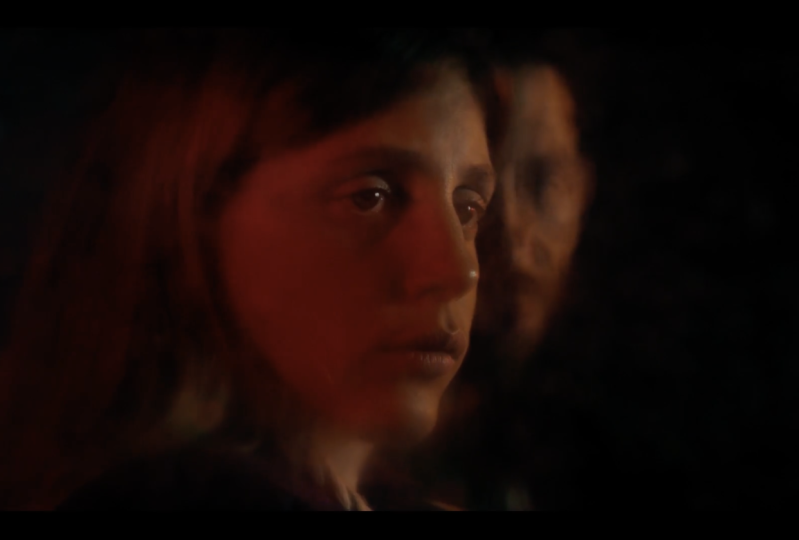
1. True Crime Intro: I ready to get started? So it was October 4, 2015, and I had just
gotten out of work. And so I decided to go to
pick up some groceries. When I walked in, I immediately noticed
something was off. I walked in and the
cashier looked at me. She looked terrified.
And next thing you know, I look over and someone has
a gun right in my face. From that day on, my life
would never be the same again. A question that I
get frequently is, how do you make something
look cinematic? How do you make something
look cinematic in the grade on set, shooting. And one of the best
things that you can know as a filmmaker or cinematographer is how to
shoot a cinematic interview. You can get hired on great jobs, high end jobs if your
interviews stand out. There's a lot of
cinematographers out there, a lot of filmmakers out
there that make their money, make their living
and move up strictly on the fact that they know
how to do basic lighting, but in a more unique
cinematic way. In this lesson, I'm going to cover choosing your location. I'm going to cover lens choice. I'm going to cover lighting, which is extremely important in creating a cinematic look. And I'm going to give
you other tips and tricks on how to take
your interviews and keep them from looking like low
budget corporate videos and have them look more like
high end videos so that you can become a stronger
cinematographer and a much better filmmaker because these skills are not
just for interviews. The skills that I'm going
to show you do carry over to other places in
the filmmaking world. Because if you know
these foundations, you'll be able to also light more cinematic narrative pieces. You'll be able to light things, whether you're in
an office space, whether you are outside, no matter where you
are these skills can travel with you and make
all of your work better. So let's get started.
2. What Will You Need?: Okay, so before we get started, I just want to go over
what you may need and some principles of
cinematic interviews. So first, what you
need, I would say, definitely, you want to start
with one to two cameras. I'd say two cameras is
preferred because cutting between two unique
shots is usually a little bit more
interesting than just having a single camera. Second thing you
need, obviously, you need a large light source, and I'll go over this a
little bit more in detail, but a good rule of thumb to remember is that the
bigger the light source, the softer the light. And the more cinematic
that lighting may look, the more natural it may look, and the less lit it will look. Because one of the key
things about lighting is that you never want it
to look like it's lit, you never want it
to look sourcy, which is usually a
term that's used. You want everything look
natural, cinematic, soft. Nice soft shadows,
which is usually one of the key characteristics
to making something look pleasing to the
eye and interesting. Now, one thing you'll
hear me say a lot in this class is that
this is an art form, so there's no solid
hard rules because there's a lot of beautiful
lighting that is hard light light that is not softened, light that is not diffused. But for this class, we're going to go
with typical traits, typical characteristics of a cinematic interview
and cinematic lighting. And with that, it is a
large soft light source. You will also need
an additional light that's used for a hair light. A lot of times tube lights kind of like this one are used. But again, use what you have. It's about practicing
your skills. You don't have to have
two amazing cameras. You don't have to have giant
professional light kits. Most of what I'm
using is pretty basic film gear, not too expensive. Yes, you can buy something super expensive, but for
the most part, it's stuff that you
can find online on places like
Amazon or B&H Photo, or on different online stores
for pretty decent prices. Also, the lenses you
choose are very important. For this class, I'm
using cinema lenses, which tend to have softer,
more pleasing characteristics. Modern lenses tend to
be extremely sharp, edge to edge, have very little characteristics
or very little character you can also use
older vintage lenses, photography lenses. Usually, when
something is pleasing and unique and
cinematic looking, it's because the lens choice is something with a
lot of character. It may have blurry corners. It may have, you know, a little bit of
vignetting in there. It may be super
sharp in the middle, and then just kind of
blends off to the sides. The lenses that I'm using for this class are cinema lenses, but they are budget
cinema lenses. Also, having something like
a bounce board for fill. Sometimes you need fill,
sometimes you don't need fill. So that's basically it.
One to two cameras, a large soft light source, some bounce, some
diffusion material, a back light, and that's a
good place to get started. And all of those things will give you some of the
principles of a unique, interesting, cinematic
interview like something you would see
on Netflix, for example. And I'm going to cover all of this stuff in this class in
a little bit more detail. So let's move on to
the next lesson.
3. Camera Placement: So in this lesson, I'm going to talk about camera placement. That is connected to the location and some
general guidelines when getting started in
camera placement is always shoot with the
most depth behind you. Place the camera so that
you're as far away from the wall behind you as possible so that you
can create depth, so you can create
background blur. Number two, always be
aware of your background, what's in your background. Make sure it's something
that's unique, interesting that
fits the character, fits the story, but at the same time, isn't
super distracting. Always look for
things like signs in the backgrounds or maybe logos that aren't
supposed to be there, words or people that aren't
supposed to be there. There's nothing worse than
shooting a great interview, and then you have something in the background that
you did not see, and then you have
to remove it and post or you can't use
that shot at all. Also think about how that
camera placement and how the shot and the composition
helps tell your stories. So are you going to do
a symmetrical shot? Are you going to do a shot where the interview E E is centered, kind of like this
one, because I'm talking directly
into the camera. Is your subject going to be position to the left
or right of the frame, looking into the person
conducting the interview? So all of these choices help make your shot more interesting. And another tip I
will say is that always go for a unique angle. Never want to choose something that you've kind
of seen everywhere because that is sort of the
perfect formula to just get a very boring looking
corporate style interview. And if you look at a lot of
unique interviews online or, you know, great documentaries
on HBO or Netflix, you'll notice that a lot
of times the framing and the composition
is very unique, something that you
typically would never see in a
corporate style video, and that's part of what drives the story and makes
the interview interesting and makes the
audience want to keep viewing. Okay, so those are
a few quick tips, and now let's mom
to the next lesson where I'm going to
talk about ns choice.
4. Lens Choice Matters: Okay, so in this lesson, I'm going to talk about lens choice. So lenses are more
than just a lens. A lot of times when
you're starting out, you just kind of see this
as, Oh, that's just a lens. It came with my camera.
Lenses are like film stocks. Lenses have a lot of character or they have different styles. So lenses are very, very sharp from edge to
edge, like new lenses. So lenses are a
little bit softer. And then, of course,
you're talking about how wide is that lens? Is it a very tight lens? Is it a wide lens? Is it a extremely wide lens? And so what I'm
really getting at is that if you get anything
out of this lesson, it's to put thought
into what you're framing and what your
lens choice does. For example, on this setup
here for my classes, I do have a wider shot because
this is a smaller office. As I mentioned before, I am separating my from
the background, so I have some
separation and so that I pop forward compared to me
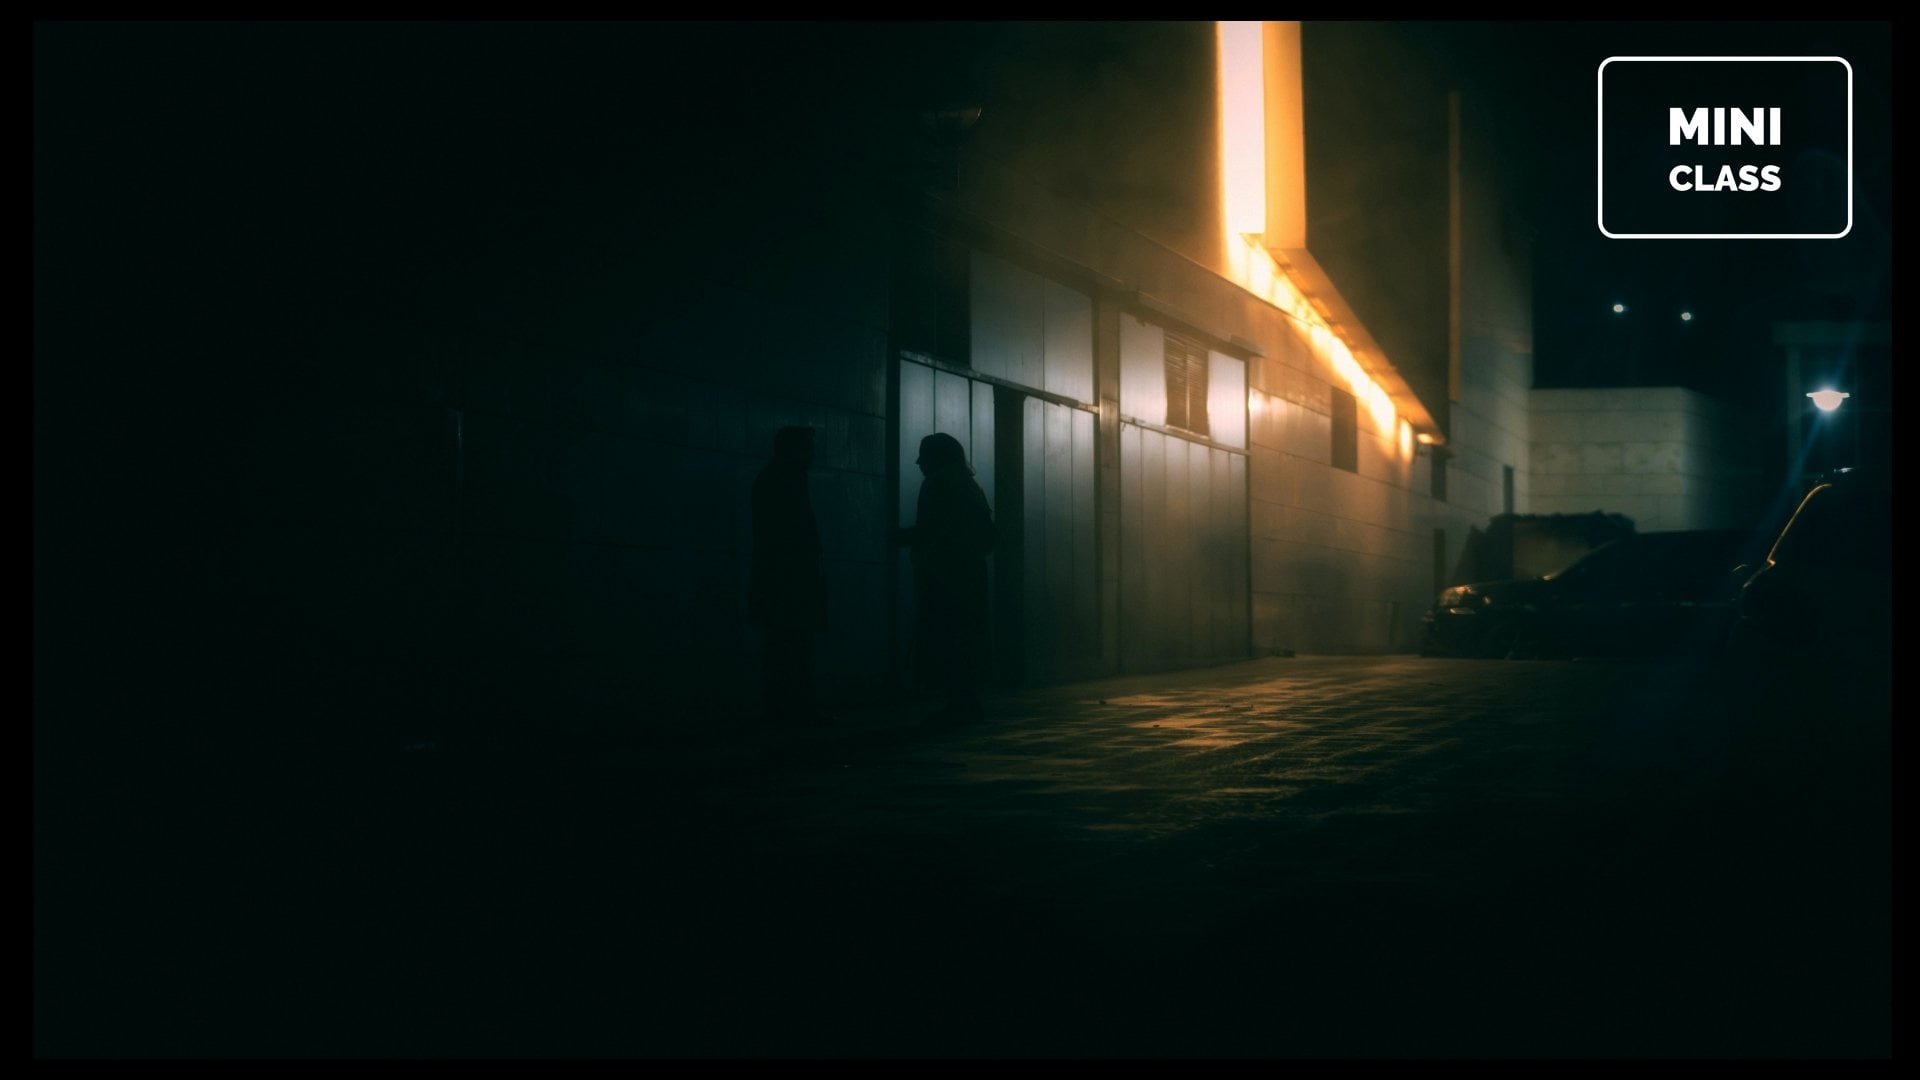
being up against a wall. Then in some of the footage that you've
seen in the intro, I went a completely different
direction with the lens. My a camera, which
is the main camera, I was shooting
instead of this lens here is a 28
millimeter equivalent. Definitely on the
wider angle side. For my more cinematic intro
that you saw earlier, I had a 38 millimeter
lens, which is tighter. The lighting was
also differently, but that lens that I chose, I intentionally chose to be a little bit tighter because
it's a little bit softer, it's not super crisp, it's not super sharp, and it just has a more
natural organic film like quality to it. And that's one of those
traits that can make a big difference between
having a lens that's super, super sharp, where you can see every pore in
someone's face. You can see every detail. That usually does not work
for cinematic style shooting. That type of super
tack sharp lens usually works for things
like nature documentaries. If you want to shoot
in an Arctica or, you know, in a desert
and you want to see every grain of sand, that's where these very
high end super modern, super sharp lenses
tend to work better. Again, to circle
back to everything, it's about putting thought
into how your lens looks, and a lot of it is practice. Practice makes perfect. So if I were to give you a tip, it's to become a student
of different lenses, old lenses, new lenses, different manufacturers so they can see what kind
of look they have. And then you'll get
to the point where you'll be able to
think of a shot, think of a scene, and know, Oh, I should probably go with
a 50 millimeter lens, an old vintage cannon
lens with an FD mount, and you'll start
thinking that way. You'll start learning
what those things mean. And that will be a huge
head start for beginners who tend to simply just grab a lens that came
with their camera. Put it on there and hit record. Okay, so in the next lesson, we're going to get into
some of the fun stuff. I'm going to show you
how I lit that intro, and we're going to
start jumping into what exact cure was used in
some of those principles. So I'll see you in
the next lesson.
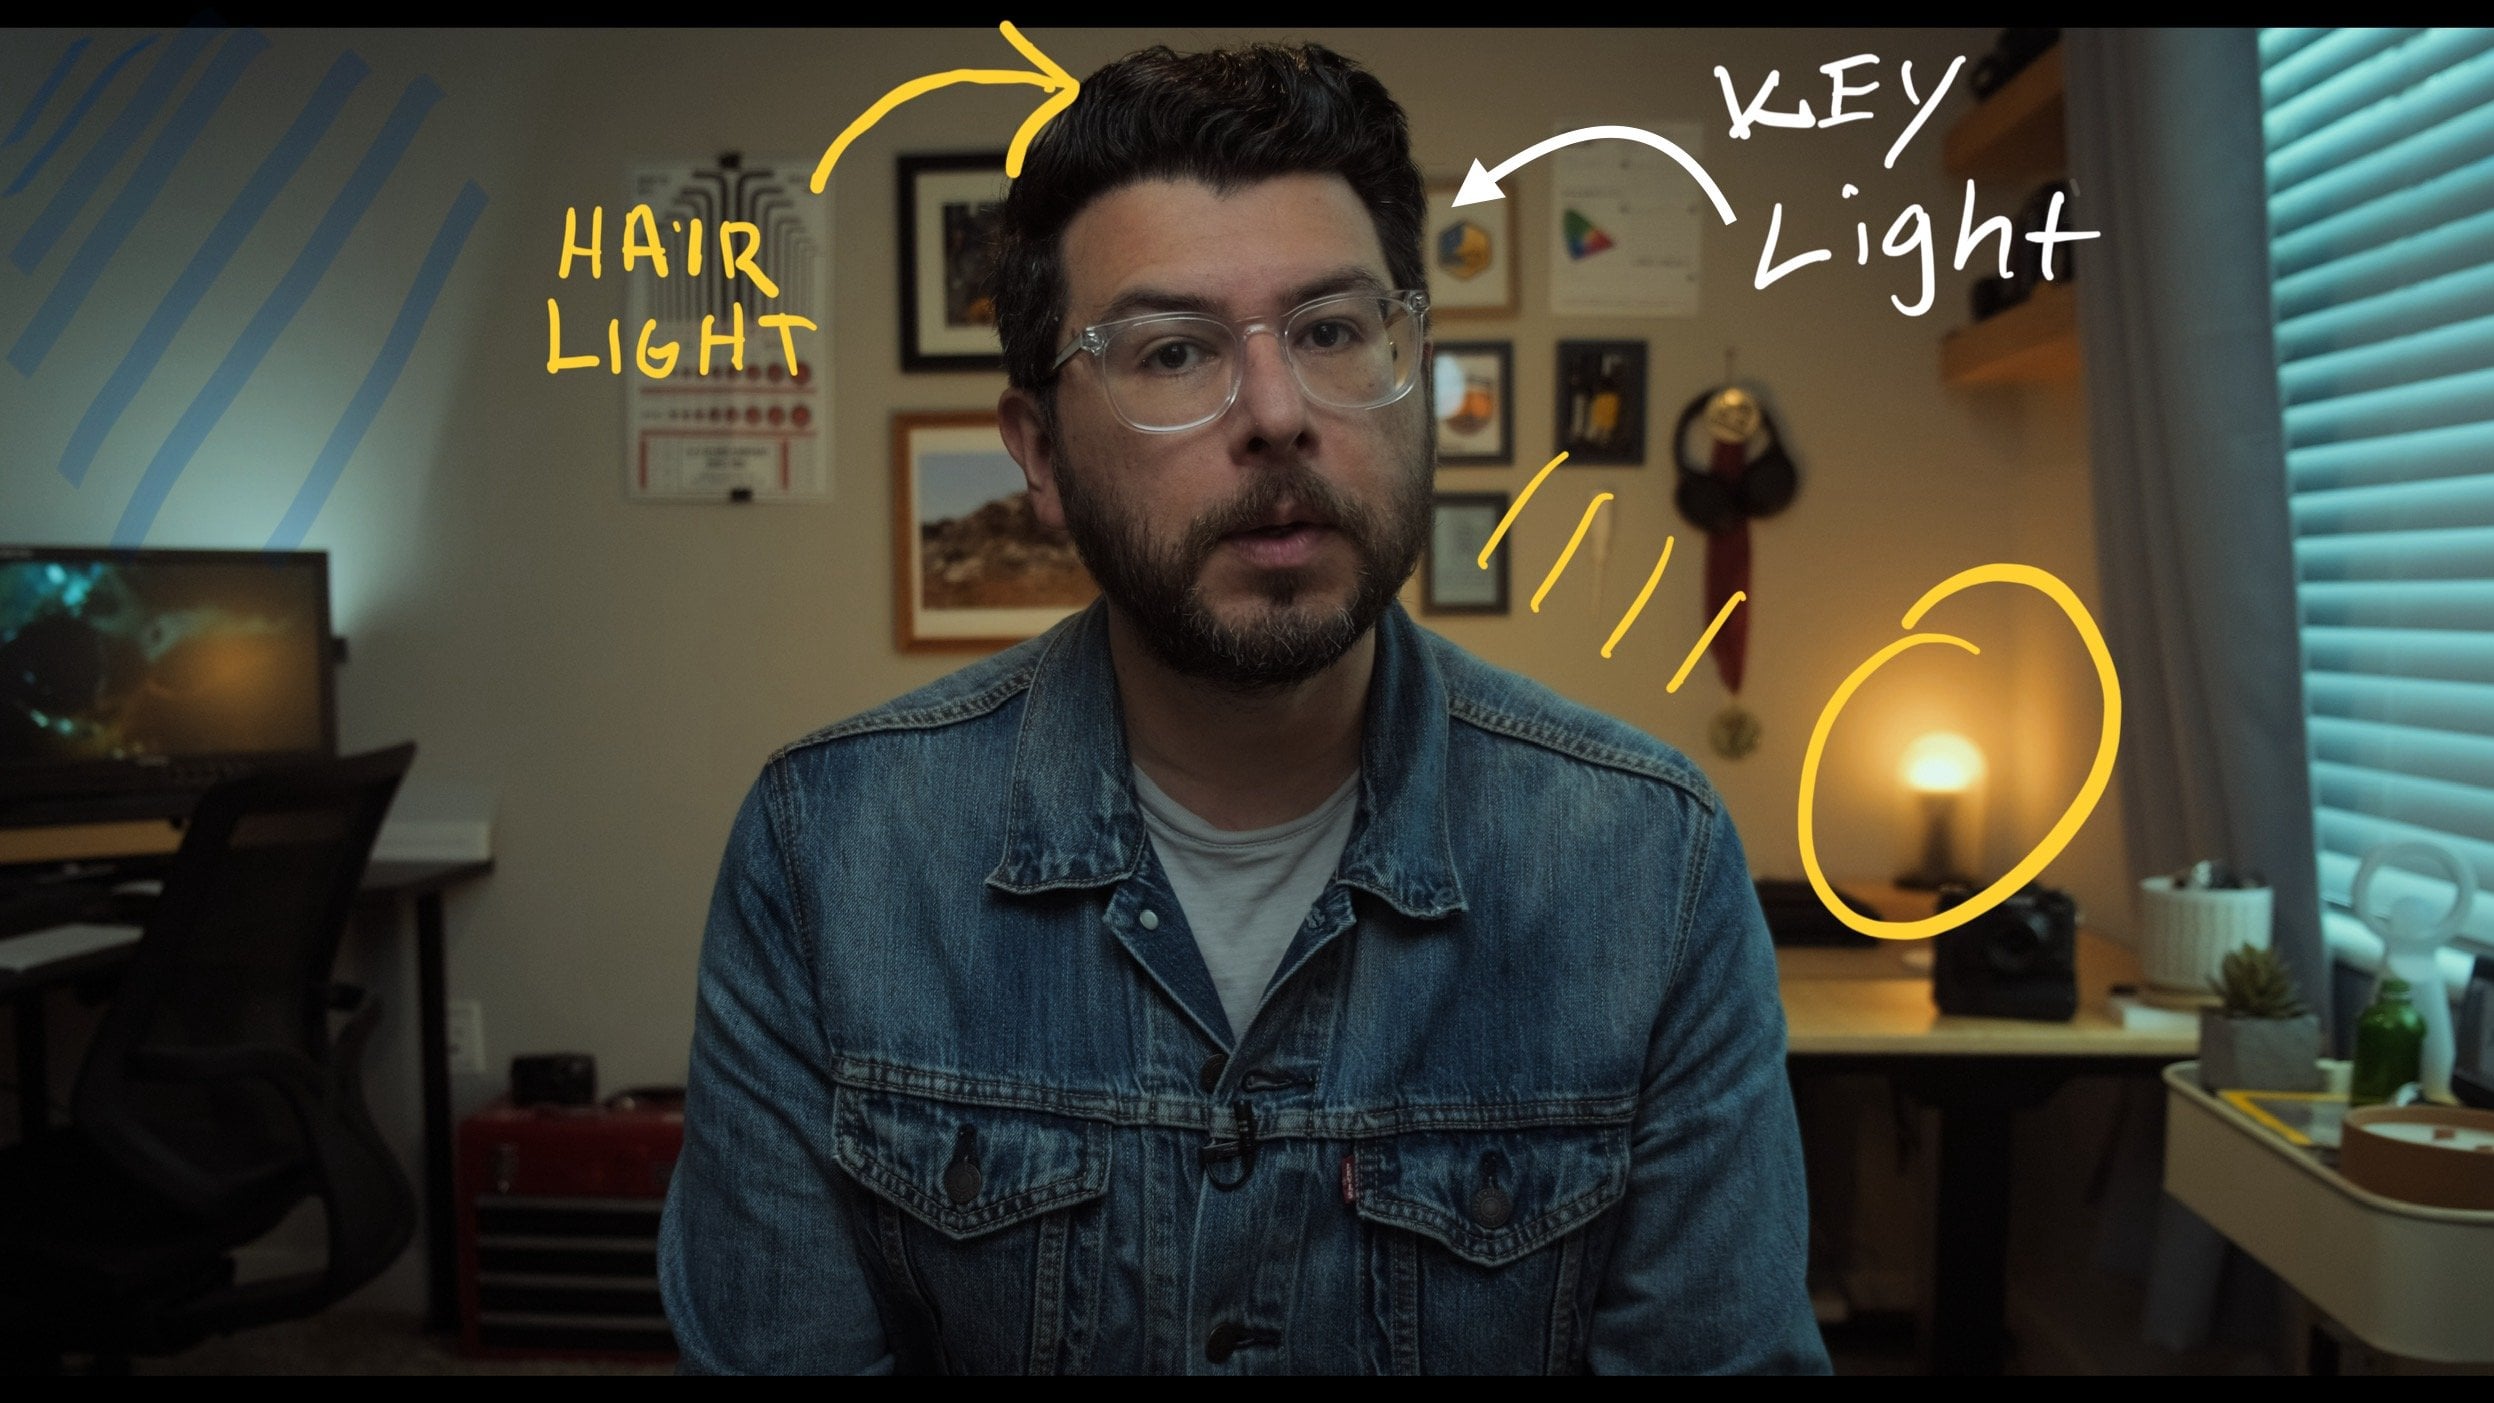
5. Lighting Techniques: Okay, so now let's talk about my lighting setup and
what I did exactly. So I'm just going
to go through here shooting on my iPhone because
it's the most mobile, the most versatile phone so that you can really
see what I'm doing. So what I did is really
based off of an idea called a book light and really the principles of getting very nice soft
cinematic lighting. So those principles
are basically having a very large
light source, the largest light
source you can have, making sure that light is
very soft, very diffused. Let me switch around
here really quick. Okay. So here you can
see my light source, and this is my
main light source. And so what you can see here is that this is actually
five feet across, okay, and eight
feet up and down. I mean, here, this is an actual cinema cloth that I have here set
up on a C stand, and if I go to the back here.
Okay so here's the back. What I have, you know, is this very basic Amaran 60 X. It's set to 80% 5,600
Kelvin degrees. I have this here, which diffuses the light
as it's coming out. And then here, we have the diffusion cloth
set on a C stand. Here. And then I have this kind of cross
bar that I put in. I I zoom in, kind of
show you what I did. This metallic bar
here is something that I simply got at
a Hardward store. It's just a half inch pipe so that I can squeeze
it through a C stand. And then I clip the pipe
through the C stand. Very basic, very
affordable setup. Probably the most expensive
thing here is the C stand, but you can actually
get these pretty cheap now, about $100. And so that's the setup. And the key to this is that you have a very
large light source. 80% here, 5,600 Kelvin, diffused through the
initial diffusion here, which then makes it this large five foot by eight
foot light, you know. So don't look at this as a small light here
that I'm using. Really, this is like having a five foot by eight foot
light that's double diffused, double softened, which is what creates this
very nice soft, cinematic wraparound
lighting that you see here on the image. Now, it's not a hard light, it's not a harsh light.
It's what you see. That's how light
wraps around an image very nicely and creates
something like this. So that's the key
large light source, diffused, double diffused, maybe even triple diffused
placing it in a position that's subjective
up to you so that the image looks nice and soft
in how you want it to look. And this is basically
a two light setup. This is the second
light that I have here. It's just a 1 ft tube light set to 33% power and also set
to 5,600 Kelvin degrees. Again, I just have a
basic light stand here, sandbag so it does
not fall over. And I got the grip
head from my C stand. This is actually the grip head from the other C stand
that I showed you. I put it on just a typical
light stand that's maybe 15 to $20
US and that's it. Then I have the arm coming out, this 1 ft tub light
screws on the end, 33%, and that is what creates the back light
that you are seeing. Here, yes and something
else that I will say about having a nice, large light source is that you really don't always
need a fill light. Again, don't think of this as something that's
a science or math, where one plus one equals two. It's creativity. It's how you want it to look. And if you have a giant light
source like this one here, that's five by eight foot, you may not need a fill light. If you feel that you
need one, that's great. But as a matter of fact, most of the time someone might
actually put a flag up, just a large black flag
kind of like this to add shadow to that side because the light source is so
large that it wraps around. So very simple lighting setup, and you're seeing all this stuff come together with location, with camera placement,
with lens choice, a very basic large, soft light as your key
light and a back light. So let's move on to
the next lesson.
6. Proper Exposure: A common question that I get a lot when
shooting something is, how do you know that
something is properly exposed from everything
from this class here to the intro that you saw to anything,
how do you know? Once you put lights up, once you set your camera up, you pick your lenses and
everything, how do you know? Well, there's a lot of
different ways to know, but one that I want to go over now because it's very commonly accessible is something
called false color. Right now a lot of on camera monitors come
with false color. And the way they basically work is that when you turn them on, there's a little kind
of chart at the bottom, where one end of the chart is
the blacks or the shadows. The very far right is the
bright highlight areas. For example, this window would be a bright
highlight area. This back corner here under my desk, that would
be the shadows. My skin, you know, my sweater would
be the midtone and that chart kind of makes this
funny multi colored image, but it will tell you if the skin tones are
in the right place, if the shadows are
in the right place, if the highlights are blown out, if something is too bright, and it's a very easy,
accurate way to be able to determine if your image
is properly exposed, but it's a great
tool that comes on pretty much every
on camera monitor, and it's one of
those tools that you should definitely
learn how to use. Now I'm going to show
you a short clip that I recorded while I was shooting
this class that kind of will give you a very quick
rundown of using false color. You know, here you
can see my image. And that question is typically, Okay, I have all
this stuff set up. So how do I know I'm
exposing it properly? Again, nothing that I'm
working with is expensive, high end gear, and false color. If I turn this on, that happens. Okay? You can see that you have this bar at the bottom, okay? This bar right here.
And typically, you have zero here, which is black.
It's underexposed. The window here, you can see it's bright red, bright pink. That means something's
overexposed. When you use these guys, it's really just
kind of guidelines so that you know when
something is very hot, very blown out with
something you see my shirt here, which
is a black shirt. I I turn it off, you can
see it's a black shirt, so it's going to
read as very dark. And typically for skin tones, regardless of your skin tone, you want skin tones
to usually lie between this range
here in the greens, which is between I'd
say 60 to 80, okay? This is, again, a range of zero to 100 and skin
tones for most people, you want them to lie 60-80. So why such a broad range? The answer to that is because, I mean, again, it's an art form. The question is, do you want
your image to look brighter, kind of like a TV commercial, or darker, which is a
little bit more cinematic. So if you're wanting
something to go a little bit more cinematic, you might be on 65 to
70, maybe even lower. It's a creative choice. It's stylistic choice. If you want something to be
more high key, brighter, more like a TV commercial, then you might have your skin tone set to something brighter. I'm filming so you can
see what it looks like. You can see how my skin tones are in the greens, which
is how I'm lighting it. The background window
is also bright, but it's not totally blown out, and everything is where I
want it to be creative. So in the next lesson, I'm going to kind of bring
everything together. I'm going to take the two
cameras, cut them together, and kind of show you what
I did in the opening intro of my sort of fake
Netflix documentary. So let's go on to
the next lesson.
7. Bonus: Basic Color Grade: What's up, guys.
So in this lesson, I'm just going to do
a quick basic grade. I'm going to show you what
I did with my footage, tell you a little bit
about the camera I shot on and just a little
bit about my workflow. This is not a color
grading class. I do have other color
grading classes, so make sure to check those out. However, this is just to
show you kind of where the footage started and where it ended. So
let's jump right in. Okay, so you can see here this is obviously
the final image. We go into full screen, you can see the final image there. And this is the
final image of the close and now I will kind of
show you where we started. So first of all, this
was the original image. I shot on the Fuji film
XH two camera in four K, and just as a basic
workflow thing, I shot in Fuji log, F Log one. And a way to do that is once you get a log
image in DabnciRsolve, for example, this, then
once I brought in the clip, I just right click go
to input color space, and then I made sure
that I selected the input color space as Fuji film Flog because I shot in that Flog format
Fuji film FlogO. So it basically took the footage and
brought it out of log, whereas if I were to click here, for example, actually,
I'll go back here. If I were to go here and say,
Bypass color management, you can see this is what the original shot looked
like, fully log, okay. And then once I applied the input color space,
I did that to it. And this, by the way, is what I saw on my monitor as I was shooting because I also have a F log to Rec seven oh nine ut or lookup
table in my monitor. Now, most on camera monitors, just like I mentioned
in the previous lesson, that they have false color. Most monitors also have
a very simple way to convert your log footage
into a Rec seven oh nine. They typically have Lutz. Advice I can give you for
this lesson is if you have it on camera monitor,
go in there, play with the menu because
every monitor is different, look for Luts and then apply a ut that will go from
whatever your camera is. If you're shooting on Sony, it would be S log to Rec
seven oh nine or Fuji film, F log, Cannon, C log to Rec 709, just so you can see
this image here. And so it's not the
super flat image here. Okay, so enough about that. And so, yeah, so this
was the original image. Let me go into full screen. And then with the
first look that I did, it gave me that look. And the next look, I did that, and then the next node, that's on the face, as you can see. I'm going to break these down in a little
bit, by the way, so don't worry if I'm
going too fast before, after. It was darker. And then the last look.
And then I applied that kind of film
emulation mode to it. Actually used a Fuji
film, ternaFlmstock, emulation to kind of
take it from a kind of video look to colors that are a little bit
more cinematic, okay? So now that's just so you
can see it in full screen. And then with those
adjustments, you know, it's just, you know, as the name here says,
it's a base grade. I applied the put color space
conversion to Rex in nine, and then I just basically
tweaked the contrast, tweaked the color temperature, and adjusted the tint. You know, I can't really
tell you how much or why I went this far because, again, it's an art form, your
shot will look different. And that's just to show
you what I did here. I got a good starting
point for my exposure. So I just needed a little
bit of a contrast tweak, a little bit of color temperature
and tint adjustments. And then I was happy
with the base grade. And that gave me this look. Before, after. And the next one was
kind of a little bit of a more interesting thing. I used the magic
mask tool, okay? And if you go here, what the magic mask tool
basically does, it helps you separate objects, whether it's a person,
whether it's an animal, whether it's a plant,
whatever it is, you select an object and it helps you separate that object, so you can make adjustments just to a specific part
of the image, okay? So in this case, turn on
the magic mask here, okay? And you can see that
what I actually did was, I wanted to go with kind
of a cool, warm look. So I selected the
background and cooled it off to again make myself
pop from the background. And if I do this, you can
see this is what I selected. And that's basically it.
And to kind of give you a quick preview of how
you use the magic mask, it's actually very simple. You simply go to the
magic mask tab here, and then it's so easy
that it might be a little confusing that it's so easy you'll want
to see more steps. But you see these two dots here. I simply clicked on my face, and it selected my face. I clicked on my body,
I selected my body. This is what it
actually did at first. And then I went here and I did the blur radius to kind of soften my outline a little bit, and so that I kind of blend in a little bit better
with the background. And then I just went here
and clicked here to reverse the selection and say that
what I actually want to effect is the background
and not myself. Okay. So I did that, and
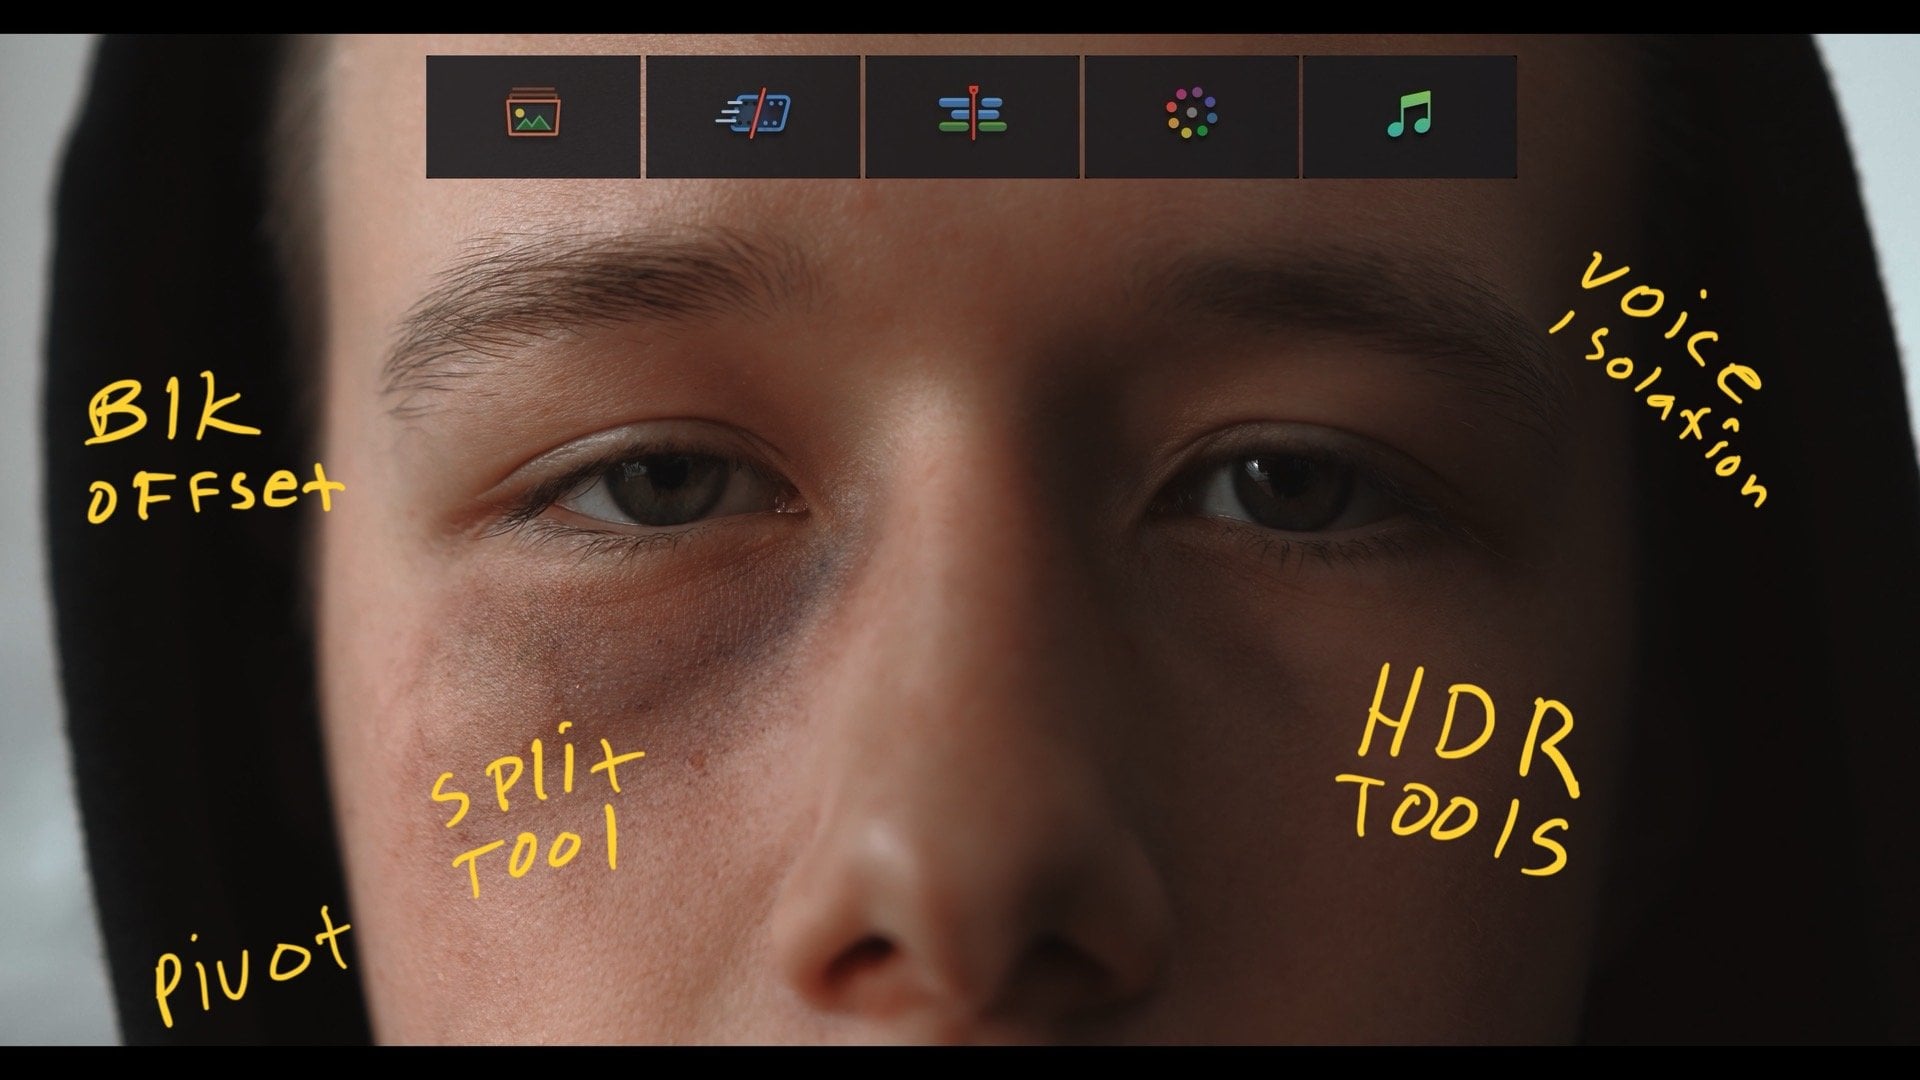
then I just simply so I went here to the HDR tools. I went to the global setting, and then I just simply pushed things into this
kind of teal area. So basically, I created sort
of a teal and orange look. And then on my third
node, very easy, I simply Ed my face. So I went into the Ker
tool. I selected my face. It selects just my skin tones. And then from there is where
I added a little bit of warmth and raised the
highlights. Like that. So in the HDR tool, you can see that I went
in here and I raised the exposure a little bit just to give my
skin a little bit more of a pop before
after, before, after. And then as my last node, resolve does have a
film look emulator, and I used that to
kind of take my shot. You'll see it'll be kind of
a somewhat subtle change. It was here and then it went here before, after. There we go. And again, this is just
a creative choice. I could go through and show
you every dial that I hit, but it really
wouldn't do you good because really what I want
from you is take your footage, play with the film
look emulator. Remember, it's all
creative choices. There's no right and wrong. So you going in there, playing with the knobs and
the switches and everything like that and create a look that works
for your project. So that was basically it. So again, to wrap up, it was the base grade, magic mask, pop on my
face, film look emulator. Then I basically did
the same thing here. This was the original image. Same thing, base
grade adjustment, magic mask, skin tones, make them pop a little bit. And then I brought
down the overall look just to match the two cameras. This camera was a little bit brighter than the first shot, and so I brought it down
to match the shots, and then film Look emulator. And that's what created
the two looks here. Okay, so that's
it. Again, that's just a quick overview of what I did with
the original clips, shot and Log, how I applied a quick grade to create
the look that I wanted. If you want to know more
about color grading, definitely check out my
other color grading courses. I have classes for everyone from absolute beginners to more advanced people,
so check those out. And now let's move on
to the final lesson.
8. Final Thoughts: Okay, so that's the class. I hope you got a lot out of it. Again, this was a kind of quick, basic getting started on
cinematic techniques, cinematic lighting, creating
cinematic interviews. Any questions, please ask
in the discussions below. And for this project, I also want you to go out, shoot something cinematic,
upload it for me to see, and I'd be happy to
give you feedback. This is my first of kind
of cinematography classes. I typically do color
grading classes, but I have been
shooting for a while now and want to bring
more classes like this. To Skillshare. Also, I always like to hear
what you want to see. So in the discussions,
let me know what sort of cinematography filmmaking
classes you want to see. And thanks again, and
I'll see y'all later.