Transcripts
1. Introduction: Are you drawn to the
symmetrical beauty of geometric patterns? But feel unsure where to start with creating
them by yourself. Perhaps you feel a little
intimidated by the thought of using geometric
construction tools such as ruler and compass to make your Art fear not in this class. I'll be guiding you step-by-step
through the process of constructing a stunning
mandala of spiralling squares. It's one of the first
patterns I ever learned. I remember seeing
it and thinking. I have just got to
learn how to draw that. It remains a firm
favourite to this day. Hi, I'm Clarissa. I'm a geometric artist and experienced teacher
from Suffolk in the UK. My absolute passion
is introducing others to this super
rewarding form of Art. And I truly believe that anyone, even an absolute beginner, can produce beautiful
geometric patterns. I see it happen all the
time in this class, I'll be sharing my tips and
experience with you and guiding you step-by-step
through creating not just one, but two beautiful
geometric patterns. The Spiralling Squares
pattern in the title is constructed on top of a subgrade
of overlapping circles, which is sometimes called
the double seed of life. And it can be decorated as a stunning pattern
in its own right. So join me as I take you
through everything you need to know from the materials you'll need to
complete the Project, to the basics of constructing
with the compass and ruler through to Ideas for decorating your finished pieces. And I'll also be
demonstrating a simple wet on wet watercolor technique that you can choose to
try to if you wish, if you're brand new to using a compass or you haven't
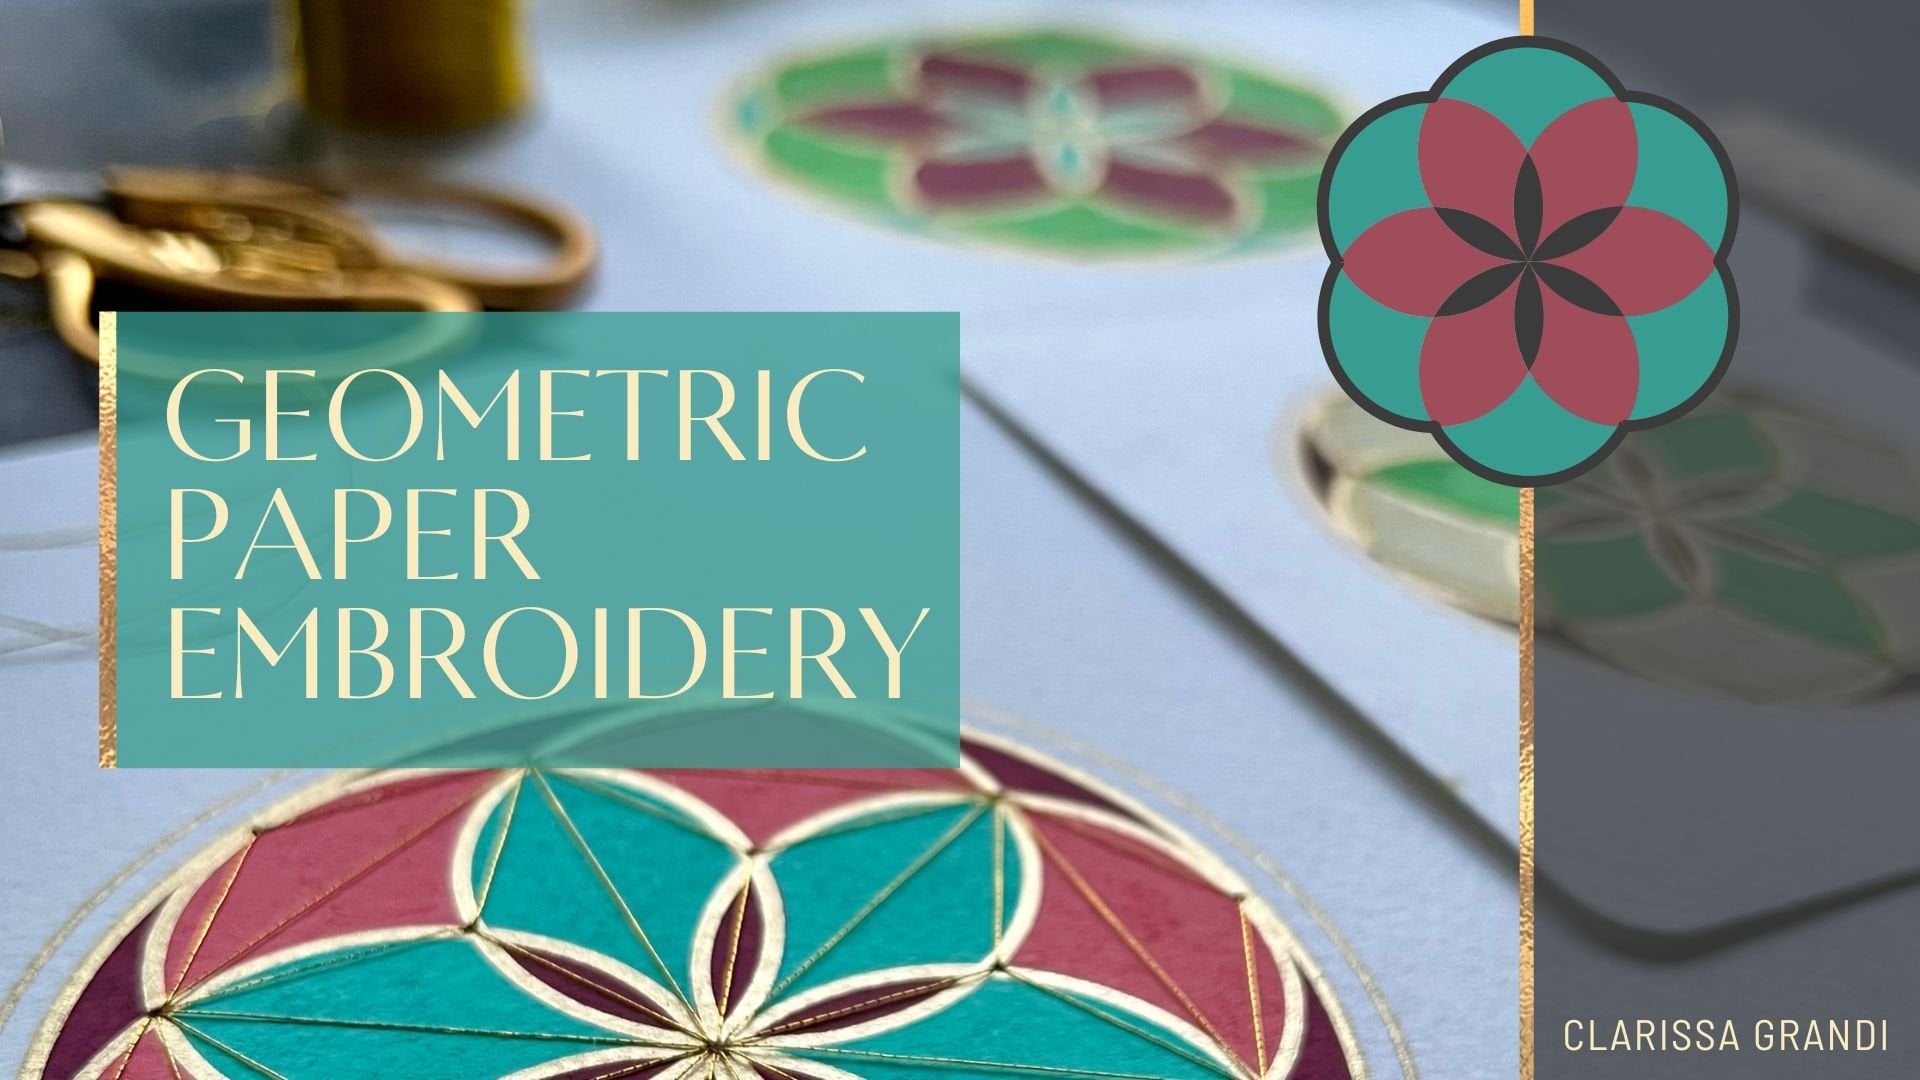
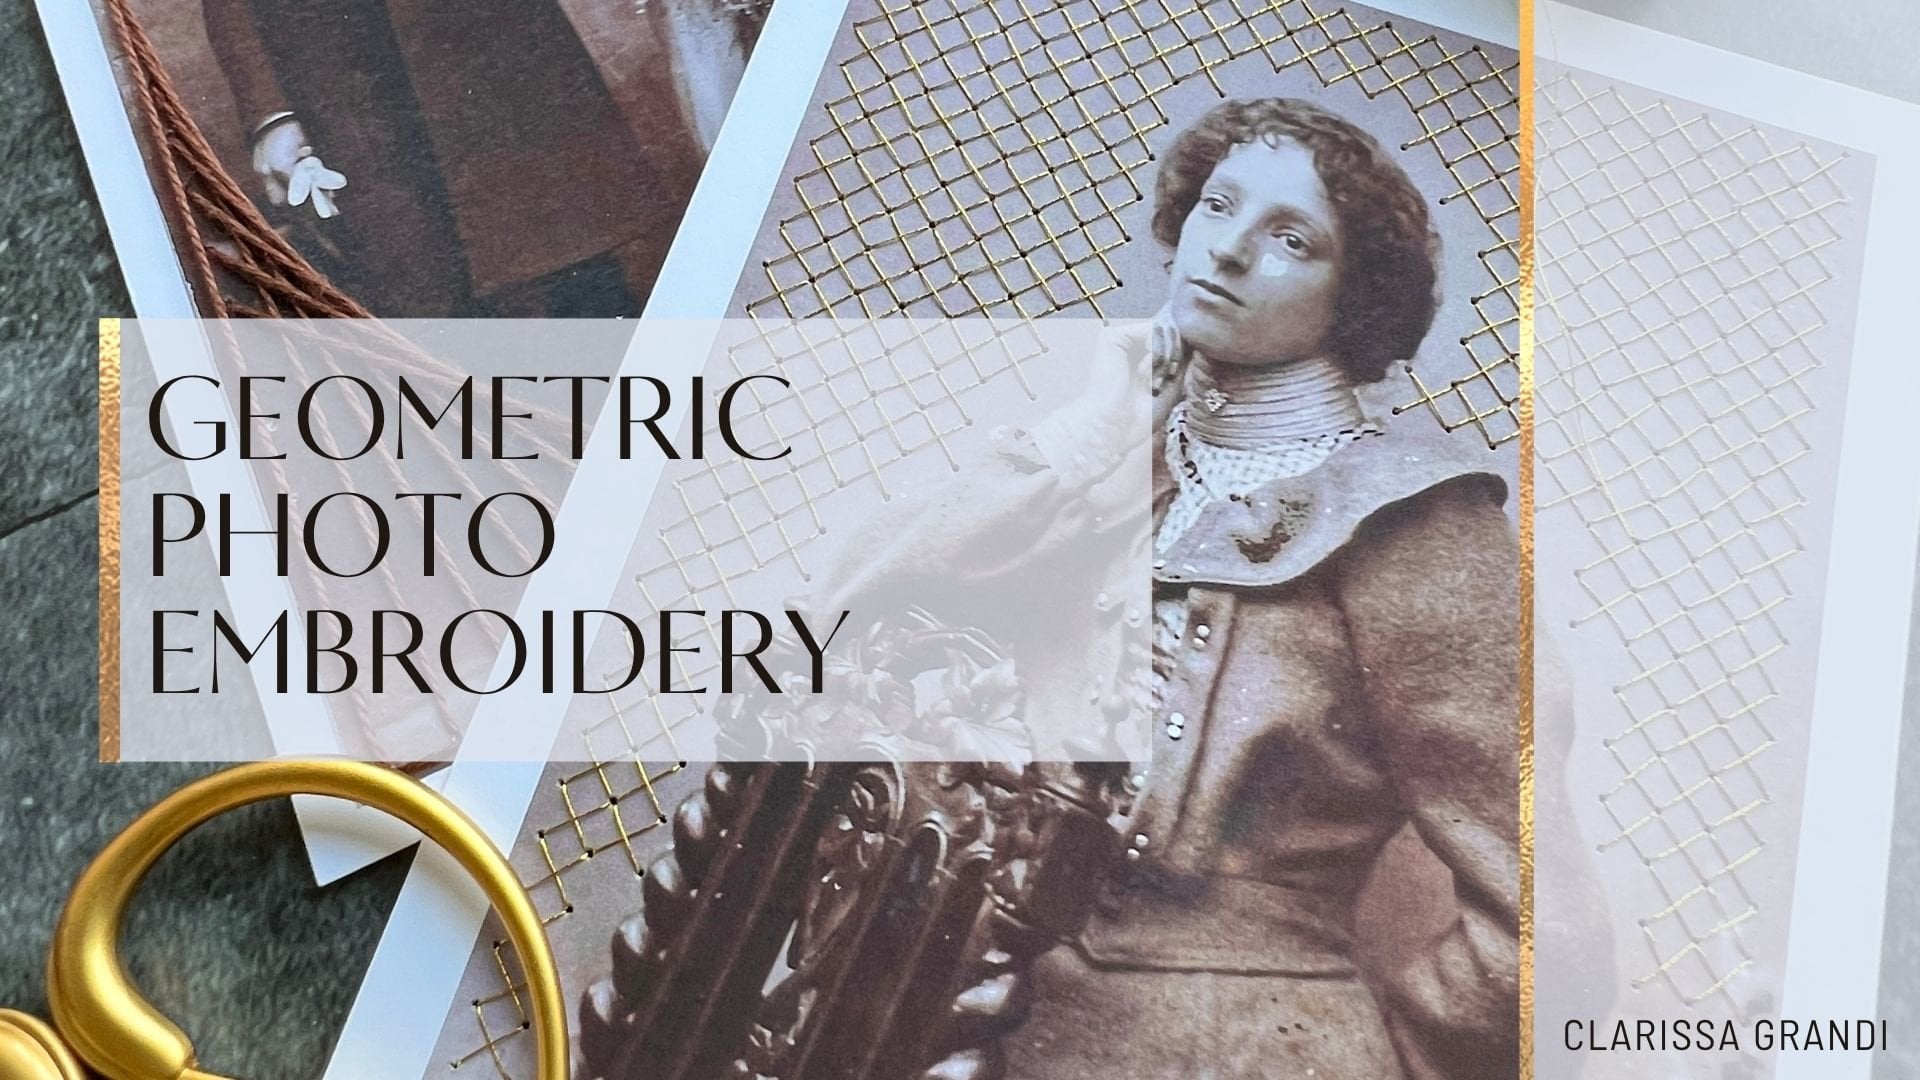
used one since school. Then you might find it useful to work through my previous class, geometric paper
embroidery, which includes a stand-alone lesson on introducing the compass
right from the beginning. However, if you've used
were more recently, you should be fine to dive
straight in with this class. So let's get started.
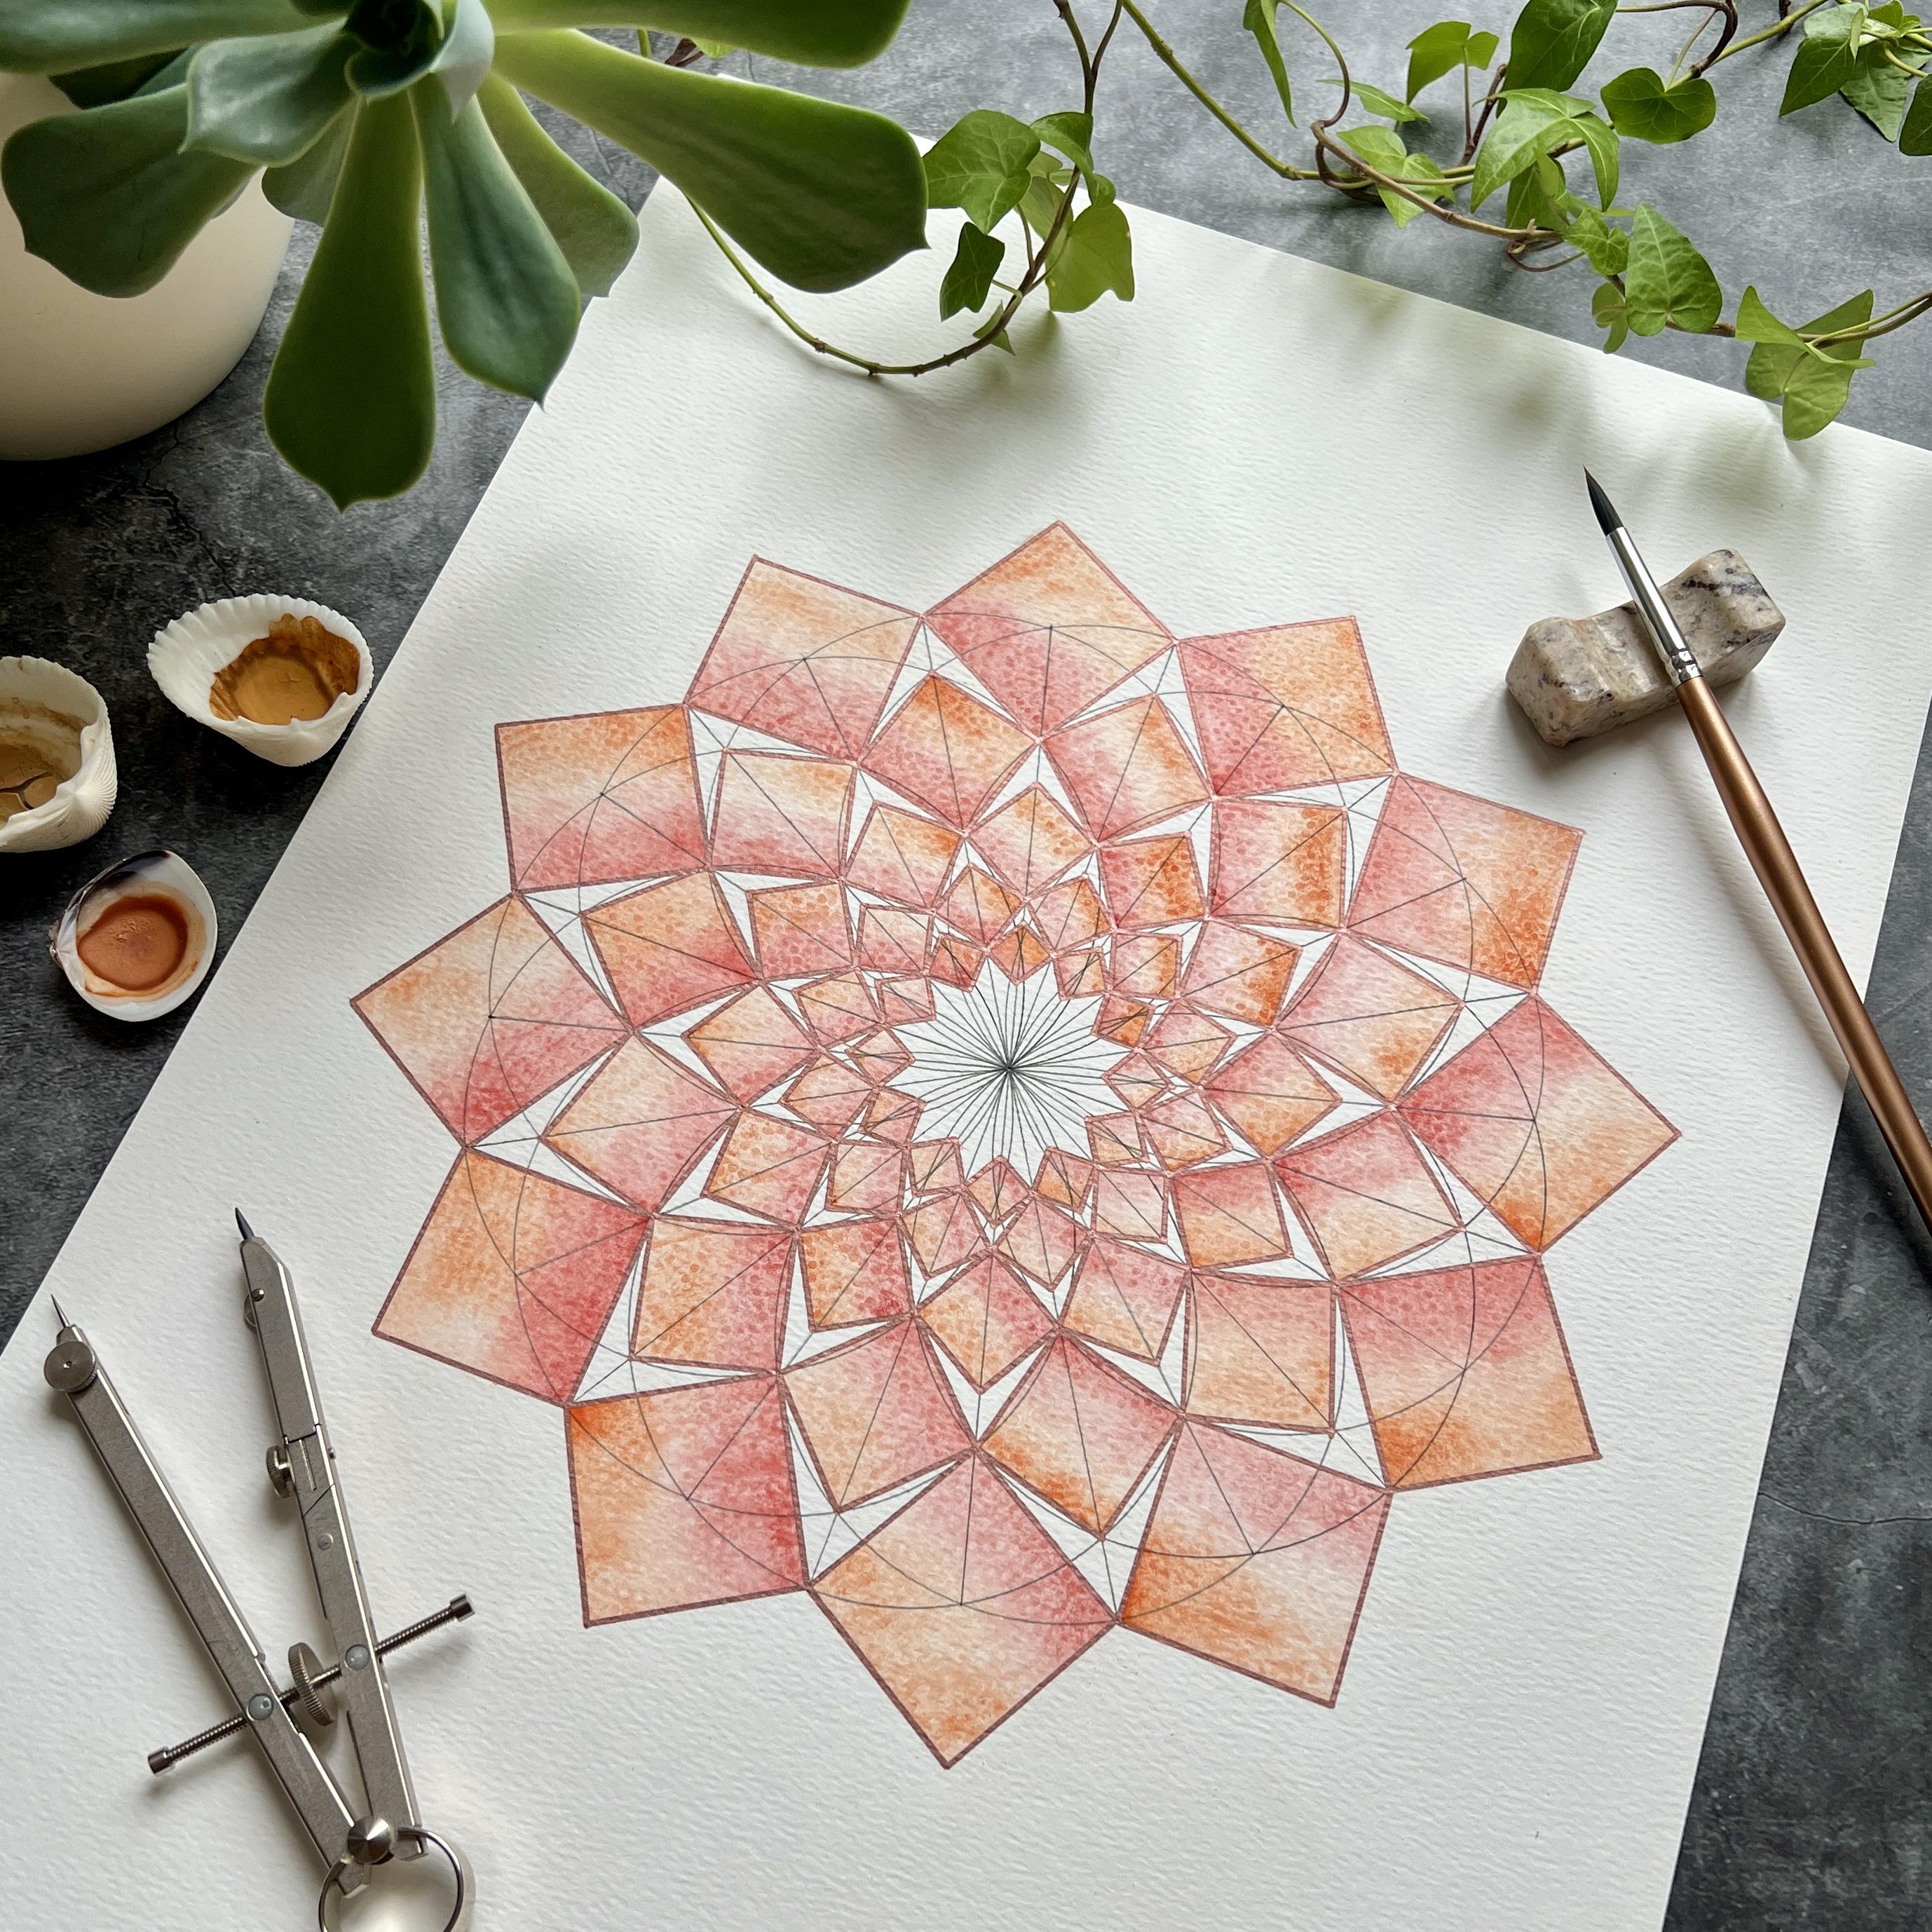
2. The Class Project: The Project in this class
is to construct and colour this stunning mandala
of spiralling squares. I'll be guiding you
step-by-step through the whole process
from start to finish. We'll begin by looking at the materials you need
to complete the project. I'll then carefully
demonstrating the process of constructing the
geometric subgrade. Show you how to outline the motif in a pen
of your choosing. Next, we'll use a ruler to draw on the Spiralling
Squares pattern, which you can go on and decorate in any way that you wish. I'll be sharing various ideas that might help inspire you. Finally, I'll be demonstrating a two-colour textured
watercolour painting technique, which you might want
to try alongside me. Finally, when you've
finished your project, do remember to upload some
photos to the Project section. I do so love seeing everyone's
work and it's great for other students to have a bank of images to be inspired by. So see you in the
next video where we'll be looking at
the materials you need
3. Materials for the Project: In this lesson, we'll be looking at the
materials you need to gather together in order
to complete the project. First, we'll look at
the materials you need to construct the pattern. And then we'll look at
what you might want to use to decorate your work. There's a handy reference
list of everything you need in the downloadable notes
that accompany the class. For the constructing
part of the project, you're going to need a
pencil and eraser of choice, a sharpener, and a Ruler. Now, transparent rulers
are best because they allow you to see your
pattern through the ruler. But if you only have a
metal or wooden ruler, then that'll be fine. You'll also of course,
need to compass. You might have your
old school compass, which is absolutely fine for pattern light with
drawing today. Or you might have a
flashier compass like this. And this one might come with
its own pen attachment, which is really useful if you
want to outline the curves, your pattern, just
make sure of course, that the pen you
want to outline with fits into your pen attachment. A small magnifying glass
can be really useful if you want to work on the accuracy
of your constructing. It's helpful when you
place the compass point. But again, it's not
necessary at all. If you've got good eyesight, you won't need one. I need one. You'll also need a
surface place on your paper when
you're doing your constructing with your compass. I like to work on a
paper cutting mat or a similar plastic surface, a desk pad or
something like that. Or the back of an old
sketch book is perfect. That cardboard is just the
right kind of surface. And then finally,
you'll need paper to construct on
for this pattern. I wouldn't really go any
smaller than A4 or Letter size, especially the first
time you construct it. Once you're more confident
with how the pattern works, then you can experiment with
doing smaller sized ones. So a sheet of cartridge paper to construct on his perfect
or in your sketch pad. Or if you want to paint
your pattern later, then you'll want some
Watercolor paper. I'd go no smaller than
something like this, which is 20 cm or 8 " across, similar size to a4 Letter. Or I would really encourage
you to go nice and big. So this is an A3 size sheet. Similar sizes are 11
by 14 " or 12 by 16 ". And this is a lovely size to
construct on and paint onto. Now, hot press paper is the
best surface to construct on. But I enjoy watercolors
on cold press paper. I construct on cold press paper and just put up with a
slightly bumpy ride. It's absolutely fine to do so. When it comes to adding
color to your patterns, you can use any of your
favorite Art equipment. So you might be
someone who enjoys using marker pens or paint pens. You might love working
with colored pencils. Or you might want to follow
along with me when I demonstrate a two-colour
wet on wet paint technique. If you want to try
that technique, then you'll need some
watercolor paints. I'm going to use this
little set of mine. You don't need
anything expensive. You'll need paintbrushes. Probably go for a larger size
one and a smaller size one. Some of the Squares
get quite little. I think this is an 8.1, but roundabout those sorts of sizes, you'll need some water. It's a nice idea to
have two glasses. You've got one to clean your dirty brushes in and one
that stays a bit cleaner. It can be quite useful to
have something to rest your paintbrushes on
the edge of a saucer. This is a chopstick rest because you don't
want to leave them in your glass of water
where you can risk the Tips getting
bent out of shape. It's also useful to
have some paper towel to hand cleaning up spills, blotting your
paintbrush if you've got too much water on it. But I'm also going
to be demonstrating a technique where you can add texture blotting
with paper towel. So if you've got
embossed paper towel, all the better for adding some interest in
detail to your work. Then finally, I'm going to be demonstrating outlining
with gold pen, both using it in a
compass pen holder and using it with a ruler. If you want to try that, then you might want
some metallic markers. These are my three favorites
that I always turn to. The secure a pen touch comes
in different size nibs. That's really useful. The Pepe you for artist marker, the two millimeter tip is the one that fits
the pen holder. And this unit paint, Px 203 marker is a lovely fine line that
I really enjoy using. Finally, scrap papers always
useful to have to hand. I use it to test out my markers
before I draw with them. And to dab my paintbrush on, test out the colors
I'm using and so on. Now take some time to gather
together everything you need before I see you
in the next lesson, when we'll start constructing
4. Constructing the Circle Grid: Now you're all set. We're going to begin
by constructing the subgrade of
overlapping circles. It's sometimes called
the double seed of life, and it's a real favourite
pattern of mine. You can decorate this Grid is a beautiful pattern
in its own right. And I'll be sharing some ideas later on to help you with that. If you're planning to use
watercolors at any stage, then you will want to
construct the pattern directly onto watercolor paper. However, I wouldn't
do that just yet. It's a good idea to work through the pattern
once or twice first before constructing it on your precious heavier paper. So for now, just work in a sketchbook or on
some cartridge paper. Finally, you might find it
useful to have a copy of the step-by-step instructions
next to you for reference, you'll find these in the
downloadable class notes. For this stage, you're
going to need your ruler. You pencil, your eraser, and you compass, and
then something to press on the paper that
you're working on. As I mentioned before, the first time you do this, it's a good idea to construct on normal paper printer,
paper, cartridge, paper, your sketchbook, just so you get your
head round the pattern first before you next construct directly onto
your watercolor paper, if you want to
paint your pattern. The first thing we
need to do is to find the center of the paper
and are starting line. Now it doesn't
actually matter with the pattern we're drawing now, whether we start with a
horizontal or vertical because the pattern is symmetric
in both directions. So let's start with a horizontal to find
halfway up the page, then you need to know how
tall your sheet of paper is. My sheet is very nearly 29 cm, so I'm gonna go with 29. Then half that half
of 29 is 14.5. What I'm gonna do is
I'm going to move my ruler into the left-hand
half of the page. Pop the zero of my
ruler at the base, a sheet of paper and measure up 14.5 cm and make a small mark. Then going to move my ruler to the right-hand half the page. Again. Line up my zero line with the base of the
piece of paper and make another mark, 14.5 cm up. Because 14.5 is half my height. Then I'm gonna put a light horizontal line that goes through
those two marks. Mine would be a bit heavier so that it shows up
under the camera. But do yours nice and light. And then finally, we
need to find the middle, the very center of our page. So I now need to
measure halfway in. So to do that, I'm going to line
up my zero line now with either the left hand or the right-hand side
of my page with my ruler lined up against
that line I've just drawn. I measure my whole page
width, which is 21. And I half that. Half. 21 is 10.5 for me. So I'm now going to make
little mark at 10.5 cm in, and that's my center. The next thing we
need to do is to work out our compass radius. So to do that, we need to measure the width
of our sheet of paper again, -21 cm. And then we need to decide how much of a margin we want between the outer edge of
our final pattern and the edge of our
sheet of paper. So I'm going to go
a margin of one, one-and-a-half, 1.5
cm either side. However, the underlying
Circles Grid, as we can see on this image, isn't the edge of the pattern. The Spiralling Squares actually extend outside of the grid. So I need to account for that. So I need to reduce by approximately 2 cm to meet the edge of my
circles pattern. So I want to one-and-a-half
centimetre margin. But then I need to
come another 2 cm in to account for the
overlapping squares. So that takes me to
three-and-a-half centimeters. In my case. Once you've got that measure, the margin plus the extra 2 cm, then you're going to double
that because it will, you'll need it on
the other side. So 3.5 times two is seven. In my case, take that double
measure off your page width. So 21 minus seven is 14. And that tells you then the width that your Circles
Grid is going to be. So now I know I need my
Circles Grid to be 14 cm And finally, I divide
this width by four. So 14/4 is 3.5, and that's my compass radius. It's a little bit complicated, so I'll run through
it one more time. Decide how much of the
margin you want between the outer edge of
the final pattern and the edge of the page, I went for 1.5 cm. Add another 2 cm to
whatever you decide. In my case, 1.5 plus two is 3.5. Double that. 3.5 times two is seven. Subtract that from
your page width. 21 minus seven is 14. And finally, this
final measure gets divided by 414/4 is 3.5. So that means my measure
is 3.5 cm for my radius. So the next step is to
measure out that radius that you've calculated for
your starting pattern. You might want to
open the compass out a little to start with. You can either use
quick release bars if your compass has them, these ones you press down on and it opens and closes
the compass quite quickly. Or if you don't have
quick release bars, you can use the cog Centre. I've opened my
compass out a little. I'm now going to place
the compass point on the zero line of my ruler. I've done this so
many times that I have a little hole just there. My compass find. My compass point is
on the zero line. Opened my compass
out and I can see that I need a 3.5
centimeter radius. So I'm going to need to
reduce my compass width. I'll use the fine tune
we'll for that one. I'm happy that my lead is
at the desired radius. I can make a start. The next step is to actually
construct the Grid. We're going to start by placing our compass point at that
center mark we made. Now this act of placing
the compass point is really the most important
part of the process. If you're as accurate as you
can be when you do this, then you'll Circles will end up where you want them
to be, hopefully. So I tend to hold my compass on the leg
itself when I'm doing this. So I'm holding the leg
with the point and then carefully sometimes I'll steady it with my other hand. Carefully place it down until I'm happy that the point
is where I need it to be. This is the stage
at which he can be a good idea to use
a magnifying glass. So if I was going to use a magnifying glass,
is my little one, I would hold the
magnifying glass in my line of sight and use it to make sure that I'm placing that compass point
right where it needs to go. Then when you points in place supporting the compass
with your other hand, move your dominant hand up to the twiddle at the top and
we're going to twist that, lean into the direction of turn. I'm left-handed, so I tend
to turn anticlockwise. You're right handed, so you
will probably turn clockwise. Leaning into the
direction of turn, applying a little
bit of pressure, spin your first circle. Now, what we've created or
two intersection points with that first circle and the horizon line we
put in at the start. So now, very carefully, I'm going to place my
compass point on each of those two intersection points
to make two more circles. You could use your
magnifying glass again. I'm just checking
that my pencil lead is going through the center. Then I'm spinning circle number two and Circle number three, just checking, I'm going to
kiss that second circle. And our patterns
beginning to take shape. I now have four
more intersections at the top of these
lovely almond shapes, 1234, and they're going to become the Centers
for four more Circles. Checking against
some intersections, adjusting if you think you're not quite in the right place. Top-left, bottom-left. Can just checking you're going through places you need to. Then top-right and bottom-right. We're halfway through. This pattern we've drawn
is sometimes called the seed of life and it's
one of my favorites. It just emerges naturally from the geometry of the Circle. Six Circles fit perfectly around the outside of
the center circle. But we're going to add a
second seed of life now. And we're going to rotate
it slightly so that it sits in-between the
Circles we've already got So to do that, I need
to find a new point on this center circle
that we'll start off. My next seed of life
bacteria ruler. And what we're going to
do is we're going to place a vertical line
going through our pattern. And we're going to use
the north and most and southernmost
intersections to do so. So what I'm gonna do is place my pencil tip on one
of the intersections. I'm going to bumped
my ruler up to that hip and then
twist it around until I feel confident that not only am I going
through the Northern point, I'm also going
through the center. So I have two other
points of reference. When you're happy, you
can actually test it out by placing your pencil
on those positions. When you're happy, you can put a light vertical line running down the
center of the pattern. Or you can simply just not watch the central circle at
the top and at the bottom. And that's what I'm going to do. Now I have my northern
and southern points in the same way as I started
the previous seed of life with East and West points. So my north and south
points are going to become where I start
my next seed of life. Remember, compass
point placement is the most important bits. I'm going to take
my time doing that. Okay? There is not that many places yet to check
it except for the center. So I'm just going
to check I look like I'm going
through the center. I'm happy with that. Going to place my first
Circle of my second seed. Now there's a lot going on. But for now I'm just
going to move down to the southernmost point and
place my second circle. Again, taking my time and
checking against the center. Hiding in here somewhere for more points
before more circles. But where are they? To remind myself where they are, I'm just going to place
my compass point back at the center of that first of
the two I've just drawn. So that was the
northern most point. And I'm just going
to double-check where that circumference, where that circle I drew crosses the center circle
and it's just here. So amongst all of this
sort of visual noise, I've now identified where
my next connection is, where my next intersection is. So now I'm going to move
my compass point to that intersection to place my third Circle of
this seed of life. And there are now some
intersection points to check against. The North most point. The center point here. When you're happy. That Circle on I'm not going to do the
one on the other side. There's my almond shape, the other end of the almond. Or if you need to, you can pop your
compass back and just check back in the North and just check where it crosses the central circle, just here. Placing that compass
point nice and carefully. Checking it against a
couple of other measures. Circle number four. It's all coming together at
the top, it looks lovely. We need to do the
same at the bottom. Just double-checking where
those two intersections are. I'll place my compass on
that south most point. I can see there's one
there. This one there. I'll do the left-hand one first, checking against a
couple of other points. And then the right-hand
one was here. And are underlying Grid is done. This is one of my
favorite patterns, the double seed of life. I particularly love. It's bubbly outline. So I'm going to keep
that bubbly outline. I'm not going to
enclose it in a circle. So the double seed of
life is now complete. You can choose to decorate
it just as it is. Or you can go onto the stage of adding the spiral of squares. If you'd like to have
a go at decorating it just as it is than
in the next lesson, I'll be showing you how to use the compass pen attachment to
outline the Circles in pen
5. Outlining Circles: In this lesson, I'll be showing you how to use the
pen attachment on your compass to outline the
Circles in the pattern. It can be a little bit nerve wracking using a pen
in your compass. So do remember to breathe. If you'd like to outline
your double seed of life as a standalone finished
pattern in its own right. Then you're going
to need the pen you want to outline with. I'm going to use my score, a pen, touch, gold pen. You're going to need
a compass to outline the Circles and it will
need its pen attachment. Double-check that you'll pen
fits in the pen attachment. Few. You'll also need your eraser because
there are some lines. Obviously we don't
want to be part of the final pattern and
we can erase those. Now. The first-line I'm going to raise is that horizontal
starting line that I used to orient my pattern in a
nice position on the page. Clean your eraser if necessary, on a sheet of paper. Because I pressed quite hard so that it showed up on screen. Minds a little tricky to arrays. Hopefully, you did a
nice light horizon line. And then you gotta
decision to make. You can either keep this central circle as
part of the pattern. If you'd like the way the
pattern looks like that, or you could erase it. I'm going to erase it
because actually I just liked the ring of
overlapping circles. Okay, now you can see that I've erased some of the circles. But actually the most important
thing if I want to redraw this pattern is the holes that the original
compass points left. And those are still there. Need to redraw those
sections of line that I've erased because I'm going to
redraw them now in Gulp pen. So the next job I
need to do is to fit my pen attachment to my compass
and place my pen in it. So the first thing I have to do is remove the leg
with the pencil. I'm screwing and taking out. And then I can place my
pen attachment inside. Screw it quite tightly,
don't over tighten. You can sometimes
ruin the thread and give it a little wiggle to check that it's all secure. And then before you
insert your goal pen into your pen attachment, if you're using a metallic pen, you might need to
prime it first. So to prime it, you need a bit of scrap paper. You need to give it a
little bit of a shape. And that mixes up the
ink within the barrel of the pen to make sure it
comes out nice and shiny. And then test out, see what the ink flows like. And if you need to give it a gentle press to help encourage the ink
down into the nib. I'm happy with that. So I'm ready to insert my
pen into my pen attachment. Before I do that though, I'm going to partially close my pen attachment
because I want to check that my pen nib and my compass points are
lined up nicely together. When they look about level, I'm going to tighten the
pen in the pen attachment, give that a wiggle as well, check everything secure,
and then you're good to go. Now we don't need a
ruler to measure out this radius because we already have the radius in the pattern. So I'm going to
measure this radius from one of the Circles.
I've already got. To do that. I'm going to find a compass pinprick on that central circle that I can use to measure
my radius from. So I'm gonna go
for this one here. I'm going to make sure that
my compass point goes back into that hole and
is nice and secure. And then I can see
that I need to reduce my compass radius little to
find that original radius. Now sometimes when I want
to make sure I'm spot on, I'll just dip my
pen down to make a tiny little dots
of ink and check that that dot of ink is
sitting plum on the Circle, the pencil Circle and mine is. So why did a pretty
good first measure? And then I'm going to
take a deep breath and spin my first gold Circle. I'm then going to work my way
around this central circle, placing my compass points each time in a hole that's
already there. So I'm going to
move anticlockwise. So the next one is here. Next Circle drawn. And then the next one is here. I've drawn over it,
but I can still see a slight indentation. And I'm finding the whole each time and not spinning
my compass to fast. Because using metallic
pens they can sometimes, you can sometimes spin too
fast and the nib doesn't have time to rethink because it goes and they get a bit
scratchy and run dry. Nice steady spin. Notice that each time I want
to reposition the compass, I support it with my
non-dominant hand and place my dominant hand on the leg with the point lifted up there. Then place it carefully
where it needs to go. Then use my non-dominant
hand to support it again, as I move my dominant
hand up to the Twistlock. It's a move that I
do without thinking, but might take a bit of time if you're new to
using your compass. Okay, That's the final one. I've made a boo-boo there. I don't know what that is. Great. So somehow, somehow complete
mess of my pattern. This might be a good opportunity to actually show
you what I would do if this was a
piece of work that I was very precious to me, and I made a boo-boo like that. So there are two
things you can do. Let me grab my fixing apparatus. So one thing you can do is
use a piece of magic eraser, but I haven't got one
handy at the moment and it doesn't always work
so well on gold pen. The other thing you can do very, very carefully is to use a
scalpel or a cutting knife. So what I do is I take
my cutting knife, which looks a little dirty. Vector. I take my cutting
knife and I lay it so that the blade is flat
on the surface of the paper or just
slightly raised. And, and I'm very carefully
and rather gently scrape the surface of
the paper very gently. To be patient. I might use my potty
rubber just to lift off that's kind of dirty
scraped paper. These are useful tools. I don't want to touch the gold paint itself because
you can remove it Xin. So I guess carefully use the potty rubber remove
zone here as well. Okay. So I've still got a little
bit more work to do really gently and just
scraping the surface. When I did that. Okay. I'm trying to avoid scraping of any of
the surrounding gold. Okay. Looks pretty good
to me. Where's the lead? Potty rubber and handy little tip. Now, if I'd been doing
this for my own purposes, I wouldn't have had
such a heavy line. I wouldn't have use
such a dark lead in my compass so that when I erase this horizon
line and the starting Circle, you wouldn't have been
really been able to see the residual
remains of them. So hopefully, you now have a pretty little
double seed of life ready to decorate in
any way that you wish. So now you've got a new
skill under your belt. In the next lesson,
I'll be showing you some ideas for adding
color to the pattern
6. Design Ideas: In this short lesson, I'll be sharing with you some
of the ways in which I've decorated the double seed
of life in the past. It's such a versatile
pattern as you will see. Okay, So if you decide you want to decorate your
double seed of life as a standalone pattern in its own right because
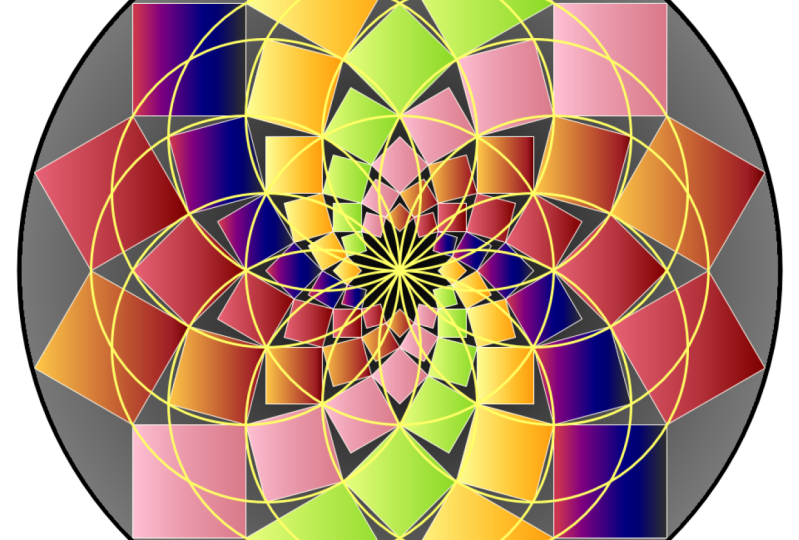
it is so beautiful. Then these are just a few ideas. You can try. This one here. You can see quite clearly that
I've colored the sections in and I went for a
rainbow color scheme. So starting with
my darkest color, dark red, red, orange,
green, and blue. So moving through the spectrum as I moved to the
outside of the pattern, what's quite nice as you get the palest Colours
in the central ring. So it helps with a
slight 3D effect, the darker color at the
center and at the edge, and a paler color in the middle. So that's one idea. This one I coloured
him with my posca is, and then after I've colored in, I outlined with my goat pen, you can say a little
bit of a gleam. This next one, you can see that this time I've done
something a little different. So here I have placed some concentric rings through
my double seed of life. Going through these little
cross intersection points that you can see in the pattern. This has given me even more sections to
colour and decorate. And then I used a doodle technique after I'd coloured in certain
sections of the pattern, I used a little doodling and stippling technique there
to add some interests. This next one, I've sort
of chopped into segments. So what you'll notice is
unlike this pattern here where I outlined full circles
all the way round. Here, I've outlined half circles starting at the center and stopping when I reached
the next door circle, starting at the center, and stopping when I reach
the next door Circle. And that's given a sort of
effect of overlapping circles. Here you can see that I didn't
erase my starting Circle, my center circle, so
it's still there. And then this one I
coloured in some sections. I chose to colour
these ones in just plain black so that
they really stood out. And again, I've
used Doodle motifs then on top of colouring. This next one, I was
feeling quite adventurous. This one is again, you can see the overlapping
circles effect, at least here in here. What do I was creating here? Was I was trying to create the infinite beach because wouldn't that be the
nicest place on earth? So I have C and then
crashing waves formed from the overlapping sections of
the double seed of life that then becomes see again until
they become waves again. In the next half, I'll put some tiny
little fishing, this one done in watercolour. This one here was part of hashtag challenge I did a few years ago called
the dune buggy challenge. And the theme was
insects clearly. And so you can just about see, I get that in this screen. You can just about see the double seed of
life lying behind it. I think it's in pencil. And then I used the curves of the pattern to
create these motifs, these sort of, this vine and the butterflies and bees
and the ants and so on. All sorts of follow the
curves of pattern itself. So it's a lovely Grid to use as an underlying construction or an underlying grid for
something other than geometry. And then finally, this one
here is a work in progress. As you can see, I'm in the middle of stitching this
one with some gold thread. Now, this one was clearly constructed
on gray paper and then outlined in gold pen. So same steps as
we've already done. I chose to erase
that center circle. And then I have punched holes in all the intersections and stitched between
the intersections. So I've got some straight lines now lying on top of the grid. Now, if you're interested
in this technique, you can watch my earlier class, geometric paper stitching, where I talk it
through in depth. But the other thing you
can do is you can do this technique but
without thread, with a Ruler and a pen. And so you can join
up the intersections where the curves
intersect each other. You can join up
those points with straight lines with
your ruler in a pen. So now you've got some
ideas for decorating the double seed of life
as a standalone pattern. In the next lesson, I'm going to be showing
you how to turn it into the mandala of
spiralling squares.
7. Spiralling Squares Part 1: So in this lesson then, we'll be adding our layer of spiralling squares over the top of our double seed of life. Remember that you can also refer to the step-by-step
instructions. If you find the
diagrams are useful. For this lesson,
you'll just going to need a sharp pencil, a ruler, and in case you make
a mistake, an eraser, you'll also need
your double seed of life ready to add
the squares to. You'll notice that I've
erased that center circle. But I've left my horizon line in because we're going
to need that line and we're gonna be
adding a lot more. Last fall. You'll notice I've got
some felt-tip pens here, but that's because I'm
going to be drawing some of the patterning color just to make it easier for you
to follow the steps, you don't need to do that. So now we're going
to build or mandala of spiralling squares on top
of our double seed of life. The first stage is to put
some more straight lines in that go right across
the center of the pattern. We already have our
horizon line in. I might just dark
and mine a little. You'll notice that that
horizon line goes through two petals of the flower
that sits at the center. So now I'm going to put
straight lines through all the pairs of petals
in that central flower. So my next pair, these two. And to place my pencil on
one of the petal tips, move my ruler up to it. Then there are other
intersections to check. So I can see that
I'll have one here, one here, I have the center, and I have this one out here. So just make sure
that you're ruler is running as best you can through the other
intersections in the pattern that are
on the same line. When you happy, you can
pop your next diameter in. And then I'm going to the
next set of these petals. And I should have 123456 diameters running
through the pattern now, including one horizontal,
one vertical. But we need one more set. So this time, we're not going
to go through the petals. We've already got those. We're going to go
through these lovely spear head shapes that are either side of the
lines we've got already. So I'm going to go through the tips of
this spear head here. And it's opposite part here. So placing my pencil
on this spear tip, pushing my ruler up to
it and then angling my ruler so that it looks as if I'm going through the other intersections that I can see lie along
that same line. When I'm happy enough, you might not have
perfect accuracy and that's absolutely fine. When I'm happy enough. Pot my line through, then I need to find the
next spear head shape. Here's one. I'm always going exactly
halfway between two lines. I've already got go through the center and then find your spear tip
on the other side. And when you happy another diameter on I'm work
your way round in that way. And to be honest with you, It's another beautiful
pattern in its own right. It reminds me a little bit of those paper Christmas
decorations that you unfold. So it'd be lovely to actually
be painted in darks and lights to give the effect
of a 3D paper ornament. But we're going to use it to make our spiralling
Squares mandala
8. Spiralling Squares Part 2: Now that we have these lines on, we can now add our squares. I'm going to be highlighting
certain points with colour and drawing my squares
in color from now on. But you would probably
find it easiest to just work in pencil in case of error. So my first squares
are going to be red. And I'm going to just
draw your attention to this version of the
pattern that's complete. And you can see
that in this one, I've also embellished
the double seed of life and made it part
of the final piece. So let's have a look. These are the squares that protrude outside the
double seed of life, and those can be the
last ones we do. So we're starting with
the next layer in. Now these Squares sit
perfectly in one of these spearhead shapes formed
by the double seed of life. So they're the easiest ones to start with because they actually sit inside a shape
we already have. So we're going to
start with these and I'm going to first of all, highlight the points that
make the corners of a set of Foursquare's that sit together
within a larger square. So each square has a partner At the other corner of
a larger square. And we're going to
be drawing two edges at once as we work our
way around the pattern. So let's have a look
at doing that now. So that spear head shape, that our first square
is going to sit in his right here on the
Northern line of our pattern. And the easiest way
to find it is to find one petal tip first from
that central flower. And then the next shape up is
the spearhead that we need. And I'm gonna circle its tip. And it's right and left. Um, what would you call
those corners or vertices. Now, my square is going
to sit in this shape, but for now we're just going
to do the outer edges. So what I'm gonna do next, and I'm just going to
lay my ruler through the top and the
right-hand side tip. And what you'll notice is on the other side
of the pattern, there are two points
of the partner square. So I'm just going to highlight the tip of that spear head pointing to the
West know, feast. And it's left and right sides. And then I'm going
to place my ruler. Checking is going through all four of those points
that lie on the line. But I'm only going to place my square in these two
sections, my square edges. So essentially between
the inner vertices or corners of the squares, there are 1234 sectors or gaps. So I'm jumping 1234
lines or four regions. I'm then going to do
the next pair of edges. Put my ruler through those
two lines and then check for the two corners or vertices
of this one's partner. And here they are. Lining my ruler up carefully
between all four points, but only doing these two
sections on the outside. And then you'll probably off now you can see what
needs to be done. Now this is the
easiest one to start with because we have it's Fourth Corner already defined
by the double seed of life. We can see that's the bottom
point of that spear shape. So now I'm going to
do the same act, but through different
intersections, I'm going to have a
pair of sides there. Parasites here. Now I need to do this
move twice more, which will give me
12 squares in total. You can see the shapes
we need here here, here, here, here,
here, here, here. You might find it
easiest to just rotate your paper slightly so that your next square is
sitting vertical. And then you can repeat
the same move again. I'll be keeping my paper in this orientation and just
working my way round. So our first ring, it's
Squares, is complete. Now that we're in a
way with the easiest, it was the best place to
start because magically, the spear head shapes in
our double seed of life, which is based on
sixfold symmetry, perfectly contain a square
9. Spiralling Squares Part 3: Now, the next ones are
a little trickier. But essentially once
we've seen the next ring, you'll know what to do
for subsequent ones. So I think it'd be
good idea to have a look back at this
completed one. So we've done this set, this sized set of squares. Let's have a look
at the next size down and how they relate. The one we've already drawn. Well, they sit in the spearheads either side of the larger
one we already filled. So they, they're
contained within this spear head shape
either side and there vertices touch the
largest square at its bottom corner here. So looking at this one
then I can see that it's inner corner touches the
base of this larger square. And where is its partner? My ruler along that edge. We can see that its
partner is sitting here in the corner of a
square on the other side. And we're going to need
to join this point here, which is a petal
tip or the base of a spearhead with
another similar tip, but it will be four
slices of our PI away. So let's have a look at that. We're going
to take this one. I'm going to change my color. I think I might use
a color that's quite different just to
make a distinction. So I'm going to use green. So here's the bottom most or innermost corner of one of the squares that
we've already got. I know that my square, my new square will
touch it just here. So I'm gonna circle
that one in green. Then I said four slices
of the pie away. So I'm going to also be going
through this point here. Now. I've got these two points that define the inner few like edges, corners of my new squares. But where do they wear to
the sides of those squares? Stop. Well the nice thing is, they stop on these lines. These diameters of all pattern that we've already
drawn in there. I'll just pull my ruler
back so that you can see those these two points of four slices away
from each other. And it's the outer two
sections of the line that joins those points that
we're now going to draw in. And we're going to stop when we hit the diameter either side. If you've got a
good eye for this, you might be able to figure
out where the next lines go. I know that this square
needs to be joined. This corner here. And I know that there
are four pieces, slices of pie between
this one in the next one. So it's going to
be this one here. Is that going to form a square? Yeah. So this one's
easy enough to do. I'm joining this
piece to this corner. This one I'm starting
here and I'm stopping when I get
to that diameter. I'll just pull the ruler away. I'm going from here
out and stopping here. When you can see the larger
square being formed, that the four little
squares sit inside. My next one must
be here somewhere. I know I'm joining this
point to this one. Where does my ruler come out? It's coming out here. There's my four slices
that separate these two. Then I'm going to
be stopping myself, going through my points. I'm going to be stopping
when I hit that diameter. Then the last one, I'm just joining
up these points, they're a little
bit easier to see. I might circle this one for you. And if you've been taking care, then you should hopefully
find that everything fits together perfectly enough. So I now have outer, two outer sides of my first set of second
smallest squares. So now I have to
complete the squares. So I know that this one's Got to come through
here somewhere. I'm not sure where, but I have a reference point in its partner square opposite. If I find the partner square
and line these two points up where it looks like I'm forming a right angle of a square. Then I can see that this time I'm gonna
be coming in and meeting that diameter here. So I'll just stop those for now. So one diameter here, and this one's going to come in and meet that diameter there. I can put those two sides in. My getting somewhere
now we only need one more side on each
to complete those. Now I can see where it's
final side needs to go via. Just focus on that online
my ruler up there. Then I can figure out where the other end of
the ruler needs to go. And I'm a little bit off,
so I'm just going to pull it down so that I'm going
through this vertex of this neighboring square. Adjust everything. Pop the two lines in, being careful to
stop the diameter. And then I can
work my way round. So now I've got to
do that twice more. Two sets done. Now are interior designers
will tell you that things are best grouped in odd numbers. So if you chose, you could just
make the next set, the final set of
Squares and just have three different sizes. I'm going to show you two designs where I've
only done three Squares. And what's quite nice about
these is that they're contained within the outer
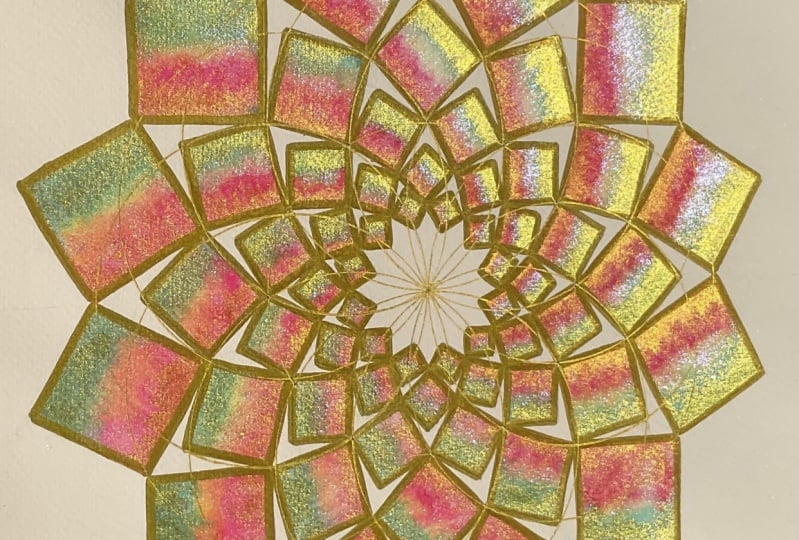
double seed of life. So this dinky little
one that was trying to figure out what a rainbow
colour scheme would be like. And I think it's rather Fun. And you can see that there are just three different
size squares and that they are enclosed by
that double seed of life, which I then decided
to colour in black to create a few like a frame
around the pattern of squares. This is another
one I did as part of a June Bug challenge, hashtag challenge
a few years ago. And so it's filled with bugs. And you can see there are
three different size squares. And they sit inside the
double seed of life, which I left in pencil. Though it's there
in the background. I'm just showing where
the squares come from. I think it can be quite nice to leave the underlying grid in. That's one option. And if you
choose to take this route, then you've only got one
more set of squares to do. We'll do that set now. And then I'll show you some
images of ones where I've put an extra square inside and
an extra square outside. So the next set of
smallest square has, I think I'll do in orange and in pretty much the
same way as before. We know, Let's have a look. Hey, we've done this locked
and we've done this slot. So now we're at this stage and
in the same way as before, they meet at the bottom
of the largest square up. So this the largest
square up there, It's innermost corner, and that's where the next
two squares will meet. If we can find those corners. And the partner
corner that forms the pair of squares
sitting in a square, larger square, and we're off. So I am going to pick this
corner here to start. And I know that
it's four slices of the pie that I need to go through to find
the next corner. So let's have a look one
slice to slice, slice, slice. That must mean that
this is my next vertex. And I'm going to be drawing
pieces of square on the outer section
line you're ruler up. And my edge will come from this out until it meets
that diameter. And similarly this, the
next one will come from this point down until
it meets the diameter. Then I'm going to work
my way round clockwise. Okay, So you could
stop at this point. I'm now going to do
one more in a set, and then I'm going to
show you how to do the outer set if you wish
to put on a set that overlap and extend out of
our double seed of life. And it's exactly the same set of steps that we've been doing. Squares are getting little. So they're probably going
to get a bit wonky. As geometry gets smaller, it becomes much harder
to stay accurate. I know that to squares are
going to meet each other, the base or the
innermost corner. And I know that from
this I need one that's 1234 slices or two bases away. So these two going to be the points I'm
going to be joining. But I'm putting outer decides on that stop at the diameters. Innermost set complete. These are the smallest
that we're doing. You could of course, carry
on well, infinitely rarely, but until they get too small
to draw if you wished. But I'm going to
show you now how to add one final set
on the outside. Now because they
overlap the pattern, we're missing some of the
connections that we need. So this stage I'm
going to do in pencil. And you need to do
in pencil as well. If you want to outline them
in pen, do it afterwards.
10. Spiralling Squares Part 4: So looking at our template, we can see that some vertices of this largest
square are in the pattern. There's this point here, the northern most point of
my double seed of life. This point here, which is
where two smaller ones, meat and then up here again on the outer edge of
my double seed of life. So those ones are nice
and easy to put in. So we'll start by
putting in if you like, this V-shape that contains the inner two sides of each
of the larger squares. So we need, I might put
this to the side, a set. We need that northernmost point. We're going to come down to this point where
to Squares meet. And then we're going
to go up again to that next intersection, halfway through this circular. Ok, so let's have a
look at doing that. I need this point here. I'm going to join down to
where to Squares meet. Then I'm gonna go back up to this point here and I'm
going to draw in that phi. Now going to work my way round. Okay? The problem we
have now is that we don't know where to stop
when we're drawing. Or two outer sides that
will complete each square. So there various different
ways of going about it. We could use a compass at this point and we
could take an ark this length and transfer that
point onto the outside here. We could do the same from
the other side and would get a little cross and that would tell us where our Squares mat. But you can be left with little crosses
around your pattern. And actually I
think in some ways the neatest way is to guess. So that's what
we're going to do. Let's think about where
that line needs to go. Let's look at this one here. So I know I need a
line to complete the square going in
this direction vaguely. So if I set my ruler up, I have in that direction where I know the
line has got to go. And then check that point, which is four slices
of the pie away. I'm going through this point
here and this point here. I can see how long my line is. You could even measure
it with your ruler. It's about mines,
about 3.63, 0.7 cm. So you could do it that way. You could just measure it. But I'm just going
to go by I and say, I know it needs to
be about that long. And this one needs
to be. Then I'm going to erase afterwards. So it probably be a
good idea to do this. These sets of pencil
lines quite light so that you can erase any excess
you don't need At the end. Where Next we'll, I need
to complete this square. So I know I'm going to have a line that goes
through this point here and comes out here
somewhere around here. And I know that the partner
intersection that I need is four slices
of the pie away. So it's going to be this one. And this one that my
rule is going through. Double-check it looks right. Does that look like it's
gonna give me a square here? Yes, it does. Now this side, I know where to stop because I have
that edge to meet. This is the side that I'm
just going to do by eye. It looks like it's going
to end about here. And then I'm going to
go through this point and 1234 slices away. I can see I stopped
a little short, but that's no problem. Just fill that in. Then here I'm going to
come out to about here. I'm gonna go through
this point and this point to complete
these two squares. First four done. So now I'm going to do
the same twice more. The mandala of spiralling
squares is complete. I almost forgot. We need to erase a
little ragged corners. The final pattern is drawn
and it's ready to decorate. In the next couple of lessons, I'll be demonstrating a wet
on wet watercolor technique, which you can choose
to have a go at. But of course, you can decorate your pattern in any
way that you wish.
11. Choosing Your Colours: In this lesson, I'll show
you how to use a color wheel to choose the two colors
for painting with Next. In this lesson,
I'm going to talk through choosing Your Colours. It might be useful
to have a copy of the color wheel in the
downloadable resource pack. You'll also need you paints. If you've switched your paints, then that can be useful. But if not, don't worry, you'll need a paintbrush or two. Really important to
have some paper towel for spills and for
dabbing your paintbrush on a glass or two for water and some rough paper just to test out some color combinations. If you've got Watercolor paper, scraps of watercolor paper, then that's quite
useful because you get a better idea of how the paints will work
together on the final piece. But if not, not to worry, any paper or your
sketchbook will do. This two-colour
technique benefits from using colors that are in the same half of
the color wheel. If we have a look at that now, if you choose colors that are directly opposite each
other on the color wheel, you would like you to
get muddy brown color where they meet and mix. So it's much better to
use colors in the same third or half of
the color wheel. If we have a look At the version I prepared
for the horse, you can see that I've used an orange and a pinky
red as my two colors. And there's a sort of peach
color where they meet. So I used colors from this
section of the color wheel. For this demonstration piece, I'd quite like to
try a different area of the color wheel out. So I'm going to test
out some colors from the blue and pink. Third, if you like. And the green and yellow third, I think, and maybe the blue
and green pairing as well. So those are the
three pairs of colors that I'm going to test
out on my scrap paper. If you've swatch two colors, then you can use
your swatches to help you choose
some combinations. But do keep an eye on the
color wheel just to make sure you're choosing colors in
the same half or third. Swatches a lovely
because you can compare colors directly to
see how they work together. But this set of
mine isn't swatch, so I won't be using swatches. I've decided to work
with a basic range of colors because I thought that's what you're more likely to have. It's a good idea to prepare
your pans before using them. To do that, you just
need a few drops of water on the Colours
you're thinking of using. If you've got a
pipette that's really useful for adding
some drops of water. But if not, you can just
use your paintbrush. So I said I wanted to test
out a green and a yellow. Just put a few
drops on that one. Few drops on that one. And then I said blue
and a purpley red. Really got a purple. I might go for this pinky red, blue, blue, this one. And green and yellow. And maybe a blue and yellow
we might try as well. Pinky blue. No, those are the
colors I'm going to see what happens with. So I'm just going
to let them sit for a moment to soak up some water. While they're doing
that, I'll talk through the reasoning behind
two cups of water. It is not a technique
of mastered, but it's a very good idea. The idea behind having two cups of water is that you rinse your dirty paintbrush in one cup and then give it a
final rinse and the other cup. And so what happens is one
cup becomes very dirty, but you always have a
relatively clean glass for to, to do your final rinse in. So that's the
theory in practice. I get the muddled up within five-minutes so we'll
see how long I lost. Okay. So these vet a little
bit of time to sit. I'm just going to use
one of my sheets of scratch paper out
of the way there. So we're gonna be using
a wet on wet technique, which essentially means
that you wet the paper first and then
apply paint to it. So I'm going to just to
that in this section here. What you're looking for
is a sheen on the paper, but not sort of a puddle. There's a nice sheen already
starting to dry out though. So you do have to
work quite quickly. I might just put a little
bit more on for luck. So I might try they're
blue and green combo. So rinsing my brush and dirty water brush and
then in the clean, theoretically, a
little bit of green. And then I'm going to dab, blocked most of that
water off my brush. And just dab the two
sections together to see how they can interact when
left to their own devices. And you can see you
get a slightly more emerald green where
the two meet. So quite like that. Let's
try another section. Again. We don't want a puddle, we want to Shane. And I might try
blue and pinky red. See what happens in clean my brush and blot it. Before doing a little
bit of dabbing. You can see an light
purple color coming. They're quite like that as well. I haven't used my yellow yet, so let's try that one, that K is put some yellow on. Let's try yellow and green. Get a sort of lie me colour. Mixed together that edge a bit. Blend it out and see
what's happening there. You just get a paler green really with these colors anyway. This is looking a
bit scrumptious. Has, is this I quite like that emerald green happening
in the middle. Their decisions, decisions. I think I might go with
the blue and the pinky, which sort of mixing a
pale pale lilac purple. Yes, decision made. So Colours chosen,
it's time to paint
12. Painting Your Pattern: In this lesson, I'll
be demonstrating a watercolour technique
that I sometimes use to decorate my own patterns. Remember, with watercolors
practices key, and if things don't turn out quite how you expect at first, either embrace the unexpected or have a go at varying the
amount of water you're using. So the amount of water lying
on the surface of the paper, or the amount of water you
will mixing into your paint, or the amount of water you're
loading your brush width, you'll soon learn how varying this affects how
the paint behaves. And before you know it, you'll become confident in using watercolors and developing
your own personal style. Okay, So for the painting stage, you'll need your prepped
pattern on Watercolor paper. You will need your two colors. Your glass or glasses of water. Paintbrush or two, if you've
got any small squares, you might want a
smaller paintbrush, some paper towel to dab your paintbrush on
and for spills. And then if you
would like to try the blotting technique to
add texture to your work. Then you'll need a few extra
sheets of paper towel, ideally with an
embossed surface. If you do decide to try
the blotting technique, then you will get a much paler
results from your colors. And as you can see, you'll get a little
sort of imprint from the embossed paper towel on
the surface of your paint, which is rather lovely. If you'd rather not try
the blotting technique, then you can just leave your
colors to dry naturally. The first step then is
to wet your square. Now on the largest Squares, I would really just work on one square at a time
because the paper does dry out quite quickly on the smallest
squares you could do to, or on your very small
Squares three or four at a time if
you work quickly. But I'm going to
start on the outside. I'm going to do one
square root of time here. I'm just going to work through three squares on each ring. So the first thing
we need to do is to apply water to the surface. Now it can be a good idea to tint the water a little so that you can see it and
you can see where it is on the surface
and where it isn't. Essentially, what we're
going to try and do is paint this square as
accurately as possible. Justin water. So I think I might
tint my water blue. See what this looks. Blue.
That's a bit better. I think you can see it. A
little bit of a blue tinge. So the main thing
is that you can see your tint doesn't have
to be dark just like to, just dark enough
for you to see it. And to see that you're
keeping inside the square, which you feel it or drying out, you can re-wet your paintbrush. And I'm trying to be as
accurate as possible. And just wet that Squares. Run my brush over the surface. There we go. Pale blue square. Oh, before I carry on, one last design consideration is to think about
where you want the darker of your two colors. So in this pattern, I chose to always have the
darker of the two colors. The red on the inside of the squares are on the left-hand side
of the squares as they run down
through the pattern. And because I was consistent
with that decision, it's helped to draw attention to the spiral that's
hiding in the pattern. So that's a decision that
you can think about. So I think I'm going to
have my dark blue on the left hand and my
red on the outside. So let's this is probably dried a little bit too much while I've been talking, but let's just add now
a nice bit of blue. I think I need wetter. So there's my blue
and I'm just doing it about a third of the way. Now I'm going to add some
red on the other side, who is very pinky. Then I'm going to rinse off my brush and just dab
the excess water off. I don't want it to dry, just keep it damp. And then I'm going to do a
little left and right up and down dabbing technique to
help the Colours along. And where I can see, I just need to drag
it out to the sides. I can do that as well. Now. You can just leave it like this or you can try your
blotting technique. So I'm going to do that. So I'm going to take sheet of paper and I'm going to fold it. Sheet of kitchen paper. I'm going to fold it in
half twice and twice again. So I've got a good watch. And the width of it is
larger than the width of my square so that I can
cover the square in one go I'm just going to lightly
dampen it down and lift it back up again.
So let's have a go. Okay. So that's pretty groovy,
happy with that. So each time I've
completed a square, then I'm going to dab with my kitchen paper,
my paper towel. He so the next square then
needs needs water on first, I'm going to use my
tinted water for that. Just about be able to see. If you feel you've
put too much water down and you have got a
bit of a puddle forming, just give it a moment to sort
of sink in and be absorbed. Or you could plot it. We painting a
transparent square K and then I'm going to dip
straight into my blue edge. And I'm doing the
left-hand edge in blue. Just encourage it
into the edges. About a third of the square. In blue. Rinse, rinse in the clean one, grab some pinky red. A third of the square
root, pinky red. The red seems to be much more
generous and it's mixing. And then we can
think about mixing the two together might
encourage some of that blue over bit. And then encourage a
little dance together. And I might rinse out my brush
and just use a dry brush. I've taken off most of
the water on that to encourage some of the pigment into the edges of the square. Let's go blue on it now. Okay? Oh, I must blot next. You don't leave it too long. Although you could
experiment with leaving a little bit longer to get
more of an intense color. The quicker you do
it, the more of the pigment you'll take off. And then being careful not to
use a side with colour on. So I'm just going to
fold that bit behind. Let me, he's going to
use this clean piece and I'm going to press
it down and lift it up. Now, I can see that I didn't really press very
well on this blue. So I'm gonna do one more. Just take a bit more
of that blue off so that I have a similar sort of intensity as the one next
door. That's a bit better. So I should do a third one and then we'll work
on the next three, smaller, and then
the final three. You'll soon get a feel for if your brush needs to
be a bit wetter, you may need to just
tilt your head. Look at the page at an
angle just to check that if you've covered
the whole square, I'm just adding a bit
more water because I've got some water, some Ken. Okay. I am going to outline this pattern
afterwards so the edges don't
have to be perfect. Okay, I'm going to work
on my next layer now. I might take risks
and do two at once. Let's see how that goes. We're going for sheen,
but not a puddle. One of the reasons I
love watercolors so much is it's a bit
like playing in the sandpit or making mud
pies at school. I was little. The similar sort
messy play, right? I have dab my paintbrush and I'm just going
to actually take all these edges first by
getting on my nerves. And then I'm going to
do the little dance. Then I'm going to block now. Block two at once
is the question. There we go. That worked whole case. So I'm going to do my last a3. These I might be rebellious
and drawn do three at one. The only thing you're risking
rarely is that one of your squares will dry out and you won't get quite
the same wet on wet effect. But a little bit of testing and you'll find out how many you can get away with it once Okay, this is starting
to look lovely and that blue edge is really
highlighting the spiral. You could of course, spiralling
the other direction. So if you're consistent
and use your darker edge, say on the right each time, then you'd highlight the
spiral in the other direction. Okay, I'm gonna go on and
finish the painting now, which I'll speed up for
your viewing purposes. You'll notice that because I'm using quite a bit of water, the paper is warping. I tend to fix that
after the event, which will dry bit crinkled. And then I tend to flatten my work by
spraying the back of the piece with a Mr bottle and then turning it upside down, face down on a clean surface. I'll put a drawing
board on top of it and then several heavy books
on top of that and flatten it out for about 24 h
really, at least overnight. And that tends to get
all the creases out. Little tip is once you've
sprayed the back of the page, let just wait a minute or
two for the paper to expand. You'll see it ARQ in a curve. I'm, before you lay
it down and press it, let it fully expand first and then when the fibers
are fully expanded, then you press it
under the heavy books. And it will hopefully
redraw nice and flat. If you overrun a bit, if you draw your brush quite thoroughly on
your paper towel, you can pick up quite
a lot of any excess, pull it back over. So while the paintings drawing, before I go on to outline it, I'll first share some more ideas for decorating this
beautiful pattern
13. More Design Ideas: In this lesson, I'll be
sharing some ideas for decorating this one of
my favorite patterns. So this is the technique
that I've just demonstrated, the two-colour
textured technique. And you can see in this one
here I've outlined it with a copper marker and that really brings a
picture together. And then I've left the underlying double seed
of life Grid prominent. I haven't made a
huge feature of it. It's still in the background, but it's certainly there. And I did that by drawing
it with a gray, fine liner. So it's a bit more prominent
than if it was just pencil. But it's not too prominent that it takes over the picture. Now, this is a print
of the first time I ever drew and painted
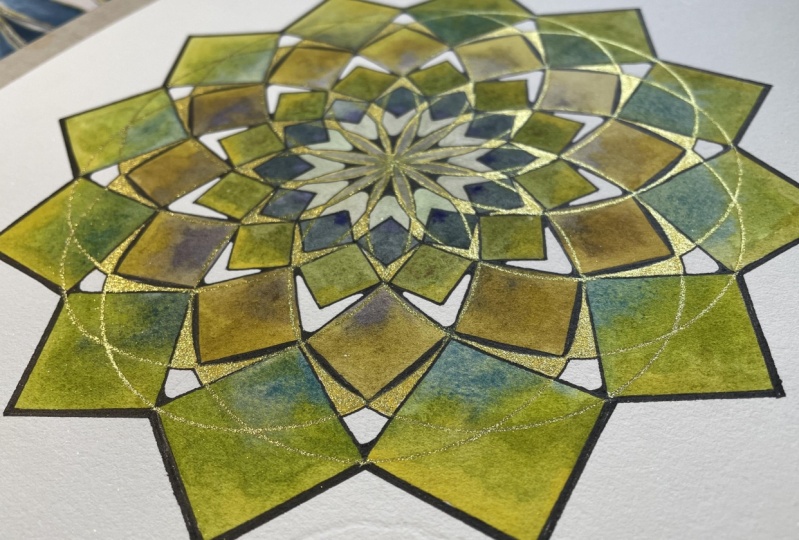
this man dollar. And you can see I've used a
similar kind of technique. I've gone from dark blue
on the inside edge of the squares to a turquoise
on the outer edge. But in this one, I chose to colour behind
in-between the squares, but I left the center blank. So that's another idea. You can try. This one here I've already
shown you this one. I used my Posca paint pens. And this was just one
with three Squares only. And I decorated the background in black because you can see. And I kept that
curved bubbly edge as the frame of the picture. This one here, again, it was my posca pens and I
outlined my squares in black. But then over the top, I outlined my underlying grid, my double seed of life with
gold pen so that it's more prominently there than in this one where it sits
more in the background. So that's something
else you can consider. You might want to have
your double seed of life overlaying the Squares rather
than lying behind them. And finally, I just
wanted to underlie the fact both these grids, the double seed of life, and the Spiralling
Squares mandala make fantastic structures
to do other things. Width. So you can see in this one I've clearly decorated it
with little insects, but you can do all sorts
of other things with them. You can decorate them with
any motifs of your choice. Okay, So it's the
final lesson Next, and I'll be sharing
some tips for outlining with a Ruler and a marker
pen of your choice.
14. Outlining with a Ruler: In this lesson, I'll be talking through the
various things to consider when you're outlining a pattern with a
Ruler and a mark pen, I always feel that
outlining a pattern really brings it together
and complete set. And you can choose to use
your outline to introduce a bright pop of color or
an elegant glint of gold. So for this final lesson, I'm going to demonstrate how
to outline your pattern with a Ruler and a marker
pen or a metallic pen. This can sometimes become
a rather messy process. So it's a good idea to have
sheet of paper towel to hand or indeed a piece of trusty
magic eraser nearby. We can use those to wipe, clean our ruler if
it gets a bit tacky. You should also make
sure that you'll ruler is clean to start with, so give it a wipe down. Finally, you might want some scrap paper to
hand just to test out your pens and make
sure they're running okay before you apply
them to the paper. Now, the main obstacle when
outlining with a marker or a gold pen is that the ink
takes a little while to dry. So while it's tacky, you want to be very careful not to be laying
your ruler on top of it or in any way smudging
the ink that's drawing. And so you have to
think systematically about how you're going
to outline the pattern. I always start at
the top and move my ruler down the page so that my recently inked lines
are at the top and not in danger of being smudged by the ruler
as I move it down. So that's the first
thing I think about. And then second really good tip is to turn your ruler over. So in this orientation, you can read the numbers on
the ruler is 1234 and so on. If you turn it over so that
the numbers are backwards, that way you get a gap between the beveled
edge and the paper. Which means that when you
move your ruler down, you're not going to be
dragging the ink because the ruler is not in contact
with the ink on paper. So I'm going to be doing
parallel lines as I go. The first set, I'll do these
two pieces at the top. I'll move the ruler down
and do the pair below. I'll move the ruler
down and do this pair. And then this pair. By then, I'm hoping that the two lines of gold or marker pen at the
top will have dried. I can move my ruler up
and do the next set. You can either choose to do your smaller squares
first and work out, or your larger squares
first and work in. So I've decided I'm going to demonstrate both the
use of the market pen, in this case a Posca paint pen, and a gold pen, in this case a secure
a pen, touch pen. I think this is a
two millimeter nip. Where does it say?
One millimetre nib? Actually, I'm going to do my outer and inner rings in pink posca and my
centering in gold. I'm going to start with
the biggest squares first. And I'm going to work
in the way I described. I'll be turning my paper
around as I worked through my parallel sets
of lines just to make it more comfortable
for me to do so. The first thing I'm
going to do is check my posca is running. Okay. Give it a good shake
with the little. I'm just to make sure the
paints all nicely mixed up and then test it out. If it's not running smoothly, you may need to press
the nib in a couple of times if you want
to over press it, but I'm happy with that. So I'm going to start
at the very top. I'm actually going
to stand up so that I can see directly over my ruler to my
reader upside down. And because I've
got to take into account the thickness
of the pen nib. I'm just pulling my ruler just a little back from
the line though I draw and my first set. So that's one set done. Hopefully these
two lines are dry. I'm going to turn my paper
around and do the next pair. Keep an eye on the
edge of your ruler. You can see I've got a
layer in both places. In two places I've got
a layer of pink paint, but at the moment it's not
causing me any problems. So I'll carry on just making sure that my
ruler is upside down. Another tip, if you've
laid your ruler over freshly laid pen, is to lift it vertically up, not drag it across the
page, just in case. Okay, So that's my
outer ring complete. While I've got the
Posca pen at the ready, I might now work
on my inner ring. And then I'll finish with the middle ring
and the goat pen. Now I could have done these at the same time I was
doing this parallel set. So there's a tip. You
could have done that one. That one, that one. This one. Benefits of hindsight. This one is one that needs to next time. Okay. Go pen time,
deep breath, time. Again, shake with the little
mistake I've made before. Okay? And then the same way, test how it's
running beforehand. And if you then think you need to can give it a little the nib, a little press or
two to rethink. Okay, I think we might be
good to go. Deep breath. Last set. I might just widen that ruler. Actually. Your kitchen paper will get
the majority of it all. What's left is pretty dry, but I will want to clean my
ruler properly afterwards. And that's where the magic
eraser comes in handy. I always work a bit
slower with a goal pen. You want to give the nib time
to rethink because you go, otherwise they can get a
bit dried out and scratchy. Now, gold ink takes a
little bit longer to dry. Then at posca, I perhaps should have been a bit more
careful at that point. Make sure I lift
the ruler carefully off rather than dragging it. Few fail your nib running dry. You can just give
a quick couple of presses on your scrap paper to get it flowing nicely again. Sometimes when you're working
over watercolour paint, you'll find you're getting a
little buildup of paint on the surface of the
nib of your marker. You might need to give that
a WIP at some point as well. You kinda feel it
get a bit rougher, a bit less giving
with its think. So survived the
outlining process, I quite like to
two-colour outline. Let's have a look and see
if we can see any shine. It difficult to tell a
little bit of gleam. It's irrelevant gray day
outside, which doesn't help. One finished mandala
of spiralling squares
15. Conclusion: Thank you so much for
joining me as I've shared with you one of
my favorite patterns. I do hope you're happy with your finished piece
or pieces plural, and that you feel more confident with the whole process of constructing geometric patterns
or the ruler and compass. Remember to share in image of your finished work in
the Project Gallery. I do so enjoy seeing the various different
ways in which you bring your patterns to life. And it's really useful
for other people to see that to do. Also tag me if you share
your work on Instagram, I really enjoy seeing it and
sharing it to my stories. And if you've got any questions about Art Materials, techniques, equipment, then do post in
the discussion section below, and I'll make sure I get back. Furthermore, if you are
interested in learning a bit more about the Art
equipment that I use, the campuses I recommend my
favorite gold pens and so on. Then you'll find an
affiliate link to my Amazon storefront
in my Skillshare bio. You can also sign
up to my newsletter there and find links
to all my son. Do follow me on
Skillshare to keep up-to-date with all
my new classes. The next one is already
forming in my head. And finally, I would so
appreciate it if you felt able to leave a short
review of the class, it helps the class come up more frequently in search results, which means that more
people might discover the joy of geometric
art-making for the first time. So all that's left to
say is thanks again, Take care and happy creating
 Clarissa Grandi, Artist | Educator | Author