Transcripts
1. Introduction: [MUSIC] Hi, my
name is Sylvia and today I am bringing
you this class from the Pyrenees which are some very high mountains
located in the North of Spain. Autumn has been bursting
for over a month and the landscape
has been turning red, orange, and yellow. With this class I want
to share with you some of the beautiful
landscapes that I've been walking through and
warping together some of the leaves
that I've been picking during my walks. We'll start by
sketching the leaves with a pencil directly into watercolor paper
and I'll explain how to draw each leave easily. Before we start painting I'll
ask you to take a minute to relax and let go off
your expectations. Whilst we paint watercolor and water we'll work
together to bring us unexpected results and during the process I want you to be present to what's actually happening on the paper
in front of you. There is no better way to practice mindfulness
than when we paint. I'll be using both my 12
color sets and some inks or echelons that I have carried with me to use on
special occasions. Towards the end I'll make use of other materials to give
extra texture to my leaves. This class is for any level, whether you're a complete
beginner or someone with more experience I think
that you can enjoy this class and you might
discover something new. Throughout my career as an
artist and as a designer, I've had the chance to use
my hand-painted assets to create patterns or
enhance digital designs. Overall, I find that painting
separate assets can be very relaxing as I'm not looking to create
a final painting. It's also a great way to try out new techniques and learn from unexpected results
or even mistakes. I hope that you take this class as an
opportunity to connect with the present moment and even if it's not
autumn where you are, share this season with me. I hope that you can join me painting and I can't wait
to have you in class. [MUSIC]
2. Your Project: Your project is to paint a set of autumnal leaves combining pencil, watercolor, and at least one material, that you find around your house. These could be pens, color pens, inks, bleach. Be sure to be careful handling bleach, as it can ruin your clothes or whatever. Just something that can help you see how fun is to mix different art mediums. If it's not art on where you are and you want to paint it green, or multicolored leaves. You can use different colors to create this exercise. As I said in the previous lesson, I'll be using two types of watercolor, pens and Ecolines or inks. But you can take this class with, any type of watercolor that you have at home. We will start by drawing each leaf directly onto the watercolor paper and I'll show you some easy shading exercises, that you can use to give volume to your leaves. In the next stage of the class, we will start adding color to our leaves. I will dedicate one single lesson to painting each of them and we'll make use of my paints and inks. So you can see the difference of painting with these two types of watercolors. I love this way of painting as I have to accept that the outcome is out of my control. Of course, I can select the colors that I want to use, dip my brush in different parts of the paper and even move it, but the ways in which the colors dry is always a surprise. Once our leaves are full of color, we're going to regain control of the way in which we paint and start having fun. These leaves will already, be looking stunning without the need of anything else. But since, I am a big fan of mixing the art materials that I have with me. I'm going to get creative and add some extra texture using pens and bleach. I will also use a bit of black ink. Mixing tools can be fun and you can get some interesting results when doing so. After you finish the project, take a photo, and please publish it in the project and resources gallery as I would love to see how they look. If you share your project on Instagram, you can tag me @silviaospina.art, and tag Skillshare as well. I get very excited, every time that I see a student project coming up on the social media. I promised to share it with my followers as well. If you share any stories, don't forget to tag me, so I can reshare it with my audience too. If you have any doubt, extra questions, or need guidance along the way, don't hesitate to reach out to me, using the panel below. I can't wait to see what you create.
3. Tools & Materials: In this lesson, I'm going to show you the materials that you will need for this class. Basically, we're going to be using watercolors and pencils. We're going to be using a pencil to draw our leaves before adding the watercolor to them and I'm going to have a couple of them prepared. This one is a 2H, is super soft, this one is 6B, so this one is a little bit stronger, and this one is an HB which is like a neutral one. If you only have one pencil, that's totally fine as well. I want you to take this class with the materials that you have at home. I'm going to be using two types of watercolor. First of all, I'm going to use this set of 12 colors which I love because the colors are very vibrant. The colors are also enough to prepare new ones if you need to and it's super portable. I'm also going to be using liquid watercolor, if you don't have any doesn't matter, you can just use your regular watercolors that you usually use to take this class and if after seeing what I'm painting you like the result, then I will suggest that you go and buy for example an orange and a red or a yellow and an orange, any colors that you can find on leaves will be fine and it will help you to experiment a little bit and see if you like it before going to buy a whole set of watercolors. I went a bit crazy in Colombia a couple of years ago because how cheap they are in there and I bought many colors. I haven't used them as much, that's why I'm saying that maybe first buy one or two colors if you like them and then if you really like them, go and buy more or if you want just buy a lot of colors and keep them, anything is fine. Those are the two types of watercolors that I'll be using in this class. Then I'm going to be using a couple of different brushes. Just use the brushes that you have. If you have flat ones, if you have round ones, small ones or big ones, I'm sure that they will work fine to take this class. When you paint with watercolor is very important to have a couple of sheets of absorbing paper. You can use whatever palette you have. I have these two, but only if you have a ceramic plate, a plastic plate or you can even use the squares that usually come with the palette of watercolor. What else? Water, of course. I have this trick that I keep a jar of water on any recycled glass by my desk so I only have to go up and take more when this one gets really muddy or dirty. I'm a bit lazy, but sometimes you just want to sit down and paint. When it comes to choosing paper, I will suggest that you use a 300 grams paper, why? Because if you use a thinner one you might find that the paper will buckle when you add too much water to it. I have been working as a surface pattern designer for many years and many times I have to paint watercolor assets to scan and then designed with and I've been recycling a lot of paper. I have things like this, if you took my first class you would recognize this, but there is a lot of things here. If you took my second class, you will recognize this as well, this is fast food, it was for a conversational pattern, but anyway. I'm just going to be recycling a couple of these sheets of paper because I don't like to waste paper and since I'm not going to be making a painting to hang on my wall, but rather to digitize the assets, I don't care about just using the other side of the paper. Then I'm going to have another material that I might use, I might not, but I want to have them available. I have a bit of black ink here that I might mix with the liquid watercolor, they might make a really cool mix on the paper. I might use a couple of these Tombow markers to create more details or texture. I also have this bit of soap with whitener because it might be good to experiment a little bit as well. Then I have some paints like some white pen, golden pen. I have this golden Posca which is great because it's a little bit thicker, but none of these extra materials are mandatory to take this class. The only materials that I would suggest really having is watercolors and pencils. In the next lesson, we're going to start drawing so have your watercolor paper on a couple of pencils ready and meet me in the next lesson.
4. Gathering Inspiration: [MUSIC] In this lesson, I want to talk about how inspiration occurs to me a lot of the time, especially when it has something to do with my daily life. Finding specific inspiration for me is a way of practicing mindfulness and staying present to my surroundings. For instance, I'm off to the Pyrenees, three months ago, and I've had a couple of projects in mind. When I write down an idea, I start suddenly finding inspiration everywhere regarding that specific subject. As you've writing it down, made everything that was already there, but I hadn't noticed visible to me. I wrote the idea of filming a class about autumn, and instantly, in every work I did, my attention was drawn to the change of the leaves on the trees. It is not that I didn't notice them before, but I started studying landscape around me in a much deeper way and became present to the smaller details. I started picking up these leaves, taking photos and videos. I started being mindful of the variety of colors, shapes, textures, and state of decay that the leaves dotted around wherein. I became really present to the change of seasons. If you have an opportunity, I'd like you to go for a walk before taking this class. It could be around your neighborhood, your garden, or any outdoor area. No matter the season that you're in, if you step outside, being present to finding leaves, I bet that you'll find some beautiful wants to paint. If you don't have time to go for a walk, you can use my leaves as inspiration. I will display the ones that I picked on my table so that you can see them. I will also leave a JPEG image of some of the leaves I took in case you want to choose them as a reference. If you pick some leaves during your walk, I would love if you can take a photo of them and publish in the project resources gallery. Maybe other students will use them as reference. In the next lesson, we'll start drawing the leaves. So get your pencil, eraser, and watercolor paper ready and meet me in the next lesson. [MUSIC]
5. Shading Exercises: [MUSIC] In this lesson I'm going to show you a couple of drawing exercises that you can start doing to gain confidence with the pencil. [NOISE] Before we paint our leaves, we're going to do a drawing like this one. [NOISE] Where we create the main shape and then we create a bit of shadows towards the borders of the leaf. [NOISE] If you want to skip to the next lesson, then that's totally fine. But if you would rather get a bit confident before we start, then these are great exercise to do. It's better if you have a pencil which is a B pencil rather than an H pencil. This means that it's stronger and it's darker. You can start. I'm going to rotate my paper. You can do the same so that your hand feels comfortable. To create shadings, all you have to do is start passing the pencil across the paper applying more pressure at the start, and then gradually reduce the pressure to create a gradient from dark to light. You can practice doing dark to light gradient and vice versa. You can try doing some softer ones and some longer ones and some shorter ones as well. You can also try doing this exercise with different pencils to understand the difference in between drawing with a B and an H pencil. Another way in which you can apply shades is by doing something called cross-hatching, which means drawing closed spaced parallel lines. If you have, for example, a leaf border that is like this, you can do little lines or you can just again apply pressure and then lift it as you move to the center of the leaf. We apply pressure and then you move to the center of the leaf. Whenever you have a corner, for example, you can make it a bit darker towards the corner and then lift your pencil as you move to the center. As I said if you don't feel comfortable drawing it, take any piece of paper, if you can recycle even better and do these exercises until you get a little bit more of hand flowing and meet me in the next lesson. [MUSIC]
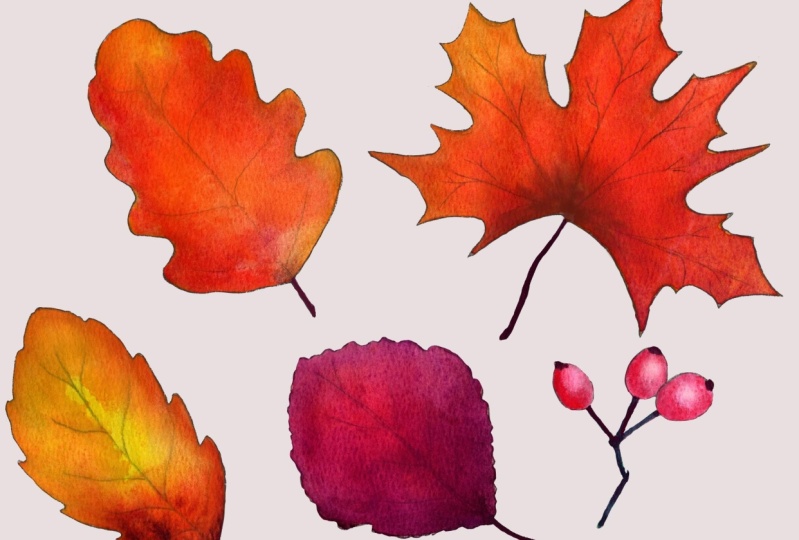
6. Drawing Your Leaves: In this lesson, I'm going to draw my leaves in the watercolor paper using pencils. I'm going to be drawing the silhouette with the six B because I want you to see what I'm drawing. This time we'll actually do want the pencil marks to see through the watercolor. We're going to be shading on it a bit, the borders of the leaves, and then as watercolor is transparent, you will be able to see those marks through and you will see that the result is beautiful. I'm going to start with a leaf which is easier to draw. Every leaf has a central vein and then whatever happens on each side changes from plant to plant. I'm going to do one here. I want to start here so I have all of this space to draw more leaves. I'll draw the central vein with a line and then add these little peaks to the silhouette as this makes the leaves look more [inaudible] That's it, super easy. Next thing, I'm going to draw for secondary veins. After doing the silhouette, I'm going to add a bit of shading towards the outside part of the leaf. As you can see, the shading that I'm applying is much softer than the one on the exercise of the previous lessons. Remember you put more pressure at the beginning of the pencil and then you lift it up as you move towards the center of the leaf. This is it for the first leaf. If you think drawing other types of leaves is too complicated, you can stick with this leaf, which is easy to draw. For the second leaf, I'm going to be choosing this one as it's also very easy to draw. I could trace it but just in case you don't have it, I don't feel it's fair that I'm tracing my leaf and you don't have any to trace. I'm going to draw the central vein, which is just a stick. Then this time the sides are going to be curved, rounded curves, so curves. Then draw a couple of secondary veins. Another very easy leaf to draw. As I did with the first one, I'm going to add a bit of soft shading towards the border of the leaf. The way in which you grab the pencil can make all the difference. Look how I'm grabbing it far from the tip and applying little pressure. Try grabbing the pencil differently and see the different results or how it feels through your hand. You can try making some leaves darker and some leaves lighter to see the different results. One of the things that I love about shading in cold press watercolor paper is how the textures suddenly becomes visible. If you have a closer look at your paper once drawing, you will see all the [inaudible] instantly affecting the shades that you are drawing. For the third leaf, I'm going to use this one. Actually, I'm going to grab one of these ones because I took them on a walk yesterday. Look at them. They're super fresh and the colors are still super vibrant. I mean, look at these textures. This one could be a bit more complicated to draw but if we break it up in parts, it will be easy, I promise. I'm going to start with this point here, just so I can draw a mark on the paper, and then it has one, two, three, and four lines. It's just like a straight line, then another one, more or less 45 degrees in here. Then another one, and then another one, and then equally to the other side. Then I'm going to simplify this and not make so many curves so that it's easier to draw. You go down, you go up, and you go down and then you go down and then you go up. That's all you have to do in each side. Down and up, down and up, down and up. You can vary these curves in each section of the leaf. Or if you wish to draw it differently, you can stop this video and have a closer look at the leaf shown in the screen to copy it differently. These leaves are imperfect and that's what I love about them. If you find this leaf stressful to draw, you can change it for another one. I want you to try and stay relaxed as you go through this class. I really like about this leaf, that the secondary veins that go out of these main veins are very clear. I'm going to draw a couple of lines which are softer than the main ones. Lastly, I will add a bit of shading towards the borders. Remember not to do the shading too strong. Again, see how I'm grabbing the pencil far from the tip, as this makes shading much easier. Try to not overdo it because you want the center of the leaves to be clear for the watercolors to be super vibrant. Now I'm going to go this way so it fits. The main vein is a bit curvy and I can see that the shape isn't completely rounded, but has a bit of a rectangle shape, more or less. I'm still going to round it up when doing this silhouette and draw it with a weakly line like the reference leaf. I'll erase the first guide I did. Lastly, draw the secondary veins which go up. You can shape the sides and add a couple of more lines on each side of the secondary veins to create more inner texture. Now I'm going to draw these berries. They are not berries but I picked up yesterday also from my walk. Their shape is like an oval with a little hat on the top. I'm going to draw three and then draw a stem coming from each one and meeting in the middle. Then I will end up by elongating the main stem. This time the shadow is going to go on the bottom. The light is coming from the top. I have a window here, so the light is coming from the top and the shadow is here on the bottom. I thought that if I'm going to be doing an autumn pattern, I want to introduce a white flower or something to lighten the pattern up. I'm going to do just one petal. I'm not going to be bothered drawing the whole flower. If you took my first class Botanical scenes in Photoshop, you follow me on this super-quick. I'm going to draw just one petal here. For those who haven't taken the class, I basically teach how to create a whole flower with just one petal using different transforming tools in Photoshop. I'm going to do a stem here just in case I want to use it later. That's it. Now that our leaves are ready, we are going to start painting them, get your watercolors ready and meet me in the next lesson.
7. Take a Minute to Relax: [MUSIC] Before we start adding color to our leaves, I'd like you to take a moment to relax and bring your mind to the present moment. Painting is a great way to practice mindfulness, and staying present to what's happening in the paper in front of you can be a real joy. During the next stage of the class, we will use watercolor in an experimental way and observing how the pigments react to the water can be a form of meditation. I will leave this video with some background music for a minute. I'd like you to close your eyes, do it slowly, and try to leave your thoughts and worries behind. Once you finish meet me in the next lesson. [MUSIC]
8. Painting the First Leaf with Pans: [MUSIC] In this lesson, we're going to start painting our leaves. I'm going to start with my pan 12 color set. So that if you don't have liquid watercolor, you can complete all the leaves with just this set. In this class, we're mainly going to be using the wet on wet technique, which means that you add water to your paper and then add the watercolor whilst the paper is still wet. The first thing I'm going to do is to add water to my first leaf. If you're painting your leaves as well, try to be organized. So if you're right-handed like me, start from the left to the right, so you can work in order to prevent smudging the paint with your hand. Then, if you're left-handed, start from right to left. I'm going to use our round brush number 9 as it's a size that can hold more water than a smaller one. As we're not going to paint any details, any brush preferably round will work to paint your leaves. As you can see, I displayed all these beautiful leaves on my screen so that if you don't have any, you can just check what I have on the table and pick one that you like and be like, "Okay, I'm going to be using, for example, this one which is yellow, and then it has these drops of a brown-green. First thing is to add water to your leaf. It's important to get the paper really wet. I'm creating a paddle where these leaf is always being careful to respect the borders as much as I can. There's a couple of ways that will help you see where you are applying the water that I will explain in the next lessons. But in case you're struggling, what are the tricks is to move your head around the paper to see where it shines. You can also move your paper. For this exercise, I want the watercolor to be very strong. I'm going to create a bit of a puddle on the pan and stir it until I get like this thick texture. Then I'm going to start adding these drops. Because the paper is wet, you will see that the paint starts expanding through it slowly. I'm going quite quickly here as I don't want this video to last for too long. But at home, try to wait for a minute or two without applying more paint to see how the pigment mixes with the water and settles in the paper. If you see that your watercolor is staying too contained and not expanding, you can dip your brush in the water and help it a bit. [MUSIC] It's key that your paper is always wet so that when you apply another color, they mix without the need of you doing much. [MUSIC] I will grab a bit of this lighter yellow and start dipping the brush in the upper part of the leaf. [MUSIC] I'm going to grab some ocher and paint some dots here in the bottom of the leaf, and then some darker brown or sienna to do the same. The key when painting with watercolor is to control the amount of water that both your brush and the paper are holding. If your paper is too dry, then the colors won't mix together. Before they dry completely, you can add more water to them and help them to mix [MUSIC] Unfortunately, my second camera turned off. I couldn't show you in a close detail the way in which the colors we're mixing in the paper. But in the following lessons, you'll be able to see this clearly. In the next lesson, we're going to keep using pans to paint the second week. [MUSIC]
9. Painting the Second Leaf with Pans: [MUSIC] Yesterday when I finished painting, I forgot to put these leaves away. This morning they were all dry and they got to be damaged, which doesn't matter but it's quite sad. If you're picking your leaves, always make sure to put them on a book or a notebook or anything to prevent this from happening. Look, some of them got a bit folded or they broke, but it's not the end of the world, they're still beautiful. Just so you remember to produce [inaudible]. For the second leaf, I am now going to follow their inspiration as I feel that I already did yellow slash ocher color leaf. I think I'm going to follow a red one or this one which maybe has a bit more of strong orange colors. As I did with the first leaf, I'm going to first add water to the whole leaf and actually add quite a lot so that when I add the watercolor, they blend well. As you can see in this glass, I'm not using any palette because I want the watercolor pigments to be super-strong and bright. There's no need on passing the colors into another palette. I would rather have them pure and just let them mix in the paper. If you find it hard to know where the borders of the leaf are just with the water, you can always add a little bit of pigment to the water to see where you're painting. As we're going to paint our leaf red anyway, it doesn't matter if the first layer of water, is a bit colored. [MUSIC] First thing, add a good amount of water to the leaf. [MUSIC] What I love about this technique is that as we already did the details of the leaves with the pencil, the process of painting becomes really enjoyable as there is no stress with getting the shapes right or with adding details. You can almost see the finished result whilst painting. Don't worry if you go over the borders as we can clean this in photoshop or you can paint over with a bit of whitewash once you've finished the painting. [MUSIC] Once the water has been added, I'm going to start adding water to my palette and I use red, this burgundy, maybe a bit of brown. I'm actually going to put some droplets everywhere, so I have the freedom to mix the colors as I want. But I'm going to start with the orange color. If you're using watercolor tabs like me, It's good to add the water and then steer it up and just make sure that the color is very concentrated. Now I'm going to start having fun just dipping the brush in different parts of the leaf. [MUSIC] I'm then I'm going to add a bit more of red in here. Maybe a bit of brown. I really love to actually take some time observing how the paints mix in the paper. [MUSIC] You can see that in the bottom of the leaf, that paper has gone dry and that's where the pigment is not splashing, but rather remaining contained. If that's happening to you at home, just dip the brush in a bit of water and help the paint mix with the other colors. [MUSIC] Sometimes I like to play and move the paper in different directions to see how the colors start moving around and mixing naturally. The pigments can be moved to the borders to create a bit of volume or box at the center. You can even stop and add a new color and move your paper again. I find that this way of painting is super relaxing. Somehow knowing that there will be an unexpected result, which I can control is a reminder to let go. Sometimes I play too much and I lose some of the tones that I added in the first time. But I can always add some more tones or shades to the sides if I feel like I need more colors. I want to add the dark stains yet as I rather wait for these vibrant colors to dry, and maybe add some more texture with a pen or some with more paint. [MUSIC] In the next lesson we're going to start painting the third leaf, and I'm going to start using my liquid watercolors. These ones or [inaudible]. It doesn't matter if you don't have these type of paint at home. You can keep on painting with your pans or tubes, and if you like what you see, you can go and buy a color or two to experiment. See you in the next lesson. [MUSIC]
10. Painting the Third Leaf with Inks: For this leaf, I'm going to start using the liquid watercolor, just so you see how awesome it is when using this type of technique. I move the paper, and I drop that of color. Just came out of the leaf, but it doesn't matter. I will fix that with a bit of white quash. Sometimes with these colors, what I find is that I never know what color they are exactly. Either I try them first on a paper or, I just trust that they're going to be great anyway. I'm going to use these ones, and maybe ill introduce a bit of red. I'm just going to take them all because, why not? I never use them so, it's fun to actually be using them in this class. I put them here. Actually, no, because it creates some shadows so, I'm going to put them here. As always, I'm going to start by adding water to my paper. See how I'm stopping regularly to grab more water, and I'm getting the paper really wet by creating a paddle. Remember that you can add a bit of pigment to the water to see where you are applying it when painting the borders. It's important not to rub the paper hard with the brush. One trick to see where you are actually adding the water is to move your paper a bit. If you have any source of light bouncing in your paper, then you will be able to see the borders and where the water is. Actually, it's better if you move your hand around the paper. Because I've just realized that if you have added too much water onto the paper, and then you start moving it, then it might drip in this little leaf here. The more water, the better their colors are going to mix. I'm going to start with this yellow-orange, although it's hard to know what color it really is. One thing that I do normally is test the water in the absorbent paper to actually check what color it is. A bit more flutter, check this out. Look at the shapes that start getting formed on the paper. I think that they're so organic and beautiful. They look like inverted trees or something that's going on fire. It's good not to rush the second color and really be present to what's happening on the paper. I love watching the shapes and how they start mixing with the water, creating all these forums. Next, I will add a drop of light yellow and start moving the paper so that my two colors mix. If you don't have inks of this type, it's also fine to do this exercise with watercolor in pants or in chips. The key is always to apply the watercolor in a very concentrated, strong way. When I opened one of the jars, a bit of dry watercolor dropped in the side of the leaf. It's just this tiny bit up here. I'm going to add water and make use of it. Now, I'm going to add a drop of these light red. Look at this. For some reason, some colors flow faster through the paper, and I love how this soft red moves. You can help the pigments mix and move to the borders with the help of your brush. Now I'll add a bit of dark red. This color is super strong, so instead of moving my paper, I rather use the brush to start mixing it with the other colors. Otherwise, I feel that it's going to overtake the yellow. You can see that at this point, I'm not having any of the leaves as a reference. I'm playing with the colors intuitively. I'm constantly moving in between water and colors. I find these wave paintings so relaxing. I'm also going to add a bit of water to lighten it up and move the paper a bit because why not? Sometimes, with watercolor inks, you can end up with too much water or liquid on the paper. I like to grab a piece of absorbent paper and take the excess out. The same way in which you can add pigment and move the paper, you can add water and do the same. This will help the colors that have started to dry to activate and mix or move around the rest of the leaf. Another touch of water and I'll move the paper to fill the diagonal corner and this leaf is full of color. In the next lesson, we're going to paint the last leaf and the berries. Before you start, take a moment to check how your mind is. Is it relaxed and present, or is it wondering about? Whenever I feel too distracted, I like to stop for a couple of minutes and make myself a cup of tea. Or sometimes I just close my eyes again and breathe for 30 seconds and bring back my attention to what I'm actually doing. Get relaxed and meet me in the next lesson.
11. Painting the Fourth Leaf with Inks: Whilst this leaf dries, I'm going to start doing this one. As always, the first thing is to add the water onto the paper, trying to respect as much as I can the borders of the drawing. Remember that the more water, the better the colors will mix. Then have fun. I love how this light red flows through the water. Not all of the colors do. Now, I drop off orange. See, this one doesn't move as fast as the pink, it seems that it stays contained. It might be because the color has more pigment and therefore is thicker. Whenever using a brush, try to paint super softly and use only the tip. Sometimes I need to subtract some paint and it's the only time where I apply more pressure. I'm going to put a bit of dark brown in this one just to give it a bit of contrast. Wow, this brown is super-strong, I still love to see how it moves through the paper. I can take some with my brush and create some stains in the other parts of the leaf and paint the stem. As the paper is so wet, all the little stains are softening instantly. If you wish to make more contrasted stains, just let your paper dry and then apply the paint. Now, the berries. As always, a lot of bit of water first and this time I'm going to use the pans as I think that using the inks directly could be messy and hard to control since it's a smaller area. I'm going to leave a white area on the top so that the berry gains volume and it seems rounded. I forgot to add water to this third one and see how the paint doesn't moves through the paper at all. To create a lighter area, I'll apply some pressure to my brush and take some paint out. I'll apply a bit of orange ink as I want them to be stronger in color. For this stem, I'm going to use the wet on dry technique, which is basically painting when the paper is dry. When painting thin details using this technique makes it easier to control. Lastly, I will paint this stem in brown in case I decide to do a pattern or digital design later and paint the stems of the other leaves which are missing. I could consider my leaves finished, but I feel that they're too plain, so I'll take them a step further and show you how I mix my other materials with watercolor. Your leaves must be dry before you start the next lesson.
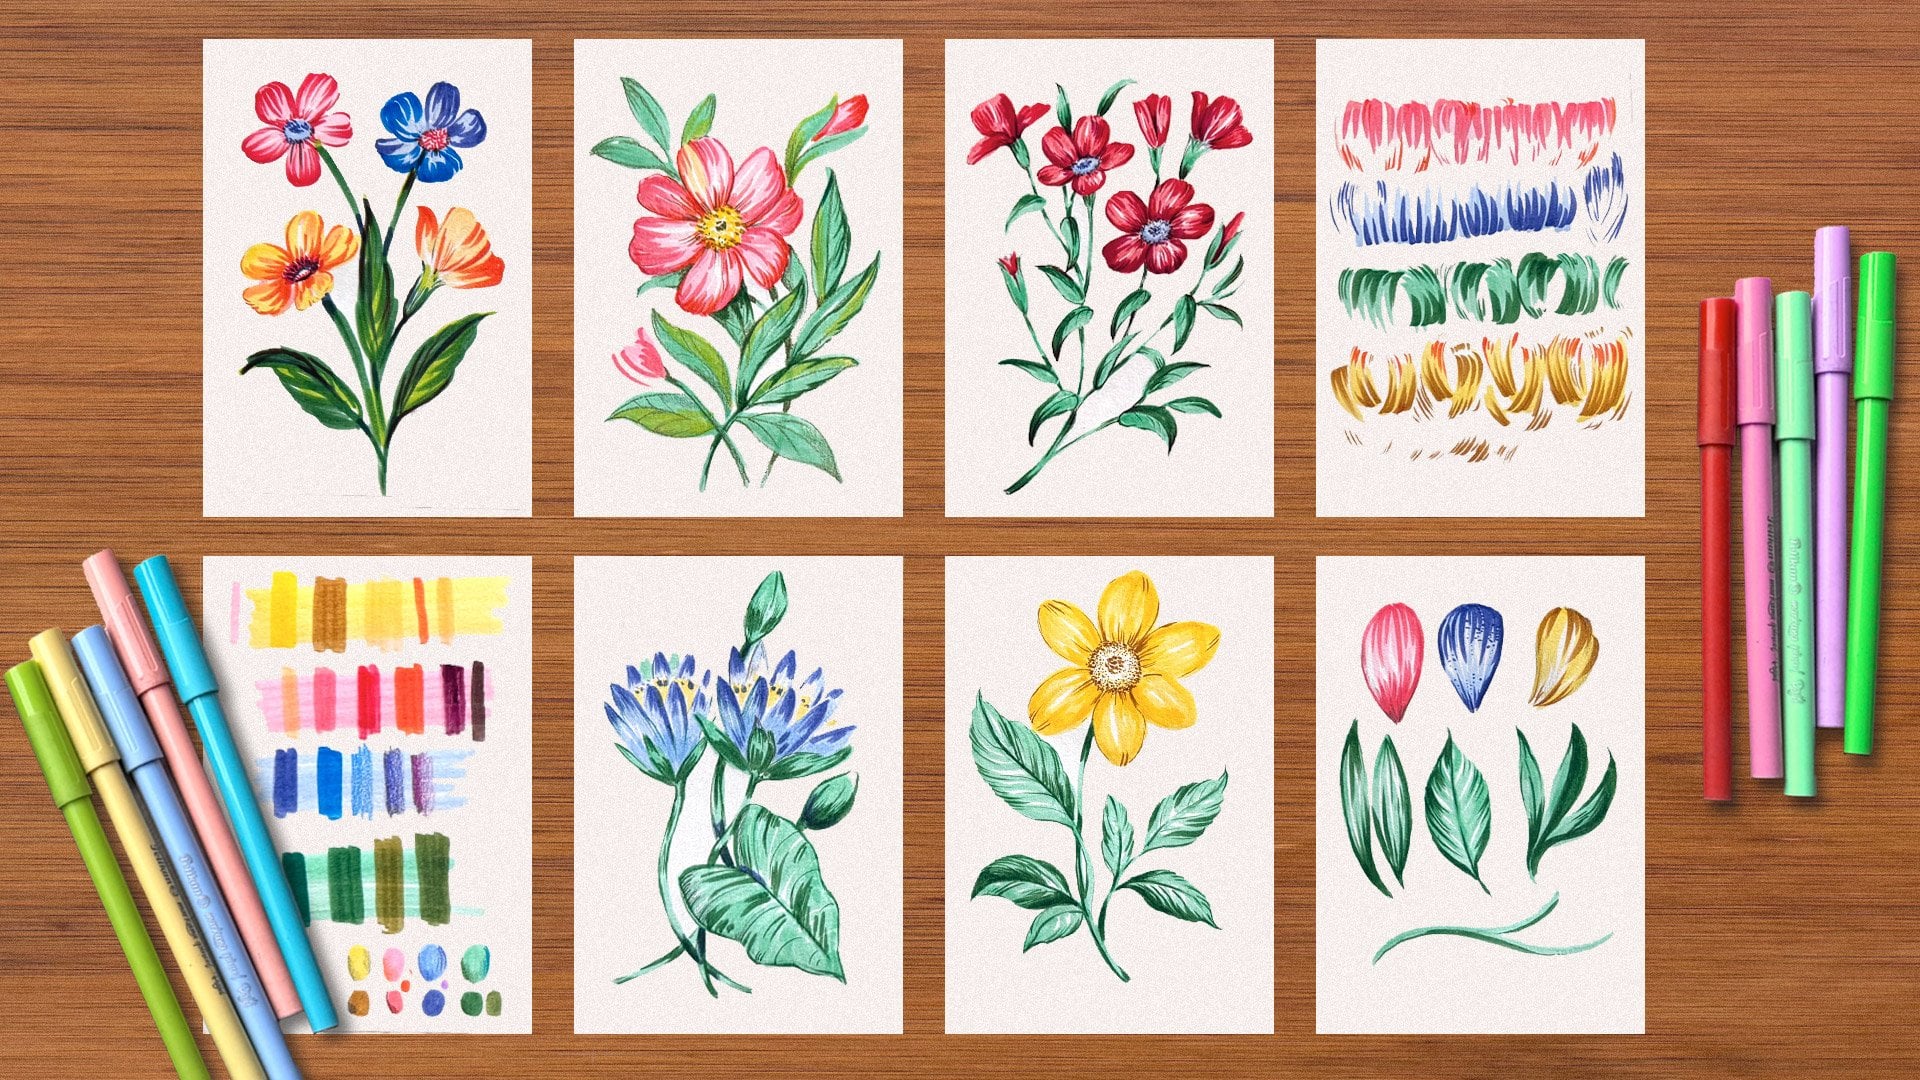
12. Combining Tools to Add Texture: [NOISE] [MUSIC] Now my leaves are dry and I could consider them done, but I feel that I could give a bit more texture to some of them and make them a little bit brighter. I'm going to try not to overdo them, but I rather give them a go, and try to bring the colors a little bit up. What I really like about this leaf is that it mixes a little bit of green on top of the yellow. I will start by adding a bit of water, much less than in the previous lesson. You might find that when adding water, the paint layered previously tends to dissolve a bit. That's why it's better to use your brush very softly, unless you want the texture to dissolve. Also if there is a space of the leaf in which you like the texture, try not to touch it or just add the water very superficially. I dry the paper with a bit of absorbing paper as a cut to it. I'm going to mix a bit of green with brown and then tap the paper with my brush. [MUSIC] I will use watercolor first, but you'll see in a minute how I can add texture using other tools. [MUSIC] For this stage, I don't want my brush or the paper to be too wet. If we have a paddle, then the stains will dissolve completely with the background. You can see that in the bottom left of my leaf, there was a drop of water and the stains that I drew before have disappeared, or have blended completely with the paper. I'm tapping the paper's super stealthy and trying to make more texture in some parts of the leaf. [MUSIC] You can experiment with various colors and levels of transparency in which you apply your paint. It's important to start noticing and recognizing when your brush is holding too much water or the paper is too wet. If that's the case, dry it out with a bit of absorbent paper and you will see how the paints and textures are much easier to control. Now I'll make use of my other tools, Tombow pens, black ink, and bleach. I'm using an ocher color very similar to the leaf. When you use this type of paints to create texture, it might seem easier to control. I love doing little dots here and there around the leaf to create depth and volume. I'm going to use a bit of black ink and see how it looks. If you want to experiment with ink too, start small. Take only a bit with your brush and even dry it with absorbing paper before applying it to the paint. [MUSIC]. Actually, I feel that the black is too dark, so I'll mix it with a bit of brown watercolor. I'll use my inks, but using a pan will also work well. I'm going to stop now with this leaf before I overdo it. It's sometimes very hard to know when to stop, especially when you're having fun. I feel that these leaf up here could be much brighter in color. I could add, for example, a whole layer of yellow and start dipping colors back in. I'm going to try, I don't what's going to happen, but this class is about experimenting. Actually I'm not going to cover the whole leaf. I feel that if I cover half of it, its going to look nicer. A lot of the time I like to think previously why I want to do, but is when I start painting that I can judge how the final result is going to look. [MUSIC] I'll also grab a bit of a darker color and create some texture in some areas. [MUSIC] Another art material that I found within my things is these golden tumble. I normally mix it with watercolor once the watercolor is dry. But I'm going to try to mix it once the watercolor is wet. Let's see what happens. I'm not going to do too much because I don't know how it dries, but at the moment it looks pretty cool. A lot of paint came out, so I'll move a bit with the brush. I'm going to leave it there just in case the paint is too opaque and it darkens or stains my leaf too much. I feel that these leaf in here now looks a little bit dull. I'm going to just add a little bit of dots of textures so that it blends well with the other ones. I'm going to use a Tombow pen, which has a similar color to the red and add some dots here and there. [MUSIC] This leaf on the bottom got quite dark. I'm going to try a bit of bleach on it to see what happens. I'm super curious. It will probably won't make an effect straightaway, but I'm sure that it will do something. I'm applying it with the same action that I was doing with the watercolor and tap the paper softly with my brush. [MUSIC] It's working. The effect is very soft, but I quite like it. I will add a bit on this side of the leaf as I'm quite excited to see the result. [MUSIC] I noticed that the bleach effect is getting stronger, so I will stop now. If you have any stains like I do on my paper and you want to let say hang this on your wall, you can always add a bit of white gouache. Just make sure that your brush is very clean and paint over them. You might have to add a couple of layers, but white gouache has a really good coverage. It should help you to get rid of the stains around your paper. This is how my final leaves are looking. They're full of textures, full of colors, and I'm super happy with them. Meet me in the next lesson, where I will say goodbye to you. [MUSIC]
13. Final Thoughts: [MUSIC] As I hope that you have seen, it's easy and fun to mix
watercolor with other mediums. Take some photos of your
painting and publish them in the project
and resources gallery, as I would love to
see what you painted. You can comment on other
students projects and this way, we can keep bringing
this community to live. If you want to get
to know me better, know that I'm constantly sharing my hard work through Instagram, and you can follow me
on silviaospina.art. If you post your art, don't forget to tag me
so I can comment on your post and share it
with my followers as well. Let me know in the
comments below, if you're interested
in me making a second part of this
class where I teach how to digitize watercolor and turn the leaves into our repeating
pattern using Photoshop. I hope that you leave this
class feeling relaxed, happy, and empowered to keep connecting to nature
through painting. Hope to see you soon and keep
exploring your creativity. Bye. [MUSIC]
 Silvia Ospina, Artist and Graphic Designer