Transcripts
1. INTRO - ABOUT THE MASTERCLASS: Alright, so welcome to
the guitar masterclass. My name is Rafael Bian center, and I've been teaching
guitar for over 20 years. So I want to invite
you for this journey, this master class, for this intense course
that I created. And I will guide you step-by-step in all the
content that I'm recording. There's a lot of
techniques to cover, a lot of boards, lots of theory. But I'm pretty sure
you're going to get that. You're going to learn
a lot to increase your knowledge a lot
with that course, or divided this
course into lectures. The lecture number one, you're gonna be playing
some warm ups in workout, exercise, exercise that
into the ED on the guitar. We also covered the
basics of the guitar as string names are two paths. How to read the court's, how to play chords, right? Even the record. And also prepared for you some
of the theory behind the triads and boards
with numbers e.g. C. Major seven, C7. Why we have those numbers, why we get those
numbers in court. We also recovered some of the theory as caged
and of course, formation circle of fifths, which is very important
for a music composition. We also want the last part. We have a basic
knowledge of strumming, finger baking, and how
to read the notes. The lecture number two, things are gonna be more intense because we're gonna be learning. Triads are Pedro's baking. Tapping had a point. For his kids. We're gonna be
covering pentatonic scale and the guitar modes. The seven gets her
modes that we use for improvisation and writes song gutter technique that we're going to be
playing and learning in this course would be
at the strip baking. Secondly, how to apply this
should baking in arpeggios. For depends on tonic session, I prepared for you some of the main shapes and how to apply this shapes in backing tracks. I also will demonstrate to
you some of the main patterns that we applied on
the pentatonic scales and a few lakes as well. You're going to
like that session because there's a lot going on. There's a lot of content
in that session, pentatonic scale, and
also on the guitar modes. I hope you enjoyed this course, this masterclass, and I also hope to help
you in your goals.
2. GUITAR STRINGS NAMES: Welcome to the
lesson number one. In this lesson, we're
gonna be covering some of the base of the guitar
as strings name. So as you can see,
on the guitar, we have six strings. We count these shrinks from
the bottom to the top. So my first string will be
E. That's the high string, E. Make sure you are in tune. You can also use some apps like guitar tuner or in this case here I'm using the logic tuner. Make sure you get
towards the end joining. So that's the E string. On the second string. I have the note B. We can call the
second string as B. Third string would be G. Remember we count these shrinks from the
bottom to the top. Bar strength will have D, the D note on the fifth
string. That note. And finally on the top
string and the sixth string, we also have another E. That's the low, E. That's your high. Again. B, D, and E again. We also have some good
exercises for a warm up. For alternate speaking. If you have never
played guitar before, those would be good
ones for you. So e.g. if you take the E string, the high E string, you can do the movement
down, up, down. Using your big took a look in my right hand. I'm not moving my arm. I'm not moving my wrist. Moving this part of my hand starts very slow. Can also count in
groups by four. Those kind of exercise will
be very helpful for you. Especially in this,
at this point, you are getting more
familiar with the strings, with the sound of the strings, with the sound of the nodes. So get ready for the next few examples where
I will demonstrate to you some of the workout and
warm ups that I do daily.
3. HOW TO READ TABLATURE: Okay, Let's learn now how
to read tablature or tabs. This is a bit different
comparing two when we compared to the
music and musical notation. Because this is
based in numbers. Let's take a look in this song, the classic milk underwater and see how we can
read those numbers, how to transpose
those numbers into to the fret board where those
nodes are located, right? That's what we need to know. If you were to take a
look very carefully on the the tabs. You don't see temples, we don't see beats,
see the timing, right? So we have to really
know this song. If you do to be able to
play this, this tabs, otherwise the nodes will
sound like in sequence and the song will make no sense. So let's take a look at that. This song, as you can see. Firstly, as you can see, all the nodes are located
on the top E string. You can tell this is the top
E string because they shrink below is a 035. Those are the first three
numbers that we see in that 0350 means open string. Don't need any
fingers to play that. Simply let the
string, that's zero. And then 3.5. That means that I have
to press the fret three, still in the top string. And the Fred five. I'm just playing
using one finger. But you can divide this, divide this fingers like to
get a better fingering right? Sampling zero. Then Fred three was in my own using
my finger one, fret five. Using my finger
three, at this point, probably already
know this fingers we will have, we'll
get some numbers. So figure one, figure
two, figure three, finger for every time I
would talk like that. Finger 123.4 to
guide you in, right? So those numbers are our
reference for fingering zero. Right? Look at the next group of nodes. I will have 0365. Then the next group, I'll have 035
again, pretty easy. And then finally, 30 adds some overdrive
here, some distortion. To have an idea
because this song was recorded with overdrive
in storage and so on. And all these nodes are
located on the top string. I will also have
some drums here, just as a guide, as reference for us
who played this riff. 1234. Again, 3434343 by three, by three, by three. Another great song that I
will bring for this lesson, it's called seven Nation Army. Let's take a look in this
song and how to read this tab and how to play this
numbers on the fret board. As you can see now,
is a bit different. Comparing with smoke underwater. I have notes on the a string and I will have one
note on the D string. When you don't know the saga, when you don't know the tabs
analyse the song like that. See how many nodes you have on the a string and if you're
playing other strings, right? If you're playing chords, we can also read tabs. You can also read chords
by the tabs room. But in this situation here is
all single nodes are right. As you can see, there is
a 77 starting the riff. Those sevens are
located where on the a string another seven. I will use my finger three now. Why? Because look at the next
fret that I have to play. The different five
located on the D string. But for me it doesn't make
any sense if I play finger one and then move my entire
hand to the flat five. So for me it would be easier
if I position my hand like that and play flat five. And then I go back
to Fred seven. And I have the
sequence of flat five, flat three, and flat to all
played on the a string. In this iteration, I can easily use one finger only solve. The entire roof
would be very slow. Let's have some
drums here to guide us just for a reference, 124. Right, So that's the
way that we read tabs. Remember what I
said about the tab? Some tabs, they have no rhythm, they have no beats. There's a great example if
you don't know this song, which is almost
impossible, right? If you don't know the song, you probably will play like you played the nodes in sequence because we
don't know the rhythm. We don't know the subdivision, don't know what's going on
on the on the main song, on the original songs, sorry. Just a bunch of numbers
being played in sequence.
4. INTERVALS: Alright, so for
this next lesson, I will show to you the intervals between
notes, what that means. As you can see in this piano, you have a group of nodes, have seven natural notes. They are C, D, E, F, G, a, B. You also have the sharp
notes and the flat nodes, which are located
on the black keys. If you see the piano,
It's very organized, very different than the
under the guitar fretboard, which sometimes can be confused. So sidenote, let's start
on the scene nodes. As you can see, piano is made by a pattern of two black
keys and three black keys. To black keys, free black keys. The nodes before the, the two black keys
is the C note, the C natural note, or demonstrators
and my piano here. So that's the next nodes. You have the sound
of the D note. So far we have C and D, right? So when you have this
kind of interval, we call whole step
between C and D. I will have one step. Okay, so where to find those
two notes on the guitar? If you position your finger
one on the fifth string, third fret, you
will find the note. That's my C note. If we skip the next fret
and play on fret five, we can also use your
finger three for that. You will have the d low. So I'm skipping one fret. See on Fred three. D on fret 51 node goes between
this two nodes, C and D. The elastic, the
piano as reference. Those c. Before the
two black keys. Again. The first black
key will be C sharp. And then D 0. D. If you do the reverse, like starting on D, D flat will be the black
key and C, right? So as you can see, a
C sharp and D flat, we will have the same sound. But if we go to C and C
Sharp, we call half-step. If you go from C to D, hose that foods that right? So where to find the
C-Sharp on the guitar? C is on the fret. Three. Remember we're still
on the fifth string. C-sharp will be on fret. For you, create that kind of
like a dark interval re-used for movie themes. If you play C and D, you don't
regenerate that tension. But if you drop
the D for D flat, C sharp, so far, so good, Let's keep going. So far we have C and
D. The next note will be the third note on
the piano, C, D, E. Remember how to find
the whole step? Look at the D note. There's the sound of the
denote. Then we have E. You have a whole
step, half step. Whole step. If I go
from D to D-sharp, half step from D to E. Post that holds that. Take a look at now
between E and F, there is no black key. So that interval
will be a half step. Half step petrified,
E, F on the guitar. If you position your finger
one on the flat seven. And then your finger
to on Fred ate. So far we have C, D, E, F. Let's take those four
notes on the guitar. It's still on the fifth
fret, fifth string, sorry. See, Fred, three, D flat five, E flat seven, and f. Read eight. Why I'm not going to
fret nine after E. Because if I go to
Fred nine, F sharp. So I'm not playing F
sharp in this situation, play E and F natural. You can also find that E and
F notes on your top string. Remember your top saying
when you tune natural. If you go to Fred one
half step interval. Let's get going. After F. We have Ji Fu step, whole step, F, G,
and then G and a. Another whole step, a and B. Another whole step. Now, B and C. That can be
a great question for you. Between B and C, Do I get a
whole step or a half-step? Be there is no sharp between BC. So when you play the B node, the next node will be half-step. Where are these notes on
the guitar? If I play C? On the third fret of the B
is located half-step down. What that means, the
B will be located on the fret to regenerate. Now, another half step, which is very patient rate. Well that's the thing that
you need to remember. The intervals between
E and F, half-step, and B and C. Another half step, the full scale on the guitar. Now, linear what that means, I will play all those
notes on the fifth string. We'll see on the flat three, flat five, and flat seven. F on Fred, eight on Friday, then on Friday, on Friday 14. And see on Fred 15. Right? So for memory, for a fresh memorization, this is the top of
the next lesson. I will speed up the
process for you. So on the fret 12 is where the open shrinks
names are located. What that means, the open
strings you already know, you already learned
on the other lesson, E, G, D, and E. You have the same order. G, D, a. And the 12th fret is on the
middle range of your string. That's why you're getting
the same notes as open. B, G, D, a, E, e.g. if you find G note
on the a string, you don't need to start
counting from here, from the open string. You can easily go here
on the 12th fret. The 12th fret is the AV node. If you go one frame
down, a flat. And then G, That's the genome is
located on the front end.
5. NOTES ON THE FRETBOARD: Alright, next lesson. Now, it's gonna be about
frets memorization, where the notes are
on the fret board. It's pretty easy, especially
on the top string. And the string, I
will highly recommend you to memorize
those three strings because our records
are scales are pages. We will start on
those two strings. So that's why it's really
important to memorize, at least at this point, this Jewish strings, top string, the E and the fifth
string, the a. So remember the intervals from the other lesson we're
going to be applying now. So on the top string,
as you can see, the red one, the red letters. We have e on the open string, ray, F on the first fret. If you skip the next fret
and play on the third. We have a gene for Fred. Fred seven b. Remember that theory? Between B and C. I will get the half
step interval red. So if I go from fret seventh, fret night, I get B in C-Sharp. When this situation here, I will need to get
the C natural notes. I place my finger
and Fred seven. And then I placed
the other finger. Friendly BC. Can also practice
vocals that exercise. Then on Friday, then I will
have the d nodes and Fred 12. Remember what I said
about Fred trough? You get the same notes
as the open strings. The fracture off on the top E
string would be the letter, E would be the nodes ie. Okay, so that was the
notes on the top strings. Easy to memorize because
on the odd numbers, the first three odd numbers, 135, you have F, G, a threat seven,
another odd number. I'll have the B gene. I'm just playing the odd frets. 1357. Of course I have C
on Fred, 810.12. C D E located located on
frets 89,810.12, sorry. Cte. And open of course will
be on the a string. I'll have a as open. And then I have to
skip the other fret, the next fret because it's
gonna give me the a sharp. And I'm not looking for a sharp, a sharp right now, so
I'm looking for B. So B will be the second fret. Take a look at now on
the green. Letters. On the green nodes. Be on second fret, third fret, D on the fret, five, E flat seven. The next note would be a
half step apart from e. So yes. You can take a look
at now on the, on the, on the top
string, on the flat 78, you find b and c. If you go one straight down on the
a string, you see EFF. Let's get going first, 781012. Finally, a note. Kind of like a sad combination. When you play from a to a. That's gonna be
the a minor scale. We're going to be taking
a look at this on the lecture number two scales. So when we have
the combination of these seven nodes, a, B, C, D, E, F, G, you get the a minor scale. You can, you can already
tell they scale. Is it sad? Right? Just playing the first
three nodes, a, B, C. That's the combination
of a minor scale. Next string, D, string, the blue one, the blue letters. As open. You skip the next fret. You get the inode. And after the note, half-step. Yes. Fred, Fred 78. Fred nine. Now, the first
time playing for at nine. But nine is gonna
give me the B node. And Fred, then of course we
will give me the c node. And Fred 12. Remember the rule about frat 12? Same letters as the open string, the same notes as open. So again, this
combination of notes on the fourth string will give
you the D minor scale. Just playing the
first three nodes, you have an idea what
I'm talking about. So the combination of the
three nodes, D, E, F. It's very sad, right? So minor scale is going to give you that
feeling, that vibe. Let's move on to
the third string. Third string is the G. Open. My second fret, a. Threat for B. And Fred five. Why I'm not going
to the fret six, because six is going to
give me this C sharp node. And then Fred file. And then Fred 70. Read mine. Dan, from
not playing flat nine. And then spread to 11. Because it regenerates
the F sharp. I'm playing flat 9.10, which will bring me the E
and F, a half-step interval. And finally fracture off. What is the feeling
of that scale? What is the vibe of
that combination? Playing the three nodes, major or minor, for
sure would be major. I'll play again for you. My major or the combination of these nodes group is going
to bring me the major scale. Let's move on to
the base strength. Now, I will have B as open. And why I'm not going
to the fret too. I'm going to fret one because I will have to have a half-step apart of those two, denotes the distance
between these two nodes has to be half-step. Obc would be located open. And C on the first fret,
three deep breaths, 568108, in front drove. And Friday, the high string e. If you take a look on
the high string e, you have to play at the same spreads as you
played on the top string E, because both are 0s rent. So EF. And first fret. Third fret Jew. For Fred. Fred seven or eight or nine. Because bread is C, natural, breath nine will
give me the C-sharp, which I'm not
looking forward to. Fret then. Fret trough. But if you play both
strings at the same time, same frets, the Loewy
and the high E. You have to play the same frets, so probably using
finger to three, so a, B, C, D, right? You're gonna get better sound when you position your finger, your fingers on the
middle of the fret. What it means, the distance between these two metal pieces here is where the best
sound is located. If you don't press
property that you get the muted sound breast properly. If you also press the frat, which is the metal piece here, you also get the muted sounds. So try to find a spot between these two frets and then position your finger and
you have the better sound. You can apply this
for all the fingers lift finger one day. So that's the frets
memorization. Another way to memorize. Frets. Lot of students
have that question. They spend, spend, spend time to find the
nodes on the D string, which sometimes can be confused. So how to find the nodes on the D string because
of the E string? Let's take an example. The G note, the note
on the E string. It's located on
fret three, right? That's my genome. Upstream, Fred 33. So when you use your finger to play the
fifth fret on the D string. Another gene, the octave
higher compared to that G. They are eighth notes. Part G. Then octave. G, a, B, C, D, E, F, G. Again, eight. That's a great, great way to memorize nodes on the D string. Find the node on the
top string first. E.g. let's take
another node, a, B. B is located Fred seven. And then using our finger three, use keep one fret, this case breath eight. And you play the fret
on the D string. When you go to open strength is even easier
because you only need one finger so you
open the knees, keep the next fret
and skip fret. One. You go to Fred to position your finger
on the fourth string. Another. If you did the same
technique for to find the other note on the B string, now, I need to find the E note on the B string,
how it's gonna work. If you do the same technique, that note is keep one fret. And then it's
keeping one string. That's my E flat. Not looking for. That technique doesn't
work for this situation. What do I have to do
is move This Fred, instead playing Fred
for you play flat five. So now you have to skip two
frets to find the next E. To find it the next octave. Again, you open. Upstream. You go to the fourth
string and play fret too. I just found the next octave. Now, you skip one fret
and it's skipped. You fret, sorry. And position your finger on the
B string, fret. Symmetrical. So you can do this in
every spot, like octets. Same notes. Here. You have F, G, a, B, C, C. You can move, move around. You can do this technique
also on the a string e.g. let's take the C note
on the a string. C note on the a string will
be located on a fret three. At this point, you
should know that, right? We did that on the other lesson. Three, the a string. I will skip the next frat. I position my finger
on the G string. I'm getting the c node. And others see note. To hire. Now I need to find the
c on the eastern end. It's missing the high E string. You position your finger here. Five on the seed that you
found. On the G string. You skip two frets ahead
and position your pinky, your finger four on the fret, eight nodes, right? A higher. Good exercise for memorization. See on the right,
the third string. The high strength. Jie Chen upstream. The D string, the B string.
6. WARM UP - BASIC: Okay. Hey, oh.
9. WARM UP - "X" STYLE: Okay. Hey.
10. GUITAR WORKOUT 1: In quarter notes. Eighth notes, 1, 2 3 4, 1 2 3 4 1 2 3 4 1 2 3 4 1 2 3 4 1 2 3 4 1 2 3 4 1 2 3 4 1 2 3 4 1 2 3 4 1 2 3 4 1 2 3 4 1 2 3 4 1 2 3 4 1 2 3 4 1 2 3 4 1 2 3 4 1 2 3 4 1 2 3 4 1 2 3 4 1 2 3 4 1 2 3 4.
11. GUITAR WORKOUT 2: String skipping. So when we go, string skipping would be very important to choose the
alternate speaking. So it would be very basic. So 123-41-2341, 234-123-4234.
12. GUITAR WORKOUT 3: 1, 2 3 4 1 2 3 4 1 2 3 4 1 2 3 4 1 2 3 4 1 2 3 4 1 2 3 4 1 2 3 4 1 2 3 4 1 2 3 4.
13. GUITAR WORKOUT 4: We're gonna be
playing in chromatic. So that means fingering
would be 1234. All right, starting
on the E string. And then you go fret 23456. What do we get under threat six. You move to fret seventh,
two on the top string. And then he started running
down like this, 789-10-1112. When it reached the fret 15, we started going
up, but it's still using the frets 151,413.12. And so we go. Now we are here on the 12th
fret and top string. So what do we do now? We start running that way. So 15141311. Now we are here on
the fret seventh. So what do we do? We do nine. It's on the E string.
You're going to play the 10987. And then the 9876. You start running that way. So when you reach the fret
one, you started going down. Guitar jam technique for would be played in quarter notes, eighth notes, and 16th notes. 1234. Hi, there. 12341234.
14. CHORDS AND BARRE CHORDS: It's time to learn some chords
on the guitar edge already played some single nodes on the other two songs
that I demonstrated. Now it's time to play chords. When you combine 23 even
four nodes, we call chords. And it also chords. We have two ways to play using the right-hand
strumming or picking. Some cases, finger picking rent. So we're going to be starting
on the eight major chord. That's another
thing about courts. When you see the letter. By itself, the court
will be major. So it's going to bring you that happy vibe that we were
talking about earlier. That's the sound
of a major report. Writer. Happier. And when you see the
M, in this case, a minor, you're going to
be having the sad vibe. Or some cores like diminished. Those We, those
chords that we have, the tritone will have that dark and sad
vibe, e.g. a minor. A major. Way we write it like happy, sad. In this lesson we're gonna
be learning a few of them. You're gonna be able
to play a lot of, lots of songs with
this simple chords. Okay, let's go back
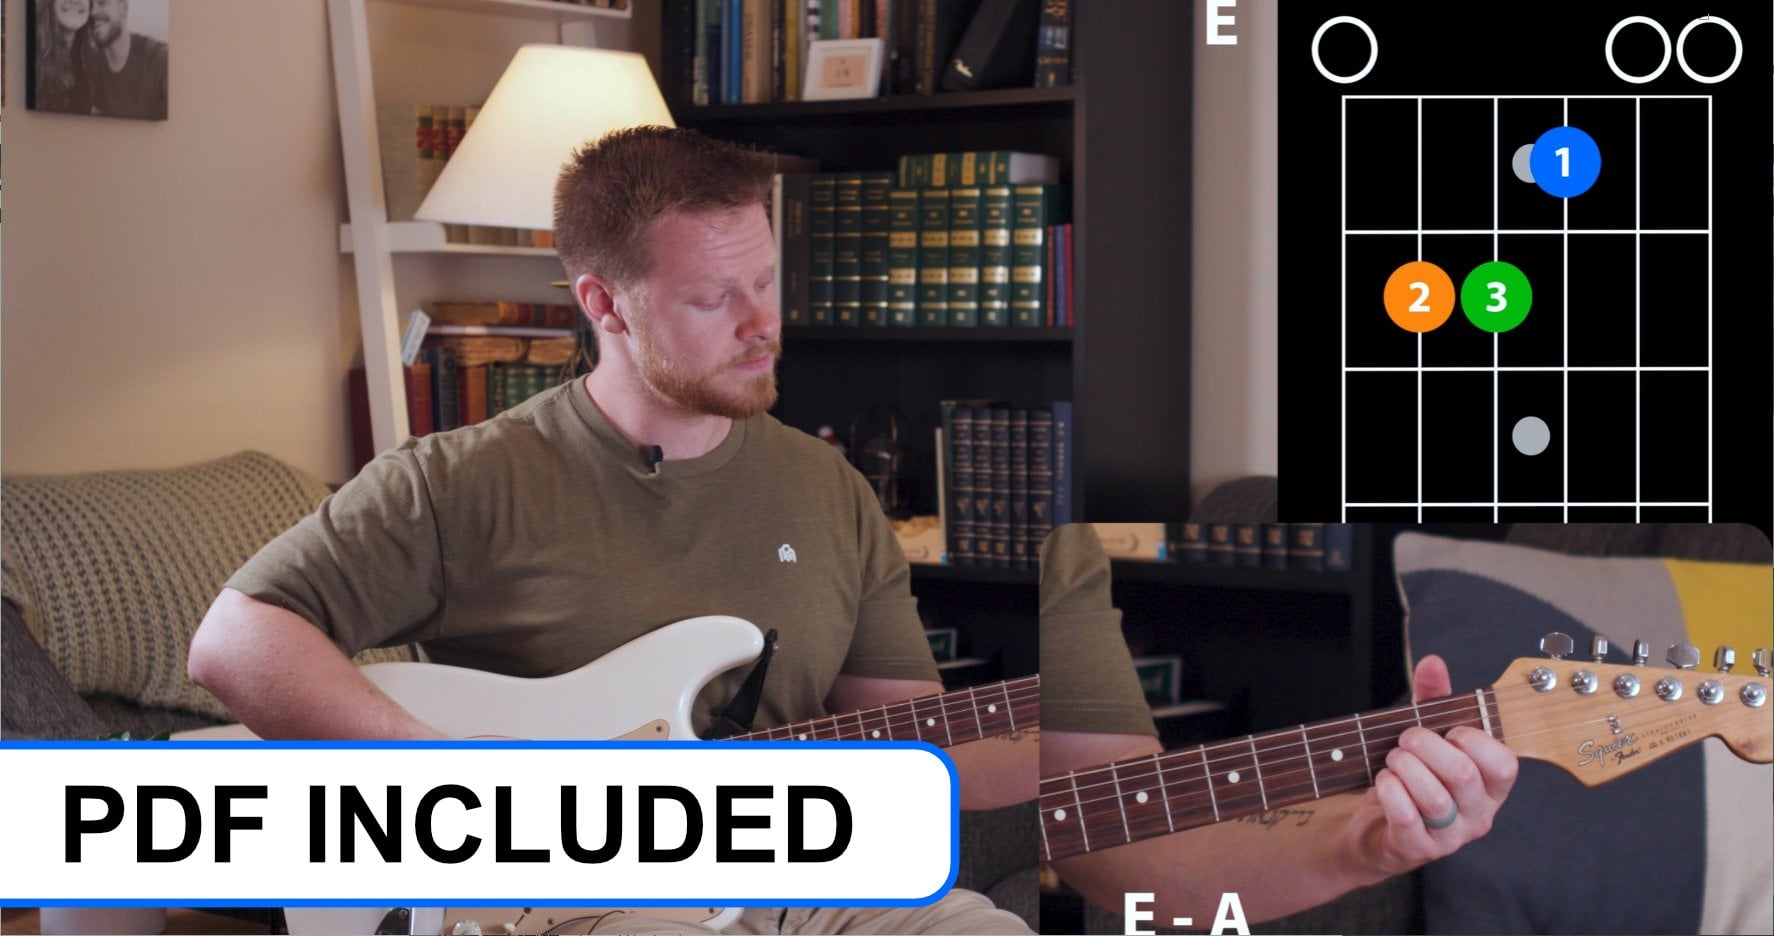
to the a major chord. So that's your guitar fretboard. As you can see, fingers 12.3
are located on the fret too. My finger one will be located
on the fourth string. Finger to look at it
on the third string. In finger three located
on the second string. It looks a bit confused, but you're gonna get used to that. Okay, So finger one, firstly, located on the
second fret string for finger to read below one, but now located on a string, g. Finger three, located
on the string to that x means that
you cannot play. You don't need to
play the top string. Let's think about this. The docstring is going
to give you the eNode. The course that we're playing
is the eight major port. We also have the inode inside that court is
part of the triad. Triad. Going, gonna
be checking that on the lecture number two is
not the case right now. So we start playing this sport. String. The chord is a major. In your age, your fifth
string, It's eight. And you can also
hit the E string, even if you're not pressing
any fret on the E string. Part of the triad. String. Second fret
of the first term. Altogether. Positioning our risks, not like that. Drop your wrist like this. And you automatically
you are dropping your shoulders so you're
not patient like that. So left hand position. How to gather better
position for cords. As you can see here, my
thumb is not like that. I'm not showing my thumb. My wrist is not that
high position like this. So it was more low position. And my shoulder is very
relaxed like that. It's not tension like that. So if you drop the shoulder, you move the wrist and having to raise lake and low position
in your thumb here, pressing the neck of the
guitar against this, this fingers to have better. I like that. I like this. I like that relaxed. Especially for cars like
this where you have to position all these three
fingers in one fret. Let's move on to
the a minor chord. A minor is a little
bit different. Take a look. On the second fret. I will keep two fingers. And now my finger one
goes to the first fret. Which string? On the second string, right? I will still playing the fifth string open and the
highest string E. Let's take a look at that. So let's build this chord
based on finger to now. Figure two, located on the second fret string
for finger three, still on the fret too. But now on the string, three, on the G string. Awesome. Then finger one will be
located on the first fret. On the second string. Altogether 00 sound
like a minor. Worked the best way. Just see if you are holding, if you're pressing
the notes properly, is playing the speaking notes. Because sometimes you can
incorporate one loads like that E string
or should be open. It's muted. So what I have to do, wrist position like this, because your corporate
strengths, not pressing proper decaying
sound will be muted. So let's trim this four bits. What does the sound of a minor? Let's move on to
the most time for a C minor or major chord. Let's say that's gonna be
the major chord, right? There is no m. So the
chord is major, C major. So we already know this. So the court would be right, would be happy. Right. Then to have that happy by what's going on here. As you can see, the X is still
there on the top string, so I have to avoid that string. Remember, you're
playing the C chord and the top string. It's E. Although the E note, it's inside that chord
is part of the triad. This situation, you
cannot play that. You have to start
streaming and picking this court by the fifth string. That's where my finger
three is located. On the fifth string. Third fret. Finger to
now located where? On the fourth string fret? On the G string, there is
no fingers on the G string, so the string is open. And finally my
finger one will be located on the first fret. Second string. And also the E string is open. There's no figures
on the E string. So in this course,
I'm strumming. Start building this
court by the finger three probably would be
a better option for you. So figure three,
finger to finger one. Let's draw this chord. Again. Look at my thumb. Position
is not like that. Right here. My wrist is in a very low position and my
shoulder is very relaxed. Tension like that. There's a pretty cool
chord progression based in these two chords
that we just learned. C major. A minor. Little
trick here for you. When you play the C major. The next chord is a minor. You want to, you want
me to move one finger? One needs to change one finger. Which finger? Finger, three. Fingers. Three. Relocate it now. Below your finger
to on the G string. I'm not moving my finger one, I'm not moving my finger
to I'm only moving. And you can practice this
like four times each chord. So let's move on. Next. D major chord. You're going to see
this coordinate. So many songs, very important chord for you to
learn at this point. D. Let's take a look on those x. So that means I have to avoid the E string and I have
to avoid the a string. I don't need to play the
three strings in this course. I will start playing discord
by the fourth string. Remember these strange
names? Shrinks. Order. For string is D, and this chord is D major. So let's position the
other fingers then. Thinker one located
on the G string, which is the third string. Fret. Two finger to located
at the same fret. But now on the E string, the first string, fingers three, located on the second string. Fret three. They start playing this chord. But first string,
that's the sound. That's the sound of the D major. Lined up like eight. Let's fix the hand position. Strumming four times. One. That's the sound of the D major. Let's move on now to the, another version of D, which is the D minor. Let's go. So D minor, a bit different. As you can see, we're still avoiding the E
string and a string. We're started strumming
discord by the fourth string. You can identify
that by that circle, your whites through
covert nerve. So that means you have to start streaming on the first string. Oh, we have finger one now
on the E string, fret one. We also have the finger to
the frat to drink three. On the G string. We have finally finger, three. String, fret, three. So you're going to need
three fingers for discord and three frets, three
different frets. Okay. That's the sound of the D minor, as you can tell. Very sad. Let's compare d
minor in D-major. There's a big, big difference between these two
chords, major and minor. Okay, Let's trim
D-minor four times D minor chord. That's a pretty cool
chord progression. When you combine D
minor chord, C major, D minor in C-Major, they work pretty good together. Next. E major. E major is the kind of
chord that we use trim. Always strings. Look
at those circles. You see where you have to start streaming from the
top string, E string. And as you can also see, the B string and the
east trend are open. Let's get this done. E major chord. Let's start building
this chord by the finger one will be a better idea. So finger one would be located
on the first fret string. Three. Finger two will be located
on the fifth string. Two fingers 3 h, so on fret too, but on the fourth string. But below your finger to array. Let's try him for six months. Let's trim this
court four times. Let's take a look at the
other version of E major, which is E minor, right? So for E minor, There's one finger here on the E major that I don't need to use it then
into play that fret. That's going to be the fret
one on the finger one. If I take that finger off of the fret board, becomes minor. In here. Yeah, look at that. There's only finger
to being played. And finger three. Now, let's compare
with the major. The major. I have finger one on the third. Drink. First fret. Listen to the difference
between this two parts. E major, minor, major. Writer. He minor. The minor. As you can see now I
have the east drank, or the first three
strings been open. Let's Trump E-Minor. Next. G major words. I think we will have to
change that fingering. For a better, get a
better fingering. It's more common
to see the other finger there to tell you. But this formation has 23.4. So pretty hard for it to play. Hard formation, heart shape
for us to play in songs. So I've replaced that
finger to finger one. Finger one now will be
located on the fifth string. Fret two. I replace that finger
three for Fred to, Fred to be located on the
top string, fret three. And it starts
playing finger four. On the E string. I will play finger three. So have finger to finger 13 open strings.
Configured three. On the high string. This G chord we owe us. We also will play 0 strings
whose trim all the strings construct G major chord. There's another formation
for this chord, which is keeping
your finger 1.2. On the top. But your finger three
now we'll move up. One string will be
located on the B string. Fret three nodes. And pinky, your finger for would
be located with the positioning on the high strength steel
on the fret three. So now you're gonna be using
four fingers for this board. Let's play the other G. That's open. And other option, which is part of the triad. Both ways are right. Let's move on out to that court. That's the nightmare
for students. But this version
here is pretty easy. I call this version
as the mini F, because you only
need four strings. The real f1, f2, f, you have to play
the record, right? What is Bart record is when
you use your finger one to cover all the strings like that. Pretty hardcore to play.
But you'll get there. I'm pretty sure. Let's
go look at that. Those two acts, that means I don't need to
play the E string. I don't need to
play the a string. I will start streaming from
the fourth string, which is, I have to use my
fingers three now on the third fret
string for the node. Remember what notes that from that little tricky little trick. By the octaves. The AV node. But now here, fingertips
now located on the second fret on the G string. And look at those 1.1. That means they have to hold two strings using one finger. Which finger? Finger one. Holding two strings
at the same fret. Altogether with sound like. The best way to see if
you are holding properly, if you're pressing properly, the courts, it's picking, lay the node separately. Let's fix the thumb position. Let's pick the rest position. That's the sound
of F major chord. Let's trim this
chord four times. Make sure you're not
hitting the upstream. And the a string.
Remember, you're playing the F major chord. The top string is E.
The fifth string is a. We also have to
learn, of course, daughter version of
the F-Major chord, which is the bar chord. That's the way that you
play the F bar chord. You have to use your finger
one to cover all the nodes, all these strings
on the fret. One. Right? When you hold like this, use the side of your finger. Like that. Not this, but moving a
little bit like that. And then you'll be able to
hold the order notes properly. Fingered two would be located. Now on the second
fret. Third string. Finger 3.4 will be located
on the fret three. Which strings? Finger three goes into
fifths ring finger for what was on that too. Sound of the F-Major chord. Again, where it's trimming
all these trends. You're playing six nodes here. Don't worry if you are
getting mute, mute, mute. It sounds like this
is very common. It's very normal. For
a couple of weeks you get that sound. But after a while, you'll get laid down and then those
will start cleaning up. So don't worry about that. What is the difference
between the mini F and the F? On the mini F? You are losing low notes,
you are losing the base. So in this quarter here, the
mini F, don't have that. The base as low. But for some songs,
this the mini f, who will sound better. Another bar chords that
we have to learn in this lesson will be the B flat. As we learned, the sharp nodes. We also have the flat nodes and now the flat boards, B-flat. So first thing to look at, the screen will be the x, where x is located
on the top string. So I don't need to
play the top string. But I have interesting formation
now using finger three, which I'm not a big fan, because you have to
hold your finger three, in three strings like that. Finger, one. On the first fret, a string, the B-flat, E-flat root node, and that finger three. Holding three strings. This works pretty good. If you are playing songs, more aggressive song
with power chords. You want to hit that. Three also. It's kind of chord progressions where you don't
need to play the, the high E string. But let's the different. Let's try something like this. Finger one will still be
positioning moves to be blamed. On the first fret. Fifth string. Finger 23.4 will be blank. The fret on the fret, three. In that order. I think at this point
you are familiar. You can also see the a
major chord going on here. Let me show it to you. A major chord. Remember that was the first chord
we learned today. The three fingers
located on the fret too. If you replace these fingers and have your fingers
out of the fret board, you have to do like this, right? The court is still a major, but now using a
different fingering, a major, that's the way
that I will get the B-flat. When you move this
three fingers, fingers, 23.4 to the fret,
three, like that. What parts that bar, the first fret, where everything is coming
from, a major. I position my a major
chord from a sound. Changed his fingers and have
my finger on my finger, one out of the fretboard. Move. I had one. Fred had this three fingers. I bar. Remember you denature
bar the fret one up to the upstream money that you're not bleeding
enough string. You need to bar the first fret, starting on the fifth string. Why? Because the root
node is located there. B-flat. Move the entire shape. One for either had major chord, C major, sharp, major, D-Major, D-flat major. Major. Part of this kind of like
we're gonna be getting there. We're gonna be
learning that topic, that system called caged. C, a, G, E, D. Alright, that's for
the next lesson.
15. CAGED - THE THEORY: Alright, so for today's lesson, let's talk about C. G. D is the system that we use for explore the fret
board of the guitar. So we will find more
chords, more shapes. The rise, e.g. you're
going to be playing that C major chord every time. And in reality we have four more shapes
for C major chord. Those are the shapes
that we're gonna be talking about today. Okay, get ready. Caged
starts with the letter C. So that means
repositioned my fingers here and get the C major chord. So at this point,
you should know that shape because we
already have over that. The second letter of
caged is the letter a. But what that means, That means that we need
to find a way to play the C major chord using
the eight major shape. It looks a bit confused,
but you'll get there. So e.g. this is
my a major shape. I always said that technique. I replaced this fingers, having the finger one
out of the fretboard. So finger or two
fingers, three fingers. For now it will be
part of a major port. As you can see, my finger one
is out of the fret board. The finger one I
will use as a bar. So this court will
become a bar chord. What to do now is move this three fingers
up to the fret, 5345. When I did this, the next
step is bar, the fret three. Right? This world now is
becoming a C major chord. But as you can easily see, the a major shape, it's, it's in this quadrant. So I'm using the
a major shape to build the C major chord. There's the purpose of caged. Let's analyze nodes,
the node by node. As you learn on lecture
number two, the triads. To build a chord,
to play a chord, I need to have three different
nodes in that court. They are the root, third, and the fifth case. So the C shape. Let's get that as an example. So you have C, I'm sorry,
on the fifth string. Nope. Nope. Nope.
Another C note. And other note. As you can see, C is the root. The third, CDE,
third, major, third. In the situation,
the minor chords, we have minor thirds. We'll practice that as well. The fifth, which is g, c, d, e, f, g, fifth, the fifth node, then we'll have
another C, another ie. But as you can see, we only have three different
notes in that chord. Although I'm strumming strings. When I moved to the, a
shape that we just learned. Eating the same nodes. But they are located in the same sequence
as the first court. As you can tell, the sequence, as you can see, the
sequence different. Have c Note the g note. C nodes again. Note the gene. Again. You only find three
different nodes in this chord, C, E, G, root, third, and fifth. Another way to practice
this is when you, when you are playing in
a project or in a band, and the other person's
playing that C major chord. Instead playing the same chord
as the outer versus blank, you can move on and play
the other C major chord, which will generate same notes but in different order, right? E.g. that you note daughter
court is not getting the highest note in
this court is the node. In this course we will have
the highest node as g, right? So that's the cage system. Let's move on to the next shape. So that's the E shape. My mission now is build
the C major chord. Find the C major chord using
the E shape. How to do this? Firstly, you have to
play the E major chord. Found my imagery record. And then I have to
replace this fingers and have the finger one
out of the fret board. They meet her finger one
is out of the fret board. What I have to do now is move this fingers up to the fret dam. Then. When you do this, you
have to bar the fret. My question now, why Fred? Remember the frets memorization? When you go to the fret
eight on the top string, you find the note. The course that we're playing
is the C major chord. So here's the root
note of that chord, C. Let's take a look in the notes that we have in this course. You will probably see the same
notes as we played before, C, E, and G root
third and fifth. Let's check it up. We'll see upstream. Look at it into a string. Another C on the first string, on the third string,
on the second string. And another C on the E, on the high E string. Someone is playing that C
major chord in the song. That you both are playing a C major chord with a different formation,
different shapes. But the most
important thing here, you are playing the same notes. The last shape, very
important shape for us. The D shape. Now we will have to find the C major chord
in the D shape. This shape, you already know
that's the D major chord. We've already done this
quadrant, the last lesson. Same system. I replaced my fingers like that. Finger. Finger four. And then I will have to move this court up to the fret 12th. It's missing the
finger, one finger, one group B, playing
the root note. But the root node now is
located on the string four. That's my C node,
that's the root node. Remembering how to find the
notes on the fourth string. The octants. That's my root node now. So that means that I cannot
strum the top string and a string which are always
trumped from there. Let's hit the notes that we
are fighting in this court. Let's say the sequence
C, G, C again. And the same combination. We only have three
different nodes. Ceg, the C major chord, C major, C major chord. In C major chord. There's nothing going on now, because the word caged
has five letters, C, a, G, E, and D. We did in this
lesson, we're playing, we're learning the shapes C, a, E, and D to what is missing. It's missing the G shape. That's probably the hardest
shape to play on the guitar. Because let's,
let's check it out. Let's take g as referenced now. You made your T-shape. That's the one. What
do I have to do? Same thing. Replaced the fingers and having the finger one out
of the fret board. For finger three, now
move on to the a string. And binky goes on
the first string. Third fret of the G matrix
would have to do now is move up this court up
to the fret, which Fred. But that's the fret that is located where the
root node is located. So C root node, as you can see, the G major's to going on here, the G shape is not gonna
be G-Major anymore, it's gonna be C major. And the finger one, you
have to bar the fifth fret. That's a very hardcore to play. That's why we don't, we don't play this card often, but it's good to know the
theory behind this court. So this part is getting three different loads for
sure. So let's check it out. C, E, G, C again. And see what I think
the main reason why I don't play as much discord is because of the
sound of the sport. The sound of this court for me, seems like discourse here. The shape, right? So almost impossible to see the difference
between these two chords. If you are a
strumming, of course. But that's the G shape. So we did a C major chord in five shapes using
the cage system. The system out So works
for minor chords, right? Let's take the chord of
a minor as reference. So a minor, that's the
first shape that we learn. Guitar, a minor chord. That last lesson. For me, the next a minor. I will have the E minor
shape as reference. What that means, you
play the E minor. Change this fingers, you
replace this finger, forefinger 3.4.
They might report. And then I move this two
fingers up to the flat seven. And then I bar the fret five. I just found another, a minor chord, the order of the notes and see
if we are playing right, so that a minor chord, we'll have a first term again. And again. Does the root minor third
and the fifth eight. C and E, right? Always keep the next letter. You find the node a. The next letter which
is B, will find, see, you skip the next
letter which is D, and you find e, a, c, e. We have to find those three
nodes here in that court. Ace. Check it out and see if we're right on the top string now because the root is
located on the top string, e, a, c, e. And we have the three ACE. And one person is playing
this minor chord is a minor song that you play the audio aid, my right. So this a minor is
following the a shape. Undertake this a minor
following the minor shape, you have to be able
to see the E minor. Yeah. Most of this course
you have to bar. That's a good
practice for records. Another minor chord
that is very useful. And I use that court. I played this
quarter frequently. So is that a minor based
on the D minor shape? That's the D minor shape. Same technique we
will apply here. Replaced the fingers and have your finger one out
of the fretboard. Now is move this
court up to the fret. Brett's 9108300. Fred nine, finger four on Fred. Fred ate and finger one. Now we'll get the root, which is located on the
D string. Read seven. Another a, and C. Again, you find a
learning disorder doesn't need to be in
that order every time. That's a minor on the
D minor. A minor. E minor. A minor. As you can see, the word caged
has five letters, right? We already talked about this. Cag, ED. It's missing two
letters in that word, the letters B and F. That's my question for you. Why it's missing
those two letters? Why it's missing those two
shapes, those two chords. Let's take the f has referenced. So F major chord. Do we have a shape
for F major chord? Or we have to follow
other chords, other shapes to get that court. That's my question, right? Let's build the F major part. That's my F major chord, made by the bar chord here. Finger one holding all the
strings on a fret one. Do you see any shape
here in this court? Inside this core? Do see any chord. I can easily see the E major chord going on
here in this three fingers. If I move this three fingers, one fret down here to the major shape and I bar. That's why we don't have a
shape for F major chord, we have to follow the shape. Major. Replace the fingers. Move one frame ahead. In bar. If we keep moving this card, you find other courts, e.g. F-sharp major, G major, G-sharp. A major. Sharp. Major. What comes after being
half step up? Bc, right? So on. The other shape that I was
talking about, It's berate. We don't have the letter
B, the word KAIST. So B, Let's see what
kind of chords, what kind of shape will find, will see in that course. So that's the by B major chord. What chord you can
easily see here? I can easily see
the a major shape. If I go here, my major,
replace the fingers. Move this three fingers
up to the fret board. And then bar. That's
my B major chord. Now, late on the, using the a shape. If I want to make
the b minor chord, I follow the minor shape. A minor. The base, the fingers. Move this three fingers to Fred's ahead. But the frets now would
be four for three. And then u bar. The second fret. Sorry. Why the second fret? Second fret is where
the root nodes located on the fifth string, not on the E string. The string is AB sharp. Node will be located
on the train. Moving around, you'll
find them all records, e.g. C minor Chord. C-sharp minor chord is E minor, sharp minor, E minor. So that's the cage system
in major and minor. The most useful chords. The course that you see in song. For the next lesson, I'm
bragging to songs for us to analyze and to
make that system, to make the case, to explore different
shapes in those two songs.
16. CAGED IN SONGS PART 1: So hope you are enjoying this lesson and finding
new chords rent, exploring new shapes
to improve your plank. Let's check it out. This
song, Hotel California. I'd like to have this
song as reference, as guide for us to practice, because this song has
seven different courts. It was a perfect
situation for us to explore the system here. This song starts with the
chord B minor, right? As we are ready. So on the other lesson, B minor, we have to follow
the shape of a minor. There's a beacon going
on in that part also. But I replay mostly is trimming. The next chord. Let's
thing like that. F sharp major. Second fret, sharp major major. So that's gonna be a pretty easy progression for you to do, because both chords are located
on the front to be minor. F-sharp. A major, major, major minor sharp. As you can see in this
part of the song, we have two 0s, the E major and minor going on. You're gonna be practicing
that in a few lessons. When we learn this circle
of fifths, what's going on? Discord, why this
sequence is sounding? All this course is sounding. Sounding pretty good together, are working together very well. That's my first guitar, so I'm playing, as you can see, my hand, It's in this area. Blank. All discourse, all
these seven chords. I'm not moving my hand, not exploring motor frets. Now is the time to
apply the case system. My mission now it's
finding another B minor. So I will have the next reminder as following the E minor
shape on Fred seven. That will be my next B minor. So I have to find
now the closest, the nearest F sharp major
because you cannot move down. Remember the other guitar
players already playing that chord or emission now is finding another kind of F sharp. I will suggest you to
play that sharp major. Alright? What shape do you see
in this F sharp major? I can easily see the C-shape. That's the first
letter on caged. See, if I move this. The C major position. C major chord. Remember, I'm not
using my finger one. When I bring this
fingers up to the Fred 9987 and I borrowed
the frets sex. The court is changing all the
code becomes f sharp major. As you can see, F-sharp
major is pretty close to the B minor major. Probably, I will go, I'm going to use that a
major major with a shape. And then using the D,
the C-shaped, sorry. I used the F sharp. If I move this chord
a whole step down, two frets down, I
will have the major. After the major. We have an interesting chord. Now here, the G
major in that shape. What kind of shape that
you see in this G major? Easily see the D-major. Remember the major
move, Africa Fred 77. And then my root
node strength for. Next, D major. Right here. The major, I'm using
the shape, right? You see that eight major move
up to the front seven bar, the fifth fret, fifth fret. The root node. The fifth string. The denotes the chords
that I'm playing is D major, E minor. I would play here
very easily shaped. Following the a
minor shape. Minor. Moved to the fret nine, and barred different sadden. Starting with the E string. The F-sharp major, we are in plate on the
second quarter of the song. C matrix, or the C shapes are altogether B minor, F-sharp. Major major. Major minor. F-sharp. That was good to take songs like that as a reference for us
to practice, right? Otherwise makes no sense. So applying the
cage system songs for me would be the
best practice to do. Alright, so every required, now the first four
chords in this song, the first guitar will
be blank in that area. And then I will look and record the second
guitar, that area. Let's check it on guitar. Again. What you can do this
exercise for the full song. Remember that
corresponds in the song, you have G, D, F sharp
major and minor. And then on the
second line, G, D, E minor, F sharp major.
17. CAGED IN SONGS PART 2: Now it's time for another
great song called Ledi be. I like that song to analyze the case and
to apply the case, because that song will find
maybe 45 chords maximum. So the song starts on C major chord played all the
courts located in that area. And then we start applying the case system in
other areas to areas. Hot chocolate fountain,
we did two areas right there and the area
of the frets seven, this one are gonna be
playing in three areas. So look at the chord
progression, this song, C, G, a minor, F. And then we go back to C major. So that can be the guitar want the first guitar
player record in this Court's that
part of the song. Now let's think about the case. I need to find
another C major chord for the next position. So my suggestion would be the C major chord
using the shape. How to do this? We already
did two lessons ago, so major, replace your fingers. Then move this three fingers
up to the flat five. And then u bar, the fret three. That's my other option
for C major chord. Next chord for the G major, I have G major chord going on at the same fret.
That's very interesting. So this G major, I'm using the E major
shape, the shape. You can easily see that now
at this point of the lesson, a minor chords, I will move my bar chord
to the fret five. So this a minor, E minor shape. I don't need to go
there to get the F. I have f very close to the nearby the minor. So F-major following the C-shape minor. F major. Just be careful on that F-major. Start streaming it
by the fifth string. Not the top stream,
because top string, you will get the notes
C. The a string. I get the f. Does
the root node of your record F-Major chord
together would be a, C, G, a minor, F. And the other area that
I was talking about is, let's find another
C major chord. My suggestion would be
the C major chord on the fret eight major ports. And using the shape and the burden would
be on the red eight. Why? Because fret eight is where the root
node It's located. For this course, you can
strum all the strings. Where is the closest
G-Major Now, I will say I played that. Did you meet her that
we have the C shape. The fret will be tan. Line 78.7. Remember not playing
from the E string? The string is gonna give me
the D note on the a string, will give me the G naught, which is the root node. So far we have C. Nice
time for a minor. I just found it. Yeah. This a minor is following
the D minor shape. On the D string. Nine, on the G string, then on the fret, on the high E string. And finally the F chord. Located on the fret. To barter Fred ate
that F major chord, I will follow the eight shape. How? Again, a major
reflects the fingers. Have the finger one
out of the fret board, and then move this three
fingers up to the fret tan. And then u bar, the fret eight. Not playing from the top string, but playing from
the fifth string. All together. C, G, a minor, F. Here will be G minor. G minor. Let's loop that
chord progression and record three guitars. Wouldn't get the first guitar. Who played that era's second
guitar and the third guitar. Let's check it out. Three or four. All right, three
guitars going on now.
18. LEARN THE MUSICAL SYMBOLS: Now it's time to learn the
rhythm and the subdivision. For how long they have
to wait in that note. How fast do I play that note? So this is all made
by Misko symbols. And the first three that
we're gonna be talking about, our whole notes, half
notes. Quarter notes. For this example, I will get
the B note as referenced, the open string, the most
straight as examples. And I also will
have the metronome. The metronome that I
have here programmed for you would be played in 80 PPM. That's our guide to
identify the temples. And hope you enjoyed
that, that'd be fun. You're going to be learning this very fast and pretty sure. Alright, so this
is the BPM, right? That's my beat,
that's my reference. I will have to play the
first musical symbol, which is whole nodes
based in that beat. Alright, so how to
play the whole notes in this became a
hit. The first node. I will have to wait
three more examples. Why? Because the whole
node takes four beats. Let's write 123-434-1234. You can see it's a
pretty long notes. You played it on the first beat and wait for the next beats. How to play the half node? So the half node, it's gonna be a little bit
faster because you have, you're going to be
playing on the first beat and on the third beat. What it means, That's right. I always use the
word weight as well. So we go, wait, wait, wait, wait, wait. So we have one beat apart before you playing the
next note. Quarter notes. That's probably the
easiest symbol to play because when you hear the
metronome, you play every, in every click that here, every node, 1234, right? So every click that
here, you play a note. This is called quarter notes. Let's drag in from the whole
load AV node, the root node, node to node. Okay, so those are the first three
musical symbols that we'll learn in music. Next, let's move on
to the eighth notes. What that means, there's
subdivision going on now, because if you have
one quarter note, you divide that
into eight nodes. So in theory, the temples
are getting faster. Or every click here for
every metronome click, you play two notes. How this is going
to work. Let's see. Let's compare the quarter notes, eighth notes, and see the
difference between both. The metronome is
still on 80 BPM. You can program yours like slower or faster, if you prefer. Take her time. 1234. Quarter notes. Let's
apply the eighth notes no one realized, but I'm using the
alternate speaking. Secondly, for this example, I'm not playing like
every time down leg. Breakdown and water node. No, it's not easy, right? Next, musical
symbol, 16th notes. That's even faster
than quarter notes. Because for this one,
you need to apply. You need to play for node B. Let's try to put her notes. The critical one-two-three-four, one-two-three-four,
one-two-three-four. One-two-three-four,
one-two-three-four, one-two-three-four,
one-two-three-four. That's the difference
between the 16th notes, eighth notes, quarter notes. They're getting
faster and make sure your metronome is
still on the 80 BPM. I don't need to change the
metronome beat to get faster. What I need to change is
the way that I'm playing, the musical notation
that I'm playing, the symbols that I'm playing. Okay, now it's
time to see and to analyze and see the difference
between all the symbols. As you can see on the
top of this page, you have the whole note. That's the symbol
for the whole load. They have nodes, to have nodes, quarter notes, eighth
notes, 16th notes. If we keep counting
1234 all the time. You apply this. Let's have the metronome on. And let's play all
these divisions. Starting off on the
whole node, 12344344. Half note, quarter note, 16th note. That's the difference
between these symbols. That's the way that we play
those notes, those symbols. There is a pretty cool exercise that I used to
play. When you go. Remember those warm-up
exercises, 1234. That can be a pretty cool
example for division. So let's check this out. I will play the 1234
on the top string, on the sixth string
as water node. And then I will play
1234 on the a string. Eighth notes, two
notes per beat. And I play the 1234
on the D string. 16th notes. Applying the subdivision here. On the top string, fifth string and fourth string, substring, quarter nodes, shrink, eight
nodes, shrink 16th nodes. Right? Then I replied to apply the same thing on the
last three strings, or the toString on the
B string, eight nodes. And on the E string, high E string 16th notes. Right? So let's see
how this is going to work on the metronome. Still 80 BPM. That's right. 1234. That's a great example. That's
a great exercise for you to identify the
subdivision room. For each you get
used to the temples. If you get tired, blend this in this area
on the fret one, you can move, move on
from Maybe Fred's seven. Let's serve as a good option. Let's see how it's going
to work in Fred seven. Last one. Okay, Let's speed it up a little bit. This metronome, the
metronome is double now. So the metronome is
going to be in 160 BPM. Just want to demonstrate
to you how this is going to work in a fast song write or to read this
nodes are to understand this tempo in fast
and faster metronome. So I would be blank.
The whole notes, half notes, quarter
notes, eighth notes, and 16th notes in 160 BPM
holds is going to work. I would choose the node a
here just as a reference. On the second fret,
third string. That's the beat. That's how fast 160
BPM is, double. So if I play whole notes here, sound like the whole knows, you put it on the
first beat in waves, the other three beats on the half note, you play with the first
beat and on the third beat. Quarter notes you
Blake every beat. Let's double this
for eighth notes. Eighth notes, you
plead to nodes. Every node. All right, so that's the difference
between this notation. Symbols. When you are in
a high-speed like that, the hundred 60 BPM.
25. LEARNING STRUMMING: The next topic for our
lesson, we'll be streaming. I haven't here, five
examples for you. And we probably will apply
these examples in songs. First of them is
you already learned this example is made
by quarter notes. So when they sram is
in quarter notes, I will probably use
one peak direction, e.g. this iteration down. Let's take the C major
chord as an example. So what's going on
in this is Jeremy, you see four quarter notes. It's trimming down. Always keep count. In 41234. Let's see. There you can see on the
before the first quarter note, that means the time
signature of the song. It's in four for four
beats per measure, for beats per bar. But that's why I only need four quarter notes to close this bar to
finish this baryon. To finish this measure, let me have some drums here, and let's demonstrate this
first example on these trimming less than 1234. Okay? First of all, you will need to find The beat, the metronome tempo, 1234123. Down. I can move around, you can play a part. I blend the same
type of question as before. I have reported beads. I changed. That was the first example played
in quarter notes. It's trim number two. What's going on now? We will
have an 8-note going on, on the last tempo. That means that every
play on the tempo 123, I played down, water
nodes, down, down, down. When I get them the last tempo, I have to play two
streams in there. I have to play down and up
eighth notes in one beat. So that's the subdivision
going on now. So I always use the word down, up or four and e.g. now, now, now, now, that's an under good
way to practice. If you mute the strings
and just focus on the right hand, right? You get better tempo, rhythm. There's no any nodes
going on here, so there's nothing. So let's go. Still based on the C
major chord, 1234. Always keep counting. Number three. Let's go. I'll have two groups of notes.
Oh, what's gonna sound? 123 and 4.1. 3.4, down, down, down, down, down, down, down. Let's see what's going
on under this trial. Number seven. Number seven, as you can see, starts up on the half note. But that means that I
played the first tempo. I wait on the next tempo, but don't mute her
guitar to keep the chord sound and
keep the notes ringing. Like to play, like to
know this is wrong. This has to be half nodes. So the nodes have
to be sounding to always keep counting
and you survive. Let's go. 1234. It's very important
the big direction. Otherwise you're
gonna be playing every time down, not
going to sound good. There's no dynamics, right? So you're hitting every
time on descent direction. When you strum down, you hit the top strings. First. Winter hit, when you
play these drumming up, you hit the high strings. That's why you have, you create
a dynamic that variation. So finally, the Strouhal number eight. That seems a bit complicated, looks a bit complicated,
but it's not. Take a look at that. I also have the numbers to
guide you to one tempo, one blade as a quarter note
to eighth notes, payable. The end of the temple
to quarter notes. The end of tempo three. We don't have temporal three. You don't play
anything on the temple three in this strand. So you play on the end of the three and then on
the last tempo, tempo four and the
end eight nodes, again, how it's going to
sound this example eight. So I have, again, again. If you play this a bit faster, use the technique
that you covered the strings and just
focus on the right hand. Remember to loop when you're
done the fourth beat, which are made, which is made in two eighth notes, you loop. When you start again. You play the quarter notes again
on the first beat. That moment when you loop
has to be very fast. 1, 2 and 4 and 1, 2 and 4, and 1, 2 and 4 and 1, 2 and 4. And let's play with the drums. And let's have the
chord progression, the letter B chord progressions, C, G, a minor, and F. But of course we can apply other
chord progressions. And this is Trump's 234. Why? All right, so those are the five options. You find more options on the PDF that you use
the on the folder. So those are the main options
that I have for this video. And you can apply this
in so many songs. Let's speed this up. The example number eight. Interesting song for her to
apply this Schramm called. Have you ever seen
the array, right? Right. This term fits
perfectly in that song.
26. LEARN HOW TO READ NOTES: Let's take a look
on the notes on the lines and those
on the space. And then we're going
to take a listen how to memorize the
notes on the lines. It's pretty easy. We will
be following that rule. Every good boy deserves
football. Or fudge. This book here, it's every guitarist begins doing
fine. What that means? That means that we have notes on these lines and notes
on these spaces, but not on the lines. We have five
letters, five nodes. So that's why we
follow that rule. When you see notes on
the first line here, every, that means that
the letter E denote e. Good boy deserves
football. What is it? Nodes on the space a little
bit different because we only have four spaces. So the first base F, second space, a, third space C, and the fourth space E. So you have to think about the
word face and hear, every good boy
deserves football. Hey, now let's jump to
the song firstNode, as you can see, is located on the space, which is based the second space. So you have to think
about the word face. The second letter on the
word phase will be a. So that's the AV node. The next letter, the next
node will be located on the line, right, which line? The third line, 12345,
the third line. The third line. You have to think
about the rule. Every good boy
deserves football. So every good boy, boy starts with the letter B. Next to next node will
be located on the space. Which space? First, second, third space. Think about the word phase. The third letter will be F, a, C, D. Why is D? Because this is located
on the fourth line, 1234. The fourth line means
the fourth letter. I'm in the fourth
word on the road, every good boy deserves
that deserves start with d. And finally here,
you're going to repeat the same knows that
you played before. See, right? Here, we have one nodes
located on the second line. That means every Good, good start with G. They know it will be located. Second fret on the third string. B will be located on the
second string. Open. C will be located
on the first fret, on the second string. And D Still on the second
string, third fret. And the last node G, will be located on the
third string open. The oldest nodes together
will be sounded like.
27. SIGHT READING: Alright, so hope you are
enjoying this masterclass. Of course, we're covering so many OpEx which will be
great for your knowledge, increase your knowledge
on the instrument. So for this next topic, I will bring for you the
assigned reading, reading notes, where the nodes are
located on the fret board, how to read the
notes and the first, second, and third string. This is just an example
for us to play. I also have the track, and you can also
see the track on the folder for this course. So I prepared 123.4 examples for us to play
with the backing track. The first example, I
mostly play the notes on the first string,
the second string. The second example,
nodes on the B string. Third example nodes
on the G string. And then e.g. I. Mix everything. First,
second, and third. You're mainly plank eight nodes. The nodes are from GI, g. So this examples are made in quarter
notes. Half notes. And I don't know if
I have any notes. Oh, yeah, I have
only one whole note. There's a pretty
easy example for you to improve your reading
in your assigned reading. Let's try example one. Say bot, just reading
the notes E, F, and G. The first
string. Number two. Yeah. All right, so example two, I'm only playing the notes
located on the B string, which are B, C, and D. That's the same for
the first string. You use the same frets, so the E string as the first
fret and the genome. So both strings B and E are
sharing the same friends. Let's move on to the
example number three, which has notes on the third string set
one, number three. So this was the
example number three, blank notes on the
G string, which RG. A. Second track. I also added a B note just to have more
dynamic in this song. Let's look at them on
the B string open rate. And finally the last example, example number for mixing
and plank off them. Example for, let's go 34. A graph. These are the four examples
that I have for you. What a sight reading. Try to play this listening
to the backing track. They speed is not that fast, so I'm pretty sure you're
going to be able to play all these four examples. They're not songs, they're just examples for
you to practice. And memorize where the
nodes are located. When I also prepared for you two other versions based
in this backing track. But the speed is a bit faster, so they are in 90
BPM and 120 BPM. This one that we just played, it's in 60 BPM. If you don't want to
practice with this track, just program your metronome or 60 BPM and then
try to play in 90. And finally in 120 BPM.
28. FINGER PICKING TECHNIQUE: Alright, let's jump to the
next topic for today's lesson, which is finger picking. I like that technique a lot. So I prepared for you five examples and
that page, that PDF. But right now we're
going to be covering only the first example, which is made by two chords, the C major chord, a minor. That technique is getting
so popular nowadays. Especially for a
chord melody and songs before playing
this technique a lot. So it's better practice that. So let's learn how to play
this technique based on tabs. There's a lot of information
going on those tabs. So as you can see,
the first 2 bar, I will have to
position my fingers. Or the C major chord, which is, which
strings do I play? So the fifth string
is consider b. That means thumb, finger,
one, index finger, and middle finger,
and the toString, three on the B string. So basically the
technique you play, you play for a string, string, string,
string, second string. On the second bar, I still
play the same chord, the C Major, we'll look at now. My thumb is still playing
on the fifth trend. But the other three
fingers, Finger 12.3, are going to move
down to the strings, G be the high E. The first bar. I played those three fingers on
the strings D, G, and B. The second bar, G, B. And that's a good practice
to do muting the strings. Memorization. First guest speaker. All right, because
the chords are pretty easy in this example, but the most important
part for this is practicing the right hand. So let's try a bit slower. So you have that variation
between the fret, the part one and part two,
which is pretty cool. Even if you apply
another course, but e.g. I. Like that core to see nine. That's a pretty cool
chord progression made by two chords, C9 and B-flat nine. Let's move on to the
button number three. Now we have the a minor chord, but my right hand would be playing at the
same strings, e.g. in the part three, I go. If string parsing, make sure you're playing two
fingers separately, right? Every finger will have
one different string. That's the goal for
how you get fast. The last bar, a minor. I played, you still blank and generating
that variation that it played on
the C major chord. That's right, Ghana
the a minor slope. Well, let's try to
e.g. and all blank. C major and a minor
can also program some metronomes for
us to guide us. In that pratt.
Because the notes, you have to play very
precise in this technique. Especially when you
hit the bass note, which is the first
node of each bar. That's right. I was
programmed as metronome in 80 PM and Friday, e.g. 1234. You can also practice this feat. He starts playing eighth
notes, quarter notes. It's never just plays
in eighth notes. Quarter notes. Right? So we can try both ways. Quarter notes and eighth notes. Daughter variations
will follow the same, the same notes and
the same chords. But of course, as
they are variations, sometimes you play the thumb, finger, one, finger, three. Back to figure two is different than num
finger, one finger. The variation goes down. One finger to be ready for
those variations on the PDF. So those videos are made
in 60 BPM and 90 BPM. Do your best. I'm
pretty sure you can nail that if you also want to combine the two
techniques that we learned today, the finger picking, the case. That's gonna be awesome
because look at the, look at this example. There's two cords going on, the C major and a minor. So how would you apply the case? The system? If we want a guitar is
playing that C major, a minor daughter
guitar, probably. I can choose this C major, which has high nodes, right? Height. Beach notes. Look at the pattern is the same. And probably I can move to that, a minor loop, this to courts. And let's see what's
going to work. Both chords are sharing
same notes, right? But a different order. But when I play this
C major chord here, I'm linked denotes root. Third, fifth. When I
play this C major here. Also playing the same notes, but a different order
in different positions. So C, E, and G, that a minor blank may see the root minor
third and the fifth. This a minor also
has the same nodes, a, C, and E. That's why both guitars
together or sounding amazing.
31. CIRCLE OF FIFTHS: All right, so let's keep
rolling or a course. Welcome back to the
guitar mastery class. And for today's topic, I brought for you this
circle of fifths. That's the theory
that we're going to use for write songs. Or if you just want to analyze
the song that you play, analyze the chord
progressions, how the bands, how they think when
they write songs, how artists think when they
write chord progression. So everything's
gonna be done now. So basically it's a chord
combinations, right? So we're gonna be
taking a look on the circle of fifths
in the key of C. Well let's see how many chords we're going
to find on a key of C. The course that
will fit together. The course that will work
together to why those songs, they have that formula
that sometimes you hear. And then you think, Oh, I have listened that
chord progression before. And so many songs have that
chord progression, right? So why this is gonna be
sounding pretty good? So let's analyze that. That's the circle of fifths. So as you can see on
the top of this page, we have the key of C, right? So the key of C is, of course, in the middle of the, we can see this as a clock
rate is on the 12 position, the trough am or
drove BM position. And when you go to the
right side of the sea, besides the sea, you
have the G chord, right? When you go to the other side, on the left side, you have F, right? So we can call
this three chords, bye, bye degrees, first-degree, fourth, and the fifth, or most popular way
to say 145, right? So this three-quarter through
sound pretty good together. Let's take a listen that C major G over time. So those are the possible
chords that you see. A song in C major chord, you probably will find
f and you probably will find G, right? So below those
three major chords, we have minor course. Take a look at below
the C major chord. I will have the
relative minor of C, which is a minor. So we can call relative
major and relative minor. If we go deep in theory, we'll see if we break
down this two cards. If we break down the
C chord by triads, you find three nodes. We have seen this before
on the other lessons. So C has C, E, and G. The root, the major
third, and the fifth. A minor has also the triad a, C, and E, the root, the minor third, and the fifth. If you compare both chords, C major and a minor, you see that they are
sharing two nodes, the C note and the inode, right? So that's why this show cards will also sound pretty good
together when you have, when you say this in
songs like C major. And they're sharing two nodes. This is going to happen on the G major and minor, as you can see. And also on the F
major, D minor, their relative major and
relative minor. Right? So let's keep going. When the song isn't a KFC, you see those five options, F and G. B major, D minor, a minor, and E minor. That means that I can
play all these courts, or I can choose maybe, okay, my song, we'll have three
chords, C Major minor. You can play around this courts and choose
the best for you. There's a seventh chords
that we didn't talk about. We will, it's called
B diminished. In this situation. As you can see, the, this is
also following the alphabet. So C major, D minor, E minor, F major, G major, a minor,
and it's missing. B. B is going to be diminished. Does another quality.
For a chord? We have major, minor
and diminished, which will sound like this. It's a very, very strong court. And the other variation for diminished will be
B, half diminished. They're very, very
similar. Half-diminished. We also have a few different
shapes for both chords. We'll be talking about
this in a few lessons. So we already talked about the three major
chords that we will find in a song in C, or C, F, and G. And the
three minor chords that you also find
in a song in C, which are G minor, a minor, and E minor, the seventh
degree will be diminished. Let's change the situation now. If you want to play the
song in the key of G, will have to turn the
circle to the right side. You have to see
where G is located. So easy to find, right? You have to find now the major chords that we
will follow, the G chord. So you go to the right side, you find D and E go
to the left side, and you find the C chord. So there's three
quarters will boost sounding very good
together. Very cool. So how many songs are coming
to your mind now that have those chord progression
ran 154 or 145. If you want to throw some
minor chords in the key of G, you find the relative
minor of each court. For the G major chord would be E minor to C major
will be a minor. In for the D major
will be B minor. So let's try to build something to write
something in the key of G. I would have probably g as the first chord, a minor minor. So that can be a good homework for your
truck to find the songs, the songs that you know. And then allies that in that system, the
circle of fifths. Structure and allies by degree. This is the first chord. Oh, that's the fourth chord. The second chord.
That can be a great, great exercise for you. If you do like to write
something in minor key, e.g. let's take E minor
as referenced. The key of my song
will be E minor. I can also use the same system, so I can go right and left. So if I go to the
right side of E minor, I will find B minor. If I go to the left side, I will find a minor. And then the relative major, which are G, D, and C. If I play the E as the first
chord in minor, B minor, a minor minor, minor, minor minor. A minor. Sound. A little bit sad because
we're in the key of E minor.
32. DIMINISHED CHORDS - SHAPES: Here they are. The diminished
chords I brought for you three variations of
the diminished chord. This example, I believe it
is and isn't a G diminished. So as you can see,
as you can tell by the first example,
the first shape. You have the root note
on the fret, five. String, fingering
three. On the fret, six fingers on fret, five fingers for the fret six. As you can see it here, this court has too
much tension, right? Funny thing about this course
is it's a symmetrical cord. So what that means, if you play this combination fret 5656, you can move the
same shape. 1.5. Step up. What it means to Fred's ahead. You will generate the same notes if you
do this technique. So 89891111, same nodes, 14151415. You can tell by the finger one. So finger one goes in front 5.5 step one would
be on Fred ate. When a half step up,
one will be on fat. Finally, 14th. That's the G diminished. Let's learn the order
shape for G diminished. This one, the root node is
located on the a string. Finger to what goes on. Fred, ten fingered through and Fred 11 finger,
one on Fred, nine. Finger for autonomy
threatened level. The fifth string. Second. If you apply the same technique, one-and-a-half step up or down, the nose and the same interval. And finally the
shape number three, which has the root note
on the top string. Let's try to. The root nodes now will be on the thread three on the top. I'm going to be using
finger to Fernet. Because finger one on
the fourth string, second fret on the G
string, fret three. Also finger one as a bar chord. What a threatened
to second string. What did I have to step up and apply the finger picking. And that's court. That's the G diminished
chord droplet, the diminished chord in
songs in chord progression. So my first suggestion would be find the key that you're
going to be playing, e.g. let's take the C major. And my next chord
would be a minor. Let's take the first court
and the relative minor, which is the a minor quadrant. So C major, a minor gets
off between the two chords. I can play the diminished chord, which 11 load comes
before c, half-step down. The seventh degree, C, D, E, F, G, a, B cell. That seventh degree will be
the diminished chord, 23123. Well, let's try to apply
this court in that chord progressions
see, and a minor. I also use that, that
one-and-a-half second big step up, landing on board, which in this case would be
the first degree C major.
33. COMMON CHORD PROGRESSIONS: Common chord
progression, the most useful and chord
progression that we see, songs that people use to build songs bit chord
progressions, right? Chord progressions.
Let's take a look at example number one, I brought for, for you. Those are we can
also say like this. We can also go by number 1454. Those are the
degrees. Those cards will work pretty good together. But also very important. Don't forget to create
your own sequence. That's very important for
your music composition. If you start, if you start
writing songs in the feature, Let's try to example
number 11454. If we take the key
of C as guide, C would be the chord number one. Number for C, D E, F. Number five, c, d e, f. Then I go back, drive. Pretty easy. It's very common to see that
chord progressions songs. Next example,
one-six-four, five major, a minor, F major, G major. Next example, 1564c major major. Already familiar with
that chord progression we played on the other lesson. This song is called
Lady B, right? That's the same
chord progression that they played that song. And finally, the last version, the less variation, we
started in a minor key. So e.g. a minor, you have a minor
degree number six, F-major, first, and the fifth. So those are pretty good
chord progressions that he can play
a lots of songs. And again, they'll
forget to create your own sequence here
on chord progression.
34. TRIADS - THEORY: So welcome to the Music Theory. Let's analyze triads now. It's analyzed chords.
So every chord, I think I have talked
about this before. Every quarter we will
have three nodes. We need three nodes
to build a chord, the root, the third,
and the fifth. Look at this page, you see on the top, on the left side, the C major. If we play the C major chord, the shape that we are learning
that we already knew. Right? So how many
nodes I'm strumming? How many different notes
I'm playing in this chord. 4955 strings also. But I'm the only plane,
three different nodes. As root, as major third, G, S. Because the other two nodes, I'm repeating again already
in that chord, right? So how to calculate this? A major third and minor third, because as you can
see, the minor chord, C minor chord, we'll have
E flat nodes, E anymore. I need to play
E-flat instead, e. And we'll see why. When I take the C
major scale look at the bottom of this page, you see C, D, E, F, G, a, B. We are going to be
practicing scales. But the next few lessons, the distance between
C and E nodes. Remember those intervals on
the first lesson, C and E. To hold steps apart. Two whole steps distance. Okay? When I have that interval, if I play those two
notes together, you can already tell
this chord is major. Trend. Is that E? If I play E-flat, take a listen to what's
going to happen. What is the distance between
C and E flat from C to D? One whole step, D to E, another whole step, right? But if I go from D to E flat, half-step,
so one-and-a-half. Add the fifth node, the root node, doesn't change. Flat, is a minor third. And the fifth chain. If I play a, C, E, and G minor, dropped, the third is that blank
E, natural, E-flat. That's the main
difference between a major chord and
a minor chords. Take a look on the third. The third is given to you, the one-and-a-half
step interval. If they are 1.5
step apart, minor, if they are to
whole-steps major, VDD to memorize, the Fed doesn't change in the
root, doesn't change.
42. TETRADS - THEORY: If you have seen numbers in courts and you don't
know what that means, now's the time to learn that. The time to learn the theory. What do we have
behind the scenes behind those numbers, right? So as example, in this page, I brought for you to see seven. In the C major seven.
It looks confused. Write C major seven. Let's take the C, the C
scale again as reference, is on the right side of
this page on the bottom. So C, D, E, F, G, a, B. B is the seventh letter
of that scare you. The distance between b and c we have seen before,
this is half-step. Remember that lasso
very showed you the one move, one fret. So when you don't skip any fret, is the half step
interval, right? So when I add that
note into my chord, my chord is C major. C major has C, E, and G. We have seen this
under Laszlo mine. If I add the beat note, I'm adding the seventh
letter of the scale. So I had to name this court
as C major seventh, right? Let's listen The sound
of the C major seven. Look at the notes combination
that I'm Geri now, we'll see root Major third, fifth, and the b as
the major seven. Let's compare the C major
seventh and the C major. What is happening now? This is the C seven, right? So the minor seventh. Look at the scale on the
left side now, C, D, E, F, G, a, B flat, and C. Let's analyze the
distance between B flat, C, which is the
root node, B flat. It's one whole
step apart from C, B flat, looking at
in the first fret, string, C note on
the third fret. So I'm skipping one fret. I'm skipping the fret too. When I skipped frets. Step B flat, right? So when I play the C major
chord and add the B flat note, I'm not changing their route. I'm not changed the major third, I'm not changed the fifth, I'm only changing the Sabbath. Is that plan B natural? I'm playing B flat. I'm dropping the seven
letter to be half-step down. That's the sound of
the C7 mutation. Bit more aggressive
than the C major seven. Let's listen to C
major seven, C7. That's the main
difference between a C Major seven and C7. Every time didn't see
the C major seven. You see the Seventh Letter, the seven nodes being half
step apart from the root node. When you see the C7
in accord with seven, you see the Seventh Letter, whole step, distance, whole step apart
from the root node. That's the main difference
between these two chords. On the next few videos, you're going to see some
variations of the C major seven. I will have 14 way she
played a C Major seven. And for the minor chord, I have the example in D minor. Now have 24 ways to play. But if our shapes for the
D minor, D minor seven, D minor six, and D
minor nine as well. So make sure you're
learning all these shapes because it's gonna
be very important for you when you
start playing songs, when he started building
chord progressions and adding numbers in your code, make sure you're
getting the theory.
47. CHORDS INVERSIONS: You also see in the
folder that I have a PDF with the chords inversion. What that means. That means that we're not going to be playing
in sequence like we did. A C major chord. Sequence means root,
third, fifth, and seventh. E.g. if you take a look in the first-quarter and that page, for its inversion,
you see this quote. What chords that is
still C major seven. But look at the
order of this court. Remember the notes that I
have to have CEG be root, third, fifth, and seventh. Here, I'll have GI. I still have those four nodes, but now they are
not in sequence. I started with g
on the top string, breath three. And
then the E note. That's my F major chord
using the same shape. So you see this a lot in music. Another variation for C major, seven, this is on the third
line, gourd number 535. What is the order of this court? Remember that I still
have to have CBGB. Have that. Let's check it out. C, G, a, B, or C major seven, when in different order, in different shapes, right? The other one that I also like, the one located on the 12345
on the line number six, the third chord on the line six. There's one. It started with e, one of my favorite chords
on the guitar. So let's look at the order
of those nodes started on. That's still my C major chord. C major seven, mate in
different order, right? So make sure you're learning
all the chords in this page. Even the minor ones. And one with nine, e.g. the chord number two in
this page is a C Major 79. Very, very cool chord. This note, G number line means that I have to
add the node nine. What that means? C, D, E, F G, a, B, C, D. This is the
ninth degree, right? So I add the letter nine, I add the node nine
In this court. So the fourth string open. I also have another
variation here, five, major, nine.
48. Cmaj7 Arpeggios (String Skipping Technique): 1 234-123-4123. 412 341-234-1234.
49. Cm7 Arpeggios (String Skipping Technique): 1234, 1234, 1234, 1234, 1234, 1234, 1234, 1234.
50. C Arpeggio Triad Shapes: 1, 2 3 4 1 2 3 4 1 2 3 4 1 2 3 4 1 2 3 4 1 2 3 4 1 2 3 4 1 2 3 4 1 2 3 4.
51. Dm Arpeggio Triad Shapes: 1, 2 3 4 1 2 3 4 1 2 3 4 1 2 3 4 1 2 3 4 1 2 3 4 1 2 3 4 1 2 3 4 1 2 3 4.
52. B Diminished Arpeggios: 1 234-123-4123. 412 341-234-1234.
53. DIMINISHED ARPEGGIOS 3 STRINGS: We're ready for the diminished, our pages. Let's go. So diminished arpeggios,
they're made in footnotes. We have seen those are
diminished chords. So they're following
the same theory. So every one-and-a-half step, you find the same notes. Let's take a look at
example number one, which is made in G-sharp. Our bedroom. Pretty easy shape to play. Why? You should pay attention? Does arpeggio, the string one, the high string, is playing the same frets as the G string. So in this case, fret, one fret. On the D string, we
have fret 34123, and then another 41,411,234.1. What is the fingering
than flying? Fingers? Four and finger one. Sometimes I believe fingers,
three fingers, 31231. When I move this entire shape, one-and-a-half step
up, what's going to happen? I've got to save notes. Fret seventh, let's say red, then we'll be done axis. And finally sixteenths. That's tragically this example, listening to the metronome 1234. Let's speed it up a little bit. 1234. Well, that's the diminished our videos
played in sequence. Every one-and-a-half
step up or down, I would get the same notes. There's another shape for the diminished that I always play, which is, let's take an example. The fret dam here, right? The line number
three, then seven. This one starts on
the eastern, right. Let's try to build this.
Our page replayed. These are page what you
started on the B string, how? I'm gonna go on the
B string, set nine. The G string fret. On the D string of
Barstow have the same frets as I played
on the B string. So six minus six or seven on G minus six dB. That can be a good
practice to do because you have both shapes going on now. One starting with the E string data when
threatened the beam. So let's write both
together, 234. Let's write a bit fatter, 234. There's another way to
play this, our bedrooms, if you play like this. Right? So I'm playing than 79.10. I'm not playing the
seven on the G string. So six months on
groups by 61234.
54. Sweep Picking Triads Am G F E: 12 341-234-1234.
55. EXTENDED ARPEGGIOS Am and Em: Alright, extended our pages. Let's have some fun. Now. We already saw in the
other video that I was playing triads and in street
picking and also our pages. Now I'm gonna be playing
one more octave. Let's add one more octave into those are pages.
So what that means? The first example
will be in a minor. So I had to play ACE, the root minor third, and the fifth in three
different octaves. Let's start on the fifth fret. Fifth fret is where the
root node is located. So finger one. Then I have to use finger
to, for the friend's age. And finger one for
the flat seven. This is my first octave.
Let's keep going. So write down your
finger to finger one. Dan finger to finger one, and pinky finger
that fret trousers. Then I go hammer
on and pull off. Does the pig direction for
the ship picking down, down, down, down, down. Who often poor.
Extended our pages. This is the, a minor example. Let's count the odd terms again. So AC, the next ACE, the next three octaves. Another variation for
this arpeggio will be just blank on the
three first strings. That's gonna be a bit
easier to take a look. As we have 910812, hammer on the tapping on the 17 dozen other organisms. So that's the anal. Very easy to play that shape. You only need three strings. Another variation would be
the extended our visual. That's the same as a minor
that we did in the beginning. But now on Fred route because the nose is
located here, right. So 12, 14, 19. That's the hardest part because there's there's a
big stretch going on between the fred 14, 17. Then. Let's have the metronome
for these two examples. So I will program the
metronome and ADB 80 BPM. So again, try quarter notes. Let's try eighth notes
now, two notes per beat. Again. Let's write the eight nodes
on the a minor shape, 1234. Let's try maybe triplets laid
in three notes per beat. One-two-three, one-two-three,
one-two-three. One time. I like the triplets. Sounds pretty cool. So that's
pretty awesome. Again. That's right. It's triplets now on E minor, 1234, right? And probably the last
challenge will be 16th notes. One-two-three-four,
one-two-three-four, one-two-three-four,
one-two-three-four. That's right. An a minor, 12 341-234-1234. Let's write it as 16th notes. Now, on the E minor chord, 234.
56. EXTENDED ARPEGGIOS MINOR CHORD PROGRESSION: Let's try to apply now the extended our pages in
this backing track, their pagers that in
plank or a minor, D minor, and E minor. If you take a look in
the circle of fifths, you see those three chords, the main key, it's a minor. And then go left and right. And you find those two chords, minor in D minor. They're gonna be worked pretty good together. Let's try that. This next example.
Let's try to have some fun on the
three first shrinks. Still playing the same sequence. E minor, D minor, and E minor.
57. ARPEGGIOS 3 STRINGS SWEEP PICKING: Example plank in three
strings will be applied now, this metronome on 80 BPM, this is made by triplets, three notes per beat, right? Let's run the metronome
is still on the 80 BPM. So 341234, one-two-three,
one-two-three. One-two-three, one-two-three, one-two-three, one-two-three,
one-two-three. Let's write a minor, 1234. We can also play
four notes per beat. Let's try minor. So let's see how
six notes per beat will sound. Whatever
do different. Now, I will start
from the E string. Rabbit click that you
hear on the metronome. You have to play that node. The first node, right? So 123456. Okay, Let's try
six mils per beat. Let's run the E minor
arpeggio, 1234. Alright, so let's read through
applied this technique, the strip baking in minor arpeggios in three
minor chords, right? E minor chord, B minor chord, and a minor chord does the chord progression
for the backing track. For part E minor chord, I will play B minor. I position my finger
to fret, elaborate. In for the a minor.
When Fred, nice. Very nice. Let's write
this on the metronome 234. Let's try that six
notes per beat. Starting on the E string, 234. Let's try to play some
chord progressions for the next examples. So the progression that blank, it's a minor, B
minor, C, a minor. There's this part of the
circle of fifths as well, based on the main key, in this case E minor. So I'm going to be playing
their visual of E minor. When I get on that note, I was lied to the
D minor arpeggio. Then it goes C
major and a minor. We will find the PDF with this oldest examples
on the folder. All right, so let's try this. Let's try this
chord progression. Minor, B minor, C major, and a minor in this
backing track. Example two will be
played in three strings, only the high thrust bearings. How does the first
bar on that example? And then B minor, C major. And finally a minus. Let's round the
same backing track and see how this
is going to work with this example in
three strings only. Let's try an example with
three blade in six nodes. Example for Ruby played
in four notes per beat, the pattern would
be a bit different. So take a look at that. That's it. On four nodes. That'd be minor. Major.
58. PEDAL POINT TECHNIQUE: Alright, so now it's time for a fun technique to
play on guitar. It's called pedal point, right? Barrel point is when
you have a scale, in this case, the miners K0, and you play a note, you're going to
be repeating that nodes every second nodes. What that means. I have the first node here. I'm Fred them, and
then I have 12. So that's the, that's
my pattern loads that. Then a blade down on E. And then I go back to 12. And then I believe
eight on evil. And they go back to drop seven. And drop again. You've
got a little bit. Let's talk about the fingering. So as you can see here,
I'm using finger. And then my paddle node would
be played with my beaker, with my finger, finger,
finger, finger. Finger. Finger for it. Right. I have a big stretch
now between Fred's 7.12. Those were my exercise from the beginning of the
lesson, blue help a lot. This technique. I can also add the G sharp node, which is part of the harmonic minor scale that
are really going to be practicing on
in a few lessons. Sounds pretty good and that
scared me, That's like me. I can also skip strings, e.g. the G string I have in mind. I can also go to the D string and landing on their root node, which is both
together various low. The thread as example, listen
to the metronome on 80 BPM. I think on the PDF, you're going to see
another progression. So starting on the 12th, fret, another variation starting to Fred 13. Let's write all those
three positions together. 1234. Let's write a little bit faster. 1234. What I'm adding here is 910. In three strings are
reversed, they mine right? And land on a 234. The bit faster, 1234.
59. TAPPING TECHNIQUE: As it's in that
second week before. I think so right here, this is called
tapping technique. So in this lesson we're
gonna be taking a look and how to build
this progression. How to build this sequence? How to play the tapping
using the right hand. As the third note.
What that means. So if you have two
nodes been played by the left hand, it's
missing one node. So we can add that note
using the right hand. So let's take a look
on the example number one for tapping technique. Alright, so as you can see, this is made by groups by three triplets, one-two-three, one-two-three,
one-two-three. That's the beat, right? The triplets, that's
the way that we count the triplets.
Well, let's go. All the numbers are
located in one string. The string to be right, as you can see, there's a 5.8. Hammer on is the hammer
on technique, right? So we can see that tight. The need to pick
the, the node twice, like you know, you
play the first note. I'm going to hammer on. That team means the tapping. So we're gonna be using
their right hand to do that. The position that I do on
the right hand is like this. I use my finger one to get
that node to that node. So I rest my thump on the
top of the neck like this. The top of the fret board. To get back to the fret five again to the sound
of the fret five. I'll have to boot this
string up a little bit with the right-hand. So going to be like this. Right? Because my finger one
is stuck in there. I don't need to lift
my finger once you get the sound of
different fight. Oh, that's too much work. And probably you won't
get fast doing that. So this is going to
save time to you. Everything made by three tempos. What word is that?
What we're generating? You know, let's take a look at the notes that we're playing, E and the E minor triad. All right? Remember
the interval between the root node and the third
node has to be 1.5 step. And we have
one-and-a-half step here. So E, E to F, F to F-sharp, another half step. So we already got
one whole step, F sharp to G half-step,
the one-and-a-half. If I'm one of the
major sound here, the E major chord be sounding. In this example, what,
what do I have to do? Replace the fret
eight per fret nine. We now replace the
front aid to Fred nine. You are having a new
node, which is G-sharp. That's 5912, less
bleed five each drove. You already realized when you
want to generate a minor, a major chord, you skip three frets
between these two fingers. 1233, friends. I'm showing a minor. You skipped two frets
to memorize, right? So let's try to build another
chord using that technique. I'm gonna be replacing
the fret 12 for fret 13. Why take a look at this sound that I'm
gonna get doing that. So I'll keep 58 are both chords. By age 125813. Let's try four times each. Right? But when I do this, I'm generating a new chord. Which quadrants that? Let's
analyze that node by node. So E is going to give you
the E minor chord. E. And C is gonna give
me which chords. Let's see. Let's
think C major Record. Why? If my first note is E, not gonna be any other
kind of e, something, no. This is going to
be C major chord. Why? Because you're
starting to see major chord by the third node. Remember the C major chord has the triad C as root major third, which is E, the fifth, which is G, so it's inverted. So I have E, G, and C. Right? So when I did this, I'm generating two
chord from a court for my tongue, for my
chord progression. Minor in C major. Let's run the metronome 34. There's other examples that
you're going to see in the PDF that is in the folder. So I have six variation of tapping is not every time that you're
going to be blamed. Sequence like we
can go patterns, we can do variations using
those three nodes, e.g. for notes per beat. I'm going to play those three notes on
the high string eat. Of course you can use the
first 12159 students. I got a C major chord
replacement team for joining.
60. TAPPING TECHNIQUE VARIATIONS: 1, 2 3 4 1 2 3 4 1 2 3 4 1 2 3 4 1 2 3 4 1 2 3 4 1 2 3 4 1 2 3 4 1 2 3 4 1 2 3 4 1 2 3 4 1 2 3 4 1 2 3 4 1 2 3 4 1 2 3 4 1 2 3 4 1 2 3 4 1 2 3 4 1 2 3 4.
61. POWER CHORDS: You have an idea
what power cord is? No. Two, let me explain to you. So as you can see in this tabs, I will have a few or a
chord is going on there. So it's not a food court because I don't need
too many notes. I don't, I also don't need too many strings being
played, vibrating. So I only need two nodes. Basically. The
theory behind this is the root note
and the fifth node. Okay, let's check
the first example. The first record in this page. I will have to position my
finger one fret, one upstream. And probably my finger for pinky on the third
fret on the a string. Right? So the thing for power cord is you have to lay those two
notes at the same time. You cannot play separately. Is not a power chord. It has to be. Just to do the calculation,
you'll find that node. So F, G, a, B, C, five. Look at the power cord, three in that page. The third string, third fret, fifth fret. The notes are G. And the node located on
the fret five will be d, G, a, B, C, D five. This will sound much
better if you have a distortion battle or
overdrive battle or if your, if your AMP has
those effects also, battles or digital distortion. Let's double-check here. What do we got? The first part? Second law reports, and so on. Right. You can choose between your fingers for
or your finger three, whatever works better for you and whatever feels
more comfortable. So all right, so those are our courts can also have another
variation for all reports. If you double the root node. Let's check this out. So on the top string
I have the, the node. The next node, of course, has to be the fifth, which is C. And then one more,
f on the D string. Fret, three. Have those three notes
played, been played together? I'm also using the
palm immune technique when they use this part of my
hand to cover your bridge. Yeah. You can also have, we can create some cool chord progressions based on the circle of fifths. So e.g. that one of them
was playing a, F, C, G. How many times
have I listened to that chord progression
is very famous. Right? So that's the power chords. Remember the theory behind that? You need to note only
the root, the fifth. You can add the third node as the root again, octave higher. So remember what I said, why it's important to memorize the frets on the top string
and the fifth string. Now's the time to
use that knowledge. So if you have a chord
progression like B and G, and a, where to find those three chords in
bar recorded versions. So B, I'm probably go through
frets seven, S phase. So G chord progression,
fret three. And a chord
progression fret five. It's unschooled. This kind of chord progression, the power chord progressions, is keeping one fret. So let's see another
variation here, a G. That's another option.
62. PENTATONIC SCALES - SHAPES: That's probably one of
my favorite skaters, a minor pentatonic scale. This is k is made by five nodes, a, C, D, E, G. That's why its name is
called pentatonic penta five. So the pentatonic scale has
one of the easiest shapes on the guitar because you only
need two notes per string. Let's check it out.
5.8 on the top string. That's going to give you notes. See, five-seven on the a string. I'm gonna give you
notes D and E. Five-seven on the
D string, G and a. Five-seven on the G string. Cd 58 on the B string, and five-eighths on
the high E string. Yeah, I like to call this
shape as a minor shape. Because it's based on
the a minor chord. As the guitar is a symmetrical instrument,
the fret board. The fretboard is
symmetrical so you can play around like I'm gonna
be playing G minor. And I played the same shape
as it played in a minor. The same intervals. 36353535. If I want to move on
and play on B minor on flat 7, 710-797-9710. Okay, so that's the shape that we're gonna be
playing a lot in blues, rock, and even jazz
improvisation. If we add the sharp
four in this scale, we will generate the a Minor Blues
pentatonic, what that means. But if you take the fourth
note, which is a, B, C, D, and played
D-sharp after that. And then if you are adding a new note in
your pentatonic scale. So now you're,
pentatonic scale is called a minor blue scale. It has that sound. Remember the lesson
about intervals. The interval between
the root node and the sharp for the tritone. Triton has a three
whole steps interval. So those nodes are three
whole steps apart. That's exactly the
nodes that we are adding in our pentatonic scale. I have another D-sharp here
located on the G string. That blank only five-seven. Add the number eight. Now, the bottom of the bottom of the scale
would be the same. 5858. Does the sound of a minor blues pentatonic. We also have the a Minor Blues put pentatonic plate
one octave higher. That means that my first
note will be located now on the string 12. So the fret would be 12, 15. On a string, we're
skipping the top string where we were not playing
any notes on the top, 12, 15, and then 12, 13, 14. Look at the blue nodes here. The sharp for drove
14 on the G string, 13, 15, 16 on the B string, and 12, 15 on the target. It will be, That's my A7 blue chord. Counsel, play a
minor chord as well. Okay, let's see how this two scales roof sound in that backing track
that we were playing before. Now it's time to move
on to the next scale, the next variation of
the E minor pentatonic, which is a minor six. What that means now, we are adding a new node in our scale. Actually we are replacing
the seventh letter, the seventh note
for the six to a, B, C, D, E, F, G, I have g pentatonic on
the D string, breadth five. That was my G note. I
was playing G note. Now I'm playing sharp, so I'm dropping that note. I'm dropping That's
one fret down, down. And then it will
generate that sound, that note, F-sharp,
minor pentatonic scale. Now we will have a, C, D, E, F sharp. And then they start again. That's the shape that is
the fingering that I use. So my 874777, Very cool sound right? On the B string. I'm not playing
Fred eight anymore. Fret seventh, which is going to bring me
the F sharp note. We also have the a minor six pentatonic octave higher.
Let's get that shape. So 12, 15 on the a string. Remember whenever
the octave higher, I don't play any notes
on the E string. So 12 151-214-1114. Why 11? 11 is going to bring
you the F sharp node. And then 13, 15. Same control for Jamie.
On the E string. The string supposed
to be 12, 15, right? Now it's E, F-sharp.
Let's listen to the sound of this pentatonic scale in that backing track. That's the sound of the
a minor pentatonic. Sometimes I like
to mix both the a minor seven pentatonic
and minor six. And of course, as you remember, the circle of fifths, The relative major
and relative minor. That's going to apply in our practice now on the pentatonic scale,
the same concepts. So if I'm playing the
a minor pentatonic AB, you'll find the same node. So when I play this
C major pentatonic, Let's check it out. So the C major shape, the C major pentatonic, has nodes C, D, G. Remember the nodes on
the a minor pentatonic, a, C, D, E, F, G. Here, I will have
the same thing. But now it's starting
on the letters C to C. That also works for
the C major chord. Reports one of Fred eight. That means that I played, I can play the a
minor running down. And when it goes to the C major, I go up like that can
be good practice to, even though reversed by both pentatonic scales are
sharing the same notes. Let's listen to the sound of
this tube pentatonic scales, they minor in C major
that they can track. I started with a minor. A minor is my
guides because this song that constructs
in the key of E minor, Major, collecting both, That's a great practice to the notes, right? So they are working pretty good. You got it because they're
sharing the same notes. But remember, for me, when they played
songs and minor, minor pentatonics
is my reference, is my starting point. And I can also apply
the major pentatonic. How the second note, when I played the
minor pentatonic, one to that node, to the second node, it's gonna
bring me the next shape. Major. She doesn't matter
what key I'm playing. E.g. G minor. I played it first
shaped the minor shake. The second note, too, that Fred is going to
bring me the major shape. This pentatonics,
the B flat major, their relative major of G minor. That's why it's
important to memorize the relative minor and major. Just going to save you time. These exercises, connecting
both will help you a lot.
63. PENTATONIC - APPLIED IN BACKING TRACK: So let's apply this to shape
that we learned today, the a minor and this C major. And also the blue scale. This backing track, this is a kind of like a
rock back in track. Mates in the a minor key. Let's check it out.
Let's see how it's going to sound the two shapes. First, a minor shape. Note. C major. You can also play the
arbitrary higher. That's the sound of
a minor pentatonic in the C major pentatonic
in that backing track. So we can also apply
these two shapes in some kind of like a metal
backing track, a minor. But let's check it out.
Let's see who's gonna sound. The band on the bread seven. I'll let you think
about undergrad. A's on the fret, on the E string, output. Dan on the B gene on it. This thing on the train. Red band on each frame.
65. PENTATONIC CONNECTING SHAPES 7 EXAMPLES: Alright, so probably
at this point, you're getting
more familiar with the pentatonic shapes right? Now, it's time to learn
some connections. Are emission now is
connecting those five shapes. Of course, if you replay five nodes on the
pentatonic scale, we have to be
playing five shapes. Every shape we
started in the notes. Okay, so let's take the
example of this page. I prepared seven
examples for you, and let's connect them. So the first example is gonna be playing in three strings, all the five shapes. So take a look in the
first group of six nodes. But that's gonna be part
of the shape number five that we covered
on the other lesson. If we move on on
the fret, eight, will find the main shape, which is the a minor shape. A minor first position. Next will be located
on the fret 1012. And finally, the last
shape. Under fact 15. I'm landing on the root node, which is this backing
tracks in a key of a minor right there we're
going to be playing on. So altogether. So when you connect
two scales like this, you start creating phrase. He's got a great,
great guitar lakes. But this is going to be
very helpful when you start improvising and when you
create your own solos. Let's check this
example. Now we're using the backing track. Let's go one more time. Very cool phrase, right? Connecting all the five
shapes in three strings using only three strings
of each pentatonic shape. Let's go to the number
two now, except one, number two is due and a minor, I'm selecting a few groups only. So group, the third group. The fifth group. So this phrase is
shorter, right? We only have three groups, three, e.g. number three. This one has a couple of slides. So let's go. We're time. So e.g. number four, Let's play
in groups of four nodes. But now, starting
on the D string, Let's see how this
is going to work. So on the first
group I have 2525. Second group, third group, fourth group. On the next line, I have benign. That's a long phrase, right? So again, one more time. Let's see how this
example we have sound on the backing track. It's still an, a minor slower to 3 v 23. Good exercise for
alternate speaking. Good example five, I think
we have that example before. Let's double check it again. That's a long phrase. Very cool. Now we're
connecting three shapes. When his life, you are
in the main shape. What is that again,
during the second shape? One nodes being part of
the third shape, again. Plate back, backwards, right? I like that. Let's move on to the next
example, number 634. And finally, except for
number seven, Let's go. Hello. And of course in this last part, I was trying to mix it up, everything, all those
three connections. Alright, so hope you are enjoying this
pentatonic connections. In practice, practice, listening
to that backing track, it's a bit more groovy. Or I also have for you the metal backing track and
the rock backing track.
66. PENTATONIC PATTERNS 9 EXAMPLES: Alright, so let's jump in
now to the pentatonic scale. Actually pentatonic patterns. Take a look at that page, that PDF that you
have in your folder. And you're gonna be playing
nine different patterns. They are in the key of
E minor and a minor. First example, in E minor, I have some Legos going on here, hammer on and pull off. Let's take a listen on that. And then let's play on the
back interact to sit down. Cause this is gonna sound. If you're improvising
or making a solo. That's the pattern.
If you're gad, how to play this on the, on the beginning, on the
first three strings. You're gonna get the
entire pattern repeats on the D string, same thing. On the G string. On the B string. We're going to be playing this example one. Now listen to the backing track. Remember the key is E minor. Let's jump to the
except for number two. Now, reversed. You can also apply the
hammer on and pull off in this example is going
to sound stupid. A little bit faster
to some examples. So bowl. Let's try example three and now skipping the string. Three. Faster. Hammer on and pull off. Example Number 43. Pretty quick. Sample,
I like that, right? So except for you can also
play on the high strings, e.g. hammer on and pull up. Good Lift, good
guitar lick for you. Blink on the high strings only. So When did you play that entire pattern? All the time? Let's see how it's gonna sound
is on the backend. Firstly, strings on it. On the B and G string. Let's try another
example, number five, but we have to change the chemo. There's examples were
made in a minor, a minor pentatonic
here granddaughter is also has a hammer on
and pull off going on. That's right. We did track phrase number six. Now, just writing down. Write it up now. Green ball, like that. And Barton's seven. It is like a poly
mutes technique. Each harmonic, That's a very hard technique
to play on the guitar. So the big very fights like this, that direction. Pretty cool technique. And finally the example
8.9. Let's check them out. Example Ace one more time. The beginning of the pattern. If you've got this,
you've got everything. So three facets. Example nine, the pattern with it, right? Those were the nine patterns for the key of E minor, a minor. We can also explore
other keys as well. Just transpose the
patterns and the leaks. Hope you are having fun. And I'll see you on
the next lesson.
67. PENTATONIC LICKS 5 EXAMPLES : Yeah.
68. PENTATONIC REPETITIVE LICKS 5 EXAMPLES: All right.
69. PENTATONIC LICKS - ROCK BLUES 5 EXAMPLES: So I hope you guys
enjoyed this masterclass. If you've got here, that means that you
are learning a lot. You're increasing your
knowledge on the instrument. So let's get ready for
the five guitar licks. Blues rock leaks
that I have now, let's try to put it together. So first guitar lick is based on the a minor
pentatonic scale. As we can tell, what
if France, right. This is maids in six nodes. The band goes on the first node, 755 using your finger, one extra five on the B string, and eight on the B string. And landing on the
E string again. So of course, based on the E minor pentatonic. Sometimes I played different
fingering in this leg. Go finger to 111, again. Three. So what play? The first note is the bands, nodes, the fret seventh, using my finger to, that's the same for the league
number two, we have 758. That's it. You only
need to memorize three nodes in that link. So that's a very bluesy lake, right? Especially if you count three, if we play the triplets,
one-two-three, one-two-three, one-two-three. Blues, power chords.
Lick number eight. It's a very, very interesting lick, very interesting phrase. So you still are on the
E minor pentatonic. You bend the eight
on the B string. Whatever band, because you don't have too much
time for that band. And then I have 55, the
first five on the E string, the second five on B. And then the next band will
be located on a fret eight. But now on the E string. Then fight. You played 55 again. Back to the B string, bandage. By five. That's seven. You
play the nodes, dropping the bands like this, you banned first,
but you don't play. When you are in the
position, the bend position, you drop it off
to the fret five. Because usually we
played the notes and then we're band right? Is the reversed techniques. So you bend first in a drop it. So the entire liquid. More time, slower. Lens on the AV node,
which is the root node. So let's go to the
link number four. Now, you have pretty
much the same beginning as the number of
one-seventh by five, then you'd have 85
late as blew off. All right, I didn't
have a blue nodes, 875 or the G string. The blue notes that we learned
on the previous lessons. So altogether very slow. If you, if you
count by triplets, then both of 33 notes per beat. Been very cool. Lick. Number five is, I call it like a respective
link that I have groups by four nodes. 1234. I can also play ball
off on the 8555. If you want to replace
that 847, feel free. I like the guitar
lick number five. When you started on the B string is still
following the a minor. Shapes are same for notes. But now we started
on the B string. So if you started on the G string, Let's
see it's going to sound. And finally on the D string,
split, play all the groups. So group number one,
starting on the E string, following the a minor
pentatonic shape. Group number two, we
start on the B string. Group number three,
starting on the G string. And group number
47, D, D string. Altogether. Very interesting leg, if you play like that,
if you want to just play that respective lactose,
free to do that.
70. PENTATONIC LICKS - ROCK BACKING TRACK: Let's apply this five lakes in that rock backing track and
a minor, that's number one. Number two. Number three. Let's try number four. Again. Number five replaced the eighth first seven. Let's play the lick
number five again. But now that secondly, way up to the string, you think you've got it slower. Those are the five blues rock
leaks that you can apply. Some backing tracks like that. Rock a minor backing track or
even the matter of a minor, or the blue that
we're going to be covering in a few
lessons. Stay tuned.
71. PENTATONIC LICKS - BLUES BACKING TRACK: Well, let's write you
apply this five leeks, same links that we just played
on the rock backing track. Let's try to play them in
a blues backing track. These blues isn't
a key of a major. Number one. Faster. Myth number two. Number two. Number three. Number three again, slower, faster. Number four. Number four in triplets, 123123. Triplets again.
Week number five. Number five replacing the
breadth of eight or seven altogether. Yeah. And hope you are enjoying
this metric lives. There's a lot going on, but I'm pretty sure you're understanding everything.
Thanks for watching.
72. PENTATONIC SCALES PLAYED IN SONGS: Alright, so welcome back, grab your tea or coffee. And less than allies.
These two songs. As you can see, you can
find the E minor pentatonic going on in these two
classic rock songs. First example, which we're here, Look at the beginning
of the shape one of the pentatonic
in E minor played, use an open strings. As the shape of the E minor
pentatonic open shrinks. If we start playing the scale. By the third fret. He's playing all the
notes in that shape. On the E string. A string is
urine to the D string zero. So you can easily see the E minor pentatonic in that song. The other example
is backing black. So that parts that he
plays three zeros on the E string, 30 on b. And choose zero on G. Also
played some quarter bands. Butter band on the fret
to hear soft bend. The three chord is going on. For the beginning. Before you playing this
riff, There's three chord, so E major, D and a. And then the lake,
pentatonic lake, right? It can easily see the E
minor pentatonic shape going on in this riff, coming from the
bottom to the top. Blank in three strings, 0300. And on the other song,
wish you were here, you see the pentatonic
scale starting on the E string fret 3300. Another great song that we
can see this shapes black, dark by Led Zeppelin of
the main roof of the song. The opening riff has a
minor pentatonic scale. That roof was written on a minor pentatonic scale. So
let's take a look at that. Started on seven. On the, a string. Is adding a node here, which is not part
of the pentatonic, that number six on the D string. I would consider that node
as a chromatic scale. To bring the root node, because he's landing on the, a note in the key of the song. Right? Looking at 79 on
the JUCE string. It's part of the second
shape of the film, funny part of the C major shape. Then he goes back to
the main shape and play 575 embryonic dwarf water bands. British law again, you can easily see the
pentagon shapes going on here. Now, as you already
learned the shapes, you're gonna be
playing this riff, thinking about what
shapes is playing. I like to bring
those examples to see where we can
find those shapes. Who is playing that shaping. So on a licensed
songs like that, It's a great friends,
the great Rachel, to learn better
tongue shapes and other scales that
we're going to be covering in the
next few lessons.
73. PENTATONIC SHRED LICKS 2 EXAMPLES: It's time for some
shred guitar licks. These ones are based in
the E minor pentatonic, adding the blue nodes. So let's take a look
at this example. As you can see, as we can here, I'm starting this lake
on the blue node scale. This is made by
groups by six notes. So you have 12345. That's the first
octave of this leg. If we go to the next octave, we started in the fret fifth. And finally, on the low octave, the third octave on a
flat 13. Altogether. 00 sound like this. Okay, let's apply this leg. Number one, the Sharad
pentatonic lake. In some backing tracks. I have it here. D minor rock metal
backing track. Let's check it out.
Let's see how it's going to sound this link. Alright, so let's jump
to the lick number to shred pentatonic licks
using the blue node scale. This one is starting
with Fred 17, then 18, 171,517.15
on the B string. That's it. So six nodes, again. The fingering for this leg
is the key to play faster. So I'm starting this
liquid fingers, three fingers, again. Finger one, finger three and
finger one. On the visceral. Feel more comfortable. You
can start this liquid. The finger to the Octave for dyslexia were built on the fretboard seen
on the G string. As we're playing octaves. You can keep the same fingering going to be easier for you. Finally, the last October, the low octave
located in France. Well, on the Eastern. I like to play this octave using the palm and
mute technique. Remember Paul Unmute technique. You covered the
bridge of the guitar. Isn't this part of the record? Let's listen this lick number
two on that backing track, the E minor rock metal backing track. That's right. Legato.
74. GUITAR MODES - THEORY: All right, So welcome back
to the guitar masterclass. And today's lesson,
we're gonna be talking about guitar modes. The seven modes,
the seven shapes that we have on the fretboard. So the guitar modes, It's a way to organize our
notes on the fretboard, to organize the intervals
on the fretboard. So all the guitar modes are
generated by the major scale. But what that means when we have the major scale
in this example, we're going to be taking a
look in the C major scale. C major scale is the only
scale that we don't find any flats in, any sharp notes. That's why we mainly
learned that scale firstly. So of course, if we have seven
nodes on the major scale, C, D, E, F, G, a, B. We're gonna be
having seven modes. Each mode we'll start
in a different note. If you do this,
you're going to be generating different
intervals, right? So you're going to be taking
a look on the slide number two now and you see the
intervals that will generate. Those are the names
of the guitar modes. Ionian, Dorian,
Phrygian, Lydian, Mixolydian, Aeolian,
and Locrian. Look at the notes combination
than those that we have on the Ionian mode, C, D, E, F, G, a, B. If we start the second mode by the second letter of the
Ionian mode, what that means, starting the next
mode on the letter D. The D Dorian scale will have the same notes as a union mode. The nodes combination
now will be D, E, F, G, a, B, C. Take a look on the beginning
of each mode, e.g. Ionian mode. I'll have the nodes
combination as C, D, E as first three nodes. So C, D, E. This is probably a
major mode, right? So I'm getting the vibe here to the feelings of
a major scale so we can easily sync the
first three nodes. If I played it first
three notes on Dorian, which are d, e, f. And the mode, garbage sad now so we
can say the Dorian mode, it's a minor mode, just taken and listening to the first three
notes in that mode. Why this is happening? When I play the Ionian mode. The intervals, remember
the first lessons in this course that we did. Intervals. When I play C, D, and E on the Ionian mode. What is the intervals
that I'm getting now? Between C, D, whole step, D, E, another whole step. Whole step. On the Ionian mode. When I play the Dorian mode, the intervals will change. How? Look at the first two
notes on the Dorian mode, D and E. Whole step, and then the interval between
E and F, a half-step. So the Dorian mode starts with the whole step and
half-step interval. That's why I have that sad vibe, that sad feeling
greener in that mode. This is, this is going to happen on the other
modes as well, e.g. Frisian. The first two
nodes on Friesian, they are E and F.
So friction starts with a half-step interval. F and then G. For frequent, it's a minor mode, but the second note
is also minor. Leading, a major mode. Take a look at that F, G and when to play those
combinations between F and G. Whole step. Another host steps. So F, G major mode, Mixolydian is also a major mode, GABA-B and Aeolian mode, another minor mode, ABC. Look at Ireland mode is very
similar to the Dorian mode. The first three nodes
I'm talking about, ABC is gonna give
me whole step on the first two notes and a half step between the
second and third nodes. So let's play the ABC nodes. And finally the Locrian mode. It's also a minor mode with a second minor BCD between BC, half-step, C, D, whole step. As you can see, the notes
are the same for all modes. Really depends where you
are starting the modes. This modes are being related
with the Ionian mode. Remember daughter PDF,
you just change the, the first node in every mode and you regenerate
different intervals. E.g. when we did the Phrygian
mode, Let's go back there. Phrygian mode starts
on the inode. In note is the third
letter on the Ionian mode. If you start with the Phrygian
mode in that letter E, F, G, a, B, C, D, you generate that interval, the Phrygian mode, based
on the Ionian mode. When we change the
order of the notes, we actually change the
structure of the scale. The shapes will be changed
to the intervals generate. So make sure to
practice the interval. The interval is the
most important part when you learn modes, generate the intervals is
going to give you the vibes, the feeling of each
mode, minor, major. The distance between nodes, as we saw on the, on the Ionian mode, between C, D, whole step, whole step, E, F, F, and G. G, a whole step, whole step. And BC. That's the Ionian mode
laid on the guitar. Does the intervals that we are generating for the Ionian mode. Let's keep going Ionian mode. We can also see the degrees of each node that we're playing. Seed node will be the root node. That's why I always say it's important to memorize the
notes on the top string. All the modes will start their notes on the top
string. Or the frets. Memorize that and you'll be fine when you learn the shapes. D, it's a second major, E major third, F,
for perfect fourth. Perfect fifth. It's
gonna be the G node, six, major six, major seven. And C Again as octave. So running all the nodes, it's gonna give me that vibe, that filling the major vibe, the major mode, Ionian mode. You can also see the
triads in this mode. Take a look on the root note, the third note, and
the fifth note. They are part of
the C major chord. The triad here is
going to be C, E, G. We already saw that on when we learned
the courts and the case. When you combine those
three nodes, CEG, we generate the major cord, e.g. even on piano, when
you play the note C, E, G, B. Again, the major seventh will be always located half
step down from the root node. We have studied this
before when we were building those chord
C major seven, C7, we saw that when we
played the C major seven, I have to add the bid node, so we'll have the triad
plus the beat note. It is called major
seventh, the Ionian mode, we will have that
chord, C major seventh. And as you can see, the
intervals between B and C half-step apart. That's the sound of the C
major seventh on the piano.
75. GUITAR MODES - INTERVALS: Hope you are enjoying the
guitar modes less than. And I'm pretty sure you're
learning a lot in this lesson. So let's keep going,
let's keep rolling. In this page you see all the modes are
organized by degrees, by the numbers
below each letter. E.g. Ionian mode. We just saw that we
have the root node. Major, second major. For fourth, perfect fifth. Meters, 6 m. C, Ionian mode. When you take the
second letter of the Ionian mode
and start running, start playing the sequence. You change the intervals
generated. So what that means? Look at the Dorian mode. It starts off on the dean mode. We're going to play D as root. You have the major,
second, minor third. The third note is
not major third, minor, third, minor seven. The shape of the Dorian mode. What kind of car do you
see on the Dorian mode? If we take the
root, minor, third, and fifth, I can also tell
you it's the D minor chord. I can also add the seventh. So it'd be D minor seven. Look at the letter C. In this mode, we have
the letter C, right? We can combine these
four notes on the piano. Let's take a listen
that D, F, a, C. And that's the C Major
seven from Ionian mode. So you can easily see
cords inside this mode. This is going to help
you and improvisation. If someone is playing
the minor seven, e.g. D minor seven, you
can easily apply the D Dorian mode because you're playing those four nodes that the court is
given to urine, D, F, a, C, Phrygian mode. That's a very interesting mode, starts on a bit dark red
because of that interval, the half-step E, F, and G, we have the minor second. Minor third. Different matter when
you have the power cord. The Phrygian mode is very
used for metal song, that kind of vibe, that interval, half-steps
and whole-steps. We also have the fourth, the fifth, minor
six, minor seven. I'm just playing the top of the strings here just
to see the intervals, just to feel the interval. One on the PDF on
the folder you'll find all the modes
are organized. Let's go Lydian, very cool mode. Also delete them because look at the difference between
Lydian and a union. Let's see if you can
tell me the difference between these two modes. They both are sharing the roots. Major second, major third. We'll look at a fourth letter. A union mode has afternoon, while Lydian mode
has sharp four. So we take the fourth letter and we increase it half-step up. What that means. I would
play the F Lydian mode. So the Lydian mode has three whole steps on the intervals on the
first four notes. Let's check it out. So between f and g, G and a, and a and B, that's the only mode that
you see that situation. Between the first nodes and the fourth node.
Three whole steps. That's the sound of the
leading mode, right? So remember, what
kind of interval you generate between the root
node and the sharp four? I believe we have
studied this before. The first lessons. Tritone, right? That's the interval between
the root and the sharp four, which is going to give
you three whole steps. So every time they
replayed that interval, FNB, FNB, Mixolydian mode out. So it's a major modes
you can tell by the third note is a
major third for GABA-B. Another whole step between AB, half step between BC, whole step between CD. And finally D and E. And E, F minor seven, so
half-step interval. So altogether would be, right. Also the difference between Mixolydian mode and Ionian mode. Let's analyze both. They're pretty much sharing
the same intervals, roots back and major third, fourth, perfect
fifth, major six. But the seventh
letter is different. Ionian mode has major seventh. Mixolydian mode has minor seven. How can I identify
minor seven and major seven with
blacks that before? For the minor seven has to
be whole step distance, step interval from
the root node. So in this situation f, right? So if you are skipping frets, are generating the minor
seven interval. Whole step. Look at the Ionian mode. B is the seventh letter, major seven and
sees their roots. So major seven, the beat, It's half-step distance, half step apart
from the root node. Let's keep rolling Ionian mode. Let's go a, B, C. Look at this Ionian mode. As I said before. It's very similar
to the Dorian mode. Root, major, second,
minor third. They're identical so far. Fourth and fifth, same
intervals, a, b, C, D, E. You can easily tell this
mode is minor rant, just playing those
first five nodes. Just creating simple
melodies like this. Simple ribs. You can already
tell the vibe of the mode. But the problem here
is on the sixth note, one has minor six, which is the Aeolian mode. There Dorian has major six. Minor six on the Ionian mode will be half-step
apart from the fifth. What that means, E
and F. So a plate, a, B, C, D, E, F. When I add that mode, the minor six mode now is, does the main node in
this mode, I would say. And then of course, minor seven, which is G minor seven because the G is whole step apart
from the root node. These nodes a, B, C, D, E, F, G, and rootNode. Again, there's the sound
of the Aeolian mode. And finally we have
the locker mood. Locker mode, as we saw before, is very similar to
the Friesian mode. Look at the beginning
of both modes. Root, minor, second,
minor third. They're identical, right? Bcd. From both situations, we have the same intervals. The fourth is the same, the fifth is different. Look at this freedom
has perfect fifth. What that means, E and B. So eNB, remember what
chords that were? What is the quality
of discourse? Power cord when we have the root and the
fifth, perfect fifth. In this situation, E and B. The perfect fifth is also 3.5 whole steps apart
from the root node. 3.5 steps distance, right? So every time they don't
have that interval usually raised to the power chords are records are
created like that. I played it like that
route and perfect fifths. The calculation and you
see that 3.5 whole-steps. But locker and
mode is different. You have the flat five. What that means, I'm not
generating power cords anymore. I'm shooting, editing
their Triton. Remember Triton, the interval between the
root node and the fifth. But now I'm getting three whole steps is not three-and-a-half
anymore is three. So we can do the calculation. Let's go from B to
F and see if we have three whole steps, a, B, C, D, have one-and-a-half, DE, another whole step. So we have two-and-a-half, E, F half step. Three whole steps, distance three whole steps
apart from each other. So every time that
a player B and F, you create that like
a dark interval, that dissonant
interval over the F or the rivers F&B lock-in will have that Triton. B, C, D, E, F minor six amps is G minor
seven, which is eight. So it's funny because
on the locker and mold, I have BC, which has
half step interval. And I also have E, F, a half-step interval as well. So engineering this kind of intervals on the Locrian mode. Where my best advice for you
now is you have to memorize those shapes to be
able to understand the sound of this interval, the sound that we are creating, the sounds that you're
getting, right.
76. GUITAR MODES - REVIEW: But this is the last page for our theory behind modes, right? So as you can easily see this, I kind of like a reveal. Comparing the root node
and the third node. I always play those two notes to see if the modes are minor
or if the modes are major. How many minor modes do I have? How many major modes? So we also see the
Ionian mode on the top. And if you take the root node, which is C, and
the third letter, which is e, I have two
whole steps apart. So that means every time the replay two whole steps apart, the chord is major. So in this situation the
mode will also be major, C, D, and E. That interval is going to bring
me the major mode. Dorian is different. We have between D and
F, 1.5 step distance. They are one-and-a-half
step interval. So Dorian will be minor. Just playing the
first three notes. Phrygian mode will
be also minor. And also we have the perfect
fifth, the power cord. In that mode. We also have the polar
coordinate, their urine, as you can see that
between C and G, Dorian mode, I also
have the power cord. Three-and-a-half
holds that distance. But a Friesian,
it's a minor mode. But remember the Friesian
has minor second. So the intervals between the first node in the
second, it's half-step. Phrygian mode, Lydian mode. It's going to be a major mode. Why? Look at the root node F, the third letter a. To hold steps. Every time I have
two whole steps, the mode major, F and a. But athlete than would
be the sharp four. Remember that B note Mixolydian mode, we also be major. Take a look under root nodes and the third letter, G and B. To hold steps apart between
root and that major. Third major mode will be minor, a and C, right? Ac, the interval
Ruby, one-and-a-half. But when you get 1.5
step apart, minor ABC. On the Ionian mode, we
also have the power cord. Look at the root node
and the fifth letter a. The perfect fifths,
3.5 whole-steps, that means power
cord. The Mixolydian. Also, we have the power cord, three-and-a-half
whole-steps, Lydian mode. We also have Friesian, E and B lock-in. That's our less mode. Let's compare the nodes B and D and find the interval
one-and-a-half ray B, C, and D minor mode, but also has the minor second. The only problem here in this
mode that we find triton, the three whole
steps apart between the root and the
flat five, B and F. That's the only
mode that generates the power cord between
the root and the fifth, because the earth is flat. And F three whole steps
apart on the Locrian mode.
77. C IONIAN / A AEOLIAN MODES: Alright, so that's the
sound of the Ionian mode. We're gonna be learning to
shape if they only mode. So I'll bring for
your two shapes now to Ionian mode shapes. Why? Because one of them, in some strings you're
going to be playing two notes. Wherever
the outer shape. In average drink, you're going
to be blank three nodes, but that's gonna be perfect for triplets. So those
are the shapes. Look at the first shape, the
major scale, ionian mode. You have the notes C, D, E, F, G, a, B. Remember, a unit mode has
no flats and no sharps. So the beginning of the mode, C, D, E, F, G. And also add the denote here. The ten. And goes back to
the fret eighth, which is gonna give
you the c node. So there are two strings that
you only play two notes, the top string, which is
8.10, and the B string. Strings are going to be
playing through nodes. Look at the D string
and the G string. They are sharing the
same frets, right? 791-07-8910. That's gonna be a easy
fingering for you. This is the Ionian
mode in two octaves. So I played the
first sequence, C, D, E, F, G, a, B. Then I start again. I'm landing on fret
on the E string, which is the root node C. As you can see
the court here, it's C major chord. On the major scale,
the Ionian mode, I will have the
triad root, third, major third, and
a perfect fifth, and also the major seventh red, which is the B node, you add the node
into that triad. So illusionary to the C major seven. Look at
the second shape. Now, the second shape, It's probably easier because every three strings
you repeat the frets. What that means, the top
string and a string, you have 81012 on
the D string and g, you will also have
91012, both strings. And on the high two
strings, the B and E, You have 101213 in both strings. But that's another variation
of the major scale. You can play this
in triplets out. So 12312, we have learned that before
this subdivision, right? Triplets. It's time for another important mode for us to start practicing
the improvisation, the minor mode, I Aeolian. In this shape here, you also will be playing
three notes per string. We can also apply the
triplets in that. Let's take a look at the nodes. The nodes are the alphabet
starting on the letter a. They go from a to G, a, B, C, D, E, F, G. Rachel on the
top two strings. You also will play
on the same frets of 578578 on the D string. And g is going to
be playing 579579. Bit of stretching
this shape, right? Especially on the D
and the G string, on the B string 6810. And find them on the
high E string, 78. Then that shape, when I played that
kind of course, the E minor chord to borrow
a chord on the fret five. Let's see how many octaves
we're playing in this shape. For the first octave goes from five to start the next octave on the spread seven up to eight. So the next octave
starts on threat, then you only have four nodes in that
octave, the third octave. That's the Aeolian mode, laid on the fret five, which is gonna give
me the a minor chord. Remember that nodes
on the C Ionian mode, C, D, E, F, G, a, B. We have the same nodes
now on the Ionian mode, which is the minor
mode, a, B, C, D, E, F, G. On the major mode, Ionian. I will play the same notes on the Aeolian minor, Aeolian mode. But it started on the letter a. Or they're sharing
the same nodes. So those for me are the
most important modes because you're gonna be playing
a song in major chords, are going to be playing
a song in minor, minor major or minor, minor key, where every time
the song is in major, e.g. C major, Ionian mode. So if I play another song
in a key of a minor, e.g. a minor. You hit that shape, the Ionian mode, three
notes per string. So when you memorize
shapes like that, you can transpose, you can
play around odder shapes. You can move around
to the fret board. Let's play a song in G-Major.
You have that chord. I already memorized
my Ionian mode, or just lay their urine and mode Start now
on the fret three. If the coordinates
that being major, chords minor, the song is
in minor key, e.g. G minor. I played there a union mode, where you started on the fret
three on the top string. Remember, breaths
memorization, Fred three. Then it gives me the G note. G minor modes. Now, G minor Aeolian
mode being played on the G minor boards over
to G minor chord, right? So I hope you are
understanding this. Modes, configuration, the
system of the shapes, because this is going to be very important when you
start improvising, when you start improvisation. And of course,
music composition. I played the SI unit mode first, and then I replayed
that mood, the aeolian. You want to write, major mode Eight or you're in mode now. You can see both modes work
for that backing track. What is the major or minor? They are sharing the same notes.
78. C IONIAN / C LYDIAN MODES: I want to get back to
that page where we were practicing the major
modes, the Ionian mode. Let's take the
second shape again. That's gonna give
me the node C, D, E, F, G, a, B, right? That's the major mode. Remember what I said
on the other page? That the Ionian mode has pretty much the same
notes as the Lydian mode. Both modes are major, but there's only one difference
between these two modes. The Ionian Lydian mode
is the sharp four. On the Lydian mode. What that means, if I want
to place C Lydian mode, what do I have to do is
change the F natural notes. F-sharp knows how to do this. So look at the fourth nodes, the fourth letter in this mode, the Ionian mode, C, D, E, F. So the F is natural. If instead I play F-sharp, we regenerate now
the sharp four. So this is my C Lydian mode. I'm changing the
mode for ligand now. That's the main nodes
on the leading. That's where someone's playing the Lydian mode
and hit that note. You know, oh, I know that
vibe. I know that feeling. I know that mode that's leading it so
strongly that nodes. If I play F natural, the vibe is different, right? The feelings are
different in that mood. That those two modes are sharing pretty
much all the nodes. But he started the F
natural, I bleed F-sharp. Let's see how it's
going to sound this in two backing tracks, the Ionian mode backing track and the C
Lydian backing track. Let's start on the next trend. That's the sound of
the Ionian mode. The notes that I'm playing, R, C, D, E, F, G, a, B. Remember death is natural if
they play F-sharp instead, F natural, Let's
see the sound that I'm going to get the mode. We'll change the name
for Lydian mode, which is generating
the node C, D, E, F sharp, G, a, B. Let's go. So as you can see, the leading
mode is more intense red. I really like to improvise
using that mood. In some songs. You see that just
changing when load is making a lot of different
data nodes are the same. I'm just replacing F
natural for F sharp note, and I'm getting that vibe. C Lydian mode. Hope you're enjoying this
guitar modes lesson. Let's go to the next topic.
82. G MAJOR PATTERN - PLAYED IN CHORD PROGRESSIONS: No.
83. C IONIAN OPEN (VARIATIONS): Good.
86. SHRED GUITAR SCALES PATTERNS 7 EXAMPLES: Alright, so grab your
cup of tea or coffee, and let's keep going
for the next topic. It's gonna be very,
very interesting because called scales patterns. I'm breaking a few
of them for you to memorize and to apply in your
improvisation, your solos. That's gonna be very helpful. They are written in two keys, a minor and E minor. So we're gonna be
taking listen on the metronome and also on the backing tracks to see how
we can apply this in songs. Let's go, Let's do
this. First example. It's very familiar for
us because we are in the blood that on the legato, hammer ons and boy
are fixers size. So that's pretty simple. We already did that. So remember the big direction, this example down. Let's apply this in a
new backing track now. A minor backing track, Let's go. Example two is more related
to the pentatonic scale. As you can see, is the
mid of the pentatonic. Five-sevenths. Five-sevenths.
The last group is 58. That's a great example for
palm and mutes technique. When exhibited three more
related to the Mixolydian mode, starting on the, do
you note on a Friday? But some strings
you'd duplicate, so you play six nodes, e.g. no, on the a string, you doubled the pattern so the D string is
raw. Juice drink. B string. Height is shrinks. You can also add
the fret seventh. For. Both work. Pretty good. So let's go blind. Isn't
that backing track? My topic brings up like they're falling
new techniques. Number four is made in a
very interesting pattern, which goes from Fred Savage. But this is also partially filled
GB till evening, which has the same
notes as a urine. So that's why it's on video
getting the key of a minor. So good exercise for alternate speaking. There's a flight
out on that track. I want to land on their part. Kind of like a ribbon on
the top string. Strokes. That's very simple.
Five, five-halves. Still in the same scale
where the pattern goes. This pattern is
made in 12 notes. So if you get the first notes, you're getting tired
patterns. So let's try again. We're going to do
now is repeating the same thing on the B string. Because string, the
string, the a string. That's a very cool way to play the Mixolydian mode because you are adding a different
sequence, right? Instead playing this
game in sequence like G, a, B, C, D, E, F, you were applying those interesting patterns in your shoulders and
your improvisation. So let's play on the
first two strings. Only. Just forget the shape, just to get the
pattern memorized. The fret on the D string. Let's write on this thing. The fifth string. A string. Altogether. Professor, sample. This is related to
the legato technique, hammer on and pull
off technique. We're gonna be, you're gonna be transposed in this cave
and out to the front row. Let's keep going. Let's run this example and see what is going to
sound on the track. So you're gonna be picking every first nodes or each group. What that means, 12, 14, 15, you pick the 12th. And then same thing
on the D string. Go back to the a string. This string. And then in how the G string, back to the D, B, G again. And then that's it
altogether. Very slow. Very interesting
pattern because you always move up one string. So go back to this. Remember backing
track, this example number six and see how it goes. We're tired. Play alternate speaking. Right? So let's jump back
to the example of sad, but that's a great exercise
for blank different modes. They're gonna be blank on the
B string and the E string. Like this. Of course, the backing track isn't
a key of a minor. I'm starting on the root node and look at the notes that
the threads are positioning. So 101213 on the number
bid on E string. Same frets. This first
group. How's the picking? You pick on the 10.10
on the Eastern? Sometimes I use that
fingering there, 12.3. Sometimes I use one for the next group, 12, 13, 15 in both strings. And then the third group, 13, 15, 17 in both strings. So far we have the first
three strings, 101213. Second group, 12, 13, 15. The third group, 13, 15, 17. Both strings. I think at this
point you are able to identify what
modes you're playing. The first group is the
bottom of the Ionian mode. And then Dorian mode. After Dorian mode, Phrygian mode is the most time for
the Lydian mode. That **** gets a bit weird
because you have 17, 18 in 17, 19 on the Eastern. Didn't have a band on the front, 20 altogether, others
for groups together. Slow. You can also keep going. You can play the
Mixolydian mode here. After the leader in
then the Ionian mode. Let's apply this example number seven on
the second track. This pattern gets
very interesting when we start dealing two
octaves. What does it mean? So if I play 101213
in both strings, the notes there and
blank are ABC DEF. Where should they find
those notes on the D string in the fret seventh? And finally, on the
low octave. Read five. Apply the legato
technique, the hammer on. That's another way to practice
octave on the guitar. And then that's the next
group in octaves now, so 12, 13, 15. But look at the notes
that I'm playing. B, C, D, E, F, G. I have the same nodes
here in the front, nine. And here on the fret. Seventh. And finally, 13, 15, 17. Notes are C, D, E, F, G, H. I have the same node,
sheriff, write them here, but whenever the octaves, I will never change
the fingering. If I'm playing finger
12.4 year old, blink that fingering on
the other two oxygens. The second group,
12.4, repeats here. You're in the top. And on the first group, 13.4, repeat here. Find it under the tongue. Does a very good
exercise for octaves.
87. SHRED GUITAR LICKS: So it's a very fun
example to play because you're going to be playing the same frets
in three strings. On the E string, 15, 14, 12. On the B string.
Also 15, 14 trucks. The juice drink as well. And I'm gonna be landing on the inode blue scale here on the D string. Independent Panic Blues care can also play triplets, one-two-three, one-two-three,
one-two-three, one. Very fun, scared
to play. Very fun. Guitar lick to play in
any song in E minor. Let's write this on the rock
metal backing track E minor. The very bottom lip
because you can apply the ban on the E string. Redford working fret
of the B frame. Bred them to just bring very fun guitar lick to apply in this backing track. Write that E minor rock metal backing track. Let's keep going. We have another
pattern here going on. This pattern is made
by six notes per beat. Let's take a look at that. So that's on the fret trout. Shrink in 14, 12 and a G. Then it go back to 14, 15. Then you start again
for pipe flow. Great exercise for
alternate speaking. If you want to replace the
Fred 12 on the big trends, for Fred 12 on the E string. That's going to bring you the
strings keeping secondary. You blend a string and the other nodes are
on the G string. On the B string,
for time's sake. Can also play hammer on and pull off in this example for us. Big that note on the B string. And you pick that
nodes, the 1,500 down. Let's try this example
on that backing track, E minor rock metal
backing track. Let's go. That's a very fun example
to play that track. We'll look at a bunch of
nodes now been played. So this is a kind of look. We can also play in triplets
or six mils per beat. So we go, those are
the first six nodes, so bad at that data, the one to six. And then you do the same
thing, the same pattern. The highest string, fret 12. Altogether. We're ready, got
12 notes in this first part. So the next group of nodes will be gone. Then finally the last group. Altogether, raise loan. Let's write
altogether very slow. Alright, so let's jump now
to the example number three, the pattern number three. We're gonna be playing now
25 nodes in this example. How, let me show it to you. So we're gonna be adding
notes on the first string. Take a look at that tab. You see the first
group of nodes. I will add the 12th
fret on the E string. So every blade, I'm
going to go back. So back-and-forth.
On the second group, I add 12, 14, 12. The third group,
I'm going to add three more nodes, right? So this is divided
in three groups. The first group, you add only
one nodes on the E string. On the second group
is you add two nodes. The third group, we
add three nodes, drove 14, 15, 12. Altogether. Slow. Of course, I'm using the storage
and an overdrive here just to have more gain. And also play this on
the G and B strings. Go, has gone to something that is a lot of nodes now
going on in this example. So again, then the same thing on
the B and E strings. Altogether. Lands on the E minor pentatonic. That exempt the G and B strings. We've got a bit of hemorrhage can
pull off legato. Talking about the
pattern number three, I will try to apply that
pattern into two modes. The modes that I'm
gonna be playing are a minor, Aeolian mode. In the C, a union mode, the major mode, major and minor. And how can we play that? How can we apply that pattern
number three into two that, those modes, well,
let's check it out. I played it 578 on
the top string. Then I add the five on the a
string, and then I go back. Pretty simple, right? And
then I add 575 on the, a string on the next group. So then I go back to the top string and then
it adds 57 on the a string. That's it. That's the pattern. So altogether, very slow. It's a good pattern for roofing. Also when you play on
the, on the top strings. We didn't do this
on the a string. Erase that those nodes. Let's try now on the
D and the G string. Next two strings, GNB. Little bit more confused that two strings because you played 579 and then 6810
on the B string. Next group of strings would
be B string and the E string. Well, let's write all
those groups together now. You can also apply this
pattern number three, this combination on this C, a union movement are gonna
be shifting the mode to the fret that they're on
a mode at this point, probably you're going to
use it that shape, right? I'll drop by their
combination now here, adding one node at a time. So that's it. Once you get the pattern, you played all the other groups. So I would say is good to have
5-10 patterns like this when you're improvising is going to give you
more ideas, right? So Brexit is on the metronome and also
in this backing track. Yeah, you're right. Yeah. Let's try this pattern on the B string and the string on the Ionian mode. The deep end juice drink.
88. SHRED PATTERNS 1 KEY:Em: Now we're going to be playing
in the key of E minor. E minor, Fred's 753. Different alternate speaking. Then when you go to
the front eight, you're moving your
entire hand like this. That position. A very fun exercise. So let's go one more time. Remember if you have a better
position on your left hand, you're going to be
playing faster. Low hands, like this. Like low hand, your fingers. They have to be spots are the
friends that they will lay. I'm using the alternate
speaking for this example. And then on the next
part I have them. That probably will
be an easy example because every friends that
you play on the B string, you blame on the E string.
Let's check it out it again. Then. When you move to a fret, then you move the
entire hand. And 12. Forget him. The second line of this example, you go to the fret routine. And then if it's been better
position to have to move your hand in front
of a live bread 17. You can also land on the key. The root node, which is eating altogether does except it is very long. So let's try again. Slope. Professor, No. Faster. Again. Also brags on the first
two group. Hold it. Gonna go. Like this group is all. You got it one more time.
89. SHRED PATTERNS 2 KEY:Em: You can also apply the alternate speaking in this
example, let's try it. Let's understand the pattern. First. Time that I
played those examples, I tried to understand
the pattern because if you get
the pattern on the first group are
the first two groups, you understand the third
thing. So let's try again. It's pretty easy to
take a look at that. The combination of these nodes, 735 and then 757-35-7531. To understand this, you move to the next combination
that's going to bring you Fred's 85787502 groups.
We gotta route sound. Right then, same
thing for 101719. That's it. All together. First group. Second
group, breath eight. Third group fret, then
fourth group, Fred drove. Fifth group, 146 group fret, fifth and seventh
group, Fred's 17. And the eighth group
fret 19th. That's it. You played eight groups
in this example, alternate picking and linear. You will need one string
to play this example. So your blank, all the
modes connected in one. Drink. Make sure you are
in the key of E minor. And understanding where
does nodes are coming from, which mode is the
relationship for this node's? Good exercise for
alternate speaking. One more time. Exactly. Let's break into reverse. Once we've got the, the pattern on the first string, you're going to go up and
play the daughter's drinks. E.g. I think this
group here to 15, 12. That's the ending part of my Mixolydian mode,
the D Mixolydian. So ago. Once I know the combination, I can play mode is shrinks. So Let's run your first string on it. Once you've got the pattern, you start running.
Because other things.
90. LEGATO TECHNIQUE: All right, So if you've got
that far in this masterclass, that means you are learning
a lot in this course. Thanks for watching
all these videos. And I hope I'm helping
you in your goals. I hope I'm helping you
discover new techniques, new skills in a different
way to play the guitar. So our next topic now
we build the Gatto, hemorrhage, arms and pull off. That's a very important
technique for solos, lead guitar, rhythm guitar, it. So I brought five
examples for you. We're going to be
playing a dose now. So we're mainly playing
578 on the high E string. For the minor is k rent ABC, G on the second string. On the G string, right? It is pretty much
the a minor scale. Blade. The height streams. Alright, so let's jump down
to example number one. The fingering that I'm using for that example will
be finger 13.4. You can also play a
different fingering, e.g. 12.3. Example. Number one, you don't need to be
blank, alternate speaking. Because we're
practically goddess, hammer on and pull off. We're gonna be playing
the first note, only. Hammer and hammer
onto the front. And then when you go
back to the fret five, as you pull the binky
down like that. You integrate that groups
by three nodes, triplets. If you apply this on the second string is going to
be fun as well. So make sure you're
playing to Fred's 56. And look at the
fingering now, 12.4 on the G string will
be Fred's 45.7. Loads applied example number
one in that metal backing. Next up, number two,
we're going to be playing the first drink and the
second string, e.g. number one, we were only played on the E string,
the high E string. Now we're going to
add the B string. So the example is
going to be like this, 57875 on the high E string and the H on the beam. So for this example, how it's going to
be the peaking. I would say breaking down when you blend
the first string. And then when you
play the B string, you pay your big
string like this. So down, down. Maybe looping four or eight
times the B and the E string. And then to go to the
shrink and a gene. So he's gonna be down. Remember the Fred, Fred 56.8. Those modes are parts
of the a minor scale. So these here has
no flats or sharps. Abcdefg. When you play this
on the G string, is going to be like your
lens on the root nodes. 345-612-3456. Got to get going
on the other mode, e.g. here, service exam. And then under these rings themselves and drop them, they still blank on the E
string and the B string. So we have five on the e86, 5.7 on the G. So then you go back, back-and-forth, 568.5 on the
E string again, together, they're gonna be bigger than
the first string with five. And then the eight. And
then into the pool. Then a big seven. The way back you Big Five. Hammer on 568. Big Five on the history
altogether would be. Let's try this example
is low in that track. You can apply this on
the G string is going to be like five. So let's write on example five on the E string. This is going to start
on the E string 87.5. Keep your hands in
like a low position. That means closer
to the fret board. Instead playing like this. Look your finger four is going to take time to hit
that note again. But keep your hand like this, not not grabbing them like that. And the risk is gonna be to
hiring and also the shoulder. So drop it and drop
it. On the B string. You have 865.7 on the G string. So they're gonna
be picking nodes. The first node on the E string, the first node, then
the B string, the 700. And then the five
on the beat. On e. To get her going up light is on the
other strings.
 Rafael Bianzeno, Guitar Instructor