Transcripts
1. Intro: Hello, welcome to this course. Gradients are one of the amazing feature in
motion design industry. Creating these type of
animations are easy, and it is one of
those techniques that every motion
designer needs to know. So in this course, we will learn how to create stunning gradients in
Adobe after effects. We'll start by designing a jellyfish in
Adobe Illustrator, and then slowly, we'll reach
an animated character. Along the way, we will
get comfortable with gradients and styling
our jellyfish. For the class project, students can design and animate a jellyfish or
an animal day like, and they can share it
in the project section. This course is suitable
for anyone who's struggling with gradients
in Adobe After Effects, and you don't need
to be expert in Adobe After effects
to take this course. Once again, welcome.
Let's start.
2. Let's Design The Jellyfish: So here I am instead
of illustrator, and I'm going to
click on new file to make a new composition. I'm going to set it
on 90 20 by 1920, and I'm going to change the
color mode to RGB color. And now let's hit Create. Now, if you open the
illustrator for the first time, you might have a different
interface than me. To fix that, I want you to go to Window and then in workspace, set it on essential classic. And if it is still different, make sure you click on the
reset essential classic. Now that we are all on the
same page, let's begin. So I'd like to open
the layers panel, and then I'm going
to bring it in here so we can see
all the layers. And now I'm going to start
designing our main character. Now, the first thing
I'm going to do that is that I'm just going
to turn off this drug by just clicking on
the nine icon in here and I'm going to select
a pinkish color like this. And then I'm going to go
towards the rectangle tool, and I'm going to
hold my mass button, and then I'm going to drag it like this to create a rectangle, and I can hold space
to adjust the shape. So this is going to
be my main shape. And now, what I'm
going to do is that, I'm just going to switch
to direct selection tool, and I'm going to
select the shape, and I'm going to select
these two points, and I'm going to curve
it down like this. However, I'm just going to
select the button points, and I'm going to
adjust it like this. So this is going to be
sort of our head and body, and I can just rescale it a bit if I want
by pressing shaft. I think it's fine.
Now on the next step, what I'm going to do is that I'm going to call this one body, and I'm going to click in
here to create a new layer. This time, I'm going to hold on the rectangle tool to
switch to the lips tool. And then I'm just going to
change its color to white. And I'm going to hold shaft, and I'm going to move it at the same time with
space with s nice. And then what we
can do is that we can go towards the
window and we can open the align tap in here and I'm going to
select these two shapes, and I'm going to make sure that I will line them into
center like this. Well, that's nice. And
then what I'm going to do is that I'm just going
to select this shape, and I'm going to
press control plus C, and then I'm going to paste
it by pressing control plus F. So that way I will
duplicate this shape. And now, as you see,
we have two layers in here and I'm going to change
it into a white color. I'm just going to re
escalate like this. This is going to
be R. Now, lastly, what we are going to do is
that I'm just going to create a new layer and this is
going to be our ball, and this is going to be Ri. Great. Now, lastly,
what we need to do is that we need to create some
tentacles for jellyfish. Well, to do that, what
I'm going to do is that, I'm just going to go
towards the pental. This time, I'm going to click on this little icon to
change it into a stroke, and I'm going to
change this color to a pinkish color as well. And now I'm just going to
go towards this icon in here and I'm going to expand
this little triangle, and I'm going to set the
stroke caps to round corners, and I'm going to set this stroke to a number
such as 100 from now. I'm going to click to
draw a line like this. So we can increase
the tentacle size. I'm just going to set it
on 150 or that seems nice. I'm going to move it
beneath the body, and I'm going to make
sure that we are going to set it on a new layer. I'm going to rename this one. And I'm going to also
push it beneath. So we sort of have an ice cream
right now, which is fine, but we are going
to modify this in any after effase a
little bit done. So once you have done that, then you just need to go
towards file and then in save, you need to save your
Illustrator file, which I'm going to
do it right now. All right. Now that we are
done with the design phase, it's time to move to the after effects and
continue our work.
3. A Good Rig Is Fundamental: So here we are in so the photo B after affix.
Now, let's begin. The first thing I'm
going to do is that I'm going to show
you my workspace, which right now I'm working
on the standard workspace. If you have a
different workspace, make sure you reset
it into safe layout. Now, what I'm going to do
is that I'm going to hit the file and then I'm going to import my jellyfish design. And I'm going to make sure
that design is imported as a composition and the
footage dimension is set on layer size. So here's the jellyfish design, and I'm going to open
the decomposition. So the first thing
I'm going to do is that I'll need to turn these illustrator
layers into shapes so we can have access
to the shape modifiers. Well, to do that, I'm
going to click on it, and I'm going to select create
shapes from vector layers. And then I'm going to
click on it again, and then I'm going to
select invert selection, and then I'm going to press delete so I can delete
the other layers. All right. Now,
what I'm going to do is that on the first step, I'm going to create a parenting rig system for our design, so we can control
everything independently. So on the first step, what
I'm going to do is that, I'm just going to make sure that the anchor points are
in the right place. So right now, as you see, the anchor point
is in the middle. So if I press rotation, it is going to rotate
from the middle. So that's not what we want. So I'm just going to go towards the anchor point tool in here, and then I'm going to set
the angor point in here. Now, the body is fine. Also the eye pole and
the eye is fine as well. Now, what I'm going to do on
the next step is that I'm going to create a
new null object, and I'm going to place
this null object above, and I'm going to parent the
body and the eye to the null. Same as the tentacle. The reason I didn't parent
everything to the body, so let me show you if I parent
everything to the body. Sorry, I parented
everything to the If I parent everything to the body
and if I start to stretch, and as you see question stretch, it will affect everything. This is not what we
want. To do that, we need to parent
everything to the n. Now we can control the body independently without
changing anything. Now that we finish our rig, let's take a moment
and talk about loops. Well, it's fundamental to remember in order a
loop to be perfect. The range between key frames, we're going to add
should be equal or multiples or dividers
the unit we choose. For this video,
we're going to set the body movement
every eight frames, and also I will work on 50 frames per second to get
a more cartoonish loop. Right now, let's check
our composition settings. Now, as you see, we are working under 24 frames per second, and I'm going to change
it into 50 frames. The width and height is fine. Now, on the next step, if I want to shift
between frames better, I'm just going to hold control, and I'm going to click on the time indicator to
change a two frame rate. Now if I type, for example, eight, I'll move
eight frames forward. But if I write minus eight, this will jump into the frame minus eight,
which doesn't exist. Well, to move backward to
sort of fix this problem, all you need to do
is that you need to write plus minus eight. So for example, if
I write plus 16, I will move 60 frames forward. Now, if I write
plus minus eight, I will move back eight frames. So I'm just going to
move towards 2 seconds, which is going to
be at three frames, and this will give me a
little bit more room to work, and then I'm going to grab a marker and I'm going
to set it down here. And then I'm going to jump
eight frames forward, and I'm going to
set another one. And again, eight frames forward, and I will exactly
repeat these markers. So these are five markers, and I'm going to place two
markers in here as well. All right, so that we
have the basic design. It is time to animate
each related part, which we are going to
do in the next video.
4. It's All About The Body Movemment.mp4: All right. So here we are. And now in this video, I'm just going to create
the main movement as well as the squash and
stretch for our jellyfish. So what I'm going to do is that, I'm just going to move
towards tree frames, which is 2 seconds, and then I'm going to press B to set the start
of our animation, and then I'm going to go
towards the 61 frames, and then I'm going to press. And the B after
effects automatically set the time indicator
one frames forward, which is now 62 frames. So this is going to be
our main loop area. So now, what I'm going to do
is that on the next step. I'm just going to press
P to reveal position. And now let's rename the null to the movement null so we can
know what this is about, and then I'm going to press P. And then on the
second market, what I'm going to
do is that I just need to make sure that I parent the body to
the null as well, and then I'm going to
push it down a bit. Now let's sold the
body so we can see it. We have this main animation. Now, there are a couple
of things we can do. Either we can copy and
paste these keyframes for the entire time or we
can use the expression. I'm just going to hold
out and then I'm going to click on this stopwatch
to set the expression, and I'm going to type loop
out in the parentheses, I'm just going to add double mark and then I'm
going to write pin Pong. That is basically loops are
animation back and forward. And now let's watch. All right. So we have this animation, but it looks too linear. So I'm just going to select these keyframes
and then I'm going to right click on them
and in keyframe system, I'm going to press ***. And the shortcut
for it is F nine, so I'm just going to use
the F nine from now on, and then I'm going to go
towards the graph editor, and I just can push the first keyframe to the
right to get a sharp move. All right. Great. Now
on the next step, what we need to do
is that we need to squash and stretch the body. Well, to do that, I'm
just going to press S to reveal the scale on the body, and then I'm going
to move towards the second marker where the
character is at its lowest. Now, I'm just going to
click on this chain icon, so we can control the
scale independently. And then I'm just going
to stretch it for like 110 and then I'm just going
to remove the same number. Now that our character
is squat at this point, if I move towards this
marker in here, as you see, the character doesn't
have movement because our loop starts at 2 seconds, but the character
is at its highest, which we need to squash it. However, since we want
to have a perfect loop, I'm just going to repeat the same key frame from
the second marker, and then I'm just going to move few frames forward and
I will squash the body. And now we can add a loop
out cycle expression. Now, if we move
towards the animation, we didn't add the
cycles just fix it. Great. Now, in the next video, we continue our animation
for our jellyfish.
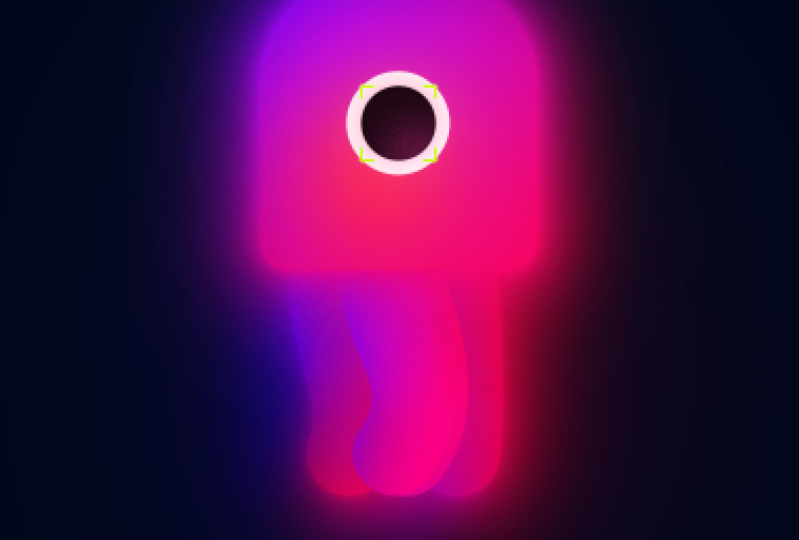
5. A Detailed Eye Animation: So far we have made
this animation, and now it is time to add a bit more detail by
animating the eye. So there are two ways
to animate the eyes. And as you see the
right one is made with a rounded re tangle and the
left one with a lip tool. And as you see the right one has a bit more depth into it. So let's start by
selecting the eyeball. And as you see it tells me that the lip size is
set on 230 by 230. So what I'm going
to do is that I'm just going to go
towards the retgle tool and I'm going to
select the retangle and I'm going to
turn off the stroke, and I'm going to get the eye dropper tool
to get the color, and then I'm going to
draw a retgle like this. And then I'm going to
call it the eyeball. And if I go towards
the red tangled path, I will change the size to 230, and I will add the
roundness just like this. So this is going to
be our main eye. So I'm just going to
replace it in here, and I'm just going to
delete the eyeball, and I'm going to parent it to
the movement null as well. Now, let's make sure
the cu poise is set on the middle. All
right. That's nice. Now what we need to do is that I'm just going to
use the track mat in here and I'm going to
pick the eye to the eyeball. And as soon as I do that, the eyeball disappears, so I'm
just going to reullt back. Now if I move the eye, as you see it moves inside of the eyeball, which
is what we want. And now let's add a bit
more animation to the eye. So what I'm going to do in order to animate a simple blink. I'm just going to
navigate through the rectangle and now
in rectangle path. I'm just going to click
on the chain option to change the size, and I'm going to make a
keyframe and one in here. I'm just going to move three
frames forward and then I'm just going to bring
the y value to zero. All right. Now we have a
nice blinking animation. Now in the next video, we are going to
animate the tentacles.
6. Tentacles Animation: All right. Now in this video, we are going to animate tentacles and we will finish
our jellyfish animation. So the first thing I'm
going to do is that I noticed that my
tentacle was missing A, so I'm just going to tentacle, and I'm sorry for that. Right now, it seems
a little bit pick. I'm just going to decrease
the tentacle a bit and I'm going to increase the length
to something like that. And I'm going to
change this color to orange and then I'm
going to duplicate. And this time, I'm going to
change this one to pink, and I'm going to
shift this one a bit to the left and
this one to the right. So we will have some balanced
tentacles like this. Nice. Now, what I'm
going to do is that I'm going to open the rotation
on both property, and I'm going to
set a key frame, and then I'm going to go
towards the second marker, and I'm going to push
this one to -50 degree, and this one, I'm going
to set it on 50 degree, and then I'm going to copy and paste the first
keyframe in here. And then what I'm going
to do is that I'm just going to copy and paste
it one more time, and I'm going to apply
the standard easings. So now we'll have
this animation. And we right now it looks
a little bit weird. So now, to make this animation
and a little bit better, what I'm going to do is that with these two layers selected, I'm going to write
path, and then I'm going to set a key frame
on path animation. And now what I'm going to do is that I'm just
going to go towards the convert vertex and
with the layer selected. I'm just going to drag
the point like this. And then I'm going to go
towards the second layer and I'm going to try
to recreate this one, and let's just solve it so
we can adjust them better. So we want to have
a perfectly shapes in the center. That's nice. Now, when it's in here, I'm just going to click one, and then I'm going to
do a shape like this. And for this one, I'm just going to do a shape like this as well. Now, on the next step, I'm just going to copy and
paste keyframes and this time, I'm going to extend
the pasting keyframes because I want to offset them, which I will show
you in a second. And I'm going to apply
the standard easings. Now, let's watch.
Well, right now, they seem super weird. Now to fix that, what
I'm going to do is that I'm just going to
select the key frames, and I'm going to offset this for two frames and I'm just going to drag these
keyframes all the way up. Now, offsetting the key
frames all depends on you, so you guys need to play with keyframes to find
the best result. So now, as you see, we
have something like this, which is close to what we want. But now, what I'm going to
do is that I'm just going to duplicate this layer and I'm
going to place it beneath, and then I'm going to give
it a bit darker shade color. And I'm going to
push it tours right. Now I'm going to select these keyframes and then I'm going to reveal the
key frames again, and then I'm going to offset
for more, two more frames. Then again, for this one, I'm
just going to duplicate it. I'm going to get the color and then let's just
move it beneath. Again, with this
pass highlighted, let's offset a bit more. So as you say, this
is not just a rule. You can play it
however you want. And as you see, we have finished
our jellyfish animation. And now in the next video, we are going to focus on how to stylize the jellyfish. Okay.
7. Unerstanding Gradients And Glow Effect: Now, before we get
to the design phase, there are two important
concepts that you need to know in order to become
better at the styling. The first one is color
and the lighting. Now, there are many
ways to achieve the gradient effects
in Adobe After effect, but there are two common ways
that I will talk about it. Understanding how to work with gradients will help you
understand this video better. On the left side,
we have a circle made by Adobe After
effect shape two. By clicking on the fill option, you can choose from various
styles for your shape. Now, you can control
the color range by changing the start and end
points of this slider. Now, the second circle is
made by gradient rap effect, which you can access by selecting the effects
and preset tap, which is located in here, and then type radian rap
and apply it to your layer. Now, the gradient wrap effect
has in start and end point controllers that allow you to control the color
range of your layer. Now, there's one
major difference between these two circles. For example, if I select the circle two layer
and I start to move it, the effect starts to
move with it as well. But unlike the circle one layer, the color range will
not change when moved. Now, we'll use the
shaped gradient for the rest of this video. However, there is a fix for
making the effect not move. Well, select the
circle two layer, hold and then click on the start of the ramp
to actiate expression. Now, right to co
value to fix it. Now, as I do that, the
start point will jump away. I need to readjust it. Now, I will copy the expression and I will paste it for the end of the ramp as well. Okay. So now it works well. Now we want to take a moment and talk about the glow effect. Now, in order to take your
gradient into the next level, you need to add the glow
effect into your layers, and there are two ways
that you can do it. Well, the best way
that you can create a stunning glow effect for your layers is by using
the deep glow effect. However, if you don't have the deep glow effect
for this course, you can use the drop
shadow effect to create a similar effect
to what we want. So now let's begin. Now, in order to access
to the deep glow, I'm just going to
select the layer, and then in effect
and preset tab, I'm going to just
write the deep glow. And then as soon as I
apply it, as you see, I will have a nice glow effect
to this rectangle layer. And now, in here,
we have a radius, which we can change the
radius of the glow effect, and also we have exposure
which will affect how bright and dark the
glow effect should be. Right now, I'm going to
set it on one, And lastly, we have the plan mode in here, which you can change
it from add to screen depending
on your animation. Now, assuming that we don't have the deep glow plugging and we want to create this manually. Well, as I said before, it will not be as good
as the deep glow effect, but we'll try to create
something similar to this one. Well, in order to get sort
of the outer glow effect, what we are going to
do is that I'm just going to select the
drop shadow effect, and then I'm going to write
the effect drop shadow. And I'm going to drag it
towards the rectangle layer. And as you see, nothing will happen because
we need to set the opacity on 100 and then I'm just going to change the color from now
to blue so you can see, and we need to
increase the softness. So as you see, we have some outer glow, but it's not close to
what we even want. So to fix that, we need to set the distance to minimal
numbers such as zero. Then I'm going to duplicate
this layer, and again, I'm just going to change
it to a brighter shade, and then I'm just going
to increase the softness. For example, I'm
going to set this one to 400 and this one to 200. Again, I'm going to duplicate
this layer one more time, and this time, I'm
going to set it on 600. So we have something
close to the outer glow. Now, in order to
create the inner glow, what we need to do is
that we need to add the outer glow effect in
the layer cells panel. So now if I add the outer glow, as you see it will
affect everything. So to fix that problem, I'm just going to
duplicate this layer. I'm going to press
control plus she plus e to remove
all of the effects, and then I'm going to
create outer glow effect, and then we can use the spread, and then we can use this size. And Ceter to get nice outer
glow around our shape. Now, we can even
push this effect further by adding an inner glow. Which will exactly do
the opposite thing. If we open the inner glow, we can use the size and choke effect to create
something like this. Now, as I have
mentioned earlier, if you can get the
deep glow plug in, which will help you to stylize and make
your animations better. But if you can't afford the
deep glow at the moment, you can use the
drop shadow effect to create something similar. Now with this knowledge, let's get back to the jellyfish and we're going to continue
the styling the jellyfish.
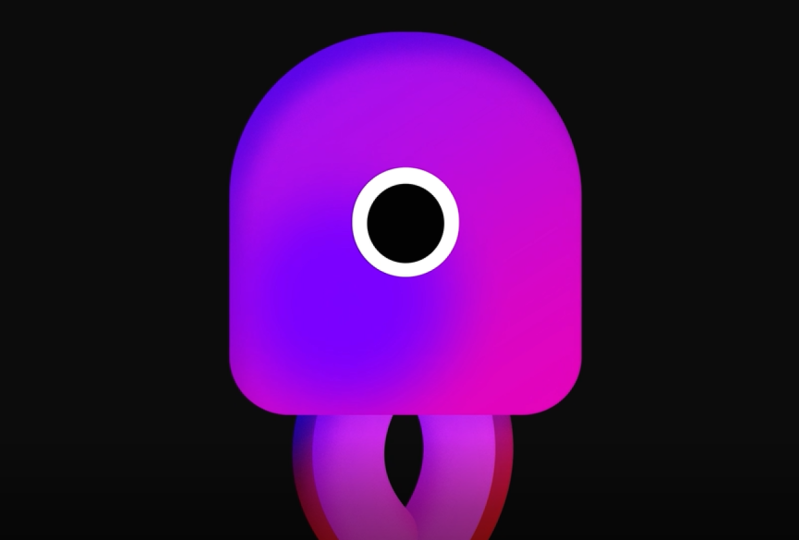
8. Applying Gradient To JellyFish: So far we have made
this animation, and now it's time to stylize it. The first thing I'm
going to do is that I'm going to duplicate
this composition, and I'm going to call
it gradient style. And then I'm going to open
the gradiate install. Now, the first thing we're going to do is that we're going to use the layer styles in order
to set up the lighting. To do that, what
I'm going to do is that I'm going to slow the body, and then in order to have
access to the layer style, I'm just going to
right click on it, and in the layer style section, I'm going to select
inner shadow. Now, in the inner
shadow section, the first thing we're
going to do is that we are going to create
a light source. To do that, I'm going to
increase the distance, and then I'm going to
increase its size as well. So I'm going to set it on 50
and then 50 on here as well. And then I'm going
to add a bit of noise by setting
the noise on 12%. Here's the light source, lastly, it's just set it's
mode on overlay, and now we have
something like this. Now, in order to
add the gradients, I'm going to open the layers of cells again and this time, I'm going to add the
gradient overlay, and now I'm going to open
the gradient overlay, and I'm going to add
on added colors, and I'm going to
change the colors. Now, in here, you can change
the style of your gradient. For example, you can choose
between the diamond, angular or even more. But for this one,
I'm just going to set it on linear
gradient for now. So here's the base design
that we have in here, and now I'm going to add a bit more by adding another gradient. To do that, what I'm going to do is that I'm just
going to duplicate this layer and I'm going to call it the body gradient mask. And then what I'm going to do is that I'm
going to go towards the lips tool and let's just remove the layer style by pressing delete on this one. And now let's draw
a mask around here. Oops we need to make sure
that we are going to select the tools that creates masks and then I'm going
to draw a mask like this. Now, on the next step, what we are going to do is that I'm going to go towards
the effects on, and I'm going to add a effect into the body gradient mask. And I'm going to
change its color. Now, I'm going to press F to
reveal the feather option, and I'm going to feather
the mask like this. So we have another gradient
like this in here. Now we can play with
the color at pit more. Now, this might not be
still what we want. On the next step, what
we are going to do is that we are going to
add deep glow effect. So I'm just going
to add the deep glow effect to the body. As soon as I do that,
you'll see that our body changed and we
have noise glow in here. I'm just going to
change the radius. That's nice. Now it's
time to create our param, so let's create a new solid. I'm going to call it Bacon. Again, I'm going to add
a fill effect into it. Let's just move it beneath. And now let's just
change its color. And now on the next step, what I'm going to do
is that I'm just going to copy the layer
styles from the body, and I'm going to paste it for
the other layers as well. And what I'm going to do
is that I'm going to open the gradient and I'm going
to change the color. And then I'm going to copy
the layer styles again and I'm going to paste it for
the second layer in here. Now, for the third
one, what we're going to do is that we're
just going to paste it, and again, we are going to
change the gradient color. And we are going to
copy it and we are going to paste it on
this layer as well. And lastly, we can get
the deep globe effect, and we're going to paste it
on the other layers as well. Now it looks better. Okay. And lastly, I'm going to go towards the
layer styles one more time, and I'm going to
copy it and then I'm going to paste it for the layer, and we can also add
the deep glove again. And for the final adjustment, we can increase the math feather on the part gradient mask and we can also change its color
to a bit reddish color. Well, I done.
9. Outro: Well, we made it. Thank you so much for watching
this course. It will be really nice
of you to leave out a review and sharing your
class project with me. This will help me out
for the future courses. Thank you so much. Goodbye.
 Erfan Talebizadeh, Motion Designer