Transcripts
1. Introduction: Hi, everyone. I'm Karen, and I'm super excited to
welcome you to this course, Luxe context using CoVUI
where we dive into the world of image editing
and image generation, and this software is totally
free within your computer. In this course, I
will show you how to turn simple prom into
stunning visuals, edit images with precision and unlock a whole new
level of creative freedom. Or with tools that are
accessible to everyone. So what we are going
to learn together, we are going to learn how to install comp ui from scratch, we are going to learn
how to generate your first image using prompt in copuIimage editing made really
easy using flux context. If you want to change
the hair, you can do. If you want to change
the color, you can do. If you want to add wings
to cat, you can do. If you want to add a dragon
in your backyard, you can do. If you want to edit or
manipulate your own images, you can do all the advanced
features with simple steps. You can even do
branding to products, add products or remove products or add logo to an AI
character, you can do. Branding of products
is really easy. Why flux context and CF UI, because they are powerful, flexible, and best of
all, they are free. Who is this course for? This
course is for freelancers, digital artists, and obviously, if you don't have any
knowledge about AI generation, you can take this course, and anyone who wants to love experiment with new creative
tech. What do you need? You need a computer,
eight GB of RAM or 16 GB of RAM and eight GB
or 16 GB of graphic card. If you have these requirements fulfilled, you can join in. I can't wait to see
what you create. Let's get started so
in the first lecture.
2. Install ComfyUI for Windows the right way: Going to install Kofi UI with a press manner because there might be some
change in the step. So for that reason,
we are stalling or deleting all the files of
Kofi UI and reinstalling everything from the scratch
so that you might not get confused because as
the technology shift, we also have to
update ourselves. So first, let's
understand how to install Cf UI in
a perfect manner. So first, we have to prepare
some file to install that. For we have to go to. So here are the two links. So first, we have
to install Git. If you have not installed
the Git version, you have to install it,
download for Windows. You have to install
it. You have to download the Git version here. So you have to install
Git 64 version. I will provide this link in the resources so you
can find it easily. Simply click this. After that,
you have to install this. Simply double click
it, install it. So you have to go to
your CompuI Github page that is CompuIlas desktop. So Compi has
launched its client, so you don't have to install
this environment anymore. So you have to down
Windows NVDA NNS and SIS or if you have MacOS,
you can download this one. You have to click
on Download button. Once you click on Download, download will start
automatically. Let's wait for some time.
It is about 108 MBO files. Wait for 3241 facon. And now click on Install. Let's open it.
Let's open CompuI. So here is our CompUI. We have already
installed this kit, and now we are going
to install CompuI. So let's double click it. So now Comp UI Window is pop
up and it's very colorful. Let's get started.
Now we have to select NVDA because I'm using
NVDA graphic card, then I'm using NVDA Cuda device. And if you are using CPU
and if you don't have NVDA, you have to select CPU mode. Let's next install it
in the C app menu. Let's install it somewhere else. Let's install it in New folder, that is new Comp UI. Let's install it here, select folder, and
install it there. App roaming app data
program UI electron source. So here's the system location, Cf UI going to use. You will C drive, press next, migrate from existing
installation. If you have existing
installation, we can copy your existing file. So let's not copy
any of the files. Let's keep it next because we have already
deleted the files, update automatically.
Uses matrix. Yes, we need to see what
uses matrix mirror setting. Yes, Python install mirror. So let's make it installed, and it will take so much time and your
Internet connection. It's going to be installed
many bigger files for you, so it will take some time. You also have Python
version 3.10 or latest. You simply have to go to Python Download and
download Python. This link I will provide
in the resource Sext, so don't worry about
that. Install.
3. Update ComfyUI for Windows Portable Version: So let's quickly go
over how to update Comp UI if you are using Windows portable version,
not the texto one. So first step is open your Comp UI folder and look for the Cofire Windows
ctable directory. Inside that, find and
open the Update folder. Now, you will see
three bat spies. Update Comp UI, update, CofiUI and Python dependency. Update Cofi stable. To update Cofire to
the latest version, just run these 351 after one. Double click each file, wait for it to finish it, and then move to the
next one. That's it. This process will
make sure Cf UI and its dependency are
all up to date. Super easy and quick. Now, restart your CUI again. That's all. See you in the next lecture. Thank
you for watching.
4. After installation generate your first image: So once your installation
is complete, another windows will pop up, that is getting started
with a template. All these are examples
you can use as selected, Haz a flux, Dave
snail, in print, can dep redux model,
image, control net, upscaling, video area
composition, three, audio. Let's start from the
basic image generation. Let's start from the
image generation to loading the graph flowing
nodes are not found. I automatically show
all information in front of you and here is the checkpoint that they
want us to download. Let's download this,
wait for some time. Once you install it, you simply have to cut
it. That's odd. Now let's run a prompt. This is first time
we are going to run it in our software. Let's click here is the image. Wow, we have beautifully
created our image. This is the first time that
we have created our image. Now let's head over to our
workflow and interface how we can use this interface and start creating our
workflow on our own. You will learn a lot from this. Thank you for watching. See
you in the next lecture.
5. Update comfyUI within the software: How you can update Cf UI. Again, there is
another Ato update CFI, how you can do that. Here is the window
that will pop up once you launch your CFUI. You can install now
and restart CUI, or you can go to manager, once you click on Manager, update all custom nodes.
That's all you have to do. Let's install it. Once you Clic on install, it will take some
time to install or a startup task has completed. You have to click on Restart. Once you click Restart, CI will automatically
relaunch itself. If not, you have to click
on CUI, double click it. Now your CUI has been updated, wait for some time, and it
will load automatically. Let's click it, Install
now and restart Comp UI. It's asking me to relaunch it. ComfUI has an update and yes, its icon is also changed. Let's wait for CompuI and
it's installing itself. It may take some time. Your
ComfUI has been updated.
6. Introduction to Flux1 Dev Kontext: Let's start with what flux one contact table is all about. This is a powerful open
source image editing model from Black Forest Lab. It can understand both text
and images at the same time, which means you can
give it instruction in plain English and it will
intelligently edit your image. It's great at keeping character
and object consistently, even if you make
lots of changes. If you want to edit an
image multiple times, things like face, pause, and layout stays stable. It's really cool. Now it's easy to use. So there are currently three
main versions Pro Max Dave. Pro is for commercial use, Max is experimental version. Dave is open source, perfect for research
and people like us, how to download and
required models. These are the information
that they have shared, how to download, and
where to download. So we have to download
diffusion model, VAE model, text encoder, and these are the folders that we have to
download in each of the Pis. Each Pis we have to download
in each folders accordingly.
7. How prompt work in Flux Kontext: Now let's talk about how to give instruction or prom to
flux one contact tap. About the basic modification, if there is any easy change, change the color to
that. That's all. Keep the wife,
change the daytime while maintaining the same
style of the painting, and if you want to
transfer the style, name that style, transfer
to dash art style. That's all. Be specific, preservative, preserve
features step by step. There is something
I call golden rule. The more details you give,
the better the magic. Context Dave loves
his specifics. Download your files, put them in the right place and get
creative with your prom. Experiment, have fun
and let your image run. Don't worry, this
is just an overe. In the upcoming lecture, I will share the workflow with you so that you can
just drag and drop and use them directly in the CFUI and start creating
images right away. All the download links and
all the file location, I will be sharing you in doc
file. Don't worry about.
8. Download files in the right folder model and VAE files: You have to copy all this
folder into the fui into your CUI user and
default workflow. You simply have
to copy and paste all the folders that you
have received in Zip file. So you have to
extract them here. After that, you simply have
to go to your workflow and click on this
folder, workflows. That's all. And after that,
you have to repress it. Once you rephrase
it, all the folders with the workflow
will appear here, how many workflow they have. So first, we are going to explore the image
generation using context. How we can do that?
Let's install it. Simply, you have to drag it
or simply have to click it. Once you click it,
once you click it, it will ask you to load
all these missing nodes. You can install,
install missing nodes, apply changes, place restart, or you can do by
doing open manager, it will show you all
the missing nodes. Right now, we have already installed the
missing nodes so you don't have to install it again and you simply have
to restart it. All right, team,
here's how you can get everything set up
for flux contacts. Super simple and stress free. Now after installing
the node system, you will need a few key files to get it starting that
diffusion model, VA file, and other
important model files. Where do you get
them? Option one, check the PDF in the download
section of your course. It has all the links you need. Option two. When you open
the workflow and CompUI, look for the nodes section. Here are the direct
links you can click to instantly download
each required file. Put files in the right folders. After downloading, make sure you place each file in
a specific folder. Inside your CofUI directive. Once you download it, you
have to go to your CUI, in the models, here is a
model diffusion model, and you have to download it
here in the diffusion model. You have to click
it and install it. It is around 12 GBOFle. We have to wait for it, and for the smaller version, you can use this
or this variant. It is depending on the VM
you have because it is for the 12 GBO vim and these are for the eight
and six GBO VM. After that, you have
to download T five VL. That is T pipe VL
XSL encoder, Q GGUF. You have to download this
clip Encoder from here. Once you click it, the download will start automatically
and you have to move this file into the specific folder
that is models and clip. Once you go to CUI,
like we did before, once you go to CPI in
your core folder of Copy, you have to go to models and
search search for clips, here you clip, click it and
you have to install it here. That's here. For the
smaller version, you have to install
this variant. It is for eight GB of frame or six GB of MM or
four GB of frame. It is depending on the VM
because it is for the 12 GB, at least for the 12 GB of VRM. For the VA E loader, we have to install it
in the VAE folder. I recommend you to
download it again because all these are updated file according
to the CFI UI, so you can install it
in the model and VAE. Let's find out in
the models and VAE, here is the folder and
you have to install it. I have already downloaded it. It is around three MBO file. After that, load scale model. You have to install it into the Comfy model is
scale upscale model. You have to download this file. It is 63 Ambio file and you have to install
it in the upscale model. About the nodes installation, we have already did from
manager custom node manager or missing nodes custom nodes. You have to search
for custom node. If there is any,
you can install it. So they are custom node
that we have to install it. Let's wait for our main file
that we have to download it. After that, we will run CPUI
and if we face any problem, we will work accordingly. If you ever unsure, just refer back to the PDF in
the download section, it's got screenshot and
step by step instruction. Or if you are working
inside CompUI, those handy links in
the workflow notes will take you straight
to the downloads. That's it. Download, organize, and you are ready
to start creating flux contact tape. See
you in the next lecture. Thank you for
9. How to Install missing nodes: So we have installed
UI EZ us and RG three. As you can see,
from the manager, you can go to install missing custom node
or you can search for custom nodes like CofUI and search for Z. I have
already installed it, as you can see, lean, you have to check for
it and install it. After that, you
have to search for another node that
s RG three C PUI. As you can see, it has a 2012 stars or reviews and
you can install it from here.
10. Using Kontext model Generate out first image: We have already installed it. After that, now this is our first run of contacts
day plus upscale. I have added the upscaler here. You don't have to
worry about that, you can ignore it and if
you want to upscale it, you can upscale the
images further. Or you can do that. You
have to simply keep your seed same that all, you don't have to randomize
this or increment it. We are working with same
seed. You can change it. It's up to you, just click
and change the number. That's all you
have to change and your image will also be changed. Right now, let's change
the seed to 5050. This is the seed I'm
using right now and let's run prompt first and I will explain you the workflow
how it's working right now. Let's run in and
wait for some time. So this is the prompt and adventure as Dog
astronautipping, and this is the result. Result is really
good, as you can see, how this workflow works, first, it's load the
diffusion model. As we know the diffusion model is our flux tape
context this time, it's not flux, not flux SNL
and any other checkpoint. There is no diffusion model. Right now we are using
Dave contacts, FP eight. Now, for the dual clip encoder, this is the same as for flux that we have
used before and now, it does not have any negative
prompt, as you can see, it does not have any negative prompt and
it has the positive prom, this is it for the
negative prompt, they have used another
condition that is zero out. This is the one that is new. They have shared in
this workflow from Blackab team and after that
we have a flux guidance. Before we have used
flux guidance of 3.5, but right now it's
working on 2.5 and it is recommended to use the
guidance of 2.5 for contexts. For K sampler, this is the brain which
encode everything and the step that we are using for context is about 20 for the 20, the result we get for flux
context is really good. I recommend you to use
a step 20 in VM used, it is basically used for VRAM to clear out the
memory that we have used before so that our workflow works
seamlessly and perfectly. You can enable or disable
it the upscale, yes or no. Once you click it, it
will automatically generate same result
in another run, you can simply enable
it and it will run automatically and upscale
your image by four X. As you can see, the
load upscale model that we have used is four X, so it will upscale by four X. We have used 1024, so it will multiply by four. So the result we get is
about 4,000 pixel of image, which is a very high quality. Right now it is at
d quality of image, which is square one, as you
can see, 102, four, 1024. Let's disable it right now and
jump to our next workflow, which is image generation
using Context GG. We are going to use same prom here like we have used here. Let's jump to this
11. GGUF Kontext missing nodes installation: There, welcome back
to this course again. Right now, let's
copy this prompt and click and open this Wblow. Right now, we have
no missing load, but we have Unit Loader, GGF, and Dual clip Loader Gf. These are the missing file.
We have to install it. How we can install
it, as you can see, flux contacts Dave at GGUf. We have to download
this file from here. Once you click it, it will
download automatically and the file is about 12.8 GB. After that, you have to
install TX encoder GGUF. That is T five VF quight. You can use smaller verson
if you have a lower VM. Right now I have 16 GB of Vim, so I'm using our qu eight. Let's click it and start
downloading it again. So we have a 12 GB of GGUF and encoder is about
five GB of encoder. We have a encoder of five
GB and context is 12 GB. After downloading, let's jump to future and after you
have downloaded this, you have to run it because
missing node type node. We have some error here. Let's find Unit Loader
GGF and missing node. We have some missing node here. Let's go to edit repress
node definition. Let's do it and
let's run it again. Okay, the issue is
still not resolved. Let's unit Loda GGF, dual clip loader GGF. You have to find install
missing custom nodes. Yes. We have two custom node
that is not installed here. We have to install
it one by one. Latest select install
this one also. Install it. Now, restart again.
12. Understand the flux Kontext workflow each node: We are going to
understand our workflow. That is flux contest
tape plus upscaler. In this workflow, in CFUI, we will walk through every
node you see on the screen, how each piece fit into the magic puzzle of
AI image generation. By the end, you will not only understand what
each nodes does, but you will also
have the confidence to experiment and create
your own workflow. It's going to a very
important lecture. I break it down in
a very simple step so you can understand it easily. First of all, you can see
load diffusion model. From the left side on
upper left and side, you can see load
diffusion model. What it does in a
simple language, imagine this as choosing
a brain for your AIRtist. What it does, this node
loads the main model. That is flux one Dave
context in this scenario, or you can use flux one
Dave or flux one SNL. If there is any checkpoint,
you can use that. In the future, if there is diffusion model created by black labs, you
can use that too. It will generate your
images. Why it matters. The model is like the style and skill set for
your AI painter. Choose wisely for
different artist result. Here is a small tip. You can swap models here to get different vibes from the photo
realistic to cartoonist, depending on the model
that you are using. Now let's go to different part
that is dual clip loader. Think of this as giving your
AI two sets of glasses. To better understand
for your words. The prompt that we add into prompter or in the clip encoder, it will understand that English. That's all or any language
if it can understand. What it does, load two
clips model that is clip one Sapner and FSCLF 16 Sapner. As you can see on your screen, clip model help the AI
understand your text prompts, why we are using
two clip encoder. Sometimes using more
than one clip helps the eye capture more nuisance
or style from your prompt. One is understand the English that the prompt has
specific in it, or if there is any style, the other will work on it. That's what it will do. Playful analogy. I like having both a poet and a scientific interpretation, your instruction for the AI. Now, let's understand
clip text encoder, where we add prompt
or give prompt to AI. It basically converts
your written prompt into a language the AI can see
and feel and understand. In 010101. Now let's move to other part that is flux
guidance. What it does. First of all, this is
your AI personal tener. Keep it on track
with your vison. It guides the image
generation process using a prompt and a clip model. The guidance value control how strong the AI stick to a crank it up for more later results or just down for more
creative freedom. That's all. There is
one fact about it. Too much guidance can
make the AI stubborn, sometimes a little freedom
leads to happy accident. What it does mean,
it's only tell us that if you
increase the guidance, the AI will stick to our prompt and give you a result that
you might never think of. Also, if you give a
loose point that is 2.5 to 3.5 flux guidance is perfect for image
generation so that AI can think on its own and give
you the desired result. So now let's move to another part that is
conditioning zero out. A result a reset
button for creativity. What it does, clears or reset any leftover condition
for previous run, ensure your next generation
start with a clean slate. After that, here comes load VA, the AI translator for
turning dreams into pixels. This is where the magic happen. What it does, loads the
variational encoder, that is VAE in short, which helps decode the
AI internal image in something you can actually
see model used aa dot Safner. This is a model that we
have used, VAE safe. If you want Suba change the
look of your final image, so you can experiment
to find your favorite. That is VA encoder, you can find on Civit AI
on any other platform, you can find it and
use it so that you can give us special test
to your final image. After that, ampity as
T three latent image. What it does setting the
stage for your masterpiece. In a simple language,
as you can see, if we use tant tenet pixel, it gives the ampute stage or
amp space for our encoder so that our image will come in same exact resolution or
pixels like we have given. If not, it will always
give you in square size. It prepares a blank canvas
in the AI internal language, that is we call latent Ispace. Width and height, you
can define as your own. If you want to use it in real, you can create a real format
or in the real resolution. You can do so using
latent image. Batch size, how many
images you want to generate at once.
This is what it does. Now, let's go to K sampler, the conductor for
your AI orchestra. What it does controls the actual image
generation process. How many step randomness seed, and which sampling
method to use. Let's understand case
sampler because it is an important part that
we have to understand. Imagine you are going on
a road trip in a car, a beautiful AI generated image. Keampler is like the
driver of the car who controls how the journey
happens from start to finish. Seed is just like
GPS coordinates. Just like entering
a location pin into your GPS or Google map, the same seed will always
take you to the same image. Changing the seed, you will end up at a different
destination. That is image. After that, is steps number of
turns on the road. So steps is just like number
of turns on the road. More step are smoother and
more detailed journey, fewer is step, a quicker trip, but maybe the image
is less detailed. You have to simply understand
once you increase the step, your machine has more time
to create this image, fewer step, fewer details. Let's talk about CFG,
classifier free guidance. This is what we have to tell the AI how strictly you
have to follow the map. Low CFG, you drive freely
taking side roads, anything you want,
creative results. High CFG, you stick exactly to the GPS route that is
prompt for accuracy. It basically helps balance
creativity versus control. Now sampler, that is dular. This is the driving style. Different samplers are like
different driving styles. Some are fast and
aggressive like Euler. So are slow but scenic. Like DPM plus plus. You have to understand
and experiment with different cellular
or different sampler and all the others are balanced. You have to
experiment with them. Each gives a different
feel to the final image. Design, denoise, how much you clean the wind seal.
Denoise what it does. The AI start with
noisy blurry image like looking through
a dirty wind shield. Once you clean the wind siald, the cleaner the image. Low denoise is equal so low denoise, more
original randomness. High denoise, you clean
the winds in mode, stick closer to the
prompt and less chaos. Once you increase the denoise, you will get a random image. The AI will change many things in your image
and give it a creative look. Once you increase the denoise, it will stick to
the prompt and it will not change major
things in the image. In short, K sampler
is your skill driver carefully navigating the AI
car with tools like Step, CFG and sampler to
make sure you want to arrive at the exact
image you are imaging. Here comes VAE decode that bring your AI dams
into the real world. It decodes the AI internal image into the viewable format
like JPEC or PNG. This is where the magic
becomes visible or the prompt that you
have given is visible. Clean VRM used, tidy up
after the creative mess. It does simple thing that
clear your video memory, that is your graphic card, I clear the RAM in it, that is used during the process, and keeping your computer
running smoothly. It prevents crash slowdown, especially on long
creative session. Save image original. This is the gallery
for your masterpiece. This is where your image
will save and the location that you have given to the
computer or your machine, it will save automatically
in the comp output folder. That's what it does. Simple.
After that, enable upscaler. It's basically upscale your
image in a simple language, increase the resolution
of your image, increase the softness
of your image. In the upscaler, once
you go to upscaler, it does same work as the main workflow that I
have explained to you. It just use upscaler
diffusion model and dual clip encoder
into the a sampler. That's all and the
process is same. Once you change or
experiment with other value, your upscale image will also
get affected accordingly. That's you have to
understand and it takes some time to increase
the size of the image. One protip. Always remember
the number of the seed, once you forget the seed value you will never get the
same result to upscale it, you have to fix the seed number
so that on the next run, the AI will generate the
same image and upscale it because once you
randomize the seed number, the AI will never upscale the same image once
you run the prompt. It will generate a image again and upscale that new
image, not the previous one. That's it for this lecture. I hope you understand the
workflow in a simple language, and if you like this course, please share your review. Thank you for watching, see
in the upcoming lecture.
13. How to upscale any image and Understand GGUF generation: Up installing it, you can find that it's now not showing
any kind of red error. Let's run it Adventure
Helgo Asnaut. Let's run this prompt, like we have used before. It is the same prompt
that we have used before. Let's wait for some time. For the seed, we have
used 050 right now. You can change it to any
number. It's up to you. Here's our result,
as you can see, it looks nice and
really perfect. It is very clean, love it. Results are really Fine. And if you want to upscale it, you can simply enable upscale
and simply have to run it. That's all you
have to do, and it will take some time to upscale. Like run it. That's
all you have to do. It will take some time to upscale it and if
you love the result, you can move forward and if
you don't love the result, you can try again with
a different value. If you want a different
type of result, you simply have to
change the seed here. That's all. You can
upscale your image. Also, you can generate unlimited images
using Context, Cf UI, increase the size of it and
I prefer you if you have a lower VM or lower graphic card or lower GB of graphic card, you can prefer lower
version of GGU. Right now I'm just
canceling it out. Execution has been interrupted and it will take some
time to cut it out. Now, let's go to
another one that is image editing and right now we are going to
combine two images
14. Understand combine 2 images and What not to do: Some people, it might take different time according to
the GGUfversion F you have used and about the main
version of context. For me, the GGF version
tos very long time, about ten to 15 minutes to generate image.
Let's check it out. As you can see, it took about five 9 seconds to
generate this image. So for this version of image, it took about another 1 minute it just generate the images. For me, GGUFs not
working that much fine, but I think I have to use a lower VRAM version that
is q six or our quarter. You can download it from here. You just have to click small variant and it
will redirect you to GGUF or Gap versen
of lower VDAM. You have to download
it from here, you can apply anything. But according to the
nodes in the model card, you can see that at least
q five and larger version is better in giving the
results in image generation. It's depending on the
variant that you have. At this you must
have a four GB of rem all lower, it
depends on you. You can check it out. And depending and test it out. Which one is giving
you a better result or taking less amount of
time, it's good for you. You simply have to test
or experiment it because I have not experimented on
this workflow that much. I love the result of eight. It's fine for me. Let's move to another part of
image generation. Let's go to workflow
and library and go to image editing and go to
combination of two image. I'm using this image that I have generated before and right
now I'm using this image. So let's see how it will work. After loading the first
image and second image, let's keep the prompt
in a desired way. That is, right now, I place the text, a prompt that you can see, place the man and forks
together in one scene, wipe being exact
facial features, eyes colors and
facial expression. The man is gently
holding the forks in her arm like a father
holding his baby. The scene style as elegant photography
captured with a professional DSLR camera. Soft morning light with
natural cidos Run this prompt. These are two images are being stitch now the case amp is loading and wait
for some time, it will actually amuse you every time you
run this prompt. Now our CD 30 pi, let's
wait for some time. As you can see,
this is the merge, and this is the result. I think my prompt is not that
good because of the prompt, I give me the results like this, no problem, but at least I
have given you the example. How we can change or
manipulate our images. This is me. Please
don't mind my outfit. Please mind my outfit
here, and I love it. The results are amusing. I told you, every time
you run the prompt on it, it just amuse you every time. How much time will it
take to create for me? It took about 187 0 seconds. It took about 31 point 1 minute for me to generate
this one image. Why? Because of the size of the image that I have
used and after that, it just computing
all the images here. Depending on the size, it
will take some time for you, but the results are not.
15. Understand the prompt Combine 2 images: So right now we are
trying to combine two images using CFUI with
using the context node. I will walk you through what we went wrong with our Isa setup, show you the result,
and then we will tweak the prom to see if we can
get a better outcome. Let's jump in. All right. So here's our CUI workflow. We have got two
images loaded in, one of an astronaut
in the field of flower and another image
that we wanted to blend in. For the context note,
I use this prom. Fox is walking with
the astronaut, keeping the model lightning
and colored unchanged. Sounds simple enough. The idea was to have fox appeared in
the scene with the astronaut, but keep the original
lightning and color. Now let's look at the result. As you can see, the
output is basically just a original astronaut image. No fox insight, so
what we went wrong. Here's what happening
with our prom. The prom tests the
model to add a fox, but not specific enough about where or how the
fog should appear. The model might just ignore the new element if
it's not clear. Context not limitation. Context is great
for conditioning, but it can struggle
when you want to merge two very different
subjects unless the prompt is super clear.
Image conditioning. If you don't give
enough visual guidance or use a the model tends to stick closely to the original image and
ignore suble prompt changes. That is why we don't
get the desired result. The fox wasn't eddy because the prom didn't
force the model to blend the two images or make space for the new subject and keep the model lightning
and color unchanged. Now let's fix the prompt. What we do now, let's change up the prom to make
it more direct. Instead of just saying Fox is
walking with the astronaut, now let's run the
workflow again with our new prompt and see if
we finally get that fox, walking with the astronaut. Stick around for the
result in the next video.
16. Understand the Kontext size concept: I think if you have noticed
that the dimension of this image is different and
this image is different. But still, it's find
a way to adjust both the images and give
it a perfect results. How is it possible? It
is because of this node, flux context, image is scale. Let's understand this node. Let me share what it does
in the new workflow. As you can see, double click
and add a load image node. After that, add image context, as you can see, load. Flux, context, image is scale. D click flux, context, image is scale, and after that, add a preview image. The word click
Preview image, turn. Now, once you run the workflow, as you can see how
it adjusts the size. Basically, what it does, if
you choose a image that has a size of 1024 and
run the prompt, the size you will get is 1024. But what happened when you
choose different image, it will automatically change the size to its optimum size. That will work with context.
That's all it does. In a simple language, it
changes the size according to the need of our
workflow and change it to 1024 to 1024 or depending
on the latent space that we have created of
different height and width and give
us a desired result.
17. Perfect prompt to combine 2 images: You have to understand
the prompt. Like the prom we
have used before, there is no exact
meaning of the prom. Right now, there's a
meaning of the prompt. We have to understand the
prom and create it like this. This is the one, this
is the two and place both Astronaut and Fox in one scene where they
are walking together. Wow. Amazing. The results
are mind blowing. I love this. Now if you want to upscale
it, you can do so. You simply have to enable it and run the prompt. That's
all you have to do. Combine the two
image has been done. Please experiment with it and
share the result with you. Thank you for watching,
S in the next lecture. I recommend you to save the
workflow before you close it. Once you close it,
a default workflow will load again and after that, let's go to amazing thing. That is image editing.
18. Generate image in any dimension: So now let's understand
this workflow. How this workflow work. In this image, as you can see, it has a fixed custom size that the flux contact image is scale will give the output and according
to the output, it will generate the image. But right now when you
image rating custom node, when you use this workflow, it has a custom nodes. That is a amputee latent image. This is the extra
latent space that we have generated here that will
go into the latent image. But before that,
the VAE encoder or the latent image was connected
to this latent image. Right now we have
changed the width and the height of the image and you can add it
according to it. How we can do that, let's use another image and change
the dimension of it. All these images that I have generated here is
from Adobe Firefly. I just take the references
from the Five fly. I don't have to use my brain, how many types of
images I can generate. I take the reference from
the firefly. You can do so. You can use Pinter firefly,
anything you have, you can use or you can use Chat JPT perplexity.
Is depend on you. For the ideas, I use
Firefly in these lectures. Right now, let's drag this
image here and let's change the width and height
to 1080, 1080. 10 801-080-1080 80. This is the image and
this is the pvment after the image and Latin image, we will get the result
according to our squared image. Right now, let's add dragon very angry. Add dragon to the scene, very angry with
fire in the Mouth. Let's run it and
wait for the result. Image is not that bad, but I think image is
very bad, to be honest. A red dragon to the scene
very angry in the mouth flying above the sky
realistic scene. Let's run it. I have changed
the prompt a little bit. Let's see what type of results we get because
this is really bad. So this is the result
that we get right now and it is better than before because it's now flying to the sky. But yes, I don't like that much.
19. Add object in the scene: So now let's understand
this workflow. How this workflow work. In this image, as you can see, it has a fixed custom size that the flux contact image is scale will give the output and according
to the output, it will generate the image. But right now when you
image rating custom node, when you use this workflow, it has a custom nodes. That is a amputee latent image. This is the extra
latent space that we have generated here that will
go into the latent image. But before that,
the VAE encoder or the latent image was connected
to this latent image. Right now we have
changed the width and the height of the image and you can add it
according to it. How we can do that, let's use another image and change
the dimension of it. All these images that I have generated here is
from Adobe Firefly. I just take the references
from the Five fly. I don't have to use my brain, how many types of
images I can generate. I take the reference from
the firefly. You can do so. You can use Pinter firefly,
anything you have, you can use or you can use Chat JPT perplexity.
Is depend on you. For the ideas, I use
Firefly in these lectures. Right now, let's drag this
image here and let's change the width and height
to 1080, 1080. 10 801-080-1080 80. This is the image and
this is the pvment after the image and Latin image, we will get the result
according to our squared image. Right now, let's add dragon very angry. Add dragon to the scene, very angry with
fire in the Mouth. Let's run it and
wait for the result. Image is not that bad, but I think image is
very bad, to be honest. A red dragon to the scene
very angry in the mouth flying above the sky
realistic scene. Let's run it. I have changed
the prompt a little bit. Let's see what type of results we get because
this is really bad. So this is the result
that we get right now and it is better than before because it's now flying to the sky. But yes, I don't like that much.
20. Change 1 thing at a time: This is the image, and this is the result. Results, I'm confused.
What do you think? Results are good? I think
results are fabulous. The way adjust the cloud, it's really awesome and just
get it sketch out of it. Wow. It's awesome. There is one more thing that
I want to discuss with you is that we have to
understand the prom. You have to drag this
image and change the lips. If you want to change the nose, you have to change the nose in the third step if you want
to change the fish, color, you have to change the fish
color in the fourth step. First run, you have to
change the eyes, second run, you have to change the lips, third run, you have to
change the nose, fourth run, you have to change the
color of the fish because rating image in this
context is step by step. That is why you
can't just flood out the changes in this prompt
and once you do that, it will not understand it or
it will confuse the machine and give you a totally
different result that you don't really want it. So I recommend you
to rate the image one step at a time or
one change at a time. Thank you for watching. See
you in the upcoming lecture.
21. Add panda in the scene: Another prom that I
have tried to add, add panda in the scena
call talking to raccoon. Keep color style unchanged. And this is the image
that I have used, and this is the image
that's generated. But I like the image, but it's not panda. Let's change something,
talking to raccoon. Let's change the prompt. Talking to white and black Panda or Racon in the scene, talking to White
and Black Panda. Let's run it again and
wait for some time. There is another prompt and this is the image
that we have used, and this is the result
that we have got. We tail different, but I think there might
be some we have to adjust a prompt
according to our need and like we have
shared the link here, you can refer to this link for how to prompt for flux contexts. It's important that you
do hit and trial with this and experience you get
and adjusting the prompt, you will get the better
result after adding lots of
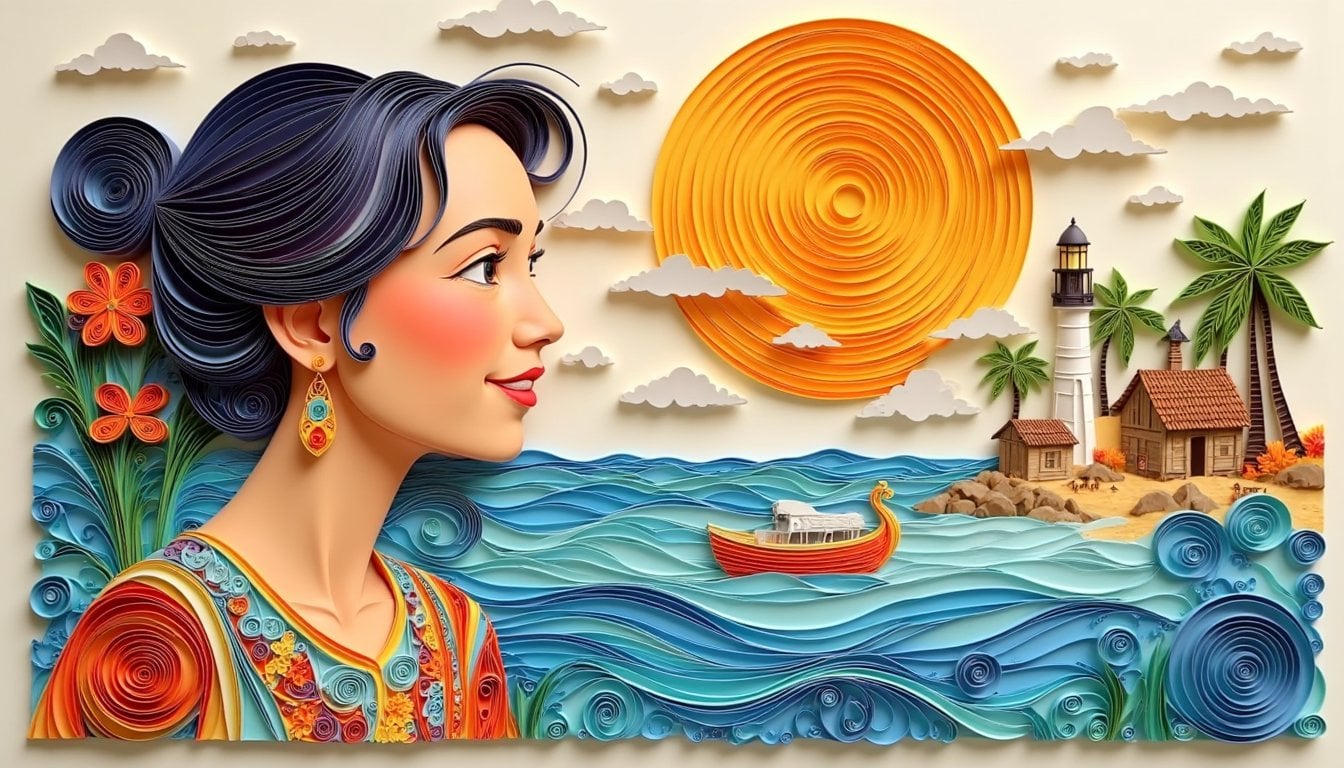
22. Convert image to line art: This is the image
that I'm going to use here. Let's drag it here. Let's understand
the prompt first, transform this image into a cute coloring page
in black and white, clean vector style, keep all
elements exactly the same, including the cat force
expression, backpack and scale. Mintain the glowing mountain
hanging stars, clouds. These are not hanging
stars, stars, clouds and surrounding nature in the same position
and proportion. Remove all shading and
gradients completely, use only two line widths, throughout the image, the
slightly thicker outline for the main contour and a consistent thinner line
for all inner details. The final results
should be clean, simple, and ready for cloring. Now let's learn the prompt
and wait for the result.
23. Change in any image: Use this image. And did this image to a custom size and change lips color to purple. Keep the scene unchanged. Keep the scene
unchanged and keep pose unchanged. Now run it. Now we are generating
another image that we took from
the Adobe firefly. I took the reference from
the Adobe Firefly and now changing the color of this
image and make her smile. Let's see how it will look like. You can see the results
are pretty fine here. It's change the lips
color to purple and with Imile and
change the smile. This is the result
that we got here and the results are pretty fine. As you can see, we
have asked it to change the lips color to purple
with Imile of the woman, keep the scene unchanged and
keep the pose unchanged. Everything is same, only
the color of the lips and the pose of the lip
that is smile is changed. I love the result, the
way it adjusts the image. And one more thing we can do. Let's check another image and let's try to
change it further.
24. Change in image of the eyes of subject: So right now I'm using this image that I have
downloaded from Adobe Firefly. I have generated it in Adobe
Fivefly from the reference. So let's open the eyes let's change unchanged and keep for same and with a smile, woman keep, open the
eyes of the woman. Now let's run it and
wait for the result. This is the result we
get. It's beautiful. I loved it and it's
really beautiful. The way open the eyes
is yes, just amazing. I love it. Now I love
the context even more. We will dive into
further in context, influx context, and transform
our images further. See you in the next lecture.
Thank you for watching.
25. Convert line art into composition: Changes in the linear color. As we have already
discussed about the transformation from
image to linear art, let's transform this
image that we have generated the linear art
of into a colored image. This prompt that we
are going to add here. Transform this line art of the. As you can see, this is the
prom that we have generated here and let's read it out, transform this line
art of the cat into a final digital
painting image. Concept art style set in
a lust fantasy landscape, keep the design in text, shape, same proportion
and details, but render it in full color
with detailed texture. Soft fabric color surrounding the cat with glowing mountains, cloud, soft mist and
magical lightning. Add ambient light rays filtering throughout the cloud
and tiny glowing particles in the air for
an enchanting atmosphere. The overall style
should be rich, colorful and painterly like a fantasy game or
illustrated storybook. Let's run this prompt
and wait for the result. This is the linear that we
have used and I loved it. Clapping. I loved it. I loved it so much that. It's really amazing.
I love it. I love it. I loved it. The way
it adjusts the image. Let's compare the original image that we have already used. This is the image. It
looks really nice. I can't actually say a word
about it. It's fabulous. After generation, it look
so nice and elegant. Everything is same. As you
can see, everything is same. According to each actu,
is really amazing. It is the important
part that you have to change the seed to increment or decrement or randomize it. Otherwise, all the
results that it will generate will be
the same because of the seed value will be the same. I recommend you to change it to randomize or increment
depending on you. I just use the
increment so that I can follow the seed number
according to the image. I love you guys because you really all my lectures and
you really love my course. I really appreciate
that you understand the hard work that I put in this course in
creating this course, learning these new things,
and sharing with you. I love that you love.
Thank you for watching. I request you to please share a five star review
with this and also share projects in the gallery and start discussion about the course. Thank
you for watching.
26. Change into different style of images: Let's try to change
this image that I have used or only dragon drop
here to a Gibby art style. You can use any
kind of style here. You simply have to
put it that style and it will automatically
change the image for you. I'm using Gibb art. We will use watercolor art. We will try to
create anime art and different types of S we
will use on this image. Let's see which type of output we will get
according to our need. I'm using Adobe Firefly. For our references, I just try to inspire from Adobe
Firefly and just generate image for you and we will try to edit or re
edit that image or try to regenerate those images in
our flux context, income FUI. You can use it for inspiration. As I am creative specialist, I have a subscription
of Adobe Firefly, which comes with
the subscription of Premiere Pro
Adobe subscription. I'm using Premiere Pro
after effect Photoshop. With this, we get about
1,000 arts per month. So next it will
automatically get 2000. I always use for
our inspiration. The way it change
the image is good. Actually good. The styles
are really awesome. The composition is really good. The way it's sharing the details in anime
style is really good. So you can transform your
images and it is really way more easy to transform
your images into anything. It's actually easy to
transform your images. Let's transform it to
water, color, style. You can ask Chat GPT to give you the style and transform prompt, it will generate many
prompts for you. You can experiment out with your images with client images
with anything you want, you just experiment it out. About the generation, it took about 1.5 minute to
generate images, about one, zero, 4
seconds, as you can see. This is the image
that I have tried to create, as you can see. The results are
pretty good, right?
27. Copy style of an image: Let's change the composition of our image to brighten the image. But yes, the way it changes
the detail and keep the composition and detailing are the same as we expected. I love the results,
no doubt about it. Now move to another workflow
that is style references. Here is our style references. Right now I'm using this
style and try to regenerate this image using our compUI
style reference image. Right now, you can use any
kind of size here also. These both are same files, so you don't have to worry
about the file here. As you can see, it has the same latent image
generator here. I'm using just here and you can experiment out with the size
also, don't worry about it. Using this art style, create a new image of, uh, man. Baby, Let's try to generate and run it and
see what it will do. As you can see,
this is the image, and this is the image
that it generated. It looked like a baby. Yes, it looked like a baby, but yes, it doesn't
have a gradient. It's just bring the image into half pink and half white with the gradient of this thing. Let's try another one and see what we will get according
to our apparent image. Now let's use this image and try to run this prompt using this image and use
this art style, create a new image of
a warrior girl with. Right now, it has bunny here. Let's change the arch style too. Fox here. Let's run it,
wait for some time. Right now, the art
style is good. It's actually generated
the image that I have shared as a reference, but I do not want
this type of here. Using this art style, create a new image of fox. Let's try this one. I created a posture of it with a warrior. Let's change it to a new
image of warrior fox, not that type of
image that we wanted. I have changed the prom
to using this art style, create a new image
of a warrior fox. Let's try the way it adjusted the warrior output is pretty
awesome and pretty accurate. As you can see, on the
solder as you can see, there's a spike and
here is a spike, as you can see, yes,
this one is different. This is extra and this
is modern we have and on the forehead of the lady, according to the
forehead of the lady, it has an ornament. Now, about the fox,
it looks blurry. But once you enable it
and run the prompt and run it will automatically resize your image
and after upscale, the result will be pretty good. After this node, after this
workflow, you can change it. You can use this workflow
according to your desired.
28. Add logo to AI generated model cloth : So this is the image
that we are going to use in our workflow right
now. Let's drag it here. I'm using it in a
product photography, and I have changed
the prompt here. This is the prompt
that I have used. As you can see, you can read it out and wait for the result. And sometime we will
get the result. Let's jump to the future again. This is the result
that we get here. It's look really identical. There is no change in it, but we want it on the left
hand side of chest. Let's move further and
change this further. Use this logo to create a product photo shoot
of a shirt profess wearing the shirt is black
and it has the logo on it. It has the logo on left
size on left side. Of size of logo is is small. Now let's run it and
wait for some time. The readers are actually
good. No doubt about it. Now our product
photography has done, how the logo will look like. Can you imagine the power
of this com UI context? This is how we can use it
in our product photography. These are some examples
you can check it out and experiment it
out according to you. You simply have to tell
the machine that you want to use this thing and the
way you want to use it, you simply have to
explain it. That's all. As you can see, it look okay, but I think it should
be smaller in size. I think I still have
to explain it further. Like like how much in size
I want it on the shirt. Can we change it further, create a product photoshoot of a military man
wearing robotic suit. Professional photoshoot,
and let's run it. I think I don't know
what we will get, but I hope we will get
something amazing. The outfit is nice. It is a military kind thing, but it is not a robotic style, but yes, the results are pretty
fine. No doubt about it. This is the prong that we have used and this is
the result that we have got and this is the
logo that we have created, don't worry about that. Let's move to another workflow. Thank you for watching.
See you again.
29. Change background of product: So this time we are
using a product and place it into different environment.
How we can do that. This time I have asked Chat GPT to create longer
version of M prompt. Let's see, Alexa
silver Wistwatch, it is not silver, it is black. W w with a burst metaltp. It's not metaltap WTP and Misticblack dial is
showcased in a high end studio. Setup style like an
elegant advertisement, the watch is a carefully on a rug piece of
nature slate stone, partially surrounded by
still crystal clear water that reflects the watch
subal and adds depth. A single white orchid
flower lies beside it. Its soft petals gently overlap the watch face introducing refined tropical
elegance in the backlog, softly focused and
exotic greenery like palm front and mona. At textures and richness
without and blah, blah blah and perfume premium let's run this prom and wait for some time
and jump to the future. This is the preview
image that it's using. Right now we are going
to use this image, which will run and we will get the results
according to our image, and this is product and we are going to use a
product photography. I chat DPT and with
the help of hat DPT, I have created a
longer version of my prom which will help
me explain it further. Or sleek black luxury with
a slim met finish case, minimistios code you can
read it out, it's a block. You can read it out
and according to it, I simply run the prompt
and wait for some time. Can you guess what
will the result? Whoaaa. This is the result
that we got clapping for it. Amamaz amazing
product photography shoot that we have
done with nothing. Can you see the change? There is a change of the
golden from silver to golden. I think there might be
a change in the metal. Met finished, rose gold, marks, showcase gate fuul. I think there might be
some change in this prom, that is why it's gold, but the results are awesome. The way it's shared the
details is really good. One more thing, actually
it's generating the image. I know it's not 100% perfect
according to the sequel. But yes, I must appreciate I must appreciate the work that it has done to this
product photoshoot. It is about 90% with
the accuracy of 90%. It's really amazing.
30. Change Hair Color: So right now I have
uploaded this image. This is the image
that we are going to use and change the
color of our image. So capoum will naturally
red rich color hearing. So it should be a red, rich color and skin appear to be a realistic look visible both cinematic depth of
face everything across the hair and run it. The face is same, but the hand and
position is different, hair color is right.
Everything is same. Let's don't use this type of and try to keep
everything is same, but the hand that we have
right now is different. It's totally different
for our image. Let's try to change the color of hair by change everything. Change the hair of the woman to Z Position, pause, unchanged. Ce the hair of the woman
to right position to t Keep pause unchanged. Facial expression. Unchanged. Let's
run it. Just Wow. The weight changes, the
color is really amazing. Everything is same,
nothing is changed, and a simple line of fromt
has changed everything. Love the results. There
is no doubt about it.
31. Change Text of image: Now let's talk about change
the text of our image. Right now I'm using this
image and let's change the shop text to
current instructor. Let's run this prompt, change the text, and
I hope this work. Right now, I think it's
not that good in changing the text according to our current instructor
that I have put it, let's try to resize the text I'm using less
character right now. I've used only current. I think it's working very fine with less amount of character. Once you increase the number of character in your
image or the text, it might break it down, but at most, I think in my
name, it's working fine.
32. Change the hair style of an image: So now I'm using this image. And using this hairstyle
workflow and a simple prom, a woman with sleek blunt above haircut and straight banks while keeping her facial
feature expression lighting overall tone unchanged. Let's earn it, and I believe
it will amuse us again. Like we have talked about,
this is the result. Everything is okay, but
yes, there is some change. As you can see, the size
of the face is little longer and here
it's round shape. There might be some
change in the image, but overall, the work
has been done pretty.
33. Remove object from image: So to remove an object, let's go to our eight number
of folder and remove items. We will use two types
of remove item. We will ask context to directly remove the
item by directing it to explaining the item
according to our object. Let's try this one first. In, let's drag this image
here and in this image, let's remove the green
curs from the woman with purple hair while maintaining
the same pose and scale, same lightning and
everything the same. We have explained it that
we have green necklace in this picture and a lady with a purple hair, we
want to remove it. Let's run this prom and wait for some time.
This is the image. Here's our result,
as you can see, it's perfectly fine with
no change in it at all, and the necklace
has been removed. It's just like magic. You just ask your AI or machine learning
that you want this, you write that prom, I
understand your words and boom, it's give you the result.
It's pretty amazing.
34. Remove object from image using inpaint: Now let's use in print
to remove the same item. Let's drag this image here. And to remove in paint, you simply have to get the in print node here
from the manager. If you have this in
paint is missing, or we can say if it's appear
in bright pink color, you simply have to go to your manager and install
the missing note. Install custom nodes,
missing nodes. You simply have to
click here and if there is any node that is
missing in the workflow, it will appear here and
you have to install it. That's all you have
to do nothing more. And after that, you have
to restart your CFUI. That's all you have
to do. Now let's move further with the neckness
and removing using in print. First, we have to
load the image, as you can see here, load image, right
click open in mask. Now let's open in Mk
area for inpnt and save. Now right click open in mask. As you can see, here is
the open mask editor. You have to mask it. You can select the thickness
of the brus. It depends on you. Now, it
doesn't have to be perfect. You just have to mask it. That's all. Now, Save. Once you save it, the mass will
appear here and you have to run the prompt again. By adding the prompt, remove the green necklace
from the woman with white purple hair while
maintaining the same pose scale, same lighting, and
everything the same. This is the same prompt
that we have used before and now run it. Wait for some time. This
is the result that we got. Now let's compare
all the images here. As you can see,
nothing has changed. The result with the
Imprint is also fabulous. Why we are using
input by the way, if we want to be able to
explain the object or the context or the contexts don't really understand
what we are trying to say. We can use Imprint
and directly ask contacts to remove this
specific area or this is specific object or we can ask it to replace the
object with something else. It's depend on us and
depend on the situation. That's it for this lecture in the next lecture.
Thank you for watching.
35. Add object into the image: So now we are going to
add a silver tiara to the woman head as this is
the image that we have load and we have to follow the same step
like we have used before. Go to open in mask Editor, select this area
using the brush. Save it run. Wait for some time, and we will get the tiara. This is the result
that we wanted and it has given perfectly. Now, as you can see, we can use the power of in
print and change the object, add to object,
remove the object, anything we want,
we can do that. Let's move further in our
category, that is Laura. This is the final lecture and using Laura is
really amusing. Once you load this workflow, you can see Power La loader. We can add more La here. It depends on us. Right now, we are going to use Glass
beam contacts La Sapna. This is the loa that we
are going to use and this is a loa that we have
to download first from AI, CivitAI open source
generative AI, and search for and search
for context, Laura. There are many as
will come up in front of you depend
on the a we want it. I think the category is
getting expanded here, anyone can use there are more
categories are adding in the a category for context before they are not
much a available here. We are going to use a specific
one that is glass prism a that is prism,
search for glass. Prism Here is the context
tape a we are going to use. Let's click it, download this
Laura in the La Download. First, you have to sign it here. After creating the ID, you simply have to
search for glass, prism, click it,
download this Laura. In the comp UI, you
have to download in the model section search
for Laura folder, and save it here. It might take some
time depending on the Internet speed you have.
36. Use lora for Flux Kontext: So after downloading the La, you simply have to
you can hide this and go to workflow go to edit,
repress node definition. That's all you have to do.
Once it's updated request, the request will update
it in some time, you have to wait for some
second, update, request it. Now our node
definition is updated. You can check for Laura here. Here is a glass in Laura, you simply have to click it
and it's selected already. By using the prompt, make this object, a glass pin
with reflex and background. This is the object. Let's run it. Let's wait for some time. This is the image. Wow.
Wow, wow. It's awesome. This is the same exactly
screen as you can see here and this is in a grasping reflexion
with a background. With this, let's conclude
our course here. I'm really thankful
that you have joined this course and
this creative journey, and I hope that you have learned something
amazing, not something. I hope you have learned
a lot from this course. Remember your imagination,
fuse everything you build. Keep pushing boundaries,
experiment boldly, and never hesitate to remix
what you have learned. A world of Art is yours to
shape, embrace surprises, stay curious and let's
flux context and comp be your next canvas for
ideas big and small, wishing you endless
inspiration and fun. See you in my upcoming course. Thank you for watching and don't forget to review this course. It really give me
motivation once you review this class and don't forget to follow
me. Thank you for
37. Same Characters all time : Let's talk about
arc consistency. Dave contacts
character consistency. As you already have
noticed that we have a arrector consistency in
the seventh number folder, it has included a Wblow with the name
character consistency. In this workblow,
I have Loda image. This is the image that I
have generated within flux, and this is woman with
purple hair is wearing an elegant flowing
black fashion dress and striking green
embroid necklace. She stand confidently with
one hand on her lips, smiling and posing consistency, the background is artistically blurred with supple sunlight, casting delicate shadows, professional fashion photography high end editorial system. Once you run this prompt, let's see what we
will get according to our so this is what we get. Let's compare both of these
images as you can see, this is the image,
this is the image, and this one is the image. As you can see, it looks with
the character consistency, yes, the look is same, the hairstyle is same, a little bit different
as you can see. I don't think they are
a little bit different. I just put the head
exactly as we want it. With the body shape structure, yes, according to a
body shape structure, it's good the
necklace that we have asked with a green color, yes, it's working now let's try
to remove this necklace, but we will try to keep
the consistency same as our arrector because we don't want the
features to be changed, let's try the prompt
according to that.
38. Project Details: Alright, you have hit the
last lecture of this course. So let's jump into our project. I want you to generate image
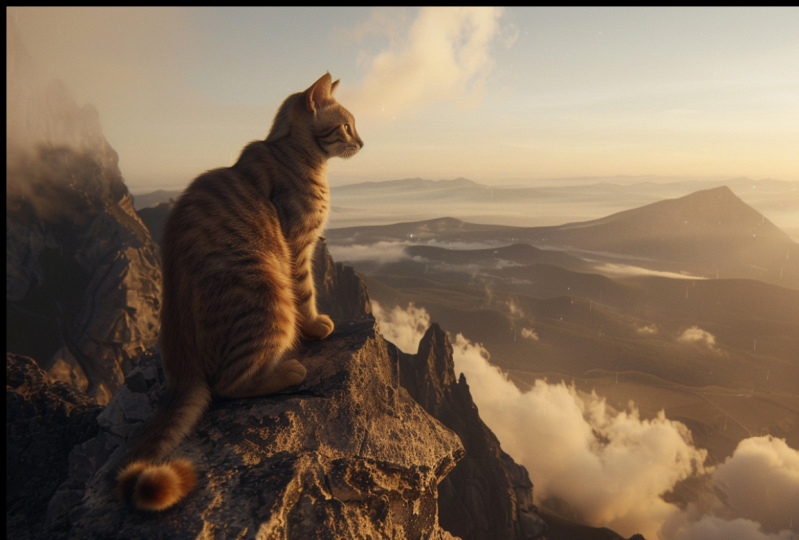
using flux context and fui. I want you to create
a cat sitting on a window sill or a
mountain landscape, so type your prompt in Cf
UI and hit the run button. After that, I want
you to manipulate that image using flux context. You can change the color of the or you can change the
cat into a cute lion. Or it's up to you. It's your imagination, whatever you want to
create, you can do so. So once you are happy
with your generation, save it in your computer
and head over to Project Gallery on Skillshare
and share your image. That's it for this course, you have done an amazing job, and I'm really thankful
that you love this course. I hope that you have
learned something new in AI image generation
and editing. If you enjoy this course, don't forget to follow
me on Skillshare so you never miss a new
class or new update, please share your
project in the gallery. I love seeing your project
and give a feedback on it. Also your work can inspire
others in the community. Thank you for
joining me. See you next time. Thank
you for watching.
 Karan Rathore, Creative Technologist: Video Editing, AI, and 3D