Transcripts
1. Introduction - Come on in!: You know that feeling
of looking at a fresh page in your
sketchbook or a blank piece of paper and feeling stuck... ...and you start to worry
that the blankness of the paper is simply reflecting blankness of
your own creativity? You're not alone. It's
a very common feeling for artists everywhere. In this class, I'm
going to share with you an art process that I
really enjoy and which always helps me warm up my creative fingers when they're feeling a little bit creaky. Enter the humble oil pastel. [Hello!] These simple sticks of creativity will be
helping us to get out of our comfort zone and embrace the messy in order to
arrive at the marvellous. With the help of a black
background to work on, which in itself will freshen up our perspective on how we
choose and use colours, we'll be using scribbly, loose gestures with our pastels to get our creative
minds moving. The great thing about
this warm up is that it can also be played
with digitally too. In a bonus lesson, I'll
be sharing examples of how the same simple
principles that we use with our oil pastels
on paper in class can be explored with the
oil pastel brush in the Procreate app. Both methods have their
advantages and just shows how our creative playtime
can always keep expanding. This class will help you to feel out your artwork
more intuitively, nudging it into
being bit by bit. You'll be honing your ability to identify the colour
combinations that you love, whilst also creating artworks made with the
freedom of knowing you cannot go wrong - because
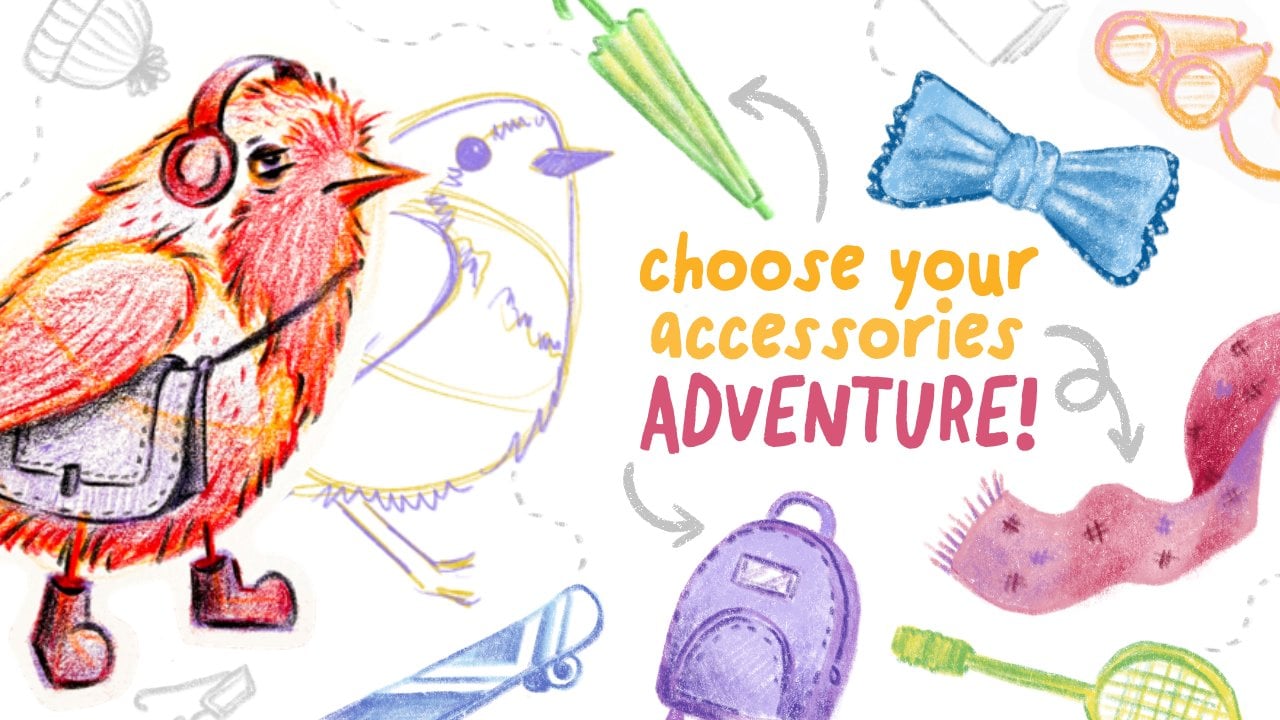
there is no wrong here! Hurrah! Whilst in class, as we learn the process, we will be drawing animals -
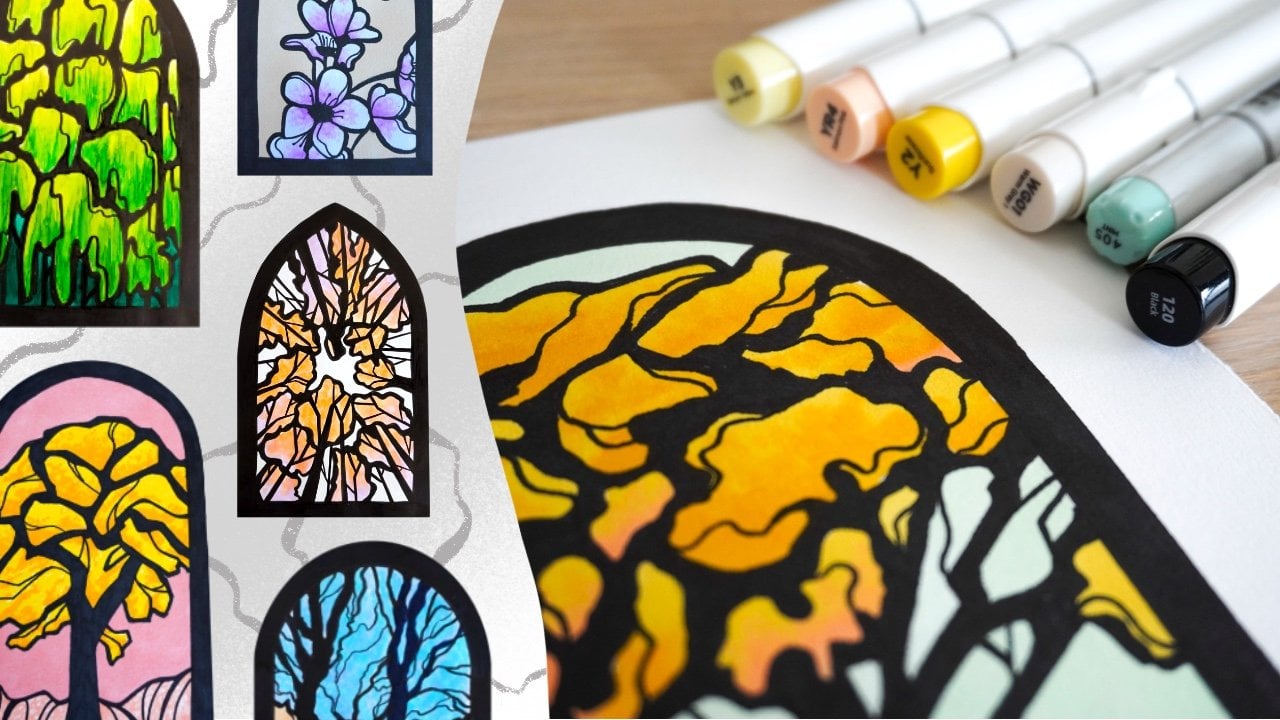
because, believe me, the fur is so much fun to draw! - this rainbow-fuelled technique can also be used to draw
other subjects too, such as landscapes and objects. My name is Gemma and I'll be your art buddy
through this class. I'm an artist maker who believes creative curiosity makes
this world pretty wonderful. From building puppets
to pulling prints, from playing with clay, to weaving a basket, there are a lot of
creative pathways out there to explore and I am very much enjoying finding my own way through them. I want you to find the
creativity that you love too, in your own way,
in your own time, and I hope that my classes can support you in trying
something new today. With that said, I'm very
much looking forward to sharing this particular
art adventure with you. So let's get going.
In the next lesson, we'll be exploring the
project a bit more. I'll see you there.
2. Project - What are we drawing?: Let's dive into the project. I'm hoping that
you enjoy drawing animals because that's our
focus in these lessons. But the great thing is the
colour process that we'll be using can absolutely be
used on other subjects too, whether that's sketching
landscapes or objects. Firstly, then we're
going to choose a reference image to draw from. If you're confident in creating animal drawings
without a reference, then please feel free to do so. But I find if I'm feeling
a little bit stuck, having a reference image
as a prompt really helps. Next we're going to switch
up our paper and try out a different coloured
background to the classic sketchbook-white, because this in itself
will help us to start feeling out our
artwork differently. Black paper works
brilliantly for this, and that's what we'll be
focusing on in class. Then we're going to grab some oil pastels to work with which encourage loose
gestural hand movements and a bit less precision. We can also choose to use
the oil pastel brush in Procreate If we are working
digitally. Step by step, we're going to create an
animal artwork together, building up our
colours gradually, and figuring out which of
those colour combinations give us the biggest "oh, yeah!" moments. And if you create
something you'd like to share, I'd
love to see it. The project gallery is a great tool for
journaling your experience and allows you to add photos of your wonderful experiments. Taking photos as you go along is a great way to look back
through the exercise later and marvel at how something that might start out as feeling quite messy can turn into something you end up
feeling proud of. If any of this sounds
daunting, do not worry. I have you covered! There are downloadable resources
included which can support you along the way, and we're going to talk about
those in the next lesson. I chose this project
to share with you, because when I really cannot
think of what to draw, this is truly one of
the ideas I turn to. And it always helps
me to just get moving again. To get
the biggest benefit. enjoy this process as
the exercise that it is. This is not about creating pristine artworks which
feel finished or perfect. This project is about
warming up your hands, loosening up your gestures, and throwing in colours that you may not usually lean into. Join me in the next
lesson to find out more about the
available resources. Let's go.
3. Resources - Things to support you along the way: I want you to know that
throughout this class, not only do you have
me here to guide you, but you also have
downloadable resources to support you along the way. You can find these located either under the
Projects and Resources tab on desktop or under the Projects tab on
the Skillshare app. Firstly, there is the
Animal Templates PDF, which provides a bunch of free reference images sourced from a royalty free
image website. So if you're not sure how to
find a good reference image, you can just choose
one of those. If you feel hesitant
about being able to draw animals freehand
from a reference you'll also find simple
outline drawings of each image in this PDF too. These line drawings give you the basic shape of the animal which you can trace onto a page. This leaves you free to dive
straight into playing with colours without worrying about whether you've got the
proportions right. For those who want
to work digitally, there will also be a
zip file of animal outlines in white as PNG files. You can choose the one
that you want to work on, import it onto your canvas in procreate, adjust the
opacity as required, and then work on top of it. Next up, there is a short
Experiment With Colours PDF, which suggests some colour combos that
you might like to try. Of course, the main
point of the class is to throw caution
to the wind and use whichever colours that you want without thinking
about it too much. But sometimes having
total freedom to choose can make
choices impossible. So if you are running
into choice overload, you can instead pick one
of these examples to try. Lastly, check out this
Step by Step Guide for a summary of the process which you can have by your
side as you play. Right, I think we
are ready to go find our materials. Off we, pop!
4. Materials - Things you'll need: What materials will you
need for this class? Truly, not many. In this class, I'll be using oil
pastels and black paper. I actually have two packs
of oil pastels to use. One is a mid price pack
of 50 by Pentel, the other is a cheaper
pack of 24 by WHSmith. I'll mainly be
using the Pentels, but I will use the Smiths
ones in a demo to show how you can still create great results with
a smaller pack. The black paper
I'm using is from Hobbycraft and is 80 GSM. None of these are
premium quality supplies or are brand chosen
for this project. Nope, they are just
what I happen to have right now and
they work fine, so you really do not need
to spend a lot of money on these kinds of supplies.
To work digitally I'm using an ipad Pro and the oil pastel brush
inside the Procreate app. The app version that I'm
using at the time of this class is 5.3.5. The oil pastel brush is one
that comes installed with the app and can be
found in the sketching menu. And that's it, It's time
to get to the good stuff. In the next lesson, we'll start sketching out our first animal. So come with me, my friend, we have fun stuff to do.
5. Sketching our Animal (incl. How to Trace a Template): Let's dive straight in. I've got a lovely piece of
plain black paper here, and I'm just resting it
on top of a pad of paper simply because my tabletop has a slight wibbly grain to it, which can show through the pastel marks if I
work directly on it. Do you remember doing
texture rubbings as a kid with chalk or crayons? Well, it can be a bit like that, so the pad underneath my page just keeps that out of
the equation for today. To start with,
we're going to use a nice easy warm up
reference image, which is this cozy
character - a highland cow. It has the best hairdos
of all the cows! This is the photo
we'll be using and remember you can find this
in the resources section. I do have a printed version, but my printer was
being a bit cheeky and the colours are pretty
squiffoo. Of course, the great thing about
this process is that our colours will be going
all over the place anyway, so all I really need from
the photo is a sense of the animal's form and the
lights and shadows across it. The fact that my
printer has unwittingly given us a different
colour filter, though, means we can use it
as inspiration for perhaps a fully pink
themed cow later. So the first thing we
need to do is sketch out the basic
outline of the cow. To do this, I'm going to
identify the oil pastel which is the closest to my paper colour,
which is the black. And then I'm going to choose the next most similar oil
pastel to that black. This means that I'm going to use this dark gray colour. In
your pack of pastels they may not be
ordered like this, or you may have a few less
shades to choose from. If so, simply look around your pack for a dark and neutral shade. I'm choosing this gray
because I want to do my sketching with
a colour that is dark enough to blend in later, but bright enough that I
can see my outline clearly. I'm going to freehand sketch
the outline of the cow. But remember, if you don't
feel confident to do this bit, you can absolutely grab
the outline template from the resources section and transfer it onto
your page instead. Here's how to do that
on darker papers. Take your printed template
and place it face down. Now grab a light coloured pastel from your pack,
such as the white. Draw roughly over
the lines that you can see through the
paper of the template. You don't need to
press too hard, just work your way
around the image, making sure you get the
core outlines covered. Now turn the template back over and place it on top
of your black paper. Grab a hard pencil and draw over the top of the outline
using a firm pressure. Once you have drawn over
all of the core lines, remove the template
and you should be left with a lovely light
outline to work from. If you are freehand
sketching with me here we're going to hold
our oil pastel in a relaxed way and just
start moving around our page. A great way to start is to find an anchor point in the reference image that
we can work from. For me here, it's going
to be the cows nostrils. I'm roughly marking them in, and then I'm starting to add the brow of the nose above it. Do noses have brows? Somebody start a discussion. Essentially to me,
this nose area looks like one big bean shape, which is rather nice to draw. Then we can add a small
arc underneath that bean, which creates the jaw. Cool. The great thing about
this image, and why I chose it as the best
starter for this class, is that there are no
eyes to deal with here. Just lots and lots of fur! Which means there is a lot of wiggle room in how we draw it. And we can relax our hand
that bit more as we do so. So moving from the nose upwards, I'm finding a centre point and sketching outwards towards
the tips of the horns. I'm just eyeballing
how wide to make them. There's no need to be precise here. With a scribbly motion I'm marking in the ears roughly. And as more elements
like this come in, I keep reassessing whether anything needs to
shift slightly - such as here, making the head just that
little bit more rounded. This cow looks like it's rocking a comb-over
at the moment. Try not to get
distracted by that. Then I'm roughly feeling
out the general hairiness, wafting my pastel up and down
the page in wavy motions, getting a sense of which
direction that it flows. Hair is always fun to
sketch, don't you think? Don't worry if this all
feels really scribbly. Scribbly is fine right now. These are simply the
bones of your piece, which will lie underneath everything that
is still to come. If it feels ugly and messy, well, take a deep breath and
try to trust the process. It's all okay. This is how it's meant to look. Don't feel like you need to work on this for
too long either. Feel out the core structure, but don't get hung up
trying to find details. Right now, this right here is as much as you need and
from this point onwards, it'll be all about
adding the colour. Ooh, let's get into it.
6. Diving Into Colour - Exploring the Dark & Mid Tones: Our general aim with this
particular art process is to move through the spectrum of darker tones to lighter tones, exploring any colours that
we like along the way. So with that in mind, our first foray into colour here is going to be focused
on the darker hues. Take a look at the reference
photo and identify any areas which feel the
darkest to you on this cow. The main area that I notice
is the cow's chin and chest. There are also smaller
patches just above the nose, between the hair inside the ears and even slightly on the
undersides of the horns. These therefore are the areas that I'm going to
focus on first. So let's take a look at the
dark colour options here. I could perhaps go for a
dark blue or a dark green. Maybe I could plump
for deep purple, a dark red, or a brown. There's plenty to choose from! I'm feeling like I'm going to
go with a blue tone first. So this one will be my choice. But remember, you can go in any colour direction
at any point. So ask your gut what it wants
today and go with that. And then we're going to start scribbling around our page in the areas where we've identified
those darker patches. Are are you ready? Try to keep your hand
movements nice and loose. You don't need to think too much about the direction
that you're going at this stage - though, if you follow the
general flow of the fur, it might remind you
which direction to carry on with later. So I'm adding in some
blue to those areas where the eyes are probably
lurking behind the fur. And yes, it is, definitely looking a bit evil now! Sstick with it. We'll turn this
cow's mood around! After adding some blue onto
the ears and the horns, I'm roughly dotting some
through the fur as well. There are lots of tiny shadows scattered throughout
the hair on the image, so we can be quite
haphazard about it, just plopping it wherever
it feels like going. So this is how it is looking, and now we're going to move
on to another dark colour. If we take another look
at the reference image, we can see that in those shadowy areas that
we looked at before, there are some patches like the jaw which are dark in tone, but are different from those darkest tones that we
just represented in blue. So we're going to choose a different dark
colour for those. We could just choose a different variety
blue if we wanted to. But I'm going to head
towards the purples. This time I'm using
it on the jaw first, but then merging
it beside some of the blues above the nose
and around the chest, bulking up those deeper tones. Now we have our darkest tones foundation laid, it's time to jump
into the mid tones. We are seeking out Goldilocks'
dream colours here: not too bright and not too dark, just happy mediums. This is a great time
to take a bit of a chance and pick a
coloor that you may not usually be drawn to
or that you might think will clash with
whatever you've already used. Therefore, my next
choice is going to be a deep but
vibrant red. Oh my! In looking at the image, we can find some
mid range tones in the ears and in amongst the fur. So that's where we'll start
laying this red down. This is the point where
we also start being more conscious of the
direction we're drawing in. If you haven't already, start to move your
strokes with the fur now moving outwards
or downwards, trying to mimic the flow
that you see in the image. Short, sharp little bursts of the pastel, laying it
down with confidence. Yes, confidence! You
have it. It's inside you! Vary your pressure
as you move around, pressing harder for some
strands and softer for others. So as you can see at this stage, during this midtone adventure, we start to get a
glimpse of what could be. The colours
are gradually starting to build
into each other and it's feeling a
little more focused. So let's step this up again and choose another midtone colour. This time I'm going to use this deep golden, yellow ochre. Immediately as it's laid down, you can see how much more
obvious this colour is. And so we pay even
more attention now to the hair direction and the types of shapes that we're making. As this is the lightest colour
that we've used so far, I'm also rubbing some onto the horns and the brightest
part of the nose. Hopefully you can see how it is starting to lift
up from the page. We're starting to lure
it out from the shadows. All we need now is
to bring it into its final stage,
exploring the highlights. And that's where we're
heading in the next lesson.
7. Highlights - Bringing the drawing to life!: Adding the highlights
is my favorite part because it's when our art
piece really lifts off. I really hope you enjoy it too. In this lesson, we're
going to be focusing on the brightest parts of
the reference image, which are the
center of the nose, the tops of the horns, and also plenty of places
throughout the hair too. I'm looking for a
colour which feels lighter than the last
golden colour I used. And my fingers are
pulling me towards trying this pale,
pinky, salmony one. So let's start with that nose. With these brightest colours, I can use light
pressure at first to get a feel for how
bright that colour is, and then can press
harder if I need to. I'm adding a sliver of the color to the
tops of those horns. Has anyone else noticed that one horn is longer
than the other? Mm, this is a wonky cow, but we're embracing that. And then we start moving
through the hair, following the flow
of it that we've already been building
up with our mid tones, but using light
strokes to pick up the edges of those
clumps of hair a bit more. In general, I start my strokes
from wherever the root of the hair would be and let the color fade off as it
moves down the strand. However, for clumps of hair, I like to place my oil pastel at the bottom of the clump
and then stroke upwards, so the colour fades as
it goes up the strand. Some clumps will have a
few of these strokes on, others will just have one
or two on their edges. The variations create a
more realistic feeling even though the colours we're using are completely
non-realistic. With these brighter tones,
it's not about picking out every
strand of hair, but in picking out some of them. Have fun with it.
Try not to think too hard about where to
strategically place highlights. See if you can feel them out. Popping a highlight down and then another quite quickly. You'll be taking in the whole of the artwork subconsciously
as you move around it. And if you sense a
bit of imbalance, feeling like you've done
too much on one side, you'll be able to
even it out with a few strokes on the other side. Keep checking in
with your reference image if you need pointers, But don't be afraid
to simply play. If you think you've added
a stroke you don't like, you can always go into the darker colours
that you've already used and just go over it with that to mute the
brighter one away. It's also okay to draw lightly across any of the more darker
shadowy areas if you like. Even if you can't see strands of hair in those patches
on the image, it doesn't mean you have to
avoid them in your artwork. This is how it looks
so far. As you can see, I've got a small oddity with
the right nostril here. I accidentally added
too much light colour over it and lost track
of where it should be. So we'll come back to re-adding some darkness into that. But for now it's time to
try another bright colour. And we haven't had a green yet, so this time I'm choosing
the lightest green. As you can see,
this is definitely brighter and we're really not going to do
too much with it. This right here is
your "popping in" colour. All you need to do is
pop in here and there, adding a few dashes
and feeling out which areas can take a little bit more
brightness or interest. So now we are coming to the
final stages of this process. Once you have played with as
many colours as you liked, your penultimate
choice is going to be whichever colour is the
nearest to your paper color. For me here it's black. You may be wondering
why, when we have so determinedly been
working our way up the brightness scale, that we should return
to our darkest colour so near to the end. Hmm, well, let me explain. I think of this final step
as upping the contrast. You know, when you
have a great photo in your camera roll and it's
pretty awesome as it is, but when you simply tweak a few bits with
the photo editor, such as brightening the whites
or deepening the shadows, all of a sudden it
just elevates a bit. Well, that's what we're
doing here in our own way. Using light pressure,
I'm adding some black back into
those darkest areas, such as under the chin
and then amidst the hair. Not too much, but just enough to start breaking up those
strands a little. Giving them a bit more
depth by pushing some back into the shadow and letting
others stay bold and bright. We can also use
this colour to make any final corrections or nudges. So for example, I can use it to encourage that nostril
back into position. And I can use it on the outer edges of the
silhouette to neaten it up. Once you feel like
you have addressed all the bits that you
need to with that black, It's time for the final pastel. We're going to choose the
lightest one we have, which is usually the white, and this is the
time to be picky. And by picky in this context, I mean that all you need to
do is pick out tiny details. Focus on picking out
little ends of the hairs. The small shine on the horns, the gentle glow of the nose. It's at this point that if you were drawing an animal that has whiskers,
then you would add them in. This cow does actually have
some tiny hairs on its nosey, so I'll see if I
can add them in... I've actually made
them a bit too long. So this is an actual cat-cow now. Just keep adding a bit, pulling out to look at the whole, and adding a bit more until your gut tells you
you've done enough. This is where I'm leaving
this version of the cow. And although it has a funny nose and an uneven set of horns, I got everything
I needed from it. It was a chance
to let loose with the colours, to
scribble about a bit without worrying
about the outcome, and slowly nudge an
artwork into being. As this class is focused on
developing a practice of free flowing art that helps you warm up your ideas
and your fingers, we're not diving into things like how to blend the pastels, although you will have been unwittingly blending some
as you've gone along. But the joy of these warm ups is that there is nothing
stopping you from revisiting your artworks later
and building them up more Ii you wish. We now have the dark to light
process in our pocket so maybe it's time
to adventure into a few more challenging subjects and explore different
colour schemes. In the next lesson, we'll be drawing a subject
from a side angle, exploring how to create
different furry textures, and we'll be using a
smaller set of pastels, which give us a few
less colour choices. I'll see you there.
8. How to utilise a smaller pastel pack & creating different fur textures: When first starting
to draw animal faces, I have found it helpful to start practicing with straight-on angles first, which allow us to feel out
the main shapes and symmetry. Then we can move
onto side angles, which let us expand on those shapes and
explore more textures. And then onto more diverse
diagonal type angles and fur patterns. So for this second demo, our subject is this super
squirrel. Why super? Because it wears a
cape in its down time {I imagine). I've traced its
outline onto my paper and as you can see, we are working with a side
angle this time. In this squirrel reference, we can see that there are two types of fur
length to play with. We have the short, sleek body hairs and the longer
fluffier tail hairs. There are also feet here, but I don't want you to
worry about those too much. You might be working with
a smaller pack of pastels, perhaps something like this, which is a pack of 24 colors. Even with a smaller
colour selection, we can still create some
joyful rainbow wonders, and in this lesson, we'll
see that in action. Like before, I'll look for my darkest colour options first and as we didn't use too
much green last time, I'm going to try that one first. In looking at the
reference image, we can see that this area where the tail meets the body
is the darkest area. The eye is also very dark, but I will let the black paper
do most of the work there. I'll just aim to go around the edges of it with the green. We can also pick out some
patches underneath the arms, some patches on the haunches, and near the feet. I'll just
start scribbling the green in and feeling out the
shape of that dark area. It can be a useful thing to look at your reference from
a distance if you can. So if you have it on your phone, you can zoom it smaller. Or if it's a printed image, you could stick it to the wall on the other side of your room. Or you can just squint at
it to blur its edges a bit, because it allows you to
see the general shapes of those light and dark tones
a little more clearly. So I'm just scuffing this green loosely around
wherever it feels right. And these pastels have a chalkier texture
than my other ones, and so create more of an uneven
texture. But that's okay. It all adds in to the
warm up - to play with different textures and see what works and how
you can use them. So now I'm going to choose another dark colour and I'm thinking I'd like
to try this brown. It's not quite as dark as
I'd like, but that's okay. We can tweak the rules
whenever we like, and no one says we have to stick with it if
we don't like it. Luckily, I am liking it, so I'm going to use
it to fill around the dark areas on the head and mingle it in
with the green on the arms. I'm using short, sharp
sort of stumpy motions, if that makes sense on this short haired
part of the body. Just scribbling it around
and feeling my way. As you've seen from
the previous demo, at this point it's not going to look anything special just yet. And that's fine. Now, as we can see on
the reference image, there are lots of areas here which will end up very light. But I'd still like to have
some colour on them which can peek out from underneath
that brightness later on. So here is where we're going to shake up our system
just a little bit. On our previous
demo, where we had lots of colour
options to choose from - meaning we could work our
way up from dark tones to light tones and still have a lot of variation
in our colours - when we
are working with a smaller pack of pastels, we have less colour
options to choose from. Which means we may be forced
to use a darker colour than we might like in a lighter
area, or vice versa. All we need to do here though, is simply decide what a colour is going to represent
before we lay it down. And if it is a colour that contrasts with the
previous areas, it's easier to
remember it later. Let me explain more with
my next choice of pastel. Here I want to start filling some of the lighter
areas on the squirrel, but I don't want to go straight in with a really bright colour, which will dominate
and distract me so early in the process. I want to use a few colours and
build up to the lightness. Therefore, I'm going
to use a deeper colour, but one which is very different to the ones
I've used so far. I'm going to use this deep pink. While dark, it really stands out against the other
two colours here. Which means it is
essentially colour coding those highlighted areas,
for me. Side note: This trick also works
well when you're working with a subject that
has patterns on their fur, as you can keep track of where those patterns are a lot
easier by colour coding them. This is where we're
up to so far. We have our dark areas
shaded in green and brown, but we've also used a dark
pink to get some colour down, but also to remind us where
our highlights will go later. As we now officially
move into the mid tones, we'll start thinking about
making more intentional marks. I'm going to keep
with my rainbow theme and choose a blue this time. And as I work it over the tail, which is lovely and bushy, I can be quite free flowing. However, once I start adding into the shorter haired areas, it's easier to use small wiggly motions or
short taps of the pastel to start feeling out
which directions those hairs need to go.
Then, grabbing a red colour I'm going to carry this
on around the shoulders, making sharp taps to keep building up those
shorter textures. Now I'm going to grab the
light pink and see if I can start really pulling out
some of the lighter areas. Just using really
light movements to build up the textures. If you go over any
areas a bit too much like I have with the eye
here, don't worry about it. Remember, we'll be coming
back in with the black later. And of course, we can return in with any of our
previous colours too, at any time to make adjustments. Part of the joy of using
this medium for this type of exercise is that you have to work with what you've
put on the page, embracing the imperfections
or unexpected surprises. But it also provides lots of opportunity for nudging things back towards what you intended. Nothing is a dead-end here. As you can see with the feet, we don't have to be detailed. We can just hint
at what's there by picking out the edges of the
toes, and that's enough. As you can see, a
smaller pack of pastels can still
deliver great results. And you can get a
great variety of marks onto the page to mimic
varying hair lengths. Of course, not every
colour exploration needs to be rainbow inspired. Now you know the process and how to adapt
and play with it, the whole colour spectrum
is your playground. In the next lesson, we'll take
a brief look at how to use more limited colour selections to achieve different results. And I can't wait
to meet you there.
9. Exploring Colour Palettes - Which colours do you love?: Having mastered the joy of using the full rainbow
in your scribbles, you can now use what you've
learned to dive deeper into your own personally
preferred colour wheel. Think about the pieces
you've made so far and consider which colours did
you enjoy using most? Which colours pushed you out of your comfort zone? For
future experiments choose two or three colours which you think go well
together. For this Llama I'm choosing brown and yellow, which very much sit closely
together on the colour wheel anyway. You know
the process by now, so I'm going to speed
these examples up. I'm only using four
colours for this llama. A brown, a reddish brown, a deep yellow, and
a light yellow. And of course, black
and white to finish. And even with just
these few colours, you can see what fun we can have with the light and
shadow across the fur, creating those
chunkier textures. In this next example, using a cat reference, I'm using blue and green. But now I'm breaking that
down into seven steps, darkest blue, dark blue, mid blue, dark green, light blue, light green,
and brightest blue. Having a wider range of
blues and greens here, helps to create some of
the stripes in the fur and on the legs, while still sticking to a limited
colour palette. And of course, do you remember the pink cow printout
from earlier? Let's use that as inspiration now. Here's a purply-pink version that pulls in a sneaky blue undertone -
using dark blue, dark purple, red, light
pink, and salmon pink. The colour combinations
are endless, and in playing with them, you'll find yourself
discovering more clearly which ones you respond
to and which you don't. You may also surprise
yourself and end up liking something you really
weren't expecting to. Our final stop on
this oil pastel train is to take a peek at
the virtual version. Yes, the Procreate app
has an oil pastel brush, which gives us an extra way
of playing with the process. So let's go take a look.
10. BONUS: Using the Oil Pastel Brush in Procreate: Isn't it a clever thing
when we can expand our art processes
onto other canvases? The Procreate app has its
own oil pastel brush, which is installed in
the brush library. And it works very much
like real oil pastels. At least it very much does for the scribbly loose effects that we are embracing
in this warm up. In this example, I'll be using
the raccoon template from the zip file pack of PNGs that you can find
in the resources. I have created a canvas at A4 size and I am changing
my background layer to black. Then, to import my
raccoon template, I'm clicking on
the spanner icon. And choosing Add file
from the Add menu. A pop up window appears so that you can
navigate to the folder where you have
saved the unzipped template files on your ipad. When it imports in, you can change the
image size to suit your preference and place it on the canvas wherever
you like it best. Then in the layers menu, I'm selecting the template
layer and clicking the tiny N symbol. Using
the slider that appears I'm adjusting the
opacity of my template so it is fainter and
easier to draw on top of. I then click on the plus icon to create a new layer on top
of my template layer. To find the oil pastel brush, I click on the brush icon, then click into the Sketching
menu and scroll to find it about halfway down. I can change the size of my
brush at any time on the left of the screen. I'm also going to use the
Reference Image facility so that I can have
the original photo easy to see as I draw. You can find it by clicking
on the spanner icon, choosing the canvas menu, and turning Reference
on. A window pops up and by selecting Image, you can import a photo
from your camera roll. You can find the
reference images within the Templates
Zip file too. All you need to do is add
the photo that you need to your camera roll to
import it as a reference. I can change the size of my reference and pop it
in the corner for now. So let's pick our first
colour from the colour menu. This is one of the bonuses
of working digitally. You have unlimited colour
options to choose from. I'm going to opt for
a dark green first, and then we'll simply
follow the process through in the same way as we did
with our real life pastels. I'm using loose
scribbly movements to lay colour down. While having a pencil to work
with tends to bring us back towards drawing
more precisely. I do encourage you to stay
as unruly as you can, especially when using
the first darker colours. Let your brush travel
around quickly and freely. And while you have
the function to undo any marks that you
don't like within the app, I also encourage you to not use that option as much
as you can. Remember, this exercise can be as relaxed or as
energised as you wish. If you want to find a pocket
of calm for half an hour, use it as an exercise
in mindful colouring - simply moving up the
scale of colours, taking your sweet time, and revelling in the freedom of not having to colour
inside the lines. However, if you need to
kickstart your creative energy, speed the whole thing up. Scribble, like you've
never scribbled before. Pick your colours quickly and intuitively
without thinking, and see if you can finish the
whole piece in 15 minutes. Being able to zoom in and out of the canvas
is a benefit here, and lets us dive in a bit
closer whenever we like. But try not to let it get
you lost in the details, at least not in your
early experiments. Details are wonderful things. I love diving into them. So if you are the
same, I hear you! But sometimes, if you're in that creatively-stuck kind of zone, focusing on details can add to the overwhelm of not knowing where to start or
how to continue. Give yourself
permission to zoom out. And remember that this
right now is playtime. Another great thing
about working digitally is that if you like, you can draw each new colour
on a different layer. So with this raccoon, I've simply been enjoying myself throwing everything
onto the same layer because it forces me
to work with whatever I've thrown down and
not worry so much. And that's the way I recommend
you start playing too. But as you get more
comfortable with the process, if you want to start being more intentional
with your colours, being able to separate your colour layers can
help you to figure out which colour combos
really sing for you. In this Owl example, you can see by keeping
my layers separate, I am able to look deeper
afterwards and fully pick apart the process that I used and the choices I made. I can see the exact
pathway I took and figure out which bits worked
well and which didn't. If you give this process with the oil pastel brush
on Procreate a go, I'd love to see your creations. Do save your images and upload them to the project gallery
if you're happy to share. Let's head to our last
lesson where we can chat through final thoughts and
wrap this colour exercise up. See you there.
11. The Wrap Party - Let's chat and share thoughts: You have made it to the end
of class and it simply makes my day to be meeting you
back here for the Wrap party! Thank you for dedicating some
of your time to being here. I really hope you are taking
with you a new skill and fresh inspiration to get you creating again with a
big old chunk of joy. Nobody says chunk of joy, do they? Except us - Right here, Right now.
It'll be our thing. Remember, there is
no rule to say that this process can only be
used with oil pastels. I encourage you to
have a play with any mediums and paper colours
that you have access to. The results will of
course be different, but the principles
of kick starting your ideas using different
coloured backgrounds, freeing up your movements and building up colours gradually, will always offer up
some fun results. Whenever you are
feeling a bit stuck in your art practice when
you want to create, but you really cannot
think of what to draw, come back to this process. Give your eye a different
background to work with, and let your hand move freely across the
page for a while. Soon you'll be
feeling creatively warmed up and ready to explore. If you have any questions
about anything in this class, the Discussions tab
is waiting for you with open arms! Go
start a new thread and I'll always help
as much as I can. There is also the
project gallery, where you can share photos of your process or finished pieces. One process can
be interpreted in so many various ways and
uniquely by all of us. So if you are happy to share, it would be wonderful to see where this one has taken you. You can also tag me
on Instagram @gemmathepen if you decide
to share it over there. If you have enjoyed this class or found it helpful in any way, I would love it if you
could leave a review. They not only help me to know if I'm hitting the right marks, but they also help
other students to decide if the class
is right for them. With each class I make, I want to improve
and ensure that my future classes are
worthy of your time. So I'm sending you
a hearty thank you in advance for sharing
your thoughts with me. Of course, if this class
has been your cup of tea, you might enjoy some
of my other classes. You can check them out
via my profile page. And if you'd like
to get notified when my future
classes are published, then just click Follow.
Outside of Skillshare, if you'd like to come say hello, you can find me via my website, gemmathepen.com, where I write art and craft blogs; on
Youtube @GemmaThePen, where I create free
videos for the creatively curious
(and yes, that's you!); and on Instagram
where we get to chat and share about our
art adventures. Do stop by anytime and say hi. Thank you again for being here. Keep making happy, and
I'll see you next time.
 Gemma the Pen, Making to Make Happy!