Transcripts
1. Introduction: Welcome to the color
block portrait less. Today we're going to create
three colorful portraits, just using one black pen and
one or two pops of colors. And we're also going
to limit the time to 10 minutes for each portray. Can I already hear you in
a critic saying, What? No, I cannot draw faces? What? Only 10 minutes. Don't worry. I promise
these are going to be easy. They do not need to be perfect. They do not to be
automately correct. They just need to
be fun and loose, and the 10 minutes time frame is actually going to stop
you of overthinking. So I promise you, at
the end of this class, you're going to have three
super colorful portraits. And if you're still not
convinced or you can still hear in the critic that
you're afraid of doing this, then, honestly, let's just
look at Picasso's portrait. Exactly. If he can do it, you can do it too. So let's go.
2. Project: So the project today is
going to be very simple. Create at least
one portray using 10 minutes and then upload
it in the project section. You can either scan
it or just take a picture with your phone
and then upload it. I would love to
see what you drew, and I'm sure that other students will get inspired
by it, as well. So let's see the next lesson which materials
we're going to use.
3. Materials: Okay, so let's talk materials. I love using a sketchbook
because of different reasons. I like to have all my
art pieces in one place. I also feel like a
sketchbook is a bit less precious than a nice
piece of paper. So I'm not scared of
messing something up. And if I do mess something up, I can always put
some color on top. Do a collage on top or just
leave it as a reminder that not everything that you create will be absolutely
amazing, right? So this is quite
cheap sketchbook from Talents, art creation. And I have plenty of these
different sizes as well, and I like this I think
it's a five size, and because it's not
too intimidating, not too big, not too small, so this is a very great size for this project that we're
going to do today as well. What you will also
need is a black pen. I have this brush
pen from Pentel. It's quite thick, but
any brush pen we do. If you are a bit too scared
to start without sketching, which I completely
understand, of course, you can start with a
pencil and an eraser, but I would say, today, live it, you don't need it. And then how do we gonna do the colorful part
of our portrais? I use these Caron dash, No coolors, which
I absolutely love. They have amazing colors. They're also water soluble, so you can also go over it with a wet brush if
you would like to. And I also have
some other brands. This is Lyra from Germany, which is really good
as well, to be honest. Like, these two blue are
pretty much the same. But yeah, Caren dash is
one of the best brands. In my opinion, it's also
Swiss, and I'm Swiss. So, you know, I
guess I'm biased. But yes, it's my choice today. I really love them. But if you don't have no
color, don't worry. You can use any other medium that really gives
some pop of color. For example, you can use
some acrylic markers. These are really great
because they also have this really nice
coverage on the page. For example, the posca pen or
these ones are from Artis. You can find this on Amazon. They're quite cheap as well. And I really like
this, to be honest. For the price, they're
really, really good. And then I also have
this creative marker, which is the same from
Sharpie, which I really like. So this would be
my choices today. Of course, feel creative,
do whatever you want. You can also use watercolor
if you prefer that. But for me, I prefer
something that has a bit more coverage
and is more opaque. So these are going to
be my choices today. And in the next lesson,
4. Inspiration: So where can you find
inspiration pictures? Well, an easy one is Pinterest. I usually just look for fashion portraits or
fashion magazines. If you have any lying around, they always have some very
cool stylish pictures. And there is also two
websites which are called splash.com and pexs.com, where you can get
license free pictures. To make it easy for
you, I have created a three page document
where I've saved the pictures and the photos
that we're going to be using and also a few
more for you to use. For me, a great
inspiration picture needs to have something
that catches my eye. I like if there is a special
accessory, for example, a hat or a scarf, some very cool earrings
or some very wild dress. What you can also do,
what is also one of my favorite things to do is actually to create
a self portray. Wear your favorite thing and take a picture and
draw yourself. That could be a
nice idea as well. Now that you have your
inspiration picture ready and your materials, let's go and do
the first portray.
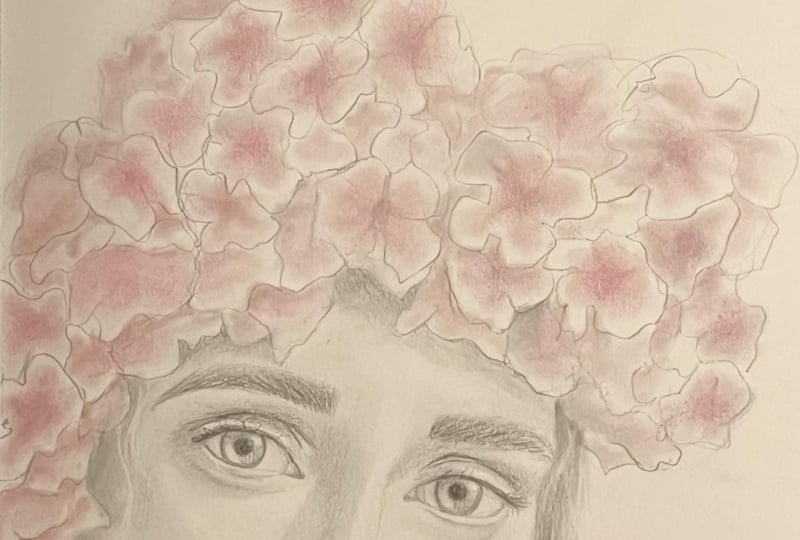
5. PORTRAIT1: Oh Okay, so I'm going
to start with this one. I really like the
flowers on her head, and I think that's
pretty clear for me what's going to be the
color on this portrait, and that's going
to be the flowers. And it is a bit scary just
to start with my black pen. And of course, you can start with a quick sketch
if you want to. But yes, this should
be, you know, easy. Just keep loose and
have fun with it. So I'm going to put 10
minutes Hymer on my phone, and then I'm just gonna start. And I'm going to leave some
space up for the flowers, and then actually, hands are pretty hard
for me, to be honest. So you can also just leave
out the hand if you want to. But let's start. I usually
start with the eyes. So let's see what we can do. And to be honest, I've
done this a lot of times and never it really looked like the person
that was there, but that's not the point
of this exercise, right? It's just the point
is to have fun. And even the eyes, they're
not going to be perfect. It's only going to
be black and white. So we need some eyebrows
with that eyebrows, a face look just looks weird. Yeah, that looks a
bit weird as well. But anyway, and
then I just try to do more or less the face. With the nose, I
think that's always the easiest because
I literally just do two black dots, more or less. And then that's it. And then it is hard to talk and to draw at the same
time. Did you know that? Also, I would choose pictures where you
cannot see the teeth because to actually do the teeth with a
thick pen like this, usually it looks very weird. So usually even if I show it shows the
teeth on a picture, usually make the lips closed. So I'm gonna actually
ignore the hands today, and I'm just going to
pretend she has no hand. Well, it looks like she has
a bit of a swollen cheek. Well, maybe she had her with some teeth removed or
something like that. Anyway, and then we can just add these beautiful
flowers because I think that's the most amazing thing
about this picture, right? And I think here also, just important and it looks
like three big flowers. Do they have to be exactly
the same as you can see? No. I even could have left
more space at the bottom, at the top, because yeah, there's not much space left, but we will do the best
with what we got again. We have 3 minutes have passed. So I'm not stressed, but I do work quickly. It looks actually quite cool. I love it already. Just confidence. Do
it. And you know what? I'm gonna go on the
second page here. Because who says we can
only stay in one page? Who says that? Nobody.
Bit more round. Honestly, I love it.
It looks very cool. What I like to do is always add some lashes because then it
makes a bit more feminine. And look how cold it
is. I do miss the hand. I think the hand would
be kind of cool. But, well, anyway, we
can still do the hair, which is very nice as well. So she has Oh. The shoulders, neck
and shoulders. And here you cannot really see because you have
the hair coming. Every now and then this
pen needs to be pressed so you have some
more ink coming. And it's impossible to do
precise drawing with this pen. And that's exactly the sense of this exercise to keep
loose to see what happens. Maybe let's do her little yeah, mix it up more complete And we have 4 minutes left. So I'm going to leave it
like this and add the color. And, of course, you can choose
whatever color you want. And this one very clear. I had to choose
this salmon rose, salmon pink in
English, actually. So I'm just going to
add this on my flowers, and I'm going to speed this up, and we'll see each other at the end with a final analysis. Mm. There we go. I am done. I'm very
happy how it turned out. I have 1 minute left. So if I wanted to,
I could continue. If I wanted to, I could
do a background as well, which I'm very tempted to
do because I always think that because it's so black and white to have
a colorful background, it actually makes the
portrait pop even more. So let's see. Here
I have some more. Flower, so it looks a bit
more round. And that's it. I literally 10 minutes, you finished an art piece. I always try to analyze
it a little bit after. What do I like? What do I like? So what do I like? I like the flowers. I think they look very cool. I like the proportions, even though it
doesn't really look like the girl in the picture, it still looks like a normal
person, more or less. I like the lips. The eyes
are a bit too different. This is a bit too
big than this one. But anyway, I do like the hair. I think that came out
very well, as well. And overall, for being
a 10 minutes portrait, this is amazing, and
that's how you get better. So as you can see, I did
decide to get a background, and I love the combination
with pink and orange. So that's what I did, and
I think it's super pretty. The more I look at it, this
eye disturbs me a little bit. So I'm going to try to make
it a little bit smaller. And then this one a bit thicker, so at least it has a
bit of consistency. Not really necessary,
but now it's a little bit more even. And one thing about new color that if I'm
going to close this, her face is going to be red. So we need to heat it up. You can either use heat gun like this on a low heat because
these are wax based, and it's going to melt the wax or use a normal hair dryer as
well, but on low heat. So I'm going to do that for
about 20 to 40 seconds. And then I see you
in the next lesson.
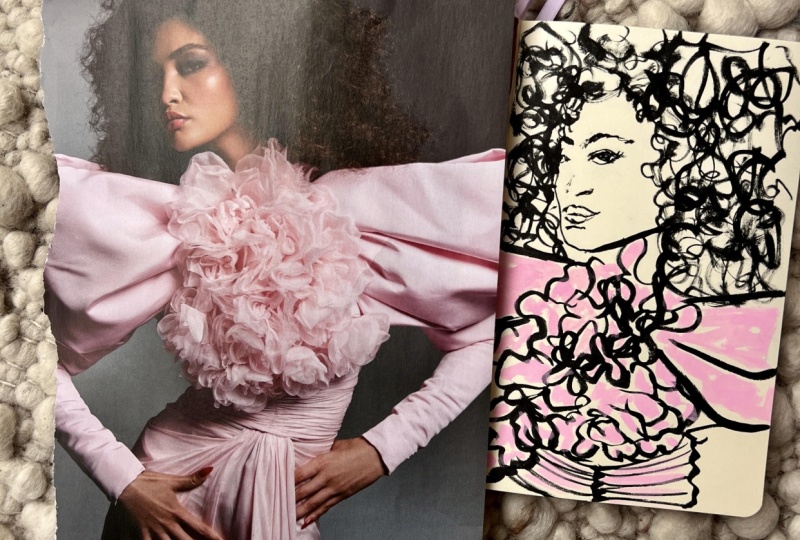
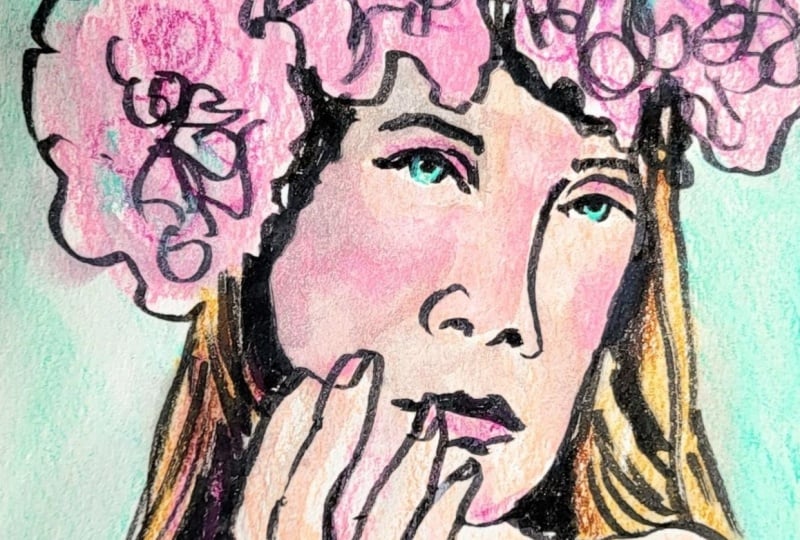
6. PORTRAIT2: Okay, let's do the second one, and I'm going to
choose this one, which I really love. I love the colors. I love
the hair, the hair band. I do think it's a little bit harder because she's
looking to the side, which is not always
that easy to then have the proportions, correct. But then again, we said, who cares about proportion
today, right? Also, the lips is not
going to be that easy, but we're going to try
our best and let's see what's going to
happen in 10 minutes. I'm going to put my 10 minutes, and then I do like to start with the eyes and I always have a look like they're
not straight. They are a bit down. Let's see. If you know what I mean, I'm
going to start a bit more down we have enough space
again for the hair. This space between
the eyes is always more or less one eye,
if that makes sense. This one, you cannot
see it properly. Try to copy what
you see exactly. The eye is very
here in the middle. But I also like to do is only draw the upper part of the eye and then leave the one
down completely open. Yeah. Always make
the second crease here in the eye
because it really gives this look of an eye. Then as we already
had some nice lashes. She has some amazing lashes now. Yeah. There we go. These are the eyes. Okay,
what are we going to do? We're going to do the they're
a bit high up, anyway. Now she has a lot of brows. Sorry. That's okay. She has some more
brows, that's fine. Then here we don't need
more browse because we're going to have the
hair coming down. Nose. Nose. You can only see one and now
these very difficult lips. Here you can see that the
lips are more or less on the on the same line ups. Anyway, are on the same line then the beginning or
the end of the eye. Let's try. It goes up. Op. And then it's actually
shorter on this side. You could almost not see it. And yeah, a bit wild, but it looks more
like she's kissing. That doesn't matter too
much, anyway. There we go. And then what is the distance
from the eye to the end? It's actually quite big. So I'm going to go
here. There we go. Not too bad. We can correct a bit later as
well if I'm not happy. Actually, here, I think I would like to see a bit
more of the nose. Yeah, I prefer
that. Okay, here we have the little ear coming down, and then we have the bandana, which is going to go
up here, more or less. Again, I'm going to go
on the second page, which I never plan
to do, but why not? Why? No. We can move
this around. Messed up. How many, we have six
more minutes. Okay. Here. I need some
more There we go. And this goes quite
high up. Fun. That's why I like to choose portrays have something special, like a bandana or a hat or something that makes
it a bit more interesting. I mean, her hair here
looks amazing, as well. It makes it super interesting. I actually think it
could even go higher, but I don't have space. On my page, that's okay. And I'm going to make
them a little bit thicker I won't be
coloring this one. Yeah, not too bad. And then here comes the
rest of the bandana do. Are we going to, we can
do the shirt as well. I think a shirt always makes a good look on
portrays as well. Try to draw what you
see. It's not easy. Even this, what is this? But at the end, it will make sense,
even if it doesn't, our brain learns something
more There we go. I really like it. And then
the shoulder goes there. Now, I could do the shoulder. I could even do the
but hands again. What do you think? Well, you can answer me, but, I have 3 minutes left, so I would have to take a
decision if I want to do the the watermelon and the hand for sake of time,
I'm not going to do it. I'm just going to add
a few more hairs here. But of course, you
can if you would like to use this portray
and do the hand as well, because I think that
would be a very cool pop of color, to be honest. But I'm going to
leave it like that. I'm quite happy
how it turned out. And maybe the eye can get some more. Very good. I'm going to add some
color because we have exactly 2 minutes
and 40 seconds left. And I'm going to do the banana. I actually think I'm going
to choose this blue one, and I'm going to call
the banana blue. I'm going to speed it
up and I'll see you in 2 minutes. Okay. There we go. This is the final result, and I have 1 minute left, and I do want to do
your background. Which I think I
will do, and I will show it to you at the end. I'm really happy with the lips. They look a bit different again, than the picture because
here it looks more like she does like kissing lip. But anyway, even I think it looks a bit like
she's missing a neck, but that's not that big
of a deal, to be honest. And there we go. This
is the final result. Yes, I did again.
Background. I think two colors together
look amazing. And then I'm going
to use my heat gun again and just go to heat it up. And I can perfection. This is a piece of
paper, basically. And I'm going to just kind of while it's melting, perfection. This page a little bit. I
actually like a bit of texture, but it's also that it wants
much too much afterwards. The best thing to do
is actually to buy a fixative and then spray
it with a fixative. But it's just a sketchbook here, so it's not an art
prints that I will sell. If you do want to do that, I will definitely
use a fixative, but this is just
in my sketchbook. So it's not really necessary. Alright. See you
in the next class.
7. PORTRAIT3: Okay, so let's do the third one. And the third one is this one. I think it's
absolutely beautiful. Her eyes and I love the scarves
that she has on her head. That's definitely going
to be the colorful part in this. Let's try. I'm going to start
again with the eyes. The eyes are always
not always, always, but most of the time in the
middle of the entire head. That means also calculating the hairline because especially if you look at this picture, it might seem more up, but they are actually halfway because she has quite some
hairline there as well. I forgot to put the
timer 10 minutes and I'm going to stop talking and start drawing
a little bit more. I can really see that one of my eyes is bigger
than the other. But anyway, that is okay. Maybe let's do a
little bit 'cause I like this little eye crease, second eye crease,
and some lashes. Mm. Yeah. I'm not too mad about it. And then some eyebrows Yes. Now, I'm going to
start over here. And then for me, it's always difficult to find
out how long is her face. I'm going to do the nose
first because that helps me. Tiny nose. We could do the
little like this as well. Then the lips and here you
can also see that the lips are more or less in the middle of this eye and at the beginning
of the iris on this one. So like this, yeah. Perfect. And Again, here she has an open mouth and
I will do it more close because I'm not going to draw or I can leave
it a little bit open, but then I'm going
to color it in, so I don't have to
draw any teeth. There we go. Doesn't look too bad. Now from here, it's easier
to find where this goes. Comes in like that.
And then we have hair. Goes down here, quite up. And it goes all to one
point because then she has technology and it stopped filming and
unfortunately, I didn't realize, so I just continued
to talk to myself, but I also finished
this portrait, and I finished it
exactly in 10 minutes, but let's do the
analysis together. So I used this scarlet red. It was obvious. I just had to use this beautiful
red as in the picture, and I'm quite happy how
it turned out as well. The lips are a bit big if
you look at the composition, but then again, it's
not that big of a deal. And the scarf ended
up very pretty, and I'm thinking, of course, of doing a background,
but I think this time I'm just going
to leave it like that. Of course, if you want it, you could also do the
pattern that she has in her scarf and her dress that
would look very pretty. But this one I'm
going to leave it as simple as it is because
I think it's very cool.
8. Final thoughts: So how did it go? What do you think
about your portraits and about the time limit? I really love mine. I think they're really cool art pieces. I would love to see results, so don't forget to put it
in the project section. And if you want,
you can also tag me and connect with
me on Instagram. Just search for Ink
credible Mica Okay. Thank you for taking this class. It is an honor for me that you use your time to
watch this class. Of course, I would
love to read a review. What did you like?
What did you not like? Once again, I apologize for
the shaking of the camera. That's something I will definitely improve
for the next course, and I hope to see you there. If you do want to improve
your drawing skills, I actually have the perfect
course already for you. It's a 100 day art challenge where you're going to draw or paint or whatever your art style is for 100 days straight. I know it sounds crazy, but I've done this
multiple times and that's how you skyrocket
your skills, I promise. Go check it out on
my page and maybe also press that follow
button. See you soon.
 Mika Simmen, colorful self-taught artist