Transcripts
1. Introduction: Hi, and welcome to this
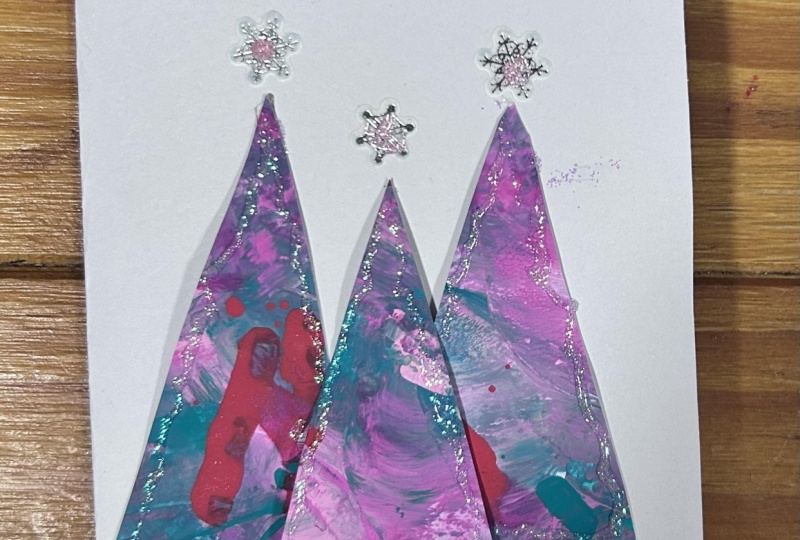
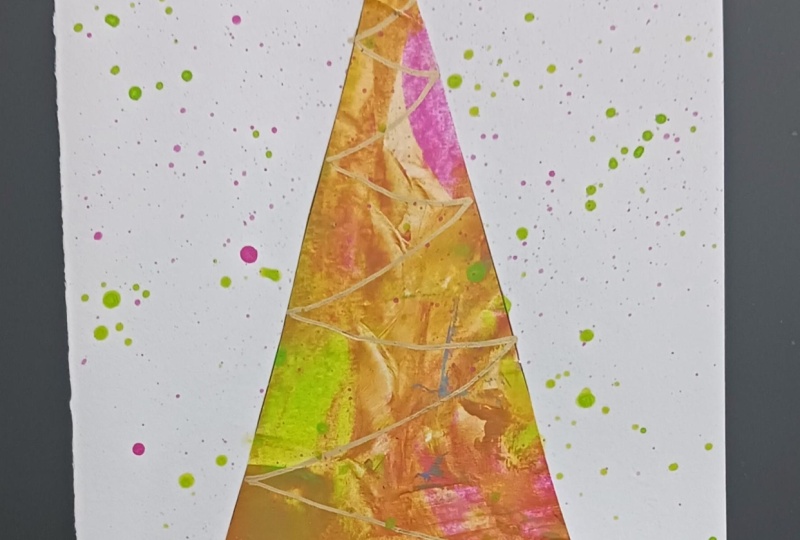
Christmas card making Cloud. Today we're going
to create these beautiful Crisps cards together. Honestly, who wants to spend
$5 for each Christmas card, and they're not
even that special. Hi. My name is Mika. I
love to be creative. I love to sketch,
I love to draw, and today we're going to
create this project together. We will go step by step through the different
techniques, how to do this. It's very easy. I promise you can also do it with your
kids if you wish to do so. First, we're going to choose a color palette that
is going to be modern. Then I'm going to show you two very simple techniques
how to use acrylic paint. You will not even
need a and last, we're going to use some lettering
to finish up the cards. At the end of this class, you will have a set of beautiful handmade Christmas
or holiday cards that you can give
to your loved ones, and you will also have the
confidence that you can create something beautiful
with very simple steps. Because I believe
that everybody is creative and that
art is a skill. And a skill can be improved
the more you do it. I actually have an entire other Skillshare
class on this topic. It's a 100 day challenge. Check that out right after we did the
Christmas cards together. For now, go grab your acrylic paint and see
you in the next lesson.
2. Class Project: Well, you have guessed it.
This one is an easy one. Your project for this class is going to be your
Christmas cards. You can show your
favorite one or the entire set in
the project section. I would love to see
what you created, and it's a great way to
inspire others as well. See you in the next class where we're going to discuss
the materials.
3. Supplies and Setup: Let's talk materials.
What do we need? So we need something
that serves as a card, which can be a very
simple craft paper, which is a bit thicker than
a normal printer paper. It can be any color
that you would like. I have here on a four, and we're going to
fold this actually twice to have our card. Here I have another one which I could use
as a card as well, but just by folding
it just in half, whatever color really
what you want. I also ordered some
empty cards on Amazon, you know, this is very easy, and I do like to keep my
colors of the cards very neutral so I can go a little bit more crazy with
the paints on top. We also need some
very simple paper, which needs to be white. This is a normal printer paper, a little bit thicker than
I think the 90 milligrams. I think it's 110,
something like that. But yeah, any paper will do,
to be honest, last year, I used some scrap paper, and it still looked amazing. Then what we need
next, of course, is paint, and I'm going to
use some acrylic paints. You can use acrylic or gouache, actually just not that
big of a difference. The biggest difference
is that gouache, you can reactivate it once
it's dry with acrylic, you cannot be activate it. But for this project today,
it doesn't really matter. I have a lot of colors, and
we're going to choose in the next lesson which
colors we're going to use. But yeah, just get your
acrylic or gouache. This is actually
acrylic gouache. Paints ready, whatever you
have. I have some more here. I have different
brands, to be honest, so it doesn't really
matter what it is. Liquitex. This is Bosners
actually a shop in Germany. So yeah, whatever we
have at home, we'll do. What we need next is an old credit card
or hotel key card. This is actually an
old hotel key card. We do not need a brush today, so it's going to be a very
easy technique as promised. We do need some kind of glue. So whatever you have
home as well will work. I have a liquid glue, but to be honest,
it's not my favorite. I prefer a stick or even glue tape to have a
more smooth application, to be honest, but anything that you have lying around
will be perfectly fine. If you want, at the end, we're going to put
some final touches. Here I have some gold or some metallic green to add some final
touches on the cards. This is just an add on. If you have it around, some gel pane or as
well some acrylic, but no mask if you
do not have it. So that is it. Let's go to the next lesson and
choose our color palette.
4. Color Palette: So let's talk colors. I do believe that this
is the hardest part of the project because colors
make a lot of impact. What do I mean by
modern color palette? It means that I'm not going
to use the classical red, green, and gold maybe that is used during the
holiday season, normally, but I want
to add a little twist, maybe add some neon color, maybe add a pink instead of a red, but still
keep the green. So I'm still gonna keep some elements of
the holiday season, but I add a little twist. Best thing to do here
is to choose two, three, or maximum four colors. If you choose more colors, it's going to get a bit messy. You can actually stick with two. I tried out one example with only pink and orange and it actually
looked quite nice. If you're struggling to find a color palette that you like, you can do three things. First of all, go Pinterest. Go on Pinterest and just put modern Christmas palette or
simply Christmas palette, and then you will find
some examples there. I can also recommend you
the app colors or coolers, which gives you so many
options of cool color palette. There are also some really
good books out there that describe you or give you
examples of good color palettes. One of my favorite is this one, which is the palette perfect
from Lauren Beijer Vegar. I don't know how to
pronounce that either. I am pretty sure you will
find something that you like. And honestly, at the
beginning, just try out a few, and then you will see
I took some green, a pink and some neu
orange. Same thing here. Here, I had some brown
with some neu yellow, also some red, orange. I also tried it with a burgundy. I really like this
one, actually, with a lighter pink
and neon pink. So yeah, just grab a few
colors and try them out. I'm going to show you
in the next lesson, which technique I used, it's very, very easy. And look at this one. It's very, very cool, I think, as well. Color combination. I think this one, in the end,
one of my favorite ones. Here I only chose two colors, which could also be
nice, to be honest. Orange and pink always one of my favorite color
combinations, to be honest. And here I added some brass
kind of copper color. But these are a bit
too dark for me, but I do like the
Teuton to be honest. And then one more, I tried here with some brown or burgundy and
some pink and orange. So in the end, I think I will go with this one, which is the green, the pink, and this neon orange. This is going to be
my final decision, which is this acrylic green, which is called an
olive green deep. Then we have the opera red. Oprah red is honestly
I must have. I absolutely love this color. And then I have this one,
which is a neon orange. It's a very cheap brand. I bought this, I
don't know, I think in one of those cheap shops. It's not very good at mid but it's good enough
for this project. So these are going to be
the colors I will be using. 22
5. Acrylic Teqniques: Okay, so let me show you
how we're going to do this. So you have your colors ready. You have your old credit
card or hotel card ready. I would also
recommend you to have a piece of paper towel close by, so in case we have
too much color on the card and maybe an extra sheet of paper where we can put the
extra paint as well. I'm going to show you two
different techniques. Both are fine. You just choose the
one you prefer. First, I'm going to
open all the caps. And then technique number
one is where you put all colors that you chose together on the
card just a little bit. It doesn't have to
be the same amount. If you like more green,
you can put more green. If you like more of Don, you can put more Dnion. But you put all the
colors on the card, and then you just put it on. Very random. See what happens. I really like this swoosh here. I do think the green is a lot. So I'm going to do a second
round with just some pink and some neon orange
and put it here up. More down. Try not to
leave white spaces because that's not going to
look too good when we're going to cut out
the triangles later. You can leave it like
this, but, of course, it's better the more
you fill up the page. But I don't want to ruin this
because I really like this. So I'm just going to put
some more down here. So I'm going to
repeat the process. Just go to put some color. Gonna put a bit more of
the neon because it's not that strong and a bit
less of the green. And then put them on again. Just let it flow as it comes. Make sure you're not going
over multiple times. This is because if
you mix it too much, it will become muddy
and grayish, brownish. So try to only go
over once or twice. And if you see that
on some points, it's a bit thicker, that
doesn't matter, to be honest. Actually, it's quite cool
to have some texture there. It will take some
more time to dry, but it's going to look
very cool, to be honest. So if we can maybe cut that out later, that
would be very cool. And that's it. And
now you just repeat the process for a
few more pages. The second technique is
just to put one color each time and then put it on
a page very randomly, take the next color. And put it on a page as well. You will see it's a
little bit different. Here, especially,
again, you need to make sure you don't have
any white spaces. But it looks cool, as
well. It's different. You can also mix the two
techniques, honestly. You don't have to stick
to one or the other. I actually really like this neon orange. I
think it's really cool. Here I mix it a bit too much. Now you can see it's,
like, brownish. That's not too nice, but we can go over it
with some pink, maybe. Yeah, there we go. Now I do have the
feeling that down here some green is missing because it's
very orange and pink, so we're going to
put some more green. And I'm not cleaning
the card in the middle. Like, there is no
need to because now I see you also have
the pink and the green. I think it looks very
cool together, actually. There we go. And this is done
so effortlessly. You can, you know, just
put it very random. I really like this
area, for example. This one has some white spaces, so we need to do
something there. Let me see. Maybe some green. Maybe we're going to put
some more colors green and orange over here. There we go. Much better. So more
orange up here. And then we're gonna
call another page done. Don't overthink it. I
know that, you know, we tend to overthink
or maybe we're like, Oh, maybe that's not
gonna look good. Look how cool this looks. This texture here,
it's very nice. I love it. Just very random. That's it. Another page done.
6. Let´s make Christmas trees: So meanwhile our acrylic
paint is drying, we can create little templates
for our little trees. So these very simple triangles. I cut them out from a cardboard, so they are a bit more sturdy
and I have two options. One is just a big one, which is eight centimeter
by ten centimeter, and I will just place it right in the middle
and then some lettering down here or you can put it on the bottom and then put
some lettering on top. The second option I created
is a smaller version. Which is actually seven
centimeter by 8 centimeters. And I would actually cut out two and then put them on
top of each other, which looks very cool
as well, in my opinion. So I recommend you
doing the same, prepare these two triangles. You don't need two of them.
You just need one and one. Or if you just prefer one
version versus the other, then just create that one and then we're going to
cut out our triangles. Now that our papers
are completely dry, we're going to cut
out our triangles, AKA, our Christmas trees. So just choose the parts
where you like most. For example, I don't really like this part because
it's a bit brownish. It has some white parts, but I do like this
part and this part. So I would turn it around and have a look
where to put this. So maybe over here, turn it around, then
trace it with a pencil. And then cut it out. I also going to trace
the second one, which I think could be
something like this. Very nice. It doesn't
have to be perfect. It just, you know, has to fit, and this fits just perfectly
next to the other triangle. And this is the good part
of having a template. You just need to trace it,
and then you can cut it out. You can either use
scissors or if you prefer cutting knife and
one of these things, which the name just doesn't come to my mind
right now in English. That's the good thing of knowing more languages, but then, you know, the words that you need will never
come up well yet. Okay, so let's cut this out. So this also has
some white space. But that doesn't
bother me too much. If I want, I can cut it and
make it a little bit shorter. But maybe it's gonna
look great, actually, with the two little
white parts on the side as well. We
will see that later. Put this on the side, and then do it for all the
sheets that you colored. Also, if you have some leftover and a triangle doesn't
fit anymore, keep it. Keep it for now because
you can use it as decoration for the envelope. I will show you some
examples at the end.
7. Creating the cards: So now I've cut out
a lot of triangles. I actually took all the
color options that I had because I think they all
quite cool, to be honest. This is still my favorite. But I also took these dark ones because I felt like
maybe they are too dark, but to be honest,
if I'm going to put them on a light background, Look at this. It
might look very cool. It probably doesn't look cool on a too dark Well,
also not too bad. So this is the fun part now. You take your triangles and you're going to put them
together, how you like them. And you choose your
background or your card, which color you want, white is always an option, just a normal paper. And then try to put them on top. This is actually not the same, so I want the same two colors, and I like to put two
triangles on top like this. This is actually already one, I would leave some
space at the bottom, so we can do the lettering
here with Merry Christmas, happy holidays or
whatever you want, even, you know, a name for dad, for m, or you can put it more down
and do the lettering on top. That's also an option. But
just don't put it exactly in the middle because
then if you're going to put the
lettering down here, it's not going to look balanced. So if you want to put the
lettering on the bottom, leave a bit more space at the bottom and a bit
less at the top. Like this actually
would look quite nice. So this is already one. I'm
gonna put it on the side. Then let's try out
these brown ones. Is that gonna look nice or not? Not too bad, but it's not
my favorite, I must admit. I actually don't mind this one on the black. It's a bit mystic. It's a bit more Oh, I like it. But let's see.
This is very dark, so I will cover this with
something a bit lighter. Let me see maybe something, even just a simple one. I have the bigger options that I'm going to put a singles
and the smaller options, I'm going to put them two
on top of each other. This looks nice as
well, actually. Then with a white
pen, the lettering. Yeah, I'm going
to keep this one. Then you just
continue. Let me see if I like any with the brown. Mmm. So here, this,
as you can see, is a bit smaller because I cut a piece because there
was too much white space, but now it looks a bit weird if I'm gonna put them
on top of the other. So let's see if I'm
even gonna use this or maybe use it as decoration on
the envelope or let's see. This one alone?
No, that's boring. As I said, take your time here. This I think is the fun part. Take your triangles, put
them on top of each other, look what you like,
what you don't like, and prepare your cards
as you want them. Once you are happy
with your selection, you just take your glue stick. Make sure you glue the edges very well so
that they don't come up. I think that's the
most important part. You can also put paper
underneath to make sure you don't glue your table, but I have this thing, which you can tell
has been used, and then you're going to
put this on the paper. Of course, you can
if you want to measure the exact middle. I honestly just
going to eyeball it. This one, I've decided I want
to do the lettering on top, so I'm going to put it a
bit more to the bottom. I'm just going to look that
it is straight, more or less, and then here and here is more or less the same
distance as well. There we go. This one is a single one because it's
the bigger triangle. So this is going to
act as a single tree, la and up here, we're going to do
some lettering after. You can do this
with all your cards now and we're going to see each other in the next lesson where we're going to
put the lettering.
8. Lettering ideas: Okay, so now for the
lettering part, for me, this is the scariest part, let's be honest because I
was never good at lettering. If you're very good at
lettering, very good. You can also skip this class
and just do your thing. If like me, you're
not an expert, I do have a few tips
that actually help me. I mean, if you do have
a creek cut at home, of course, you can just
print them printed here. Merry Christmas and
happy holidays, and these were 9 centimeters. I think it would actually make
them a little bit smaller. So I would maybe recommend 8 centimeters and then
just put them on. If you don't know what a
cree cut even is, forget it. We're going to do it ourselves. So one easy thing
we can do and this works best on white paper is to print the lettering
in a font that you like, and then we're going to print this on here and I'm
going to show you how. You will need a
pencil for that and it would be great
if it is a two B, three B, or anything higher because that means it's darker. I even have a nine B here. This is very exaggerated, though you don't
really need this. But don't take the ones that
say H because He means hard and they are the least graphite you're
going to put on paper. You're going to
turn this around. I already did it here,
but you just going to go over with the pencil so
that it gets very dark. There we go. Then I'm
going to actually show you on a piece of paper. You're going to put
it where you want it. Let's pretend this is our card. I want to put it down
here in the middle. And then you can take here a pencil or a pen or it
doesn't really matter, to be honest, but you need to make sure to put
some pressure on it. Then you just go over
it with some pressure, as mentioned, you go over
the entire word or words. Here I chose Merry Christmas. And There we go. And then you can
remove it and you will see the
lettering underneath. And then you just take your
pen of choice and go over it. And that's the easiest
way to transfer a nice lettering onto the cards. Another thing you
could use is stamps. If you have some
letter stamps at home, you can use them this
I bought from Hema. And if you use stamps, what I would recommend is to always put the
letter ready first, so you're not going to make
mistakes in the middle. So for example, if
you're going to write once again
Merry Christmas, I would because I feel like if you don't
do it one by one, it's very easy to make a
mistake, to be honest. So let me do this, and
then I'll see you later. So let's decorate one
card with the stems because I think it makes a
very cool look, to be honest. I'm just indecisive if I should
try this vermilion color, which could go well with
this or with a simple black. Let's do this vermilion.
Let's try it out. Okay, so I will be doing Mary on the top and then
Christmas at the bottom. I'm going to try to do the
Mary a bit round dish. Let's see if I'm going
to succeed in that. And another tip which
I would give you is that Mary has five letters. So that means the first R will be more or
less in the middle. So you could actually start
with that because then you're going to be
more sure that it's going to be in the middle.
Actually, let's do that. Let's start with the R.
So just tap it lightly. And it has some black
from previous uses. So let's see if
this goes through, but even if it doesn't
really bother me. So I'm going to put
the R over here. There we go. It actually
looks quite nice. This mix of orange and black. And then I'm going to continue with the R because
it's already there. I'm going to put it a
bit with an angle, Mary. And it doesn't have
to be perfect, to be honest. That's
the fun part. Actually I'm going to continue with the E on the other side. Like, people can see
they are self made. Merry very good. And now we're going
to do the Christmas. Again, we have nine letters, so that means the S
is in the middle. I'm going to start again with my middle one to make
sure it's at central. Actually, I'm going
to align this one with the line of the
paper over here, so I have more or less a
straight line as well. And there we have
it. Merry Christmas. I think it's very, very cool, especially if you're going to do a few more details after. And this is tip number two. And the last one is
just go with it. Honestly, just take your
card and start lettering. I believe it is easier to
letter with all uppercase.
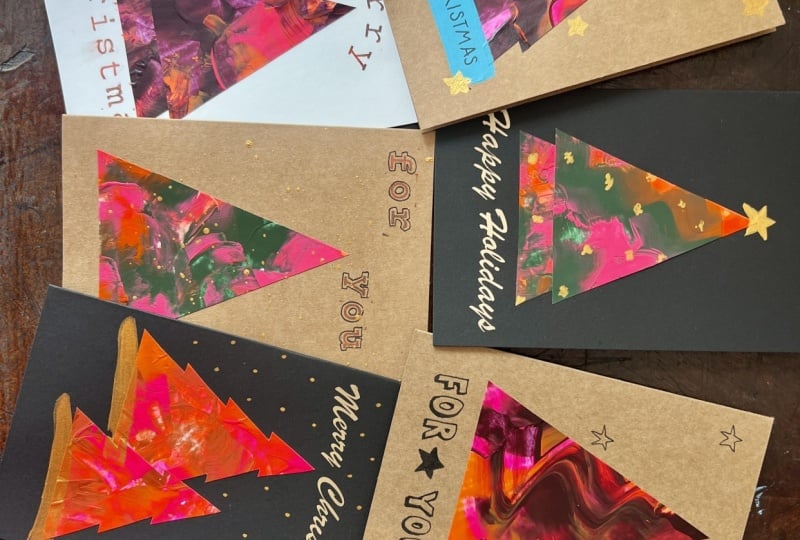
9. Final touches: So now that the cards are ready, we can add some details. You can add as little or as much detail as
you would like. So on this first card, this is actually the ones
I did with the cree cut. So I cut the ones out. And I think they are actually
the most boring ones. I actually prefer the ones
I really entirely did with my hands and some
lettering and stems, et cetera. So on this one, I just
took the acrylic paint. This is dark gold
from art creation, and I put a star, and then I put a few
little golden spots, as you can see here
because there was actually a few white
spots I didn't like, so I had to cover that up,
and I think it's very cute. Next one is actually
one of my favorite, and here I made a mistake. Then I put some
blue color on to, and I did the
lettering once again. I added some gold stars, and I think it's
very, very pretty. This one I thought
it was very simple, and I didn't want to
add anything else, so you can also leave
your cards as they are without any more
golden details. Next one, I just added
a few stars in black. I also think this
is very stylish, very cool. I like it as it is. Then this one, I added
some gold splashes. And I took, again,
this acrylic gold, and I put a lot of water, and I just slashed it
around with the brush. I think the effect is very cool. Ones with the stamps, I really really
like how the mix of the darker and the red came out. So I also left it as
simple as it was. And then I have one
more where I actually created some actual trees, and then I added some
gold bottoms and some gold dots that seem
that they are like stars. This is also the Merry
Christmas done with the creat. I really like this one with the gold swoosh at the back as well. Remember, I told you to
keep the little scraps we had at the beginning because then I decorated the
envelopes as well. And I think these are actually adorable because they have little trees and
they're super cute. So this one, very simple. I just added a tree and
then some gold details. Then this one, look
how cute these are very little ones at the top. I think this is
adorable, and then here, you can just write the
name to who it goes. I think it's really,
really cute. One more. Here, I actually took some silver to just
have a change, not to have gold all the time. And I think it's also
very, very adorable. Here, I deconstructed
the tree a little bit, so I cut it in three pieces, and I think that's
also very nice. Again, we're writing
something here on the side. This one, very simple as well
with some little lettering. So it's actually one
of my favorites. Because I think once I'm going to put the name here
on top of the golden, it's going to look
very, very cool. And last one, again, I cut the tree
into a few pieces, and then I added
some gold ditals. So if you still have some of
those papers lying around, you didn't use completely, add them on top of
your envelopes, I think it is going
to look amazing.
10. Final thoughts : And there we go. You have now a set of beautiful
Christmas cards, and I am sure that your loved
ones will 100% enjoy them. I would love to see
what you created. So don't forget to put your favorite cards or the entire set in
the project section. And if you're already feeling
very Christmasy and want to give me a gift I would
love to read your review. I'm happy to hear your feedback. This is my second
Skillshare class, so don't be shy
and tell me what I can improve and what you
like about this class. And yes, why not? Go check out my other Skillshare
class as well, which is a 100 day
drawing challenge. Yes, 100 days. So perfect for the
beginning of next year. I wish you an amazing
holiday season. It was a pleasure to have you here and hopefully see you soon. Yeah. Looks. Come to this Christmas card. We call them Christmas cards? We call them holiday cards. These ones are handmade. They're handmade. Anyway. D.
 Mika Simmen, colorful self-taught artist