Transcripts
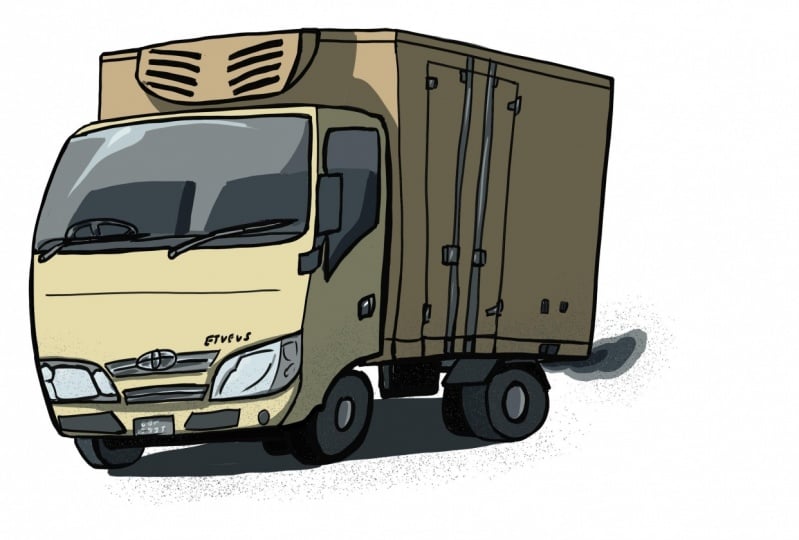
1. Introduction: Hello askew share students. My name is T0 and I have been creating art with traditional media as well as digital tools for more than ten years. In this class, I'm going to teach you basic digital illustration with clips studio paint. And we're gonna talk about a software, what you can do with it. I'm going to show you how you can create a sketch from start to finish and then color it and also share it online. So this course is for beginners, so don't worry if you don't have any knowledge when it comes to drawing because I'll be drawing something really simple, a very angular boxy truck that anyone can do. And if you think you can draw, you will realize that you can draw and up this lesson. So let's jump right in.
2. CSP Installation: In order to follow this class, you obviously need to have clips, studio paint. And if you already have the app installed, you can skip this video and go into the next lesson. Now eclipse Do D0 is available on Windows, Mac OS, iPad, iPhone, and Galaxy tablets. So if you happen to be using a computer, you can go to their website, clip studio.net slash EN for English on their website, you will be able to find links to download the software. So here are two links. One is for the free trial and one is to bite a license for the software. My class is for students who have already purchased a license where you get all the features with the free trial, there are some limitations. Sama features are actually not available. If you know you're going to be drawing a lot very frequently, is actually buying trip studio. So these are the prices at the time of this video. If you are using flip studio on Windows or Mac OS, basically on desktop, that's a onetime purchase. If you are using clip studio on the tablet, it's a monthly subscription. Again, I think it's if it if you are going to be drawing very frequently. So that's how you would go about finding and installing clips studio on a desktop. If you happen to be using a tablet, if you are using i hat, you can download the app from the Apple app store. If you are using a Samsung Galaxy tablet, you can download the app from Samsung Galaxy store. At the time of this review, clip studio is not available from the Google Play Store. So to search for the app, just type in Eclipse studio and just install it. So once you have the app installed, just launch it. This is where they will ask you whether you want to go for the free trial or if you already have the license, just sign back in. Now there are two versions of clips due to pin that eax and probe. The Pro has most other features that majority of people will need. Yaks has some extra features. Pro is the one that you should go for unless you do need the extra features. So I already have the license I'm going to sign in. Alright, so now I have clips to your on my tablet. In the next lesson, we will go through the user interface of Phipps studio paint.
3. CSP User Interface: In this first video, I'm going to show you how to set up the interface and preferences so that you can have the most efficient workspace for drawing. The eclipse studio I'm using is running on Android. Studio is available on Android, iPads, Mac OS, and Windows, and the user interface is pretty similar across their platforms. There are some minor differences. So for example, with Android, there is this each he bought here with shortcut buttons so that it's easier for you to use your fingers. We've just shortcuts the menus here pretty similar to the desktop version, except here on Android, they have split their preferences into this button here. On the desktop. The preferences is grouped under the File menu after launching clips studio, this may be the interface you see. There's the menu bar, the two bars on the side, pallets on the left and right side. Now if your interface is different from my, you can go to the menu bar, click Window, Workspace, and click comic. So this is the default comic, drawing Lee out. We have the color wheel here and a different pans and brushes here, and the brush sizes here that Cleopatra is on the right side. So let's go ahead and create a new file, File, New, or if you're using a keyboard, just hit Control. N. Pip studio actually provides many presets depending on the type of work and that you are creating. So if you're just creating a very simple illustration, you can just go for illustration. Here I have selected four K. If you are drawing comics, you can choose comics and you can choose the page size. This is A4. They have so many different sizes and resolution you can choose. And for comics, you can actually create multip ages, multiple pages, and you can also create animation. Some other features may or may not be available depending on which version of clips studio you're using. So let's just create a 4K resolution foul and make sure that width is wider than the height. If not, you can click this button here to swap. You can also see Tom knew there. So I want horizontal and thus, OK. Flip studio is best used with a keyboard so that you can have access to keyboard shortcuts. That alternative to shock us when you are using, in this case, a tablet is to go into the menu and click functions, the commands, which can be rather inconvenient when you are drawing. So when you have a keyboard, you can just do your commands, your shortcuts, and continue drawing. There is no break in the workflow. Take a look on the right side, add layers palette, make sure you have layer one selected. Here. I want to rename the layer two ink. So this layer is where I'm going to draw all the lines and not from the left side from the two balance, choose a brush. This are the different drawing 2s we have Penn, brush, pencil and spray. So let's choose brush. And I wanted to choose bit husky. That's actually one of my favorite brushes because it has. Texture on the ages, it's a bit difficult to see here because the lines are quite thin. So let's try and increase the thickness water lines. If you're using a keyboard, you can use the square brackets. This is to increase and this is to decrease the brush size. So I'm going to increase the size and you will be able to see the cursor increasing in size. All right, now it's much better. And you can see that additional texture, which is really nice. If you are using a tablet and you don't have access to a keyboard to increase or decrease brush size. I highly recommend you use each keyboard here, go to Preferences, shortcut settings, and under shortcuts settings from this setting, a dropdown menu and choose options and look for brush size pallet so that he fought a shortcut for select a smaller preset than current debts, the square bracket, and select larger, that's the yellow square bracket. So here I have a sine and additional shortcut, which is T1 and T2. So for T2, basically, select the shock i1 and click at shortcut. So press T2 and heat. Okay, so now when you press T1, the brush size will increase and t2 to Prussia size, we'll decrease. The attendance area is to click on this brush sizes here. The other alternative is to go into windows and look for tool property. Click it and drag this pellet down here, plays it beside the other pallet. So here you can also change the brush size this time by dragging the slider. Personally, I prefer keyboard shortcuts. If you happen to be using our stylers that has the whole capability, that means minor pan is close to the display and you see the cursor. Sometimes you may have to lift your pen away from the display in order to change the brush size. Undo and redo is also very important to undo the key Bosch Hawkeye is control z. And if you are using a finger gestures, it's double finger tap on the display. The last preference I want to change is penn pressure setting. So we'll go into the provinces, look for Penn pressures settings. And this is where you can adjust the pen pressure, that mean reset to default. So this is the default pleasure curve. I'm going to move pen pressure so that it looks something like this. This means that when I am drawing with very light pressure and the line is going to be even thinner. And when I draw with more pressure, the lines will be even thicker. The last thing I need to show you is how to move around a canvas. So there are several ways to do it with the keyboard. You can press control space to zoom in and out. So when you press control space and click, you're gonna zoom in. Press control space, a tenet, going to zoom out. And when you press spacebar, you're going to be able to move this left to right anywhere. And if you take a look at the Navigator, you will be able to tell where is this window. So this window is looking at the bottom right side of the letter a. If you are using a tablet, you can just use your finger gestures to zoom in and out and rotate. So it's very convenient.
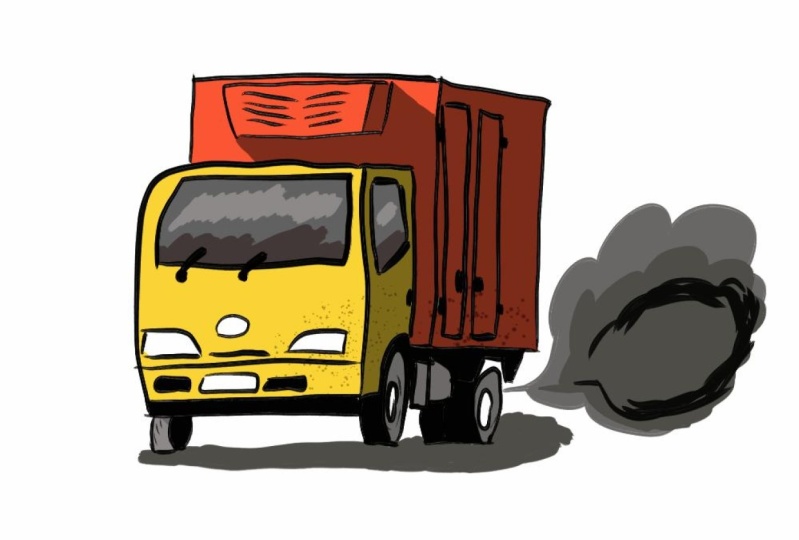
4. Let's Draw Line Art: And now in this lesson we are going to draw so mixture that you have the brush beat husky selected and I have a RED color selected, so I one and black color. So let's draw the front of the truck. Don't worry about getting the accuracy. Here just as a bar, three parts, this is about one parts. So you can actually just follow my line drawing rather than following the photo because the photo can be quite detail. So this will be the bottom of the truck. We have license plate. If you're using a pressure sensitive scholars, you can press Dao harder for their lines. So what I'm doing here is basically drawing the beak shapes and then drawing the smaller ships we've been. I find it to be much easier. And we have decide window here. So don't worry about accuracy, just focus on the workflow. Focus on what you can actually do with this software. And I'm going to draw the top here. There is this protrusion is could be refrigerated truck and this is the back of the truck. There is some perspective going on. So let me just move this line at an angle. And this line will be at a slight angle as well. If you are using a keyboard or you are using the desk top version of clips, or you can press Tab to height the pallets. But if you are using a tablet to Haida Pelosi actually had to go into the manual, which is rather inconvenient, which is why I lived. Keyboard. Ok, let's draw the site DAW. So this is very basic ink drawing. Oops, once that let me delete that. This is the site off or the truck. I can add some details here. The hinge and for the bottom as stroller wheels. Two views here, 11. So don't worry too much about accuracy. Just have fun drawing. And you can see this truck slowly coming to life. K Most done, maybe a logo here. And yep. So almost done. So I want to do some correction here because some of the lines I drew down a bit too long. So in this case here I'm on Android, I can actually press this button here to you raised a line. And I need to draw this refrigerated pot bit leftover. So let me just erase this whole pot. I can also choose the eraser button here, in which case I can increase the size of the eraser to make it easier for me to erase larger areas. Okay, then let's go back to the brush again. This time. Draw the extrusion to protrusion lower. And for the vents here, I'm going to reduce the size. You can reduce it here as well. Oops, too thin. Steer through to a thin. I need to increase it. A bit thicker, may get a bit thicker. Alright, let's take a look and see what we have here. So missed out some lines here. Oops, too thick to thin. That's put two wheels here. And draw something here at the bottom. I need to erase this part to put that got behind. And here. Now notice for my drawings, I close all the lines. I don't have any open lines like this. This is because later on when I am coloring, I will be using the field bucket if there are any open. Why is the colors are going to pour out of the lines, out of the ships. Okay, so let's see what we have here. I have some white space on the right side, actually a lot of white space on the right side. So in this case I can actually crop the Canvas, but we will do that at the last stage. Maybe I need the space later on. So what I can do is actually moved a truck a bit lower and to the right side. So to do that, just click this move to theirs for directional move Layer two, and it is layer to the right side of this. I wanted to have some space here because I want to draw the smoke that comes out from the truck. In the next lesson, we're going to color this.
5. Let's Colour: Before coloring, let me talk
about the use of layers. When you are doing
digital illustrations, you will want to use layers. In this case here, I will have one layer for the line art, one layer for the color, one layer for the texture, and one for the shadows. I already have the
layer for the inclines. Let me create another layer. To create a new layer, just click this new
raster layer button or you can use the
keyboard shortcut Control Shift and and one
new layer has been created. I'm going to rename
this layer colors. Before we add colors, make sure you have the
colors layer selected. I'm going to add colors by
using the field bucket. The tool is here selected, and I'm going to choose a
yellow from the color wheel. So using the paint bucket, you can see that icon there. Just click on the area
you want to color. Colors should fill inside
and enclosed shape. Now, if you click inside and enclosed shape and something
like this happens, have a look at the Subtool
palette for the field bucket, and now you see it's refer
only to the editing layer, which is the color layer. So what you want
to do is to have the field bucket reference
the line art layer as well. So just click here,
refer other layers. Now when you use the
field bucket tool, it will also reference
all the other layers. Notice as I click on this area, the color expands into the line. The color shape expanding that can be controlled
by color margin. I still want the line art
to show off prominently. I don't want the colors
to cover the line art. So here at the layers palette, just move this layer, drag it below the
line art layer. With this layer arrangement, all the colors that you
add from now onwards, they are going to appear
beneath the line art. The field bucket tool, it's very convenient when
it comes to filling colors. I need to color this
area with this yellow, but I have the red selected. To use the same color here, I'm going to press a turnt to go into the eyedropper mode. You can see the iconic changes
and click on the color, and it's going to
pick up the color. When I release the urnt key, I'm back with the field bucket. If you are not using
a physical keyboard, you can use the H keyboard
to get to the eye dropper. There is an alternate
button here as well. Now with this Samsung Spen, when the cursor is
close to the display, I am not able to
press the button, so I actually have to move
the pen away before I can click or tap
that button and now you can see that eyedropper to and now I tap the button again and now I'm back to the
field bucket two. Let me create another
color layer for the tires. For the tires, I'm going to use this gray and use the
field bucket two again to fill all the if there are
areas where you cannot fill, you have to go in with a
brush to color those parts. See the white areas here. I need to go in and
color with the brush. Now I'm going to use
the field bucket to paint some of
these shapes black. I have black selected and the field bucket selected.
Let me click here. Notice what happened here. Let me undo and
turn off the ink. What happened was when I
click the field bucket, it's selected and painted
all the colored areas. What I need to do is to
change the color margin here. Right now it is at 77, let me move it down to maybe 24, turn the lines back on and
use the field bucket again. Now I'm able to fill
all these shapes. So what happened earlier was the pink bucket thought all these colors
were rather similar. I mean, it's either colored or it's either uncolred
or it's colored. So it treated all the colored
areas as just one area. So when you fill it, basically, you just filled all
the colored areas. So what you want
to do is to have the fill bucket more sensitive to the colors so that it can detect
different colors. So let me click
here, here, here. The reason why I have the gray and black on its own layer
is because I want to draw some reflections here and with the shape that I have here. Basically, this shape here, I can click this button,
lock transparent pixels. I'm going to lock the
pixels on the tires layer. What this means is
now when I have a darker brush and I color
outside of the colored shape, notice the colors they
do not run outside. Which is really
convenient when it comes to coloring within
certain shapes. Now, notice I have the line art here and I have
the original lines here. This line art was created
with the field bucket too. Back when I was using
the field bucket, it was too sensitive and it looked at the line art and
also filled the line art, but it was hidden beneath, which was why I wasn't able
to detect the gray lines. So let me just
select all of this. Control A and Control X
to delete everything. This time around, I'm going to use the field bucket again, but make it more
sensitive so that it so that it doesn't feel
the black lines as well. So I have color margin at 24. Let's choose the gray
again and fill it. Make sure the lock
transparent pixels are off so that you
can feel the layer. Let's turn off the lines
and see if it works. This time, it works. So once again, let's use black to paint these areas black. Very convenient to
use the eyedropper. I'm going to use brush
to color the parts here. And now let's lock the pixels so that I can choose a darker
brush and color here. Let me increase the brush size. This is the reflection. I'm going to choose
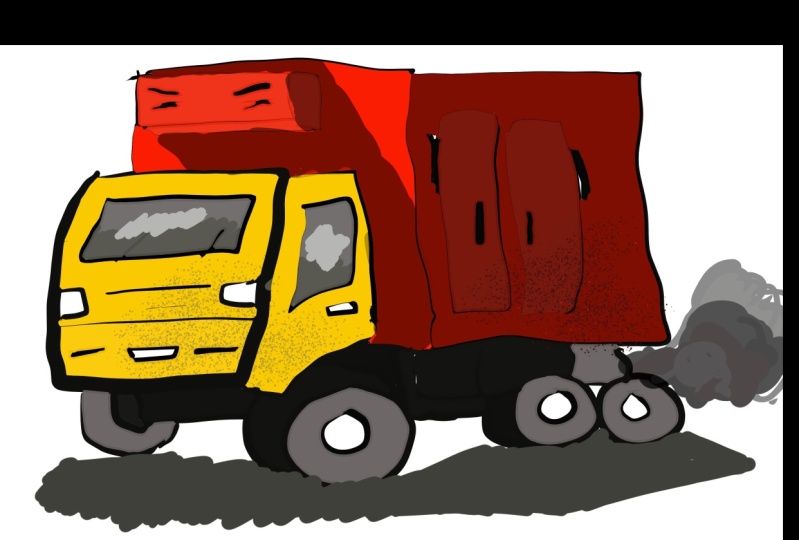
a lighter gray. And for the front of the truck, well, I shall leave it as it is. Let's add some shadows. So for the shadows,
I'm going to create a new sta layer and
I'm going to drag the restor layer all the way to the top because the shadow
will go over all the colors. And for the shadow, I'm going to choose
this black color. It's a black color, and I'm going to set the
layer opacity to 50%. So the opacity will
go down to 50%. The black on this layer
will actually be 50% gray and I want to set the
blending mode to multiply. So now it's multiply. Now with the paint bucket two, just paint on the shadow layer. For this area here, if I were to use the paint bucket two
and click like this, it's not accurate
because this part here is supposed to be in light and this part is
in light as well. I need to manually draw the shadows here and to
make it easier for me to draw the shadows here and not accidentally
draw somewhere else, I'm going to create a selection based on
this color shape. Basically create a
selection based on this color shape so that I
can draw within the colors. Remember earlier, I
showed you how to lock transparent pixels and
color within the shape. Here I am not able to do so
because let me show you why. If I were to lock
transparent pixels by clicking that icon, I will only be able
to color within the shadow shapes here,
which is what I do not want. I want to color
this shadow here. Let me show you a new trick. Just click on the colored
layers, basically on the Area that you want
to color and go to layer selection from
layer, create selection. The keyboard shortcut is to press Control and
click on that layer. So now I have selected
all the color shapes on this layer and I can
paint the shadows. So go back to the shadow layer. Remember if you want
to paint the shadows, paint on the shadow layer. So here I'm going
to choose a brush. I'm going to draw at
this angle here like this and this angle here. Now, the orange is
still being selected, which means if I were to
draw over the orange, that will happen, so be careful. But I have the black lines to separate the
orange and the red, so it's going to be
easier for me to color. So once I reach this area here, I can just fill it
up very easily. This part here is also in sheet. And after you are done, you see all these
shiny lines moving, the selection lines are moving. Control D to di select or select here from the menu, Diselect. You may want to correct I mean, touch up the areas here. So this sketch is almost done. Maybe I want to add some
shadows on the ground. So I'm going to go to
the tires layer and use my brush to draw the
shadows on the ground. I'm going to use the
eraser here to erase? Nope. I'm going to
extend the shadows here because the light source
is coming from the left, so we get a bit more shadows
here on the side here. This looks good. And now I want to add the exhaust, some smoke. So I'm going to
create a layer and place it beneath
the color layer. Basically place
it below the red. And I'm going to choose brush, the same brush that I was
using earlier, bit husky. So the exhaust is going to
be quite low to the ground. So the smoke coming
out will be quite low. So this is the Smoke. I'm going to use the field
bucket to fill this. Now, sometimes when you
click the shortcut, G to field bucket, you'll notice that there are other tools within the shortcut. So field bucket is one of these tools that will appear
when you press G. If not, just keep pressing G until
you go to the correct tool. This will apply to other tools as well because
each button here, they may have several tools
hidden within the button. Okay. So this is
looking quite flat. So let me add another layer above this
to maybe add more smoke. So I'm going to add
maybe a darker smoke this and maybe I can
add another layer. Maybe this time
around really dark. Oh, I'm right at the edge there. So let me just erase it here so that I don't go
all the way to the edge. Okay. So that's
the smoke I have. I created three layers
to draw the smoke, so that's easier for me to create the overlapping effects. So now that I'm done
with the smoke, I don't need the three layers. I'm going to keep
it simple. So I'm going to merge the three layers. So I'm going to click
the first smoke layer and Control click the
second smoke layer to dit, and Control click the
third smoke layer to edit. Or you can actually use
the check box here, does the same thing
and go to the menu. After the layers are selected, go to merch selected layers. Now all the smoke layers
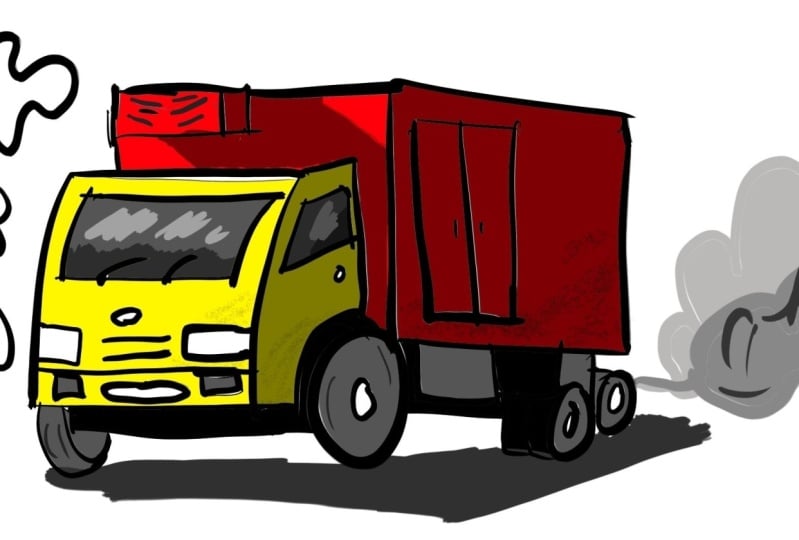
are merged together. This drawing still looks flat because of the
coloring style. I want to add some texture
to the side of the van. I'm going to create a
new layer on top of the color layers and I'm
going to name it splatter. Because I want to create
some splatter marks. I'm going to choose
the spray can two here and look at some of the options
that I have here. You can use your finger
to scroll down the list. I'm going to choose spray. Now with the spray
brush selected, I'm going to use
the eyedropper two. I'm going to press turnt
and use the eyedropper two. If you are using a tablet, you have to click the eyedropper and click the spray can again. Now I have this same rate. I want to make the spray darker. And I want to apply to
the side of the van here. Now, it doesn't
seem to be working. That's because the
particles are too small. Let me increase
the particle size. So under two property, you can increase
the particle size. And when you do that, you will also notice
the particles here, they become larger. And now you can see the texture. Let me choose something
smaller but not that small. All right. Maybe a bit smaller. Make sure you paint
on the particle, sorry, the spray layer. Okay. Looks nice. We have some texture here. Some of the particles
actually went out. If you just want to paint
within this red color, remember earlier the
shortcut that I taught you, press Control and
press the color layer. So I want to add some spray to the front
of the truck as well. So I'm going to press Control
and press and click on the color layer to
create a selection so that I can spray
within the selection. I'm going to use the eyedropper again to pick this color and pick a darker yellow and spray, make sure the particle size
are smaller this time. And just give it
some texture as if the van just went
through some rain water. So the water actually sprit onto the truck. You know what? Let me just select the
tires layer and roll on that layer just to add a
bit more texture to it. So this sketch is done. So when you are
working with layers, it's very useful because sometimes when you want to do some corrections, for example, let's say I want to change
the color of this van, I can turn off the initial colors by
clicking the eyeball to. In fact, let me
turn everything off except for the ink lines. So now I can change it
to a different color. Let me just change it to green and create a new
layer for the new. And for the back, let's
change it to a dark blue. And I can turn back
all the other layers, and we have a
different colored van. However, the splatter marks, those were created using the eyedropper by picking the
colors of the original red. If you want the splatter marks to look more natural
against the green, don't select a color instead, select gray and then multiply
that layer over the red. In this case here, let
me see what I can do. So I'm going to change the
color for the splatter marks. I'm going to select
multiply, and it works here. In this case here, I just had to change the blending
mode to multiply and the splatter marks immediately just multiply over
the color beneath. So now you have two options, either the yellow and red truck or the green and blue truck. That's why using
layers, it's so useful.
6. Goodbye: Thank you for joining my class. I hope you have learned something. Do share with me your sketches on this huge gap that forms so that I can have a look and maybe give you some suggestions on how you can improve. And if you guys have any questions, you can post them on the platform as well. I will try my best to answer them. All right, thank you so much for watching. And if you want to learn more about drawing, I actually have silver audit classes on traditional media as well as on digital drawing. Do check them out. See you in the next class. Bye.
 Teoh Yi Chie, Sketcher, watercolour lover