Transcripts
1. Introduction: Hello, everyone. I am Mona and I am so excited to welcome
you to my online course. All about creating realistic,
stunning clay supplies. I am a clay artist
from India and I have been working with
Clay for over 30 years. It's my passion and my artistic interests
are quite diverse. I enjoy making everything
from dolls to fountains, flowers, murals and sculptures. Clay allows me to explore
so many different forms. You can see more of my work on Instagram, YouTube and Facebook. Just search for Mona art. Now in this course, we are going to deep
dive into the world of air dry clay and learn how to create incredible
realistic supplents. We will go step by step from
the very basic of shipping the clay to adding those fine details that make your supplents look
like they are alive. We will cover
everything you need to know to capture that realism. Whether you are a complete pgner or have some
experience with clay, this course is designed for you. I'm here to guide you
every step of the way. If you are ready to
unleash your creativity and create your own
miniature botanical wonder, I invite you to join me in this exciting
journey. Let's begin.
2. Materials : Let's start with our materials. Our main material
is air dry clay. Choose a type of air dry clay where colors can be premixed. This clay dries at
room temperature, so there is no need for a clean. You can find this clay in
any craft store or online. To make it colorful, we will be mixing acrylic or
oil colors into the clay. By mixing these paints, you can create any
color shade you like. For shading, we will be
using soft pastel colors. You will also need a
paintbrush, a knife, all purpose glue, some plybgs to store the clay
and ball tools. Ball tools are optional, so feel free to
create without them. So let's get started.
3. Preparing Green Color Clay: In this step, we are mixing
colors into the clay. I am using lemon yellow, white, and sap green. First, I am mixing these colors together to
get the perfect shade. Then I will mix it in the clay. To lighten it just a bit, I am adding a touch
more lem yellow. Mix well. Now we will mix
this color into the clay. It might feel a little sticky and loose initially,
but don't worry. As you kneel, it will gradually return to its
perfect consistency. Rolling and folding the clay is a great way to make sure the
color mixes in really well. Keep at it, and you
will see the clay transforming back to its
perfect consistency, soft, plable and
no longer sticky. Now that the color is
beautifully blended, we will pop the clay
into a zip lock bag, so it's ready for our next step. And let's move on to
mixing our second color.
4. Preparing Brown Color Clay : Now I am using dark brown and mixing it into a
small amount of clay. We are creating a
dark brown clay. K the color throughly just
like we did with other clays. It will take about
five to 6 minutes. We only need a small quantity
of this dark brown clay. Once the color is
evenly distributed, we will set it aside. Now we have three colors ready, green, white, and brown. Let's move on. A
5. Preparing White Clay: For the pot. I'm mixing white acrylic paint
into the white clay. Even though the clay
is already white, adding a bit more
white paint will prevent it from looking
dull after it dries. You can use either acrylic
or oil paints for this. Make sure the color
mixes in beautifully. And remember, keep your
hands and work area super clean because white
clay shows everything. Keep kneading until the
color is perfectly blended. It's now throughly mixed. Now we will keep it
in a zip lock bag.
6. Let's Make the Pot: Let's begin making the pot. We will start with
some white clay. Make sure to knead it well. Before using the clay, it's important to condition it. Conditioning helps
distribute the moisture evenly and making the clay soft, smooth and easy to work with. Knead the clay for
about five to 7 minutes to condition it properly. Now, let's shape it into a bowl. We will use a ball tool to
create a hollow inside, gently move the ball tool
around to widen the cavity, forming a cup shape. I'm holding the
clay in my palm and slowly rotating it as
I use the ball tool. If you don't have a ball tool, you can also use your finger
to create this cavity. Take a small amount of
body lotion or moisturizer and gently rub it onto the surface of the pot
to make it smooth. Then place the pot on a piece of butterpaper or a plastic sheet. We will now use
the brown clay we prepared earlier to fill
this cavity we created. Apply glue inside the pot. You can use all purpose
glue or wood glue. Make a small ball of brown clay, place it inside the pot. This will create the illusion
of sand or soil inside. So our cute mini pot is ready.
7. Making of Leaves : In this section, we will be creating supplants
using green clay. We will start by
conditioning the clay, which means kneading it for
about five to 6 minutes. This makes the clay
easier to work with. Once it's conditioned, we will
roll it into a long shape. Then we will divide and cut this roll into
nine equal pieces. These pieces will become the disal leaves
for our sucklin. Let's turn these pieces
into little balls. Using a bit of leftover clay, form a small ball, flatten it, and stick it
in the center of the bot. This will serve as the
base for the supplant. Next, we will shape the balls, roll each ball between your fingers to form
a teardrop shape. Repeat this process
for all the balls. You don't need any
fancy tool for this. You can easily create the
teardrop shapes by hand. Once you have shaped all the balls, set them aside, now take the teardrop shape and
flatten it slightly. Then pinch the tip
to make it pointed. Gently pinch the backside
to adjust the shape. And there you have it a
perfect succulent leaf. Before we attach it to
the base with blue, let's create the rest of the petals using
the same technique. Just flatten the
teardrop shape a bit and point the top,
pinch from backside. Now, let's take these leaves.
8. Arranging First Layer : Apply a small amount of
glue to the center part. Now gently lift each
leaf and one by one, carefully stick
its lower portion. Place them close together, leaving no gap to create
a full appearance. I prepared nine
leaves beforehand, and it turns out eight are
enough for this project. Once you have arranged the
leaves in a circular pattern, use a ball tool to gently
press down in the center. This will secure
everything and provide a polished finish adjust the shape of the
leaves if needed. Now, we will make the
leaves for the next leer.
9. Second Layer : Alright, we are ready for the second layer of our
beautiful supplant. For this layer, we will
need to create six petals. So cut the roll into six parts. These petals will
be a little smaller than the ones we made
for the first layer. Just like we did for
the first layer, start by rolling a small piece of clay into a smooth ball. The technique is exactly
the same as before. Roll each piece into a ball, then flatten it gently, pinch the top of the flattened
circle to form a point, then pinch the back
to refine the shape. Now you have two options
for attaching the petals. You can apply a
tiny tab of glue to the base and carefully
stick the leaf. Or if you prefer, you can make all six petals first and then attach
them all at once. I find it easier to
work step by step, so I'll be attaching
each petal as I finish Make sure to space
the petals evenly. Don't be afraid to adjust
the placement as you go. It's all about creating
something beautiful and unique. Press the center
part with ball tool. Once the second layer is
complete, as you see here, we will move on to the
third and the final layer, and then the delicate
center part. In the next video, we will
tackle those steps together. So let's keep going, and I'll see you
in the next video.
10. Third Layer and Center Part: For this third and final layer, we are going to
create the leaves for roll that layout smoothly. Once you have a roll, cut it into three
equal sized pieces. Remember, these leaves will be smaller than the
previous layers. The first layer has
the largest leaves. The second layer was smaller, and now for this third layer, we are making them
even smaller again. The process is the
same as before. Next, apply glue
to the center of the succulent and stick
these leaves in place. Press gently with a ball tool
to secure them formally. After that, we need to
make the very center part, take a small ball of clay, gently form it
into a drop shape, attach the broader end of this drop shape right in the
center of the succulent. And with that, clay
work is finished. And now in the next video, we are going to add shading to give it a truly
realistic look. It's
11. Shading: And with the claver finished, let's move on to the shading to really bring this succulent
to life with color. To add that realistic touch, I am using soft pastels
in purple and magenta. These will give us
beautiful subtle shading. Using a knife, we
will gently scrap off just a tiny amount of
pastel. We don't need much. Then with a soft brush, pick up a very little color. Tap off all the excess
pistols from your brush. We want a very
light application. And then lightly apply it just
to the tips of the leave. Think of it as just kissing
the tips with color. Repeat this process
on the tips of all the leaves being consistent
with your light touch. Feel free to choose
shades you like best are the tones
or vibrant hues. It's all about your
artistic vision. Next, we'll take
the magenta pistol. We'll scrap it in the
same way as before. Again, just a small amount and apply it right
next to the purple. We just add it slightly
overlapping for a blended effect. Remember, less is poor. Apply it lightly and gradually build up the color to
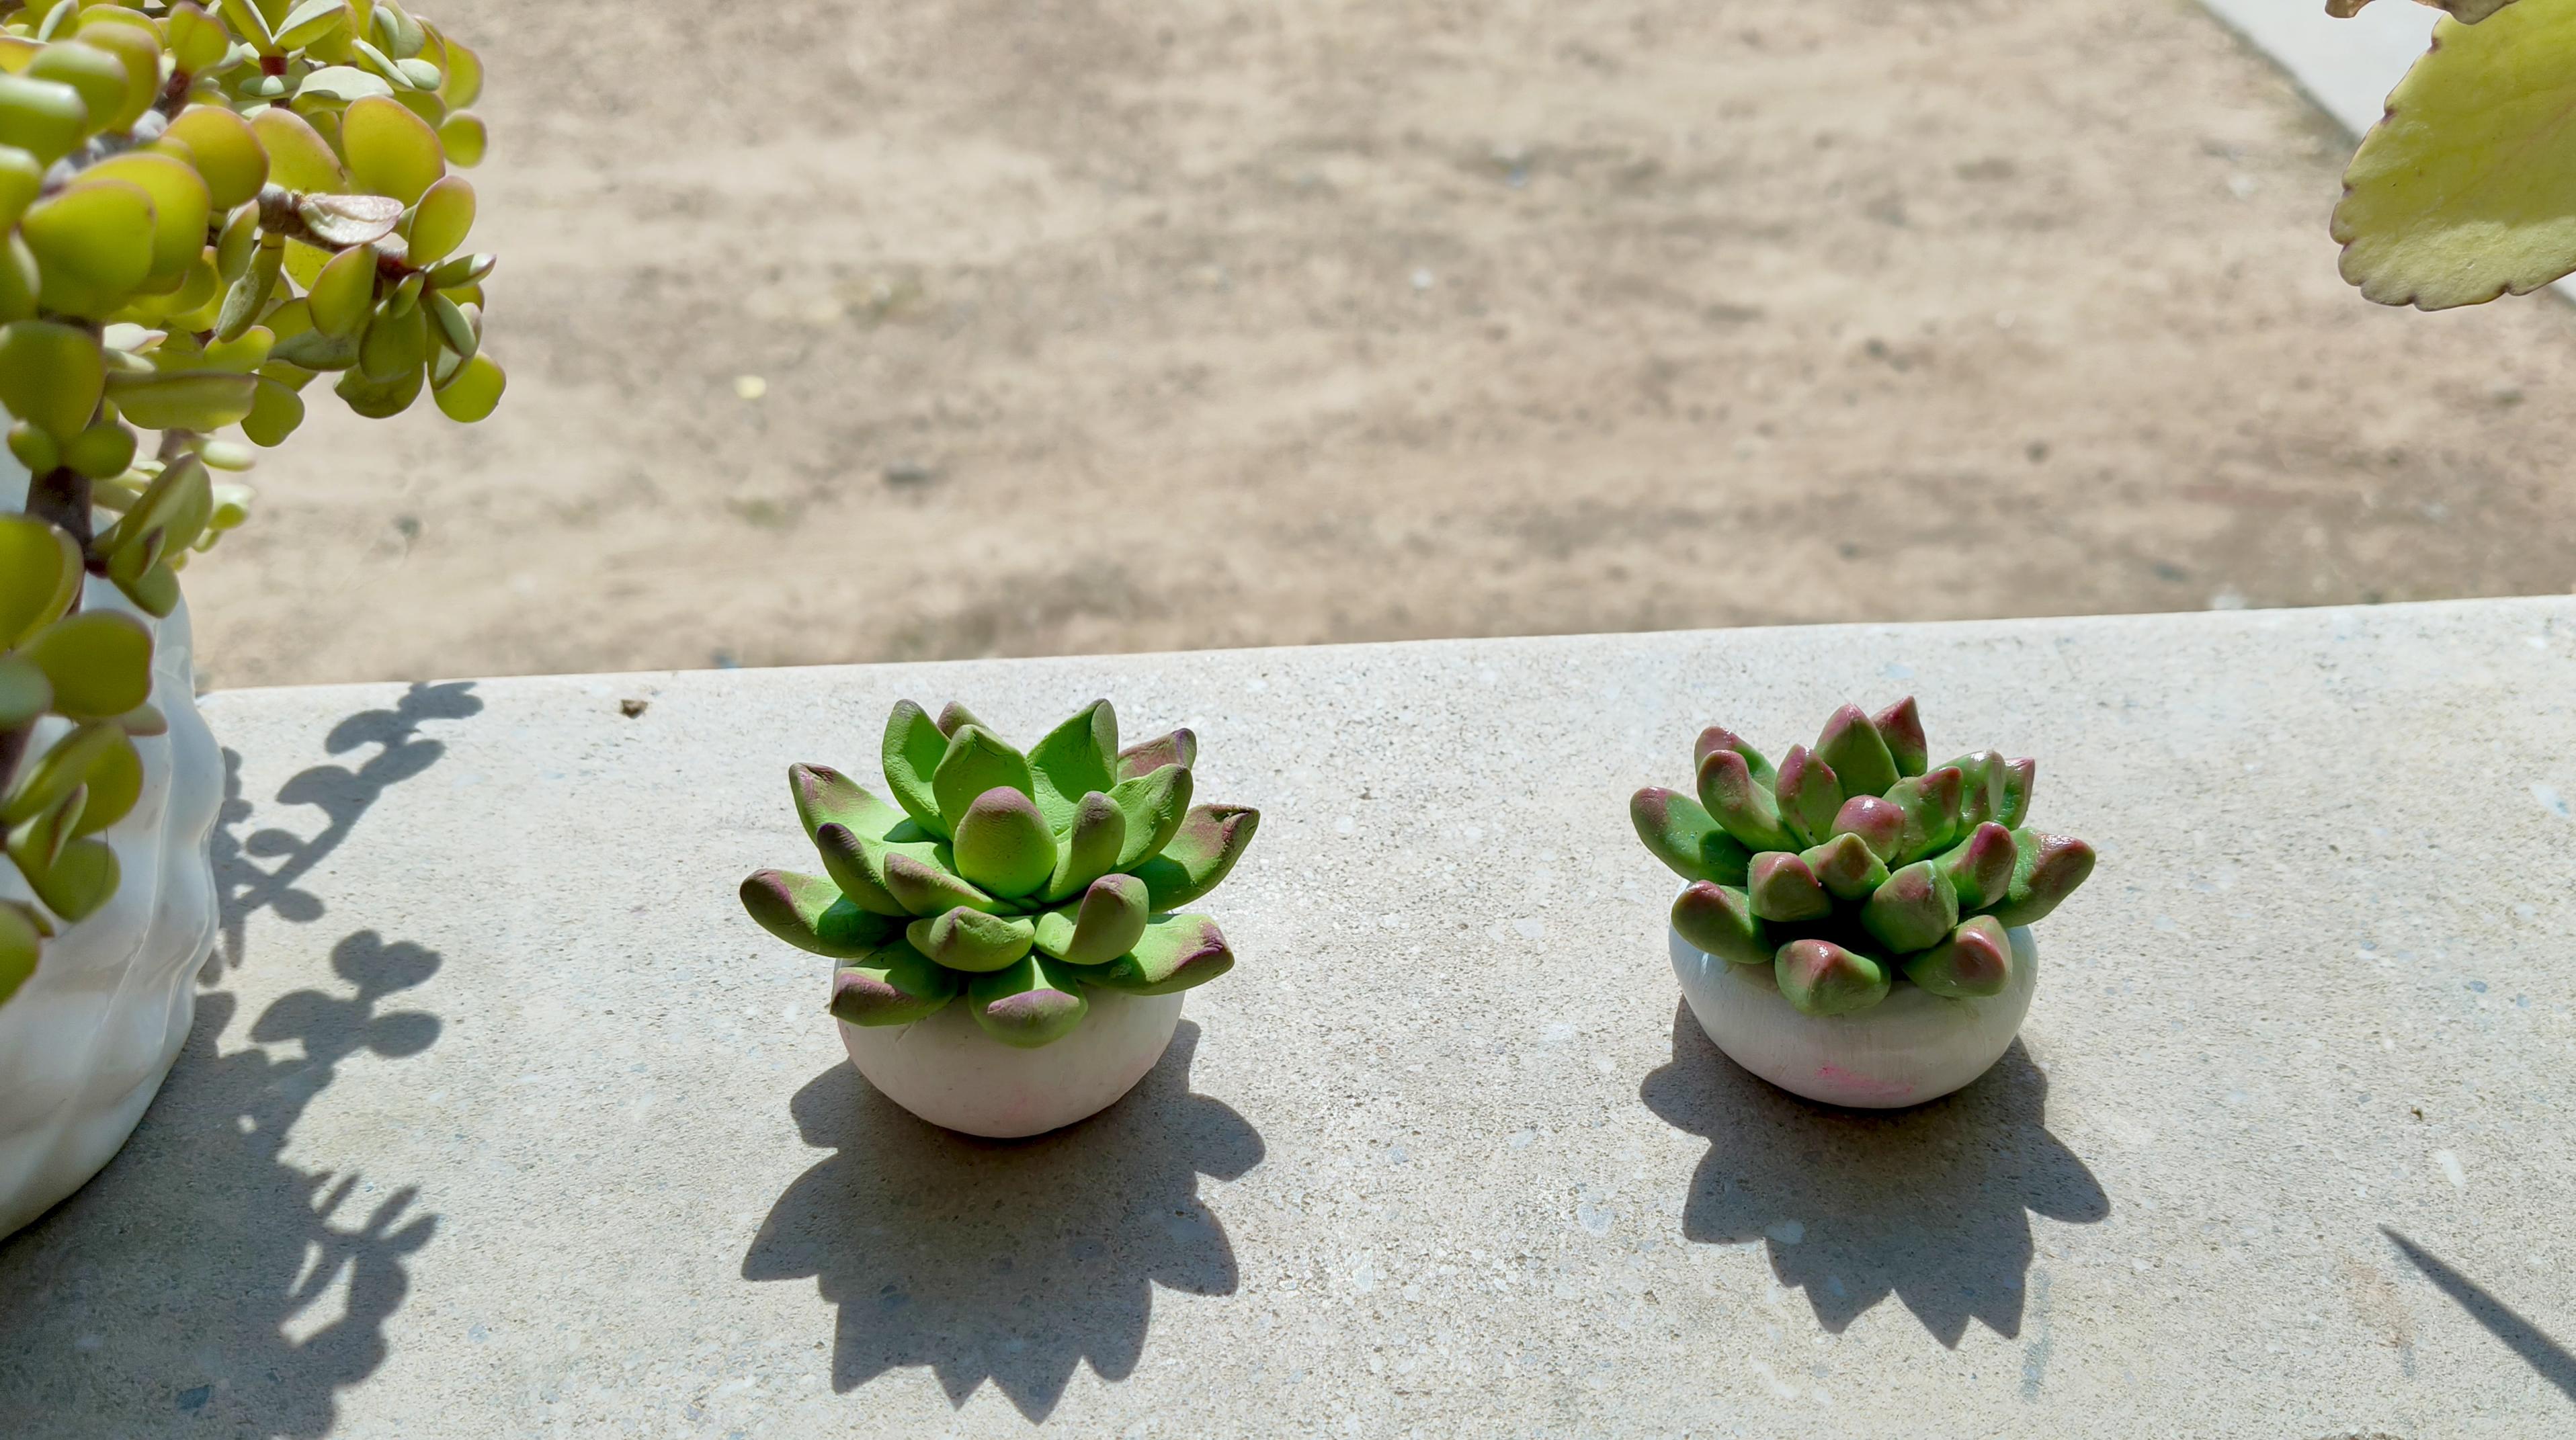
avoid harsh lines. And with these touches of color, our succulent tips are
beautifully shaded. Now we need to let
it dry slowly, cover it loosely with a
light cloth to protect it. Proper drying at
room temperature, which may take about
two to three days is crucial for it to dry completely and properly before we move on
to the next days.
12. Varnish : Now for the final step, you can apply a varnish
to preserve your work. Since it's still not dry, I'll show you how to varnish
on this other piece. I am using a spray varnish, spray it from a slight
distance, covering everything. The varnish will protect
your piece from humidity and moisture and also give it
a light glossy finish. It dries within minutes. Now your cute suclnt is ready.
13. Final Words : Thank you for joining me in this clay supplant making class. I truly hope you enjoyed the process and excited
to create more. Remember, feel free to experiment with
different designs and colors to make your
supplant uniquely yours. I absolutely love to
see your Finish piece, please share your results. You can post them here or
tag me on social media. You can find me on YouTube, Instagram and
Facebook as Monrti. I look forward to seeing your beautiful
creations and hope to see you in my next class
until then Happy crafting
 Mona Arty, Clay Artist & Educator