Transcripts
1. Welcome & Class Project: Hi, everyone. My
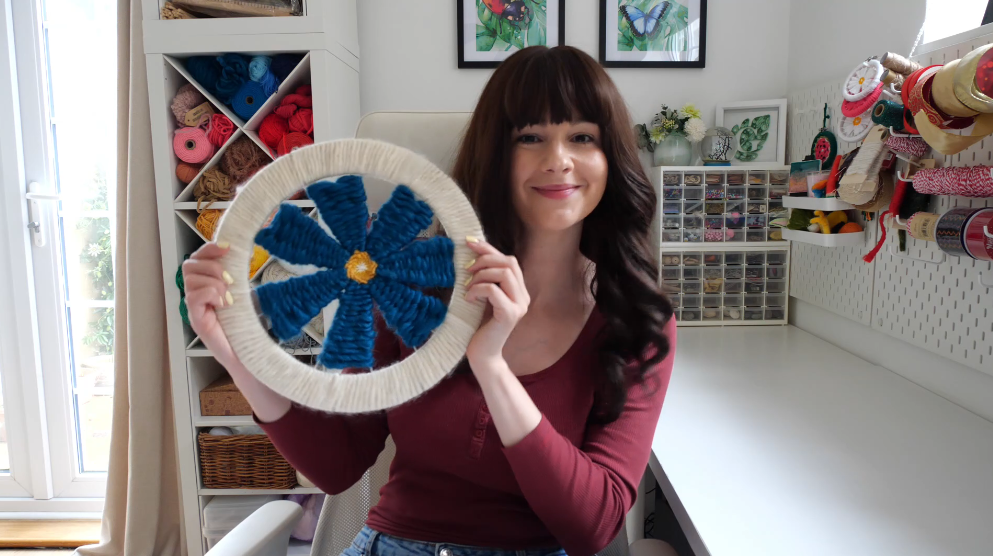
name is Geisler, and I'm a fiber artist
and a craft teacher, living in the UK with my
husband and my dog Chunky. I've always suffered
badly from anxiety, so I taught myself
different fiber crafts like needle felting, Macram and, of
course, loom weaving. I use this as a form of
escape and mindfulness. So whether you're looking
for a peaceful craft, a creative outlet, or if you're a complete beginner wanting to learn something new. This class is for you. You will learn how to create
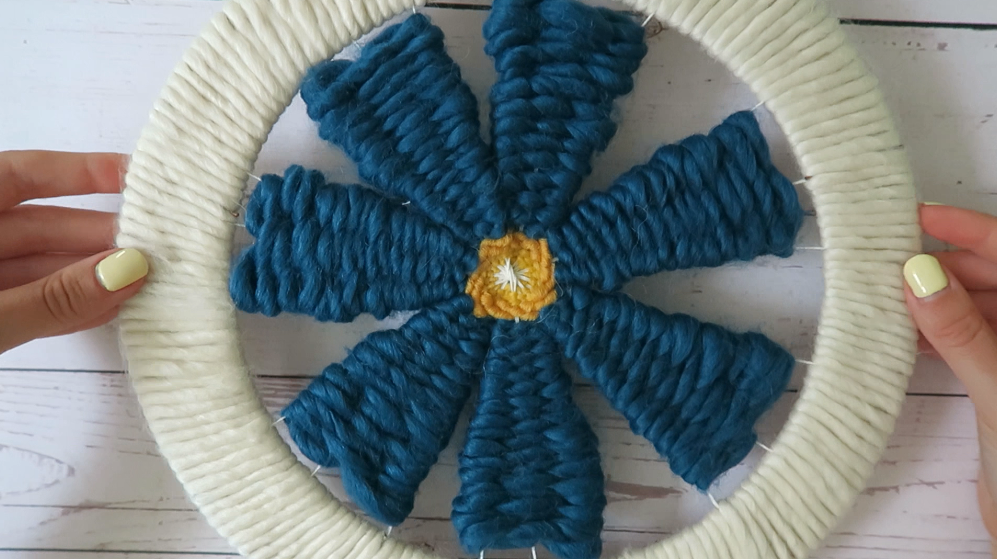
a beautiful woven flower. Using a circular loom, I'll guide you step by step from choosing the right
tools and materials, setting up your loom, learning your first weaving techniques to finishing your
circular weave. Not only will I
show you the steps, but I will also run through
the most common mistakes. And, of course, how to fix them. If you've never done weaving
before, don't worry. By the end of this class,
you'll not only have your very own handmade
woven flower, but the confidence and
skills to continue your weaving journey.
So let's get started.
2. Materials: Before we begin weaving, let's take a look
at the materials and tools you'll need
for this project. The good news is that
circular weaving doesn't require lots of
specialist equipment, and many of the supplies might already be in your craft stash. I've provided a
checklist here for all the materials and tools
that you'll be needing. The first thing you'll
need is a circular loom. I'll be using this 12
inch metal wire wreath, but an embroidery
hoop works just as well if you're
just getting started. The size you choose
will determine the finished size of your
flower wall hanging. You'll also need a strong
yarn or thread for your walk. These are the threads that form the structure of the weaving. Because they'll
be under tension, choose something strong
and non stretchy. The one I've used here is a 65% cotton and 35%
polyester blend. For the weaving itself,
choose a selection of yarns in colors and
textures that you love. I've chosen a couple of
different yellow yarns for the center of the flower, and then I've chosen a
nice chunky blue yarn for the petals of the flower. You can use a mixture of
thicker and thinner yarns to add interest and
dimension to your flour, but you can get
through the project faster if you're
using a thicker yarn. One of the joys of weaving is
experimenting with texture, so don't be afraid to mix
different yarn types together. I've also used a
creamy white yarn for the outside of the ring. A yarn needle makes
weaving much easier. The large eye allows
the thicker yarns to pass through easily, helping you move quickly
around the loom. You'll also need a
pair of scissors for trimming yarn and
finishing your weaving. If you'd like to
personalize your flour, you can always incorporate embellishments such as ribbons, textured fibers or beads, although these are
completely optional. Remember to use your checklist
before you get started. Now that we've gathered
our materials, we're ready to start
setting up the loom. In the next lesson, I'll
show you how to warp a circular loom and create the foundation for
your woven flower.
3. Warping A Circular Loom: In the previous lesson, we gathered all of our
materials and tools. Now it's time to prepare our loom by adding
the warp threads. Think of the warp as the
skeleton of your weaving. It's the structure that supports everything we'll create
in the following lessons. Before we begin, let's quickly talk about
what warp threads are. Warp threads are the
strands that stretch across the loom and remain in place throughout the
weaving process. Later, we'll weave our yarn over and under these threads to
create our flower design. Begin by securing your warp yarn firmly to the hoop with a knot. Make sure it's secure as this tension will support
the entire weaving. Measure out a long length of
warp thread for your loom. I've used 5.5 meters. Always go a bit
longer than you need and trim away from
the cone of thread. Bring the yarn
across the center of the hoop and wrap it
around the opposite side. I take it from underneath, bringing it to the front. Thinking of the wreath
like a clock face, we're going to take
the warp thread back opposite to in 12-1 o'clock. Again, we're going to
take the warp thread under and wrap it
around to the front. Keep your tension tight here. This is really important. Again, we're going to take
the warp thread opposite, and like the clock face, we're going to take
it in 6-7 o'clock. Again, taking the warp
underneath the metal wreath, wrapping it around and
bringing it to the front. Continue bringing the yarn directly across the
center each time. As you continue, you'll
begin to create spokes, similar to those on
a bicycle wheel. Try to keep a
consistent tension, firm enough to stay in place, but not so tight that
the hoop begins to bend. Spacing your spokes
evenly as you go. If you're finding this
difficult, don't worry. The strings do like
to slip around. My advice to you is to make sure that you've
got good tension, but you could always
use an easier loom like a wooden embroidery hoop where
it's less likely to slip. One really important
and useful trick in circular weaving is creating
an odd number of spokes. An odd number allows
the over under weaving pattern to alternate automatically as we
work around the circle. You can do more or
less spokes than me, depending on the
size of your loop. Just make sure you
have an odd number. As you can see here, I have 21 spokes on my loop. Now, this is the tricky
part, so bear with me. We're going to take the
string at Spoke number 11. We're gonna bring
it over the top of the center in between
Spokes 21 and one. We're then going to take that
same string back underneath the center in between
spokes 11 and 12. Keep the string
in the center and give it a really good pull. As you can see, it tightens up all the spokes in the center. Before we tie this off, we want to make sure
that the spokes are evenly spaced out. So as you're holding the
string nice and tight, move your spokes around to
try to space them evenly. Don't worry if it's not
perfectly centered. This is handmade,
and I promise you'll get better at this as
you practice this more. Once you're happy
with the spacing, pull the string nice and tightly and bring it back
to Spoke number one. So the 12:00 position
on the clock. So we're now back at the start. We're then going to take the
string under the metal hoop and tie it tightly onto the
loom at Spoke number one. I like to use a double
knot here to tie that string tightly
onto that metal loom. I would leave a little
bit of the length of the warped string before
you trim off any excess. Well done. You've
done the hard part. We now have a
lovely warped loom. In the next lesson, we'll begin creating the center
of our flower using one of the most important weaving techniques,
the tabby weave.
4. Tabby Weave: Now that our loom is
warped and ready to go, it's time to start weaving. In this lesson, we'll create the center of our
flour using one of the most important
weaving techniques you'll ever learn
the tabi weave. The tabby weave forms
the foundation of many weaving projects and is often the very first
technique new weavers learn. The weft threads or the weave, are woven over and under the warp threads to form
the fabric or the design. We keep this more loose
than the warp threads. First things first, we need
to pick our weaving yarn. I've chosen two different
types of yellow yarn. Like choosing
chunky yarn because I can get through my
project a lot quicker, and it also adds
some lovely texture. For this project,
I've used roughly 1.5 meters of yellow yarn. We will also need a yarn needle or a large needle
with a large eye. The tabiwe follows
a simple pattern. We pass our yarn over one
walk thread under the next, repeating the sequence all
the way around the loom. Over under over under. Thread your yarn needle with the yarn you'd like to use
for the center of your flour. Leave a short tail hanging at the back of your weaving
to secure later. I leave about a five to ten centimeter tail hanging
out at the back. Starting near the center, weave over one warp thread or one spoke and under the next, continuing all the way around. Remember here, go over
under over under. Over one warp string, under the next. Take your time here. Accuracy is far more important than speed when
you're first learning. We don't want the yarn
pulling on the warp threads. You don't need to pull
the yarn tightly. Allow it to sit naturally
around the circle. After each round, gently push your weaving
towards the center. This helps to create a
neat and compact flower. When we reach the
starting point again, the pattern automatically
shifts because we're working with an odd
number of spokes. So the previous row that went over is now going to go under. This second circle should be the opposite to the
previous circle. As you continue weaving, you'll notice the center
beginning to grow. This is where the
magic of circular weaving starts to happen. Each round builds on
the previous one, creating a smooth
circular shape. For this project, I've gone
round roughly four times, but you could do more
or less than that. If your circle looks a
little uneven, don't worry. This is completely
normal for beginners. You can gently reposition the rows with your fingers
to even out the shape. After I finished my four rounds, I then take my needle and
push it through to the back. Again, I'm going to leave
a tail about five to 10 centimeters long and then
trim away any excess yarn. It's always important to
leave a little bit of tail because we're going to be
sewing that in later on. I've then chosen a different
type of yellow yarn, and I'm going to go again, around a few times just to
expand a little bit more on this circle and also to add a slightly
different texture. It's important to continue
where you left off. So again, thread your
needle with a new yarn, bring it through to the
front where you left off, making sure that you're leaving a little bit of a tail
hanging out the back. And then continue
your tabby weave, remembering to do that technique of over under over under. With this second yellow yarn, I've gone round roughly
three times and I've used in between one to 1.5
meters of yellow yarn. Again, once you're happy
with a few rounds, we're going to take that
needle through to the back, leaving a little bit
of a tail of yarn, and then we're going to
snip away the excess. We don't want to make
this center part of our flower too big because we need to have enough spaces
for the petals. Well done. We've now created the
heart of our flower, and we've learned one of the most fundamental
weaving techniques. In the next lesson, we'll start transforming this
simple circle into a beautiful flower by creating woven petals around the outside.
5. Weaving The Flower Petals: Welcome back. In our previous lesson,
we created the center of our flower using
the tabiwed technique. Now it's time for the
really exciting part, transforming our
circular weaving into a flower by creating beautiful
petals around the center. For this section, I've switched
to a chunky blue yarn. You don't have to use blue, you can pick whatever
color of your choice. For each petal,
I'm using roughly about 1.5 meters of blue yarn. But again, you can use
more or less of that, depending on the
size of your loom. I'm going to start just outside of that yellow flower center. Pick any point in your loom to start bringing a yarn from
the back to the front, again, leaving a small tail. And begin by weaving
over and under the warp threads using your tabby weave for a
small section of the loom, rather than going all
around the clock face. Again, it's up to you how many you want to
go over and under, and it really depends
on the size of your loom and how many
spokes you have created. Notice that I'm only working
across a group of spokes. This allows me to build up
a petal shape gradually. I start by going clockwise. After completing the first row, I'll head backwards, so I'll
be going anticlockwise. You're weaving back
across the same section, remembering to alternate
the over and under pattern. As I continue weaving
rows back and forth, you can see the petal
beginning to grow. I'm keeping my tension relaxed, allowing the yarn to curve naturally around
the warp threads. If the yarn is
pulled too tightly, the petals may begin
to pinch or distort. Remember here to
go over and under. The next row should always be different from
the row before. Every now and then, gently
push down on the weave. This will hide the
warp strings better. If you run out of yarn,
don't worry. It happens. What we can do is make sure
that we leave a little bit of yarn leftover and weave it
into the center of our petal. Once it's in the
center of our petal, we're going to push the
leftover tail to the back. Cut a new length of yarn, and starting where you left off, bring the yarn from
the back to the front. Again, leaving a little bit of a tail that we're going
to sort out later on. Continue the weave
as you did before. I like to keep weaving until I'm nearly at the outer hoop. Again, once you're
nearly finished, make sure you've got
a long enough tail, and we're going to
bring that back to the center of the petal. Once it's there, we're
going to push the rest of the tail towards
the back of the hoop. And there is your
first petal complete. We're then going to move
on to the next petal, repeating this exact
same technique. Before I start the next petal, I like to leave a
single segment gap. You can leave bigger
gaps if you would like. Taking your next length of yarn, I'm going to pull
the yarn again from the back to the front
in that segment gap. Again, I'm weaving in
a clockwise direction, and I'm going to weave over the same amount of warp strings. I'm going to do this
technique for each petal, leaving one segment gap. Each petal will be created using the simple tabby
weave technique. One of the joys of
handmade weaving is that every petal can
be slightly different. Flowers in nature aren't
perfectly symmetrical, so embrace those
little variations. As you continue around the loom, you'll begin to see
the flower emerge. The blue yarn creates a lovely contrast
against the center, helping the petals
to stand out and giving the weaving more
depth and dimension. This stage is often
my favourite part, because it's where the
design really comes to life. Once you filled your
loom with petals, we have then
completed the flower. In the next lesson, I'm
going to show you how we secure all the ends at
the back of our loom so we can prepare it
for the final step of wrapping our yarn around
the outside of our loom.
6. Tidying & Securing: In the last video, we
weaved our lovely petals. In today's lesson, I'm
going to show you how to secure the back and
trim off any excess. There are several different
ways of securing the back, but for myself, I like
to use two main ways. Particularly for the
tops of the petals, I like to sew them in to secure them before trimming
away the excess. At the top of the petal, find the excess yarn and thread it through
a large eye needle. Then taking the needle,
you're going to sew it through the back
of some of your weaving. Do this very gently
because we don't want to pull our weaving
and distort it. Once you've sewn it
through the back, we're going to leave a
little bit of the excess. You can then remove the needle. For other parts, I'd
like to just tie these into a knot or a
double knot securely. So as you can see, with
these two end pieces, because it's in the
middle of the petal, I'm just going to tie
them into a knot. And then I go again to
make a double knot. You can even tie a third knot
in it to be extra secure. You want to pull this relatively tightly to make sure that
it doesn't come undone, but we don't want it so
tight that it distorts it. We always want to
leave a little bit of the length just in case, but anything too excessive, we can snip off
with some scissors. Again, as you can see here, at the center of the petal, I like to tie these two ends
together to secure them. And then at the top of the petal with the
single bit of yarn, I like to sew that in. We're going to do the same
thing all over the petals, either sewing them in or tying two ends together
tightly in some knots. Don't forget the center as well. These ends need to also be
secured and trimmed away. Don't worry about it being
slightly messy in the back. This is completely normal
when it comes to weaving. As long as you can't see the excess yarn, you're
absolutely fine. You could even think
about potentially gluing the back if
you would like. You could use some fabric
glue or some hot glue. And there we have it.
Our lovely flour is now secured and it's now
finally ready to be wrapped. In the next lesson, I'm
going to show you how I use some white
yarn to wrap around the hoop to set off our lovely flour as
the finishing touch.
7. Wrapping The Hoop: Welcome back to the final
part of the project. In the last lesson,
we learnt how to sew in and tidy up the
back of our flower. In today's lesson, I'm
going to show you how to do a final wrap around the
hoop to finish it off. For this, I've used a
really chunky white yarn, but you can do any
color of your choice. I would recommend
a chunkier yarn as it gets through the
project a lot quicker. For the entire hoop, I used
four times 8 meters of yarn. I did 8 meters at a time, as it was easier to wrap
it around the hoop, but you could do longer
amounts at a time. I start by tying the yarn
onto the hoop using a knot. Make sure that this
is nice and secure. I then thread the other end of the yarn through the
eye of a chunky needle. Using the needle,
start wrapping this around the outer part
of the hoop tightly. Make sure that the wraps
are sitting side by side next to each other
so there are no gaps. Keep wrapping this
around the hoop. If you run out of
yarn, don't worry. I will show you how
to sort this out. Flip the hoop over to
the back and make sure you've got at least a little
bit leftover of the tail. Sew the needle
through the middle of the wraps at the back and
then remove the needle. Taking your next yarn length, tie this onto the hoop
tightly with a knot. Before you continue to wrap, take both the previous tail you sewed in and the
tail by the knot of the new length and hold that in the center of the outer
circle of the hoop. As you hold these tails, start wrapping around the hoop. The tail should disappear behind the wraps and will
be safely secured. Make sure again to
wrap tightly and have the wraps sitting
neatly side by side. Once you've wrapped
all the way around the hoop and you are
back at the start, we need to sew the end in. Again, leaving enough of
a tail sew into the wraps at the back of the hoop in
an anticlockwise direction. Then repeat sewing
behind the wraps in an anticlockwise
direction again. Leave a little tail and trim
any significant excess. Remember, the back will
always be slightly messy and you could use fabric glue
or hot glue to secure. I also trim away the
excess warp yarn I had, but you could tuck this behind the white yarn wraps to
be on the safe side. And there is your completed
circular loom weaving. Well done. In the final video, we will be displaying our
beautiful loom weaving and reflecting back
on our project. I will also be showing
you where you can upload, discuss and ask questions about the project you have made. Oh
8. Displaying & Thank You!: Congratulations for making it
to the end of your project. You should be so
proud of yourself. I hope you've been
enjoying creating it just as much as I've been
enjoying teaching it. Now is the time to
display our artwork. In order to hang it up, I take a small length of the white yarn and I thread it
through the needle. Flipping the hoop
over onto the back, I sew the needle through the
white part of the wraps. Using the two ends of the yarn, I then make a nice knot. Once I've made my knot, I then move the loop so that the knot is facing the
wrapping at the back. If you also have
too much excess, you can always trim this away. Now we have a loop
that we can hang up. Through the course,
you've learned lots of valuable weaving skills from
the tools and yarns needed, learning how to warp your
first circular loom, practicing the tabby weave, forming your flour, and securing and presenting
the hoop beautifully. Don't worry if you've made
any mistakes along the way. I did exactly the same
when I first started. It's all about practicing,
learning and growing. Remember, you can always
try circular weaving with different colors,
hoops and patterns. If you'd like to see
more of my classes, remember to press
that follow button. Or if you'd like more
in depth lessons on the fiber arts
or loom weaving, I also teach one
to one lessons as well where we go much more
in depth into the topic. I would love to see how you
got on with your project, remember to upload it to
the submit project section. There I can review it or answer any questions
that you may have. Thank you again so much for
joining me on this course, and I can't wait to see you on another lesson. Happy crafting.
 Gisela Narten, Fibre Artist, Craft Teacher - Knot Weave Stitch