Transcripts
1. Introduction: Hi, everyone, and
welcome to Beyond the basics Mastering
floral embroidery. I'm Shanas your instructor, and I'm so excited to take
you on this creative journey. I love to combine my passion for embroidery with my love for
exploring the outdoors. Embroidery is more
than just a hobby. It's a journey of
self expression, a source of relaxation
and a way to tap into your inner creativity.
And who knows? Maybe you'll even discover
a new way to share your passion and earn
money doing what you love. We'll start by learning how
to transfer our design onto fabric and then dive right into stitching each element
of our arrangement. I'll guide you step by
step through each stitch, offering tips and
tricks along the way. I'm excited to start
this journey with you. Let's explore our first lesson.
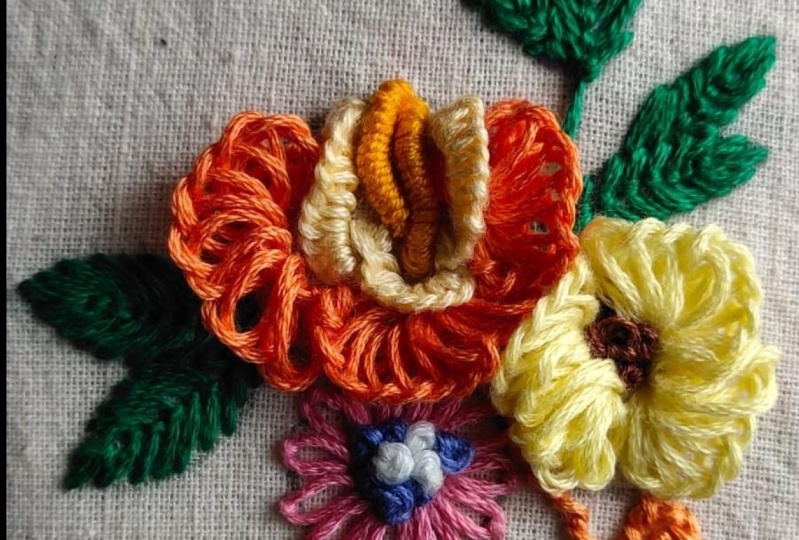
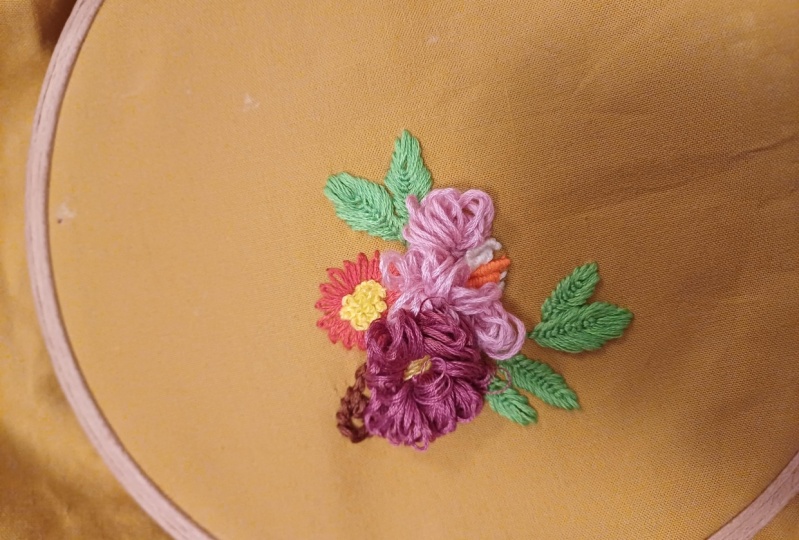
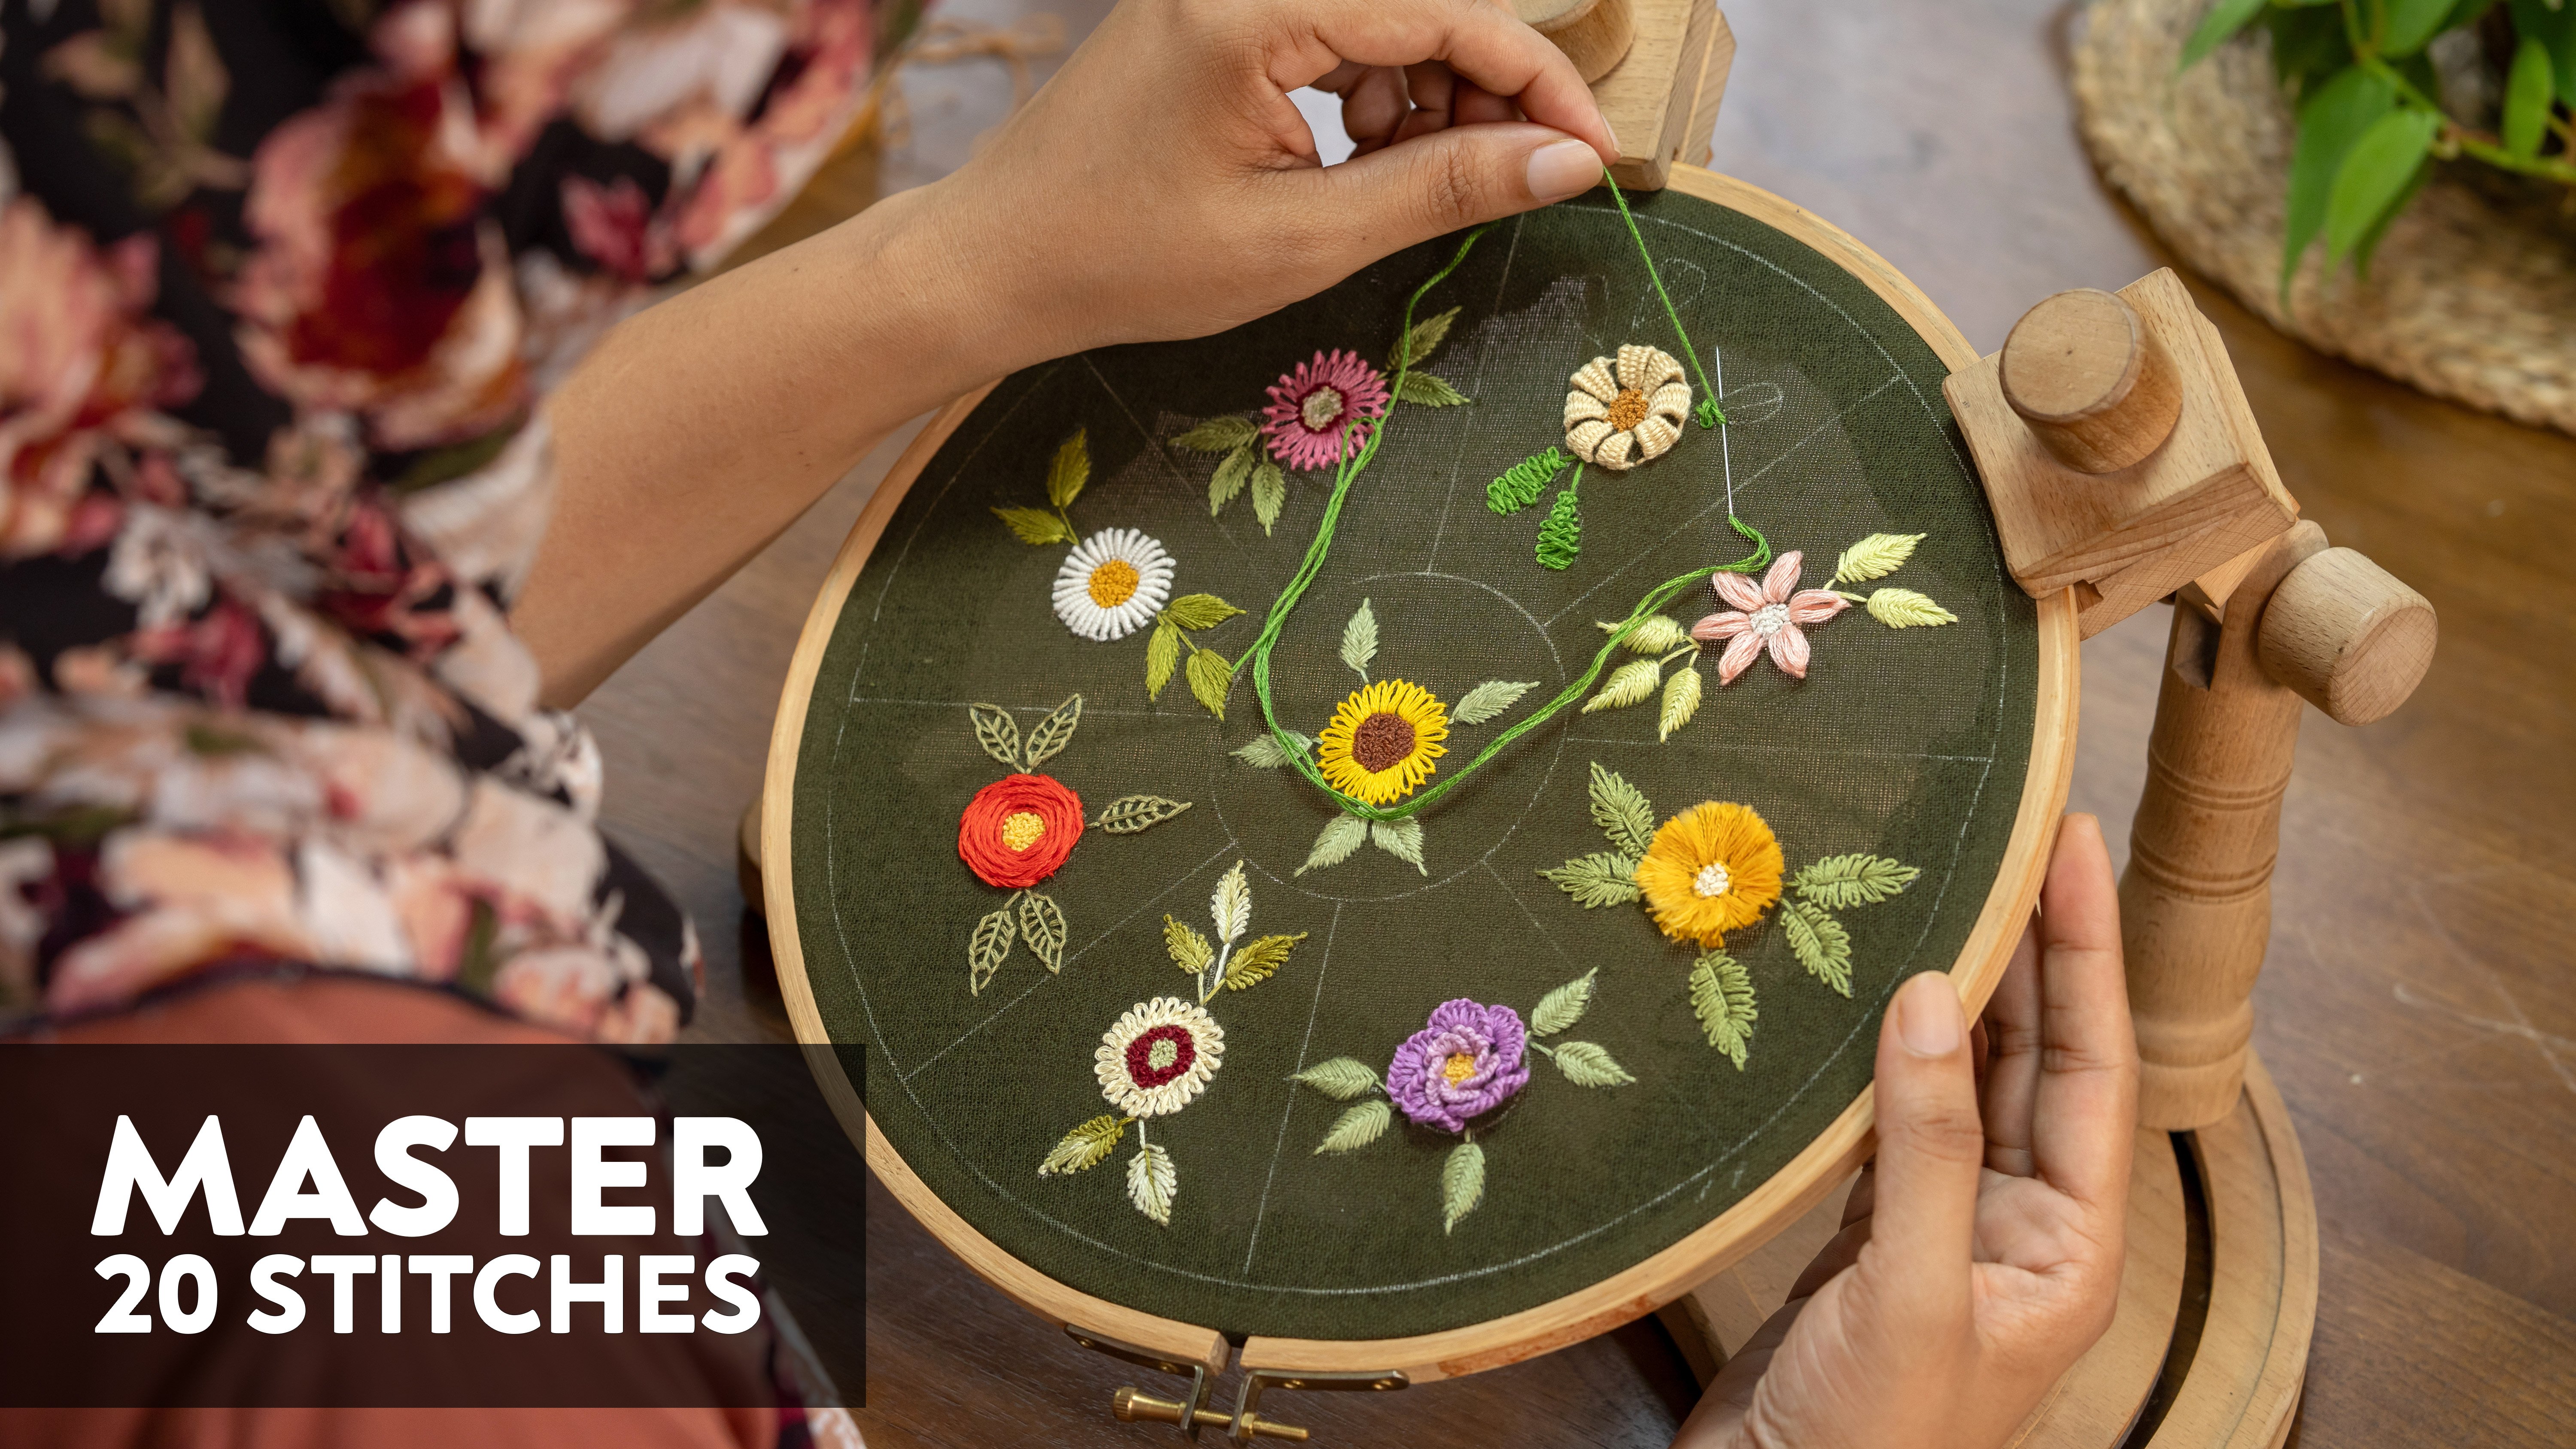
2. Preparing for the Design: We're going to create this stunning floral design together. It's the perfect way to put all those amazing stitches
you've learned to good use. We'll delve into advanced techniques like Bullion naughts, cast on stitch variations, and more while building a beautiful embroidered
floral arrangement. This course is perfect for those who have a basic understanding of embroidery and are ready to tackle more
intricate projects. First things first, download
and print the pattern. I'll put a link to
it below this video. Now, I've already got my fabric fixed in my eight inch hoop. But before I
transferred the design, I did something
sneaky at the back. See this? I stitched a running stitch all around
the edge of the fabric. This helps to really
secure the fabric and keep it from moving
around while I'm stitching. Plus, it gives the back of
my hoop a nice neat finish. For this project, I've chosen this lovely maroon
cotton linen fabric. I love the rich color and the slight texture of the linen, but you can choose any kind
of cotton fabric you like. Linen, quilting
cotton, even canvas, it's totally up to you, and of course, feel free to choose any color
that inspires you. I'm just giving it
a little tug here to make sure everything
is nice and tight. See how that pulls the fabric in and makes it super secure. Okay, now that our
fabric is extra secure, I've transferred the
pattern onto the front. Now, I've got my fabric nice and snug in my
eight inch hoop. Remember, no wrinkles. I'm using a dark fabric today, so I'm using my LED tracing
pad to transfer the design. If you've chosen a
light colored fabric, you can skip the tracing
pad and draw right onto the fabric or use your window and the sunlight
to help you see the lines. I used a heat erasable
pen. It's like magic. You draw your design
onto the fabric, and then when you're
finished stitching, you just use an iron to
make the lines disappear. Poof. See how easy that is. The light shines through, and I can just trace the
lines onto my fabric. These pens come in all
sorts of colors, white, black, red, blue, so you can choose one that shows
up well on your fabric. Just remember to test
it on a scrap piece first to make sure
it erases properly. Now, when you're
threading your needle, remember not to pull out a
super long piece of floss. It's easy to get
tangled up that way. I usually recommend
about 12 to 20 ", maybe about the
length of your arm. Alright, let's get stitching. I've chosen some
beautiful floss colors to match my fabric, pink, beige, orange and green. Now, before I start stitching, let me show you how
I separate my floss. I'm using this beautiful pink
color for the first flower. See how I'm gently pulling
one strand at a time. It's important to do this carefully so you don't
tangle your floss. I'm going to use four
strands for these petals. For these lazy daisy petals, I'm going to use one of my
thinner embroidery needles. This will help me make
nice neat stitches. And of course, I've already separated my floss and
threaded my needle. Don't forget to secure
the end with a knot. Now we're ready to create
those lovely loops. All right, our design is
all traced and ready to go. Think about what colors you
want to use for your project. In the next lesson, we'll
dive right into stitching those beautiful lazy daisy
petals for our first flower. Get your threads
and needles ready, and I'll see you there.
3. Flower One - Lazy Daisy and French Knots: Let's begin stitching
our design. To make a lazy daisy stitch, you first bring your needle
up through the fabric. Then you take a small stitch, but don't pull the thread
all the way through. Instead, you leave a loop like you're making
a chain stitch. Now, bring your
needle up through the fabric at the end
of your petal shape, making sure the thread
goes around your needle. This creates the
loop of your petal. Finally, to secure the loop, take a tiny stitch over the thread that connects
the loop to the fabric. See how it forms
a teardrop shape? That's what gives it
that lovely flowy feel. This stitch is like the
magic wand of embroidery. It creates these
beautiful delicate loops that look like flower
petals or little leaves. Now, as I'm stitching
these lazy daisy petals, I want you to notice something. I'm using my left hand
to hold the needle, but if you're more
comfortable using your right hand,
that's totally fine. Embroidery is all about finding
what works best for you. Looks like I'm running
out of thread. No worries. This
happens all the time. I'm just going to
finish this stitch, then pop my needle
to the back of the fabric and secure
my thread with a knot. You might notice that I'm using a hoop stand to hold my
hoop while I stitch. This isn't absolutely necessary, but I find it really helpful. It frees up both of my hands so I can
focus on my stitching. Now I'll thread my needle
with a fresh length of floss and we'll pick up
right where we left off. But if you don't have a
hoop stand, don't worry. You can absolutely hold your hoop in your hands
while you stitch. And remember to hold
your needle lightly. No need to grip it too tightly. Relax your hands and
enjoy the process. Now for the center
of this flower, I'm using some white floss
to add some French knots. To make a French knot, bring your needle up
through the fabric. Then wrap the thread around
the needle once or twice, depending on how big you
want your knot to be. Hold the thread taut with one hand and with
the other hand, bring the needle back down into the fabric very close
to where it came up. As you pull the needle through, keep that thread nice and taut so your knot stays
neat and tidy. H. And speaking of comfort, make sure you're sitting
in a position that allows you to relax
and enjoy the process. Keep your back straight,
your shoulders relaxed, and your hands comfortable. Take breaks if you
need to and don't be afraid to stretch
or move around a bit. These little guys are like
the sprinkles on a cupcake. They just add that extra bit
of sweetness and texture. And there we have it. Our
first flower is complete. Look at those lovely
lazy daisy petals and the delicate French
knots in the center. Now, take your time and practice these stitches until you
feel comfortable with them. In the next lesson, we'll
move on to our second flower, which features those
fabulous bullion knots and cast on stitch variations. I can't wait to see
what you create.
4. Flower Two - Bullion Knots and Cast-on Stitch Variations: Let's move on to
our second flower, which has a slightly
different look and uses some new stitches. See how I'm using a
longer needle for this. It's called a milliner's needle, and it makes it much easier to wrap the flows
for boolean knots. To make these boolean knots, I'm bringing the
needle up through the fabric and then wrapping
the flows around the needle. I'm doing about 18 to 20 wraps. It seems like a lot, but it creates a really
lovely textured knot. Now, here's the tricky part. Hold the wrapped floss with your fingers and gently
pull the needle through. See how it forms that
beautiful elongated knot. This flower has a more
whimsical feel and we'll be using those fun bullion knots and cast on stitches
to create it. This creates the pistol, which is the center
part of the flower. Since this is a side
view of the flower, having the bullion
knots stacked like this gives it a really
interesting dimension. Now that we have our
Billion knots in place, it's time to add some
petals around them. For this, I'm using the cast on stitch and this lovely
light beige floss. To make these cast on stitches, I'm bringing the needle up right next to the Billion knot. Then I'm wrapping
the floss around the needle about 18
times for these petals. And here's the key. A bigger
gap usually means you need to wrap more times to keep the petal looking
balanced and full. Insert the needle
back into the fabric near the base of the loop
to secure the stitch. Now, pay close
attention to this part. The distance between where your needle goes back
down and comes up, that's going to determine
the length of your petal. A bigger gap means
a longer petal. So play around with it. Try making some stitches
with a smaller gap and fewer wraps and then try some with a bigger
gap and more wraps. See how it changes the
look of your petals. See how those cast on stitches create these beautiful
rounded petals. It's like magic.
I'm making three of these smaller petals
close to the Bullion knots. Now, to add some extra
flair to this flower, I'm going to add
four bigger petals, and for this, I have a little
trick up my sleeve. A. I'm going to show you
a little trick here. I'm using a plastic
straw to wrap my thread around for
these cast on stitches. It helps me create
bigger, fuller petals. I've threaded my needle with
this vibrant orange floss, and now I'm going to insert the straw onto the
needle just like this. Now, I'll make my cast on
stitch just like we did before. But this time I'm
wrapping the floss around the straw instead
of just the needle. It You can use any kind of straw
you have on hand, or even get creative and try other things like a small
piece of rolled up paper. See how that works. It gives
us a much bigger loop. I'm adding four of
these larger petals, spacing them evenly
around the smaller ones. It creates such a beautiful layered effect, don't you think? And there you have it a stunning flower
with a combination of bullion knots and cast on
stitches in different sizes. It's all about playing
with textures and techniques to create
something truly unique. See how that works. It's all about combining
different stitches and colors to add variety and interest to your embroidery. Now take a moment
to admire your work and make sure all your
stitches are nice and secure. In the next lesson,
we'll move on to our third and final flower, which features those beautiful large cast on stitch petals.
5. Flower Three - Cast-on Stitch and French Knots: Alright, let's move on to
our third and final flower. This one is going
to be a showstopper with those big,
beautiful petals. I'm using this beautiful
beige floss for this flower. It's going to give us
a soft elegant look. Now, let's get those
petals started. Remember how we
used the straw to create those larger petals
in the last flower? We'll be doing the
same thing here, but this time we'll create all the petals with
that technique. Now, here are a few tips for stitching these fluffy
cast on petals. First, I'm using all
six strands of floss. This gives the petals a
heavier, more substantial look. If you want a more
delicate look, you can use fewer strands. And most importantly,
be patient. These cast on stitches with the straw can take
a little practice, but trust me, the
results are worth it. You'll end up with these gorgeous three
dimensional petals that add so much texture and
interest to your embroidery. And there we have it. Our
third flower is complete. I love how those large cast on stitch petals create
such a dramatic effect. Now take a moment to admire your work and make sure all your stitches
are nice and secure. In the next lesson, we'll move on to the leaves and vines, which will add the
finishing touches to our floral masterpiece.
6. Leaves and Vines - Fly Stitch and Twisted Chain Stitch: Now we're going to add the finishing touches to
our floral masterpiece, the leaves and vines. These delicate
elements will bring our design to life and
add a touch of nature. Now, let's start
stitching the leaves. We're going to use
the fly stitch, which is a simple
yet elegant stitch that creates a
feather like effect. I'm using a beautiful
green flows. You can choose any
color you like, but I find that green really complements the colors
of the flowers. Try to keep your stitches
even and consistent, but don't worry if
they're not perfect. And feel free to
vary the length of your fly stitches to create different leaf
shapes and sizes. Embroidery should be a relaxing
and enjoyable experience. So make sure you're taking care of yourself
while you stitch. And remember, there's
no right or wrong way to hold your needle or position your hands as long as it feels
comfortable for you. So find your groove and enjoy
the rhythm of stitching. I'm going to add some straight stitches here to fill the leaf. Now, as you're stitching, it's really important to
follow each step carefully, keep a close eye on where the needle goes
down and comes up. This will help you
create the stitch correctly and keep
your tension even. Now, let's add the vinees. For the vinees we're going to use the twisted chain stitch. This stitch creates a
delicate flowing line that adds a beautiful
touch to the design. Experiment with different
colors and sizes of leaves and vines to create your
own unique designs. Try to keep your stitches close together for a smooth
continuous vine, and don't forget to
keep that tension even so your vinee doesn't
get too loose or too tight. Remember all the tips and tricks we've learned
throughout this course. Take your time, have fun, and don't be afraid
to experiment. I can't wait to see
your finished projects. If you're ever unsure, don't hesitate to rewind the video and watch the
demonstration again. You can also pause the video at each step to make sure you're
following along correctly. I hope you enjoyed this
course and learned a lot. Keep practicing
and you'll become a master of embroidery
in no time. Now it's time to show
off your skills. Take a photo of your
finished embroidery and share it in the
project gallery. I can't wait to see your
beautiful creations. Congratulations on completing this intermediate
embroidery course.
 Shanas, Embroidery for Everyone