Transcripts
1. Intro: H Right now, I'm at an old
Ministry of Justice building in Legos Nigeria. I'll be taking my amazing model, and UK I'll be showing
you how to create cinematic portraits using
any camera you own. Right now, I have the 60
with me and the 50 MM, 1.8. I'm shooting at 2.0, 1.8 because I want that dreamy
background from my model. And also, we'll be talking about composition rules
like negative space. We're doing the role of Thus, we're doing symmetry
and patterns. As we doing frame within the frame to make
sure she looks good, and we can tell amazing stories. I,
2. Shooting Demonstration 1 & 2: I have the sun coming from
the left hand side here, and we have this lovely shade coming from the pillars here. So I'll put her close to
the pillar over here, and I will shoot at 1.8 or 2.0. Let me do 1.8, okay? Go really close to
that. Thank you. Okay. She's giving me
really lovely poses, and I think I'm good. So I have a story in mind, and I'm going to
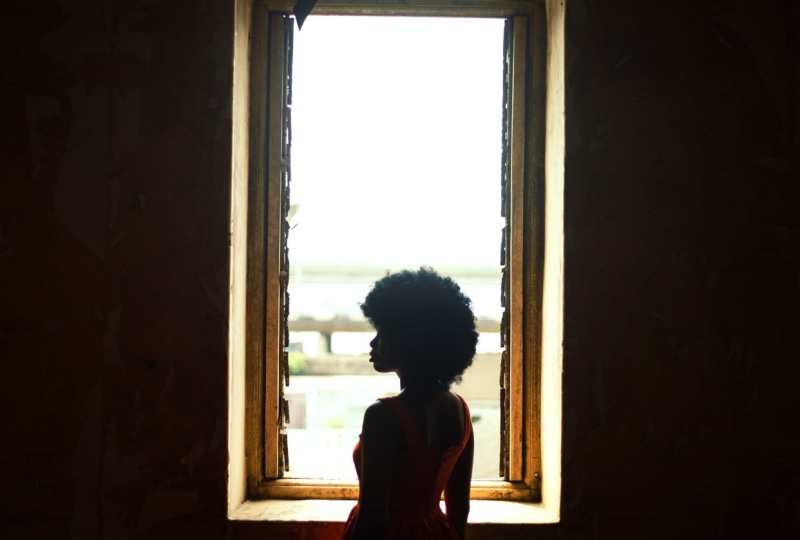
tell the story here. W to try and show her by the window side a
little bit moody. I have a mood body in mind, and you should have
a mood body mind that you will try and recreate. C to the natural
light coming in, that's by her next hand side. Ftp is 2.0. Shutter speed is 200
and I am at ISO 1,600. Okay, so then see. Thank you. Stay right
there. Nice. Ah. Hi. Okay, can you put your head
towards the light like that? Thank you, yes.
Stay right there. Beautiful. Stay. Nice.
Stay right there. Oh, beautiful. What have
you go up. Go up, yeah. So just be in the
middle of the arc. Put your hands behind. Yes. But your head
towards the light. Thank you. Let's relax, yeah. Right now, I have k standing right in
the middle of this frame. So I'm gonna be shooting at
1.8 and my shar speed is 200. I so is 251.8, so please, let's go about
audition. Thank you. Go be closer. Thank
you, sir there. This is nice, right
there. Take a shot. Oh Don't just stand
immediate like this. Just look at me. Yeah, good. Turn we stand straight.
Then just stick. Yeah, good. But
Trump just chess. Okay, good. The head.
Look at me, yes. To the. Yes, thank you. Nice. Stay right
there. Thank you. Looking at this frame here, I'll put her in
between the frame and also by the side of the frame face out
fully. Turn straight. Good. Yes. Good. Then, bring your hands
down a little bit. Hey, yes, then look
towards your left. Turn some more. So more,
some more. Yes, good. Thank you. More like it. Alright. Thank you.
Don't look at me. Here, S right there. Okay,
so let me my shutter speed. Right now, I'm at 2.0 F
shutter speed is 1,000. I saw it's 200 right now. Good Alright s right there. Okay.
3. Shooting Demonstration 3: So let me look for
leading lines. Oh, nice. I can do leading lines
and the will of third. That's right there. Beautiful. Okay, so I want to
add like I walk in now over there and
just look this way. No, I walk in the same position. Like I walk in. Yeah.
So take a step. The same position, yes, then you look, thank you that way. For this shot, I want to try
out something different. I want to try out
the slow shutter, and I have a ton so you can have that blowy effect
from the model, and it will make it
look really amazing. Now, my start fade
is on eight and my A is 100. I'm on F 13. That's aperture. Okay, so let's
go stay right there tone. M.
4. Using Lightroom: Welcome to Editing class. In this video, I will
show you how I take my pictures from the
folder to Lightroom and also the Photoshop
to get my pictures ready for posting on any
platform I want it to be ready. The first thing I will
do is I will go to my folder, click and drag. You can also go to Import
and do it that way. What I'll do is I will check all this because I don't
import every picture. I just import a few
pictures for me to edit in Lightroom and take it
also to Photoshop. Go to this icon over here, click on it and scroll
through your pictures. Yeah. So I like this picture. I will just click
on Including Input. I think I love this. Including
input. Keep going through. Just click on the ones you
want and include the input. Make sure you check, including
input when select ten. Keep going. Just a quick
one for the class for edit. This like this. Just go quickly. This nice. I love the texture. I love I love the texture
on this picture. I love it, so I'll work with it. Oh. I love this negative space,
so I think I'm done. Click on Impact, and here
we are in light trim. Click on the first picture,
don't click on it. Go to Develop. Now, here, I'm going to show you
what I quickly do. First in convey here the
profile, click on VLS. I'll just try and look
for camera matching. Let me go with portrait. Standard. I love standard. Sound good. Click on clothes. The next thing for
me is I'll work on the exposure and
highlights white, dark, texture if I want to. And you do what? Do white balance. Yes. So let's do white balance
first. Let's see. It'll be warmer.
Get this as nice. Okay. Good. Special.
Highlights. L d a little bit shallows. Yes, Shadows, yes. I want to bring up
the shadows a little bit up then white. Let's see. This is nice, dark. Okay? This is okay right
here. Then vibras. You see? Now, this is good. This is good. You can
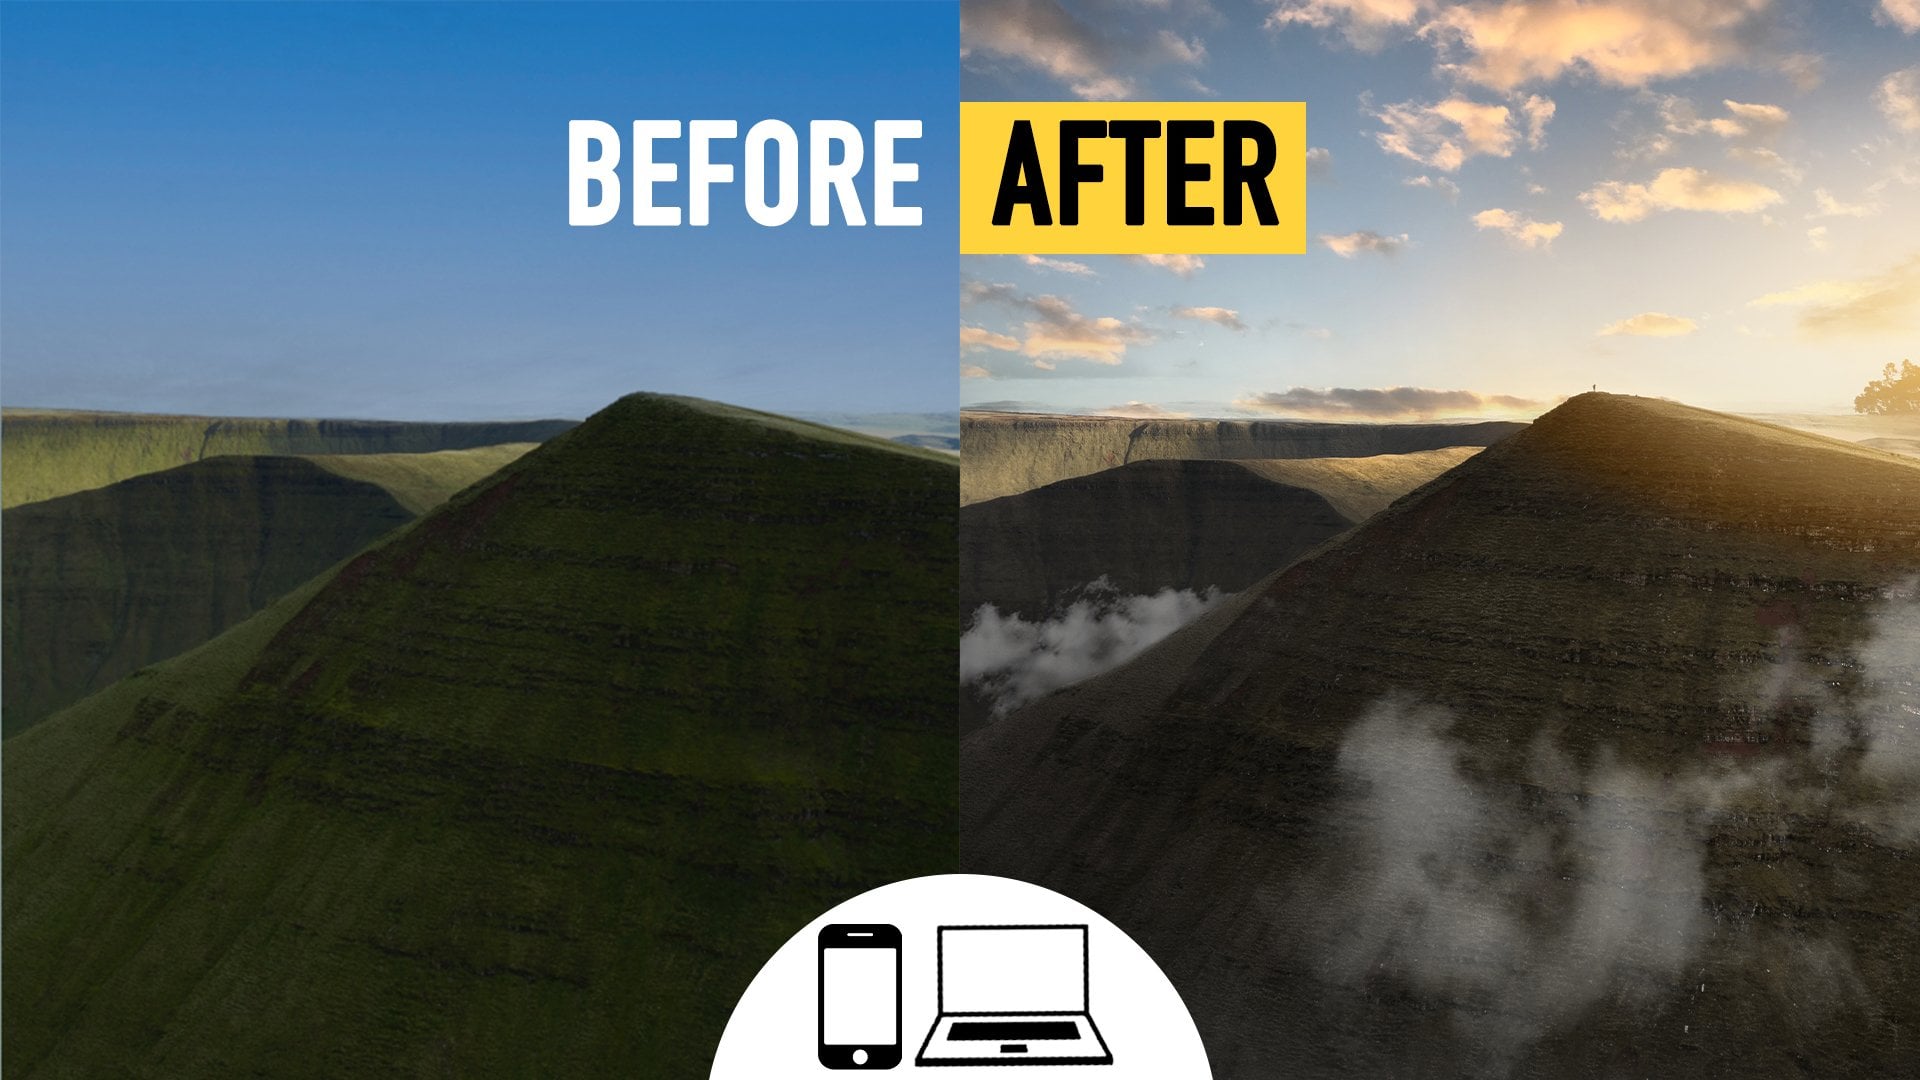
see before and after. Just press on why. And you
said before and after, this is before, this after. Little adjustments
here and there. Next thing we do is gonna try
and work on other things. But I try to do most things in Photoshop because Photoshop is just a place I feel comfortable being color
grading and all that. Yeah, but those
basic things here and we move. Come to the reds. We can see what we
can do with the reds. If it's nice, they can. But then, Don't try to make it look a
little bit cinematic. Just have fun. Can
click on this icon over here and just click
on the screen to say, Well, but this is
not good for me. So let's click on T over here. Let's click on anyone here. Yeah, so you can click on the red and just play
around with it. This is what is
called creativity. You just play around the colors and see
what works for you. O here, I think. This is nice. I'm trying to have a little
bit of cinematic flow here. You know, like cinemas.
Yeah, okay, music. Yeah, so this is nice. I love this. Yes, this
is good. This is nice. I think I'm getting there. For the blues, play
around with it, too. Just click on each line. You can see there and just try and play around with it
and see what you get. This is the blues. I love this. This is before, after. This is nice, right here. This is nice. I'll live on the first picture
here, hold Shift down. Click on the last
picture here. Okay, see? So if you highlight
everything now click on sync and click on synchronize. And, yes, we are good. We are good. This
is really nice. Now, here, I can do a little bit of adjustment here to
work on the shadows, make it up a little
bit, and think we go. So let me look at Cove here. Here. Look at T curve. Yeah, this to cove Remember, I to off for the first picture before I sin everything up. So this is the first one
I'll come to here and say, Let's work on the
brightness a little bit. Good. To Here's the highlights, Midtones, here shadows.
Okay, I think this is good. I love this. It's dramatic. I can also do some
more adjustment in photoshop and just
backing up her face, and I'm good minor adjustments. Okay, I love this. This is nice. A little bit of
contrast to this. You can take on this
icon here if you have the new ltrm and you can go to background and work
on your background. That's if you have the new ltrm. Without the new lightrom, you have to do that
manually in Photoshop. Having lightroom, you are safe. This image here is looking
a little bit greenish, so I think I'll take
a little bit of green from the white balance. And this is nice. Next image, let me add contrast, and kill the highlight
a little bit. Now, this is nice.
Beautiful. I love this. Next image here, click on this icon here,
go to Background. Let us kill the
background a little bit. Oh, let me see,
it's not working, so I'll use this. I come over here and
just delete this. Click on linear gradient and just click and
drag over here. I see this This is
nice, kill this. Then I also add
another one here. Uh, I'm going to go ahead and click this
and add another one here just separately
for her face. Tell the bit in two, but
this is the round one. Yes, for her face. Yes. This is nice. Pull this down. This is nice. You can see before and after. For this, a little
bit of brighten, but go to the background and
make it darker a little bit. Kill the highlight bit. Nice for me. Let's
see white balance. Now, this is where that
background really shine. Look at this beautiful.
C bit of this. Ideas of contrast. Shadows bring it down. I love this. I'm
going to also make sure she looks a
little bit darker. Cling on this icon here, select
this, click on subjects, selt sets. Before after. It just brings out the mood, and it's looking really
cinematic right now. Now, this is really
nice. I'm trying to create negative space here. If I come over here,
click on this cop icon, I could just click over here, go to four by five, eight by ten, which is
IGs size and just make it Yeah. I can expand this in
Photoshop when I'm editing and move all the
distractions out and make her really small it's
really small in it. I can do that in Photoshop. Let me just go ahead
and check this reset, close I'll do this in Photoshop. All these cars I take them out, and that will work for us. Yeah. So let me just
work on the background. Let's see, make it a bit darker. Yeah, check this. Then's work on this
out of contrast. Yeah, it's nice. Oh,
that's beautiful. Like now, I am done. W I'll do next is that I'm going to just click
on Command A, Control A. I'm on the MAX. If you're on the
Windows Control A, click on it, go to File. Now go to Expot. And here, I'm going to
make sure my Epot is on TFL or PSD. TV or PSD, depends on you. If you can use PSD,
you can use T files. It's all your own choice. So I will use T file of PSD. For me, I will use T file
for this video quickly. And you can put it on 16 bit. If you have a fast system. If you have a slow system,
you can do eight bits, eight bits are
quicker to work with. I have a slow system. 16 bits easier to work with. You have a fast system, and it all depends
on what you have. Compression here, I just click
on and that's what I do, SRGB color space, and I'm good. So that's what I do,
but for most people, mounts use PSD foil.
It depends on you. This right here is
a personal choice. Just do what works for you and make sure it doesn't
kill your system. If you have a good system, then you are safe, anywhere works. Now, right here,
I'll check this. Like on this, I go to
folder, choose folder. I'll make sure I'm going
to pick somewhere. Let me just pick this and
look for Skillshare class. And this is it here,
pictures, TFL. Create and choose. So this is good,
thick on exports. We are done with chum. The next thing is Photoshop.
5. Using Photoshop: Come over to the icon,
click on it, and it loads. Next, we need the pictures. We have it here under
the folder, the file. So let me show you
what I do quickly. I can get your pictures ready
for Instagram portfolio, quick process, and it looks really good. Let's
go with this first. Somebody will click
on this and drag it down to the Photoshop icon. You can also go to
inputs and do it there. Click on this here. So now I'm at the crop two. This is four by eight by ten. Good. Come over here. Okay. Now this is nice. And I mean to move to here. You move to, you can
just go to Spot Healing or use a closest to
anyone works fine. But remove to is kind of
faster for me right now. You know, I got this
one and it's faster. Then we're done with this Oh, that wasn't nice.
Just take it slowly. I want to make her
smaller in this. For this picture because
she's far away from us. We don't really need
to do much things. Yeah, clean some
other stuff there. So a little bit of, like, shadows on her skin,
and we are good. Just a little bit of
red. Come over here, flatten this, cold
sat down and drag. This one I want shave. You see how small she
is in this frame. I'll come over here,
the marche tool. Click on this.
Click on the layer, come on J, move to, then drag. Come over here, too. On this, Command J, move to drag. Everything together on a
different layer above it all. And for the MAC is Command
Option Shift E. It is nice. Come over here to the two.
Also, Mac two, click here. Command J, click and drank. Okay, so this is not
working well for me. I need more of this
in my selection. So take on it. Command J. Now this is good
and just drank out. Yeah, this is nice.
Look at this. This is really, really
nice. Yes, this is nice. Now, I'm going to merge
everything together, click on flatten image,
and we are good. Click on this Maceo, too. Just take a selton around her. Like this, right? Yeah, push it up a little bit. Now, come over here to
calls, take on calls. In a bit dest, yes. Command I, and go to filter, go to blow, go to Goshen blow
and just plan with this. You see? Now, this is
looking really, very nice. Go to levels. Look at this. Beautiful. And this is it. I am
done. Nothing else. Now, I want to kill
a little bit of the highlights here,
if it's distracting, I come over here to remove too, and I just take it off. Yeah, that's it. But
this is really nice. This is nice. And you can also just blot the background
if you want to. Yeah, I can add a blot to the
background if you want to. Just your creativity. Anything you want
to do, you can do. Just go ahead and do it. Just click on cove, take it down a
little bit, beef or brush and just paint
stress out a little bit. Is place just a bit
skill the highlights. Yeah, yeah, yeah.
Okay. Now, this is it. This image right here, I'm good, and it's a wing. So come over here,
flatten image. Tick on Command S, so save or you click on command Shift S to save us and
save it to us JPEG. Click on SVI Copy. Saves
PEG, and I'm done. This is the before
over here before. Look at this after. Look at how it looks.
This is really nice. We're done with this, let's
work on the next image. A let's pick one, this is nice. Let's hop with this.
Let's open it up. You can click and
drag it to this icon over here or just go to
Import and bring it in. The first thing we're
going to do is we're going to remove any blemishes, we can see on her
skin that visible to the eyes and from there,
work our way through. Now, let's go in and zoom in. Command plus to zoom in. If you're on the MAC,
if you're on Windows, that should be control.
Let's come over here. Let's pick on remove two. But if you have
the old Photoshop, go to Spot Healing Bosch or the healing Bush do depends
on what works for you. Try to remove anything we
can see like this. Yeah. Next thing what you
do is fig Separation. Flinn has free servon
actions online. You can go ahead
and download it. And if you have an active
membership with Flinn, you can go ahead and download
all these actions for free. Click on this, system bits, clay continue, click on
the screen over here. Let's use, Enter. We have low F HF, low F is low frequency, colors, HF is texture,
high frequency. So come over here, go
to this, the last 02. Zoom and select areas
also apply blow too. For this texture over here, you can use HF, come over here. Close D two, closet two here, and the flow can be
73 depending on you. Just make it work. Oh, sorry. This have to be on This has to be on cont
layer, not all layers. This over here, Covent layer, please, not all layers. So come over here, select I think this is a bit
hash of 50 for the flow. Yeah. Yeah, so this is nice, right
here. This is nice. I love this here. Next thing
I'll do is I'll go to Low F, then I'll go to Mixer Bosch. So come over here, Mixer Bush. These are my settings.
Make sure you're 30, 30. And if you have
other settings you see online that work for you, please do that soon. Touching has no like touching
is retouching, yeah. Just make sure they
made looks good. I agree. I'm here
my mixer brush, I'm won't try to just
mix it up a little bit. Yeah. And we are good right here. This is before,
after before, after. Just a little adjustment here
and there, and we are good. The next thing is that would
go to this action over here called Queta by Gaspe,
we touch necessities. Now, please, if you
have the money, you can purchase this. It's really nice. It's nice. Have the money.
Purchase it, yes. Clay on write in eyes
white. Go to the eyes. Opt of this layer here is 50. Let's take it to 70. Okay, I think 60
might work for us. So 60 is good. And
this is it right here. You could do more
grading if you want to. If you're good with
this, let it go. But if you want to
do more grading, you can come over here, go to color balance, and you mix it. So, for example, if we have highlights and you put
red for the highlights, for example, you have to put the opposite here the
sing for the shadows. That's how you do it. So
just have some fun doing it. Let me show you a
quick one, take this highlight and
just play on the tat. Yeah. And this is it.
You can see that. So here for the
highlight, we have -14, minus six, for the shadows, we have plus two plus
one, plus three. Just lay on with it
and see what you like. So this is before,
this is the after. Look how this looks like.
This is really nice. And for this right
now, I am done. If you want to sharpen
it, you can go in and sharpen it,
add sharpening to it. But I did the mad
in sharp enough, and most time I'll
sharpening from trum. But this is good, and
I'm done right here. Sometimes I add of
levels here and there, come over here, make
it a little bit thick. Come levels. A little bit of highlight
overhead depends. This is good. Let's say, before, after. Get a little bit of contrast. Just make it look a little
bit tick and I'm good. So this is the image.
Alright, I'm good. You can add more things,
flares and other things. But right now, I'm good. So
this is my image right here. But this image we don't
need skin be touching. We just need to do
a little bit of push up here and
there and we're good. This is nice. So I
will copy this too. Command, click on the two, click drag to the
next layer and drop. Is looking good over here. I just kill this pat the
highlight, and I'm good. A lot of the colors
here. I'm wearing a little bit darker,
what do you do next. So you can just go to
your cove. Get darker. You see that, yeah, S. Yeah. And honestly, you're good. Is it. That's what we did. We just it curve,
clicked over here, the middle and drag it down with the whole image darker
and this is before, after. And we are good. This is short. So right here, this image, we are good. For ID size, you may
have to resize it to four by five, eight by ten. Let me s I will do it
quickly for Instagram, to make it perfectly
size on Instagram. Just come over here, click on this and just make it digger. Enter. So make sure
you copy match. That's Command Option Shift E on the Windows on the MAC on
the windows is different, e. So just come over here. Mac two, click drag, Command J, move to
click and drag. Enter. Always go back to
the layer because that's why you want to select your
bag one and Command J. Command J is also
duplicate. That side. You've made the
selection on the image. So Command J, click and drag. Enter. Now, this is the
image, we are good. This is the before, after. Yeah. And this is Instagram
size perfectly for you. Right now, I'm going to
just flatten the image and click on Command
S, and I am good. So creativity is
really interesting. When you shoot
cinematic portraits, you have the privilege to go in and just manipulate
it how you want to. Remember, it's like a movie. So movies only have one
particular type of color grid. They have diferent
type of color grid, so you can do it the
best way you think it's good for you and
tells your story. Right now, this is
interesting and good. Also drop some of the Wout, the class project
for you to use to practice and follow along. Thank you, guys for
watching the class. I really hope you
enjoy it. Not forget to drop your questions. And please if you can
edit the image and let me see how you interpret this
type of image. I'll be glad. I'll be really happy if
you can drop it down there in the class
project for me. I'll be happy. And also, please drop reviews, let
me know what you think. I'm always here to help you out and let us get
creative together. So that's it, guys, thanks for watching and stay creative.
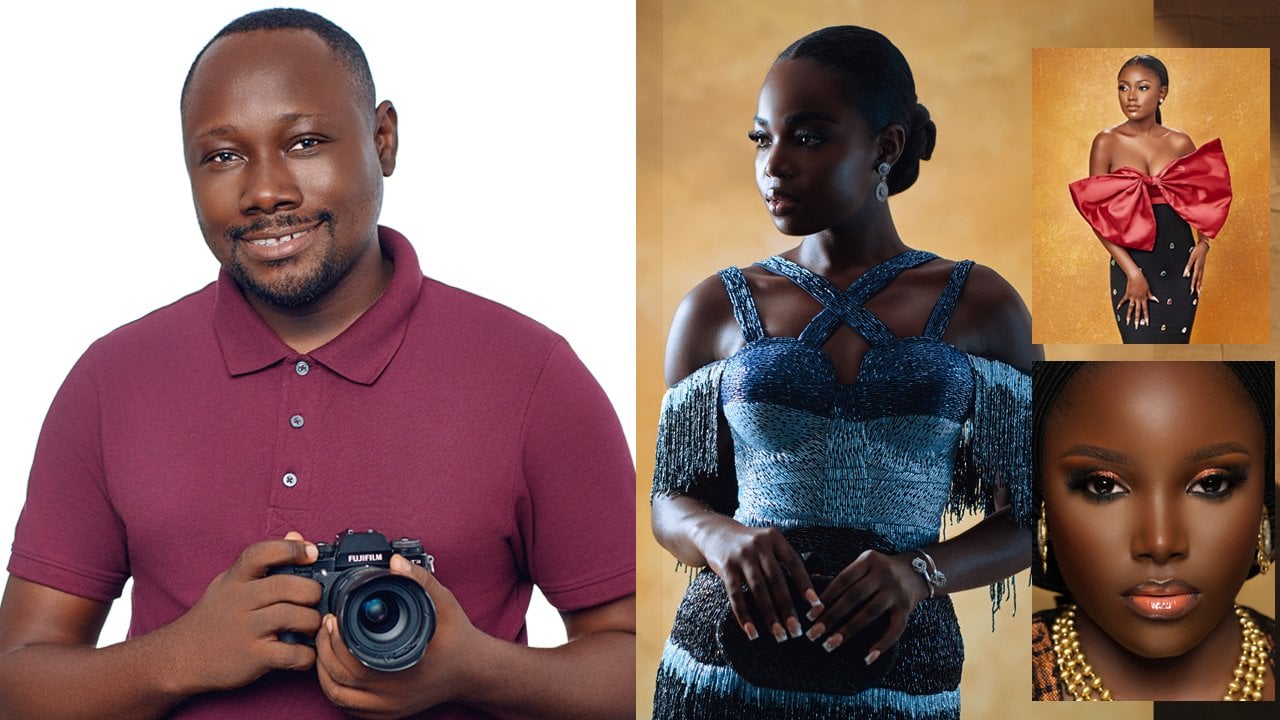
 Olusola Abisagbo, Professional Photographer and Educator