Transcripts
1. Introduction: So, have you ever watched
a movie and thought, Why does this shot
feel so cinematic? Why is it so
emotionally dialed in? A big part of that magic
comes from something very, very simple, and that is colors. Hey, guys, my name
is Jijo Sengupta, and I am your teacher
here at Skillshare. I am a huge movie fanatic, anime fanatic,
storytelling fanatic. I have my bachelor's and my master's in films and animations from Rochester
Instiuor of Technology in Upstate New York, and I've done crazy
amount of films, short films, series,
music videos, and all of them
have won a bunch of awards across the world, including Akan's nomination
last year in 2024. So I'm humbled, but also, I want to give all of
this knowledge that I have and just pour it
out into the world. So today's class is going
to be all about Rosco. So Rosco is basically
gel and is used kind of, like, in front of the lights on professional film sets, okay? So basically, they shape the
emotional tone of a scene. So warming up her face or, like, you know, cooling down
the shadows at night. Um, or maybe even
adding a surreal mood. So they're using everything
from Indie films to Oscar winning blockbusters. Basically what they do is
they help the director of photography paint
with the light. What if you didn't
have the lights of the crew or those
special Rosco gels cause they're highly expensive. So in this class, we're going to learn
how to recreate those typical
Hollywood style looks. Uh, to simulate the
same Rosco gels advanced node structures. We're going to be
using the hue curves, the color warpers and also a couple of look
development tools. But again, no lighting
setup needed. You can work with any footage. I will be providing practice
footage for you as well, which is from a good red camera. So these are the looks that we are going
to be recreating. R02. So this is called
the Bastard Amber. So the Bastard Amber, basically for warm
theatrical skin tones, then we will be
creating the echo 003. This is called the Lavender
Tint, the Lavender Tint. This will be usually used for Sci fi or maybe
dramatic coolness. Then we will be
learning echo 002. This is the rose pink, basically for playful, cheerful, sometimes, like a
whimsical tones that you want to create.
That's what we will do. And then last but not least, we will be creating rr07 look, which is basically the Straw Gold nostalgic golden hour glow, something like that. So it's r07 and 08. We'll be learning
basically kind of like a mix of them because
they kind of go together, and we'll be learning
that learning how to break down a couple
of reference shots. So from popular films, I've taken some reference shots, which I will also provide
into your project resources. So we will understand
those references shots. We'll take our own footage, then we will match the
shot according. What we will do at the
end is we will try to create reusable lots
and power grades, if not lots, at
least power grades, so we can work on any
project regardless. So we can carry it across
our own films and also, you know, our music videos or some of your commercial work. That's super helpful, right?
Because cinematic color isn't about just pretty visuals. It is about it's you got
to understand the mood, you got to understand
what the directors thought for the film,
the genre, all of that. And when you know how to control the emotional temperature
of your film, I promise you you unlock the power to direct how your
audience is going to feel. Alright? Literally shot by
shot, depending on the mood, the genre, the subtext
of the character, the arc of where the character
is going, everything. So if you're ready to add Rosco style storytelling to
your Color Grading toolkit, let's dive into the next lesson. Let's look at some
reference charts first, understand what's going on, and then dive into the software.
2. Setting the Project: All right, guys, welcome
to the first lesson. So in this, the first
thing that we're going to do is I'm going to
take you across my DaVinci Resolve project file, and I'm going to just show
you what we're working with, and I'm going to show you
a couple of references as to how we're going to be tackling and what are some things that we are
going to be covering. So before I begin, I want you guys to go
through the project files, and I want you guys to see that these are a couple of
things that I provided. So, for example, you see here,
we have references here. So we have references here. And these are all
the red raw files. Again, we might not be using
every single one of them, but we're going to be
using a couple of them. And we have references
from different movies. So I want you guys to
take these and start importing them
into the timeline. And the footages that I'm
going to be working with are not necessarily the footages that you have to work with. You can work with
other footages as L. I did provide the proxy files so that it
is easier for you guys. In case you don't have
a powerful machine. You guys can still scrub
through the timeline. Again, make sure you turn off proxies during the color grading because then the proxies aren't the original file and the
original color data in it. So let's now dive in. These are the footages
that I'm working with. So, for example, you have
12, three, and four. Now, I've color
coded these clips individually to kind of
match with the Rosco colors. So this one is our two, which is the Bastard Amber. I've kind of clipped this one, which is clipped it
orange, the color. This one is the Lavender Tint, which is echo 003. This one would be the Rose Pink. Which is E Echo 002, and this one is the straw hat. Sorry, not straw hat.
That's one piece, the straw and pale gold. Alright? These are the four footage that I'm gonna be working with. We're gonna be converting them. And this is our references. So let's take a look
at these references. So I turn out these clips. So this one is Bastard Amber, so you can see over here
the color of the clip. So this is Bastard
Amber. Let's open up these waveforms,
and let's take a look. So you can see the
overall image is very, very orangish, very,
very warm tones. So I'm going to just increase
it put this into on aller. So you can see the second
tone is pretty proper. It's mostly residing
on the warm tones. So if you look at it, I'm
going to zoom in here, zoom into a couple
of the shadows, and we can see over here
that even in the shadows, the warmth is a
little bit lifted, and there's overall
saturation bumps, as you can see in
the vectorscope, that it's more like
stretched out towards it. Like right here, you can see in the vectorscope
over here as well. And then also, if you look at, let's say, these curtains, these are supposed to be
white, obviously, metallic. But then again, you can see
the you can see the parades, how the red is more higher. The green is made in the blue
is like, very, very low. So that is the look
that we're aiming for and same thing with
the shadows here as well. The shadows are pretty
nicely balanced, so it's important that
we balance our blacks, and we balance our
whites properly, right? E Even though the look
is very warm tone, we can see the dark sides are meant to be dark,
which is how we want it. We don't want none of that
muggy warm stuff, right? So that's that is what is
it. That is what is there. Then we see the difference
between this one and this one, basically the subjects
and the background. So they're maintaining
their natural colors, which was shot in
the actual set, but also the background is a little bit more
warmer, warmer tones. But we're doing
justice to the skin, as well. It's not too warm. And this is a golden hour scene, so we are pretty good. Now let's move on
to the next one. We will go to this one, which is one of my favorite
scenes from this movie. This is Lavender Tint. So you can see over
here, the reds, the greens and the
blues are just like freaking all the way
up there, right? You can see the
highlights over here. E Everything is very,
very, very purple. Take a look at the shadows
over here near Tanos' neck. You can see a little bit of, you know, purple and gunk, which is in there, but I
think that is on purpose because it is how
it's meant to be. But it's, like, beautiful
art, just amazing art. You can see, same
thing over here, we have a lot of basically the lower and the Gamma is more
pushed towards purple. So even though they are
purple in actual color, but these some people are not, so we're trying to push
them towards the purple. The gama at least. So overall, gamma is pretty magenta,
pretty lavender. So you can see, like, the
skin over here. Beautiful. The blues are high,
the reds are high, and the greens are the lowest. That's where we're gonna be doing creating this simple look, the sci fi look that
we're going for. Then we have the next one, which is Rose Pink.
Take a look at that. So you can see, like the
skin overall is very, very, extremely,
extremely pinkish. So over here, what
we're going to be doing is we're going
to be creating an overall pink wash
in the entire image. You can see, like, everywhere, the reds and the blues are high, the greens are the lowest. There's magenta, there's
blues in the shadows, which is really, really nice. And we're going to
try to create that, but they've also maintained the blacks properly, which is cool. The hair is also over
here, it's more bluish. The blues are high, over
here, the blacks are proper. If you look at the
parade, the red, the green, and the
blue are pretty good. But over here, the
blue gets more higher. And then here, it's more magenta because the reds
are coming back up again. So you can see that. Okay. So that is
the look that we're going to be creating
and overall pink wash. So basically what this does is, I think the Gamma and the gain like over
here in the waveform, the gamma and the gain a lot
is there in the pink a lot. However, in this one, mostly the gamma is in
the lavender magenticide. In this one, the gamma
and the gain is also, again, in the warm side. So that is that. Then we look at the straw, gold, pale yellow. Take a look at that. Ooh, so
much yellow, so much yellow. So a lot of yellow there
is pushed into the gamma, like, almost, to
be honest, almost, like, if you look at it,
the green is also high. So it's like yellow green, like hue around like 60
degrees, I would say. Like, it's almost yellow, but with, like, a little
bit greenish tinge, as well that I'm able to see. You can see how
the skin is still having its innate warmth, which is also what we're
going to be trying to do with our subject is
basically in this one. Like we see like we have to
maintain the skin as well. So you got to do
justice to that. And over here, maintain
it is yellowish, but they've done justice to it. Let's take a look at
the shadows real quick. Shadows are also a
little bit more amber, yellow gold over
here, the dark sides. See, you can see, if you
look at the parades, you can see the green
is actually higher. So there are moments
where the green is a little bit more push is a
little bit more stylistic, which is not bad at all. So yeah, that's pretty much. There's also green stuff around, so I guess it does justice
to the art over there. So that is what we're
going to be creating. These are three references. So we're going to do
Bastard Amber for this one, which is like a perfect scenery, a perfect town, perfect. We have a overcast light what's
coming from the daylight. Then in this one, we're going to do, like, a Lavender Tint. So we have a lot of yellow light to deal with in the background. So that's going to
be super fun to do. Then we have the Rose Pink, which is gonna have
a nice car scene. Oh, the lights also turn on. So it'll be fun to do. So we're going to do justice
to the Lamborghini, the yellow, but also, you know, have that sense of
pink wash, as well. And then the last one, but not the least
we'll do the gold. Which gonna be super
fun because the sky is blue, the water is steel. So we're gonna be creating
that gold effect, but also make sure we don't
over gold this guy over here. So go to do justice to his skin. So, right, so in
the next lesson, we will be diving deep into creating the Bastard Amber look, which is going to be this look. So again, get your pens ready, get your software ready. We're gonna be diving right
in and starting the node. Oh, last but not the least, what I have done is this. Again, this is an
intermediate level class, so I hope you understand
what's going on. Is I have clipped, I've grouped kind of one, two, three, four clips. And what I've done
is in the pre clip, I have added an IDT, which is not the light
box, but the ex. I've added a color
space transform, where I have done
red white Game RGB and Gamma Log three G ten, and output color space, and the working color space is DaVinci white gamet with
Gamma DaVinci intermediate. And in the group post Clip, I have done DaVinci, to use timeline which is R07 09. So this is a proper conversion
as well. All right. And I've also made it as
a shared node between, like, these four of them. So I don't know why
I did that, but I did that anyway. I think
the groups were not there. That's why I created
a shared node. But anyway, that is
the starting point. My color space overall, color management
is pretty simple. DaVinci RGB R07 09 R07 09, and that is my
working color space. And then in the clip
is where we will start doing our grunt work. All right, so Bastard
Amber. Here we go.
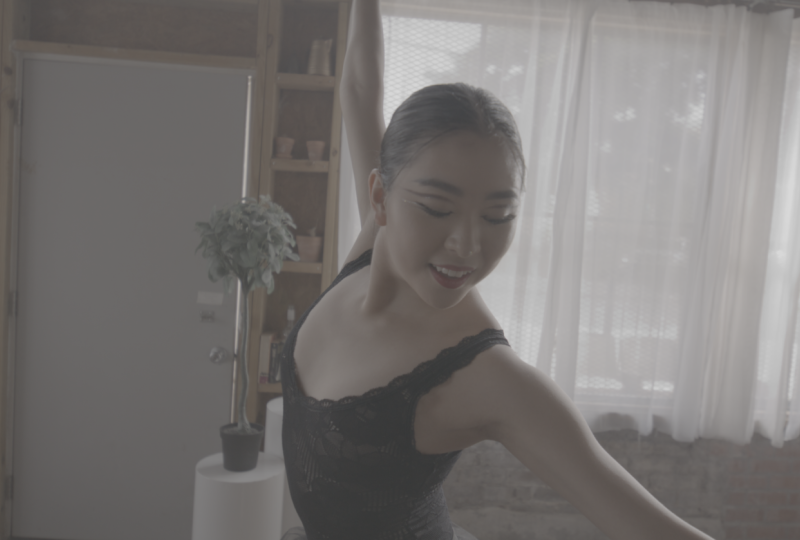
3. Bastard Amber: Alright, so welcome to the
Bastard Amber, which is rr02l. So this is the
footage that we're going to be working
with right here. This is the footage
of the dancer doing some ballet, right
here in slow motion. So we're going to
focus on this one. And our reference is this as we discussed
in the last lesson. So let's get on with it,
and let's go step by step, and let's see how we can achieve this look through the beautiful
nodes of DaVinci Resolve. Get your coffee, get your
drink, whatever you want to do. Alright, so node number one, what we're going to be
doing is we're going to be doing primary correction, right? So do a simple balance to
make sure everything is even. So you see over here in
the waveform around here, we see that over here, we have a lot of whites in the in the highs and also
oranges in the mids. So we're going to try
and balance it out by making everything
white, right? Basically, look at this curtain. If I take a look at
the R RGB value, we see the R RGB is a little bit more the R is a little
bit more high, right? So what we're going to be
doing is we will first rename this node to balance. So overall exposure and also
primary adjustments, right? So I'm going to take the lift, bring it down a little bit, increase the gamma, maybe
decrease the gain a little bit. Lift up the skin tone and also stretch out
the lifts a little bit. Cruse gamma again. Perfect. See before after
before after, right? Not that bad. There you go. My lift up lift a little bit
more, increase the gamma. All right, so exposure is done. Now let's do a little
bit white balancing. Now, what I'll do
is take the gamma. I'll make this linear. Oh, sorry. Don't do this. So we will go here.
And instead this, we'll just call it exposure. And we'll make another node,
and we will call this. We'll call this
balance. All right? So BL is for balance, basically. So now in this one, we will make this
node as a linear. So basically the
reason why I do linear is because it balances it out based on exactly how
the camera was used on set. So you're working with
linear color space, which most VFX artists use. So it's just like easier and
much more better to work and balance in this
without destroying the actual colors on set, right? So what happens is
your gain becomes your offset when you do
your gamma as linear, your gain becomes your offset. So I'll take the Lumen mix. I'll put that to
zero, take the gain, and then I'm just going to
eyeball it a little bit. Since I know it's a
little bit more warm, I am going to cool
it off a little bit. Make the whites a little
bit more white. Go extra. No, that's too cool.
There you go. Perfect. So now my R RGB parades
are also proper. I can see that on my
scopes over here. Over here, the reds are a little bit firm, but the whites. If you see the white levels are overall easy and
overall the same. Take a look over
here, the whites. The R R, the G, and the
B are on the same level. Here the R is a little bit more. The green is less,
and the blue is even lesser that's skin,
which is nice. Over here, the green should be a little bit more,
which is natural. The whites over here are
also more or less the same. The whites over here are okay, it's a little bit more
red here on this side. There you go. Perfect. You see how that's good.
Beautiful, beautiful, beautiful. What I'm going to be
doing is I'm going to add a cereal and a
parallel, right? So this one is
going to basically be it is going to be skin. We use target the
skin with this, and this one is going to
be background hue shift. Alright. And actually, I
will add another cereal note here. There you go. And this one I will call
as the warm push, right? So basically, this was the overall fixing,
and this is the warm. There's the skin,
there's the background hue shift, parallels, right? So in the warm push, what I want to do is I'm
going to take the gamma, and I'm going to push it
more towards the warm side. Take a look at our
references again, see how warm it
is. Look at that. Look at the waveform. Look at the You see how the reds
are much more higher. The vectroscopic look over here. Amazing. I look over here, so we're gonna
push it over there. I take the warm push. What I'm going to do is I
am going to take the gamma, get to my hero pose. There you go. There you go. Cool it down a little
bit more. There you go. So we have the warm push
disable Disable nib. All right. Again, it depends on how
warm you want to go. So let's try to compare
and see over here. So I will select selected
clips and I'll do here. Actually, I'm going
to just open up the clips and go there. So you can see this
is a little bit more. We're moving more
towards the red, so let's go back here
and move it yellowish. So keep in mind, over there, the sun is the golden hour. So over here, we don't
have golden hour, which we're just on
an overcast shadow. So there's only so
much you can do again. When it comes to shot matching, do not try to match it exactly. You have to do justice to the image to the
own footage, as well. Now, let's go to the skin. Alright, so we see over here, the skin, again,
is too orangish. So this is where we're going
to fix the skin so that it doesn't affect it does make
everything look too crazy. So what I'm going to do
is I'm going to use, in this case, I'm going to
use the AI magic mask, too. So this has been updated
with DaVinci 20.1. It's become more powerful. So what I'm going to do is
I'm going to take a point, and I'm going to grab
her chest right here. Boom, and we will check. We'll just wait and we'll
see what has been selected. Beautiful. Look at the precision as to how the mask is taking. So now maybe we'll add
a little bit blur and the main sauce until the main sauce is going to
be here in the denoise. That's gonna be the
main sauce. All right? That's where
everything is going to be like good
selection, basically. So for this case I'm
going to choose faster. And what I'm going to do is, I am going to track it. So I'll go to my
tracker to my tracker. Actually go by. You can
actually track it right from here and just go
forwards and backwards. Let it track, let it do its job. Amazing. Do you
see how beautiful? It's just amazing,
super, super good. All right. Cool. So now I will take this out and go back here. So
I'll go to the skin. What I'll do is I
want to just cool off the skin just by
a wee bit, right? So I'm going to
take in this case, I want to take the
offset. All right? I'll take the offset and I'll just cool it
off just a bit. So I can preserve the
skin tone. That's it. See that? This is
how it was before. This is how it is now. So I preserve the skin tone. If you want, you can kind
of check the vector scope, see how it's falling into the skin tone indicator,
which is nice. All right. Hey. So you got to be extremely
careful with artifacts. So it doesn't happen anywhere
on her face, forehead. Alright, everything is good. Just do, like, a quick bypass
and see everything is fine. We look at the waveforms. Everything is
beautiful. Maybe what we can do is maybe we can go back to our exposure lift.
Because this is warm. I want it to be, like,
nice and bright, right? So we have the skin. Now you want to do the
background hue shift, right? Mm. So, again, this
is still warm. Again, it's not. We're not keeping it warm,
it is still warm. The only thing we
have to keep in mind is that it maintains
a neutral skin tone, right? So this was before. I don't want that
much warmth than me, cause if you take a look
at our clip over here, like, everything is warm, but it's maintaining the overall aesthetic of the
skin, at least, okay? Let's go back here.
Now, what I'm going to do a fun thing is I am going to make and put a depth map because
I love depth maps, and I think it's
usually it's just like an amazing thing,
an amazing tool. So what I'm going to do
is I'm just going to take this, drag it over here, connect it over
here and take this and connect it to the
outside node for now. And what I'll do is I'll
finish the mat first. So take the depth
map. I will adjust my levels FX and
take the far limit. Near limit. And then the Gamma will
increase a little bit. Then I will take this
isolation isolation. Then I'll take the target depth. Increase the tolerance
a bit. There you go. And the main point is to have the softness in it because we
don't want things to again, we're not doing this
for green screen, so it doesn't have to be exact. As long as the focal length is being captured, that's
the most important. Just decrease that. Blur it out. Perfect. Then if we
see the overall. Alright. Not bad. All right, not bad. We can work with this. So I connect this
back. What I'll do for the background
here shift, I'm going to take this deep map. I'm going to connect
it to the Alpha. So it will read the Alpha. So now, if I look at the Gamma, for example, if I make it blue, Look, so it selected
the mat as her, right? So obviously that is not what we want to do. So
I will reset this. What I will do is
I will take this. I will invert it. So now
the mat is inverted. So if you want to check it,
I will show you right here. Look at that. There's
just inverting that. Alpha, take it out. Now, this one, what we will do is I will make this even more a warmer
amber sort of a feeling. Okay? So let's take this
and we will in this time, we use the log
wheel a little bit. I'll use the midtones
and the shadows. Maybe a little bit of
the highlights as well. Get the highlights a
little bit more red. Look at that. Mm hm. So now I'm taking this and this. If I'm taking these two
together, disable it. Disable it. Look at that. Beautiful. So look at
how far we have come. I'm gonna take this one off, take this one off, this one off. So we have come here,
did a warm push, fix the skin, background
with a depth map. Amazing. So now we
have the exposure, we have the balance,
we have the warm push. We have the skin, we have
the background hue shift, and we have it fed via
the depth map, right? Now. Alright, so now we're
going to be adding glow. I'm gonna take this
glow, put it here. Now, what I want to do
is I want to mainly adjust the highlighted
areas, right? So take the spread, maybe. Let's see what I'll
do is I am going to firstly Do the
spread a little bit. You see the hands over
here, like right here. See that? That's where the main, like, the fun part
is happening, right? So if I turn this off,
that's what's happening. So I want the spread to be
not too jarring to the eye, but also in a way
that it's nice and gloomy because that's the whole point of the Bastard Amber. It needs to be nice,
dreamy look, right? So I'm doing that, maybe a
little bit change over here. I really like the hairline that's giving her.
It's really nice. Decrease that a
little bit over here. Decrease it. Decrease
the reds, as well. Decrease Actually, no, let
me not adjust them overall. Let me just work on the
spread, keep it simple. Yeah, I think that's
pretty much it. Let me just see the gluon. Yeah, that side is crazy
because we have so it's just So just like
that should be fun. This is the arm right here. Yeah, okay. But I really don't like the thing over here on her head
that's happening, which is making it look
like she has red hair, which is not also the truth. So what I'll do is
I will decrease the spread a little
bit over here. And maybe the global blend, what I'll do is go like that, and then take the
blend to, like, 0.3. Yeah, that's good.
So let's stick here. Let's label this as glow. Gives an overall nice feeling, though, a theory of feeling. Okay, perfect. And last but not the least, we will add a wee
bit of a contrast. So we'll take the
curves over here. I'm just gonna add just
a small little curve. There you go. Disable it. Unable to disable
it. E Unable it. Perfect. Just very little. Alright, now what I'll do is I'm going to go to my exposure back, go to my primaries, and I will just take up the shadows
just a little bit. Again, we want our blacks
to be looking like Blacks, which is exactly
what we're doing. If you look at the
parades, open it up. If you look at the parades.
The blacks are proper. There's no extra red. There's no extra green. There is no extra blue.
We're maintaining justice to the blacks, not getting any of
that gunkiness. Now, this one is a
little bit more reddish, but that's not black completely. E Even the shadows, let me
see the shadows right here. Okay, this is good. The shadows
here is also pretty good. Alright, amazing. So I
think we are all set. So that is basically this
is the note tree that we are going to be following
for most of our work. And yeah, so just to summarize, we did
the exposure first. All right. Let's go one by one. Let's go one by one here. All right, so we were
here. All right. So we have this is completely
red log video, right? So now CST, R07 09, right? Now we go E exposure is number one, we
balance the exposure. So you can see the
waveforms over here. We lifted up the
shadows a little bit, got the gamma up overall. So I'm going to keep the waveforms open
for you guys here. All right. Take this, make it into a waveform. Alright. Perfect. All right. Next we did is the
balance overall. You just look at
the vectroscope. We moved it towards the
center, balance it out. If you see the
waveform, everything was more warm amberish. We made it more white,
balancing it out. Then we did a warm push
to the overall image. Look at that, saturated
it without using the typical saturation,
simple gain. Again, guys, in color grading, the whole concept is not to overdo all the
tools that you know, but doing simple tricks to
make the image look good. Main that's the name
of the game, right? Simple things, but do it in a way that creates
amazing looks. That's what people do. And we have the next note
is we fix the skin, look at how orange the skin is. We fix that. You can
take a look here. Let me zoom in again. Look, this is how orange was, we fix that. All right. Then we took the depth map, and we had we created a whole mat for the
background, inverted it. Then we went to the
background hue shift, and we just changed the background to a little bit more warmish
tonality with the log wheels. Now I can still adjust it
a little bit if I want to. Make it a little
bit more, you know, ethereal, if you will,
something like that. All right. And the
next node we added was a little bit of a glow
and last but not least, a little bit of
contrast for film. Now, in this contrast, maybe I did it a
little bit too much. Maybe I could just,
you know, take it a little bit more like that. Lift up the highs a
little bit more. Perfect. So that's not lost, and after doing that, I want to go back to
the first node, and I'm going to lift up
the gamma a little bit, cause I want to see
her skin properly. Alright, beautiful.
Now let's do a play. Amazing. Amazing. Well,
I'll do a playback. I'll do Smart R render cache. So you can see all the red
ones are going to be like, you know, gonna
turn blue so that they work properly.
So you can play. E Even with a powerful
computer such as mine, you still need to
cache because these are eight K footages that need to be um cached so that the
tools such as depth Map, the glow, the magic mask, they work properly, right? Amazing. Amazing. Look at that. Beautiful. Smooth as butter. So
that ends bastard Amber. In the next one, we will
be going to the echo 003. Alright? We're gonna be doing
echo 003, and we will be, uh looking at the
Lavender Tint look, which is going to
be this footage. Gonna be focusing on this one. And again, this is completely
as in a yellow lights, we'll be converting that
into something like this. I'm excited. Let's go
to Lesson number two.
4. Lavender Tint: Amazing. So now in this lesson, we are going to echo 003, which is Lavender Tint. So on this one,
we're going to be focusing on Lavender Tint, and we're going to be
focusing on this clip. So you can take a look
at the waveforms. It is pretty yellowish,
warm, right? So again, CST has been done, and our goal is to kind of
replicate this scene, right? What I'm going to
do is I'm going to take I'm going to use a
similar structure, right? So exposure, balance, a push, skin, hue shift, a
glow, depth map. Alright? So let me
just clean this up. Take this over here. Take this around here. Amazing. Put this here, put this here, put
this warm push. Alright. Okay, so exposure and
balance always come first. Alright, so I'm going to
label so I'm going to label this as exposure. And what I'm going to
do is I'm going to take the lift gamma
gain over here and I'm going to lift it
up. So I can see stuff. So if you take a
look, I'm looking at the waveforms over here trying
to mess with the gamma, LGG, and the gain, maybe not that much,
maybe a little bit here. Move it down a little bit. All right. Exposure again. Lift it up. Yeah, like that. So this is where we were
before, after before, after. So I got in the skin
and everything. Alright. Amazing.
Cool. So that is done. Now we're done with exposure. Now we're going to
go into balance. So add one more node. I'm going to call it balance. And what we're going to do
is we're going to again, do a similar way. We're going to make this
node as take the gamma, make it linear, make a linear. And then what we're
going to do is the gain becomes the offset. So take the gain, and we
see it's a bit yellowish. So we'll add maybe a little bit. Blue. Just like that. So you see how the
waveform is turning white? That means we're doing
a proper white balance. Basically, the goal
is to kind of have this part white and see if you look with
it's very yellow. I want the whites to look
like whites. All right. So let's again go back
over there to the blue. That's a little bit too
much. All right, perfect. Boom. Amazing. So now we're
looking at a proper white, and we can kind of see it in our let's see look at parades. You can see the green
is a little bit more, so let's push it to a
little bit of a magenta. There you go. There you go. Amazing. So now the whites
look like whites? Now, we're going to
go with a similar, very, very similar approach. The next node, I'm going
to call it a push. Basically, in the Bastard
Amber we did a warm push. In this one, we're going to do a lavender push,
right? The push. Let's call it the push, alright? So what I'm going to do is
I'm going to take the gamma. So make sure that this
is proper, right, cool. Because, again, the difference why this works is if
you look over here, if I use timeline, it
doesn't make sense, right? So it's important
to do justice to the cinematographer and
actually keep the elements, the yellows proper, the skins proper, but to keep
the whites white. That's why I love this
way of balancing footage. Anyway, so now the push, what I'm going to do
is take the gamma. I am going to push it towards, let's say, magenta blue, kind of like lavender
kind of mix of ps. So take the gamma and
I'm going to push it. Like that. Maybe not that much. Bring it back a little bit more. Amazing. Let's look at my
waveforms. Beautiful, love it. All right. What I want to do is I'm gonna go back
to the exposure, bring the lift down
just a little bit. Just a little bit. There you go. I'm gonna go back to the push. The reason why I want the
blacks to look like blacks, you know? So Okay. So again, go a little
bit more perfect. Now what I'm going
to do is I'm going to add another node, and we're going to
label this as skin, and I'm going to add
a parallel node. I'm going to label this
as the background. All right. So on the skin, what we're going to
do is we're going to try to bring back the skin a little bit of the skin
texture and see how it works. All right? Similar way of how we did with
the Bastard Amber. So what I'm going to do is I'm kind of going to go over here, take the magic mask, make one point here. Let's see how AI does it. Not bad. Guy is not bad. I'm going to add the
arm as well. Amazing. Wow. Blur the radius
maybe a little bit. I want to take a the denoise. This is where the
main sauces. Denise. And then, oh, sorry. I think I did a
mistake. There you go. Did it on the wrong note, guys. Let's do one more
time. Let's go there. And let's go here on
the arm. Perfect. Now I'm going to
blur the radius. Maybe like 30 should be fine. Let's turn this off. And then let's do
the denise bit. 20 should be good.
Alright. Now let's track it forwards and backwards. Hopefully it does a good job. Yeah. Amazing. Look
at the precision. That's freaking cool. That's so cool. That's amazing. Anyway, so go on there. Now what I'm going to do is
I'm going to take the skin. Again, the skin resides
in the gamma, right? So what I want to do
is I'm going to take the gamma and go the
opposite of magenta in blue, which is over here
towards teal and green. Alright. So I'm
going to go there. Again, I don't want
something like this. Again, the whole point
is just because, let me open the ectroscope Um so the whole point is just because it is not on the skin
line of the vectorscope, which is over here, it's okay because the
look is lavender, so we don't need to
bring it to this line. You know, it's not
necessary to bring it to this line. We can
push it a little. I'm just saying is to
bring the sense of skin a little bit back so that it's separate from the
background, right? You don't have to bring
the skin. Oh, we need to make the skin proper skin color, again, the look
is Lavender Tint, so there has to be lavender. You might not follow this
instruction properly, so again, creative bias is
very, very important to have. Don't just follow the rules
blindly. Let's go back. Okay, don't just go here, like, Oh, now the skin looks proper. It represents her ethnicity. No. We just bring back
the skin a little bit. Alright? So, look,
before was like that. See how far we have come with
such little adjustments. This is before, but we still have the sense of
lavender over here. See, it's not on the line, if you look at the vectorscope, but it's still there, right? So that's the name of the game. Alright. Amazing. Cool.
So now the background. So what I'm going to do is I'm going to again go to my eft. I'm gonna go depth
map, drag it here. Just take this, drag it there, and I'm going to just
put this in mean output. Take a look over there. So we have adjust mark
levels, go my effXs. Then we see for limit. Let's increase that near
limit.creseF limit. Let's kind of like that. Then we take the gamma,
decrease a little bit. Then we go isolation and take the target depth and
go here like that. Target depth, and
then go back to the near limit for
limment Like that. We got a map for ans
post processing on, and we take the post filter and take the contract expand, maybe just a little
bit like that, and we'll go back to
our far limits again. Then go back to the
target depth again. There you go. This
should be fine. A little gray is actually
good for blending. Again, we're not doing
green screen removal. We're doing, uh, a blend. So take this, put
this in the Alpha. Okay. Perfect. Bring this
output again back here. And what I want to
do is take this off. Not full screen.
Let's go like that. Now, what I'll do is I'm
going to take this one, and I'm going to
affect the midtones and the highlights over here. So let's put it like
a full screen here. Take the mid tones
and the highlights. But this time, I'm going
to do my log wheels. Do my log wheels
midtones and highlights, I'm going to make
it more lavender. So let's go here. And highlights this. Well, maybe we had a
little bit of below here. Perfect. Amazing. Let's try and see how it looks over here. Let's compare it with this one. All right. If you see
this is a little bit more softer because the
cinema is different and their skin is actually purple
because they're aliens. But we've done a
pretty decent job. Maybe this is more purplish, this is more magenta. So what we're going to do
is we are going to take the background and
instead we'll make the mid tones a little
bit more purple. And this one will go
a bit more purple as well and go back to the push. Remember the game that we did? Take off the log
wheels, and remove it. More lavenders. There you go. There you go. So again, always try and see the come. Now we're at a better.
We're definitely better. Take the skin, actually, and go to the gamma and just maybe push it a little
bit more like that. Just perfect. Beautiful. This is
the background. Amazing. So we'll go to the log waves again.
Take the mid tones. Not much. Take that like that. Perfect. Now, this is how
far we've come. Look, guys. This is the log three G ten. How far we've come.
Amazing. Now, what I want to do is I'm going to add a glow that's always one of
my favorite notes is a glow. So I'm going to label this glow. And I'm going to
go here effects. I'm going to choose glow. Apply the effect here. So you can immediately
see these areas, turning it off now, turning
it on, turning it off. You see how just by default, uh, it's created
so much like Oop. So increase the spread, increase the spread a little
bit. Look at the glow alone. Just like that. Final result. Take the gain, take the
came a little bit more, a bit less perfect. Then what I'm going
to do is I'm going to add another add another node. Another node, I'm
going to call it just a regular contrast. What I'm going to do is take
the custom curves here, and I'm just gonna
like, you know, just minor. There you go. Just like a minor film contrast. And then last but not the least, what I want to do is This is
it's up to you if you want. I like adding, like, a quick film grain, maybe doing like 35 millimeters cause the 35 millimeters is the best type
of grain to exist, then that is my opinion,
and I am right. Well, there you have it, guys. This is the live
Enter tin echo 003. Uh beautiful look.
So to summarize, we did exposure, though
we balanced it out. So let's go node by node, and let's disable it. PAP. All right. Let's go to this area. All right. Let's take this. So, so this was rec 709. Then we did a quick
exposure check. Then we balanced it
out, white balance. Then we did a lavender push. Then we fixed the skin. Then we fix the background. Then we added a glow, added
a little bit contrast, and some beautiful grain.
And there you have it, guys. That is how you can
do Lavender Tint. Moving on to the next one, have Ooh, we have roast ping, which is echo 003, and I can't wait because
it's not a human being. This is going to be a car, and ooh I love cars. Let's go.
5. Rose Pink: Alright, so now we're
moving on to the next one. Now you're getting
the hang of it, right, so now we can move
a little bit more faster. But again, there are
minor minor differences based on the footage
and how we're doing it. That's why I've selected the footages perfectly so you can understand the
different scenarios, right? One was the Bastard Amber, which one was slow, romantic, nice and warm. Over here, we had a subject
with low backgrounds. Over here, we have a car which is not in the foreground
is in the midground, which is, like, there's
roads in between. And if you take a look at the
footage, there's a change. The car turns on its
lights or it has, like, you know, the high beams. It's a traveling shot, right? So what I want to do is
we're going to go to our hero image over here and we're going
to begin, right, easy. First note, let's
build out the tree here. So we have this one. So let's build out one by one. Let's go to label. We will do a primary,
which is exposure. So let's take the lift
Gamma gain a little bit. Let's look at our waveforms, and boom, right, perfect. So let's make the blacks
look like blacks. Take up the gain a little bit. Gamma seems good, in my opinion. I'll dig the lift
down just a wee bit. Amazing. Alright, beautiful. Now we balance it out. Mostly, I think it is balanced properly. We will still put this
Gamma and we go linear. And when you go
linear, make sure you turn off the luma mix. I had forgotten to do
that in the previous one. So make sure when you
go here, balance. Since this one is in linear, make sure you turn off this because the reason why
is when you linear, we don't want our offset, which is the gain to affect the luma mix
which this does, right? We want it to be completely
our proper control. And also just one more thing
since we're back here, if you take a look over here at the parades, like these areas. If you look at let's say the black parts,
the black parts, look at the parades, and you can see the red
and the blue are higher, which means there's
a bluish gunk. So you might want to kind of
make that make that into, let's say, proper black. So the way you can do that is
let me just turn this off. So the way you can do that
is go to the log wheels. And since you look at this, we have a little bit
more higher blue. So what I want to do is I
want to just take the shadow, make it the blue a little
bit more show softer. Maybe just by 0.1. All right. So what
that does is it creates the black
as a black, right? That's the only difference,
right? Alright, amazing. So now we're going to go
back to our clip here. Go back to our clip here, turn
this off, balance it out. So Gamma linear.
Alright, perfect. Now what I'm going
to do is go back to my gain and let's see, open the waveform real quick. Reset. Reset R node. Take the gamma, make it linear. And look at the waveforms. We can see it's a
little bit yellow. So what I want to do is just add a pinch of blue, a pinch. Alright? Let's look at
the waveforms real quick. I'm looking at other
waveforms, as well. Just a pinch of
blue. Pinch blue. Look at that. So what I was looking at was I was
looking at these letters, and I was looking at the
waveform. This is before. See how it has a warmer tinge. I just made the
whites look white. That is what white balance is. Alright. Next we have is push. Push. Now in this one, again, Lavender Tint rose pink. They're very, very similar.
If you take a look here, this is lavender, and
this is rose pink. So you see this
is more purplish, more lavender, this
is more pinkish. So it is very close. It is very similar,
but they are very, very different, alright?
Look at the waveforms. Over here, we see more pink. And look at this. You
see the difference? Like the colors, even
look at the colors. Let me look at the
ectroscope look at where this lies and look
at where this is. Very, very different, right?
Okay, now in the push. Okay, so now we're
going to do in the push is in this case, we're
going to take the gamma. Let's take a look over
here. Alright, amazing. So a lot of it is being on
the pink, not lavender. So what I'm going to do is
I'm going to turn this off. Take the gamma and the
gain in this case, because we want the
lights as well. So I want them to
also have that flare. So I take the gamma
make it more pink, and take the gain.
Make that also. Amazing. Alright. Push it. Push it, push it. Dig camera. Amazing. Alright. Now we add a cereal. Now, there's no skin here, but
we're going to have a car. So label this car. And again, very simple. We're gonna go to the
where's the thing. There you go. Magic mask. I keep forgetting
where it is always. And what I want to do is
I want to select this. Always amazing. Look how beautiful
it's selected. Alright, I want to track
it forwards and backwards. Beautiful. It's a little
wonkier on this side. Do I is just going to
add one more here. Add a little bit here. I tried these as well. Just making sure that area is actually covered. So this is where you see
this is where each footage is even though we're going
with the same note tree, it is still difficult. And it's not about,
Oh, I'm using so many. I'm using the Hue versus
Hue. I'm using Luma mix. I'm using, Magic
Mass power windows. It's not about using
so many tools. It's about using one tool but
doing it properly, right? So I think everything
is tracked overall. Yeah, okay, everything
is tracked properly. Now what I want to
do is since this was magenta, Okay,
this is weird. Alright, there you go. Since this was magenta,
what I want to do is I want to put this gamma, remove it, keep the yellow. I want to take the
gama and make it. Remove the gamma by
adding more green. But again, the whole
point is to have this roast pink so don't
completely remove it like this. Just go easy does it,
minor minor touches. Look at that. We retain
the yellow as well. And maybe with the gain, we
can add some yellow. Perfect. So it maintains the
overall aspect of it. So now what I'll do is I
will add a parallel node, and this one will be the same. But this time, we will
not do a depth map over here because the depth map means this has to be in one focal length,
which this is not. Actually, it is. Okay, never mind. So we could
use a depth map. So we'll call this
as background. Alright, I'm going to
go to the effects. Go to go to depth
map. Take that. Drive it here. Check that. Adjust map levels for
limit near limit. Go there. Isolation. Then
we take the target depth. Okay, see, that's the issue
that I see happening. I can't just select the car. It has to be in a
proper focal lens. If I'm focusing here over here, everything's
gonna be alright. So I was right. This is a little bit more,
you know, hard to do. So what I want to do is I'm
going to do the same thing. I'm going to go here, go to my magic mask,
select this here. Reset. It's like that. Perfect. What I'm going to do is track it forwards
and backwards. Now, I don't need to
worry about this one because what I'm going to do
is I'm going to invert this, I'm going to affect
affect the background. All right. So take this off. What to do is I'm going to go to my log wheels log wheels, and I'm going to make this
make the mid tone pink. Take the highlights.
Make that Pink, as well. Take the car and seem
a little out of place. So what I'm going to do
is go back to my gain, bring the gain back over there. Take the gamma, bring it
back a little bit more again. There you go. So Boom. Do you gonna look?
Okay. Amazing. Alright, beautiful.
That's perfect. Now what I want to
do, go over here. My favorite node,
gonna add a glow. Go here actually. Yeah, never mind. So glow instantly. We see there's a glow
right here, right here. Go to the effects.
Take the spread down a little bit.
Just like that. Perfect. Amazing. Take
the gain decrease, again, just a little bit. But decrease the
gamma a little bit. Perfect. Amazing.
Use that beautiful. And then what I want to
do is add a wee bit of a contrast just for, you know, film purposes. It's always empty without
a contrast, right? So in this case, what I want
to do is go to my curves. Custom curves gonna decrease
a little bit right here. Do a small little small little Small as curve. Amazing. And Walla Simple. So you see how
simple it's getting. It's like, once you
get a hang of a notary and hang of
how you're doing it. Now, these are basic things
that I'm doing, right? Like the push, simple gamma, simple gain, simple magic mouse. It's not about using
that many tools. It's about knowing
how to use what. And over here, I'm teaching you, giving you a method to how to make the Rosco Color
inspired looks, alright? Take a look at this,
take a look at this. Look at that beauty. Amazing. The comparison
is phenomenal. Beautiful. Love it. Love it.
Now, some people might say this cars too
yellow, that's fine. That's my creative call to
make it a little bit yellow. I want to retain
the ambrchini feel. Alright? Amazing. Cool.
And that ends Rose Pink. And in the next lesson,
we're going to go to my beautiful straw gold, beautiful, amazing basically
this type of look. Alright? I'm going to
do it on blue waters. That's amazing. Love that. Because we have skin, we
have water. Let's go.
6. Straw Gold: All right, ladies and gents, welcome to the last one. In this one, we're
going to be talking about rr07 or rr08. We're going to be
talking about straw and pale golden hour
nostalgia, natural warmth. That's what we're
going to be creating with this amazing little surfer. So the video goes like
this. Look at that. Amazing. Amazing.
So as you can see, immediately, first, we're trying to understand what
exactly is going on here. So looking at the waveforms, E everything is pretty
much a little bit blue. We have a little
bit skin. We have a little bit of sky
and clouds as well. So this is going to be a
challenging shot for us. So we'll try and keep a hero
image, which is kind of, like, mixed between the sky,
the water, and the skin. So let's choose this one
right here. Perfect. Alright, so again,
going a similar route, we're going to first
immediately do exposure. So looking at the waveforms, let's go back to our
primaries primaries. Do a little bit of
LGG, lift, gamma gain. So let's see. Let's put it
down a little bit here, lift the gain up and lift. Take the game up, gamma up. Maybe bring the actually, we can push it a
little bit more. Push it a little bit
more, maybe bring the gain down just a little bit, and the lift down. So what this does this
adds a natural contrast. So this was before,
after before, after. All right, beautiful.
Let's bring the gain up a little bit. Again, we're trying to
look for that nostalgia, so I want to have more of the I want to have
more brighter areas. Again, the main
thing is kind of, you know, understand the
image, understand the footage. And what is very useful
for you guys is, I'm not just telling
you what to do. I'm going through
the process of what I'm thinking and I'm
thinking out loud, so you guys can understand
how I'm thinking. So you will kind of learn how
to think in colour trading, as well. All right. Amazing. So I did this. We're going to add
a serial node. We're going to
call this balance. And what I'm going to do
is I'm going to take this, go to Gamma and let me just make sure.
Okay, we're recording. Go to Gamma, make this
linear, take the luma mix, bring it down, and then the
gain becomes the offset. So we see in the waveform, everything's pretty blue, take
a look at the vectorscope. Okay. So I'm What I'm going to try and do
is I'm going to take the add a little bit warmth
so you can remove the blue. So I'm looking at the
vectorscope, right. Let's look at the wave form. Too much worm. I'm looking at these whites over here and the clouds to make
sure they're white. It's too warm. So
let's go again. Just minor minor adjustments. There you go. This
is the bluish. This is after.
That's a little bit. Amazing. I think
this looks good now. If I kind of look
at the parades, and I kind of see if I look at the RGB values,
look at the whites. The R RGB are sitting
on a similar level. Look at the dark
sides. Amazing. Okay. Beautiful. Now what
we're going to do is we're going to
take another one. We're going to call
this the push node. So label it to be push. I'm going to take the Gamma
and we're going to tint it towards yellow, yellow. This is a hint of green, right? So let's call Gamma. I'm going to take it a little bit maybe move it to
the right, basically. Again, I want to show you the look that we're going
for it is right here. So, take a look at
let's take a look at the vectorscope real
quick. Look at that. So it's like yellow,
but there's also, like, a little bit
hint of green as well. So we got to keep that in mind. Going back. Turn this off. Alright. Let's go to
our ear frame, alright? Let's go a little
bit to the clouds. Perfect. All right, so now, perfect. Okay. Amazing. All right. R Very cool. Now in this one,
looking at the footage, we have three elements that
we need to worry about. Um, number one is the skin. Number two is the water, and number three is the sky. So it's important to kind of differentiate both of
them and make sure, like they are doing justice
number one to the look, which is the r07, the straw, and the
pale gold look, but also doing justice
to the elements, which is the skin, the
water, and the sky. So it looks real
and it looks slub. Alright? So let's go. What I'm going to do is
I'm going to label them. I'm going to call
this one the skin. I'm going to add
a parallel node, call this call this let's say water and add
one more parallel node, and call this sky. Alright, so we have three
parallel nodes here. I don't think we
need death map here. I think what we're
going to be doing is we will do qualifiers. So for the skin, let's go
to the qualifier here. Wow. Immediately,
I thought DaVinci is really smart.
Alright. Amazing. So let's look over here. Let's grab this. I'm going
to zoom in a little bit. And what I want to do is
grab this one right here. Boom. So kind of
selected, I think. Let's see the highlights. Alright, more or less nice, a little bit water selected. So let's just move the center
a little bit like that. Maybe take the
saturation and take the luminance decrease
the low the high as well. Just a little bit. There
you go. Take the high. And what I'm going to do is I'm going to just soften this up. And move the high out.
Soften this a little bit. All right. Amazing. Now what I want to do is with the skin. So I kind of got
the skin proper. What I'm going to do
is I want to take the gamma or what I'm going
to do is I'm going to go to my curves and go to the hue
versus hue or naturally, what I'm going to do is I think gamma is better over here. The primaries are better. So take the gamma and
I'm going to move it towards a proper skin. There you go. Like that. Maybe not too red. Bit.
Alright, look at that. Beautiful. So we got the
skin back and we got the skin reflections
on the water as well here. Beautiful. Amazing. Looking at the
mid tones. Perfect. Amazing. Now we
look at the water, we'll take the qualifier again. Over here, we will just
select boom like that. Let's look at the
highlights. All right. So what I want to do is
I'm going to go to my hue. Maybe I will decrease
the lose a little bit. The saturation, I show
a little bit, yeah. Then take the center
of the hue point. Maybe the width, maybe
decrease the width a little bit like that
and soften it overall. Soften and take the width. Since it's mostly like
teal, like greenish yellow. And what I'm going to do is I'm going to take the
luminans as well, take the luminans as well, and I'm going to take
the high actually out. So it's just the
water. Take the lows. There you go. Okay.
Perfect. Now in this one, what I want to do is I want
to push that gold look, so I'm going to remove
from the highlights, and I go to my log wheels,
go to my midtones, and I'm going to just crank
it to, like, the yellowish. You'll see the difference. Beautiful. So let's
move it a little bit more saturate it a little
bit more. Amazing. Beautiful. Looks good. I think that gold look is
coming somewhat. Let's look at the
vector scleT see. Alright, right. Let's kind of look at this
one, see how it is. All right. So we
have a little bit more towards the green, and this is a little
bit more gold, all right. Makes sense. So what we can do is we can
go back to the push and go back to the primary,
maybe to the gamma. Maybe just move it you
see how it's on the line, we'll just move it
up a little bit. To match that aesthetic,
match that aesthetic, and we'll take the skin, and we will kind of, you know, push it down. You know, since I added there, I subtract here to
keep the balance. Alright. Beautiful.
Now the vectroscope is sitting somewhere
on the yellowish, right here, as you can
see, overall. Amazing. Cool. Alright, moving
on to the water. That is fine. Water is good. I like where the waters sitting. Go to my log don't. Yeah. Maybe move it a little bit more to
the yellow. Perfect. Amazing. I also have other
scopes on this side. So if you're wondering
why I keep looking here, it's because I do
have my scopes here. Let me just show you.
This is a paid app. It's called omniscope.
It's amazing. It has different,
like, showcases, different usages the lows, the highs, the
overall vectroscope, the low mets high of the
vectorscope, overall waveform, parades, a three D view, a three D view,
which is amazing. And then we have
the saturation map. I'm looking at that as well. As a professional colorist, these are some
tools which I have, but I'm also referring over
here for you guys, as well. So do not worry. You're
not missing out. You are missing out, but not
from a learning standpoint. Alright, next one, we're going
to go to the sky. The sky. Again, I want to bring back
the blue a little bit. So what I want to do is I'm
going to do a qualifier. Qualifier just like, boom, select that, look at
the highlights. Okay. So the luminance over here, I want the luminance to be a little bit more
on the higher side. It's a little bit hard
to understand this. Let me just go near the
clouds. There you go. Choose that. Choose
that go to highlights. There you go. With
a little contrast, it's easier to
actually understand. So this is, take this out. Look at them. I
mean, take the hue, take the center, a
little bit maybe there. And the saturation.
There you go. Perfect. All right. Now, let's go from the high go away
from the highlight. Let's try go to my log wheels
again, go to my log wheels. And what I'll do in this
case, since it's the sky, I'll take the gain and
move it towards the blue. Not sure wait. Let me so I think the overall qualification
is not done properly, so let me just do
it one more time. So let me just qualify
the blue here. Let me just take the luminance, let me just take the
softness and move it. There. Right there. Then I'm going to take the
primary go to my log wheels, take the gain and the highlights in the midtone make it
a little bit more blue. Let's now see the difference. Without without without,
without width. Alright. It is a little bit blue, I can see it in the waveforms. Like in the parades,
you see the blue ones. Like you can see
over here, the blue is a little bit more higher. And I'm trying to increase the blue and the mid
tones a little bit. I pushed it all away, but for some reason,
it's not happening. Uh, let's exit. Let's just reset the log wheels and look at the
overall luminance real quick of the qualifiers. My qualification is not proper. Sky with water is
always difficult. So this is everything selected. The issue is the sky and the sky color and the
Alpha color is the same, so it's kind of hard to gauge. Like this color and the
alpha color is the same. So that makes it a
little bit difficult. So I'm going to take
back here to the hue, take the center, made
it a little bit more. There, take the
saturation is fine. It's the luminance. That
is the tricky part. H All right. Let's move the central, like, a little bit
more. Down. Alright. Maybe it should work
now, let's try. Got the log wheels. Let's see. Okay. There's a little
bit bluish here, but it's like
creating artifacts, which I don't want, like,
right here. I can see. Let's try to, like, you know,
take the qualifier again. Let's make it a little
bit more higher. Make qualification higher. Go back to saturation. To the hue, maybe. Okay. That makes a
little bit difference. Alright, now you can
see kind of Alright, so it was the hue,
that was the issue. Okay. Cool. Amazing.
Alright. So that's that. That is the sky. Take
a look at the bottom. Take a look at the bottom. Sorry, the top left. Beautiful. Amazing. Well, what I want to do is, you know, since we have overall, I'm just going to see whether
it works here as well. There you go. See how
the sky is blue here? Beautiful. I'm just gonna
check my highlights. Alright, so it is affecting
a little bit on this part. I'm just going to
see whether Alright, so I'm going to try to remove the skin where it's
affecting the skin here. So the way I can
do that is kind of move the hue back again, like, not select that. And then now, there you go. So now, it still works. Alright, minor
minor adjustments. Do you remember how
the skin was getting affected now as the skin
is not getting affected. The skin is not
getting affected. Perfect. All right. Amazing. Amazing, beautiful. Alright,
so that's pretty much it. Let's just quickly save this. And then I'm just
going to look at the shadows real quick. The darks, because I want the
blacks to look like blacks. So what I'm going
to do is I'm going to go here, add one more node. Actually, you know,
how we did it before, we're going to go to the Let's
do it here. Okay, why not? Let's just look at
the fixing the dark. Like the blacks, basically. The blacks. And let's
look at over here. We have the reds, which
are a little higher, and the reds are a
little bit higher. The greens are a
little bit higher. Okay, over here, we have the
greens a little bit higher. So I want to remove
that muddiness, like right here, green. So I want to take over here, and I want to take
the green decrease by, like three points. Decrease a little bit more. Six ones. Let's see
the difference. See that green.
Now we have, like, removed it, so the blacks
properly look black. Like, inside the mass, the red
is a little bit over here. Maybe just increase
the But I mean, there's the tongue and
stuff, so that's fine. Maybe 0.05 is okay. Let's look up before, after
before, after. Perfect. Alright, amazing. So we'll
just rename this Blackfx. Alright. Then my favorite node, we have the glow. We have the glue
the glow the glow. Good effects search, glow drag. Alright, let's see before. Alright, not much difference. Let's take the spread Glone. Take the gain a little
bit higher Gamma. We'll see the final result. So right where the form is
of the form of the water is, we're gonna like
capturing those moments. Maybe increase the spread a
little bit more. Perfect. And this one, I'm trying
to, like, you know, maybe add a little
bit more grain. So grain. My favorite grain
would be just sorry. Favorite grain would be just 35 millimeter,
35 millimeter. Still 400 for this one. Just add some texture. Perfect. And I don't think I'm going
to add contrast to this because I've done the
contrast in the exposure. I think it does a lot. Take that take the grain here. Alright, and that's
pretty much it. Kind of like let's compare
pop with this one. Site E clips. Alright. Alright, so now let's just
compare and see how it looks and just do a
comparison. Not bad. So we have water
here. So obviously, there's a little bit more that straw color,
the yellow color. But overall, we
have kind of, like, you know, met
expectation, I believe. And I think we've done
a pretty good job. So that is kind of it, guys. That is kind of it
to the rr07 r08. And yeah, so overall, we
have kind of, you know, seen how this works, a pretty fun experiment
with the Rosco gels. And what I can say is, uh, that what I'm going to
be providing is I'll be providing a basic ut and a power grid that you guys can use for your workflow,
for your films. It is going to be in the
digital products download. Again, for people who
are my students here, there is a huge discount
for the people. And again, you can just import the power grade and start
using this note tree and, you know, adjusting it
to however you want. For example, if you
see in this one, we have skin water sky. In this one, we had a
car and a background. This one, we had skin, background and teal
fix, and in this one, we had skin background, hue fix. All I'm going to be
providing a basic not etree. Then you can either whether
you require depth map, you don't require depth Map, require a qualifier,
that is up to you, but I'm giving you
the notary that I have built, which is exposure, balance, then we have a push, then we fix without
following the rules, but actually doing
justice to the look, but at the same time doing
justice to the textures of the elements of the subjects and then do a little bit
fixing a glow and a grain, and you are all set. It is not about how many
tools you're using. It's about whether
the tools that you know using it to the
most efficient way. That is the name of the
game in Color Grading, guys, not using every
single tool over here. If you notice, I did not use much tools, but I
created an amazing look. So that is what pro colorists do is knowing how to use
the spoon and the fork, not using five
different spoons and five different forks
together. All right. Thank you for attending
this class, again, if you have any questions,
please leave a comment. I would love to have discussion. You can book a one
on one with me if you have any concerns. So thank you.
7. Thank You!: And guys, that ends the
class for Rosco Colors. So I hope you guys had a
wonderful time with this class. I honestly went through
a huge, um, you know, journey building these
looks for you guys, because I think when I'm going through these notes
structures and, you know, building it out
every single time, it's a new story, every single
time, it's a new journey. So I really hope you guys
enjoyed it and understood the emotional tone
of each and every single one of these scenes
because it's super, super important how to use it. And once you're confident and
I hope you are after this, and you can use these
notes structures again, uh, to build out whatever
Rosco gel that you want, again, keep in mind
the overall structure as to where we're trying to go, the object and the
rest of the scene. Keeping the object, its colors on scene
as doing justice to that and also doing justice to the background and also doing justice to the story. So these three things are the things that you
have to juggle. Hope you guys had
a wonderful time. And yeah, comment below. The discussions always
available always open for any questions
that you may have. Any other Rosco gel that you might want to,
you know, emulate. I would love to,
you know, put up, like, a short 15 minute
class for you guys. So let me know. Looking forward
to seeing you guys more.
 Jijo Sengupta, Be the Master of Space & Time