Transcripts
1. Introduction: Car. Now, that, my friend is a $1.6 million
commercial made with AI. Again, not partly with
AI, not AI assisted. Every frame of every
scene, every environment, every location, every
reaction, every character. Everything is generated with
the tools you have right now with your laptop. All right. Now, before I tell
you how you build it, let me tell you a little
bit about myself. My name is Dijo Sm gupta. I run a production house in Bombay called Ag
Media Productions. I am an entrepreneur. I'm a director, producer. I had my bachelor's and
my master's in films and animations from
Rochester Institute of Technology in New York, with a specialization of FX, CG and color grading. And I've been making film. It's been my passion ever
since I was a child. I've been doing this
for almost 20 years now started very young. The course of my life,
I've been honored to have received
over a dozen awards, nominations, including
Akans 2024 nomination, my short film countless. Many more films in the works. I also make stories for brands, for my clients, a
lot of short films, a lot of DVCs, lot of fun stuff. So about two years
ago, I started paying serious attention to AI, just not as a gimmick, not
kind of replacing what I do. But because I could see clearly, this was going to change
what production means, and I wanted to understand it before it
changed me, my mindset. So I tested a lot of
tools, built AI employees, built automations, good
systems that I've built, good systems that my entire
company is working with. And it was a lot of failures,
a lot of successes. What you're looking now
is a result of that work. Going to the crux of it, the brief you just
watched is real. It's a proper
production bible to kind of document
that gets handed to a director before a $1.6 million gets sanctioned
by the producers. Again, like log lines,
synopsis, thematic core, 31 shot breakdown
with camera notes, duration targets, tool
assignments, the whole spiel. And obviously, we didn't
have $1.6 billion. We reverse engineered it with
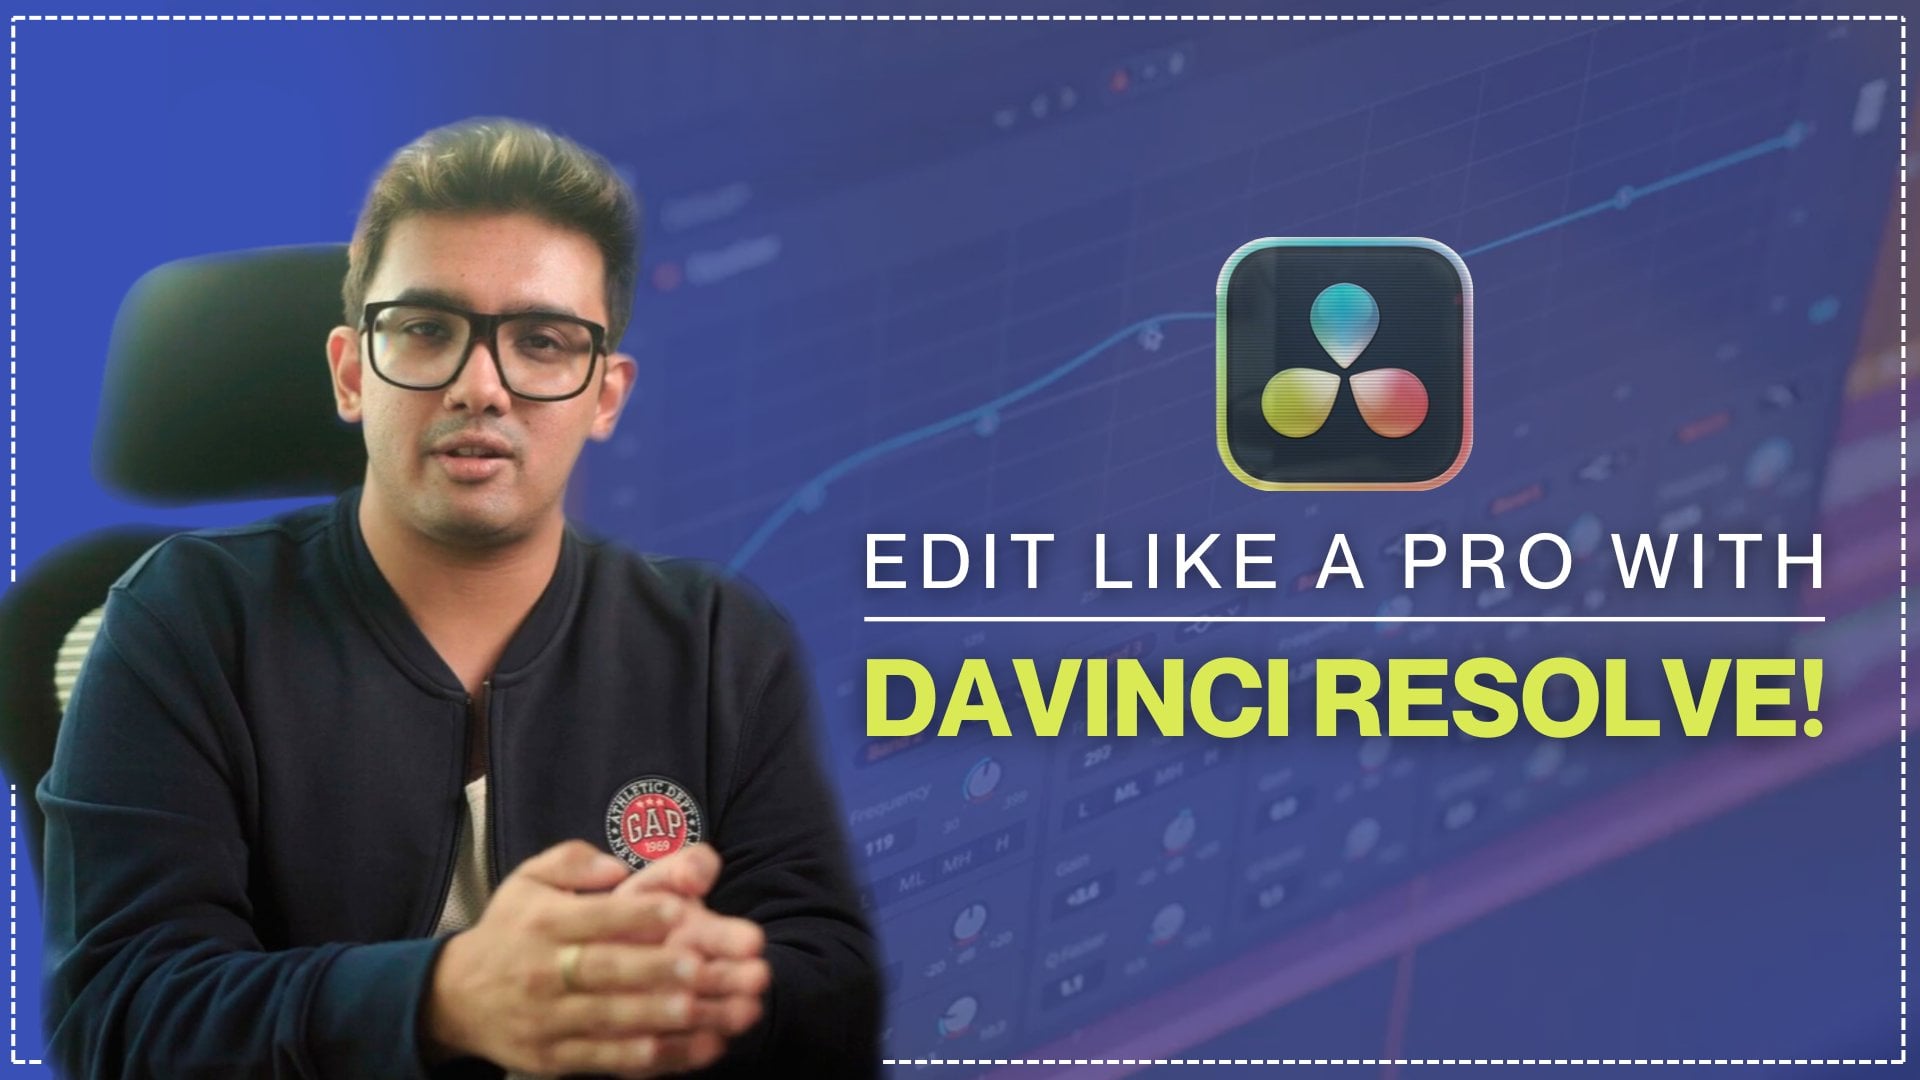
Hicks field cinema studio, nano Banana and DaVinci Resolve. That's what this course
is. Again, we won't go deeply into the nano
Banana cinematics. We will dive more into
the prompt engineering. So, again, this is
commercial filmmaking, which means different
rules, different structure. The way you're
thinking is different. Again, you're not
telling a story. You're making
something that makes an audience want to
stop completely in like 105 seconds with no
dialogue, just sound effects. So you have to think creatively. That's the product,
that's the film. Everything else is a
setup for that one frame, which is the beer. So I chose again, this is something that
obviously AI could not think of is what if? So if this was an actual beer, it would be like the
sound, you know, something that the
crack and the hiss. That's like the sound,
the classic sound that touches every person's
heart of a beer. I wanted to capitalize on that. And that was the
whole point of it. Like, with sound, I direct. Again, Hicksfield Cinema Studio is your primary
generational tool. Every dramatic scene, the operating theater,
the courtroom, the cockpit, the Himalayas, the apartment, everything comes out of Hicks field, right? We are not going to go
into detail of how I made these characters and
how I made the locations. That's a complete,
separate class altogether. If you want it, please leave
it down on the discussion. Today, we're just going to
work with what we have. Basically, we will be using
a specific prompt structure, basically one flowing paragraph that moves through the camera, moves through the
subject, action, environment, lighting, and
maybe a little bit texture and audio in that exact order. Audio maybe not that much, but be using the character, the tagging system that
Cinema Studio has, use that to always maintain
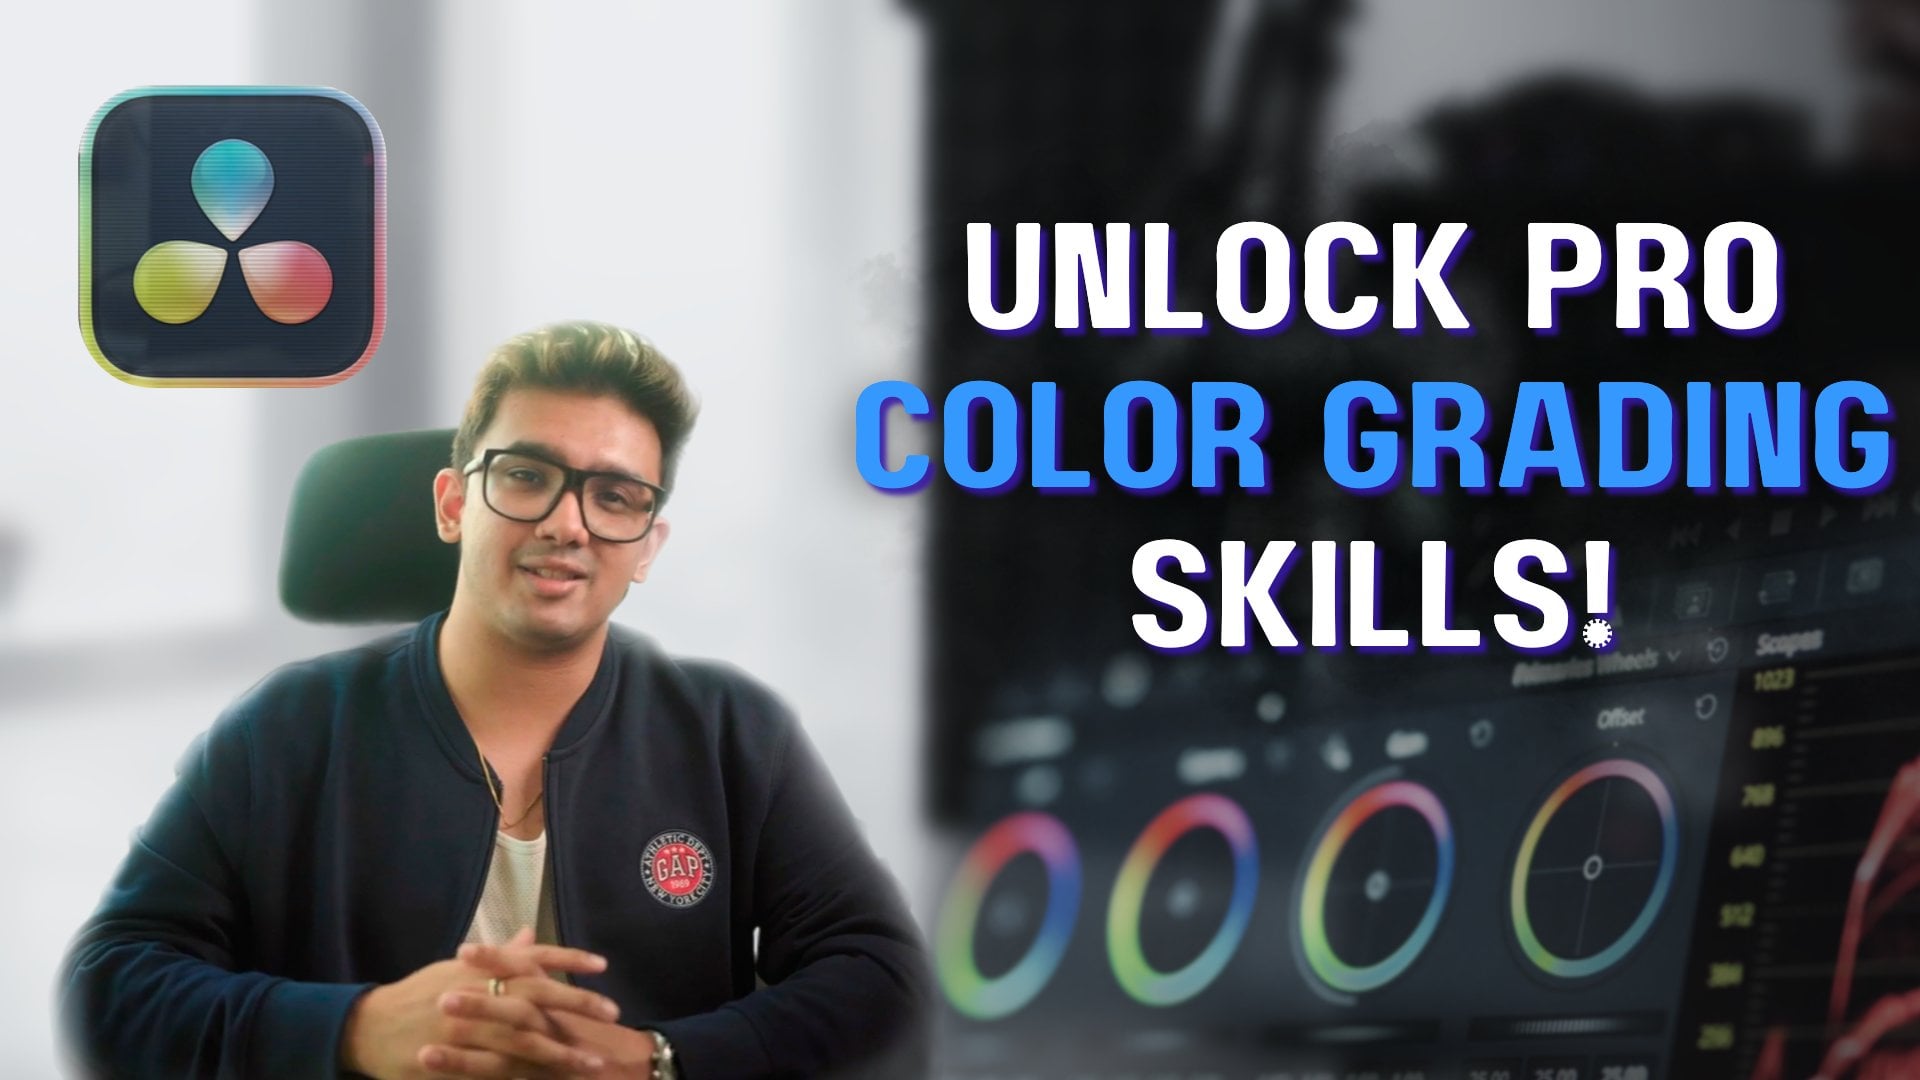
character consistency. We're going to use divid resolve for the edit, a
little bit grading, and the sound design
and the final mix, 11 labs for the voiceover, which is towards the end. So this is how the
class is structured. We start with a
production bible. So before you touch
a single tool, before you need to understand the brief as a real director. The thematic core is where the shot list is built
the way it is. Why are we using B roll here? Why are we using
extreme close ups here? The order of the elements,
why are we doing this? We build a system before
we generate even, like, a single frame. Then we go scene by scene,
total of five scenes, 31 shots, 105 seconds,
approximately. So, again, the hardest
scene is the Himalayas. The most critical shot is
the crack of the beer, and the most underrated lesson is probably the
selection system. Knowing which image to
keep, which take to keep. That is an edit decision, and most people do not
treat it like one. They're like, This looks good. Download. You got to think
from a director standpoint. So again, every lesson
has one output. By the end, these outputs stack into a
finished commercial. So let's go. Let's build it. Try to work on the
prompt engineering and try to work on
those aspects instead, rather than focusing on character consistency at this
particular point of time. To focus on getting
the shots cinematic, trying to make it
so that you are actually in control
of the shots. So, let's go. Let's begin. I will dive right in, build the entire from
scratch with you guys. So let's get into it.
2. Reading a Production Bible like a Director: Alright, so let us begin. So we are now in
lesson number two. So think about it like this. So this commercial is about
a beer, sparkling water. Basically, I'm envisioning
this as a beer, okay? Because it's just like,
it's an emotional thing. So every commercial starts
with a brief, right? Basically a short
document that answers, what is the product, who is for, and what does it make them feel? And that is where you
need to always build the production bible of
your commercial. Alright? So if you see over here, we
have 32 shots, 110 seconds, approximately $1.6
million value, zero crew. Alright? So if you see, we have the entire thing
kind of laid out in one, two, three, four, five, six. We have scene one the
operation theater, scene two basically
kind of like a court, scene three the cockpit,
scene for Himalayas, scene five is the payoff and last but not
the least the logo. So before we have when I was thinking about
this whole commercial, what I was thinking was, what
can we do to make this pop? So the whole structural
rule that I came up with is sound before vision,
always, right? And that is how I kind of built out my log line,
my thematic core. Now this is something
that AI cannot do. This is something which is completely in your brain.
You have to think of this. So here we have a log line. In the moments that define
you, ARCA finds you. Right? So that's the log
line of this product. Then we have the thematic core. Arca is not a
product commercial. It is a film about the moments
before something breaks, and the something
breaks is kind of like the crack and the
hiss of a beer, right? So it's like that moment
just like that anticipation before every time a
beer is over like that. And that can is the relief. That sound is the story, right? Every creative decision in this commercial flows
from this one idea. The product does not need to
be explained or sold, right? It needs to arrive
at the right moment and be heard your ears. So sound design is extremely
important in this. So we have five
people, five worlds, five moments of
extreme pressure, operations theater,
courtroom, legal decisions, pilot flying in the skies, Himalayas being in the mountain, meditation, one sound
that finds them all. So the thematic core is basically the whole
point of this beer. It reveals itself through sound. First, image becomes second. Again, remember,
thumb rule is never design a shot before
you know what it feels or know
what it sounds like. So as like an
exercise, I would say, kind of try to write
a single paragraph about your product
or your concept, a single line, see where
you can find peace in that. So we see over here,
operating theater, surgical theater,
blazing overhead, steel procession,
nobody home yet. Grand courtroom,
architecture of authority, empty gallery, no session yet. You know, so these are the
locations that I have defined. And if you see what I did, what are these cool,
cool, cool, cold, warm, is I'm also subconsciously using color grading to
define the emotion. Everything, every single one of them are following a
cool color palette. And then finally, the payoff is just a regular ordinary
person having that warmth, giving that feeling of
homeliness with that beer. The protests entire
identity in 0.3 seconds. Everything before this
moment was building up to this sound. All right? So now, that is that is all
for lesson number two. Let us move on to next lesson where we will be discussing
the five scene architecture, and we will go a little bit
into in depth with color.
3. The 5-scene Architecture: Alright, amazing. So
now let's get into the five scene architecture and the color arc
in detail, right? So we have over here, we have scene one, which
is the operating theater. We have a total of six shots, which is going to be
like around 19 seconds. So basically, five
vignettes, right? Each scene is a
complete world with one character and one
location and one problem. And the problem is kind of
basically the distraction, the familiar sound, the crack
and the hiss of a beer. That's what's happening
with scene number one, which is the operating theater. We have the sound kind
of like biometric, the ECG blap, the teat, teat, the machine registering
life under pressure, tempo, regular, human, not
metronomic. Alright, so cool. Then we have the
courtroom, the barrister, which is the lawyer
or the judge, the weight of judgment,
every word is calculated. Grand courtroom, a place of
authority gavel strike echo. You know, we can use
deliberate final followed by the silence
that, you know, the anticipation of the
gavel to the sound of um, okay, wait, the crack
and the hiss again. So a little distraction. Same thing with the cockpit, you know, maybe during
a turbulent time, maybe during a
thunderstorm, he's about to access the VFR. And as soon as that
happens, he hears a sound. Looks a small distraction. Same thing with the Himalayas, wind dropping to silence
in the whole blizzard and the whole snowstorm or there's
a calm within the monk. And then finally,
there's a small smile or maybe a small
distraction or looks in another direction and sees that, okay, there is something
that's happening. That's that. And then the payoff
is kind of like the most ordinary
person a person can be a simple guy with
a white t shirt at home on a holiday or after work, just chilling by his couch, takes the beer, crack
in the hiss, you know? So that's where, like,
the main product's identity kind of
comes into play. And then if you
look at the thing, the color temperature is basically kind of like
an emotional map. It's cool, cool,
cool, cool, and warm, which brings you home, which
is the final home run, yeah. So if you see the rule over here is the color arc
is not a style choice. It is more of an
emotional story. So your project, whatever
you choose to do, make sure to map out
your scene structure. So now let's go to the overview. Map out your scene
structure and assign a temperature to each scene before generating
anything, right? For this one, our
structural rule is sound before vision, always. And what we're going to be doing is we're going to be
following a prompt system. So in the next
couple of lessons, we will be mapping out
a basic shortlist, a basic understanding of how we're going to be
generating the shots, and what is the timeline, what is the story of how we're going to be
unfolding each scene. So let's get ready
for the next lesson.
4. Mapping the Shot Lists: All right, so as we discussed, we have a total of 32 shots and across five
different scenes. So each shot has a job. So the way we're
going to be doing is we're going to
be establishing. We are going to be acting. We're going to edit
breathe for a little bit, and then which you know, the breath is going
to be the Bro and then we're going to react, and then we're going
to transition. So again, the tool assignment
is not random, all right? So it is basically Higgsfield handles everything with
characters and motion, and we're using Nano Banana Pro for um the product
itself because it handles the product
with text and graphics with super
hyper accuracy. So we're going to do that for the stills where the
product is visible. That is only in scene
number five, right? And for this one,
what we'll do is file naming is going to be
of the utmost importance, um, every shot gets like a
scene number and a letter. And when you have
almost like 200 takes, trust me, this naming
is truly going to help. So what we're going to
do is we're going to have a project name, something like ARCA
underscore one A, one Alpha, underscore
take one.p4. All right. So what we're
going to be doing, I'm going to show you a
quick example of a scene. So we have, let's say,
this operation theater. So if you see first, we have
a couple of stills that we're going to be doing
is we have scene one A, start frame then scene one B, scene one C and
scene one E. Now, basically, so this has six shots of the operating theater. So the way we're
going to be doing is we're going to have the
stills generated using Soul Cinema using one
Alpha Bravo Charlie Delta echo, and one echo. The last frame of that
scene of the video will become the first frame of one F, which is one foxtrot
start frame. So what that will do is that creates a chain
link of the shot. That's what is one way of adding consistency to our
images. All right. So now, for example, we see over here
like a breakdown, we have an establishing shot, and the way we will
always remember, the way we're always going
to be working is we're going to be working with
the prom structure, which is camera,
subject, action, environmental lighting,
texture and audio. This is something we
will always follow, and I have seen with a lot of tests that this is the best way to get high quality
cinematic images. Alright? So let's
take an example over here. I'll let you
read through this. And, of course, you
can see we're going to be tagging the location, the character, and the
prop whenever necessary. That way, it always um, takes that into consideration. So we see establishment, we
see Bro, we see an action, we see another role,
we see another action, and then a reaction. And then after that, we switch. So for example, operation
theater, we have six shots. The courtroom, we
have six shots, cockpit, we have six shots. Scene four, we have six shots. Scene five, we have seven shots, but just kind of
like the payoff. And in this, we will be having the Nano Banana Pro
images as well, which we're going to be using as and for the product, right? And the other thing what
I'm going to be doing is, I'm going to be showing you the folder structure real quick. So we have this folder structure
called ARCA Production. If you take a look over
here, we have assets. The assets are going
to have characters, the locations, the location
cards, the product can. So over here we have the product can for the beer. So
you can take a look. I have a front hero,
a three fourth angle, a back, a top down, a condensation of
the entire thing, and a tab up close. So these are all references that when we use the
prompt in nanobanana, it will be able to
automatically use this for, um, accuracy of the product. Then locations, we'll have
the location cards here, via theater, courtroom, cockpit Himalayas
apartment, right? So doing that, and then
we have the characters, the lawyer, the mountaineer, personnel, pilot, and surgeon. Alright. And we have a couple
of test frames as well. So what we will do is basically this whole aspect of
camera, subject action, environment, lighting,
texture, and audio, what we're going to be doing
is in the next lesson, we are going to be showcasing
with a test frame. Basically I have a test frame
of the court and the monk. So you can see the monk. This is the character,
by the way. And the courtroom. This
is also the character. We're gonna be doing a test
video with a prompt with the similar structure
and showcasing how that is actually going to help us
build it in the next lesson. Alright? So let's go.
5. The 7-element Prompt System: Alright, amazing. So now
what we're going to be doing is we're going to take
one of these test frames, and we will be working
on making, um, a prompt using this
same camera subject, action, environment,
lighting, texture, and audio. So always keep in mind that, um, cameras always first always try to lead with that
because otherwise, it's just going to guess your camera movement,
and we don't want. Want to be a director. And that's the whole point
is you need to think before you need to
put everything here. Don't just let AI decide. Again, AI is your tool. You control it. Don't let it control your story. All right. So now we will use
location tags. So for example, so
let me just go to Higgsfield and let me
go to Cinema Studio, and I'm going to do 2.5. And what we're going to be
doing is we're going to be using basically a
start frame, right? So use a start frame, and I already have the start
frame already generated. So we're just going to
use this one right here. So we have to start from here. Now, this is how we're
going to go about it, okay? So we do, like, a
slow push in from mid distance mid distance. And basically, So at this
point of time to words. Now I know my character is Tenzin Dorgi, so
I tag him like that. I said dusted in the
Himalayan plateau. So I'm going to do Himalayas, which is the location
that I have built. Fine 35 MM grain, breath condensation
traces visible in foreground, near silence. So I can do that. Now, basically what this does is it kind of o you can choose a
category as well, and I'm just going to copy this. Scot. I'm going to take
this start frame right here. Put it there. What that does, it also locks in the aspect ratio. There you go. I'm going to do I'll just
do one generation for now, and I'll just generate
it single shot, and let's do a 7
seconds for now. Let's just do 6 seconds just
to understand. How it goes. I sweet to generate. We're gonna do same thing for the courtroom. And I have these um go forward. As Lillian whereas Lillian. This is my character, Lillian. She reads, and this
is the courtroom. I have the courtroom.
So I'm tagging. So every time, keep in mind, the reason why I'm
tagging is because I've spent time building
these characters and building these locations. So that way, there's always
consistency in the location, always consistency
in what I'm doing. So you can see, over here,
static slope push in, camera eases forward as this person sits on the
bench in full black robe. So keep in mind, we are following this structure
always, right? So it's very important to
follow that structure. A distant creek of old wood near silence underneath, right? Now, just change
the start frame. I am going to drag the courtroom picture as a start frame and do
just one generation. There you go. Now
we just wait till this is properly generated. Alright, so we have
one generation up. Pick this. Look at that. Isn't that amazing? My see, there's some artifice
here by his hand. So again, I just
did one generation, but you can see with like
a single pump like this. Imagine the amount of detailing that we've already had with. Now, we'll just wait
for the second one. It's still generating. Oh,
it's done. Take a look here. Look at the detail of sheet, the crumbling of the paper,
the details, her eyebrow. Freaking amazing. So imagine
if you do this properly, I'm telling you, you have you can make whatever
you want to make. And you can cast whoever
you want to cast, honestly, even if it's
yourself, to be honest. Alright. Basically, this
is last number five, which is the Higgsfield system. So, um, basically,
in such a case, what we would be doing is,
let's say we have this one. Let's say we
downloaded this one. So let me just show
you a quick example of the chaining logic
that I'm saying. So let's say we have
this one right here. What I would do is I
would open Resolve. I would go to the edit page. I would let's say drag
this video file here, and I'd go to basically
the last frame. I'd go to this last
frame, for example. And then what I would
do is I would do File export current frame still. And then let's say I
put this in downloads. Let's just do I do a
test chain and I export. So that becomes the start
frame of the next scene. And then I go back to do this. Go back here, take
the start frame, go to my downs and take this one as my
start frame. There you go. Sorry, that scene
was black in color. And now what I will do is
we do another prompt here. So we have as himalian elder, which is ten Zen,
Breath our eyes open, deep water gaze, lens calm, join unhurried smile not perform
camera, blah, blah blah. Recognition, the frame
and opens fully. The milia opens fully
behind thin cold flat boom. So let's do that and we'll
do just one generation and generate. One more. So let's just see
how this one works. So now what we can do is now
we basically chain this, and now this one, we're going to kind of put it in timeline over here so that way we can chain and make it
consistent as a star frame. So I hope you understood
the last frame of the previous take is going to be the first
frame of the next take. So that is how we're going
to be chaining this. I'm just showing this as an example of how
we're going to be working on our commercial
as we make it. Alright? So let's
wait until this is generated. And now this is done. Now let's check this
video out. There you go. Now, again, this is
a test. Again, I set the duration very less,
so it hasn't had time. The amount of information I put, and the duration that I
put is actually not right. So this is just a test to
show you how this works. So now let's see if I downloaded this and I let's say
I put this over here. And this would kind of
go entirely like this. Boom. Okay? Now, again, you can see the aspect ratio. This is kind of playing
around with it. So that's because in the prompt, if you recollect, I kind of put, um, the Himelis opens
fully behind him, now obstructs the storm
begins to thin out. Turning away from the camera until the back fills the frame. So the fills the
frame even change the aspect ratio of it, which is okay,
which is something we can take into consideration. So again, guys, this is
trial and error, right? So not everything is going to
happen and take number one. AI can make mistakes. It is up to you to
take those mistakes, prompt engineering it to make it exactly like you want it. It's as good as
telling action to a camera and the actor doesn't do a well job,
you take another take. You do another
take until you get the perfect take. All right. And that's pretty
much it for now. Let's move on to the next lesson where we would be talking a little bit about
the character design without a casting director. Alright? So let's go.
6. Characters without a Casting Director: Alright, so in this one, we'll talk about how we're
going to be tackling character design
consistency without being a proper casting
director on site. So again, keep in mind,
you're not casting a person. You are designing an
archetype, right? Or role, or world, a set of pressures. So we've chosen five
very difficult, um, extremely
difficult professions. We have a surgeon,
we have a judge, barrister, we have a pilot, we have a monk, and we
have an ordinary man, which is, like, completely, completely polar opposite
of the other four. So again, intense situations, for example, the surgeon, he
is not a doctor, you know? The surgeon is someone
whose decisions have no margin for error. That idea drives the
whole character. So one soul cinema
reference character image one soul cinema
reference image per character, that image is kind of like
your consistency anchor for across all your scenes
across different angles. Every shot of that character
must reference it. So again, I'm not diving into how we create the
character in Hicks field. This is more of showcasing
how we're actually using it. So, for example, I
have a character called Diego Diego Marin,
right? Diego Marin. So if you take a look over here, we have different shots
of him holding the beer. So we see Diego Marin leaning back on the
couch in rooftop holding Arca on his chest with one hand upright label facing directly
towards the camera. Refer to Image one for
accurate can design, label placement, and angles. So take a look at
this. We have a prompt where we're tagging the
character, tagging the beer. So the product design, the character design
is already made. So that way it's consistent. So we see this one. Then we see another angle where it's
the same person, you know? So this is where this how you're creating the consistency
of the characters. Same thing over here,
a little condensation, some more reference images. Again, Diego Marin in
the tag of the prompt. Another one which is inside. Then we have another
one where he then we have another one
where he's drinking the beer. Another one with the blinds, you know, the lights falling, the blind lights
falling on his face, little condensation
of the Arca beer, another one at the rooftop. Sorry, I keep hearing a noise. So over here, you see that. Another one with a different
angle condensation. So you see how we're using the same character references,
we're using that. So now let me show you the character sheets that I've made. So we have the lawyer So
this is the character sheet. So you see, like, a
close up mid shot, the back side and
the front side. So we're going to
be always referring to this character
sheet for the lawyer. Then we have the monk in the
snow in the snowy mountains. Then we have the person at home. Simple crumpled white T shirt. Then we have the pilot. Crystal blue eyes. I don't know, I just thought that
there would be some good nice eye color, especially if I
zoom into his eyes, especially at the nighttime
when he's flying the plane. Then we have the surgeon. The surgeon is
going to be easy to nail with in terms
of consistency because he's mostly going
to be wearing a mask and, like, the hat that people with the scrubs
that's usually there. So that is the characters. Then we have location tags. Again, this is in the
assets folder location. We have basically the cockpit. So in different angles of
the cockpit of the plane. Different views. The courtroom. Showcasing a little
bit of the windows. Again, all of this is kind
of like your pre production. It's kind of like
your storyboards. If you don't do this,
you will never get a proper looking commercial,
proper looking film. The Himalayas. Then we
have the living room. So you can see how much detail I'm working on over
here is that if you see even the little cup over
here, it's there everywhere. So that will maintain it
maintain the consistency, the pattern of this design, like right here, right here, right here, right
here, right here. Always nailing consistency. It is that attention to detail. Then we have the
operation theater. This is the flip
side of the angle. So when I generated all
these through an Banana Pro. And again, we're not
going to get into how generating these images. It's mostly the prerequisite of this classes that
you have these ready, and then you kind
of just get into creating the actual cinema. Put it in the discussion below if you want a separate class on just working on the locations and working
on the characters, we can get into how we
are going to do that. Yeah, that is the
character design. In the next lesson, we will be generating scene number one. And again, super excited
operation theater. Five scenes to go, Scene
one. Let's begin. A
7. The Operating Theatre | Part 1: Alright, boys and girls, let
us begin scene number one. Alright, so scene number one is basically the operating theater. So what we're going
to be doing is we have a couple of setups here. We have different
again, like I said, we have in finite budget. So we have a 70 grand
format, 70 film. We have a premium
large format digital. We have a cine digital. We have a classic 16 film. We have a premium large format, digital. We have all lenses. We have cinema primes,
we have anamorphics. We have extreme macros. We have all different
types of apertures. We are using different setups, and we will be using different lenses to create
some amazing looks. So now, the first one
we're going to do is we're going to do the
establishment still, which is scene one establishment shot, right? So let's go. I'm going to take
a prompt, right? And what I'll do
is I'm going to go here and I have the
setup saved here. So I'm just going to make sure it's the right one. It's epic. Uh, So in this one, we're gonna choose a
grand form at 70 MM. Classic anamorphic 14
MM and aperture of 11. I'm gonna take a prompt, and we're just going
to put it there. So white exterior shot,
slight low angle, looking up at the hospital
building facade at night, modern hospital glass and steel or brutalis
concrete, cold, white, blue light blazing from
the upper floor windows, blah, blah, blah, building lit monolith against
dark night sky. Clinical authority at night, distant hospital
the hum of building a full operation,
photorealistic still image. Again, this is important
for the image generation. I'm going to do a
grid four by four, 21 by nine for cinematic format. We will do just a one batch
because the reason is a grid generation basically it skips generating
one image at a time, get a full grid from
a single prompt. What this does is it
just saves your credits. So I'm just going to be a little stingy on that, and
let's generate. Boom. Alright, so you can see it does like a four by four grade, one, two, three, four, one, two, three, four, which is nice. I actually think I
don't need that. I think two by two is good.
I think a total of four. And what I'll do is I'll
make this bat size two. But anyway, we do have a couple of good images
that we generated. So we have this to All right. I think I'm going
to use this one. I'm gonna upscale this. So basically, you could
see the number of credits that you're using is
more or less the same thing. So it wouldn't make that much of a difference from
what I'm seeing. So let's wait for
this to get upscale, and then we're going
to use this as our establishment shot. So you won't really
waste your credits. I think I'm just
going to do a one by one and keep two images. That way, we have a little
bit two different variations because now what
I understood from the grid is that basically you get a full
grid from a single prompt, but shares the same context, but there's not much variation. Like, if you take a look here, like, there's hardly variation. So there's no point.
Again, this system just released kind of today, so I'm also getting used to it. So anyway, we got this ready, so we'll just download
this preparing download. And the best part
is it's four k. So it's gonna preview
this real quick. Perfect. Boom. We'll just
do one establishment shot, and it's going to cut this. And what I'm going
to do is I had a couple of those extra images
and go to place it there. And ignore those. I was just testing
those stuff out. So we're done with the
establishment shot. Now let's move to
scene one Alpha. Alright? So this is where tags are going to be super important. So let's go to the setup. So this is going
to be setup two. So let's go to the saved. So set up two, we're going to do a
grand format 70 MM film, clinical sharp prime lens, 14 MM with a focal length
of F aperture F 11. We'll use that and what I'm going to do
is use this prompt, high overhead white angle looking directly down
at the surgical table. Then I'm going to tag
the operating room, sterile surgical suite
chrome instrument trays, flanking the table,
overhead surgical lights, blazing white blue
from directly above. Then we have doctor
Matteo Rinaldi stands at the head of the table, full surgical gloved masked, two scrub nurses
flank either side. Also gown and masked instruments arranged with
military precision, full surgical team visible
from directly above, diagram of authority
and precision, cold, clinical overhead
light, heart shadows directly below, no
warmth anywhere. Clean surgical
drapes on the table, photo realistic still image.
All right, so let's do this. I'm going to add their
I'll just keep this. I have a feeling
that they might be looking at the camera,
which I don't want, but let's see how these two
how the two images generate. Then we'll take a call
after this and generate. So we'll wait for this
to finish generating. Okay, so there was an issue
with one of the generations. Apparently, there was some NSFW which they started getting, which is, like, kind of, like, they probably thought I
was breaking up a body or something like that,
but I didn't want that. So anyway, looking at this, it took the character right.
I took the location right. Pretty nice, pretty nice. Um, Let's do this. Let's do two more. Let's
do two more of these. I want to see some
more options, right? But I really like this one. I'm gonna download
and keep this one. This is one Alpha, by the way. Pretty good. Pretty
good. Not bad. Not bad at all. So Arca, one Alpha. Start frame. Alright. Cut this. Oh delete this one. This is the old one or test one. I'm gonna do take one for one. Oh to this as well. I can always get it
back from X field. Alright. Let's wait for this generation,
and we'll be back. Okay, so what did I tell you? In this one, all three of them are looking
up at the camera, which is obviously no. So this one doesn't look like
it has a body in between. So it just looks like a flat
bed, which will not work. Also, this location
isn't that accurate. I really like this one. So
it's a little bit clean. Obviously, this is a
little bit more realistic. So maybe let's try to reference
this and trying to do, like maybe not two. The let's see, the
green sorry call line. Green surgical
drapes on the table, I should look like there is a body underneath
the green drape, but not directly visible. Alright, let's try this. Let's do two of these, and
then if these two do not work, then we will just go with the one that
we have downloaded. And I use that as a reference because I really like how
there are stuff around. It makes it look a
little bit realistic. This one was a little
bit more empty, looked a little bit more
like a studio setup. So let's wait for
these two generations, and then we'll come back. Keep in mind, guys,
the start frame, this is where it's kind
of like preproduction. You spend a lot of time with a good start frame because if this is not proper, this is not accurate,
when you do the videos, there is going to be possibility of it kind of breaking, right? So this is where you spend
ample amount of time. Alright? Alright, so you can see it looked like they were trying
to show something real, which is, I don't want. So this is fine. I guess
we can work with this. Let it be a little bit
studioish, which is fine. Um, this is also nice, though. Let's use this as a reference. Less cause that looks like
something, there's something. Then we have Doctor is focused. Nobody is looking at the camera. And let's just do one of
this and see how it is. See how much time
I'm spending just for the first start
frame because this is kind of going to be the
anchoring point, right? Is basically if you
get this right, everything else has a
reference point. All right? And I think scene one Delta
is also like a Broll shot, but it also carries the
first ARCA sound cue, which is, like,
check the ECG blip. So we'll work on that
when we get there. Again, don't get attached
to your first take. I know it's amazing, but, like, try to keep
generating more and more. Different takes
always. Remember how on live action when
you're on set, you go one for safety. These are the safety nets. Alright? So let's get back once
this finishes generating. So you can see in
the recent one, he's just looking outside,
which I don't want. So basically what I did
is focused looking down. Nobody's looking at the camera. So I just do it a generation to see whether it
works properly, right? So one Alpha, let's
do another one. Keep in mind, we already
have one good take, and we just need I'm
just trying to get to that perfect moment to see whether it's
actually gonna work. Alright. Okay. This is perfect. I'm going
to use this one. I'm gonna download
this. I'm gonna keep it we'll generate the videos, and we'll see which
one works better. Okay? So this is gonna
be our take two. So Arca, one Alpha. Take two. Cut this and just paste it here. And yes, this is a start frame. Naming always, guys.
Always helpful. Alright, now we move
on to shot. One bravo. Top down close up, nurses
hands arranging instruments. Alright? So this is gonna be basically
the B roll shot. Alright. So let's go here. What I want to do is I want to get rid of this, boom, boom. Take this top down
close up overt angle, looking directly down
at the instrument tray. Then we do OT, sterile chrome
instrument tray surface, nurses glove hands, arranging
surgical instruments with military precisions,
scalpels, clamps, and retractors laid
out in perfect order, cold, white, blue surgical
light from directly above, hard shadows on instruments and chrome trae surface,
Chrome instruments, green surgical cloths
lining the tray, edges, latex gloves,
no warmth anywhere. Photorealistic still image. Look at the amount of
detail that I'm using. We're going to do
two generations. For this setup, what we will do is we will use
setup number three. One, two, three, which is a
premium large format digital, clinical sharp prime, a 50 millimeter lens,
and 1.4 aperture. I just feel like a director. I'm like, on set, just choosing
whatever camera I want, which is just so
freaking amazing. Right? And there you go. 21
by nine, check check. Alright and generate
two more images, and we will see
how they turn out. We'll be back when it's done. Alright, so we have
two images flipped. One is from this side, and
one is from this side. I really like both of
them, so I'm going to download both of them, and I'm going to keep them
because in the Edit page, I might just see from a continuity standpoint
which one might look good, because again, it's a mix of AI and what I'm going to be
doing as an editor as well. Alright, so let's
go check that out. So we have downloads. This will be one Bravo. So Arca one bravo. Start frame, T one. Copy, and so be T two. Alright, cut them
and put them here. Alright, so we have one B done. I really really,
really good job. Really good job. Love it. Alright, now we're going to
one Charlie, which is here. Tight close up a
surgeon's gloved hands in the surgical field. Alright. Amazing. So what I'm going to do is go back here. And for this, I think I'm going to use the same 150 M because we're doing a close up. A very shallow depth field 1.4 premium large format
digital. Alright, perfect. And one, Charlie,
tight close up, eye level on the surgical field. We will choose the operating
theater instrument trays in the shallow background blur Chrome tools precisely arranged. I'm going to choose doctor MaterVnads gloved hands at the surgical field,
positioned and ready. So I have practice person with hands studying
overhead surgical s, blazing white blue
from directly above, heart lean shadows on the
gloves and instruments, clean surgical drapes, framing the field, stainless
steel instruments, latex gloves catching
cold, surgical light, no warmth, photo
realistic still image. God is in the details, guys, and generate And let's wait
until this is generated. Okay, so I'm looking at
the first the one Alpha. I honestly, to be honest, like, this is a little
bit more realistic, yes. But in this commercial, everything's going to be
pretty much zoomed in. So I'm honestly liking this one and also is doing
justice to the location. So I kind of like this, and I like his texture of how
he's like, you know, ready. The light on his skin is definitely much
better than here. It's a little bit too
much commercially. That's more cinematic.
So I might go with that. I'm just sharing my thoughts. Alright. Ooh, amazing. So we have one with blue
gloves, one with white gloves. So let's take a look
at our original image. Keep in mind, guys,
continuity is key. So both of them
have white gloves, so we have to kind
of use this one. Alright. But I do like
this one, as well. But again, I don't think we
should show much gore in, like, the actual film, so I think this is better. So, right, so let's do this. Let's download this one. So this is gonna
be one, Charlie. So we have Arca, one, Charlie. Start frame. Take one. Cut and paste. Alright. This is fine. Alright. In case
we need anything, we can always come back, okay? Now we do the next one, which is one Delta. Tied on ECG monitor screen,
steady green Hartline. Alright, so we're
going to do this one. This is a pretty
simple to do. Boom. But with this location,
you see how overall, there's always consistency in the environment, which
is just amazing. Now on this one, we're
going to go macro. So I'll do like eight
K digital, full frame. We'll do an extreme macro. We'll do, like a
50 MM and a four. Allright? Te close
up, blah blah blah. All right. Let's do two of
them, and let's generate. And we'll be back
once this is done. Alright, so we have a
macro shot of this. No, the thing is, I'm not a huge fan of this,
like, translucent thing. So what I'll do is I'm
gonna do another one. The monitor is kept. I think what it's
trying to do is trying to forcefully put the um, the location. So what I want to do is I'm not gonna put the
tipering theater.
8. The Operating Theatre | Part 2: Let me find your room dark. Behind it, I'm just not
gonna put this one. The screen glowing with a study. I'm just gonna keep this. So the reason why I don't
want to keep the background, I want to just do like
a tight focus just on the ECG monitor. Just that. So let's do that and I'm going to see how it looks. All right. Let's do two generations. So on purpose, I
remove the tag so that it doesn't try
to force a location. Again, keep in mind, guys, that just because you have a location tag for consistency, sometimes you don't need
to see the location, so you need to make
sure you need to think on the fly when you're
using that. All right? This is where a
director's job mix in AI is very, very important. So let's wait for
this generation, and then we'll be back. Okay, this isn't that bad. It kind of gives like a low
key reflection of what. At least it's like
way up in the TV, which I can zoom in
and post as well. This is, like, not the
location, which is fine. This is somewhat the
location, so I'm gonna keep this one, okay? So I'm gonna keep this one. Down on this, this is one Delta. Downloads. So we
have ARCA one Delta, start frame, T one. Actually, I don't really
need to put takes. It's only if I download only if I download one. But I'm just. I'm used to nomenclature, so I'm just going
to do it anyway. And in the project
files, by the way, I will provide the whole
naming convention, so you can just use
this for your usage whenever you if you're following
along on this project. Alright. And then last
but not the least, we have one echo which is medium close up
surgeon face eye level. So this is very important
to get consistency mark. All right. So over here, tagging is hella important. So the prompt is medium close up eye level location importante. So we have OT, sterile surgical sweet, clod white blue, placed from above. Then we have doctor Mateo, Rinaldi stand as surgaly
fully surgical gloved mask, co clinical surgical
eye, no warmth, eyes alert and focused
above the mask scrub cap. Now, he hasn't been
wearing a cap, so I'm going to
remove this because the earlier generations
didn't have a cap. So consistency. Insymmetry is
blurred behind him, the authority of
someone completely in control of the space. Now, in this particular one, over here, you see
this little thing. We can add emotion. So I'm going to put a little bit acceptance,
apprehension, disgust, hope, which is interest, basically,
Serenity, trust. So I think I'm gonna put
a little bit of trust. Actually, I'm going to let AI decide quickly for this one. Maybe for the next one,
we could use surprise. Let's see how it generates. Alright, so we'll be back. While this is generating, let me go to the last one,
which is the reaction. Eyes above the mass, hands slow. In this particular one, the reaction, we're going
to be chaining this. So once the video of
one echo is done, we're going to take
the last frame of one echo and use that
as the start frame and then use one fox trot as
kind of like the prompt. Use that as the
start frame to build the build the rest of the
scene, which is the next shot. So that's why one echo that
shot is very important. Alright. Now, take a look. Now, this one is pretty good in terms of, like,
what's happening. But you can take a look
that this is not really adding context to our scene
as to what's happening. So what I would do is the two ones that we
have, which is this one. I will basically reference this, add this as a reference. Reference this and
the one that we have, I will reference this, as well. So we will add two references, and what we will do is we will also please refer to image one. Sorry. Two. Image one
and Image two for surrounding elements
for surrounding environment and placement of people and of
subjects and objects. Subjects and objects,
maintain continuity. I'm putting that so that, like, you know, people around are
making are still there. I understand it's
a medium close up, but this will not fly
because it's a table. We have a whole body, you know, so let's do this and let's
generate two more images. Because I have a
feeling that this one, the earlier one will
not really work. So let's see. We'll be back after all of
these finished generating. Okay, so one of them
didn't really work out. So I'm going to do a
batch of three this time and just see
whether this works. But this is at least
better than this one. But we don't want the masked. No cap on his head. Let's do three
generations this time. It's always difficult
with people, trust me. So let's do this this
one for some reason, started having a cap which is not correct in
terms of continuity. So, see, AI does make mistakes. It is up to you to, like, kind of ensure that this
is done properly. Alright, let's wait and
see when this is back. Okay, so we do see a
couple of nice ones. So I like this one. So
it is very natural. It is very possible
for a nurse to come behind and watch what the
doctor is doing, which is nice. This one is also
really, really nice. I really like this one.
I really like this one. So I'm gonna download
both of them. These are the first, only
two ones that I really like. This is also nice. I'm being honest. So three takes for this one. Alright? So downloads. So this is one echo. So Arca, one echo, start to frame, T one. Copy this. Take two. Take three. Cut and paste. So we have Alpha,
Bravo, Charlie, Delta, and Echo, and this is establishment shot.
Alright, amazing. Cool. So we are done with
our image generation. Now what we'll do is we will
now put them into footage. Alright? So we have
establishment. So we'll add one more
folder called Just Epic. Exterior establishment. I think this folder was missing. So we will call do this as
zero. Zero. There you go. Copy this 'cause I think
everyone is gonna have that. Just gonna put this here. Paste. Courtroom, then
we have a cockpit. Himalayas footage. You might call me
being OCD about it, but this when you have
a lot of footages, things like this are
really, really helpful. Alright, so back to theater
Opresion Theater. Footage. Alright, so now what we'll do is we'll do the
establishment shot first. So I'm gonna copy this.
I'm gonna, this is fine. Base this here, here,
keep the start frames. Keep the start frames
open and this one open. Alright. Now what
we're going to try to do is we are going to
move to the videos. Now we're going to take this establishment shot
basically that we did. Make this into a video, right? Okay, now we go into the
videos. So let's go. So what we're going
to do is we have various options now the time
of me recording this video, there's a lot of new things that have just come
out, which is, um, basically Cinema Studio 3.5, which is really, really nice. But I don't know
whether I'm going to be able whether I'll have enough credits to showcase that to you. So we will try. We will try. We will see we'll
try one of them, and we'll see what
can be done, right? So, what we'll do is we'll use the
establishment shot first. So we'll take this.
We will upload media. And what I'll do is I'll
just paste this here. We have production,
theater, start frames. So we have this arc on this establishment.
Now the thing is, I'm going to leave
this auto aperture dy focus one point
for moderate auto. Then we have color
palettes as well. So I'm going to leave this auto, leave this auto, leave
this auto as well. I'm going to explain it
in the prompt, right? Camera Lens But I don't like this ten ADP, you know, I'm just gonna do 2.5. I'm gonna keep it like that. I'm gonna keep it suspense. Keep the sound on, keep three. And for the establishment shot, what I'm going to
do is I'm going to basically keep this one, and I'm just going
to paste this. And I just want to basically
I want to see what happens if I use
the AI director, and let's see what happens. Curious. Alright,
so it's working. AI director. Let's try to
see if the tag works here. Tag is not working here. Operating theater.
Let's do this. Let's see what Let's see
what the AI director says. Okay. Thank you. Okay, amazing. So
I did this for me. So what I want to do is I
will apply the changes. The issue with this is if I add a reference media, let's
say I did this one. But now I want to use
this as sort frame. Okay. I'm going to do one
and just see how it is. Let's make this maybe 7 seconds and generate. If this works properly, then, and if the thing is quality is good and this AI
director is helping me, you know, place these things, then it's really I'm really
happy, to be honest. So Alright let's be back when
this is done generating. But the issue with C
dance is that I think it takes long time. So let's see. And in the meanwhile,
what I'm going to do is I'm going to do the
regular one, as well. With my regular prompt, I'm going to do a 2.5, as well, and then we will
see which one is better. I'm sure the newer
model is better, but I want to kind of If it does a better
job, why not, right? Start frame. We'll just
think it's this one. If I'm not wrong. There you go. It is the right one.
Suspense. Yeah, it is a little suspenseful. We'll keep that movement. We'll keep this 7 seconds. So that's 70 credits
versus 14 credits, so keep that in mind. Let's just do one generation. So we have two different modes. One is cinema 3.5 and
one is cinema 2.5. We'll see which one is
better, which one is faster. Alright, let's wait for
these two generations, and then we shall compare. Or let's see how this
one was the cinema 3.5. This one was cinema 2.5. So let's check both of these
and see which one is nice. Okay, let's take a look
at this video. Go back. Definitely not. I don't
want no transitions here. Ca 2.5 didn't really
do a good job. Not bad. This is really nice. I
really like this one. I really like this one. Wow,
3.5 is actually really good. Alright, let's go with
this. Amazing. So I am going to download this. Let me just hear
this real quick. Not bad. Okay. All right, so I
think we're gonna be using cinema Studio 3.5. What I'm going to be
doing is I'm going to be now quickly. So this
is a good test. Now what I'm going to be
doing is I'm going to do the similar thing
for all the scenes. I'm going to take the
prompt that I have. I am going to put them
in the AI director here. I'm going to put
them in AI director. And when I put them
in the AI director, I'm going to be
generating three takes of each of them of
cinema Studio 3.5. And once I generate them, we
will be doing a picking of, um, which take is good. And I'll tell you exactly
why I'm choosing what. And then based on that,
we are going to, um, we are going to put them
into the folder. All right. So let's speed up that process, and we'll again slow
down at the end of when we're shooting
when we're shooting, when we are generating play shooting when we're
shooting scene one Foxtrot. Basically, we're going
to take the last frame you said as
the first frame. All right. So let's speed this up for the next
couple of shots. And again, same way I'm
doing with the AI director. Write my prompt. And let's see. Okay, you guys will see it. I'm just going to speed
through it so that the se lessons aren't like huge. All right? This is one Alpha. Drama I will using some
characters location tags. Probably do 5 seconds. Choosing 5 seconds. 5 seconds. Let's do
6 seconds, actually. 7 seconds is good. Just cutting. Okay. Change. Choose
that one. Choose that. Sounds on mind. Start frame. You take one.
9. The Operating Theatre | Part 3: Let's do in my generations.
Which one was it? Perfect. Just this
one. Let's do suspens. Let's do general. And we will generate. We'll do three takes. Alright, now moving on. Let's move to the next
one, which is the B roll. Top down. Close up. This one. Write my prompt. One problem. Trouble. James tags. You What language product? Great. Location. That's as So I think it was gonna
go what I have. I generations. I'll use this one. J Okay. Let's try this one. Okay What I want to try is take this one again. Do this. T Doctor. So this is a start
frame I want to use This one start frame. Three of them here. Gene my original prompt. Generate that. Alright, we have a lot of
things that are happening. So, perfect. Glad to generate. Okay, amazing. So we do have a couple
of good generations. We do have a couple
of good generations. What we're going to do is we're going to
go with this take number one, which is one Alpha. We can cut these
courses in between, kind of use them
interchangeably, maybe zoom in a little bit,
and then we have this one, which is take two, which
is a nice camera jib. We can reverse it and see
use it however you want to. So anyway, these are good. These are good ticks. So now
what we will do is we will move on to the next one,
which is the nurse. So what I will do is remember the start
frame that we have. The start frames over
here for one bravo. We have two ticks,
which is this one and this one. Alright, perfect. So I'll do is I'm going to do top down extreme flows
directly down static. We will tag it over here, OT, roman spintr surface,
gloved nurses hands, scalpels, clams,
retractors, blah blah blah. We'll just copy this. This needs to be in video. 2.5. Boom. That what we will
do is we will generate 7 seconds and a start frame is we will choose the
one that we have. We're gonna choose this one. We're gonna choose this one. We're gonna do three of them, three of them, and we're
going to generate it. Alright? After we generate, we're gonna just
choose the best steak. We'll do one with this one
and the other with, uh one is this is that. So one
is a little bit low angle, and we'll choose this
one. So, same thing. We're going to regenerate these three takes each
from two of them, and we're going to choose one from the T one,
one from take two. And we'll do 7 seconds, and we will generate, and that's it. So
after generation. Alright, so generation
is done now. We have We have the action, which is one this
is sorry, the BL. I really like this one, because the other ones were just the instruments were breaking apart. This one is doing to justice to the movement of the hands with
the instruments. Gonna use this as the Bal. So use one take
generated six of them. This was the best one
out of all of them. So let's go with this one.
Moving on to the next one, which is the action
shot, which is tight close up of the surgeon. So in this one, o we have
this is one, Charlie. Remember the one was
with the blue gloves. This is a white glove. So we're gonna use
the white gloves. So we're going to
use this one as the start frame
and take this out, add this as the start
frame and paste it. What we're going to do is
we're going to go to OT, and then surgeon's gloved hands. What we're going to do
is we're going to choose doctor Mattia Rinaldi,
apostrophe S, which is his hand
or we can do has his gloved hands work
carefully at the things so that instruments pass
rhythmically between hands, everything control method
method methodical, the rhythm of someone
who has done this 10,000 times, cold, white, blue surgical light above defining the gloves clearly against the deep
surgical drapes. Text clouds, gleaming
steel instruments, deep colored surgical drapes, controlled breathing,
and the soft click of instruments being
passed, right? So this we will always again do another three generations. And after three generations, we get The generations,
we get these three. I don't want too much
blood on a commercial. Here. Alright, so I like this one. So I'm gonna go ahead and
choose this action shot here. Actually, I took kind
of three of them. I'm gonna download
all three of them, and I could use them a
little bit interchangeably. Obviously, this
cut that is there. Whichever if you
wear. Unnecessary. Take this one. All right. Cool. So this is done. Now we move on to the other Bro, which is the ECG monitor. So we'll take this
one, ECG monitor. What we will do is we're going to take this one,
take start frame. We are going to use this one, which is the one that
we had generated with not much stuff
in the background. And, boom, we'll
tie this one as OT. Again, three generations
and generate. Once we generate
that, we have these. Once that's generated,
let's wait for that. Alright, that's generated.
Now we have this one. Ooh, there's a nice shift here. I don't like this one as much. Ooh, I like this glitch.
Alright, so I think I'm going to go ahead and
take two of them. So download two. This one. Little bit shipped. And I
can use these, you know? Amazing. Love this. Alright.
Beautiful. Then we're going to do a medium
close up of the surgeon. This is very important
because he needs to look he needs to look good. So go here. And this is after he's
hearing the sound, so keep that in mind that the expression is hella important to
your doctor Mateo. So, look, doctor Mateo's focus completely in control,
hands working below frame, eyes moving deliberately between the field and instruments, the authority of someone
untouchable in this space. Cold clinical overhead,
surgical light, even and without want on his face on the
upper edge of his mask, surgical mask
covering lower face, scrub cap, alert
eyes above the mask, cardiac monitor
beeping steadily, surgical instruments,
controlled breathing. Alright? So after so let's
generate three of them. Let's generate six
of them, actually. Actually, let's
generate three of them. Alright, so after generation
four this is one echo. I have taken these three takes. Take a look. So I have one with the start frame as the
nurse. Fricking amazing. Now we have one without
the nurse, just like this. And T three is just this one. So I remember how for the
start frames for one echo, we had three different
start frames, one, two, and three. I took three takes of all of
these three start frames, and I chose the best one,
which is these three. And what we're going to do is
going to take these three, take the last frame of that, and after taking the last frame, we're going to use that
as a first frame, right? So in resolve, what you
can do is you can take, basically, I'm just going to do this create new timeline
using selected clips. Here timeline. And take this here. So
basically what you do is you choose this last frame. And basically what
you do is you do file export current frame is still. That is
what you do, right? And you do that and
then you'll have kind of do it this timeline,
do it this timeline. Once you do that,
you're going to have more start frames,
which is this one. Take one, last frame,
take two last frame, take three last frame
because there are three different locations. So I took this one,
this one, and this one. And doing that, we will do the last one, which is Foxtrot. Extreme close of eyes
above mask, hand slow, head toiles 1 millimeter, far away look, single
blink refocus. All right, so let's do this one. Foxtrot. And using those
three start frames, what I'm going to do is extreme blows are
blurred surgical lights softly out of focus. Then we have doctor Matteo Rinaldi hands slow
slightly below frame, his eyes shift upward,
not towards the monitor, not towards a colleague, towards something that has no
business being in the room. His head toe is barely
a millimeter, far away, crosses his eyes, a
single slow blink, then his eyes refocus
and he is back. Again, same thing. White, blue, surgical light, blah, blah,
blah, the same thing. Cardiac monitor continues
to steady beep. Nothing has changed. Alright? And we use the start frame. We're gonna use the
three start frames, which is the last frame of one echo of three
different ones. And after the three
different ones, we're going to choose. We're going to
generate them, and let's wait till the generation. Alright, so now
generations done, I have taken the best
one, which is this one. So I've taken Take one with
a nurse in the background. FT is my favorite one. This is T two, Version one. I really like the textures of his eyes here. That's
why I chose that. And this is another version
of the same start frame. Just take two and take
three. We have another one. He's looking up. I like how he's looking away,
and then he's looking back. So I like these three, but my favorite is the
one with the nurse in the background since but
I've always added nurses. So I just think it kind
of flows very, very well. So what we will do, finally, we will kind of put all of these together in a timeline and
just see how it is, alright? So scene one, what I will do is I'm going to
take the footage. I'm gonna go meet these ones. And master, I'm gonna
go to the media. I am going to go here. Go AMP projects f But this is the favorite
theater footage. Take this. I'm gonna take this and just
drive out this year. Maybe, I think, add folders
and subfolders into media. No. How do I make a add fold? Okay, create bins. Perfect. Alright, so
now what I'm going to do is going to have this
one, which is there. Establishing. So
I have a timeline which is made,
which is this one. Go to scene one,
establishing this one. Then we have This one
will take one here. Then we'll go here
to roll one bravo. Then we go to Charlie.
Let's take this one. One Toto. Toto. One echo. One echo right here. And one fox trot. Like, take one. Sorry.
I gonna put this here. Alright, let's just quickly
watch this one time. Okay. He was before
Steen the sent. Whichever if you wear. This is very, very good stuff to work with, and I love it. So this is scene
one is complete. We can do a lot with different takes and
different things. So let's go ahead, move
on to the next lesson and build the courtroom
together. Alright?
10. The Courtroom | Part 1: Alright, so now we are moving in to moving into scene number two, which is the courtroom, guys. It's gonna be fun. This is going to be amazing. We're gonna have
some fun fun times and basically what this is. I don't need this right now. Alright, so we have an
establishment shot first. We have Alpha, Bravo
Charlie Delta echo. Alpha again establish
again, the same concept. Bravo is Bro, Charlie is action. Delta is again another Bro. Echo is action. Foxtra is reaction. We're going
to use the same thing. We're going to build
some stills first. Let's do the establishment
still. So let's go here. Let's go to Image.
Simple do this. And what we're going
to do is this one, what we're going to do, we're going to use EpicideO
setup number one Oh, hello. There you go. Grand form at 70 Mm. We have classic
anamorphi 14 MMF 11. What we'll do is we'll
just use this prompt. Wide angle, slightly low
angle from the foot of the steps looking up at
the courthouse facade, grand stone courthouse,
neoclassical architecture, white stone steps sweeping upward to heavy
carved wooden doors, columns or carved
stone pilasters, the weight of the law in every
surface, late afternoon, golden light hard,
directional from one side, long shadows cast by columns
across the stone steps, few small background
figures on the steps, barristers with
briefcases barely visible to the building. Scale of the institution makes
everything below it small, hard golden afternoon light cutting diagonally
across the goldstone, carved limestone or marble. So the amount of details
that I've put in. Is amazing. So anyway, we are going to generate
three of these, and let's go. Okay, so after generation, what we're going to do
is we have three takes. I personally loved this take
where persons are just, like, they're chilling there. The one is walking
down the stairs. Two of them are
above the stairs, and I like the blue
sky over here. The other two were
too many buildings. I didn't feel like
there was enough. Over here, this is
also pretty grand, but I didn't want to, you know, include all of this detail. I wanted to focus more on, like, the pillar.
So I chose that. So that's the
establishment shot. Now we go with two Alpha, right? Two Alpha. And for this, again, I'm going to use
this similar thing. Setup one. Instead, we're gonna now do the tag because we're going to
show the insides of it. Sorry. Court Courtroom.
Grand courtroom, full session, tall windows, filtering golden
afternoon light. Tables occupied Judge
precisely the elevated ben smaller in sons the
room doors with liberatory, Um, Gold enhterm sunlight through all windows,
dossilights, dark, polished wood, full skill of the room visible for
realistic image. Now, grand courtroom in full session is I don't know
how that's gonna turn out, but ideally, I don't
want too many people. We use Lillian over here, because that is our actor. We hired her. We casted her. Sonya, let's generate this one. Um, there's gonna be Ideally, I want the courtroom
to be empty. I just want it to be laser
focused working on by herself, because the more people you add, the more crowd you add,
the more AI breaks. So let's see how this works out. Alright, so we have three
different generations. One is here. This
one, this is not bad. This is also not bad, but this is a man which
this is not good. This is also not really Lilian. So I'm going to use the
one which has Lilian here. I'm going to use this one
for sure. I like this one. I go to save this two
Alpha start frame Lilian. From afar, you can already
see the way she looks. I think it is beautiful. I'm gonna use this as two Alpha. Now we go to To bravo, which is a tight close up
of a gavel which is Tight, close up, gavel resting, judges, hands on papers. Alright? Tube bravo. There you go. Tu bravo. Too tight. Close up. Same thing. T courtroom. George's hands. In this case, we would two
Lillian's hands resting. And this one, what we will do is we will use setup number five. So one, two, three, four, five, we will
have a full frame. We will have this 150 MM, 50 MM, 70 cinema prime, 1.4 aperture, and a grand format
70 M film, right? If you have access
to the cameras, why in the world
would I not use it? Alright? So that's good and
generate three of them. And after generation. We see I have two different
takes that I like. One is this one.
Really, really nice. One is this one. I really like this one because it's
a little bit more closer. However, you can see, like, the texts are not really they are like they look
like alien stuff, so I might just use this one. Lionel's looks decent here, but she might she
looks a little bit, like, um, a little bit
older than who she is. So we might have to fix that. But we'll come back here if
it doesn't work out, okay? For now, let's go back, Let's do two Charlie now. Now we will do two Charlie, which is slightly low angle, Judge mid sentence
one finger raised. I might just remove
the one finger raised because that means
she's talking to someone, and I want the
courtroom to be empty. So we'll try to remove that
one finger raised instead. Alright? So what we
would do is take this, remove that we are
going to, again, tag courtroom, and we do lilian. And I'm just gonna remove
this one finger raised. Remove this. Leaning slightly
forward, blah, blah, blah. And for this one, I will use 35 MMs to set up four Same lens, same camera, the focal
length I'm changing to a little bit wider and the F
stop to F four, alright? And generate. Now, after generating, I see that we have many
takes that we like. So now we have take number
one, which is a finger raise. So I did do one
extra generation. Alright scratch this. So using
this one. So this is one. And this is number two.
So I like both of these, so I'm probably going
to use both of them. I'm going to generate one with a finger up as well, and
we'll see how that is. Now with the original
prompt, I had the finger up. This does look good, but we will see. I don't
think I want to use this. I think I'm gonna use
take two or take three. Alright? So there you
go two Charlie's done. See now our speed is now faster because now we've got
the hang of how this is going, you know? So we have a couple
of these done. Out of this generation,
I also like this one. I'm just gonna download
this, as well. This is the tube rubble. I do like this tube rubble. I'm just gonna save it
as take them with three. And boom, boom. Take three. Don't need all of this cleanup. Some of my invoices.
One of the things that you got to keep paying
for being a business owner. Alright. Next one we have is the tie closes up
Lawyer Spen hoovering, Jo leaning forward Atlas Dudas. T closes up your ****. Stupid take this out.
Boom. Tight closes up. Take this out. Cordrm. And this one, what we will do is we'll
again go back to setup five pun chin again to a 50 MM with open
aperture for more boca. Let's close. What's up?
Proxy is not been perfect. Alright. Then we have Baba. We generate three of these
and four Delta. Let's see. Now, we see that the generations over here are
going on the opposite side. So we started wide. Then
we went to her left side, her left side and her shooting. Now, if we move to
the right side, which is behind her,
we can't use these. Why? Because they are
breaking 180 guys. So it's very important to
keep those into perspective. The second thing is we
can't use this as well, because this doesn't
have this little ledge. You see this ledge? This ledge is important
because we need to showcase continuity
here as the ledge. So that is something we need
to keep into perspective, and you need to make sure
that is always followed. Otherwise, there's no point. So kind of hovering. What we're going to do, again, we're going to use
this one probably. You see, this one
is flat. We have more people there.
This is breaking 180. This is breaking 180. This is, again, changing
the entire layout. Remember, we already
established the area. She's not down. They're
all on the same level. So this is another person,
again, breaking 180. So what we will do is we're probably going to use this one, and we're going to edit this. So edit this, and
we're just going to remove people in the
background and generate. That's the fun part about AI. You can still edit it. Now nano Banana Pro
does this the best. But nano Banana Pro
doesn't do the best in generating cinematic images and the choice of cameras
that we have. I mean, you can input
it, but this one, this cinema studio
does it the best. So that's shot to Delta. After the edits, we have two takes that we generated.
So one is this one. One is this one. So one with the person, one
with other person. So you see now I'm probably
going to use this one. But now, the issue that I am
facing is, if you see, like, her mouth here and
the one that Delta, the one that we took here,
her mouth here are different. She looks way older in
this take one, right? So I'm going to regenerate
the two bravo one, and instead I'm
gonna use this one, T two as a reference, alright? So let's do that. A perfection
is the name of the game. So we are going to go
to some of the cameras. Now two Bravo was
setup number five, which is 70 MM 70 prime, 50 MM, three F 1.4. Perfect. We are going to use
the same prompt that we did. I'm gonna tag
courtroom and Lillian. And what I want to
do is I'm going to take references from I want to upload
it. A start frame. Let's just see without it if
it does a good job or not. So It's too bravo,
right? Too Bravo. Too fun. I'm going to use this one as a reference. Let's just generate,
see what happens. I do want to generate this.
And while we're doing that, we will also generate um, this one, medium
close up judge face chain two F via
last frame export. So two foxtrot is gonna be the first frame is gonna be the last frame of
two echo, right? So keep that in mind. So
we go do two echo now. To echo, use this
prompt. Courtroom. Lillian Brooks at the bench. Reading glasses resting. I want to remove this 'cause we need to show that
she's gonna wear it. Otherwise, there is no
point of continuity. I just figured that out. Medium clothes, and
it already floor. The images and generate. Boom, so after generating,
we have two echo. Three takes, which I
liked. One is this one. This one. And this one. So these
are all good images. One has the gavel in the papers, which is continuity, but
I think this is fine. She could have closed
it, so so that's okay. We'll see if Ds are generating. Okay, so this one we have
this one. Gavel resting. So it's not showing continuity. So what we're gonna
do is we're going to do tube grava again. And it's gonna reuse the prompt. Carton Lillian. And we're going to use reference
of let's see, something. This ensure the desk set up and the tilt and the ledge at the top end is exact
matching to image one, which is a reference to
three generations generate. I'm doing this for
basically two Bavel, which is this one
tie close gavel resting judges hands on papers. Is another Bro so again, we have the two Delta
already kind of taken. Right here. This is still fine. We can fix a lot with color correction
and, like, blurring. So just fix the writing. But let's fix let's check
these generations out. So two echos also done. So foxtrot is gonna be the
last frame of two echos. So not so worry. So let's wait back until
this generation is done. Alright, so we got
good generator. So we have this one. So I think we're going to use this one.
I think this is perfect. So we're gonna use this
one, and this is two bravo. We're gonna do this
as take number three. So I think I like this one. Pop, pop. I'll see two bro
CoplesPis and Tip three. Maybe take four. Sorry. Okay, this one was also not bad, but she looked
maybe a little bit. The desk is not proper. So just take four then. There you go. Let's go back. Strot it. Perfect. Alright, so we are
done with our still images. Now we can begin our video. Amazing. We're getting
the hang of these guys. Now we'll just power
through the video. So now what we're gonna do take the establishment
shot the first one.
11. The Courtroom | Part 2: And we will be making
videos out of this. So just delete this one, go into video. Start frame. Image generation
WW that we chose, which is the blue
one with the blue. So we'll choose this
one. I just want to see whether the like actually
happens. I'm curious. If I like this, will
I be able to see it? As a start frame. Doesn't
make a difference, right? I thought it would. I
really thought it would. Alright. So extra
shoans push up, we'll just do, like, a ort room, as poem classroom. Well, let's do 5 seconds. 6 seconds is good,
I think, for these. Three generations and generate
perfect. There we go. Let's just wait back until we generate the
establishment shot. Alright, Zed had really nice
ones, so we have this one. Then it is doing a
cut for some reason, which I don't want. I want to cut myself.
Okay, this is pretty fast. Don't want that? No I
don't want to fade either. But this is nice.
I'm gonna use this. I don't need that much. This is good. This is good. This is good enough for
an establishment shot. Cool. So we're
gonna use this one. And we are going to by the way, you can extract
the end frame and the start frame
from here in case you want to download this one. I think I download twice my bad. So Thanks. Here, courtroom. We have footage,
exterior establishment. Boom. So we'll do Arca two step. Amazing. Now we do the two echo. To Alpha, sorry, grand Courtroom juts Mmll against architecture,
and perceptible push. Amazing. We're
gonna do this one. We are going to take
this, take the prom. What we're going to do
is take the start frame. Our image generation. I think it's this one? Amazing. The reason I'm selecting
here and not directly uploading is because
the sizes are too big, so it will have to
re encode them, and then after encoding,
then upload them. So it's just easier to choose from the generation instead, as long as I am aware
of which one I'm using. So I'm using this one. Alright. So Fortran, Lillian Brooks. Boom, single shot three
generations in the studio. Generate. 7 seconds
for this one. Six is actually okay.
'Cause each shot is gonna be around 3 seconds, so six is good, just like 1.5, 1.5 from either
side, just for cutting. In case there's an issue
in the edit timeline, we can always come back
and redo it, you know? So the best part about this is we don't have to
go back and shoot it. It's a matter of a few seconds. That's the best part
about AI is I'm directing this while I'm sitting on my computer,
which is amazing. And they look they don't
look AI. They look real. As long as you
prompt it correctly, use this exact structure, camera, subject, action, environment, lighting,
texture, audio. Six step. Alright, let's
wait till this generates. Well, let's take a look at
the videos it's generated. Let's check this out. Not bad. Oh, I love the papers. Good touch. Okay,
I like these two. I'm gonna download this
two T one and take two. This one and this one. I love the fact that she's
playing with the papers. Seems to me she's busy
in some crucial work. Alright, so take these two. Cut. Establish boom. So this would be Arca two Alpha. Take one. No, I do two Bravo, which is son. CT Bravo tight close up. Alright, so this one is gonna
be Alright, so two bravo. Let's go here. So we have many takes for
this one, I remember. We have four takes for this one. So let's do one, two,
three, four, five, six, 789-10-1112. 12 generations, guys, can
we do it? Can we do it? Um let's see. Which one was take number four? I think that was my favorite
one. Just this one, right? So let's use this one. Was it
this one? Let's comparing. Yeah, this is the one. Let's use take number four. Let's see how that
works, actually. Alright, Let's do,
six second, let's do. Yeah, this is the
one for T four. Yeah, this looks pretty good. Okay, I'm going to do this one. To three of them, generate.
All right. Amazing. Then I want to do one
with take number three. Tate number three, but it's not accurate to the thing.
Let's do take number two. So, this is what
happens when I directly tried it right here. 20 megabytes. And
this is 30 megabytes. This is where I like I miss Mac 'cause you could just, like, you know, encode it right there. And you cannot do that
unfortunately with, um, windows. So let's try to look
for it. We this one. Let's choose this one. Take two. So m Yep, this is the one. So I think I'm
going to use these two takes and I'm
going to generate. So I think six
generations is okay. The other ones I've
kept just in case, it's like you're taking
couple of takes continuously, and you maybe use two
or maybe use three. And then you finally put and use only one, which is
your final shot. So it's basically like I'm
shooting a couple of things. So I'm using two takes, two
different start frames, and then kind of work in a way that I understand that from these two,
which one will be better. And I might like both of
them and I might keep it. Then in the edit timeline, I will decide which one I will use as the final final
final final one, which will be so these two will basically
be my candidates. Alright, so let's wait for
this generation to complete. Alright, now we have six
different generations. Let's take a look. Alright,
so we have this one. Oh, man, this is showing
people which I don't want. And same thing for this one. Same thing for Oh,
the paper glitch. Alright. Well, let's
take a look at this. Oh, not bad. I like this one. Let's just download this. Okay. Coring. Okay. I want to do another generation, and I want to use the first one is the starting frame,
which is this one. Because I really like the
take four that I used. But this time, what
I want to do is the dry shuffle of papers,
the quiet creep of wood. Don't show the entire courtroom. There is nobody else in the
courtroom and shouldn't be visible in the
background at any time. Alright, let's do three
generations of this. Alright, let's we'll be
back after this generation. Amazing. We have a couple
of more stuff. Let's see. Little bit win. I still see this guy's hand.
I don't want this. Okay, definitely not. Okay. All right. Alright. I think we
have our shot then, 'cause this is the
best one that we have. And we'll use a little
bit of the VintiRsolves, like, thing to make sure, like, the text is really not
legible and doesn't look AI. Alright. Amazing.
And if anything, at the end, we will try to recreate this with
nano Banana Pro. Just a steel frame. We'll see. So this one
will be this is to gravel. So we'll call this Arca two B. No take, so there's
just one take. Alright. Now we move
on to two Charlie, which is slightly low angle, Judge mid sentence, one
finger race, low push in. Alright, perfect. Let's do this. Now, poop. It's too slight low angle
to emphasize authority. Slope push in. We will
do at the courtroom, tall windows behind
her, law books. Now we have Lillian, mid sentence from authoriative. We do not want one finger
raised and we do not want every word carries a fold of the law. While she is reading the papers, read legal papers, her
words are pretty perfect. So we are going to first see which one is our candidates for two Charlie. We
have three takes. One, we're going to use I
think this one start frame. Alright. Okay.
Perfect. So let's go start frame. I chose
the right one? Yes. Perfect. I did
choose the right one. Alright, so you will do
three of these, generate. Chenchen chen generate. And then after that, I'm gonna do T two, as well. I'm gonna use this one. I really like T two. So
gonna use T two as well. And generate this, as well. Ooh. Lillian Brooks, let's go. Let me see some good acting. Lillian Brooks, let's go. I'm excited. Alright,
let these generate. We will get back
to Lillian Brooks. Alright. Boys and girls, we have two Charlie ready, which is the slight low angle. Okay, so let's see
video number one. For the record, this court
is done negotiating. For the record, this court
is done For the record, this court is negotiating done. I wanted to look outside. I wanted to For the record. Look down. This court
is negotiating done. For the record, this court is negotiating done.
For the record. This court is negotiating done. Roll, this is a the record. The court has read
what you filed. And now the court will read
what you tried to hide. The court has the court
has read what you filed. And now the court will read
what you tried to hide. The court has read
what you filed. And now the court will read
what you tried to hide. The court has read Wis
want to use the ones which has more of her
looking downstairs, not downstairs, like down
at the paper, right? For the record, this court
is done negotiating. For the For the record, this court is negotiating done. For the record, this court
is negotiating done. For the record, this court
is negotiating done. Okay. For the record. The court has read
what you filed. And now the court will read
what you tried to hide. The court has read
what you filed. Yes. And now the court will read
what you tried to hide. The court has read
what you filed. And now the court will read the court has read what you filed. And now the court read
what you tried to hide. The court has read
what you filed. And now the court
will read what you. I like only one out
of all of them. What I want to do is The moment
she starts to look down, she never looks back
up anymore up anymore. She continues to read by
looking at the paper, pretending to read
lines on the paper. Only starting is looking up. And what I'll do is
I'll just increase this to 8 seconds and do
three more generations. So this will do since the
start frame is looking up, and there's nobody in the court, so she's gonna go down. So she's gonna go down,
and then we'll have plenty of time to
her for her to read, like, the paper and stuff. So let's see how this works. We already have one good take. Again, this thing is probably only going to be 3 seconds long. We have already done that, but I'm just going
that extra mile to see if I can get a little
bit more perfection, right? Alright, let's wait till
we get these generations. Also, I'm almost done
with my generation, 34%. This is where you have
to spend money, guys. This is where you
have to spend money. Again, it's better
than $1.6 million. Alright, so let's see now, we have three different
ones, which is built. Alright, I'm gonna
turn on the lights because too dark for you guys, eh? Alright. Let's checked. The court has heard enough. By the authority vested in me, by your excuses are
noted, then set asad. She's exact Judgment is entered. The court has heard the
court has heard enough. By the authority vested in me, your excuses are noted. Then set assade.
Judgment is entered. The court the court
has heard enough. By the authority vested in me. Let's do one. Nothing She look. Maybe I am following my
own thing incorrectly. What we would do is we will do the action part. I'm
doing it towards the end. Ways She looks at papers, turns the pages, and continues to read
without looking up. Let's try this now. 8
seconds and generate. Alright. This is
two Charlie, right? Yeah. Do we have one
too Charlie already? The court has read
what you filed. And now the court will I do have This is
really good already. So I'm gonna go here
footage to Charlie. So I would do Arka two
Charlie, take one. Hopefully, out of this,
we'll get to take two, which is a better one for
safety. So let's see. Alright, let's check
how the two Charlie is. We already saved one. Um, we saved one for this one. Let's hope this
one does a option. Hope this does a good job. For the record, there is
no room left for doubt. This court isn't here to
negotiate with noise. Judgment is entered.
For the record. For the record, there is
no room left for doubt. This court isn't here to
negotiate with noise. Not bad. See action following the step,
the prompt structure. It helps. Let's see the
last one. Let's hope. For the record, there is
no room left for doubt. This court isn't here to
negotiate with noise. Amen is entered. For the record, there is no room left for doubt. I like this one
and the last one. Let's download this one. And let's download this one. Download both these two,
put them as T two and T three. We can cut across. You can change once
you have the clips, you can kind of, like,
punch in punch out. Then you use your editing
skills to make stuff. Freaking amazing, bro,
freaking amazing. Alright, so we have Alright.
These are all done. Downloads. Alright, so I'm just going on what I'm
gonna do is copy this. Paste this to take two and
paste this to take three. Alright, two Charlie
is done, guys. Now we move to two Delta
tight close up Lawyers, pen hovering, JerelanFwd,
everyone suspended. Amazing. Amazing.
Alright, headphones off. Now we will create two Delta. So I'm gonna take this prompt. Boom, boom, boom. So tight close ups
quick intercuts. Tight close ups with
quick intercuts. We do courtroom. Y'all do with are pen
hovering over notepad. Now writing, suspended
mid thought. No. Now we have juror
leaning forward. So instead of a
juror, what I'll do is Lilian Brooks leaning
forward, completely held. Suspend gravity for words. No, I don't want
to show this one.
12. The Courtroom | Part 3: Looking forward,
completely held. Again, this is the Bureau. Suddenly looks away. Distracted, distracted on
global afternoon light on the faces of the
audience business. This is wet the courtroom. Perfect. This is good. Now, what is This is
two Delta, right? So in two Delta, what was our start frame?
Delta, two Delta? Alright. We have two takes. This one and this one. So without, without,
without, without the person. So take two. So
do you use T two. Alright. So now what I
will do is start frame. Start frame. Yeah, it's
gonna be difficult. This is the one with
the guy, right? Mm. Yeah, right now, the website is glitching
out a little bit, my boy. Alright, let me fix it.
I'm just going to refresh, maybe restart my
computer and just come back. Give me a second, guys. Alright, so now you have the start frame ready?
Man slop it forward. What I'm going to do in
this one is I'm going to try doing a multi shot. I
want to do a single shot. I'm also going to do
a multi shot auto, and I'm going to just
crank it up to 10 seconds. I just want to see what
AI does over here, right? Generate. And I'm also going
to do a single shot as well. Multi shot auto. What that does is kind of
takes different angles, cuts it according to you. What we can do is
we can use that, maybe use some parts
of it. We will see. And we didn't do it for
the operating theater, but I thought, let's
switch it up over here. So these are ways of how
you can kind of make or break different types of
videos and commercials. It is going this extra mile
that makes a difference. It was taking time
to even generate, but we'll do this, and we will do a
single shot as well. Turn it down to maybe seven, 6 seconds, and we'll
do another generate. And then we will see you guys when these six videos
have been generated. Alright. Alright, now, let us check what these footages are. I don't like
the thumbnails. There's personality
there in the background, which is improper,
which isn't accurate. Let's see. This is multi shot. Yeah, this is the first
one about Multi shot, yes. Correct. Okay, if you
take a look at this one, I do like this
one. I do like it. This is nice, but
I don't like how there's a person in
the background again. This is nice. Um, right. Multi shot. Multi shot. Um, see. Distracted. There
are no other people other than Rooks
in the courtroom. Let's try that, and we will do one with multi
shot and another one with the regular just like single shot. I want to do that. I want to see how
this is. I don't know why it just
included people. Okay, this is nice. I can use the pen and
her looking away. I'm unable to see
this one. Took? No. Okay. We could use There's pen on the side, but there's a person
on the background, but we can use the pens. That's nice. Alright,
let's download this. I think we're good, per se, but let's I mean, I still don't want
to, like, downloads. So two downloads, which
are pending, right? Yeah, two downloads
that are pending. Or let them download. This is obviously not gonna
work for the single shots. I'm glad we did the
multi shot for this one. Very, very creative. That's where AI can really be. Alright, let's pause until
this downloads finished. I'm just gonna save it
to my File Explorer. Alright, so one is downloaded? Let's take that. To child
This is too Delta right. It's, uh, too Delta hero. We'll do Arca, two Delta. Take one. Alright. Second
one still downloading, so we will wait until then let's see
if we can watch this. It's there, but it's not
there. It ain't playing. Alright, we'll wait. Alright,
so now we have these ones. Okay, you're red. Leg out part. Come on. Another person. People
keep coming in my frame. Okay, you're Red.
Alright, see this one. We already have
something similar. Oh, she's not in the main juror. She's like, Oh here. Does make sense. Okay, we
have what we need. We're just waiting for this download 'cause
it's taking forever. Alright, we'll just
wait. Alright, amazing this is done. We'll
take this one. Coffee. Take two. Boom, boom. Take two. This is the final that we chose. Okay. Perfect. Now we
do, um, two echo. Alright, so two echo is. Her face commanding the room, eye level is static.
Alright, cool. Amazing. So two echo
is basically this one. Boone two echo. Close up eye level. Courtroom Bird courtroom
background behind her. We have Lillian
commanding the room, come who gets control the room. Amazing. Reading glasses. Not there. I'm changing 'cause I don't
want reading glasses. It's been 10,000
times looks and reads the paper with confidence 'cause I don't want it
to look, again, outside. Alright, so let's just do two. What is this two echo right? Let just look at the start
frame. So we have two takes. Which one should we use?
One. Two. Alright, so we'll use T one. I like T one. So take one is basically
we have is it this one? Come on. Trying to
see which one it is. Oh, we have three takes, sorry. One, two, three. Okay, so it's the
one with the papers. Let's use that one. One with the papers.
And the gavel. Right. Let's just drag it here. This one is less than 20 MB. We'll just drag
this start frame. 6 seconds. M don't need
the room listening. Perfect. And and we will do multi shot auto. I really like this multi
shot 'cause it gives me room to play with in post production.
So I'm going to do that. I'm going to make it 7
seconds and generate poop. Because what we can do is we can play around with
a little bit of that, play around a little bit with this, mix and match, you know, put Delta and echo a
little bit back and forth. That way we can really,
really capitalize on the reaction because we
have a medium shot of her, like, you know,
looking on the side. And then here we have
maybe she's speaking more, so we can punch
back and forth at different angles,
which is really nice. Okay, so three generations.
Let's be back. A, let's check. There are some generations
which are done. Let's go here, go back. Okay, man. This is nice. I like this wide. I
like this white kind of brings back, goes back. I like this one which can
be used. This is nice. And I want to do, like,
a single shot as well. 7 seconds. Generate.
Let's generate the single shot and see
what works, what doesn't. I'm almost out of credit, spois. Alright, let's wait till
this generation is done. Alright, so we have a
couple of generations. Let's take a look at this one. For the record, your
story is very tidy. Shame the facts aren't is nice. For the record your
story is very tidy. Shame the facts aren't
for the record, your story is very tidy. Shame the facts aren't
also very nice. The record. We can
use it in. The story is just someone we
can use this to, like, Oh, she's distrusted, you know, something like that. For the record, your
story is very tidy. Shame the facts aren't Okay. For the record, your story is accents 'cause
the book is closed. We'll be getting kind
of zoom in on later on. Okay. So we have two Delta. This would be two Echo. Spell downloads. So ca two echo. Take one, copy this, paste this, and then take two. Alright, e's go back here. Okay, so we have this one.
Okay, we can use this one. To echo. Did I put
this in the wrong one? No, I didn't. Two echo. This is T three, 'cause I might
just use that white shot. Look, I like this white shot, which is nice. Yeah, okay. W. Just copy this. Sorry to play it. Let's pick three. Now what I'll do is I will open Resolve. Alright, so I have this one, which is the whole video. Let me just for now,
what I want to do. This is for some reason, my Internet is not working. So I will try to change
this to a local thing. The Internet is being wonky
for some reason today. I just need something to. Alright, so I'm gonna take these three takes, put them here. And I'm going to create a new timeline using
selected clips. Create, take take number
two, take number three. Now. Shame the facts aren't. Put this right there. One frame before. Take
this file export. Is current frame as still. What I'll do is
Courtroom start frames. What I will do is I will
make this as a PNG. PNG, and I will call it Arca. This is two echo. Take one. Last frame, take one. I'm gonna copy this. Export. Perfect. Same
thing with this one. Take the last frame here. File, Export. Current
frame is still, paste it and make this take too. Export, that's done last but not the least.
Take this frame. Because it's creative, I
want to maybe use this wide, punch into the next one. Export, current frame is still, and we'll do this as
take number three. Boom, export. Amazing. So we have all these
three. Delete this. Don't delete this, delete this. And I will close resolve also. Boom. So now we have these
Last frames, as well. Now what we'll do? 'Cause we will take this one,
which is the reaction. Extreme close up.
Absolutely static. Now what we'll do is we'll do Midward she straps mouth open, heatils eyes elsewhere,
beat, then returns. All right. So we
will take the sorry, so take one JPEG file, put that as a start
frame, upload it, and you add a little
bit of distraction. Do a quick generation. 42. There you go, generate. But anyway, this is
done. Move this, upload, take number two JPEG. Wait for it to upload. Hopefully, this time
it'll be faster. Okay, wow, this is
done. Generate again. Generate, generate,
generate, generate. And then we go to the next
one, which is the last one. We'll just take number
three JPEG file. Excuse me. There you
go. I delete this. Take three JPEG file. Ri frank. Let's hope this is done early. Alright, so we have the
next one which is ready. And There you go.
Generate. There are a couple of ones which are done. Let's see. There's a cut. All right, let it generate,
and we will be back. Alright, so for to echo, we have these final
takes. Take a look here. For the record, your
story is very tidy. Shame the facts aren't. For the record,
your story is very tidy. Shame the facts aren't. I really like this. I really like this one, which
is really good. And then for the
for the last one, which is basically
the last frame, what I'm going to be doing
is I have this reaction. Sorry. Using the start
frames as this reaction. Basically, the JPG files. So this one T one and this one. So we're gonna be using these
three last frames, right? So basically, based on
these three last frames, we are going to create
the two foxtrot. So let me just quickly Alright, so we're going to
be for courtroom. The two fox extreme close
up, midward, she stops, mouth opens, head tiles, eyes elsewhere, beat, then returns. All right, same thing. What
we are going to do is here. We are going to pace the prompt extreme close
up absolute static. Again, just tag, and
we use Lillian again. Lillian, boom, boom, boom, boom, boom. We take
the start frame. What we're going
to do what we're going to take the start frame, and we want to use
every start frame, every start frame of the
last frame of two echo. So the three start
frames, I'm going to generate three, six, nine. Don't do nine generations, and we'll see which one is good. Alright? So after generations, go let me show you the
takes that we have. Now I workshop, I did
a lot of assessment, and I found these two takes to be the best ones. Take a look. For the record. The slight eye twitch
is just perfect. I might just use that zoom. So this is just amazing. Now, what I'm going to do is
I'm going to put them in, put them in DaVinci
Resolve and just see how everything kind
of floats, alright? I'll just line them
up and we can see. Alright, what I'm going
to do is I am going to take just, like, the timeline. I'm just going to drag
everything from here, courtroom, footage,
establishment shot. Take this one. Then I'm
going to take **** one here. So drag this out here. Put the dig one
here. Take one here. Then take the Bro, put it here. Here, then we take the action. I'm gonna put all
three takes here. And I just put maybe on
let's see how it is. I go to Charlie's Don to Delta. Let's do B here. To Delta to Echo. Take one. And then to Foxtrot,
else, do you take one. 'Cause right now, we're
just lining up to see. Again, we can always
come back and change it, but I just want to see how
it looks, alright? Let's go. When it removes this? Be raw. Amazing. The court has read
what you filed, and now the court will read
what you tried to hide. For the record, your story is very tidy. Shame the facts aren't
it was take two, right? Aren't Good. I think we have enough.
We have enough. If we need anything, we will take a look at it in our edit. And obviously, we
can switch, like, for example, maybe I want to use this one
here, this one there. We will switch it around and see what we can get, alright? So that's it for courtroom two. Now this is where you
have to, like, you have enough footage. You
did enough takes. There's only you have to, like, stop at certain
point and move on. Otherwise, we will never be
able to finish this project. So take a pause, move
on to the next scenes. And when we're editing this
at that point of time, we will see if we need any
other generations, alright. Onto the next scene,
which is the plane, the cockpit. Let's go.
13. The Cockpit: Alright, so now we're
going to go to the next one, which is the cockpit. Now, you guys understood with the first two scenes
how this works. Now what I'm going
to be doing is I'm going to be speeding
it up a little bit, and I will not make you sit through every single
trial and error. So that's something I showed you with scene one
and scene two. So in a similar aspect, we're just going to go
through the prompts. And after going through
the prompts, again, keep in mind that go
through each generation, see which one will fit in your vision in your
vision of the story. Look for continuity. And for example, in
this particular one, the still images will be
including the instrument panels, which is going to have a lot
of numbers, a lot of text. Now, for that, doing a simple Hicksfield cinema still image wouldn't
be my recommendation. Instead, I would go
with nano Banana Pro because it does an accurate, um, accurate render of
graphics, especially text. So I'm going to go with that. We're going to go through
each and every shot, and then we're going to I'll show you the ones that I took, and then we'll move on from
scene three to the next one. So let's begin the cockpit. Alright, first thing,
establishment still. What I'm going to do is
I am going to basically, use this particular prompt. Alright. So for this
establishment still, what I'm going to be
doing is this one. Witsinmn exterior shot from
slightly above to one side, looking at the aircraft
in level flight, large commercial aircraft at cruising altitude
against deep night sky. Where are the dining
grids you lights. Beautiful. Generate
two of these. And once I generate, we
have cockpit, star frames. We have this one.
Now keep in mind, I did choose this one. I really like this one. I
like the city lights as well. The thing is I'm
going to be including make sure that in case the window from the window
inside the cockpit, if the outside is visible, make sure the city lights
are also somewhat visible. That is extremely
important to note. Alright. Cool. Amazing.
Moving on to the next one. We have three Alpha,
the start frame. Amazing. Boom. Take the next one. Start frame. This is the prompt. What I did is I used a
Syndigito for this one. Synadigito, this is
a little bit wide, so I would go with a 14 MN
and I keep the aperture four. And we could choose a
classic anamorphic. There you go, class inimorphic. And go over here, 21 is to nine, four K one by one,
and generate this. Now, I could generate
through here, but sometimes what
happens is because of instrument clusters
and text and graphics, which is gonna be
on the instruments, it's better to go
with nano Banana Pro. So doing that is always better. And obviously always remember
to tag your elements, which is cockpit
and also the pilot. In this case, it is his name is Mateo Alvarez. Alright,
so you do that. And with the generation, we have this one right here. We have this one. Take one. This one. Take two. Now, I personally love T two, usually pilots, when they sit when they're
flying the plane, they usually don't wear
their jackets, right? So I like the fact that
he's wearing a white shirt, and he removed his jacket because they like
to be comfortable. They usually come into the
plane with jackets on. So the fact that I'm
able to think like this is what I would
like you guys to do. So most of AI is just
you thinking here. So that I cannot you
cannot outsource that. You know, it is
very important to know which one is
which one to do when. This is something AI
will not tell you. AI is going to be like, Oh, this is the element.
This is this. You just so that's where
your directorial things, your continuity things, your overall skills as director of this commercial
will come into play, alright? Alright. Next one. We have three Bravo, tied on
instrument panel. Needless. Study.
Perfect. Go here again. This is the prompt I'm
going to be using. I'm gonna tag the
location and generate. So this is three bravo, and we have two ticks. One, two. I see how, like, the controls
and everything are proper. Like the text are
good. They're really, really nice. So, that's good. And the layout is also similar
to how we see over here, which is exactly what we want. That's why nanobnanaPro
comes in clutch guys. Okay, amazing. Now we
go to three Charlie. Here Charlie is. Dry
close up pilots hands on the instrument panel. Now, that's a
complication, guys. Alright. Now, we
do same cockpit, and we go Pilot's hands, which is Matteo Alvarez. Hands resting on the controls. Now, one thing which I really
think is necessary for, again, you are the
director. You control AI. AI doesn't control you. And I hope that never happens. But hands resting
on the controls. Over here in parentheses, what I can do is he's
not wearing his jacket. Wow. White shirt only. So you
can, like, you know, reiterate it because AI is not smart enough to
understand what you want. So it's always good to
reiterate your guy, your employee, which is this
guy right here, you know? So do that and generate. So what that will do
is for three Charlie is we have There you
go. White shirt. Same instruments, DG RCB I
five MRs exactly as we wanted. There's another ti that I have. So I want to use both these
ticks and see which one it is when we finally generate
the videos and the edits. Alright. In the next one, we have three Delta. Three Delta is what exactly? Side window,
moonlight cloud tops, night sky, no character. Perfect. This is again another Broll just like cutaway
from what we're seeing. So keep in mind,
it is it needs to be similar to the
establishment shot, alright? So we see. So cockpit, aircraft side frame window. And what I would do here
is I would add an image. You can add you can
basically add an image here and use that as
a reference, yeah? So, for example, if
I had, let's say, the establishment shot, so I would do
something like this. I would just drag here, and the outside the outside
of the aircraft. Needs to be exactly
like tag Image one. So that's how you
reference images, and that's how you maintain continuity throughout all
your scenes, alright? Now, there might be some of these stakes will
have um, errors. So it's important to
find those errors, see what went missing, and counter those with prompts. So that's where your natural language skills are
extremely important, and knowing how to
type English is very, very, so important, guys. You cannot rely purely
on an AI to do an AI. I mean, you can, but you need human control to
think consciousness. Yeah? Alright, that
is three Delta. Moving on as we have three Echo. Perfect, medium close
up pilot phase, instrumental it. Don't eat this. Don't need the image. Take that. We have cockpit. Or, let me show you the photo, the image that we generated. So this is the
image that has been generated from T Delta. So decided to use this one. Perfect little bit clouds
from the pilot scene, and also the city that we generated in
the establishment shot. Now moving on to three echo. Medium close up cockpit that
we have Mattel and generate. Now three echo.
We have this one. We have this one. And
we have this one. I really like this one, as well, because it's not really behind,
it's not really in front. It's also from the side. But also, I use the
image as a background, which is extremely, extremely important to put
that in the image. Alright? And the white shirt, of course.
Alright now that's done. Now three Foxtrot is going to
be the start from is going to be basically the last frame of the video of three echo. So keep that in mind. Now
moving on to the video, guys. Let's move on to the
videos for each scene. Same thing we go to the
video and white shot this guy. G here. Cockpit, Admie Another reason why I'm using this
guy is next 2.5 is because it's less coins. I would it's only 24 coins. If I were to change the
same thing to, like, 3.5, let me show
you. ****'s crazy. 192, 1192 guys. Like, I guess it's
much more better, but, like, 2.5 is
still very nice, and 3.5 does give you
that optionality of, like, you know, choosing
the style and stuff. But right now with this, I think I'm doing enough with my own prompts that I don't
need that. It does help you. So when I get money and use and have more
coins, I will use 3.5. Anyway, so doing that, movement Autospeedam duration and I'm going to upload the start frame. And we shall generate it. Alright, here are my two takes. One. Let's take two. Grateful. I'm going
to use one of them, whichever fits the
edit properly. Well, let's go back
to three Alpha, which is, wide from
behind both the pilots. So we'll take that, copy it. And paste. The prompt. This
is the prompt, by the way. I'm using everything
in natural language, 'cause that's what
works best with, um, Cinema Studio 2.5. Tag my elements,
put the start frame and Vala This is three Alpha. Take a look at T one.
Nice. Okay, It's one. Oh, I like this guy's reaction how he's looking at his fingers. This is much better. Now we have the Bro tight
on instrument panel. Now I'm going to take the
prompt of the second one, and we will be creating this
prompt. So we have cockpit. This is three Bravo, which is a B roll and have
the start frame and generate. So no character in
this. Excuse me. I like this? That's weird. So I did a multi shot audio
just to see how it is. I think the stake one is
pretty nice. Go with that. Now let's move on
to three, Charlie. Tied on hands when you cross instruments adjusting
cha materials. Alright. There. All go cockpit, Mateo. This is the prompt I'm
using as and generate. Let's three, Charlie. And Nice. I like the tilt of the
camera, which is nice. Anyway, I'm keeping these takes, and in the edit, it's just like I
have extra shots. I'm gonna edit and see which
one I can edit out of these, use a mix of both, but it's good to have
good takes, you know? So, now, there are many
generations that have happened. These are the two ones
that I've selected. Now we do three Delta, go here. Let's close up to the side. Your culpet and generate Three Delta. Nice. I like the little
turbulens. Nice multi shot. Okay. Also cool. Amazing. These are
the takes that I've chosen for three Delta. In the next one, we have three echo medium
closed out face under the pines wrinkling
focus completely in control. Alright. Mes focus. That
makes it perfect. With this prompt, I want to be suddenly hears something that gets distracted. Los away. You decide to eye this 'cause I'm thinking about
the vision of what. Again, this is exactly the place where you're telling
your actors, Hey list, and by the way, can you look
away when I'm recording? Like, you're telling the actor. Like, while I'm I
already practice, this is my preproduction, all the prompts and
everything, but, like, I am here on the on set thinking,
Okay, you know what? You're hearing something and
you get distracted. Do that. That's what he's gonna
do 'cause he has to. If I say jump, you ask how high? Alright, so sweet echo,
so we have this one. The best ****, in my opinion. Wow. And that last frame is
gonna be my first frame. Right here. Last frame. This is the last frame.
I'm gonna use that to make three foxtrot. And boom, take this. This is the prompt
for three Foxtrot. Blanks on the drums,
instrument on. Amazing. Both start frame and generate. And this
is what we get. Nice. Look at that
doll want Look at that dolly. Oh. Hell yeah. Now, that's that. And we have all our shots
for the pilot scene. Now just put it in the
timeline together, and we'll have some
masterpiece. Let's take a look. Alright, so now I'm
just gonna want to remove maybe this one, three A. I'm gonna. Let's see. I'm gonna take this one out. B, this one, three, Charlie. I'll just do this one, three D I'll take. This one echoes. Let's see. What is that, and this is
what we have. Let's view it. Oh, we use the wrong take for
this one, but it's okay. Again, it will change
when you're caught. I'm just placing
it for you to see. Beautiful. Amazing. Now
moving on to the next one, which is the final not
the final scene, but, like, the final profession, which is the monk, alright? Let's move on to that one.
14. The Himalayas: Alright, so now we move
on to the next scene, which is the Maas. Alright. Let's go.
So same thing. We are going to go one by one. Establishment shot. Let's check out the
establishment shot. Use this front. We're
gonna go to Image. Take that. We're
gonna go Himalayas. Actually, let's
just do it because this doesn't have
to be the location. It's like the overall
establishment. So this is the prompt
that I'm using. Stupid. Extreme angle. Perfect. And this
is what we have. You have the establishment one. Wow. It's so beautiful. I think I like take two better. Amazing. That's take number two. Alright, then moving
on to the next one. We have four Alpha, wild himalia so now no monk yet, but we need to still
see the main location. So it's like there's a
sense of familiarity. Alright. Putting
the prompt here. Now, we don't need
to use nano banana anymore because
there's no images, so we do Himalias
Location tag, boom. Location tag, there you go. So that is that. Um, let's wait. Let's generate. And for Alpha, we have one
beautiful take. Amazing. The monk visible far off, maintaining continuity,
isn't that amazing, guys? Amazing. Alright. That's done. Move you on to the next one. Now it's gonna
happen. So basically, you now have an idea
of how to do this. You take a prompt, take some of the takes. If something doesn't
add up, immediately change it through your
natural language. Four Bravo, tight close up, snow driving across Jagged Rock. So now it's just
following your shot list, which I created here. So now we have four bravo. Boom. B there. Same thing. Me sure you tag location, Himalayas, and my four
bravos right here. Beautiful. Got some nice inserts of some Bro which is
exactly what I wanted. Close us out. Moving on to the next one.
We have four Charlie. So now we have to reveal
the monk a little bit. So on this one,
what we will do is we got to tag two of them. So Himalayas, and then
we have the monk. His name is Tenzin Dorji Boom, Genot and we have four Charlie. Amazing. That's amazing. Look at how he sells Zen
which is amazing, which is really,
really cool. Love it. All right. Moving on to the next one,
which is Fort Delta. We have tight close
up saffron robes, again, another nice
bel for nice cuts. So you can check
out my prompt here. Location tag. Don't
we have this one. We have tens and Doc. Now, you must be wondering why
this is why this is there. Like, why am I not teaching
you how to do this? This is your natural
language skills. So this class is advanced
in the sense that you need to know what filmmaking is. You need to know the verbiage, you need to know how to
set the tone of film, set the tone of color, right? Yeah, filmking I can teach you, but filmmaking, watch my
other classes for that. Alright, and generate,
we have four Delta now. We have four Delta, take one. Oof. And we have take two. Both of them are equally
good, which is amazing. Now, for Echo, we have medium distance one seated dolly
towards the face. Amazing. We will just take that. Boom, boom. So we go Himalayas. Then we do Sorry, tens in tens in Dory. And generate. For Echo, we have it generated. Boom. This is one, and this
is the other one. Amazing. I really like this one. The one straight
ahead, which is nice. Alright, and now for
four Foxtrot this would be the first frame would be the last frame of the
video for four Echo. So now let's move
on to the videos. Alright, now we do the establishment shot,
the extreme wide. So we're gonna go here Extreme
wide, absolute static, the HimalianPlateau,
in a full blizzard, blah blah blah, and generate. The start frame is the main
establishment shot. Generate. Alright? And these are the
takes after generation. Okay, let's see the next one. I don't like the
plateau as much. I mean, we can use
the beginning parts of the establishment,
which is nice. All right. Amazing.
This is done. Now we go into the next one, which is the four Alpha, which is the actual location. Alright? Here we do need the location tag,
Himalayas, boom boom. So there's that generate with start frame and four
Alpha. Take a look here. Beautiful. I'm gonna keep. These are good takes, guys. Keep them. In the edit, you can always select
which one you want. So this is what,
again, like I said, it's similar to just recording
the same scene twice. You do another take
for safety, right? This is that safety.
All right. Moving on. Moving on to four
Bravo. Alright? Let's see. Four bravo. Himalayas. Boom, this is a tight close upshot
and generate. Alright, now we have four Bravo. Take a look here. Amazing.
A nice review Iteration. There you go. Amazing. 67. Nice orbit motion. Beautiful. Amazing. Love it. Moving on. We have the
reveal. Here's the prompt. Now, again, this is something
all of it I built myself. How? If you want to
know how I did this, put it in the discussion below, I might just make another class. Alright, Hamelion
Storm. Let's go here. ImonFllbzsard. Then we have this guys ten
Dorgie Boat start frame. And this is for
Charlie and generate. Alright, after generating. We have Charlie. Take one. Alright. This can be used. BEA tifo guys. All right, moving
on until next one. Four Charlie, four Delta. Let's take this is
another B roll tie close up on the saffron robes, basically. So let's go here. Take that location tag
again. Anybody else. And Tenzin has his saffron
robe fabric WeppingGenerate. This is four Delta. So four Delta. Alright.
Take one. Okay. Nice wing. Nice one, please. Alright. Okay. I love the fingers. So like, it's very accurate
in terms of meditation. It's a proper Mudra, you know? Nice. I forget what
it's called, but nice. Alright. For echo, we go here. Copy this. Now, guys, now this is easy because this right here is preproduction.
Do not forget this. Learn to do the pre production. This is my shot list. I thought about this,
I created this. I did everything,
and now I'm able to, like, you know, do this fast. But again, choosing
the right take all of that is also not easy. Alright, so for echo, Himaleos we have tens in Dorgi's face
generate with a start frame. And we have four
echo right here. Oh, look at that doll Amazing. Okay. I don't want him
to open the eyes yet. Beautiful. All right. Now we'll take the
last frame of this of all of these three takes,
and this is what we have. Take a look. Uh, go back here. Start frames. Last
frame, take one. I have this one. I have this
one, and I have this one. I'm going to use the
one which is closed. So for that one, we have the foxtrot. Let's
close these out. Boom, right here. Take this Helias ten sentgi. Perfect. Amazing and generate.
And this is what we have. Sorry. Kias footage
Fox Trog. Take one. Small smark. There you go. Oh, I like this one. Beautiful. Alright, amazing.
Now what we'll do is we will take
this into resolve. Now we're done with
all the videos for the Himalayas, basically. Feeding for now. And what
I'll do is I'm going to try the footages right here. Perfect. Take this one here, and then Alpha two Foxtrot. Drag them here. Now for Alpha, I might just, you know, just delete this. T three. I'll delete it four B, T two, four Charlie, take two it. Four Delta take two,
Delta I take four, for Echo, T two, take three. I don't need. For Foxtrot.
Alright, there you go. Let's take a look.
See how it is. Nice. Here's a sound. He looks up. Smiles. Perfect. Now obviously, I just did a simple
lineup to see how it is. We it's flowing, whether I need anything, and it's
flowing amazing. And we are going to now
work on the next scene, which is the payoff with
the white T shirt guy. Alright, so see you
in the next lesson.
15. The Apartment: Alright, welcome to
the final scene, which is the warm apartment,
white T shirt guy. Alright? So, going back
to the payoff scene, which is completely this guy is going to be completely warm, non important white T
shirt guy. Alright? Let's go. Establishment shot. Take the still, boom. So keep in mind
that for this one, there's gonna be a
lot of proper logos. So we need to use
nano banana for that. So just do this, since we don't really care
about the interior, so you just do a
simple generate and we have There you go. That is the establishment
shot. Beautiful. Amazing. Now, I don't know if I'm going to use this
establishment shot or not. It depends on the
edit, you know, how the flow of it is, how the music is, the
sound design is. So it's important
to keep the shots. Again, keep in
mind, these are ts. It's as good. I keep repeating itself, keep repeating myself. It is as good as
basically making sure that we are recording the
camera all the time, okay? Now, that's done this
image number one. Then we move on to the next one. I see, I kind of make this
orange I'm yellow nanobnana. So we go five Alpha.
And this time, the way nano Banana
works is it works with more natural language rather
than too much information. So that's what I did.
Alright? So go here. We'll go image. So we have. So this guy's name,
by the way, my cast. His name is Ethan Morales,
okay? Ethan Morales. And we have living room
is our location tag, plain shirt, white apartment, completely ordinary and
generate and generate, right? So that's five Alpha. We have five Alpha right here. Look at that chill in by
the lamp. Location tag. Amazing, good, beautiful.
Alright, that's five A. Now we go five B, which is Bravo. Same thing. PUB from inside. Call
refrigerator interior. Let me do living room. And let me go Ethan Mas
hands enters for Arca. Actually, I don't I
want to reveal the can yet for something on the shelf. Alright, and generate, which
is this is five bravo. Look at that. Beautiful. Got a POV from inside the fridge.
Okay, amazing. Moving on to five, Charlie. Sits down. Take
that. Boom, boom. Then we have Ethan. Ethan others walks back to
the couch in the living room. In the living room, sits down, medium shot, apartments
apartment quiet and generate. This is five Charlie. So
this is five Charlie. Good. So we get shot
of him walking midway. But you can see the
issue that's already there is that he's
holding something, but we don't want to show
that he's holding something. Like, we don't want to show the product yet because
we're going to be using our special
macro photographies, videographies that we have
taken for the product, right? So that's going to be the
big, the big, big review. So we'll wait on for that maybe in post production,
we can gonna fix it. Zoom, maybe add some pan, maybe add some tilt, right? So, anyway, that's five Charlie. Then we move on to five
Delta, the hero shot. Boom, take that. Dota take EN Morales right here. Then here we need to do like, we need to tag the beer because even though it's not going to be visible completely, we want to still show
consistency over all the shots. She's from Hos on gold. Boom. Okay, and generate. This is five Delta. Take a look here.
Oh, PEA, beautiful. Amazing. Take the other one. Amazing. Amazing. And then what I did is, I also took an EMT shot
with nana Banana Pro, and I used this one
as a room reference. So basically the reason why
I did this is basically I will always take this
image, drag it here. And when I do this, the reason why I do that is
now what I can do is refer to Image one for
location accuracy. Alright, so going back to
what we were talking about is that if you don't put
the location reference, what happens is sometimes
it could just give you an outside golden hour. Just because I said warm lights, it assumed that I wanted
golden hour in my um, entire scene, which is
not true because I want, like, a nice contrast
of the tu and orange. So you can see, like, it does different stuff like that.
So, like, it added another. The location per se, is the same, like,
with the same lamp, same floor lamp, desk
lamp, and all of that, but it's he's moved into, like, a different couch,
which I don't want. We need him to be
on the same couch in the same field all the time. So keep that in mind that
this is important, right? Not this, not this, even though the
location is the same, that you need to make sure that that consistency is always
always there. All right? So now, what we are going to do is we're going to
go a little bit more raw. And sometimes what
happens is we want to showcase the fact that
he's going to the fridge, he's opening the fridge. He grabs something,
he grabs something. He comes and sits
down, the crack, which is the main crack in his, the main the proper time
when the actual sound, which is going to be
like the big blast, which is what the surgeon, the judge, the pilot, and the monk is hearing
is finally gets revealed. And when we do that, it cuts to the macro shots,
the product videos. Alright. So let me show you
what I have exactly done. So you can see
here, he just sits, but he doesn't carry anything. Take a look at this one. Carries it. Same thing. Take
a look here. Cut. That's a very good multi shot. So the prompt that I
use is right here. So sometimes what happens is I had to wing it a little bit. In the living room, the carman dolls in
into a medium shot, and we see the couch
straight ahead. Ethan Morales walks in from
the screen left, sits down, sighs and then looks outside and goes to
grab something from the coffee table
from screen right. So the amount of
information that I'm giving to him in terms of what he's
grabbing, where he's going. So I'm taking these shots from an impromo I'm
going on the fly a little bit apart
from pre production, and that is the learning, guys. That is the learning that, yes, you make a short list,
you have everything, but at least I have a
vision of what I'm doing, which is why I can improvise
and build my shots out. So it's like me as a director being in front of the field, and, like, on set, and I'm like, Okay,
you know what? Let's try to do
this a little bit differently and see
how it comes out. And you'll be surprised
that if you take the right decision
and if you have a proper reproduction
of your vision, you'd actually be
able to win this. So if you take a look
at this multi shot, we have him walk. He sits down. There's another cut size looks so well, and I could
just cut it over there. I don't have to
showcase this, you know? So it's like that. And the one thing I
was struggling a lot with is the fridge, because I was not
able to get a shot from the inside of the
fridge to the outside. So every time inside of her fridge shot with
stuff kept inside, door is closed, I was
unable to get it. And finally, I had gotten that, and now take a look. Now, see. This is where
AI breaks a little bit. Take a look at the
things that I've done. The fridge door opens,
we see Ethan Morales looks and grabs something
from the bottom shelf. We don't see what he grabs. The refrigerator
door swings closed, and the light cuts to dark. Alright, so then we
look at in this one, he opens the fridge
from the other side. Now, see, this is something that AI really is frustrating.
Fridge door opens. We see Ethan Morales grab something from
the bottom shelf. We don't see what he grabs.
The refrigerator door swings closed, and the
light cuts to dark. So it's like, again,
it's a trial and error. Can we have this one? It just I just appears.
But I can use this. I don't have to
use the entirety. We can cut away
when the AI breaks. Like, What the hell? Over here, the shelf just stays put. So this is a lot of
trial and error, and you have to these
are examples of where you have to make sure
that you are properly, properly doing this prompting because prompting is
as good as directing, so you need to be able
to learn how to type, learn how to say things
in the film lingo. Only then will the model
understand, right? Then I have a couple of these. I'm just showing you all the
failures that have gone. This guy just gets up. Nowhere. And sits
on the other side. I mean, it's a good shot, but I want him to sit there. Now, this is where,
like, you know, if I was on set, I would just tell him, Don't
sit there, sit here. So it's just a little
bit different. If you look at the prom, take
a look. This is what it is. Now, this is the other one. I really like this shot because his hands are covered
with the chair, so might use that might
not use that. Let's see. Now, we hear he breaks
the fourth wall or he looks somewhere else. So so what I decided to
do with my impromptuness, I decided to basically
open the fridge, close the fridge, sit down, give a macro shot of the
beer of his fingers, actually going and basically
about to crack it. When we crack it is when the entirety of the
macro photography and the videography begins. So I'm using that as a point because that's,
like, the most slub. It's been the anchor for the entire scenes
of the film, right? So now let me show
you the things. After all of these failures, let me show you what
I have generated. So we have five Alpha. Walk in a way. Five bravo. It's cut from here.
Five Charlie. Five Delta T one. Too much of a spray. That's not necessary.
But it's nice, though. The text is weird. I did a multi shot here. This is not how you open a can. Now, out of all of this, I'm going to cut
it in a way that I'm going to make
something in the edit. So this is where your skill as a filmmaker and your new skill as an AI filmmaker
comes into clutch, which I will show you
in the next lesson when I go through my edit timeline and my sound design timeline. Then I also generated some money shots film slow motion drinking with live
condensation beer. Then we have I smelling it.
Then another money shot. I think in my pre production,
this was kind of missing, which is to showcase the end
of the the end of the um, the end of the commercial,
basically the hero shot. So I did that, and that kind
of concludes the payoff. So I kind of reduced onset. When I was on my set, I kind of improvised
it because it wasn't really working in the
way that I wanted it to. Like, the actor wasn't
doing a good job, so I had to improvise
based on the location, and that is why you
get rehired, guys. That is why you get
rehired because you're able to
think on your feet. It is as same as
being on set, okay? Now, what I did is I
made another scene, which is basically
all my macro shots. So if you take a look, I made
the macro film, basically. And what I did over here is I used the new model
that came out, C Dance two point oh. Now, I'm not going to go
through this entire thing. That's a whole class
within itself, but I'm going to show you
what all I generated. All right? Now, let's
take a look here. Let me go here, take a look. So we have this one Beautiful. Amazing. Amazing. Beautiful. So I use
different kinds of, like, materials because
everything was sound related. So I decided to, like, you know, let me just use a hop
cone, filter it out. Some of these, some of this, some of this 'cause
it's sound related. Tuning fork with the
beer in the glass. And then the final reveal. And all of this is done through
nanopanana because it's needed to have the
proper text render. And then I added the footages and all the footages
had proper seat duns. The way I did the prompting was I did shot by shot calculation, and I did all of that
in a proper way. And then in the next lesson, we will go through the
timeline, the sound design, the edit, and I will show you exactly how I've
placed everything, the choice, and then you'll be able to see the
final product. Again, do not get excited. This is not an editing class. I will just show you
how the timeline looks. I'll show you what
I've selected, and I'll show you
my choice of sound, and then we see the
commercial once more. And then alla you have your $1.6 million commercial ready to go. And this is a beer. It could be a beauty product. It could be a car, it could
be anything you want. Remember, you're the master of your space and of your time. Let's go.
16. Post Production in DaVinci Resolve: Alright. Amazing. So now that we are done
with all our scenes, I went ahead and did
an amazing edit. I did a quick lineup, then I did a nice creative edit. I did a couple of takes
and did the sound design, the entire music composition, the foli, the sound effects, mixed and mastered them,
kind of all of it together. And let me take you let me help you go through the timeline as to what all I selected and why was my choice. Again, this is not
an editing class. This is just
something. The final This is where your
film knowledge, you as a filmmaker, will be
extremely important, right? So I'll scrub through the
footage that I selected. Alright, so we have here. So I left basically
kind of like I left black in the beginning. I'm going to mute
the music for now. Black. Then we have
this operation theater. Maybe what I can do,
I can add, like, a couple of dynamic zooms
here. Maybe just like So, see, I've kind of done an intentional
cut where tools. So we have tools, and then we have
the actual tools, which is coming into the picture of him actually
cutting through the body. And that Look,
this is what I did is I took the T one of one Delta and I used
a little bit of it. I took this one as the one echo as, like,
slowly starting. And then I took the one Delta. And this is Take two. I use the glitch later
on and I cut it. So when the glitch happens, he actually looks up, you know, so that is
what your edit is. So basically, it's like, I
have shot so many footages, and now I'm going to
kind of, you know, going to cut it
and make it very, very, you know, creative. So that's what I did
over here, and then I joined it with
take number one Fox. Fade out. Establishment,
same thing. Did some black points. Establishing the court,
little rub of the paper. She's reading something loudly. Pen, different viewpoint,
cut, and boom. Got to, like, the plane. Now, if you take a look
at the court scene, if you take here. So I did Alpha Bravo, Charlie, then I did Delta,
then I did echo. And then I did a foxtrot. So I didn't join
them consistently. I kind of left a little
bit caps because there was issues with the
court the judge, remember? There were sometimes
people in the background, sometimes people not
in the background. So that continuity, I used I
cheated it through editing, and that is what exactly
is your job as an editor, as a colorist is to remove the imperfections and
add some imperfections. Making it believable.
Now we move on to the plane add a little bit more
turbulence here. Took that, then took the window. So if you take a look here, the way I construe
the story is I took the two takes of three
bravo, take one and take two. Take one and take two. So I kind of match cut them. So, Okay, turbulence
is happening. He's going to grab his throttle. And then I skipped Charlie
and I went straight to Delta. Delta, the turbulence
is happening, and he's fixing more
stuff for the turbulence. And that's when he pauses, the finger, hears it, added a little bit
more camera move, and then slowly into that and
use that as a transition. And I kind of faded it
to white to match cut with the Himalaya scene,
which is the establishment. The same thing, you can
see, I kind of over here, I did different
takes from Bravo, take one, faded to take two. Fat to Black, then went back to four Alpha again because that's when I'm
introducing this guy. So I'm using I'm
interchanging my takes, yeah? For Alpha, then again,
move to Charlie. Then we have Delta T one. I wanted to add more insert. See, this is why more
taking more takes is so important is
more Bros of Delta, so I to take one
and take three over here that flowed with the story of what
I'm trying to say. And then I did Foxtrot. And then cut to, like, a complete different
scene. That's on purpose. That if you take a look, is I did so many
generations for scene five. I was only four clips maximum
in the beginning here. I used five Alpha, five Bravo, five Bravo twice, and
I did five Delta. I'll tell you why. Take a look. We have five Alpha, five Bravo. And this is the
place Papa and then transition to the macro
Broll. How amazing is that? And then I did the entire
shots for the Broll. I added a bunch of effects, bunch of cuts, and did a
couple of effects like this. Boom effects like that. Then add another transition
with water. Boom, like that. The way I did that is again, I did it through AI generated first and last frame,
did a transition, flipped this thing to
my screen direction, and use this one
instead as the base. So that is that, my friend. That is the commercial. Now, after all of our hard work, let me play the commercial for you now with the
final sound design, a little bit more
tweaking. Here you go. Have fun. And that, my friend, that that is kind
of what the commercial is. I hope you enjoyed it.
I hope you had fun. I think it is a beautiful,
beautiful commercial. We can make anything that
our imagination lets us. Alright, keep that in mind. And thank you for
attending this class. If you have any
questions of how I did the macros, macro photography, how I did the sound design, or if you have
questions on how I, um, worked on the characters in detail of how to
make the characters. Put it down in the
discussion below, and I'll be more than
happy to kind of help you out and make another
class out of it. So let me know. I'm
here for you guys. You can book one on ones with me while you're working
on this project. If you have any
questions as well. You have access to my calendar. And yeah, thank you so
much, guys. Please.
17. Thank You!: And voila, you guys
just made a commercial, not a demoeel, not
a proof of concept, a full blown commercial. With a production Bible, a thematic system, a five
full realized environments, a color arc that moves from cold to warm without a single
line of dialogue, and a brand moment
built entirely, entirely around a sound. Now, again, you
probably did not have the character consistency,
the prop consistency, but this is something that you guys need to take your time and go through those settings, the one that I talked
about, the sole cast and also the prop
engineering, right? Now, basically, the $1.6 million budget
was never the point. The thinking behind the
budget, the production bible, the entire architecture, that is what you have
learned, my friend. Here is what I want
you to stick with. Everything you built
in this class, the way you read the brief in the Higgsfield prompt structure, the key framing,
chaining system, the workflow for
product accuracy, the color temperature arc, the sound before the vision, the structural decision,
the selection criteria, that turned 12
takes into one cut. None of that is
specific to ARCA. So take it to brief, any product, any brand moment. System works because it's not really about
the tools, yeah? It's about understanding
what a frame needs to do and choosing the right
tool to make a to do that. The skill does not expire
when the tools update. Remember that? I'm
there on Instagram, tag me on Instagram
on simply Jijo. I want to see what you made, and I mean that every time I say it. I would love for you guys to
post on your discussions. Let me know your thoughts. Let me know if you want to have a deep dive into the
character making, into the product making, how
I nailed the consistencies. I mean, you pretty
much got an idea. It's just like a little
five minute tutorial that you might want
if you need to. Again, remember the gap
between what AI filmmaking was two years ago and what you just filled is genuinely something. Okay? That's the good
stuff. Take it for granted. And that's a wrap. In
the next one. Clock it.
 Jijo Sengupta, Be the Master of Space & Time