Transcripts
1. Welcome To The Class: Hello, dear students. Welcome to this fun and creative class where
we'll paint with coffee. Coffee is a very
interesting medium, especially if you love water soluble mediums
like watercolur. If you are a beginner, coffee is perfect to learn
watercolor techniques. It also offers a very
unique painting experience and sparks curiosity. Grab some coffee sachets from any grocery store and you're ready to start
coffee painting. This class is perfect
for beginners. As I'll explain step by step how to mix
your coffee paint, and the subject will
paint is simple and fun. Along the way, you'll also learn useful watercolor
techniques while creating a delicious looking
chocolate ice lolly. For those who'd like
to dive even deeper, I also have another coffee
class where we will paint a steaming cup of coffee and explore watercolor
techniques even further. It's a perfect subject for
winter and autumn days. I've been professional
artists for many years, focusing exclusively
on watercolors. I've always been captivated
by the magic of this medium. I started to paint when I
was a child, but as I grew, I had no idea how to improve or how to create
effects that I wanted. I didn't know any of the
techniques or how to use them. Now I've taken part in exhibitions and been
fortunate enough to win rewards from such highly
regarded organizations as International
Watercolor Society, Helvetat light space time. Archo International
and Royal talents. Watercolor can be challenging to manage for those who
start to use this medium, which is why it's my intention
to help you to enjoy watercolors and to learn
it in an easy and fun way. In the step by step lessons, you can see the hunt
and brush movements clearly from different
points of view. We will explore versatile and fundamental
watercolor techniques that you can use in all your
paintings and sketches. The approach of my
classes is to start with an easy wash. As we
proceed with the painting, step by step, we will arch more details completing
the artwork. If you have any struggles or
difficulties along the way, you can start a discussion and I will read and respond
to all your questions. Remember to hit the
follow button next to the class title just
below the video. By doing so, you'll stay updated and be
among the first to receive updates on my upcoming classes and
exclusive giveaways. Discover free
watercolor tips and tutorials by following me
on Instagram and YouTube.
2. Your Project: Now, let's talk
about our project. In the resource section, you'll discover my
completed painting as a helpful reference, along with pencil drawing
that you can trace. You have the freedom to
select your own object to paint or to closely follow
my painting as a guide. It's a great pleasure for me to give my students feedback. So after you put so much effort in your artwork,
why not share it? You can do it by taking a photo of your painting
and share it in the student Project Gallery under the project
and Resources tab. I'd love to hear all about your painting process if you had any difficulties or what was the most enjoyable part
of the painting process. Upload your artwork by clicking Submit project on the
project and Resources tab. Upload a cover image. It can be your artwork photo, but it will be cropped. No worries. You can upload
a full photo father. Share your thoughts
about the class and your painting process. Under the field where you write, you can find three small icons. Click on the first one image
and upload your artwork. You can see your photo
appearing under your text. Scroll to the top and click on the button published
to share your project. If you have any struggles or
questions during the class, please start the discussion, and I will be sure to
answer your questions. I highly encourage you
to explore the work of your fellow students in the
student project gallery. Viewing other creations
can be truly inspiring, and also to receive support
can be incredibly reassuring. Therefore, please
consider engaging by liking and leaving comments
on each other's projects. Join me in the next lesson, and let's get started.
3. Get Started - Making Your Coffee Paint Step By Step: Let's find out in this lesson what we'll
need for this class. Next time you go to
the grocery store, don't hesitate to pick
up some instant coffee, either in sachets or a jar. It is the most convenient way to paint with coffee,
as you'll see. You can easily create
different shades, even very dark tones. We'll use a sachet
of Nescafe gold, which has larger granules. Later, I'll show you how it
compares to powdered coffee. We'll pour different amounts
of coffee into a palate, starting with just
a few granules and gradually increasing until the last well
is completely full. In the final well, I'll
add Nescafe select powder, which I use for all my
projects because it dissolves more easily than the
larger gold granules. Now let's add water, either warm or cold. I haven't noticed
a big difference. You can use a plastic bottle
with a pointed nozzle, a pipet, or even a
regular teaspoon. I'll show all three methods. Start by adding a
lot of water in the well with just a
small amount of coffee. Stir it well. You can
use a spoon or like me, a small plastic spatula. Now I'll use a piped to add
water to the next well. This time, use less
water than before. Stir until all the
granules are dissolved. You'll see a kind
of foam on top. I'll explain more
about it later. For the third well, I'll use a teaspoon to add a few
small drops, about three. Stir thoroughly until
the coffee dissolves. The result will still be watery, but more concentrated than
the previous mixtures. The fourth well contains
a lot of granules. We'll add just two drops
of water and mix well. The mixture will be thicker
and take longer to dissolve. Personally, I find the large granules harder to work with. So I prefer using powder. The last well contains
powdered coffee. Add on the tiny amount of water. Be careful not to add too much, just like when
making cake butter. Since there is a lot of powder, we'll add a couple
more drops and stir until the
consistency thick. If the mix becomes watery, simply add more powder until it reaches the
desired texture. When dry, the darkest
tone appears glossy on paper and adds beautiful
contrast to your artwork. While we wait for the
powder to fully dissolve, let's clean the fam of
the other mixtures. Removing the foam helps create a cleaner, more saturated color. If you paint with
foam on the surface, your color may appear
lighter and muddier. I use a teaspoon to dently
scoop the foam off. Then wipe the spoon on a tissue. You'll notice a much clearer
paint color underneath. It doesn't have to be perfect. If there is still some
foam around the edges, it will disappear in
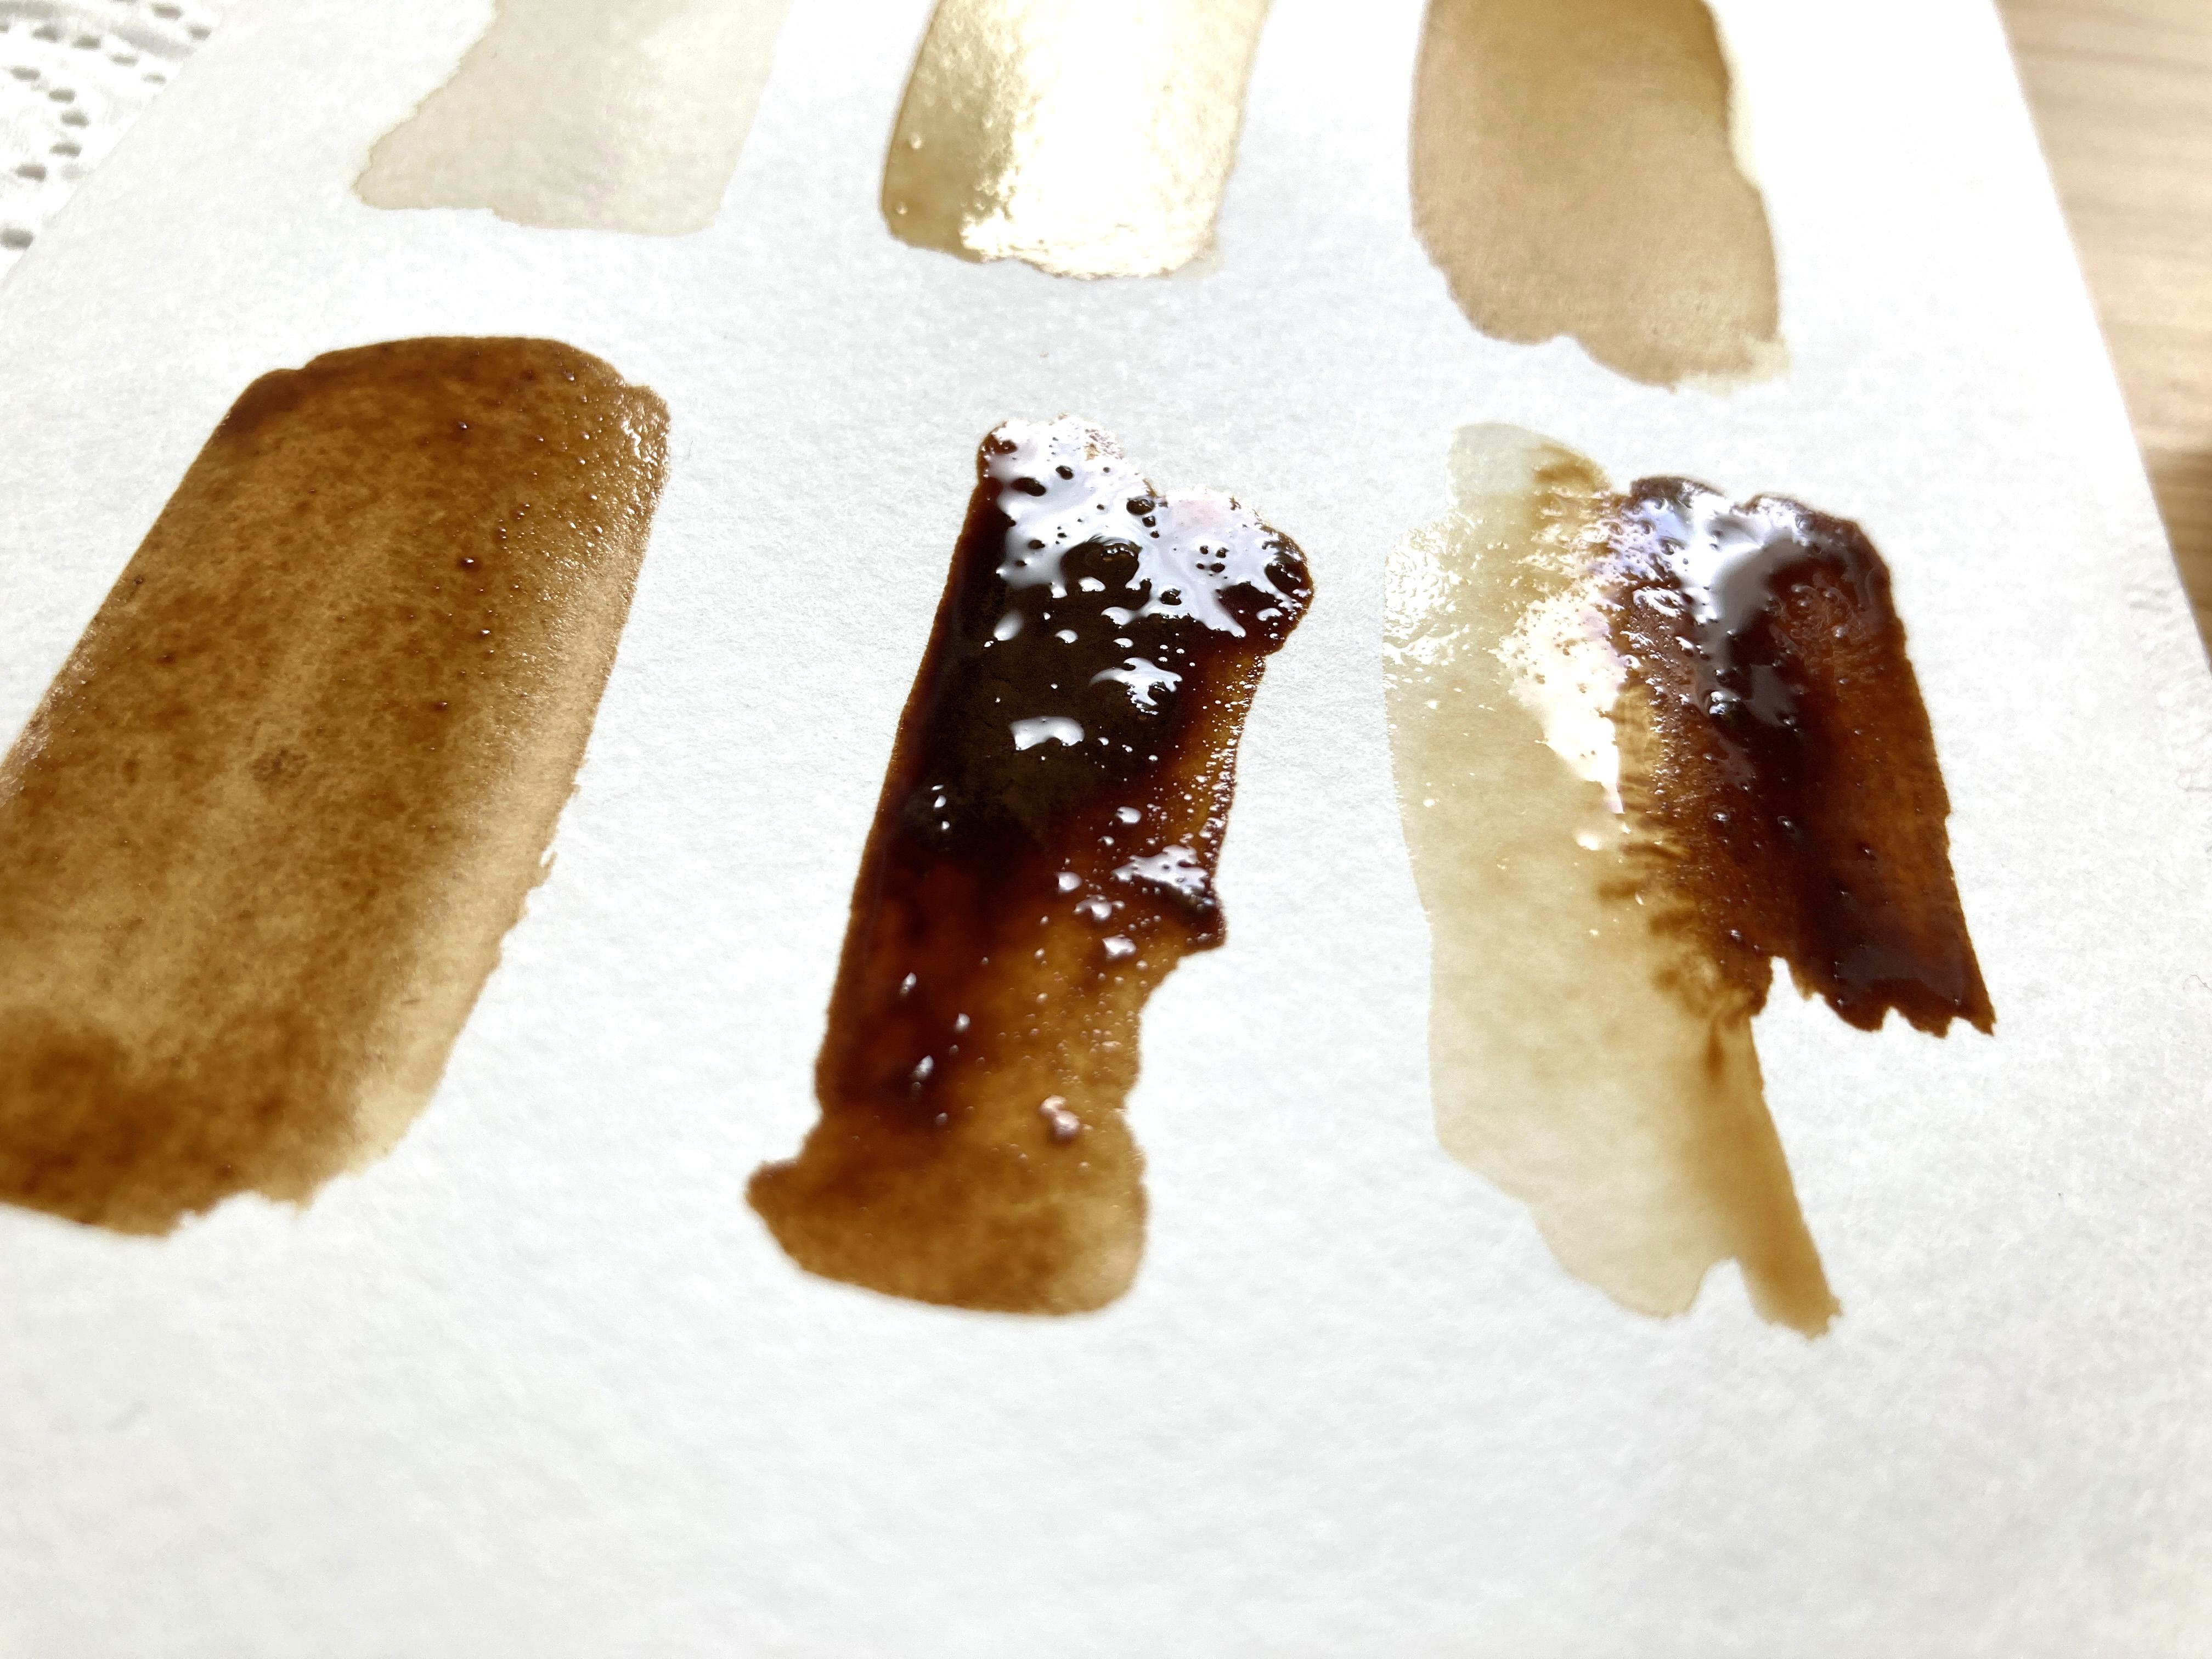
a couple of hours. Let's tt the colors
on a scrap piece of paper to see the
full range of shades. The first one is the least
concentrated of all. It has a light subtle color. The second is a
darker golden brown. The surg is a nice medium brown. The next one is a
beautiful dark brown. They look great, from
very light to deep dark. Now it's time to clean the
foam of the darkest sone. You'll see how dark and rich it looks underneath
the brownish fam. Be sure to touch only
the surface with your spoon so you don't disturb the beautiful
dark mixture underneath. Scoop the foam gently, working until the
dark color is clean. If there is some foam left
on the edges, that's fine. Later, if you notice
it spreading again, you can take a pose
from painting and remove the foam to reveal
the clean dark color. When you dip your brush in the darkest mix, it
will feel thick. Look how intense it is. It's almost like gouache
or paste in a thickness, and it will lay
beautifully on paper, adding incredible contrast
and uniqueness to your work.
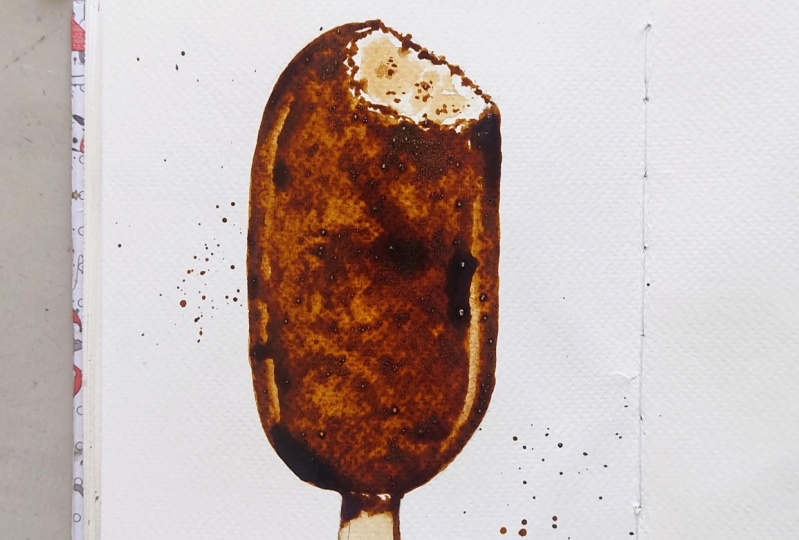
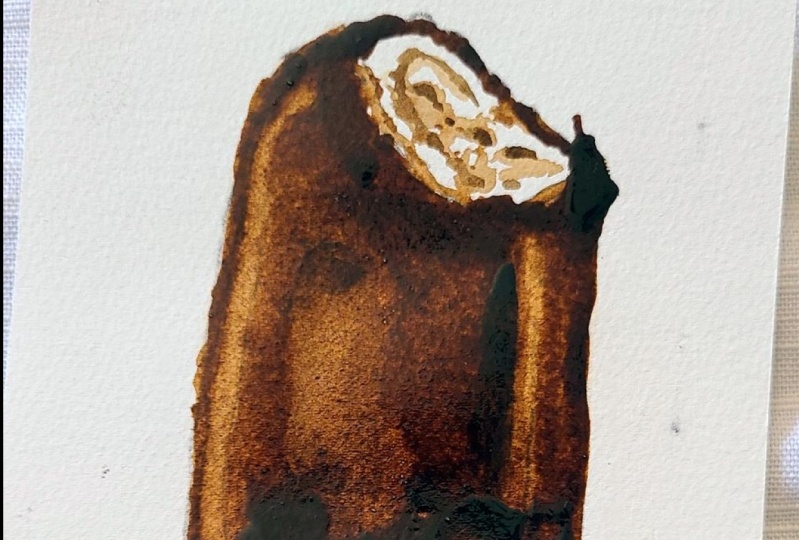
4. Painting - Creating A Chocolate Ice Lolly With Different Shades Of Coffee: In this lesson, we will start
with the darkest tones of our mix and create the dark chocolate coating
of the ice cream bar. The darkest tones will glisten when you
turn the painting. That's what makes it so very
special for coffee painting. I love this magic a lot. We will need some round brushes, both regular and fine. I'll also use a
special metal stick to create texture
during the lesson. Some brush sets include
this kind of stick, but if you don't have one, you can use the point
of a thick needle, a knighting needle, or even the sharp tip
of a brush handle. It just needs to be pointing. Make sure to keep several
paper tissues at hand. The I must have when painting
with offee or watercolors. I usually fold one and hold it in my other hand
while painting. Take the fourth mix with your brush and start
outlining the edge. Load a bit more paint and begin outlining the
ice cream bars edge. Then continue with the body. But be careful to leave the reflections
unpainted for now. We'll keep the second
reflection unpainted, as well. Outline the other edge
with saturated paint. Now take a fineer brush, wet it, and gently tickle the
Kaffee paint stroke, letting the paint bleed
into the wet area. Continue wetting
the reflection area and softening the paint edge. When you wet your brush, remember to tap it on the tissue to prevent
water from dripping. Wet the second reflection
and soften the edges of the previous stroke,
smoothing the transitions. I notice my darkest mix has
a thin film of foam again. It looks brownish and will
appear muddy on the paper. So we need to
remove it to reveal the beautiful dark
paint underneath. Take a spoon and gently collect the foam
from the surface, wiping the spoon in
its tissue each time. Now we can continue painting, load the darker tone
with a finer brush, and add paint to the body. Then carefully outline the
it with the brush tip. Add a bit more dark paint. Hold the paper at an angle to let the paint move downward. The wonderful thing about
coffee paint is that it dissolves beautifully into the
steel dump previous layer. You don't need to do
anything with your brush. Just keep painting and
enjoy the magical result. Clean your brush and smooth the reflection edge as before. I even add a slightly darker
tone to the reflection. Now let's saturate the body
fully with the darkest tone. Soften the second reflection
with a damp brush, then add more dark colour
to both sides of it. Optionally, hold the paper at an angle again to
help the paint flow. Next, paint the
hiny chocolate area on the wooden stick
and add a touch of thickness to the wood for a more three D effect
using the darkest color. Now let's work further on the
edge of the ice cream bar. Take a middle dark
color and paint a thin jagged line to show
the broken crispy chocolate. It looks nice if some
darker paint bleeds into this area by lightly
touching it with your brush. Add a few darker dots here
and there for variation. Wet the white area and drop in some color using
the latest mix. Wonderful. Adjust
with a clean brush to mimic the subtle variations
and the vanilla ice cream. Let's refine the reflections. Take a flat brush, or the same fine tipped
brush you've been using and draw a line through
the second reflection, and another on the first. A slightly down brush
will lift a bit of color, leaving a lighter line. Add just a touch of darker
paint to both sides of the reflections to
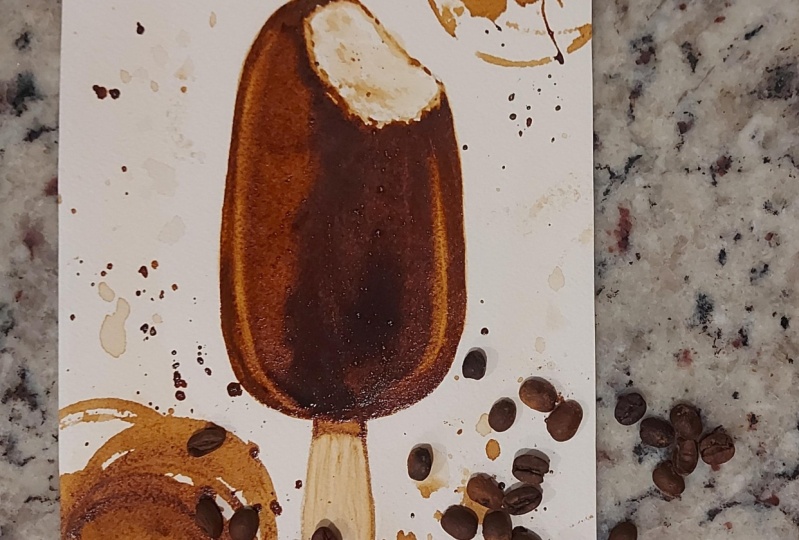
make them pop out. The next step is to paint the wooden stick
and lighter colors. Now take your pointy
tool and scratch in some wood grain lines
to mimic the texture, applying a little pressure. I'll try using a needle. It works fine, too. Optionally, add a bit
more light colour. Then leave it to dry or use a hair dryer to speed
up the process. Oh, it's wonderfully glossy. Add some finishing touches
to the ice cream texture. And don't forget
the tiny thickness of the stick to enhance it. You can leave it as it is or add a small logo or icon
on the wood and stick with a very fine
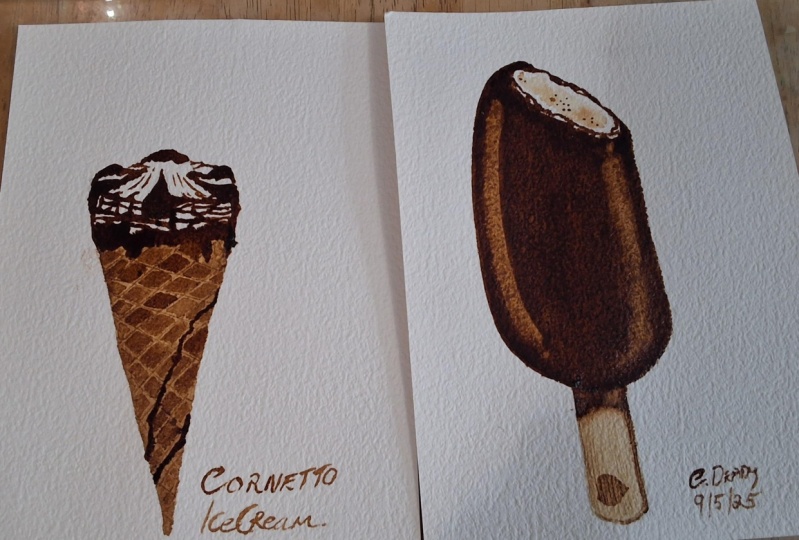
brush and sign your work. Congratulations on completing
this cute aff artwork. If you enjoyed the class, I would be really grateful for
getting your review on it. I hope to see your artwork after you put so much
hard work in it, and I love to hear all about your painting process if you had any difficulties or what was the most enjoyable part
of the painting process. Share your artwork in the
Student Project Gallery by clicking on Submit Project under the Project
and Resources tab. Every piece of art, no matter the level, represents time, effort,
and personal expression. But most importantly, it's a part of your
artistic journey. It's a visual record of
your growth as an artist. If you have any questions, I'm happy to respond
and to help. Just post your thoughts
in a discussion thread. If you prefer to share your artwork on
Instagram, please tag me. I would love to
see you painting. Skillshare would also love to see the artworks of my students. So please tag them as well. I hope you enjoyed painting
this delicious illustration. Feel free to explore more
watercolor techniques in my other coffee class
where we will paint a steaming cup of coffee
together step by step. I'm really looking
forward to seeing your wonderful artworks
in the project gallery. Bye for now and see you. Mm. That's so good.
 Evgenia Cordie, Professional Watercolor Artist, Belgium