Transcripts
1. Introduction: [MUSIC] Today I
wanted to experiment with a supply that I don't pull out as frequently as some of my other supplies, charcoal. I want to play in all
the different forms of charcoal that I could find in my studio and just see what interesting abstracts
I could come up with. I'm Denise Love, and I'm an artist
and photographer. Today we're going to do some projects abstract
with one supply, maybe not one item
but one medium. I want that medium
to be charcoal. I want you to experiment with all the different
ways that we can push charcoal past what we normally think
charcoal can be. I have liquid charcoal, I have watercolor pan charcoals, I've got blocks of charcoal, I've got charcoal pencils. Who even knew charcoal came in all these different forms
and it was so exciting! I hope you have fun
today in class. We're going to do
some little samplers of different colors
and mark-making and just get a feel
for how to push it around with water and
see what we can create. Then create a couple of larger pieces from
our smaller samples, and just see what
is the differences and the challenges when you
go a little bit bigger. I have done tons of
little bitty ones. I did several large ones. Then when I turned
the camera off, I did some more
because I'm like, let's just concentrate without having to talk while
I'm painting and see what can I come
up with with this exciting medium just playing
and enjoying the experience? Sometimes that's
when I come up with the most amazing things that
become my very favorite. I can't wait to frame them
and hang them and enjoy them. I hope you enjoy playing
with charcoal today. I can't wait to see
what you create, so come back and
share that with me. Let's get started. [MUSIC]
2. Class Project: Your class project is to
come back and share with us some of the abstracts that
you made from class today. I can't wait to
see what kinds of charcoals that you're using, what colors you picked, and how you put those
together into an interesting little abstract that I know you're going to love. What charcoals do
you have on hand? Work with those first and then the block charcoals
are my very favorite. If you had to pick
like one thing to get, those are my favorite, and then a couple of colors in charcoal pencils are what really pull those
together and make it fun. I can't wait to see how much fun you're
having with charcoal, I want to see it a little
abstracts that you create, so come back and
share those with me and I'll see you
in class [MUSIC]
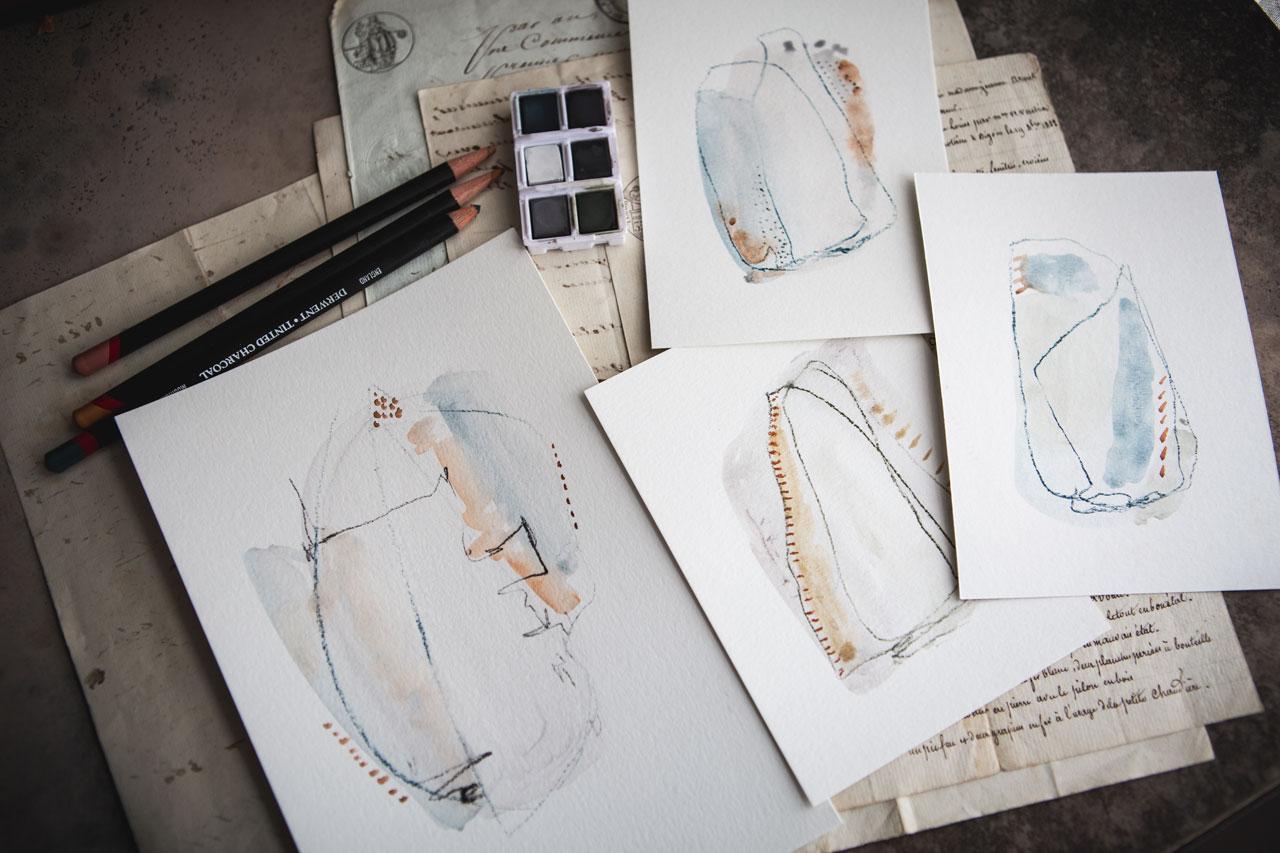
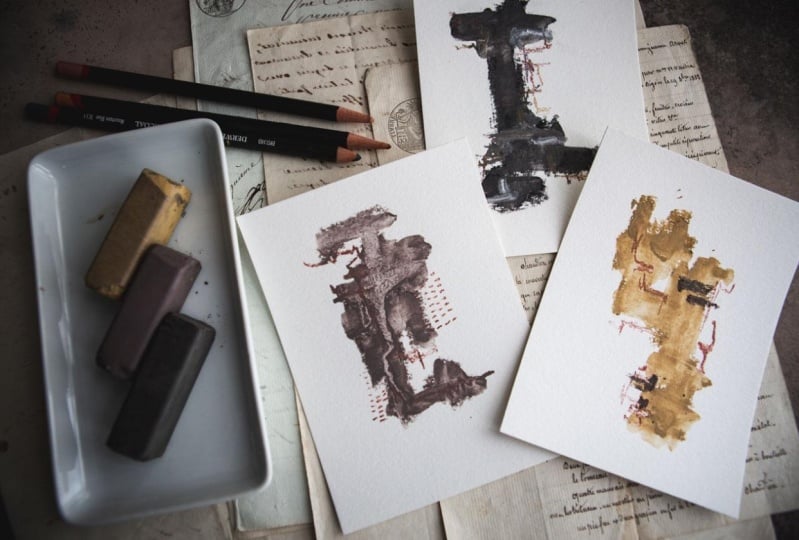
3. Supplies: [MUSIC] Let's take a look
at the supplies that I have pulled out to
use in class today. My goal is to make abstracts
only with charcoal today. I have looked through all
my art supplies and pulled out all the different forms of charcoal that I
happened to have. I've got some charcoal powder. You can mix charcoal powder, you can sprinkle
it onto wet medium and let it create and
blend, and leave dots. But I used the charcoal
powder to make some little charcoal watercolors when I was making my
graphite watercolors. It really just ends up
being a black tinted color. But it's still pretty cool. If you're thinking that you want some colored charcoal
watercolors, because I'll be
using some today, then go back to the graphite, make your own graphite
watercolor class, and substitute charcoal
powder for graphite powder. You can easily have any color of charcoal
watercolor that you want. I've got charcoal powder, that's fine, it's
just a black powder. I've also got tinted
charcoal paint pan set. This is Derwent product and it has six charcoal
watercolors in it. I will be using that
since I have it. Then of course you can make
some of your own if you want some other colors
because you love working with this
medium so much. I really do like working
with this medium. I would be tempted to go
and make a day of making some charcoal watercolors
like I did with the others, and just have a whole pan of
colors I could play with, but these are really pretty too. We'll be playing
with the Derwent tinted charcoal paint pan set and maybe my one
color I made myself. I also have Derwent
extra large charcoal. I love this little set,
they're six colors. There are giant chunky blocks. I really wish these came in more colors
and maybe they do, but I hadn't found that. I'm thinking that
these sticks is it. There's this gorgeous
mustard color, this maroon color, there's a white, this looks it's a chocolate and I'm not sure exactly what these
other two colors are. Today may be the time to
explore what are these. [LAUGHTER] You can tell that I have pulled that yellow
out and really used it. These are the extra
large charcoal. I love these set and definitely
going to be using these. I also have just some peel
and sketch charcoal sticks. This is a regular
charcoal pencil. I have these and I'm
going to play with them. It's black and what I
like about the peel and sketch is that you keep
your hands pretty clean. You'll notice when we
use something like these big chunky blocks will get charcoal all
over our fingers. Whereas when we're drawing
with the pencils and stuff, we don't get charcoal all over our hands and so I like that. These only come in black, but they're nice for
mark-making and in general, just sketching with and
doing some fun stuff. I also have tinted charcoal
pencils and I love these. These are Derwent also. Look at all the fun colors that these charcoal
pencils come in. These are going to add a little bump of pop of
color to our pieces. I really love all the
shades that I have, all these little pencils so I do love the tinted charcoal set. It's 24 pencils and I don't remember if that
comes in a bigger set or not. If it does, I'm said I
didn't buy it because I am that person that wants all the colors in all
the forms I can get. I'm going to have
to go look again because after playing with
some of these abstracts, I know you're going to love
these just as much as I do. I also have something that somebody recommended
and introduced me to and I'm like, whoo, doesn't that sound fun and this
is liquid charcoal. This is like the watercolor
charcoal that I made, but it's still in wet form, so we'll use it just
like a watercolor and this is Flussige Kohle. I'm up to look and see,
did this come in more? I'm sure it did, but this was cherry pit black and I thought, well that sounds interesting. It just might be something
fun to play with. I've got one of
those to play with. I'm going to be playing on just some Canson
watercolor paper today, experimenting
and creating. It's a nice, inexpensive 140
pound cold press watercolor paper that gives me
good results with these and so I like
playing on this today. I recommend a microfiber
cleaning cloth and you get these over in the
cleaning departments of the hardware stores
and grocery store. These are the most amazing
find for your art room. I'm going to use it to keep the charcoal powder cleaned off my fingers so I
don't put fingerprints, charcoal fingerprints all over my pieces after I paint them. This is the easiest way to
keep your finger clean. It just gets all that
dust right in there. Then when you get it
full and it's dirty, you can just wash it in
the washing machine, so I love that.
These keep using. Another thing I'd
recommend you having on hand is a towel. Paper towel or shop towels, I'm usually shop towels
because that's what I have at my room
that I really like. A roll of those came
from the hardware store, but you can get those
in the cleaning departments and you can use regular paper towels because
really the only reason why I'm recommending you
have paper towel handy is so that when we get
charcoal drawing on our paper and we get a whole
bunch of dust on the paper, I don't want you to
blow the dust off. I don't want you to
blow it on everything, on your table, on your
art room, or the wall. I want you to just take
your piece of paper, tap the dust off, and here's where that will collect for us and then
you can throw that away with all this powder not spread on all
your work surfaces. Try not to blow charcoal powder. Then I just have a random
watercolor brush handy. This is my Raphael
SoftAqua in zero. It's going to work just
great for what I want to do. I want to spread some of
this water-soluble charcoal. If I say graphite anywhere
in the middle of this, just know that I
really mean charcoal. [LAUGHTER] and I apologize. I'm just going to use
the brush to move the tinted charcoal paint set and the water-soluble
charcoal stuff because charcoal
is water-soluble and will use this to
push that around. Any paintbrush that's
your favorite, use that. Let's get started. [MUSIC]
4. Testing Charcoals: [MUSIC] Let's do some
little charcoal tests and see what we're working with. I just got a piece of my Canson 140-pound cold
press watercolor paper. I've just cut those
larger sheets in half. I've just got some of that. Let's just start with
the standard charcoal. There are definitely more
charcoal types out there. I've just pulled
together all the stuff that I have in my art room. There's vine charcoal,
there's stick charcoal. I don't have some of
the vine and the stick or if I do, I've
hid it from myself and I'll probably find it just
after recording this class. But I just want to see. You can tell that regular
charcoal, it breaks easy. See, I've already broke off
a piece of this tip here just by pressing it
down on the paper, so it's very flaky and chippy. But I just want to
see what do these do. Again, if you get
charcoal powder anywhere, don't blow it, just
come over here, tap it on your paper towel and then let that dust
live on the paper towel and not all over your table. That was pretty cool. It's
a nice dark black line. It'll be good for
drawing and mark-making and I can come back and do
favorite shapes and lines and interesting things as
I'm creating my abstracts, so standard black. Then I've got all these yummy
charcoal pencils over here and they work in
the exact same way, only they're a beautiful color. Look at some of these,
they're beautiful. They're like working
with colored pencil but they're slightly
a different feel than a regular colored pencil. A regular colored pencil almost has a little bit of
a waxy look to it. These are more chalky and matte. But look at all
these yummy colors. While we've got these
colors on here, I've got some water over here, we could take this
opportunity to see how water-soluble are
these little items. We can see that
these push around like my water-soluble graphites. Yes, I'm liking that. I could do some really
cool heavy lines. I could come back and spread
a little bit of water and we would still see
our line underneath that. Then these light
little pencils also, we can spread some
of this color around with our water, so super fun. Look at that. Can't you see all the
possibilities there? Love that. We've also got some of these
yummy pan-tinted charcoals. These are light and
you got to really maybe wet them first,
let it sit for a bit, and then come back
with a wet paintbrush and grab some of it because if you're using
these just from dry, they're super-duper light. But look at all
these pretty colors. Let's just see what all
these colors are real quick. See, like that one,
it wasn't very wet. Not getting much in there and that looks like
that other shade, very close anyway. It looks like I've got
a couple of shades of what should probably be gray. This one looks a
little more purple. I've definitely got
a blue and a green, and then there's this white here which because I'm
on white paper, we're just not going to
see, but that's okay. I also have this
random one that I made and I thought, what
would this look like? You can see it just
is a darker shade because what this color was
is a very bright orange and when I added
in that charcoal, it made it a very pretty
terracotta color. Mine are, in my opinion,
more pigmented and stronger than these
little Derwent sets. But I do like how
soft these are, so I'm not going to
say give up on it. I do love those. Let's take our big chunky guy and see if we can
get some big lines. I can fill in pretty good. I can create some shapes. I have charcoal all over my
fingers but look at here, now I've got most of the
charcoal off my fingers and I'm less likely to come back and put fingerprints and
charcoal on the rest of my work. This guy leaves a lot of dust and that's exactly
what I'm saying, don't blow that dust. See, I got it all
right back off, just tap it on your towel. Let's move this around. Look how amazing
this is with water. Now you see why I want a whole plethora of these
extra-large charcoals, because look at that. Now that's the most
exciting to me out of everything that
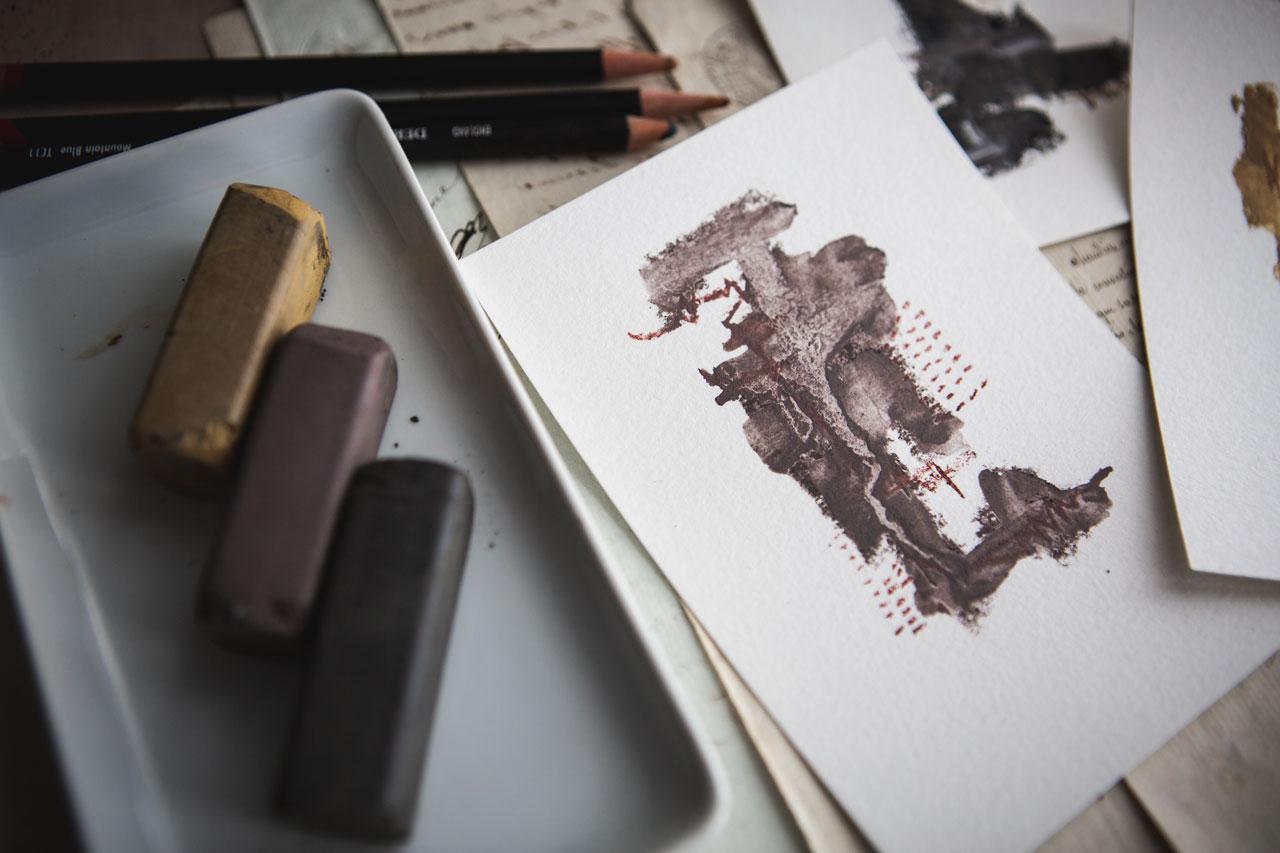
we just played with. Now, I also have this
Schmincke cherry pit black. Let's try that. I've put a little bit
of that over here in a little palette. Let's just see what we got here. See now this is
definitely a black, but it's like a
chocolatey black. How pretty is that? That's super fun too. If I came back with
say, charcoal pencil, I can easily add
some yummy marks and stuff in that
for an abstract. Super fun. Now we have done a
little paper test of all the different charcoals
that we've gathered together, which is what I want you to do. I want you to know
how these work and what they're
going to do for you before you start creating. Now you can say, I love this and that was
pretty awesome there. I like how soft these are, and those are still
water-soluble. If I don't want them to smear, I need to put it on top after whatever I've done
underneath is dried. These are how we figure
some of these things out. Do your little samples, put all your charcoal
options together if you don't have the
extra large blocks, those are super fun. [LAUGHTER] Out of
all of my charcoal, those are my favorite. Then let's create some
little abstracts. [MUSIC]
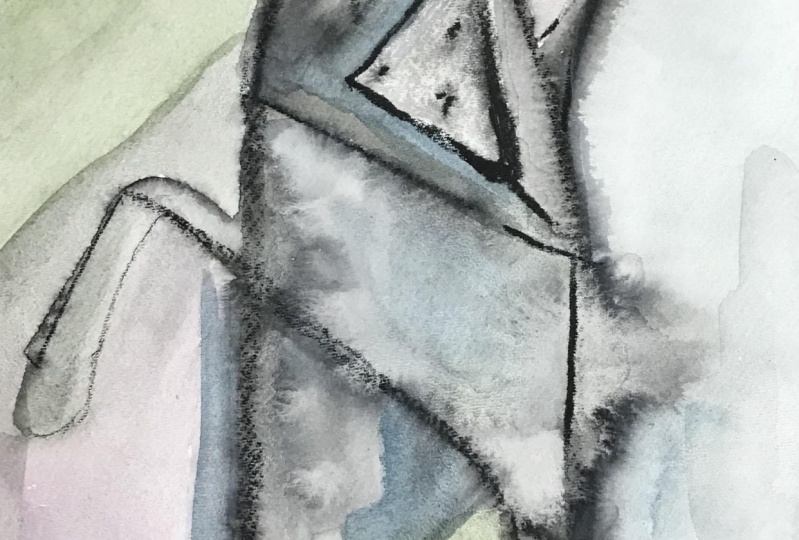
5. Small Abstracts: [MUSIC] Let's start creating some little abstracts on
a little piece of paper. And then we can move up to like some half sheets or you can
move up to some full sheets, whatever it is that
excites you there. But I thought it'd
be fun just to do a whole little series of
little tiny abstracts. I was already playing,
getting so excited. I'm like, oh my, I love
these so much [LAUGHTER]. So just to give you
an idea of where my mind goes when I'm
thinking abstracts, I'm thinking pushing
color around, some interesting
contrasts, some marks. We're going to create
some of these. We're going to play with the
different colors and just create as many small
ones as we love. Then we can go a little
bigger and see you know what we can create just
going a little bigger. But let's just start off
with some chunky charcoal. And I want to make
a bunch of these. I don't want to just
make one and say, okay, I'm done and
give up on it. I want to go ahead
and just mark make. We'll do some color and just
like that, look at that. And again, when
you're using those, let's get that microfiber
cloth and clean our fingers off so we don't immediately destroy the yumminess
we just did. Tap our charcoal off
on our paper towel. Now we're ready to see
what we can do with that. So let's do a couple
of these and then go, I want to get my fingers
dirty all at one time and then we can just see
what can we create here? That's pretty, look at that. [LAUGHTER] Tap that dust off
and we are ready. All right. I want to actually know
what all of these are. Let's see what is this one? This one I broke.
I don't know how my cane broke but didn't matter. If you get some dust on here
before you smear it off, don't brush it off
with your hand, tap it on your towel. Okay. So this is like a traditional charcoally
grayish color. All right. Tap that dust off. Get it off your fingers
before you touch your next clean piece of paper. All right, let's just
set this over here. Let me grab another one. Let's see what is this one, I hope this is a chocolate.
Oh, you know what? Yeah, it's a different grayish, maybe a chocolaty grayish shade. It is a little
different. Look at that. Maybe a greenish gray. I don't know. It's different
than the black Look at that. It's obviously a
different color. But very interesting. All right, let's try.
What's this last one? Then we'll just make
these into something fun. Oh, see, now this one is very
obviously the black black. Okay. I think you got black, gray, and a greenish
brownie gray. We just tap that off. I have so much dust in my little paper towel that
I'm going to go ahead and put a new paper towel out
because I can tell you exactly what I
would do with that. Stick my hand in it and
smear it on everything. [LAUGHTER] All right, so super cool. These are super fun. So let's go ahead and make some yummy abstracts
out of these. I'm going to set each one
to the side for a second. Make sure I've got all
the extra dust off. I don't want to set these
on top of each other because then they'll
smear on the back. But we'll just set these
over so I can focus on one. So let's start with the yellow, which I can tell you is already going to be my
favorite [LAUGHTER]. Because I just love
this yummy gold color. I've just put that
in a little bit of water and I'm just
going to smear that around very
strategically and see what can I
get? Look at that. Oh my gosh. You can leave some
of it chalky on the edges. You don't have to fill
all of it with water. You don't have to
get it all done. Look at that. So cool. I really love gold
and this dusty pink, like the ocher and pinky color. So there is this yummy
sunset pink over here in my charcoal colors
and you know there's only one pink and
that whole thing. But we're going to use this
because I'm feeling like how amazing would this be as just a little pop of color and
some lines and some marks. What's really cool
to notice here is as I go through
the wet charcoal, my lines are very heavy
and deep and dark. So if I dip this
piece of charcoal into water and
then draw with it, I'm going to get a much
stronger darker line than if I mark with it dry. Very fun, cool observations. So experiment with that. Play with it in the water, play with it dry, play with it dipped in some water and just see
you know what can you get. Before I overdo that,
I think I like that. But I also think, would it be cool if we went with this purply mavy maroonie, whatever this color really is, and come back in with another just interesting
color or mark, look at that. [LAUGHTER] That's so amazing. Oh my goodness. So
amazing [LAUGHTER]. I know you think I'm crazy but
you know what, go with it. Whatever excites you
and you're creating, that's what's gonna get
you back to creating. Okay. Now that's like the
most amazing little charcoal. All right, so we're
going to set this one. We're going to tap it and
make sure all of our dust from that other color
got off of there. Don't blow these. We're going to set that
up and let it dry. Here's a black,
let's do this black. Move this around. See what can we create that's going to
be interesting here. Oh, yeah. Cool. Then we could do some other
color on this. Let's take a look here. We've got like this color. I don't know what this is.
This is burnt orange. Why not? Orange and black now we can draw right
in there and get a little bit of color showing. We can come right outside. Mark make, draw some lines, just see what we
can get, super fun. Okay, so that one's very dark. Got some interesting
stuff going there. We don't have to overdo it. Feeling like that could
be it right there. I could draw some other
marks or dots or something. I don't know that you could do a Posca pen on top of these, but that might be
something to consider. What you could do
is spray this with a finishing spray
because it is a powder, like a pastel powder. It's a powder, so
you could spray it and then maybe draw on top of it with other
mark-making utensils. I'm not doing that for my
charcoal class because I want these to be all charcoal pieces. But let's set that
one up to dry. I'm really liking
this color here. This is a lighter
of an army green. It's more of a sage. Let's call this one sage. I'm just working what I've
already got on the paper. But you can get creative
and spread that even a little further and just see what can you make out of this. It's fun there. I didn't do that as good as I did that yellow, I don t think. What if we come in with burnt embers and do some good lines right up
here through the middle. You know what this looks like, the same color, so we'll
call this burned embers. [LAUGHTER] Just get
creative with it. Have some fun with your art. Let's come in with
this, I don't know. It's like a forest pine. See, forest pine. I'm almost thinking
maybe we need like a pink or red or something
different going on here, Let's see. Green moss. Now I'm just testing
out different colors, but I'm feeling like, what if we went back
with this sunset pink? Because I feel like
you could see that. And I bet we could
do like black. We could probably
see black pretty good because it's so
dramatic a color. See, look at that. Can definitely see that
in there. That's fun. I'm liking that.
Okay, so that's fine. Let's tap that off
and set it up. These are fun. Look at this one. All right, check it
out. Let's go ahead. We would, let's be strategic
like I was with the yellow. The yellow is my favorite. I'm not going back over. I think with one of those, I kept going back over it and it spread it out kind of weird. Whereas if you don't
go back over it, do it once and keep going. As I go back a little bit. [LAUGHTER] I think
you'll have less of that randomness and a little more of it looking
like it was on purpose. So let me go back with
sunset pink again because I'm feeling this
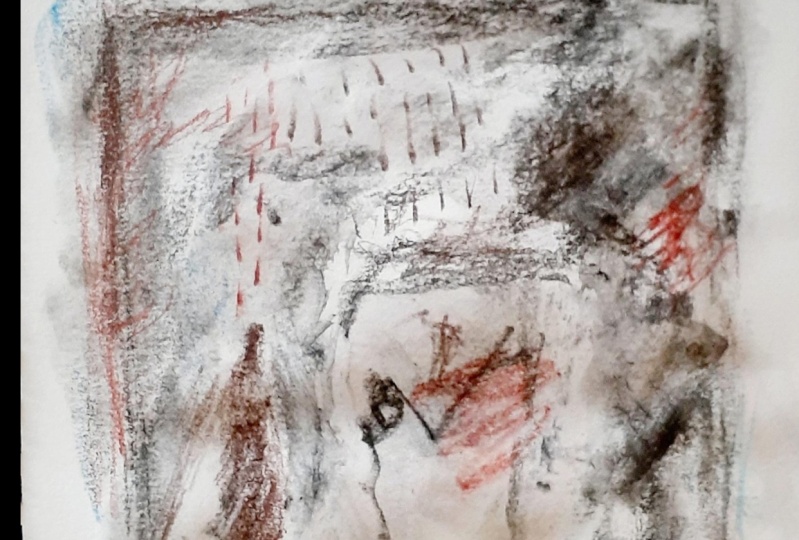
pink and this lavendery, purply, mavy, whatever this is color. [LAUGHTER] Look at this and see. We could come back in here
with some fun mark-making. Let's do some dot dashes, dots. Just something interesting. Look at that Maybe I'll do
some of those down here. [NOISE] Look at that. Oh, yeah. Let's call that one good. [LAUGHTER] Oh, I love that one. Okay, we've got
another dark one here. Let's see what we can do
with this one, and then. Let's go a little faster. There we go. Let's just not
mark it all back in there. You can tap off any
extra. There we go. And what are we feeling? We are feeling, let's
see what this white does just because it's got some
black, maybe we'll see it. Yeah, not really.
[LAUGHTER] All right, very interesting
experiment there. I can see it, but it really
didn't do at all what I wanted it to do. Let's see. How about, here is a, let's try this sand. Now I can see the
sand not in the piece itself but over off to
the side I can see it. Okay, that's interesting. I really want to
go back again with that pink one, but
let's try lavender. [LAUGHTER] I feel like that pink is the only one that's really contrasting for me. Isn't that interesting
what we're drawn to when we're creating. I feel like I'm
getting a little bit of a, look at that, contrast here with
this sunset pink. You only get one color.
This one is great. [LAUGHTER] That's fun. Okay. I'm feeling that. That's pretty cool.
So let's look at, we're going to come
back to those. We're just setting them
up and letting them dry. Let's come back to our
cherry pit black and see. See now, this is a
rich pretty color. Look how pretty
and rich that is. Why not go with the pink? [LAUGHTER] Just get
some marks in there. Look at that could do some lines outside here if I wanted. Oh, yeah. That's super fun. All right, so cherry pit black, that's a super fun one. [MUSIC]
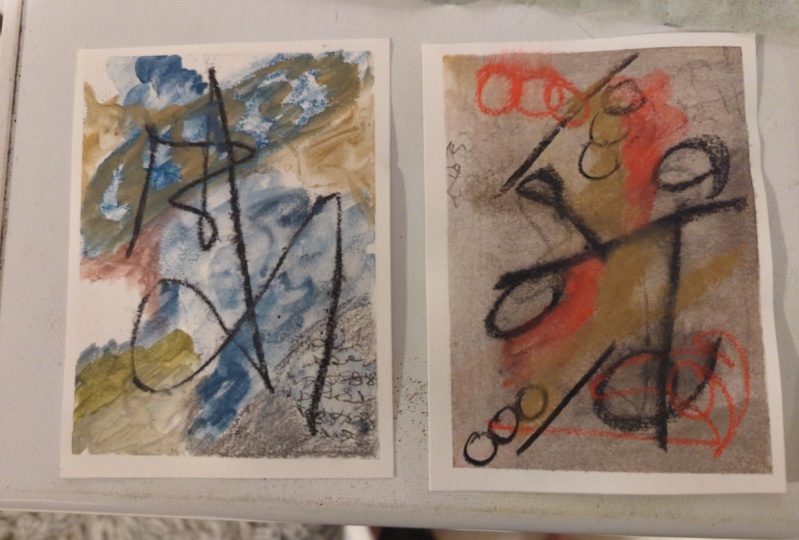
6. Finishing Small Abstracts: [MUSIC] Yes, look at here. Before we stop the little ones, let's play in these
little yummy pre-mixed, and just see what
can we get here? I'm going to just
maybe do some shapes, a little shape abstract. You can see how light these are. That's very, very light. I was about to say maybe too
light, but you know what? As we layer other
things on here, maybe that lightness is
exactly what I want. Now I can come back in here
with some other color, and we can draw on top of that. Let's do a few dots there. That's pretty. Let's draw on top of this. Yes. Maybe we could pick a blue. Let's go with this blue here. I'm liking this one. Mountain blue, we like that. Maybe we'll just do some lines. Look how pretty that is. That's pretty nice right there. What if we come back with the color that we made
ourselves just to see. See now, that one just spread
right out. Look at that. Now I feel like I need to
stick that somewhere else and I wanted dots. I didn't want that spread
out, but you know what? Abstract is a little bit about what can we create with this? It's not about total control. Let's just go with
it. [LAUGHTER] I want one more. Let's do one more. Let's do a little sit while we're letting
that dry for a second. Let's just do another one. See, in these faint shapes might be exactly what
you were thinking. This might be the exact
thing that you're like, "Oh, that is my thing." It's very interesting. I really feel that
green that I just did. Why don't we come
back with green moss and [NOISE] put
some lines in here. See, that's pretty. Now, is there another color?
I'm feeling this lavender. I was about to say,
''Where did my pink go? My pink didn't make it
back into the box." [LAUGHTER] We can come in here. I'm trying to be very light. You know what, I might do, because I've put that
lavender in there. It wasn't super
light but remember, if you get something on
there and you're like, "Oh, that's way more
than I expected." Come back in with some
water and blend that in. Make it work for you. That's different. I'm feeling like,
what if [NOISE] I don't want it to blend in, I want it to be more of a dot. We might have to let
this one dry a tiny bit, but what if we came back in with maybe some of this
terracotta as a dot and I'm filling this and
my paper is still wet. I just want to get some
of this fill in here and watch this. What if we took our
chunky charcoals and we just picked up some of that color
on our paintbrush. I want you to start thinking outside the box
because look at that. Totally picked it right
up on my paintbrush. Didn't expect that, did we? [LAUGHTER] Just came to me.
I'm like, "Let's do this." [LAUGHTER] We really
technically probably should be able to do the
same with the little pencil. There's just less surface
area for us to pick up there, so it might not be as dramatic. I want a shape or something to be a tiny
bit more dramatic or maybe I feel like this
needs one more something. What does it need?
Help me out here. Maybe we could take
one of these colors and create a pattern in
here as a final touch. See, that's pretty. See now, I like that.
That's very subtle, but it just added a tiny bit of extra something in
there for me, I like that. Maybe with this one, we'd like that too. I'd do that with this
gold burnt orange. It's not actually gold, is it? Looks like it though. Look at that. If we just give it an edge
right there, look at that. [NOISE] Super fun. This came out really gorgeous. Let's just take a look at
all of our little pieces that we just created here. You can see, we could
do this all day long. Now this is dry. Look at the other
aspect that we can see on this piece right here. Look at this. I don't even know what that is, where it separates from the
water and it separates out. That's pretty. We set that there. Let's go ahead and pull
some more of these. Look how many we
did in 20 minutes. See, I actually like this with
the white smeared in there and our yellow piece,
that's gorgeous. Here's a piece that I was
playing on in class earlier, and here's another
yummy little piece similar to that one. Look how pretty
all of these are. I want you to do
a bunch of these and gather together all of
your charcoals and experiment and see what is it
do you really love? Because I really love
this burgundy color and these extra large charcoals. I really love the
extra large charcoal, these make the most
exciting pieces. I really love this mustard color and I can see a whole
series in these two colors. They're gorgeous. Try out all the different ones. The pan ones, look how
amazing these are. I can definitely see you doing
lots of different series with these yummy washes
of charcoal. Yummy. I want you play and experiment
on the little pieces, and we will go and
make something bigger. I'll see you back
in class. [MUSIC]
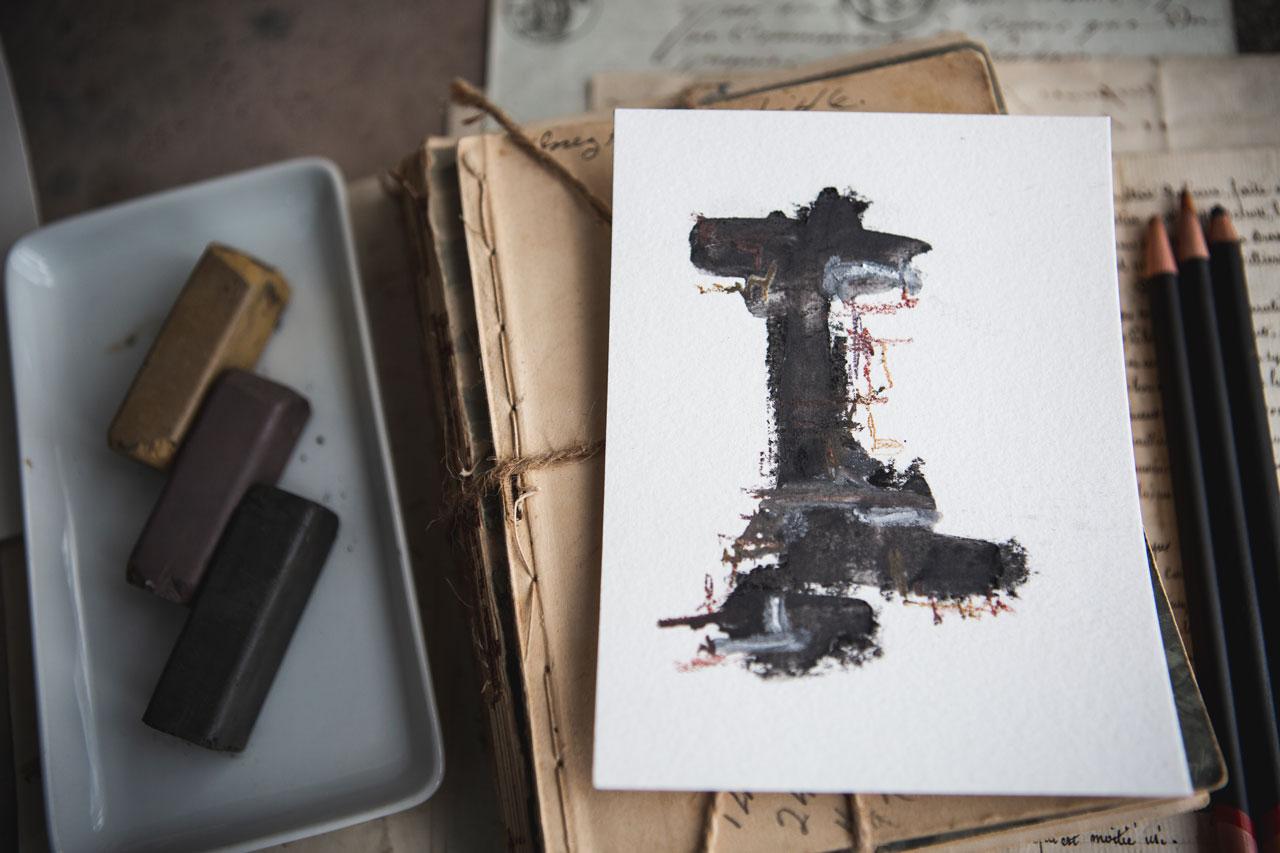
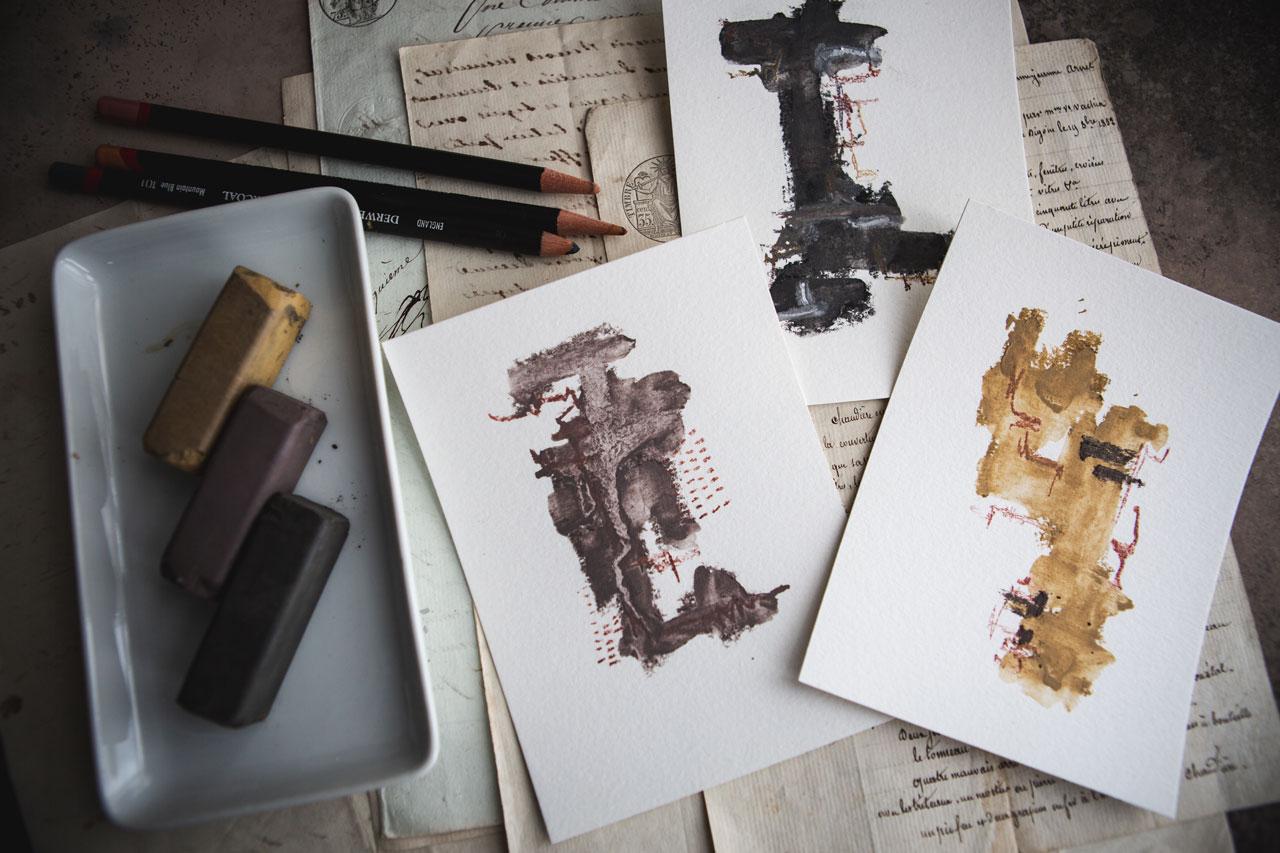
7. Going Larger: [MUSIC] All right. Let's make
something bigger. I might make a couple of these because out of all the
ones that we created, I was really inspired by my little pieces with the very transparent
watercolor and I was totally in love with
the yummy ocher and burgundy and pink charcoals. I want a bigger of these and
maybe a bigger of these. Then I happen to think this
might be pretty too with that shminky chocolate pit as
some little marks in there. As we get a little bigger, we can experiment some more. Let's just put these back
over here behind us as an inspiration and
start on this one. I just in love with this yellow. Let's start with the yellow. If you've got any
charcoal powder on your paper and you
do the swipey thing, you're going to swipe the
charcoal into the paper. I just did that
like a dumb dumb. Let's start with a clean piece. [LAUGHTER] I've got
my fingers that I've cleaned off really good
on my microfiber cloth. I'm going to have that
handy because I'm working with this yellow one that we know makes yummy dust. We could go sideways, we can use this smaller
surface or the larger surface. We can definitely
play a lot with these little blocks with how
we put that on the paper. I'm really loving that. Let's clean our fingers off. Let's tap the dust
onto our paper, don't blow the dust. Don't suck in the
dust, if you go, [NOISE] you don't want to
suck that dust in either, so resist blowing in any form. Have a paper towel to the side, tap that paper on
that paper towel and you are ready to go. Let's go ahead with some water. Man, I just love
the way it looks when the water hits it
and the way it smears. I just love this
color yellow anyway, I'm obsessed with
ocher this year. Maybe next year we
might take ocher, ocher can go with
this for a while. [LAUGHTER] Then try to
resist going back over it and over it if you can because you create
weird puddles of water. Whereas if we can
do that one time, we'll get some yummy
texture in there. Let's go in with
our sunset pink. [LAUGHTER] I don't know if they sell these
colors separately, but after using these, I can see me using this whole
pencil up and thinking, "Oh no, I need more
of this pencil." [LAUGHTER] Can I
just get one color? I'm going to have
to look because after you try out some
of these yummy shades, you're definitely
going to use up whatever your favorite one is. You're going to definitely
be going for that. I like having some really
dark, heavy wet marks, but I also want some lighter, just [inaudible]
charcoaly marks here. I can tell too because I've
used this quite a bit. I've sharpened down
to where the tip is dull and I think I would
love if the tip were sharp. This would be a
good opportunity to stop and sharpen my pieces, then I'm going to keep
going for a minute. I love that. I also want, [LAUGHTER] remember we
loved this color here. I'm just going to come back in here and put some of this in. Look at that.
That's pretty cool. Check it out. That did it. I like a little set
of three there, a little set of two there. Oh my goodness,
I'm feeling that. That's pretty. We're going to let this one dry and we can tap
it really gently, make sure we get anything off of there that
we didn't intend. Let's set that right up
and let it do its thing. Let's do one of
these others with our watercolor pans and see if we can get
something fun out of this. I've got some dirty
water, but that's okay. We're still going to go for it. I can actually see
that better now with the dirty water
than the clean water. How funny is that? I actually don't mind it. [LAUGHTER] That was
the bluish color. This is the greenish color here. All that blue with that dirty water looks a
little greenish, doesn't it? You might let these dry in-between the layers
if you really want to see some definition and difference in what you're
adding onto your page. You might do a layer, dry it with your heat
gun or let air dry, come back to it and see what will that do if
we let that dry some and come back to it later. This is the purpley one that's in our thing here. Look at that. That's super cool. I love what that does. Look at that. Look
at that right there. It made the previous little line around the color like a
little teardrop shape almost. Look how pretty that
is. Wow, I love that. [LAUGHTER] That was pretty. I'm feeling like
blue. Let's see. Here is a bilberry.
Let's try bilberry. Bilberry's got a nice
sharp lead on it. [NOISE] I'm holding that
pencil super, super light and just letting it barely touch the paper and just
pushing it along. Isn't that beautiful? That is beautiful. Feel like it needs something
a little brighter. What if we do this block and pick up some of that color and just see
what's that going to do. If you're afraid you're
going to mess everything up, take a scrap piece of paper and just see what does
that look like. See, that's pretty. That pulls in with that other color that we
just added on top of there. I'm just like you, I feel
like I don't want to mess it up because I'm really
loving where it's going. [LAUGHTER] Yeah, right there. You can see as those colors dry, we can get these to
sit right on top. See, now that's a fine line. Not getting it
completely on the paper, but let it skim the
paper and create some variation there.
That's pretty cool. We can do that at this
top. That's pretty. I feel it needs some contrast. What contrast are we
going to give it? Are we going to give it some of this cherry chocolate contrast? Let's see, cherry
chocolate, cherry pit. See, now that's got a lot of contrast and it's actually
such a pretty color that we could come. See,
now I'm [inaudible]. That's a pretty
abstract right there. [LAUGHTER] Let's just jump in. Let's just be brave. Just feel like it
needs something. [MUSIC] I'm loving that, let's just come back with
the chunky charcoal and get some lines in there
just because. Then I'm thinking that's
looking pretty cool. I think I'm going to go
with that for this one. We can continue making more and more pretty little
abstracts like this. Because these little
bitty ones were my very favorite and
it would be fun to continue along in
this thought path of pretty layered washes of charcoal and just
seeing what we can get. I'm going to play some more with the washes and just
see what can I make. I want you to create some of
these yummier larger pieces, inspiration from your
smaller pieces, and just see what can you create as
you go a little bigger. I love translating things a little bit larger
because there are different challenges than you
have when they're smaller. Then you can see, how do I take that
a little bit bigger and what worked and
what didn't work and how can I then
practice a little further so that it then
really works for me? I think I'm going to continue painting a couple of
these larger ones. I can't wait to see
what you create. Definitely come back and
share some of these with me. I'll see you back in class. [MUSIC]
8. Finishing Spray: [MUSIC] Let's talk for
a moment on how you would finish a piece like this. The less things that you can
add to the top of these, the less likely it is
to change the color. But if you wanted to go
ahead and set that powder and hopefully later wouldn't
keep then shedding on to, say, the mat that
you framed it in, you could finish off
with a fixative. I already keep the Sennelier fixative for soft pastels
here in my studio, and I have sprayed this
one with this fixative. Usually, when I spray, I'm pretty far back. I'm spraying in one direction. I'm letting that dry. Come back and spray a
second or third coat as you need it and then that will
fix that powder in there. There's no way to really
permanently protect a piece where you
couldn't come and smudge it if you pressed
on it hard enough, but it will definitely lock all that stuff in place
so then when it's framed, it won't keep shedding
charcoal and stuff. Another thing that I
use quite regularly in my work is a workable fixative. This is just a light
layer that you can protect powdery things from, like pastels and charcoals, so that you can continue
to layer on top. If you have a workable fixative, that will probably be okay also. That's how I would recommend
you finish these off. I would definitely
do a little bit of a fixative and let those
dry before I would do, say, a shellac or any lacquer
top that you wanted to do. I wouldn't do any of those brush-on lacquers or
anything like that that you finish paintings
off with because you're more likely to activate anything that didn't
have maybe a little bit of that fixative spray on
it and spread it around. I'd spray it with a fixative and then frame it under a mat. Under glass is probably how I would work with
the charcoal pieces. Just a little FYI, little ideas for you there. I'll see you back
in class. [MUSIC]
9. Final Thoughts: [MUSIC] What did you
think about working with different forms of charcoal to make interesting abstracts? It's super cool. It's almost as fun
as the graphite, [LAUGHTER] but it
doesn't have that shine. But who knew that charcoal came in so
many different forms? I don't think I ever even
realized that and I don't even have all the charcoals
that are out there. There's vine charcoal,
there's stick charcoal, there's pencils, there's
liquid, there's graphite pans. There are just so many. There's the great big blocks. So many different
forms of charcoal that you can
definitely work with that one medium on an entire series and not
even have to pull anything else out and you can create really interesting abstracts
just with that one medium. I find this so
fascinating. I love that. Instead of pulling out
lots of different things, let's limit ourselves
to one supply. Let's see all the
different forms of that material and let's
see what we can create and how we can push that
further than we even thought with something
like water. Super cool. Hope you enjoy working
with charcoal. I cannot wait to see the
abstracts that you create from the different
charcoal items that you have or come across. I can't wait to see those, so definitely come
back and share your abstracts after class. There's nothing more exciting than to see a project posted. Or somebody tell me about
a supply they found that I can't wait to look and see and go,
ooh and ah with you. So come back and
share those with me. If you find a charcoal type that you don't think I have
and you think I'd love, come tell me about that too. I'd love that. I'll see
you next time. [MUSIC]
 DENISE LOVE, Artist & Creative Educator