Transcripts
1. Class Intro: Who doesn't love a
good character design, who isn't thrilled by a character on-screen
who is captivating visually and who really connects with the viewer on
an emotional level. The impact your designs
can have on others is something truly
unique and special. Almost like a superpower. Designing a character
is fun and exciting, but it can also feel a little daunting if you haven't been taught the fundamental laws
of good character design. Welcome to the character
design fundamental series. My name is Emma
Gillette and I am a full-time freelance
illustrator with experienced in the Illustration and
Animation industries. I have a BFA in animation
and art directed the student Emmy nominated
short film tie G2. I have been a full-time
freelance illustrator for almost five years. And my clients include Disney, random penguin house, and American girl among many others. In this three class series, I'll be helping you level up your character design
skills by teaching you all the things that
I learned in art school. First in this class
you'll be learning basic construction
and shape language. And the next class, you'll be learning how to
put those designs into expressive and dynamic
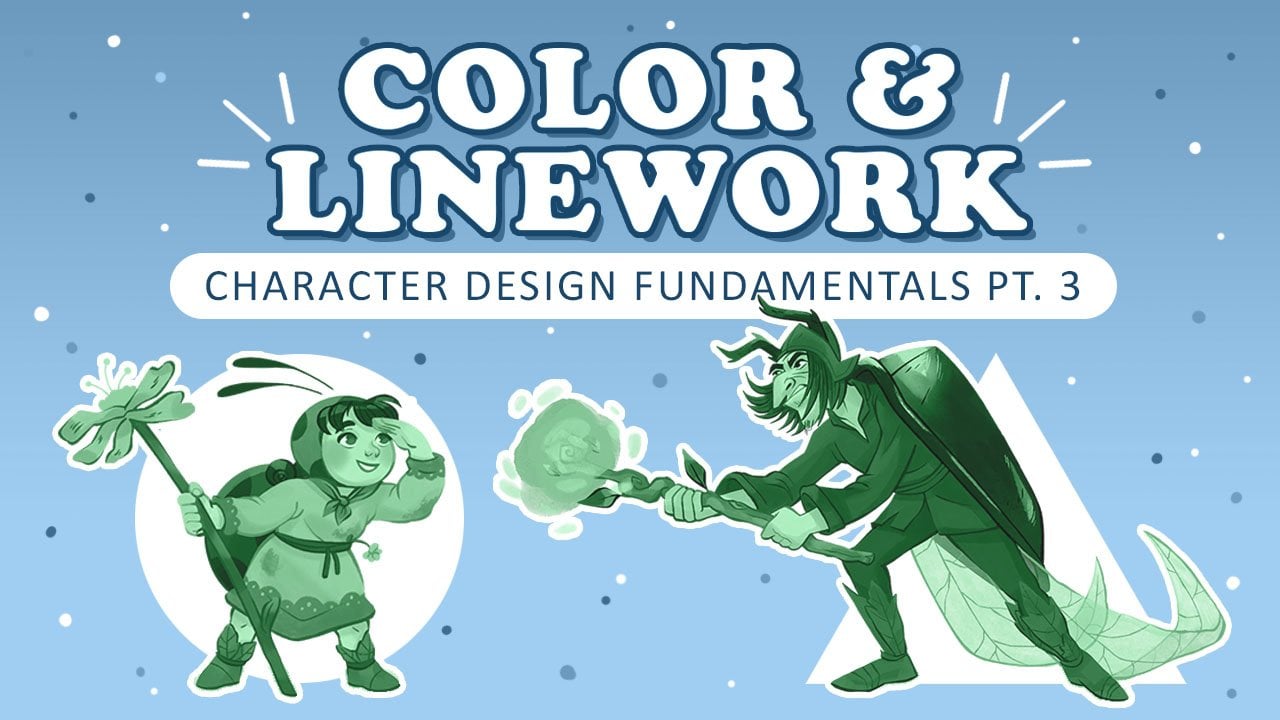
poses and gestures. And lastly, the third class, you will be learning how
to take your designs to finish and polish them off
with color and line work. These fundamentals are
tools of the trade that every experience
designer knows by heart. And soon you will too. In this first-class of
my fundamental series, you will be learning
basic construction in shape language. This is probably the most foundational and
important aspect for good character design. Learning to speak
this language is going to help you take
your designs from chaotic and confusing to
streamlined and meaningful. I'm going to show
you how you can use basic shapes and
smart proportions, unique and interesting stories with your character designs, I want to show you how
using this language can easily and effectively
tell compelling stories. Today's class project is
to design two characters, a protagonist and an antagonist, a hero and a villain. By the end of this class, you will be better equipped with the tools necessary to create compelling characters that have interesting stories simply
through their design. If you are starting out
on your design journey, or even if you're
just looking to brush up on your basic skills. This is the class for you
as you consistently apply these techniques and
fundamental lessons that I'm about to teach you, you will see consistent growth. Every new project
that you start. And when you look back on your
designs before this class, you will see a huge difference. I am so excited to see what characters you come up
with for this class. So let's get started.
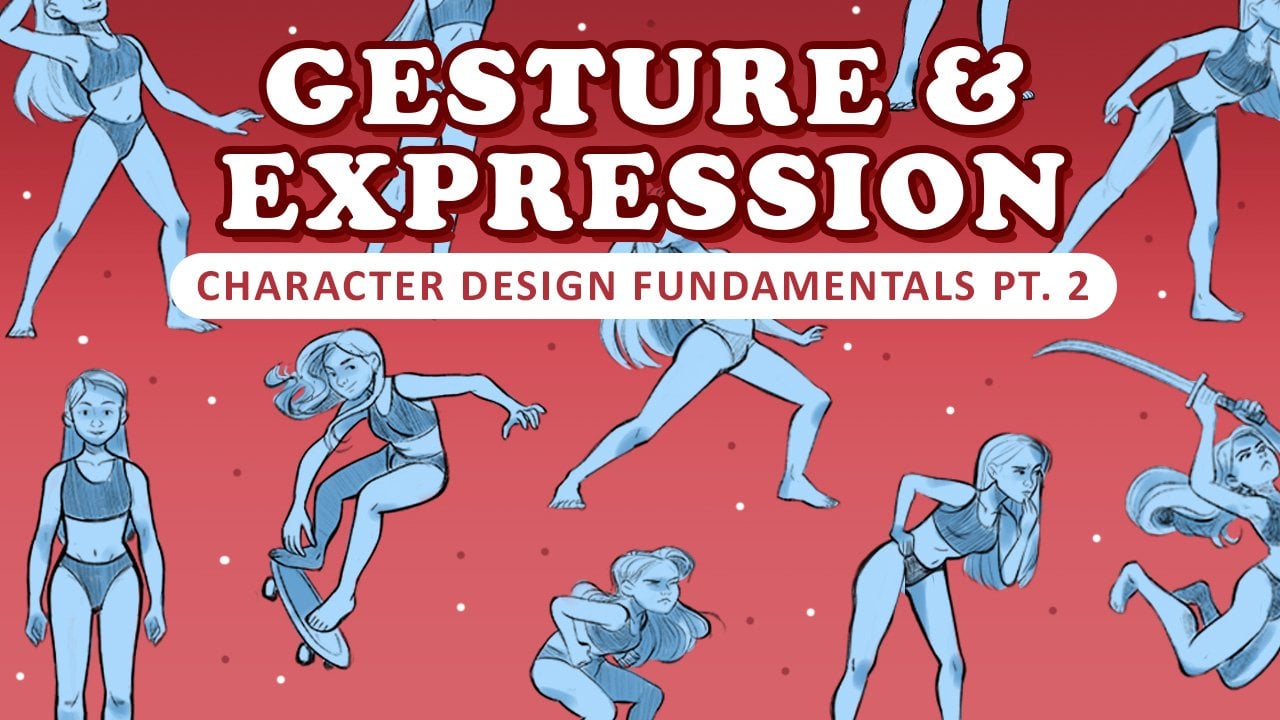
2. Your Project: At the end of this class, you will demonstrate your
knowledge of the principles of construction and
basic shape language. You will design two characters
that are contrasting, a hero and a villain, or a protagonist
and an antagonist. If you understand
the class material, you will be able to smartly pick proportions and shapes
for each character, so that the viewer
will instantly know which character
is the hero, in which character
is the villain. And if you go above and beyond, the viewer will also
be able to tell the basic story and
personality of each character. For this class, I
encourage you to draw your characters
in a static pose, which also means a passive or standing pose in a front
or three-quarters angle. In the next classes of
my fundamental series, you will be learning
how to put your designs into fun and expressive poses, and then how to finish those drawings with
lighter in color. So go ahead and leave your design sketchy
for the most part. I will be using
the gesture brush from the retro max
pack on Procreate. But you can use any brush or
medium that works for you. Lastly, your assignment
will include a image with your
characters broken down into their basic shapes and a ladder character
comparison model. If you don't quite know what I'm talking about yet, don't worry, we will be covering these in the class when you have
finished your project, I would love for
you to post it in the class project gallery below. Or if you're looking
for critique, you can post any
preliminary designs in the discussions tab. Receiving critique
is the fastest way to grow as an artist, especially if you
receive it graciously. So please don't be shy in
asking for critique for me. I would love to help you. Also if you share your
designs on social media, please tag me in it. Here's my handle. It's the same for
Instagram and Twitter. You can follow me on those
platforms to if you're interested in seeing my
professional and personal work, I'm also available
to give critique over on those platforms
and my DMs as well.
3. The Human Brain and Images: Before diving into
the principles of good character design, there's something very
important that we need to touch on first to
create great designs. We first need to understand
the human brain and how it responds to and
interprets images. Now you probably already know a little bit about how
the human eye works. But if you don't, here's
a little refresher. Light bounces around off all
of the surfaces around us. And when it hits the
back of your eye, also called the retina, your brain then has to interpret that light that it receives. The interpretation of that light is where the magic begins. Our human biology
predisposes us to react a very specific way to certain colors and
certain shapes. For example, do you ever find yourself looking
for faces and random objects like the bark of a tree or the clouds in the sky. This is a response written into our DNA from the
caveman days when being able to notice the face of a leopard and a bush
could mean life or death. Because of this, certain shapes
and certain colors evoke feelings of either safety and
comfort or danger and fear. Good character design
takes advantage of these primordial
responses to create physical and emotional responses in the viewer when they see
your character designs, depending on the
shapes and colors that you use for
your characters, people will make judgments on the kind of people that they are based off of these
ingrained responses in us. So don't confuse them by
using dangerous shapes on acute soft baby or round safe
shapes on an evil dictator. Of course, there can be exceptions to the use of
basic shape language. If you want to, for example, confuse or throw off the viewer. You can do this by
adding hints to a character's true nature, or perhaps showing that a certain character has
room for growth and development simply
by the shapes that you pick to incorporate
into your design. For example, if your baby is actually an evil demon child, you'll want to hint
at this by adding some sharp dangerous
shapes into her design. Or for a cry baby dictator, you might add some round shapes or soft, fleshy
looking clothing. Character design is all about telling stories and connecting
with your audience. So always keep
that in mind first before you start
designing a character.
4. Learn to Speak Shape Language: Shape language is
the secret language that every human nose. Some shapes come
pre-programmed in our brains to inspire feelings of danger. Some inspire safety, and
others inspire stability. Every good character design is constructed of basic shapes. First, as you can see
in these designs, each character has very
specific and unique shapes chosen for their base design. These were not
picked arbitrarily. They were picked while keeping the principles of
shape language in mind in order to say specific things about
each character, you'll notice that
one bird is mainly constructed of
circles and ovals, one of squares and rectangles
and the other triangles. Let's break down the basic
interpretations of each shape. Circles and flowing lines
typically represents softness, homelessness, peacefulness,
approachable illness, or to be malleable
and changeable. Squares typically are
interpreted to be solid, sturdy, strong, reliable,
and sometimes in flexible. Whereas triangles and
jagged lines feels sharp, directional, dynamic,
unpredictable and dangerous. Knowing this basic language and without the shapes
being defined for you, answer me, which bird is the
soft approachable character? Which Berg is the stubborn, immovable character,
which is the villain. Can you see how powerful
shape languages and communicating the personalities
of these designs? As a word of warning, try not to take this
principle to literally. You can mix and match shapes
as your design dictates. For example, in
this design we have a good mix of curves,
circles, ovals, and roundish blobby
shapes that give off the overall look and
feel of the circle. You'll also notice there are some corners and angles in this. They're just more rounded than they would be in
a different character. The key to this design
is that I'm mostly avoiding too many
straight lines or angles. With that being said, you can create
complex characters by mixing and combining shapes, you can design a
character that has mostly angles and triangles, but shows a hidden ability
to change and grow for the better with some curves
and some soft corners. Or you can have a soft, round looking character
that actually has a hidden evil side by putting sharp pointy little bits and details all
throughout the design. Triangles can also be used to hint at strength or ability, such as a protagonist
having sharp pointy hair or armor to suggest that they are capable and can be dangerous
if they need to be. Let's take a look at Ralph
from Disney's Racket. Ralph. Ralph is a very interesting
character and his design perfectly describes his
character arc in the movie, he is the villain of his game, but the protagonist
of our movie, he needed to look
intimidating and strong for us to believe
that he was a villain, but also soft and
malleable enough that he could possibly change
by the end of the movie. His design uses all three
shapes effectively. Ralph is known for
breaking things, so he is strong and sturdy. The main shape
present in his design as a square to
reflect that string. Just look at how
boxy his hands are. He is also a very
stubborn character, which also lens very
well to the square. However, Ralph has a soft dean. He just wants to be
loved and appreciated. So you can see all
those round shapes in his face indicating. So lastly, we need to believe that he's a
villain in his game. He's given that edge with the pointy hair and a big
triangle across his chest, you can really tell that Ralph's character
designers spent a lot of time thinking
about his arc as a whole and try to
incorporate all the shapes that would reflect that story
growth into his design. To demonstrate your knowledge
of these principles. After you have designed your character designs
for your class project, I would like you to include
an image where you have drawn over them the basic
shapes of their designs. You can use this image as an example and can download it in the
class resources below.
5. On Motifs & Harmony: A more advanced way of using shape language is
to create a motif, which is a decorative
design or pattern. To create a motif, you really need to spend
some time thinking about your character and their
overall story or arc. Then with that in mind, you think of a design
that really just funnels all of that story
into one simple design. Then you use that
design like you would with one of the
three basic shapes. You just use it throughout
your whole design, from the basic shapes all the way down to the little details. For this demonstration
for a motif, I've decided that I want to
design a moat, be sad bird. And I've decided
that a teardrop is a really good motif for expressing that
character archetype. A teardrop immediately reads
sad to almost any viewers. So I think that this will be a very simple and
effective way to communicate a sad character. So what I'm going to do is start tests relating this
motif throughout my design, starting with the basic shapes. So I'm not gonna be too
literal throughout my design, but I'm just wanna kinda get, I just want to get a basic idea starting with the
foundational large shapes. So I'm starting
with the head here and then drawing the body. Like I said, I'm not
being too literal, but as you can see, I'm keeping this smaller
top and I'll large, kind of like blobby bottom. I feel like the
teardrop just feels weighted down and droopy. And that's why I think
this is gonna be such an effective
motif for this design. Getting my basic shapes. So even just using this simple
motif in the basic shapes, we already have a pretty strong foundation
for this character. You can feel the drooping
is the sadness. Oh wait. This is just the
beginning phase. So let's keep refining this overall
silhouette and start adding in some of the
finishing details. So now my aim is to
refine the shapes and I'm going in and
making it less extreme. And this is where
I was saying you don't have to be
too literal when keeping continuity with
your shape language, you can pull back and push in other areas Just as long as you get the
general feeling. Throughout the design of the
shape of that you've chosen. To base your character off. I'm mostly just going and
solidifying the silhouette. And you'll see here
as I flush out the tail on this sad bird, I'm also using the tear
shape in the shape feathers just to push that
message along to the viewer that
this bird is sad. Here, even in the
little Blake's dumps. You have the small and
the big I've inverted. And I don't think that
flipping it so that the bottoms on the
top is as effective. But here it's such a
small detail on the leg that I'm still able to get the shape even if
I've turned and turned it. Around here, I haven't closed the
top of the wing. In fact, I'm going to erase
this and keep it open. But I have the general shape again of that tear drop shapes. I'm going to add some more little feathers, little details. Bring that consistency
throughout. Some right here. I think this little quail feather on the top is a really
excellent way of using this shape and further communicating that
sad droopy field, just drooping over the face. Then here again in the toes. I'm just trying to
get a little bit of that same blobby shape. Even though that was a
really quick drawing, you can see how I utilize this motif throughout
my entire design, starting from the
basic shapes of the silhouette down to the small details and the
feathers and the toes. You were not required to use a motif for your class project, but it's something
to keep in mind for future projects
if you're looking to try something a
little more advanced, It's a really effective way at communicating story and
personality and your designs. Motifs, or an advanced
method for creating harmony. Harmony is keeping your design
consistent and balanced within itself to communicate
a clear message. This can be achieved whether
or not you use a motif, basic shape language can also
be used to achieve harmony. For example, if you've
chosen the square to be your main shape
for your character, you don't have to
only use squares, but it should be the main shape that you use throughout
your design. You might use it to
maybe square off some rounder shapes or keep your angles from
getting too pointy, helps you keep your
design consistent with itself and send a clear
message to your viewer. For example, if you choose a
square for your character, you don't have to only use
squares and your design, but you should try
to use them mainly, starting from the
basic construction up into the smaller details. Otherwise, your character
may look chaotic and confused and may lose your
viewers on your design. You can incorporate
your shape in the facial features
and the hands, fingers, fingernails,
costume elements, shoes, feet, what have you. This helps your character to remain consistent within itself. And two, send a clear
message to your viewer.
6. Large, Medium and Small: Now that we know how to tell interesting
stories and how to manipulate our audience
through basic shape language. It's time to start
thinking about how to create interests
within our designs. Contrast is when two or more opposing elements
are placed together. Whereas variety is
just having a lot of different kinds of elements
available to look at. When you have contrast
and variety and an image, you give the viewer a lot of interesting things to
look at in your design. You can have a variety
of shapes, textures, proportions, details,
and orientations. One of the easiest
ways to add variety to a character design is to use the principle of big,
medium, and small. Let's look at this character
design proportionally. All of the major pieces of this design are
functionally the same size. This is boring to the viewer. There is no flow of shapes, sizes to lead the eye
around the design. That all looks staining
and in general just has a very bland
and boring effect. Before understanding
the principle of big, medium, and small, it might be hard for
an amateur designer or the average viewer to put their finger on why this
design is so uninspired. Let's move to a simpler example. We had two snowmen, which snowman is more
visually appealing. The one on the right has a lot more interests in
variety than the snowman on the left has three sections
are all different sizes. Big, medium, and small. Your eye moves
organically across his form from top to
bottom and bottom to top. Whereas the other
snowman doesn't have any direction or flow. It's all the same
and very boring. Just like the snowman, when you're designing
a character, always tried to
include big shapes, medium shapes, and small shapes. Let's take a look at that
character from before. But now using these
principles, as you can see, this character has many
sizes of shapes dispersed throughout the design and is much more
interesting to look at, even in the small details of the character is the
principle of big, medium, and small
being employed.
7. Don't Design Ladders: The principle of designing
letters was taught to me by my good friends and comic
artists, Johanna Taylor. Another way to practice the principle of big,
medium, and small, but also helps with the proportioning and
grouping of your design. The idea of this principle
is that you do not want the horizontal lines of your character to sit
equidistant from one another. For example, with the
previous example, if I were to draw
horizontal lines across from the major
points of interests, it resembles a ladder
with about equal runs. However, in the improved
design, when drawn across, we can see that
the groupings are much more varied
and interesting. Again, creating
variety in the design. When designing your character, look for these horizontal lines. They typically fall at the
top of your character's head, up their neck line, Hamline, at their pants line, and at their shoes. These are the ladder
rungs of your design. If they're equidistant
from one another, that probably means that
your design is kinda boring and could be
improved by being mixed up. This principle is also an
excellent way to make sure that your costume elements
are also interesting. Along with the example that you drew over with the basic shapes, I want you to demonstrate your knowledge of the
principle of big, medium, and small by including a side-by-side comparison of your character in its bladder. Again, you can use
this as an example. You can also download it in
the class resources below.
8. Using Exaggeration: Once you understand
the importance of the principle of big, medium, and small, you must then learn how to use it to its
greatest advantage. And you do this by combining it with the principle
of exaggeration. Exaggeration is how you use your knowledge of the
principle of big, medium, and small in conjunction with your character's
personality, story, and skill sets. For example, if your
character is an academic, you might design them with an exaggerated large head
compared to their body. Or if you're designing
a woodcutter, you might design their
arms to be large and guerilla like with a small
body and short legs. The point isn't to
arbitrarily choose shapes to be bigger than others
are smaller than others. But to strategically pinpoint the pieces of your
character that can push the story and their personality by
exaggerating them. This is another
plug for spending the time thinking
about and planning your character's story
arc and all the facets of their personality before jumping in blindly into a design. Planning goes a long
way with design. Before we move on, I want
to give a little bit of a warning that the amount of exaggeration that you
use needs to meet the stylistic needs of the type of design
that you're doing. For example, realistic
designs for movies or video games use a different
level of exaggeration, then first-day cartoons
or animated films, the designs and
Final Fantasy are far less exaggerated
than in Spongebob. They still have exaggeration, for example, in the costuming
hair and body proportions. But it's done in a believable
way that fits in the genre. So another thing add to your
planning phase is to think about your audience and what the genre is that
you're designing for. When you have picked the
type of design it is, and for what audience
you're designing for. It will help you
determine the level of exaggeration that you
should use. Your design.
9. Baby Face Bias: Baby-faced bias is
just a funny term for another tool in the
designer's toolkit. Though funny sounding, it's
just another tool that takes advantage of our
primordial hardwiring. They can instantly make a viewer like or feel protective
of a character. It uses the science behind
the concept of cute. The reason we as humans
find things cute is a biological response
that makes sure that we want to protect
and care for babies. So what makes a baby cute? Big eyes, a little nose
and a small mouth, arranged closely together in a pattern called the eye nose triangle with a big head and a small body with
lots of round shapes. These features all scream, I'm little in defenseless. Take care of me when designing
a character that you should like your hero
for your class project, for example, keeping this
principle in mind is key. Don't believe me, try googling any main character from
any animated show. And you will find that 90% of the time that character
will have a shortened, I know it's triangle. If they don't, I guarantee
you that they'll always have large eyes
to make up for it. Conversely, if you're
designing a villain, like for your class project, if you want them to
look like a villain, you'll give them small
eyes and a heightened, I know it's triangle
or a small head. And that will make them
look evil and dislike. And again, these are not
hard and fast rules. They can be strategically
broken when you keep your character story and other
design principles in mind.
10. Areas of Rest: Now that you have all these
tools in your tool belt, I want you to slow down, look for a minute and
not get too excited and clutter up your design with
all of this cool new stuff. Visual interest is important, but it can get to a
point where you've put way too much
interior design. And it can confuse your viewer and actually cause
them to stop looking at your design before
they've even had time to see all of the elements
that you've placed into it. Good character design helps the viewer move their
eye effortlessly across the design
by having areas of interests and areas of rest. Going back to the ladder
design principle, we can see that there are concentrated areas of interests here on the face and head, for the torso is left
largely detail free. But then the waist and hips have interests, but the
legs are free. This gives the viewer breaks. Their eyes move through
your design and keeps them from becoming
overloaded with information. This is a simple yet
important principle. You don't want to waste
all of your time adding tons of detail into
your design only for your viewer to give up halfway through before they've
even been able to see all that you've put in just because of all
the visual clutter.
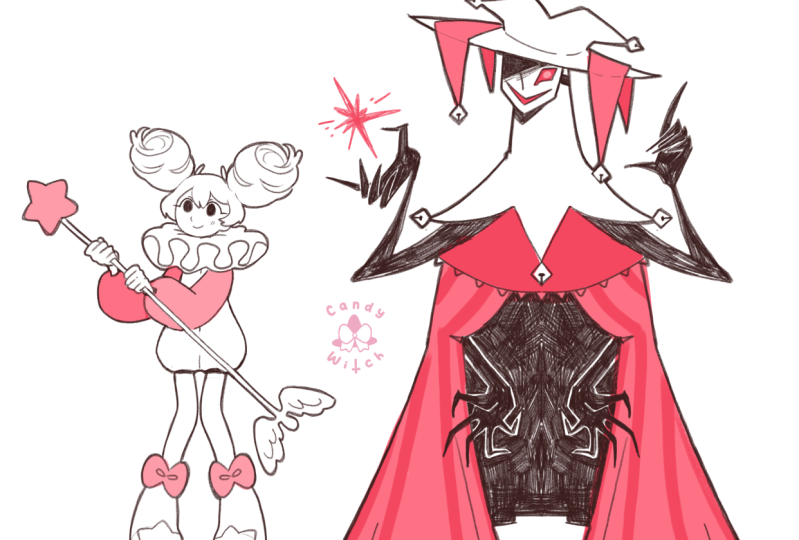
11. Hero/Villain Demonstration: Now I know that was
a lot to learn and you might be feeling a little
overwhelmed right now. Don't worry too much though. With practice, these principles will become second nature to you to help show you how I use and implement
all these techniques. I'm going to do a
little demo for you and design my hero and villain
for the class project. So the first thing that I
did was just to start to think about what kind of
characters I wanted to design. So I just wrote down very basic ideas are
archetypes for my characters. And they landed on a little lady bug adventure
and an evil beetle mage. So I decided to start designing this little lady bug character and started off just
with a very basic shape. I was very rough and loose. And then I went in and just
drew a circle since I had decided that I wanted her
main shape to be a circle. I went in and I made her
head a little circle and then went back and altered the shape to make
it not so literal. Her eyes you can tell are also very round and also the ears. The ears are pointed on the end, but the general
shape is a circle. I ended up actually
ditching them for just a cute little
wrap around her head. But I added somewhere
around here. And then here I'm
flushing out the body. And you'll notice that I get kinda stuck on her costuming. I'm going to erase and
draw and erase and draw. Just trying to figure
out how to get the overall circle shapes in your design while having
that kind of iffy nature. Look to her costume. Eventually ditch the leaf. And you'll just notice
that I went Meet the shell on her back
list waiting around. I ended up going for
just kinda round dress. Does something that
had soft curves and edges and it just really
touched the leaf dress idea. But altogether it
was too pointy. I made her smaller to keep her in contrast
to the villain. I wanted to be able to
have her with reference. So I again block out the basic shapes and tried
to get as many angles as it was nice. The little lady bug
next to him so that I could see if he
was looking sharp enough in contrast
with her with him, I had a little bit of
a harder time trying to not make his
angles too sharp. I wanted there to be a little more nuance
within his character. Didn't want it to be two angled. But as you'll see, as I draw, he loses that edge that he
had in the original sketchy. I put too many round edges. I don't keep things as
sharp as I should have. And what you'll see
is that he does, it looks more like an old
man died in his heyday. You stood evil but
no longer is evil. And so I, I recognize that and not quite happy with his design at this
point in the process. So here I'm finishing up
the Lady Bug character. And this is where
I decided that I needed a drought
over for my husband, who is also designer. I'll have him talk
about it a little bit. Thanks for doing this
drawer over foreigner. Yeah, of course, I'm kinda
fun with this design. The first thing I
thought when I saw it was that he didn't
look evil enough. You had a lot of great strong triangle
shapes and then you had a really fun character. But I felt like he needed to be pushed a little bit further. He looked a little bit too much like a grandpa who used to be evil and was now bringing his costume out to show
his grandchildren. So the first thing I
did was sharpen up some of those key
features on his face. His nose just even a
little bit pointier, has chin a little bit pointier. I shrunk his forehead
a bit to make him seem just a little bit more disgusted and little
bit more disturbed. I really liked how you pulled
some of those sharper, more triangular shapes into the design of his entire body, into a silhouette and not
just in the features. So I tried to make sure
to maintain that as I changed his pose and
straighten them up, something else, I wanted to add some different shapes
and varying shapes. And so I tried to add
some more squares and some more rigid shapes. Show that not only is
this person dangerous, but he is capable, he is strong. He's not as feeble as he might've looked in
the first drawing. Now I will say that
I think the design lost a lot of the
fun that you had, but I trusted that you would
add that back in and just take the positives from my draw over and I work
those into your design. Thank you, Connor. I very much appreciated
his draw over it. Definitely brought
in that edge that I had lost with my first design. So as I started to go over
my old design with his, drove her up in the corner. For reference, I found that
it actually was easier just to use the head
that he had drawn. It was so good. Like
why waste the drawing? So I use that for the face and then I went in and
made some adjustments. I still wanted him
to be hunched over. That was just the
image I had was an old evil like a wizard or which I felt like him
standing was too foreboding. It wasn't like the
character is looking for. So I pushed him over, but I just added a
lot more angles. Got rid of a lot of
the softer edges and curves that I had
kept in the older design. And I really struggled for a little bit with the hair because I had decided
that I was blinded. The long hair, it was breaking
up my silhouette too much. And so I decided on
short cropped hair. Wanted because I could get more angles and
edges in there to further push my triangle shape. But it was getting muddied
up with the hand and the theme was just totally
wrecking my silhouette. So I decided to actually push the hands out further
away from the body so that there would be some
negative space around his chin to put their hair and that it wouldn't
get lost in his torso. And I felt like that
made this design and overall stronger, better
character design. These are the two characters
opposed from each other. And I feel like they
turned out really great. I did notice though that the, I was getting a little bit of a ladder effect on this girl. So I decided to
shorten her torso to add more variety to break
up that larger dressing. There we have it there. I designed my hero
in my village.
12. Final Thoughts: I want to give you a
big congratulations on finishing this class. I'm so excited to see
your character designs. I hope that you felt
confident and excited to use all of the principles
that I taught in this class. I hope that you
feel really excited about your character
designs as well. Even though it seems
like a lot right now to memorize and use all
of these principles. I promise that with
time and practice, but they will become
ingrained into your memory. Soon enough. You won't
even be actively thinking about them
as you're designing. They will just naturally
flow from your brain through your hand and onto the
paper. Just keep drawing. It will happen soon enough. You will be amazed at
the growth that has occurred after some time practicing with
these principles. When you look back
at your designs before taking this class, please share your completed
character designs, your shape and ladder
exercises and the project below so that I can
see your amazing work. If you want to critique, you can put your designs up
in the discussions tab below, or you can DM me on any of the social media platforms that I've shared it previously. Also, if you post
your work online, don't forget to tag me in it. This was part one of a three-part series of classes on character
design fundamentals. Makes sure that you follow me
here on Skillshare so that you can be notified when
my next class goes live. And if you liked this class, please leave a review. This really helps me get my glasses out in front
of other students. Thanks again, and I'll be
seeing you again soon.
 Emma Gillette, Freelance Illustrator